Rover 200 BRM - 1.8 K-Series turbo project
Discussion


Ive said:
These numbers are not that far off for a Rover K.
Pressurized coolant is 99% head gasket or porosity in the head. The other 1% might be the inlet gasket. I always smear a thin layer of Hylomar around the coolant ports of the inlet gasket.
Rings manufactured for std size liners such as 80mm normally do not need to be gapped. They are set for the std bore size. Measure it before fitment and you'll find they comply to factory specs. For a turbo car, you rather gap them wider.
For anything well above 200HP, you need additional crankcase ventilation. This is normal. All supercharged Rover K folks observed this. Lee, me and others. Even the high powered NA Ks need additional venting. Or they fit a dry sump with scavenging pumps.
Widen the outlets in the valve cover (changes functionality regarding emission) and add a extra big breather to the dipstick mount. This one needs a catch tank as oil is pushed up. In itself the blowby is not an issue. You need to manage it. Doubling HP and torque also doubles volume of blow by.
Thanks mate. Hopefully get the engine out and stripped this weekend so will have more of an idea. Porous head is certainly a possibility with the K-series. I did the Hylomar thing with the inlet to add a bit of extra sealing. I run a Ferriby thermal gasket so have an inlet gasket either side of that so maybe there is extra potential for leakage there... Pressurized coolant is 99% head gasket or porosity in the head. The other 1% might be the inlet gasket. I always smear a thin layer of Hylomar around the coolant ports of the inlet gasket.
Rings manufactured for std size liners such as 80mm normally do not need to be gapped. They are set for the std bore size. Measure it before fitment and you'll find they comply to factory specs. For a turbo car, you rather gap them wider.
For anything well above 200HP, you need additional crankcase ventilation. This is normal. All supercharged Rover K folks observed this. Lee, me and others. Even the high powered NA Ks need additional venting. Or they fit a dry sump with scavenging pumps.
Widen the outlets in the valve cover (changes functionality regarding emission) and add a extra big breather to the dipstick mount. This one needs a catch tank as oil is pushed up. In itself the blowby is not an issue. You need to manage it. Doubling HP and torque also doubles volume of blow by.
Edited by Ive on Tuesday 9th January 10:58
Interesting to hear your thoughts on blowby. I run my crankcase ventilation exactly as you suggest based on your previous comments. The dipstick tube breather runs through a large vessel that allows draining back into the sump.
Big update coming soon. Lots has been going on, good and bad! Need to sort all the images out.
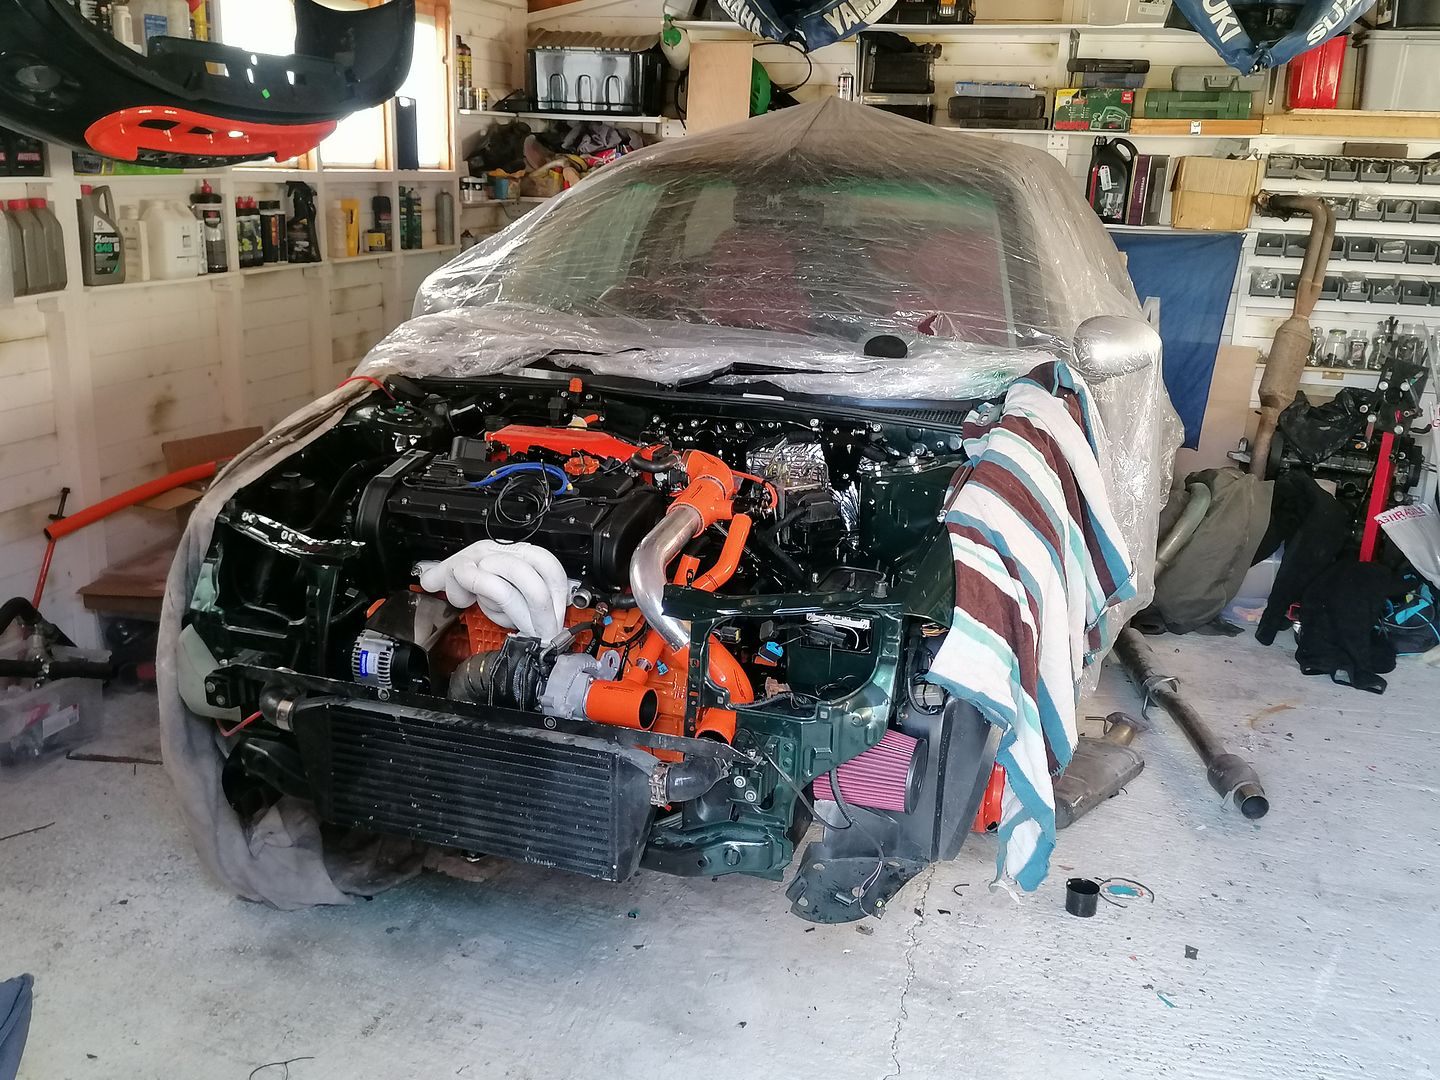
Engine came out to fit shorter rods and discovered excessive bore scoring. Still investigating the cause but I've been focused on getting a stock nasp engine slotted in for now just so I can drive the thing. Bodywork is done (less bonnet for now). ZR steering rack and subframe grafted in for more positive steering. KW variant 2 coilovers on. New wheels,etc.
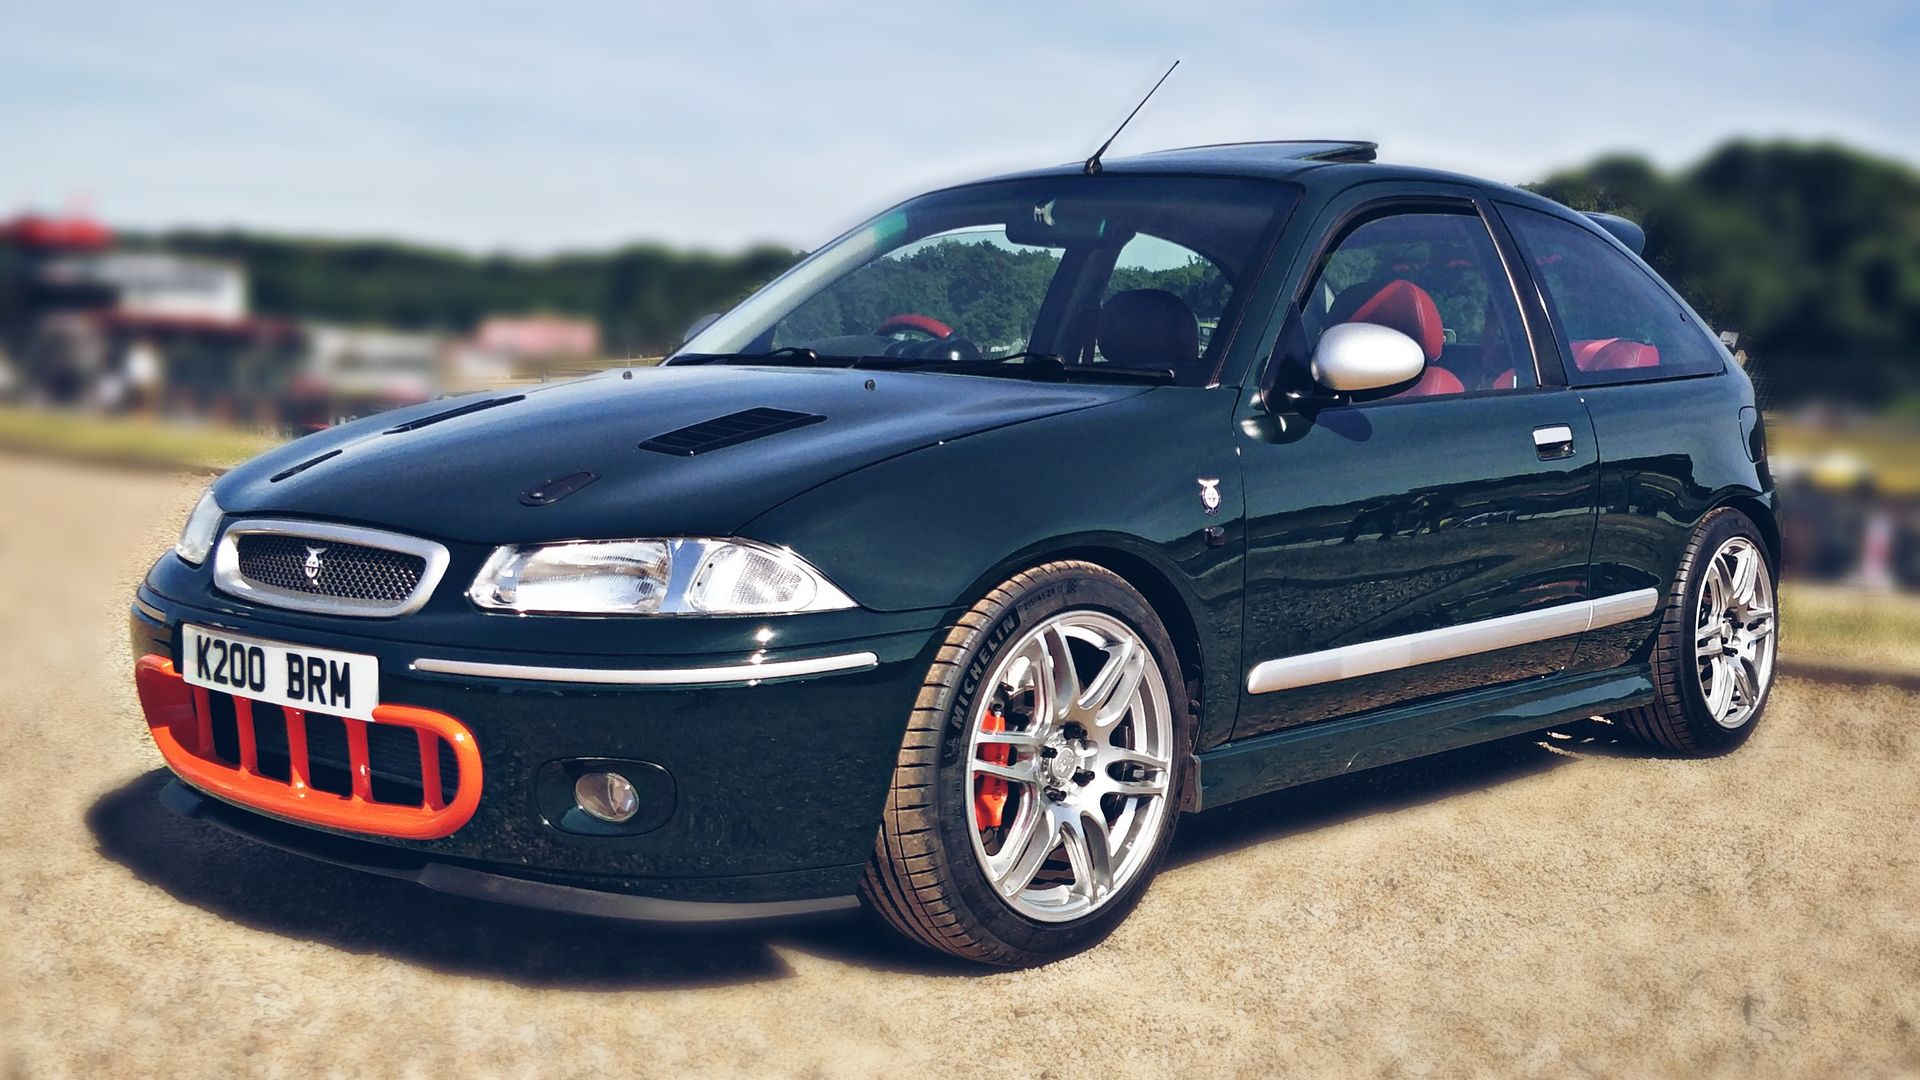
How she currently sits:

More detail to follow...
Engine came out to fit shorter rods and discovered excessive bore scoring. Still investigating the cause but I've been focused on getting a stock nasp engine slotted in for now just so I can drive the thing. Bodywork is done (less bonnet for now). ZR steering rack and subframe grafted in for more positive steering. KW variant 2 coilovers on. New wheels,etc.
How she currently sits:
More detail to follow...
Time for an update!
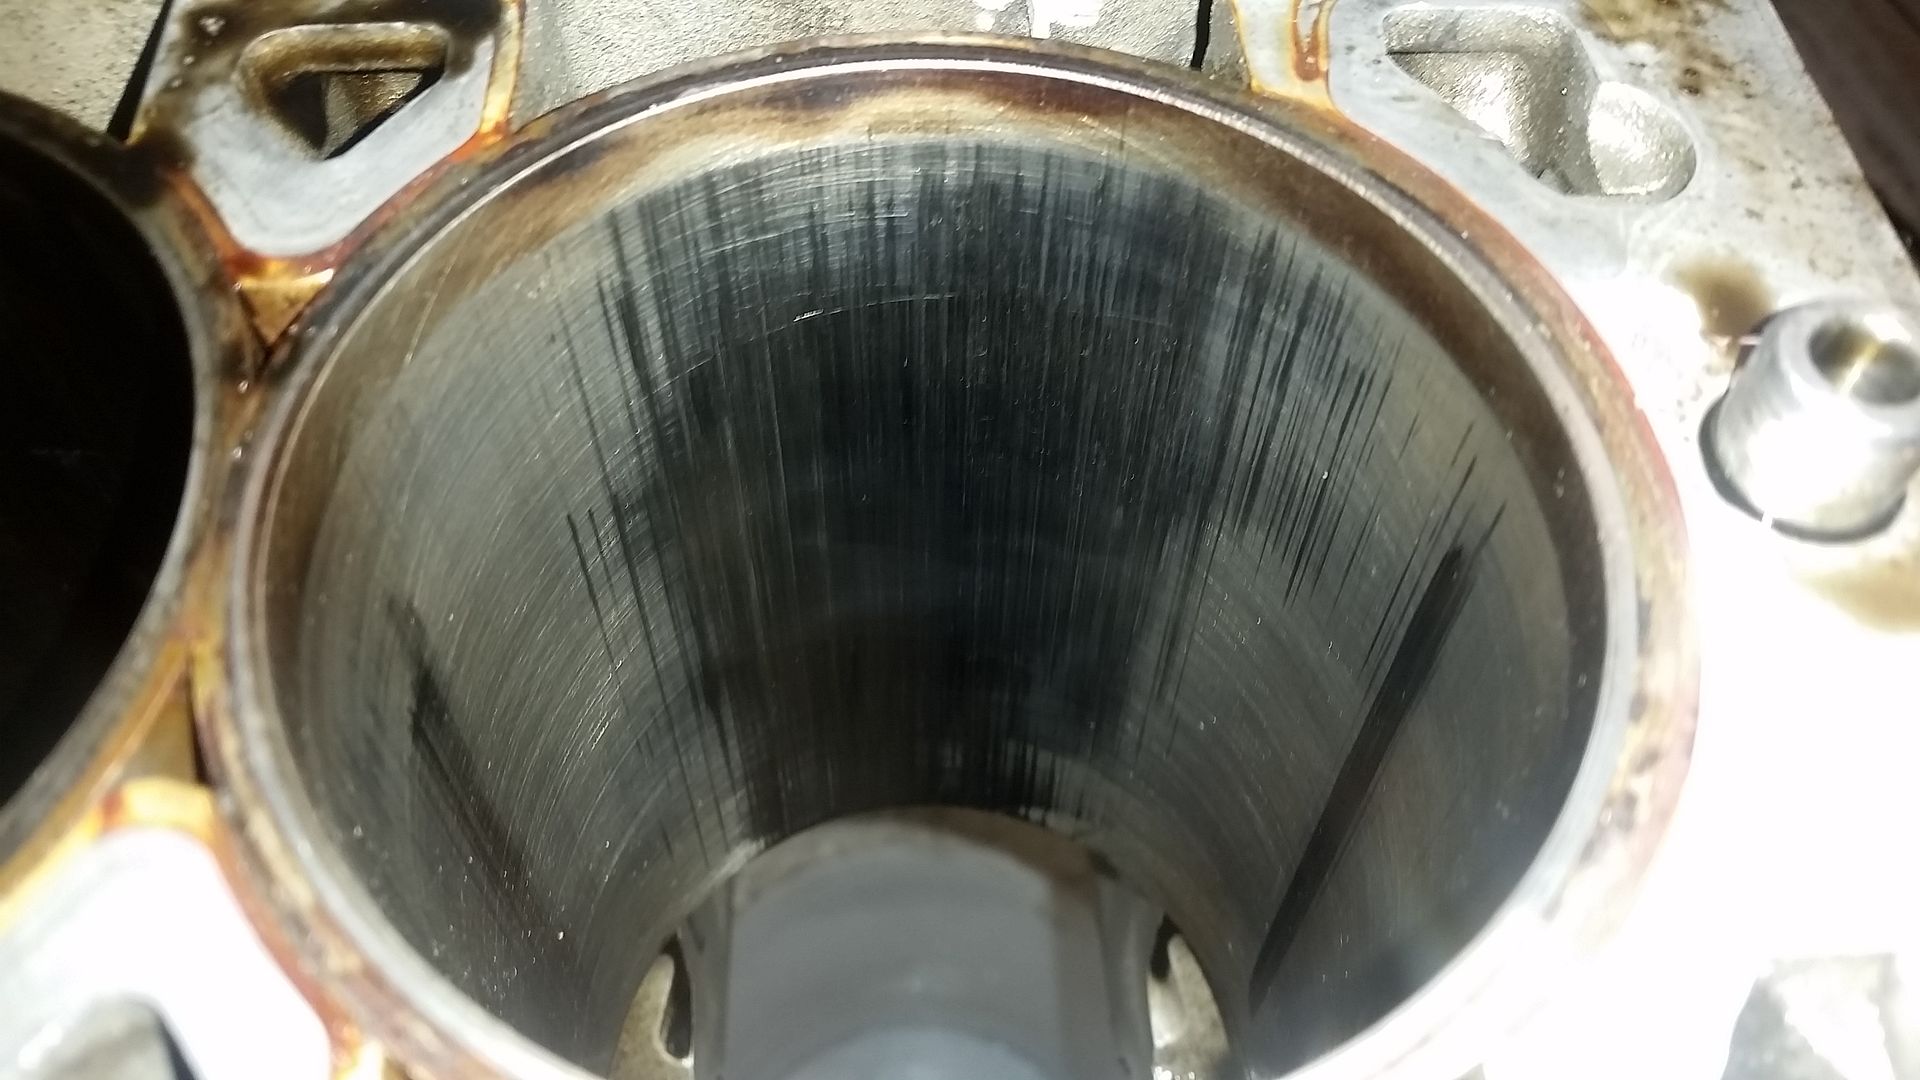
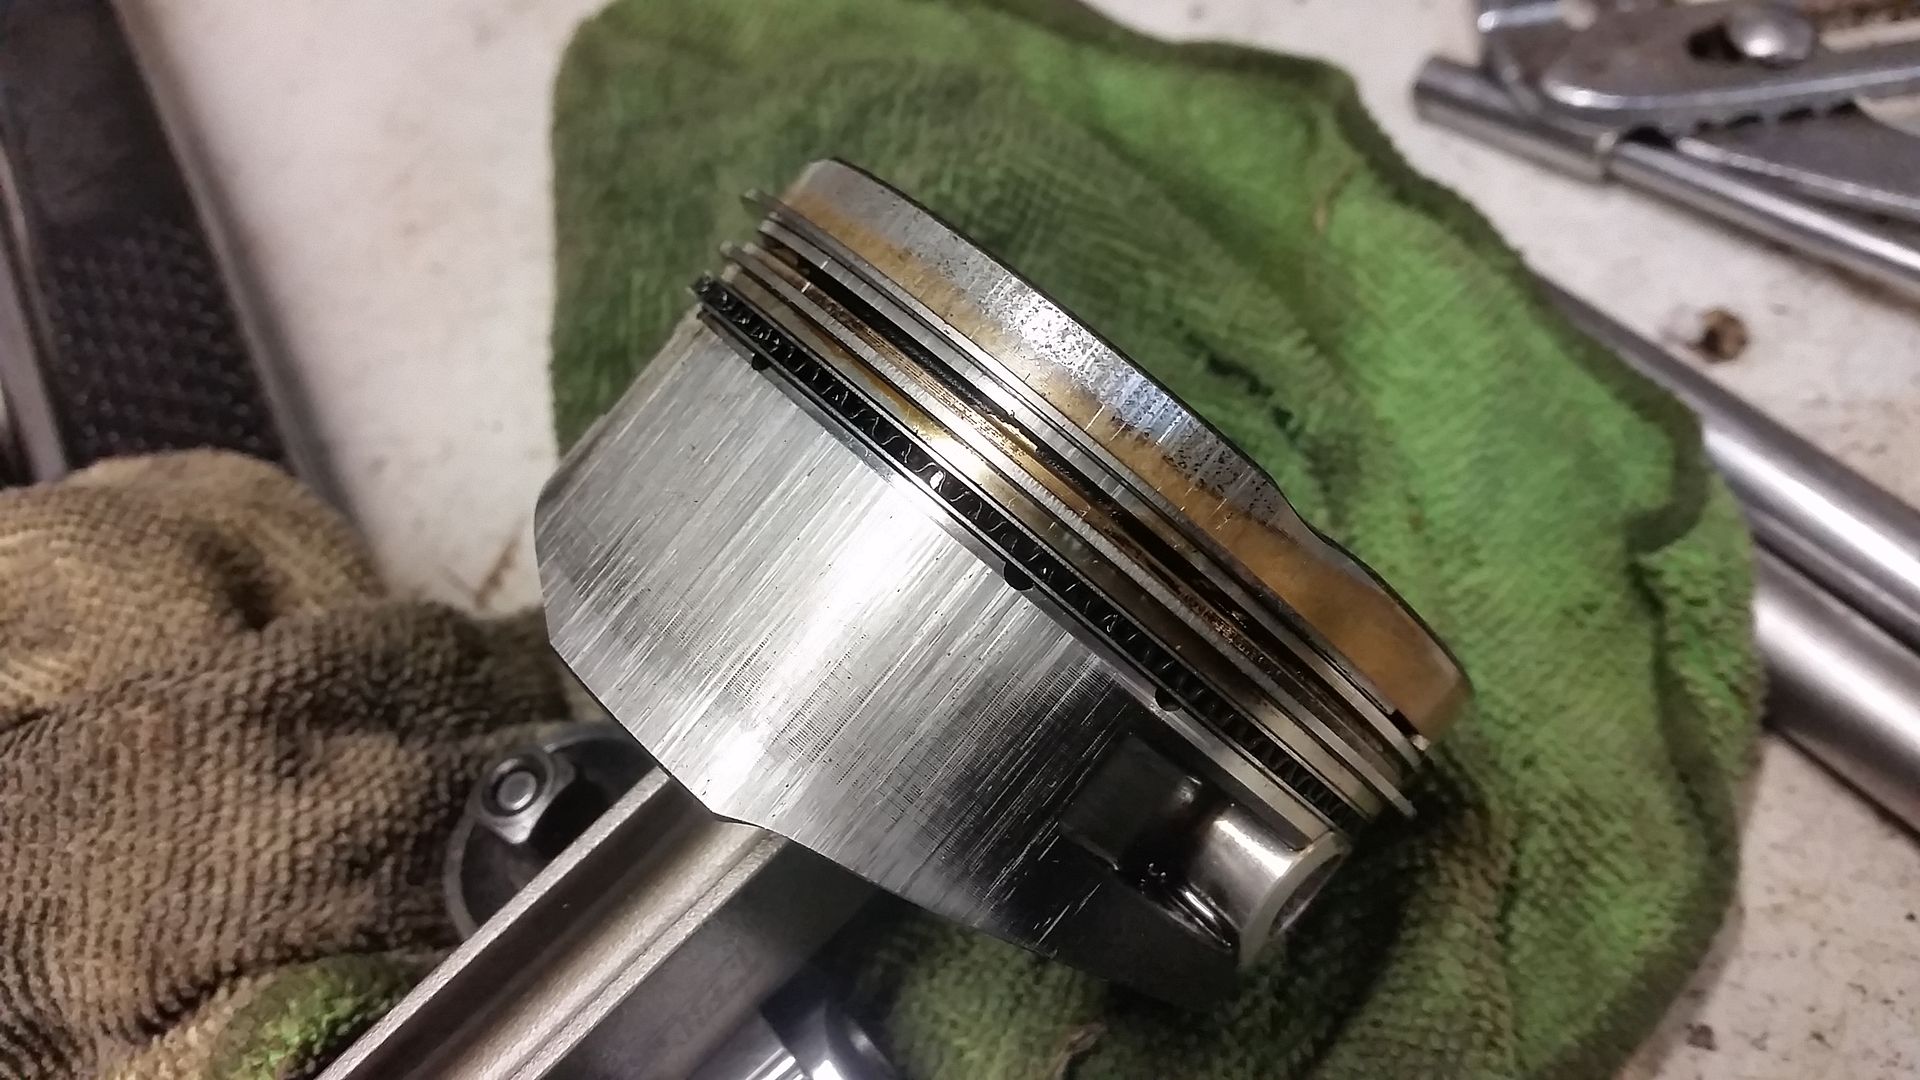
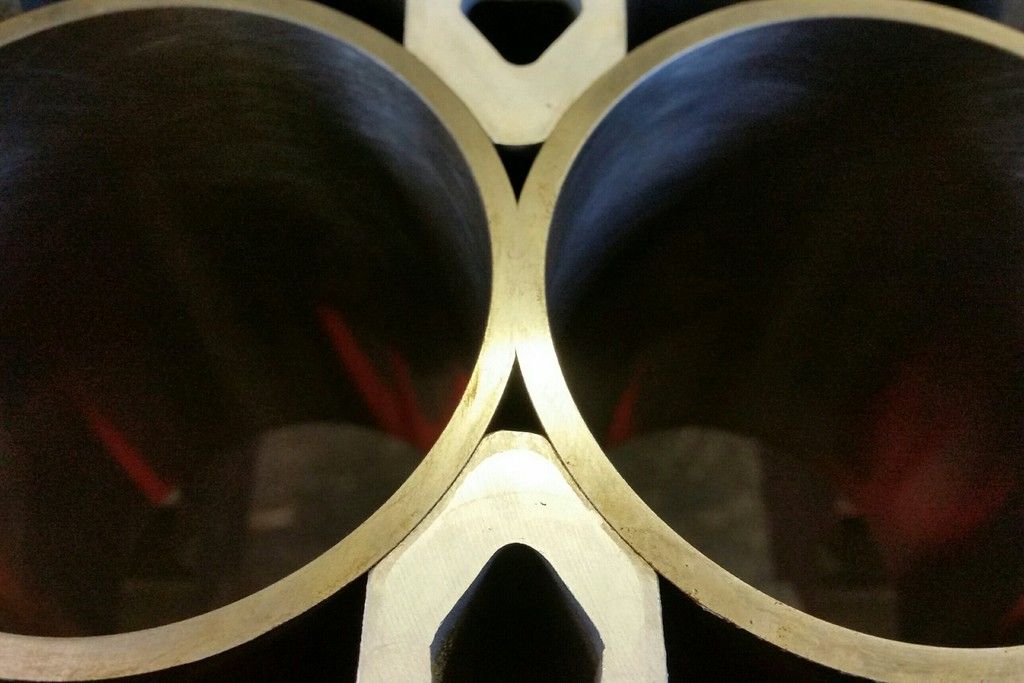
As I alluded to above, my high compression build had issues with excessive blow-by and pressurising coolant and, upon stripping it down to fit shorter conrods, I found severe bore scoring! It's hard to tell because of the damage but seems either the pistons or bores were oval. Pistons and liners are scrap.
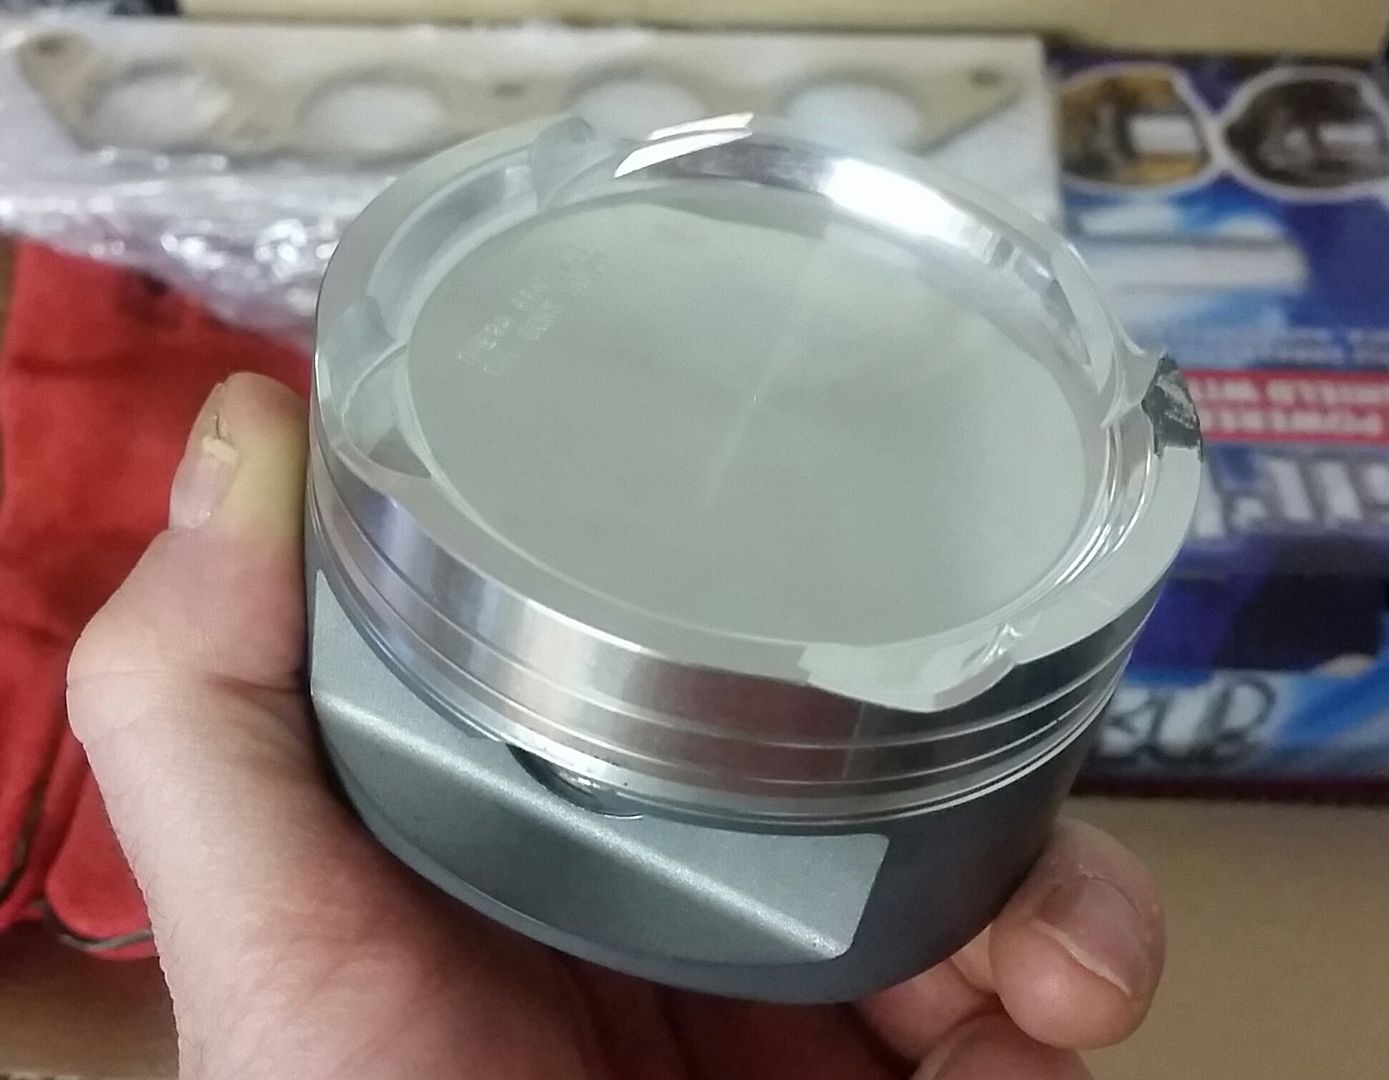
Fear not. I had already sourced a spare set of pistons and liners to bring me back down to an 80mm bore anyway. This time pistons are supplied by Omega, and designed specifically for the Rover K-series turbo running the shorter turbo spec rods. More on that later but here's the piston:
For now, I've just fitted a nasp engine from a ZR160 to keep me mobile.
Steering:
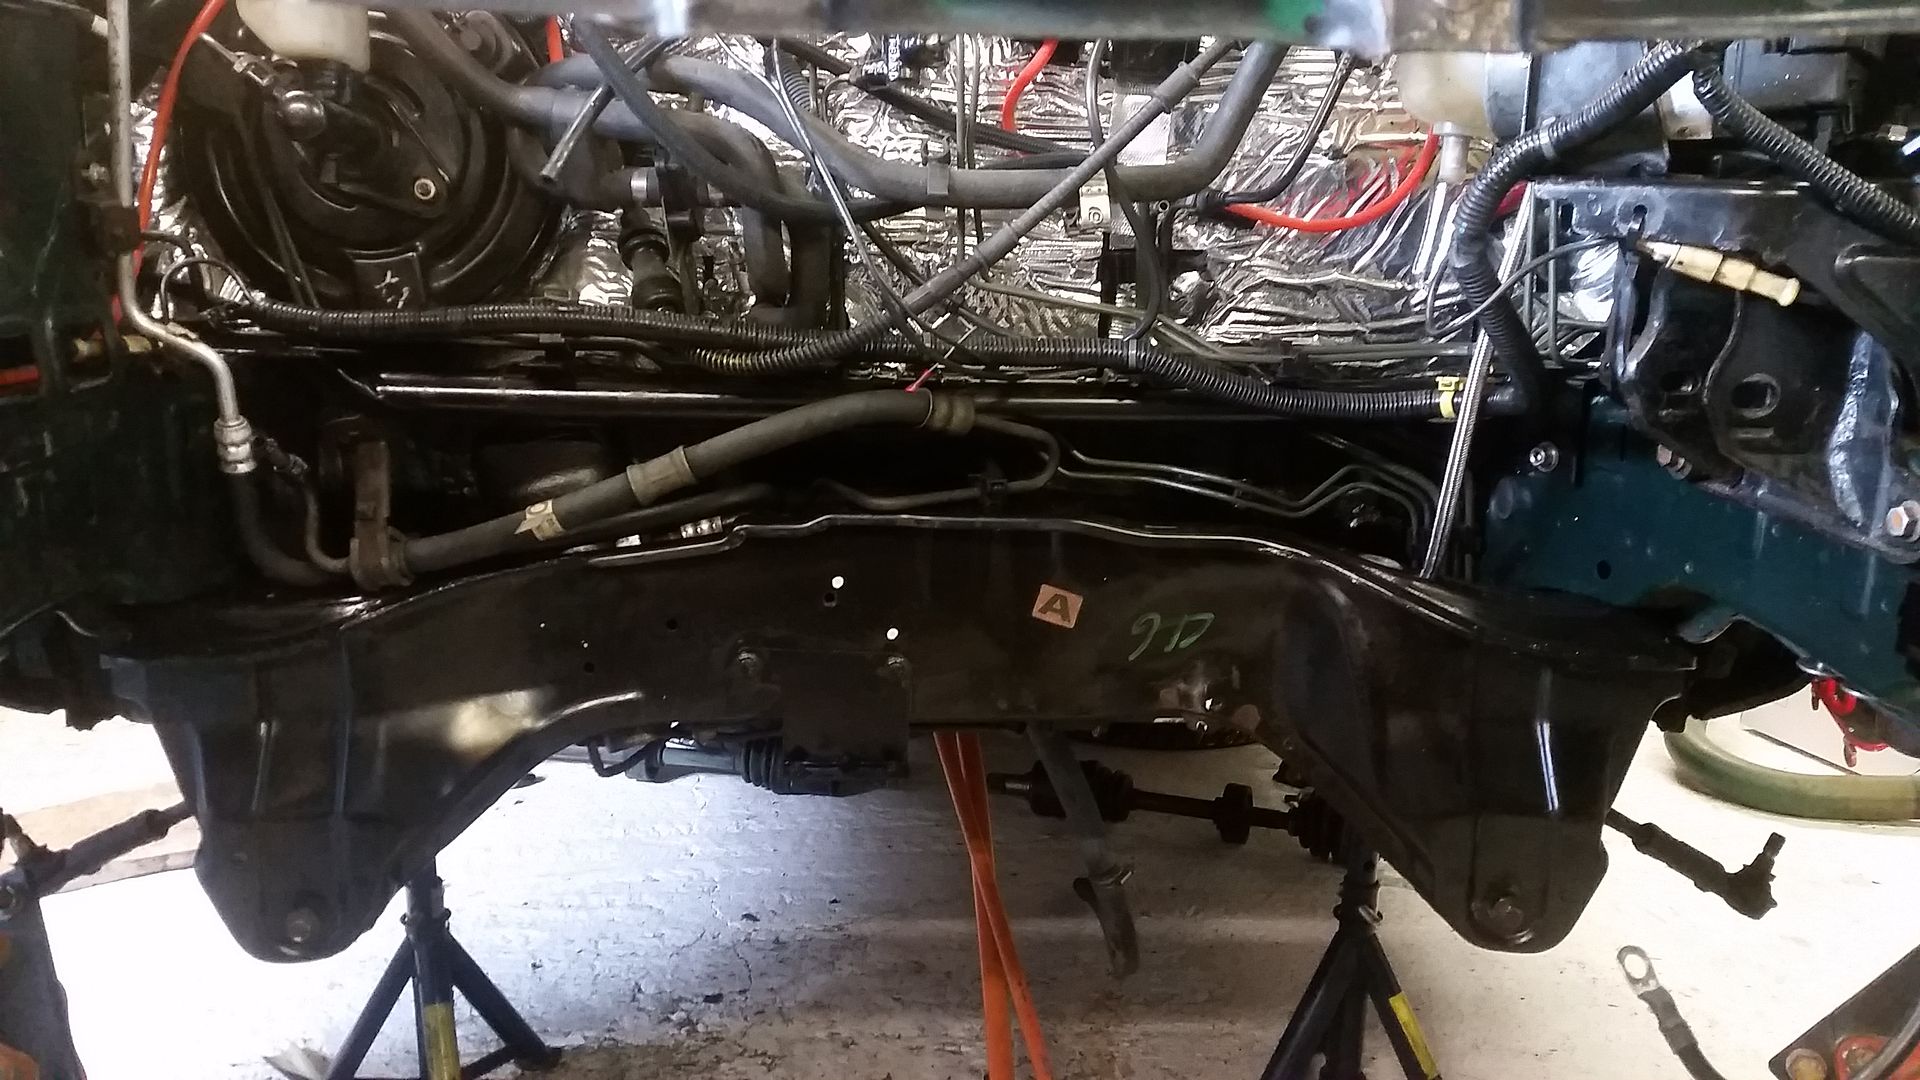
I wanted a more positive setup given the amount of power going through the front wheels. The rack in every Rover 200 I've ever driven felt vague so add big power and the front end just has a mind of its own. Enter MGZR. Less turns lock to lock and supposedly a more more "feelsome" setup. Unfortunately this is not a straight swap, even less so than I thought it would be actually...
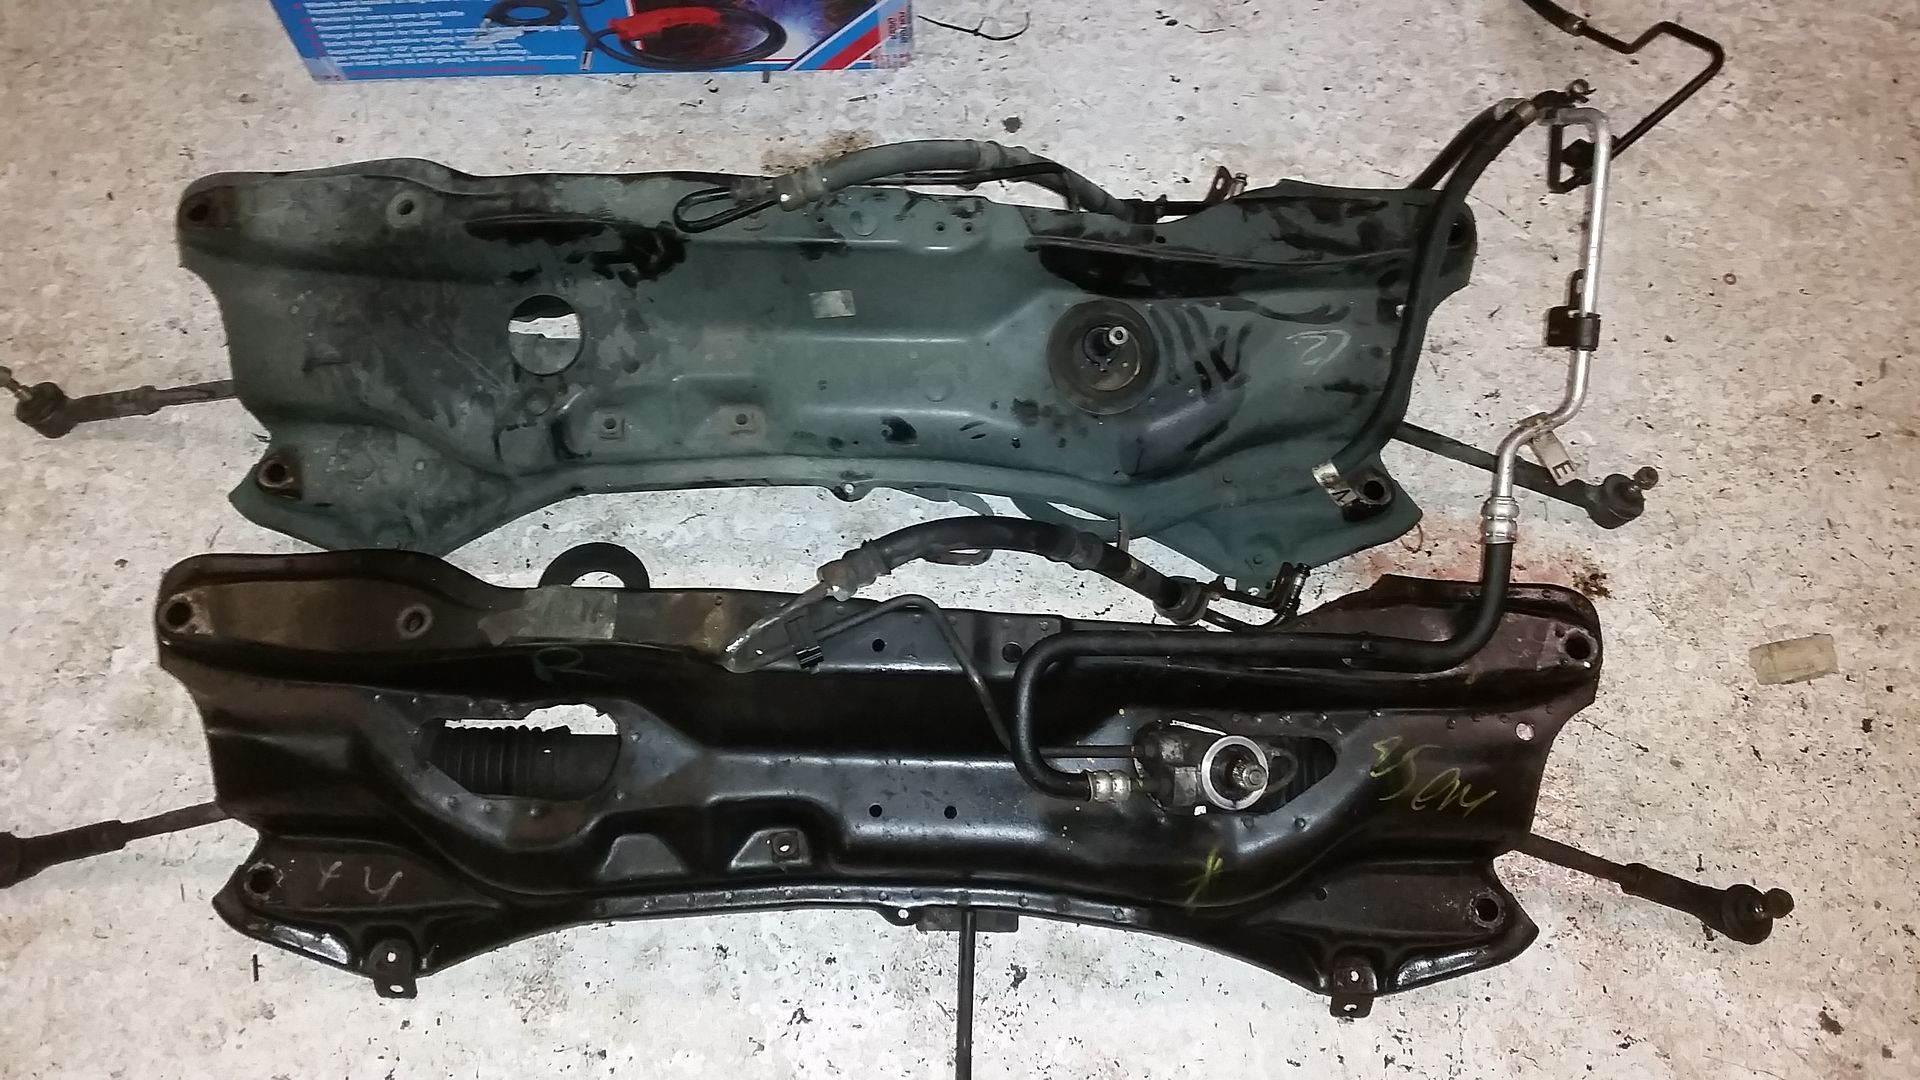
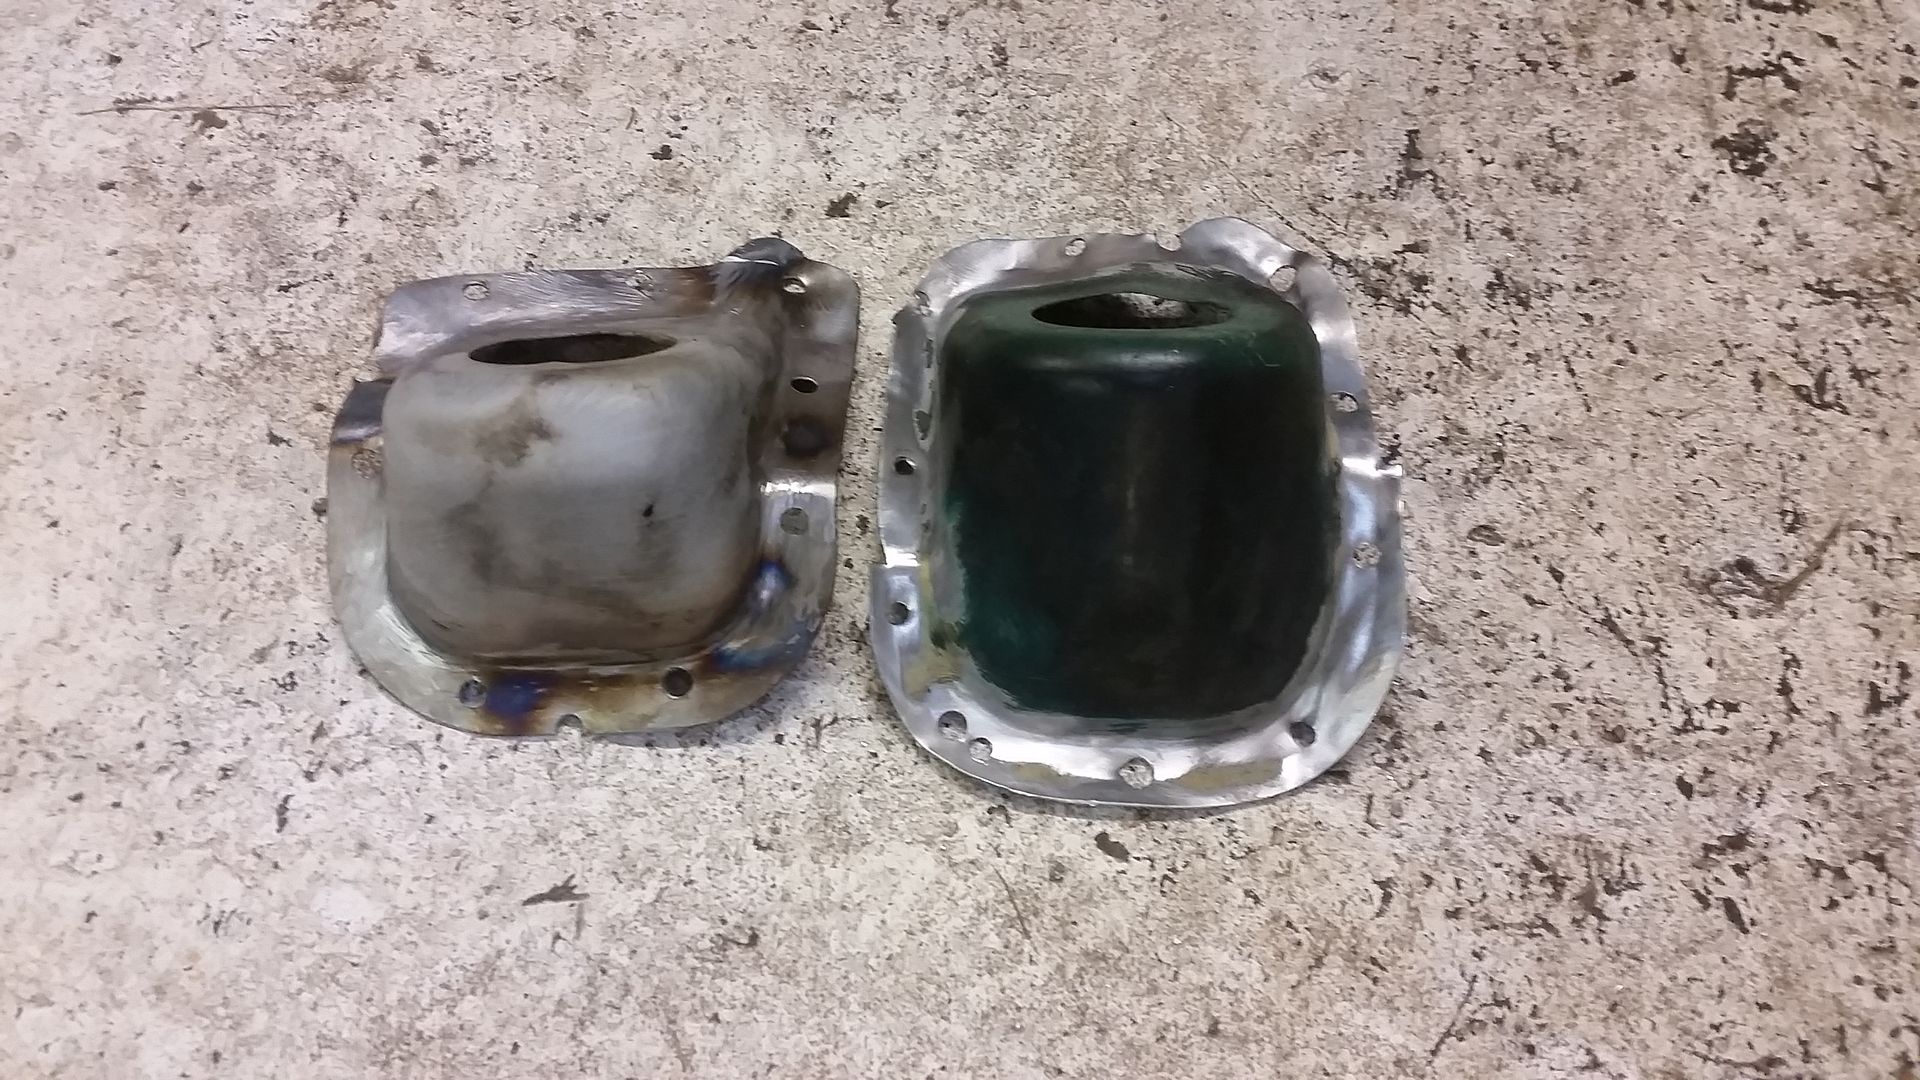
The rack is completely different, as is the subframe:

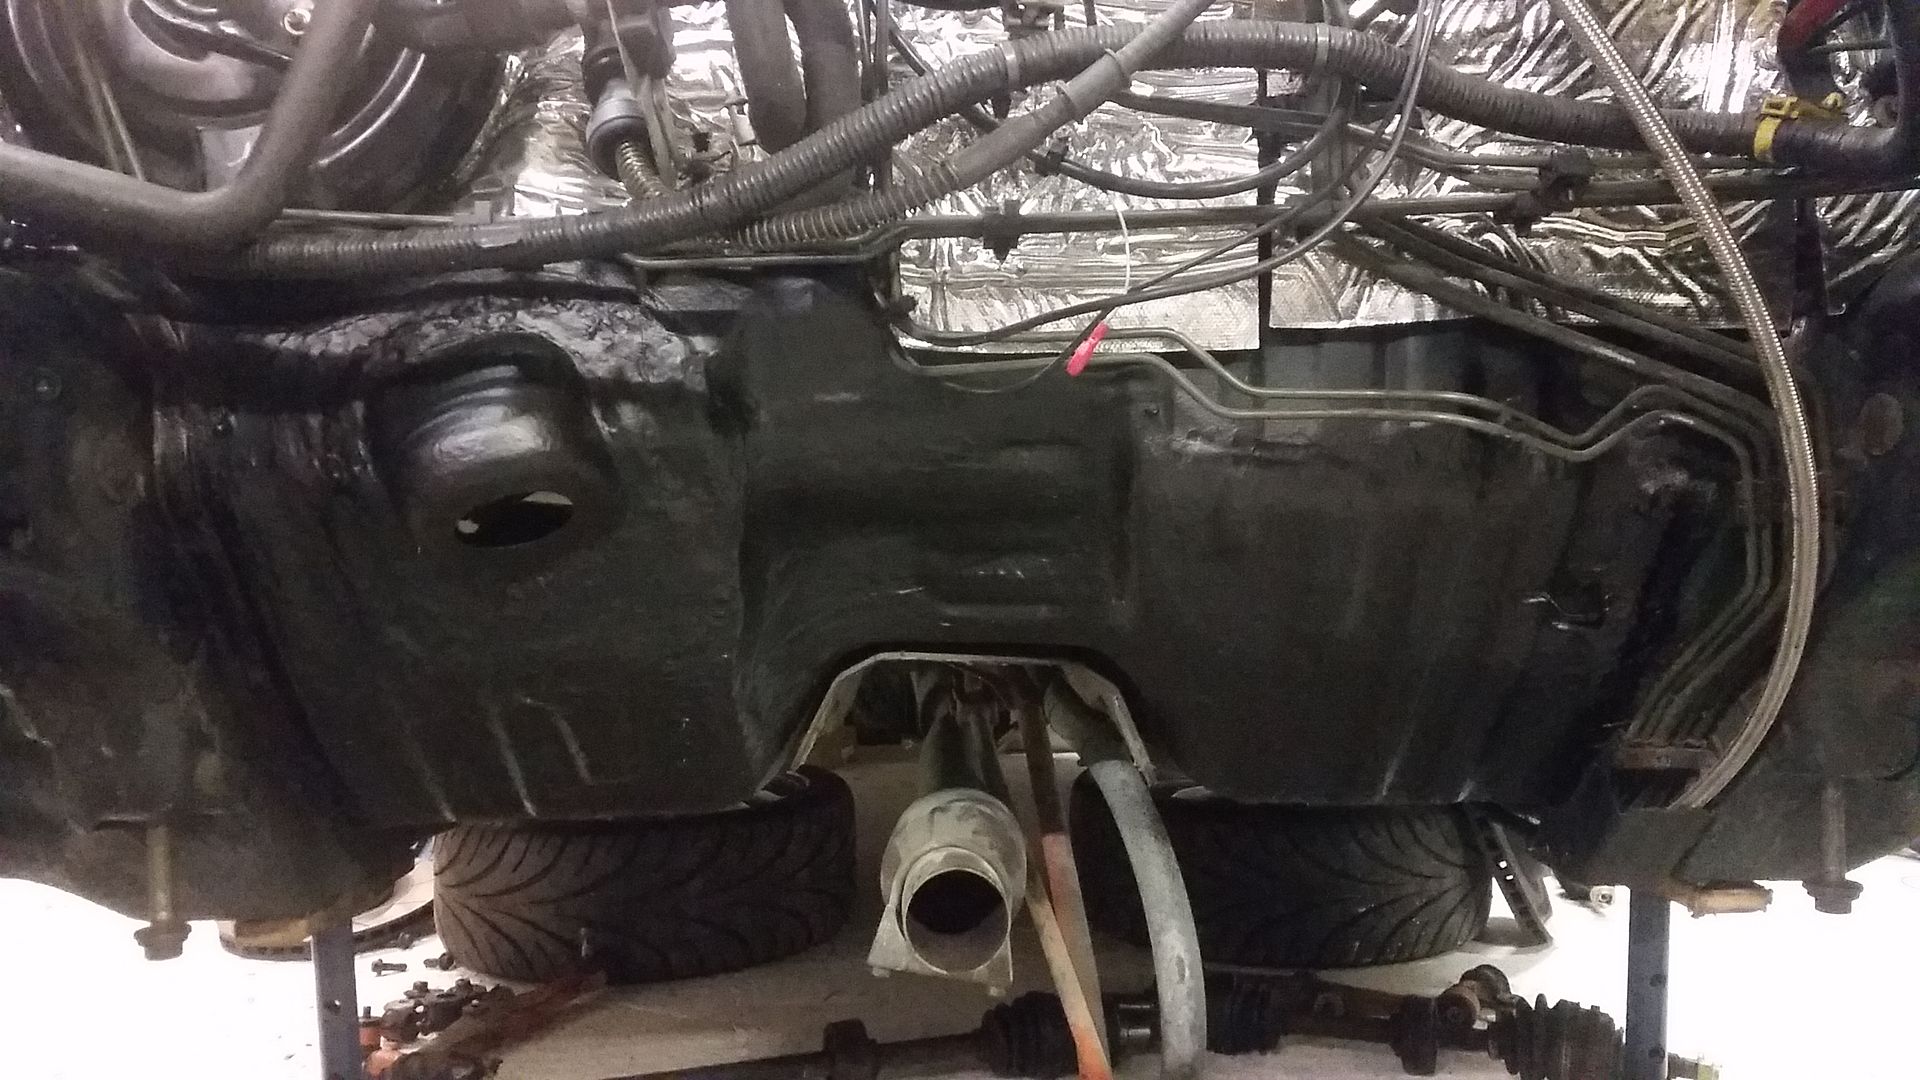
The splined shaft the steering column fixes to is in quite a different position. I thought this would entail a simple swap of the pressed steel pocket on the bulkhead that butts up against the rack. Drill out spot welds. Swap over from zr to brm. Weld. Done. I was wrong
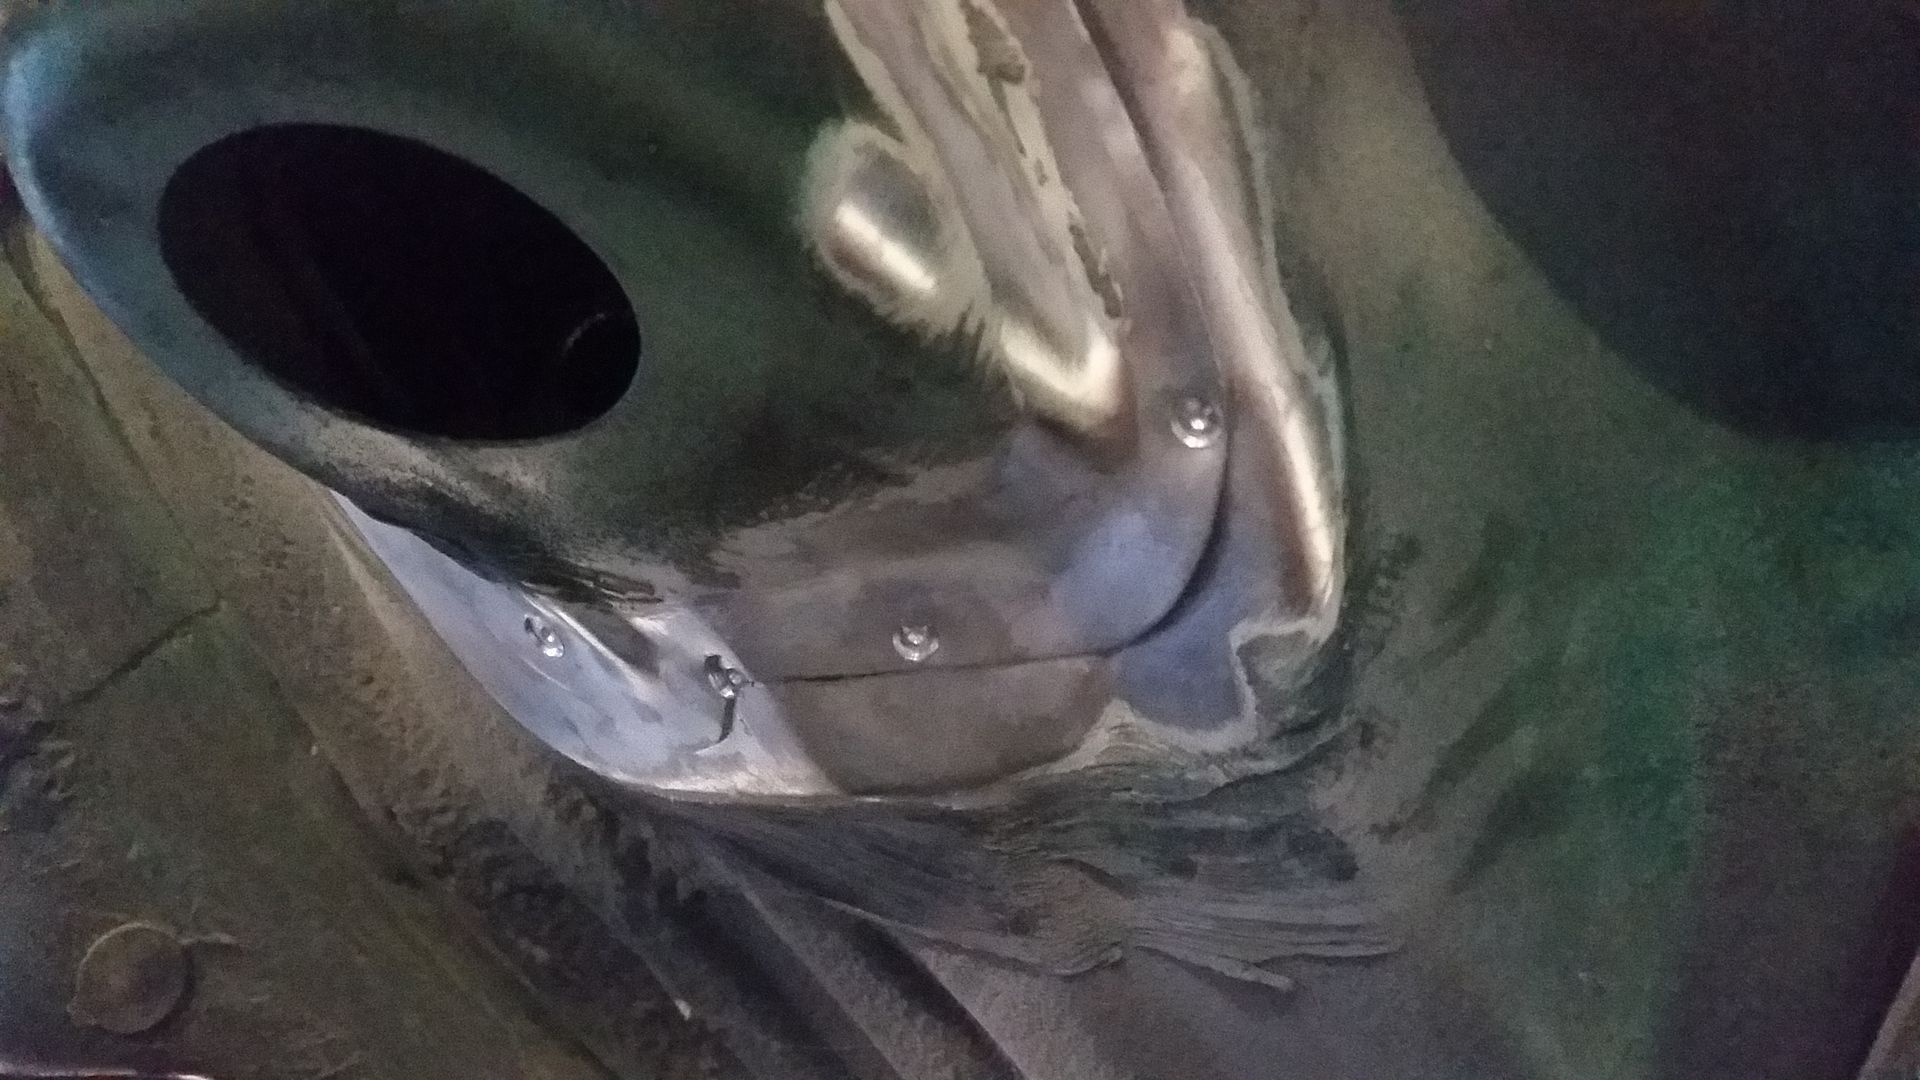
It turns out that whole area of the bulkhead is a different shape between the cars. Long story short, I had to modify the brm firewall a fair bit to make it work. There was a point when I was cutting holes in the brm (having recently got it back from paint I might add) thinking to myself "what am I doing?"!
I had to teach myself how the mig weld for this bit. Not easy when the steel is 0.7mm thick in places. Just kept blowing through. It's not pretty but it's solid enough. Seam sealer saves the day!
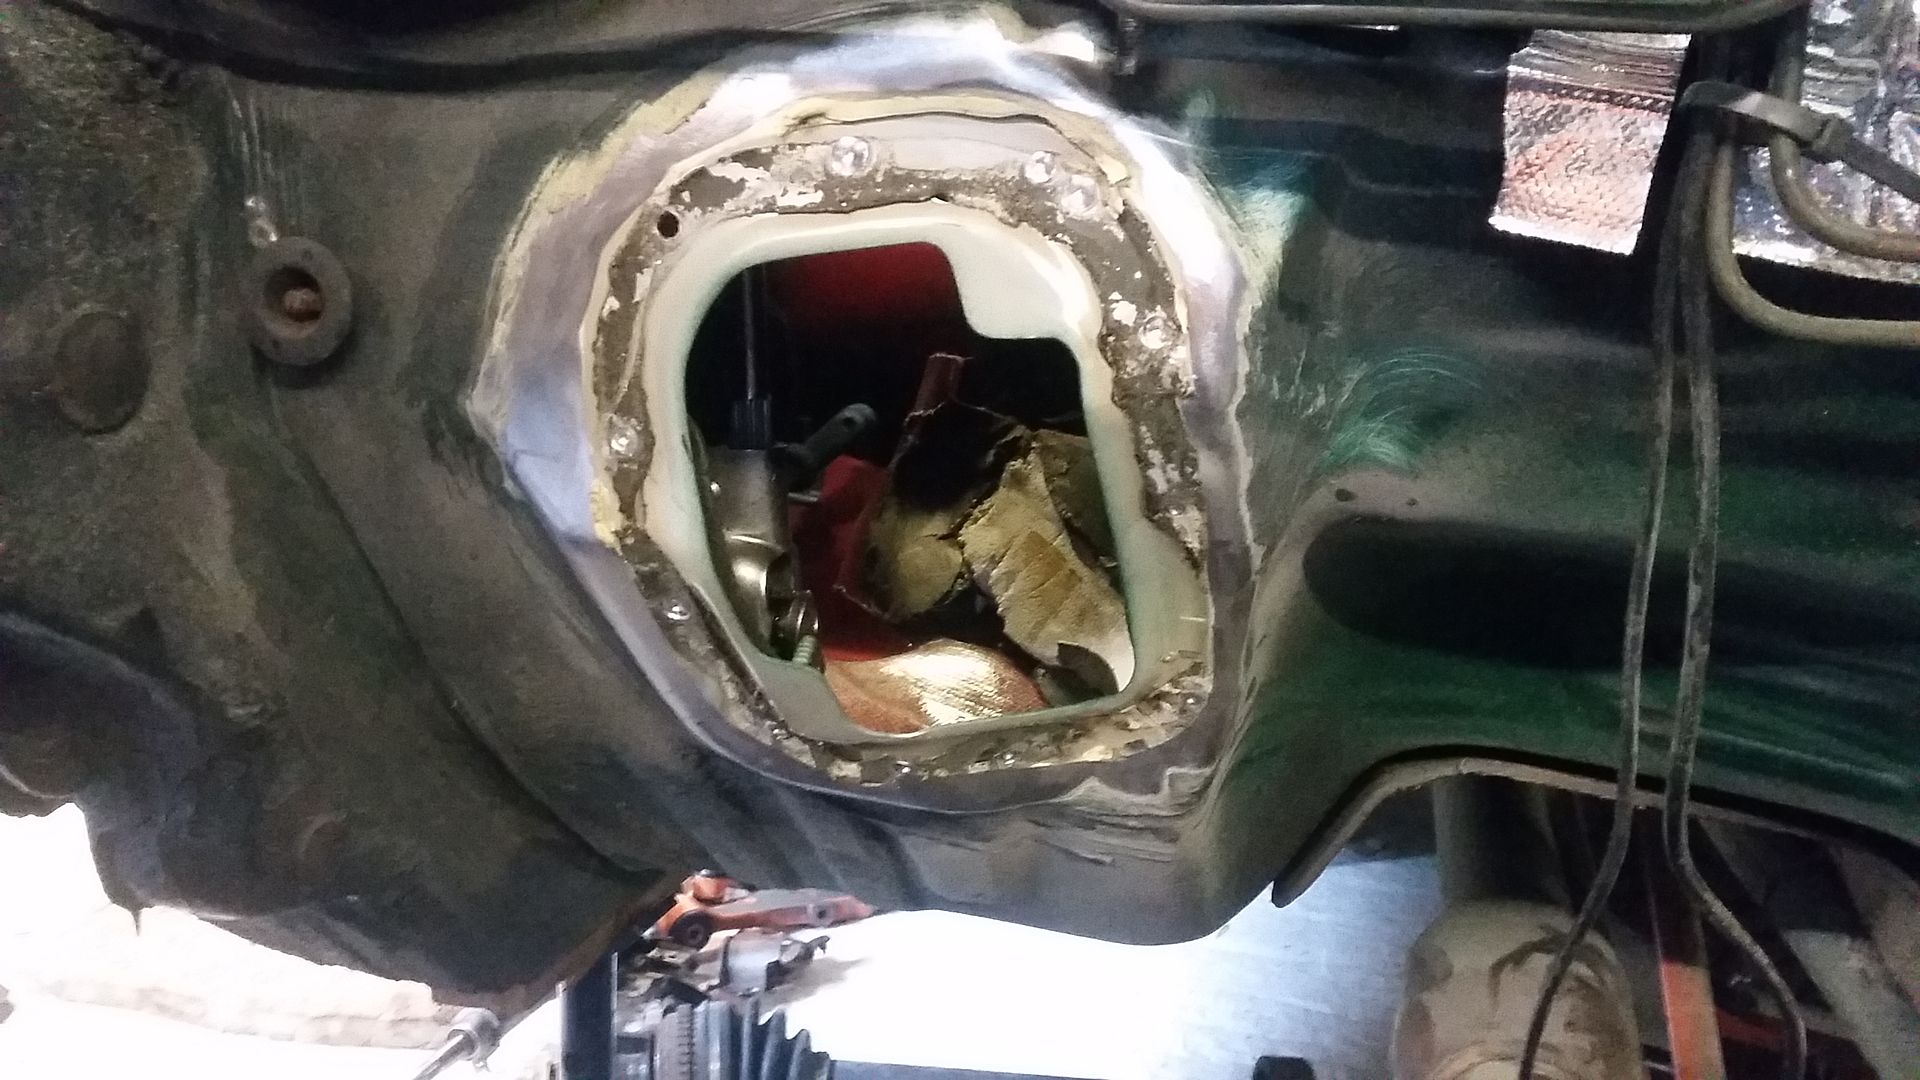
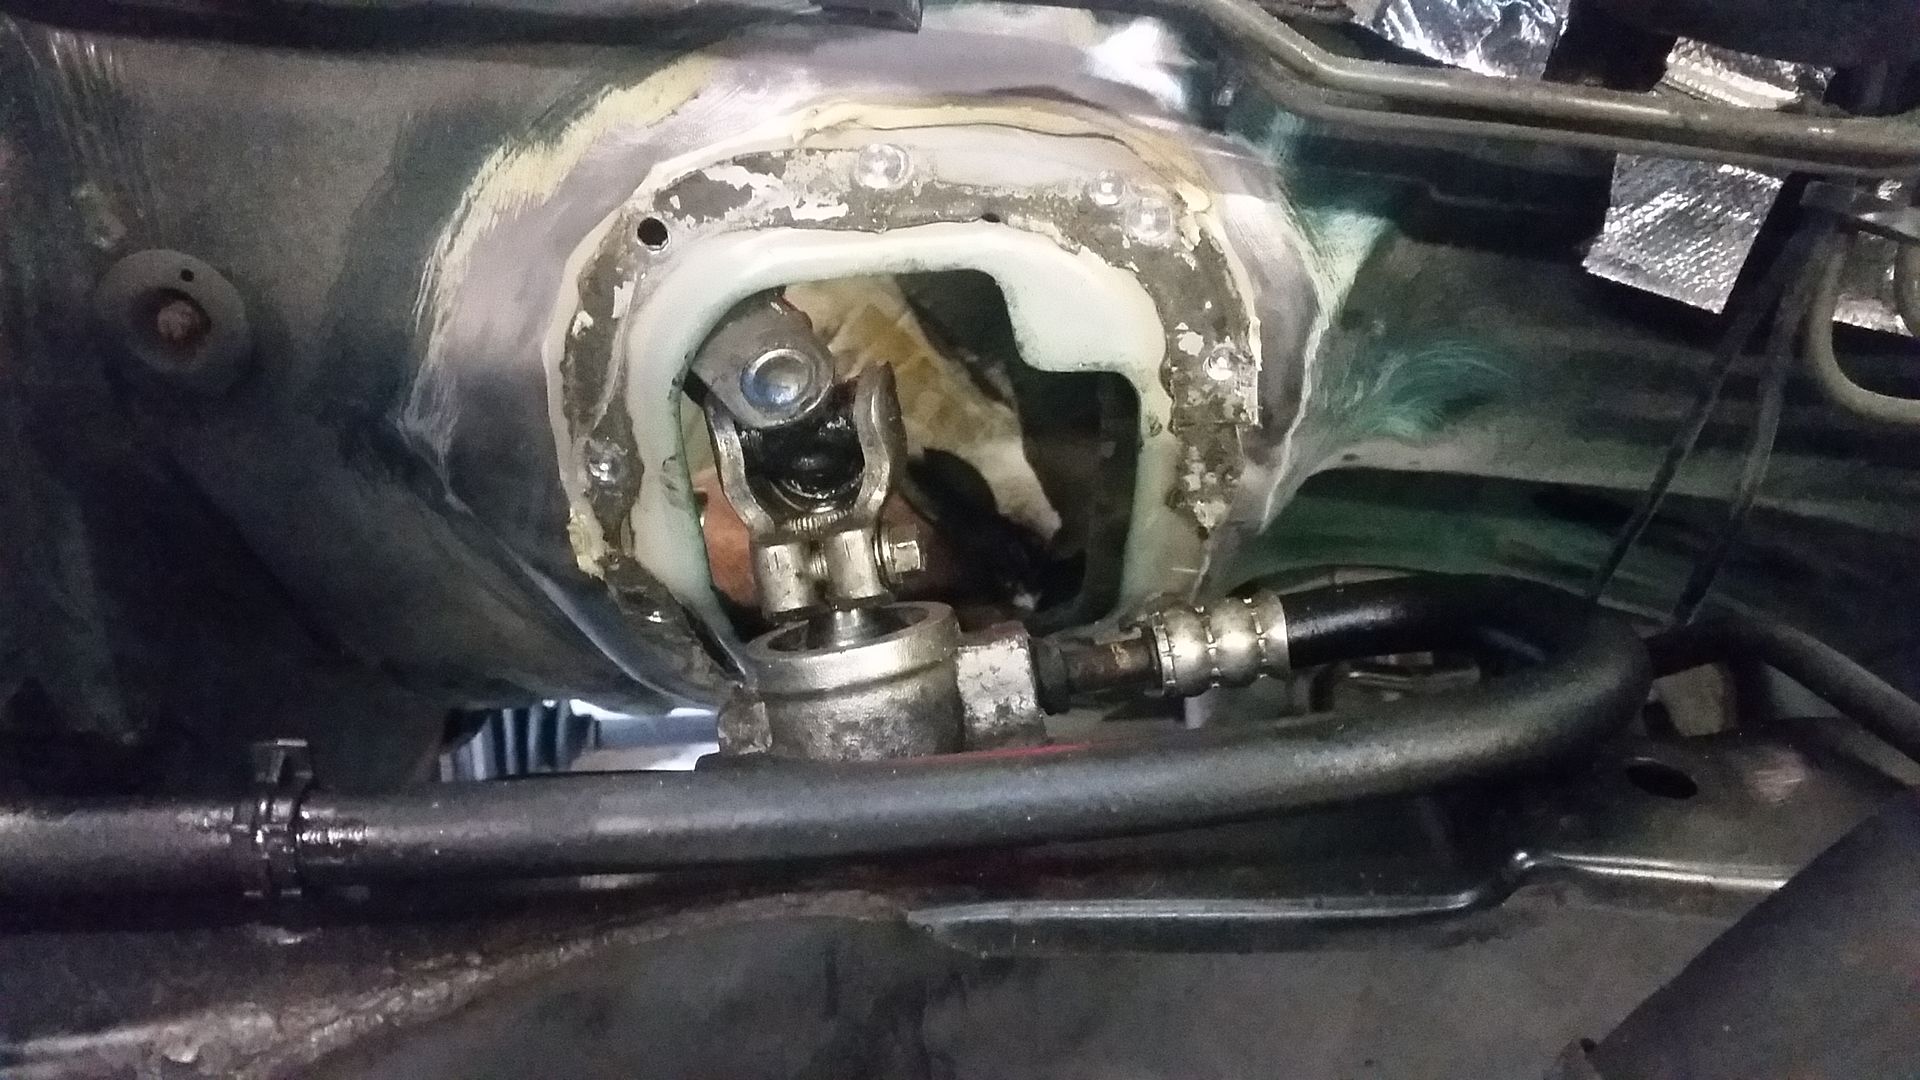
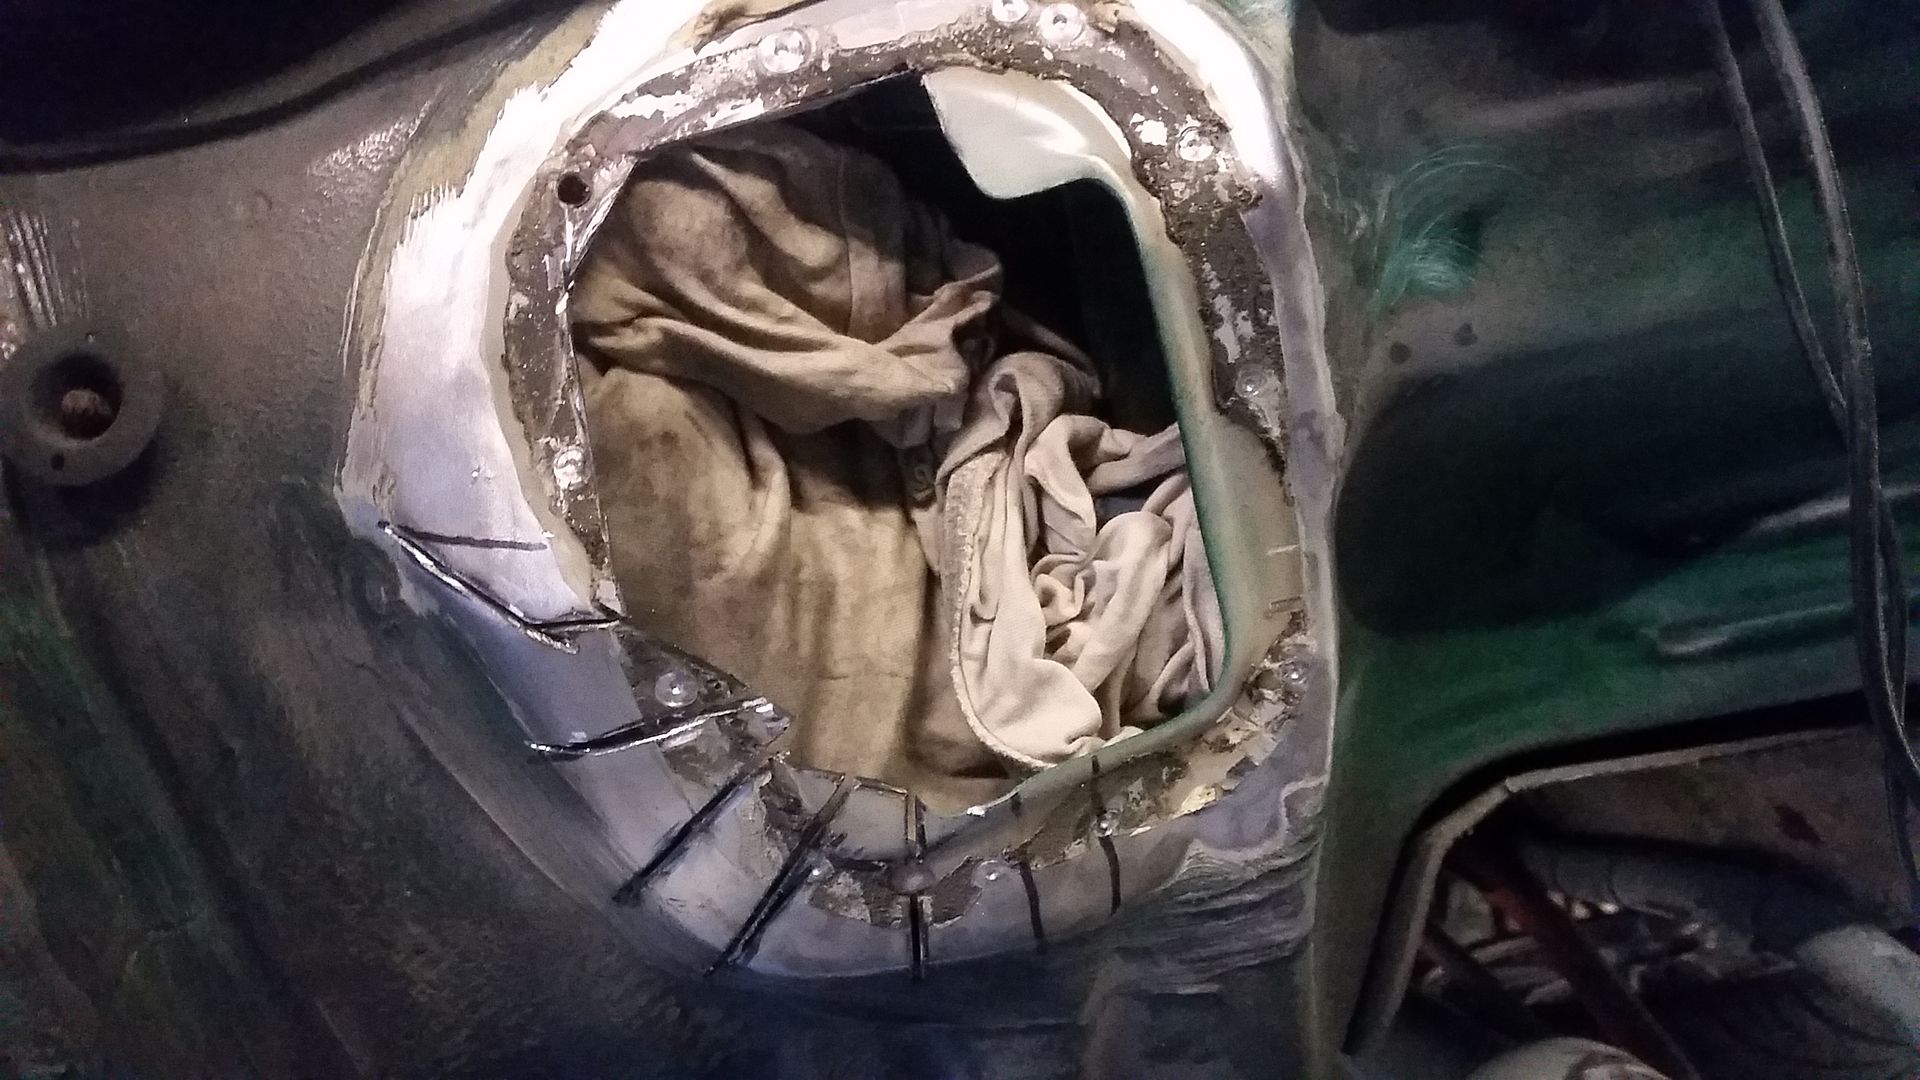
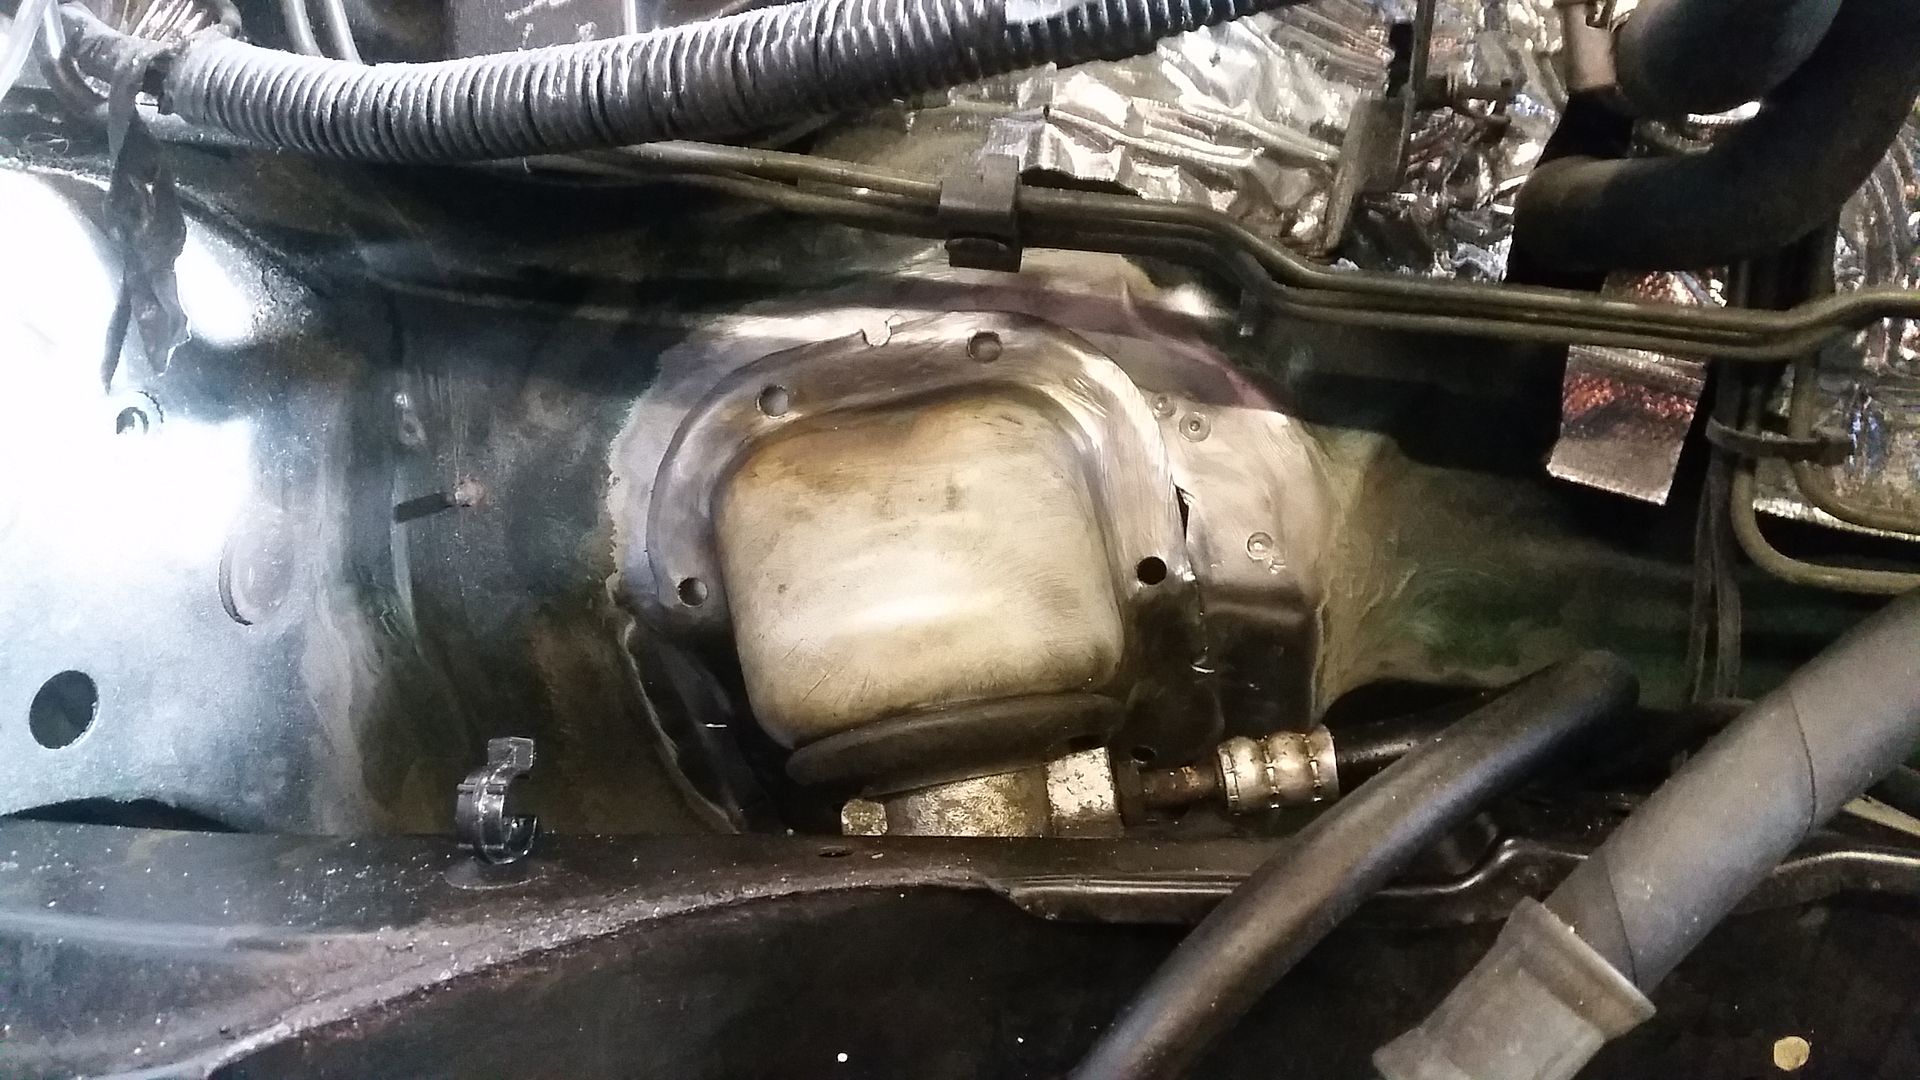
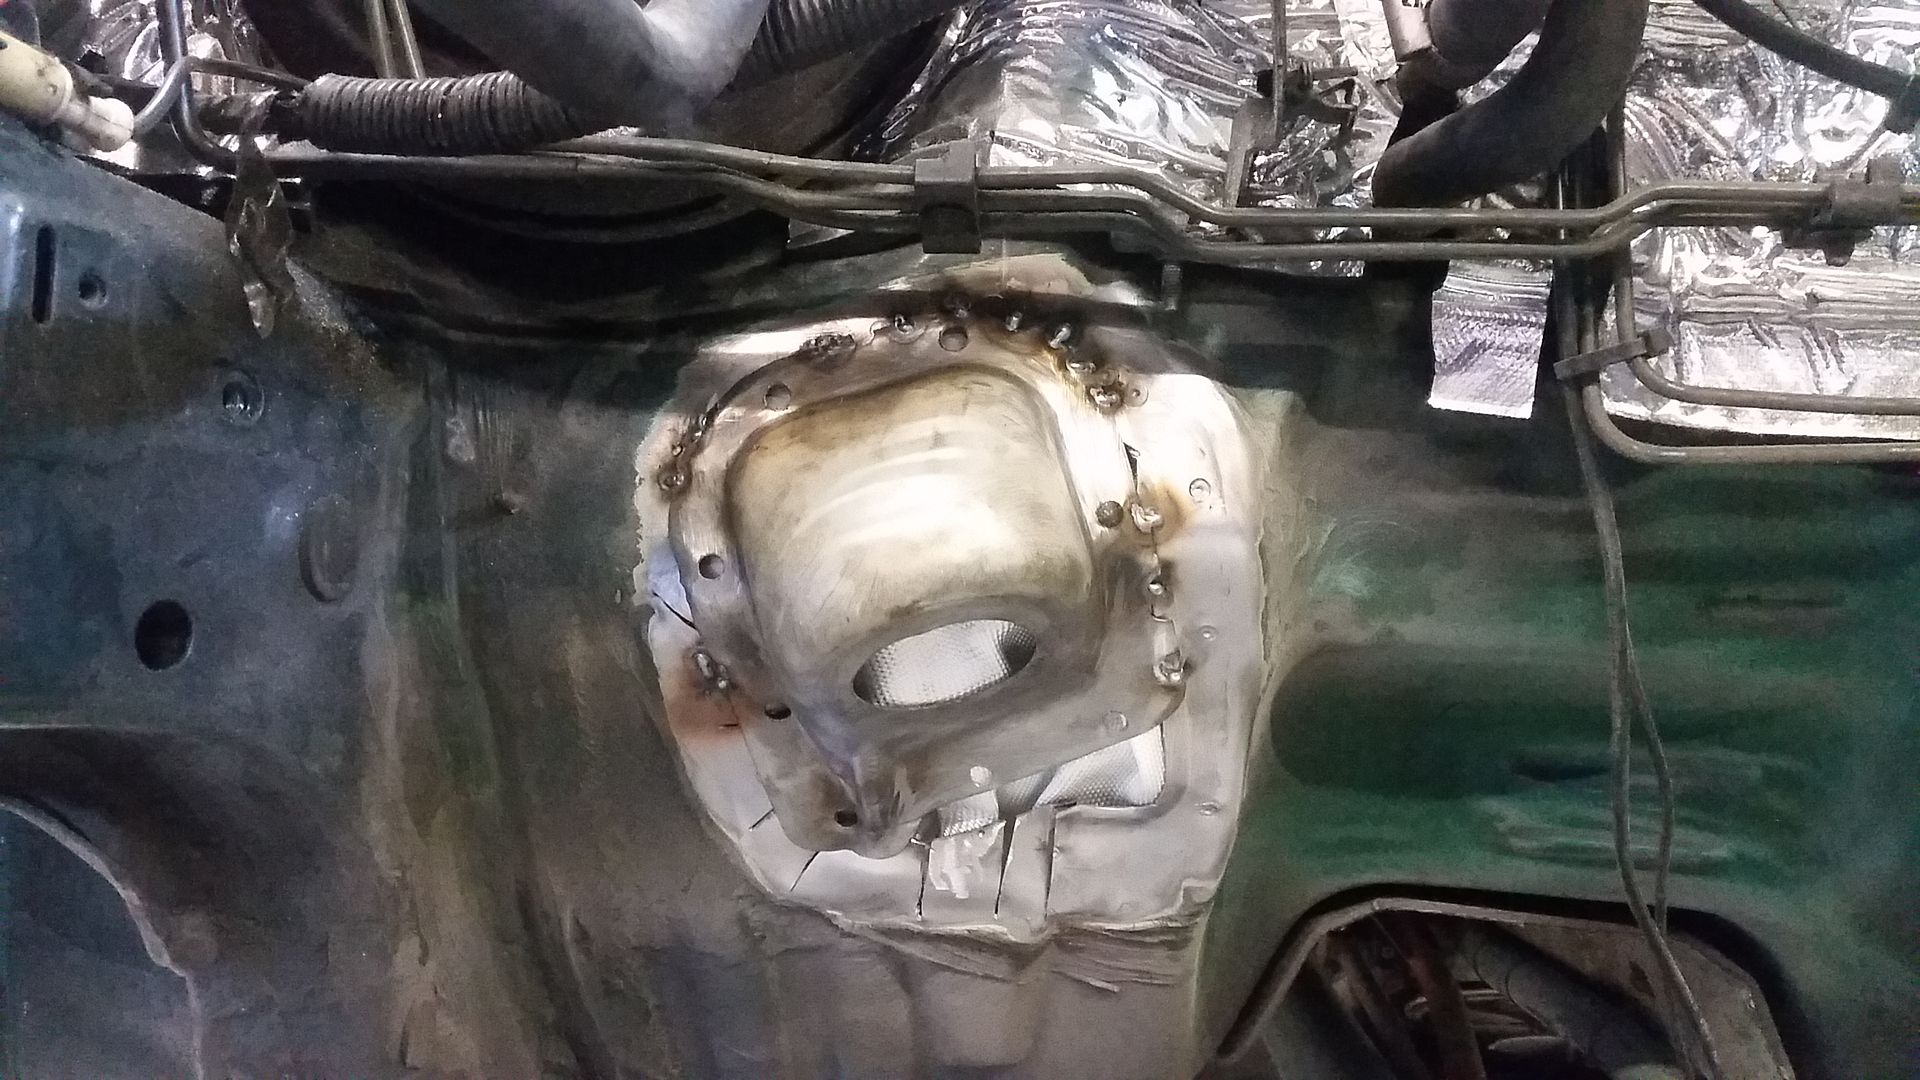
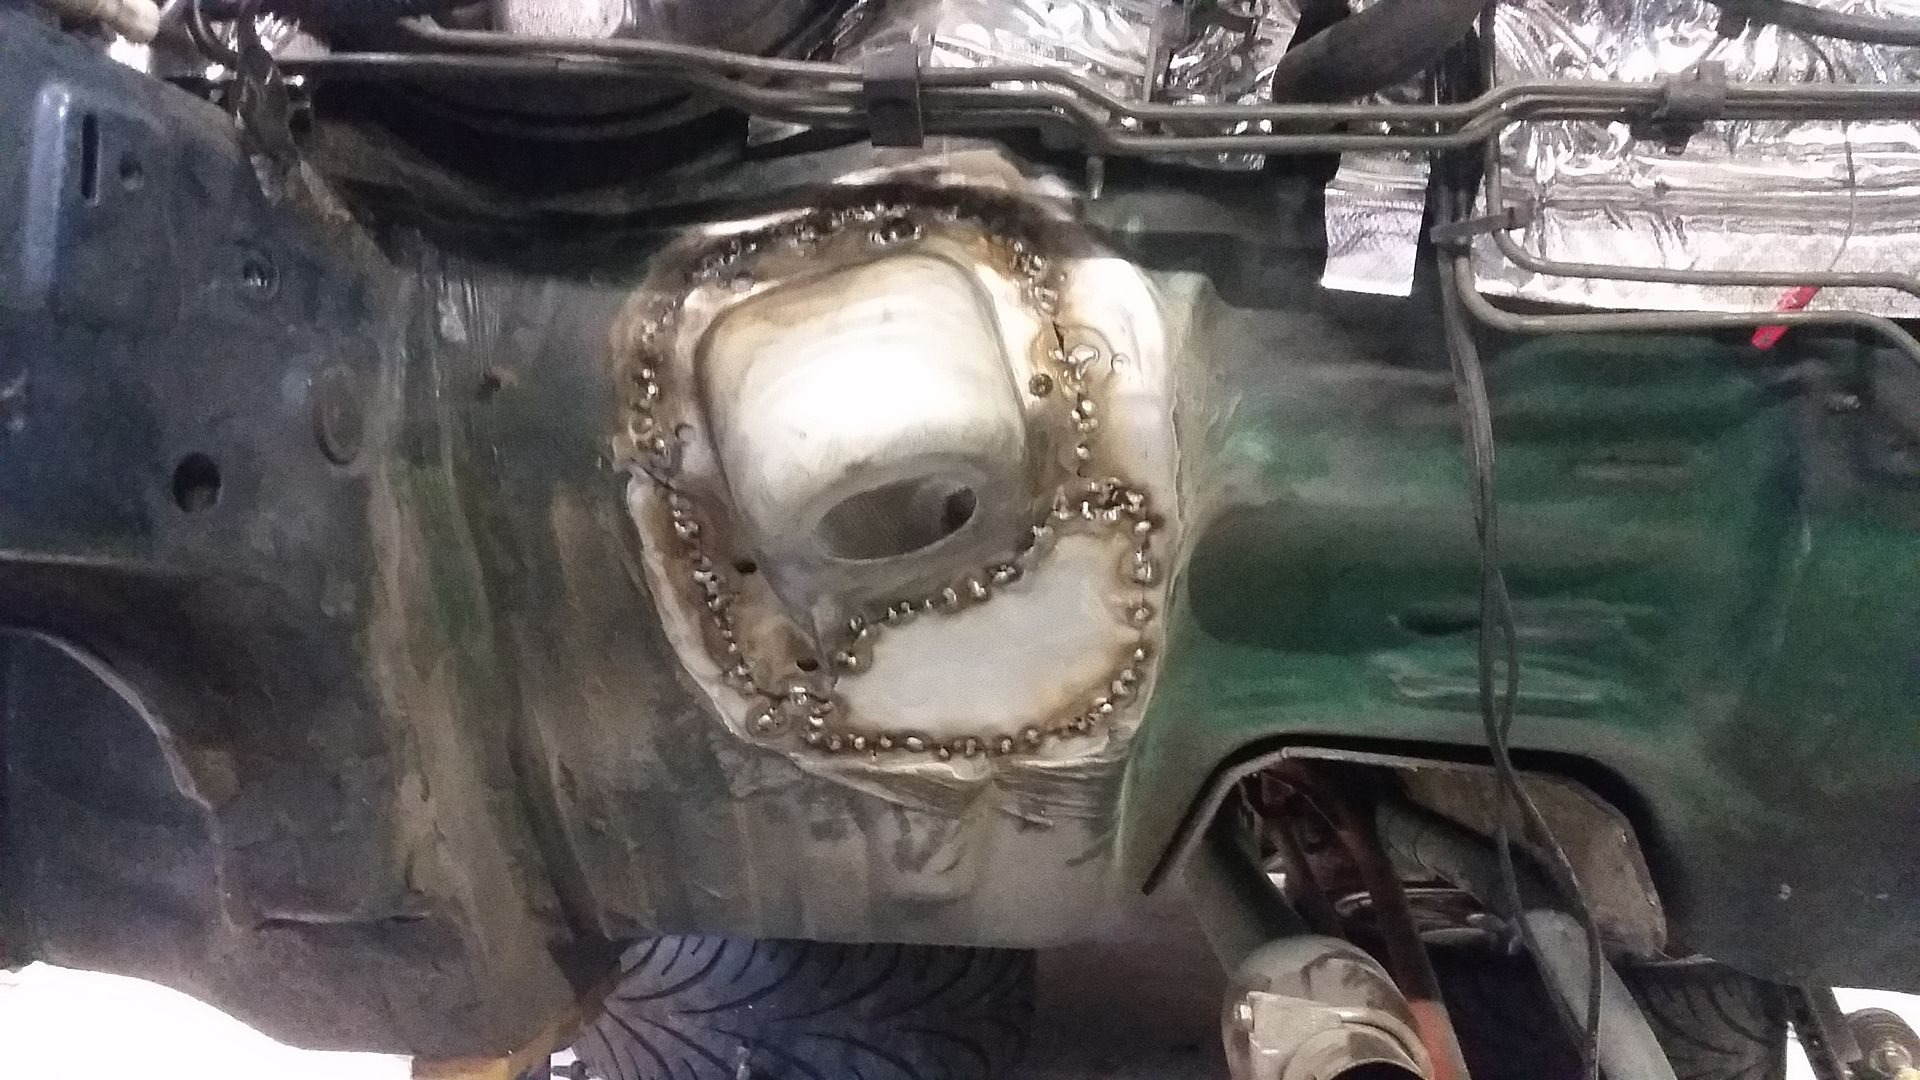
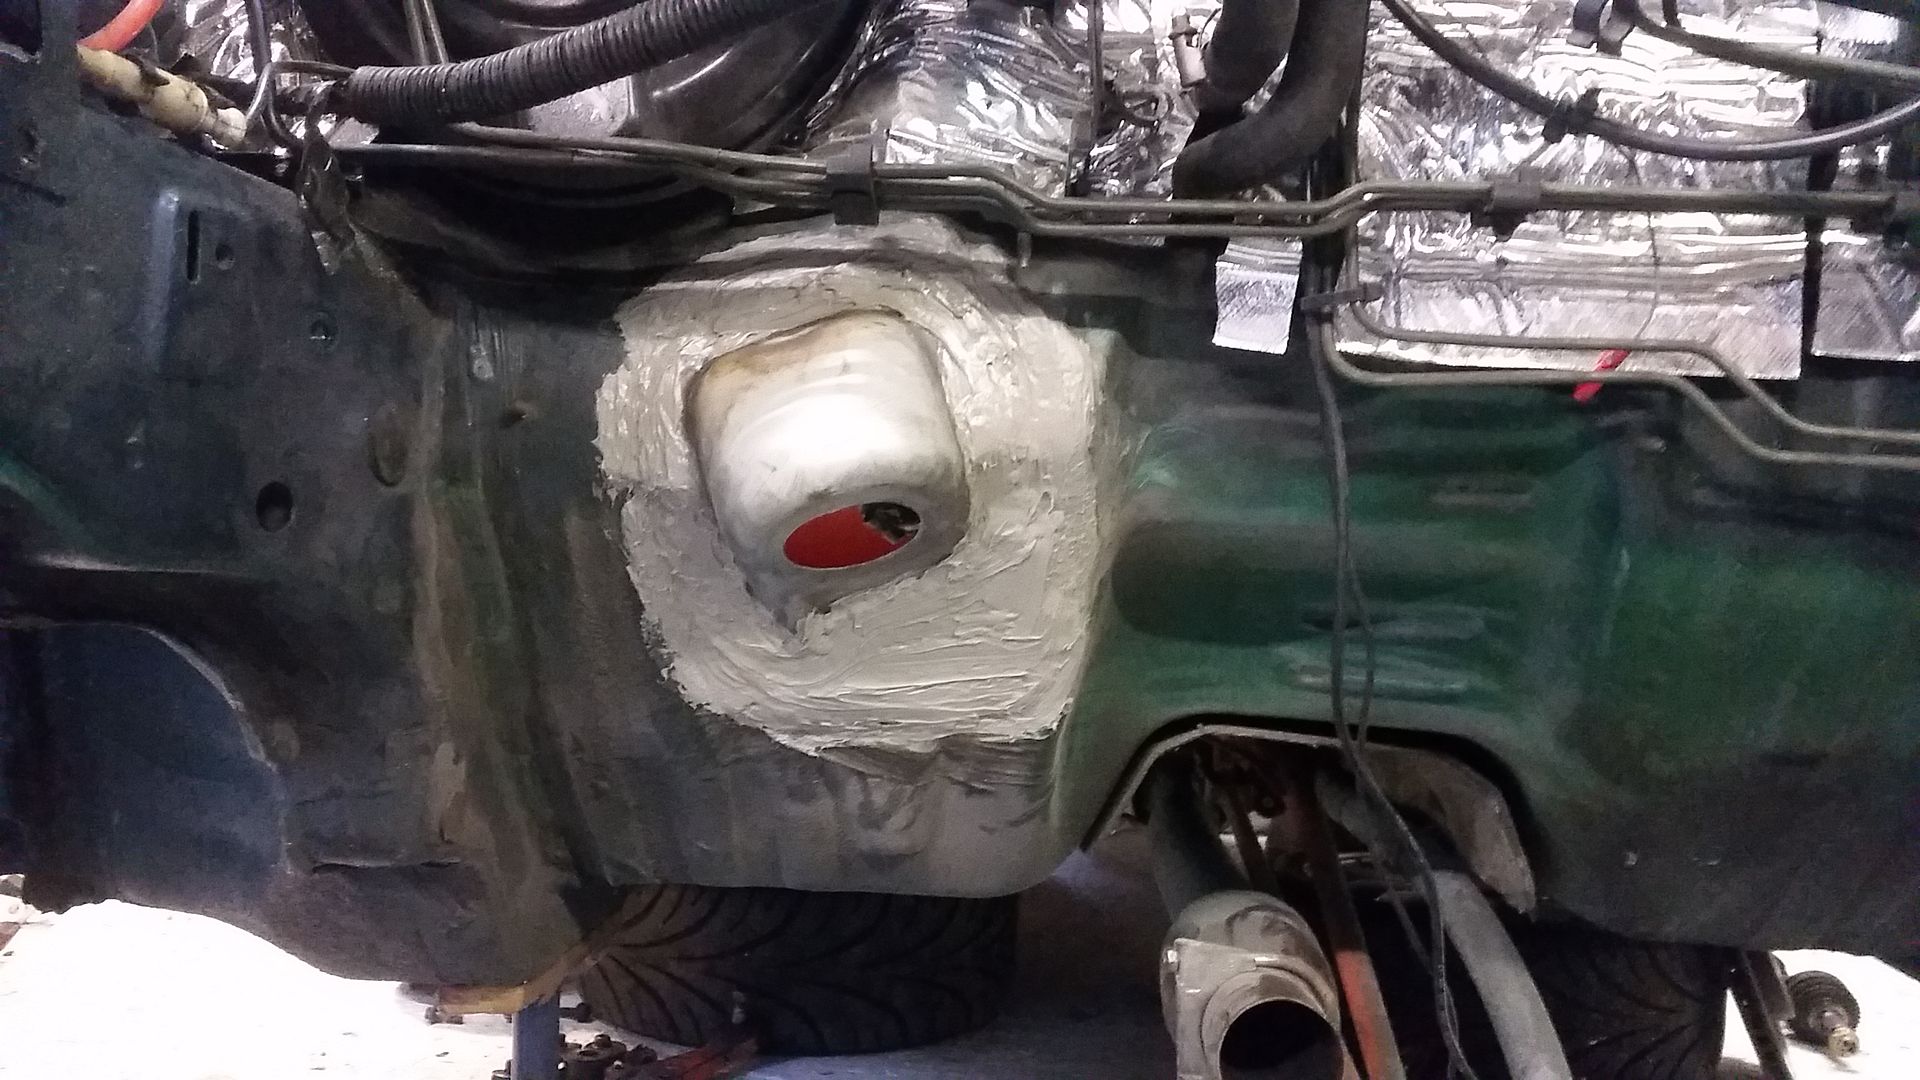
You'd never know!
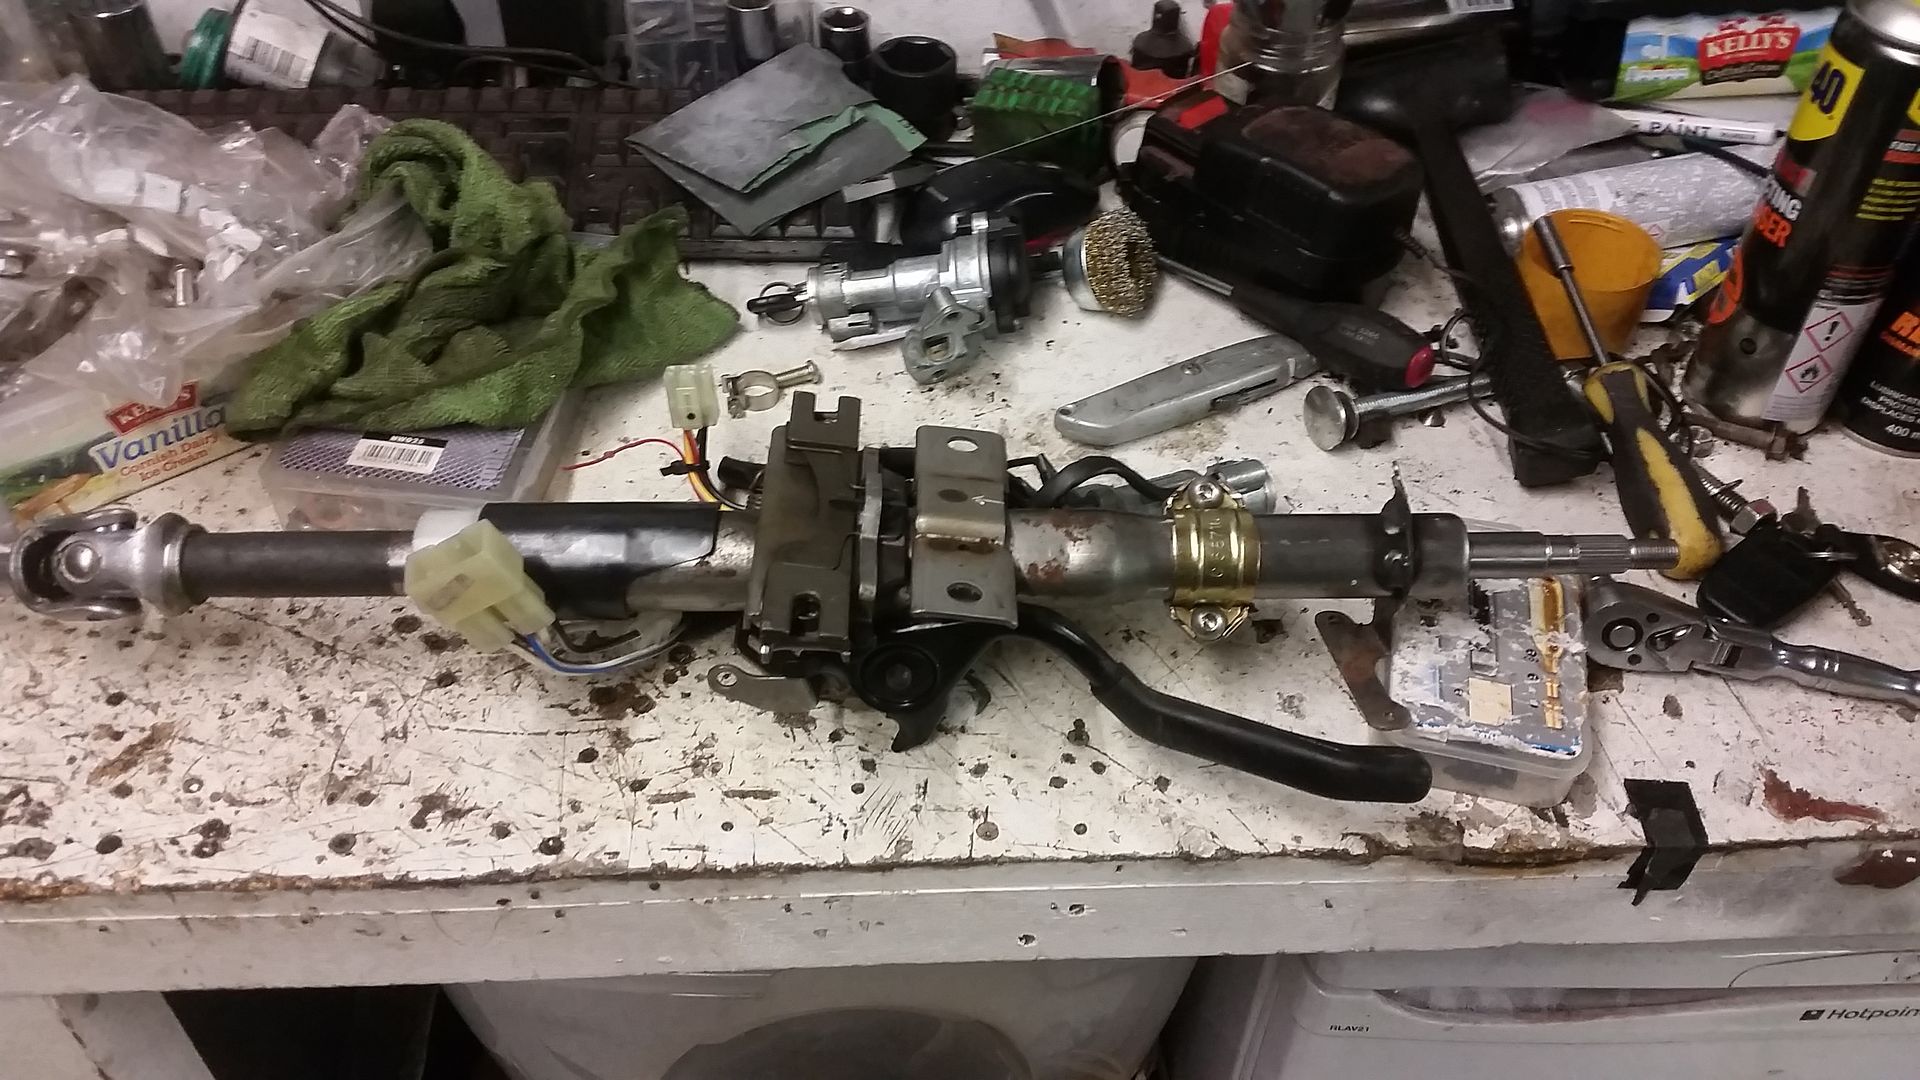
This also meant I had to swap the steering columns. Fiddly job, especial swapping the ignition switches.
I'm pleased to say the effort seems to have been worth it. I've yet to have the steering geometry sorted but it already feels better. Heavier and more direct.
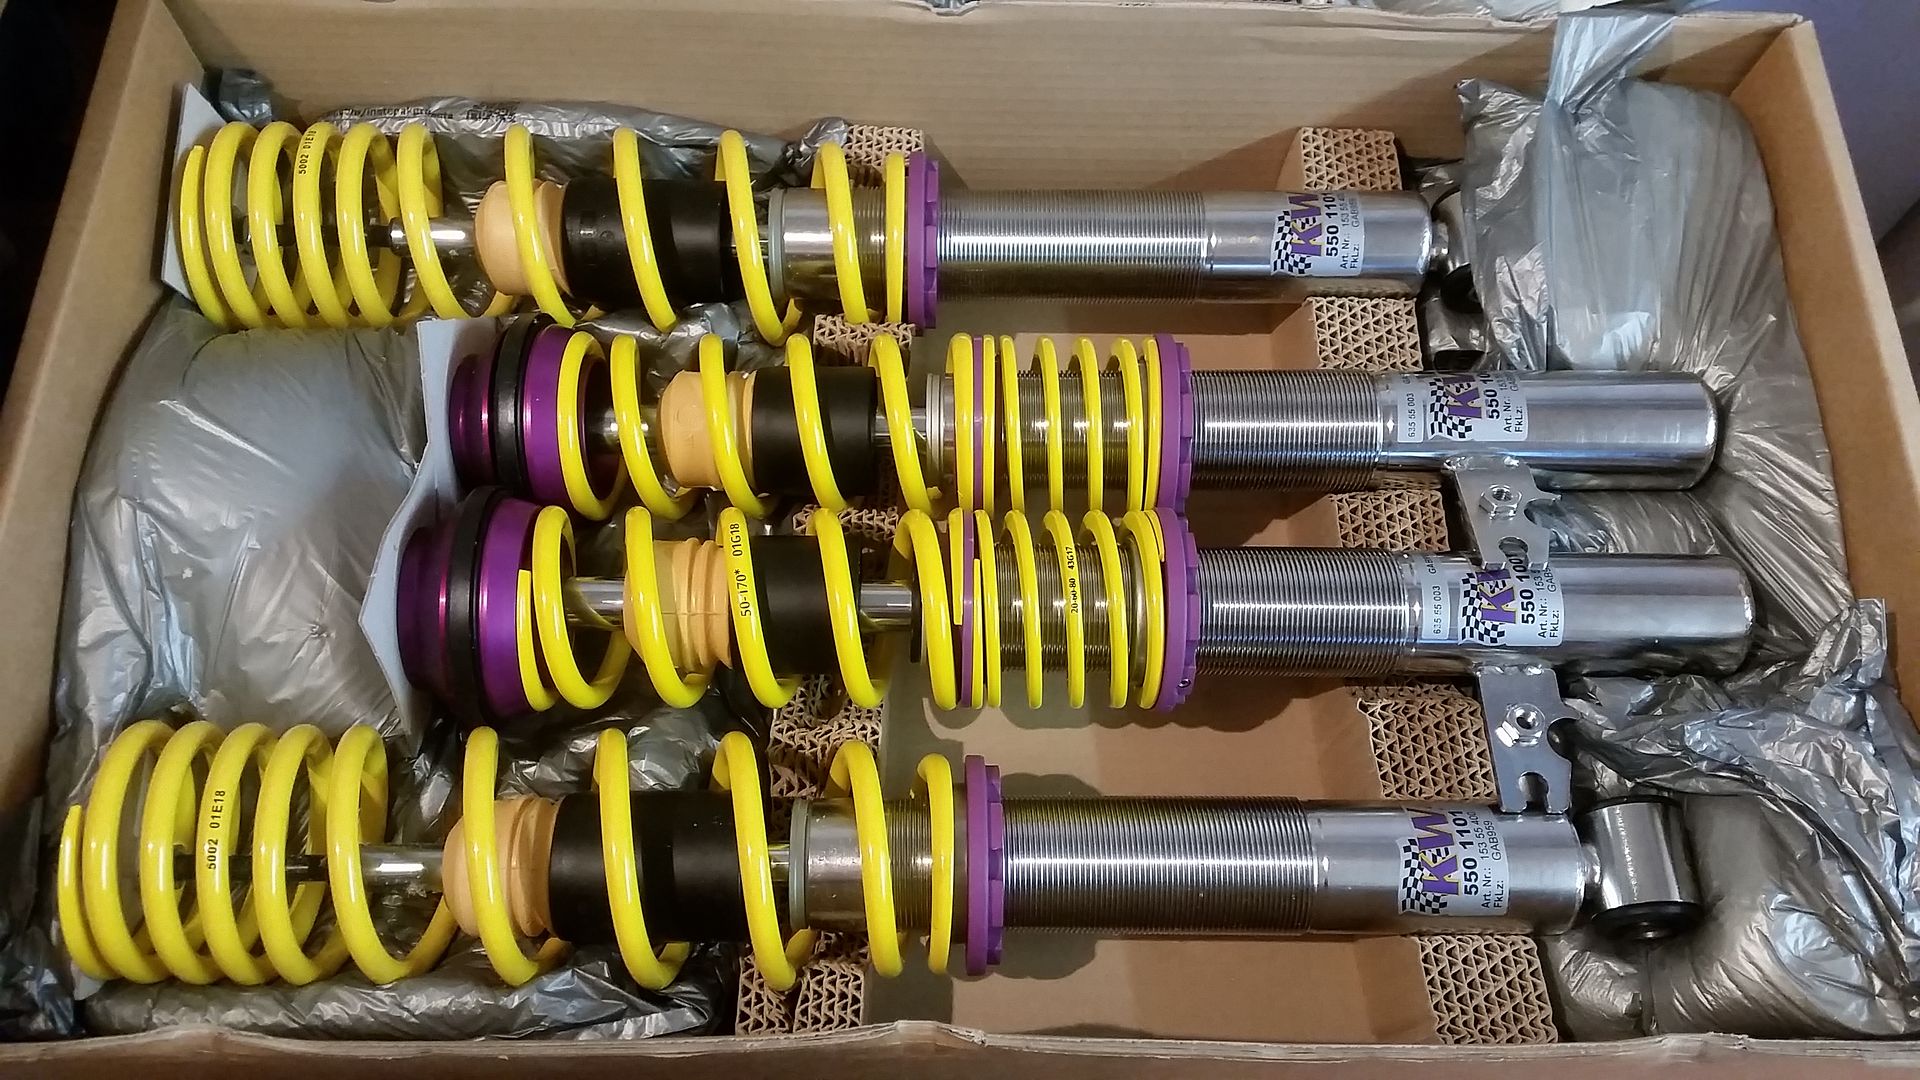
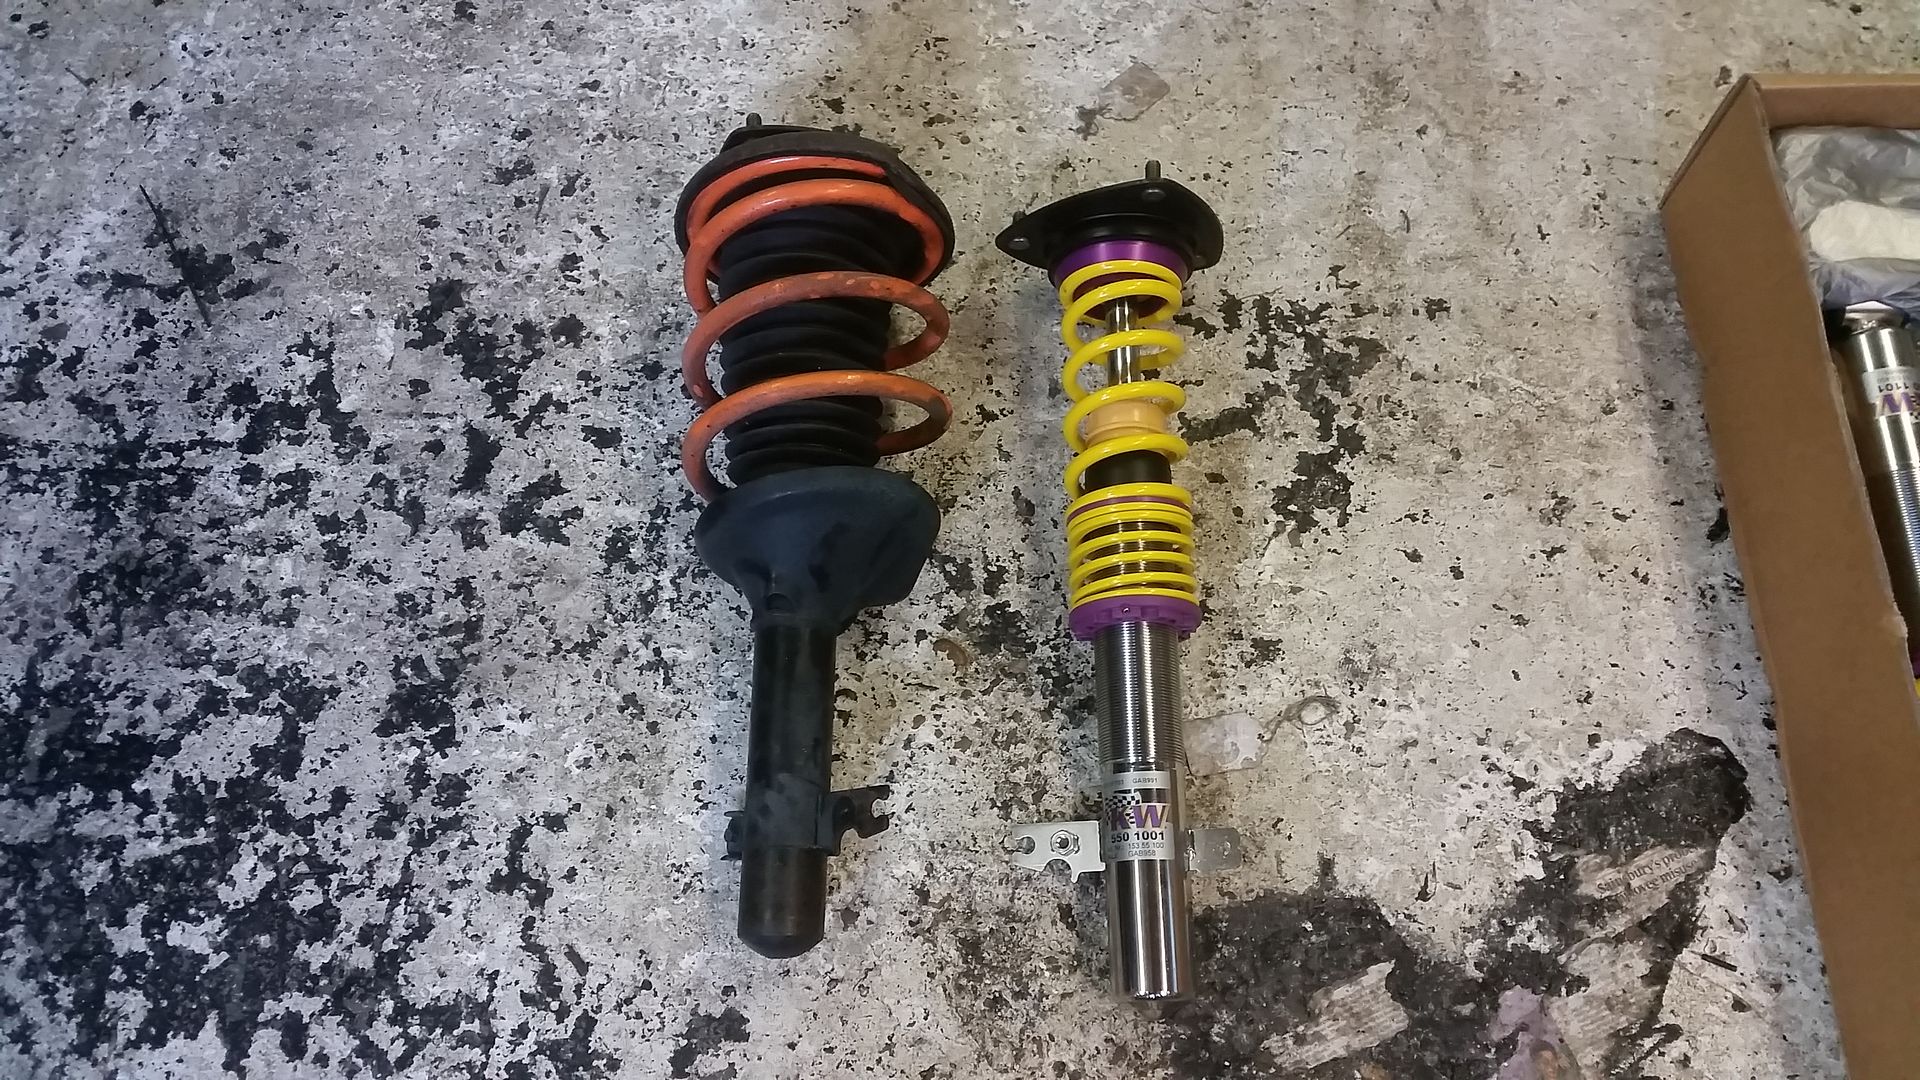
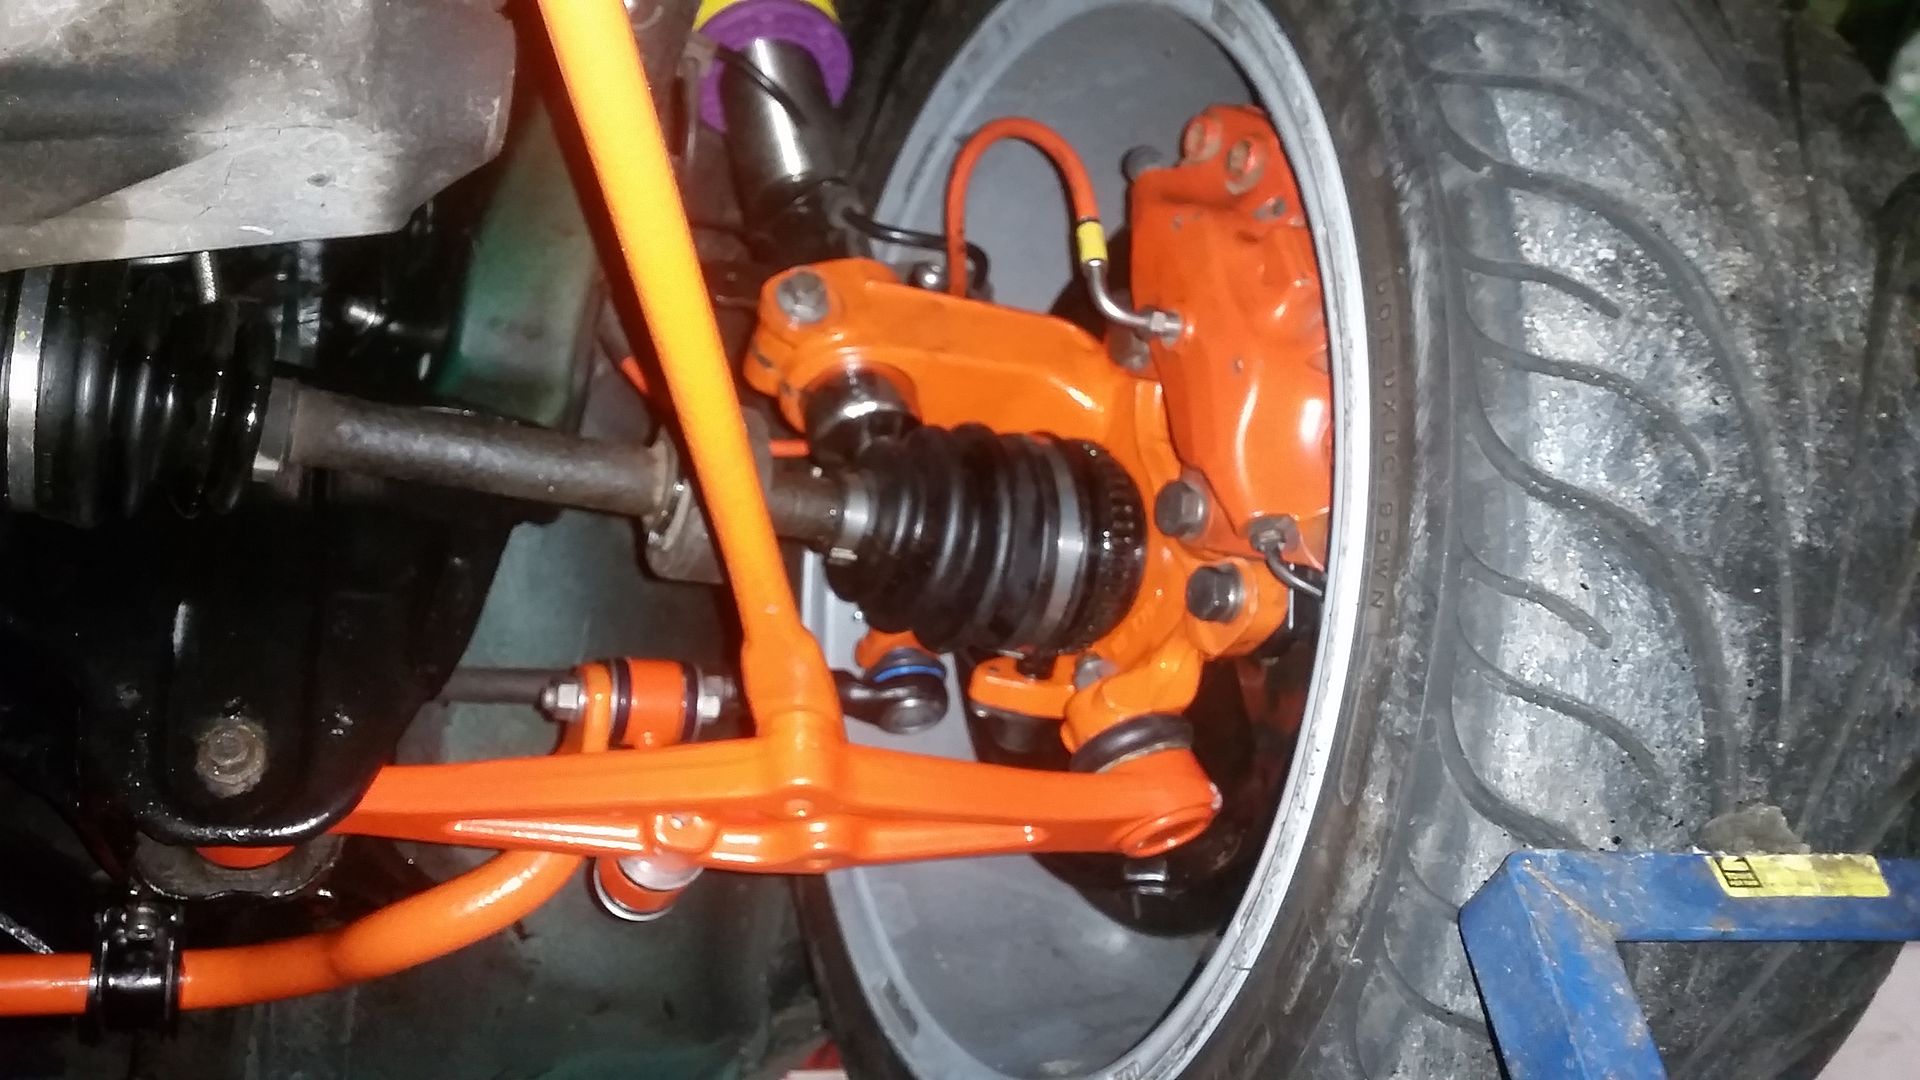
I've also fitted variant 2 KW coilovers. And while I was at it, fitted the beefier (but overall lighter as they are hollow) mg zr hubs. Had everything powder coated while it was off too. Black was a 2-day wait. Orange was same-day. Go figure!

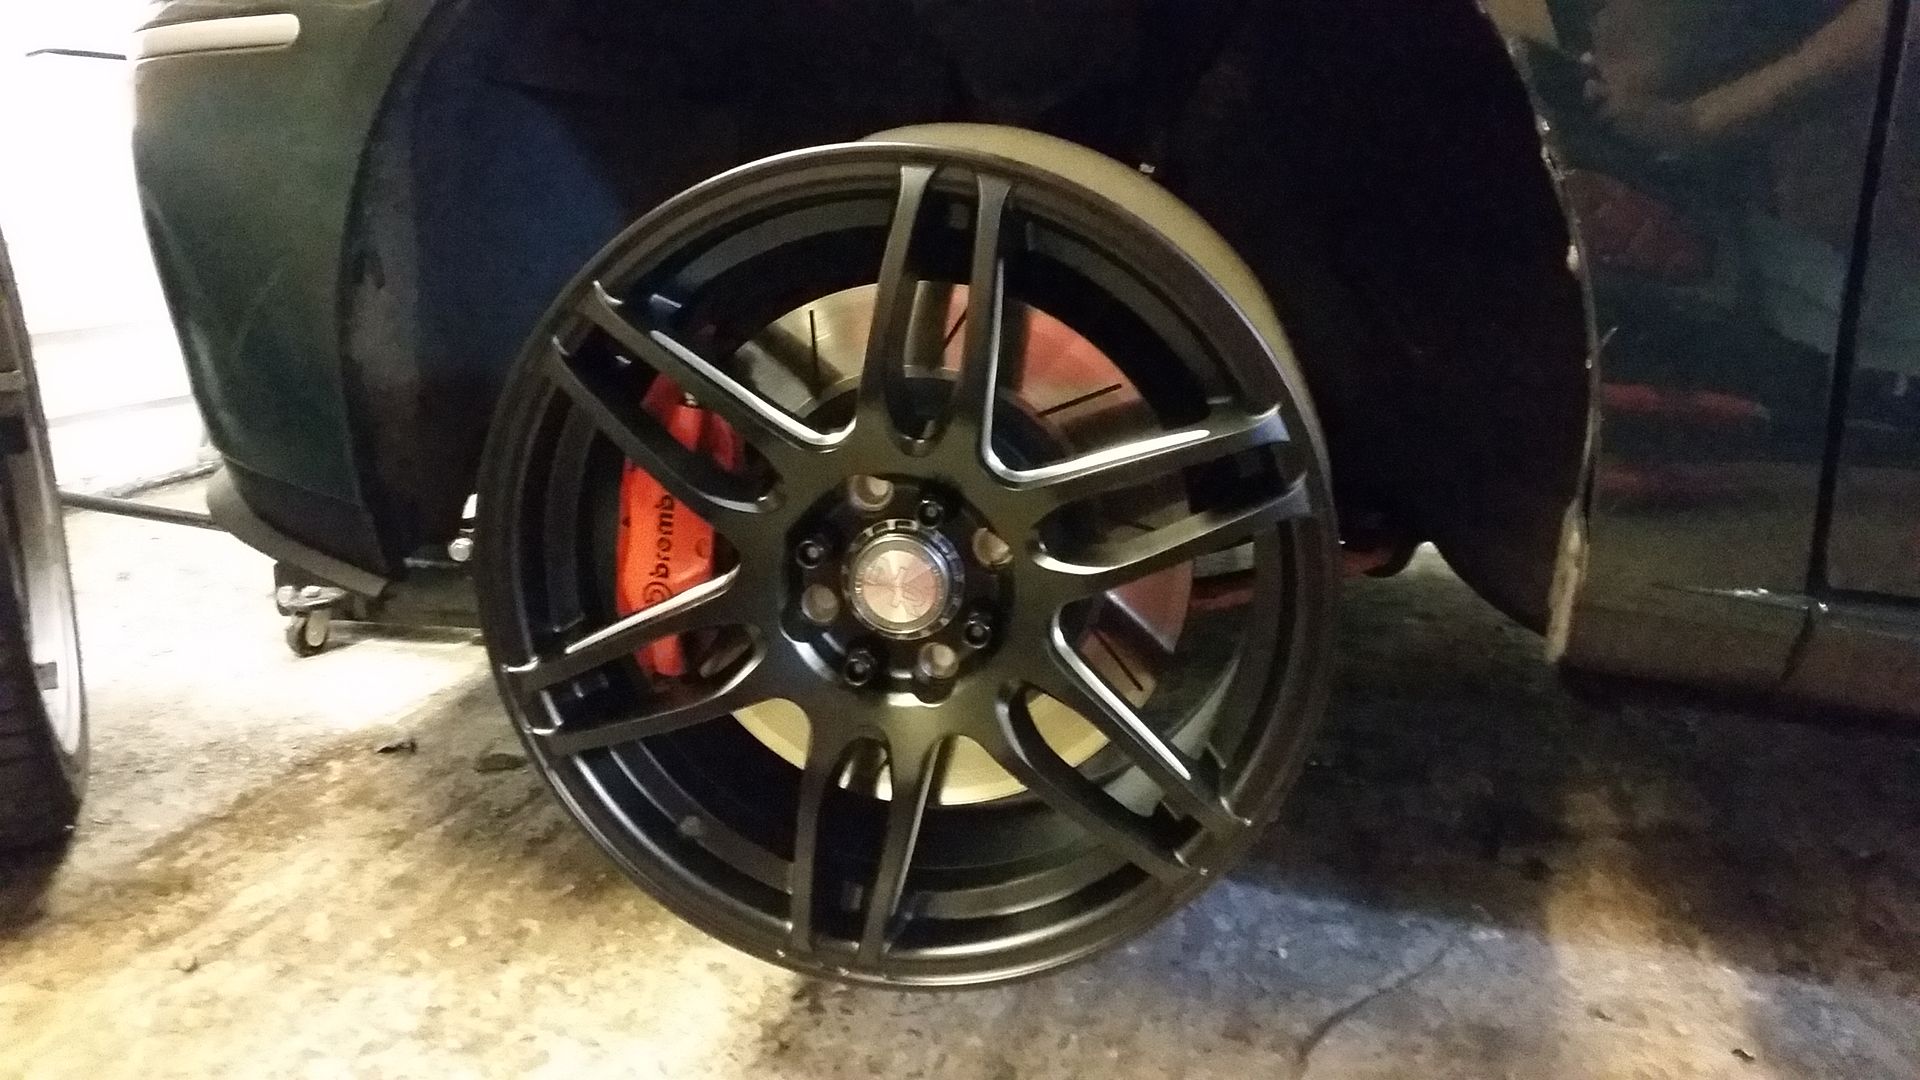
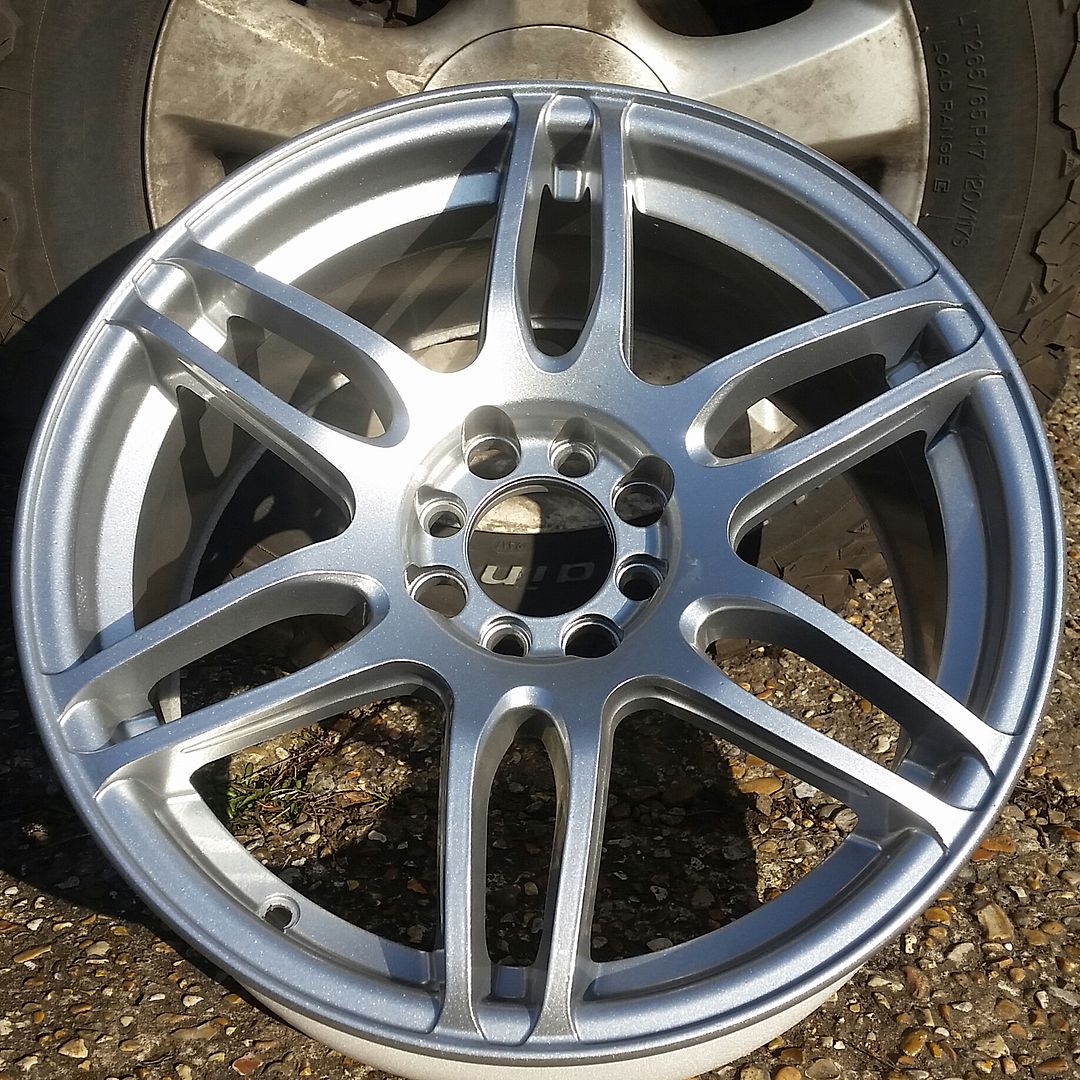
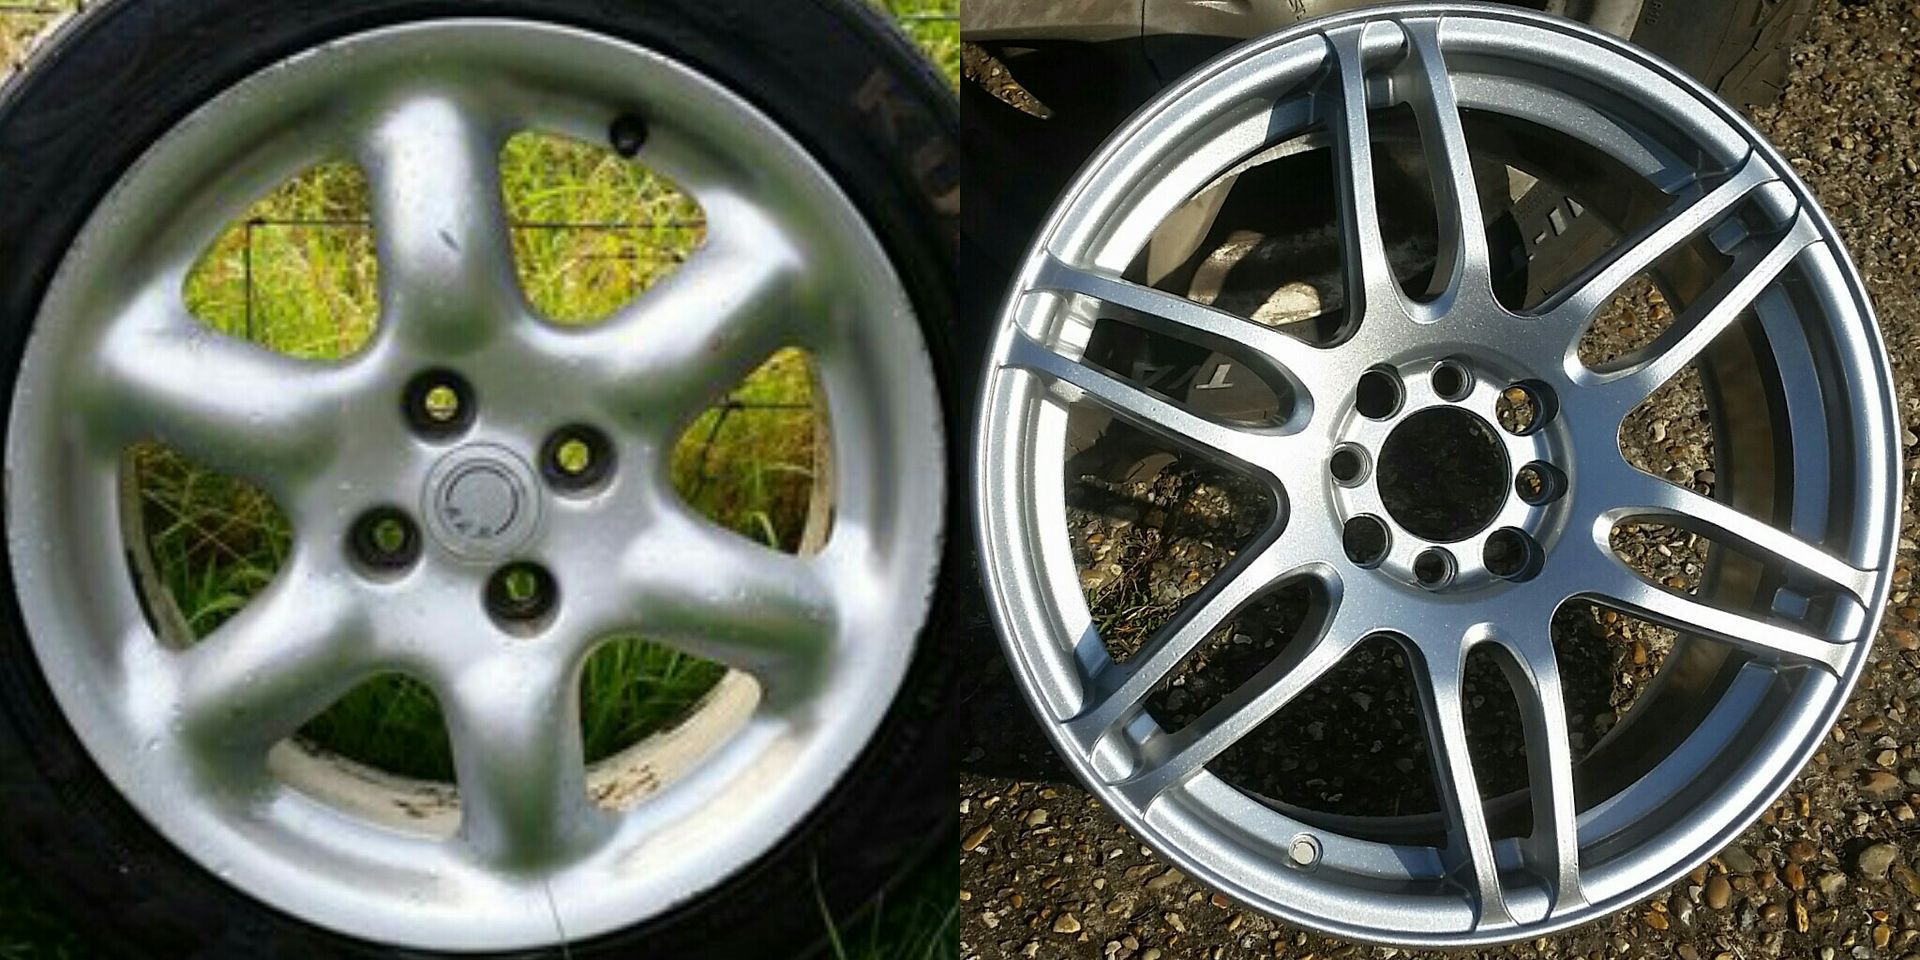
And finally, new wheels!
Ideally I wanted something similar to the original wheels (6-spoke) but with a modern twist and enough room fit my big brakes.
I found these from the the States and loved them although bear little resemblance to the originals. Had them powder coated sparkle silver (as per original cosmos wheels) to match the trim.
She's sitting pretty now. Next job is to build the engine...
I set up a Facebook page for more regular updates on the project but I'll keep this more detailed thread going, of course! Feel free to follow:
https://www.facebook.com/RoverBRM/
As I alluded to above, my high compression build had issues with excessive blow-by and pressurising coolant and, upon stripping it down to fit shorter conrods, I found severe bore scoring! It's hard to tell because of the damage but seems either the pistons or bores were oval. Pistons and liners are scrap.


Fear not. I had already sourced a spare set of pistons and liners to bring me back down to an 80mm bore anyway. This time pistons are supplied by Omega, and designed specifically for the Rover K-series turbo running the shorter turbo spec rods. More on that later but here's the piston:

For now, I've just fitted a nasp engine from a ZR160 to keep me mobile.
Steering:
I wanted a more positive setup given the amount of power going through the front wheels. The rack in every Rover 200 I've ever driven felt vague so add big power and the front end just has a mind of its own. Enter MGZR. Less turns lock to lock and supposedly a more more "feelsome" setup. Unfortunately this is not a straight swap, even less so than I thought it would be actually...
The rack is completely different, as is the subframe:


The splined shaft the steering column fixes to is in quite a different position. I thought this would entail a simple swap of the pressed steel pocket on the bulkhead that butts up against the rack. Drill out spot welds. Swap over from zr to brm. Weld. Done. I was wrong
It turns out that whole area of the bulkhead is a different shape between the cars. Long story short, I had to modify the brm firewall a fair bit to make it work. There was a point when I was cutting holes in the brm (having recently got it back from paint I might add) thinking to myself "what am I doing?"!
I had to teach myself how the mig weld for this bit. Not easy when the steel is 0.7mm thick in places. Just kept blowing through. It's not pretty but it's solid enough. Seam sealer saves the day!


You'd never know!


This also meant I had to swap the steering columns. Fiddly job, especial swapping the ignition switches.

I'm pleased to say the effort seems to have been worth it. I've yet to have the steering geometry sorted but it already feels better. Heavier and more direct.
I've also fitted variant 2 KW coilovers. And while I was at it, fitted the beefier (but overall lighter as they are hollow) mg zr hubs. Had everything powder coated while it was off too. Black was a 2-day wait. Orange was same-day. Go figure!


And finally, new wheels!
Ideally I wanted something similar to the original wheels (6-spoke) but with a modern twist and enough room fit my big brakes.
I found these from the the States and loved them although bear little resemblance to the originals. Had them powder coated sparkle silver (as per original cosmos wheels) to match the trim.


She's sitting pretty now. Next job is to build the engine...

I set up a Facebook page for more regular updates on the project but I'll keep this more detailed thread going, of course! Feel free to follow:
https://www.facebook.com/RoverBRM/
Thanks guys. I'm still enjoying the process and she now looks exactly how I envisioned. Everything is how I want it except the engine, so I'm very excited for the new build. I've learned a lot from the two engines that haven't worked out, so I've no regrets!
The new pistons will produce a static compression of just under 9:1 and are tall enough to maintain squish with the shorter rods (meaning the ring lands are chunky as 'eck). I have new steel rods and a new crank is on the way, plus a lighter flywheel. Everything will be balanced. I'll be using a brand new block with Westwood ductile iron liners.
The icing on the cake is the brand new in box VVC cylinder head I was able to source. To avoid exposing any porosity (sometimes an issue with these) I'll not be fettling it except perhaps port-matching the inlet side.

I'm currently talking to Owen Developments about turbo choice. Over the years the car has moved away from a daily road car so I'm prepared to go a little more extreme, whilst still keeping in mind the limitations of the drivetrain. A larger turbine (than the gt2560r on it previously) will help the whole thing breathe and reduce ebp which was costing power at the top end on the last build. I'm currently leaning towards a Gen 2 Garrett GTX2867R. I could run that at a safe 250bhp on low boost but would have scope for 350-400bhp if I ever felt the need.
Well I've had a mental year this year what with getting married and having to move house unexpectedly (the week before the wedding) to a house with no garage (I know). The BRM has therefore taken a back seat (and been banished to a random lockup 15 miles away from my house).
Earlier this year I did manage to get all of the new engine components balanced AND I've also had my turbo modified to a similar spec to gtx2867r. It's basically my old turbo's front and rear housings machined to fit bigger wheels, and a whole new centre housing.
I have a lovely timber garage going up next month so that will give me somewhere to unpack all my tools and stuff and finally build the new engine and get it in. Plan is just to have the car maps and run in before the end of the year.
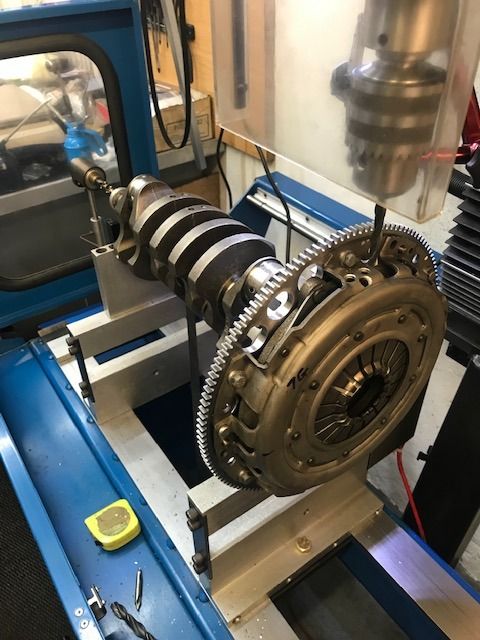
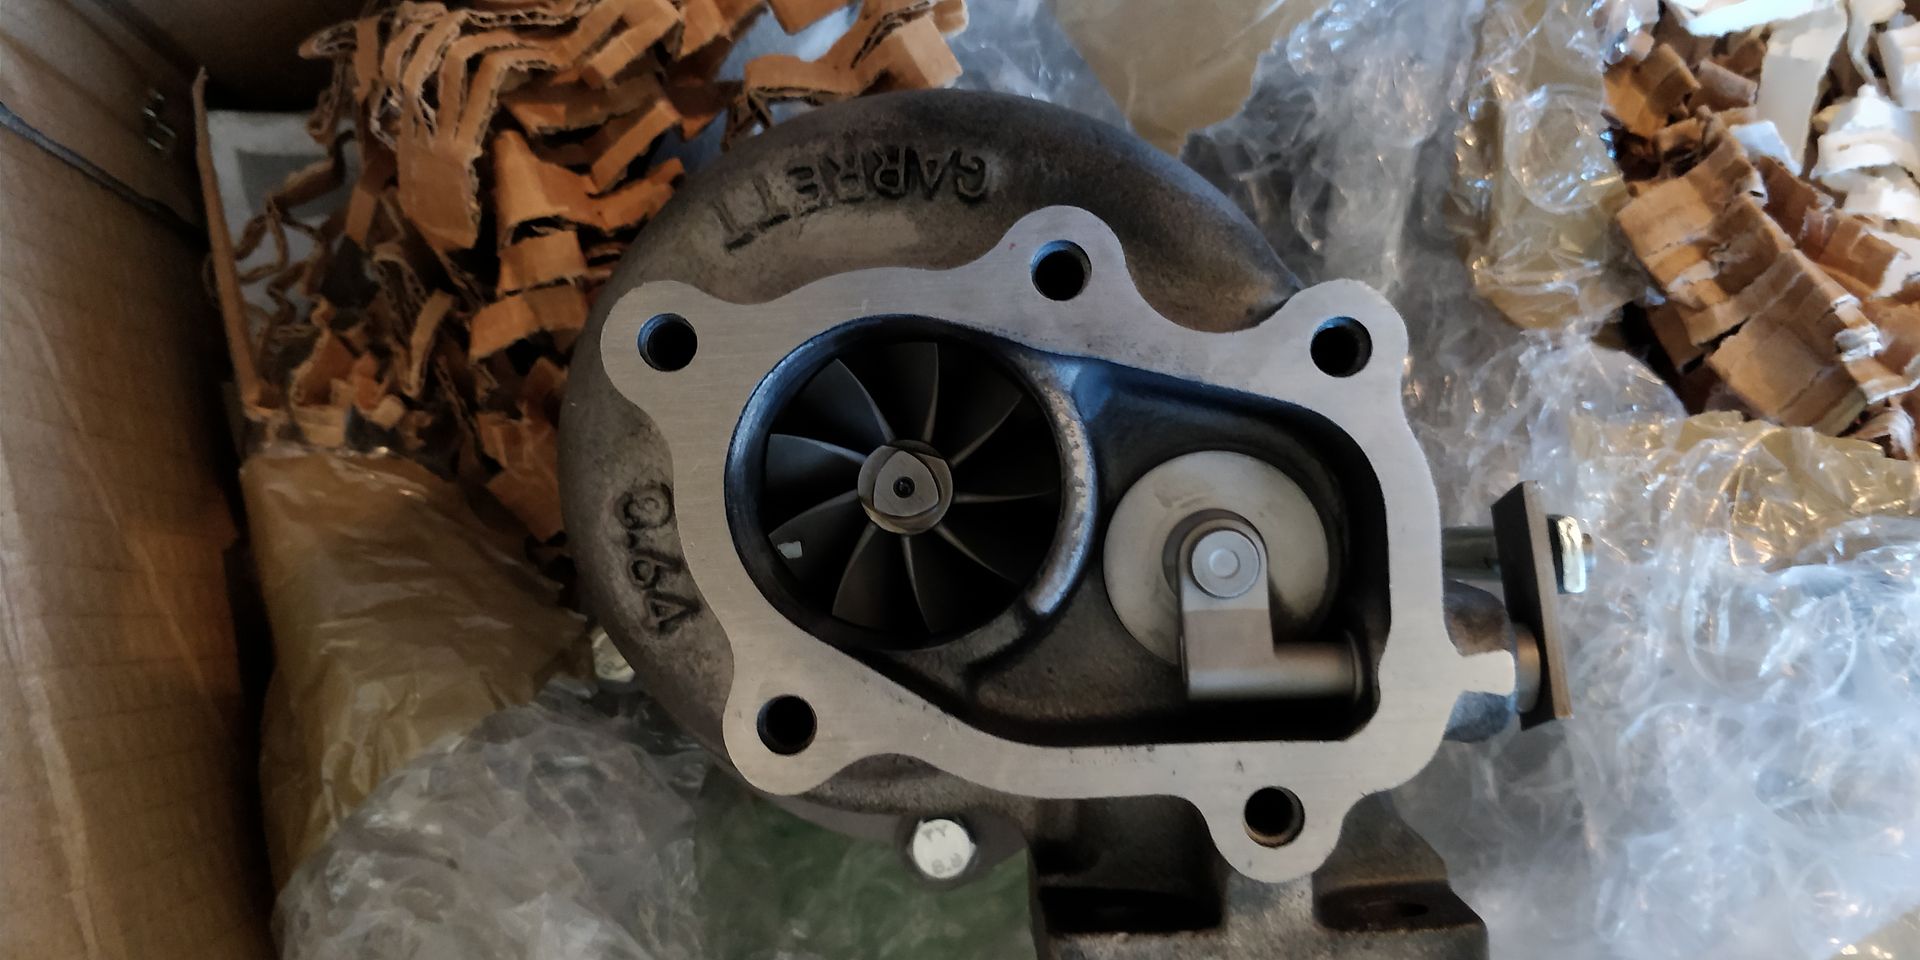
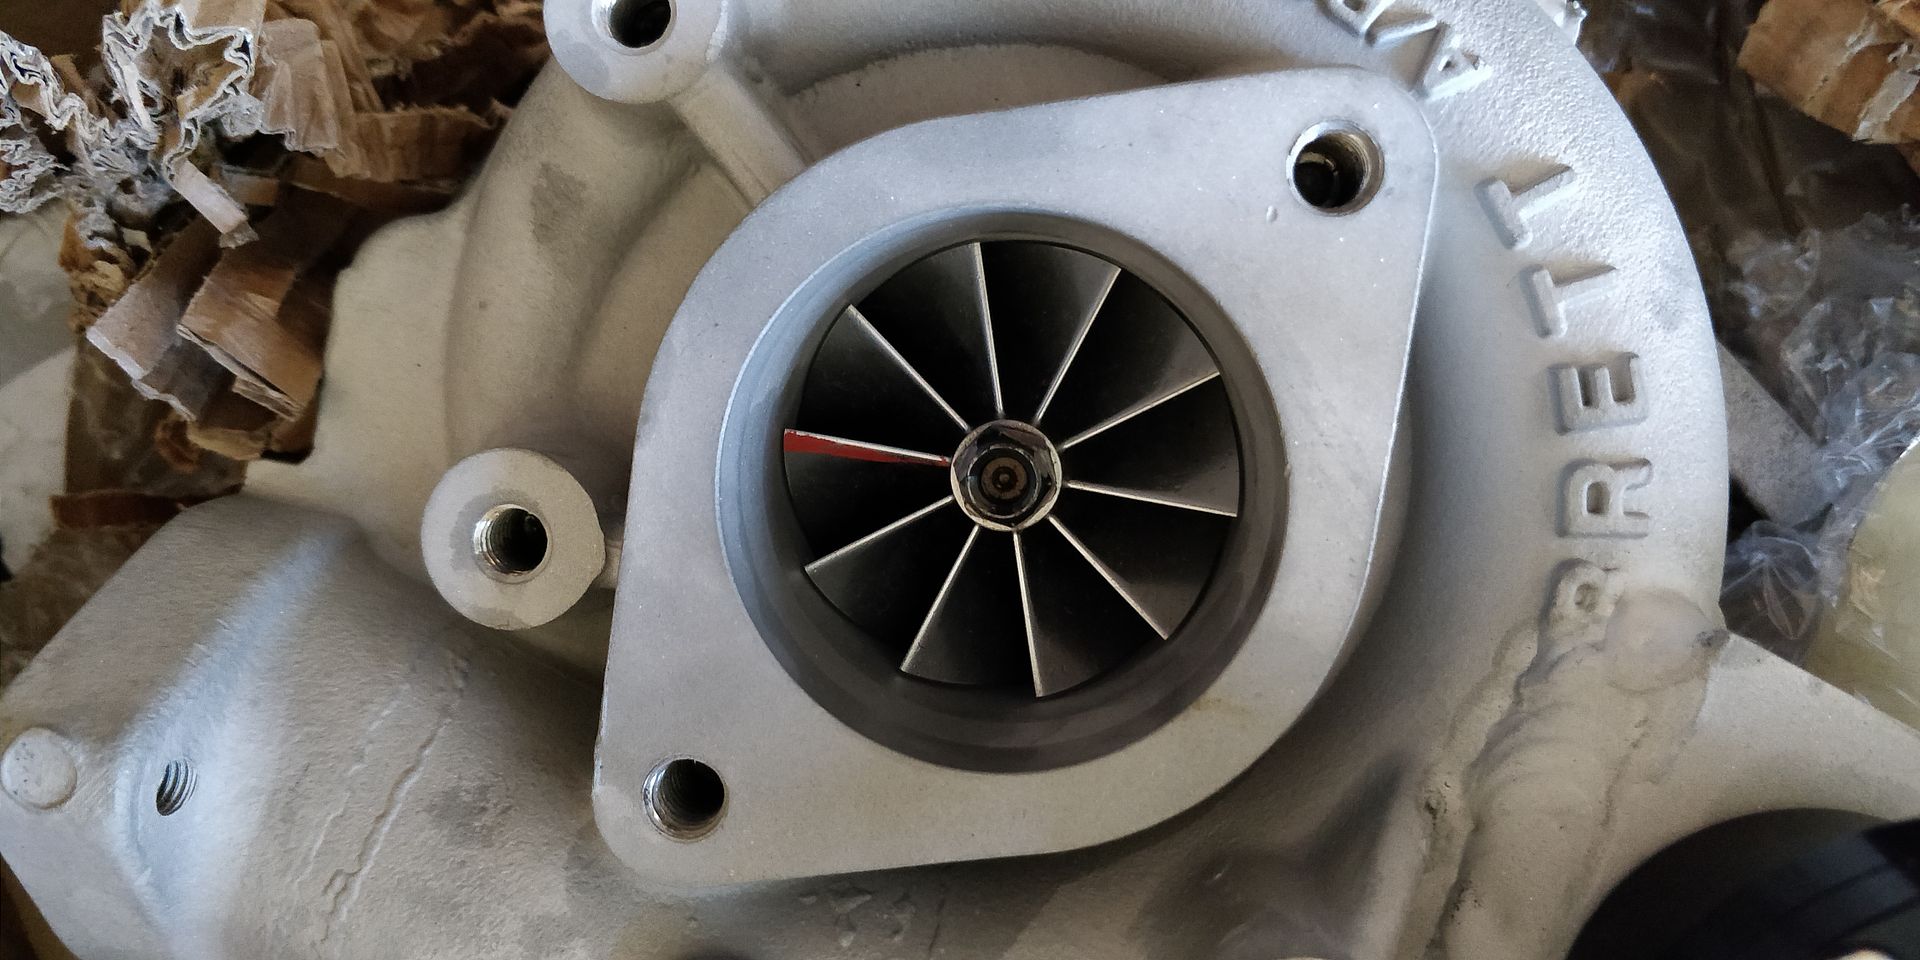


s3 akr said:
I wondered what had happened here. I read the piece from end to end a while back and it just stopped. Keep it going - interesting read and a lot of work going into a very rare car.
Thanks. I expect most people have stopped reading it now given all the problems and questionable decisions, but I feel compelled to keep it goingitcaptainslow said:
Nice to see something at the other end of the scale to my standard one! 
Thanks. Seen yours and it looks tidy!Thanks for the comments
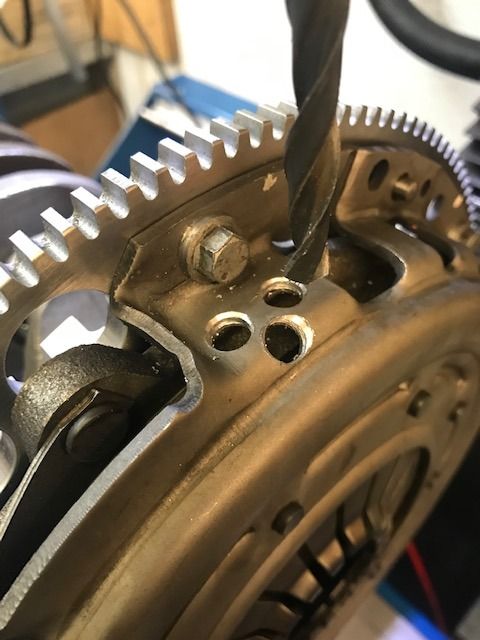
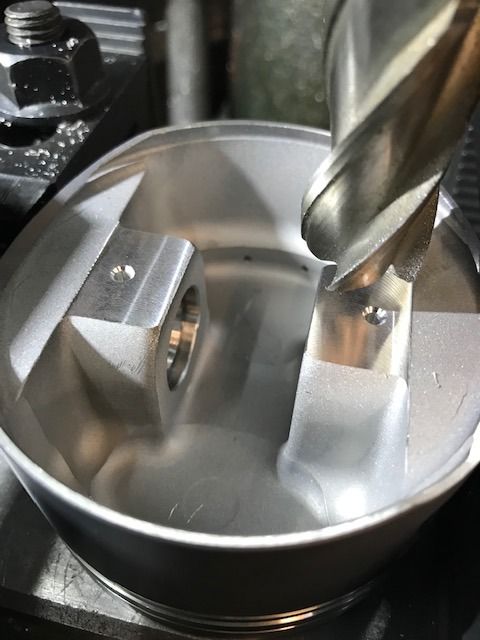
Updates are on the way. I've recently been collecting parts and just setting up to start the new build. Hopefully get the piston rings gapped and plastigauge the main and big end to ensure clearances are within spec after the crank was polished.
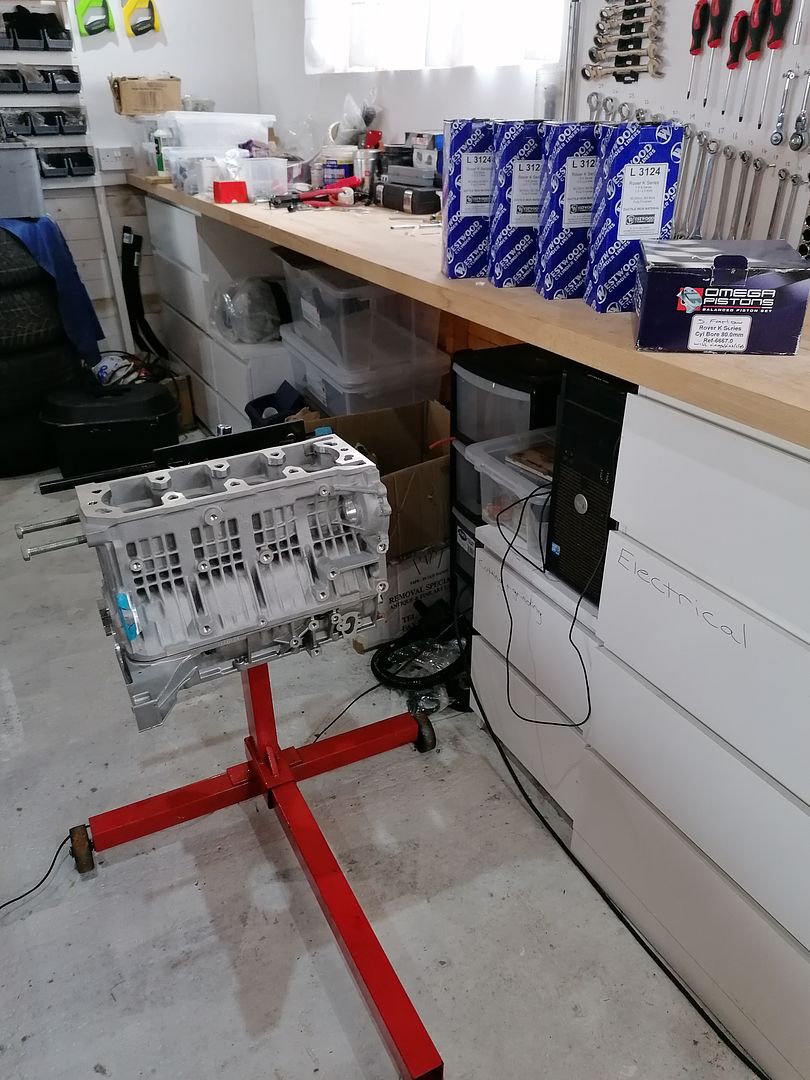
Starting this one with a brand new block...
Updates are on the way. I've recently been collecting parts and just setting up to start the new build. Hopefully get the piston rings gapped and plastigauge the main and big end to ensure clearances are within spec after the crank was polished.
Starting this one with a brand new block...

Elise Parts sell the blocks new. They're supposed to be "stronger" on account of the ribbing. I've seen other comments that the ribbing reduces noise from the engine, possibly allowing it to run a knock sensor. Not sure I buy any of that. I just wanted to rule out having a block that could have been overheated and sunk the liners. As you say, the weak link of this engine eally comes down to how narrow the liner seats are, and how easily the liners sink when the block is overheated.
The last built engine was a 1. 9 Scholar. My non-engineering brain figured an added bonus of the press-fit system was the liners would be harder to sink given the frictional forces between the bottom half of the liners and the alloy block. One reported problem with this conversion (but I have no evidence) was ovalisation. My engine suffered with epic engine noise and when I stripped it down to investigate and sort the pressurising coolant I discovered knarly pistion/bore contact inlet and exhaust sides. So bad in fact it had written off the block and the pistons. I had always intended to investigate and have everything measured properly by my engineering shop. However in a last minute unexpected house move (to a new place with no garage) I just chucked the lot in a skip!
There probably is a way to reinforce the liners, but ultimately it would come down to cost - benefit I guess? MaxTorque I'm no engineer so didn't follow a lot of what you said. The K-series was so widely used I expect if there was an affordable (or even an unaffordable) solution it would have been tried.
Of note: The 1.8t saic/kavachi/tci-tech engine in the mk1 mg6 (and used extensively in China) is effectively the same architecture as the K-series (different head) but doesn't suffer the same hgf issues the original K-series did. I really want to get hold of one and strip it down to see exactly what is different!
Build is progressing now that I've had a bit of time off work to focus on the important things! I would share pictures but photobucket are having issues yet again. There are some pictures on my Facebook page if you're interested...
https://www.facebook.com/RoverBRM/
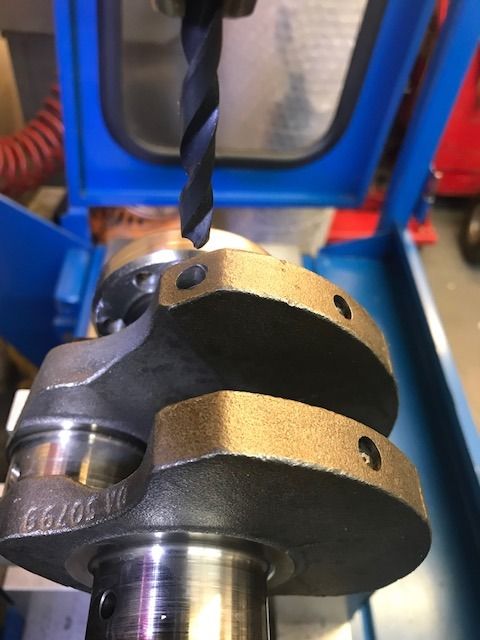
Plastigauged the main and big end bearings and all checked out. The excessive piston/liner wear on the last engine left some crap in the oil that lightly scored the crank journals which I had to have polished out. Rover K-series cranks use different sized bearing options (which you usually select based on a code stamped on the crank and block) so I went with the thickest bearings. Happily, this brings things within tolerance by a nice margin.
Gapped the piston rings and went fairly wide. 0.5mm top ring and 0.6mm second ring. The turbo I'll be running is capable of 400bhp (although my fuel system probably isn't) so whilst I'll probably get a bit more blow-by I'll never have to worry about things being too tight. Crankcase will be well ventilated.
Fitting the pistons was going well until I was in the process of fitting the second piston and my ring compressor broke and unravelled. I didn't have a spare so that put an end to the fun!
While I wait for a replacement from Amazon, I might get started on the head. I'm keeping the Vvc and not doing a full port job on it this time, but as its a brand new unused head from at least 15 years ago I'm going to replace the valve stem oil seals and rear vvc belt.
While the head's apart I'll probably also fit stiffer valve springs on the exhaust side. The vvc runs the weakest of valve springs used in the K-series and they were never intended to see the kind of exhaust back pressure a turbo setup produces, so stiffer springs will help prevent the exhaust back pressure holding the valves open. Whilst I don't expect my pre-turbine pressure to be excessive with my new turbo (effectively a gtx2867) there's no downside to running stiffer springs and I have them sitting there so may as well use them. The vvc mechs on the inlet probably wouldn't cope with stiffer springs, so they will stay as they are.
More updates soon.
https://www.facebook.com/RoverBRM/
Plastigauged the main and big end bearings and all checked out. The excessive piston/liner wear on the last engine left some crap in the oil that lightly scored the crank journals which I had to have polished out. Rover K-series cranks use different sized bearing options (which you usually select based on a code stamped on the crank and block) so I went with the thickest bearings. Happily, this brings things within tolerance by a nice margin.
Gapped the piston rings and went fairly wide. 0.5mm top ring and 0.6mm second ring. The turbo I'll be running is capable of 400bhp (although my fuel system probably isn't) so whilst I'll probably get a bit more blow-by I'll never have to worry about things being too tight. Crankcase will be well ventilated.
Fitting the pistons was going well until I was in the process of fitting the second piston and my ring compressor broke and unravelled. I didn't have a spare so that put an end to the fun!
While I wait for a replacement from Amazon, I might get started on the head. I'm keeping the Vvc and not doing a full port job on it this time, but as its a brand new unused head from at least 15 years ago I'm going to replace the valve stem oil seals and rear vvc belt.
While the head's apart I'll probably also fit stiffer valve springs on the exhaust side. The vvc runs the weakest of valve springs used in the K-series and they were never intended to see the kind of exhaust back pressure a turbo setup produces, so stiffer springs will help prevent the exhaust back pressure holding the valves open. Whilst I don't expect my pre-turbine pressure to be excessive with my new turbo (effectively a gtx2867) there's no downside to running stiffer springs and I have them sitting there so may as well use them. The vvc mechs on the inlet probably wouldn't cope with stiffer springs, so they will stay as they are.
More updates soon.
Now that photobucket is finally working again, thought I'd share some pics:
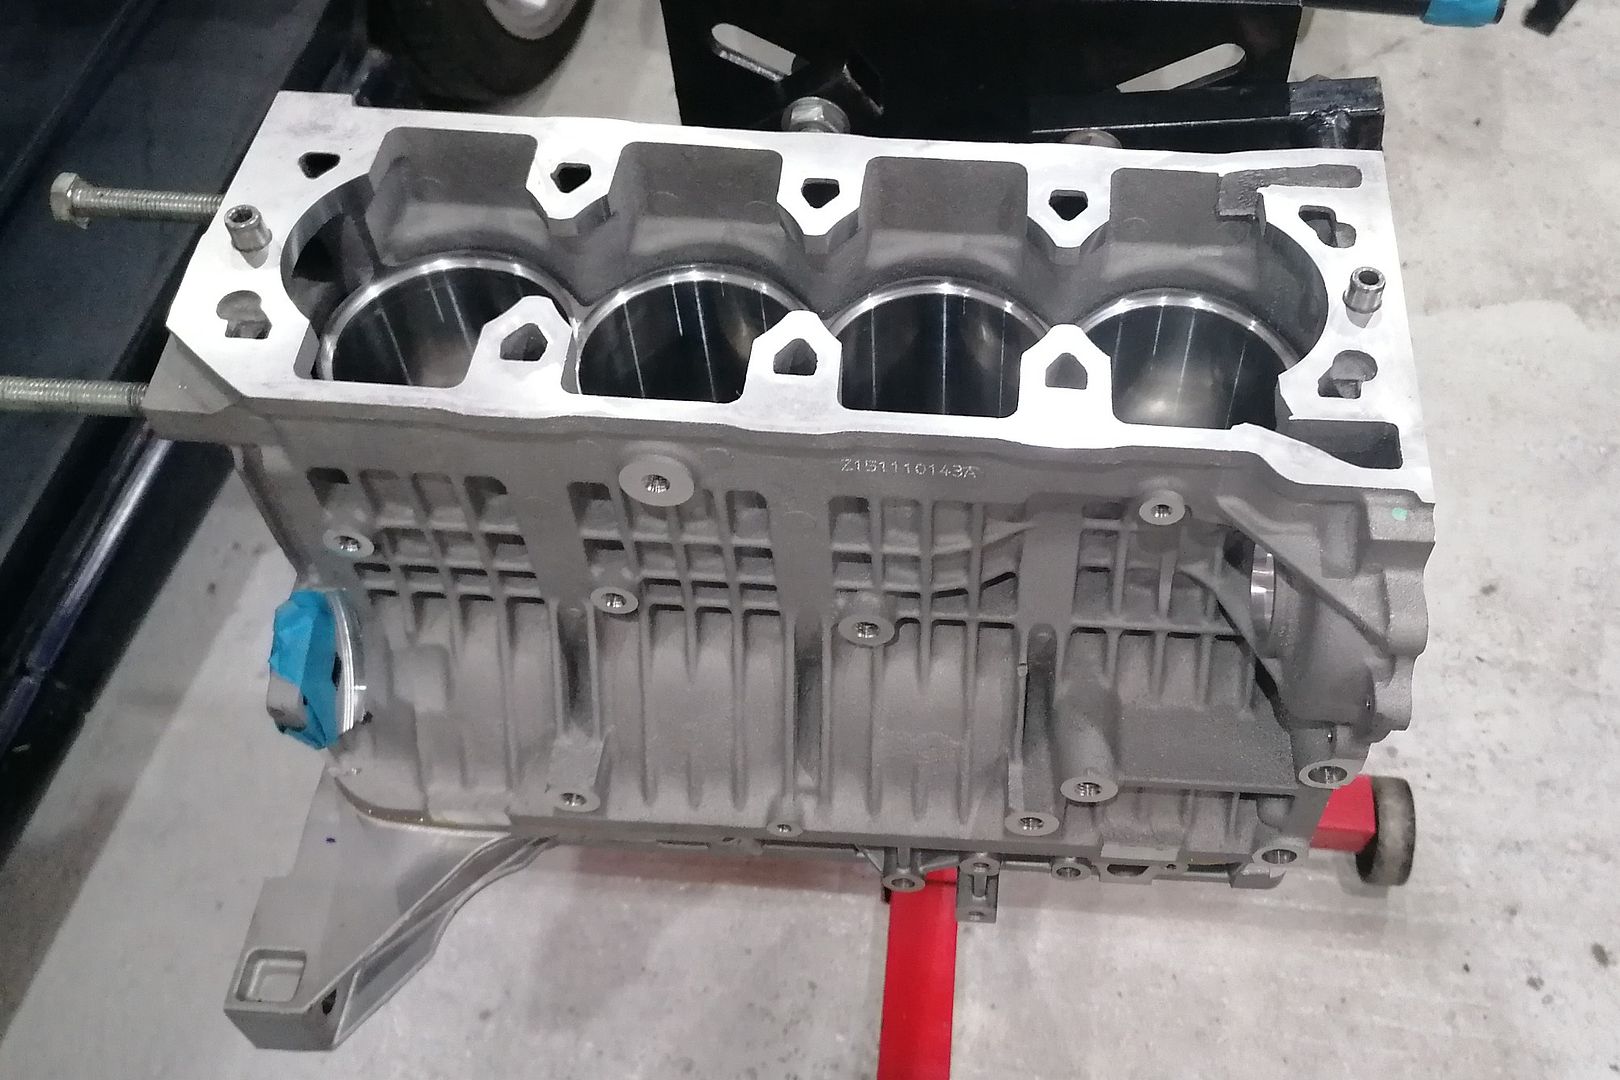
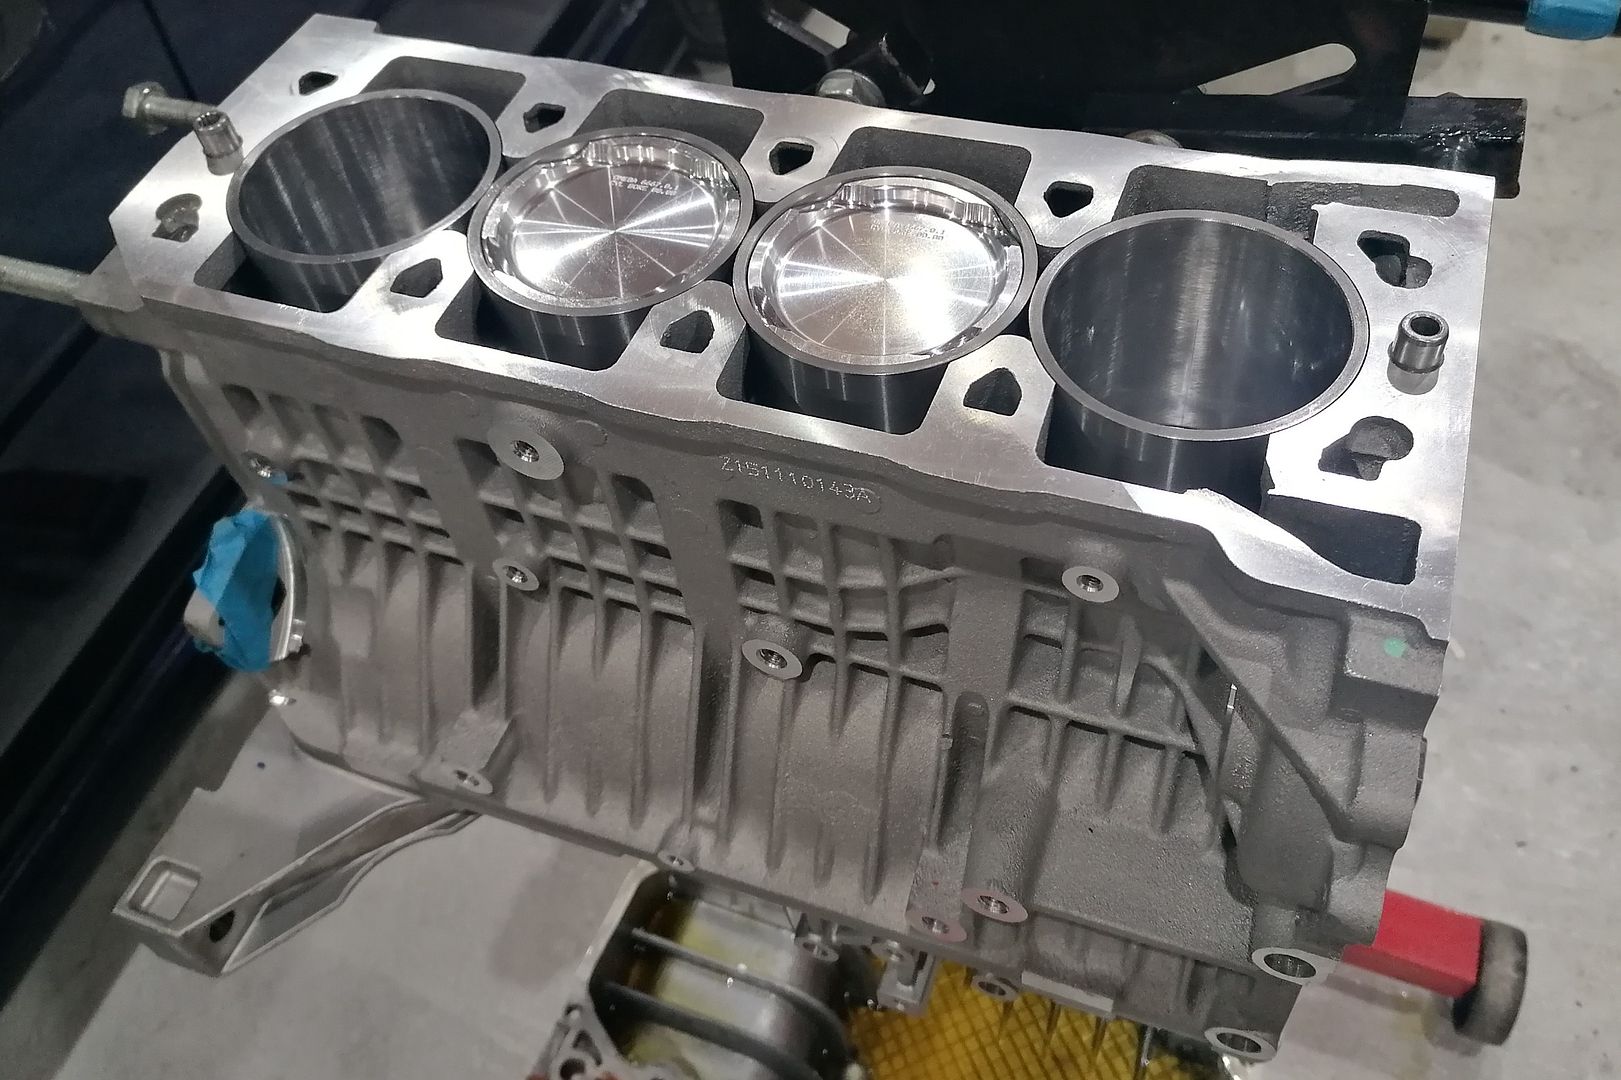
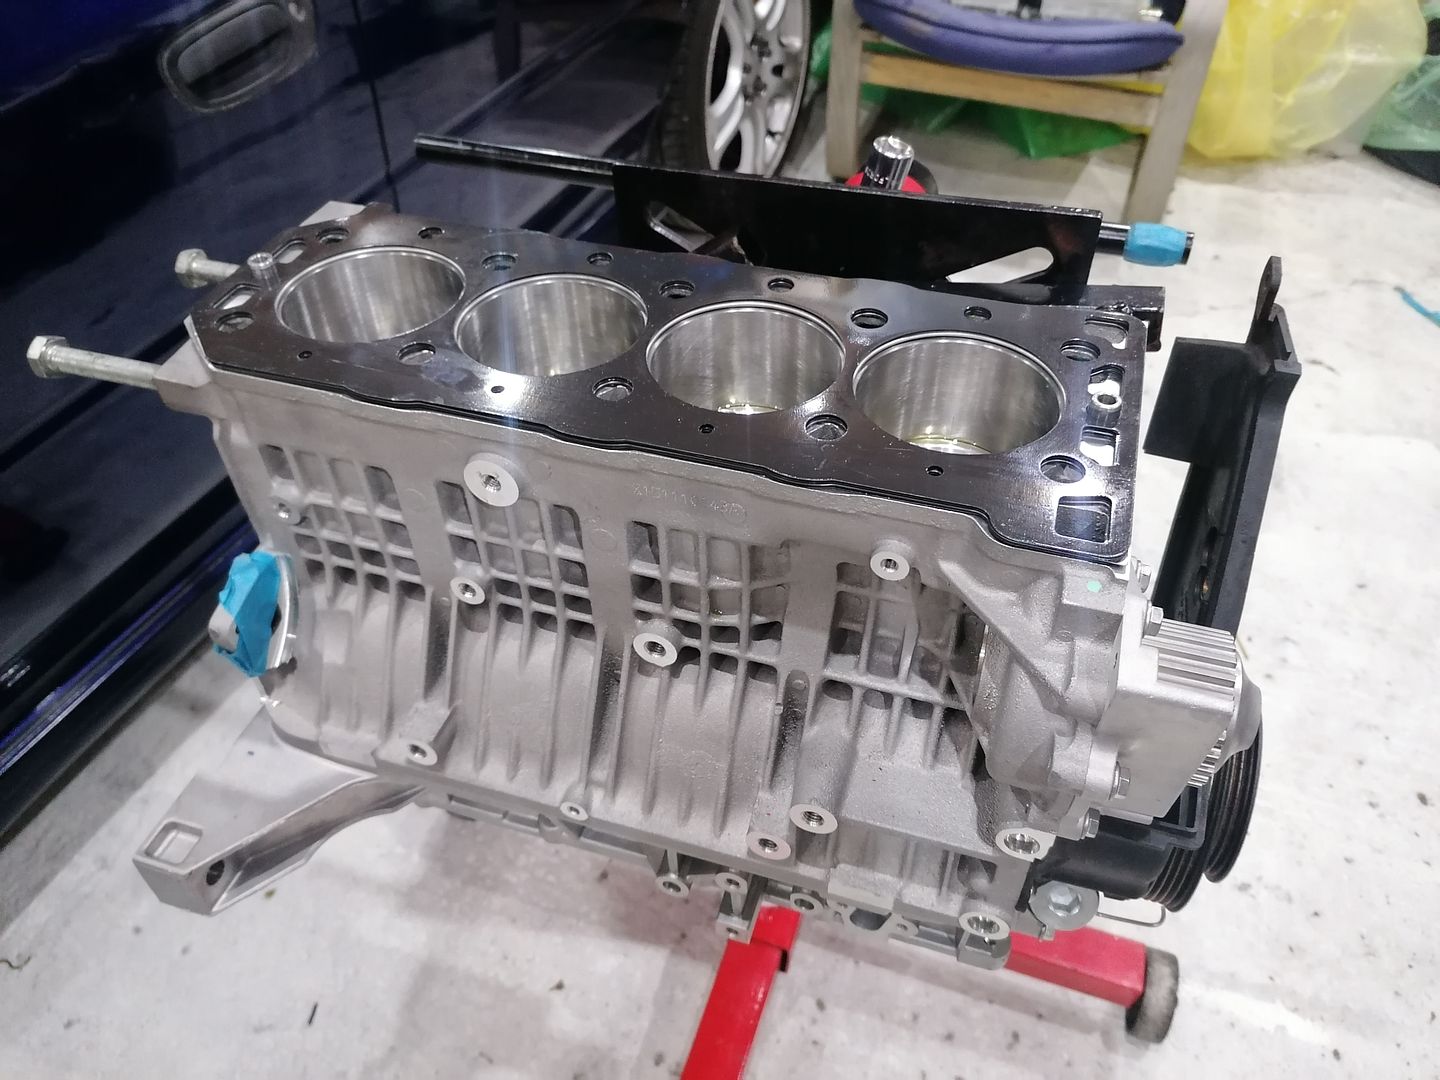
New block
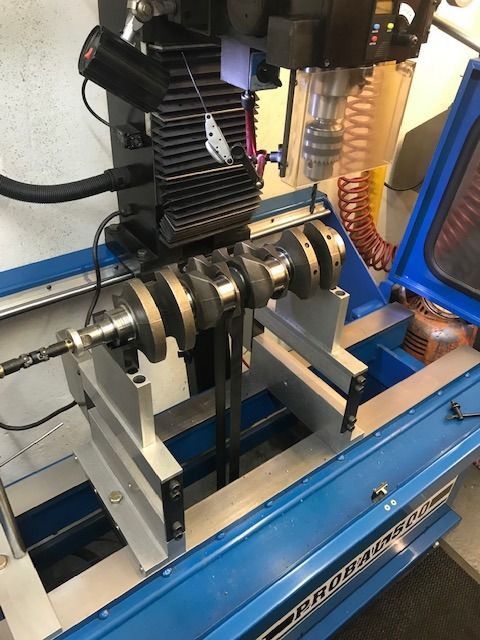
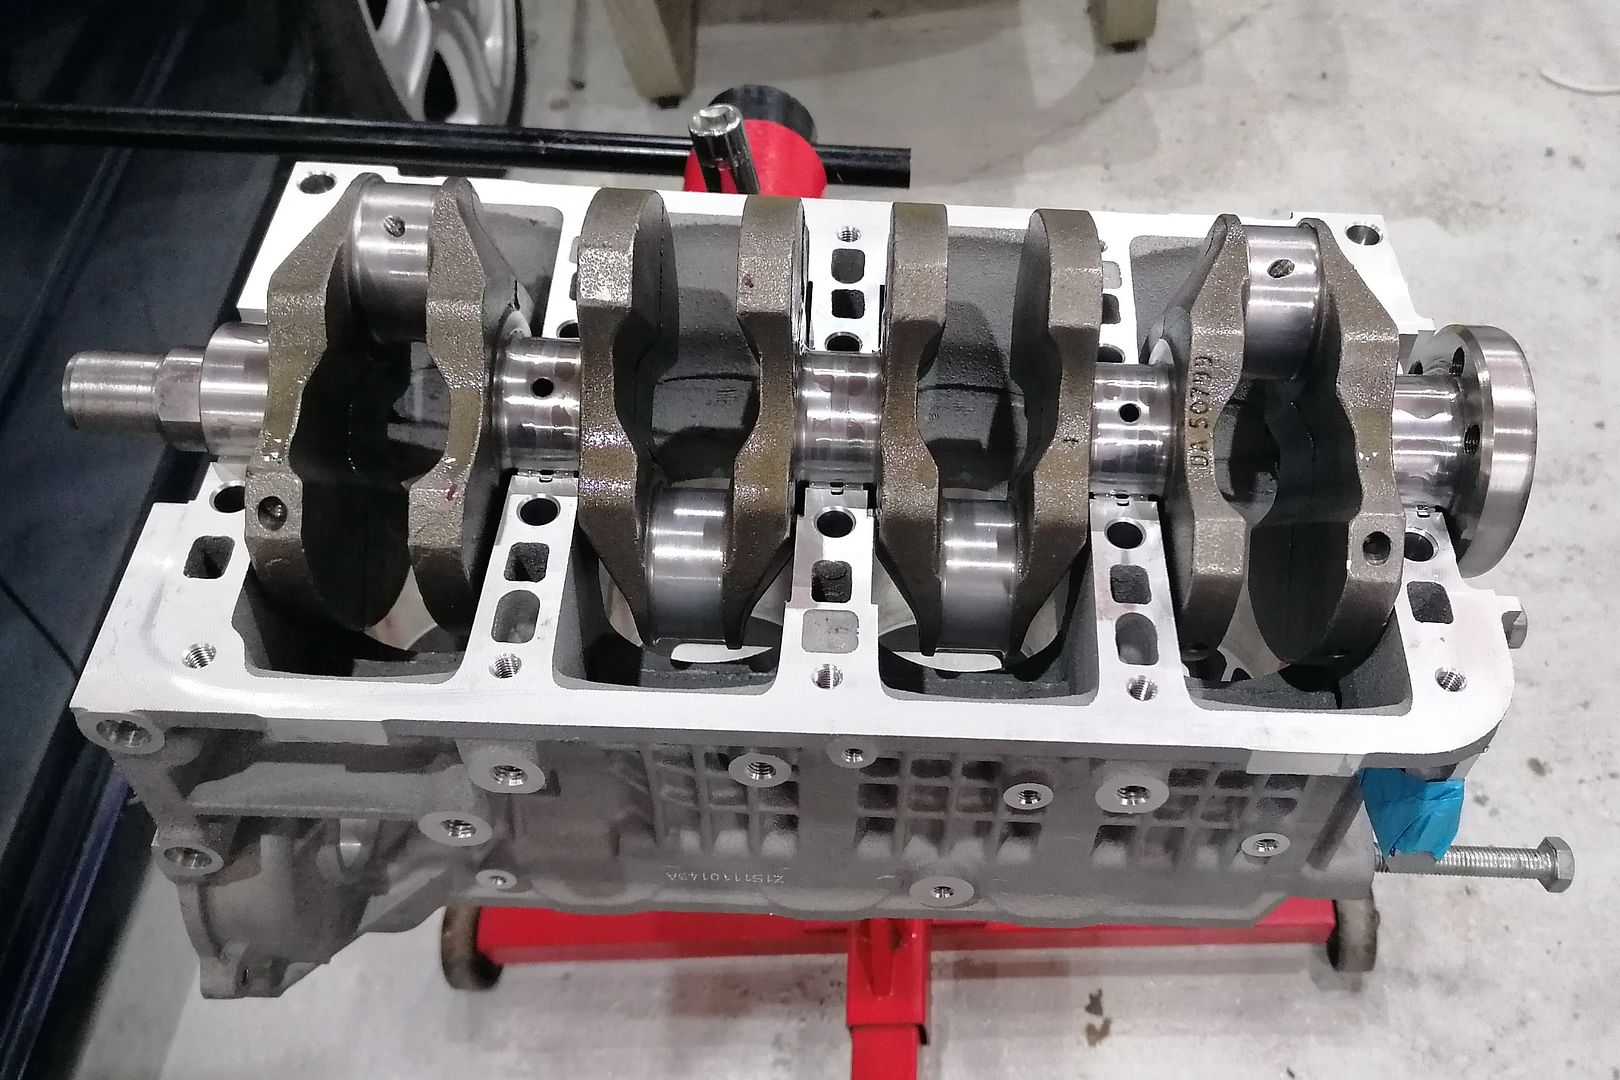
Reground and balanced crank going in.
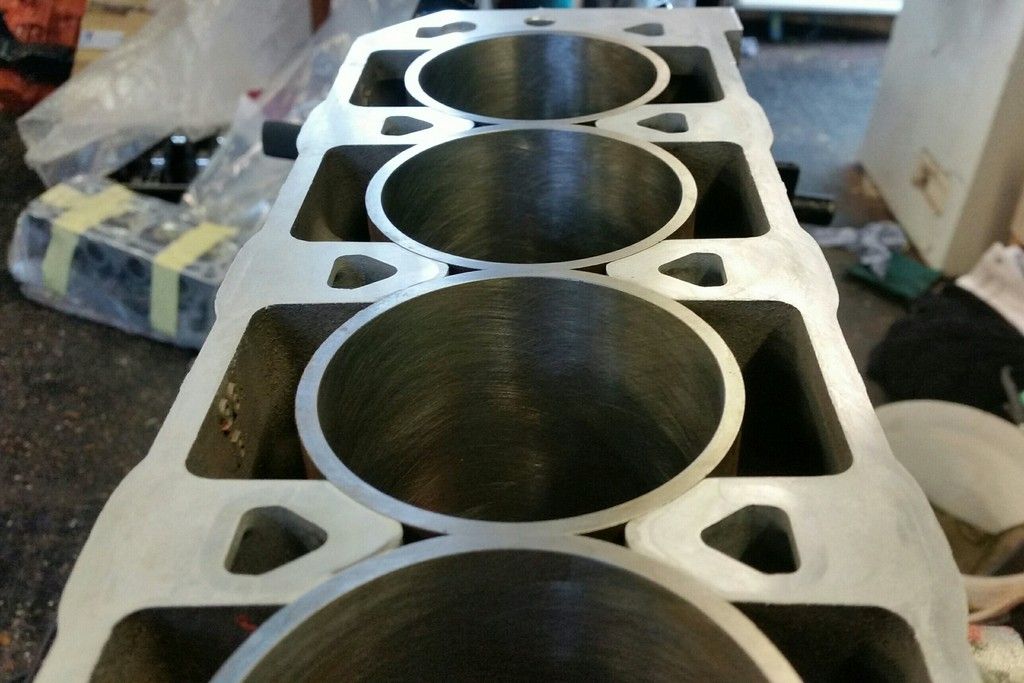
Westwood ductile iron liners for a bit more strength

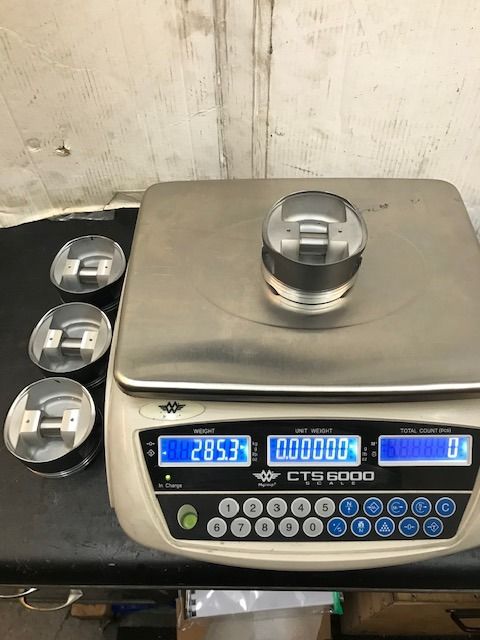
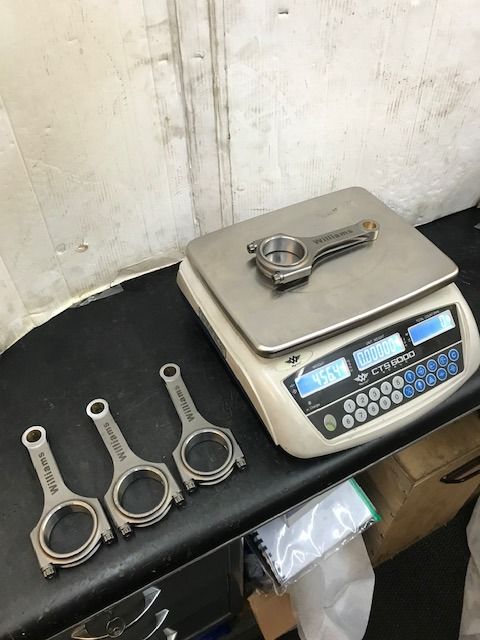
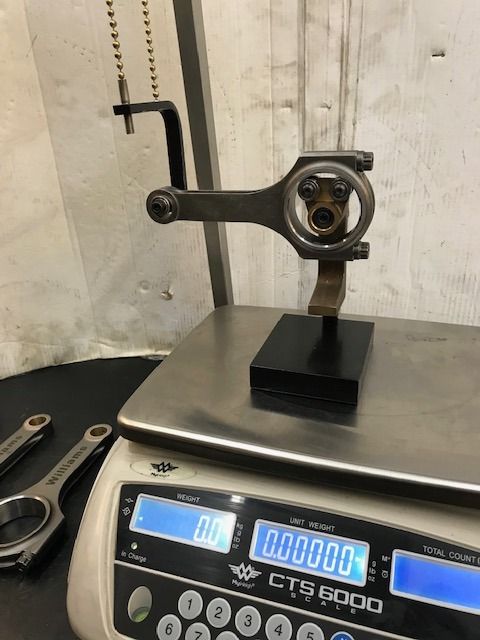
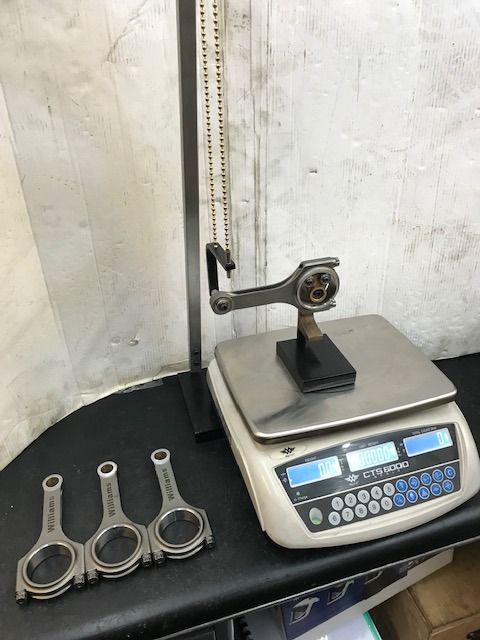
Pistions and rods all balanced too:
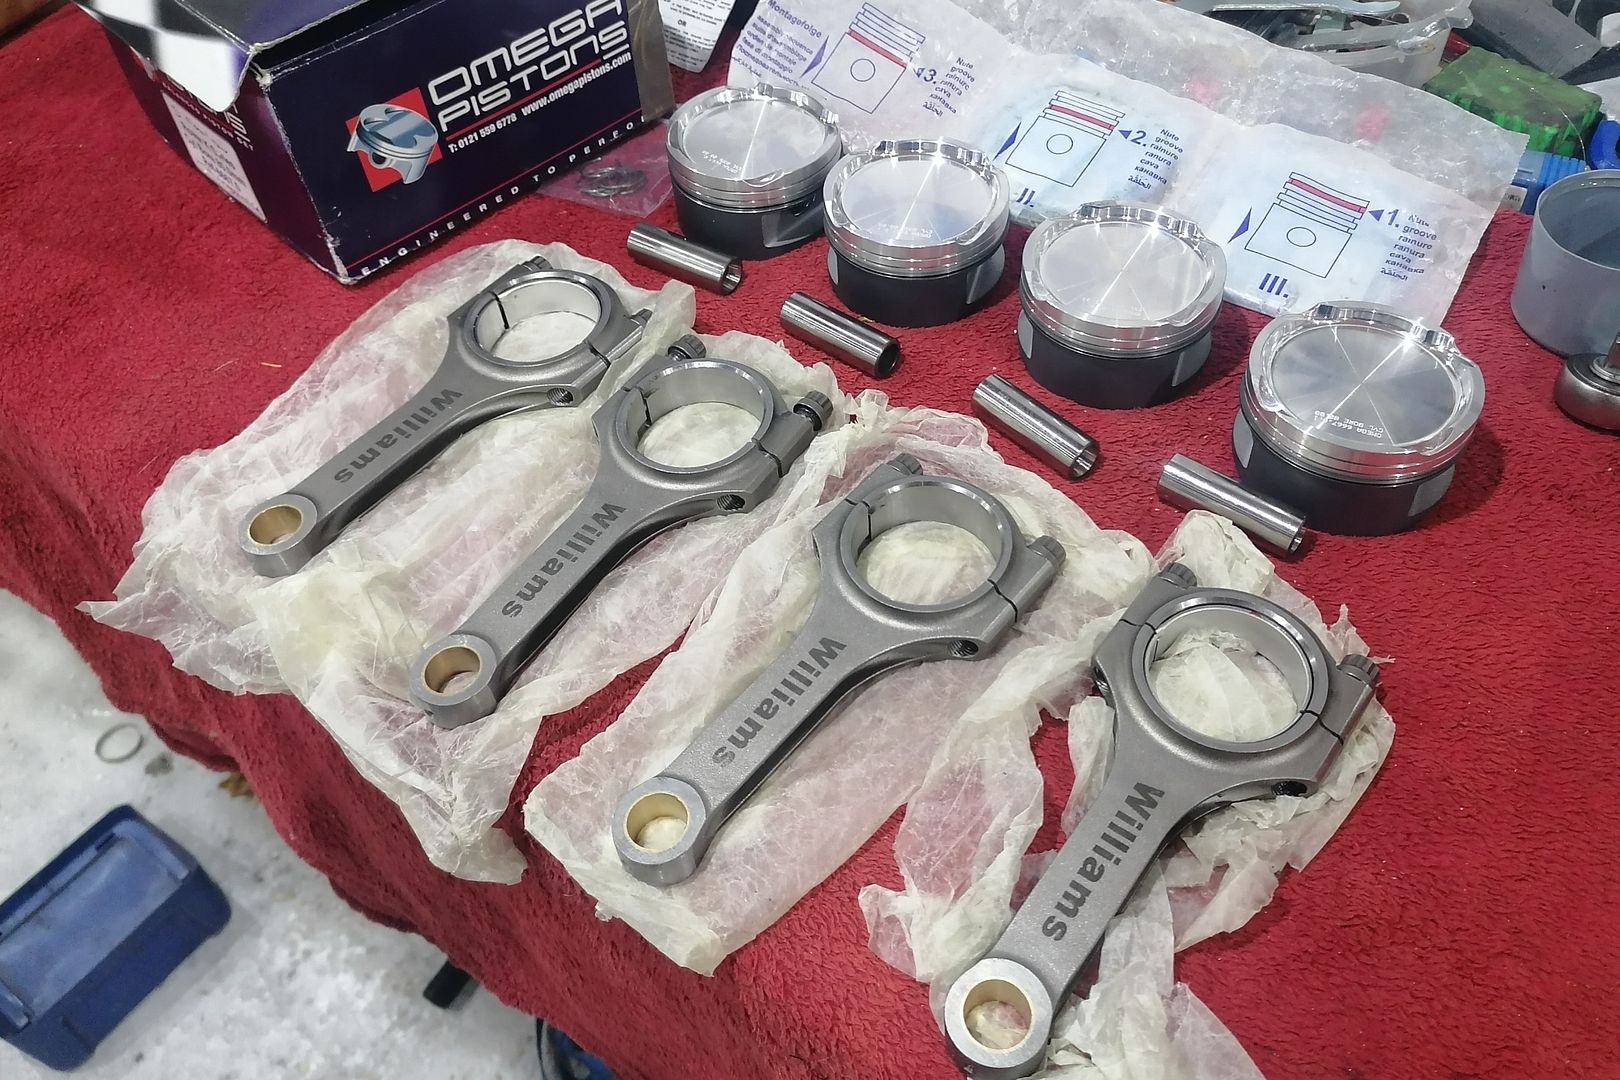
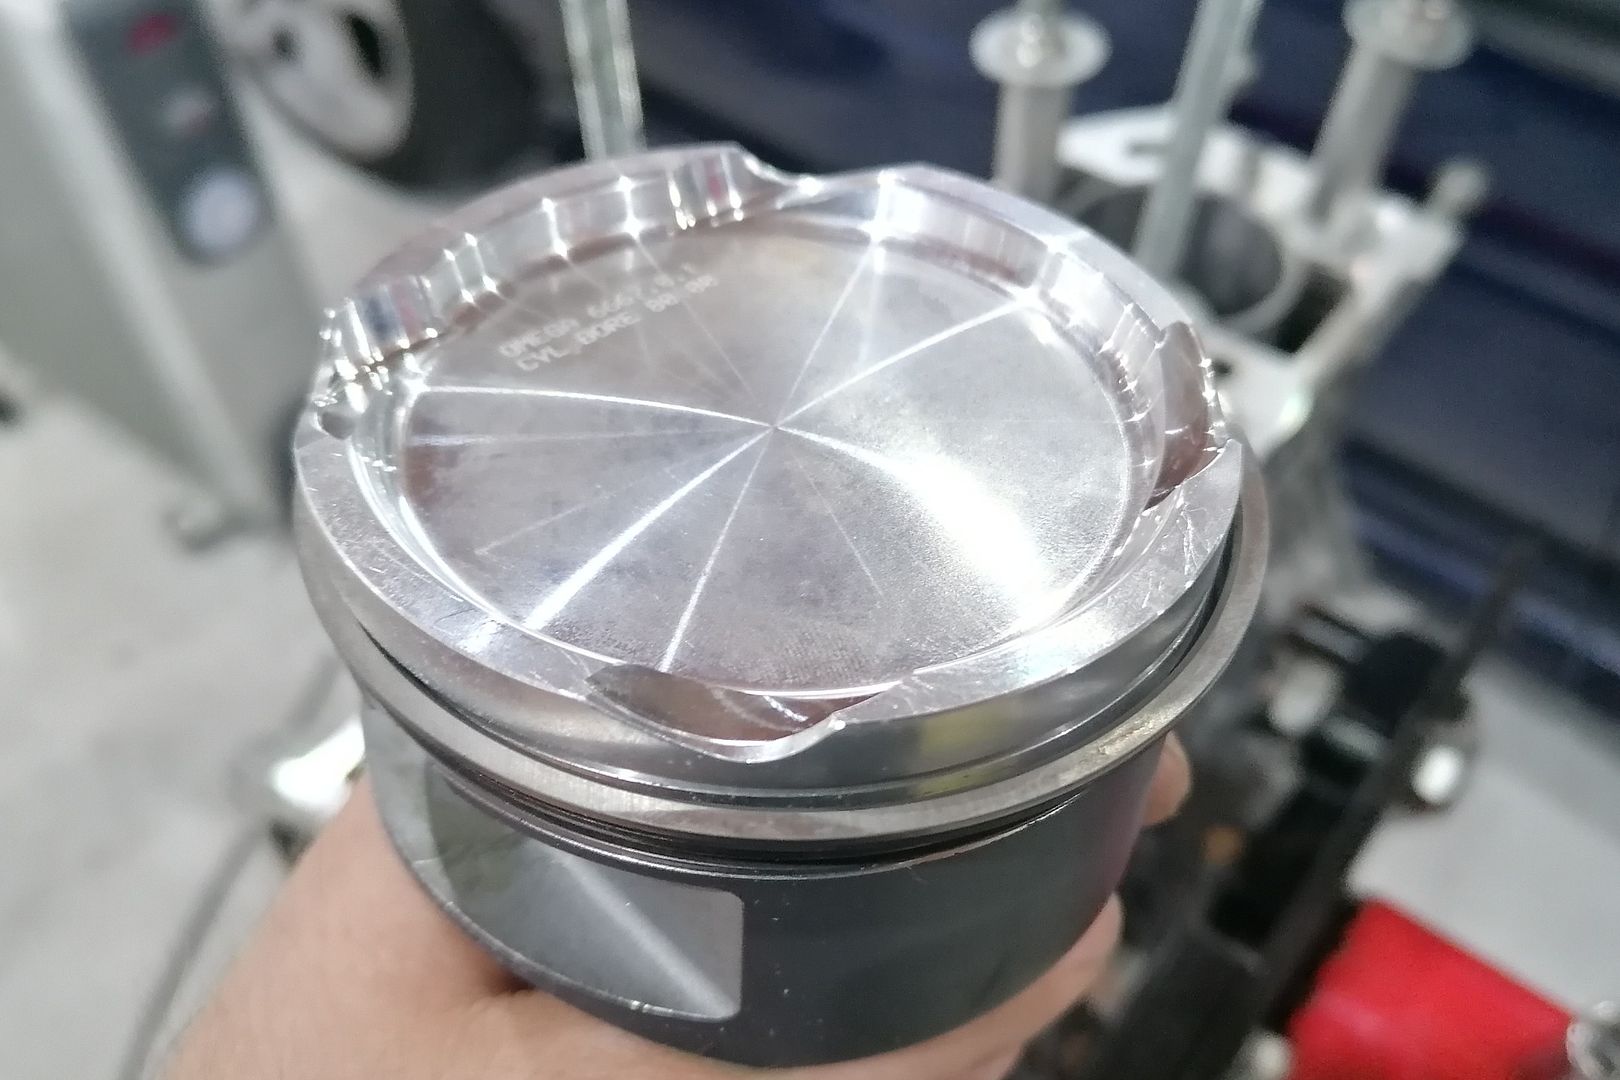
Omega pistons have a nice big dish for just under 9:1 CR. Much better design than the wossner I used (and destroyed) before.
Ready to go in

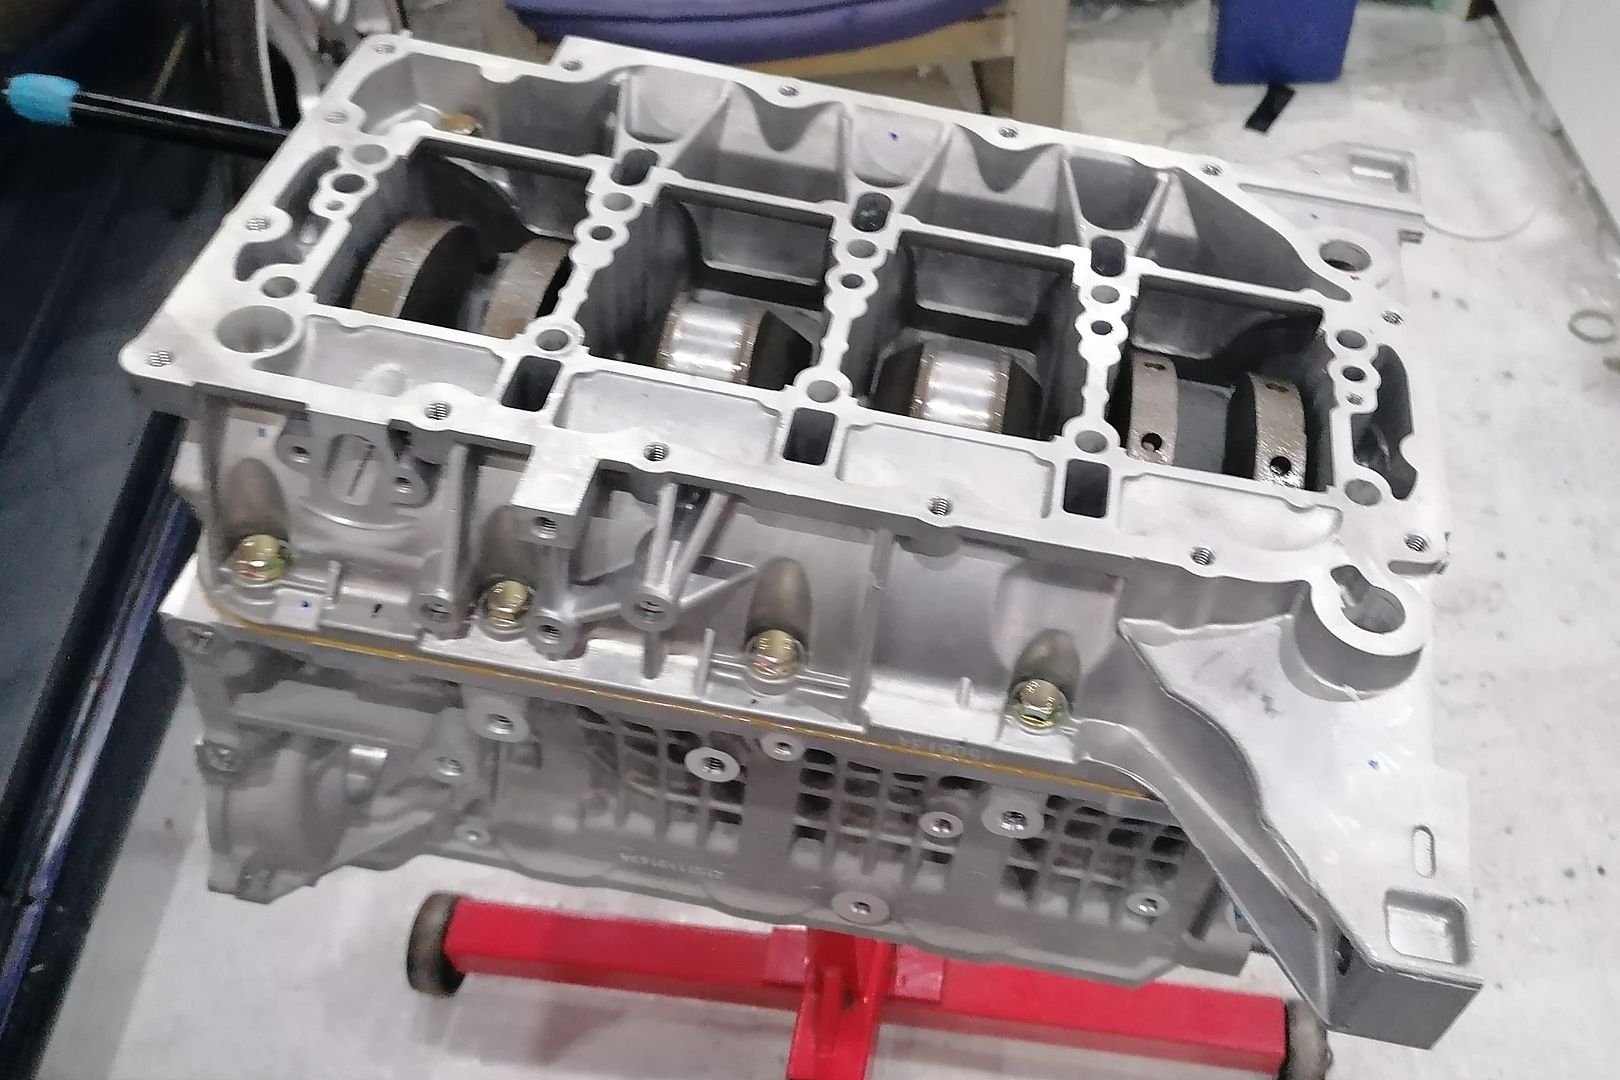
Bottom end built:
Just waiting on parts now to finish getting the engine together and sort the head out. Stripping a VVC head is not for the faint-hearted (if you want to put it back together and keep the vvc).
New block

Reground and balanced crank going in.


Westwood ductile iron liners for a bit more strength

Pistions and rods all balanced too:

Omega pistons have a nice big dish for just under 9:1 CR. Much better design than the wossner I used (and destroyed) before.

Ready to go in

Bottom end built:

Just waiting on parts now to finish getting the engine together and sort the head out. Stripping a VVC head is not for the faint-hearted (if you want to put it back together and keep the vvc).
Little bit more progress.
A white ago I managed to source a brand new in box vvc cylinder head:
The vvc head is preferred over the non-vvc (mpi) head that normally lives in the K-series turbo because it flows better. Most people would swap the variable valve gear out for solid cams. I've tried both on previous iterations. The first time I ran vvc turbo I ditched the vvc as the mechanisms were very rattly (a common problem) and I had a valve spring cap crack and partially sick a valve open! In this build I wanted to keep vvc for the added flexibility.
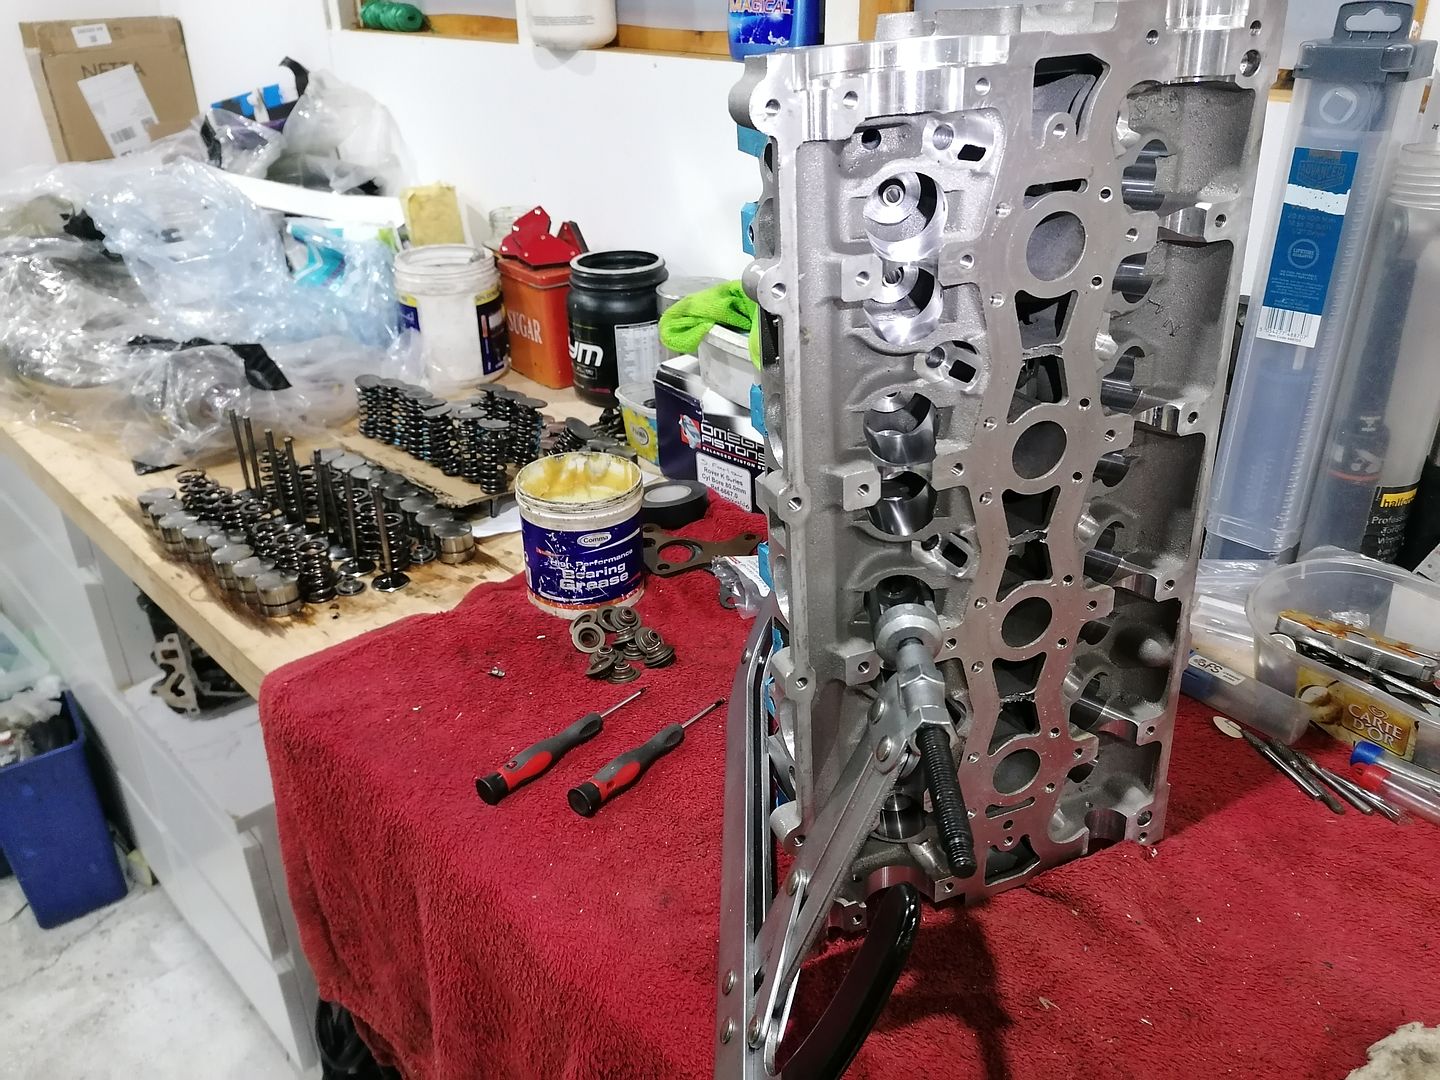
Obviously the head's been sitting around for a few years so I decided to change the valve stem oil seals and rear vvc belt. Seeing as I had to strip the head completely to do this, I thought I would fettle things slightly. Just for fun really - I doubt anything I've done will make much difference!
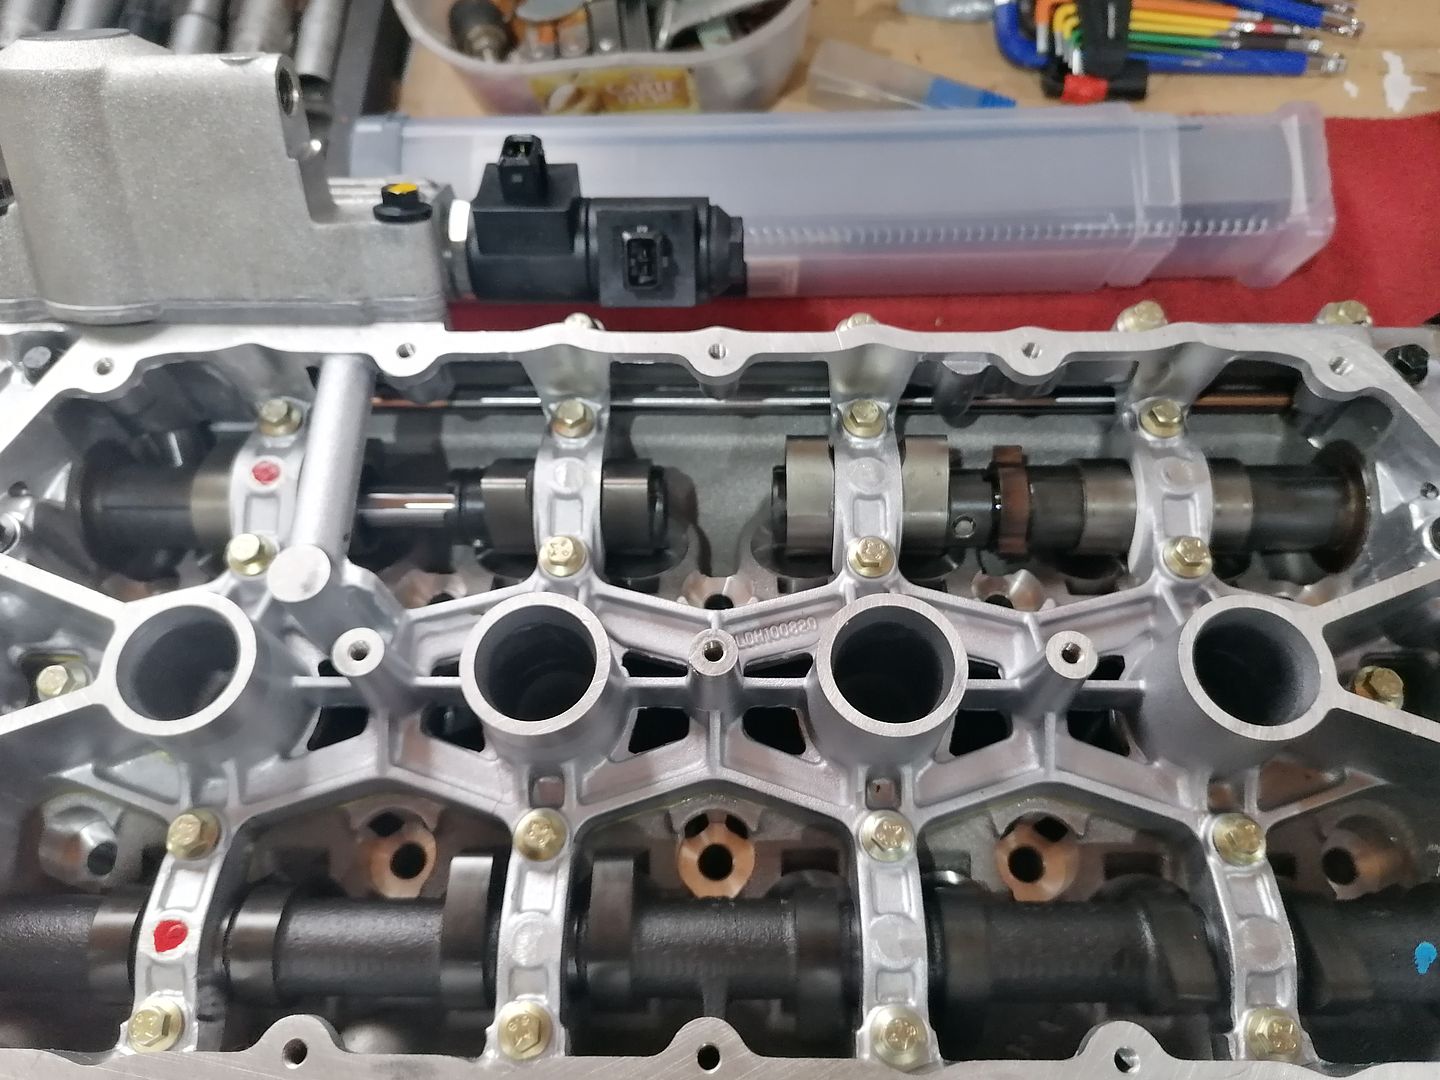
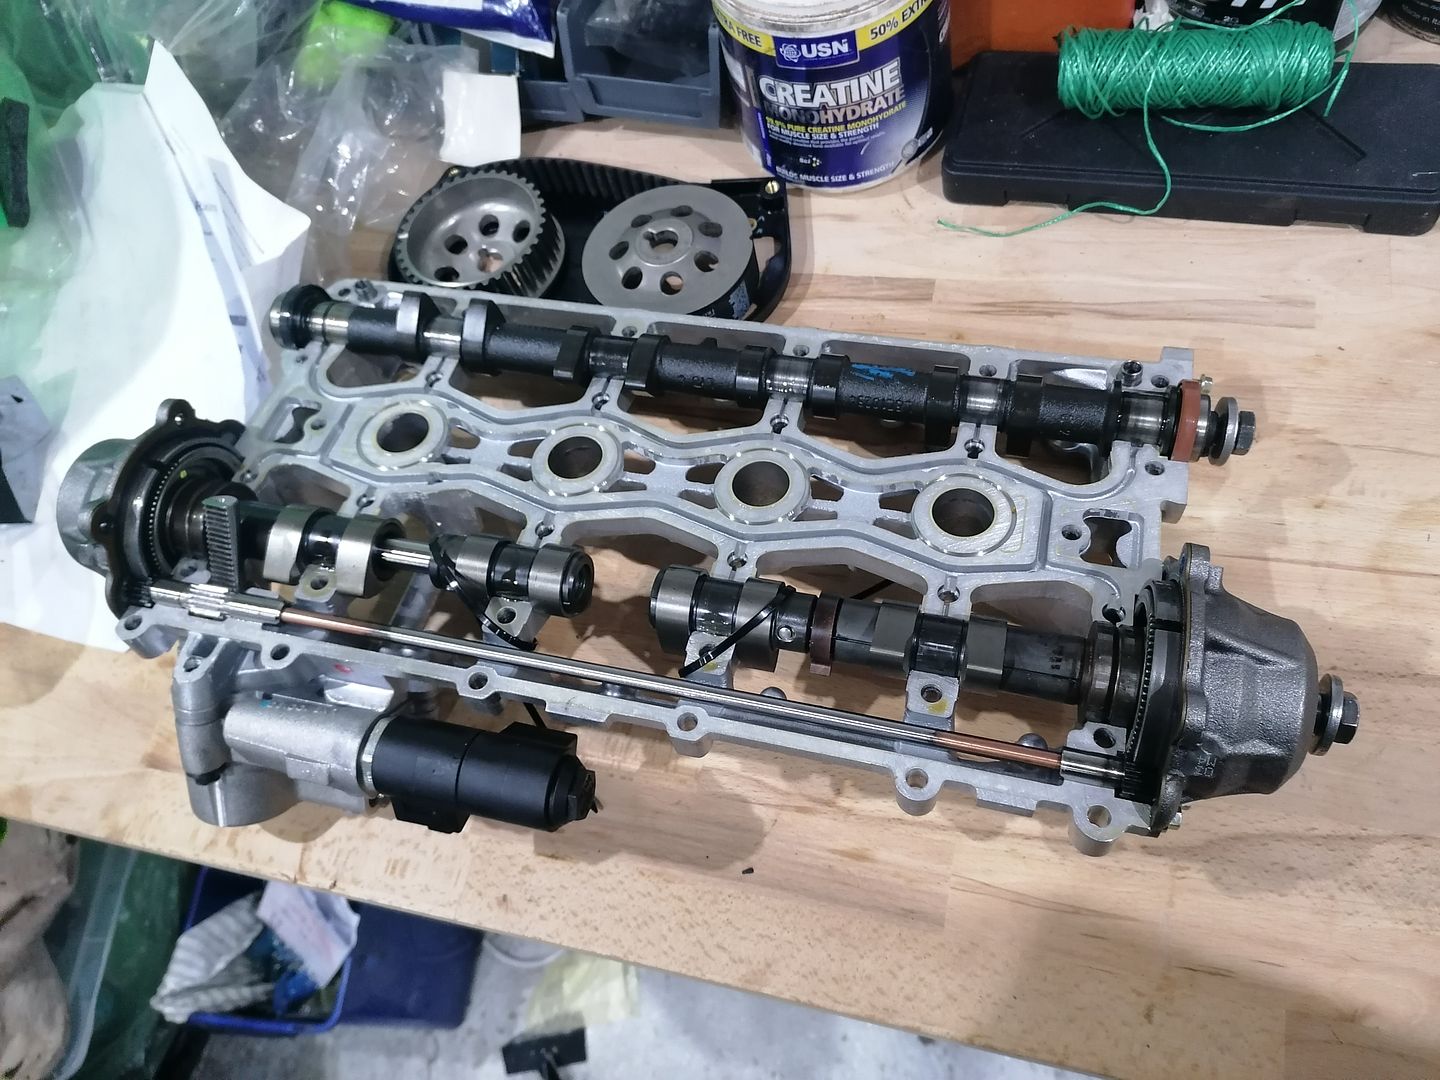
The Rover VVC is a fairly complicated bit of kit. The inlet camshaft is actually two separate camshafts. A piston driven by oil pressure moves a gear which in turn moves the position of an eccentric drive in each vvc housing. The effect is that the rotation speed of the camshaft can be varied. At minimum, the duration of the inlet can is only 220 degrees, and at maximum duration is 295 degrees. I've taken one apart before and it's not fun putting them back together! Fortunately, it's possible to keep the cams in the cam ladder and just lift the whole lot off the head in one piece...
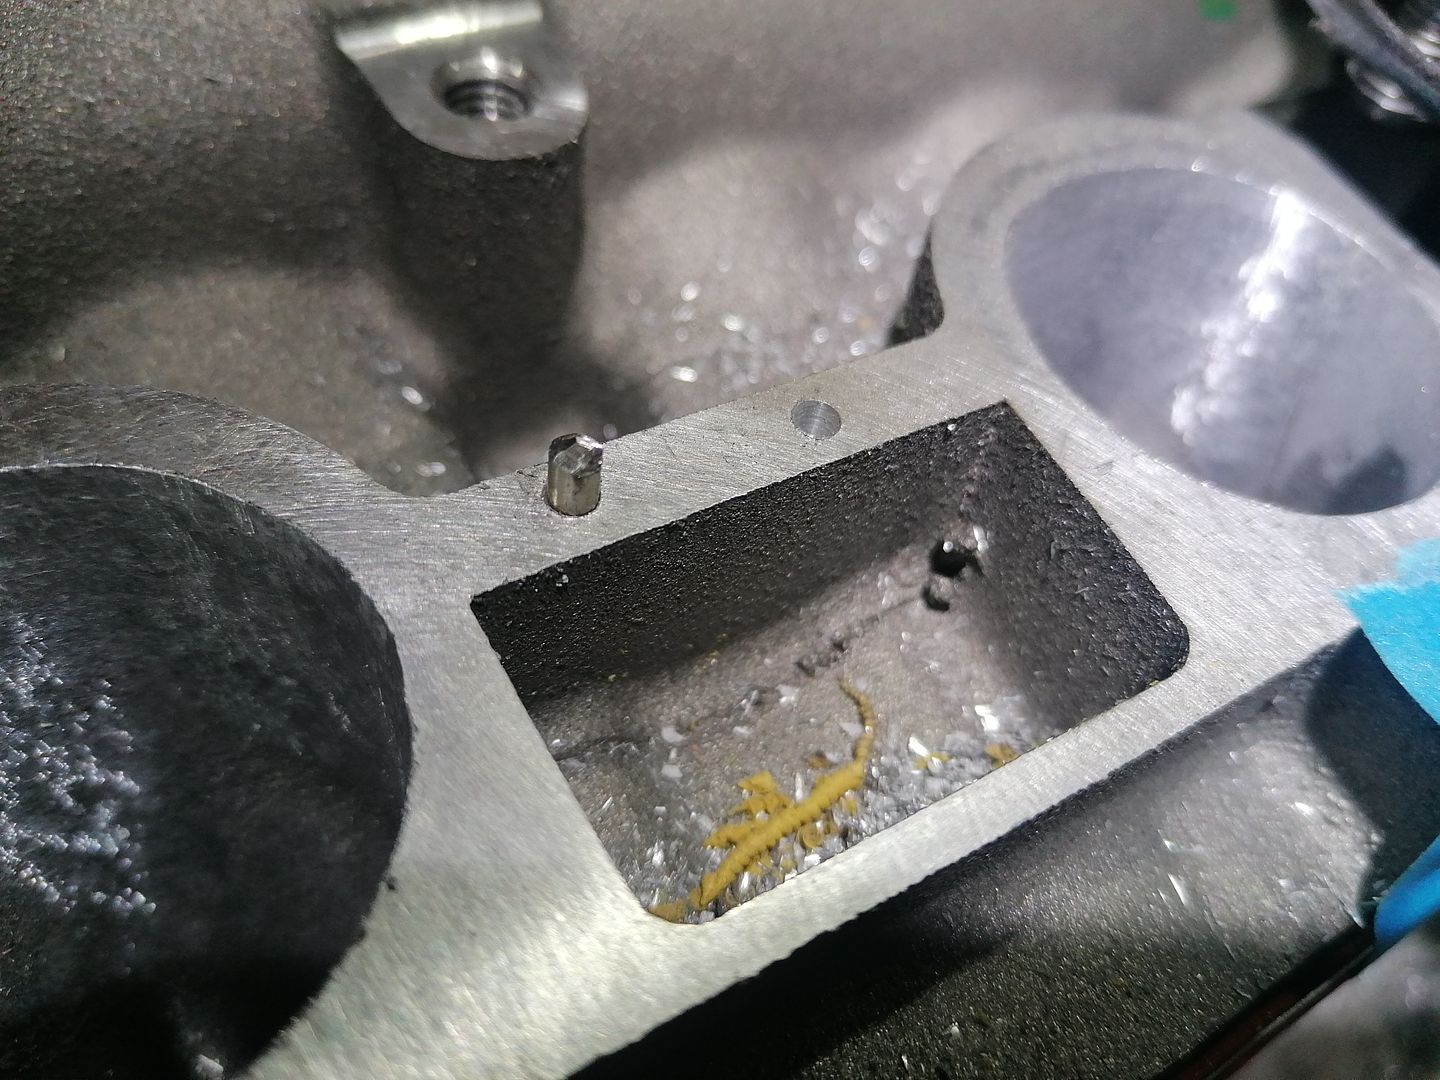
I didn't want to splash out on a full port job, and didn't fancy doing it myself on a brand new head, so I just opened up the inlets slightly and port matched to the inlet manifold to remove the step. I run a ferriday inlet gasket, which helps prevent heat transferring from the head into the intake manifold. There's quite a lot of play over the manifold studs, so I port matched the spacer to the head and positioned it with dowels. Worked out well.

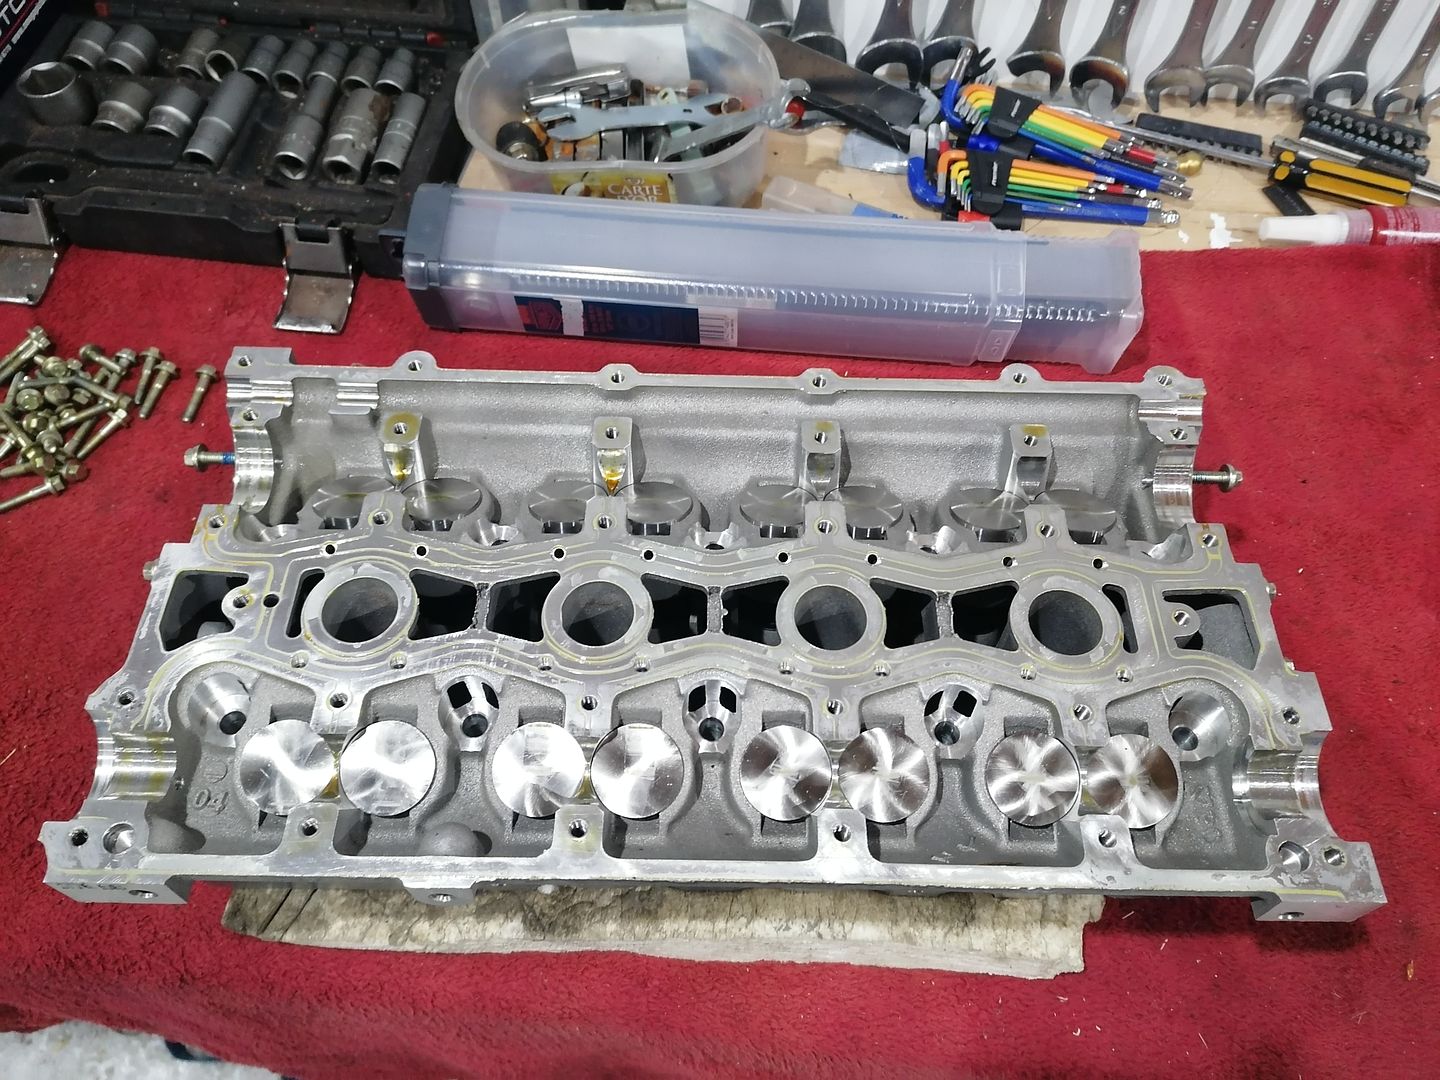
Time to get the head back together. There's a real knack to getting the collets in place on the valve stems but once you've done a few it's easy.
All back together and ready to go on.
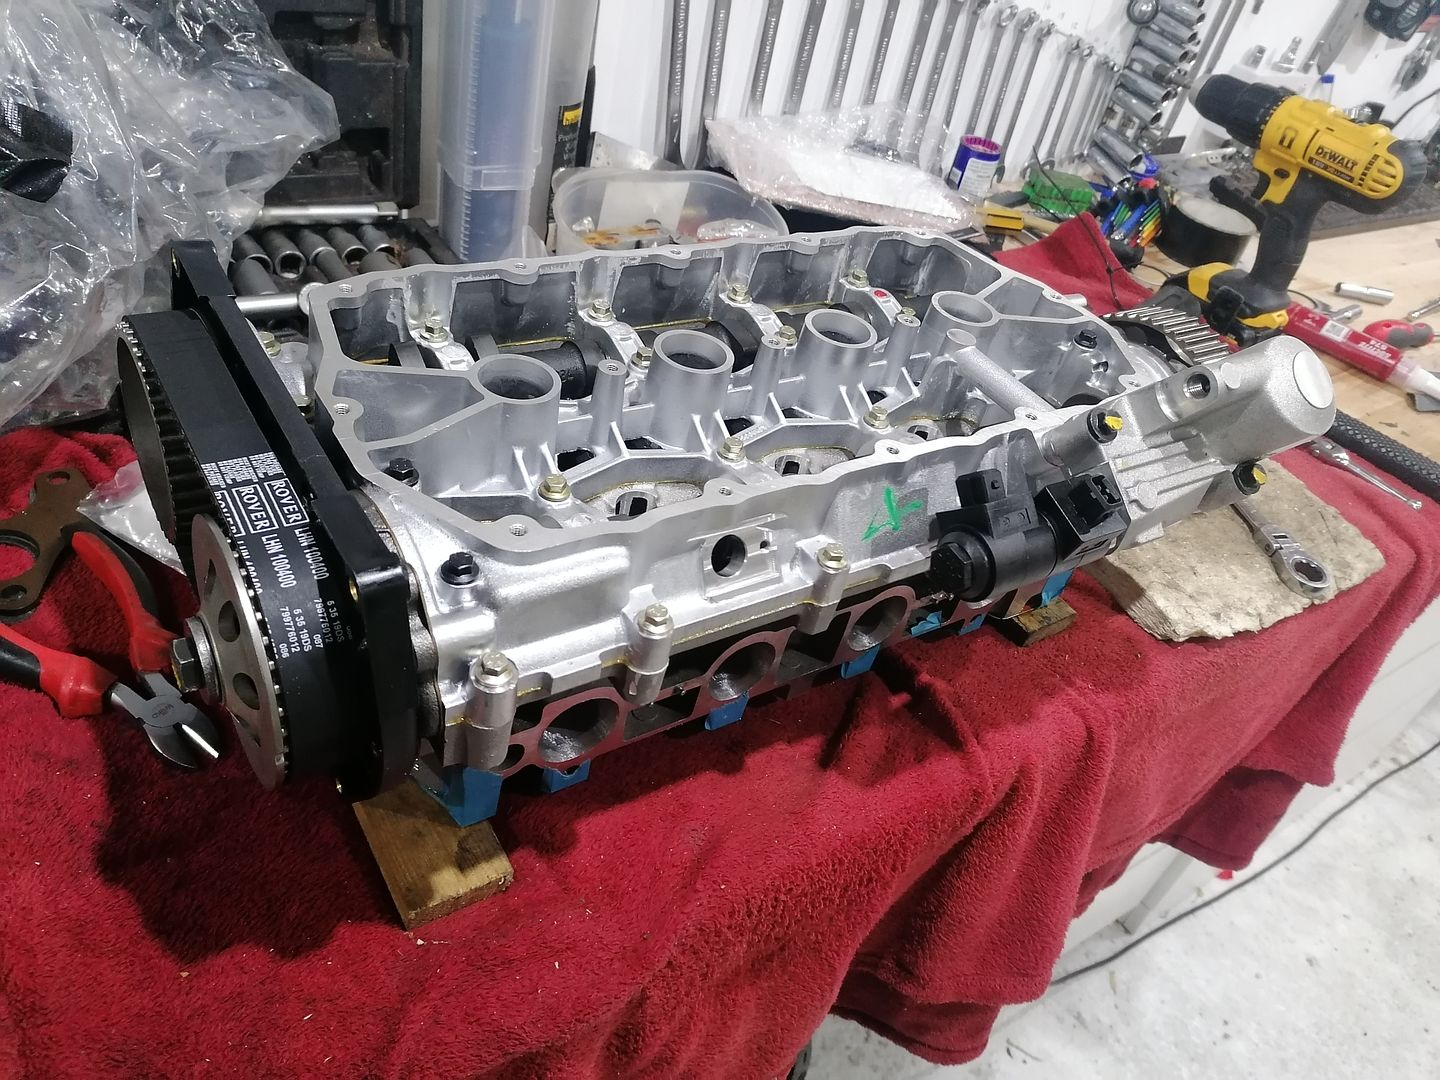
New head gasket
And head is all bolted down.

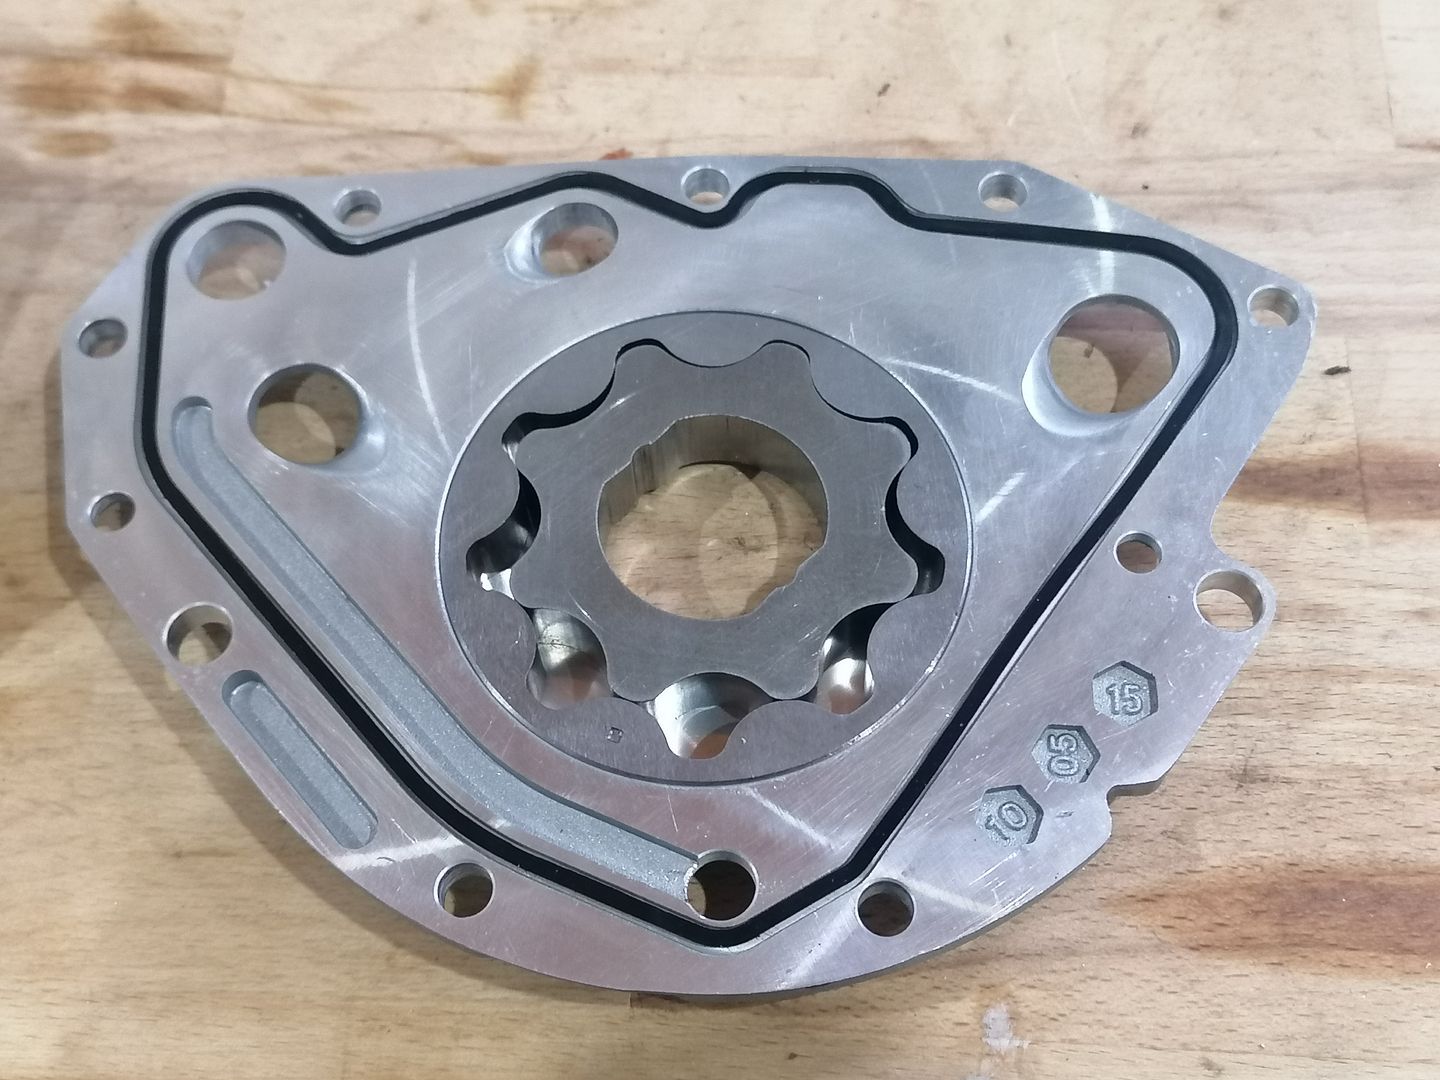
Fitting a new oil pump so fettled that to flow a bit better. Just a case of radiusing some of the edges.
Intetestingly this is a pattern oil pump made by BGA. The uprated pump rotor on later K-series is 11.5mm (up from 10.5mm). This one is 12mm.
Now I just have to fit the cambelt and the ancillaries then it's ready to go in the car.
A white ago I managed to source a brand new in box vvc cylinder head:
The vvc head is preferred over the non-vvc (mpi) head that normally lives in the K-series turbo because it flows better. Most people would swap the variable valve gear out for solid cams. I've tried both on previous iterations. The first time I ran vvc turbo I ditched the vvc as the mechanisms were very rattly (a common problem) and I had a valve spring cap crack and partially sick a valve open! In this build I wanted to keep vvc for the added flexibility.
Obviously the head's been sitting around for a few years so I decided to change the valve stem oil seals and rear vvc belt. Seeing as I had to strip the head completely to do this, I thought I would fettle things slightly. Just for fun really - I doubt anything I've done will make much difference!
The Rover VVC is a fairly complicated bit of kit. The inlet camshaft is actually two separate camshafts. A piston driven by oil pressure moves a gear which in turn moves the position of an eccentric drive in each vvc housing. The effect is that the rotation speed of the camshaft can be varied. At minimum, the duration of the inlet can is only 220 degrees, and at maximum duration is 295 degrees. I've taken one apart before and it's not fun putting them back together! Fortunately, it's possible to keep the cams in the cam ladder and just lift the whole lot off the head in one piece...


I didn't want to splash out on a full port job, and didn't fancy doing it myself on a brand new head, so I just opened up the inlets slightly and port matched to the inlet manifold to remove the step. I run a ferriday inlet gasket, which helps prevent heat transferring from the head into the intake manifold. There's quite a lot of play over the manifold studs, so I port matched the spacer to the head and positioned it with dowels. Worked out well.


Time to get the head back together. There's a real knack to getting the collets in place on the valve stems but once you've done a few it's easy.

All back together and ready to go on.

New head gasket

And head is all bolted down.

Fitting a new oil pump so fettled that to flow a bit better. Just a case of radiusing some of the edges.

Intetestingly this is a pattern oil pump made by BGA. The uprated pump rotor on later K-series is 11.5mm (up from 10.5mm). This one is 12mm.
Now I just have to fit the cambelt and the ancillaries then it's ready to go in the car.
Stick Legs said:
I have just read this from start t finish, your dedication to this project is astounding!
I love to see something like this come together and can't wait for the next update!
Blimey that must have taken you a while! Welcome to the roller-coaster!I love to see something like this come together and can't wait for the next update!
As long as I'm still enjoying the tinkering, I'll keep going. I do need to get this done though as I have a classic impreza in need of attention before the summer and my daily 535d wagon needs some bits doing too.
Link appears dead but I'm guessing from the description that's Turbotoaster's car. I know Lee. He actually worked with Omega to design the pistons I'm using (and several other guys).
Thanks for the comments all (hadn't realised they were there hence delay responding).
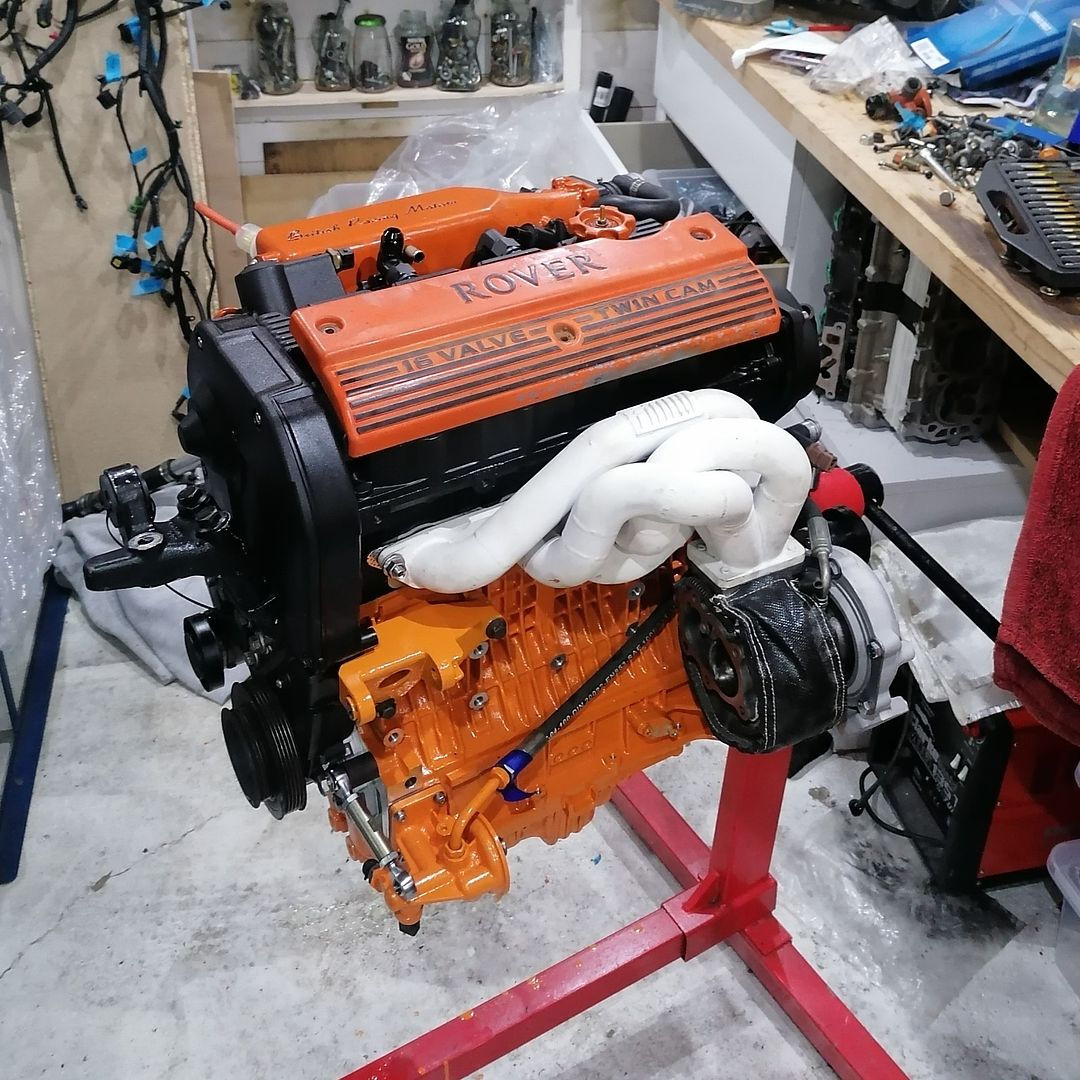
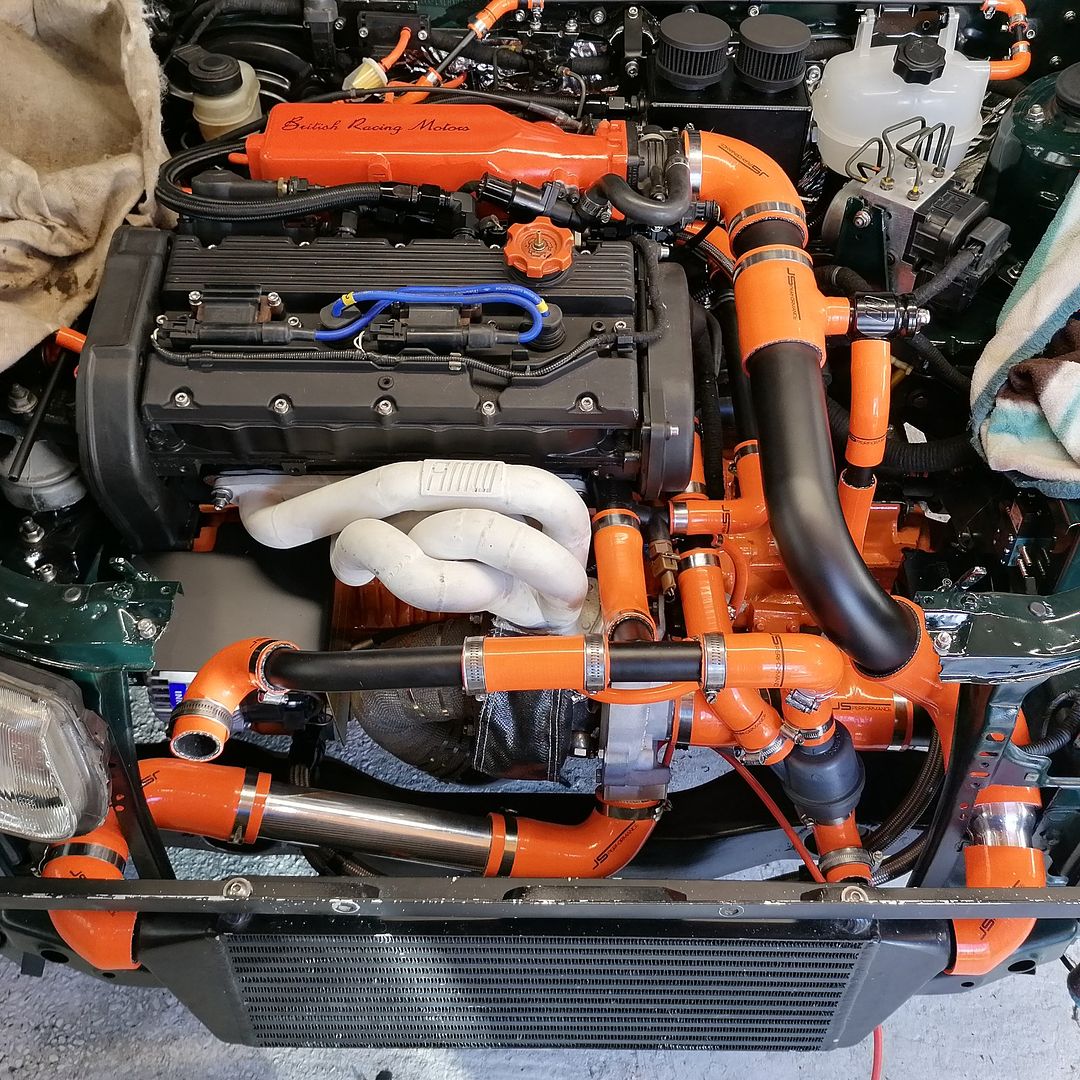
I picked the car up from the storage lockup and have been working hard to get the engine finished so I can get it in the car. I've also been tidying up the engine bay and just trying to get things a bit neater. This weekend I'll be slotting the engine in and will hopefully get it started.
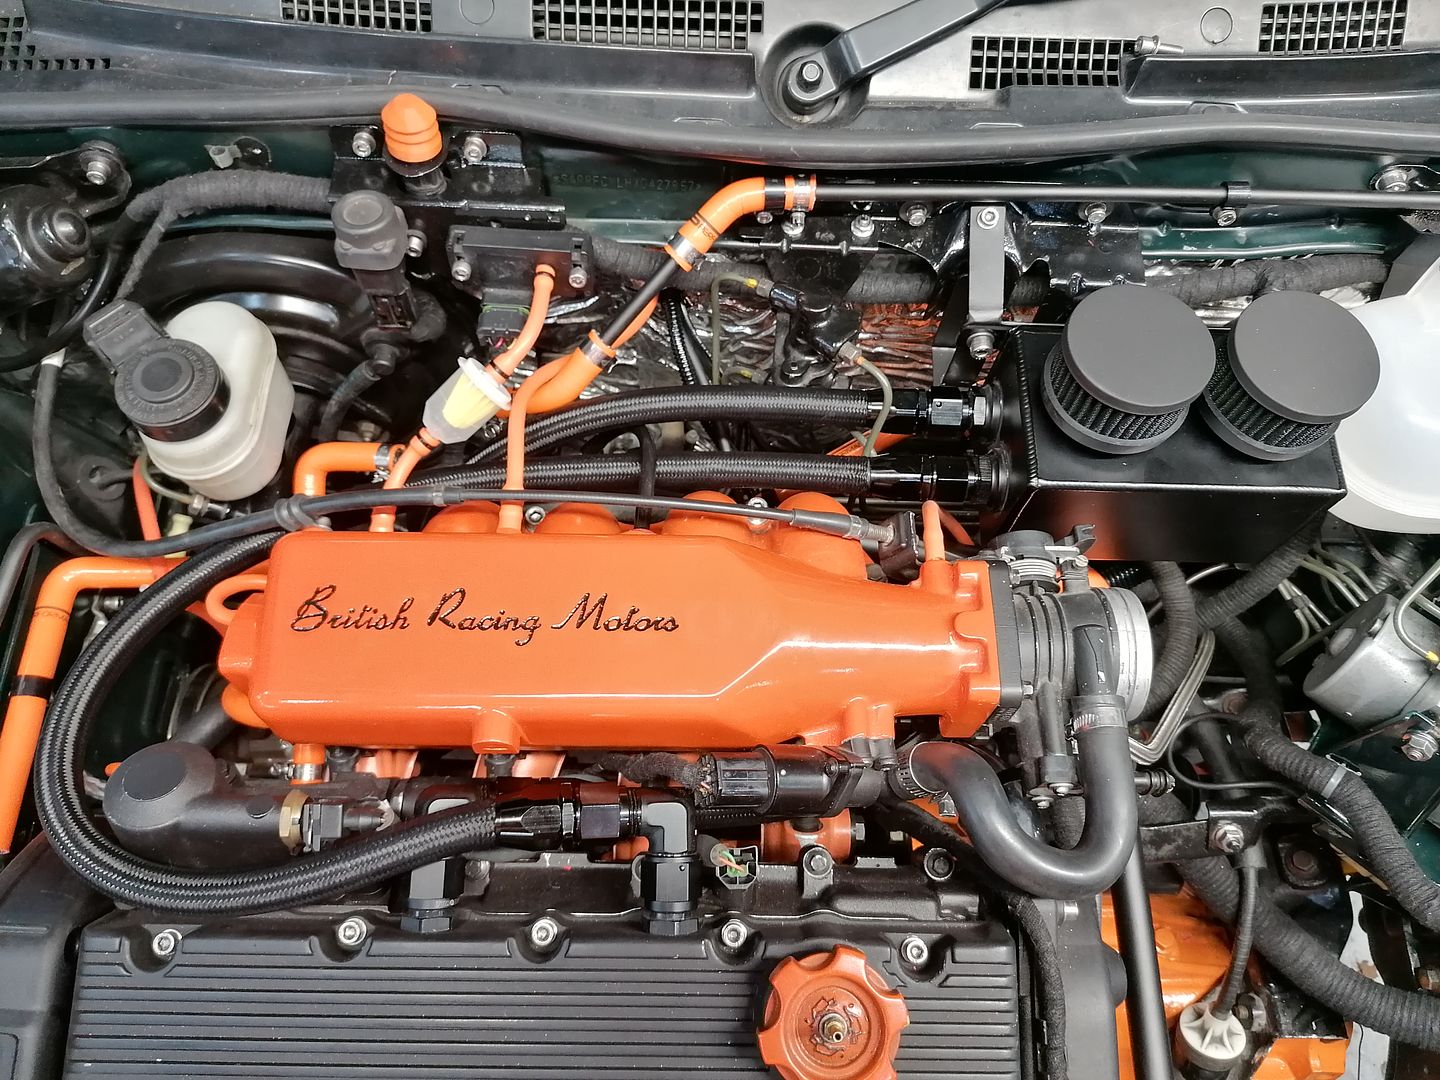
In homage to previous skip-destined iterations of this build, I went mad with the orange paint again.
Thanks for the comments all (hadn't realised they were there hence delay responding).
I picked the car up from the storage lockup and have been working hard to get the engine finished so I can get it in the car. I've also been tidying up the engine bay and just trying to get things a bit neater. This weekend I'll be slotting the engine in and will hopefully get it started.
In homage to previous skip-destined iterations of this build, I went mad with the orange paint again.

Out with the old (temporary leaky af nasp 1.8vvc):
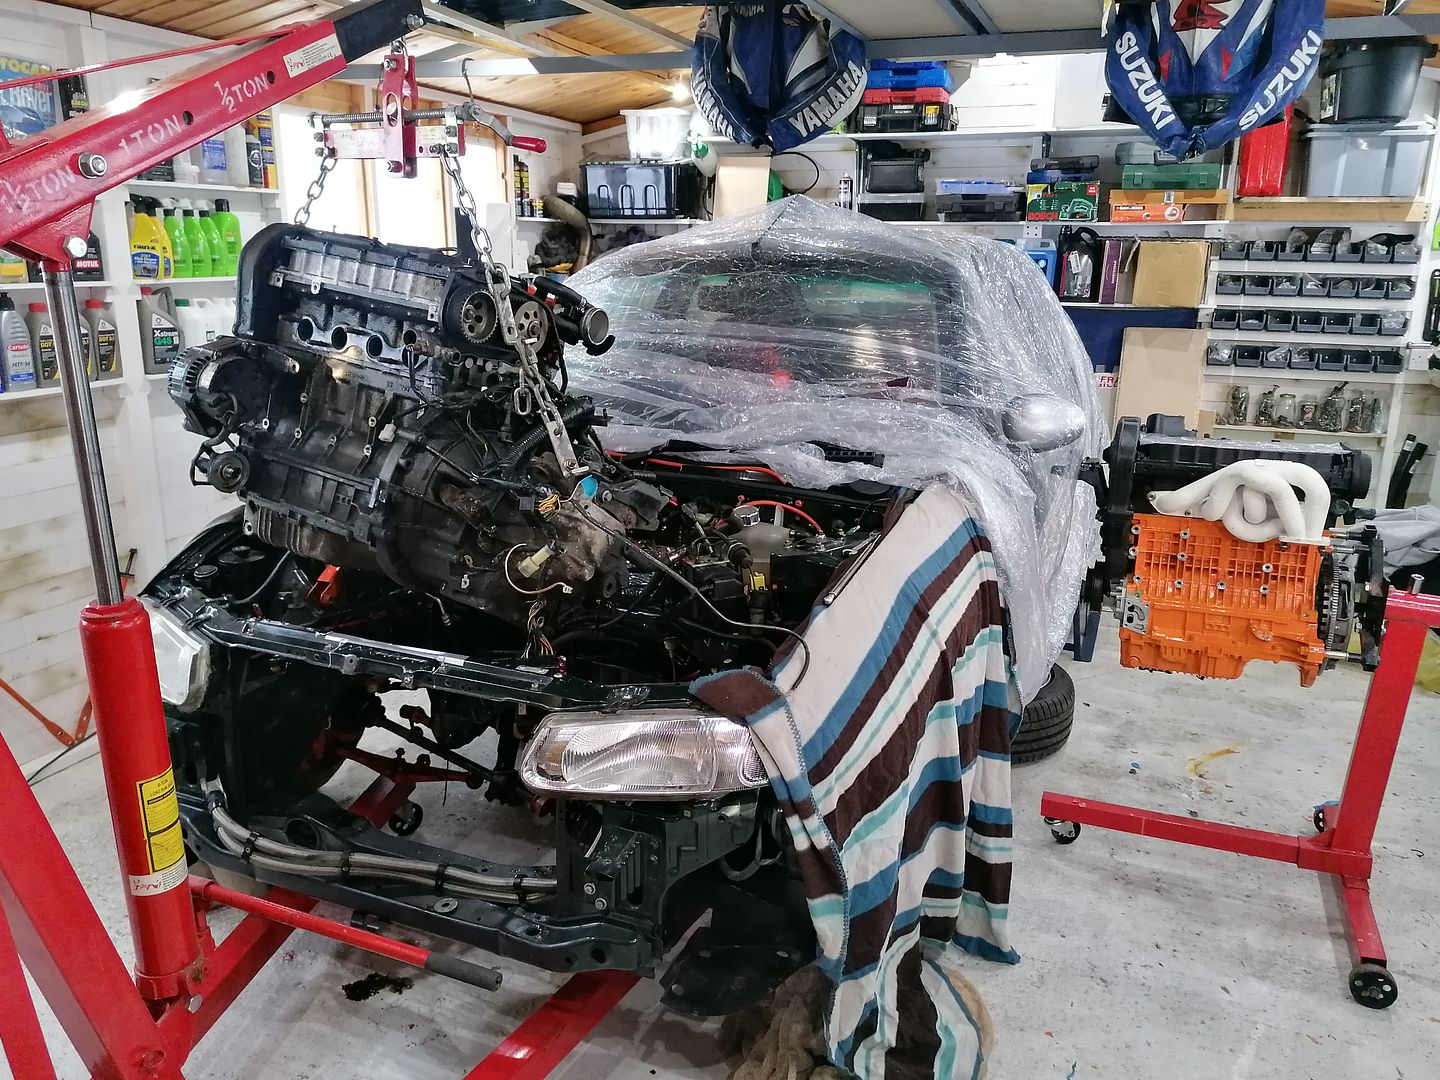
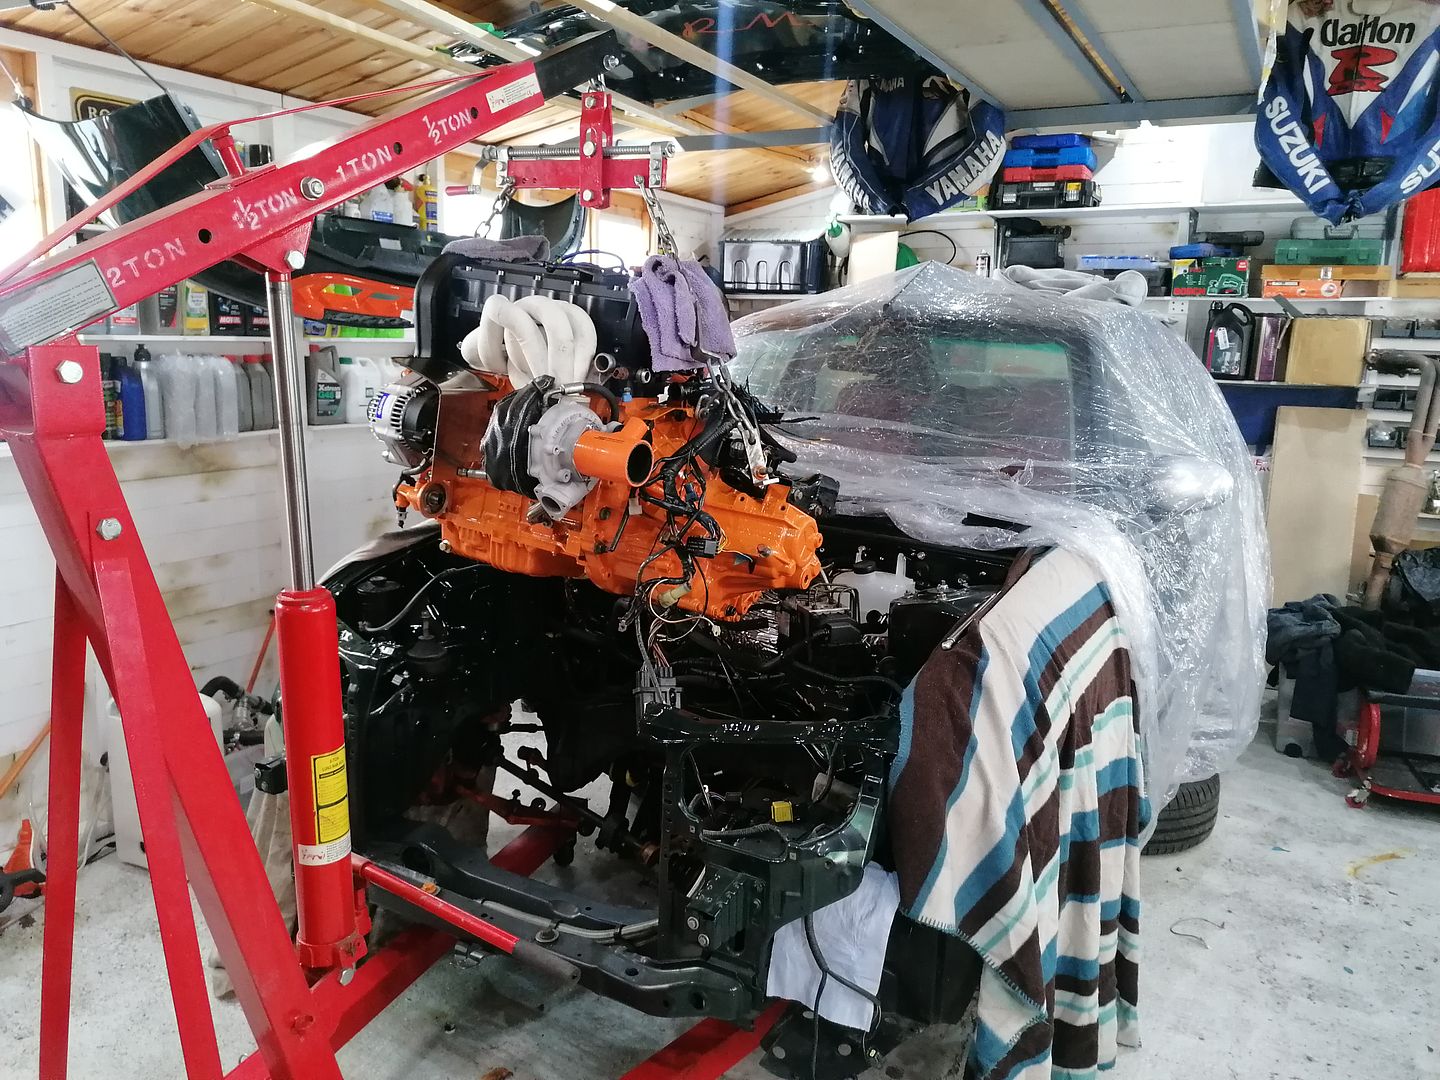
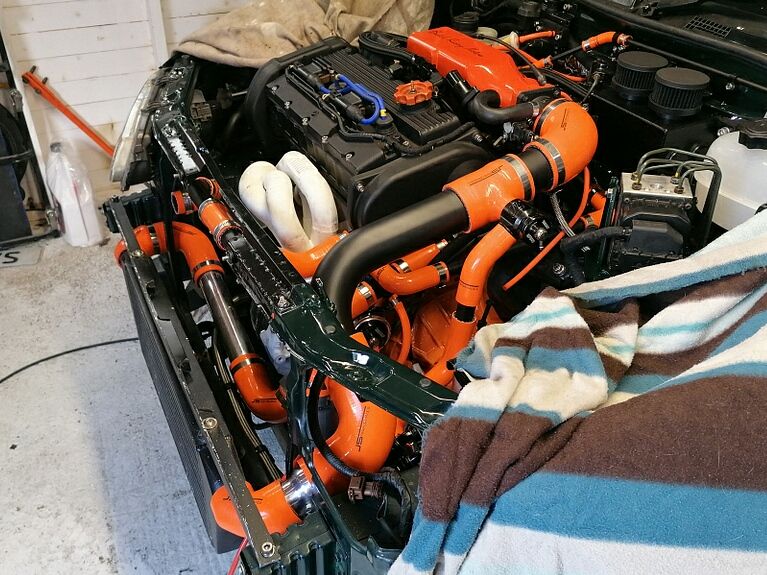
In with the new :
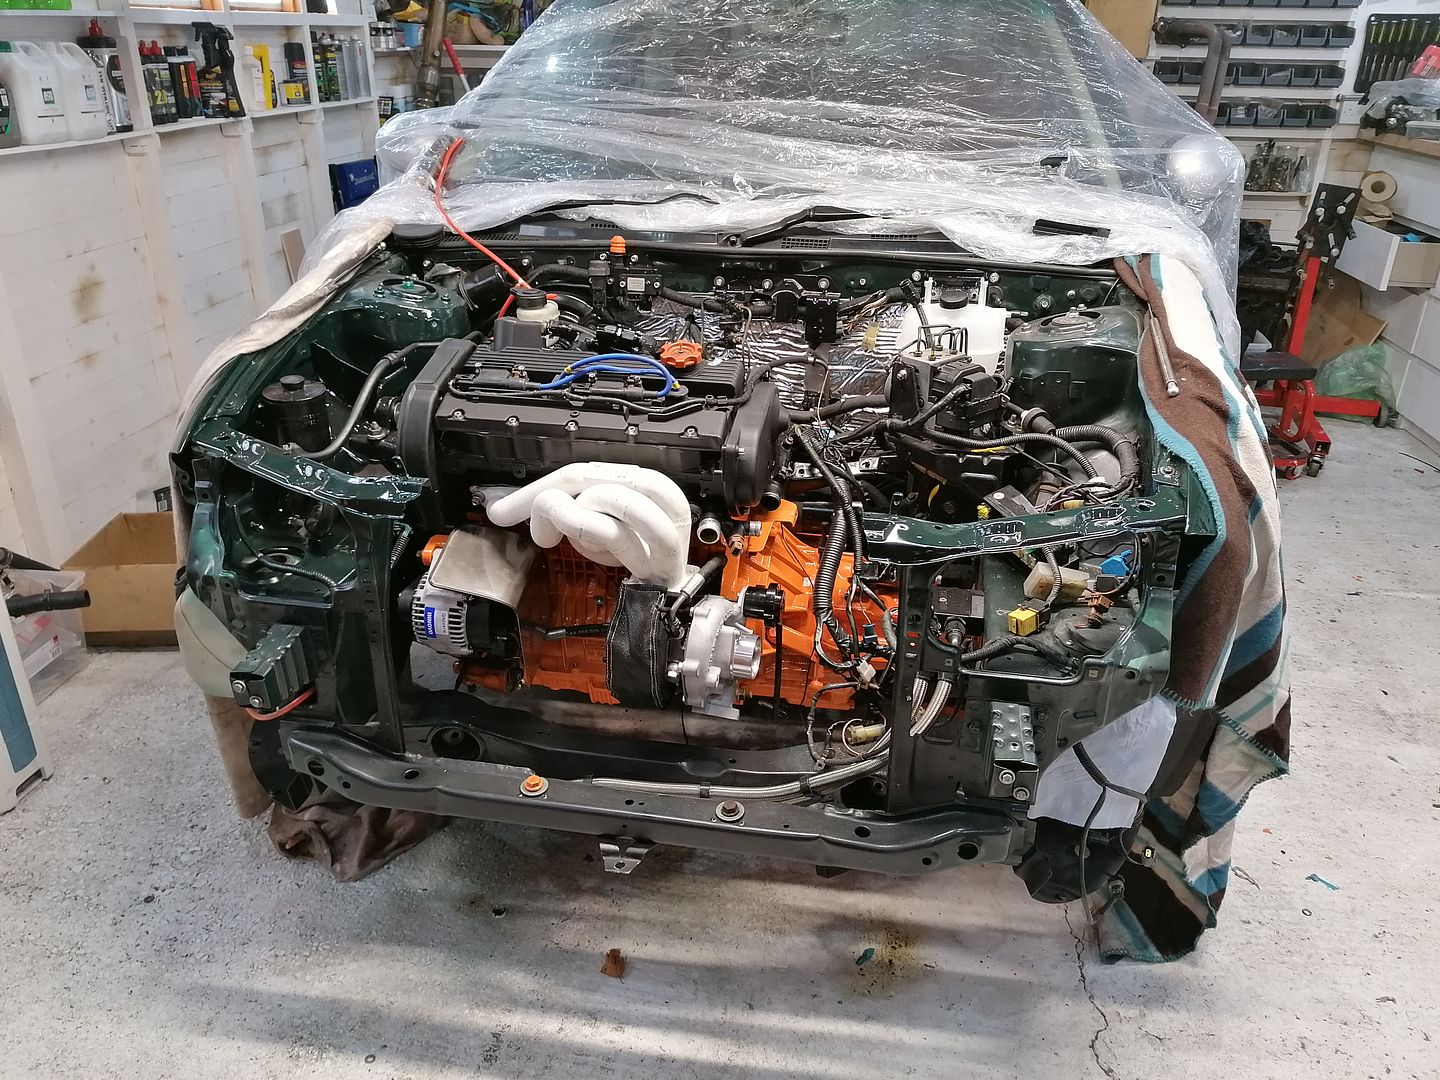
And sitting on the mounts:
Its taken a lot longer than I expected to get to this point as I keep finding little jobs to do (tidy the paintwork in the engine bay, sort out the wiring, etc). Very happy with how it's coming together though.

In with the new :

And sitting on the mounts:

Its taken a lot longer than I expected to get to this point as I keep finding little jobs to do (tidy the paintwork in the engine bay, sort out the wiring, etc). Very happy with how it's coming together though.
mercedeslimos said:
Fair play for sticking with it, I'd have run out of enthusiasm and motivation for it years ago!
I must confess to losing enthusiasm for it from time to time. But I have the luxury of being able to just walk away from it when I feel like that.Robmarriott said:
I know those blocks are available fairly cheap now from certain places but do you have any idea what they're actually from? Are they from the SAIC versions of the K?
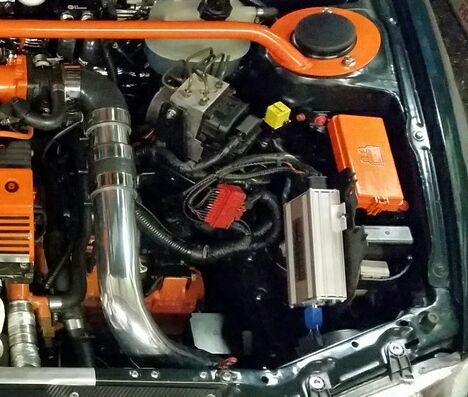
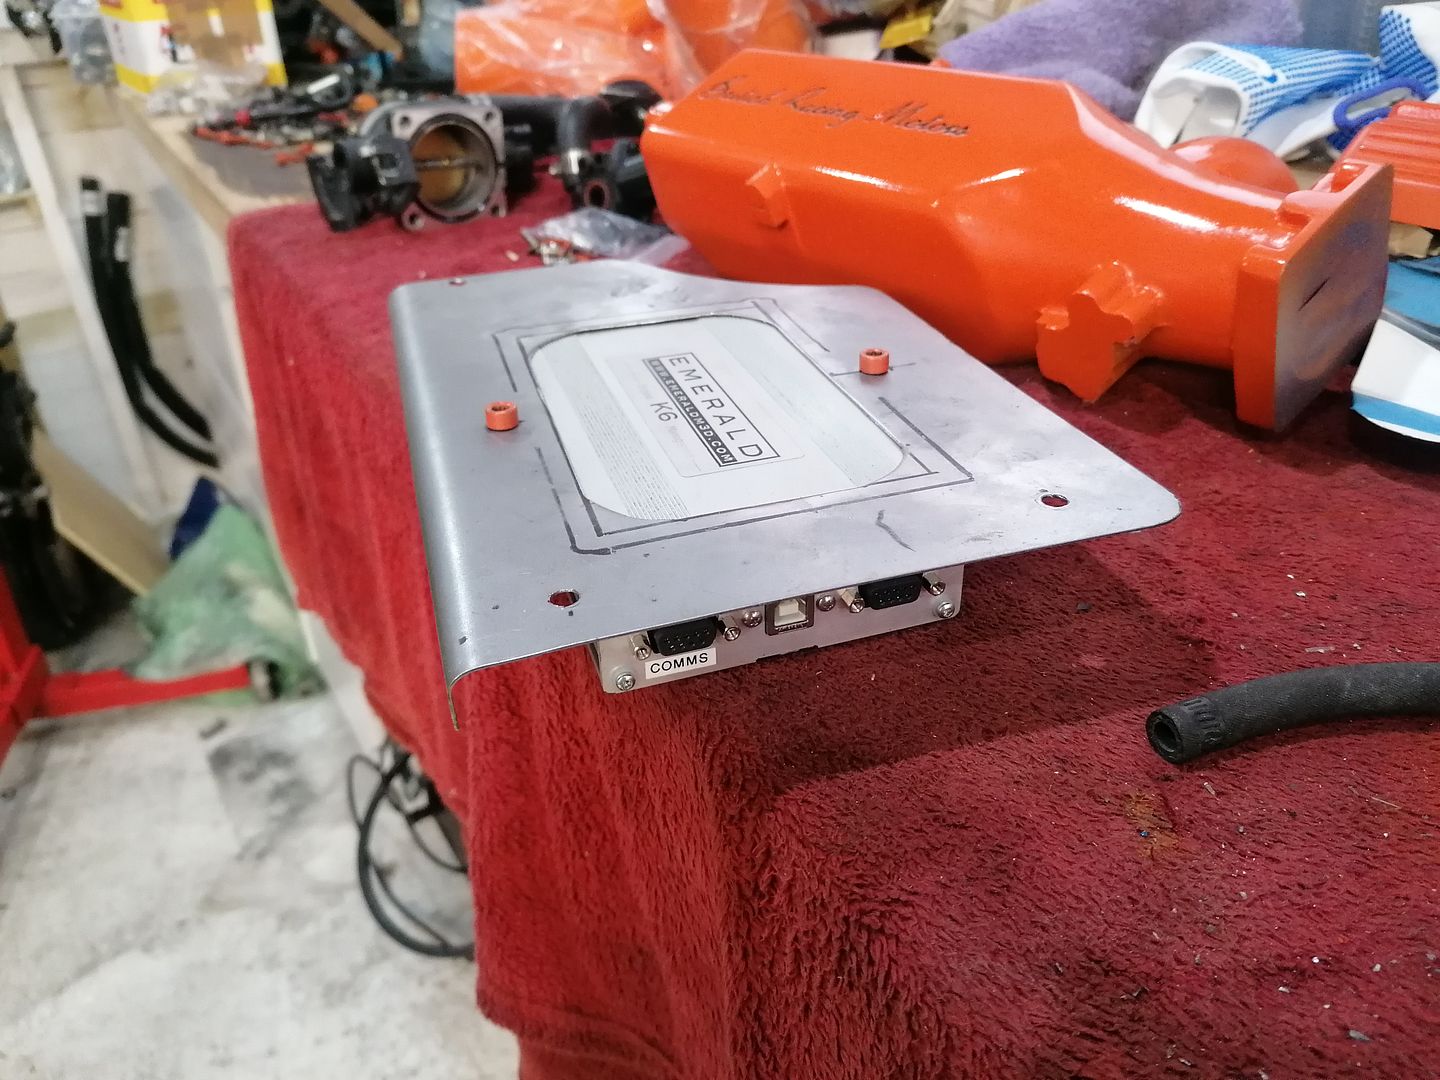
Used in the mg6 up to 2017.Had a bit of time on my hands (don't we all!?) so since I'm waiting to order my new Zeitronix wideband to get things running I decided to tidy the wiring and make a nice enclosure for the Emerald.
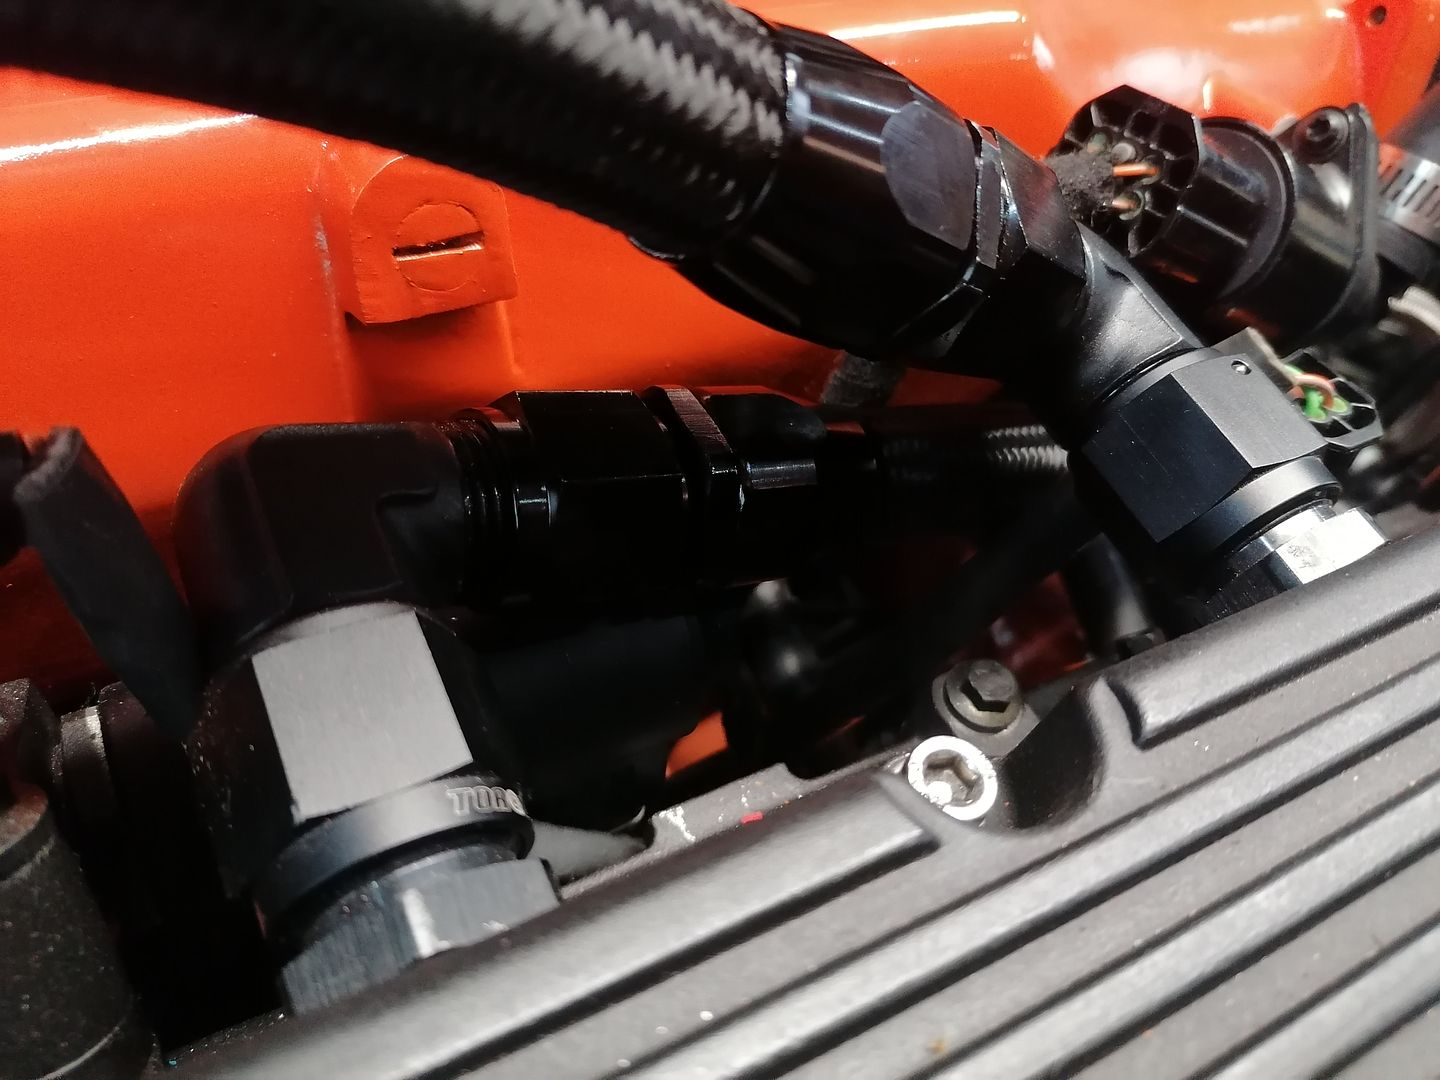
Setup before. Bit untidy and was using the emerald adapter. Not pretty enough!
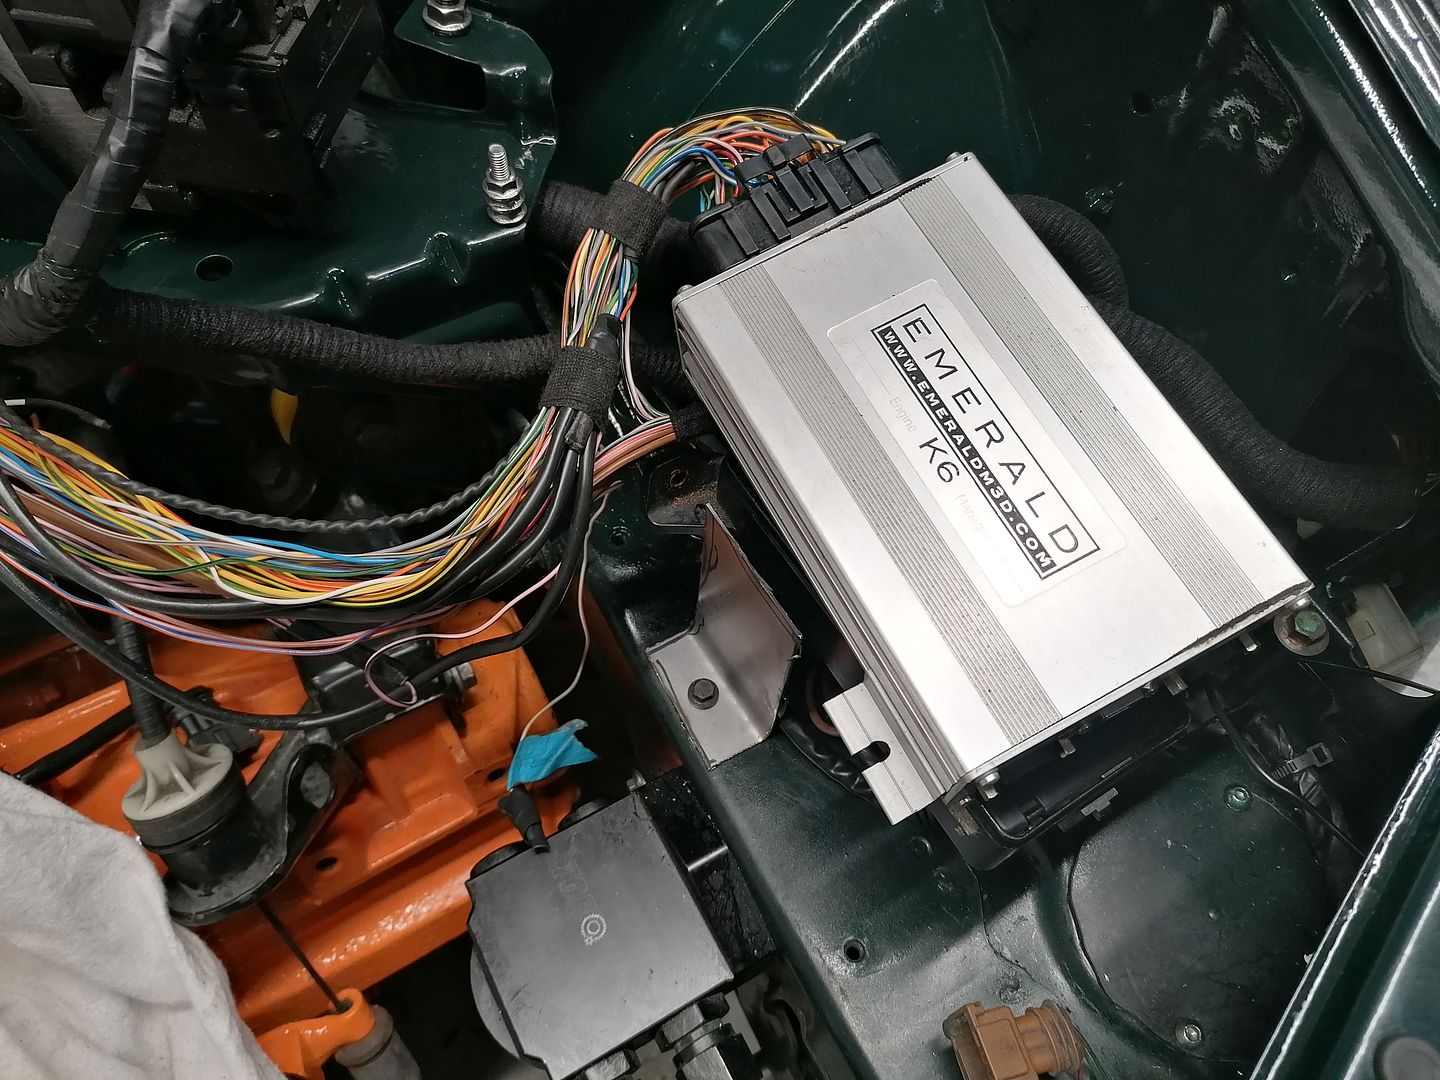
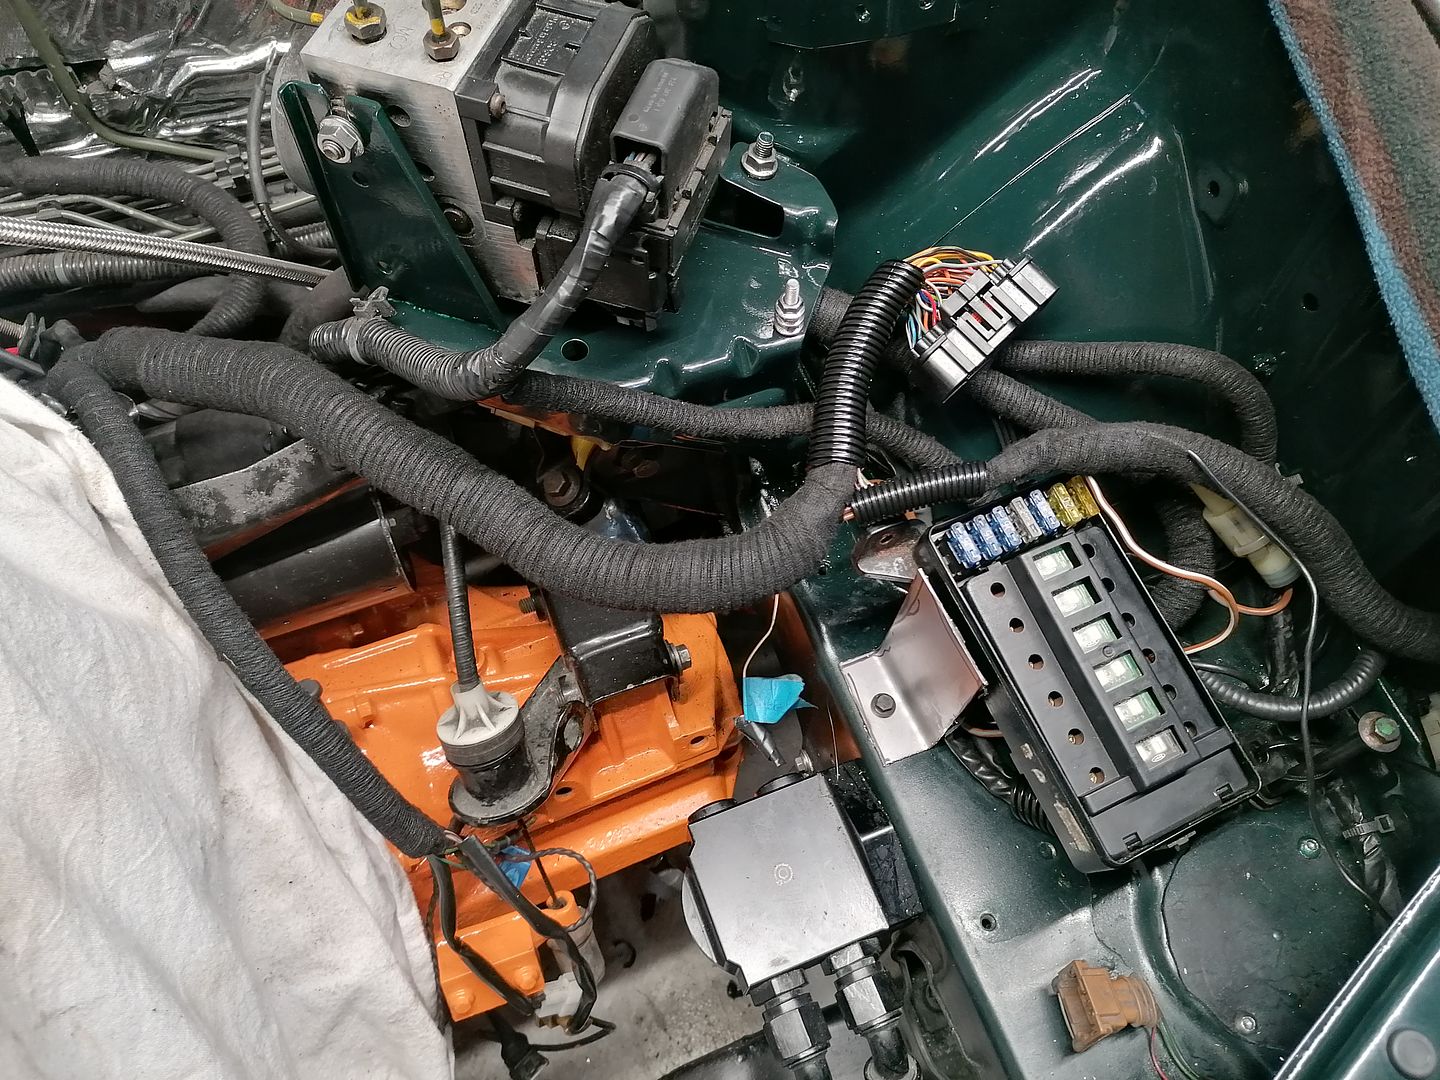
Breaking out the looms to see what I'm working with.
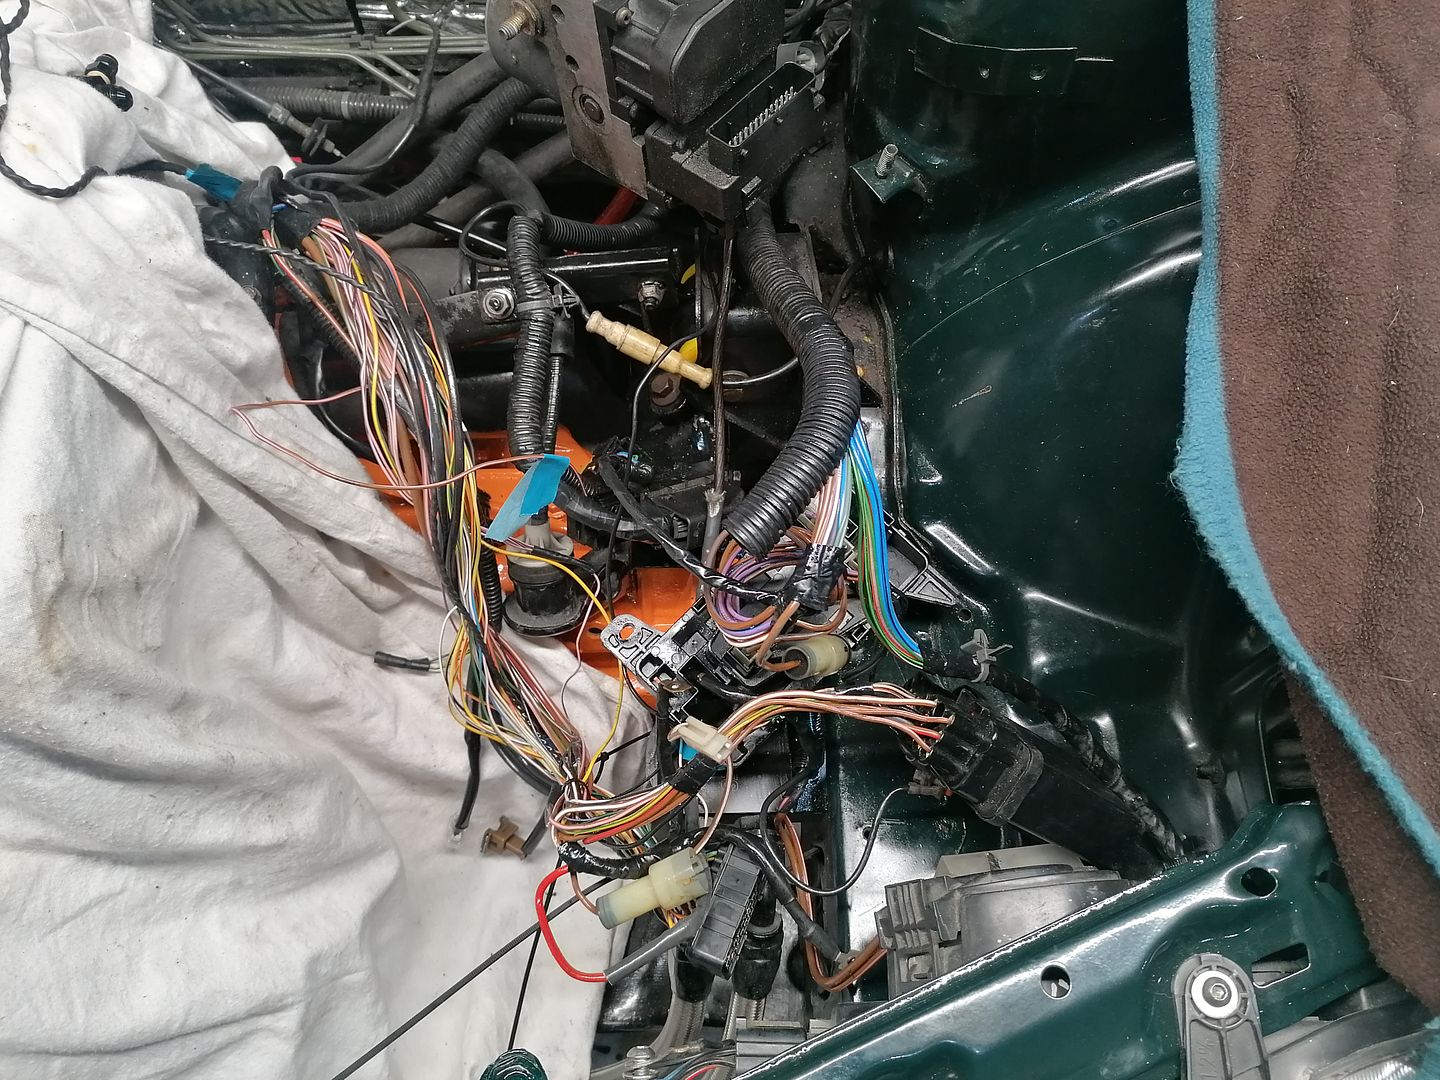
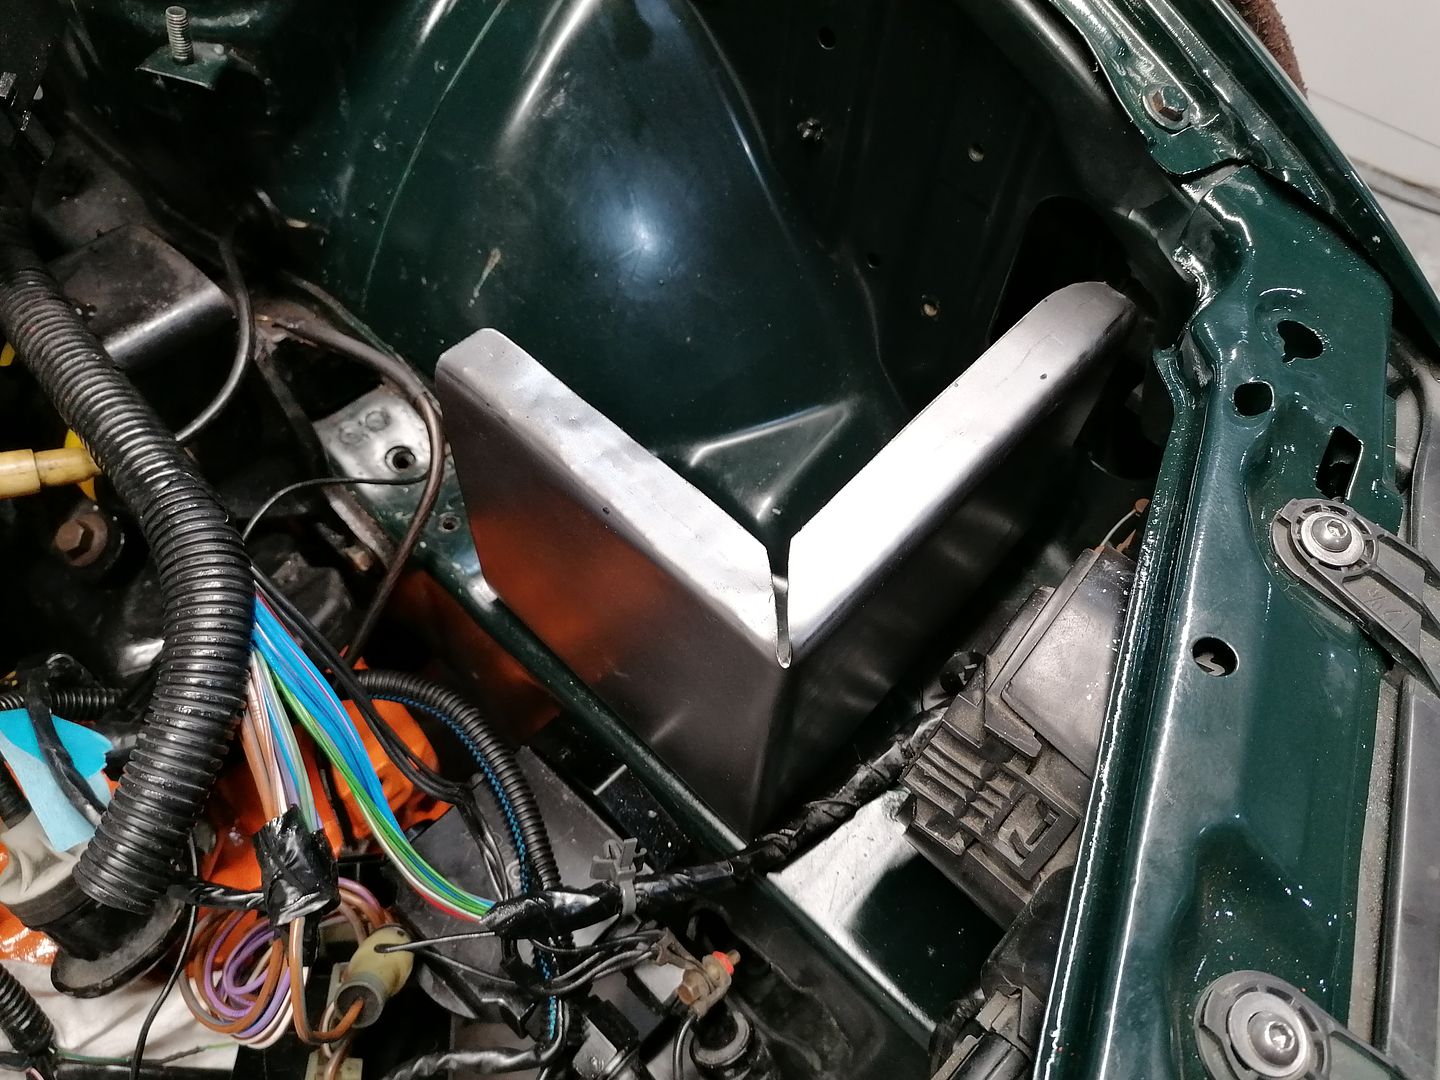
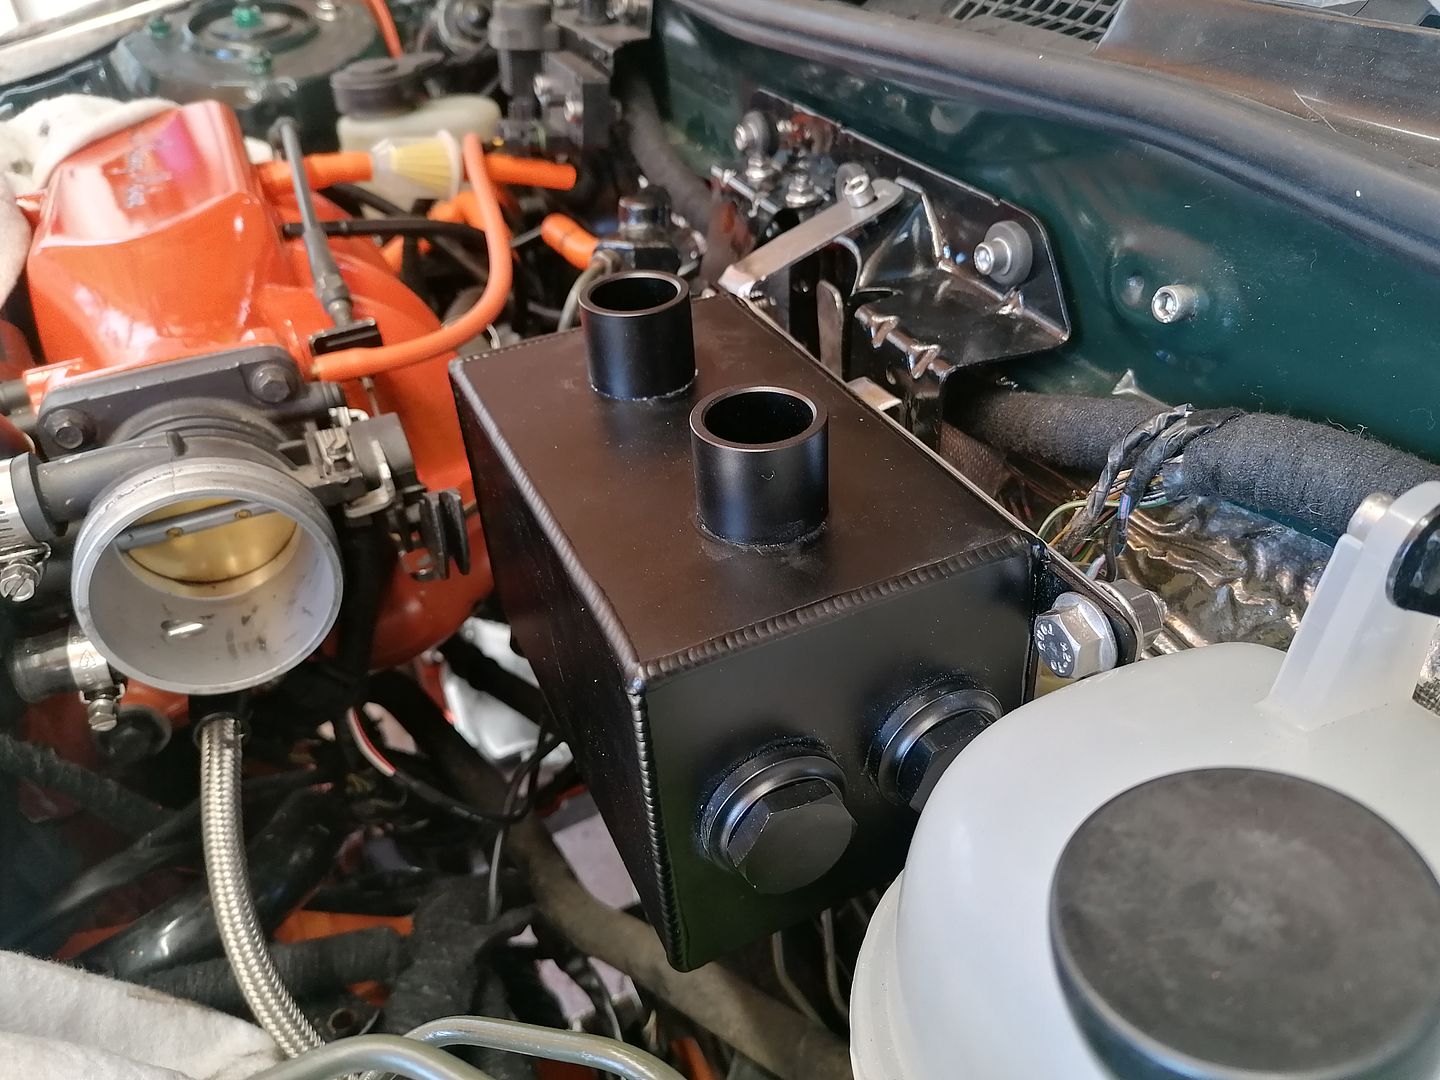
Building something to hide all the wiring and house the emerald.
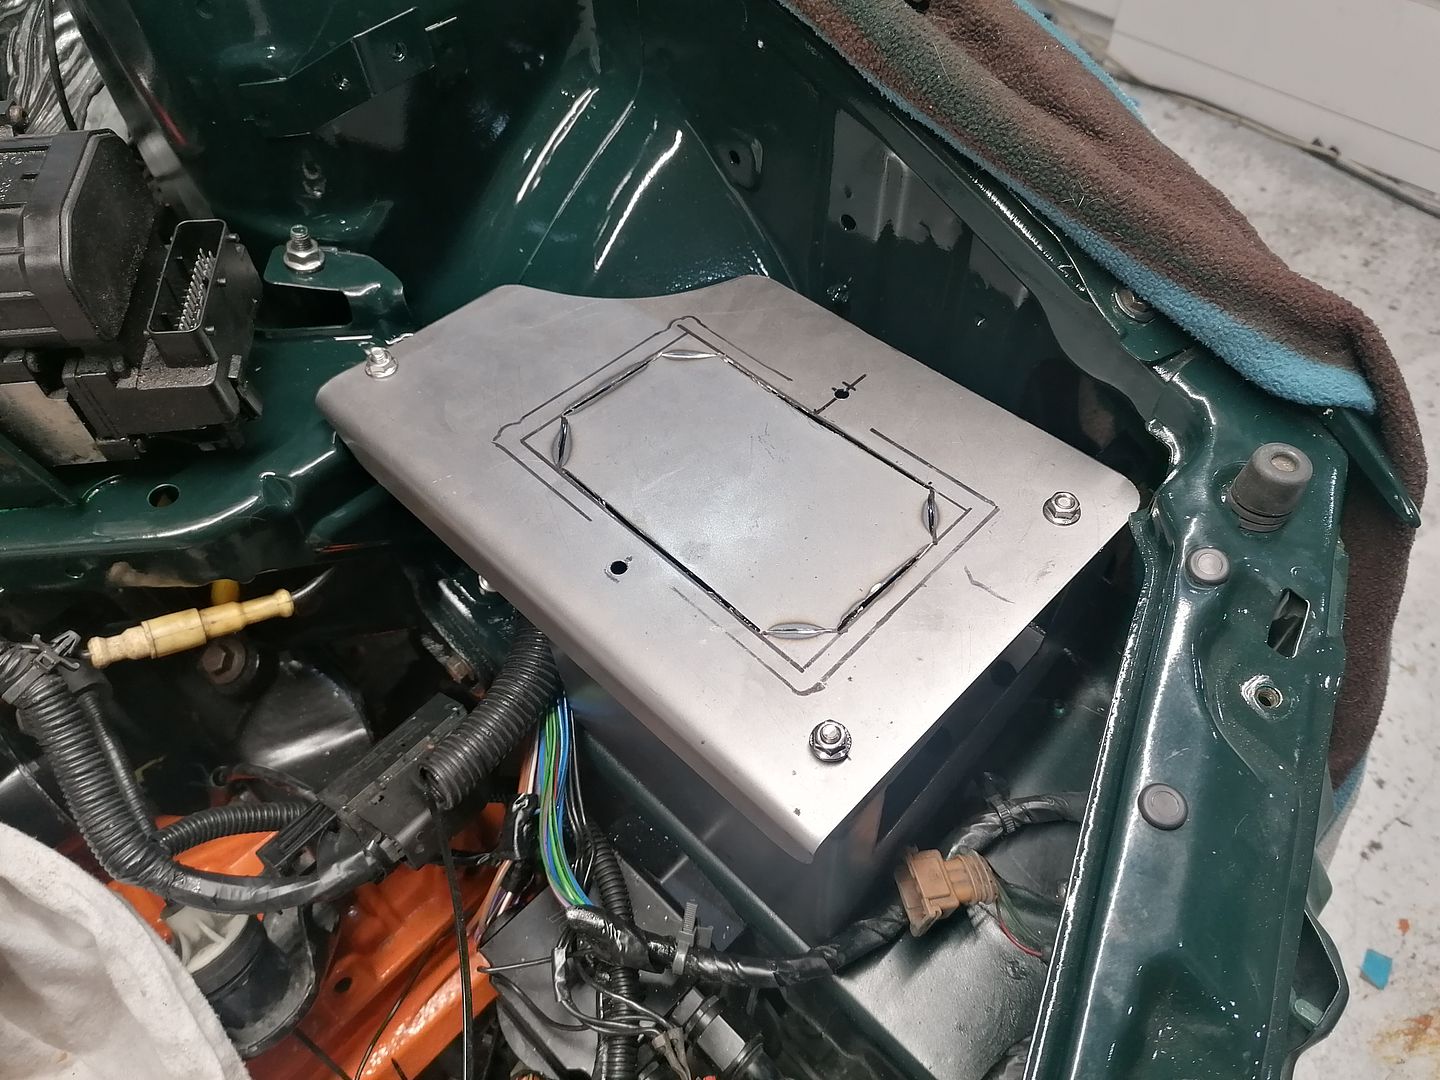
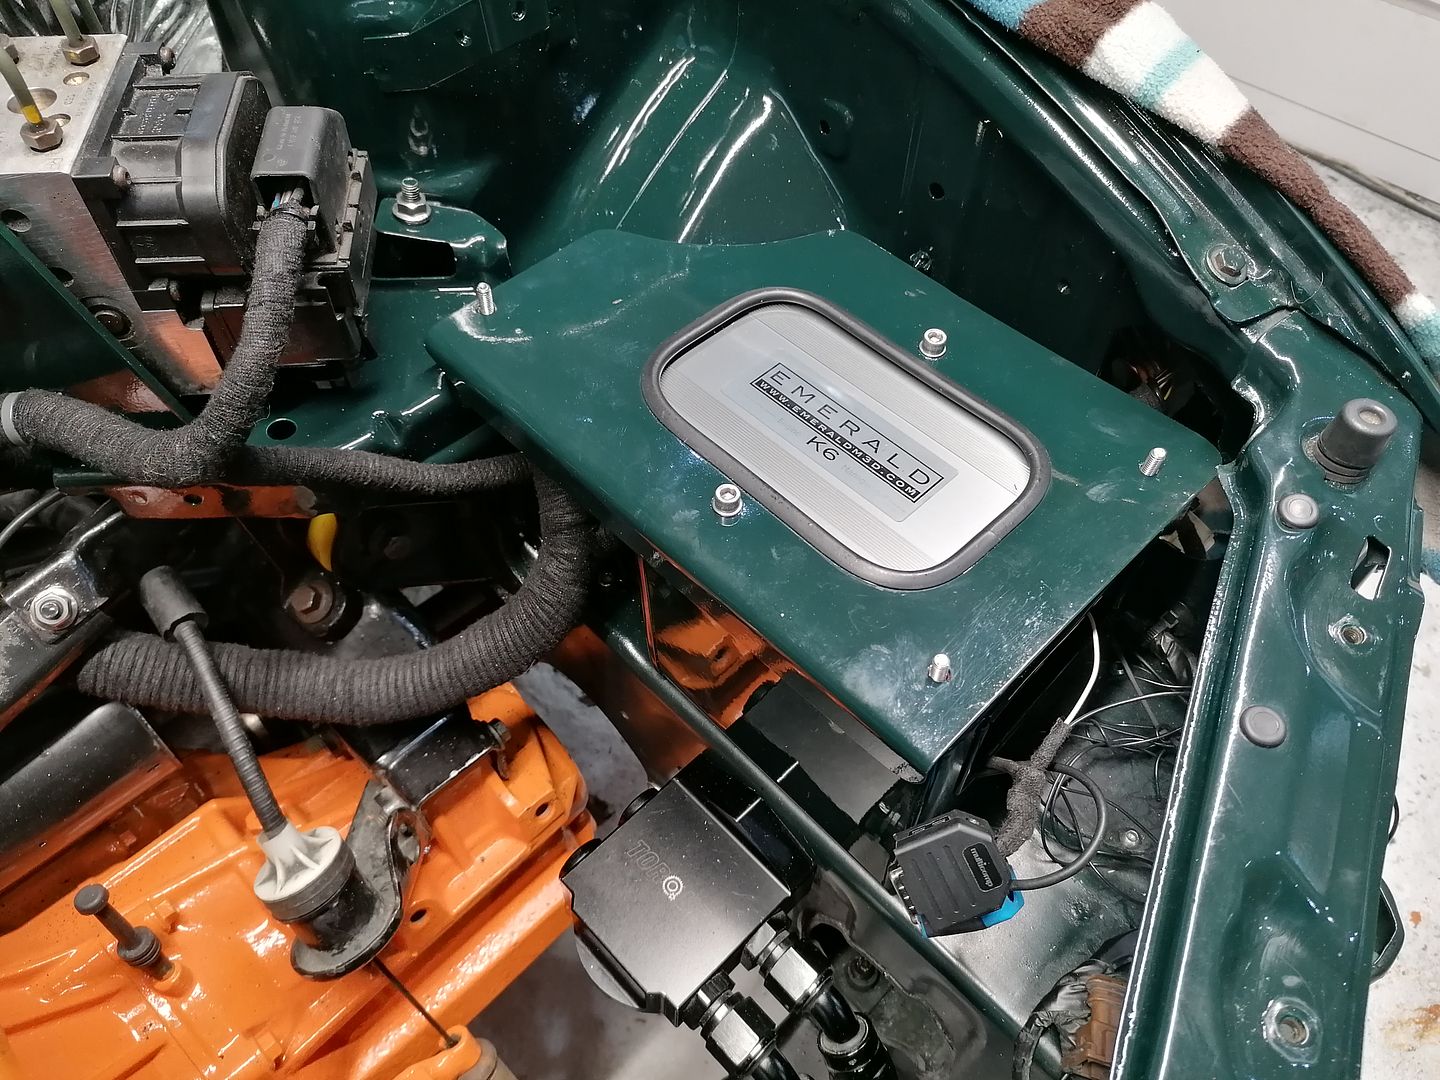
Thought it would be smart to display the emerald so made a cutout:
Wiring coming together
And done. Very pleased with the end result. The emerald is fixed to the underside of the top piece and that whole piece is held on with wing nuts so I can still get to the fuses.
While doing this I also integrated wiring for the speed signal so I can have boost by gear, and a clutch switch so I can play with flat foot shifting.
On the subject of boost, I upgraded my internal wastegate to a dual-port turbosmart unit. Apparently this can be controlled with a 4-port MAC boost control solenoid in much the same way as you would control an external gate. As you probably know, controlling a wastegate like this allows you to apply pressure to the top and bottom of the wastegate to give you a greater range of boost control. With a conventional 3-port boost controller (manual or electronic) you can usually only run twice base actuator pressure. Since I want to run very low boost in 1st and 2nd gears (7-10psi) to aid traction, but still be able to get up to 25psi, the 3-port wouldn't have done the job. I've not found much online about internal wastegates being used like this, so it will be interesting to see if it works.
Currently working on all the pipework
Setup before. Bit untidy and was using the emerald adapter. Not pretty enough!

Breaking out the looms to see what I'm working with.

Building something to hide all the wiring and house the emerald.

Thought it would be smart to display the emerald so made a cutout:


Wiring coming together


And done. Very pleased with the end result. The emerald is fixed to the underside of the top piece and that whole piece is held on with wing nuts so I can still get to the fuses.

While doing this I also integrated wiring for the speed signal so I can have boost by gear, and a clutch switch so I can play with flat foot shifting.
On the subject of boost, I upgraded my internal wastegate to a dual-port turbosmart unit. Apparently this can be controlled with a 4-port MAC boost control solenoid in much the same way as you would control an external gate. As you probably know, controlling a wastegate like this allows you to apply pressure to the top and bottom of the wastegate to give you a greater range of boost control. With a conventional 3-port boost controller (manual or electronic) you can usually only run twice base actuator pressure. Since I want to run very low boost in 1st and 2nd gears (7-10psi) to aid traction, but still be able to get up to 25psi, the 3-port wouldn't have done the job. I've not found much online about internal wastegates being used like this, so it will be interesting to see if it works.
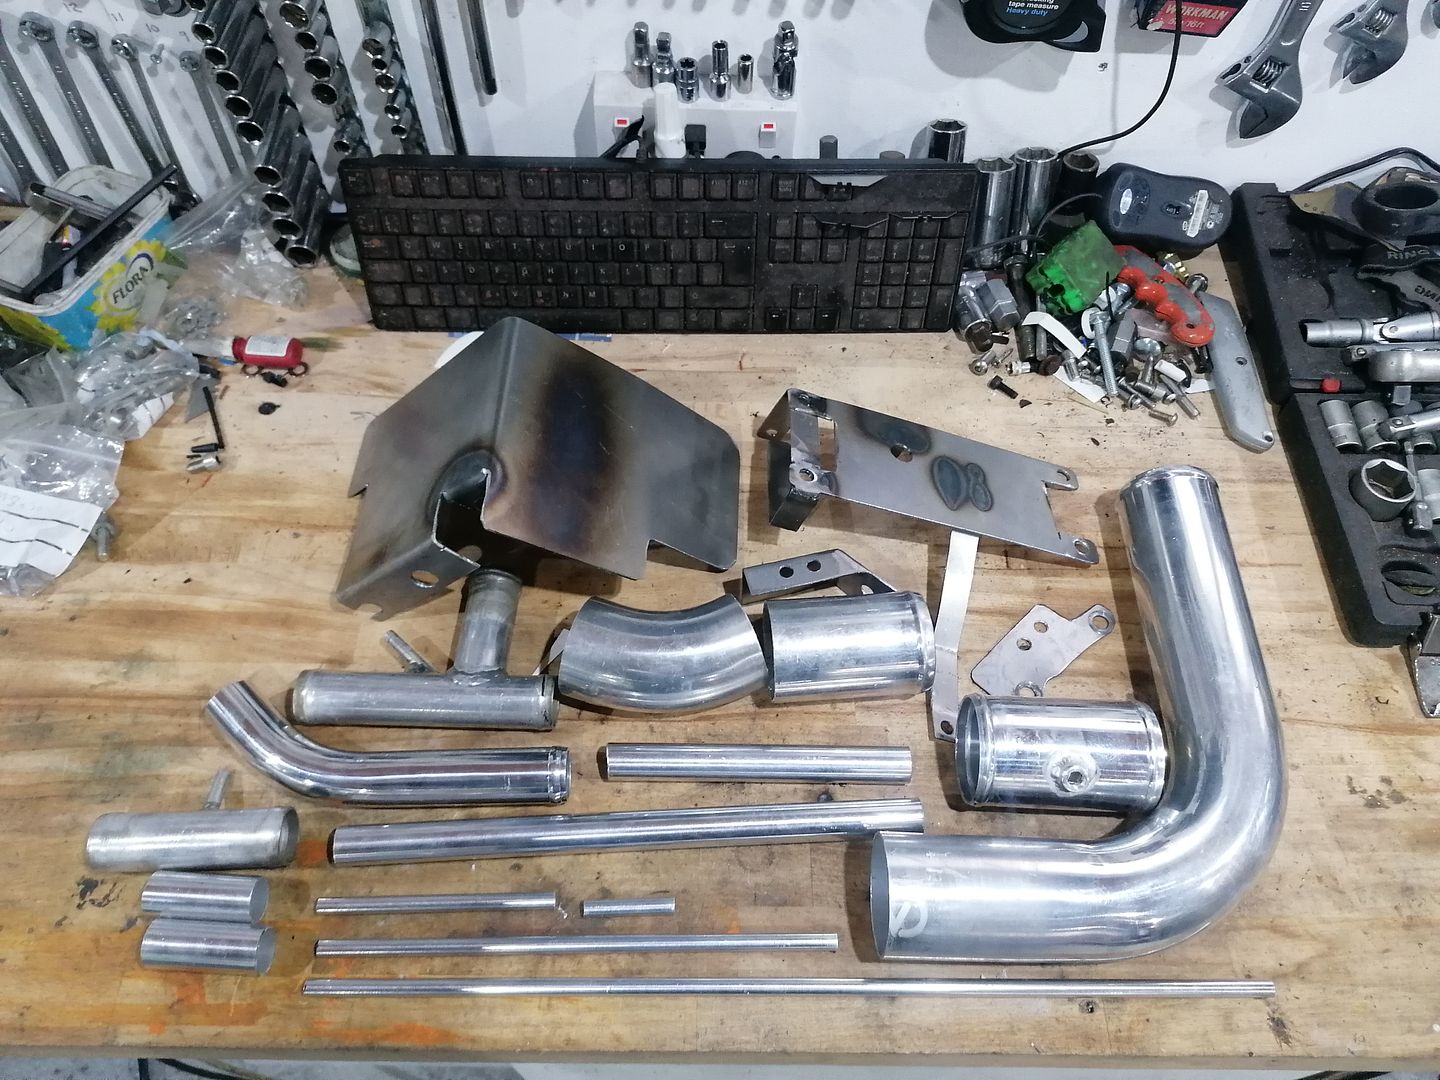
Currently working on all the pipework

mattdavies said:
Looking good.
Have yo umade any changes to the exhaust ? What size is the whole exhaust currently ?
Same exhaust it's had since first turbocharged. 3" downpipe into a 2.5" system after the flexi. Sporys cat, mid silencer and backbox.Have yo umade any changes to the exhaust ? What size is the whole exhaust currently ?
I'll be looking into making it less droney at some point, but that's a future tweak.
Shadow R1 said:
Great job on that wiring.
Thanks. Took forever! Lockdown has given me a bit of extra time to work on the BRM. Since mapping the new engine isn't going to happen for a while I thought I'd take my time and do a few things differently.
First up was sorting the crank ventilation. I opened up the cam breathers as they are tiny on the factory K-series and have AN10 lines running to a 2l catch can. If I pressurise the crankcase with this setup it'll only be from a catastrophic failure.

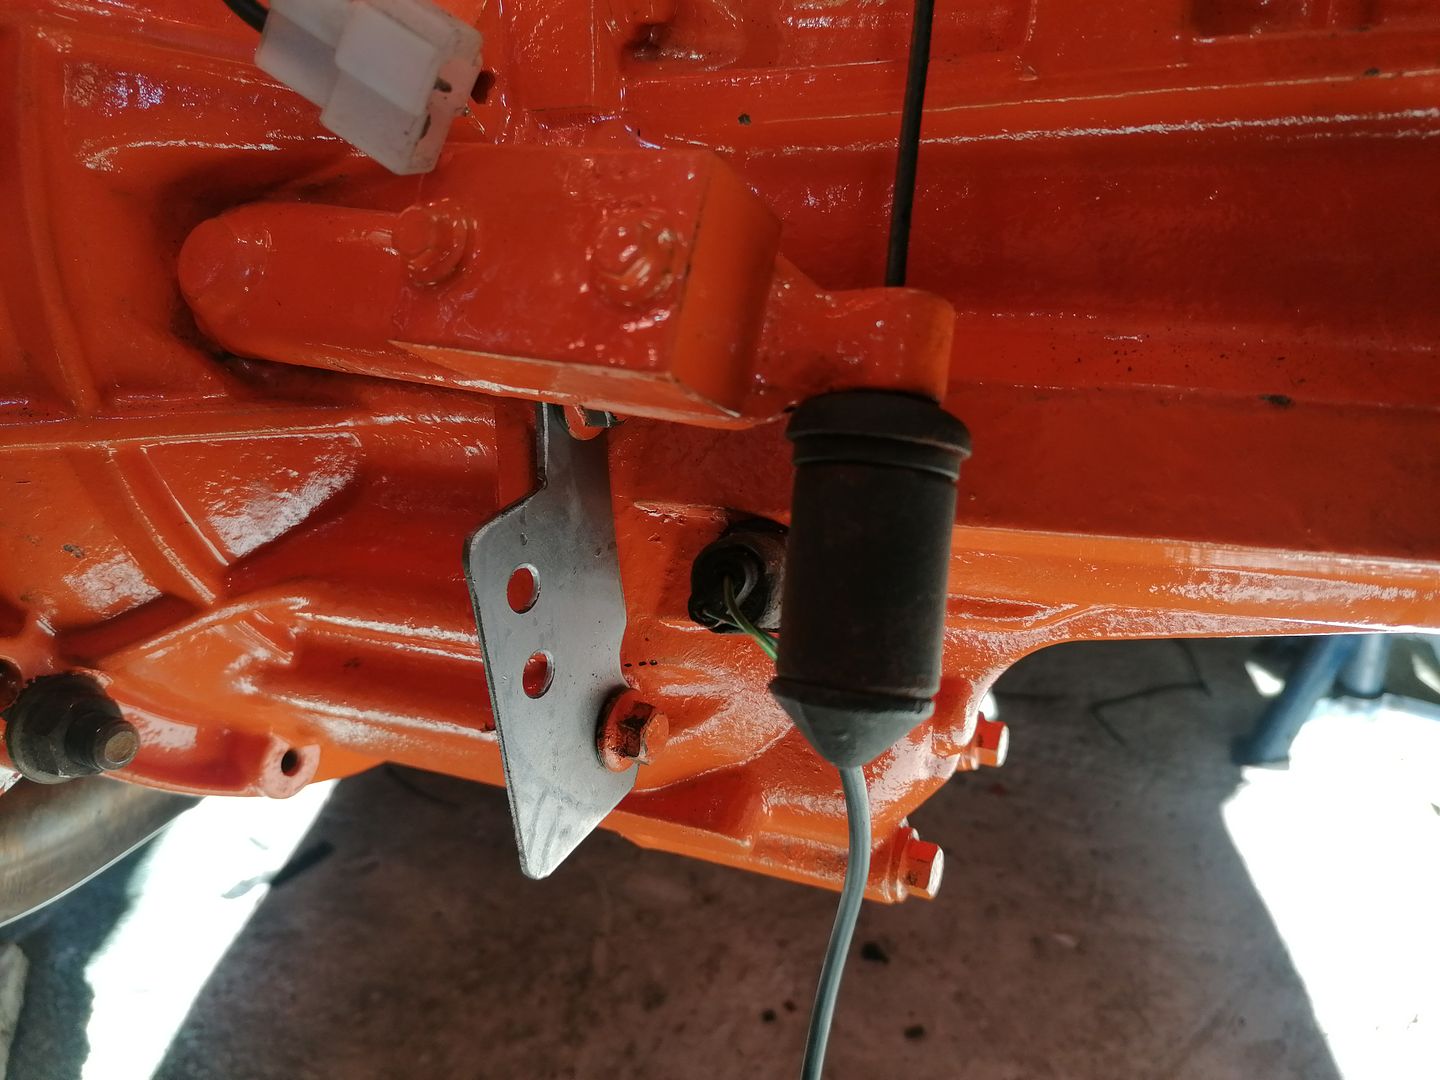
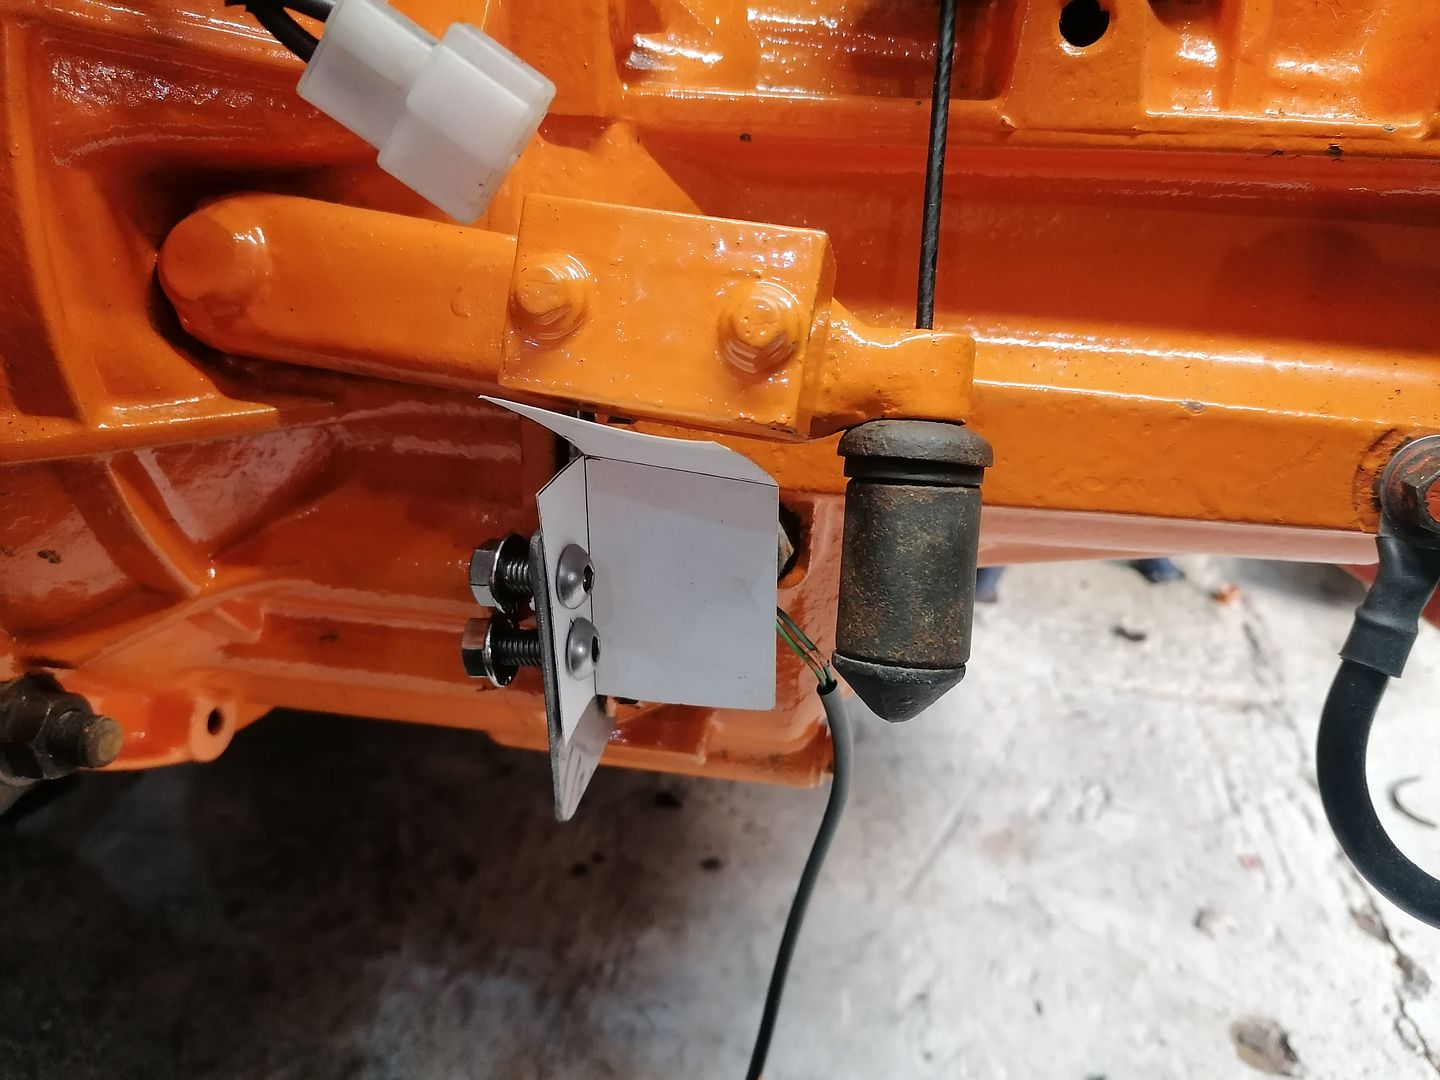
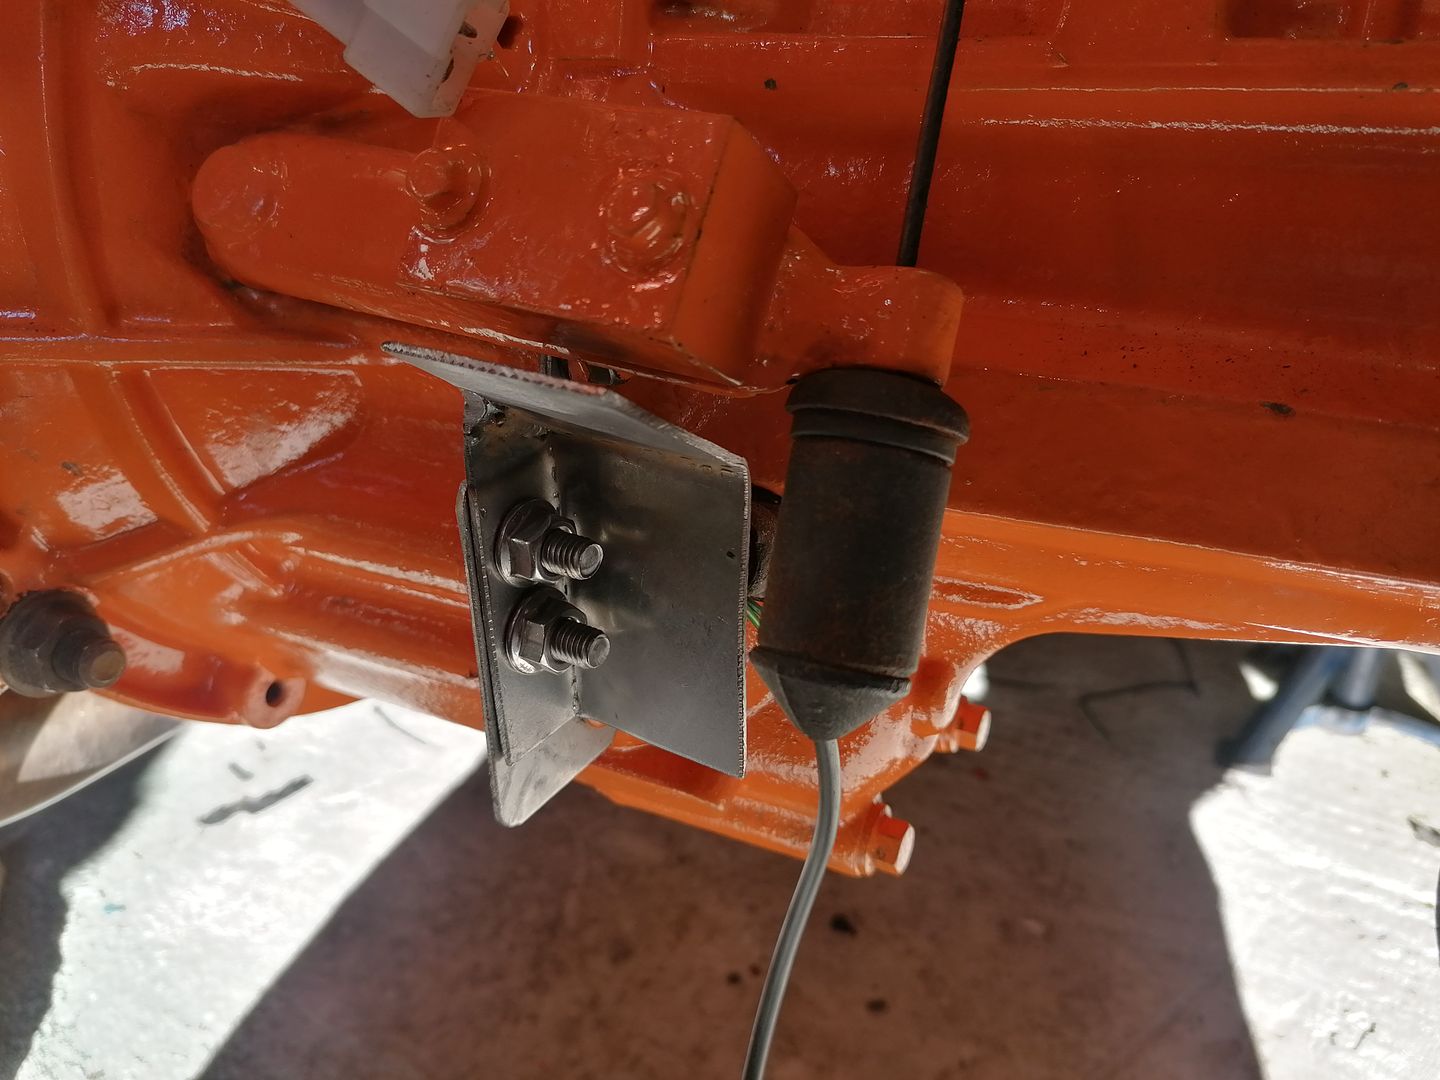
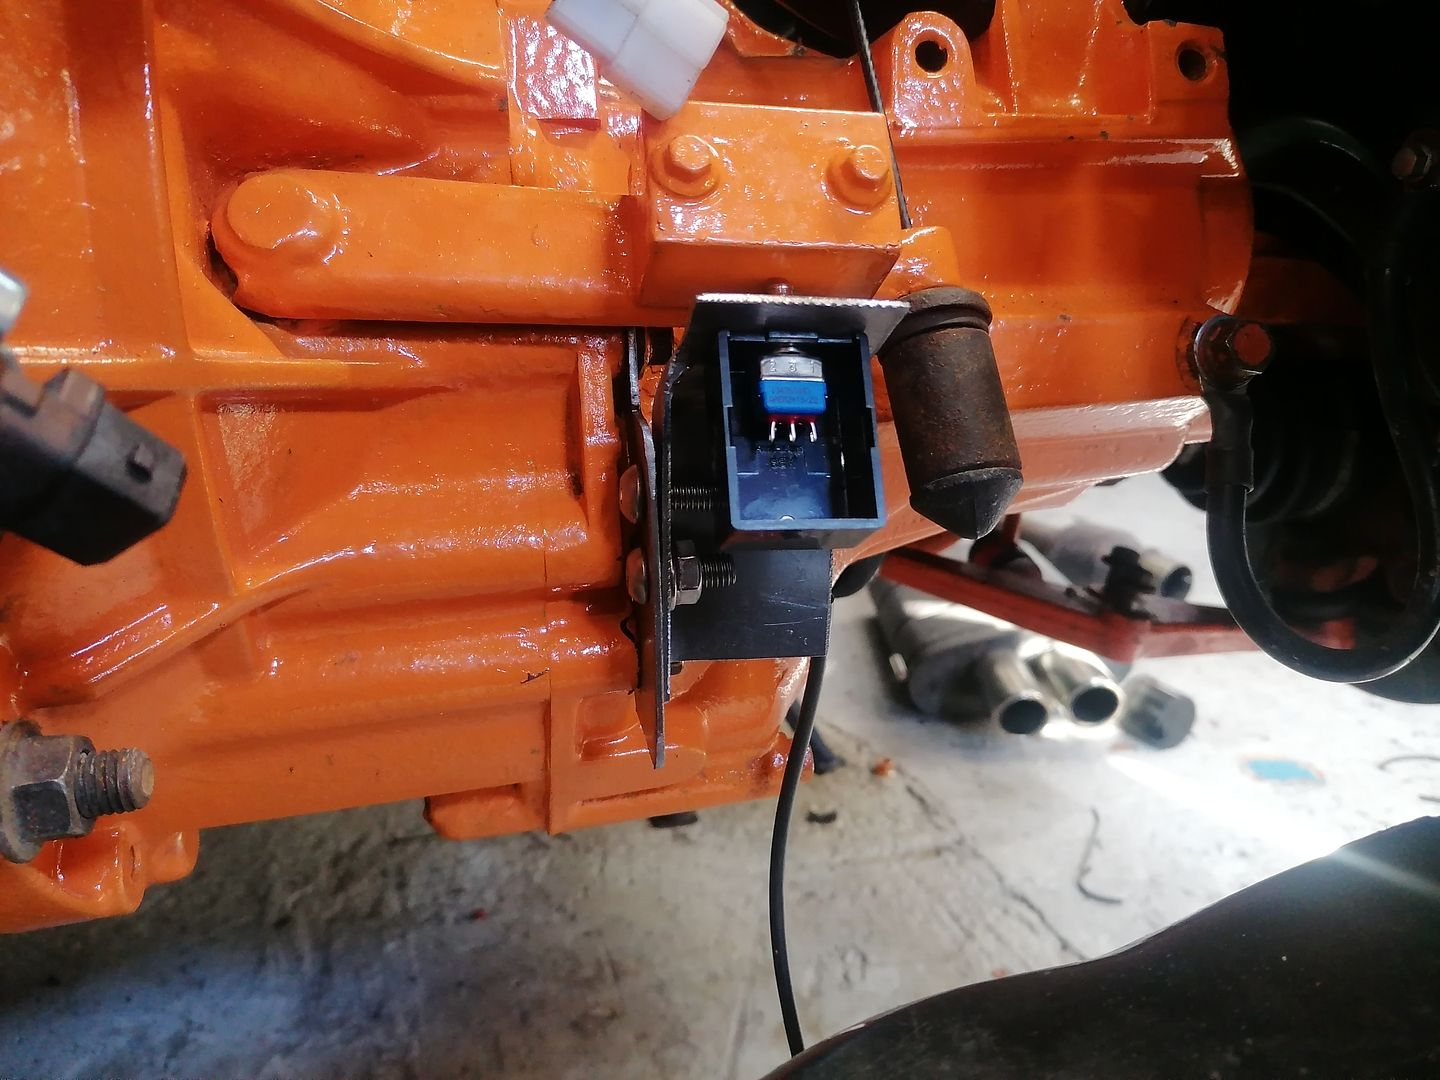
Next up was setting something up I'll probably never use, but might be useful for rare visits to the drag-strip - flat foot shifting. Basically when changing gear, leave the throttle pinned, and a switch on the clutch tells the Emerald to cut the ignition during gear changes. Apparently it can work with a regular h-pattern box. Some say it's only really for sequential boxes. Others say you need a dog box. I'm aware it can cause clutch damage but it's only for occasional use, if it even works. Just thought it would be a bit of fun. My car doesn't have a clutch switch so had to fit one. A quick look in the footwell confirmed it would be easier to do at the gearbox end, especially as the engine bay is still not together.
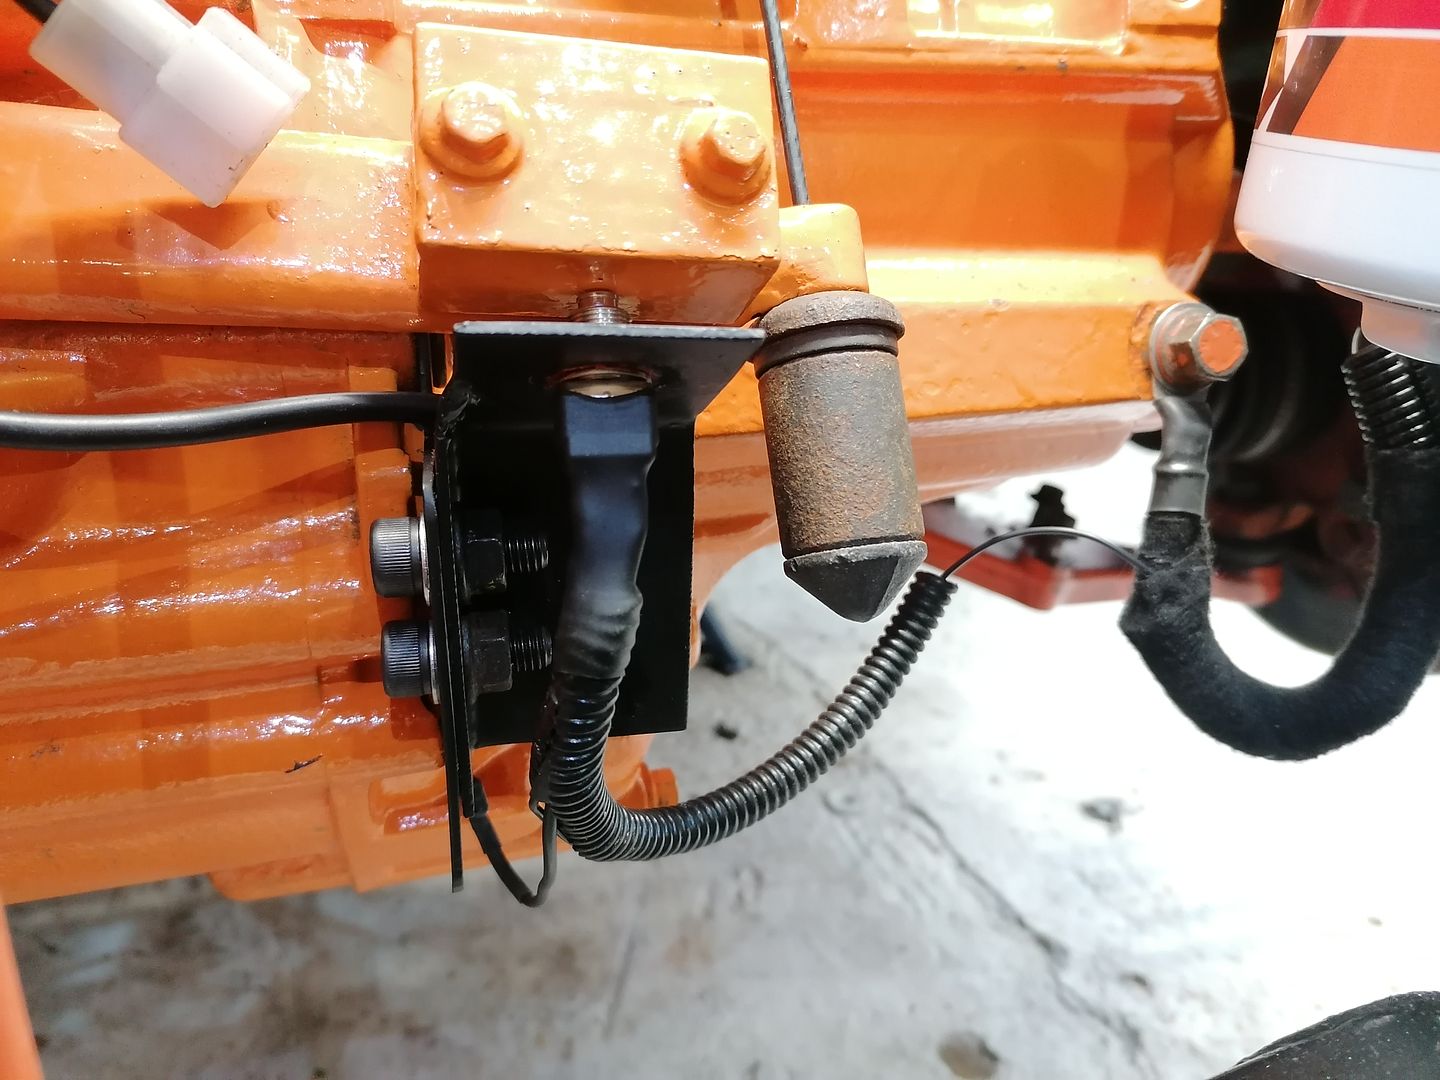
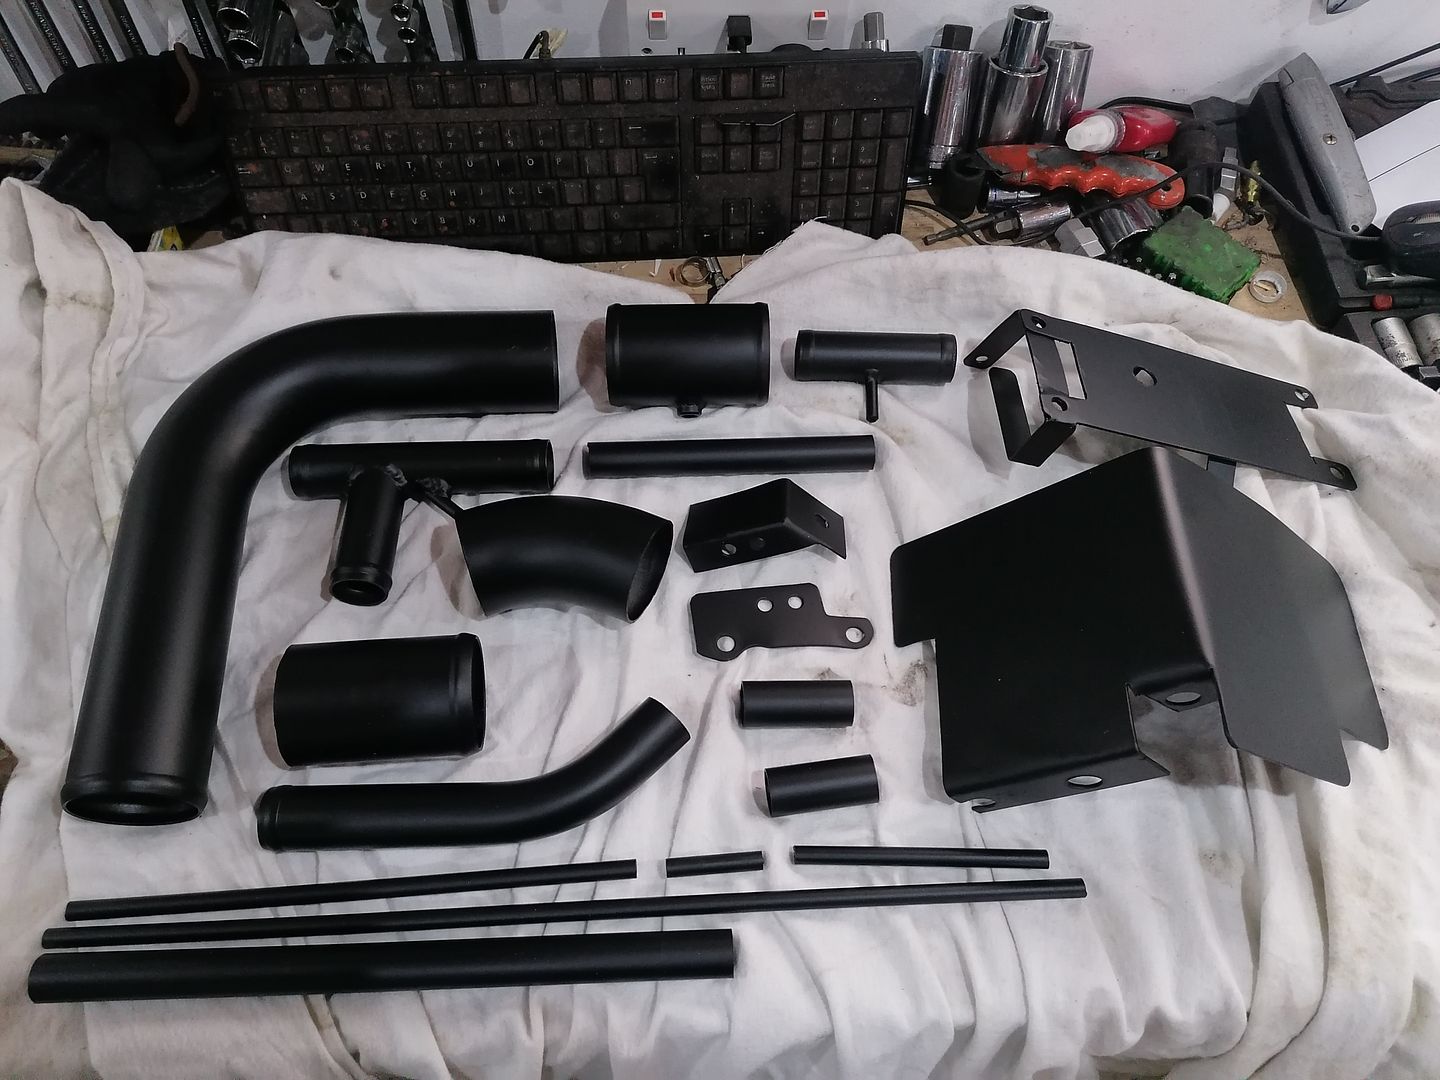
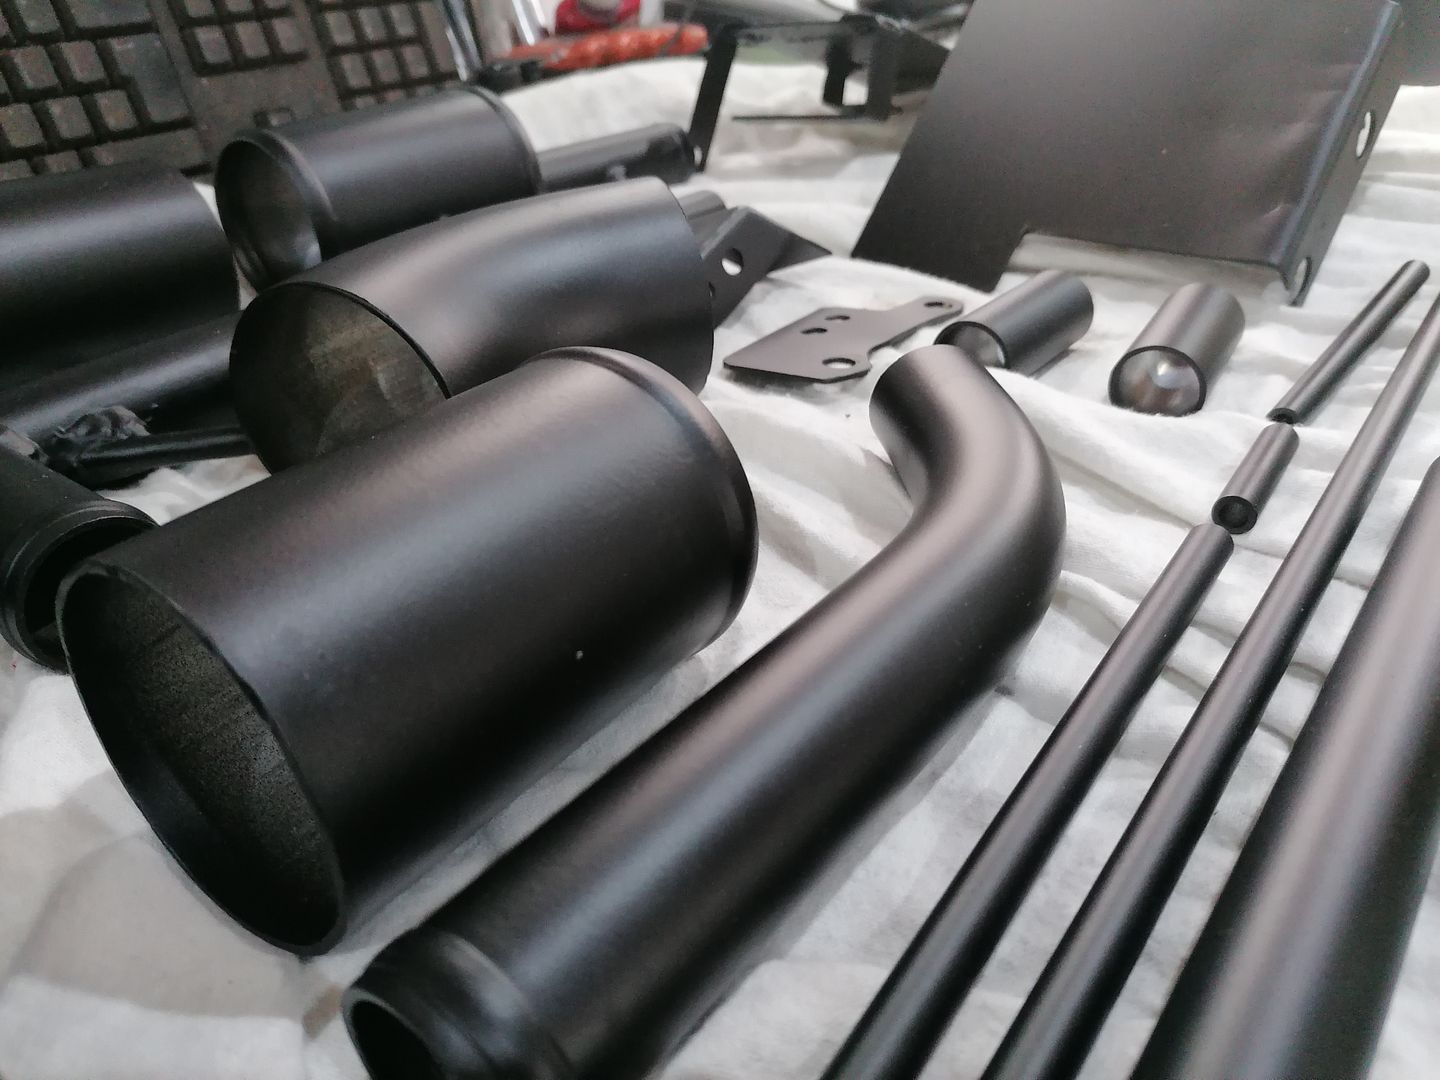
Finally, I decided to redo all the coolant and intake pipework in orange silicone. Also had all the pipework powder coated black. Had some other bits done at the same time including the clutch switch bracket and new alternator heat shield I knocked up. Very pleased with the outcome.
I've also fitted a new zeitronix wideband as the plx has been playing up a bit. The 5v signal from the zeitronix now goes to the Emerald, but I've kept the plx in place as a standalone since it works most of the time and I have a spare bung. Thought it could be a handy backup. Just need to finish b the install inside the car.
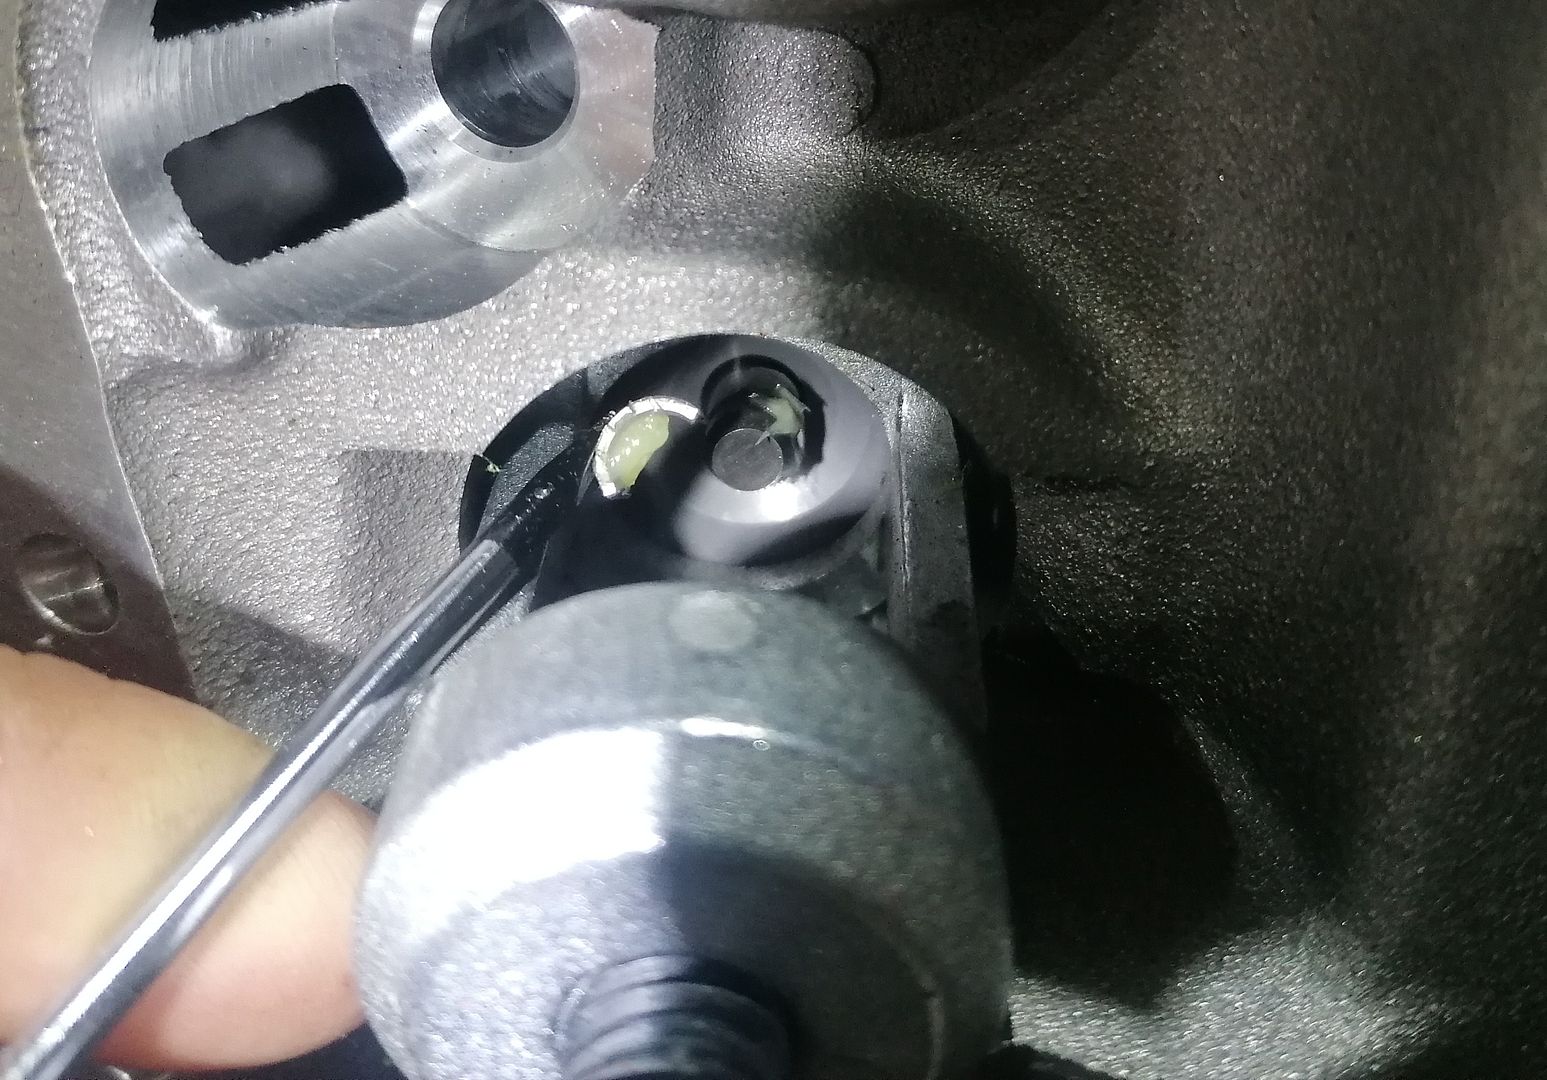
Thought it would be a good idea to get her cranking over to check I have oil pressure. It was taking longer than I was comfortable with for the light to go out so I whipped off the remote oil filter lines and primed them. Also rewired my gauges so they stay on during cranking and I could check the actual pressure rather than reply on the 15psi oil switch. Happy to report she made good pressure at cranking speed.
So all that's left to do now is fit the radiator, fill with coolant, and start her up.
First up was sorting the crank ventilation. I opened up the cam breathers as they are tiny on the factory K-series and have AN10 lines running to a 2l catch can. If I pressurise the crankcase with this setup it'll only be from a catastrophic failure.


Next up was setting something up I'll probably never use, but might be useful for rare visits to the drag-strip - flat foot shifting. Basically when changing gear, leave the throttle pinned, and a switch on the clutch tells the Emerald to cut the ignition during gear changes. Apparently it can work with a regular h-pattern box. Some say it's only really for sequential boxes. Others say you need a dog box. I'm aware it can cause clutch damage but it's only for occasional use, if it even works. Just thought it would be a bit of fun. My car doesn't have a clutch switch so had to fit one. A quick look in the footwell confirmed it would be easier to do at the gearbox end, especially as the engine bay is still not together.


Finally, I decided to redo all the coolant and intake pipework in orange silicone. Also had all the pipework powder coated black. Had some other bits done at the same time including the clutch switch bracket and new alternator heat shield I knocked up. Very pleased with the outcome.


I've also fitted a new zeitronix wideband as the plx has been playing up a bit. The 5v signal from the zeitronix now goes to the Emerald, but I've kept the plx in place as a standalone since it works most of the time and I have a spare bung. Thought it could be a handy backup. Just need to finish b the install inside the car.
Thought it would be a good idea to get her cranking over to check I have oil pressure. It was taking longer than I was comfortable with for the light to go out so I whipped off the remote oil filter lines and primed them. Also rewired my gauges so they stay on during cranking and I could check the actual pressure rather than reply on the 15psi oil switch. Happy to report she made good pressure at cranking speed.
So all that's left to do now is fit the radiator, fill with coolant, and start her up.


Vickers_VC10 said:
It's been a while since I've read this thread, so apologies, but what are you expecting this engine to produce, horsepower wise once it has been remapped?
This turbo would probably be good for 400bhp. However I still have the 660cc injectors on standard 3 bar fuel pressure so they might max out before the turbo does. The Borg & Beck clutch is a potentially limiting factor - they supposedly cope with 300lbft, but we shall see. I didn't want to change it for something harsher as its so nice to drive. I can change it later if I need to, or just limit the torque. Realistically, I'll be happy with 350bhp on high boost. It'll be hard enough to drive at that power I expect!RumbleOfThunder said:
Regarding the flat shifter, if it's liable to hammer the clutch and will only to be used sparingly, would it not be best to just flat shift? 
Perhaps. I just wanted to get it working for the hell of it. Didn't get around to starting today. I'm converting to Evans waterless coolant and 5l prep fluid wasn't enough to fill up. Doh! So it'll have to wait for now. She's literally ready to turn the key now. I put together a base map for the Emerald based off previous builds and had my buddy (who designed these Omega pistons) look it over and make a few tweeks.
Gassing Station | Readers' Cars | Top of Page | What's New | My Stuff