Rover 200 BRM - 1.8 K-Series turbo project
Discussion


for comparison:
here is how my spark plugs looked like after the track day in Spa:
 kostenlos bilder hochladen
nice and brown
here is how my spark plugs looked like after the track day in Spa:
kostenlos bilder hochladennice and brown
I also have a turbo k series it's an Elise fitted with a remote rear exhaust fitted turbo
( I got squish by accident ( ( I wanted shorter rods ) )
I do run squish at 47 thou max cold I expect it will be tighter as the piston expands , my Pistons I had custom built , they now run proud of the liner and my squish is with the thickest gasket I could find.
I did read either go for squish or don't as too little is worse than none ?
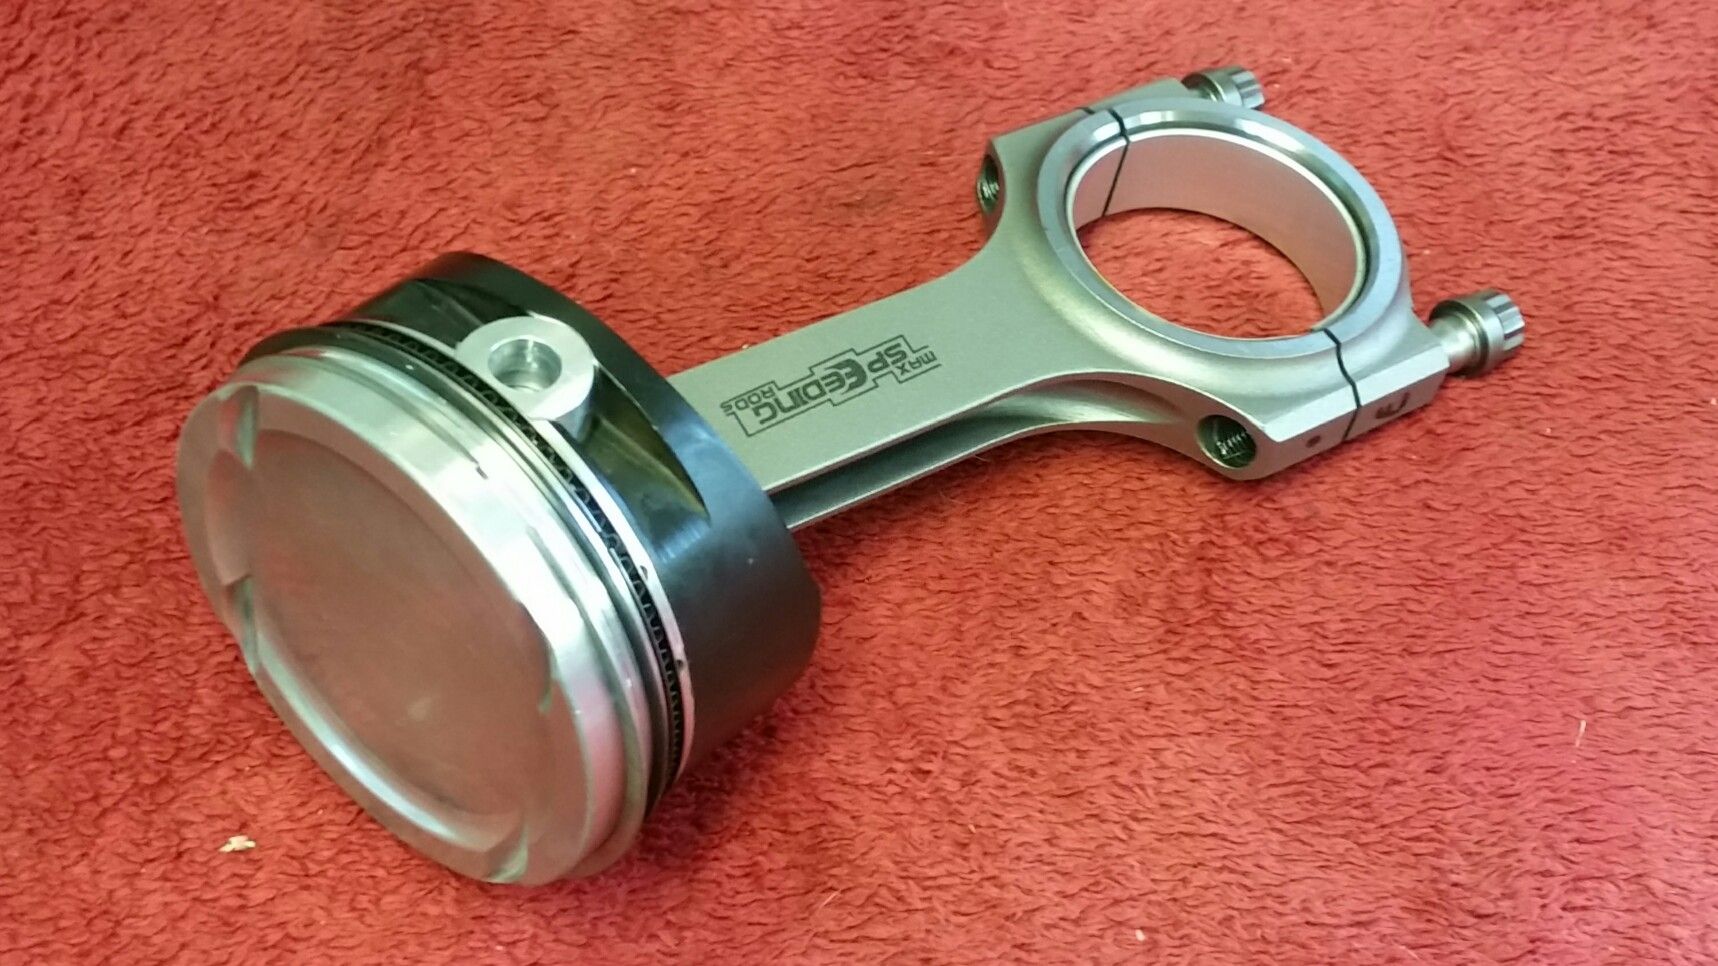
The billet rods are also drilled so I have forced oiling beneath the piston
The problem with the k series is it was designed as a 1.1 / 1.4 and later on stretched to a 1.6 / 1.8 hence the piston ring lands are on the thin side , because of the high ( thin ) piston pin there is not a lot to play with either ,dish the bowl too much and it's crown becomes too weak
I am on the limit I would use as if I use a thinner gasket to gain more squish I also raise the comp ratio and diminish valve to piston clearance , the piston is dished as much as I dare take it
It runs a high c/ r low boost with out issue and revs like an n/ a on steroids I have a charge cooler and an air intercooler but don't require the intercooler it was built with belt and braces lol
The only thing I should do is raise its boost as I feel being only 0.5 the turbo is not into its efficiency band
( I got squish by accident ( ( I wanted shorter rods ) )
I do run squish at 47 thou max cold I expect it will be tighter as the piston expands , my Pistons I had custom built , they now run proud of the liner and my squish is with the thickest gasket I could find.
I did read either go for squish or don't as too little is worse than none ?
The billet rods are also drilled so I have forced oiling beneath the piston
The problem with the k series is it was designed as a 1.1 / 1.4 and later on stretched to a 1.6 / 1.8 hence the piston ring lands are on the thin side , because of the high ( thin ) piston pin there is not a lot to play with either ,dish the bowl too much and it's crown becomes too weak
I am on the limit I would use as if I use a thinner gasket to gain more squish I also raise the comp ratio and diminish valve to piston clearance , the piston is dished as much as I dare take it
It runs a high c/ r low boost with out issue and revs like an n/ a on steroids I have a charge cooler and an air intercooler but don't require the intercooler it was built with belt and braces lol
The only thing I should do is raise its boost as I feel being only 0.5 the turbo is not into its efficiency band
hiscot said:
I also have a turbo k series it's an Elise fitted with a remote rear exhaust fitted turbo
( I got squish by accident ( ( I wanted shorter rods ) )
I do run squish at 47 thou max cold I expect it will be tighter as the piston expands , my Pistons I had custom built , they now run proud of the liner and my squish is with the thickest gasket I could find.
I did read either go for squish or don't as too little is worse than none ?
The billet rods are also drilled so I have forced oiling beneath the piston
The problem with the k series is it was designed as a 1.1 / 1.4 and later on stretched to a 1.6 / 1.8 hence the piston ring lands are on the thin side , because of the high ( thin ) piston pin there is not a lot to play with either ,dish the bowl too much and it's crown becomes too weak
I am on the limit I would use as if I use a thinner gasket to gain more squish I also raise the comp ratio and diminish valve to piston clearance , the piston is dished as much as I dare take it
It runs a high c/ r low boost with out issue and revs like an n/ a on steroids I have a charge cooler and an air intercooler but don't require the intercooler it was built with belt and braces lol
The only thing I should do is raise its boost as I feel being only 0.5 the turbo is not into its efficiency band
Interesting stuff! What turbo are you running? ( I got squish by accident ( ( I wanted shorter rods ) )
I do run squish at 47 thou max cold I expect it will be tighter as the piston expands , my Pistons I had custom built , they now run proud of the liner and my squish is with the thickest gasket I could find.
I did read either go for squish or don't as too little is worse than none ?
The billet rods are also drilled so I have forced oiling beneath the piston
The problem with the k series is it was designed as a 1.1 / 1.4 and later on stretched to a 1.6 / 1.8 hence the piston ring lands are on the thin side , because of the high ( thin ) piston pin there is not a lot to play with either ,dish the bowl too much and it's crown becomes too weak
I am on the limit I would use as if I use a thinner gasket to gain more squish I also raise the comp ratio and diminish valve to piston clearance , the piston is dished as much as I dare take it
It runs a high c/ r low boost with out issue and revs like an n/ a on steroids I have a charge cooler and an air intercooler but don't require the intercooler it was built with belt and braces lol
The only thing I should do is raise its boost as I feel being only 0.5 the turbo is not into its efficiency band
Sounds like a beast. What engine management are you running and who mapped it for you?
The evolution of the k-series is interesting and I've often wondered if a 1.4/1.6 crank with 1.8 rods and custom pistons would have been the better option. 79mm stroke (vs 89.3mm for the 1.8). Maybe even use 82mm scholar block. That would give a capacity of 1669cc. Wonder if anyone has ever done that?
[quote=Stuballs]
Interesting stuff! What turbo are you running?
Sounds like a beast. What engine management are you running and who mapped it for you?
The evolution of the k-series is interesting and I've often wondered if a 1.4/1.6 crank with 1.8 rods and custom pistons would have been the better option. 79mm stroke (vs 89.3mm for the 1.8). Maybe even use 82mm scholar block. That would give a capacity of 1669cc. Wonder if anyone has ever done that?
[/quote
Gt2854
Datafast s60
Jdm dyno
Stuballs said:
Interesting stuff! What turbo are you running?
Sounds like a beast. What engine management are you running and who mapped it for you?
The evolution of the k-series is interesting and I've often wondered if a 1.4/1.6 crank with 1.8 rods and custom pistons would have been the better option. 79mm stroke (vs 89.3mm for the 1.8). Maybe even use 82mm scholar block. That would give a capacity of 1669cc. Wonder if anyone has ever done that?
Zastec in Poland did something similar to that back in 2007Sounds like a beast. What engine management are you running and who mapped it for you?
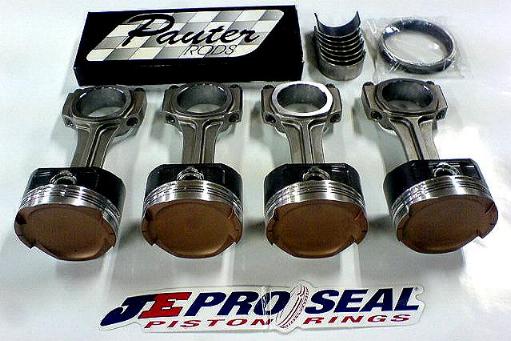
The evolution of the k-series is interesting and I've often wondered if a 1.4/1.6 crank with 1.8 rods and custom pistons would have been the better option. 79mm stroke (vs 89.3mm for the 1.8). Maybe even use 82mm scholar block. That would give a capacity of 1669cc. Wonder if anyone has ever done that?
1.4 crank, pauter rods and larger bore JE pistons to the capacity to 1548cc.
VVC head with 280 degree cams
was a drag car but still made 428bhp, lots of boost and water injection
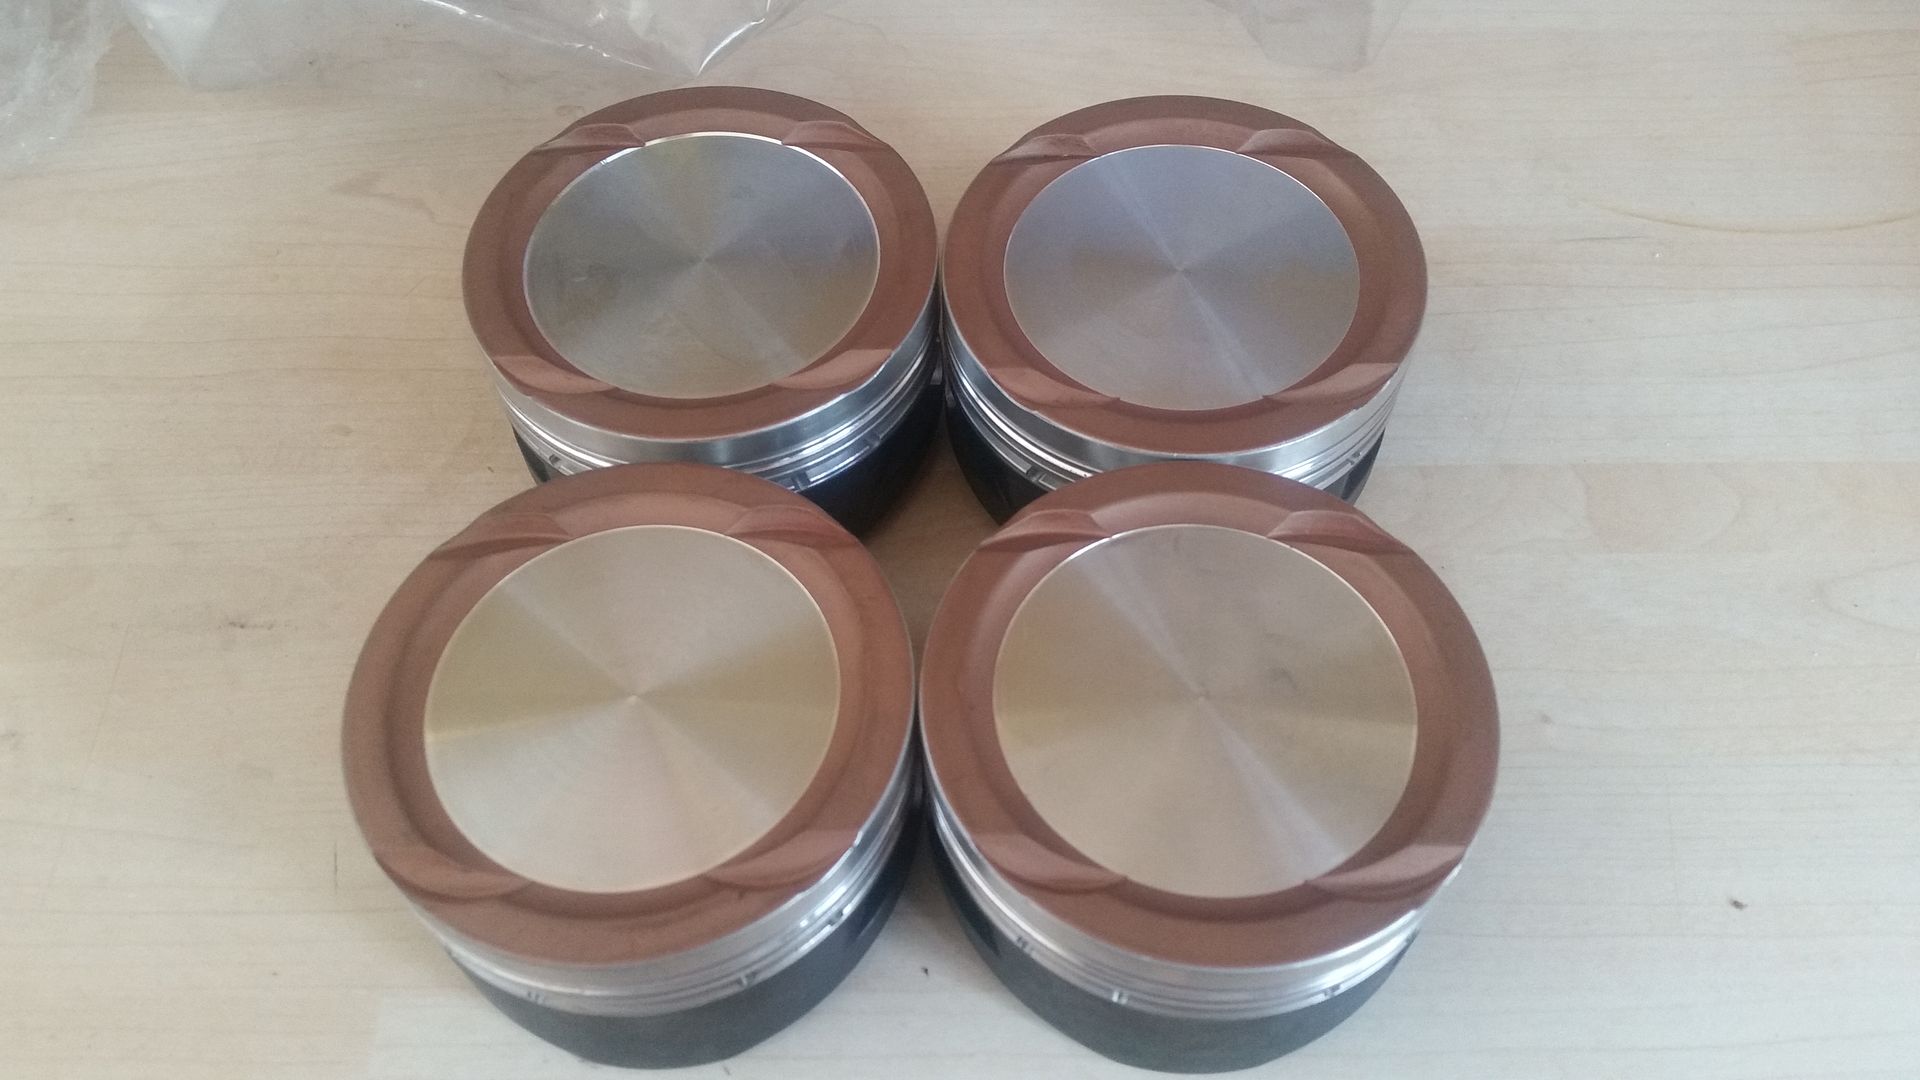
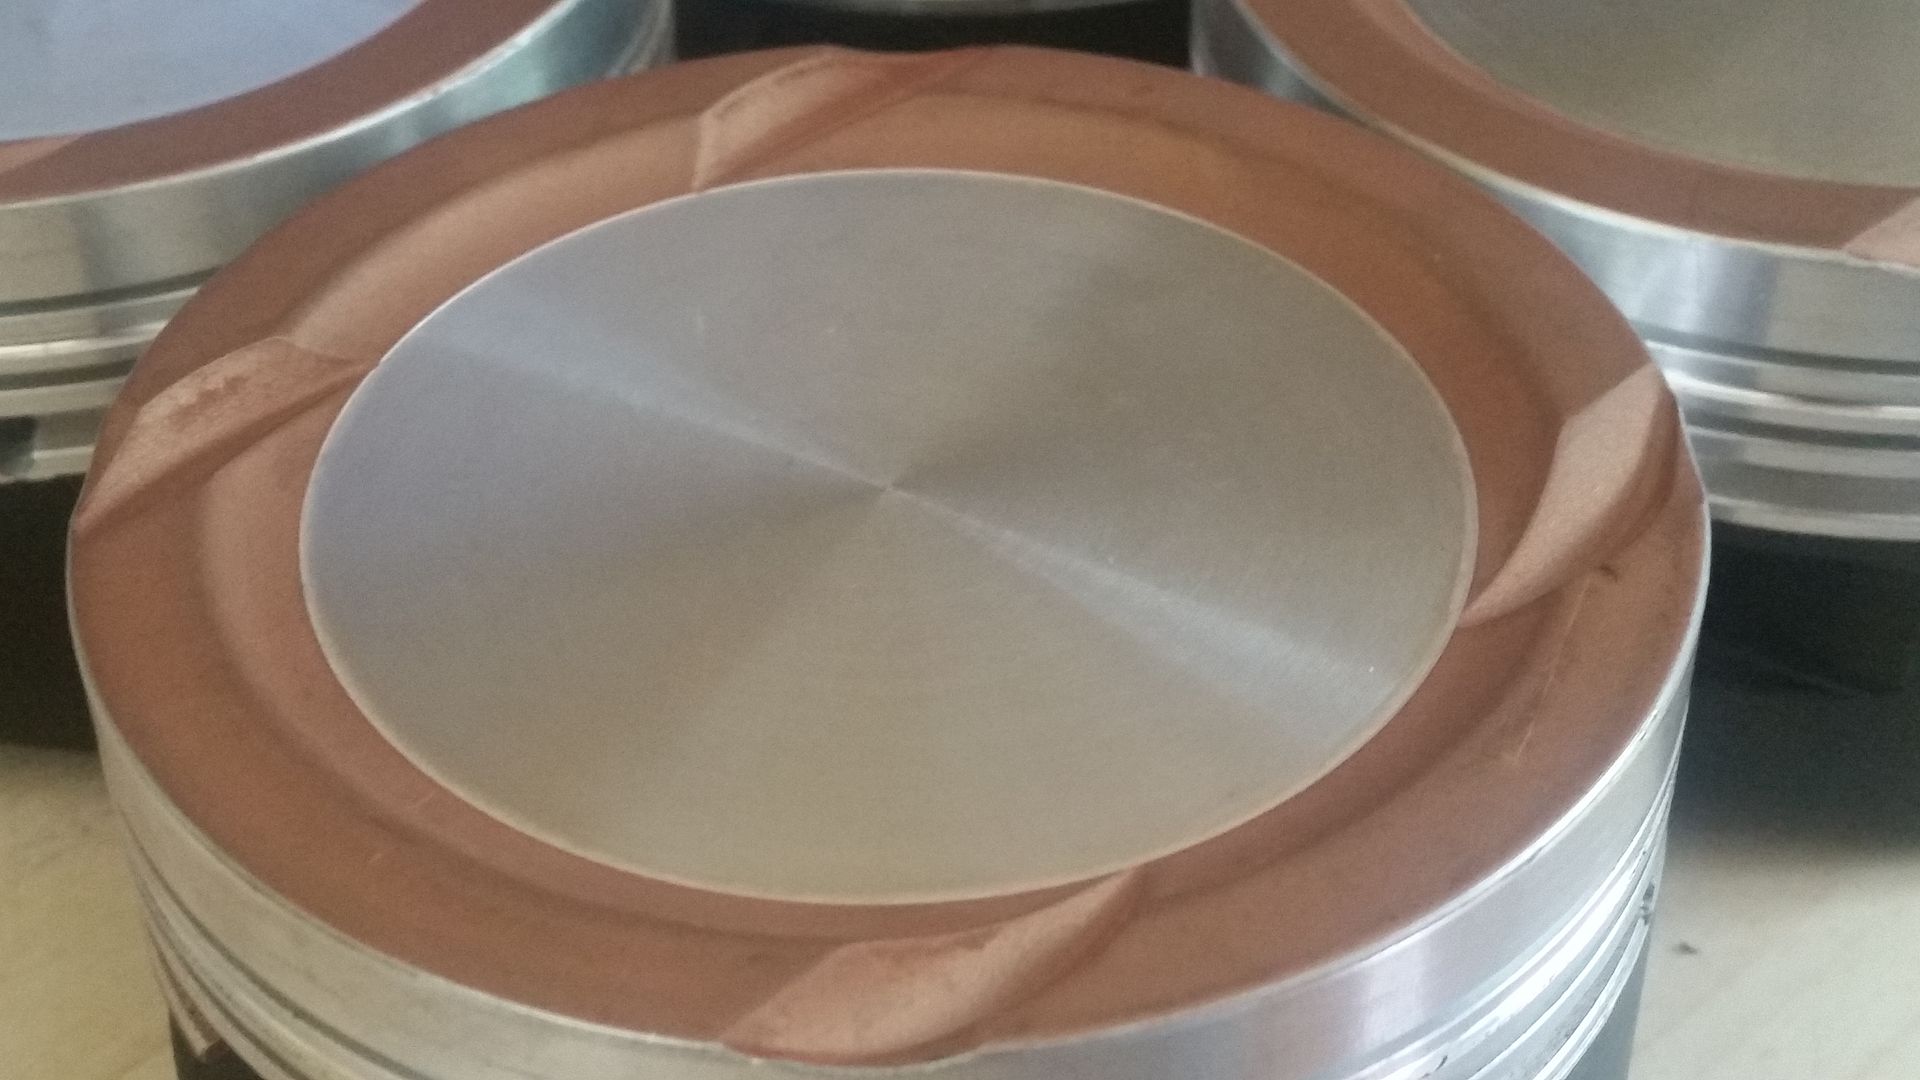
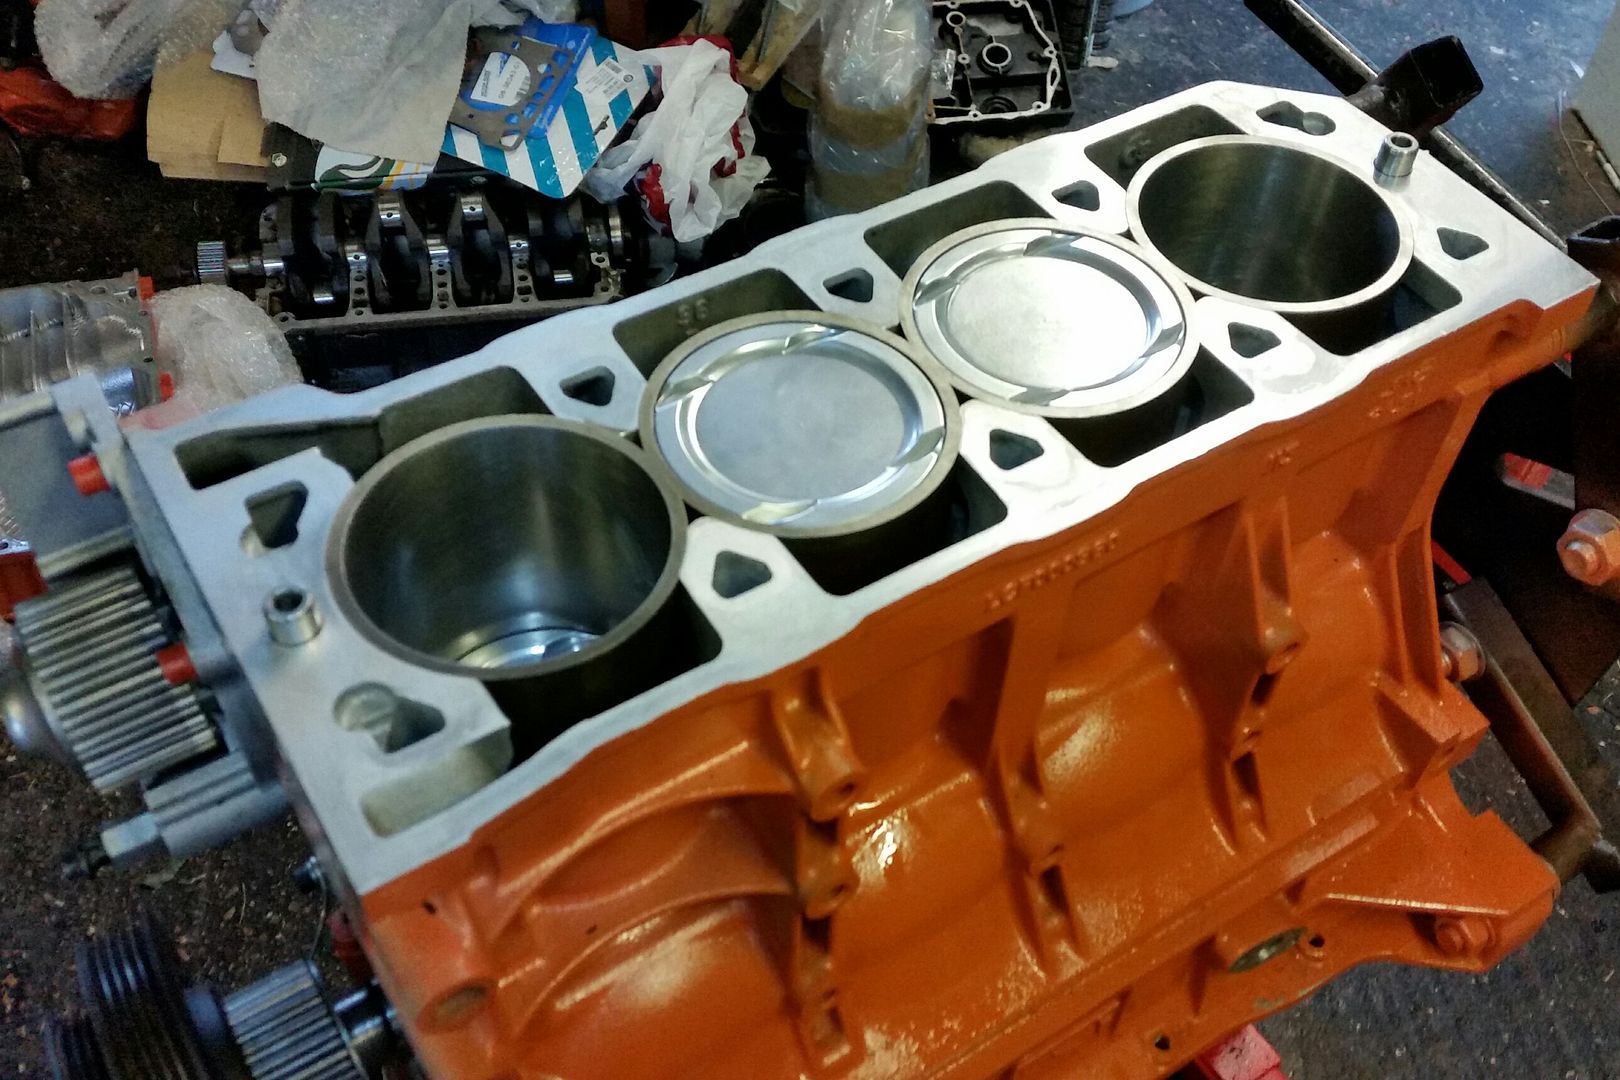
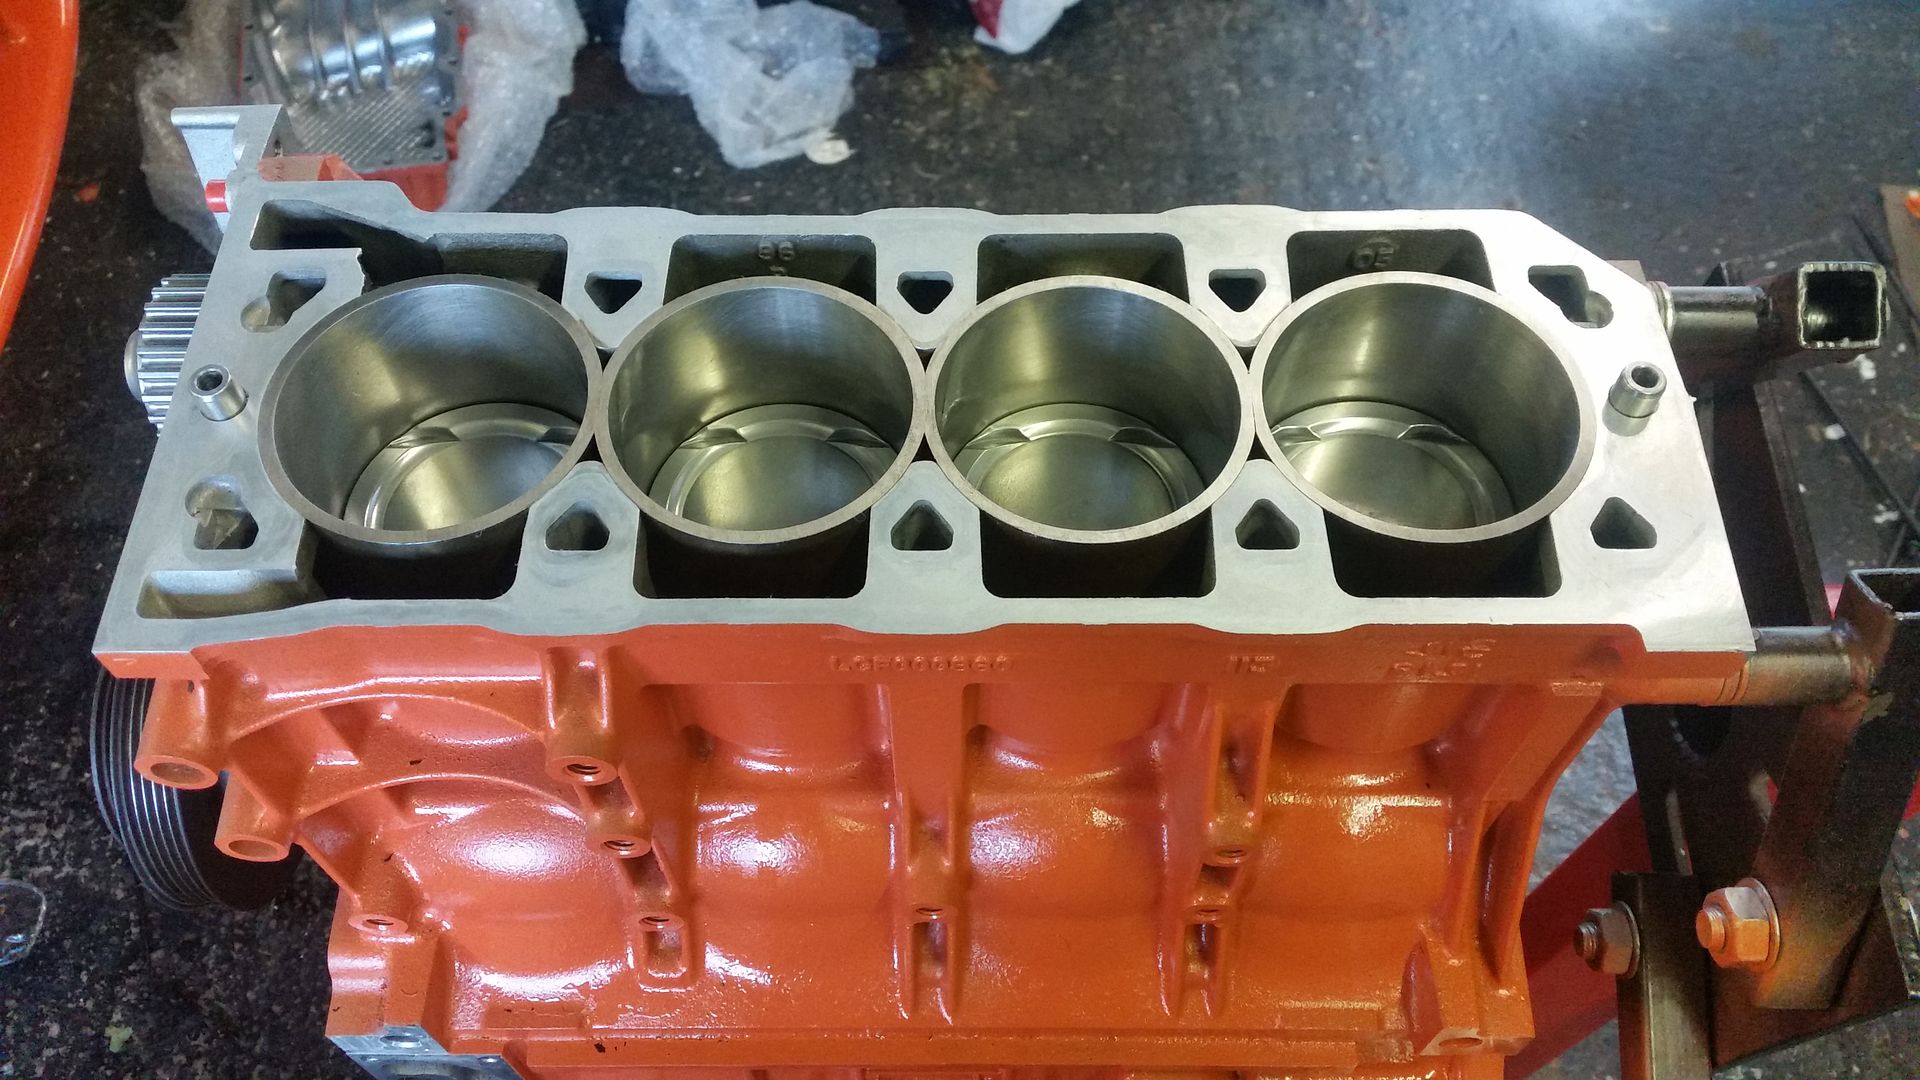
Had the pistons machined down today. The crowns measured over 8.5mm thick in the centre which is loads more than I thought. We therefore took them down to 6.5mm. I'll never be able to run silly boost through them but then it's unlikely the rest of the engine could take that anyway. Interestingly, the ceramic coating was extremely hard and blunted two carbide cutters in the process!
This increased the dish from 5cc to 9cc. This gives me a compression ratio of 10:1 which I'm happy with.
I'll be sending them off to camcoat to have the coating redone tomorrow. Hopefully get them back ASAP and get the rebuild underway
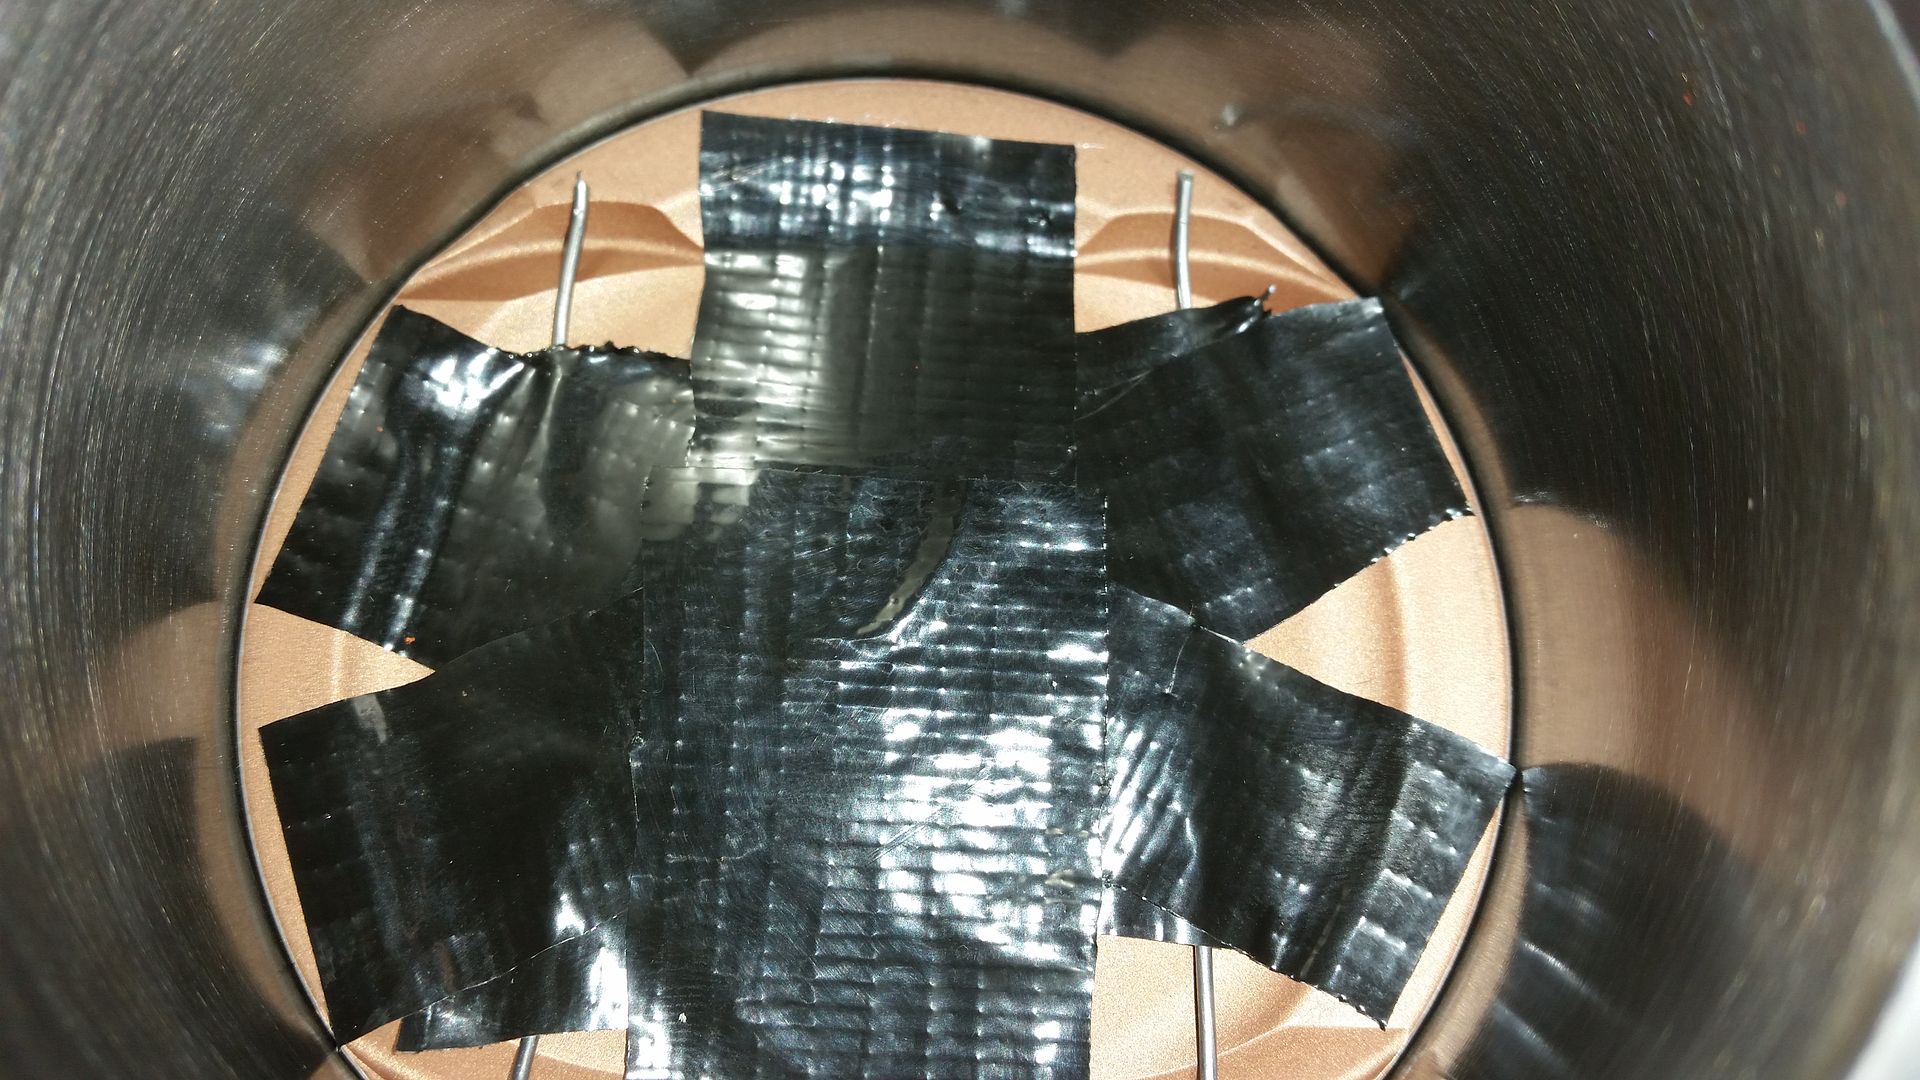
Whilst the pistons were in (before I had them machined) I built up the head, refitted it and turned the engine over a couple of times to check valves clear pistons. I taped some solder to the piston tops to make sure I had sufficient clearance. I needn't have worried as there's at least 2mm clearance.
This increased the dish from 5cc to 9cc. This gives me a compression ratio of 10:1 which I'm happy with.
I'll be sending them off to camcoat to have the coating redone tomorrow. Hopefully get them back ASAP and get the rebuild underway
Whilst the pistons were in (before I had them machined) I built up the head, refitted it and turned the engine over a couple of times to check valves clear pistons. I taped some solder to the piston tops to make sure I had sufficient clearance. I needn't have worried as there's at least 2mm clearance.
Finally some real progress!
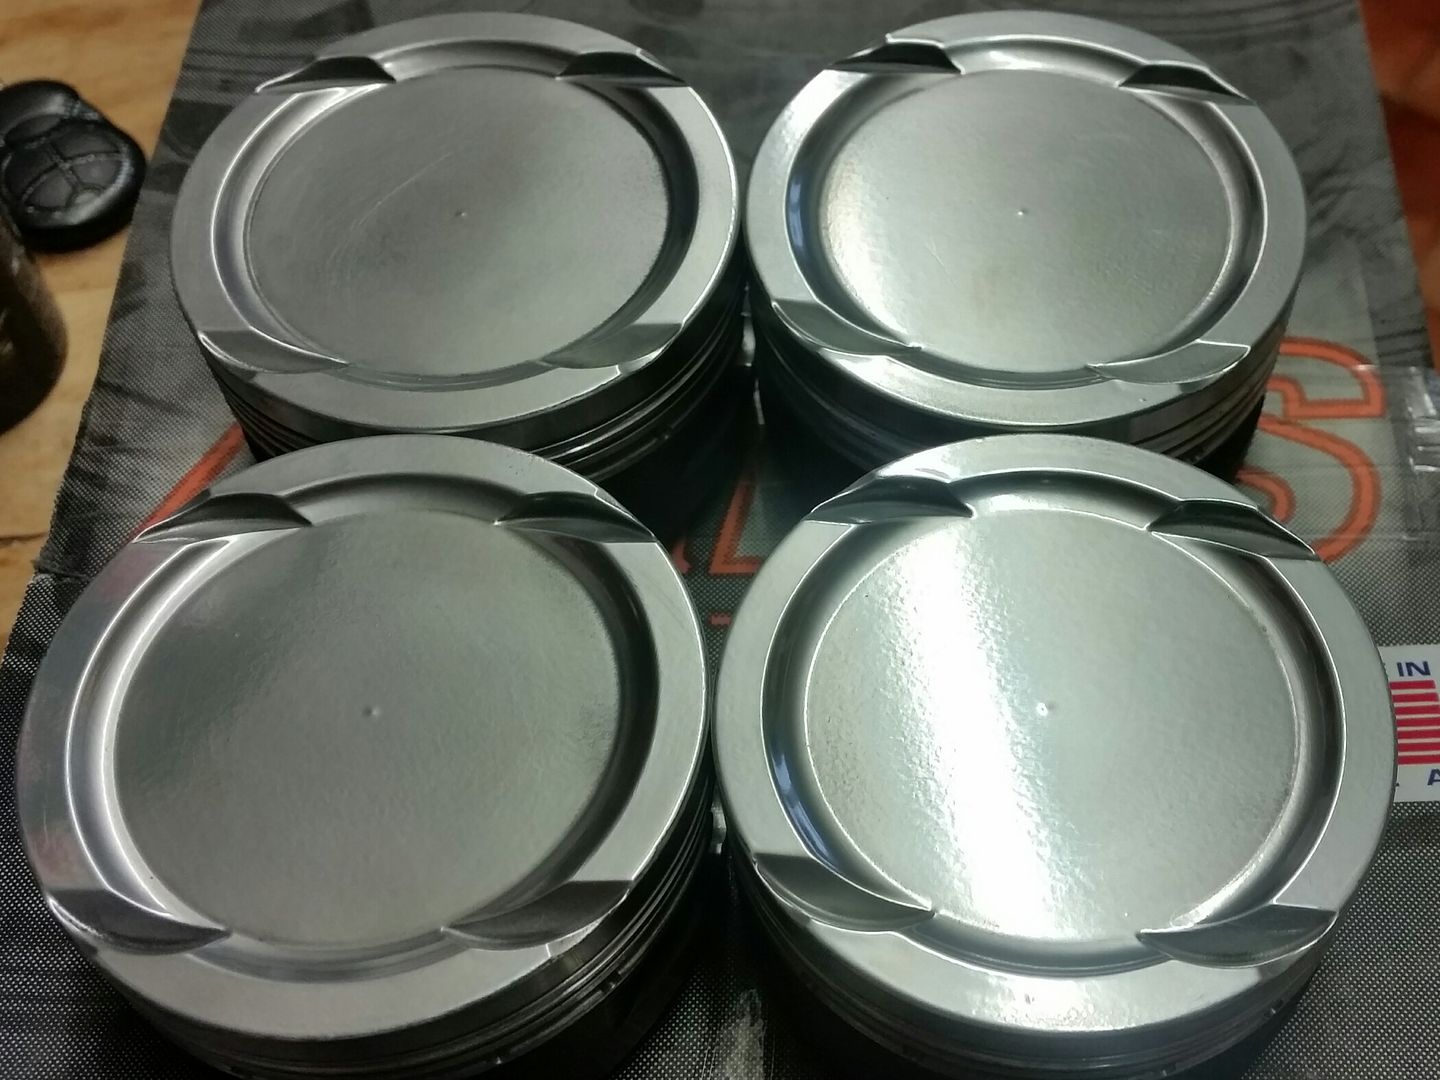
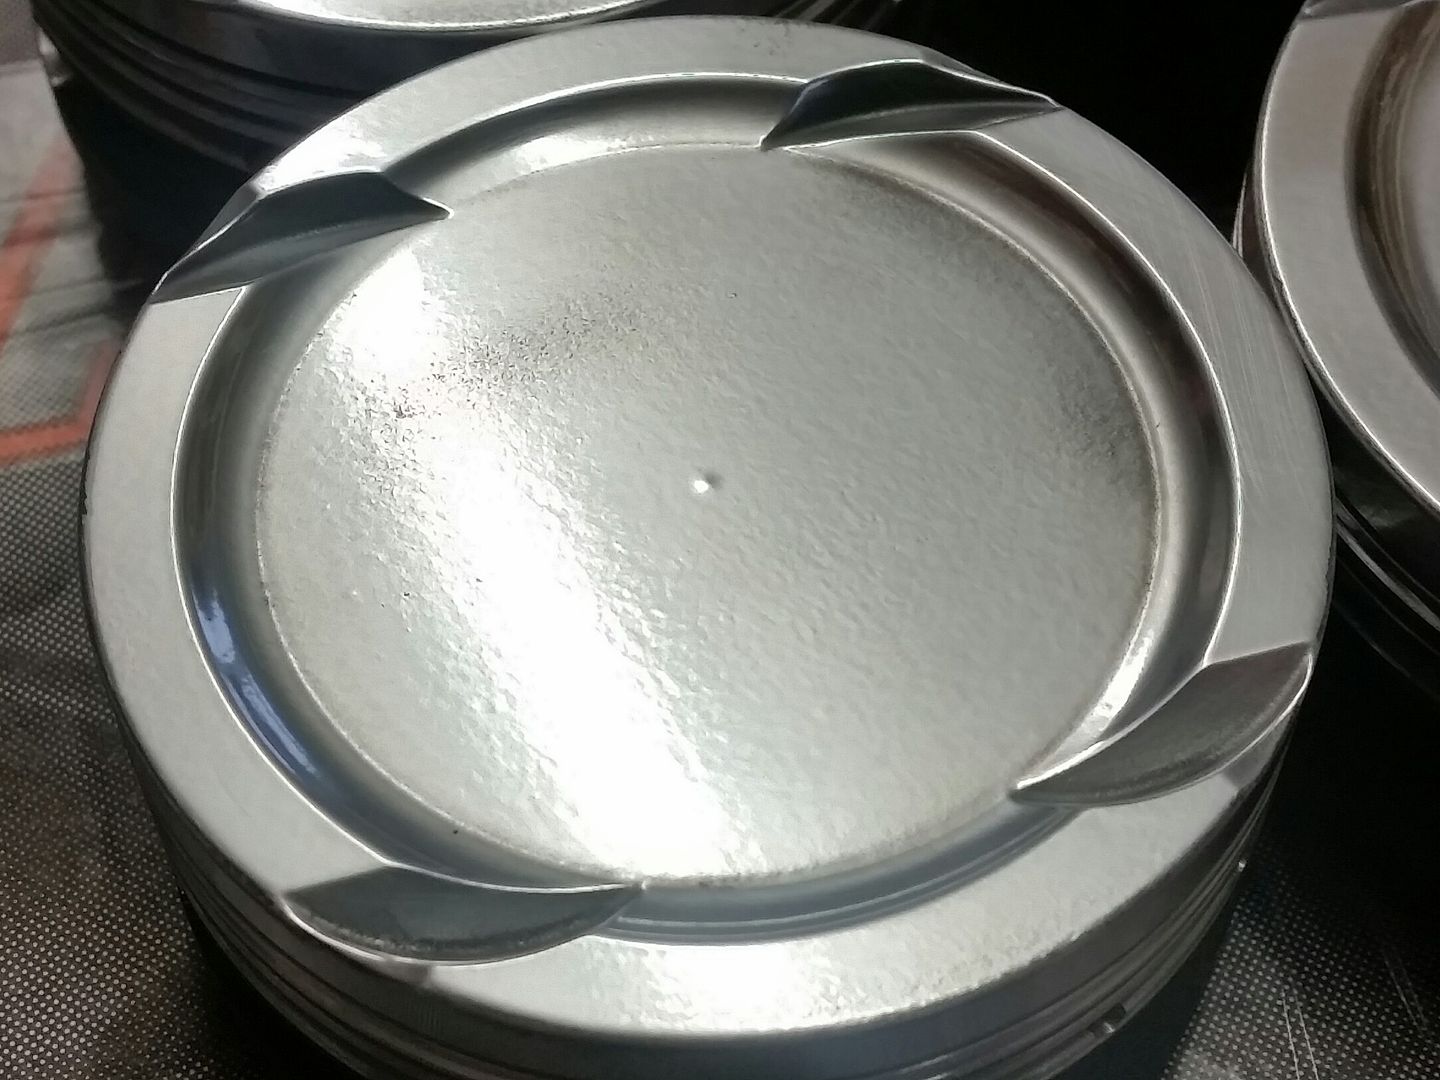
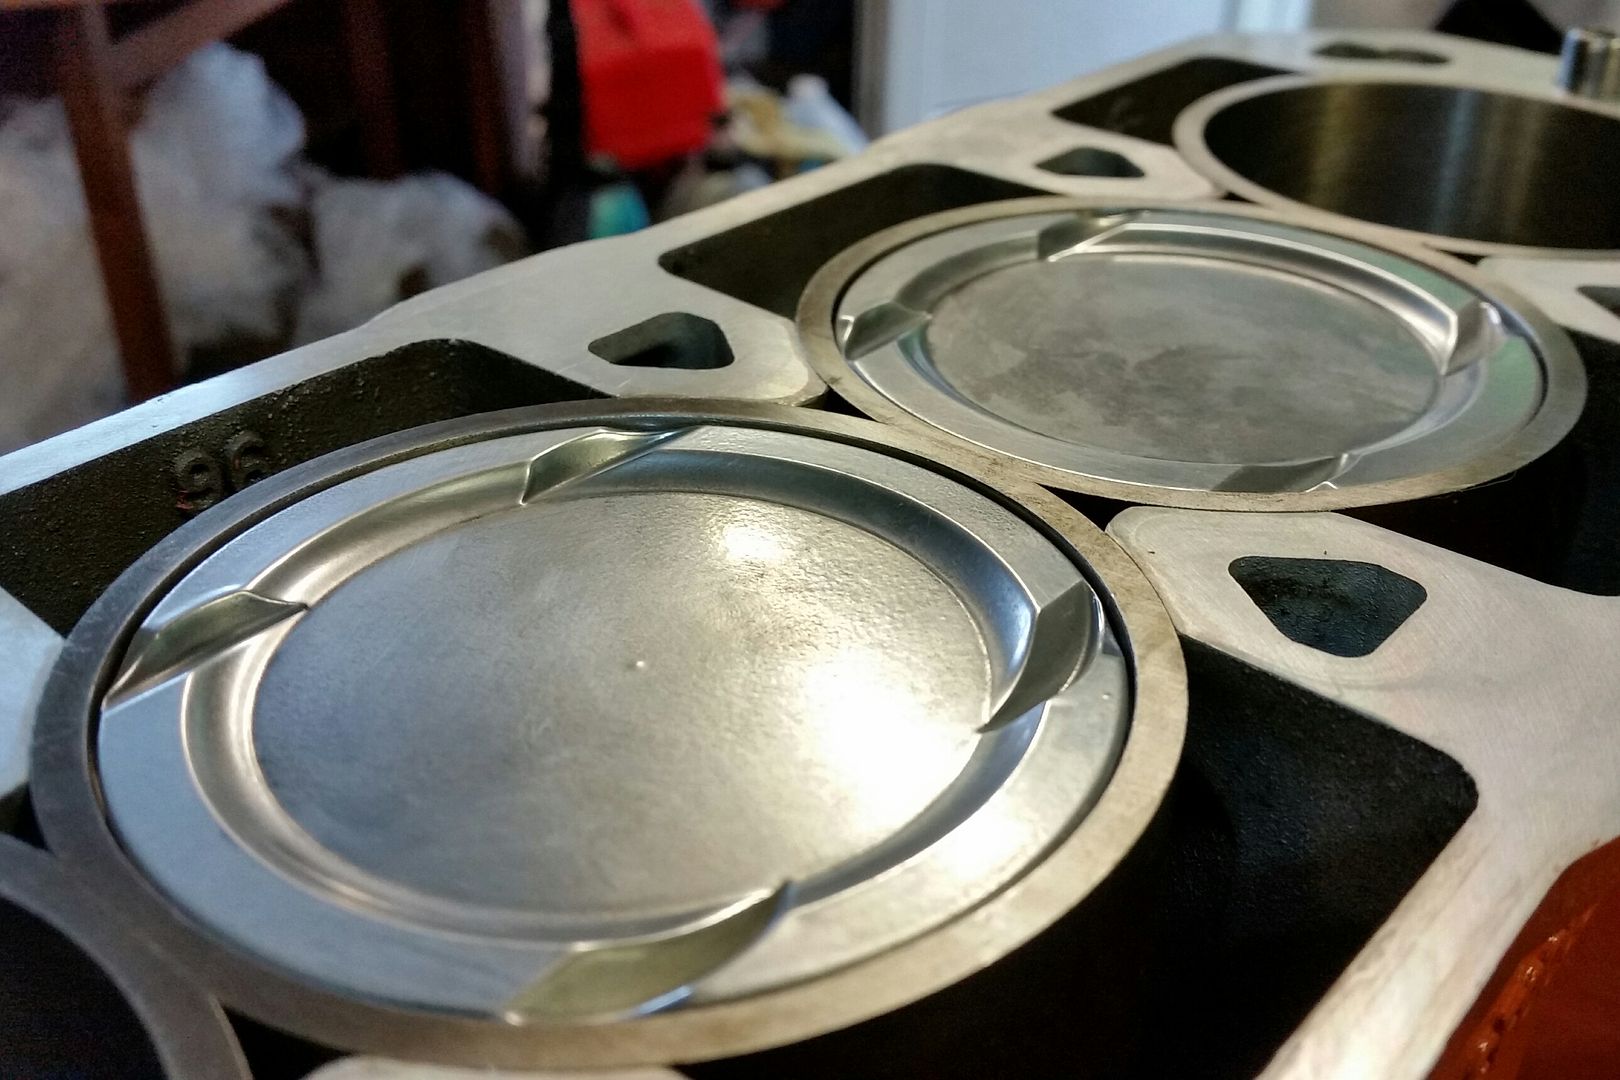
Pistons back from Camcoat. This is their polished cbx coating.
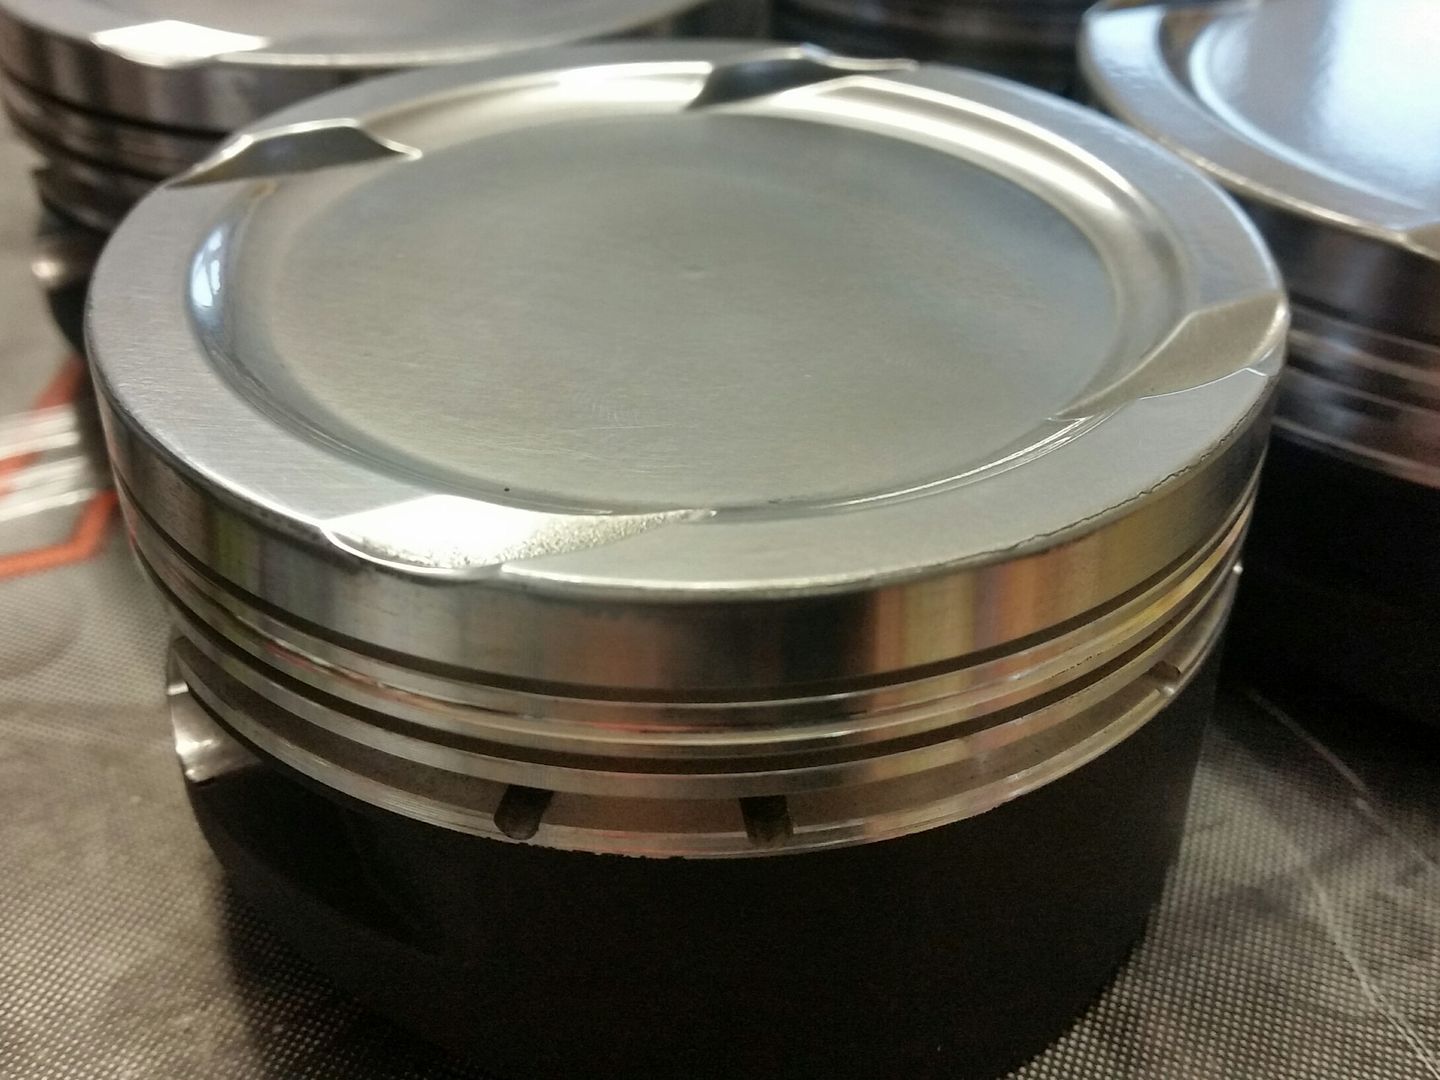
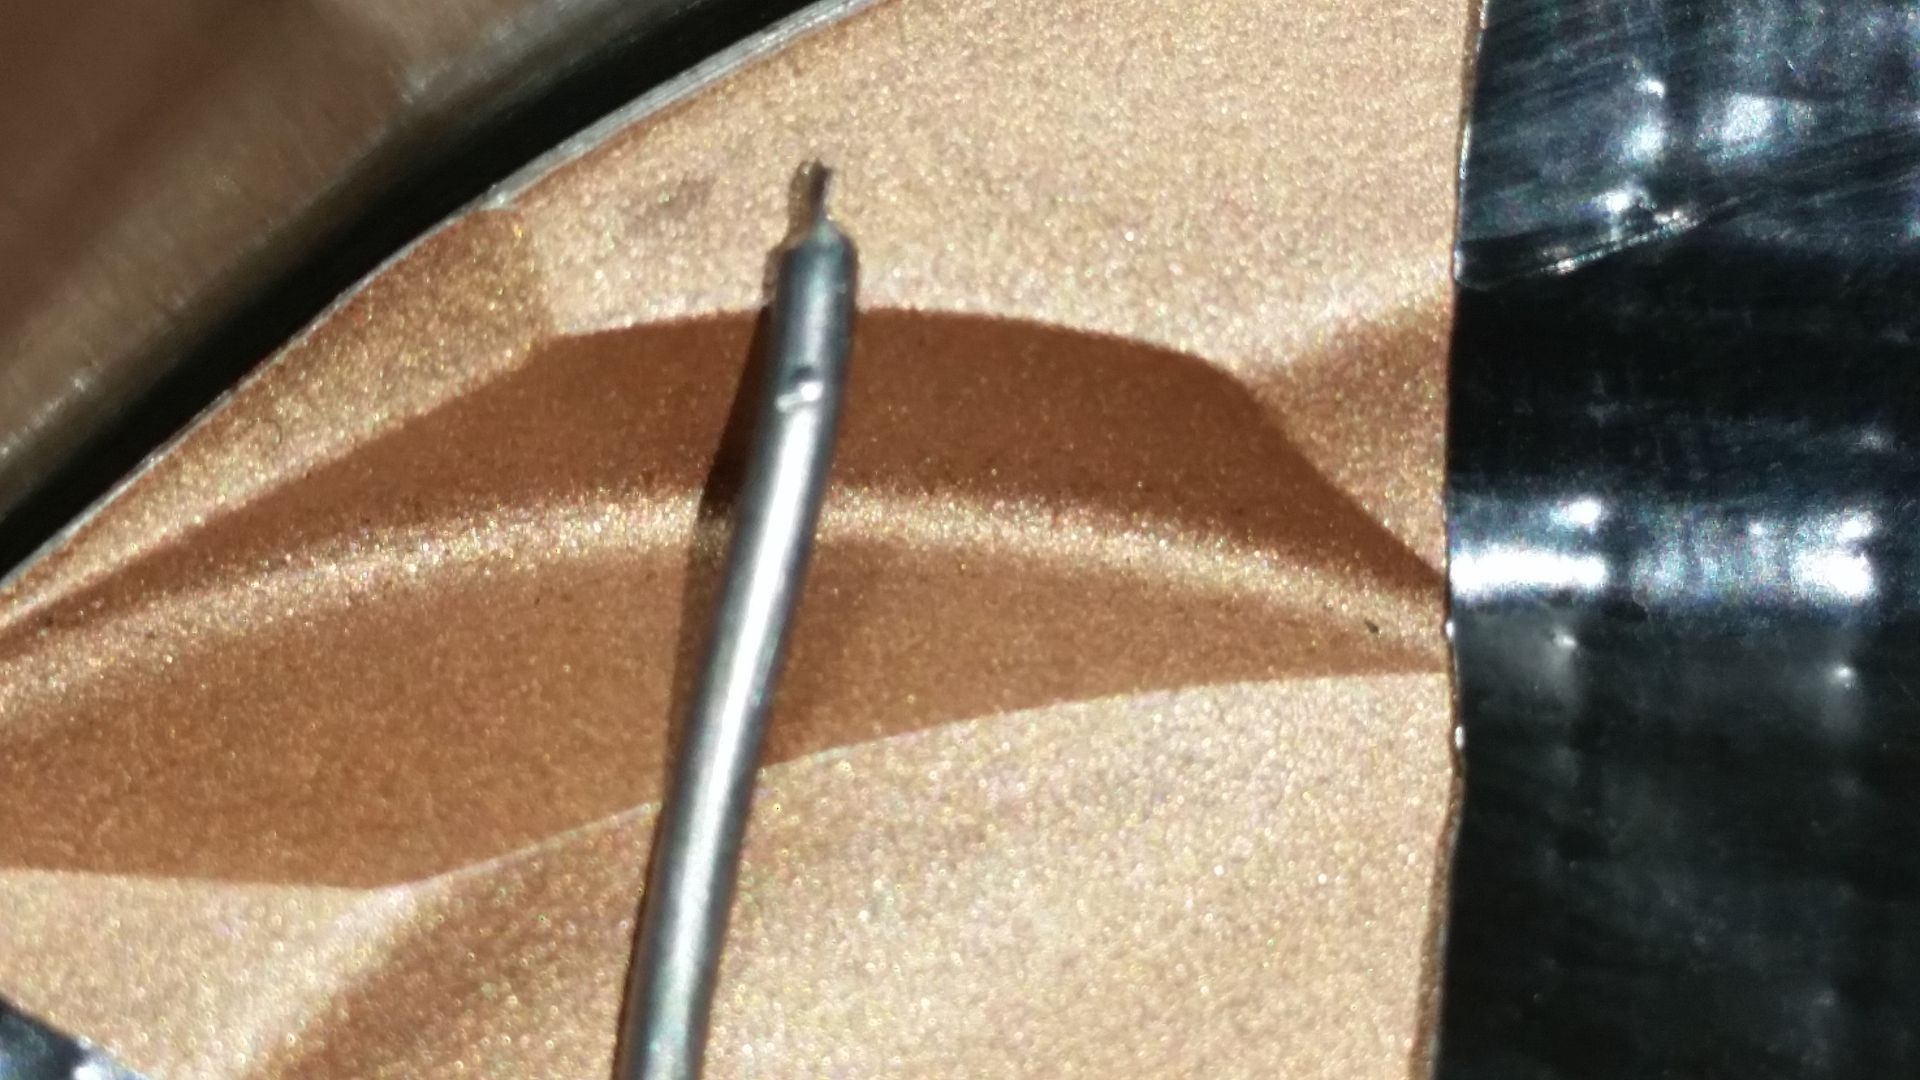
Before I had the pistons modified I built the engine up to check valve-piston clearance. Didn't want to get all this done for them to foul the valves! I Just stuck some solder on the top of the Piston and turned the engine a couple of times. As you can see that's just a tiny bit of contact with the solder so loads of clearance.
Pistons on rods for the last time hopefully!
Going in:
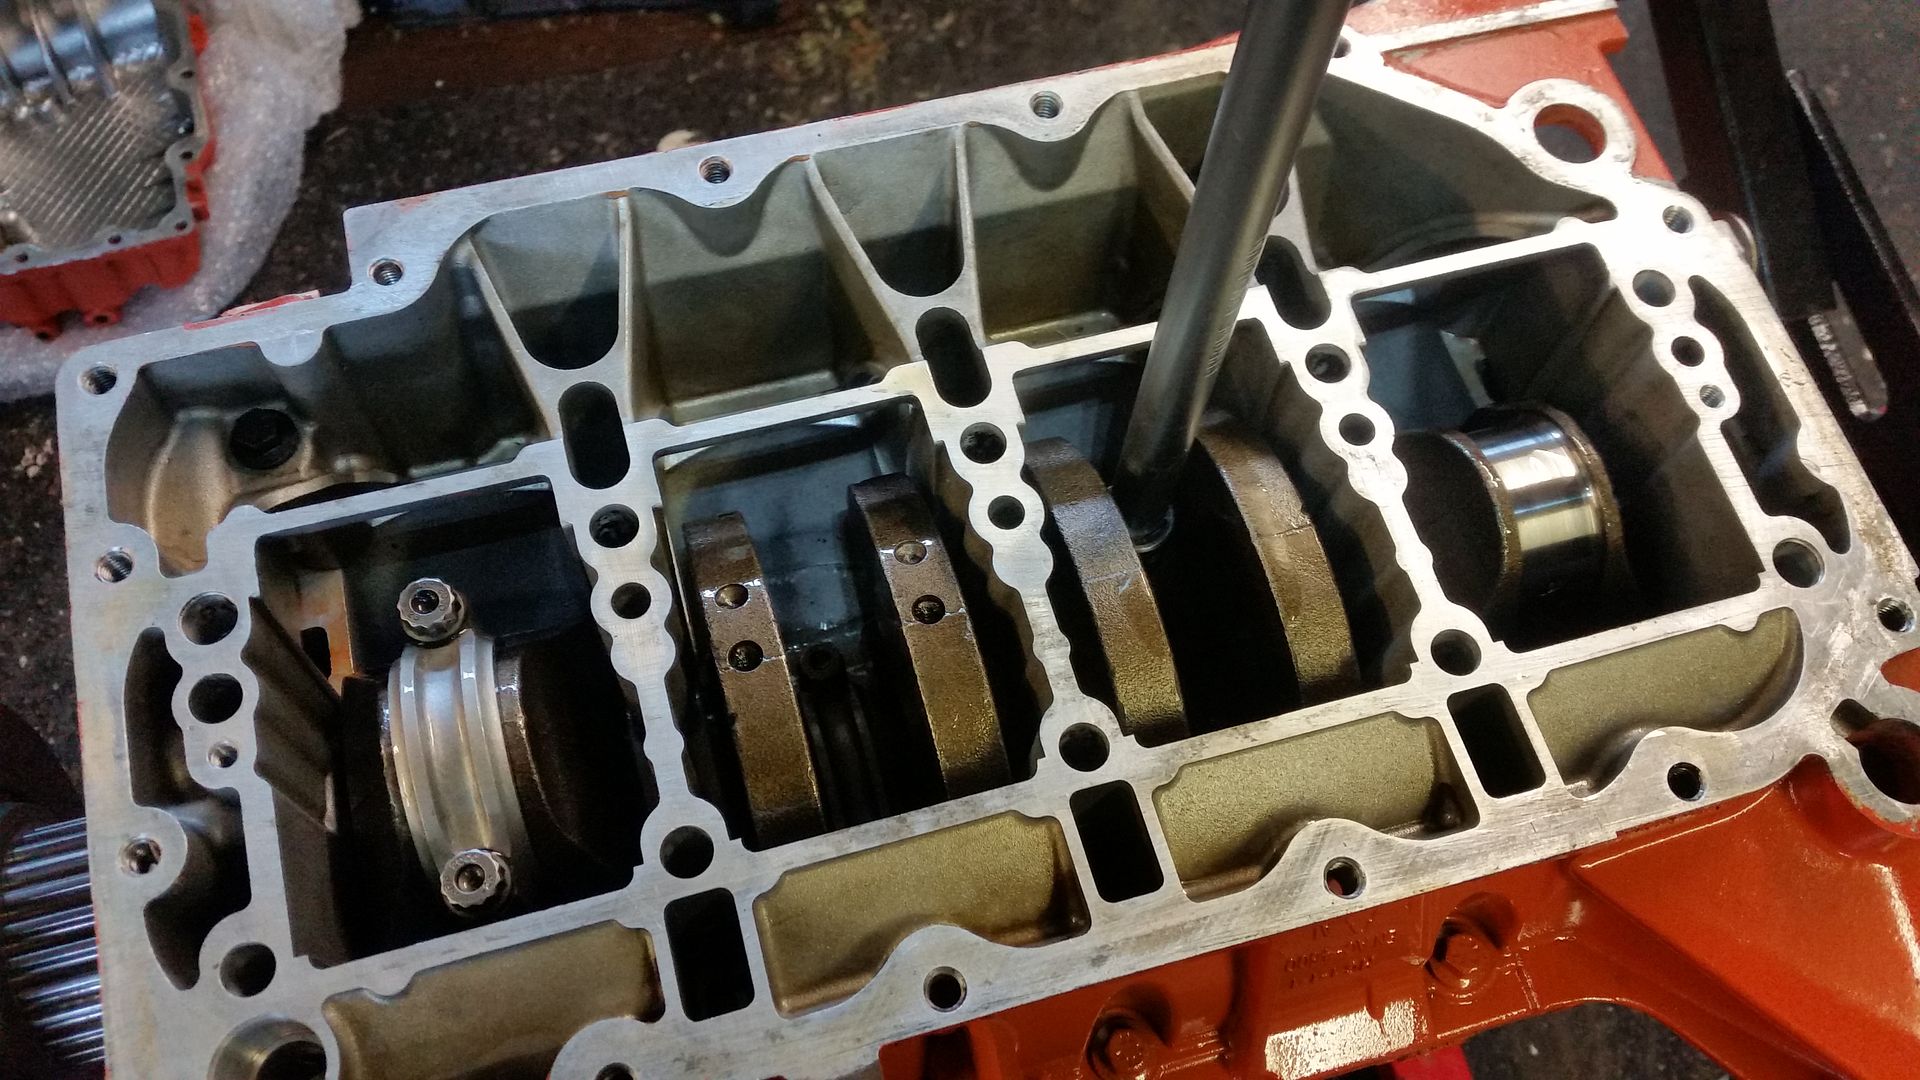
Back to 90°BTDC
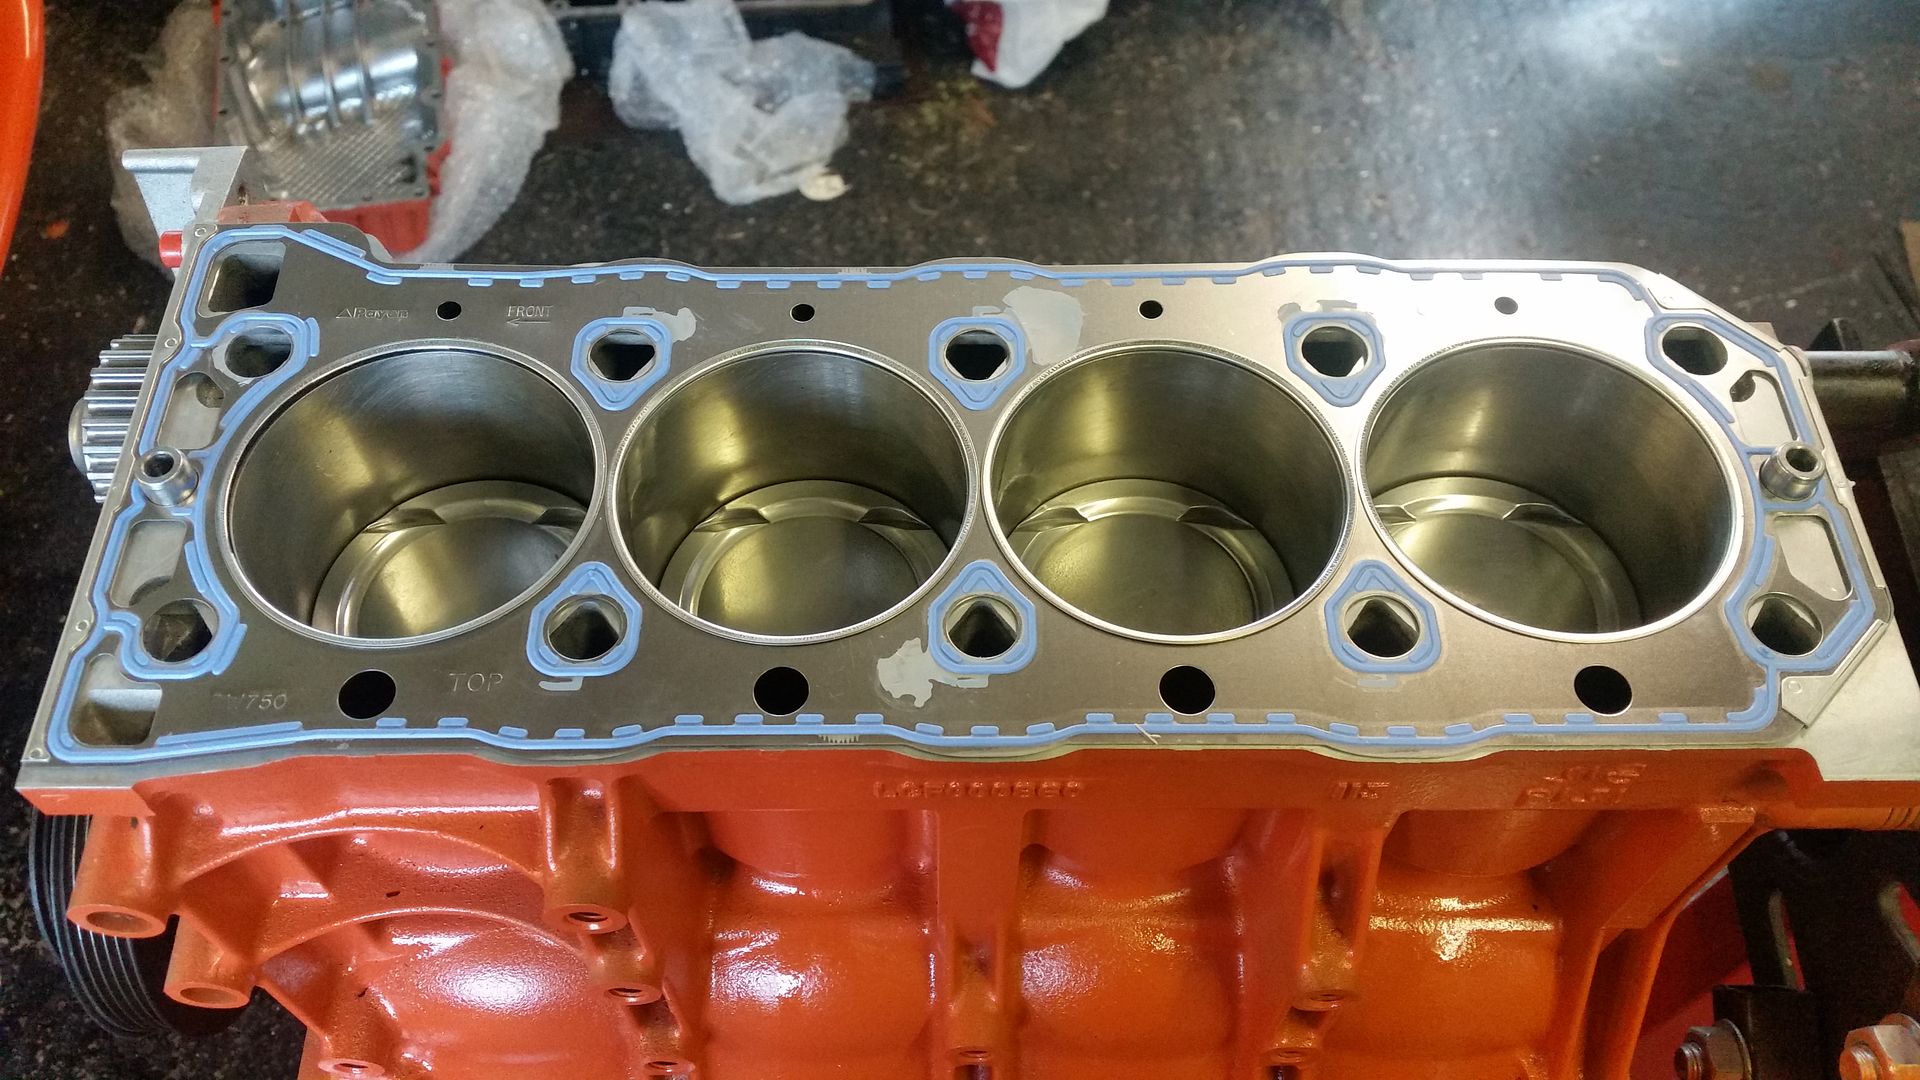
New genuine Payen head gasket:
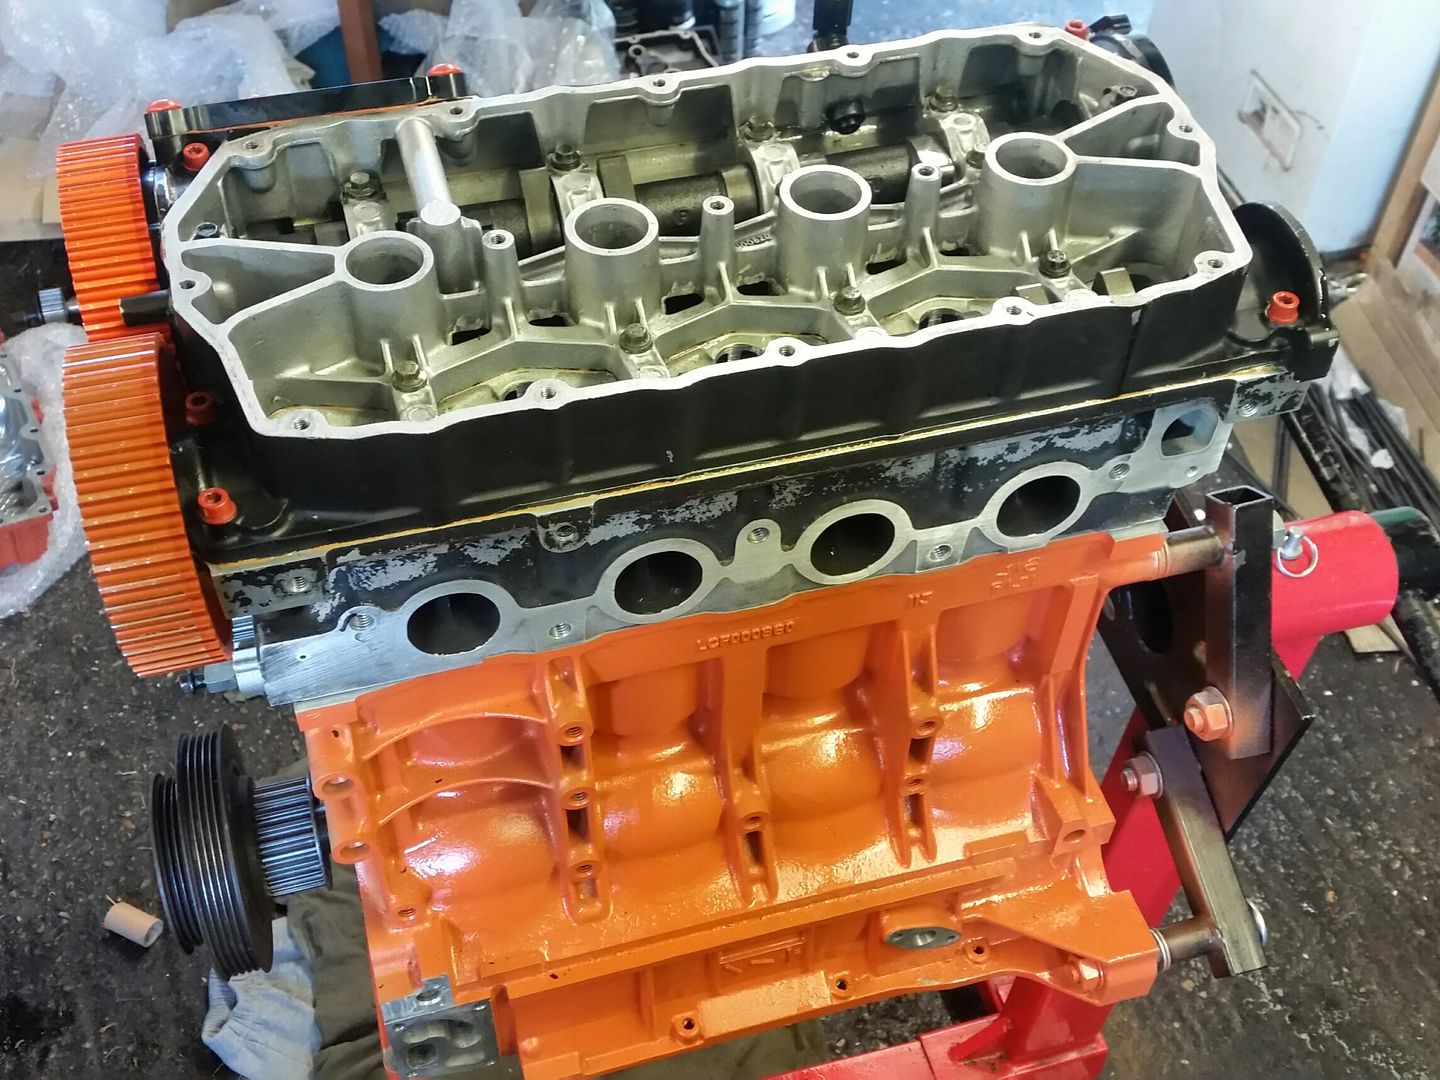
Head on:
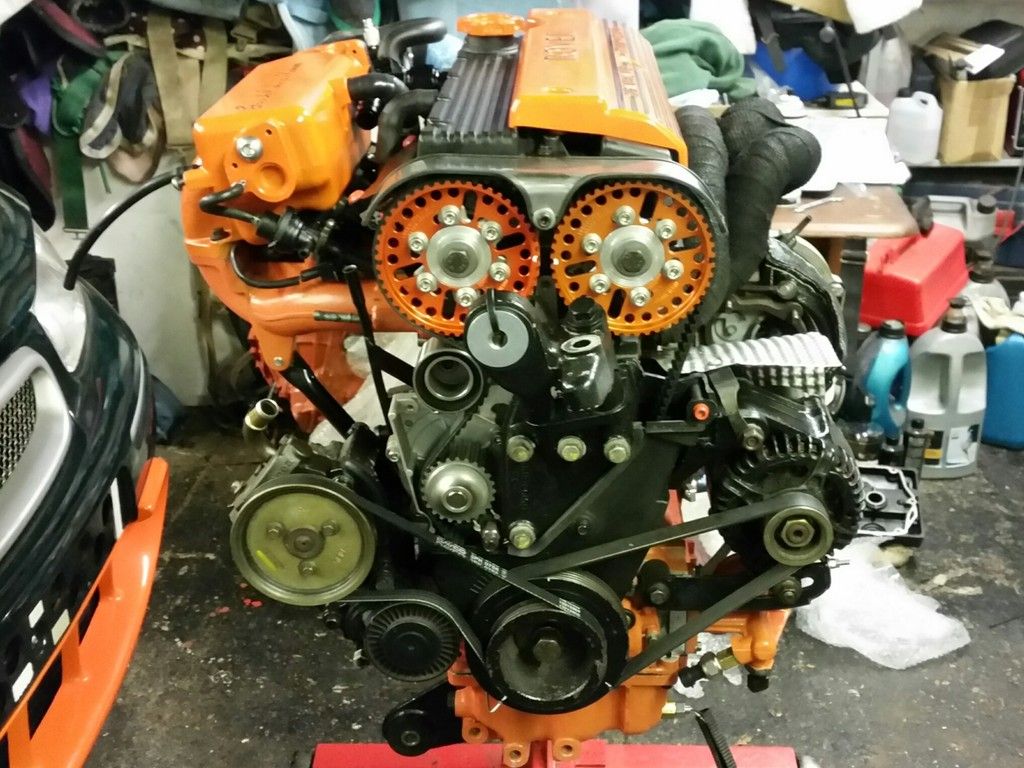
And cambelt and a few other bits going on and generally tidied up:
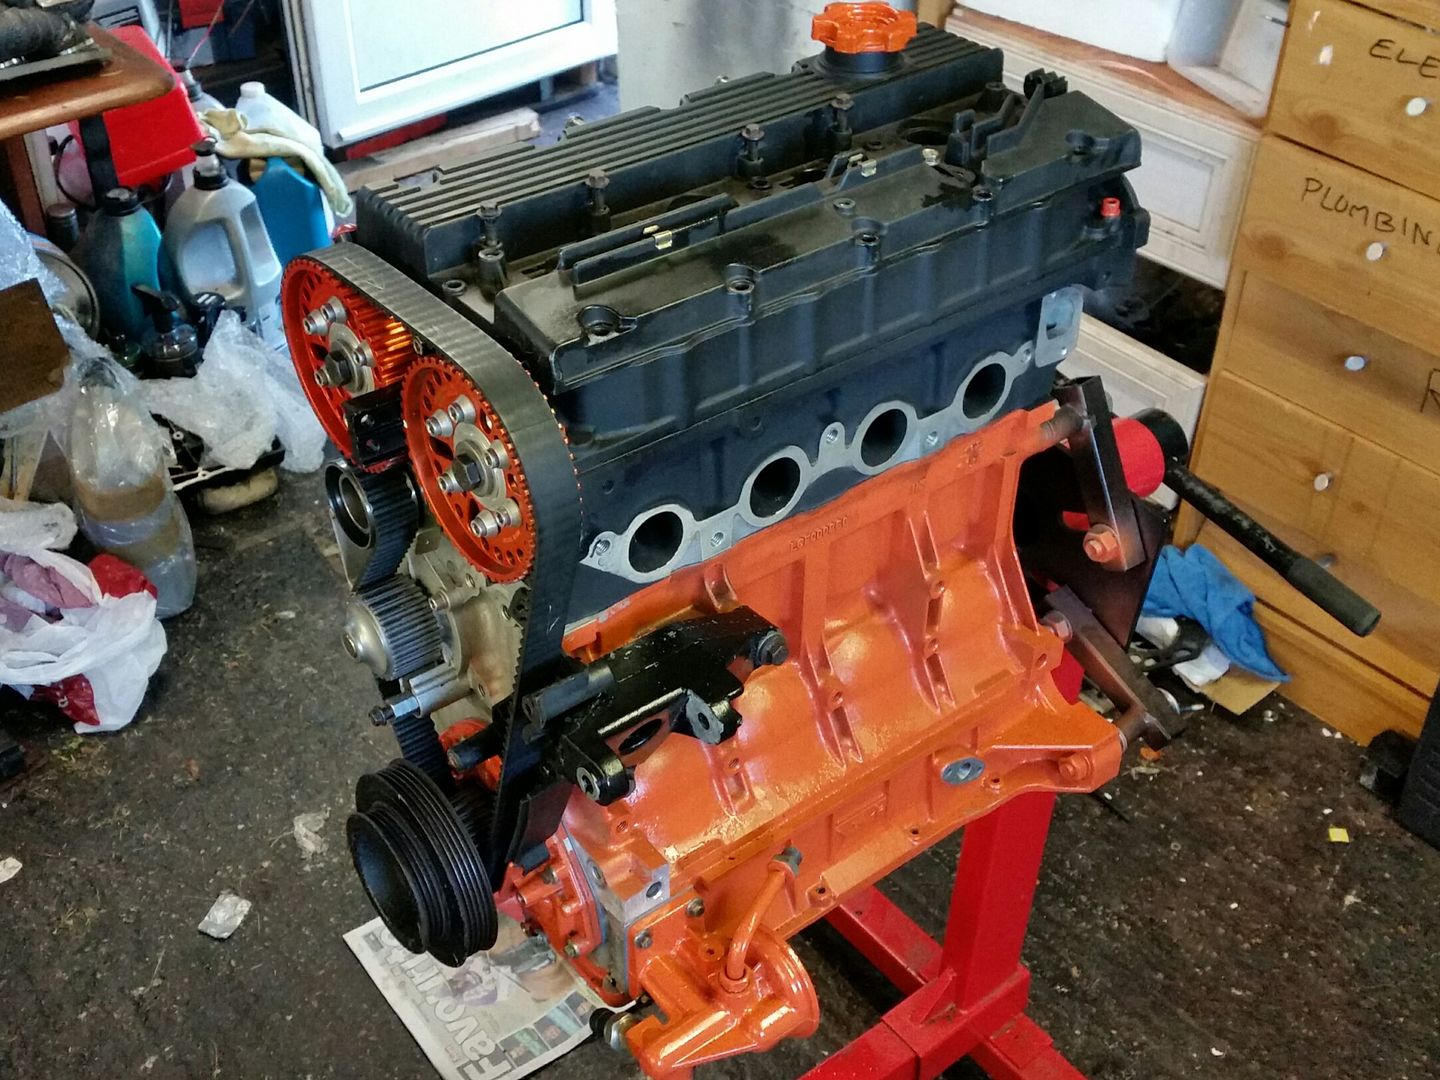

I didn't fancy getting into timing the cams in today (I will need to adjust the timing slightly as the thinner gasket and skimmed head will have altered the geometry slightly) so that's next week's job.
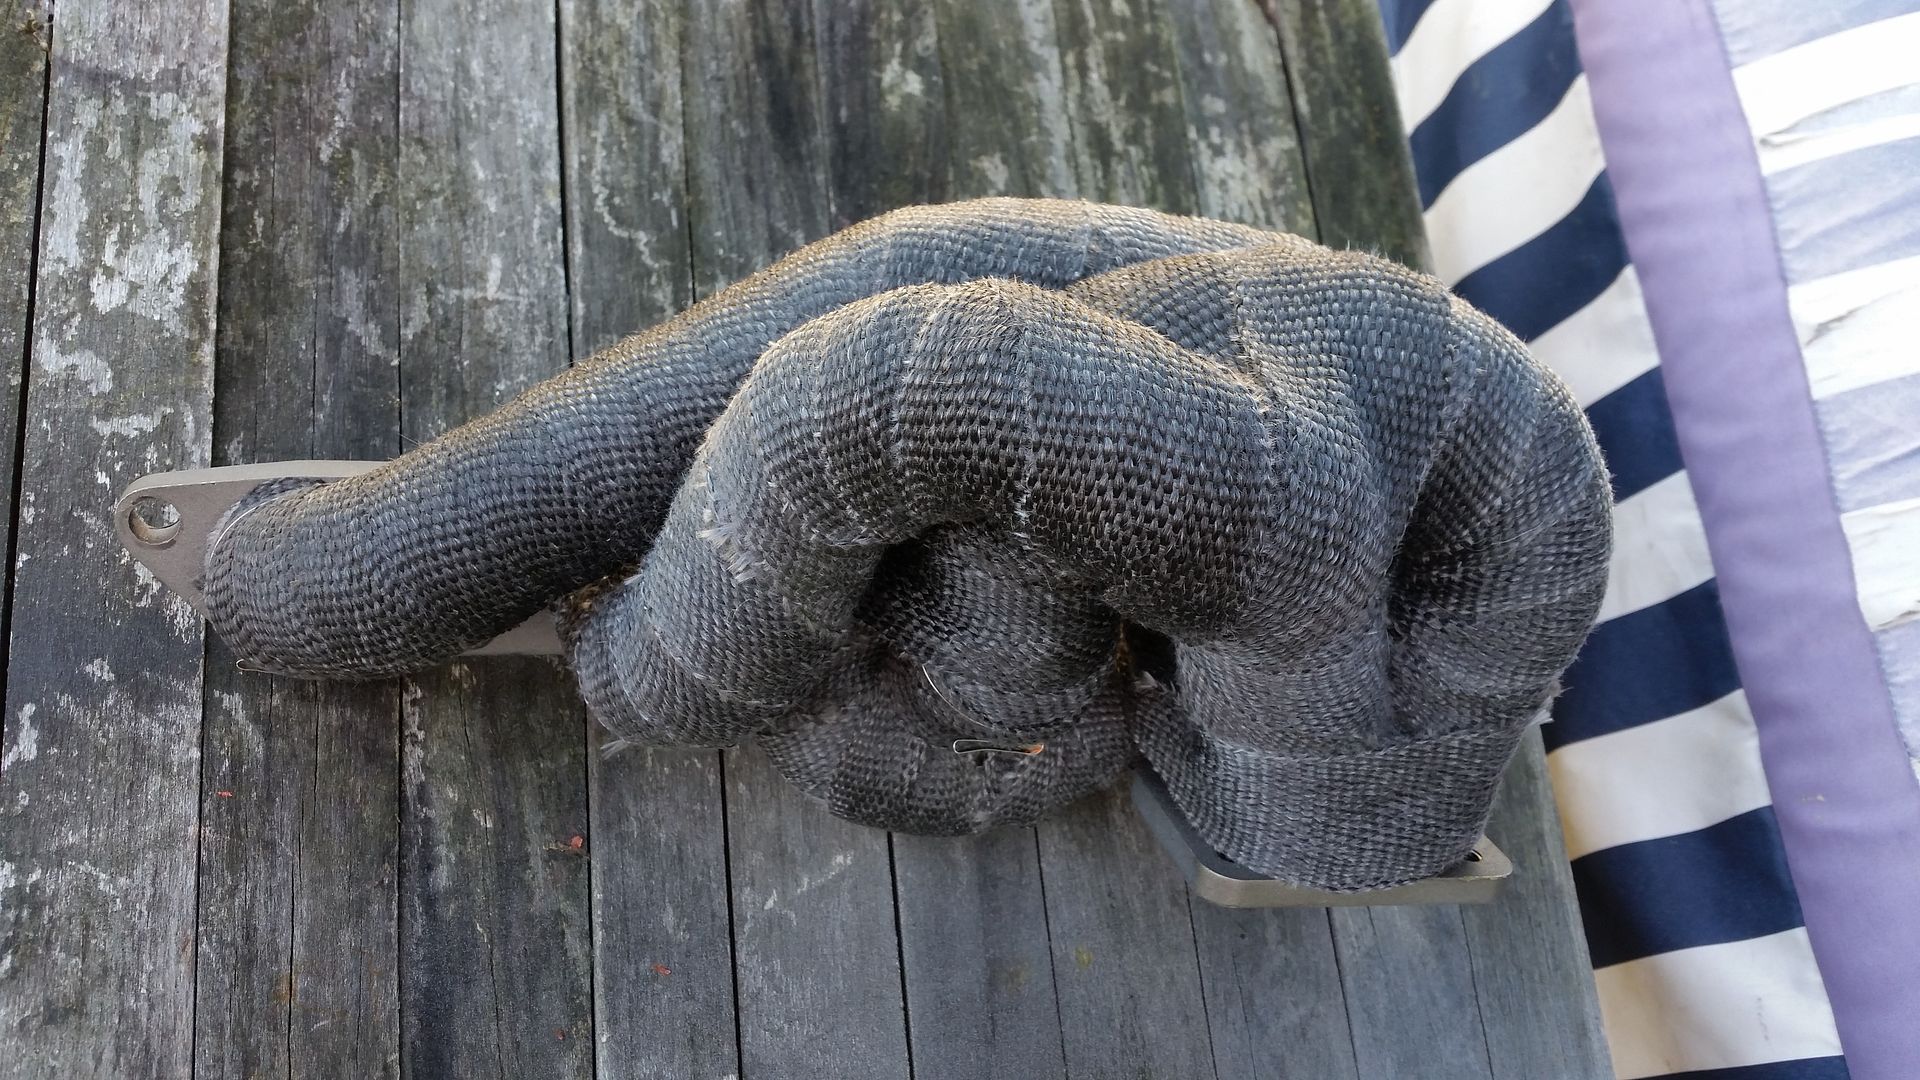
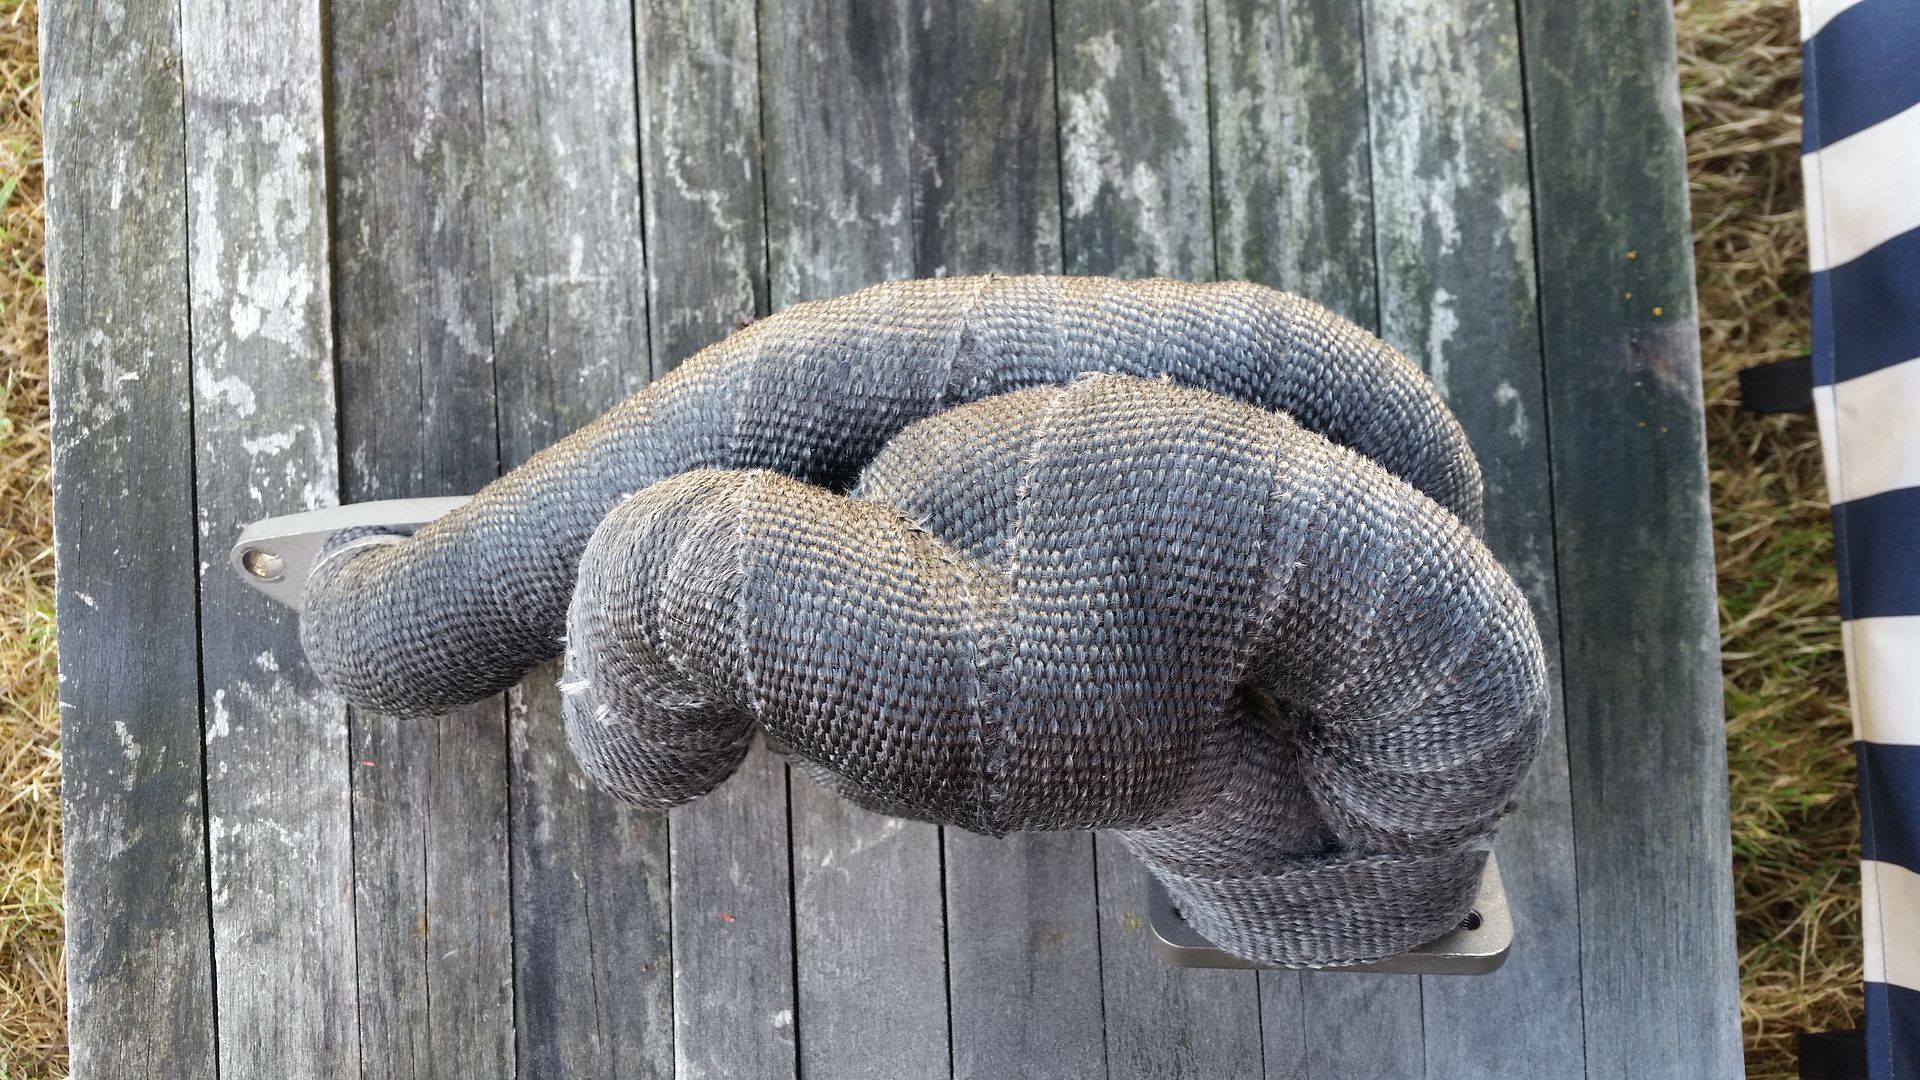
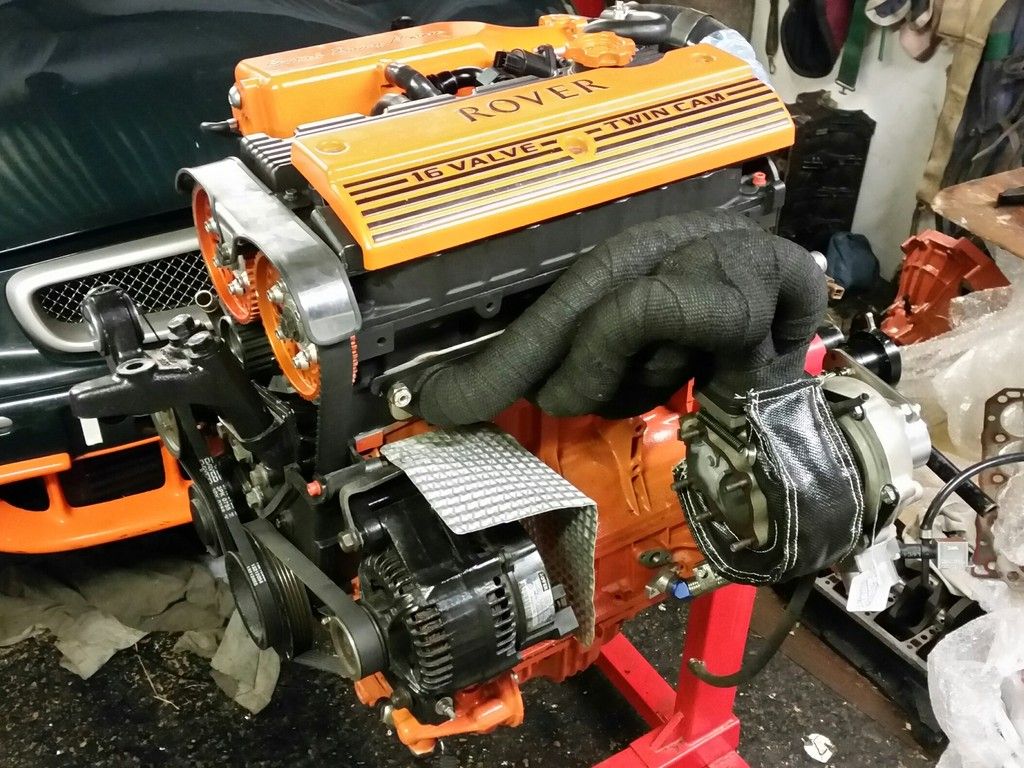
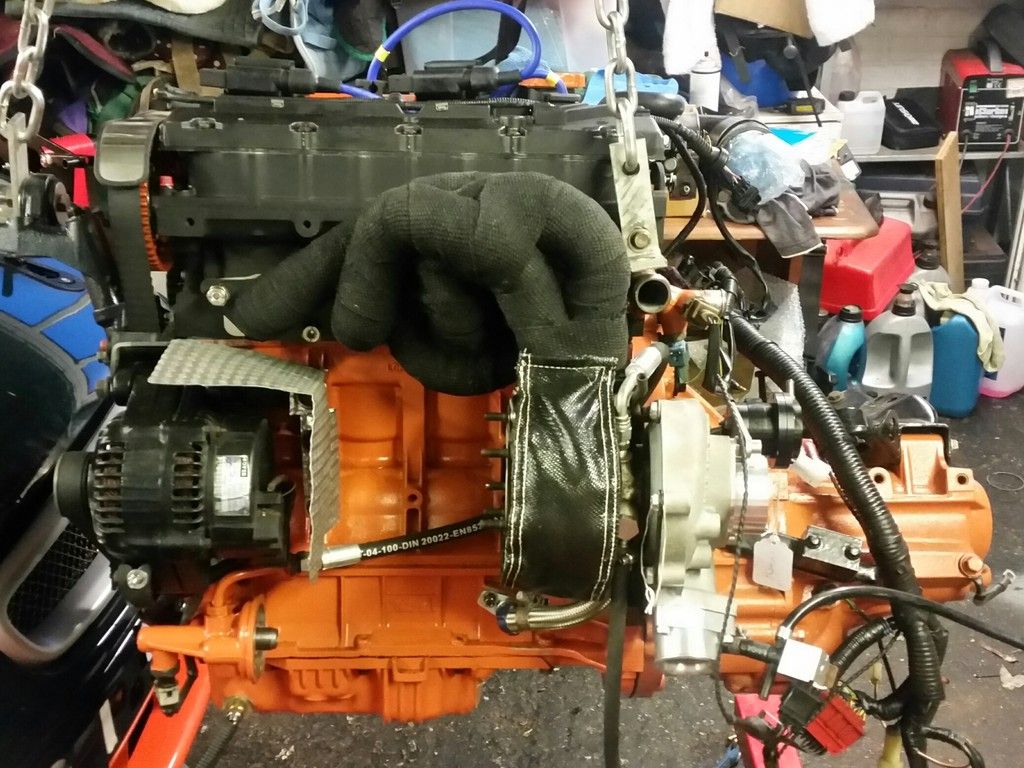
While I was waiting for the pistons I wrapped the exhaust manifold. I've heard all the stories about wrapping causing cracking in stainless tubular manifolds, but to me lower intake temps are a priority. If it cracks I'll deal with that later.
It took me forever though as some of the pipes virtually touch (hence the double wrapping). I'll give it a coat of hi-temp silicone for longevity. It's not as pretty now but after seeing another guy running one of these having serious problems with bay temps I didn't want to run the risk.
That's it for now.
Pistons back from Camcoat. This is their polished cbx coating.
Before I had the pistons modified I built the engine up to check valve-piston clearance. Didn't want to get all this done for them to foul the valves! I Just stuck some solder on the top of the Piston and turned the engine a couple of times. As you can see that's just a tiny bit of contact with the solder so loads of clearance.
Pistons on rods for the last time hopefully!
Going in:
Back to 90°BTDC
New genuine Payen head gasket:
Head on:
And cambelt and a few other bits going on and generally tidied up:
I didn't fancy getting into timing the cams in today (I will need to adjust the timing slightly as the thinner gasket and skimmed head will have altered the geometry slightly) so that's next week's job.
While I was waiting for the pistons I wrapped the exhaust manifold. I've heard all the stories about wrapping causing cracking in stainless tubular manifolds, but to me lower intake temps are a priority. If it cracks I'll deal with that later.
It took me forever though as some of the pipes virtually touch (hence the double wrapping). I'll give it a coat of hi-temp silicone for longevity. It's not as pretty now but after seeing another guy running one of these having serious problems with bay temps I didn't want to run the risk.
That's it for now.
AWG said:
Looking good mate. How many metres of wrap did you use in the end?
Thanks Andrew. Used about 4 Metres I think. And about 5 hours of my life I'll never get back.If I had the choice I would have ceramic coated, but I can't justify the expense at the moment. I just need it running!!
Time to get the engine in!
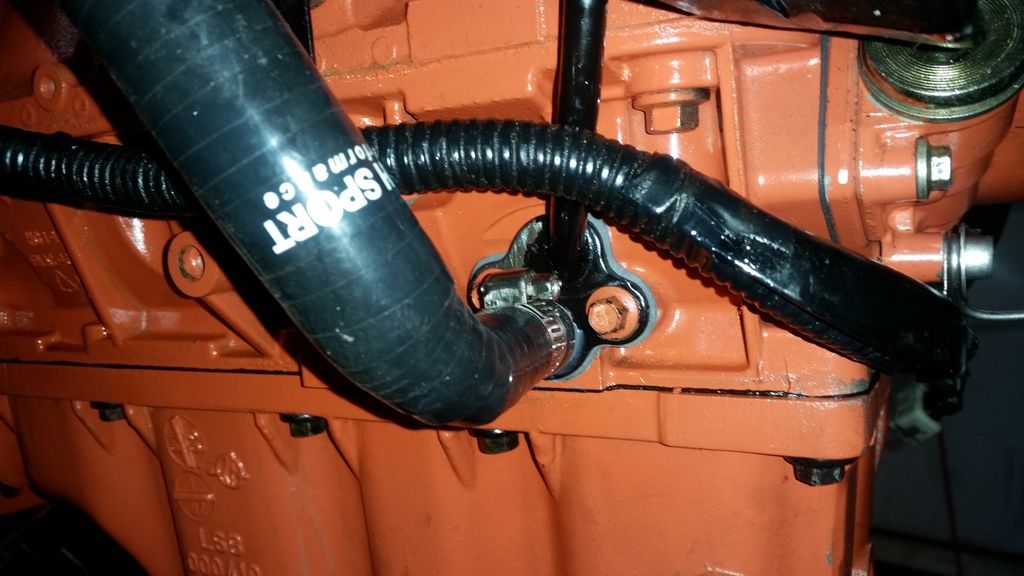
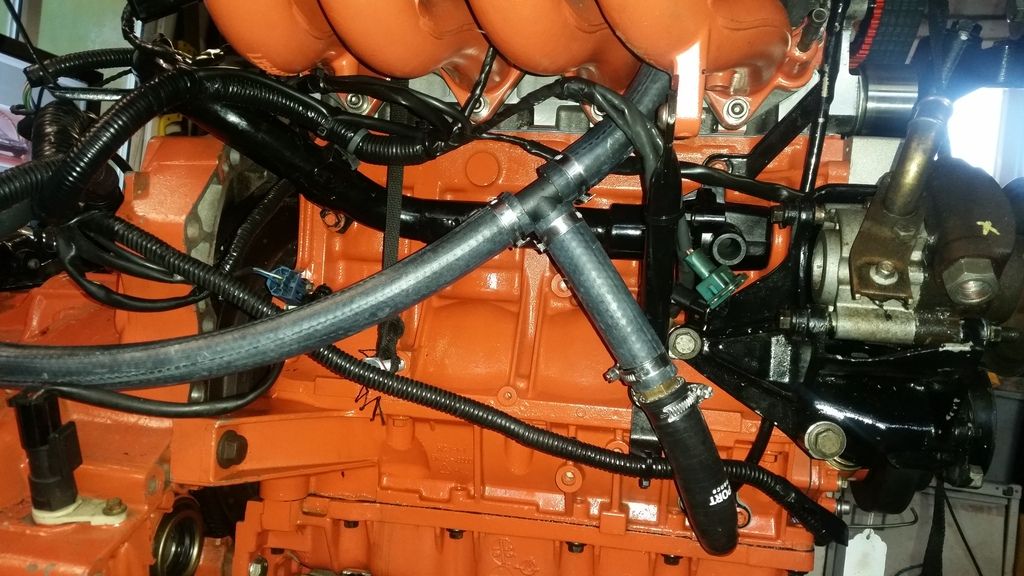
But first, I've been making some changes to crankcase ventilation. I never really thought much about how the engine breathes but I've been researching it a lot recently and I've come to realise how important it is. In the last build I had the usual breather from cam cover to inlet manifold with a one-way valve to stop from pressurising the crankcase. Then the other breather from the other side of the cam cover (which on the stock k-turbo goes to pre-turbo pipework) venting via a catch can to atmosphere. I realise now that this was wrong. I used to get a lot of blowby that vented through the catch can and I suspect my crankcase was pressurised.
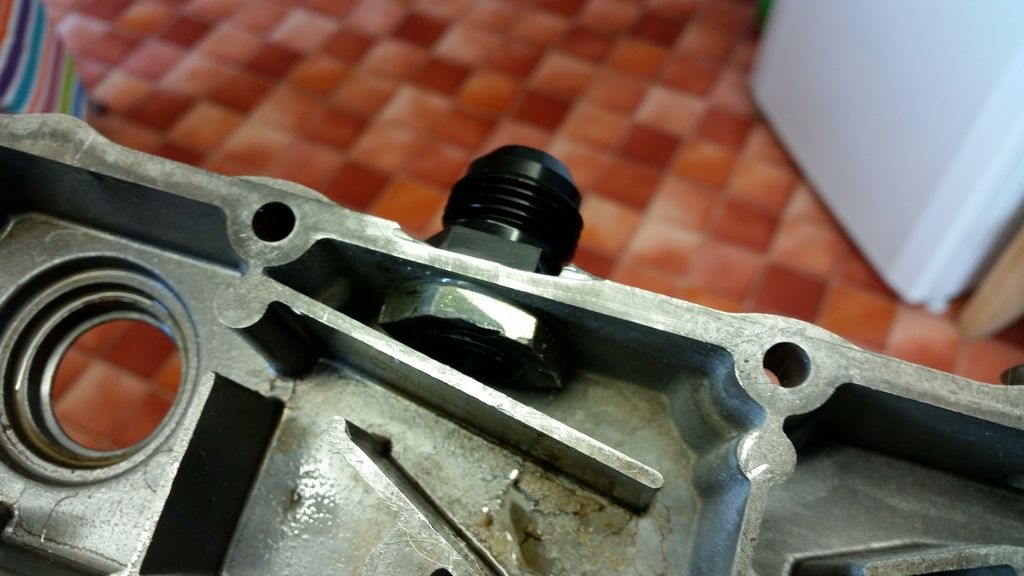
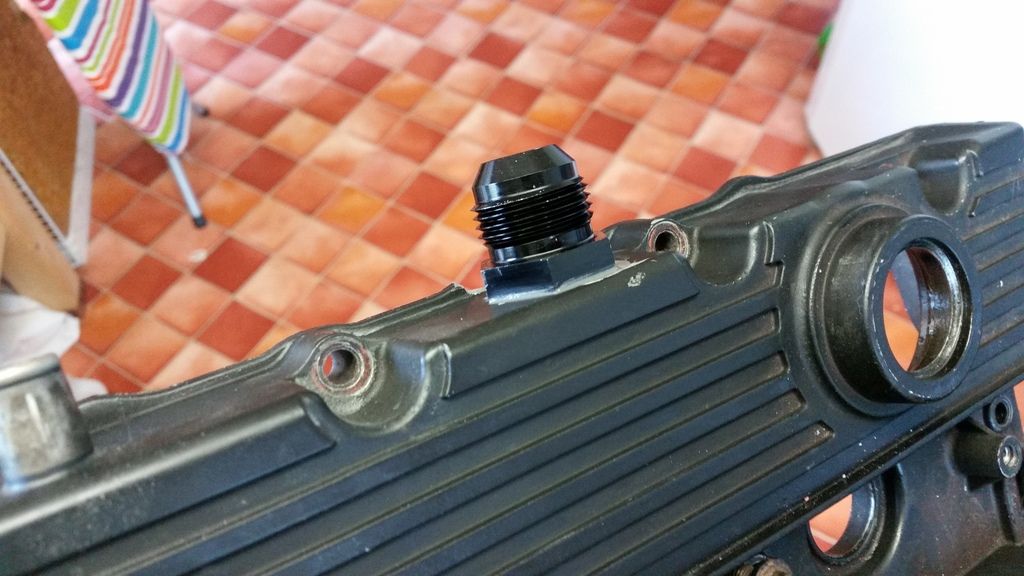
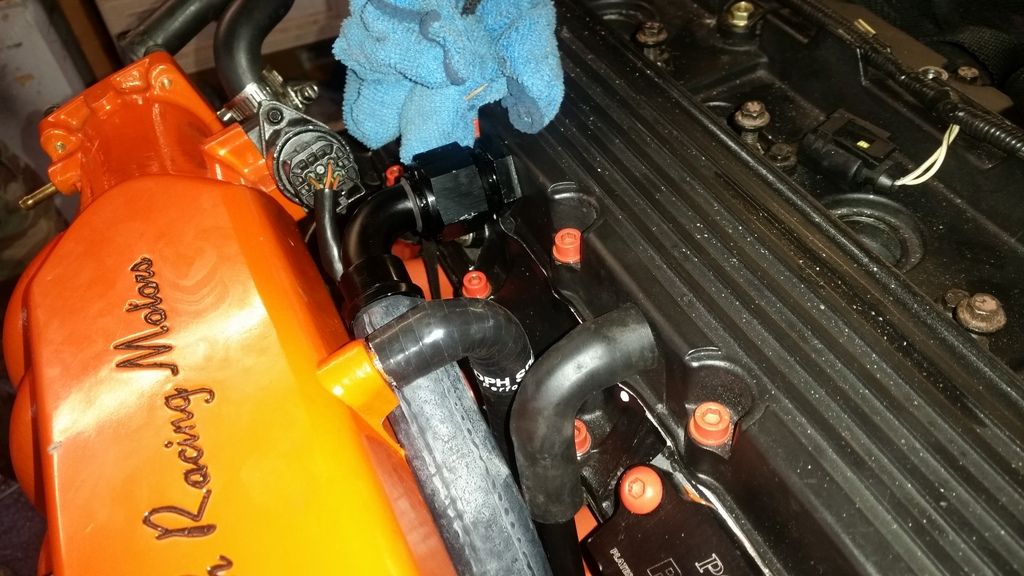
So on the rebuild I've enlarged the breathers in the cam cover (the holes are much smaller than the hosetails) and rerouted everything. I've added a breather directly from the crankcase by drilling and tapping the dipstick tube where it bolts to the engine. Both cam and crankcase breathers tee together and feed into a catch can. Then the catch can outlet goes (via another tee and one-way valves) to the inlet manifold and pre-turbo pipework.
The intention here is for the catch can (and therefore the inside of the engine) to alway see some kind of vacuum whether the engine is idling or on boost. I'm not sure how well this will work (or whether it will affect my idle) but it's an improvement on the old setup and is really just a slight variation of the stock setup but with bigger breathers. The other side of the cam cover has a fresh air inlet I should be able to use to regulate how much vacuum the engine sees by putting a restriction in it.
A few pics:
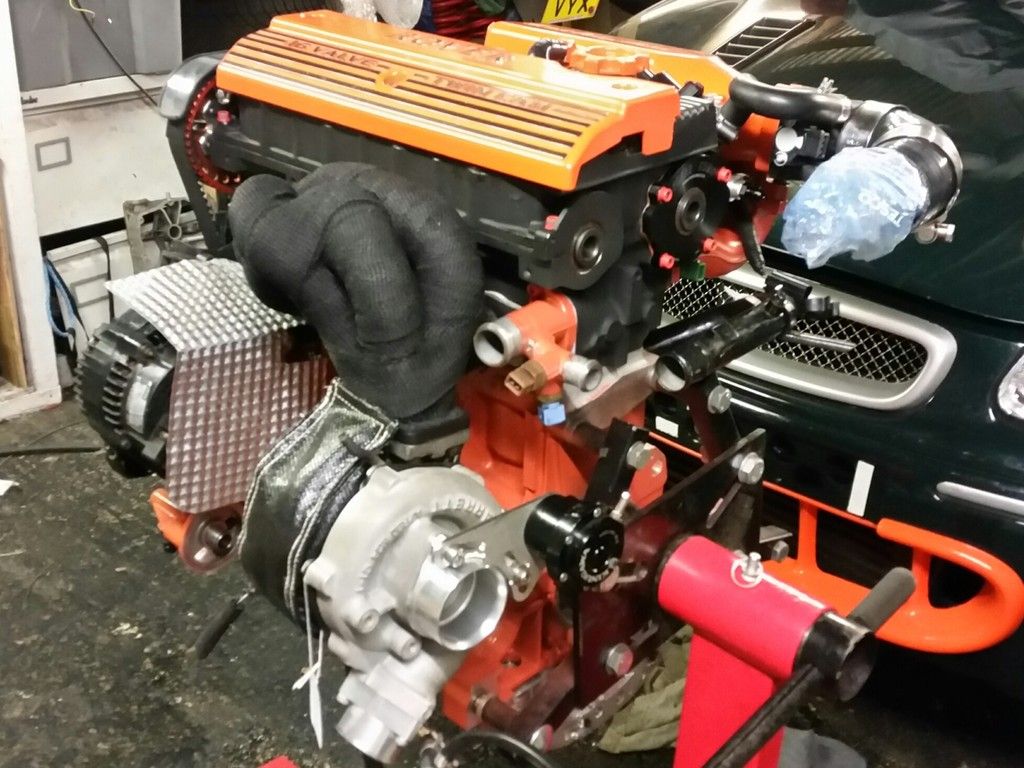
Now the exciting part. Getting the engine in!
I've covered the exhaust wrap in a coat of hi-temp silicone paint to protect it a bit. Also using a turbo blanket this time around.
Gearbox on
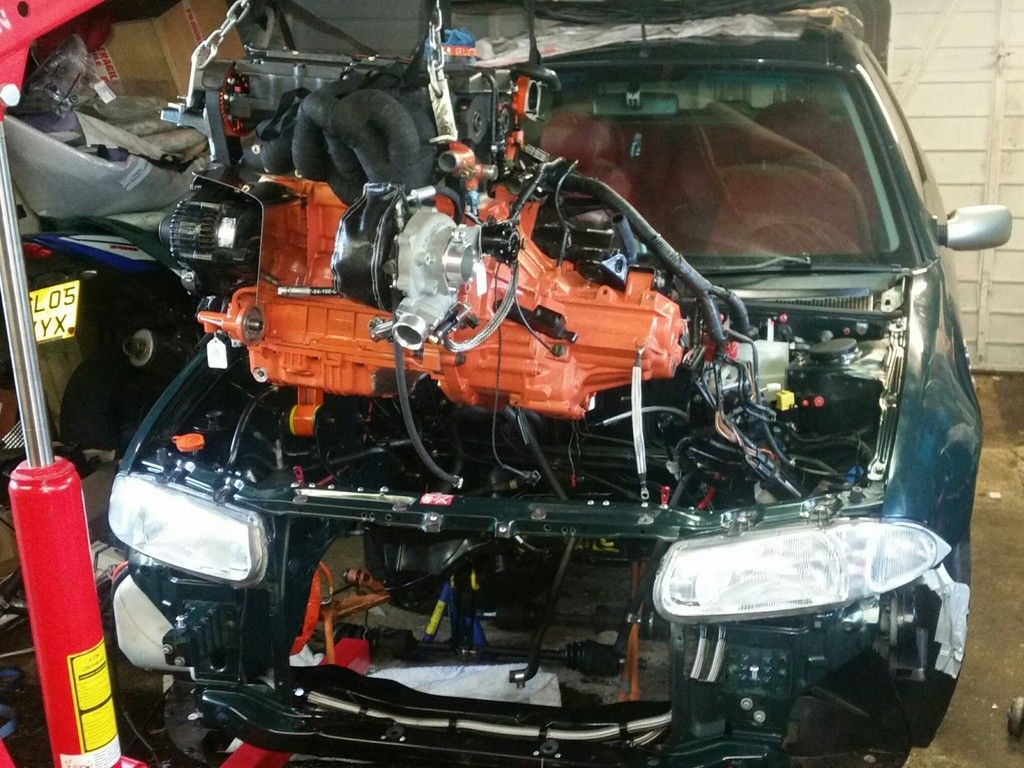
Lobbing it in from an acute angle:
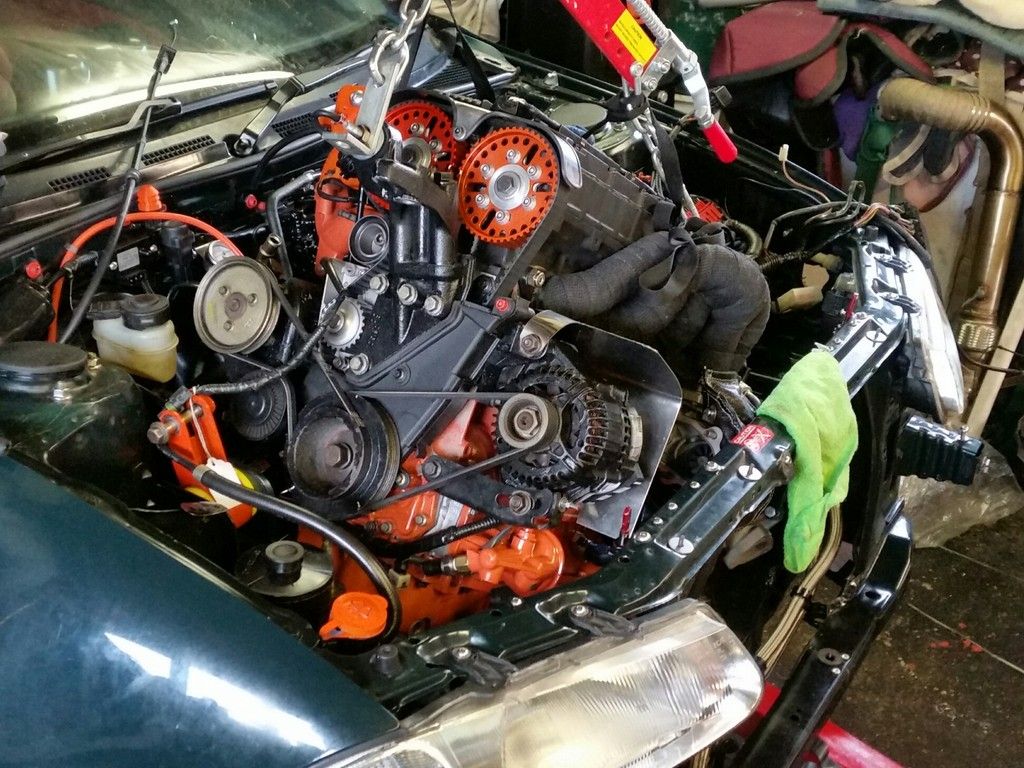
In! (again)!
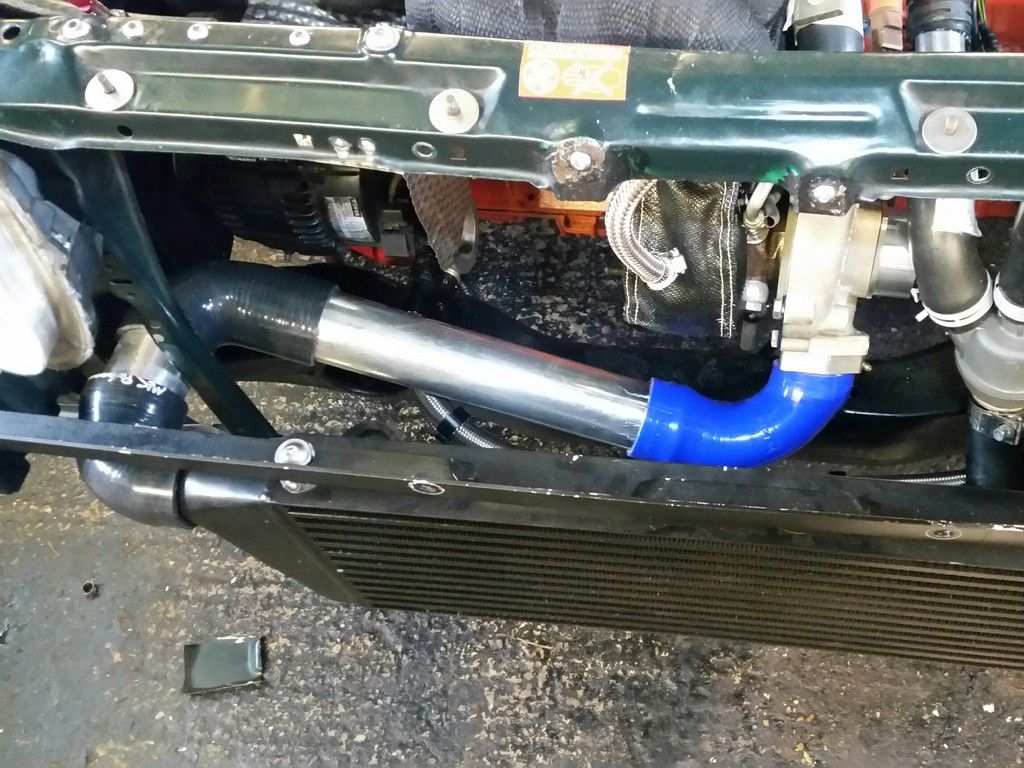
That's it for now. Lots left to do. I had actually test fitted the engine to get the turbo clocked into exactly the right position - it now points downwards because the new exhaust manifold takes up all the space an up-and-over setup would use. This routing is a fair bit shorter and the intake should run cooler this way too.
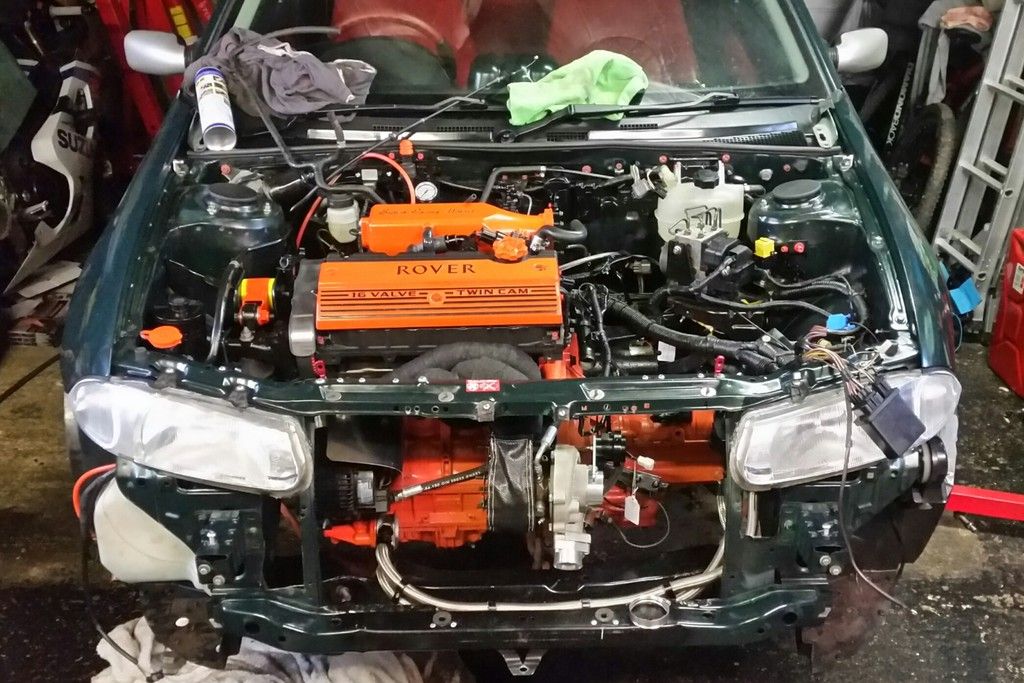
Mocked up:
Just have to get the engine buttoned up now and should be ready to run it up within the next couple of weeks.
But first, I've been making some changes to crankcase ventilation. I never really thought much about how the engine breathes but I've been researching it a lot recently and I've come to realise how important it is. In the last build I had the usual breather from cam cover to inlet manifold with a one-way valve to stop from pressurising the crankcase. Then the other breather from the other side of the cam cover (which on the stock k-turbo goes to pre-turbo pipework) venting via a catch can to atmosphere. I realise now that this was wrong. I used to get a lot of blowby that vented through the catch can and I suspect my crankcase was pressurised.
So on the rebuild I've enlarged the breathers in the cam cover (the holes are much smaller than the hosetails) and rerouted everything. I've added a breather directly from the crankcase by drilling and tapping the dipstick tube where it bolts to the engine. Both cam and crankcase breathers tee together and feed into a catch can. Then the catch can outlet goes (via another tee and one-way valves) to the inlet manifold and pre-turbo pipework.
The intention here is for the catch can (and therefore the inside of the engine) to alway see some kind of vacuum whether the engine is idling or on boost. I'm not sure how well this will work (or whether it will affect my idle) but it's an improvement on the old setup and is really just a slight variation of the stock setup but with bigger breathers. The other side of the cam cover has a fresh air inlet I should be able to use to regulate how much vacuum the engine sees by putting a restriction in it.
A few pics:
Now the exciting part. Getting the engine in!
I've covered the exhaust wrap in a coat of hi-temp silicone paint to protect it a bit. Also using a turbo blanket this time around.
Gearbox on
Lobbing it in from an acute angle:
In! (again)!
That's it for now. Lots left to do. I had actually test fitted the engine to get the turbo clocked into exactly the right position - it now points downwards because the new exhaust manifold takes up all the space an up-and-over setup would use. This routing is a fair bit shorter and the intake should run cooler this way too.
Mocked up:
Just have to get the engine buttoned up now and should be ready to run it up within the next couple of weeks.
Crankcase breathers are quite simple and you've not done yours very well, you don't need vacuum in the crankcase at this level, but if you do you don't get the engine inlet to provide it.
Take the pipes from crankcase separator and cam cover (if it has or really needs them up there) put them to a proper OEM external separator, from that there should be a drain at the bottom which takes the oil back to the sump. At the top of this take a pipe and route it under the car, put a filter on it.
And that's it, it's as simple as that.
Oily fumes being pulled into the engine will interfere with the burn process and increase the chances of detonation.
If you reeeaaally feel you need some kind of crankcase vac then you connect the separator vent to the exhaust using a special shaped valve and let that do it.
Evoluzione said:
Crankcase breathers are quite simple and you've not done yours very well, you don't need vacuum in the crankcase at this level, but if you do you don't get the engine inlet to provide it.
Take the pipes from crankcase separator and cam cover (if it has or really needs them up there) put them to a proper OEM external separator, from that there should be a drain at the bottom which takes the oil back to the sump. At the top of this take a pipe and route it under the car, put a filter on it.
And that's it, it's as simple as that.
Oily fumes being pulled into the engine will interfere with the burn process and increase the chances of detonation.
If you reeeaaally feel you need some kind of crankcase vac then you connect the separator vent to the exhaust using a special shaped valve and let that do it.
Thanks for the tip. That's actually easier to setup than what I was going to do. I wasn't happy about hot fumes going back into my inlet but I understood vacuum ventilation to be important at any level, and this is really just an upgrade of the OEM system on the k-turbo but with the fumes going through a baffled catch can first to remove as much of the oil vapour as possible. If vacuum isn't required I'll have a rethink and simplify the system along the lines suggested. Take the pipes from crankcase separator and cam cover (if it has or really needs them up there) put them to a proper OEM external separator, from that there should be a drain at the bottom which takes the oil back to the sump. At the top of this take a pipe and route it under the car, put a filter on it.
And that's it, it's as simple as that.
Oily fumes being pulled into the engine will interfere with the burn process and increase the chances of detonation.
If you reeeaaally feel you need some kind of crankcase vac then you connect the separator vent to the exhaust using a special shaped valve and let that do it.

I hope you don't mind me pointing this out, but your natural way of doing things must make your life very difficult and expensive, your mode is Type B:
Have an idea about something you know nothing about, but is a well trodden path.
Do it how you think is best way possible.
Show people the results.
They tell you it's wrong or it broke anyway and you do it again.
Ad infinitum.
The correct way should be Type A:
Have an idea about something you know nothing about, but is a well trodden path.
Show people what you are intending to do.
Fully explore the advice given and the validity of that advice and those giving it.
Take all the advice and make an informed decision based on that.
Succeed first time.
I'm sure if you could adopt type A more often your life would be greatly enriched, you must have learned somewhere along the line that to test if something is hot or not doesn't necessarily mean one has to push ones face against it.

Gassing Station | Readers' Cars | Top of Page | What's New | My Stuff