Rover 200 BRM - 1.8 K-Series turbo project
Discussion


Absolutely brilliant work that looks fantastic! It's nice to see someone devoting time to something a bit different from the normal crowd and vastly under appreciated. My little brother drives around in an MG ZR and I ended up doing the head gasket etc. on that, just to live up to its reputation! Regardless I still think the K series is a fantastic engine, clearly advanced for its day and really it's a shame it wasn't put together with better bits in the first place otherwise it could've been a real gem.
Thanks for the kind comments guys.
Chassis-wise. Since you asked:
I've decided to initially go for zr struts on x-power springs and a full poly bush on all new suspension and steering moving parts. I've had the steering rack refurbished too. I will be using the stiffer ZR160 rear beam (that also gives me the larger rear brakes that came with) to which I will trial the 18mm "anti roll bar" from my BRM rear beam and 2.5 degree negative camber plates. The arb is actually a strengthening bar to stiffen the beam. For the zr they just made the beam with thicker material avoiding the need for this bar. However they left the mounting points for it so you can make the beam extra stiff (possibly too stiff - we shall see).
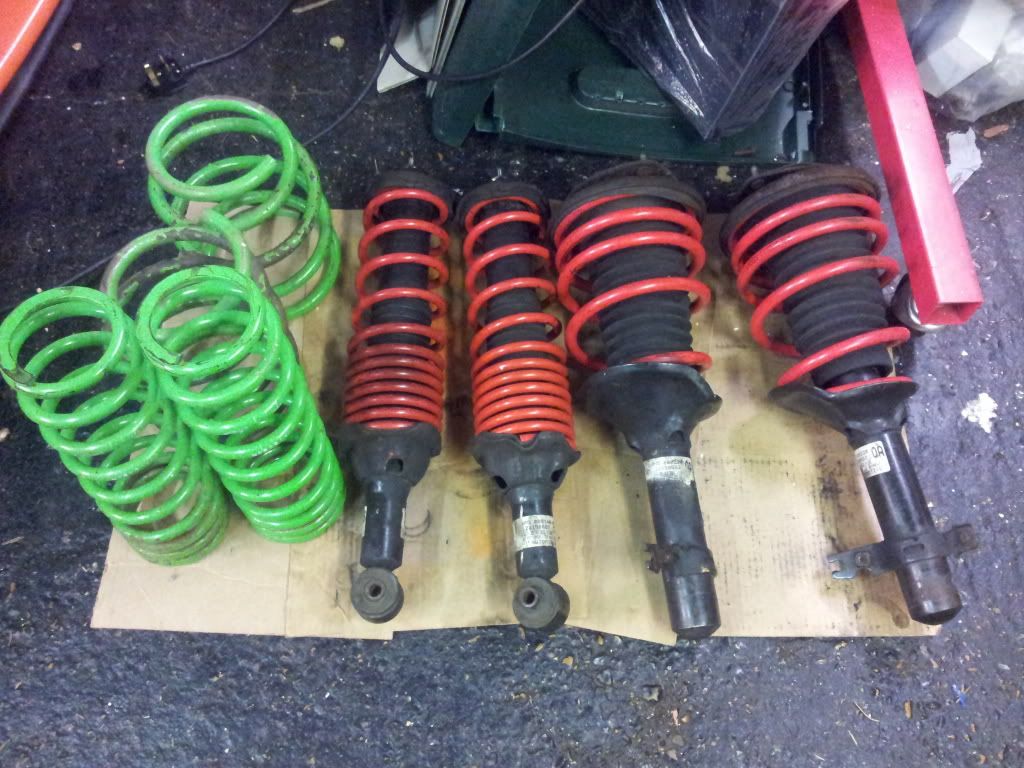
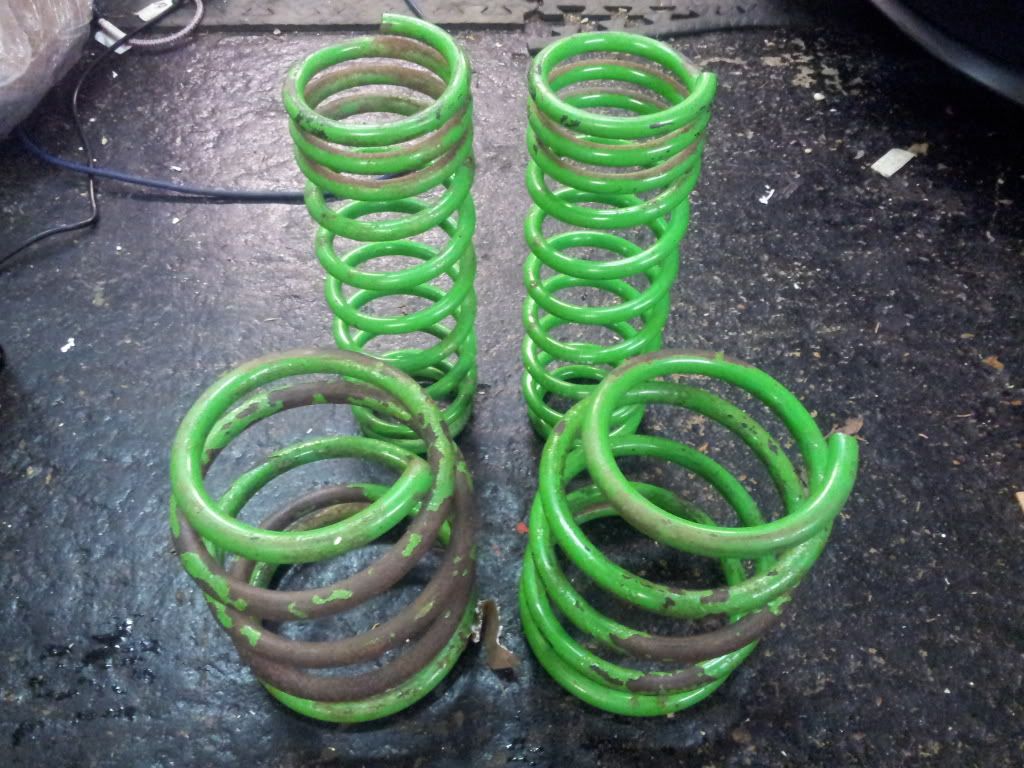
Picked up a set of ZR struts and some genuine x-power springs in generally poor condition.
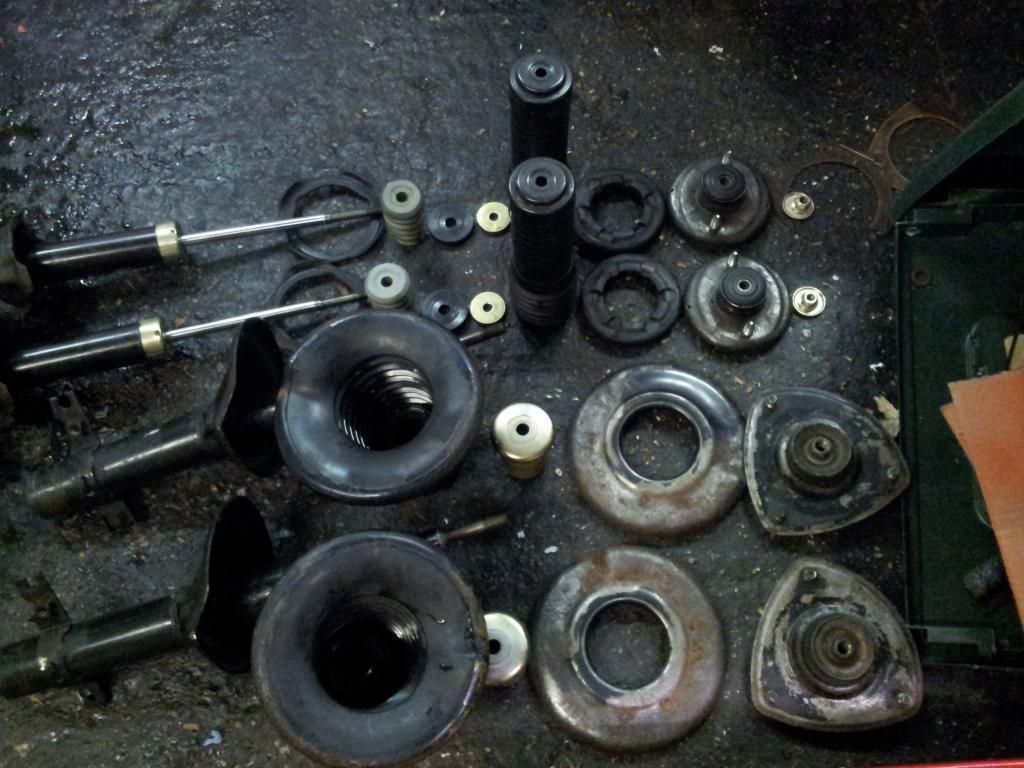
Struts stripped down for a rebuild, ended up replacing the top mounts with new standard units.
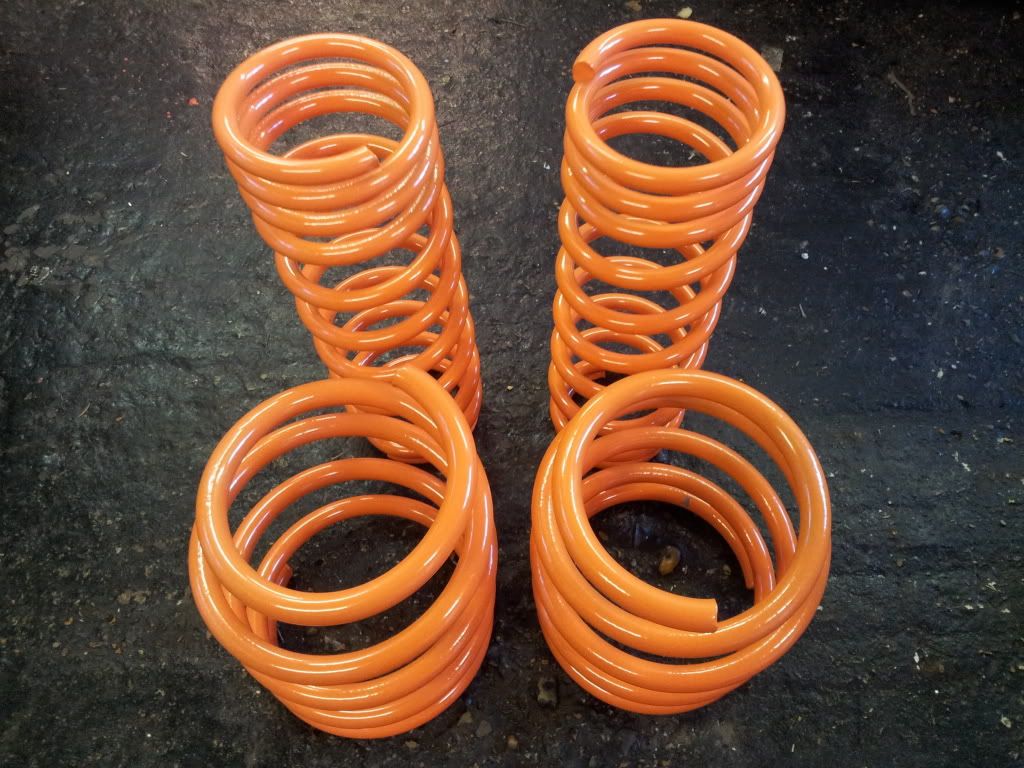
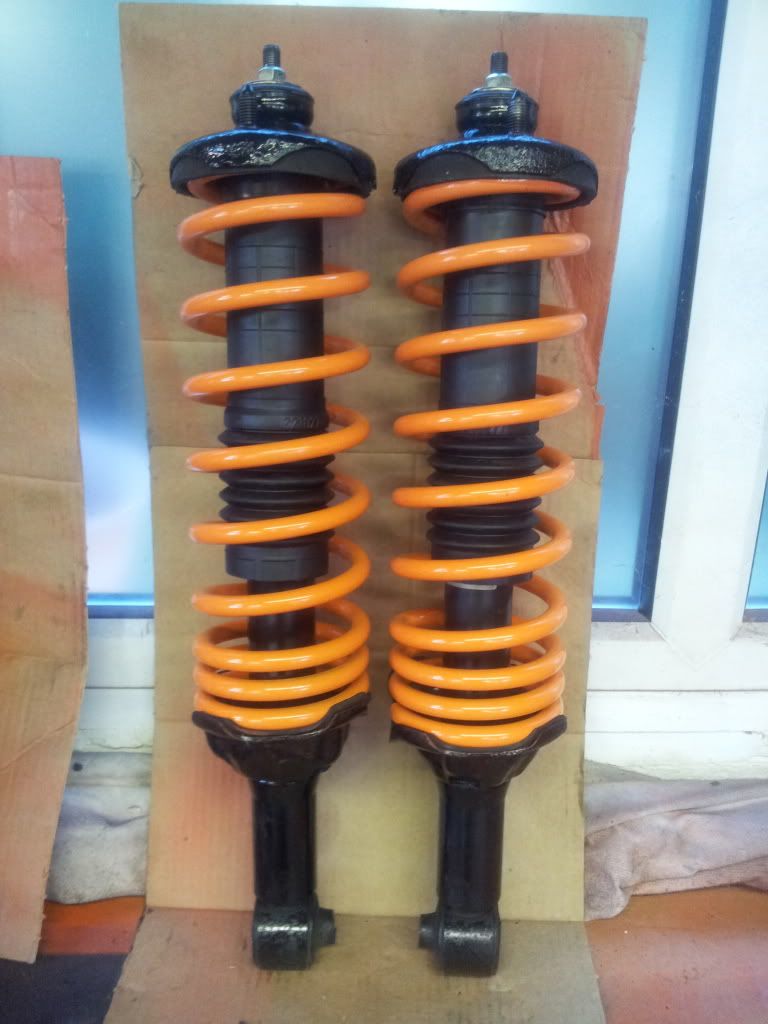
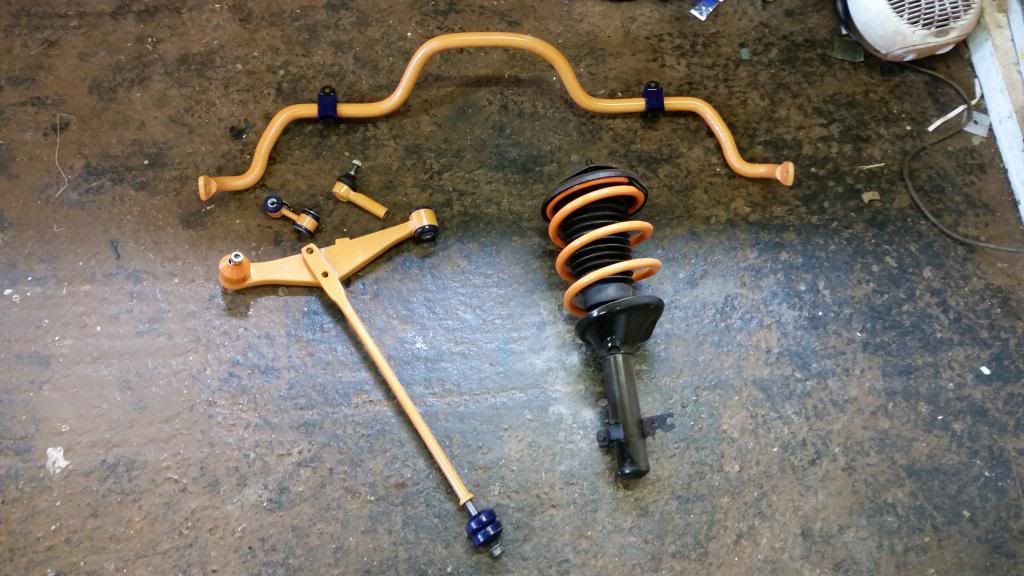
Had the X-power springs sand blasted and powder coated orange (obv)
Building the struts back up

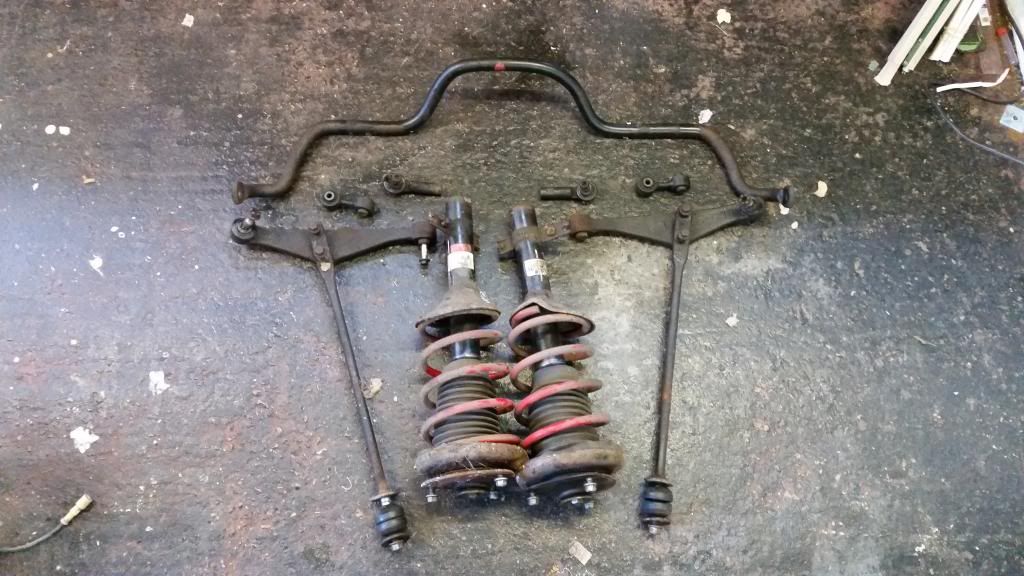
taking the old struts, lower arms, tie rods, track rod ends, drop links and ARB off the BRM:
New lower arms - removing the bushes
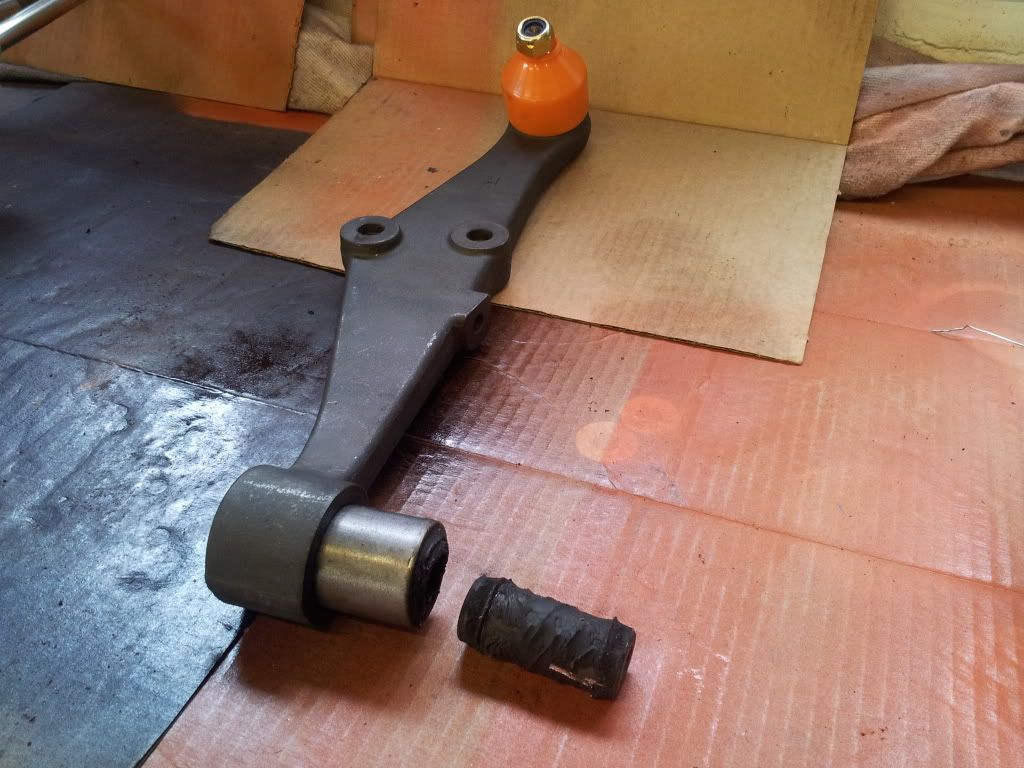
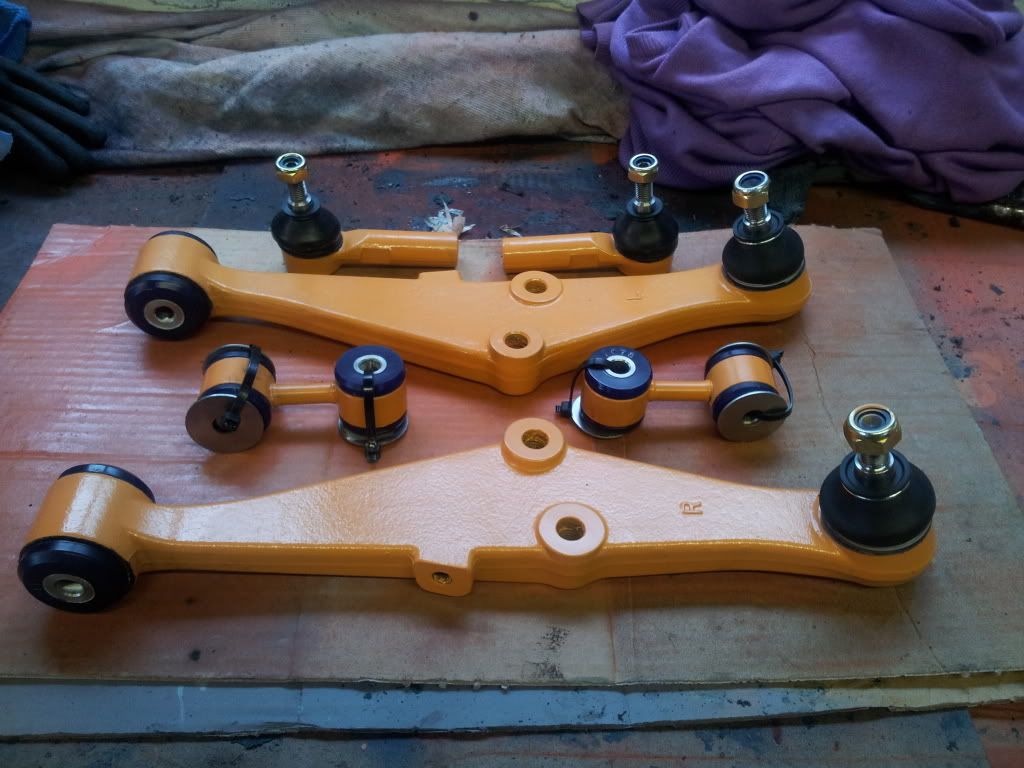
All ready for poly bushes
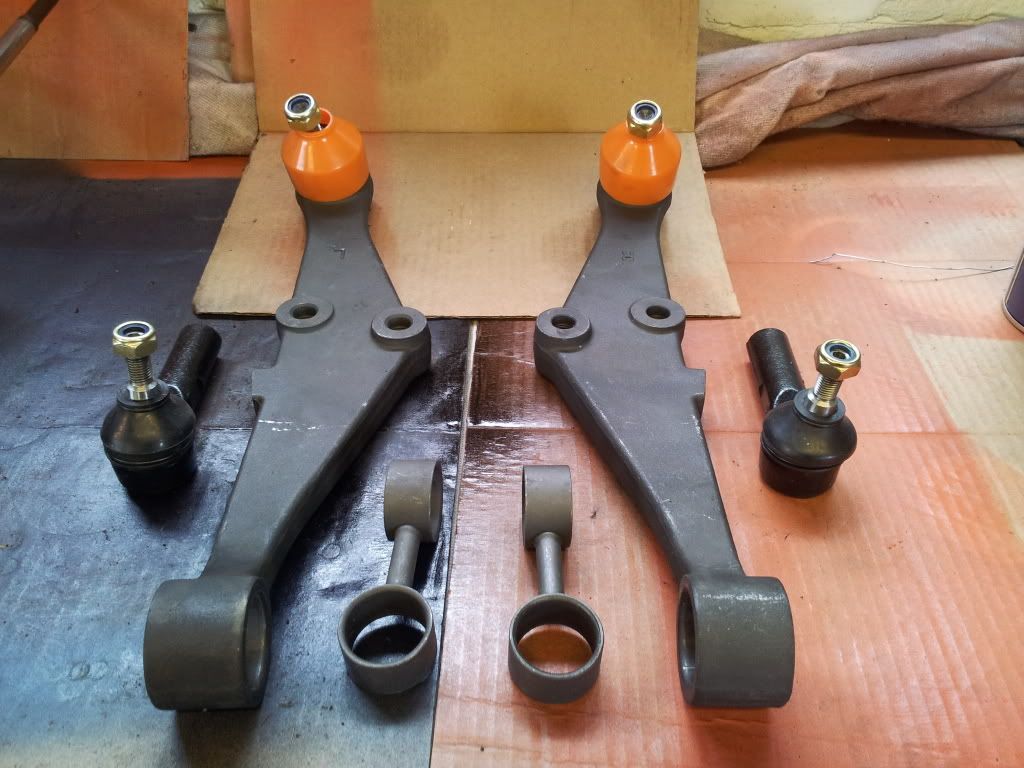
Poly bushes installed after a lick of protective paint. I only had orange...
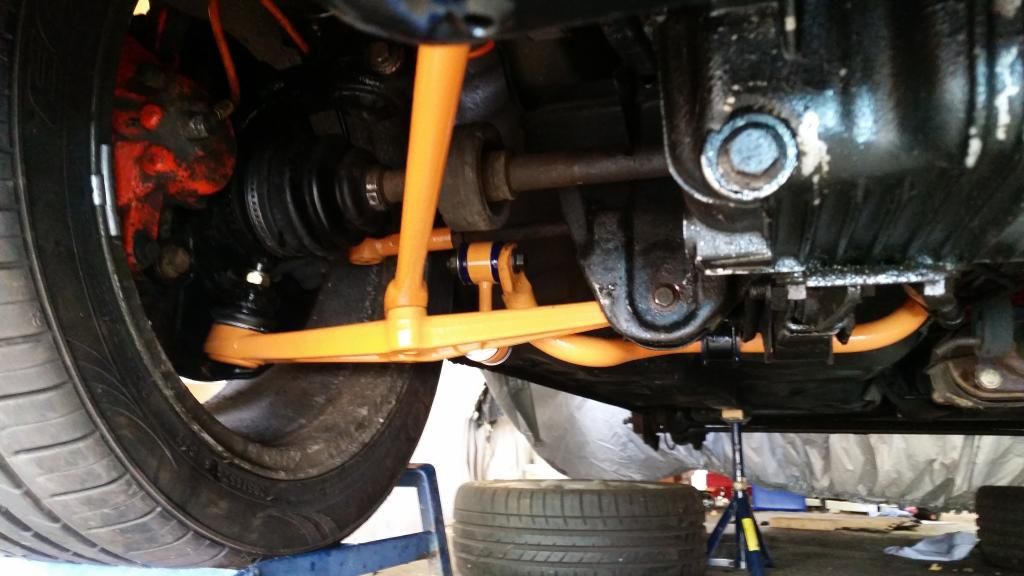
All ready to go on:
And all on. Gave the front cross member a lick of paint too - Found some black paint for that...
I also replaced the steering rack with a recon unit whilst doing this job which is a horrific task. Got it done but no pictures.
Whilst under the car I also installed the short throw (and poly bushed) gear linkage. This is a great piece of kit and gives the gear shift a really slick action. It reduces the throw on the BRM from 3rd to 4th from 10.5cm to 7.5cm. That doesn't sound a lot but trust me it really make a difference.
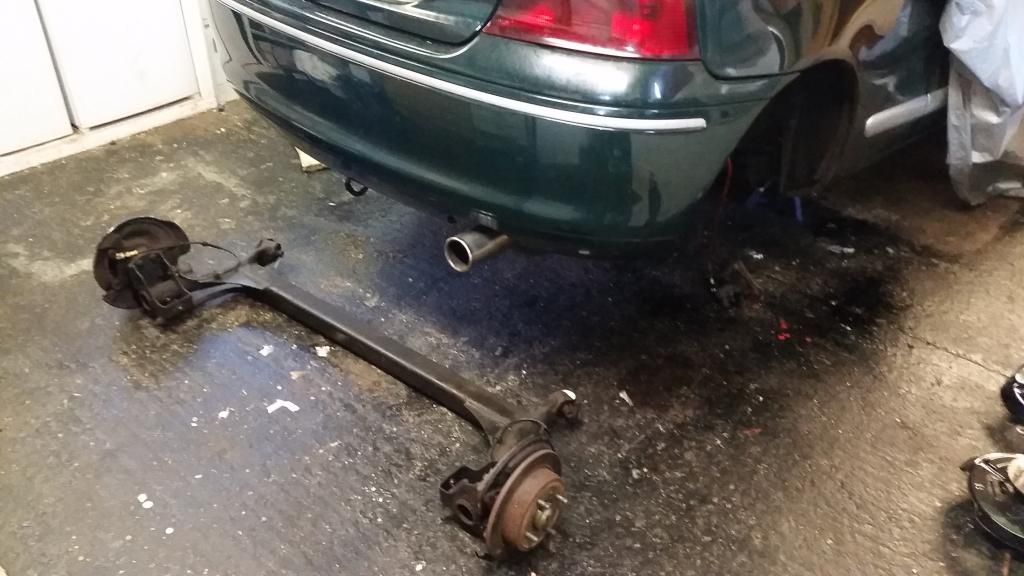
Turning attention to the rear end:
Removal of the rear beam was actually quite simple.

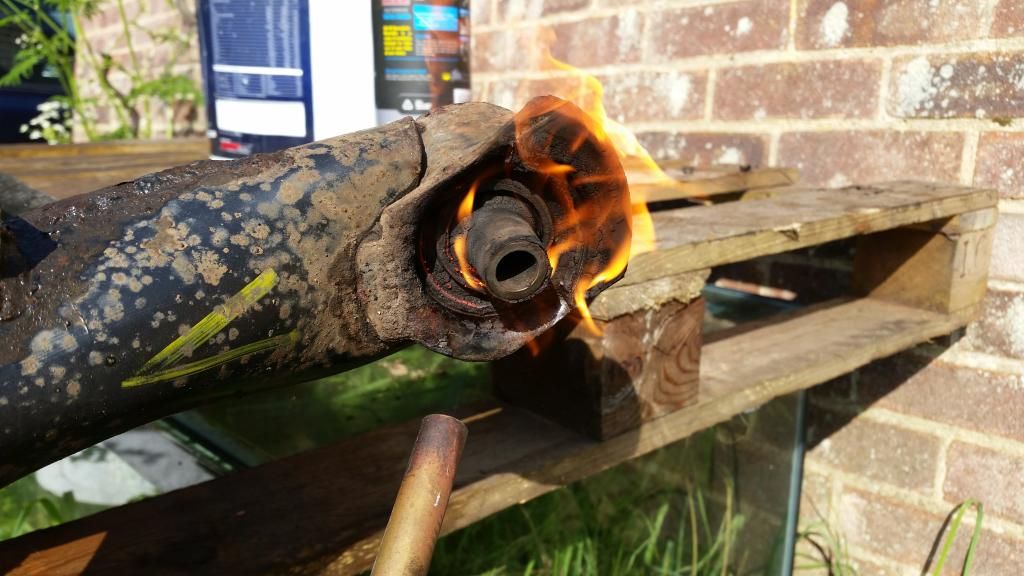
Removing the rubber bushes from the ZR beam to make way for poly. Had to burn them out! Getting the giant poly bushes in was surprisingly difficult. Had to fashion a tool out of threaded bar, nuts and spacers. Shame I didn't get any pictures of this as it took me forever to do!
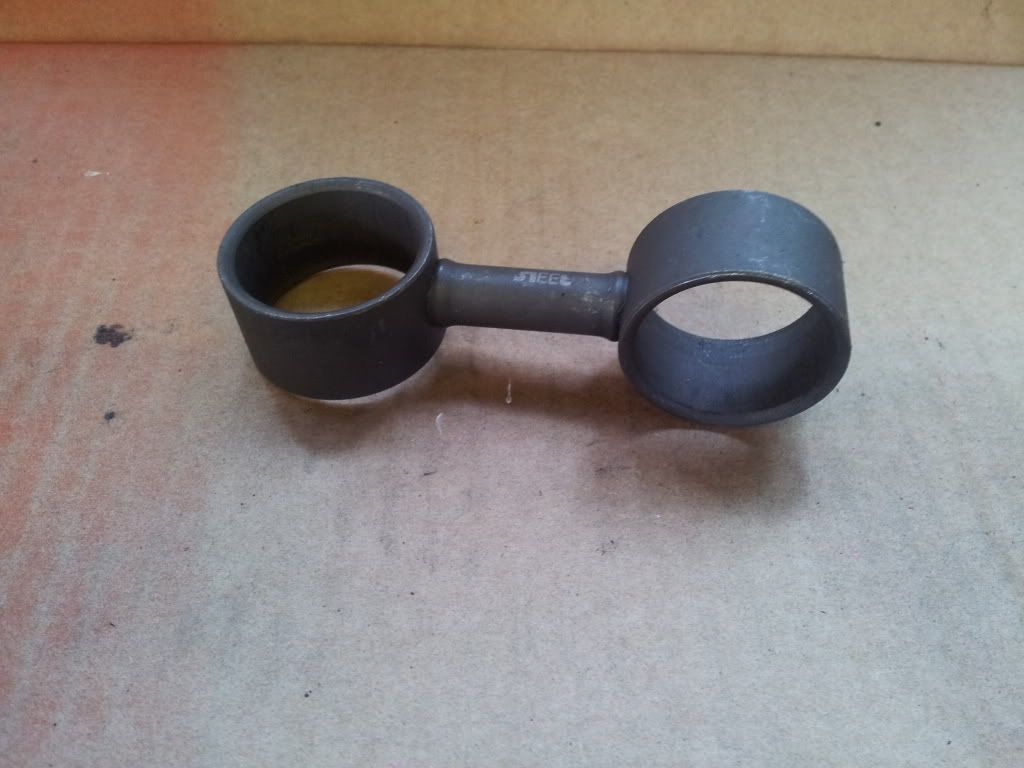
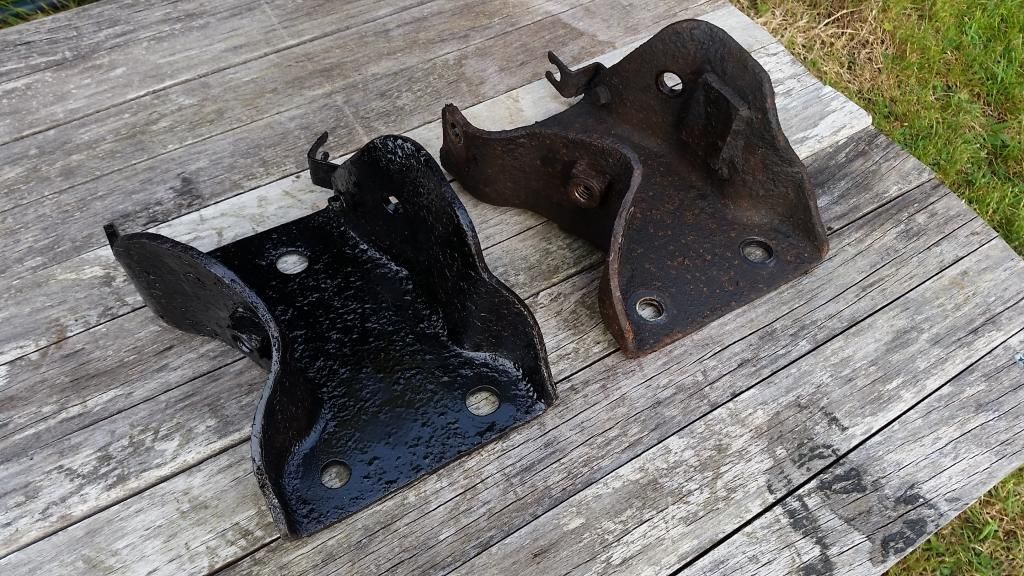
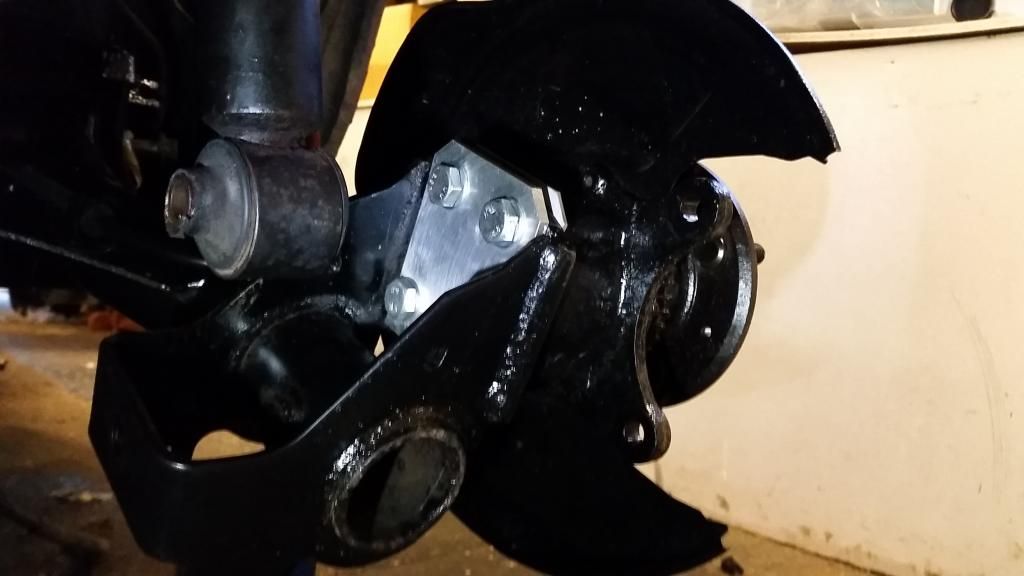
It turns out that the beam-to-chassis brackets are unique on the BRM. You'll see in the image below that the BRM bracket (on the right) has a small piece welded into it. Apparently this was to reduce lateral movement of the rear end to give more precise feel. It would have seriously hampered installation of poly bushes which only come designed for the standard 200 brackets so I had to source a set of non-BRM brackets.
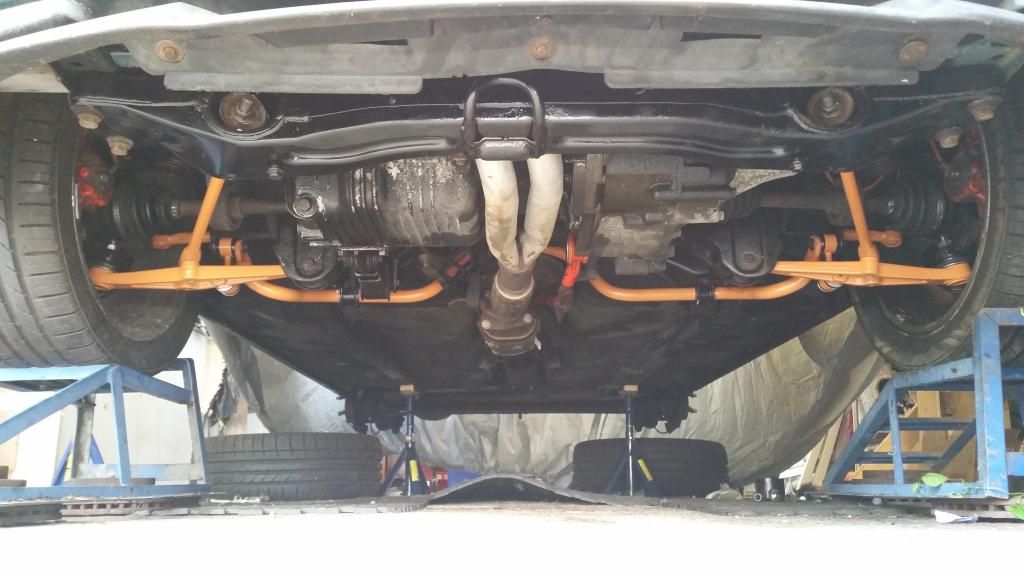
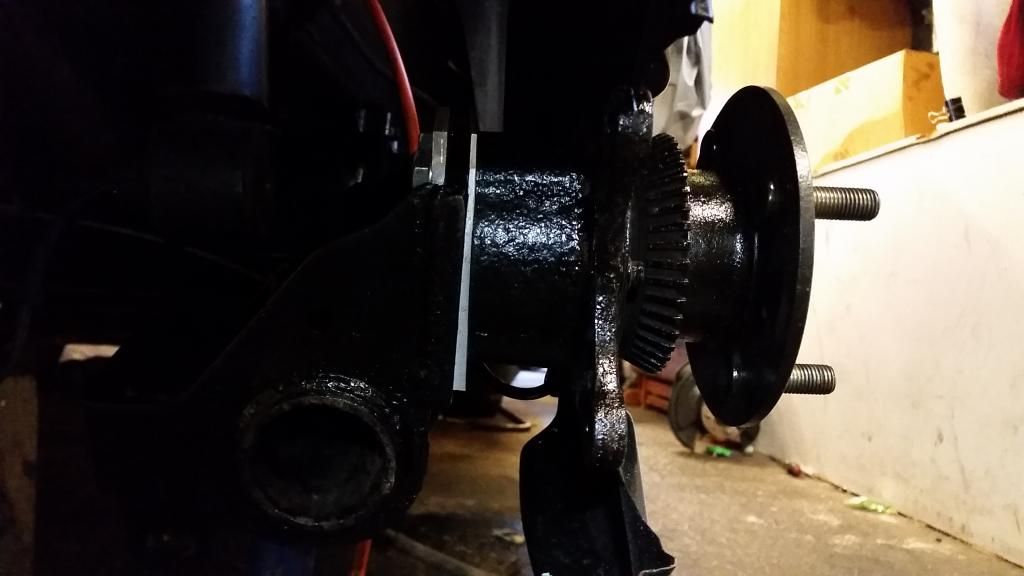
New beam in complete with (ahem) orange ARB I extracted at great effort from the BRM beam. The ZR beam is apparently stiffer so the ARB (which is not really an ARB in the classic sense - it just adds stiffness) is not needed. However it still has the bracketry for one so I thought I'd give it a go. This might make it a bit flightly on the road so if it's too much I'll take it off. It'll be a shame though as I had to perform grinder cutting surgery to get it off without damaging it. the 4" or so spacers you can see at each mounting end are new stainless spacers I had to fabricate as one of the old spacers had to be hacked to bits to get it off (it had basically welded to the bar with corrosion).
Also installed some negative camber plates. I was originally going to go for 1.5 degrees as this will be a road car. However I got talked into 2.5 degrees. Will see how they feel on the road. If too much then I'll swap for 1.5 degrees later.
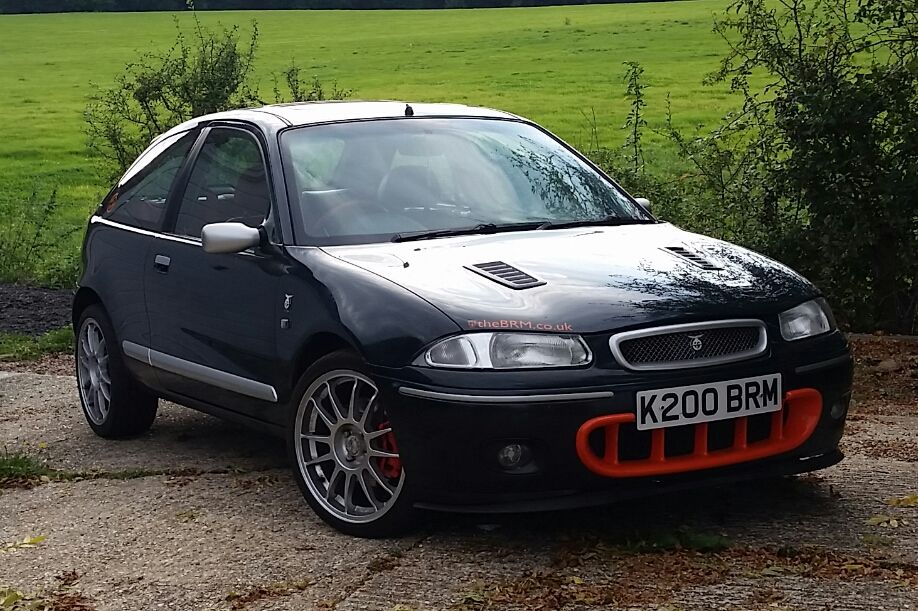
And how she currently sits on this setup. a Little high on the rear still. That might just be the uneven driveway. Suspect I may end up going with coilevers but will let it sit like this for the time being. The wheels are temporary as I wanted something I knew would fit over the big brake kit I'll be using (the BRM cosmos wheels will not work unfortunately) . Eventually I'll source something in 17" that has similar 6-spoke design as the cosmos. Saying that, the OZ superlegerras have grown on me.
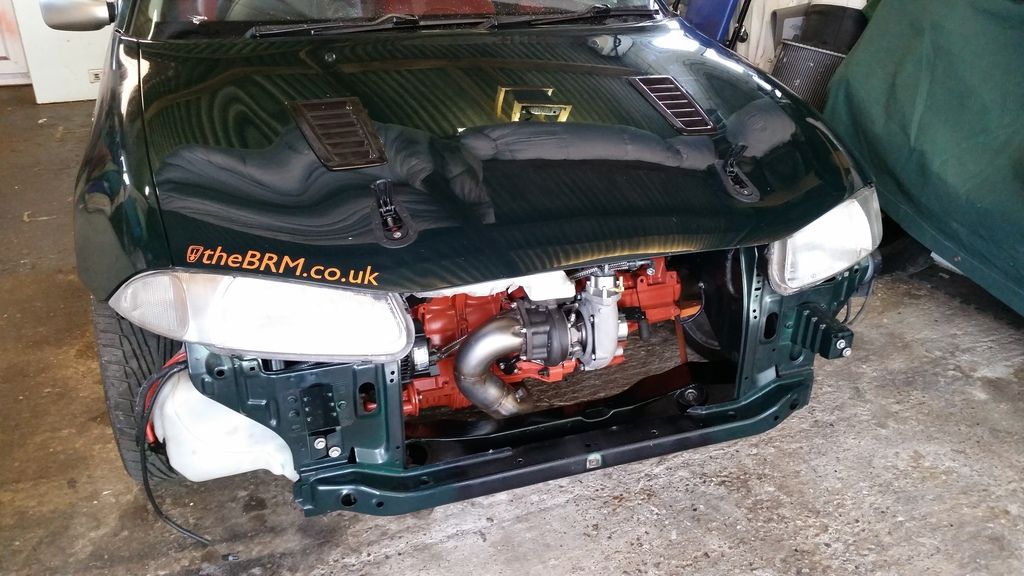
You'll notice the bonnet vents. That's a tale for another day...
Chassis-wise. Since you asked:
I've decided to initially go for zr struts on x-power springs and a full poly bush on all new suspension and steering moving parts. I've had the steering rack refurbished too. I will be using the stiffer ZR160 rear beam (that also gives me the larger rear brakes that came with) to which I will trial the 18mm "anti roll bar" from my BRM rear beam and 2.5 degree negative camber plates. The arb is actually a strengthening bar to stiffen the beam. For the zr they just made the beam with thicker material avoiding the need for this bar. However they left the mounting points for it so you can make the beam extra stiff (possibly too stiff - we shall see).
Picked up a set of ZR struts and some genuine x-power springs in generally poor condition.
Struts stripped down for a rebuild, ended up replacing the top mounts with new standard units.
Had the X-power springs sand blasted and powder coated orange (obv)
Building the struts back up
taking the old struts, lower arms, tie rods, track rod ends, drop links and ARB off the BRM:
New lower arms - removing the bushes
All ready for poly bushes
Poly bushes installed after a lick of protective paint. I only had orange...
All ready to go on:
And all on. Gave the front cross member a lick of paint too - Found some black paint for that...
I also replaced the steering rack with a recon unit whilst doing this job which is a horrific task. Got it done but no pictures.
Whilst under the car I also installed the short throw (and poly bushed) gear linkage. This is a great piece of kit and gives the gear shift a really slick action. It reduces the throw on the BRM from 3rd to 4th from 10.5cm to 7.5cm. That doesn't sound a lot but trust me it really make a difference.
Turning attention to the rear end:
Removal of the rear beam was actually quite simple.
Removing the rubber bushes from the ZR beam to make way for poly. Had to burn them out! Getting the giant poly bushes in was surprisingly difficult. Had to fashion a tool out of threaded bar, nuts and spacers. Shame I didn't get any pictures of this as it took me forever to do!
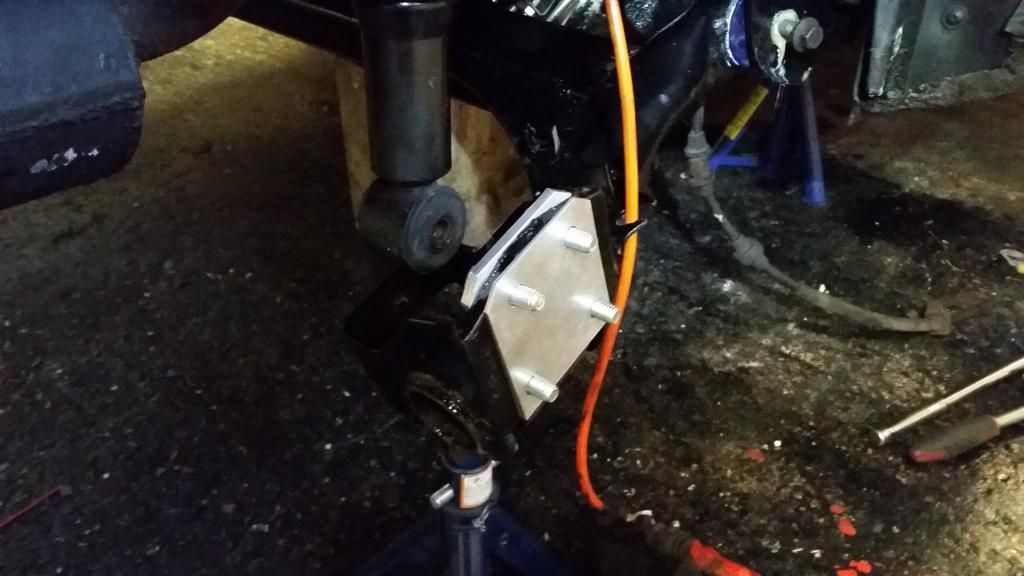
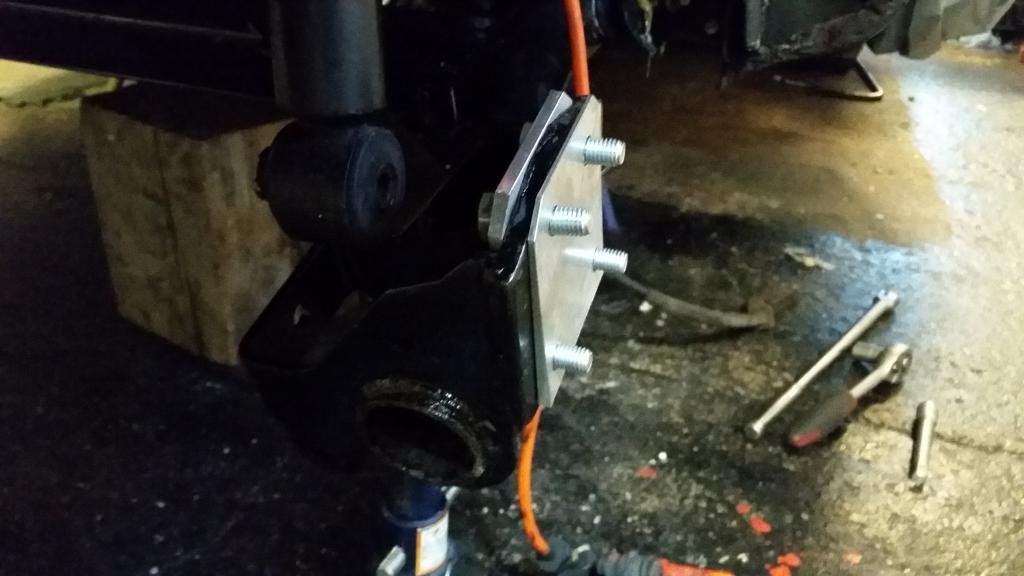
It turns out that the beam-to-chassis brackets are unique on the BRM. You'll see in the image below that the BRM bracket (on the right) has a small piece welded into it. Apparently this was to reduce lateral movement of the rear end to give more precise feel. It would have seriously hampered installation of poly bushes which only come designed for the standard 200 brackets so I had to source a set of non-BRM brackets.
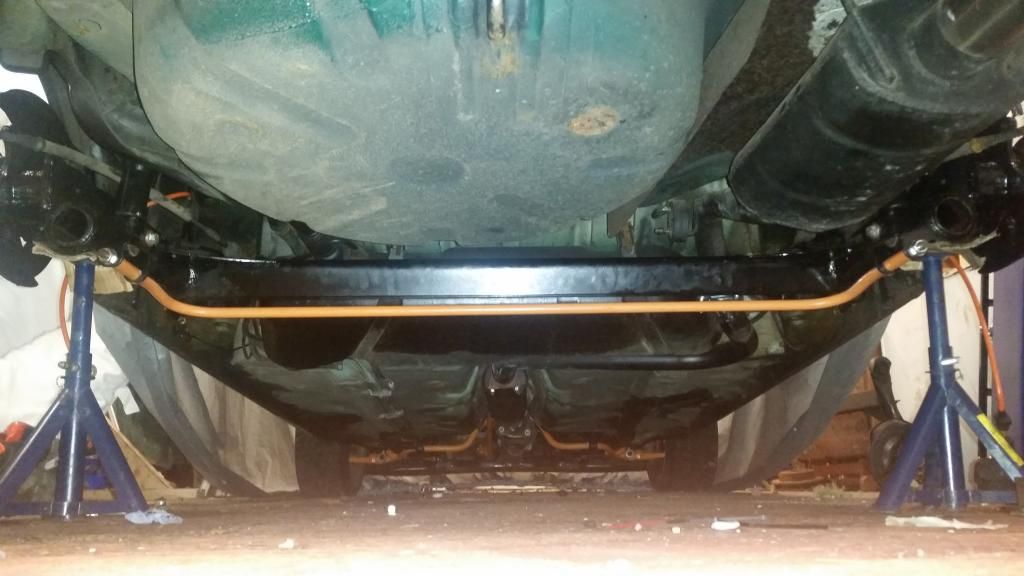
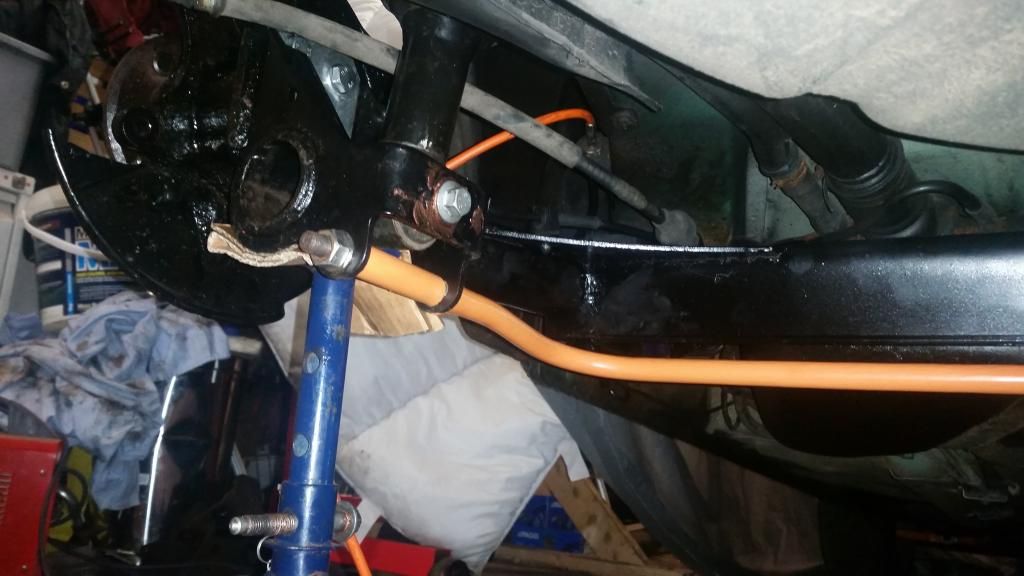
New beam in complete with (ahem) orange ARB I extracted at great effort from the BRM beam. The ZR beam is apparently stiffer so the ARB (which is not really an ARB in the classic sense - it just adds stiffness) is not needed. However it still has the bracketry for one so I thought I'd give it a go. This might make it a bit flightly on the road so if it's too much I'll take it off. It'll be a shame though as I had to perform grinder cutting surgery to get it off without damaging it. the 4" or so spacers you can see at each mounting end are new stainless spacers I had to fabricate as one of the old spacers had to be hacked to bits to get it off (it had basically welded to the bar with corrosion).
Also installed some negative camber plates. I was originally going to go for 1.5 degrees as this will be a road car. However I got talked into 2.5 degrees. Will see how they feel on the road. If too much then I'll swap for 1.5 degrees later.
And how she currently sits on this setup. a Little high on the rear still. That might just be the uneven driveway. Suspect I may end up going with coilevers but will let it sit like this for the time being. The wheels are temporary as I wanted something I knew would fit over the big brake kit I'll be using (the BRM cosmos wheels will not work unfortunately) . Eventually I'll source something in 17" that has similar 6-spoke design as the cosmos. Saying that, the OZ superlegerras have grown on me.
You'll notice the bonnet vents. That's a tale for another day...
Edited by Stuballs on Wednesday 3rd January 13:19
most ZR160's run 205/45R17's
the ZR also has a faster steering rack vs the rest of the 200/25s but with slight bigger turning circle.
With 205/45R17 using the stock 200/25 rack you may get rub on full lock.
My now dead Vi's story
http://forums.mg-rover.org/showthread.php?t=111432
the ZR also has a faster steering rack vs the rest of the 200/25s but with slight bigger turning circle.
With 205/45R17 using the stock 200/25 rack you may get rub on full lock.
My now dead Vi's story
http://forums.mg-rover.org/showthread.php?t=111432
Edited by cirian75 on Tuesday 24th November 07:03
rb5er said:
Looks great. How does it drive if at all?
A bit all over the place but geometry not set up yet so hard to say. I expect I may end up undoing some of the suspension mods but nothing I’ve done is not easily reversible.andburg said:
amazing how many names I still recognise here from .org and no one is left there!
I know! Seeing a few familiar names pop up. .org seems mostly for MGF and TF owners now.FWDRacer said:
If this was a VW, people would be fisting off over it.
I love the fact it is a BRM Rover. OP-> Top skills. Bit heavy on the Orange tho'
Thanks mate! Yeah orange is a bit heavy but the engine bay when finished will be fairly subtle.I love the fact it is a BRM Rover. OP-> Top skills. Bit heavy on the Orange tho'
300bhp/ton said:
Just out of curiosity, what sort of cost had this rebuild involved?
Absolutely everything in the engine bay including nuts, bolts, gaskets probably about £9k. However I’m currently in the process of overhauling the head again and going solid cam so add another grand plus. I know it’s silly money to spend on a Rover but for me it’s less about the end result and more about my enjoyment of tackling the project myself. I’m not a mechanic (just a self-taught hobbyist like a lot of guys)– I’ve used this as a learning process as much as anything else. That said, I do want something special at the end!Stuballs said:
Absolutely everything in the engine bay including nuts, bolts, gaskets probably about £9k. However I’m currently in the process of overhauling the head again and going solid cam so add another grand plus. I know it’s silly money to spend on a Rover but for me it’s less about the end result and more about my enjoyment of tackling the project myself. I’m not a mechanic (just a self-taught hobbyist like a lot of guys)– I’ve used this as a learning process as much as anything else. That said, I do want something special at the end!
It's not silly money if YOU are getting value out of it by enjoying the build! We should have more people like you 
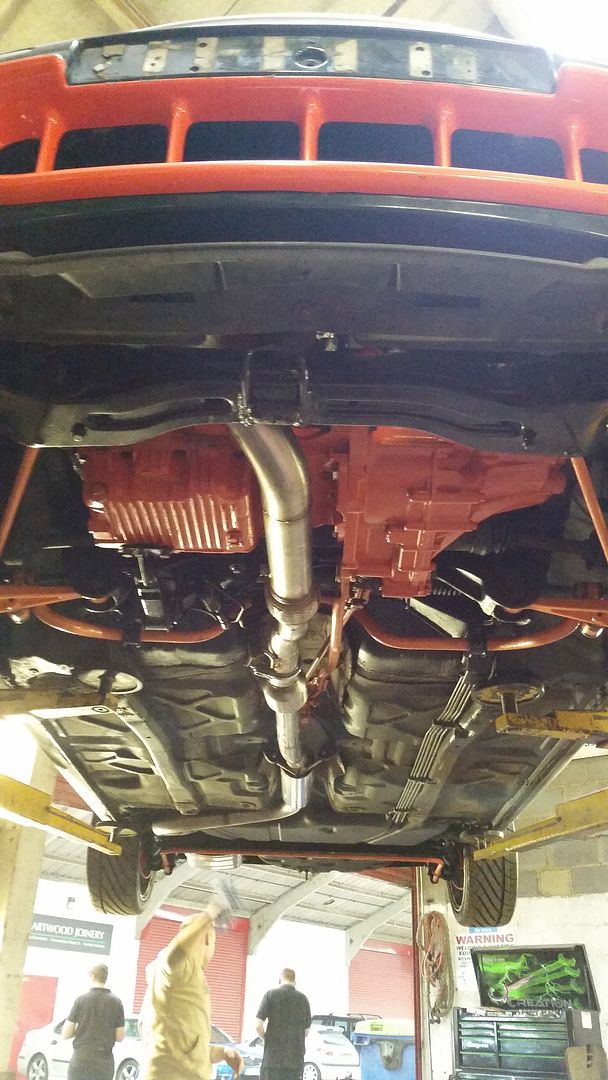
Time to get the exhaust done.
Obviously being a non turbo car I had to at least sort the downpipe. I initially considered just having a downpipe made and mating it to the existing cat-back system. But then I figured if I'm having the car trailered somewhere and paying for fabrication, I may as well go the whole hog and have a full system made.
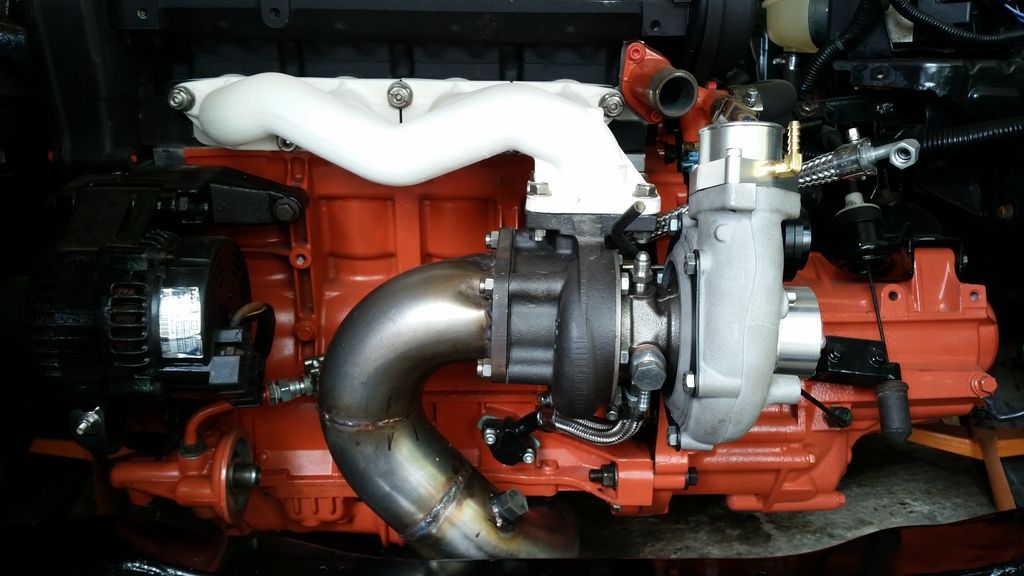
I had a few options but went with Fast Road Conversions in Ashford (Powerspeed). They made me a full turbo-back 2.5" system with a sports cat and managed to squeeze in a massive 3" downpipe.
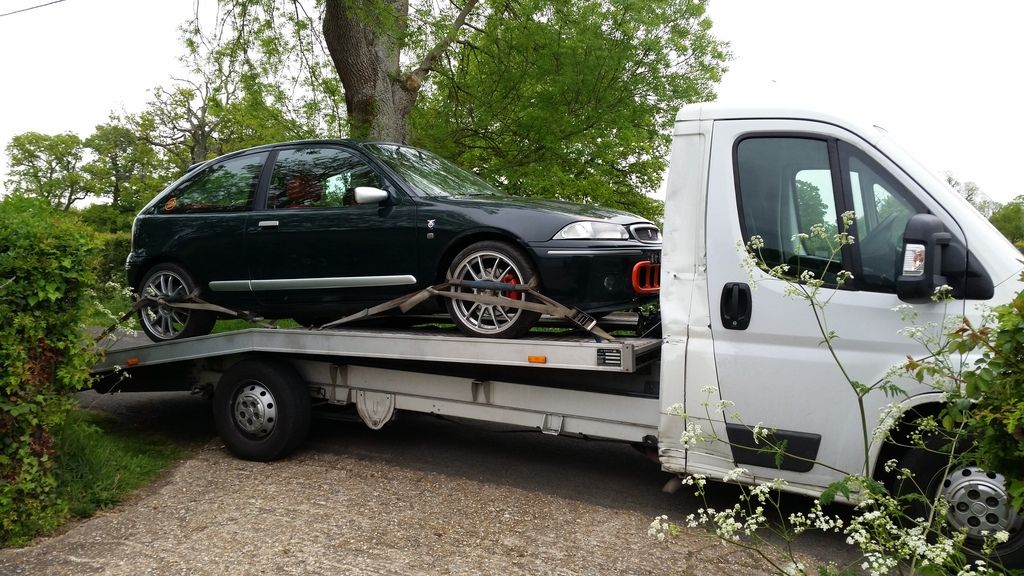
First time out of the garage for a while. Gave her a quick wipe down as she was covered in generic garage dust.
Obviously not running at this point so had to arrange for transport there and back
3" downpipe! You can see it runs quite close to the alternator so done heat shielding will be needed.
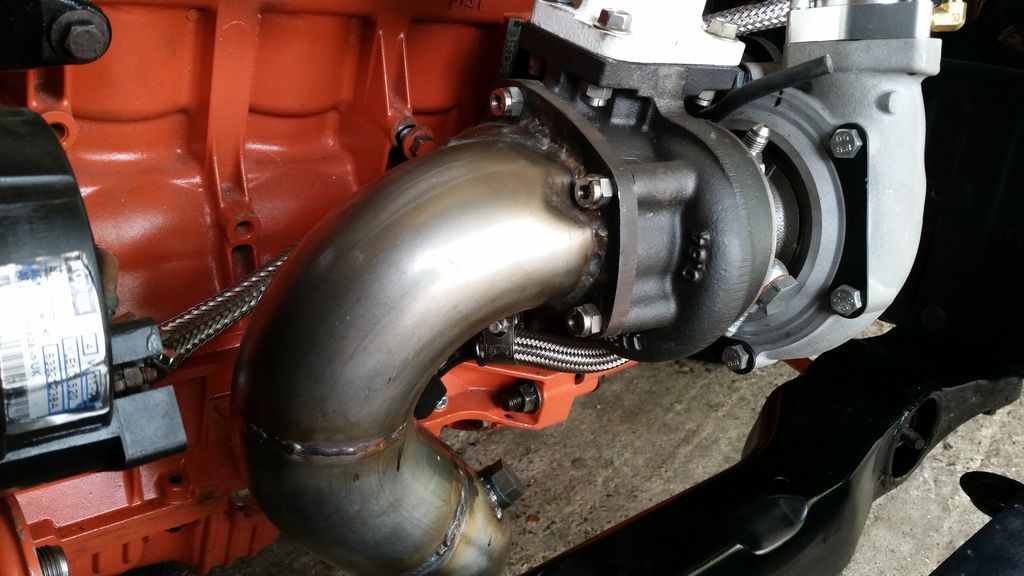
Downsizes to 2.5" after the flexi

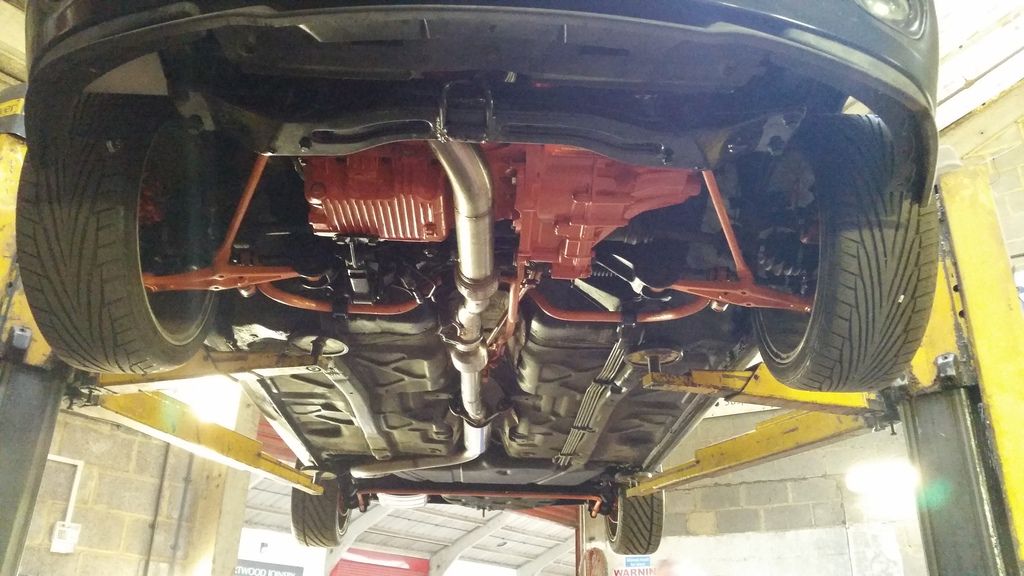
Back box is not the prettiest thing so I'll paint that black at some point.
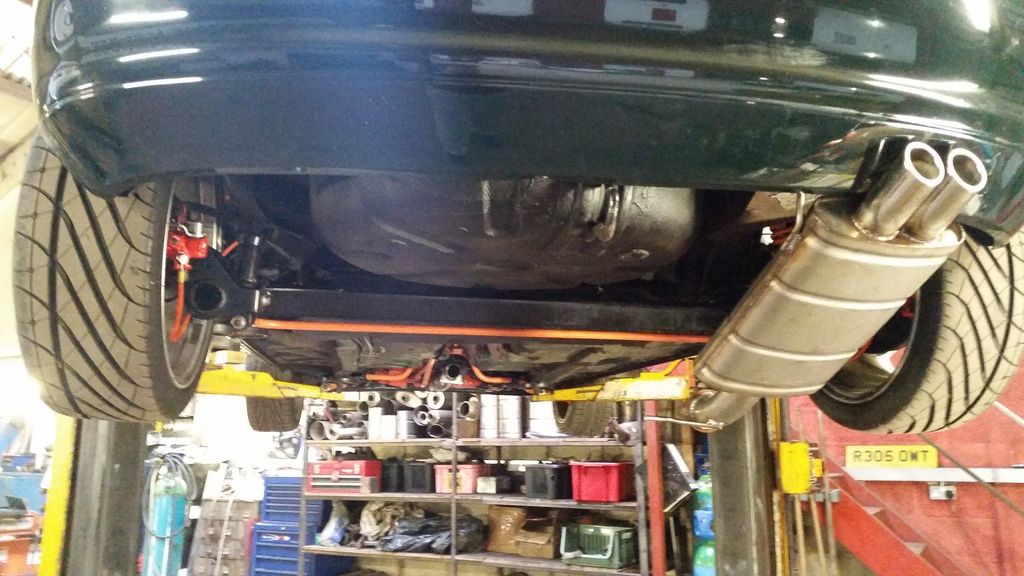
Love this shot:

And with some heat wrap and my DIY heat shield.
I was generally very happy although there was a small hiccup when a miscommunication left me without a cat. It got sorted but it does mean I now have a slip-on join before the cat - not the end of the world I suppose.
Obviously being a non turbo car I had to at least sort the downpipe. I initially considered just having a downpipe made and mating it to the existing cat-back system. But then I figured if I'm having the car trailered somewhere and paying for fabrication, I may as well go the whole hog and have a full system made.
I had a few options but went with Fast Road Conversions in Ashford (Powerspeed). They made me a full turbo-back 2.5" system with a sports cat and managed to squeeze in a massive 3" downpipe.
First time out of the garage for a while. Gave her a quick wipe down as she was covered in generic garage dust.
Obviously not running at this point so had to arrange for transport there and back
3" downpipe! You can see it runs quite close to the alternator so done heat shielding will be needed.
Downsizes to 2.5" after the flexi
Back box is not the prettiest thing so I'll paint that black at some point.
Love this shot:
And with some heat wrap and my DIY heat shield.
I was generally very happy although there was a small hiccup when a miscommunication left me without a cat. It got sorted but it does mean I now have a slip-on join before the cat - not the end of the world I suppose.
Edited by Stuballs on Wednesday 3rd January 13:21
Stuballs said:
cirian75 said:
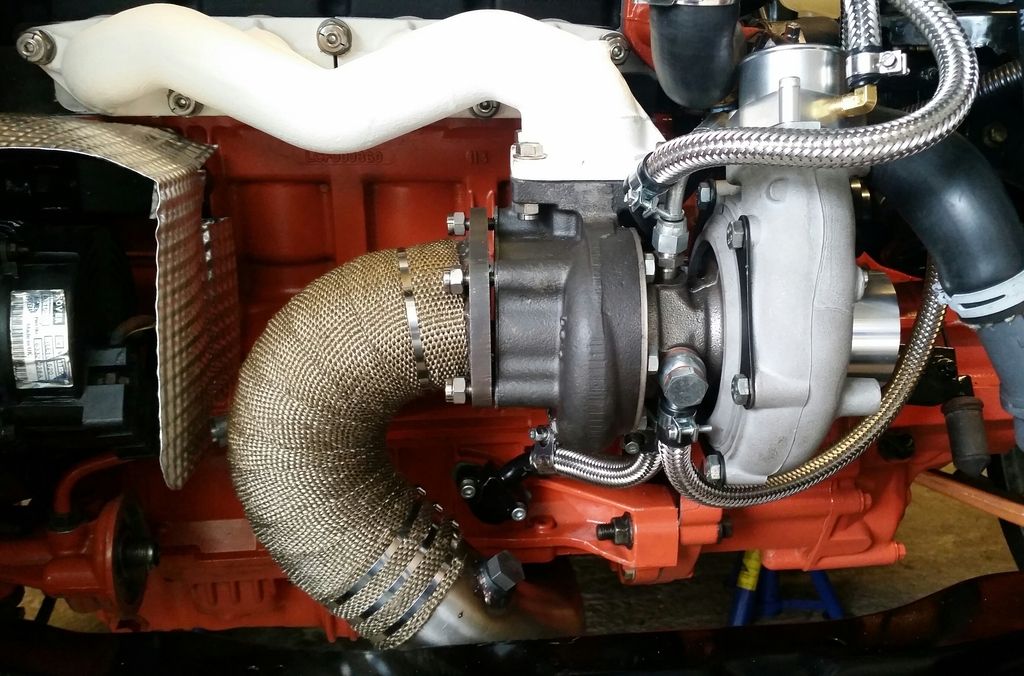
heat shield you turbo oil return pipe as it passes close to the turbo exhaust side.
VAG didn't and the early TT suffer oil sludge as the turbo cooked the oil.
Good call! Thanks for the tip! VAG didn't and the early TT suffer oil sludge as the turbo cooked the oil.
maybe some wrap or shield around the section that goes past the sump too
cirian75 said:
np, thats why build pics are great, people will see things others don't so 99% of the problems are nipped in the bud right at the start.
maybe some wrap or shield around the section that goes past the sump too
I have reflective heat shield on the sump itself but wanted to avoid wrapping that section of the downpipe as I'd be worried about it soaking up any oil leaks and catching fire (paranoia perhaps but you hear horror stories!) maybe some wrap or shield around the section that goes past the sump too
Since that picture was taken I've redone the oil drain so it has more of a downward angle and is further away from the exhaust housing. But I will definitely sort some heat shield for it!
Gassing Station | Readers' Cars | Top of Page | What's New | My Stuff