Alfa Romeo 156 2.5 V6
Discussion


Over the summer Ive been spending a night or 2 each week finishing the engine bay, Ive been enjoying this part! Everything has been cleaned, resprayed and any rusty bolts replaced.
During
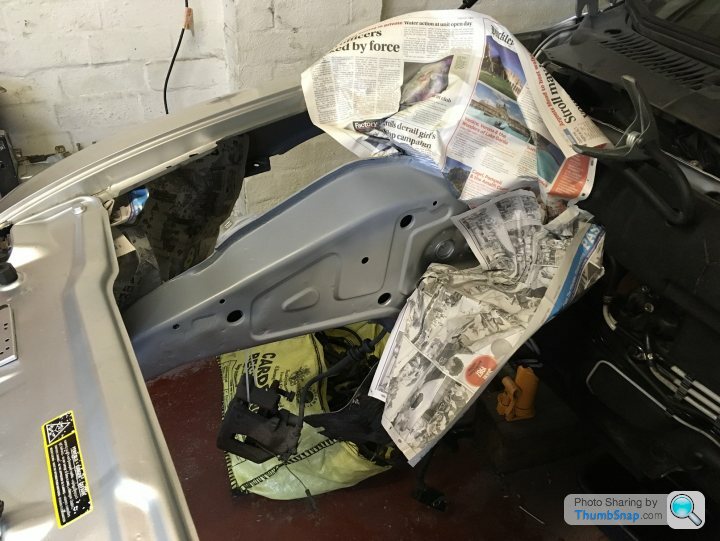
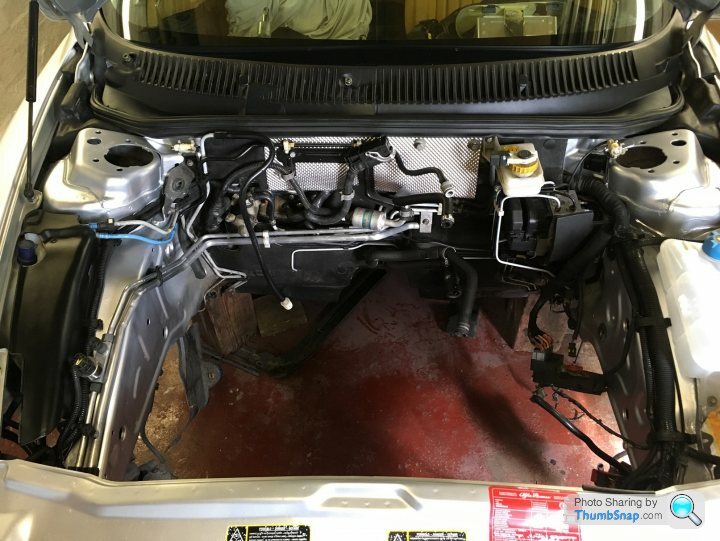
After

Before and after
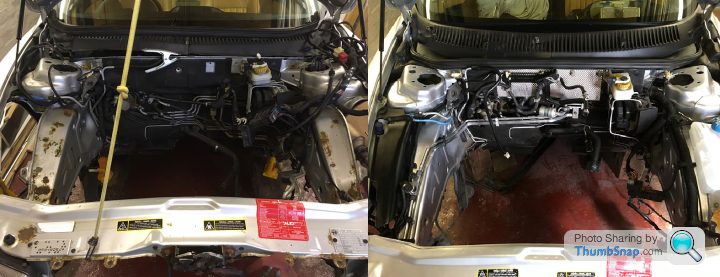
I thought 156s all had the same brake setup...I was wrong. The 2.4 and 2.5. have a bigger master cylinder with shorter stroke pedal, and the CF3 cars have a different ABS pump, so I swapped all this from the crashed car, everything unbolted nice a cleanly and it was very straight forward. The V6 also has a bigger (metal) clutch master cylinder and some other electrical gubbins on the pedal assembly so that all went across too. The pipework and aircon bits and peices were re-attached, then the V6 engine wiring loom was fitted and routed. I also made a heat shield above the engine where the loom routes through it across the bulkhead.
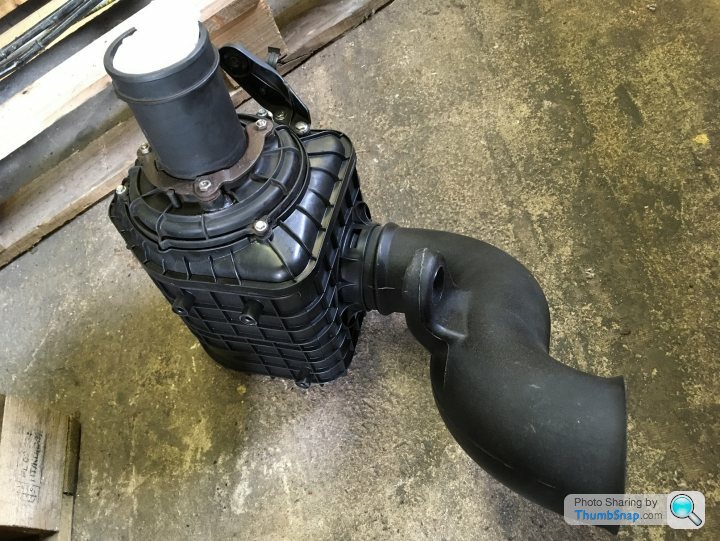
I restored the airbox, with new screws/bolts and O ring. I had to drill the old bolts out and glue it in some places, it should hold.
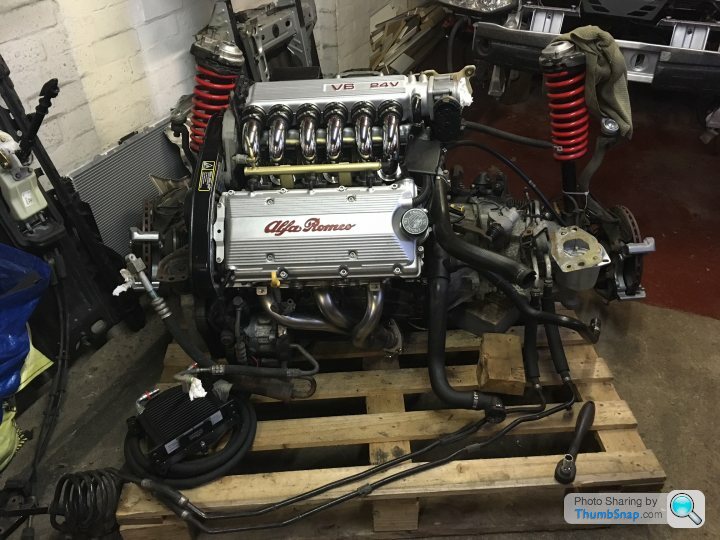
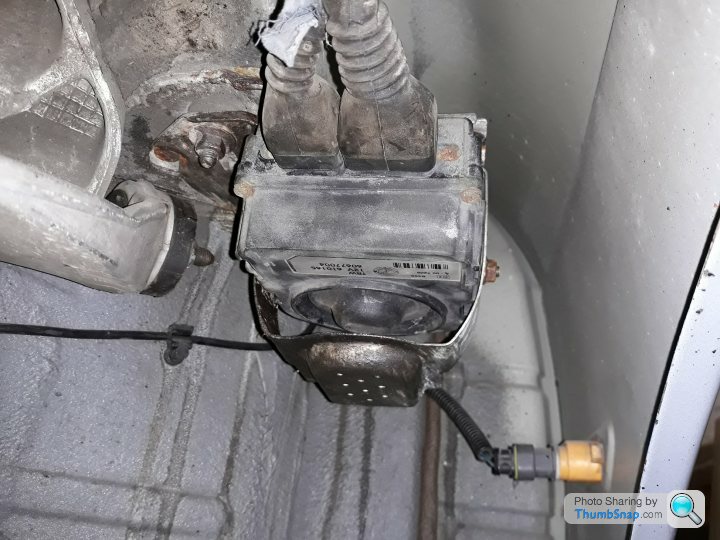
Moving onto the engine I removed the heat exchanger on the back of the engine that was pretty gunked up, earlier in this thread I wanted to replace this with the GTA setup. Im not convinced the exchanger setup does very good job as its in the hottest part of the engine bay and its possible this was the cause of the small amount of oil that had got into the coolant. Now its off I decided to fit the readily available popular Mocal thermostat sandwich plate and cooler, the parts for a whole kit is actually cheaper than Alfa sell the heat exchanger for (the standard Alfa part is also no longer available).
Note the curious small pipe made in blighty.
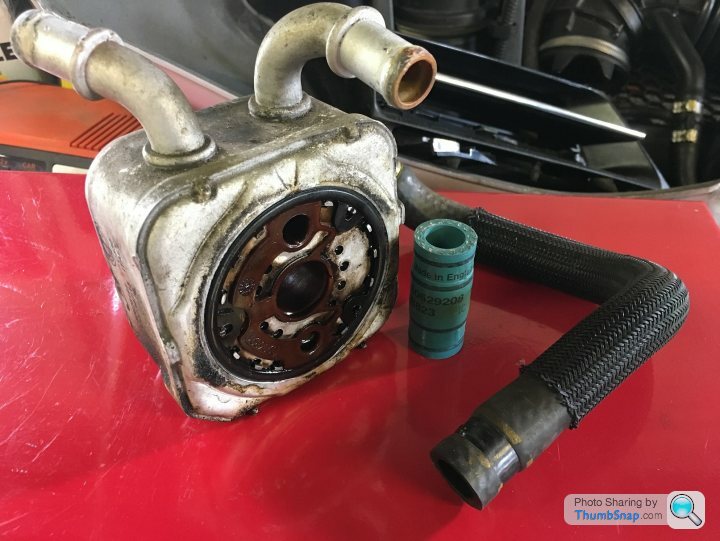
I went for a 16 row narrow cooler, and added a spacer so the take off plate clears the 2.5 exchanger housing.
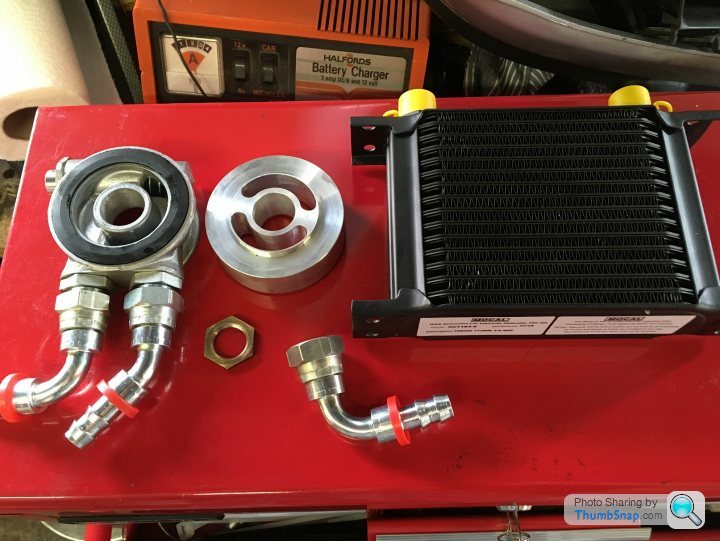
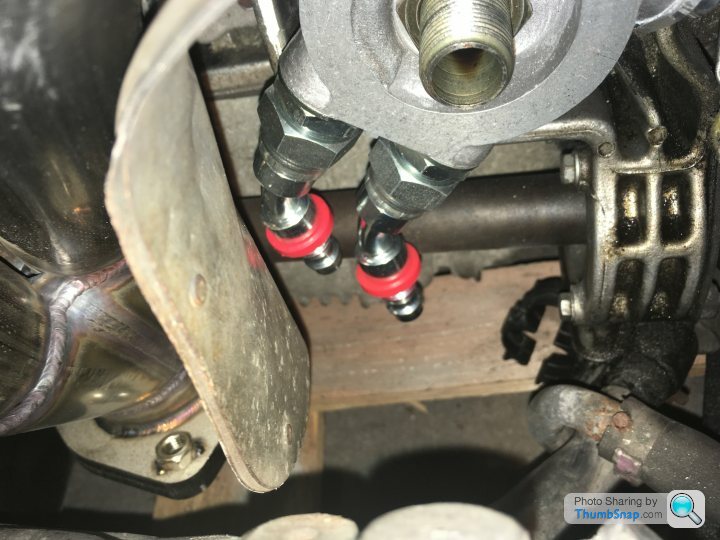
Test fitting,I need to make sure the pipes clear the driveshaft, manifold heatshield and dont get in the way of oil filter changes! Then they will route under the engine along with the power steering pipes to the front somewhere.
During
After
Before and after
I thought 156s all had the same brake setup...I was wrong. The 2.4 and 2.5. have a bigger master cylinder with shorter stroke pedal, and the CF3 cars have a different ABS pump, so I swapped all this from the crashed car, everything unbolted nice a cleanly and it was very straight forward. The V6 also has a bigger (metal) clutch master cylinder and some other electrical gubbins on the pedal assembly so that all went across too. The pipework and aircon bits and peices were re-attached, then the V6 engine wiring loom was fitted and routed. I also made a heat shield above the engine where the loom routes through it across the bulkhead.
I restored the airbox, with new screws/bolts and O ring. I had to drill the old bolts out and glue it in some places, it should hold.
Moving onto the engine I removed the heat exchanger on the back of the engine that was pretty gunked up, earlier in this thread I wanted to replace this with the GTA setup. Im not convinced the exchanger setup does very good job as its in the hottest part of the engine bay and its possible this was the cause of the small amount of oil that had got into the coolant. Now its off I decided to fit the readily available popular Mocal thermostat sandwich plate and cooler, the parts for a whole kit is actually cheaper than Alfa sell the heat exchanger for (the standard Alfa part is also no longer available).
Note the curious small pipe made in blighty.
I went for a 16 row narrow cooler, and added a spacer so the take off plate clears the 2.5 exchanger housing.
Test fitting,I need to make sure the pipes clear the driveshaft, manifold heatshield and dont get in the way of oil filter changes! Then they will route under the engine along with the power steering pipes to the front somewhere.
rxe said:
That rust - you need to fill the inside of that section with dinitrol or similar. See my GTA thread on Alfaowner. It all starts from the inside....
Do they rust inside the front box sections?I fitted a new pair of track rod ends, I removed the inners just to check there was no play and nothing was bent from the crash. Parts for these cars are very cheap.

The old shell was sent off to be made into baked bean cans, sad to see her go really.

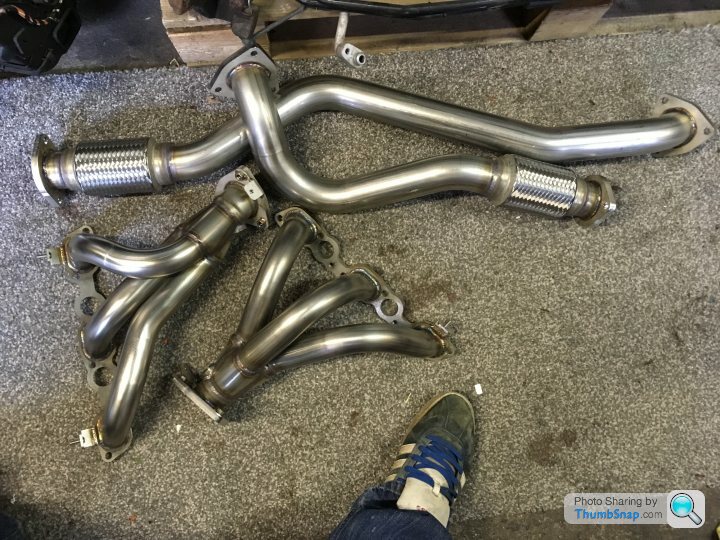
I decided to go all out on the manifolds and downpipes and ordered from the renowned Alfa exhaust maker Wizard. The quality is amazing, they are a lot higher quality than the orignals, and a lot lighter. Removing the pair of manifold cats should also bring a decent performance gain, a remap maybe in order although the standard CF3 ecu is quite adaptable. They are expensive, I tried to offset it from the money from selling the shell, various scrap, spare dials, climate, pipes, I sold a spare set of wheels which all covered about a 1/3rd of the cost.
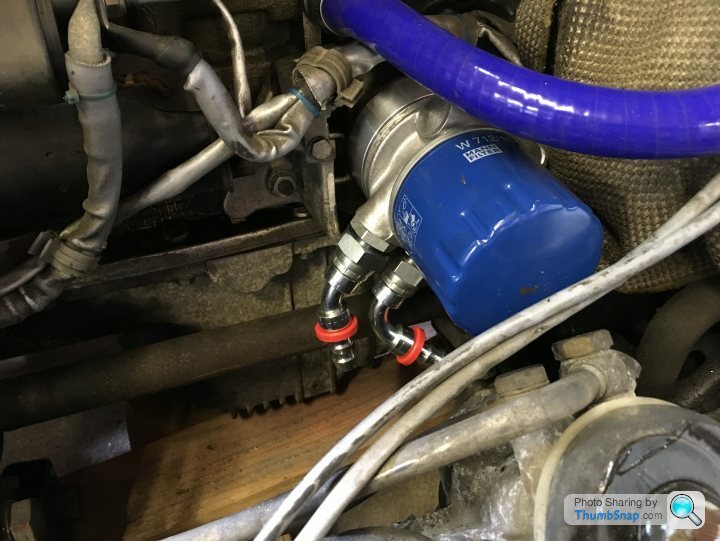
On the rear bank, with the heatshield it clears the oil cooler nicely, theres enough room to get your hand from underneath with the oil filter. I fitted a plastic bracket (that fell off the old twinny somewhere) for the cooler pipes attached to the other side of the ps pipes.
I just need to fit and route the oil cooler pipes, and now the engine is ready to go back in. I cant wait to fire it up again :-) I hope it all goes back in ok with the suspension and subframe all still attached...
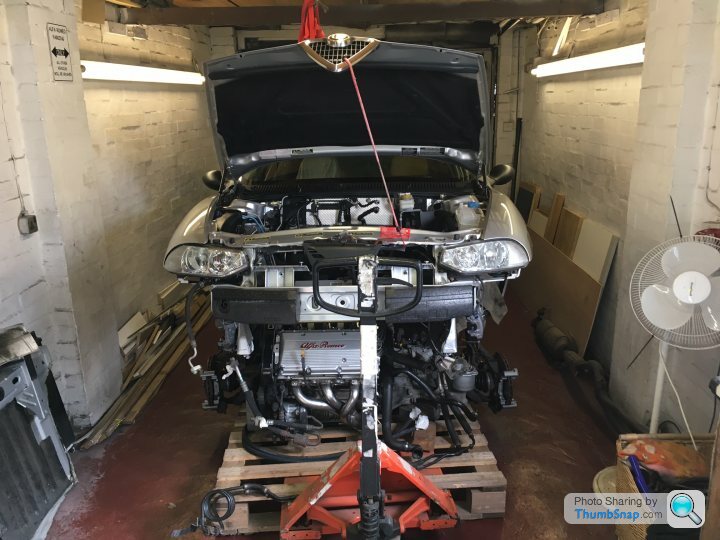
The engine went back in ok, it was a little tricky getting it all aligned at the same time, I lowered the car down over the pallet, aligning first the top of the struts with the shock towers, then the steering rack, then lots of swearing, tilting and shoving to get the subframe in the right position, then finally the engine mounts. I made sure the gear linkages routed through before bolting the subframe in position, then everything connected back to the engine. I did bolt up the entire centre section, then realised I forgot the heat shields and had lower it and do it again!
I connected the handbrake, steering column to the rack so it steered again, and then bled the clutch system, as the pedal finally got pressure and sprung back it did feel like the car was starting to be woken up and becoming alive again.
Everything else was connected back up. Battery put on charge.

The power steering cooler was mounted to the opposite side, I didnt need to modify it other than removing the long pipework that goes across the front end, I just removed the bracket and turned it around. Its mounted so its in line with the bumper vent next to the foglight.

I found the horns were both in the way of my oil cooler setup, so I mounted them on the wing bracket so they are higher up. Then mounted the oil cooler and routed the pipework. The aeroquip 'push' fittings for these were really hard to get on as you need hands and arms like Popeye to fit them, Im not sure I would use them again but will see how reliable then end up being. The cooler pipes were routed so they could not be grounded, and I fitted stainless braiding to the bottom pipe to protect it. Im going to fit a vent behind the cooler in the wheel arch and possibly some ducting.

I also fitted a pair of refurbished calipers courtesy of my mate at Biggred, and refitted the performance friction pads.
I connected the handbrake, steering column to the rack so it steered again, and then bled the clutch system, as the pedal finally got pressure and sprung back it did feel like the car was starting to be woken up and becoming alive again.
Everything else was connected back up. Battery put on charge.
The power steering cooler was mounted to the opposite side, I didnt need to modify it other than removing the long pipework that goes across the front end, I just removed the bracket and turned it around. Its mounted so its in line with the bumper vent next to the foglight.
I found the horns were both in the way of my oil cooler setup, so I mounted them on the wing bracket so they are higher up. Then mounted the oil cooler and routed the pipework. The aeroquip 'push' fittings for these were really hard to get on as you need hands and arms like Popeye to fit them, Im not sure I would use them again but will see how reliable then end up being. The cooler pipes were routed so they could not be grounded, and I fitted stainless braiding to the bottom pipe to protect it. Im going to fit a vent behind the cooler in the wheel arch and possibly some ducting.
I also fitted a pair of refurbished calipers courtesy of my mate at Biggred, and refitted the performance friction pads.
Paul S4 said:
I am sure you have considered this, but I have seen some Alfa threads where they have fitted a remote oil filter to make oil changes easier...
I did consider that, Ive seen kit cars with Alfa V6s relocate the filter, but I thought it would make the final route to and from the filter, then cooler too long? As the relocated filter ideally should be fitted at the rear top of the engine bay, then the pipes routing over the top of the engine to the front.Neil-91ezs said:
Great to see so much love going into a 156 V6. I did a similar 'shell/engine swap' on a Lancia Delta Martini many, many moons ago so it brought back memories of all the little differences you come up against when the two cars don't quite match.
I actually run a silver '99 156 V6 manual with 92k as a hack, having run others in the past, and agree they are very characterful cars with a wonderful engine note, although I am wincing at the pumps having moved over from a 147 JTD... I get roughly half the fuel mileage...
I have to say your engine bay look fabulous; my last one had 50k on the clock and looked similarly clean and shiny, but that was 15 years ago when they were modern. My current example is becoming scruffy, although to my eyes still the most attractive car in almost any car park!.
I occupy that position where the car is just a cheap banger, and will probably be broken up if/when major malfunction occurs. I do have a 2006 registered example however, which is in better condition but sadly falls into a comically high tax bracket at over £500 p.a. so will probably end up tracked, or broken for spares.
Thanks, its suprising whats different, or what changes over a 2 year production span, even in parts which look identical (such as the abs module) change internally, the differences in the bodyshells did throw me off though! The earlier Twinny has more sound deadening, and was missing a couple of captive nuts in the engine bay (understandable), curiously the V6 had an extra brace fitted in the bulkhead too, and the suspension forks I took over from the original V6 were alloy, but the twinnys were a heavier steel. I like working on cars and getting my hands dirty so enjoyed the rebuild, although I havnt got around to connecting up the wiring looms yet, only the engine and dash is wired in....!! The engine is turning over.I actually run a silver '99 156 V6 manual with 92k as a hack, having run others in the past, and agree they are very characterful cars with a wonderful engine note, although I am wincing at the pumps having moved over from a 147 JTD... I get roughly half the fuel mileage...
I have to say your engine bay look fabulous; my last one had 50k on the clock and looked similarly clean and shiny, but that was 15 years ago when they were modern. My current example is becoming scruffy, although to my eyes still the most attractive car in almost any car park!.
I occupy that position where the car is just a cheap banger, and will probably be broken up if/when major malfunction occurs. I do have a 2006 registered example however, which is in better condition but sadly falls into a comically high tax bracket at over £500 p.a. so will probably end up tracked, or broken for spares.
I have seen the odd late registered 2.5 156 with silly tax rates, Im not sure what the tax will be on mine when I inform the DVLA because its a euro3 engine in a euro2 car..
I still have a diesel 159 as my daily, which has been reliable and economical, but I dont enjoy driving it, due for replacement soon though for a petrol Giulia (hopefully).
Had a couple of setbacks this week, I went to connect everything back up and found the dashboard loom was wired differently for the V6 engine bay loom so transferred that, then the ABS module mini loom went across too which includes the wiring for all 4 abs sensors. Because I changed the dash loom, the main body loom which goes to the back of the car and back round also had to be replaced which involves stripping the interior (which I was going to do anyway to fully check the floorpans), and because I changed the body loom I had to replace each of the 4 looms for the doors too... A nice suprise while the door cards were off is that all 6 door speakers are made by Alpine.
The V6 loom didnt have the wiring to the pretty hefty #7 and #8 speakers on the parcel shelf for some reason.. but has some extra fuses/relays in the boot that dont seem to do anything, further investigation needed but will leave them disconnected for now, everything else connected to the V6 loom fine apart from the sunroof which had a different size socket, so I changed that. The only wiring left in place from the twinny was for the aerial and the cd changer.
Once everything was wired up I turned the ignition on, to my horror petrol was being sprayed all over the engine bay and onto the windscreen!! The crappy plastic clip to the fuel rail was leaking, petrol was also in between the nylon line and the rubber protective sleeve so somehow its got damaged, so the top engine bay line needs replacing. I also had to remove the bottom coolant hose as it was leaking, replacements pipe has been ordered.
For now Ive disconnected the fuel pump relay so I can check everything else which all seems to be ok, I will replace the fuel line with the correct standard hose, or make a new nylon line with the correct dorman connectors.

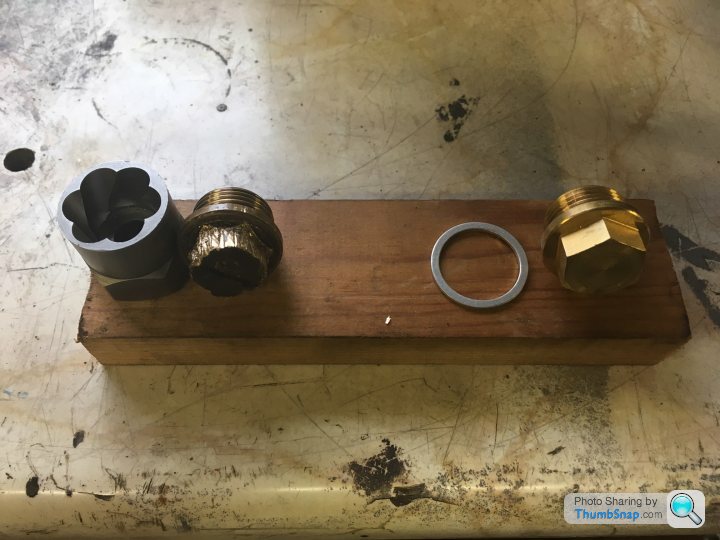
The final setback was when I went to change the oil, the magnetic sump plug was rounded off and overtightened. I had to borrow some Irwin bolts to finally get it off, I was very lucky the threads on the sump were not stripped as I had to use my breaker bar with the Irwin to finally crack it off. I filled the car up with Millers 10w40w fully syntetic, all 6.2 litres of it!! Ive turned the engine over on the starter motor to circulate it a bit.
I refitted the bumper and arch linings, the lining on the oil cooler side had a vent fitted for any hot air to escape and encourage air to pass through.

While I was messing around in the boot for the wiring loom I noticed the bumper has a crack in it which spoils the whole rear end. If anyone has a mint 612 silver saloon bumper, Id be very interested?

The V6 loom didnt have the wiring to the pretty hefty #7 and #8 speakers on the parcel shelf for some reason.. but has some extra fuses/relays in the boot that dont seem to do anything, further investigation needed but will leave them disconnected for now, everything else connected to the V6 loom fine apart from the sunroof which had a different size socket, so I changed that. The only wiring left in place from the twinny was for the aerial and the cd changer.
Once everything was wired up I turned the ignition on, to my horror petrol was being sprayed all over the engine bay and onto the windscreen!! The crappy plastic clip to the fuel rail was leaking, petrol was also in between the nylon line and the rubber protective sleeve so somehow its got damaged, so the top engine bay line needs replacing. I also had to remove the bottom coolant hose as it was leaking, replacements pipe has been ordered.
For now Ive disconnected the fuel pump relay so I can check everything else which all seems to be ok, I will replace the fuel line with the correct standard hose, or make a new nylon line with the correct dorman connectors.
The final setback was when I went to change the oil, the magnetic sump plug was rounded off and overtightened. I had to borrow some Irwin bolts to finally get it off, I was very lucky the threads on the sump were not stripped as I had to use my breaker bar with the Irwin to finally crack it off. I filled the car up with Millers 10w40w fully syntetic, all 6.2 litres of it!! Ive turned the engine over on the starter motor to circulate it a bit.
I refitted the bumper and arch linings, the lining on the oil cooler side had a vent fitted for any hot air to escape and encourage air to pass through.
While I was messing around in the boot for the wiring loom I noticed the bumper has a crack in it which spoils the whole rear end. If anyone has a mint 612 silver saloon bumper, Id be very interested?
Edited by davebem on Saturday 21st October 18:07
MarkwG said:
Love that little grill! Is that home produced or available somewhere, looks like a neat solution to a problem I have!
It was random ebayness:https://www.ebay.co.uk/itm/Louvre-Vents-Plastic-Bl...
Edited by davebem on Tuesday 31st October 20:17
Slowly getting somewhere. Ive replaced the fuel line with some SAE J30 R9 fuel hose and correct type hose clips. Im looking for a proffesional opinion on this, will this type of hose take the high engine bay temps?

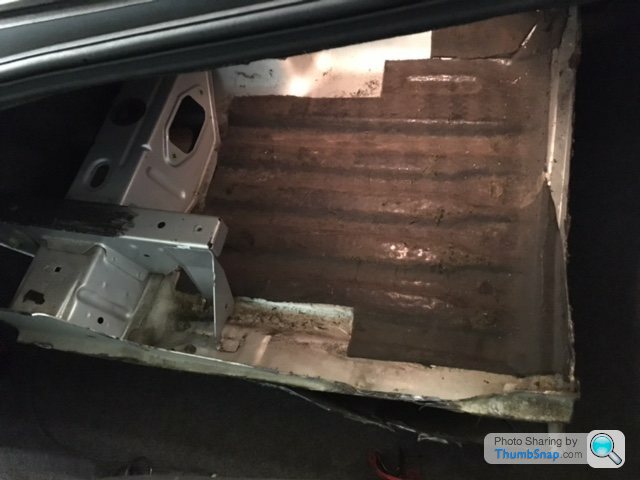
My attention is now back on the body, whilst I had the interior out (from changing the loom) I checked around for rust. On the drivers side as initially suspected the rear footwell has some holes. I think they rust here when the sound proofing is not pushed in properly from the factory. I could get my fingers under it and lift it off as it was not fully affixed to the floor and was laid bridging over the corrugated bottom, leaving a gap for moisture to sit and get trapped. The passenger side was fine and the insulation was correctly installed. I guess it was someones job in the Pomigliano d'Arco factory to lay this, and this is why so many 156s are scrapped/broken up.

Im looking for someone in Leicestershire area to weld this up for me, I have replacement rear sections cut from the original car that was rust free. These have the insulation on and its laid correctly.
My attention is now back on the body, whilst I had the interior out (from changing the loom) I checked around for rust. On the drivers side as initially suspected the rear footwell has some holes. I think they rust here when the sound proofing is not pushed in properly from the factory. I could get my fingers under it and lift it off as it was not fully affixed to the floor and was laid bridging over the corrugated bottom, leaving a gap for moisture to sit and get trapped. The passenger side was fine and the insulation was correctly installed. I guess it was someones job in the Pomigliano d'Arco factory to lay this, and this is why so many 156s are scrapped/broken up.
Im looking for someone in Leicestershire area to weld this up for me, I have replacement rear sections cut from the original car that was rust free. These have the insulation on and its laid correctly.
helix402 said:
Close! Nissan Cherry Europe. Superb engine, shame about the body. I rebadged it as an Arna, it’s replacement was a real Sud, 1.5ti no less.
Sounds interesting, they are as rare as hens teeth now. Id like to see a pic of yours, that factory seem to always cock up on something, even right up to the last alfas made there (159?)..they put the wrong PS fluid in on 2/3rds of the production run!SydneySE said:
did you get the Mocal oil cooler adaptor? if so which model number? am interested in doing this myself; also did you make your own blanking plate for the block from the (removed) heat exchanger or did you buy a blanking plate?
Hi, I got the standard mocal thermostatic oil take off SP-1, with matching mocal spacer SPA1, and fitted this where the heat exchanger originally was, it just fits inside the exchanger mount and with the spacer it locates the filter in the same place, although I did trim the mount at the bottom a little to keep the pipes away from the manifold heat shield. I also bought a centre extender bolt (m20 from memory), the extender is not needed but I cut this in half and screwed the end peice over the existing long thread to ensure it all sits centrally. To block off the exchangers old coolant feed you will need a lower rear block blanking plug from a 3.0 or 3.2 and also blank off/remove the metal pipe that runs from the back of the thermostat along the back of the plenum. The 3.0/3.2 one wont do because the coolant tank is on the other side on those and it feeds that instead. However for now on mine ive just run a straight through 15mm ID coolant pipe. I couldnt source the parts and at the time wasnt sure if the 2.5 is plumbed internally any different (im now sure it is not).I sold the Twinny engine without even trying to a well known Alfa specialist, there is a lot of demand for them. Ive made the money back now from purchasing the 2nd car.
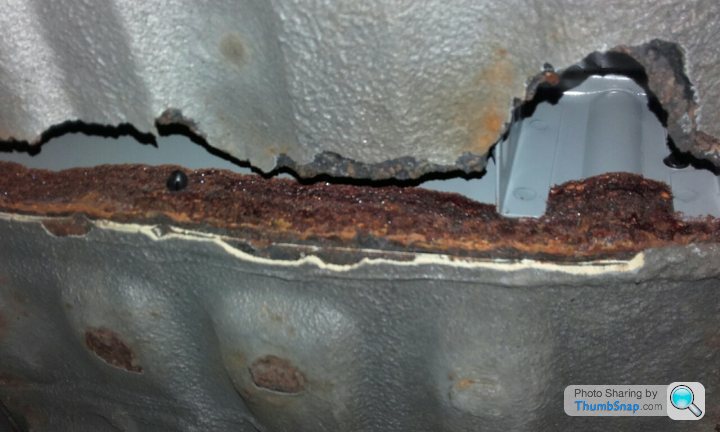
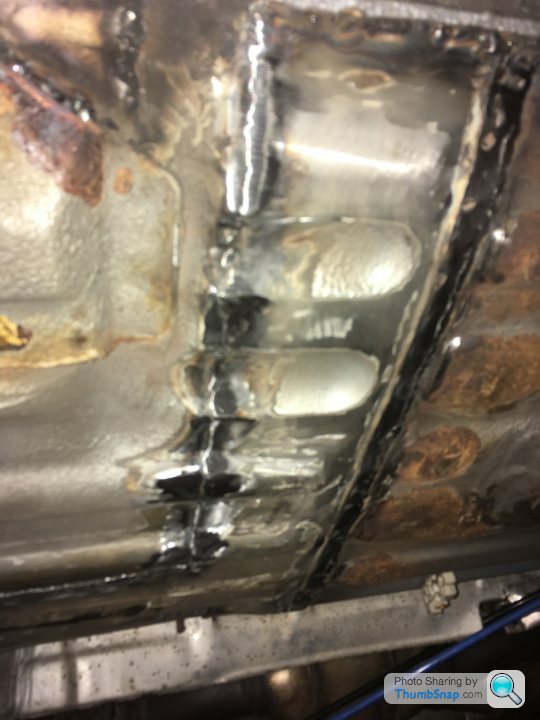
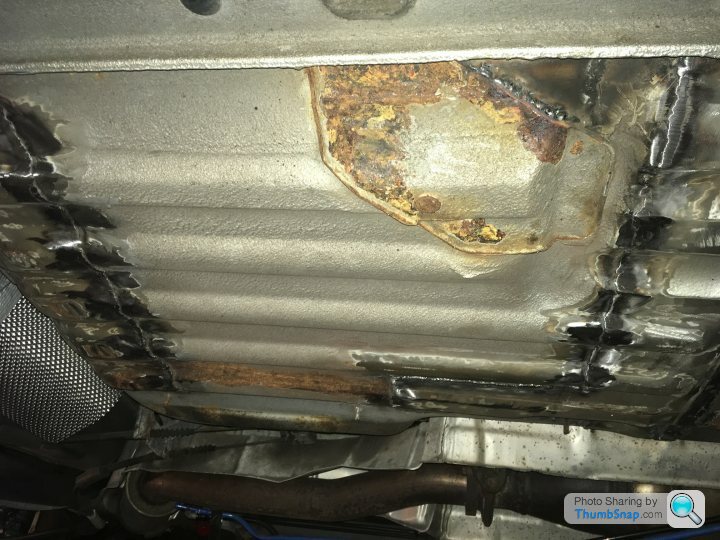
Unfortunately after more poking around and scraping off loose underseal I found the drivers side rear footwell was shot on both ends. As per previous post the rear vents had turned into holes (I suspected this when I bought it), but also most of the section under the front seat near where its joined to the front floor panel had rotted through too. I cant figure out how this has happened, I can only assume the car has or had a water leak and the water has sat here for a long time.
At one point we were contemplating replacing the whole floor section, but the sills were fine apart from a tiny hole near the seat strengthening plate that we just plated over. So we sanded off all the loose underseal, moved the fuel line out the way and my (new) welder mate replaced any rotten sections by cutting out sections from the floor that I cut from the 2001 car. We even managed to drill and spot weld the front seat strengthening section.
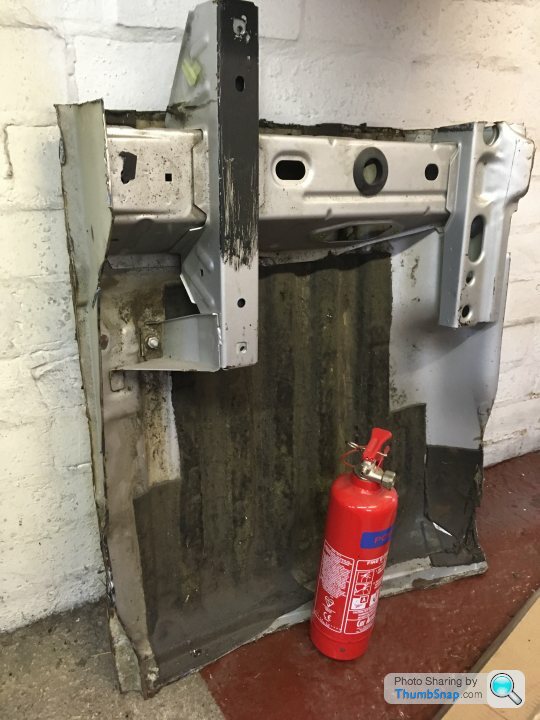
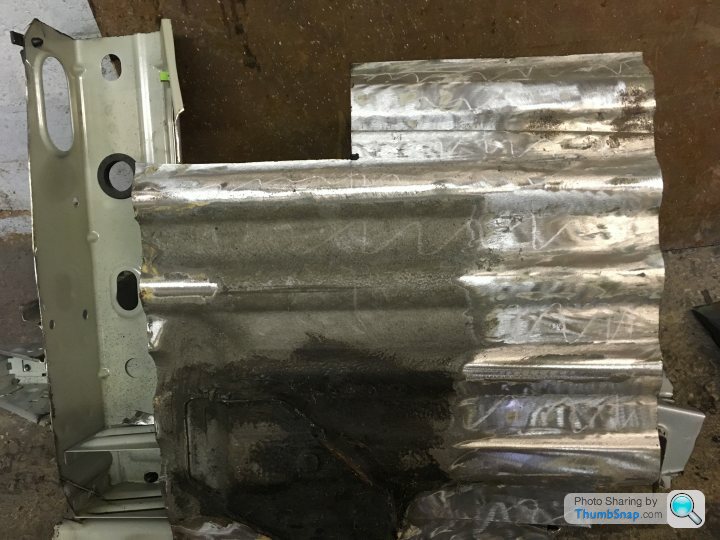
Doner panels, so lucky I had the forsight to cut the whole sections out of the original car (my original intent was to sell them).
I went through this by stabbing it with a screwdriver. The metal here did seem thinner than the donor panel above.
Vent section replaced, those pesky vents will be welded up next week. I shielded the fuel tank as was paranoid of explosion
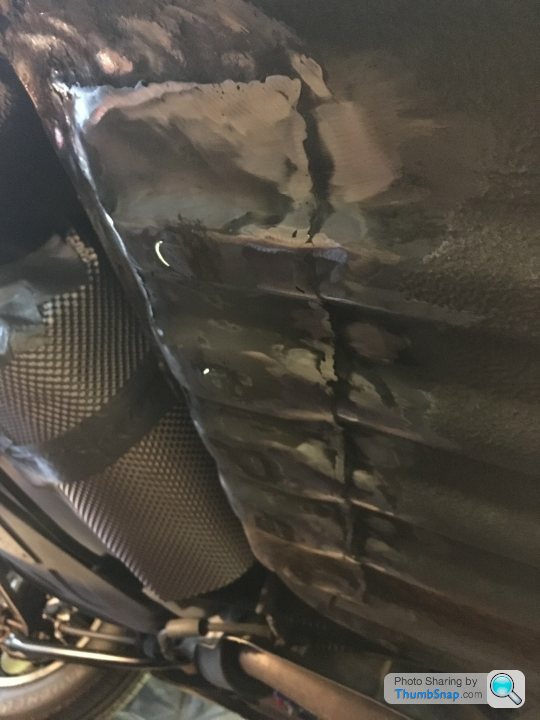
Replaced section under the front seat.
Nearly done. All original contours have been maintained, onces its smoothed off and undersealed I dont think it will notice.
This was what we left of the rust free panel from the first pic.
The front, sills and rear passenger side is all fine, so all thats left is welding up the vents, some finishing/smoothing to make it more perfect, then it will be treated to a full belly rust proof and re-applicaiton of underseal.
Unfortunately after more poking around and scraping off loose underseal I found the drivers side rear footwell was shot on both ends. As per previous post the rear vents had turned into holes (I suspected this when I bought it), but also most of the section under the front seat near where its joined to the front floor panel had rotted through too. I cant figure out how this has happened, I can only assume the car has or had a water leak and the water has sat here for a long time.
At one point we were contemplating replacing the whole floor section, but the sills were fine apart from a tiny hole near the seat strengthening plate that we just plated over. So we sanded off all the loose underseal, moved the fuel line out the way and my (new) welder mate replaced any rotten sections by cutting out sections from the floor that I cut from the 2001 car. We even managed to drill and spot weld the front seat strengthening section.
Doner panels, so lucky I had the forsight to cut the whole sections out of the original car (my original intent was to sell them).
I went through this by stabbing it with a screwdriver. The metal here did seem thinner than the donor panel above.
Vent section replaced, those pesky vents will be welded up next week. I shielded the fuel tank as was paranoid of explosion
Replaced section under the front seat.
Nearly done. All original contours have been maintained, onces its smoothed off and undersealed I dont think it will notice.
This was what we left of the rust free panel from the first pic.
The front, sills and rear passenger side is all fine, so all thats left is welding up the vents, some finishing/smoothing to make it more perfect, then it will be treated to a full belly rust proof and re-applicaiton of underseal.
Edited by davebem on Sunday 31st December 16:56
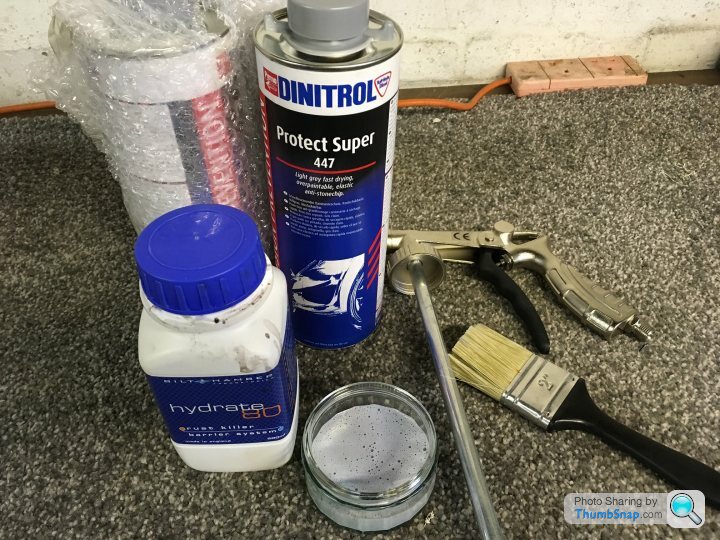
The passenger side rear floor has had some minor future proof welding done, all the rust is cut out re-welded and gone now. The inside of the body was then rust proofed, which compromised removing sound deadening, rubbing down the areas with loose paint and surface rust then criss-cross coating with bilthamber rust converter. Then it was painted further with rust proof paint. On the rear floor pans new sound deadending was re-applied making sure it was pushed into the corrugated floor channels. The inside box sections in the sills and the box sections under the front seats were sprayed with spare can of waxoil where I couldn’t get to it with the bilthamber. All that’s left is to do is the outer rust protection underneath, its been too cold and damp to do that this weekend! The plan is to linish off all any loose underseal to bare metal, coat with bilthamber, paint then Dinotrol 447.
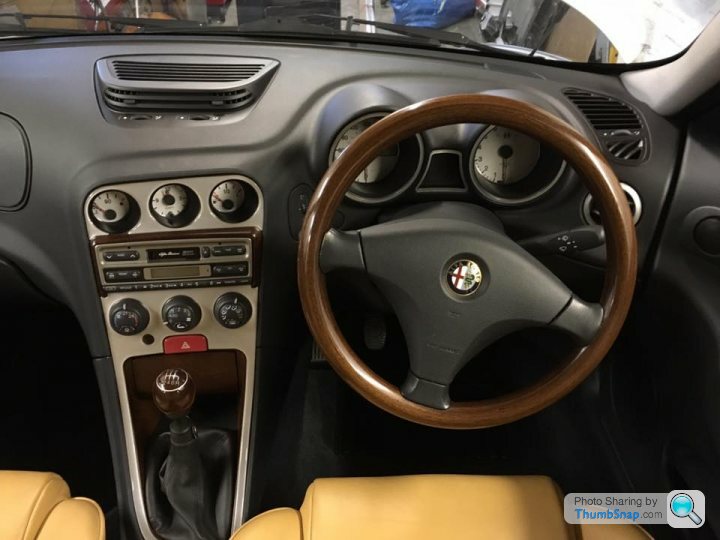
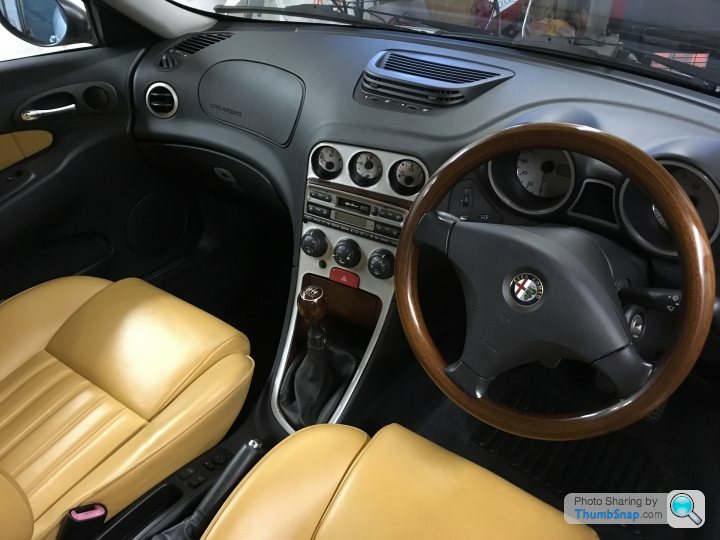
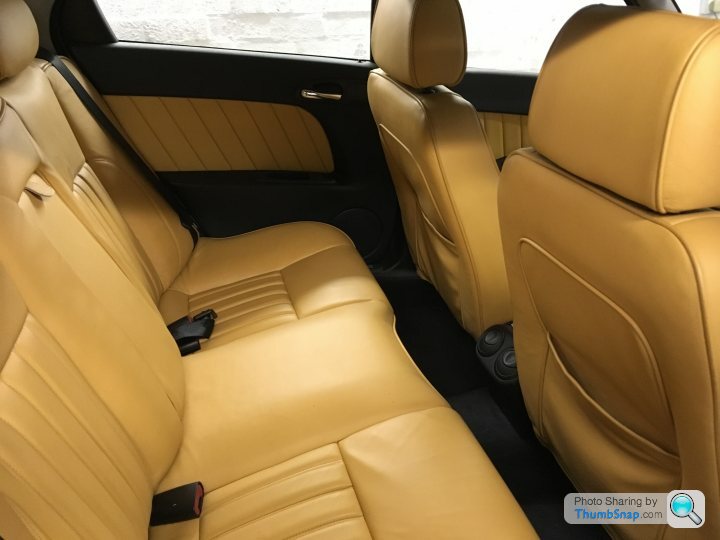
It may not be to everyones taste but I refitted the Tan interior rather than the red interior as it is pretty much concours condition and looked nice. The Tan seats were a tad lighter than the later red ones because it looks like the early seats have magnesium base and frames. The tan ones don’t have the connector for the seat belt light but light on the dash is still going out! I also fitted the wooden steering wheel and a new-old stock wooden gear knob rather than the leather ones. I like how the steering wheel feels, I love the Italian-ness of the early interior, theres no cup holders...but you get 3 ash trays ;-) and no steering wheel buttons, driver aids or phone connectivity to distract from the driving experience. The cassette deck is connected up to the cd changer in the boot.
It may not be to everyones taste but I refitted the Tan interior rather than the red interior as it is pretty much concours condition and looked nice. The Tan seats were a tad lighter than the later red ones because it looks like the early seats have magnesium base and frames. The tan ones don’t have the connector for the seat belt light but light on the dash is still going out! I also fitted the wooden steering wheel and a new-old stock wooden gear knob rather than the leather ones. I like how the steering wheel feels, I love the Italian-ness of the early interior, theres no cup holders...but you get 3 ash trays ;-) and no steering wheel buttons, driver aids or phone connectivity to distract from the driving experience. The cassette deck is connected up to the cd changer in the boot.
Thanks Im really pleased with the interior, its a nice relaxing place to be.
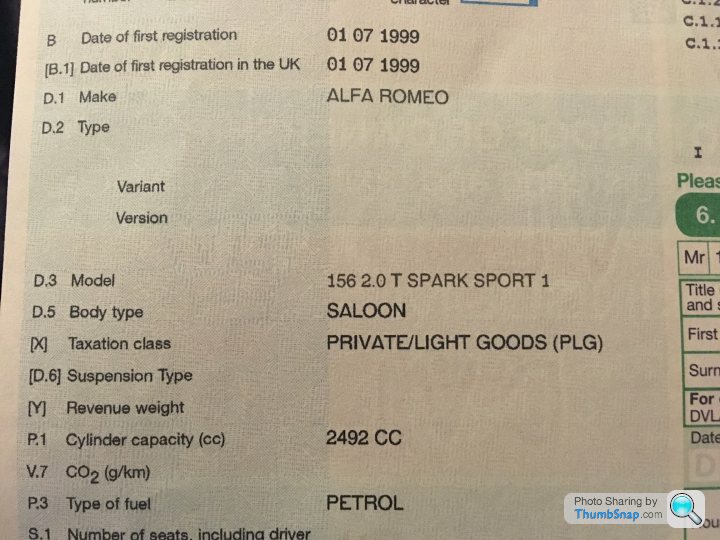
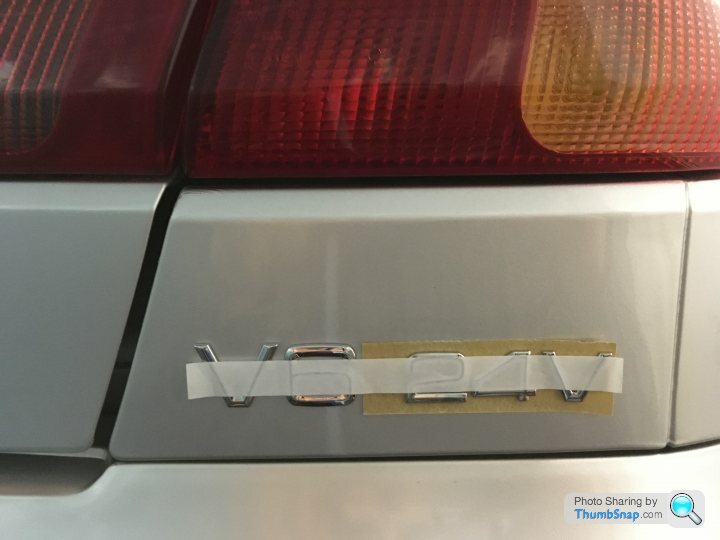
I submitted engine number and CC change to DVLA with letter explaining Ive done it myself and included images from this thread of the work. I was slightly nervous it would need an inspection or something, but took the gamble thinking they would appreciate my honesty and attention to detail. Sure enough 2 weeks later I got the amended V5 back no questions asked. Im not sure what man maths they used to calculate my V6 Tax, its is now £60 cheaper (£245 Per year). On the V5 the model vs engine CC might confuse a new owner, but Im never gonna sell it!
I submitted engine number and CC change to DVLA with letter explaining Ive done it myself and included images from this thread of the work. I was slightly nervous it would need an inspection or something, but took the gamble thinking they would appreciate my honesty and attention to detail. Sure enough 2 weeks later I got the amended V5 back no questions asked. Im not sure what man maths they used to calculate my V6 Tax, its is now £60 cheaper (£245 Per year). On the V5 the model vs engine CC might confuse a new owner, but Im never gonna sell it!
unclejam said:
Sorry I took months to answer this Dave! Well, I got on fine at Castle Combe except that as soon as I arrived the car started misfiring and carried on all day.....grrr. Handling and brakes - wise it was great, as I had fitted 4-pot Brembos and 305mm discs and uprated rear anti-roll bar. It also has Koni adjustables fitted which make a big difference.
Your car looks really superb and well done for all that time and effort. I'm also in the process of restoring, respraying and fitting a tan interior too. What great taste you have. ;0)
Thanks, Im still waiting for warmer drier weather do do the underneath rust proofiing and Dinotrol underseal as its still a lot of bare/linished metal under there, then its finished! Did you fit GTA hubs with the Brembos of use adapters?Your car looks really superb and well done for all that time and effort. I'm also in the process of restoring, respraying and fitting a tan interior too. What great taste you have. ;0)
Ive linished the floorpans lightly again, including going all along the sills, surface rust all along the drivers side. I then criss cross coated 2 layers of bilthamber hydrate80 rust proofer, then after 24 hrs using a spray gun put a layer of Dinotrol underseal on. Unfortunately I must have set my compressor too high because it was going everywhere and on too thick so started to drip off, finally got the regulator set quite low and it coated the rest nicely. Im a bit ashamed to take some pics yet because when it was going on heavily there was overspray on the fuel tank and subframe, but I did mask the centre section and brake/fuel pipes. Theres some tidying up to do underneath, and Ill redo the spare wheel well underseal at some point.
With the car complete, I decided to test everything once more and carry out my own preflight checks. The aim is to get everything working as it should:
- Airbag light on and passenger airbag disabled light on – In MES every single possible airbag error was present in a big scrolling list, cleared them all and they havnt come back *touches steering wheel wood*! I did cable tie the connections under the front seats to make sure they don’t get disturbed when sliding the seat.
- On the engine management side the diagnostics was complaining the throttle pedal had gone over its max threshold, cleared this, I think it was due to the pedal stop being removed when it had no interior.
- When the lights are on the alarm LED on the dash glows brightly. I found the connections for the alarm system are the same as some of the lighting circuit, I swapped the LED light and ash tray light connections round and now ok.
- Driver door stereo speaker wasn’t working, I gave it a heavy thump and now it is.
- Central locking works but no hazard flash or bleep. The alarm ecu is built into the siren hidden in the passenger side wing and I forgot to swap this over. Ill do this next time I need to remove the front wheels for something.
- ABS light on, I bled the brakes again but this time carrying out ABS pump drain and fill sequences. Wasn’t getting any air in the lines via the gunson until I got to the last front right where it was constant bubbles until the fluid hit the min mark.. Cleared ABS fault light.
- Mileage was wrong (50k), so I swapped the circuit board from the original V6 speedo, so now the mileage matches the engine, ecu and running gear (89k).
- Windscreen washer pump is leaking everywhere over the oil cooler, swapped it for spare one with rubber bung.
- The headlight washers spray all over the car except for the headlights, I can live with that.
- To my suprise all the electric windows work!
The car is outside today seeing sunshine for the 1st time in over a year. Ive put a new pair of number plates on and got MOT booked. Insurance is a Classic car policy with Lancaster, with the mods all declared for a reasonable price.

Quite possibly the trickiest bit of the whole conversion
With the car complete, I decided to test everything once more and carry out my own preflight checks. The aim is to get everything working as it should:
- Airbag light on and passenger airbag disabled light on – In MES every single possible airbag error was present in a big scrolling list, cleared them all and they havnt come back *touches steering wheel wood*! I did cable tie the connections under the front seats to make sure they don’t get disturbed when sliding the seat.
- On the engine management side the diagnostics was complaining the throttle pedal had gone over its max threshold, cleared this, I think it was due to the pedal stop being removed when it had no interior.
- When the lights are on the alarm LED on the dash glows brightly. I found the connections for the alarm system are the same as some of the lighting circuit, I swapped the LED light and ash tray light connections round and now ok.
- Driver door stereo speaker wasn’t working, I gave it a heavy thump and now it is.
- Central locking works but no hazard flash or bleep. The alarm ecu is built into the siren hidden in the passenger side wing and I forgot to swap this over. Ill do this next time I need to remove the front wheels for something.
- ABS light on, I bled the brakes again but this time carrying out ABS pump drain and fill sequences. Wasn’t getting any air in the lines via the gunson until I got to the last front right where it was constant bubbles until the fluid hit the min mark.. Cleared ABS fault light.
- Mileage was wrong (50k), so I swapped the circuit board from the original V6 speedo, so now the mileage matches the engine, ecu and running gear (89k).
- Windscreen washer pump is leaking everywhere over the oil cooler, swapped it for spare one with rubber bung.
- The headlight washers spray all over the car except for the headlights, I can live with that.
- To my suprise all the electric windows work!
The car is outside today seeing sunshine for the 1st time in over a year. Ive put a new pair of number plates on and got MOT booked. Insurance is a Classic car policy with Lancaster, with the mods all declared for a reasonable price.
Quite possibly the trickiest bit of the whole conversion
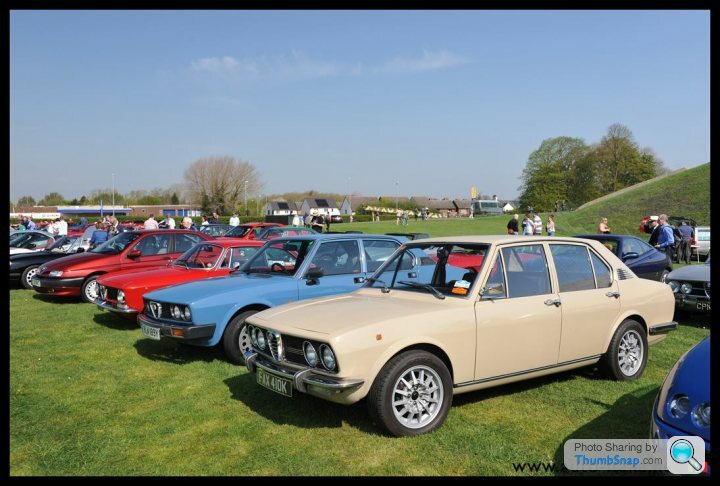
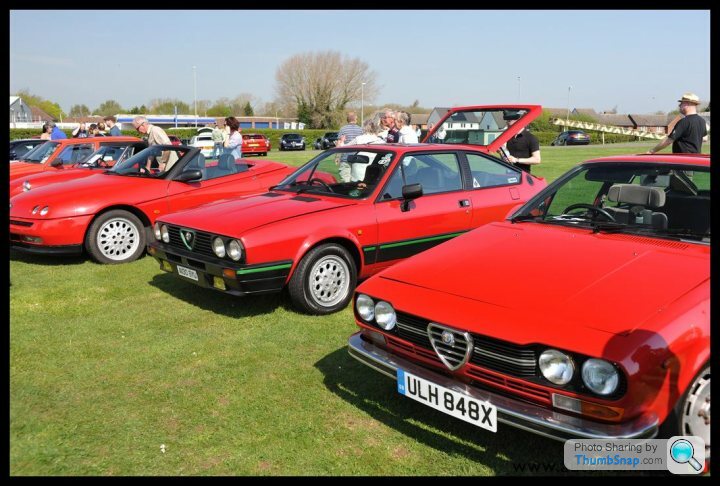
Sailed through MOT with no advisorys. Still a few tidyup jobs to do underneath to make it perfect, but on an initial run I did make the 170 mile round trip to the AROC Spring Alfa day with no hiccups. The long run appears to have done the car some good blowing the cobwebs away, the brakes are biting so much better and engine so much more responsive than before, the eibach springs have settled now to an ideal ride height, the car seems to turn in better when cornering hard. Ive forgotten how great the Busso V6 sounds and how eventful journeys are in this car, it was comfortable motorway crusing although the leather seats cause a lot of backsweat, but in the sun it smells like one of those leather wallet/handbag tourist shops you get in Spain.
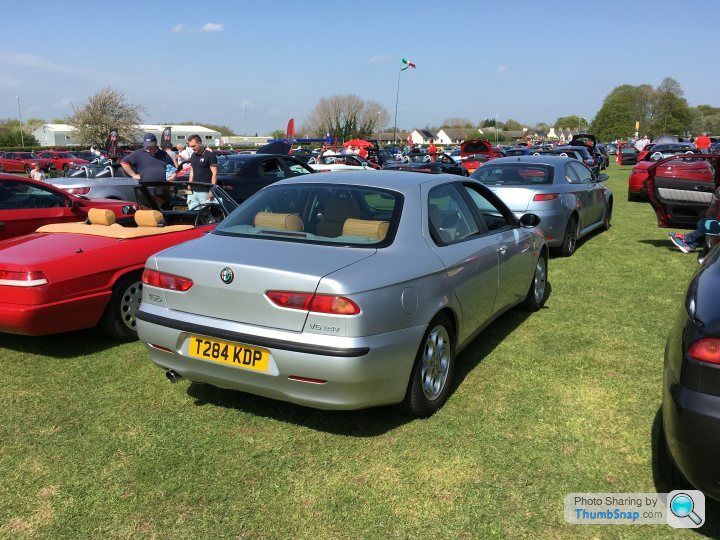
Alfa car meets are different to the norm which adds to the ownership experience, so many diverse owners with diverse cars from Alfas ups and downs through the years, some good, some maybe not so good, but all interesting, driver focussed, full of character, and historically significant in one way or another.
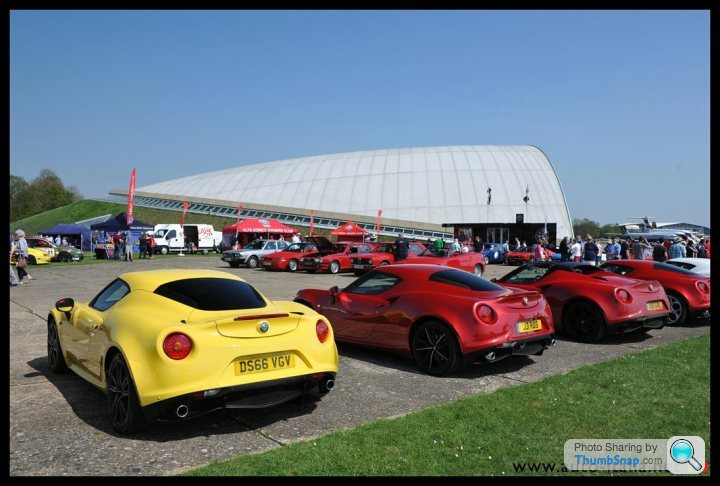
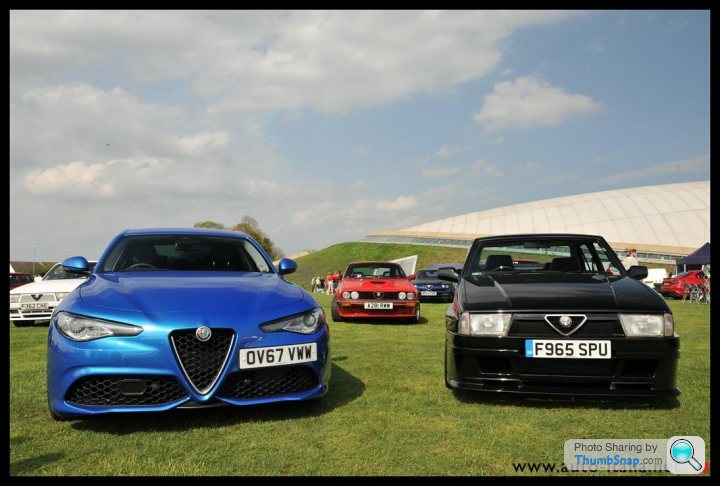
More pics (external link to auto italia magazine facebook page).
https://www.facebook.com/pg/autoitaliamagazine/pho...
Alfa car meets are different to the norm which adds to the ownership experience, so many diverse owners with diverse cars from Alfas ups and downs through the years, some good, some maybe not so good, but all interesting, driver focussed, full of character, and historically significant in one way or another.
More pics (external link to auto italia magazine facebook page).
https://www.facebook.com/pg/autoitaliamagazine/pho...
Edited by davebem on Tuesday 24th April 20:07
Thanks, I had a 159 too as a daily, but just sold it and missing it already although it never got under my skin like the 156. I really wanted a Giulia but didnt want to pay out or lease one for the asking price, I looked at some Giuliettas but they seemed like a big downgrade from a 159, Ive now got a 3 year old Golf GTI as a stop gap until the Giulias are 3 years old and hopefully half the price.
I finally sorted out the alarm, it just needed connecting up and it all came back to life. I removed the original TS one as it was a big heavy old thing.
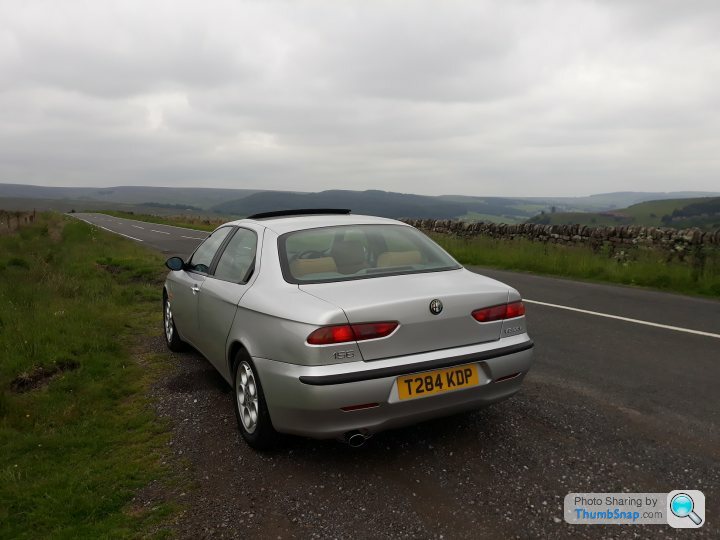
Spent today in the Peak district, decided to take the Alfa rather than my daily and it didnt miss a single beat. It would be rude not to drive the the full Snake Pass, so did this...both ways. I also sampled some of the roads off it, the highlights that Id recommend is Mortimer Rd to Wigwizzle, and the small section of Lodge Ln near Hallasham Golf club on the Sheffield side, both included some great drivers roads. I also got a thumbs up from a cyclist, he must have appreciated the Busso sound blast.
Im now confident the car is reliable and ready for going on a trip abroad ;-)
^Looks like a nice find that, have you got any plans for it? Youll have to get a pic of the blue interior.

Paul S4 said:
Quite rare to see a sunroof on a 156...in fact yours is the first one I have seen ! I am assuming it is a factory one.
Yeah they are quite rare, its a ex Alfa press car according to previous owner so perhaps it had all the options ticked. The sunroof is fully electric tilt/fully slide in type. I think its made by Webasto, Ive seen very similar designs on other cars. Its just right for the car and you hear the Busso engine sound more with it open.Gassing Station | Readers' Cars | Top of Page | What's New | My Stuff