The £200 Alfa...
Discussion


Hereward said:
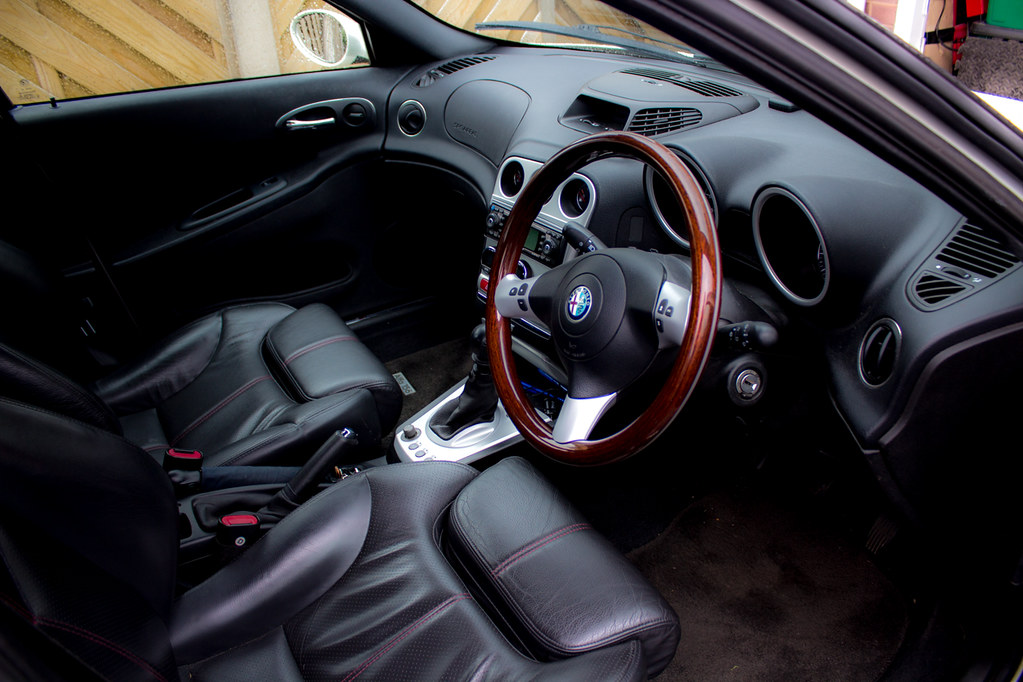
I really like the appearance of the pics of the engine and interior. What camera/filters/software are you using, may I ask?
Thanks,  I have a Canon eos 650D as well as an eos M and have wide angle lenses for both, 10-18 efs and a 12mm f2 prime for the M. The only filters I use routinely are UV, mostly to protect the lens.
 I shoot in raw and edit the pics in Lightroom. Some of my earlier photos, particularly in the Gta thread are over processed and I'll admit I'm still trying to find a balance.
I do a bit of landscape stuff photography too;
www.facebook.com/onlyphotons
Edited by Zombie on Monday 6th June 14:39
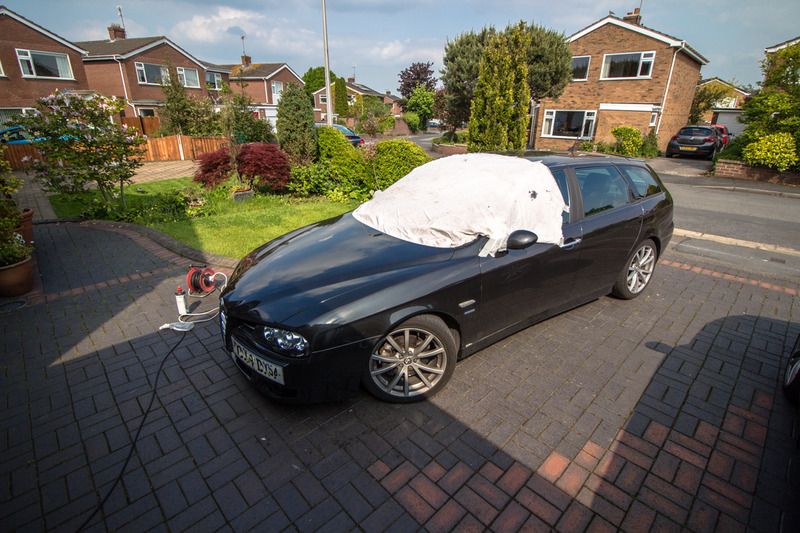
After spending 3 days cleaning and polishing it, and the aforementioned MOT work, I went to the lakes for a weekend in the walking in the mountains.
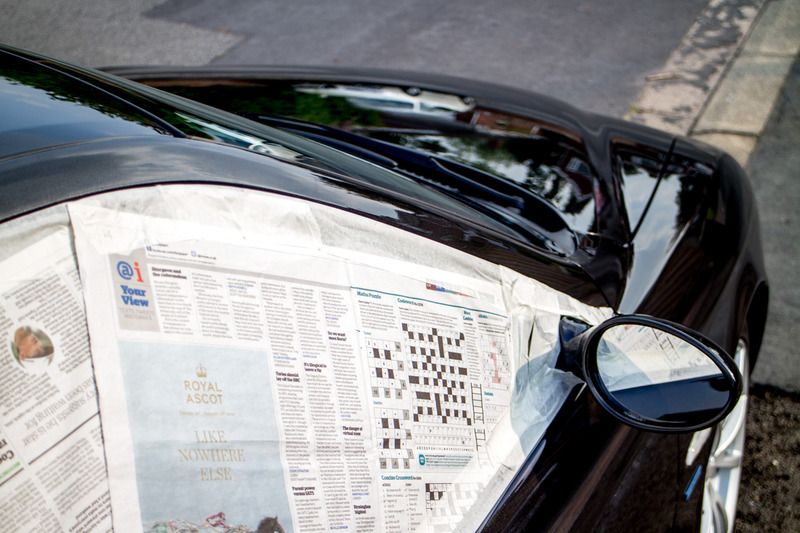
It's still pishing about with MCSF, no surprises there but on arriving at the campsite, I found that I had no choice but to park it under a tree for 2 days and it ended up COVERED in tree sap. You could have stuck a live cat to the roof.
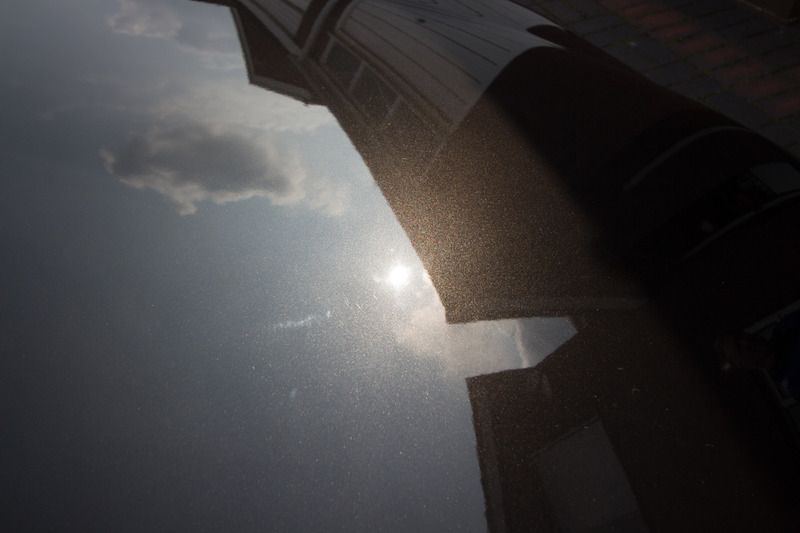
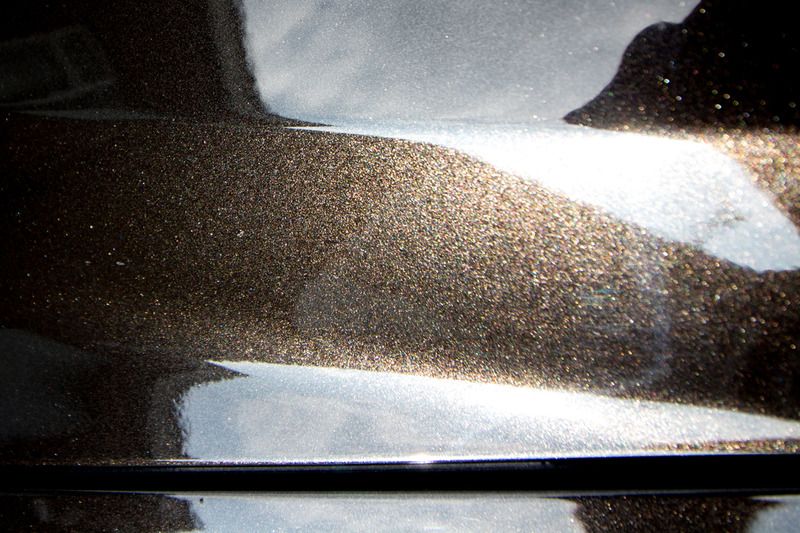
Being mindful that it's so hot ATM I took it down to tesco yesterday afternoon and washed the worse of the sap off. I wasn't getting anywhere with the pressure lance so I used the brush. I thought it may be a mistake at time and confirmed it when I got home. Scratches in the paint where there was none post buffing efforts.
I don't know why I bother...
It's still pishing about with MCSF, no surprises there but on arriving at the campsite, I found that I had no choice but to park it under a tree for 2 days and it ended up COVERED in tree sap. You could have stuck a live cat to the roof.
Being mindful that it's so hot ATM I took it down to tesco yesterday afternoon and washed the worse of the sap off. I wasn't getting anywhere with the pressure lance so I used the brush. I thought it may be a mistake at time and confirmed it when I got home. Scratches in the paint where there was none post buffing efforts.
I don't know why I bother...
Edited by Zombie on Tuesday 7th June 15:49
Tonights efforts;
As I mentioned in a previous post my Dad sourced a replacement ecu kit.
Quick guide to replacement:
DISCONNECT THE BATTERY
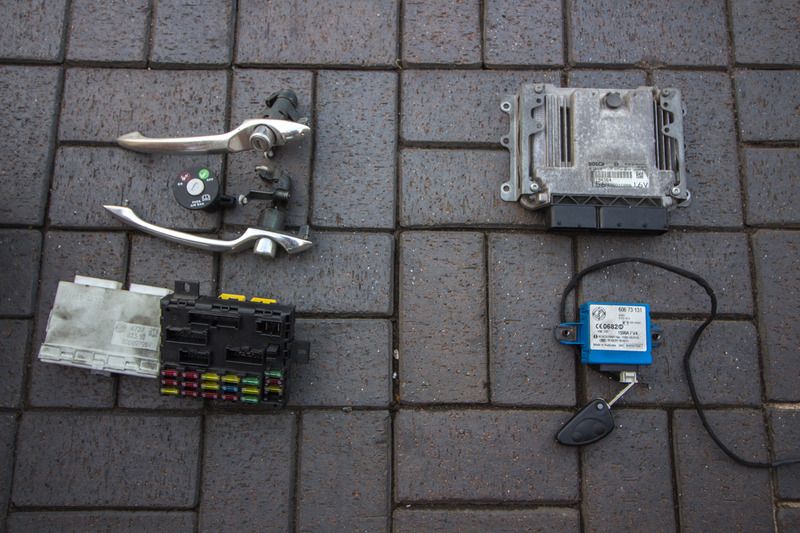
The bits on the right, code box, engine ecu and key are required, the rest that turned up with it are not.
The code box is mounted above the fuse box, to the right of the steering column.
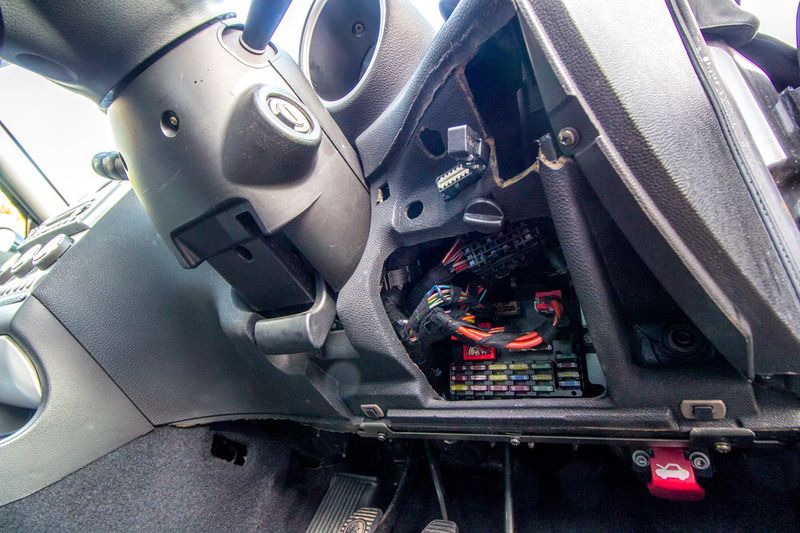
Removing the fuse box is relatively easy assuming you can get the locks on the plugs undone.
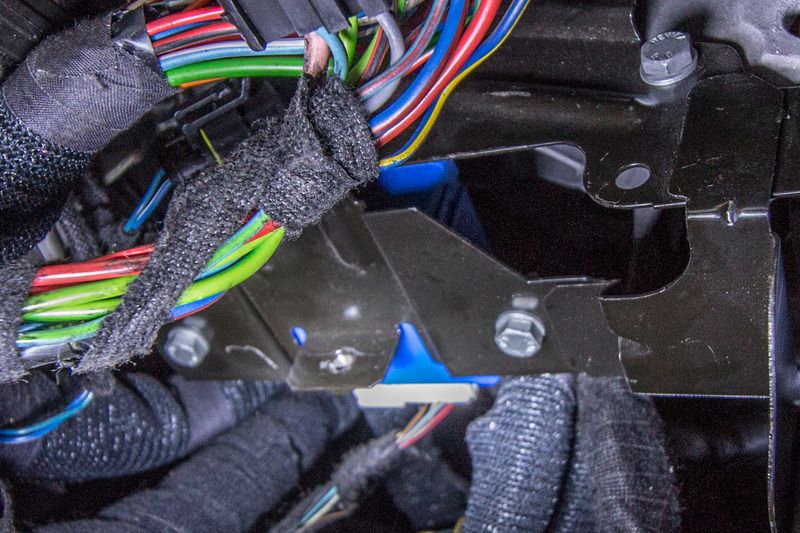
It's bolted in with 2 x 10mm bolts that are easy enough to get at. One is visible in the pic below, the other is off up on the top left hand corner

With that removed you can see the code box - It's the blue box mounted onto of the black bracket;
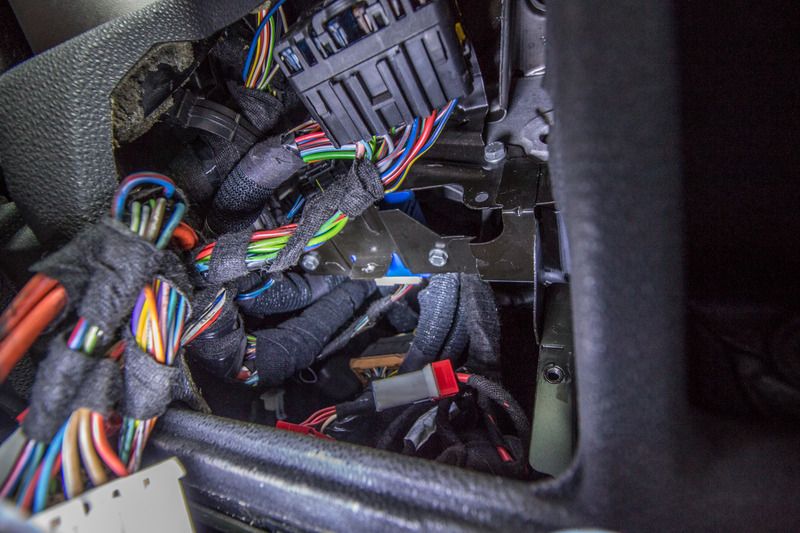
It's held in place with another 2 x 10mm bolts that go in from below. Undo them and disconnect the plugs and pull it out. Engine ecu is under the bonnet and easy enough to replace.
Once they've both been replaced it's also a simple enough job to swap the transponder from the key(s) that came with the ecu into your existing keys.
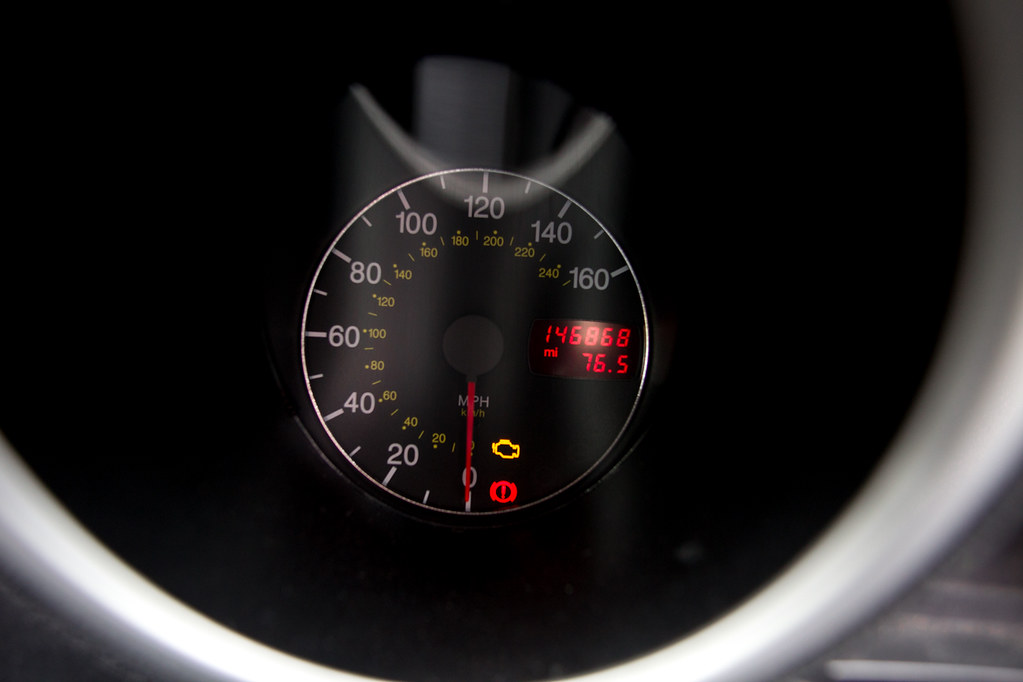
On connecting everything I found the engine management light was on and the glow plug light was flashing. I cleared the fault codes that presumably were a remnant of the previous owner. Not all that surprising really.
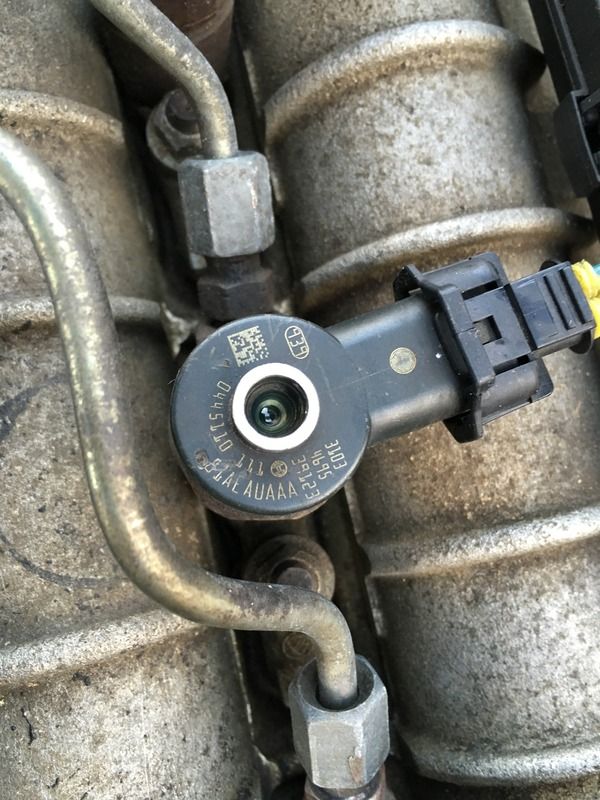
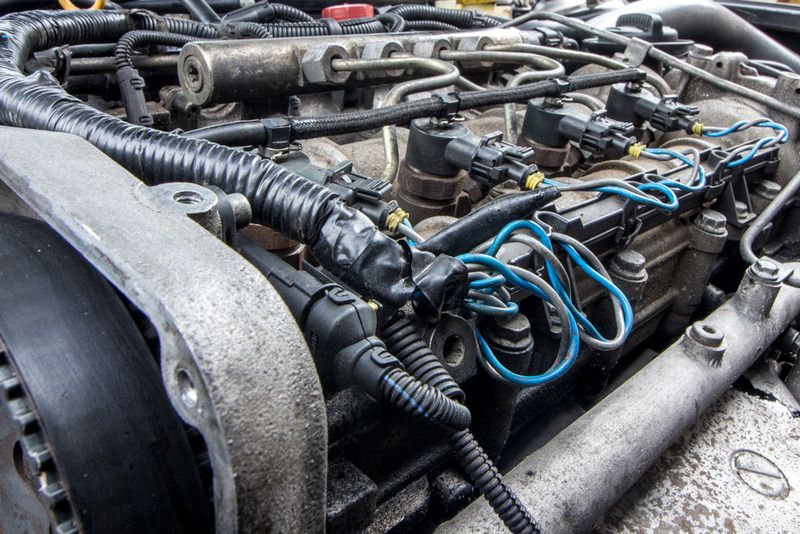
The other thing you need to do is code the ecu to the fuel injectors. The injectors have characteristics specific to each individual injector that are described by a code on the top of the injector, which in this case (no 3) is; 81AEAUAAA
You can use Multi ECU Scan to alter the codes.
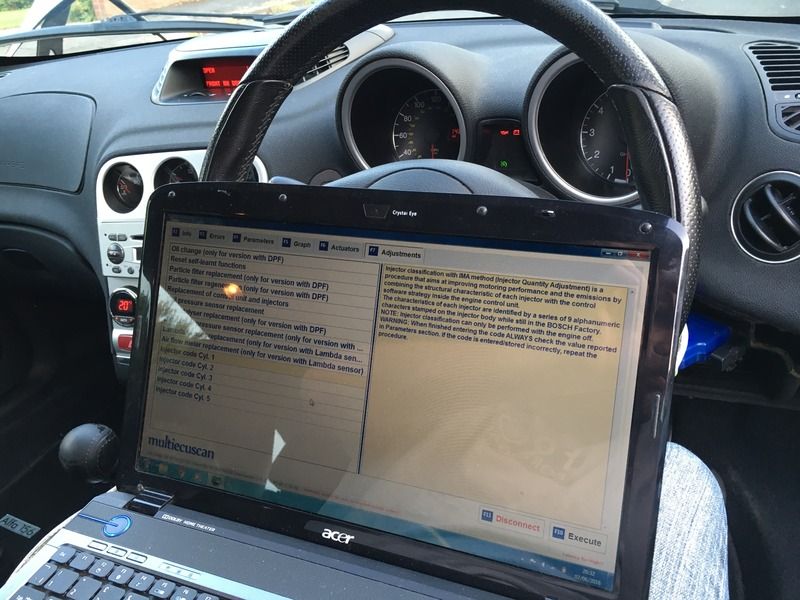
This may sound complicated but, TBH, its dead simple.
There endeth the guide.
We went for a 12 mile drive, no errors. Boost pressure seems to be more consistent and it's definitely running better. It's also slower. MPG figure is more realistic though. As in not 55mpg after being spanked.
Not arsed about the performance aspect. That's what the GTA is for, I just want a car that doesn't throw a wobbler when you floor it.
As I mentioned in a previous post my Dad sourced a replacement ecu kit.
Quick guide to replacement:
DISCONNECT THE BATTERY
The bits on the right, code box, engine ecu and key are required, the rest that turned up with it are not.
The code box is mounted above the fuse box, to the right of the steering column.
Removing the fuse box is relatively easy assuming you can get the locks on the plugs undone.
It's bolted in with 2 x 10mm bolts that are easy enough to get at. One is visible in the pic below, the other is off up on the top left hand corner
With that removed you can see the code box - It's the blue box mounted onto of the black bracket;
It's held in place with another 2 x 10mm bolts that go in from below. Undo them and disconnect the plugs and pull it out. Engine ecu is under the bonnet and easy enough to replace.
Once they've both been replaced it's also a simple enough job to swap the transponder from the key(s) that came with the ecu into your existing keys.
On connecting everything I found the engine management light was on and the glow plug light was flashing. I cleared the fault codes that presumably were a remnant of the previous owner. Not all that surprising really.
The other thing you need to do is code the ecu to the fuel injectors. The injectors have characteristics specific to each individual injector that are described by a code on the top of the injector, which in this case (no 3) is; 81AEAUAAA
You can use Multi ECU Scan to alter the codes.
This may sound complicated but, TBH, its dead simple.
There endeth the guide.
We went for a 12 mile drive, no errors. Boost pressure seems to be more consistent and it's definitely running better. It's also slower. MPG figure is more realistic though. As in not 55mpg after being spanked.
Not arsed about the performance aspect. That's what the GTA is for, I just want a car that doesn't throw a wobbler when you floor it.
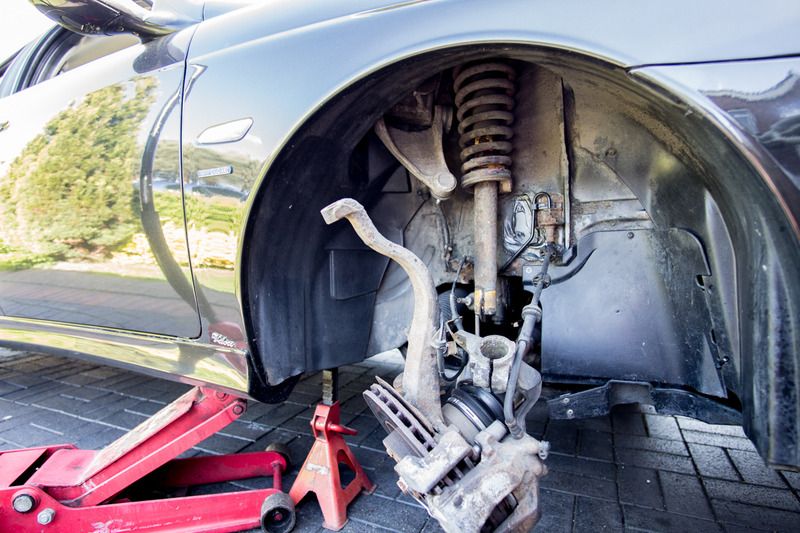
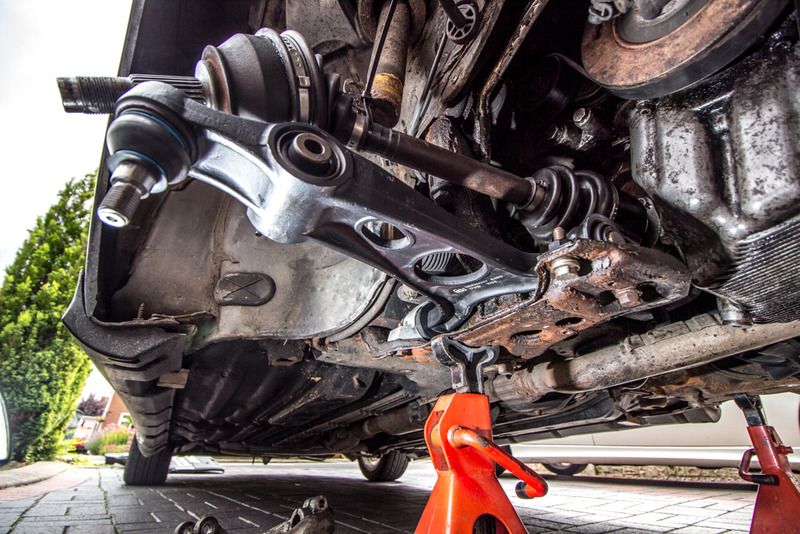
And the rush job changing the offside upper arm. We had one in stock (Genuine ricambi!) and a drop link, which was an advisory...
Simple job as the damper fork fell apart - My Dad has been there before and spent about 6 hours separating the 2. Needless to say, the went back together liberally coated in copper grease. And yes that includes the pinch bolt...
Simple job as the damper fork fell apart - My Dad has been there before and spent about 6 hours separating the 2. Needless to say, the went back together liberally coated in copper grease. And yes that includes the pinch bolt...
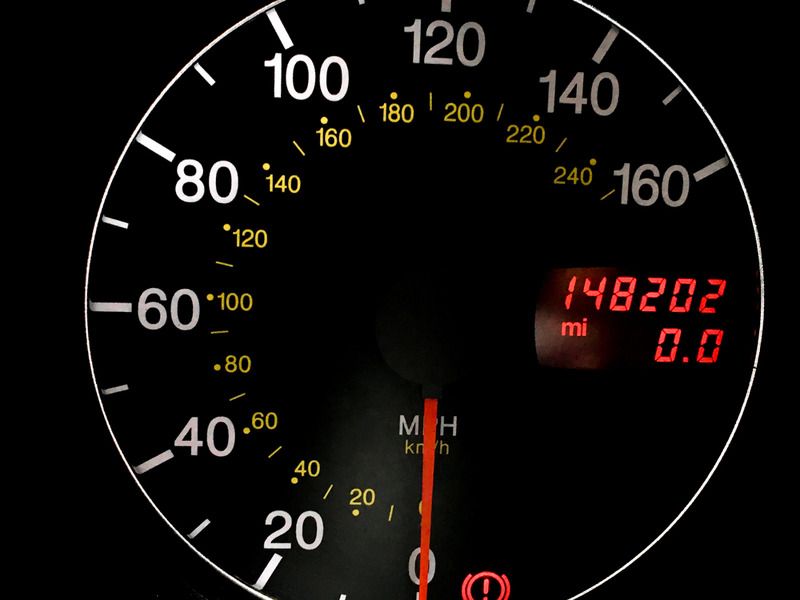
Time for another service. Oil and filter changed when I bought it, and again with the turbo. Now not due but probably worthwhile at:
 IMG_9943 by Chris, on Flickr
As mentioned before, I went to the lakes last weekend. We did a silly walk that was 17km and involved 1400m of ascent, but it also involved sat nav, a "discussion" and the scenic route. Hard Knot Pass.
Consequently, the under tray and it's numerous hybrid repairs took a bit of a hammering. So much so it took 15 min to remove and 3 hours to repair. Sorry Dad, Thank you Dad.... aranoid:
Otherwise it was the standard stuff;
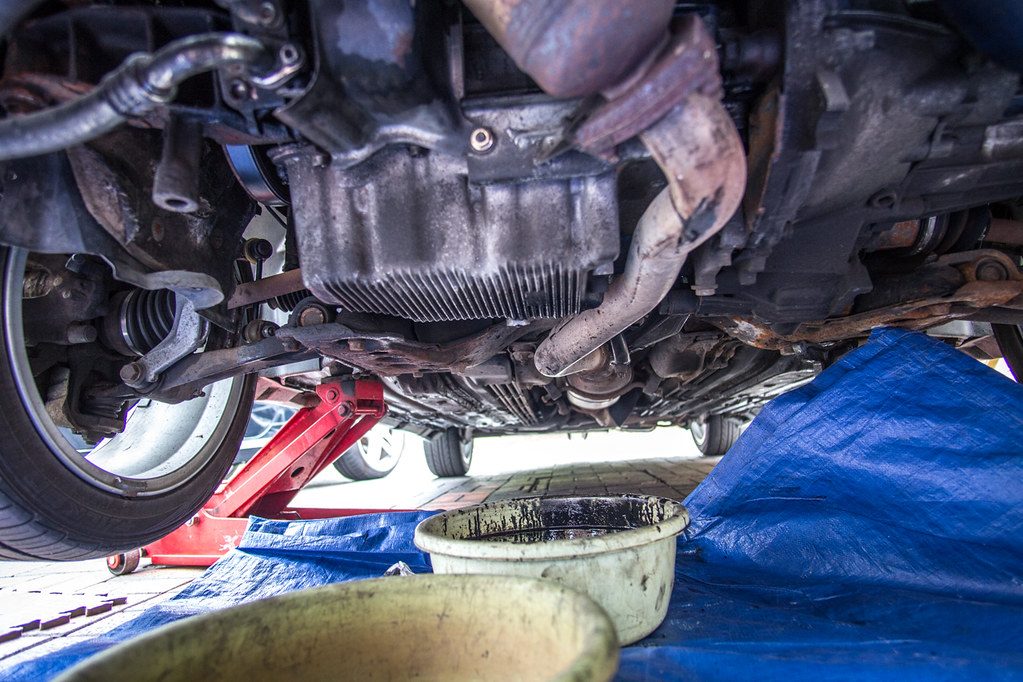
Drop Oil
 IMG_9931 by Chris, on Flickr
New oil filter
https://www.flickr.com/photos/97420435@N05/2748808...
We also changed the fuel filter (again) as I suspected that may have been causing problems too. Notable by it's absence in this pic...
https://www.flickr.com/photos/97420435@N05/2748807...
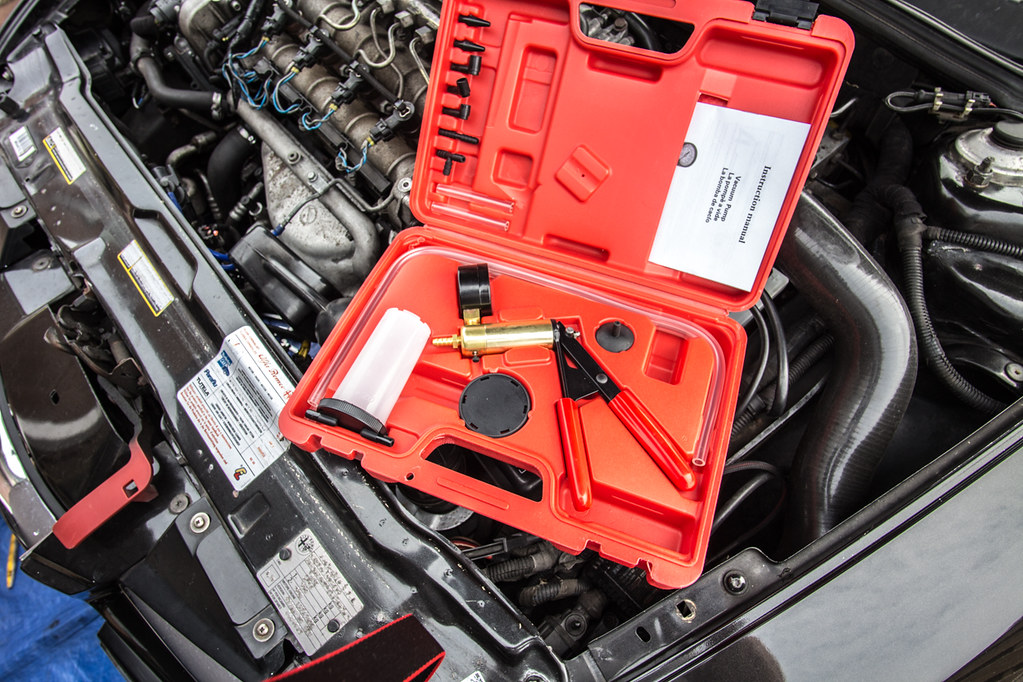
Whilst we were there I also tried the new toy;
 IMG_9934 by Chris, on Flickr
I ordered it to test the vacuum system prior to the ecu change which seems to have solved the mcsf but I thought i'd test it anyway
 IMG_9936 by Chris, on Flickr
 IMG_9939 by Chris, on Flickr
IMG_9943 by Chris, on FlickrAs mentioned before, I went to the lakes last weekend. We did a silly walk that was 17km and involved 1400m of ascent, but it also involved sat nav, a "discussion" and the scenic route. Hard Knot Pass.
Consequently, the under tray and it's numerous hybrid repairs took a bit of a hammering. So much so it took 15 min to remove and 3 hours to repair. Sorry Dad, Thank you Dad....
aranoid:Otherwise it was the standard stuff;
Drop Oil
IMG_9931 by Chris, on FlickrNew oil filter
https://www.flickr.com/photos/97420435@N05/2748808...
We also changed the fuel filter (again) as I suspected that may have been causing problems too. Notable by it's absence in this pic...
https://www.flickr.com/photos/97420435@N05/2748807...
Whilst we were there I also tried the new toy;
IMG_9934 by Chris, on FlickrI ordered it to test the vacuum system prior to the ecu change which seems to have solved the mcsf but I thought i'd test it anyway
IMG_9936 by Chris, on FlickrIMG_9939 by Chris, on Flickrcannondale said:
Really enjoying the thread. Thanks for sharing.
Can you explain what the new tool is for? Assume it's to understand boost pressures?
Thanks Can you explain what the new tool is for? Assume it's to understand boost pressures?
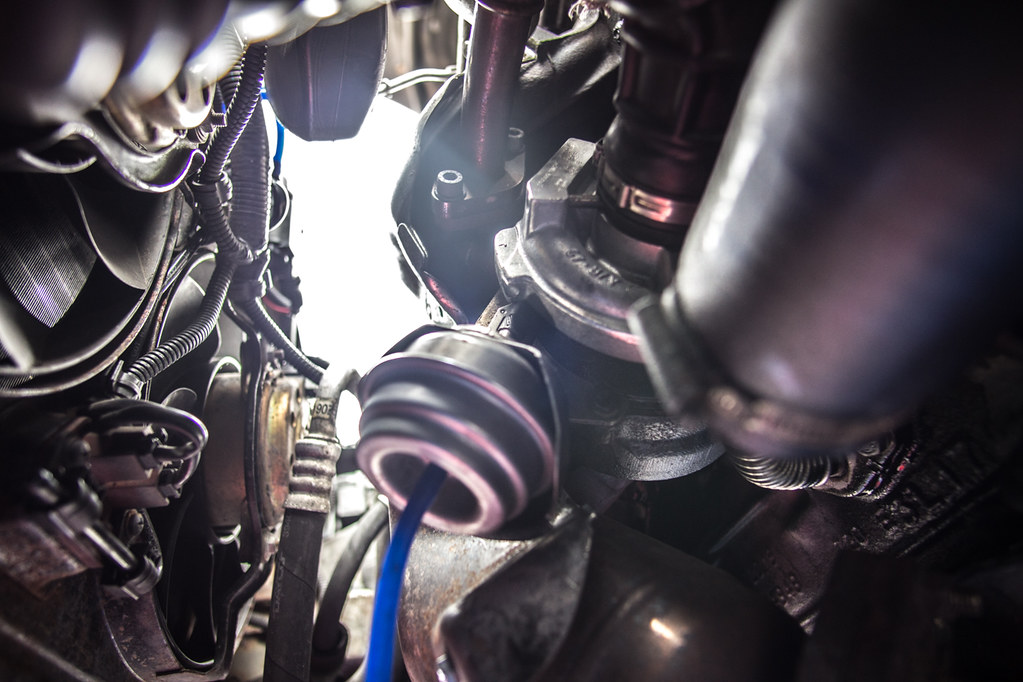
It's a vacuum pump. The bit that the blue pipe is attached to is a diaphragm that uses a vacuum (generated by the pump on the engine as it's turbocharged) to pull a rod that alters the vane geometry in the turbo, increasing or decreasing the amount of boost it produces.
I was using the pump to check the operation and response time relative to pressure. The new ecu has fixed the boost issues I was having but seen as I'd bought it, I thought I'd try it.
It also comes with a reservoir that you can use in conjunction with the pump to bleed the brakes. Given that I've had problems in the past with bleeding the 4pot brembos on my GTA, I felt it was worth the £13 just for this.
Edited by Zombie on Saturday 11th June 22:30
Just had a frustrating weekend which started with a broken 'leccy window switch earlier in the week. Not a huge problem, I thought i'd just find one on eBay...
The ebay search resulted in me spending a sizeable sum of money on a 1/12 scale Tamiya Porsche 935 model kit and the some more money with camskill on some Rainsport 3 tyres to replace the landsail ditch finders that are on the back of the 156 as a temporary measure whilst my Dad repaints 2 wheels.
I'd completely forgotten about the window switch.
Tyres turned up on Friday around mid-day - I ordered them Wed eve. So I popped home to collect them and the wheels to have them fitted by the local tyre shop, no problems there. It was at this point I looked at the offside front wheel and noticed that it was covered in black grease.
Arse. Outer CV joint.
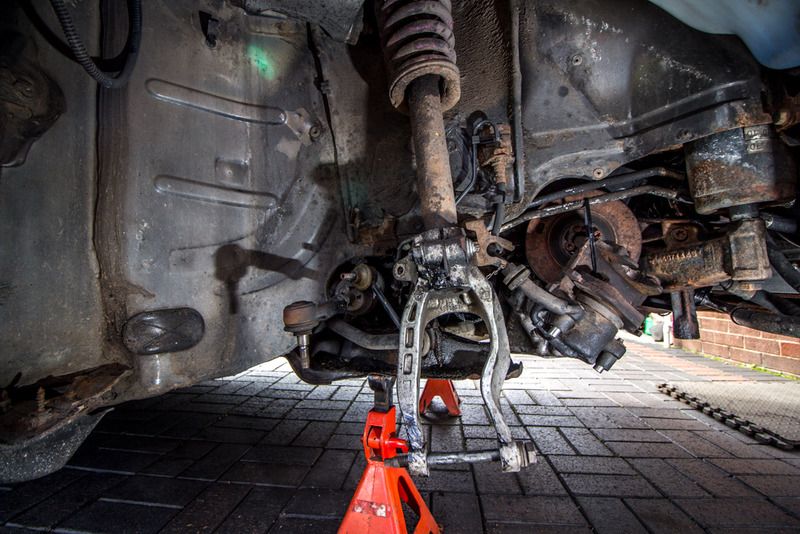
Jacked it up, took the under tray off and found the air con compressor and the front of the engine was covered in oil and coolant.
(Mint...)
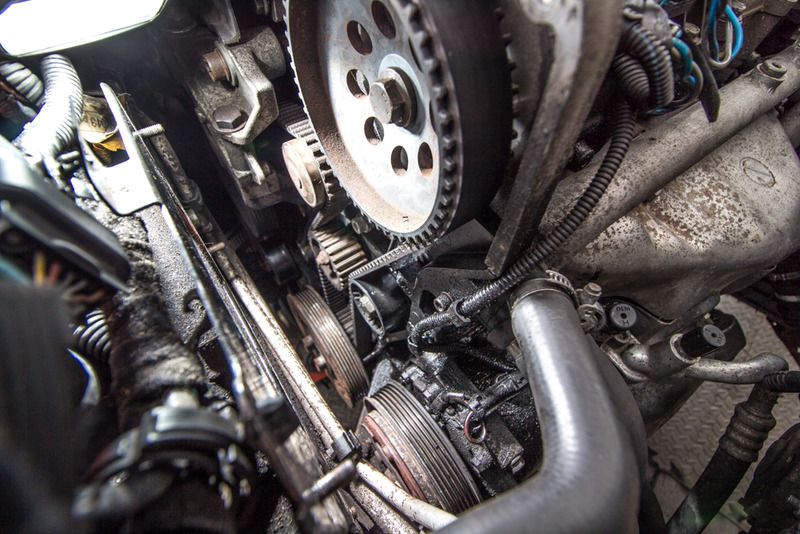
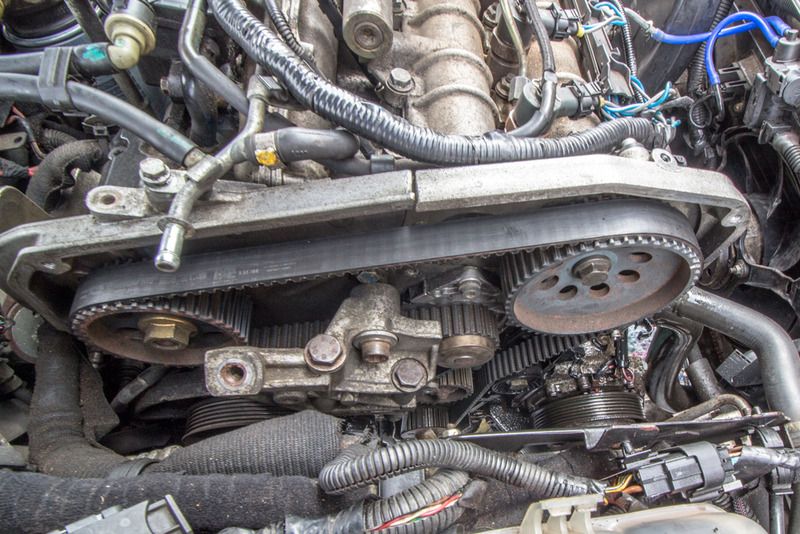
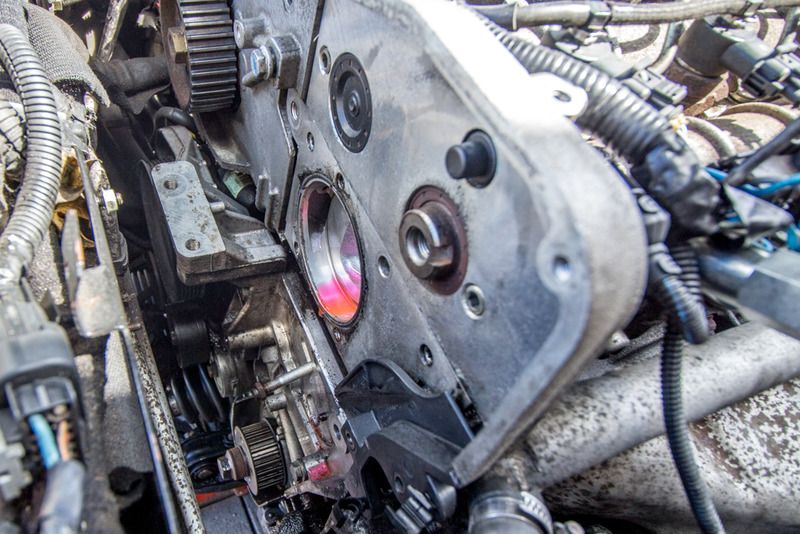
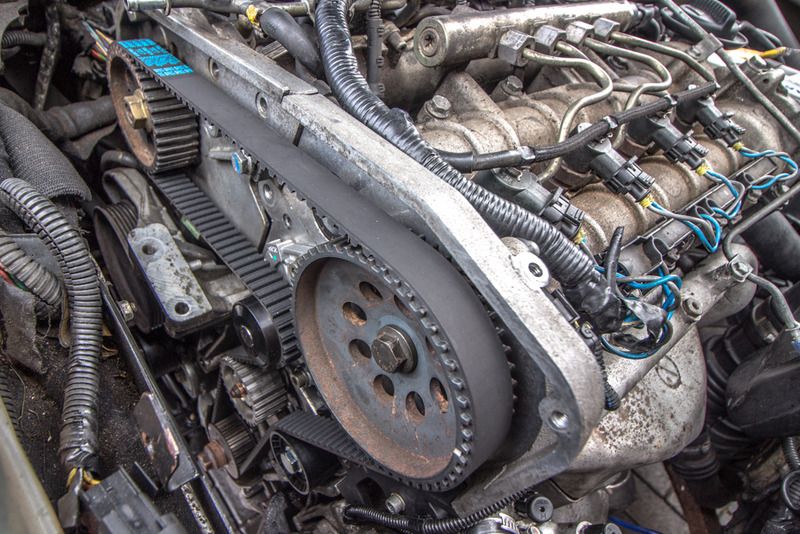
On finding this the cv issue took a secondary role. It's had an oil leak since I got it, I think it's leaking from between the head and the cam carrier but it's not that significant it just looks bad because it's accumulated. Even so, I was concerned that it may have gotten worse and wanted to check whether the cam belt had been contaminated;
I felt a bit happier but still needed to know where the coolant was coming from. My Dad found the leak with a mirror...

Great, it's coming from the water pump. So it needs a new pump and a cam belt change. (Next week...)
We put that back together and went back to the CV joint.
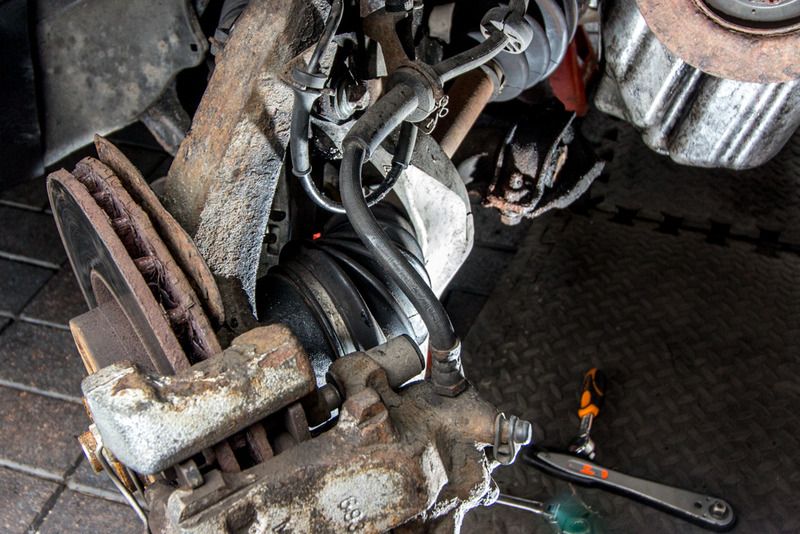
If the brake hose wasn't in the way you'd be able to see that there's no obvious split in the cv boot. But on close inspection we found that it had worn through in some places and had numerous pin sized holes in it.
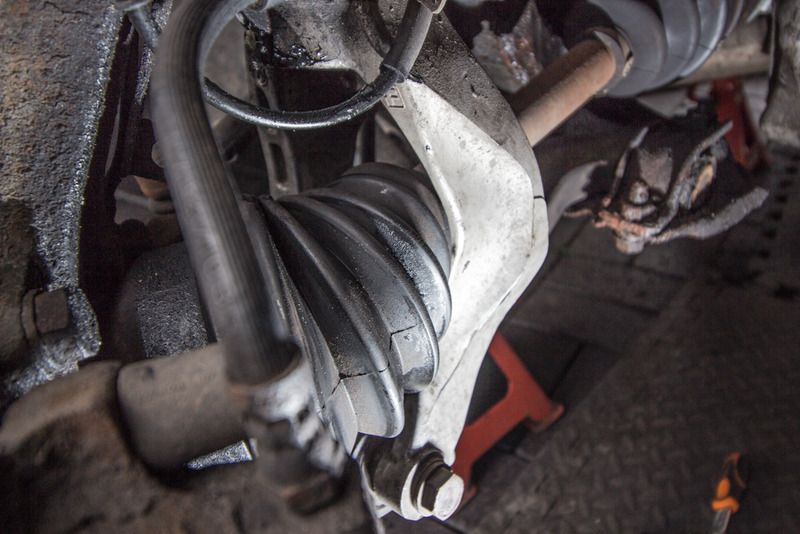
Taking it apart should have been easy enough but the lower arm ball joint wouldn't release, so that had to come off with the upright. Damaged the thread releasing it so that needed to be repaired...
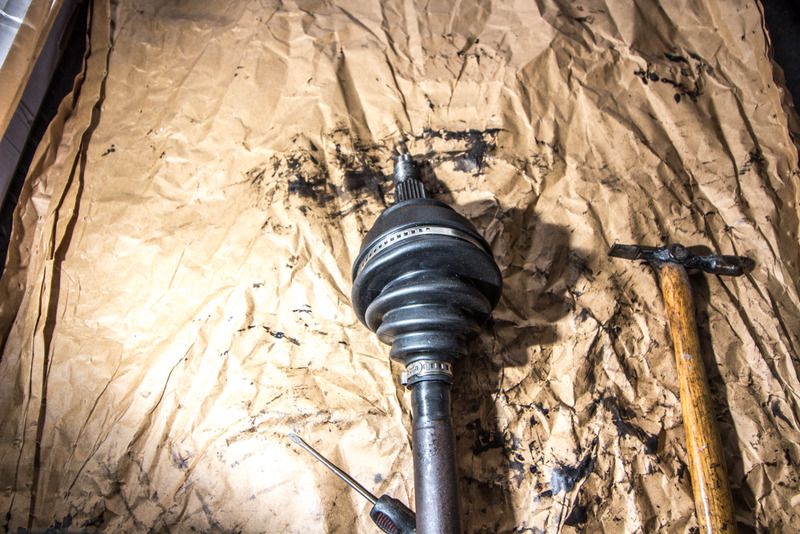
We have some spare drive shafts so the plan was to cannibalise one for a cv boot. The difficulty is that the offside shaft goes straight in to the gearbox, so removing it means draining the gearbox oil (and the cost of refilling it).
Sod that.
Plan b. Split the shaft at the inner joint spider and hope we can get a band around the inner cv boot when we refitted it.
Every part of the other drive shaft was different to the existing shaft. Including the cv boot. The other cv boots we have in stock didn't fit it and we ended up with that bloody grease everywhere. My dad ended up going to europarts this morning for a generic replacement boot, which worked fine.
Getting a band around the inner cv boot took an hour though.
After getting the shaft back in, it should be a simple job to put it back together?
Nope.
The thread repair on the lower arm ball joint was fine but the bolts into the front mount wouldn't torque up. Both threads stripped. So new lower arm required. FFS. And the only one we had in stock was a decent quality one.
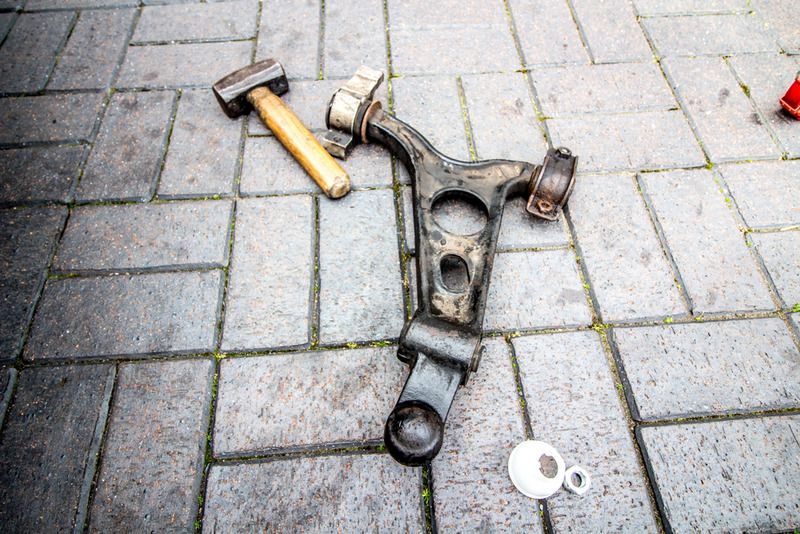
And then the thread stripped on the (new) ARB drop link. The lower arm was old and corroded. I can understand that failing but a new drop link. No idea what happened there. By chance I realised it had a coarse thread rather than the usual fine thread, so it wasn't a case of using the wrong nut.
As I said, it was a frustrating couple of days. Back together now though.
The ebay search resulted in me spending a sizeable sum of money on a 1/12 scale Tamiya Porsche 935 model kit and the some more money with camskill on some Rainsport 3 tyres to replace the landsail ditch finders that are on the back of the 156 as a temporary measure whilst my Dad repaints 2 wheels.
I'd completely forgotten about the window switch.
Tyres turned up on Friday around mid-day - I ordered them Wed eve. So I popped home to collect them and the wheels to have them fitted by the local tyre shop, no problems there. It was at this point I looked at the offside front wheel and noticed that it was covered in black grease.
Arse. Outer CV joint.
Jacked it up, took the under tray off and found the air con compressor and the front of the engine was covered in oil and coolant.
(Mint...)
On finding this the cv issue took a secondary role. It's had an oil leak since I got it, I think it's leaking from between the head and the cam carrier but it's not that significant it just looks bad because it's accumulated. Even so, I was concerned that it may have gotten worse and wanted to check whether the cam belt had been contaminated;
I felt a bit happier but still needed to know where the coolant was coming from. My Dad found the leak with a mirror...
Great, it's coming from the water pump. So it needs a new pump and a cam belt change. (Next week...)
We put that back together and went back to the CV joint.
If the brake hose wasn't in the way you'd be able to see that there's no obvious split in the cv boot. But on close inspection we found that it had worn through in some places and had numerous pin sized holes in it.
Taking it apart should have been easy enough but the lower arm ball joint wouldn't release, so that had to come off with the upright. Damaged the thread releasing it so that needed to be repaired...
We have some spare drive shafts so the plan was to cannibalise one for a cv boot. The difficulty is that the offside shaft goes straight in to the gearbox, so removing it means draining the gearbox oil (and the cost of refilling it).
Sod that.
Plan b. Split the shaft at the inner joint spider and hope we can get a band around the inner cv boot when we refitted it.
Every part of the other drive shaft was different to the existing shaft. Including the cv boot. The other cv boots we have in stock didn't fit it and we ended up with that bloody grease everywhere. My dad ended up going to europarts this morning for a generic replacement boot, which worked fine.
Getting a band around the inner cv boot took an hour though.
After getting the shaft back in, it should be a simple job to put it back together?
Nope.
The thread repair on the lower arm ball joint was fine but the bolts into the front mount wouldn't torque up. Both threads stripped. So new lower arm required. FFS. And the only one we had in stock was a decent quality one.
And then the thread stripped on the (new) ARB drop link. The lower arm was old and corroded. I can understand that failing but a new drop link. No idea what happened there. By chance I realised it had a coarse thread rather than the usual fine thread, so it wasn't a case of using the wrong nut.
As I said, it was a frustrating couple of days. Back together now though.
Edited by Zombie on Sunday 31st July 21:33
Edited by Zombie on Sunday 31st July 21:47

I can relate to your ebaying. I too was searching for a window switch and got sidetracked and ended up buying a whole red leather interior for my 156! consequently the switches were thrown in with it so if you still need one give me a shout as I have some spares. I too have stripped the rear lower mount threads, but on a brand new TRW arm, in the end i put longer 90mm M10 bolts through and a good nut and washer tightened over the top!
noway said:
Nice collection on the drive there...
Mines a pre face lift....its my daily with 62k miles and ive had it just over 6 yrs.Its been the most reliable car ive owned and ive had a few.It had a suspension refresh just before i bought it and theres a few squeaks now and then but its just gone thru its last mot a few days a go again with no advisories...im always on the hunt for my next weekend car but the 156 will stay a while longer yet.
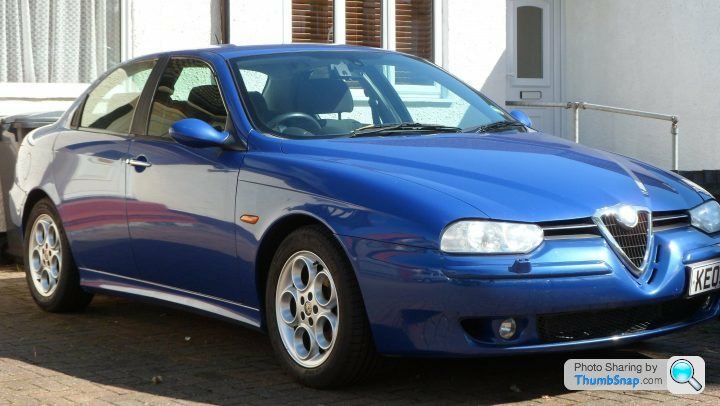
Very nice, one of the best colours. Mines a pre face lift....its my daily with 62k miles and ive had it just over 6 yrs.Its been the most reliable car ive owned and ive had a few.It had a suspension refresh just before i bought it and theres a few squeaks now and then but its just gone thru its last mot a few days a go again with no advisories...im always on the hunt for my next weekend car but the 156 will stay a while longer yet.
Edited by noway on Monday 1st August 20:26
Edited by noway on Monday 1st August 20:28

davebem said:
I can relate to your ebaying. I too was searching for a window switch and got sidetracked and ended up buying a whole red leather interior for my 156! consequently the switches were thrown in with it so if you still need one give me a shout as I have some spares. I too have stripped the rear lower mount threads, but on a brand new TRW arm, in the end i put longer 90mm M10 bolts through and a good nut and washer tightened over the top!
Thanks, but my Dad sorted out a new switch in the back ground... It was the front mount that failed. We were looking at the longer bolt and nut option on the outer of the two until I found the inside bolt wouldn't torque up either.I'm guessing you've seen this thread;
http://www.alfaowner.com/Forum/alfa-gta/907450-cau...
Took it for tracking yesterday - new tyres, new lower arm etc plus the steering has been out since I hit the pot hole in the winter.
Guy calls me into the workshop to explain an "issue". He was turning the track rod and it wasn't having any effect on the tracking. The only viable expaination for this being that the track rod must be loose on the rack.
He couldn't fix this issue for various reasons, so put it back together and I drove it the short distance home gingerly.
I Pulled the boot off the rack and sure enough, the track was looking to part company with the ball joint on the end of the rack.
We have replaced the track rod, last year sometime iirc, but the section that has come undone was in the middle of the replacement part - it came with the ball attached, so it should've been tight and I've had no reason to mess with it since.
I'd also imagine it should've had thread lock on it. It does now at least. Quite scary really.
Eta
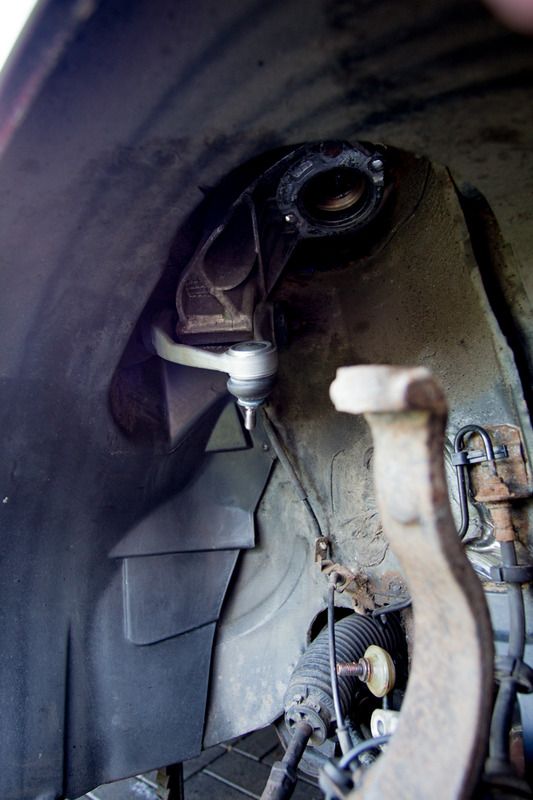
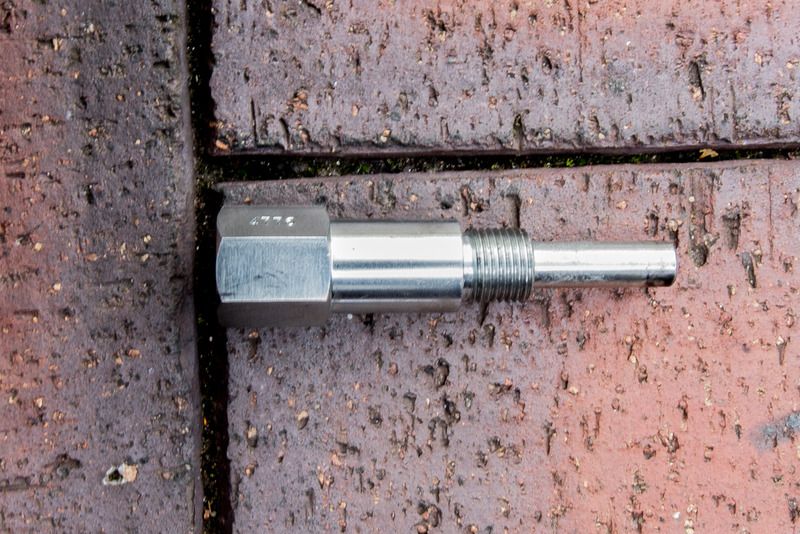
Been back through the thread and found a pic I posted of the track rod when I fitted it.
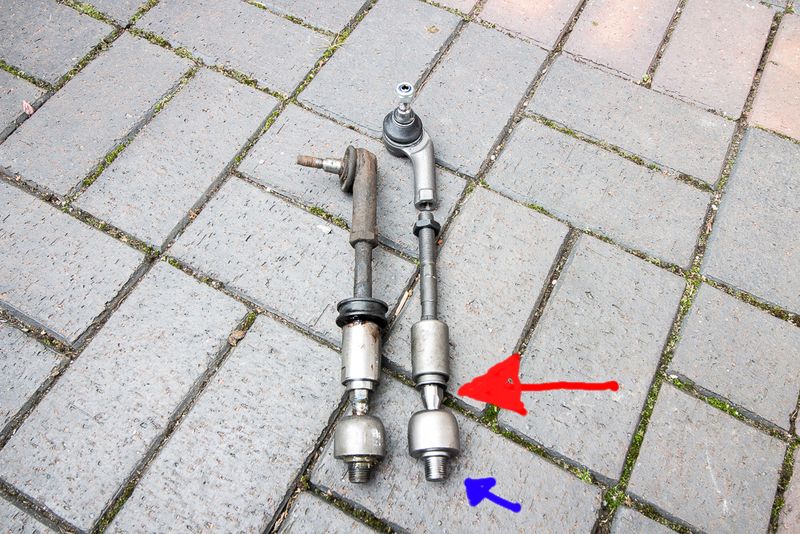
Arrowed blue is the bit that screws into the rack, arrowed red is the joint that fell apart. Obviously, I had no reason to mess with that joint.
Guy calls me into the workshop to explain an "issue". He was turning the track rod and it wasn't having any effect on the tracking. The only viable expaination for this being that the track rod must be loose on the rack.
He couldn't fix this issue for various reasons, so put it back together and I drove it the short distance home gingerly.
I Pulled the boot off the rack and sure enough, the track was looking to part company with the ball joint on the end of the rack.
We have replaced the track rod, last year sometime iirc, but the section that has come undone was in the middle of the replacement part - it came with the ball attached, so it should've been tight and I've had no reason to mess with it since.
I'd also imagine it should've had thread lock on it. It does now at least. Quite scary really.
Eta
Been back through the thread and found a pic I posted of the track rod when I fitted it.
Arrowed blue is the bit that screws into the rack, arrowed red is the joint that fell apart. Obviously, I had no reason to mess with that joint.
Edited by Zombie on Tuesday 2nd August 14:10
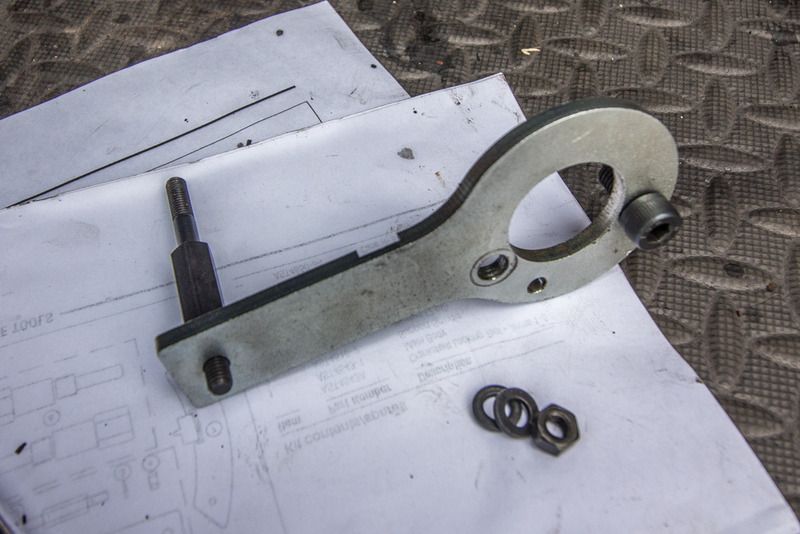
I mentioned in my previous post last weekend that the water pump was leaking (requiring a cam belt change) and with work being slack ATM I've elected to take a couple of days off to tackle it. I know we could do it in a day but there's no rush and it'll give us the chance to clean up the mess from what may or may not be a current oil leak.
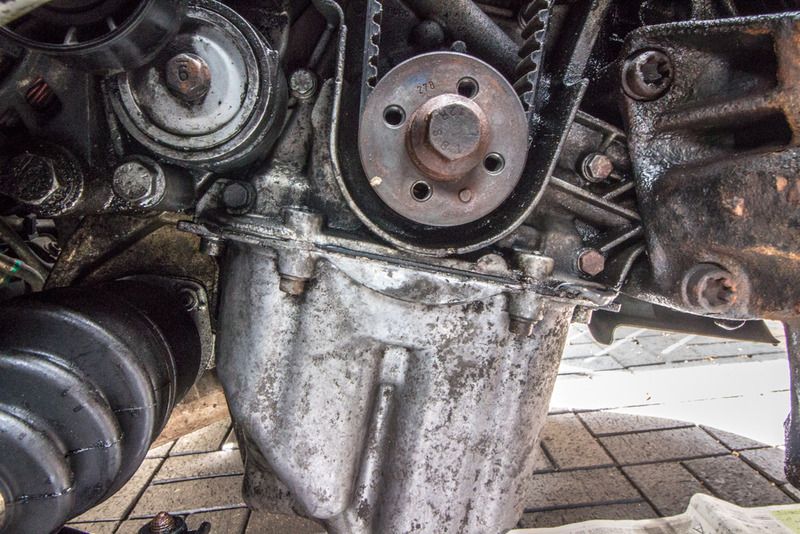
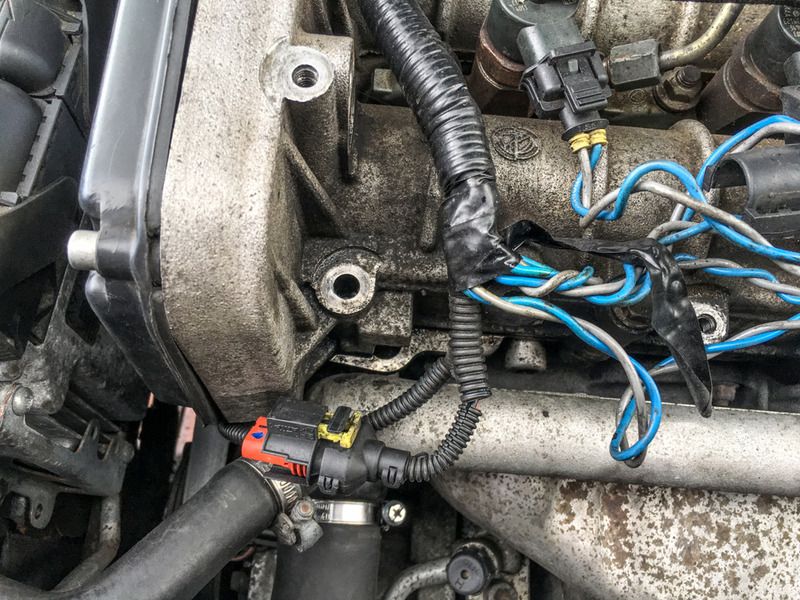
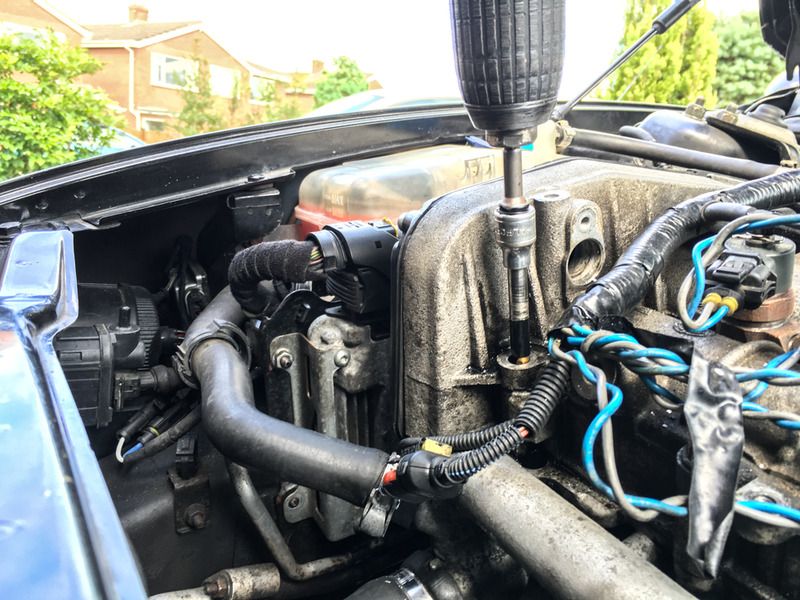
The job requires special tools. There's a hole in the side of the cam cover which has an allen bolt in it in the pic below
Into which you fit a sling loaded locking pin that finds a hole in the camshaft to lock it;
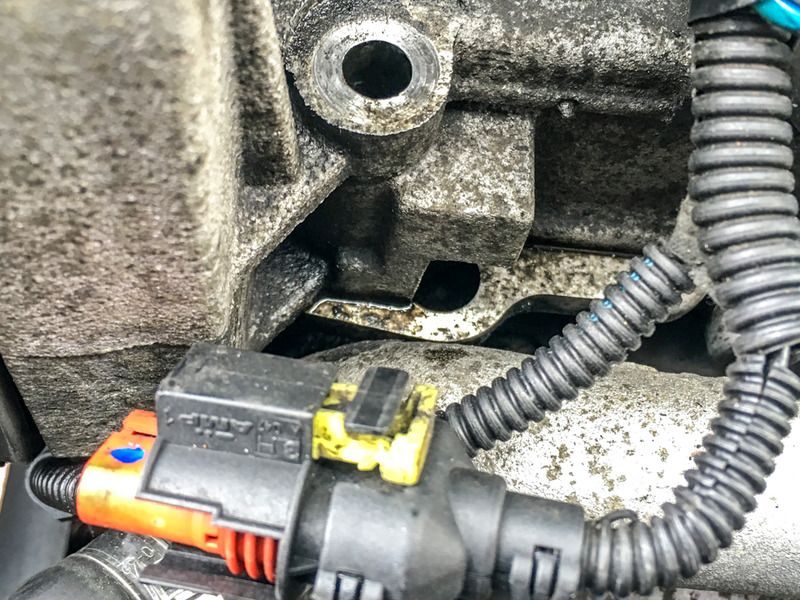
There are two holes and 2 cams but the exhaust cam is driven by a gears from the the inlet cam. The second pin is only needed when undertaking a full top end rebuild.
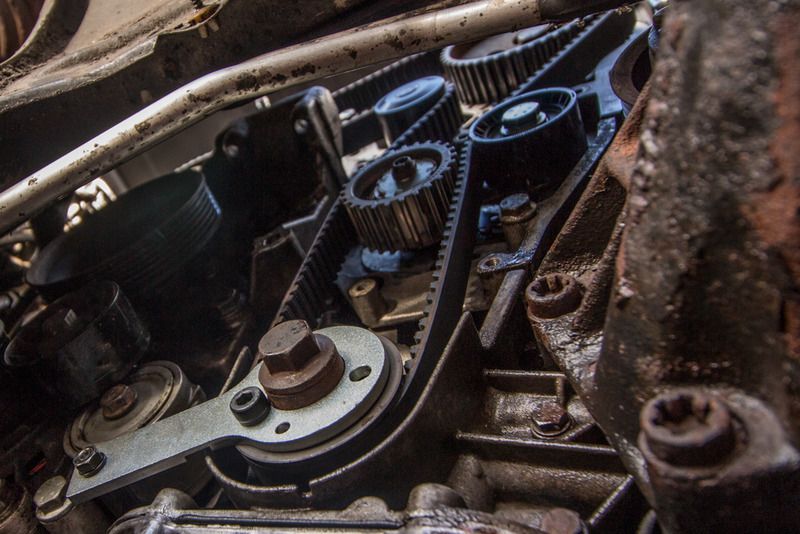
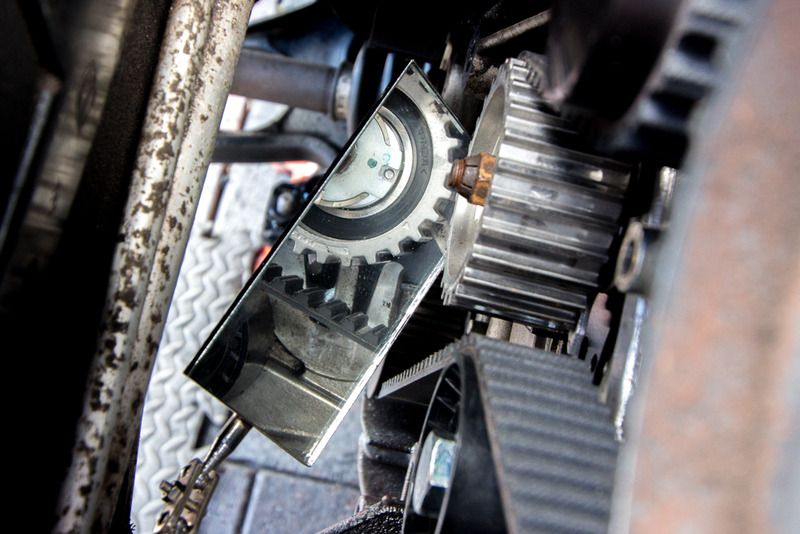
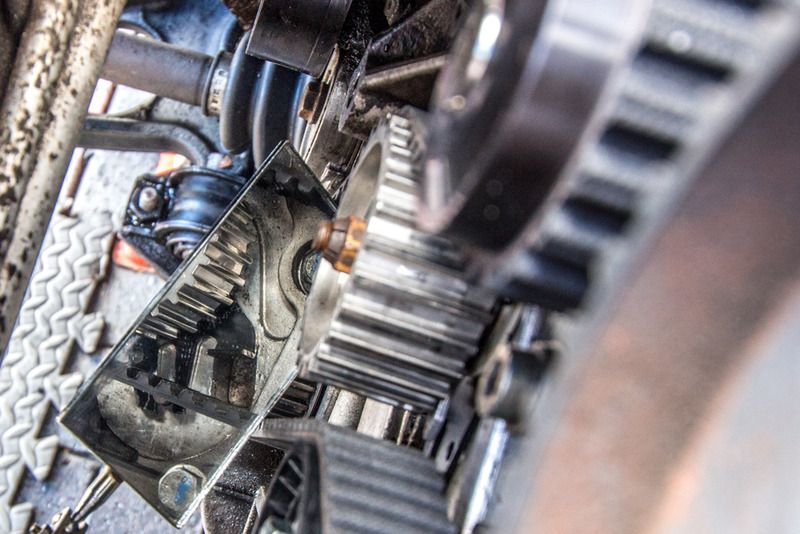
The crankshaft is locked using the bobble in the pulley;
Moving to the water pump;
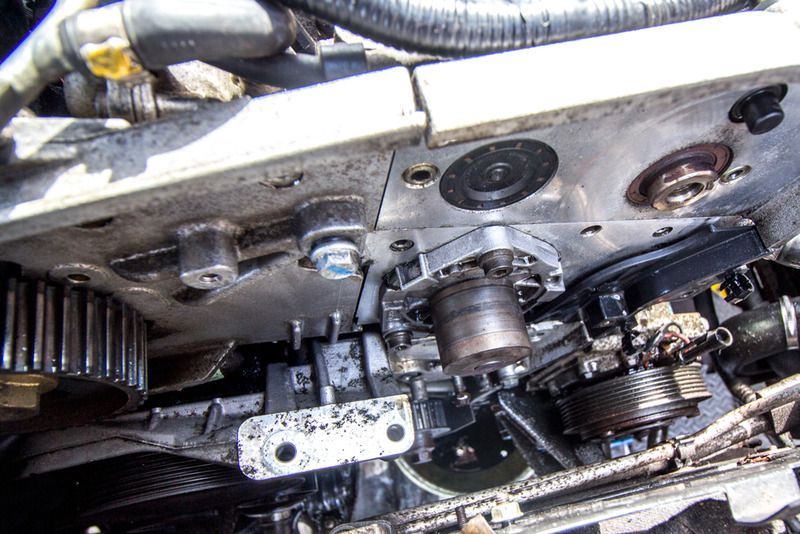
It had RTV round it, suggesting that it's been refitted using an old gasket that may explain the leak.
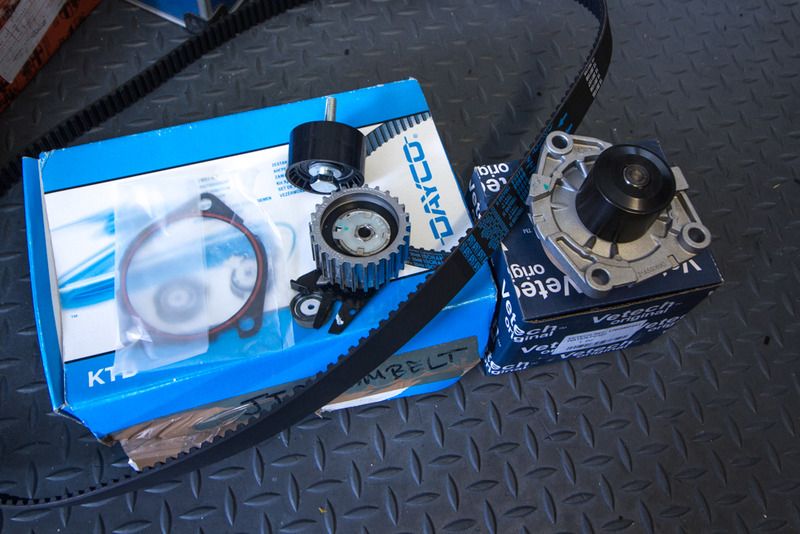
Shiney new bits;
Tensioning the belt is easy enough. We used a screwdriver in a convenient hole against the black tongue on the tensioner.
And on it's way back together...
The job requires special tools. There's a hole in the side of the cam cover which has an allen bolt in it in the pic below
Into which you fit a sling loaded locking pin that finds a hole in the camshaft to lock it;
There are two holes and 2 cams but the exhaust cam is driven by a gears from the the inlet cam. The second pin is only needed when undertaking a full top end rebuild.
The crankshaft is locked using the bobble in the pulley;
Moving to the water pump;
It had RTV round it, suggesting that it's been refitted using an old gasket that may explain the leak.
Shiney new bits;
Tensioning the belt is easy enough. We used a screwdriver in a convenient hole against the black tongue on the tensioner.
And on it's way back together...
Edited by Zombie on Thursday 4th August 21:39
Edited by Zombie on Friday 5th August 20:49
We put it back together today, straightforward job, no issues.
However, now that the engine's clean(ish), it was possible to identify where the oil leak was coming from - between the top of the head and the cam carrier;
Which is what we were thinking. First thought was to slacken and re-torque the bolts holding the cam carrier down and in doing so we found that the bolt nearest the leak had stripped it's thread and was loose.
Helicoil to the rescue? Hmmm.
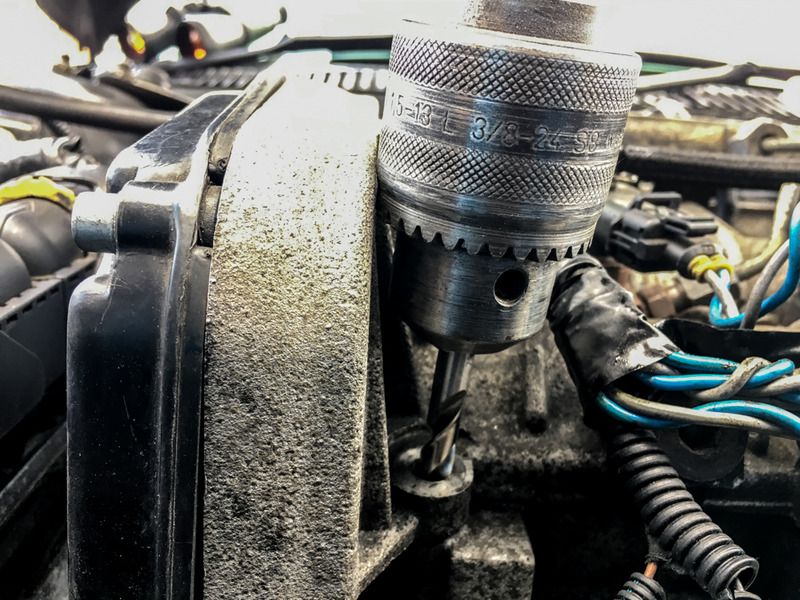
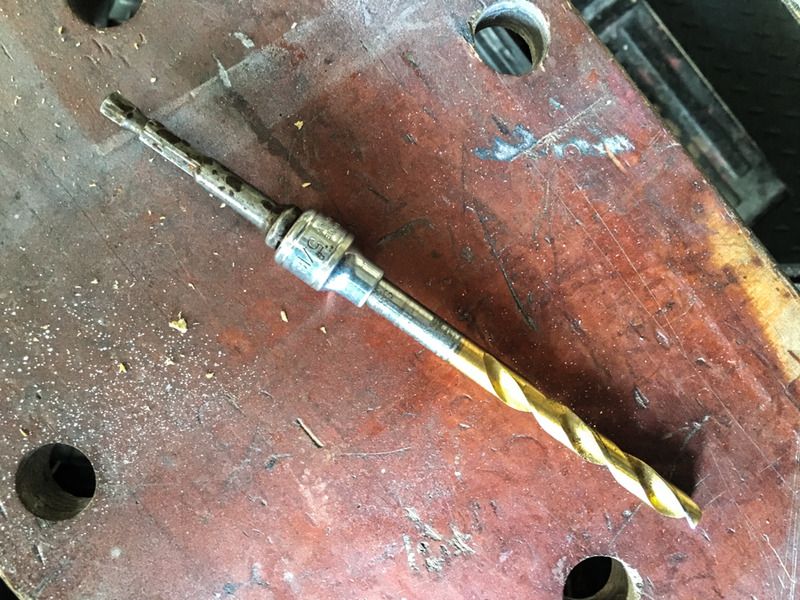
And that was with a slimline chuck. Finding a longer 8.3mm drill bit proved difficult which resulted in this;
All of which took about 4 hours to resolve. Think the leak is fixed though.
However, now that the engine's clean(ish), it was possible to identify where the oil leak was coming from - between the top of the head and the cam carrier;
Which is what we were thinking. First thought was to slacken and re-torque the bolts holding the cam carrier down and in doing so we found that the bolt nearest the leak had stripped it's thread and was loose.
Helicoil to the rescue? Hmmm.
And that was with a slimline chuck. Finding a longer 8.3mm drill bit proved difficult which resulted in this;
All of which took about 4 hours to resolve. Think the leak is fixed though.
Out on site with work this morning, I was wondering what the slight burning small was, checked under the bonnet thinking it might be the aux belt. Nope. And the wheels, checked none of them were running hot, tyre pressures seemed fine, tyres warm but not hot...
And then I was out again this afternoon and I noticed a small amount of smoke on acceleration. Car felt fine though. It was only when I got to my destination that I noticed some black fluff in the rear wheel. So I was looking at the ride height again (it's low but no lower than normal);

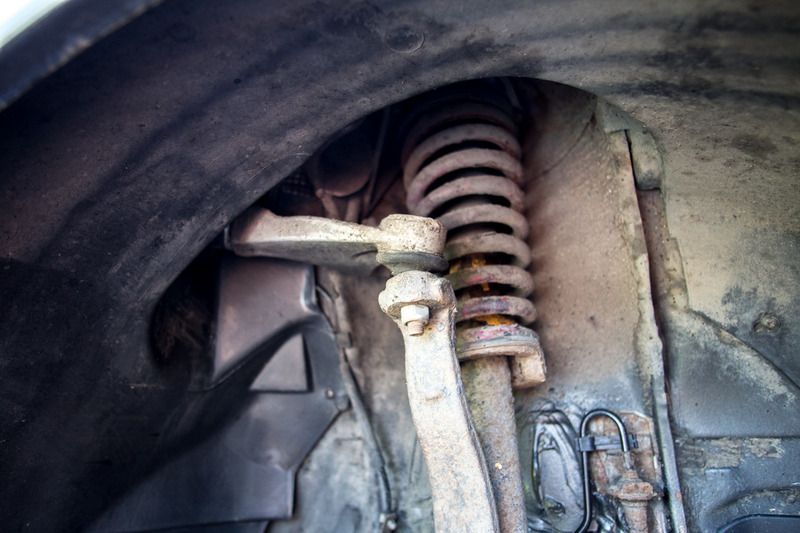
And as it had stopped raining I got on my knees and had a look under the car;
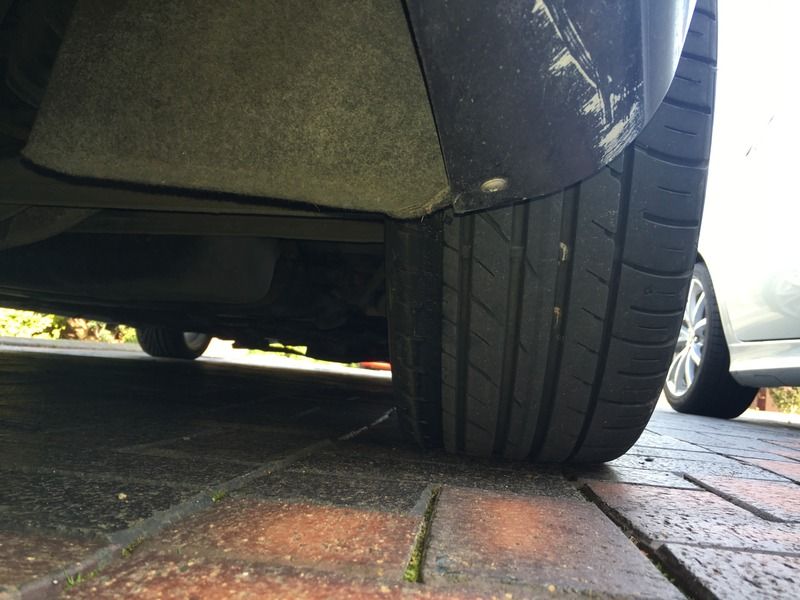
Ah.!
I reckon the spring pan has corroded and dropped down the shock body slightly, causing it to rub on the tyre.
And then I was out again this afternoon and I noticed a small amount of smoke on acceleration. Car felt fine though. It was only when I got to my destination that I noticed some black fluff in the rear wheel. So I was looking at the ride height again (it's low but no lower than normal);
And as it had stopped raining I got on my knees and had a look under the car;
Ah.
!I reckon the spring pan has corroded and dropped down the shock body slightly, causing it to rub on the tyre.
Gassing Station | Readers' Cars | Top of Page | What's New | My Stuff