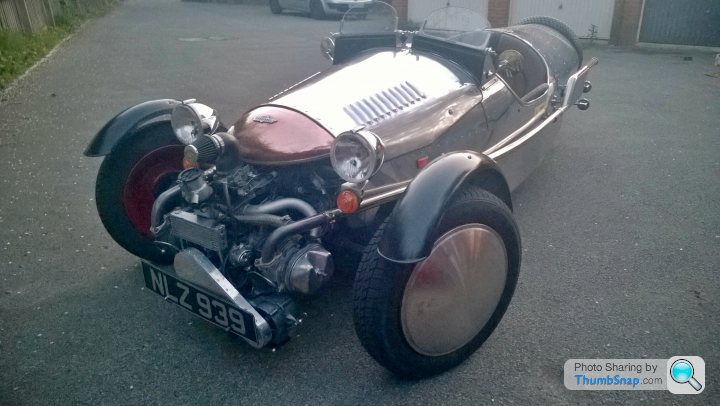
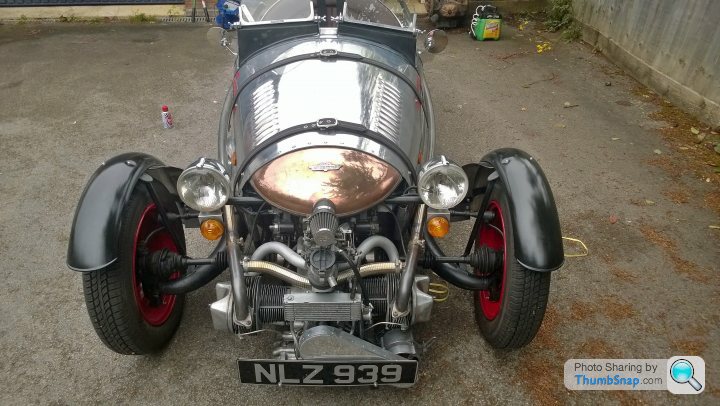
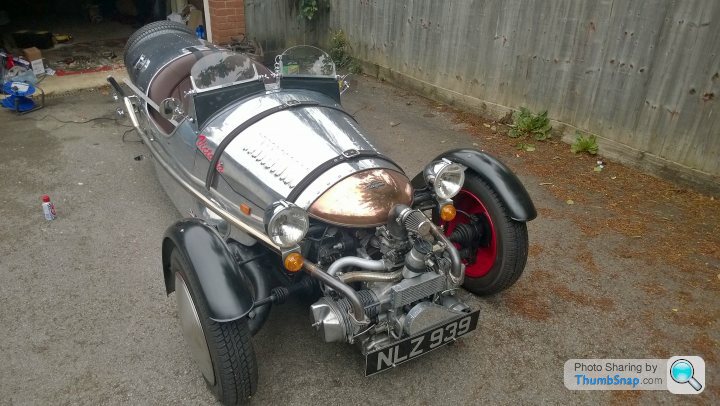
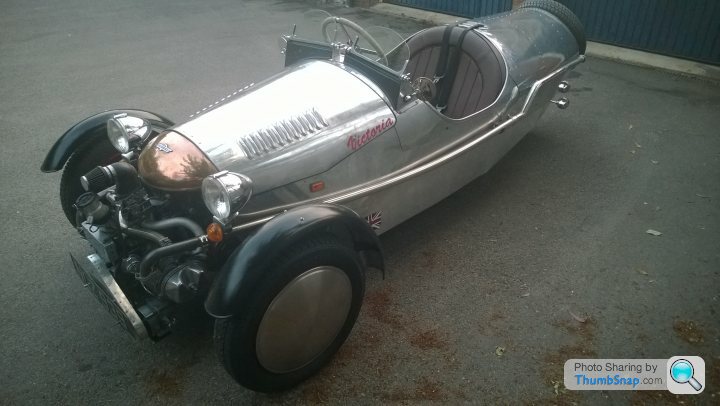
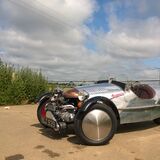
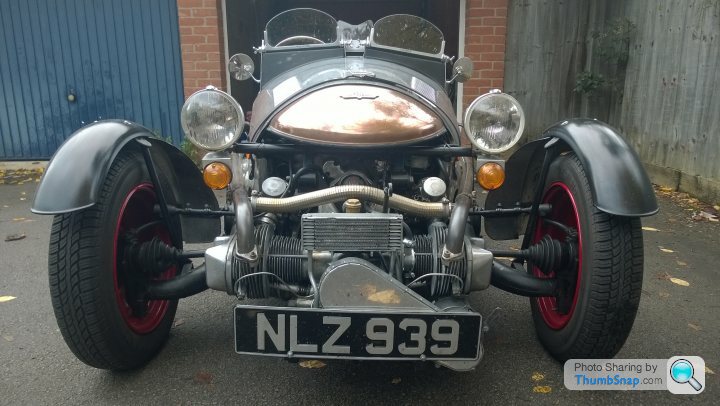
Victoria - Pembleton SuperSport
Discussion


Huff said:
Eek.
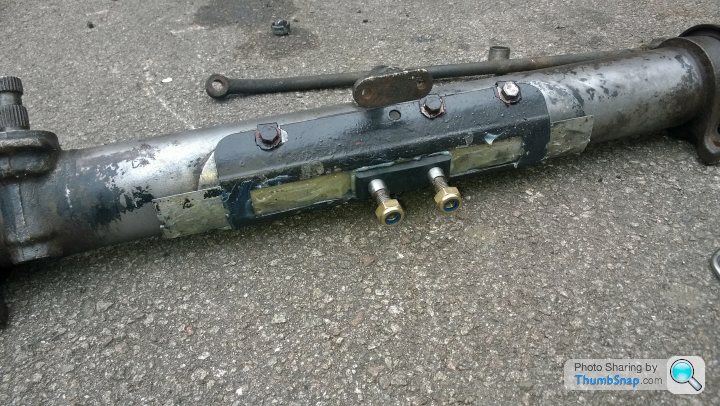
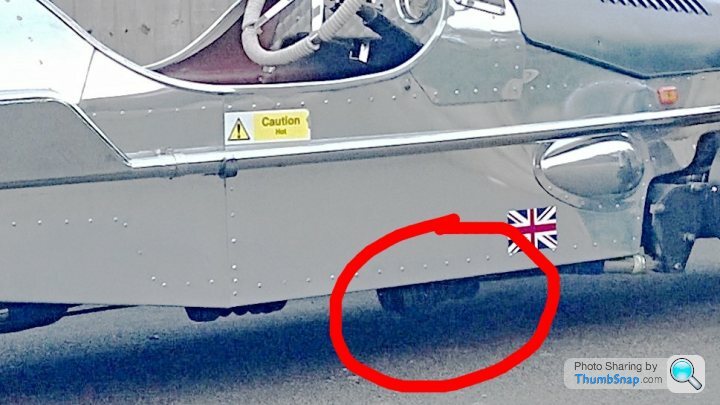
As an aside, the last photo also shows neatly-fitted P clips with tidy ( and overkill) bushings to protect the brake pipework passing through in a place no-one will ever look; if that's the standard of the rest of the build, it's very, very nice indeed - seems put together with great care otherwise
This is what surprises me! The rest of the build is immense! The level of care and thought about everything is cock on! I wouldn't be at all surprised if this was overhauled by someone else and fitted, without the builder really looking at it in too much depth, just assuming it was done properly! I cant believe that this was done by the same man, a retired engineer, who built the car over a period of 4 years. I have every single receipt and bill for the build, so I might go through it and see if I can see anything mentioning a steering rack...As an aside, the last photo also shows neatly-fitted P clips with tidy ( and overkill) bushings to protect the brake pipework passing through in a place no-one will ever look; if that's the standard of the rest of the build, it's very, very nice indeed - seems put together with great care otherwise
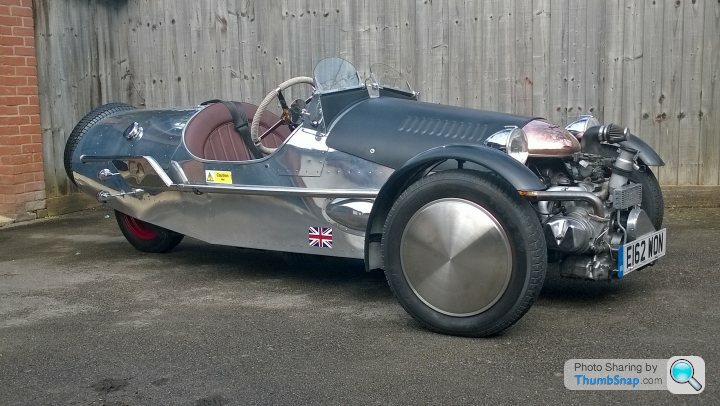
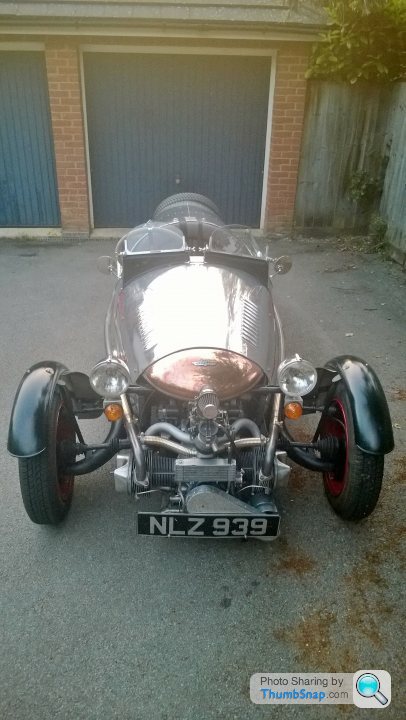
I managed to get my hands on a nice little dateless 3x3 numberplate the other day for Victoria. As soon as the paperwork is through that'll be going on. I hate the look of the one that's on. It's just not in keeping with the rest of the car.
Obviously I will have white/yellow ones for the road, and a pair of black and silver plates for pictures and show visits etc....
Obviously I will have white/yellow ones for the road, and a pair of black and silver plates for pictures and show visits etc....
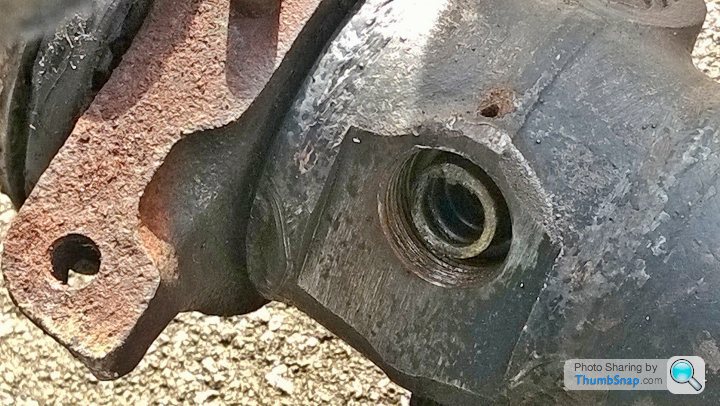
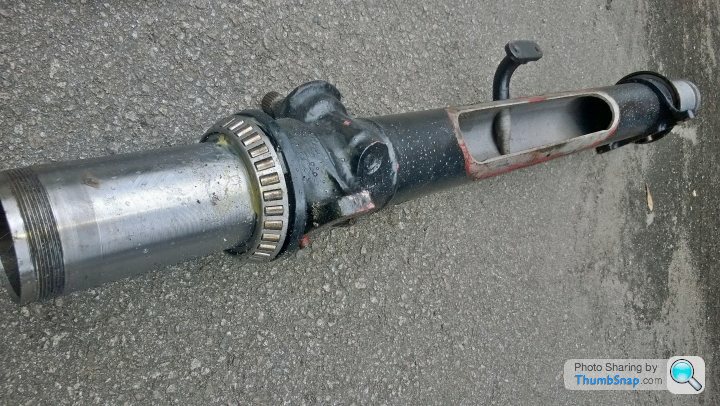
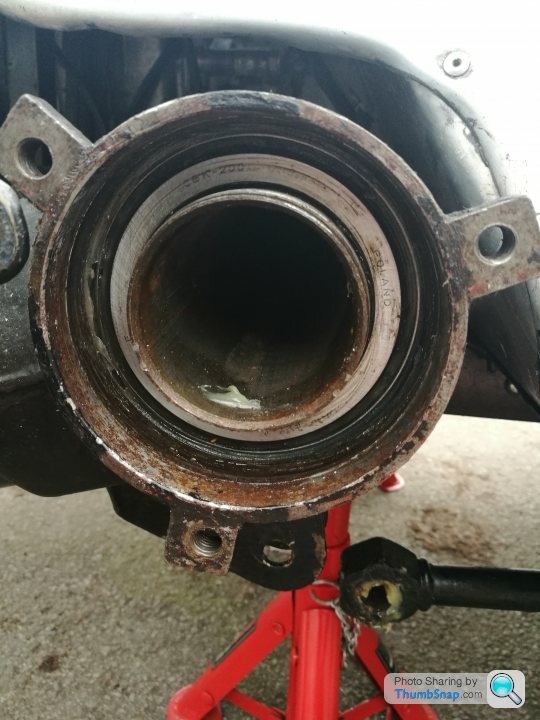
Well this morning, with permission from the other half, I wandered out to the garage. Looking over the pembleton, I decided that rebuilding the steering rack was a mornings work, 4 hours absolute tops.
How wrong I was....
First job was to strip down and have a look at the free one I was given.
break the steering arms free from the ball joints.
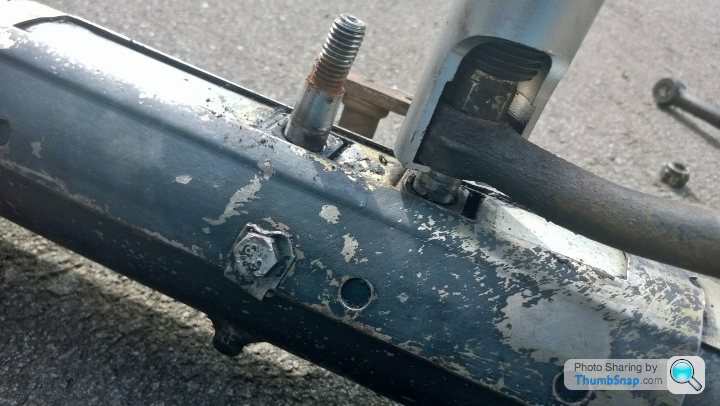
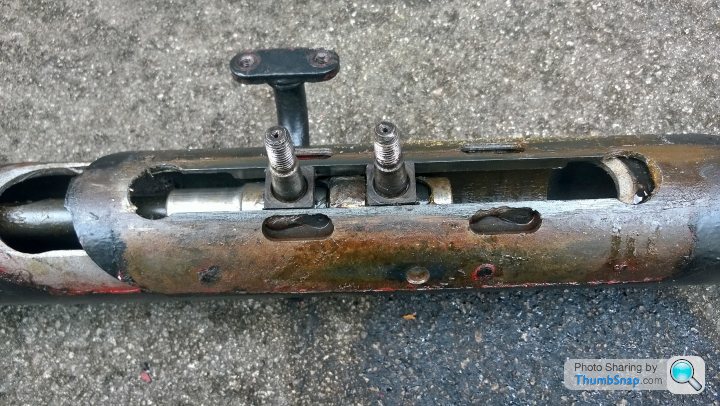
Remove the cover from the slide plate

Time for a look inside!
Everything looks in brilliant order. The grease is still lovely and golden, a bit darker to the top.
Time to remove the castle nut and guide bush...
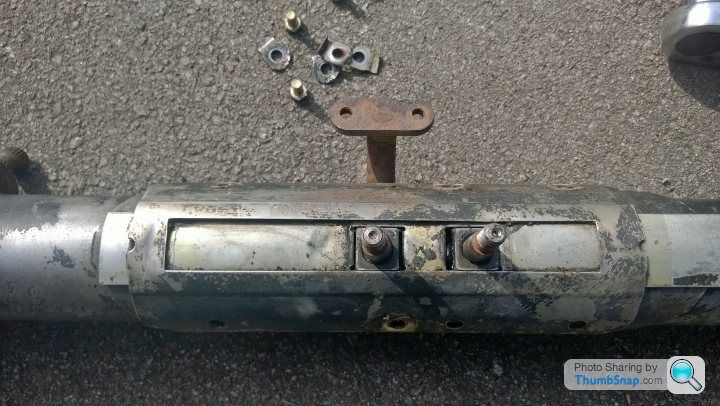
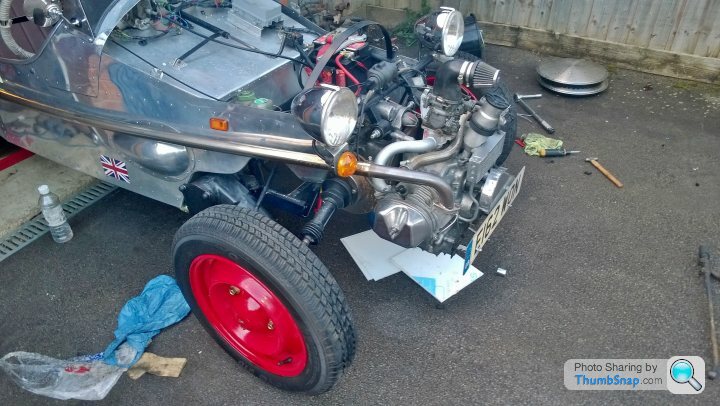
With a better idea of what I was letting myself in for, I started to pull victoria apart in order to do the job...

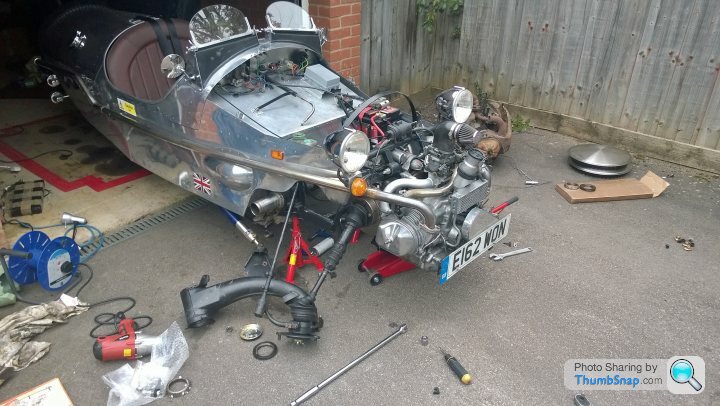
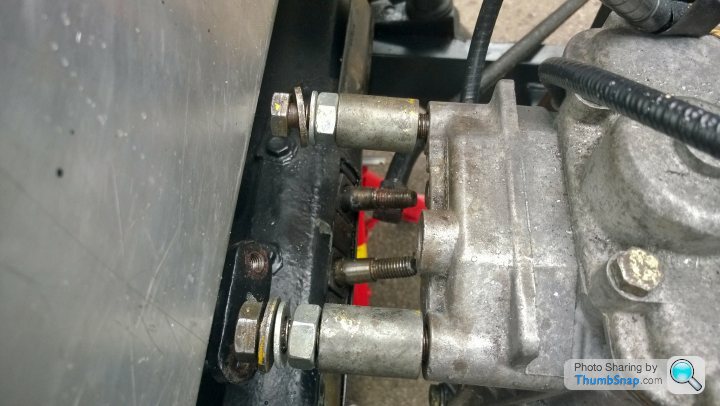
With everything disconnected, it was time to try and release the steering rack from the grips of the engine bay. I supported the gearbox from underneath and removed the gearbox mount on the front beam assy.
This is where the job got a lot more complex.... The builder obviously built the bodywork around the organs, so it was a nightmare to remove. I had to reach for the tin snips in the end to make the steering column hole larger in order to rotate the beam and lift out. Was a fricking nightmare..
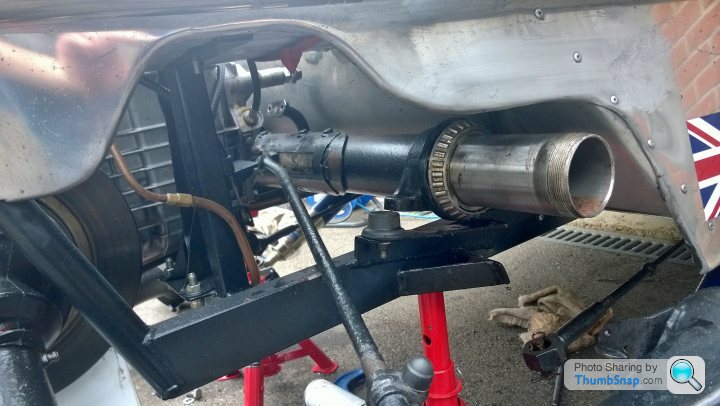
And finally it was out!!
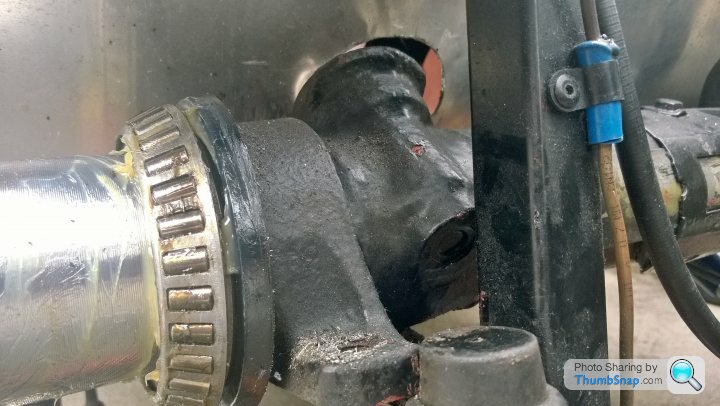
With it out and apart you can clearly see that this unit had been properly overhauled/renewed. BUT, the threads were absolutely ruined at the castle nut/guide bush. So although it looks good, is actually bad. Whoever built/did this needs shooting...
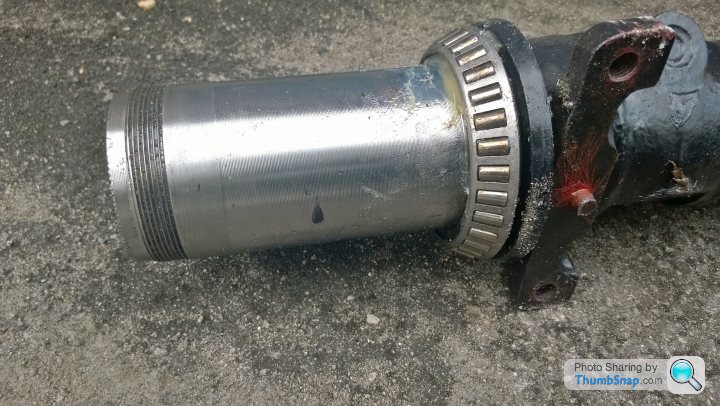
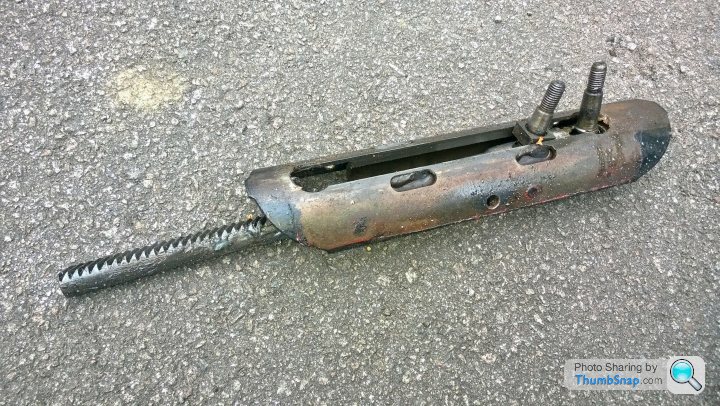
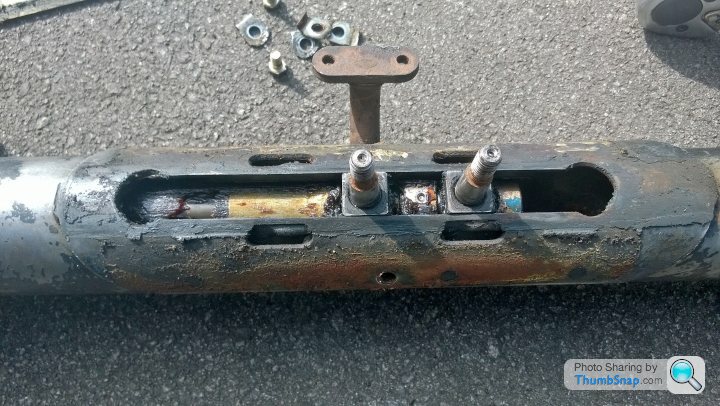
With all this in mind, I decided to rebuild and fit the free one I was given. This included new ball joints, guide bush, spring and castle nut, as well as a new anti rattle pad.
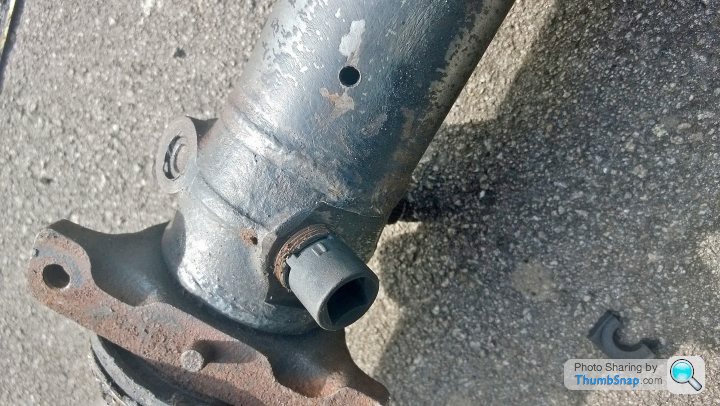
Here t is ready to be put in... Although it doesn't look as neat (a quick lick of paint will sort that). I know its in good order...
I started putting it back together but had to rush as I was being beckoned in, and it was going to get dark... Only 10hrs... Fml...
Huzzah! Just got to finish putting the steering column/interior back in and purt the wings back on....
How wrong I was....
First job was to strip down and have a look at the free one I was given.
break the steering arms free from the ball joints.
Remove the cover from the slide plate
Time for a look inside!
Everything looks in brilliant order. The grease is still lovely and golden, a bit darker to the top.
Time to remove the castle nut and guide bush...
With a better idea of what I was letting myself in for, I started to pull victoria apart in order to do the job...
With everything disconnected, it was time to try and release the steering rack from the grips of the engine bay. I supported the gearbox from underneath and removed the gearbox mount on the front beam assy.
This is where the job got a lot more complex.... The builder obviously built the bodywork around the organs, so it was a nightmare to remove. I had to reach for the tin snips in the end to make the steering column hole larger in order to rotate the beam and lift out. Was a fricking nightmare..
And finally it was out!!
With it out and apart you can clearly see that this unit had been properly overhauled/renewed. BUT, the threads were absolutely ruined at the castle nut/guide bush. So although it looks good, is actually bad. Whoever built/did this needs shooting...
With all this in mind, I decided to rebuild and fit the free one I was given. This included new ball joints, guide bush, spring and castle nut, as well as a new anti rattle pad.
Here t is ready to be put in... Although it doesn't look as neat (a quick lick of paint will sort that). I know its in good order...
I started putting it back together but had to rush as I was being beckoned in, and it was going to get dark... Only 10hrs... Fml...
Huzzah! Just got to finish putting the steering column/interior back in and purt the wings back on....
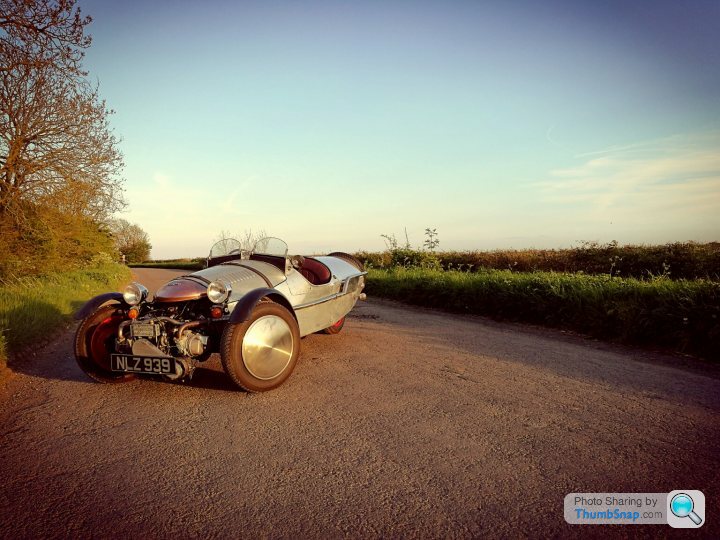
This afternoon/evening I managed to get another couple of hours in the garage and put the Pem back together properly, I had another go over the bonnet (still not perfect but it'll do for now). Put the new plates on it (these are just for pictures, I have a set of white and yellow ones for driving on the road before any of you grumpy old gits point it out), put her names on and give her a quick wipe down to remove all the greasy handprints on the Ali bodywork.
Now I just need yo bloody well get out in her! Its been too long! Especially with the way the weather has been over the last week!


Now I just need yo bloody well get out in her! Its been too long! Especially with the way the weather has been over the last week!
With the wedding now out of the way, I have been able to spend a little more time in the pembleton over the last few days/weekend.
First job was to raise the suspension a bit. Last time I was out with my friend in the passenger seat, I bottomed out the front end as we were pootling along, it wasn't even rough terrain, or at speed! Unfortunately, the lowest bit is the sump and I nearly shat myself, as it was such a loud bang I thought id taken the whole bloody lot off.... Good news is it was just a fin that got scuffed up. I raised the whole car by about 30-35mm though as it was way too low according to the build/design height.
Before
After

While I was at it I looked over the front spring cups and set up. The front springs were drooping down and looked pretty ugly. This also caused the pull rod to droop and was catching on the fwd spring cup. Its difficult to see, but ive blown this image up and lightened it a bit...
Upon closer inspection, it appeared that the cups were not aligned. Essentially the fwd end of the spring rests on 2 bits of metal. The upper bit is the chassis rail, the lower bit is a plate, with a surrounding strip holding it all in place. The lower plate was not exactly aligned to the chassis rail (about 3/4mm). So I made up a packer for the lower cup for the spring to rest on (3mm), and hey-presto, problem fixed!
I also finally got round to removing those bloody "warning hot" stickers. They were really bloody sticky!
Next on the agenda is to fit a smaller steering wheel. The string one does look good, but at 16.5 inches its a bit big for my liking "ooh er missus". Plus it catches on my leg. Ive opted for a wood rim 14" riveted one which should be arriving this week!
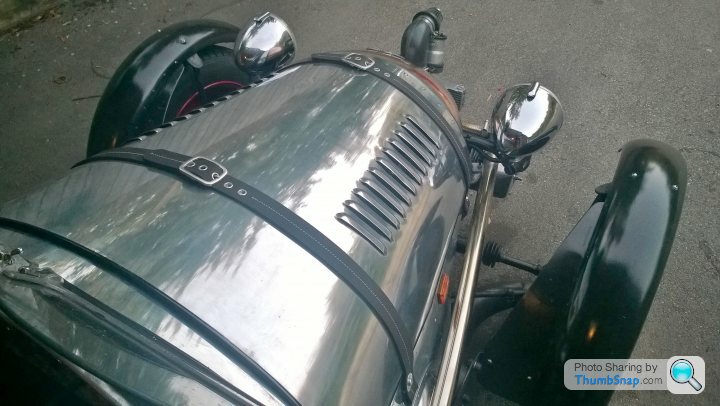
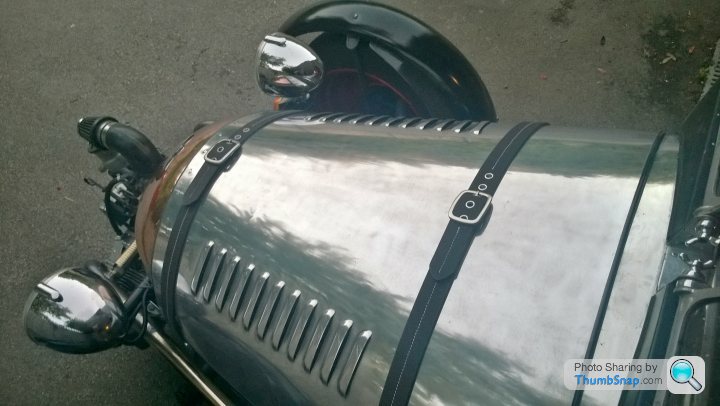
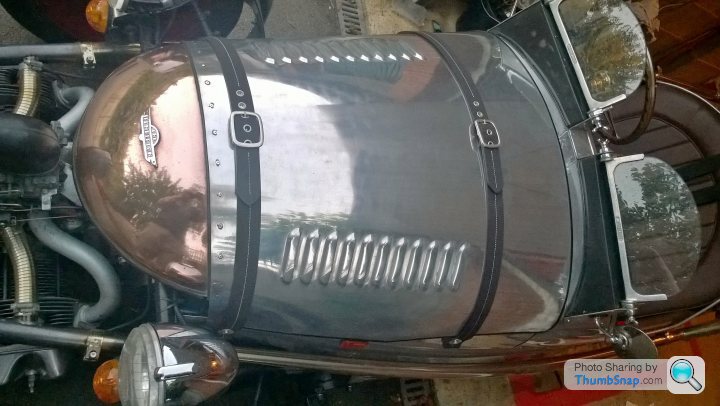
Ive also been on the lookout for some hefty belts that I could make some decent looking bonnet straps out of. We were in north wales last week and I found these in a local factory shop. They just need trimming down to size and mounting. They are nice and thick, have reinforced eyelets and a decent buckle...
I've also started tinkering around with an inlet too. My plan is to move the carb back under the bonnet. The mod is not massively complex, but needs to be thought out properly.... More on that later....
Here's how she currently stands...

First job was to raise the suspension a bit. Last time I was out with my friend in the passenger seat, I bottomed out the front end as we were pootling along, it wasn't even rough terrain, or at speed! Unfortunately, the lowest bit is the sump and I nearly shat myself, as it was such a loud bang I thought id taken the whole bloody lot off.... Good news is it was just a fin that got scuffed up. I raised the whole car by about 30-35mm though as it was way too low according to the build/design height.
Before
After
While I was at it I looked over the front spring cups and set up. The front springs were drooping down and looked pretty ugly. This also caused the pull rod to droop and was catching on the fwd spring cup. Its difficult to see, but ive blown this image up and lightened it a bit...
Upon closer inspection, it appeared that the cups were not aligned. Essentially the fwd end of the spring rests on 2 bits of metal. The upper bit is the chassis rail, the lower bit is a plate, with a surrounding strip holding it all in place. The lower plate was not exactly aligned to the chassis rail (about 3/4mm). So I made up a packer for the lower cup for the spring to rest on (3mm), and hey-presto, problem fixed!
I also finally got round to removing those bloody "warning hot" stickers. They were really bloody sticky!
Next on the agenda is to fit a smaller steering wheel. The string one does look good, but at 16.5 inches its a bit big for my liking "ooh er missus". Plus it catches on my leg. Ive opted for a wood rim 14" riveted one which should be arriving this week!
Ive also been on the lookout for some hefty belts that I could make some decent looking bonnet straps out of. We were in north wales last week and I found these in a local factory shop. They just need trimming down to size and mounting. They are nice and thick, have reinforced eyelets and a decent buckle...
I've also started tinkering around with an inlet too. My plan is to move the carb back under the bonnet. The mod is not massively complex, but needs to be thought out properly.... More on that later....
Here's how she currently stands...
Edited by Ambleton on Monday 6th June 23:50
In an attempt to tidy up the front end i've come up with a plan....
1) move the Carb back under to bonnet
2) biff off that big old oil filler/breather unit and fabricate something up
3) move the oil cooler somewhere else (still in decent air flow)
Number one!
During the build of a pembleton, if you are sticking with a 2CV engine, there are a number of options you can take regarding carbs. You can locate 2 sets of 250 Honda Superdream carbs and use 2 x left carbs (old and outdated some would say), you can use 2 x Dellorto PHBH carbs (expensive) or you can use the trusty old solex carb from the 2CV. Ive never had an issue with the Solex Carb (either on this or on my Lomax), in fact, i quite like it. When mine was build, it was obviously done with simplicity in mind so the Solex Remains!
The touble is, its pretty damn ugly lump. I managed to acquire another inlet manifold so im going to have a go at doing a bit of a frankenstien job to move it back under the bonnet. Its been done before, so its not a completely alien concept. A few people have raised that Carb Icing may be an issue as you have to extend the inlet by probably around 100mm, but those who have done the mod said they have face no such problems.
Here's a piccy of one hosed and clipped! I'm hoping i can weld something up on mine!

heres an image of mine... and what i plan to do....
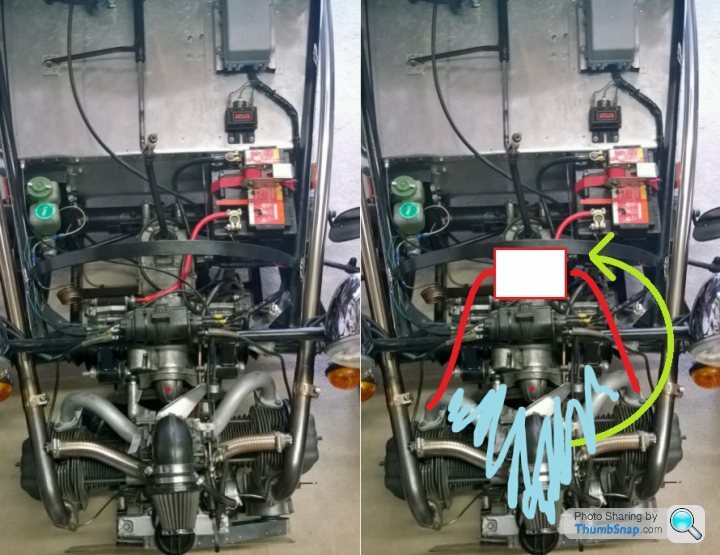
Number two!
Sorry if im teaching a granny to suck eggs!
For those who don't know, the pistons both compress at the same time in the crank-case as one cylinder sucks and one is firing. This means that there is a high amount of pressure in in the the case that needs to be vented off on the compression. This is done with the breather valve, which also doubles up as the oil filler. Its that big thing on the front that looks like a can of beans with a clip on top!
Traditionally this is done with a rubber diaphragm but these are prone to perish, crack and fail, resulting in a crank-case that is open and results in a loss of power (no vacuum), and oil mist everywhere! More recently people have been cutting out the rubber all together and fitting a reed valve on the outlet - these last forever and give a better vacuum. These are usually bolted onto the original breather as an addition. There are a few well known 2CV retailers who sell new style units with reed valves built in, but these are still quite tall!
Here's my idea!
Most of it is using off the shelf components, but i'm still looking for a suitable flanged base!
Number three!
probably the simplest of all, but maybe the most thought required is moving the oil cooler to under the bonnet somewhere. I'll get some flexis made up, but i'm still unsure of its location! It needs to be hidden away, but still with a good airflow! maybe ill get a slightly bigger on to compensate for the loss of air flow....
The aim is to get the front end looking as clean, or cleaner to this one....
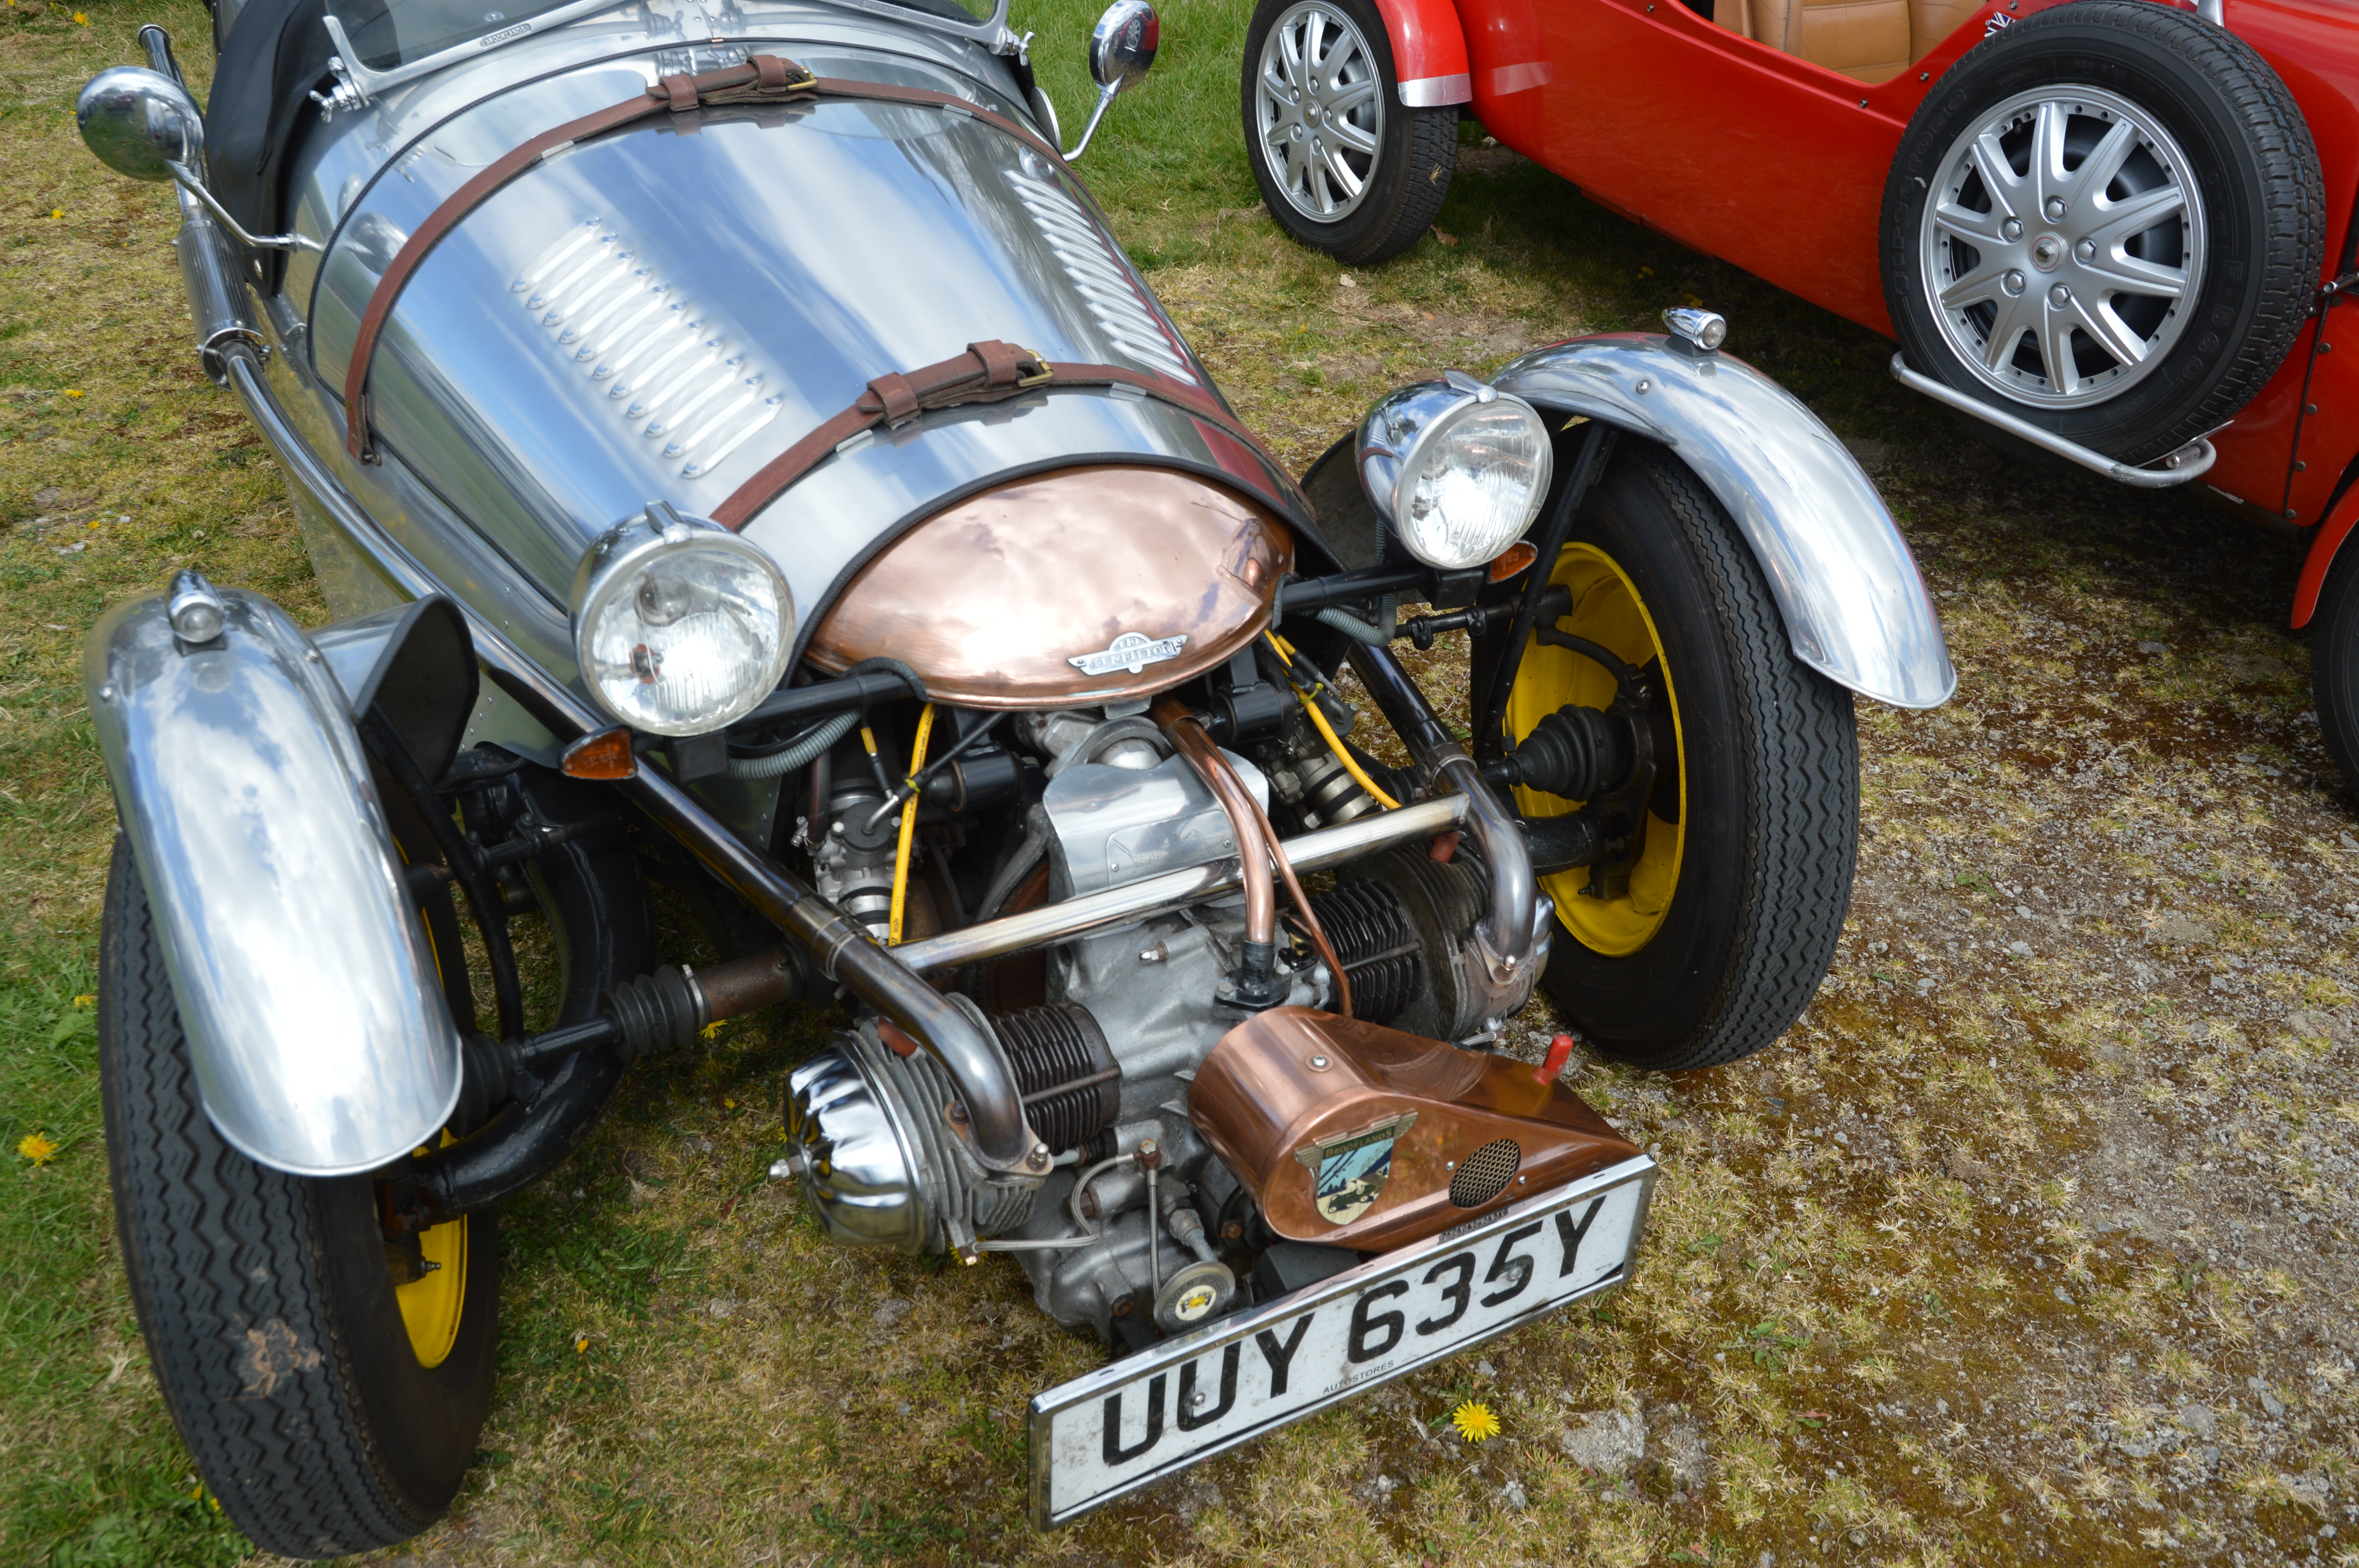
(yes i know thats running twin carbs....)
1) move the Carb back under to bonnet
2) biff off that big old oil filler/breather unit and fabricate something up
3) move the oil cooler somewhere else (still in decent air flow)
Number one!
During the build of a pembleton, if you are sticking with a 2CV engine, there are a number of options you can take regarding carbs. You can locate 2 sets of 250 Honda Superdream carbs and use 2 x left carbs (old and outdated some would say), you can use 2 x Dellorto PHBH carbs (expensive) or you can use the trusty old solex carb from the 2CV. Ive never had an issue with the Solex Carb (either on this or on my Lomax), in fact, i quite like it. When mine was build, it was obviously done with simplicity in mind so the Solex Remains!
The touble is, its pretty damn ugly lump. I managed to acquire another inlet manifold so im going to have a go at doing a bit of a frankenstien job to move it back under the bonnet. Its been done before, so its not a completely alien concept. A few people have raised that Carb Icing may be an issue as you have to extend the inlet by probably around 100mm, but those who have done the mod said they have face no such problems.
Here's a piccy of one hosed and clipped! I'm hoping i can weld something up on mine!
heres an image of mine... and what i plan to do....
Number two!
Sorry if im teaching a granny to suck eggs!
For those who don't know, the pistons both compress at the same time in the crank-case as one cylinder sucks and one is firing. This means that there is a high amount of pressure in in the the case that needs to be vented off on the compression. This is done with the breather valve, which also doubles up as the oil filler. Its that big thing on the front that looks like a can of beans with a clip on top!
Traditionally this is done with a rubber diaphragm but these are prone to perish, crack and fail, resulting in a crank-case that is open and results in a loss of power (no vacuum), and oil mist everywhere! More recently people have been cutting out the rubber all together and fitting a reed valve on the outlet - these last forever and give a better vacuum. These are usually bolted onto the original breather as an addition. There are a few well known 2CV retailers who sell new style units with reed valves built in, but these are still quite tall!
Here's my idea!
Most of it is using off the shelf components, but i'm still looking for a suitable flanged base!
Number three!
probably the simplest of all, but maybe the most thought required is moving the oil cooler to under the bonnet somewhere. I'll get some flexis made up, but i'm still unsure of its location! It needs to be hidden away, but still with a good airflow! maybe ill get a slightly bigger on to compensate for the loss of air flow....
The aim is to get the front end looking as clean, or cleaner to this one....
(yes i know thats running twin carbs....)
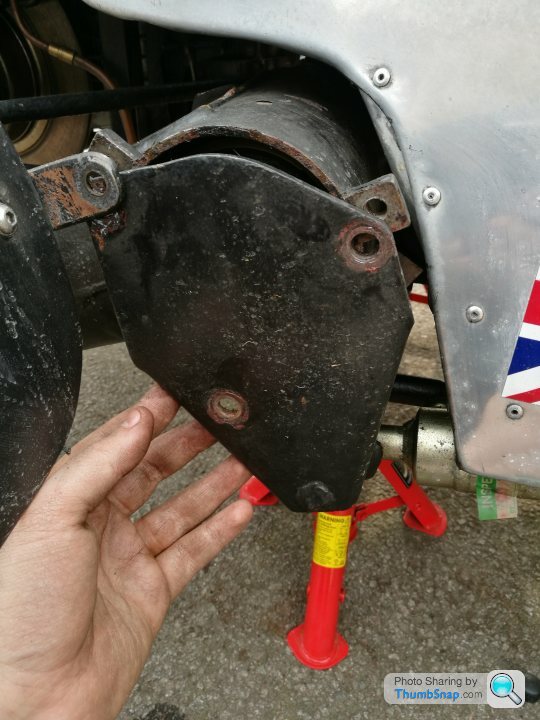
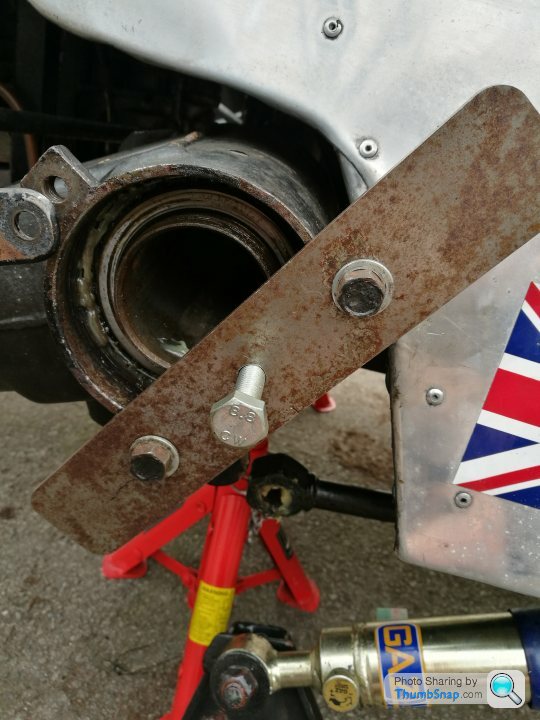
TooMany2cvs said:
There's one thing about that which makes my teeth itch - and it's the same on yours...
Sort those front mudguard mounts out! Get hold of a set of older front hubs, with mounts for the inertia dampers on. Then they'll turn with the steering... I can put you in touch with a likely suspect, if you want.
yeah yeah yeah... all in good time... that's lower down the list.... Sort those front mudguard mounts out! Get hold of a set of older front hubs, with mounts for the inertia dampers on. Then they'll turn with the steering... I can put you in touch with a likely suspect, if you want.

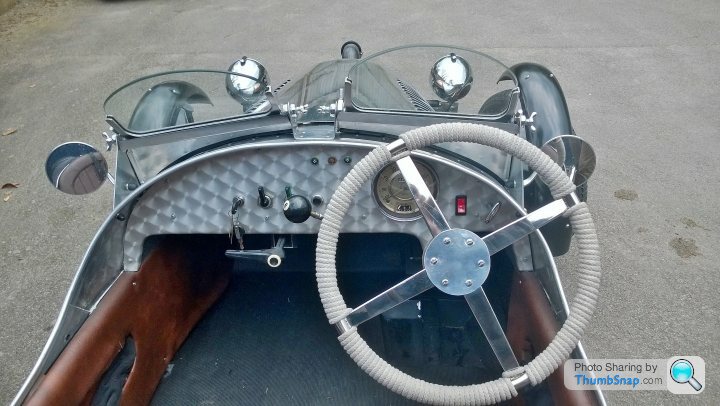
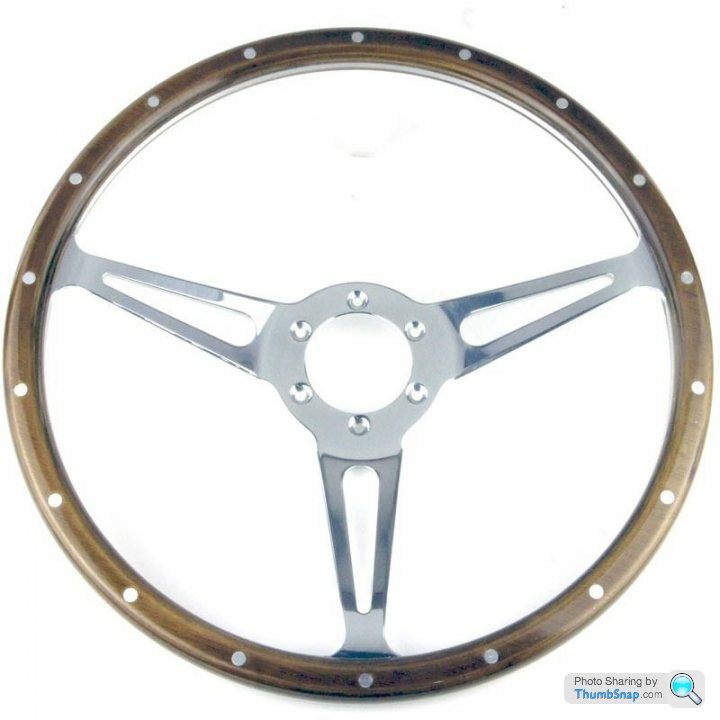
First off the bat, my new steering wheel came today!
Its surprising the difference in size! New and old.

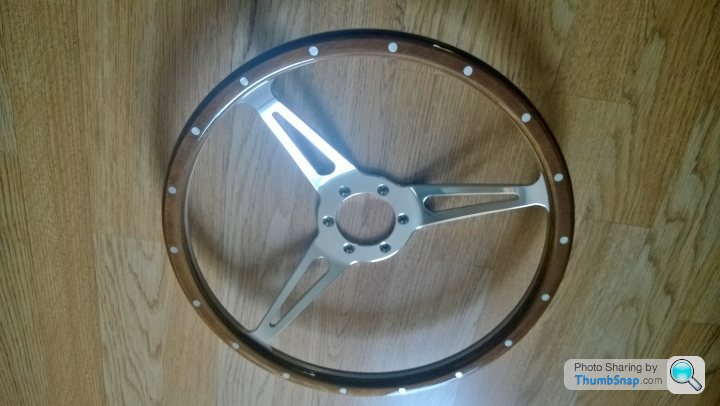
Its slightly dished too which brings it closer to the body, again making more legroom, where the old one was flat.

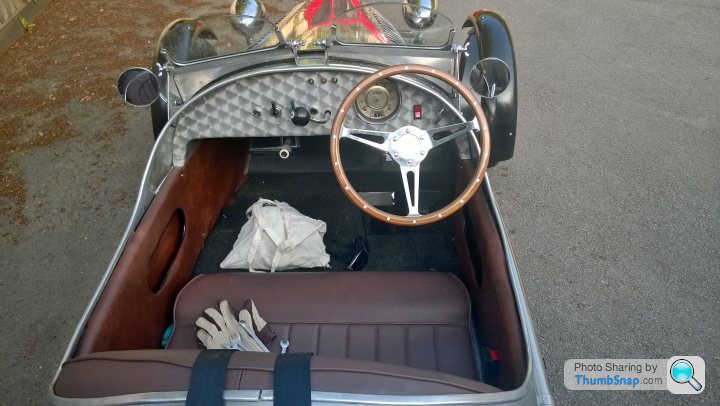
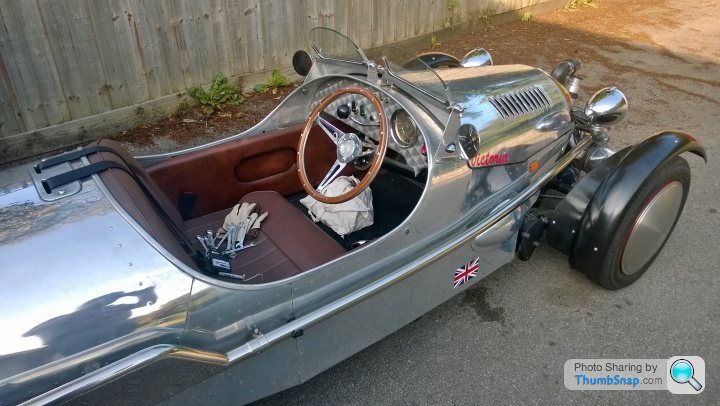
Much better on the old leg room!

Went out fir a quick drive and couldn't believe the difference it made! The steering was less wishy washy and generally more feedback!
Next interior mod is to make the seat comfy!!
Its surprising the difference in size! New and old.
Its slightly dished too which brings it closer to the body, again making more legroom, where the old one was flat.
Much better on the old leg room!
Went out fir a quick drive and couldn't believe the difference it made! The steering was less wishy washy and generally more feedback!
Next interior mod is to make the seat comfy!!

Here's a little video on start up/rev.
It will be going as part of a longer video when I eventually get around to doing one properly....
https://m.youtube.com/watch?v=EHGjHwu9TxE
I think it sounds pretty good!
It will be going as part of a longer video when I eventually get around to doing one properly....
https://m.youtube.com/watch?v=EHGjHwu9TxE
I think it sounds pretty good!


A few Updates:
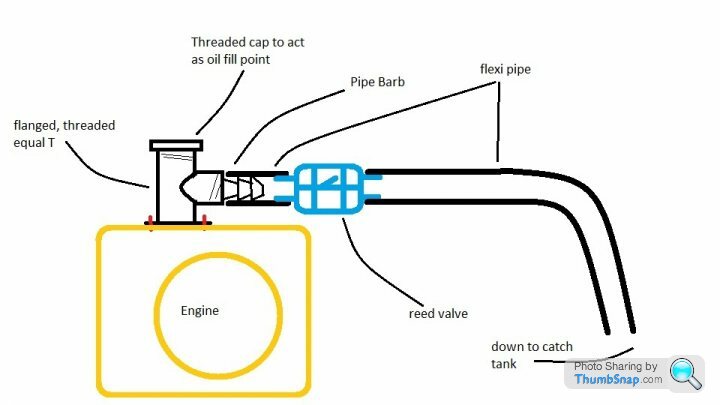
I've managed to fabricate up a new breather arrangement and it looks a lot neater and MUCH smaller than the ruddy great big bean can on the front. My only problem with it is that it uses a brass fitting, a small length of copper pipe, a bit of hose and a couple of jubilee clips. To help hide all the detritus going on underneath, i've wrapped it in some black tape - i'm sure i will come up with something more permanent when i can be bothered.
The only flanged fitting i could find was a tap wall fitting, so i've drilled this out to 12mm:


this will be be attached to some braided hose and will lead to an oil catch tank. This can't be fitted until that big ugly carb is out the way though...
One of the guys on the builders/owners forum was changing his set up, so i've also purchased his twin carb set up too. That arrived today so no photos yet. I might get a chance to fit everything next week!
i also noticed that the gap between the aero screens seems to turbocharge cold air straight into your face and adds a lot of buffeting so i've bashed up a bracket and a rough bit of plexiglass to help with that. I will get a bit of plexiglass cut properly as its almost impossible to get it perfectly symetrical with a jigsaw and a file

I've managed to fabricate up a new breather arrangement and it looks a lot neater and MUCH smaller than the ruddy great big bean can on the front. My only problem with it is that it uses a brass fitting, a small length of copper pipe, a bit of hose and a couple of jubilee clips. To help hide all the detritus going on underneath, i've wrapped it in some black tape - i'm sure i will come up with something more permanent when i can be bothered.
The only flanged fitting i could find was a tap wall fitting, so i've drilled this out to 12mm:
this will be be attached to some braided hose and will lead to an oil catch tank. This can't be fitted until that big ugly carb is out the way though...
One of the guys on the builders/owners forum was changing his set up, so i've also purchased his twin carb set up too. That arrived today so no photos yet. I might get a chance to fit everything next week!
i also noticed that the gap between the aero screens seems to turbocharge cold air straight into your face and adds a lot of buffeting so i've bashed up a bracket and a rough bit of plexiglass to help with that. I will get a bit of plexiglass cut properly as its almost impossible to get it perfectly symetrical with a jigsaw and a file

TooMany2cvs said:
That "ruddy great big bean can" does a lot more than just route the breathings. It's got a one-way valve in it, which keeps the crankcase pressure negative. Remember, you've got big changes in crankcase volume, due to both pistons going in and out at the same time. A one-way in the hose will do the job.
Yes, that's why there is a one way breather valve on the brass tap elbow! Today I had the pleasure of visiting the Grinnall showroom and workshop and chatting with Mark Grinnall - the founder and brains behind the operation.
Truth be told, I've had my eye on a grinnall scorpion ever since I started looking into 3 wheelers at the age of 17. When I came to sell the Lomax earlier on in the year I wanted to replace it with a Scorpion, however the OH said they were ugly and the pembleton came up at the right time at the right price, and was an excellent build (barring a few issues - documented earlier in the thread).
Mark has 5 or 6 Scorpions in at the moment - some customer cars, others for sale ranging from £7.5k-£20k for a brand spanking new unregistered top of the range weapon. At 6ft 5 (very long legs) and rather doughy, I knew shoehorning myself in was going to be the decider. I don't fit. Even if I lost some weight off my arse/hips so I could really get into the back of the seat my knees would still be hurried in the dashboard roll moulding...
Whilst I was there the wife did take a fancy to the trikes though and it didn't take much persuasion to have a sit on one. My god they're nice machines! Brilliantly built and put together, incredibly comfy and solid, yet not a bit intimidating. Again there were two to choose from, the new triumph Rocket III, and a BMW R1200C. The rocket felt a little big and heavy for a first trike, but the BMW was lovely. Mark was in the middle of prepping a competition bike, so I didn't want to outstay my welcome - but he has invited me back to have a proper look at the trikes and have a go on a BMW one. I must say - I am VERY tempted - although it would mean getting rid of the pembleton... :sad:
(apologies for the stock images - I totally forgot to take them whilst I was there)
So I've test fitted the two keihin Honda carbs and plumbed them in, and also fitted my home made breather arrangement.


Once it pumped the fuel through and i adjusted the idle, it started and ticked over well, although it seems a little rich, so they will need some fine tuning. I still haven't fitted the modified accelerator cable yet... Or attached the Bowden cables for throttle or choke.
After this is done my next job os to relocate the oil cooler!
Ive been playing around with a location further up and back just in front of the starter motor... I'll need to make up a bracket and try out with my spare one...
Since getting the pembleton I always knew that something wasn't quite right with the suspension set up, it seemed to heave and roll a fair amount. The other week I had a quick glance underneath to check how far the suspension stops were off the plates that they react on.... the stops themselves were fubar, so there was nothing to stop the suspension travel. It just kept going until the spring rate overcame the inertia.... no wonder it rolls....
I could see from looking at them that the ones fitted were the cheaper copies that have a very poor reputation, so I splashed the cash and got some new hight quality ones ordered...
Bit of a pain as its an arms off job...
Technically you don't have to remove the wheel, but it makes it a lot easier to do...

First off removal of the end plate that the shock absorber mounts to...
With that moved out the way, underneath is the ring nut that holds the arm on. With the split pin removed, a couple of blows with a screw driver and hammer is needed to get it moving, then over to the special tool to unwind the rest of the way...

After a some jiggling and pulling I realised the arm wasn't going to come off that easily, so I made a very quick and dirty arm puller (same principle as a caliper wind back tool) out of a bit of plate and a nut+bolt...
A few turns here, then rotate, then turn and rotate, soon had the outer bearing and arm off...

The swap from the old bump stop to the new probably only took about 2 minutes here... just about big enough for athe socket

Old bump stop+spacer

New bump stop+spacer


Reassembled, using a wooden drift to tap in the bearing and re-seat it...
Put everything back together with a new split pin and do the other side...
The bump stop on the other side was a little easier as the arm just pulled. Off straight away and I didn't need to use my improvised puller... the old one was just as ruined though....

By this point I only had about an hour of light left and I still needed to put everything back in the garage, so I only had a 5 minute drive around town and around some mini roundabouts, but the difference is night and day, it gets to a point where it just doesnt roll any more and gives you the extra confidence to throw it about.
I could see from looking at them that the ones fitted were the cheaper copies that have a very poor reputation, so I splashed the cash and got some new hight quality ones ordered...
Bit of a pain as its an arms off job...
Technically you don't have to remove the wheel, but it makes it a lot easier to do...
First off removal of the end plate that the shock absorber mounts to...
With that moved out the way, underneath is the ring nut that holds the arm on. With the split pin removed, a couple of blows with a screw driver and hammer is needed to get it moving, then over to the special tool to unwind the rest of the way...
After a some jiggling and pulling I realised the arm wasn't going to come off that easily, so I made a very quick and dirty arm puller (same principle as a caliper wind back tool) out of a bit of plate and a nut+bolt...
A few turns here, then rotate, then turn and rotate, soon had the outer bearing and arm off...
The swap from the old bump stop to the new probably only took about 2 minutes here... just about big enough for athe socket
Old bump stop+spacer
New bump stop+spacer
Reassembled, using a wooden drift to tap in the bearing and re-seat it...
Put everything back together with a new split pin and do the other side...
The bump stop on the other side was a little easier as the arm just pulled. Off straight away and I didn't need to use my improvised puller... the old one was just as ruined though....
By this point I only had about an hour of light left and I still needed to put everything back in the garage, so I only had a 5 minute drive around town and around some mini roundabouts, but the difference is night and day, it gets to a point where it just doesnt roll any more and gives you the extra confidence to throw it about.
One of the guys on the forums I frequent was selling a couple of MGA 40 spoke wire wheels, one LH splined adaptor, various spinners etc.
I've snapped these up and despite looking a bit crappy, all the spokes are tight with no breakages and they run true with no dents. I've had a quote from a local blasting company for about £40 for cleaning them up.
I've already ordered a matching adaptor for the other side. Once I've had them cleaned up and I've painted them I'll need to order a coupe of tyres and tubes. The speed-discs are nice, but wires just look right on a Pembleton.


Gassing Station | Readers' Cars | Top of Page | What's New | My Stuff