Race Car Rebuild
Discussion


Part 12
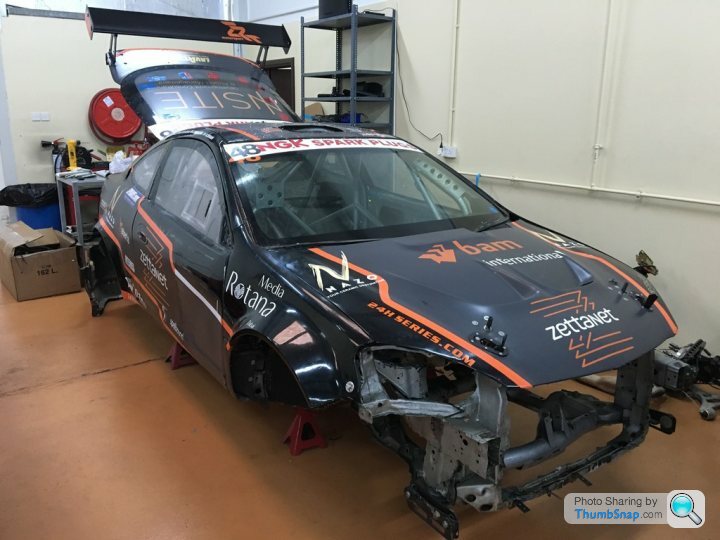
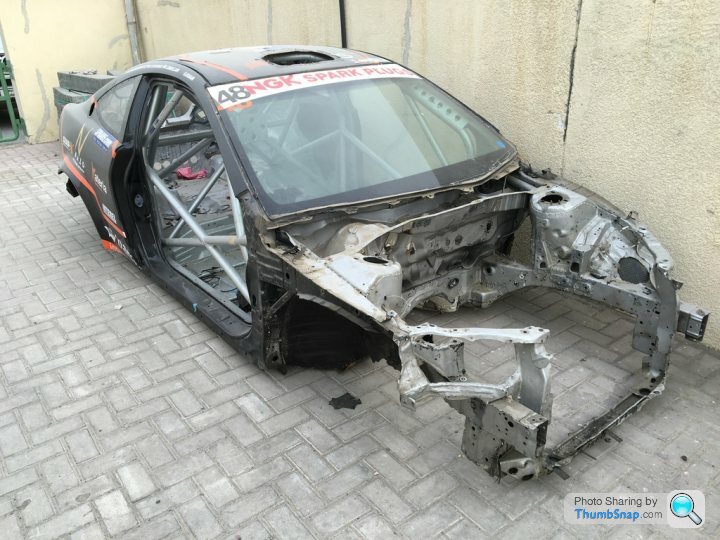
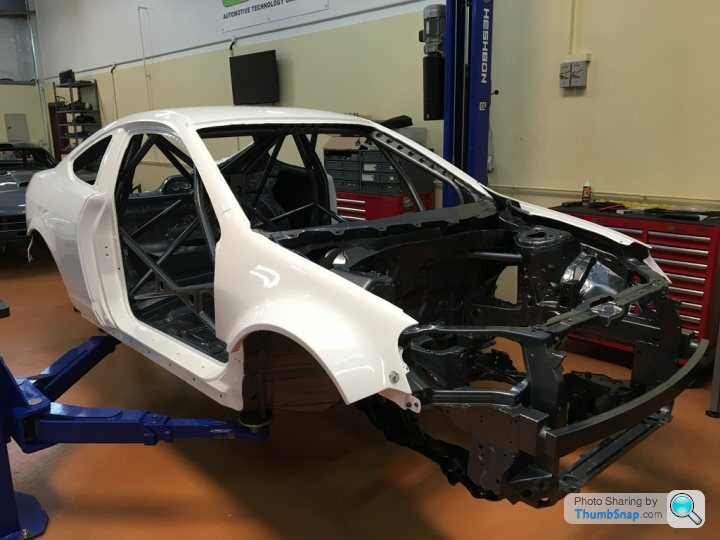
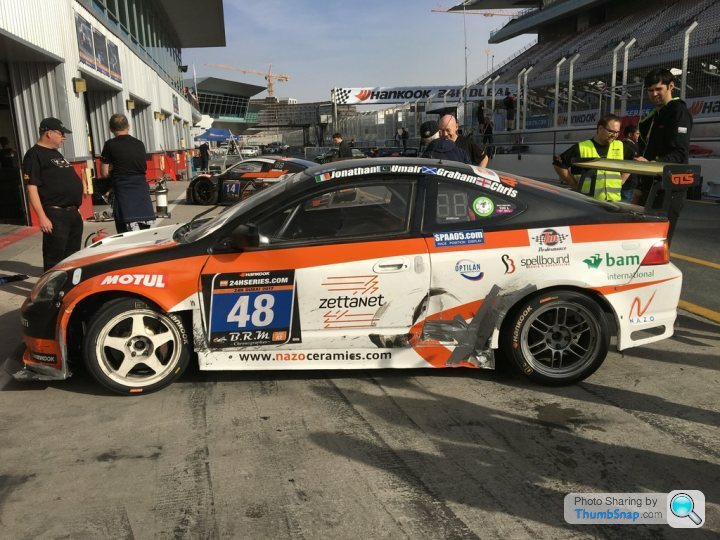
Our original race car has been efficiently stripped to a shell. Just the doors, hatch, bonnet, wings, fuel cell and subframe remain to be removed.
The dash will be reused however re-organised to be a nice neat enduro spec. incorporating all the requirements in a cartek power control panel. Plus we will incorporate all of the Creventic 24Hrs gadgets such as the driver ID switch.
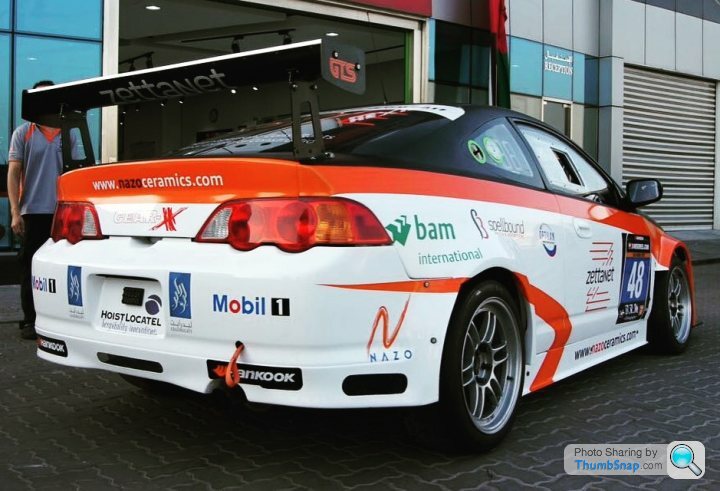
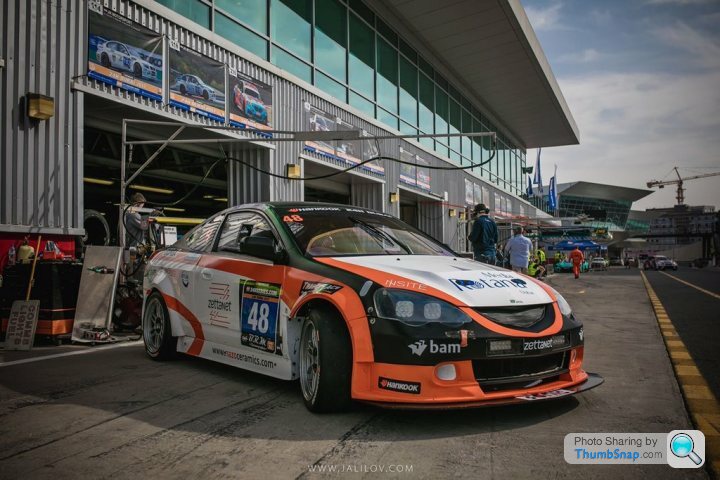
So, this is probably the last photos of the old car before it goes off to the big scrap heaven for race cars.
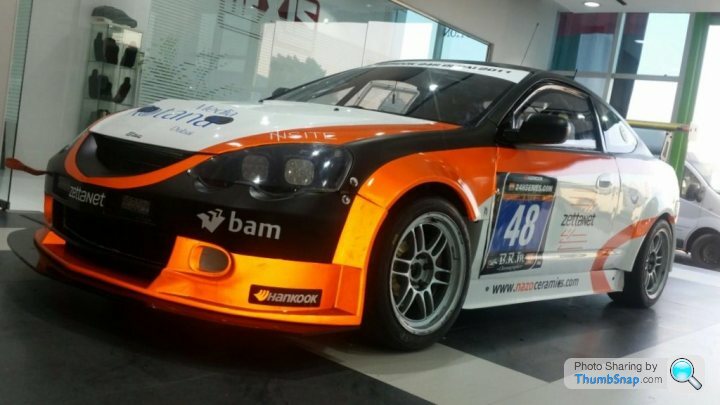
This was our car where it first originated (Sepang) in 2008. The red & white no. 27 car.
https://www.youtube.com/watch?v=sqI3jSiaZ7M
Its had a hard life since to be fair
Ciao for another while
Our original race car has been efficiently stripped to a shell. Just the doors, hatch, bonnet, wings, fuel cell and subframe remain to be removed.
The dash will be reused however re-organised to be a nice neat enduro spec. incorporating all the requirements in a cartek power control panel. Plus we will incorporate all of the Creventic 24Hrs gadgets such as the driver ID switch.
So, this is probably the last photos of the old car before it goes off to the big scrap heaven for race cars.
This was our car where it first originated (Sepang) in 2008. The red & white no. 27 car.
https://www.youtube.com/watch?v=sqI3jSiaZ7M
Its had a hard life since to be fair
Ciao for another while
Part 13
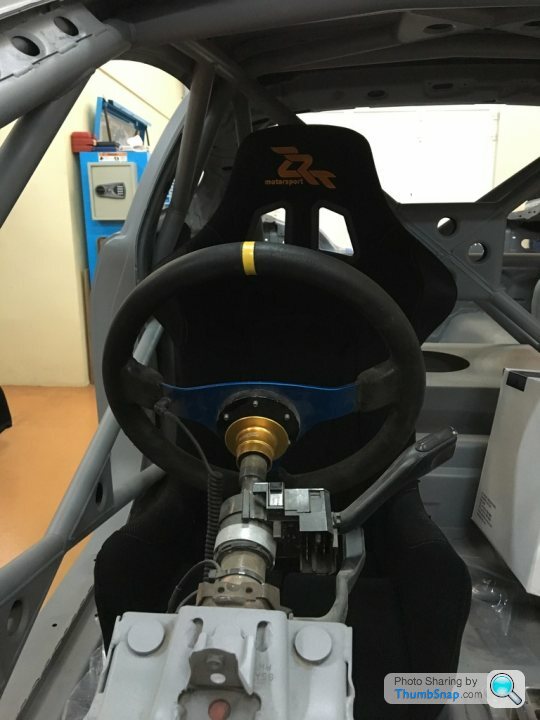
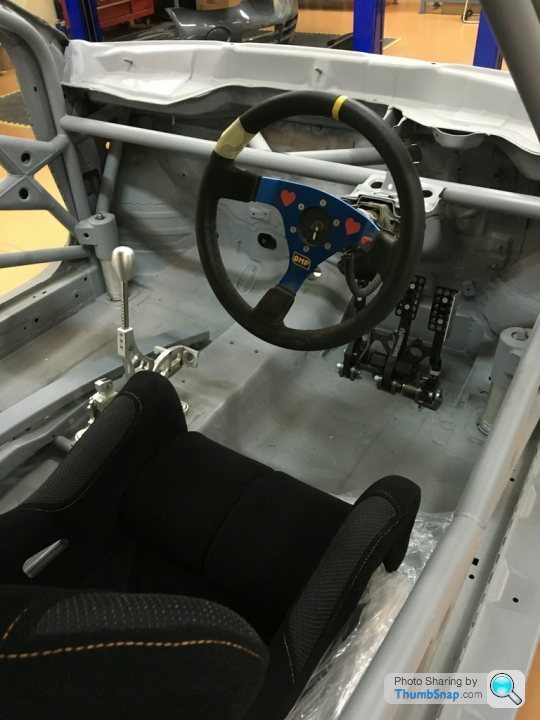
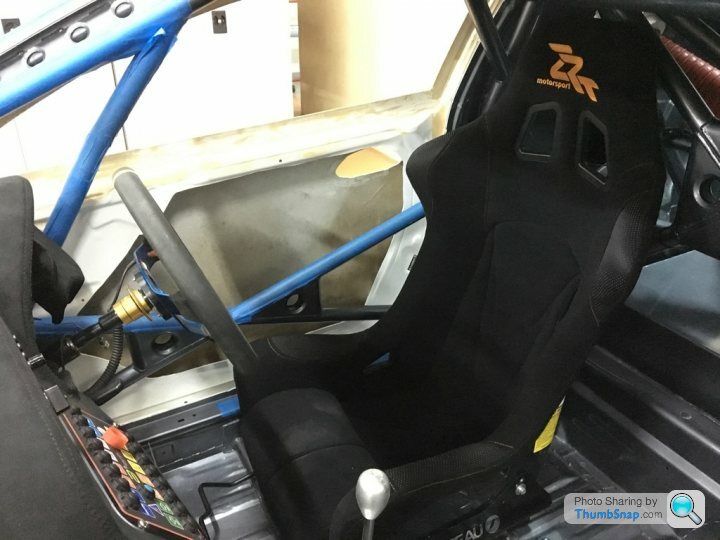
As previously mentioned we were waiting on the new seat and pedal box to test-fit with the steering column position before finally welding the remaining roll cage bars. Thanks to Jon Simmonds at MW (MotorsportWheels) the fantastic Corbeau seats arrived fully branded (drivers seat is carbon fibre and the passenger seat is GRP). We opted for the ‘Pro-series’ as we couldn’t fit the ‘Revenge’ seat due to the basic ergonomics of the roll cage design within this shell.
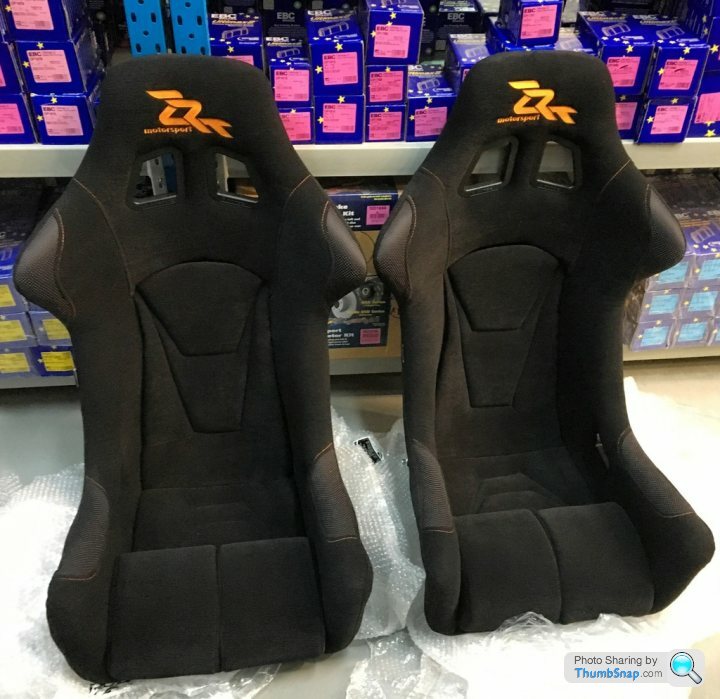
To be honest the Pro-series suits us better. It is easier for the driver to get in and out and gives better peripheral vision, with 90+ cars in the race this is essential. From a marketing perspective the logo will be more visual also.
We did an initial placement along with the steering column, the new AP Racing pedal box (again courtesy of MotorsportWheels) and the gear selector (K-tuned billet shifter). The seat seems a little high. This is partly because we run it on an FIA approved slider rail (10mm), partly because the fact we use the rail we cant put the Corbeau seat on its lowest setting on the side-mount brackets and partly because the actual seat base fixing rails could be lower in the floor. The latter seems to be the easiest fix. It will involve some cutting just behind where the centre console would be but we’ll explain this later with photos.

?
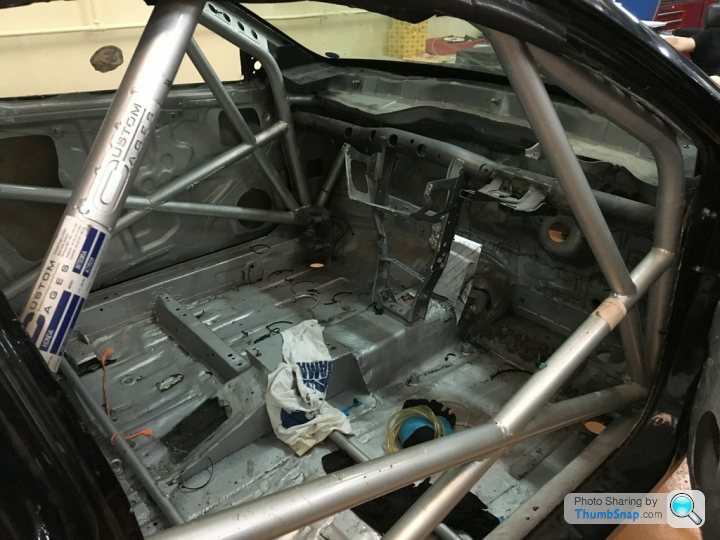
You can see in the below image how the seat sits perfectly within the roll cage.
?
Now that all those important components are measured up and positioning is agreed, the car is off to Saluki tomorrow for final welding.
?
Once the welding is complete the interior, underside and inner wings will be painted metallic grey. Stay tuned for that.
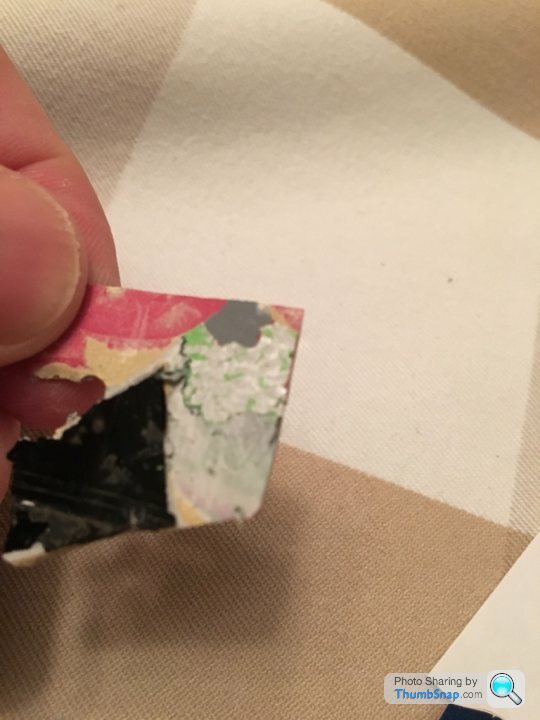
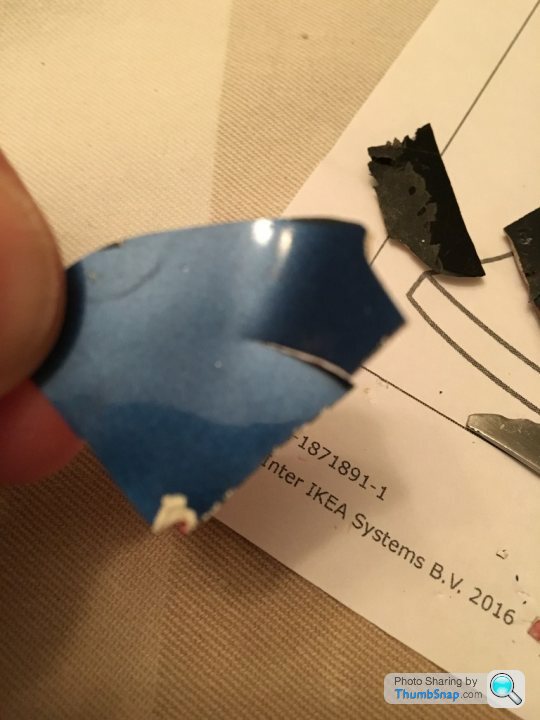
Last note for this update is to say goodbye to our old ZRT #48 shell… which incidentally on picking through the cracked paint on the roof we managed to discover that it started out life as a black car, was then painted metallic blue, red, white, lime green and eventually back to black (twice). If you see the layers it was like a time team geological survey.
So it's good by old shell...
As previously mentioned we were waiting on the new seat and pedal box to test-fit with the steering column position before finally welding the remaining roll cage bars. Thanks to Jon Simmonds at MW (MotorsportWheels) the fantastic Corbeau seats arrived fully branded (drivers seat is carbon fibre and the passenger seat is GRP). We opted for the ‘Pro-series’ as we couldn’t fit the ‘Revenge’ seat due to the basic ergonomics of the roll cage design within this shell.
To be honest the Pro-series suits us better. It is easier for the driver to get in and out and gives better peripheral vision, with 90+ cars in the race this is essential. From a marketing perspective the logo will be more visual also.
We did an initial placement along with the steering column, the new AP Racing pedal box (again courtesy of MotorsportWheels) and the gear selector (K-tuned billet shifter). The seat seems a little high. This is partly because we run it on an FIA approved slider rail (10mm), partly because the fact we use the rail we cant put the Corbeau seat on its lowest setting on the side-mount brackets and partly because the actual seat base fixing rails could be lower in the floor. The latter seems to be the easiest fix. It will involve some cutting just behind where the centre console would be but we’ll explain this later with photos.
?
You can see in the below image how the seat sits perfectly within the roll cage.
?
Now that all those important components are measured up and positioning is agreed, the car is off to Saluki tomorrow for final welding.
?
Once the welding is complete the interior, underside and inner wings will be painted metallic grey. Stay tuned for that.
Last note for this update is to say goodbye to our old ZRT #48 shell… which incidentally on picking through the cracked paint on the roof we managed to discover that it started out life as a black car, was then painted metallic blue, red, white, lime green and eventually back to black (twice). If you see the layers it was like a time team geological survey.
So it's good by old shell...

Part 14
I think this will be the last update on the fabrication works as everything seems to be finished. A big thank you to Robbie and Mark at Saluki for the speedy, quality and efficient service. Its worth mentioning that they kept us updated at all times and they took a genuine interest in our project which is reflected in the quality of the Engineering.
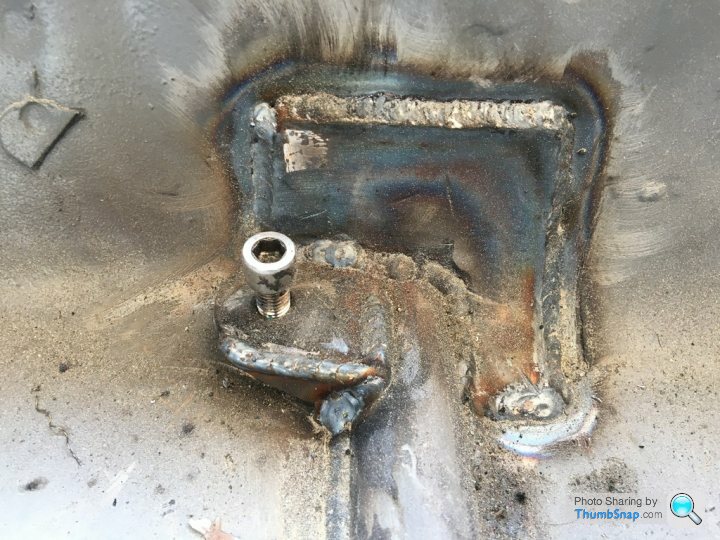
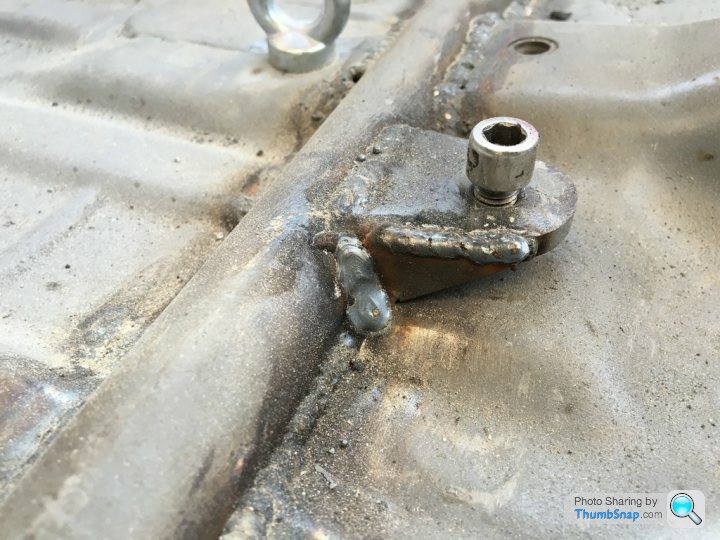
So first up the seat rails were fully welded.
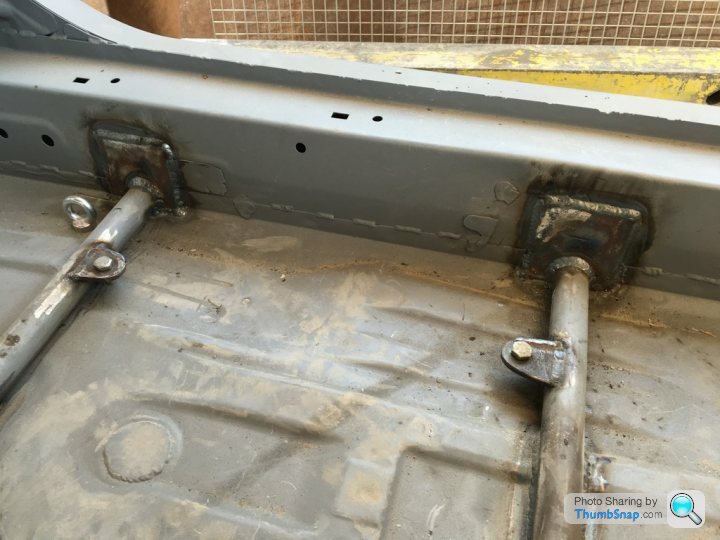
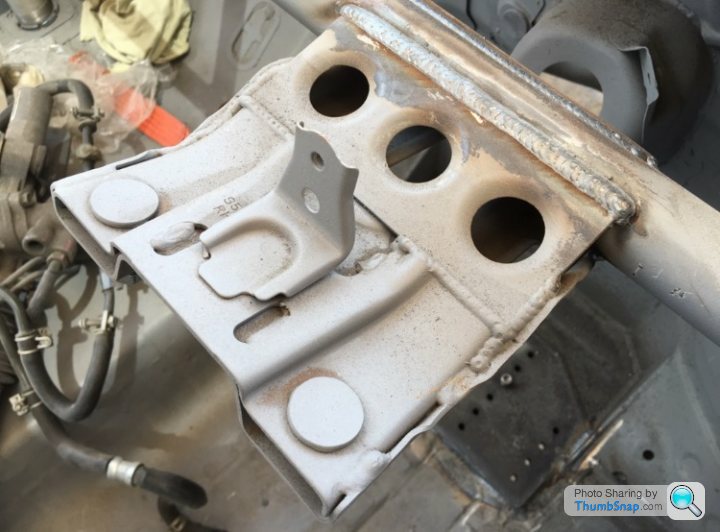
The lugs were also strengthened using fillet gusset pieces.
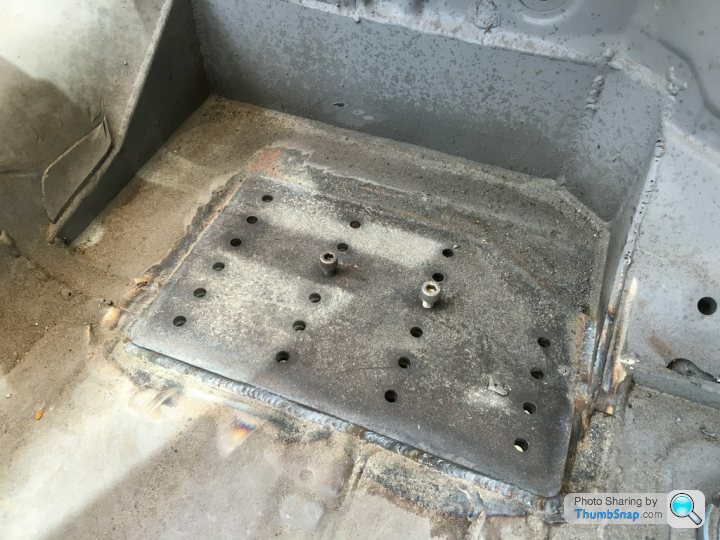
So with the seat positioned and fixed the pedal box reinforced floor plate was installed. Note the multiple holes are for flexibility in terms of the fitment position of the pedal box. They have been fitted with bolts to the underside so it is easy to install/remove/refit the pedal box.
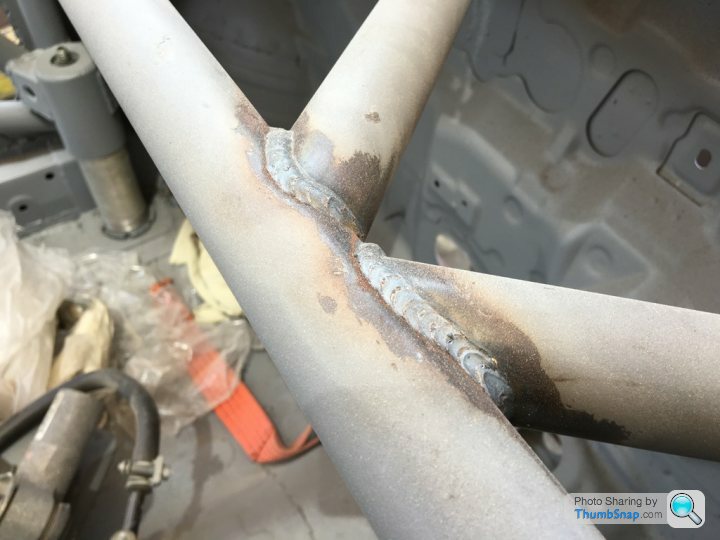
Saluki then firmed up the steering column position and finalised the welding.
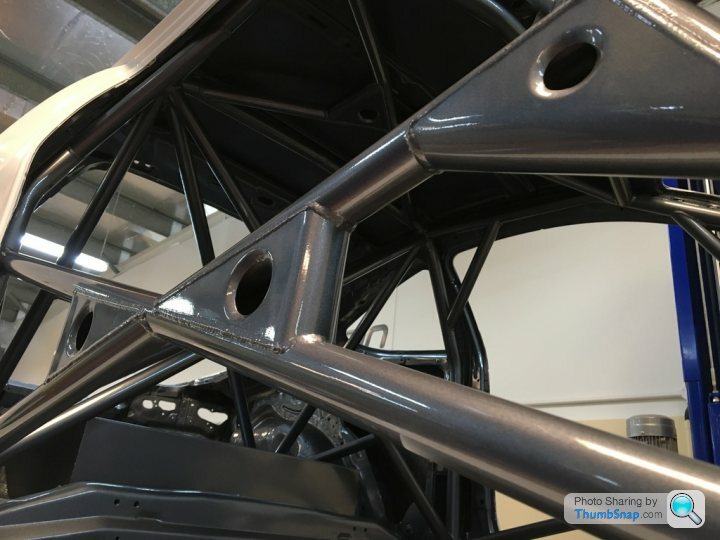
This then enabled the finalisation of the front CDS bar and the triangulated bars to the strut turrets.
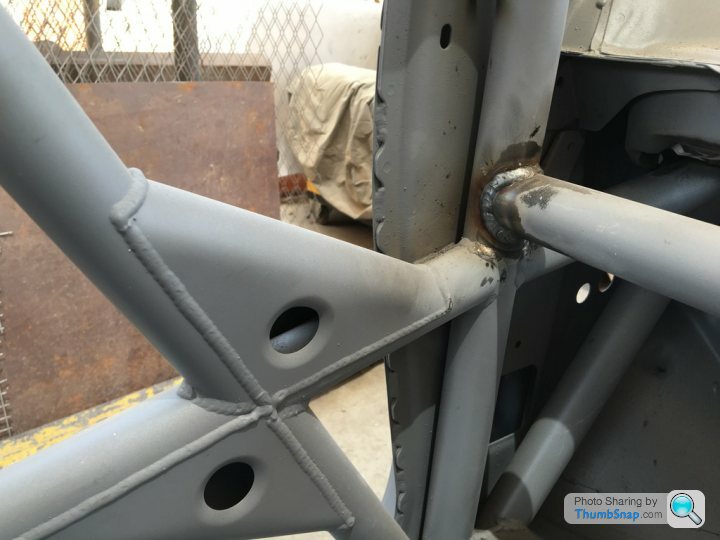
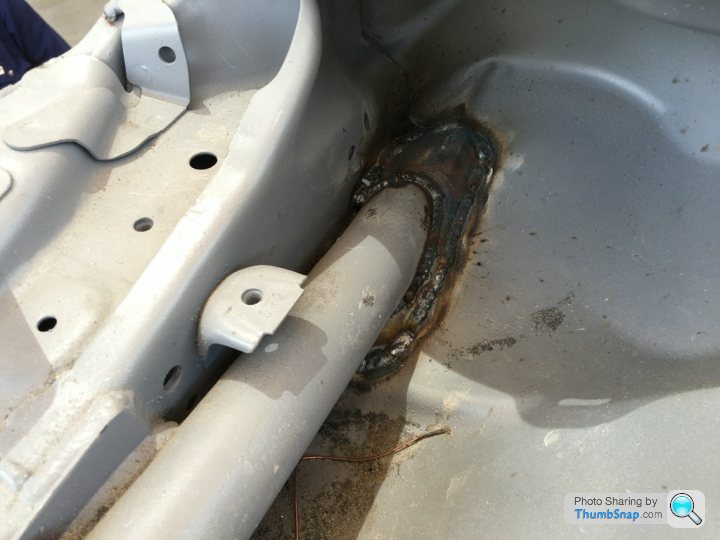
Below is the bar which comes through the bulkhead and provides the lateral strength to the turret. You can see how tidy the hole has been closed.
Now the car is in the paint shop for bodywork. Initially it will be protected to prevent rusting of the welding then some bodywork to fix the panels which were damaged by sandblasting then, interior and underside painted then we will definitely start the mechanical works.
On a side note, 2 of the teams drivers will be competing in the Barcelona 24hr race, with myself another team member helping the team the 2 drivers are driving for.
I think this will be the last update on the fabrication works as everything seems to be finished. A big thank you to Robbie and Mark at Saluki for the speedy, quality and efficient service. Its worth mentioning that they kept us updated at all times and they took a genuine interest in our project which is reflected in the quality of the Engineering.
So first up the seat rails were fully welded.
The lugs were also strengthened using fillet gusset pieces.
So with the seat positioned and fixed the pedal box reinforced floor plate was installed. Note the multiple holes are for flexibility in terms of the fitment position of the pedal box. They have been fitted with bolts to the underside so it is easy to install/remove/refit the pedal box.
Saluki then firmed up the steering column position and finalised the welding.
This then enabled the finalisation of the front CDS bar and the triangulated bars to the strut turrets.
Below is the bar which comes through the bulkhead and provides the lateral strength to the turret. You can see how tidy the hole has been closed.
Now the car is in the paint shop for bodywork. Initially it will be protected to prevent rusting of the welding then some bodywork to fix the panels which were damaged by sandblasting then, interior and underside painted then we will definitely start the mechanical works.
On a side note, 2 of the teams drivers will be competing in the Barcelona 24hr race, with myself another team member helping the team the 2 drivers are driving for.
Part 15
After a fairly long gap since the last update (due to holidays / Ramadan / Eid / Racing in Barcelona...) here is the next installment.
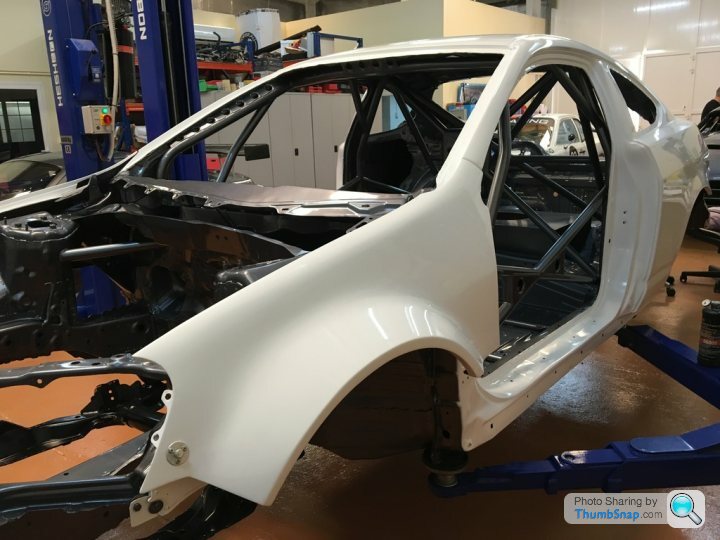
Ok so its October instead of September but the good news is that things have moved on and we now have a really smart looking shell (painted under, internally and externally). The bodyshop faced three main issues:
- Front wings needed some modifications at the top where they meet the windscreen posts (actually the windscreen posts were modified as opposed to the wings) with added metal since they both didnt marry up cleanly.
- Doors were modified to fit.
- The shot-blasting caused a lot of damage particulary to the roof and rear 3/4 panels. There was a lot of hammering required to straightening those three sections of the car as opposed to opting for filler.
A-tech insisted in their trademark metallic grey for internals/under/inside the wheel arches/bonnet etc. And a nice clean white for the exterior. Our final livery will be revealed in due course but this year you can expect to see more white as the main part of the scheme.
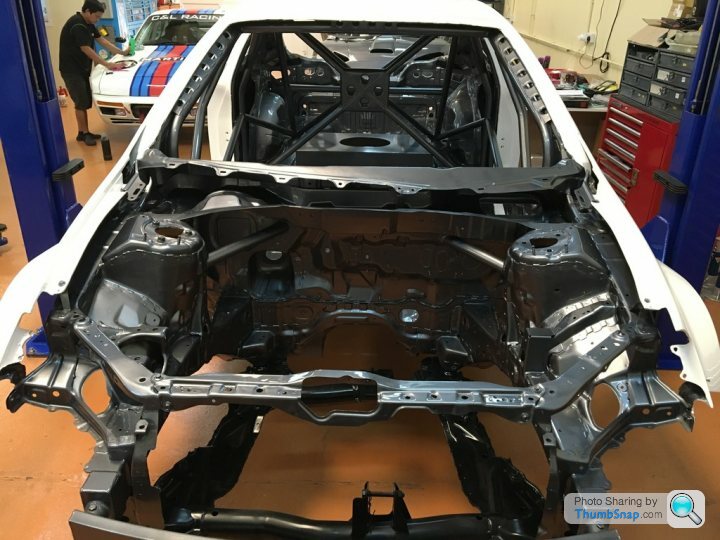
First up is under the bonnet:
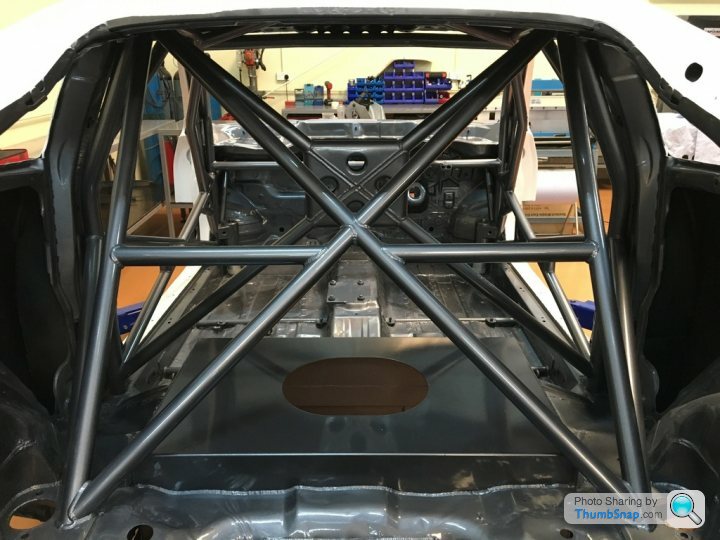
Below is the roll cage which you can see is painted as nicely as the exterior:
Internally we need to start some fit-out:
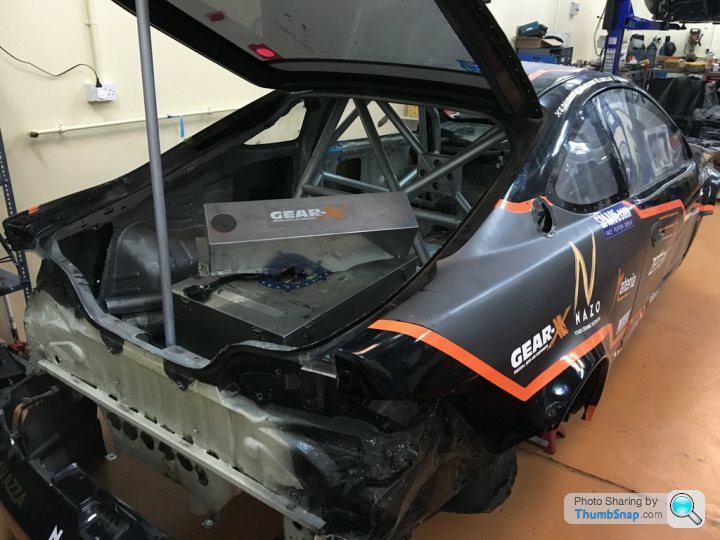
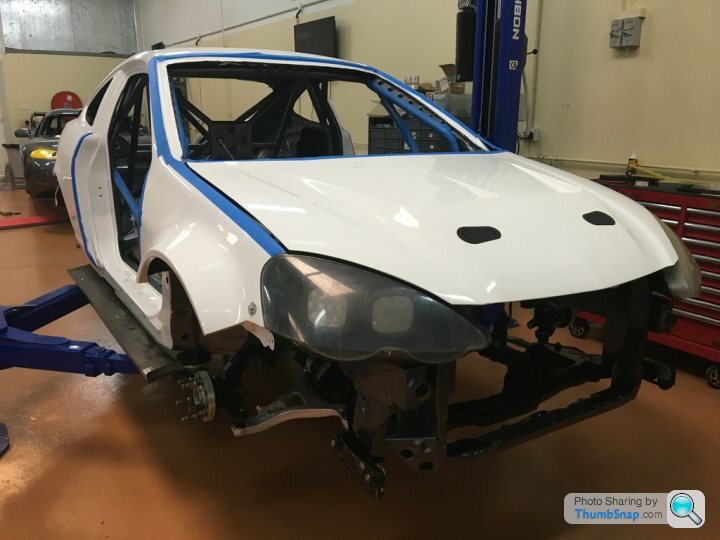
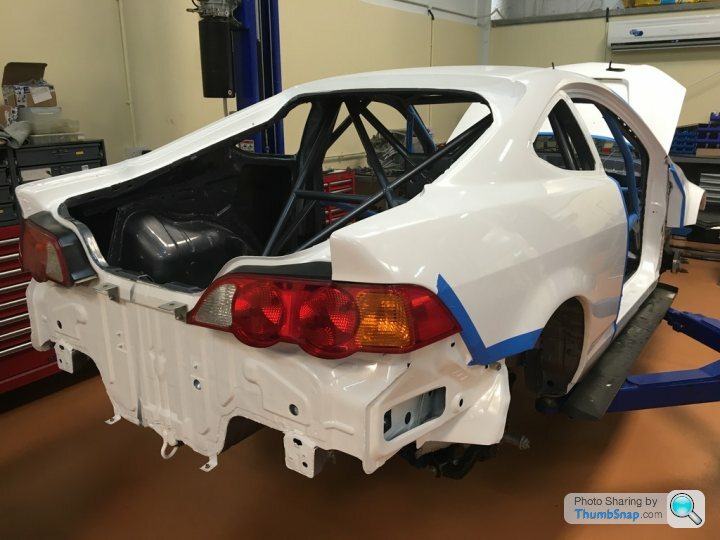
And the last few pics show the exterior of the shell: Doors/bonnet/hatch and bumpers will all be fitted at the end of the build. The other panels will now all be masked off to avoid any damage while the rebuild continues:

So, with some luck in the coming weeks we shall start to see the shell transforming into a #racecar!
More updates as the build progresses...
After a fairly long gap since the last update (due to holidays / Ramadan / Eid / Racing in Barcelona...) here is the next installment.
Ok so its October instead of September but the good news is that things have moved on and we now have a really smart looking shell (painted under, internally and externally). The bodyshop faced three main issues:
- Front wings needed some modifications at the top where they meet the windscreen posts (actually the windscreen posts were modified as opposed to the wings) with added metal since they both didnt marry up cleanly.
- Doors were modified to fit.
- The shot-blasting caused a lot of damage particulary to the roof and rear 3/4 panels. There was a lot of hammering required to straightening those three sections of the car as opposed to opting for filler.
A-tech insisted in their trademark metallic grey for internals/under/inside the wheel arches/bonnet etc. And a nice clean white for the exterior. Our final livery will be revealed in due course but this year you can expect to see more white as the main part of the scheme.
First up is under the bonnet:
Below is the roll cage which you can see is painted as nicely as the exterior:
Internally we need to start some fit-out:
And the last few pics show the exterior of the shell: Doors/bonnet/hatch and bumpers will all be fitted at the end of the build. The other panels will now all be masked off to avoid any damage while the rebuild continues:
So, with some luck in the coming weeks we shall start to see the shell transforming into a #racecar!
More updates as the build progresses...
Part 16
Another brief update mostly by virtue of images it must be said. Things have progressed and we expect the car to be race ready in little over 1-month from now for its first shake down.
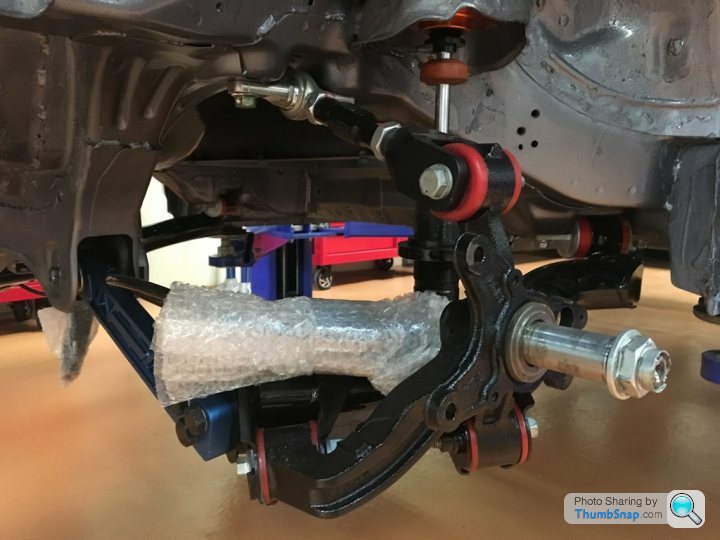
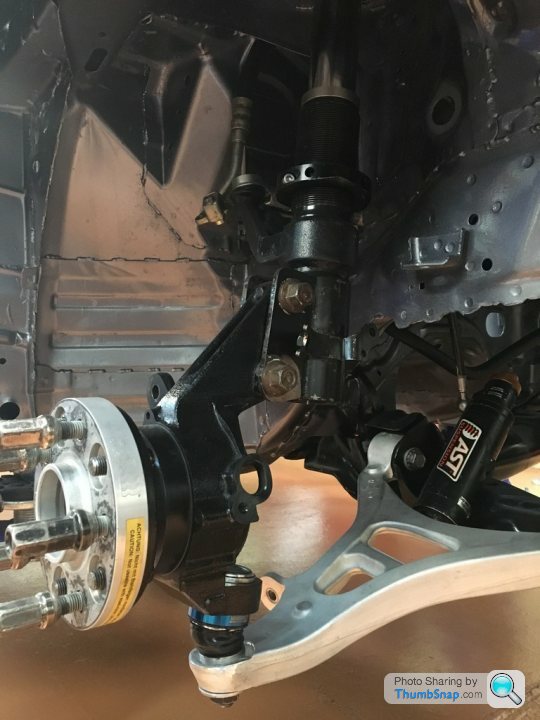
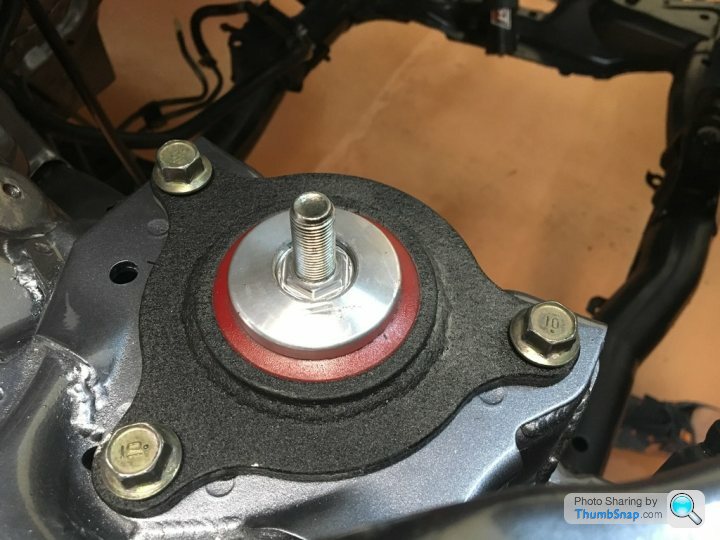
Suspension has been shotblasted, repainted and built up at each corner.
Above is the rear assembly and below front albeit missing springs as they will be fitted later.
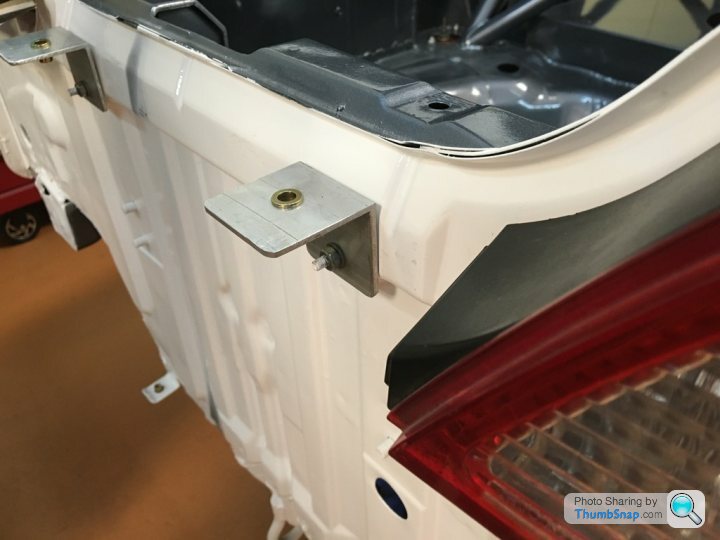
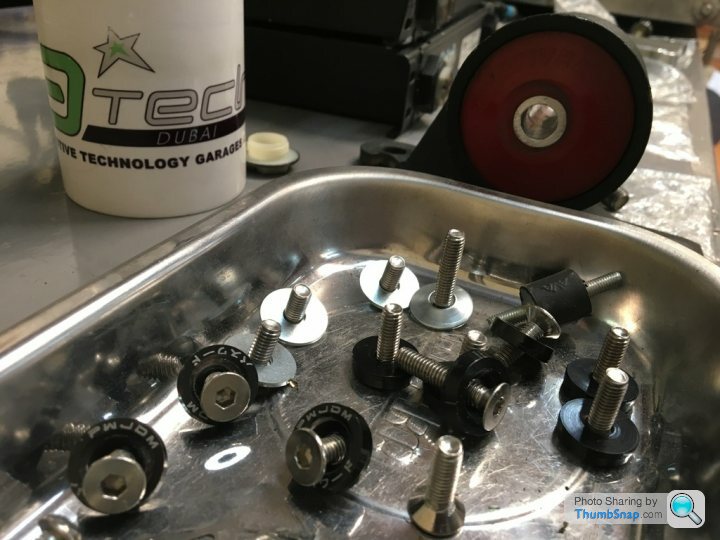
Most of the body panels such as bumpers are all fitted using 4mm allen key bolts c/w Japanese writing on them to give that authentic look! 😂
Below you can see the typical mounting backets and the actual bolts.
We have started fitting up engine & box using the excellent 'innovative mounts' products. www.innovativemounts.com
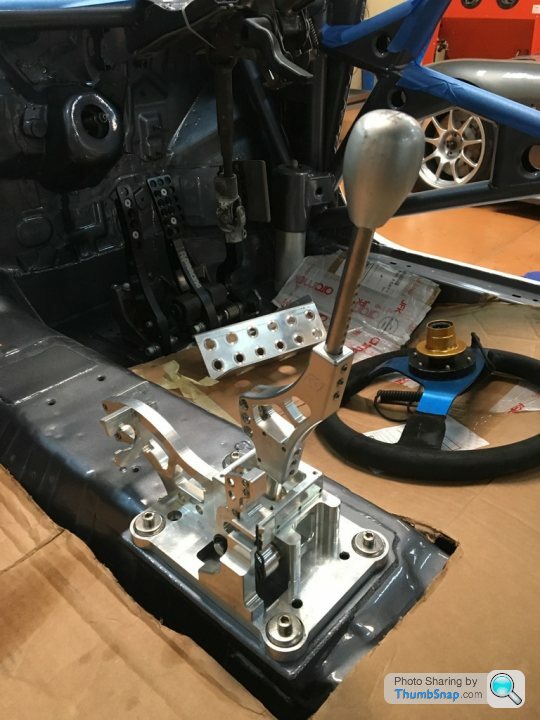
The really special K-tuned billet alloy shifter has been mounted. This time however to preserve the aesthetics of the product we have used stainless steel fixation bolts.
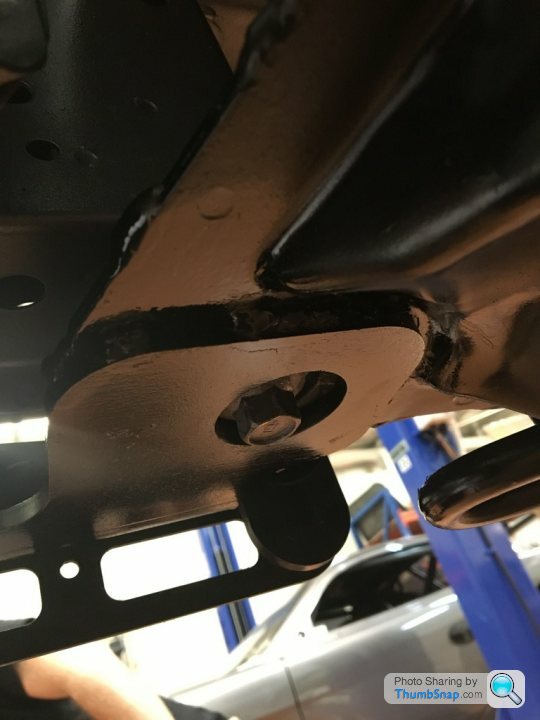
We use a front splitter bracket system provided by specialprojectsmotorsport (KIWI). A-tech made a slight change this time by welding the brackets to the subframe. We will do the same with the spare bracket set and a spare subframe so that in the event of serious damage we can quickly swap both over.
Last up is just a shot of the car itself from front and rear. Bumpers are currently in the paintshop so within a week or so we will be able to post another update. All in all we are really happy with how the build is coming along. It might be the newest Honda Integra in the world at this point in time 😊
Another brief update mostly by virtue of images it must be said. Things have progressed and we expect the car to be race ready in little over 1-month from now for its first shake down.
Suspension has been shotblasted, repainted and built up at each corner.
Above is the rear assembly and below front albeit missing springs as they will be fitted later.
Most of the body panels such as bumpers are all fitted using 4mm allen key bolts c/w Japanese writing on them to give that authentic look! 😂
Below you can see the typical mounting backets and the actual bolts.
We have started fitting up engine & box using the excellent 'innovative mounts' products. www.innovativemounts.com
The really special K-tuned billet alloy shifter has been mounted. This time however to preserve the aesthetics of the product we have used stainless steel fixation bolts.
We use a front splitter bracket system provided by specialprojectsmotorsport (KIWI). A-tech made a slight change this time by welding the brackets to the subframe. We will do the same with the spare bracket set and a spare subframe so that in the event of serious damage we can quickly swap both over.
Last up is just a shot of the car itself from front and rear. Bumpers are currently in the paintshop so within a week or so we will be able to post another update. All in all we are really happy with how the build is coming along. It might be the newest Honda Integra in the world at this point in time 😊
Part 17
Just a snippet of an update from the build..
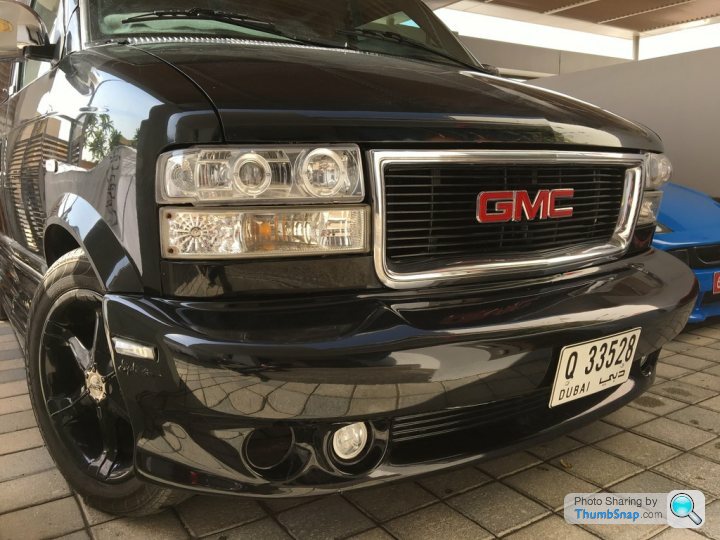
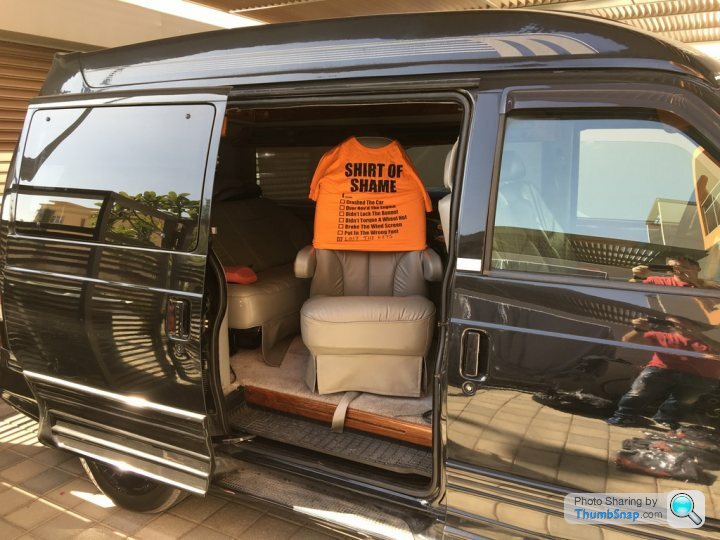
Firstly and a bit random but the team bus (24Hrs sleeping wagon) has been fitted with a new set of headlights I bought for AED 300 (~£60) in in Al Ain. Actually our friend Kinan Dawood sourced them for us. Probably my favourite new part of the year to be fair. Transformed the look of the old girl (or at least the front of it anyway).
The inside got a spring (winter) clean and its ready to do its annual 100kms driving!
Meanwhile. When I visited the car last weekend there were a few more jobs completed.
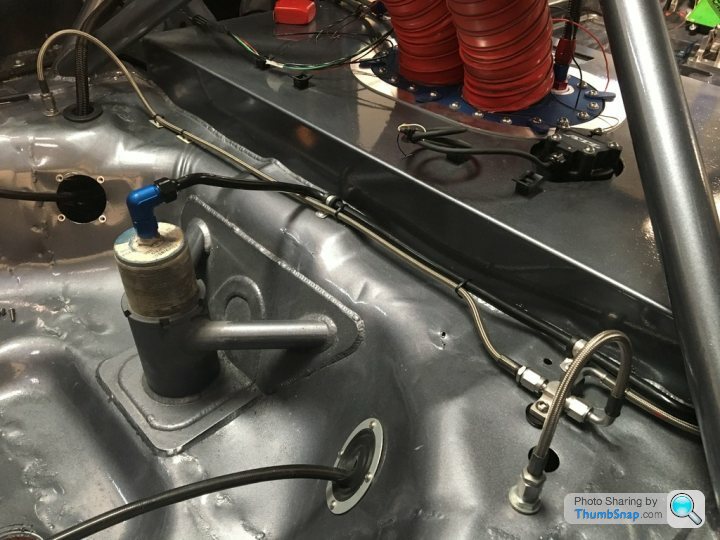
New electrical lifeline fire extinguisher kit was fitted (Supplied by our friends MotorsportWheels Dubai):
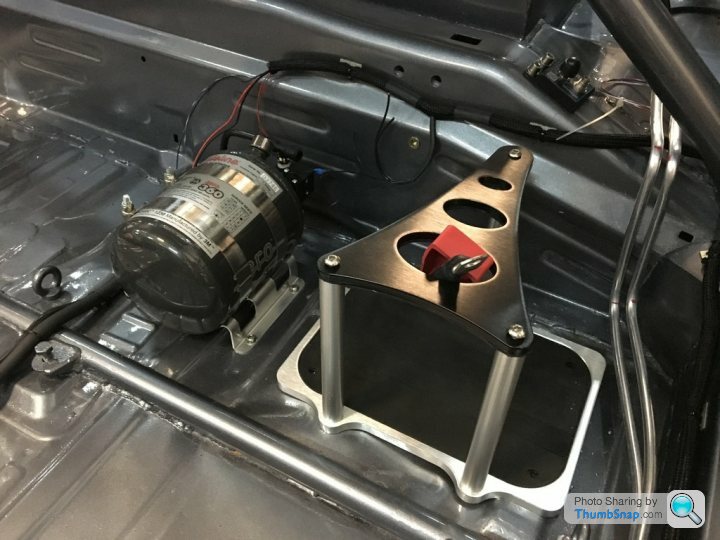
.....along with a spanking new battery holder which can be seen in the above image. Much nicer than the big ugly red box we had previously.
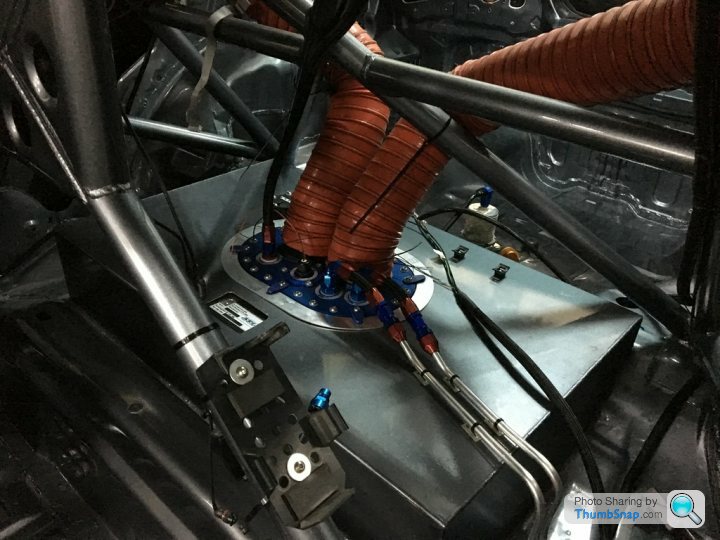
The accusump was positioned and new loom pretty much wired in pending final terminations to things like lights and the control panel.
The AST suspension adjustable canisters have been mounted front and rear for easy access. Below is a pic of the rears.
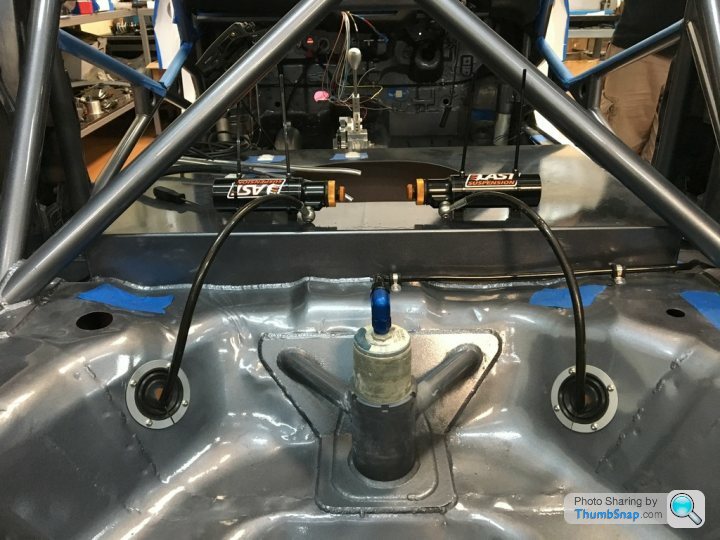
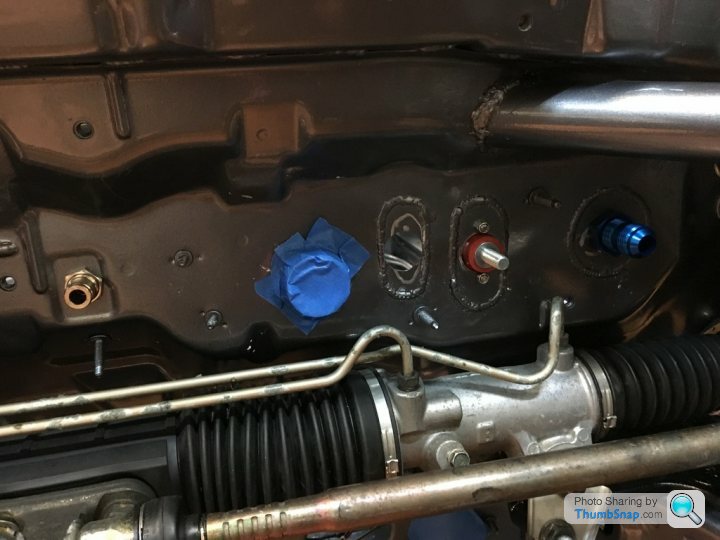
All of the engine connectors are in place on the bulkhead including engine loom plug (from wireworx USA), battery positive and oil lines from the previously photographed accusump.
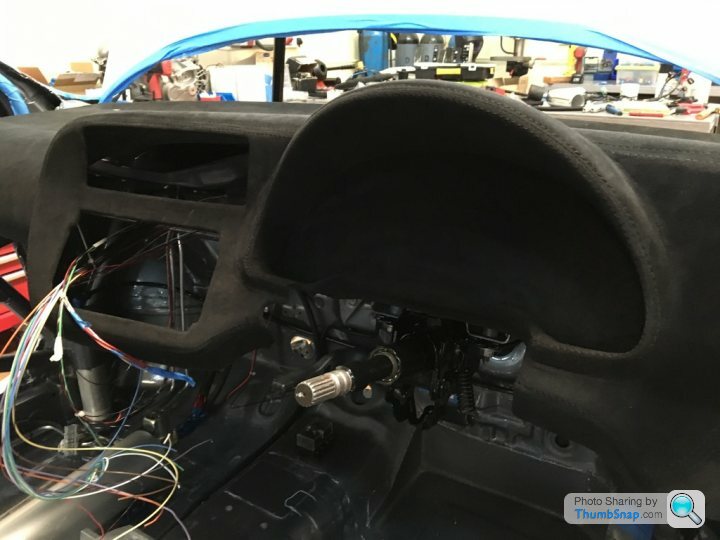
Last up is a pic of the dash mounted in place. Still not sure what the two holes are for but all will be revealed soon.
Meanwhile the doors and hatch are all in the paint shop to get tidied up and refreshed in a nice crisp white. I also visited Leadright Dubai earlier today to finalise the shade of orange for the colour scheme. Again something a little different coming your way soon.
Just a snippet of an update from the build..
Firstly and a bit random but the team bus (24Hrs sleeping wagon) has been fitted with a new set of headlights I bought for AED 300 (~£60) in in Al Ain. Actually our friend Kinan Dawood sourced them for us. Probably my favourite new part of the year to be fair. Transformed the look of the old girl (or at least the front of it anyway).
The inside got a spring (winter) clean and its ready to do its annual 100kms driving!
Meanwhile. When I visited the car last weekend there were a few more jobs completed.
New electrical lifeline fire extinguisher kit was fitted (Supplied by our friends MotorsportWheels Dubai):
.....along with a spanking new battery holder which can be seen in the above image. Much nicer than the big ugly red box we had previously.
The accusump was positioned and new loom pretty much wired in pending final terminations to things like lights and the control panel.
The AST suspension adjustable canisters have been mounted front and rear for easy access. Below is a pic of the rears.
All of the engine connectors are in place on the bulkhead including engine loom plug (from wireworx USA), battery positive and oil lines from the previously photographed accusump.
Last up is a pic of the dash mounted in place. Still not sure what the two holes are for but all will be revealed soon.
Meanwhile the doors and hatch are all in the paint shop to get tidied up and refreshed in a nice crisp white. I also visited Leadright Dubai earlier today to finalise the shade of orange for the colour scheme. Again something a little different coming your way soon.
Apologies for the late response. From a practical perspective it means everything (body panels) can be removed with 1-tool. Aesthetically it looks great and we just happened to have a load of them. In terms of expense this is pretty low down the overall expense sheet to be honest.
More updates soon.
More updates soon.
Part 18
So where were we!....
A lot has happened since the last update although some days when I visit it looks like we are going backwards rather than forwards. This is because A-tech test fit things then remove them again. The upside to this is perfectionism. The downside to this is that the car is so clean it looks like it should go straight to a museum.
Team roles and responsibilities have been updated this week with each of the drivers having the been allocated the sole task of "DONT CRASH CAR!".
Oh yes... the build..
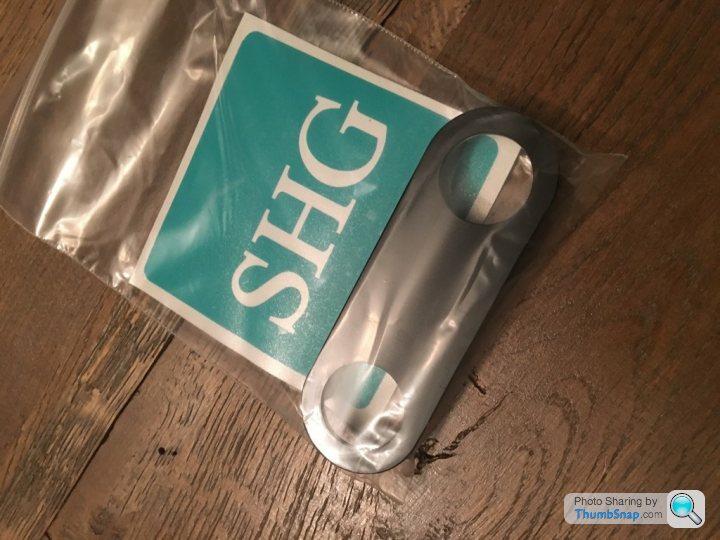
First up we recently read on www.shgmotorworks.com website about their experience with steering rack failure and what was the cause (track rod slider) and how they developed a solution made from deralin. Evan from Shg (So Honda Garage) took the time to explain to us that the plastic slider wears and allows significant play. This not only causes bump steer by letting the tie rods shift up to 2* but also affects the rack/pinion gear mesh since the rack bar is able to rotate.
Evan designed a Delrin insert to replace the oem part. It increases surface area, depth, hardness and tolerances have also been reduced to just a few thousandths. The cost is $65usd plus shipping and on the face of it seems a must have upgrade for anyone racing or tracking an Integra.
Next then is the infamous footrest. 2-years of moaning from Umair Khan prompted us to finally make something nice and fit for a king khan! I tested it and can confirm it is perfect for his code 60 exploits.
The drivers seat has been fixed in place with three fundamental differences over the old car. (1) It is much easier to get in and out of comparing to the corbeau revenge series, (2) The seat is much lower and (3) The FIA approved slider had to be fitted upside down so in otherwords to slide the seat you have to push the slider down as opposed to pulling it up. Thats a bit un-natural but nothing we can do and besides it still works fine.
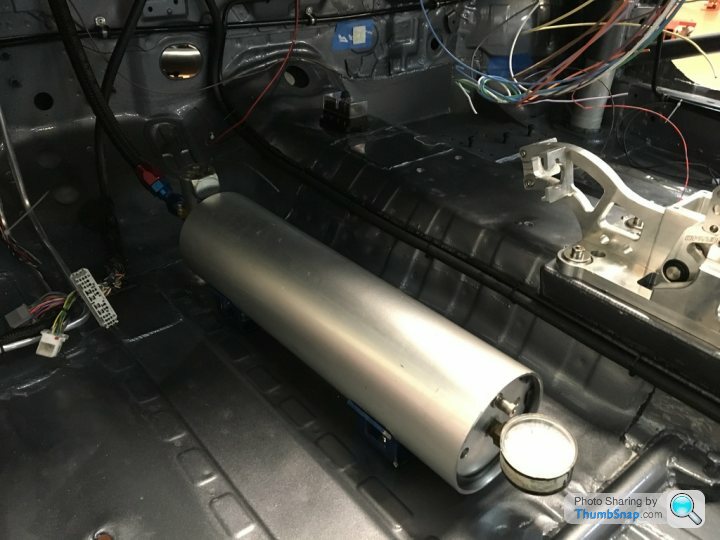
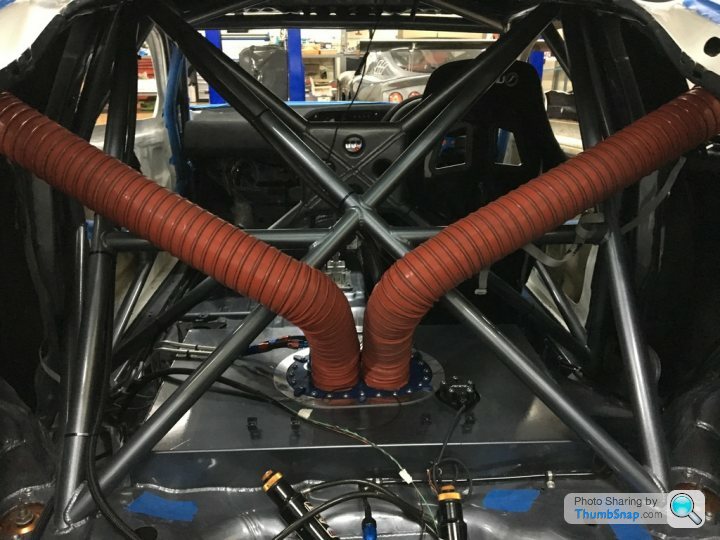
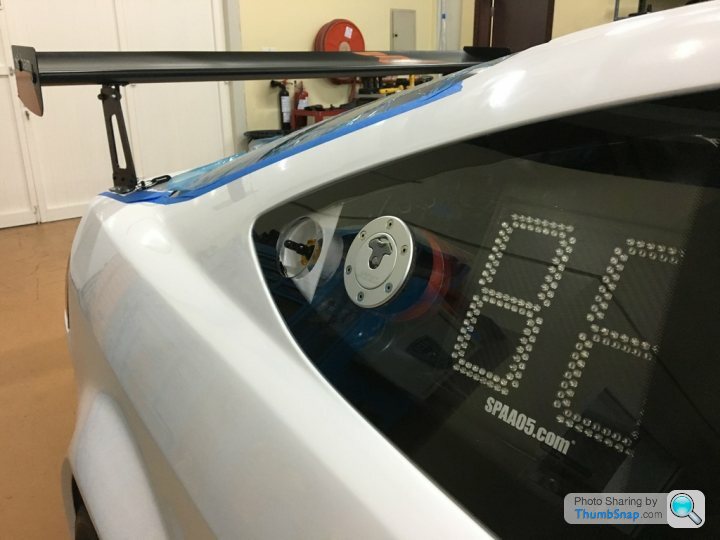
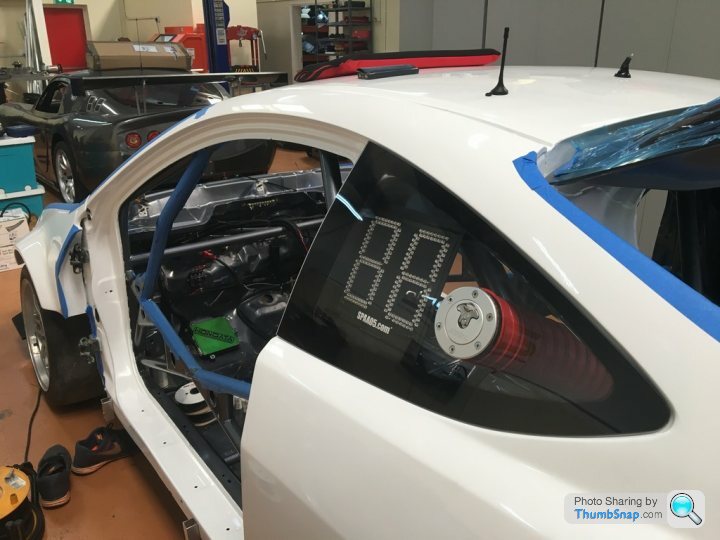
The fuel cell that had some of you wondering about some time back has also now been fitted. We chose to fit dual fillers. The reason being we are not restricted to which side of the pumps we can go to in the refuelling station during the race. (Sometimes there are queues).
Below are two pics showing the installation along with the filler cap (installed within the rear 3/4 windows). It is also worth noting that the rear visibility has been hugely improved along with significantly lower centre of gravity.
Our doors this year a much lighter. They are not the crazy expensive carbon fibre doors but still pretty good at a fraction of the cost. They do however need some fettling with regard to final fitment which resulted in no end of moaning from Julian but for those of you who know him, he would be lost if he didnt have something to moan about!
You can see the markings in the below image for trimming and painting. We ordered plastic windows (front/rear and sides) from plastics4performance in the UK. Due to the design of our doors the windows will need to be cut down slightly and fitted within the frame as opposed to sitting over the frame in the standard Integra.
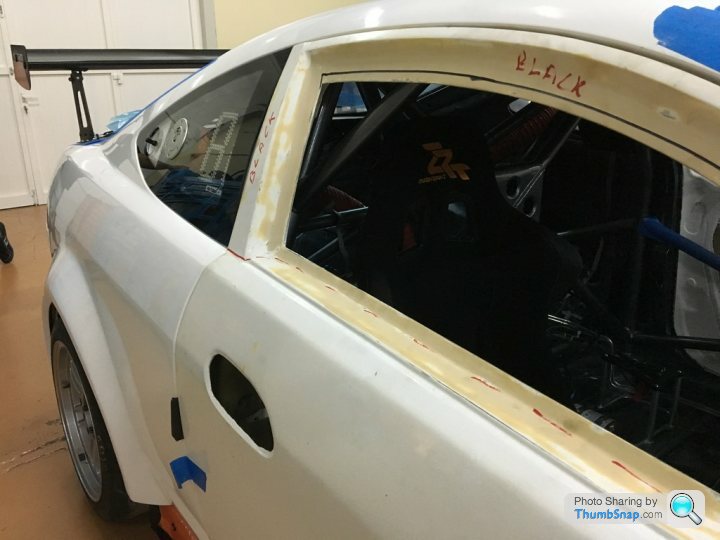
We think it will still look really great and we ordered the pro-slider for the drivers side which is really an impressive quality product. More on this next time.
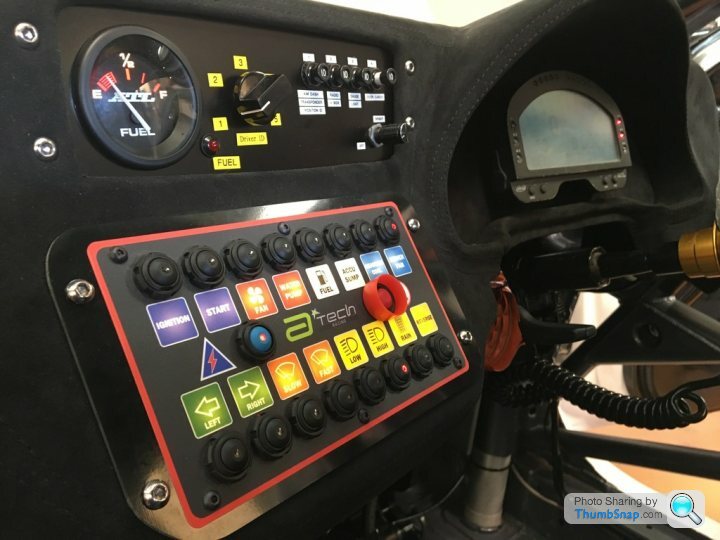
Last up for this update is the dash. The holes have been filled and sadly no room for the Alpine stereo I ordered.
Go on ask the question.... Whats the fuel button for?
Answer: I have no idea!
Not sure we will manage another update this side of Christmas and New Years so in the meantime Happy holidays from all at ZRT
So where were we!....
A lot has happened since the last update although some days when I visit it looks like we are going backwards rather than forwards. This is because A-tech test fit things then remove them again. The upside to this is perfectionism. The downside to this is that the car is so clean it looks like it should go straight to a museum.
Team roles and responsibilities have been updated this week with each of the drivers having the been allocated the sole task of "DONT CRASH CAR!".
Oh yes... the build..
First up we recently read on www.shgmotorworks.com website about their experience with steering rack failure and what was the cause (track rod slider) and how they developed a solution made from deralin. Evan from Shg (So Honda Garage) took the time to explain to us that the plastic slider wears and allows significant play. This not only causes bump steer by letting the tie rods shift up to 2* but also affects the rack/pinion gear mesh since the rack bar is able to rotate.
Evan designed a Delrin insert to replace the oem part. It increases surface area, depth, hardness and tolerances have also been reduced to just a few thousandths. The cost is $65usd plus shipping and on the face of it seems a must have upgrade for anyone racing or tracking an Integra.
Next then is the infamous footrest. 2-years of moaning from Umair Khan prompted us to finally make something nice and fit for a king khan! I tested it and can confirm it is perfect for his code 60 exploits.
The drivers seat has been fixed in place with three fundamental differences over the old car. (1) It is much easier to get in and out of comparing to the corbeau revenge series, (2) The seat is much lower and (3) The FIA approved slider had to be fitted upside down so in otherwords to slide the seat you have to push the slider down as opposed to pulling it up. Thats a bit un-natural but nothing we can do and besides it still works fine.
The fuel cell that had some of you wondering about some time back has also now been fitted. We chose to fit dual fillers. The reason being we are not restricted to which side of the pumps we can go to in the refuelling station during the race. (Sometimes there are queues).
Below are two pics showing the installation along with the filler cap (installed within the rear 3/4 windows). It is also worth noting that the rear visibility has been hugely improved along with significantly lower centre of gravity.
Our doors this year a much lighter. They are not the crazy expensive carbon fibre doors but still pretty good at a fraction of the cost. They do however need some fettling with regard to final fitment which resulted in no end of moaning from Julian but for those of you who know him, he would be lost if he didnt have something to moan about!
You can see the markings in the below image for trimming and painting. We ordered plastic windows (front/rear and sides) from plastics4performance in the UK. Due to the design of our doors the windows will need to be cut down slightly and fitted within the frame as opposed to sitting over the frame in the standard Integra.
We think it will still look really great and we ordered the pro-slider for the drivers side which is really an impressive quality product. More on this next time.
Last up for this update is the dash. The holes have been filled and sadly no room for the Alpine stereo I ordered.
Go on ask the question.... Whats the fuel button for?
Answer: I have no idea!
Not sure we will manage another update this side of Christmas and New Years so in the meantime Happy holidays from all at ZRT
Part 19
So I thought... do we do another update or do we just leave it and show a finished product in the New Year. On one hand I dont want to become like Project Binky dragging the thing out and on the other there are still a few interesting things going on before the lot gets covered up.
Firstly theres the matter of wiring. To be fair years ago I had a Honda civic racecar rewired and it was fantastic. The guy had a skill or a signature of basically hiding all the wires so that when you looked at the car it was like wifi. Wireless! This was fantastic right up until around the point the car wouldnt start because of a loose earth. Not a big issue apart from the fact we couldnt find the wire never mind the loose wire!
So, whats the point?
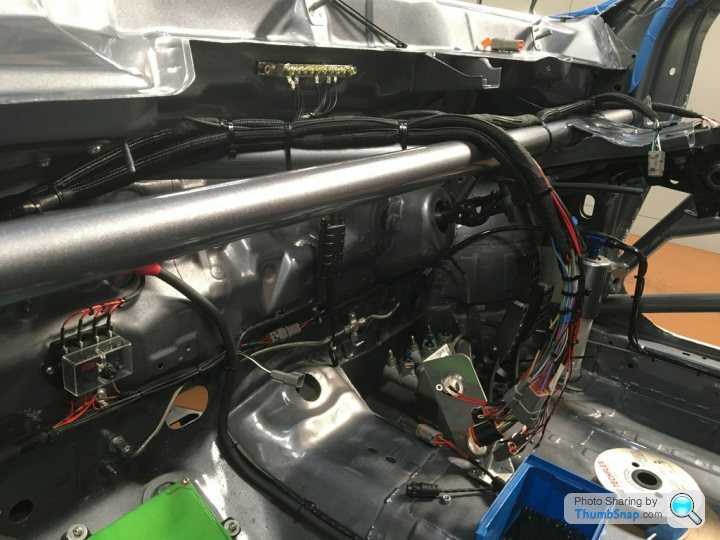
The point is wiring is a skill or maybe even an art! Especially when you have nothing to copy so below is an image of work in progress which I hope you can zoom into to fully appreciate how well thought out and amazingly neat the schematic is.
As the build continues it becomes more and more apparent that it is possible to dismantle the entire car with an allen key tool from IKEA which is slightly weird and somehow very cool.
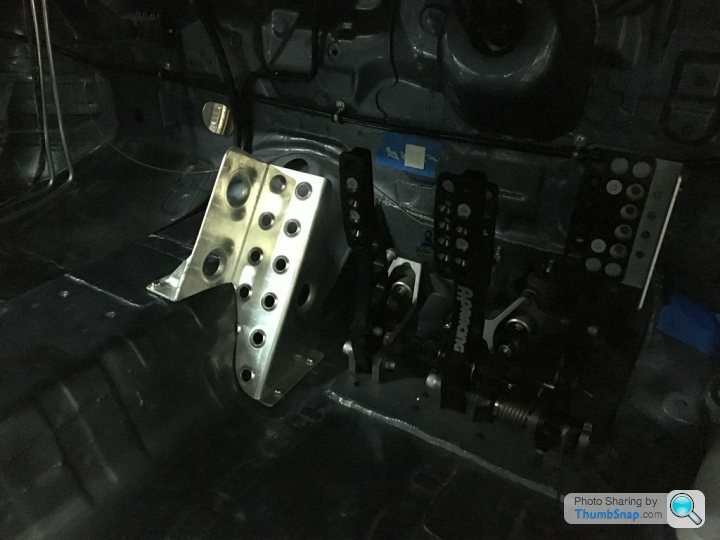
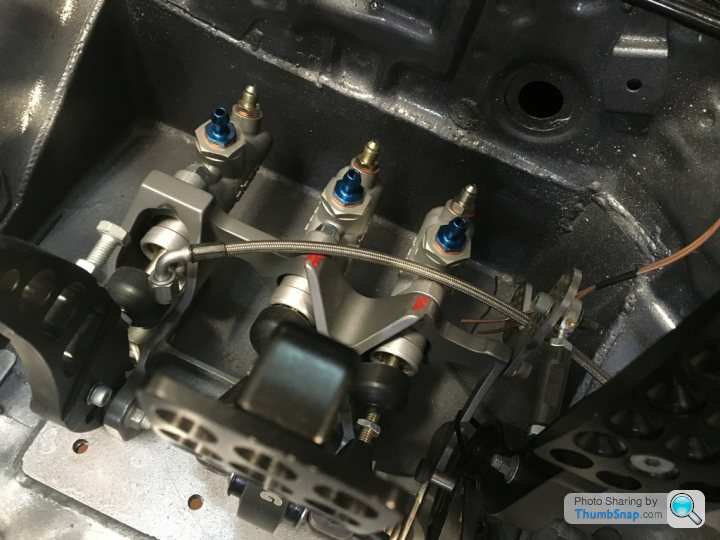
Next is an image of our pedal box. To be honest we had one which was also AP Racing but it was a curse. In last years race it stuck half way on me and then after it was adjusted it stuck at say 5% throttle. Believe me there is nothing more frightening than driving a Dubai 24Hrs at night at 40kph and trying to get back to the pitts safely! Later in the race (19-Hrs later) It stuck in the wide open position and after a few seconds for whatever reason valves and pistons whilst uninvited joined together and spoiled the party!
So, having decided on a few choice words to describe the old pedal box we ordered a new one from our local friends MW (Motorsportwheels). So all was good. Nice new pedal box... the best part was that we also had nice new cyclinders from last year except! Our old pedal box was from a Nascar which was imperial whereas our new one was from UK and metric! Initially this looked like a problem (No idea why) but our Friends at MW came through and delivered 3 lovely new cyclinders for the box as you can see below.
Below are the rear brake internal lines. Again fitted with the infamous IKEA tool. Who needs Snap on eh!!
That pretty much concludes it for now. The car will be finished in a day or two (photos are a little bit behind the writing as such) so in the next update maybe we can show you the livery design and the team race suits. For now the last pic shows the other side of the car which also has the refuelling option. The doors are on the way but if you look closely you can see a pair of trainers on the floor. If you remember we talked about perfectionism! Well Julian doesn't let anyone in the car with shoes on.... might be a challenge for the drivers
Til next time, Seasons Greetings to all our petrolhead friends from all at ZRT.
Oh and the fuel button question from the previous post is to enable us to pump the tank dry.
So I thought... do we do another update or do we just leave it and show a finished product in the New Year. On one hand I dont want to become like Project Binky dragging the thing out and on the other there are still a few interesting things going on before the lot gets covered up.
Firstly theres the matter of wiring. To be fair years ago I had a Honda civic racecar rewired and it was fantastic. The guy had a skill or a signature of basically hiding all the wires so that when you looked at the car it was like wifi. Wireless! This was fantastic right up until around the point the car wouldnt start because of a loose earth. Not a big issue apart from the fact we couldnt find the wire never mind the loose wire!
So, whats the point?
The point is wiring is a skill or maybe even an art! Especially when you have nothing to copy so below is an image of work in progress which I hope you can zoom into to fully appreciate how well thought out and amazingly neat the schematic is.
As the build continues it becomes more and more apparent that it is possible to dismantle the entire car with an allen key tool from IKEA which is slightly weird and somehow very cool.
Next is an image of our pedal box. To be honest we had one which was also AP Racing but it was a curse. In last years race it stuck half way on me and then after it was adjusted it stuck at say 5% throttle. Believe me there is nothing more frightening than driving a Dubai 24Hrs at night at 40kph and trying to get back to the pitts safely! Later in the race (19-Hrs later) It stuck in the wide open position and after a few seconds for whatever reason valves and pistons whilst uninvited joined together and spoiled the party!
So, having decided on a few choice words to describe the old pedal box we ordered a new one from our local friends MW (Motorsportwheels). So all was good. Nice new pedal box... the best part was that we also had nice new cyclinders from last year except! Our old pedal box was from a Nascar which was imperial whereas our new one was from UK and metric! Initially this looked like a problem (No idea why) but our Friends at MW came through and delivered 3 lovely new cyclinders for the box as you can see below.
Below are the rear brake internal lines. Again fitted with the infamous IKEA tool. Who needs Snap on eh!!
That pretty much concludes it for now. The car will be finished in a day or two (photos are a little bit behind the writing as such) so in the next update maybe we can show you the livery design and the team race suits. For now the last pic shows the other side of the car which also has the refuelling option. The doors are on the way but if you look closely you can see a pair of trainers on the floor. If you remember we talked about perfectionism! Well Julian doesn't let anyone in the car with shoes on.... might be a challenge for the drivers
Til next time, Seasons Greetings to all our petrolhead friends from all at ZRT.
Oh and the fuel button question from the previous post is to enable us to pump the tank dry.
Err I seem to be a bit behind the build schedule (I blame work and way to much travel). Anyway, here are the last 2 build updates:
Part 20
Its come down to the line but we are finally finished. 8-months ago almost to the day we bought the scrap DC5 shell in Sharjah from Lap57.
Its been a long build and whilst we had a lot of parts in the end we replaced a lot more in a bid to ensure the build was to the higest standards possible. With that we would like to firstly thank the following companies who helped us along the way:
- A-tech DXB
- Saluki Motorsports Dubai
- MotorsportWheels Dubai
- Deutches Auto Services Dubai
- Lap 57 Sharjah
- Leadright Dubai
- TGMsport UK
- SpecialProjectsMotorsport USA
- Gear-X USA
- SHGmotorworks USA
- Plastic4Peformance UK
- Torq racewear
- Cartek UK
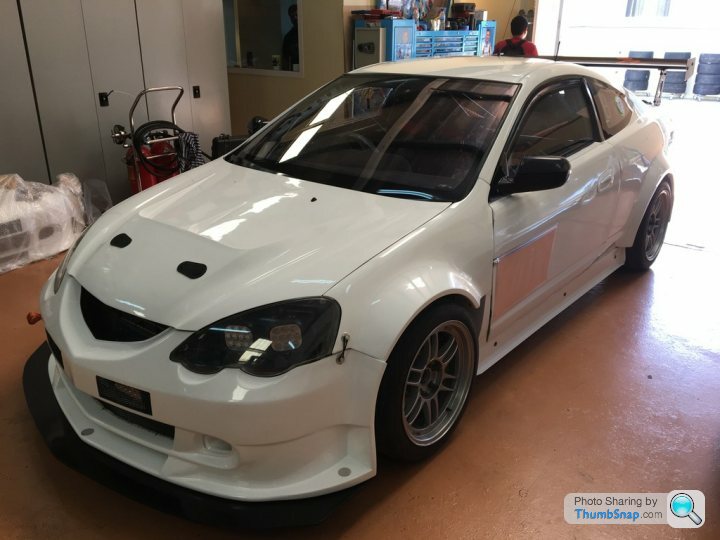
So, how does it look. Well quite honestly due to the light the photos dont do the final product justice but have a look and see what you think.
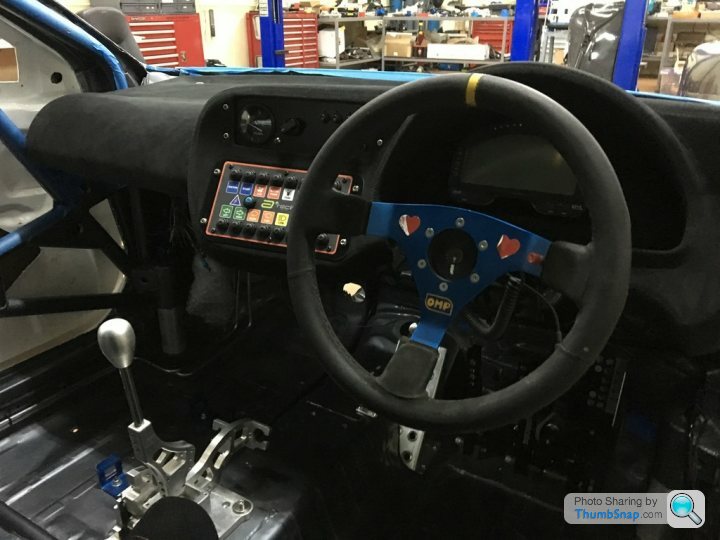
Purposeful and highly technical dash which was a bespoke design for our needs.
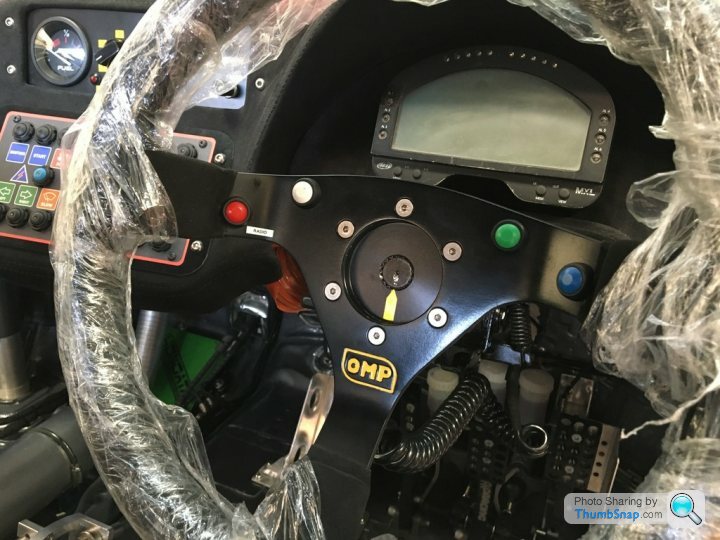
Steering wheel refurbished with new alacantara, fresh paint and a few new buttons including the awesome main beam x3 flashes for when we are overtaking A3 class cars
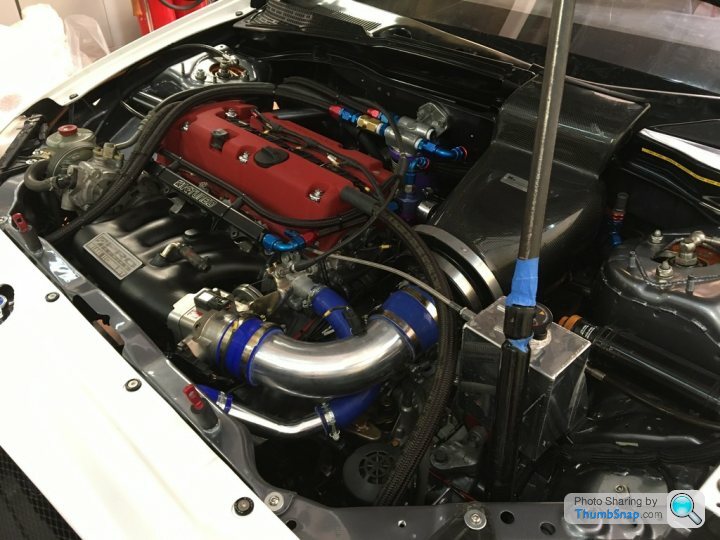
The business end of the build which was tuned on the rolling road during the week and produced a healthy Horse Power figure. Nothing crazy as we are looking for longevity rather than outright power.

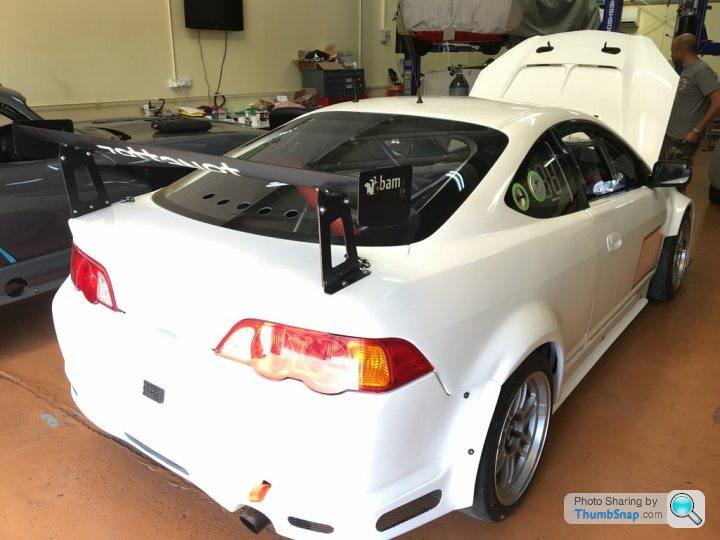
A few pics of the exterior of the car before we wrap it.
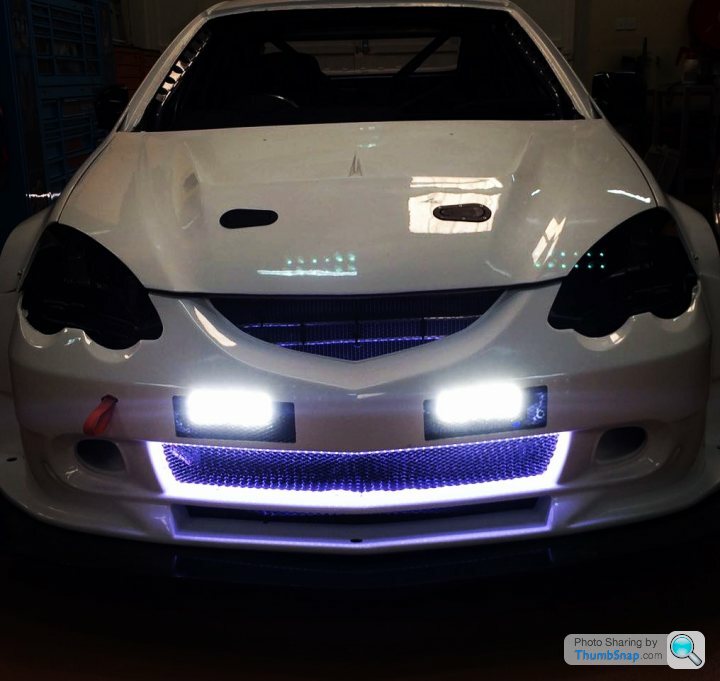
Preliminary light test:
Onboard view:

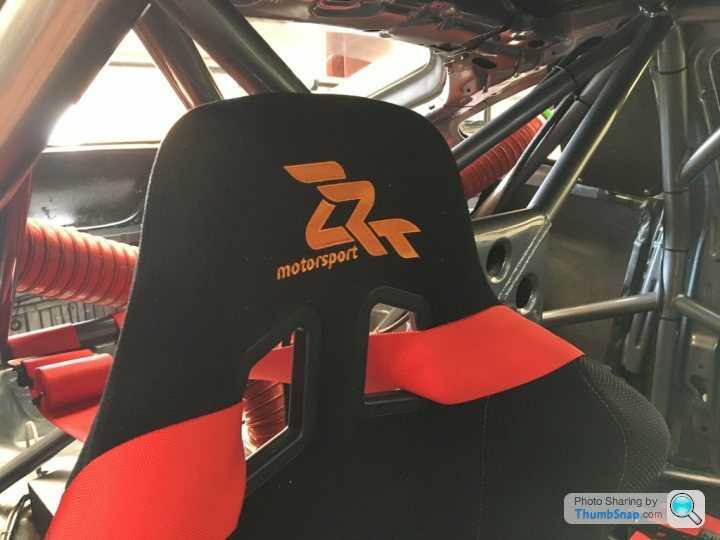
The office chair:
Another view of the business end of things:
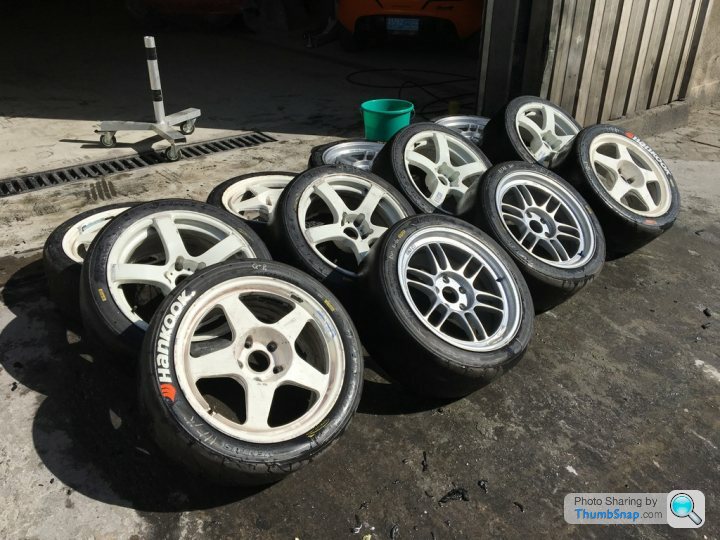
Need to clean up a few wheels:
Part 20
Its come down to the line but we are finally finished. 8-months ago almost to the day we bought the scrap DC5 shell in Sharjah from Lap57.
Its been a long build and whilst we had a lot of parts in the end we replaced a lot more in a bid to ensure the build was to the higest standards possible. With that we would like to firstly thank the following companies who helped us along the way:
- A-tech DXB
- Saluki Motorsports Dubai
- MotorsportWheels Dubai
- Deutches Auto Services Dubai
- Lap 57 Sharjah
- Leadright Dubai
- TGMsport UK
- SpecialProjectsMotorsport USA
- Gear-X USA
- SHGmotorworks USA
- Plastic4Peformance UK
- Torq racewear
- Cartek UK
So, how does it look. Well quite honestly due to the light the photos dont do the final product justice but have a look and see what you think.
Purposeful and highly technical dash which was a bespoke design for our needs.
Steering wheel refurbished with new alacantara, fresh paint and a few new buttons including the awesome main beam x3 flashes for when we are overtaking A3 class cars
The business end of the build which was tuned on the rolling road during the week and produced a healthy Horse Power figure. Nothing crazy as we are looking for longevity rather than outright power.
A few pics of the exterior of the car before we wrap it.
Preliminary light test:
Onboard view:
The office chair:
Another view of the business end of things:
Need to clean up a few wheels:
Part 21
So its time to wrap up the build story. If you want to read the race report and all our blogs (mostly serious but also a few not so serious) head over to www.zrtmotorsport.com
So where were we?
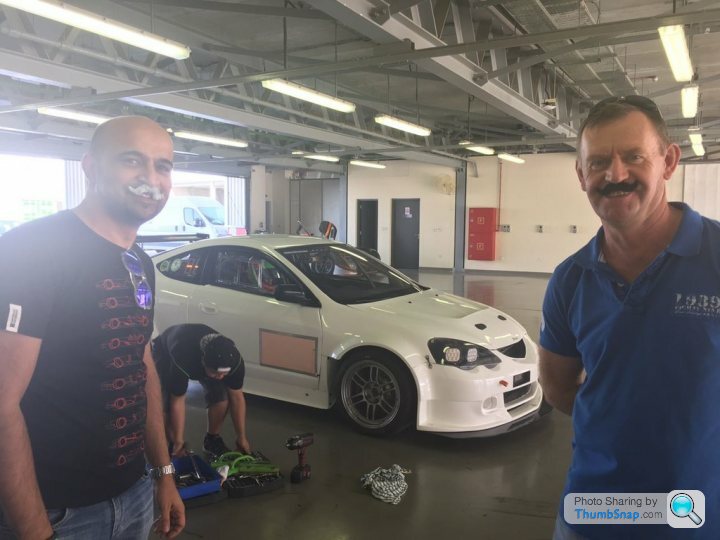
I think we were due to head for our first test day.... which we did but our team suddenly developed a 'tash-attack'
The car ran well. We clocked a 2:26.5 after only a few laps on old tyres. In perspective our old car best lap time was 2:24.5
We weren't running the car on the final geo set-up and a front tie rod arm came a little bit loose because it didn't have lock-clip on it. The car felt stable and really solid. Engine pulled strong and our new Gear-X box ratios were perfect. We had a few comments / feedback to A-tech which were all recorded by Richard T and communicated clearly. There were some minor issues such as the fact Jonathan & Umair prefer the radio comms talk button on the right side of the steering wheel on the basis that we tend to still shift gear from 3-2nd when entering pit lane.
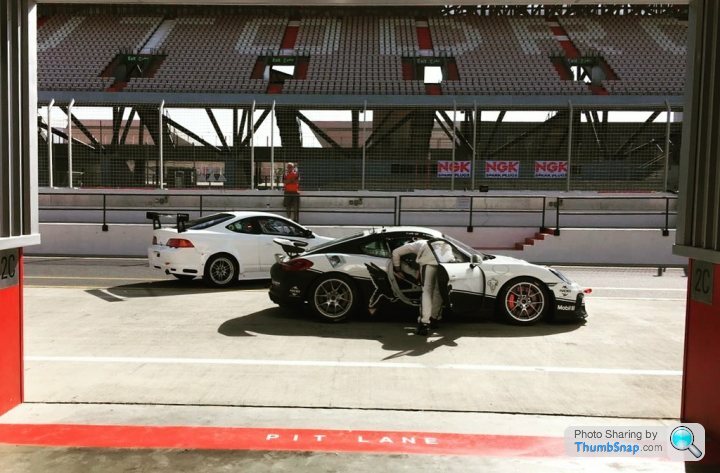
This was the first time our new car named Rhonda2 entered pitlane:
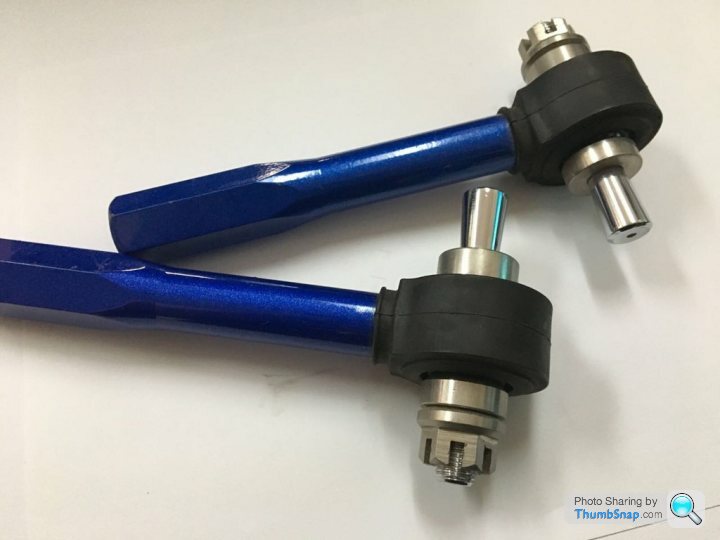
Even after the test day we still had some parts en-route. The main thing A-tech wanted upgraded which wasnt yet was the track rod ends. Thankfully as usual our trusted partner www.specialprojectsmotorsports.com 'Kiwi' for those in the Honda trade came to our rescue and sent a set of Hardrace track rod ends. Thank you Kiwi.
Next up was our livery. We deal with Alah of Leadright UAE mainly because we trust him, he understands exactly what we want and his standards are higher than our expectations. Leadright's business is mostly wrapping and detailing the UAE's super and luxury cars to the highest standards so whilst our little Honda may have looked out of place when it arrived, it certainly didn't look out of place when it left.
So in terms of the build thats it finished really! Now it was time to race.....
With that it just leaves me to thank those of you who followed the build thread, I hope it has been informative and light-hearted. For anyone who would like more information, please email me on ian@zrtmotorsport.com and for the guy on pistonheads who enquired as to what the total cost was... There are only two people in the world who know the answer to that..
I leave you all with a few pics with commentary from the event.
We did bring back Caglar (Director of our film Labour of Love) so there will be a very short video coming out on vimeo in a few months.
The car before the race:
The car during the race:
Julian (A-tech) who with his team built arguably the best Integra DC5 enduro spec race car there is:

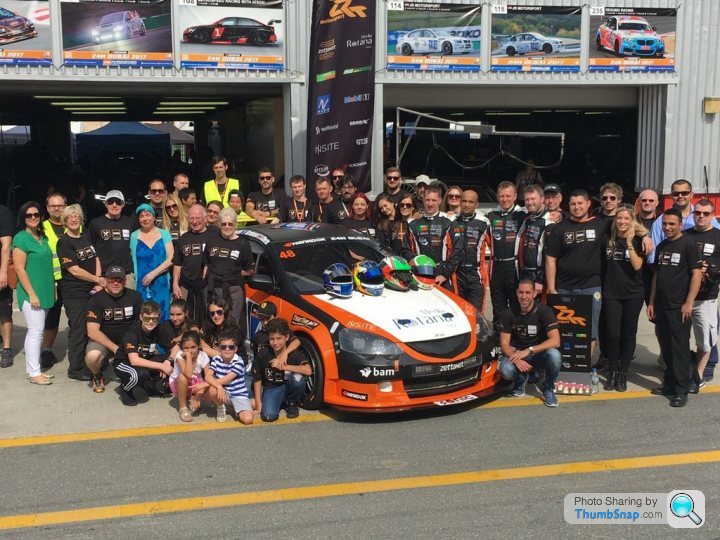
Our ZRT family:
Our team mate and media icon: Chris Yarwood:

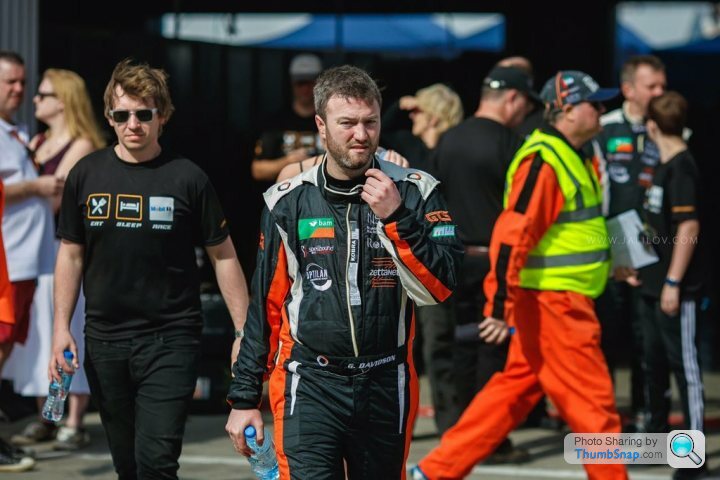
Our team mate and fastest lap 2:22.5 Graham Davidson:
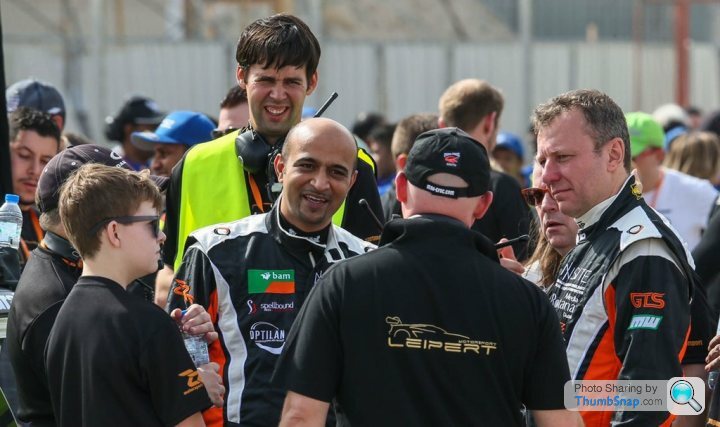
Our team mate and coolest guy on the grid start: Umair Khan
Richard T directing/advising and generally looking after all of us.
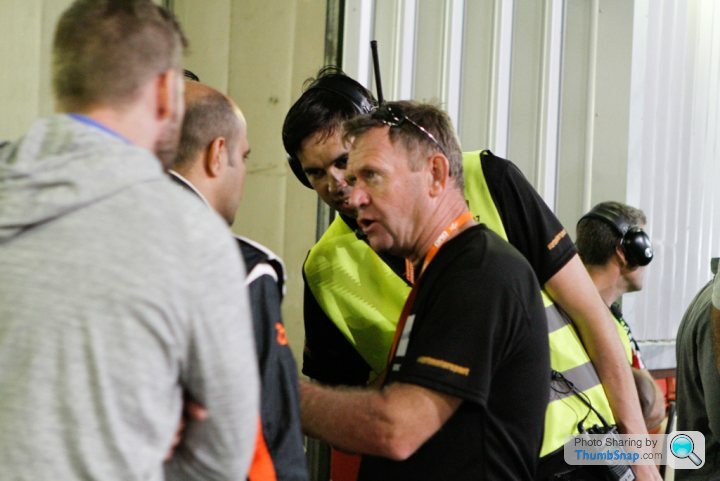
Our Crew Chief Heiki Heleema making sure our splitter is not likely to fall off. Previously I thought his favourite tool was a hammer... turns out its duct tape!
The A-tech team along with Heiki from DAS:
Our Team Manager Theo Souris with his boy racer Jonathan:

Our Sporting Director Ian Rodgers (me) keeping a watchful eye:
Our pit lane control: Adnan Khalil:
Our tyre and spares manager: Jason Lyness:
Our trouble shooter and top mechanic: Sander Sink:
Our youngest team member Huw Williams who is in charge of refuelling:
Lastly but not least the ZRT core family (Jonathan's family) for supporting all of us.
The car after the race:
The moral of the story is... The build is important but without the support of family, friends, sponsors, fellow petrolheads and all these guys we couldn't have done it. We started 87th and finished 65th.
Till next time....
ZRT
Stats for the petrolhead nerds here: https://www.zrtmotorsport.com/dubai-24hr-2017-race...
So its time to wrap up the build story. If you want to read the race report and all our blogs (mostly serious but also a few not so serious) head over to www.zrtmotorsport.com
So where were we?
I think we were due to head for our first test day.... which we did but our team suddenly developed a 'tash-attack'
The car ran well. We clocked a 2:26.5 after only a few laps on old tyres. In perspective our old car best lap time was 2:24.5
We weren't running the car on the final geo set-up and a front tie rod arm came a little bit loose because it didn't have lock-clip on it. The car felt stable and really solid. Engine pulled strong and our new Gear-X box ratios were perfect. We had a few comments / feedback to A-tech which were all recorded by Richard T and communicated clearly. There were some minor issues such as the fact Jonathan & Umair prefer the radio comms talk button on the right side of the steering wheel on the basis that we tend to still shift gear from 3-2nd when entering pit lane.
This was the first time our new car named Rhonda2 entered pitlane:
Even after the test day we still had some parts en-route. The main thing A-tech wanted upgraded which wasnt yet was the track rod ends. Thankfully as usual our trusted partner www.specialprojectsmotorsports.com 'Kiwi' for those in the Honda trade came to our rescue and sent a set of Hardrace track rod ends. Thank you Kiwi.
Next up was our livery. We deal with Alah of Leadright UAE mainly because we trust him, he understands exactly what we want and his standards are higher than our expectations. Leadright's business is mostly wrapping and detailing the UAE's super and luxury cars to the highest standards so whilst our little Honda may have looked out of place when it arrived, it certainly didn't look out of place when it left.
So in terms of the build thats it finished really! Now it was time to race.....
With that it just leaves me to thank those of you who followed the build thread, I hope it has been informative and light-hearted. For anyone who would like more information, please email me on ian@zrtmotorsport.com and for the guy on pistonheads who enquired as to what the total cost was... There are only two people in the world who know the answer to that..
I leave you all with a few pics with commentary from the event.
We did bring back Caglar (Director of our film Labour of Love) so there will be a very short video coming out on vimeo in a few months.
The car before the race:
The car during the race:
Julian (A-tech) who with his team built arguably the best Integra DC5 enduro spec race car there is:
Our ZRT family:
Our team mate and media icon: Chris Yarwood:
Our team mate and fastest lap 2:22.5 Graham Davidson:
Our team mate and coolest guy on the grid start: Umair Khan
Richard T directing/advising and generally looking after all of us.
Our Crew Chief Heiki Heleema making sure our splitter is not likely to fall off. Previously I thought his favourite tool was a hammer... turns out its duct tape!
The A-tech team along with Heiki from DAS:
Our Team Manager Theo Souris with his boy racer Jonathan:
Our Sporting Director Ian Rodgers (me) keeping a watchful eye:
Our pit lane control: Adnan Khalil:
Our tyre and spares manager: Jason Lyness:
Our trouble shooter and top mechanic: Sander Sink:
Our youngest team member Huw Williams who is in charge of refuelling:
Lastly but not least the ZRT core family (Jonathan's family) for supporting all of us.
The car after the race:
The moral of the story is... The build is important but without the support of family, friends, sponsors, fellow petrolheads and all these guys we couldn't have done it. We started 87th and finished 65th.
Till next time....
ZRT
Stats for the petrolhead nerds here: https://www.zrtmotorsport.com/dubai-24hr-2017-race...
Edited by IanUAE on Sunday 5th February 18:29
Edited by IanUAE on Monday 6th February 04:40
Mini update.
We entered and won our class in a local 3hr endurance race in April. The event was great for us as the drivers could focus on looking forward and not in their mirrors most of the time (at the Dubai 24hr race we are in the slowest class) and thus we have better idea on fuel consumption, handling etc.
https://www.zrtmotorsport.com/ngk-3hr-enduro/
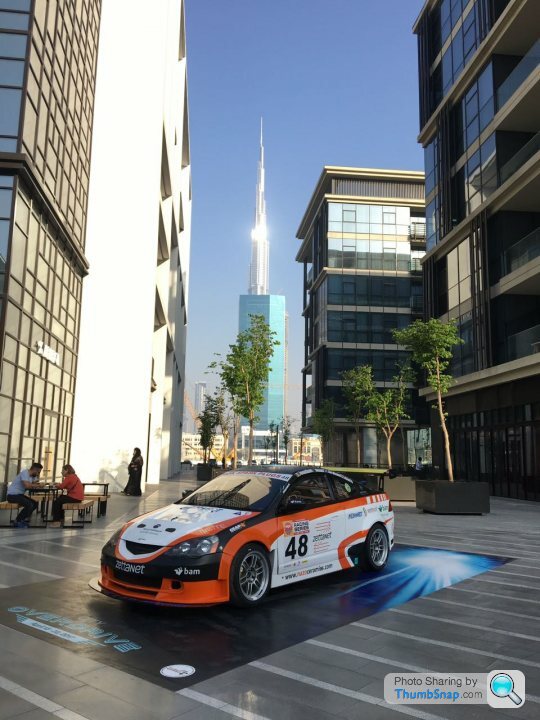
We are being asked to display the car at exhibitions and car shows. So the car is currently on display for a week at the City Walk car exhibition.
We entered and won our class in a local 3hr endurance race in April. The event was great for us as the drivers could focus on looking forward and not in their mirrors most of the time (at the Dubai 24hr race we are in the slowest class) and thus we have better idea on fuel consumption, handling etc.
https://www.zrtmotorsport.com/ngk-3hr-enduro/
We are being asked to display the car at exhibitions and car shows. So the car is currently on display for a week at the City Walk car exhibition.
Gassing Station | Readers' Cars | Top of Page | What's New | My Stuff