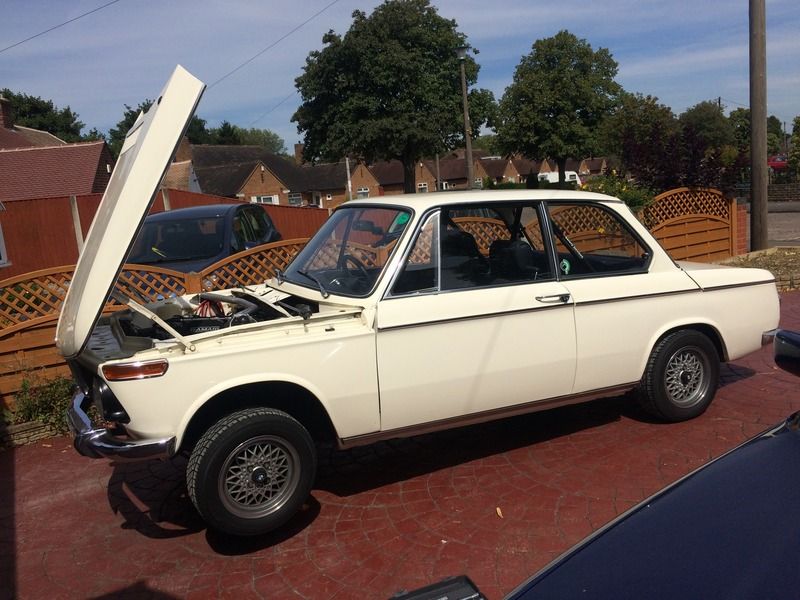
1970 BMW 2002 ITBs
Discussion


Camoradi said:
Hi Ed,
I was at Llandow on Saturday and I have to say it was your car which caught my eye out of the four BMWs pictured. Sounded superb as you thrashed it down the straight.
Very nice indeed.
Cheers bud!I was at Llandow on Saturday and I have to say it was your car which caught my eye out of the four BMWs pictured. Sounded superb as you thrashed it down the straight.
Very nice indeed.
What car were you in? There was a good contrast of cars there.
Mark, that's interesting. Going to have to look into it. If you have any info about whether it'll fit in the tunnel etc that'd be great.... Off to google.
Gearbox is out!
Up on sticks
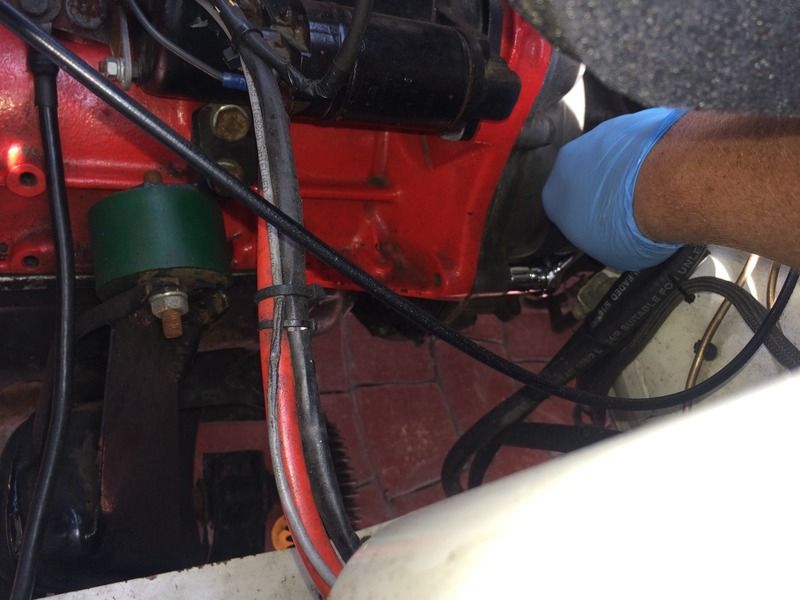
Removing the bellhousing bolts
The culprit!
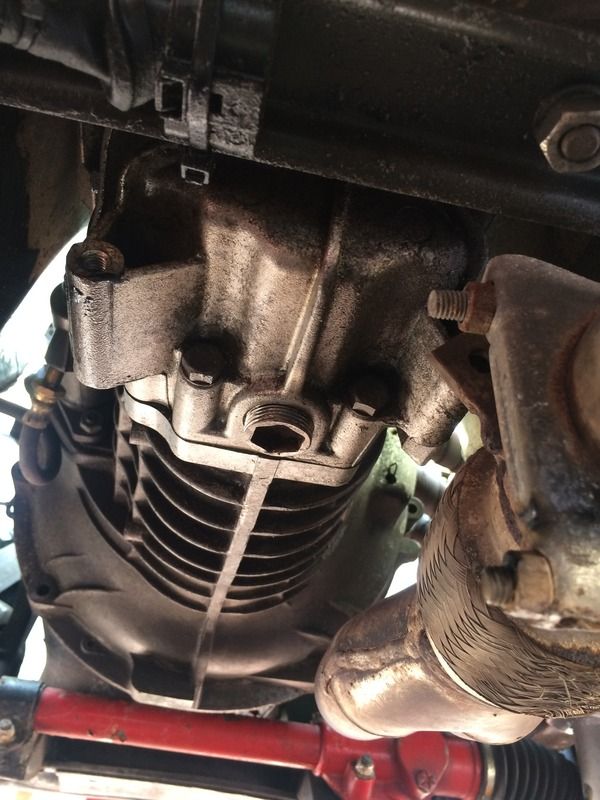
Was a bit of a pig to remove, some of the nuts on the output shaft were rounded so I filed a 16mm spanner to fit.
Got it all separated from the engine but it wouldn't fit through the gap between the firewall/transmission tunnel & the exhaust.
Ended up loosening the exhaust manifold and jacking the front of the engine up.
Don't fancy fitting it on my own.
Forgot to take a pic of the removed box, but it wasn't anything exciting!
It's currently being stripped down to see what's up with it.
Up on sticks
Removing the bellhousing bolts
The culprit!
Was a bit of a pig to remove, some of the nuts on the output shaft were rounded so I filed a 16mm spanner to fit.
Got it all separated from the engine but it wouldn't fit through the gap between the firewall/transmission tunnel & the exhaust.
Ended up loosening the exhaust manifold and jacking the front of the engine up.
Don't fancy fitting it on my own.
Forgot to take a pic of the removed box, but it wasn't anything exciting!
It's currently being stripped down to see what's up with it.
Update time...
Unsure if people are interested as it's not the most exciting build on PH but at least I can log everything here.
After getting the gearbox back from being rebuilt it was found that I needed 2 bearings replacing. However the crunch in 3rd was still there and it started to develop when changing down into 2nd too.
There was nothing obvious when the GB was apart and It was agreed that when I pulled the engine in winter it'd go back to be opened up again.
Fast forward to November and I thought I'd go to Mallory park for one last track day before the engine rebuild.
I changed the brake pads a week before and started using the car for work so I could bed them in.
2 days before the track day the car was pulling heavily to the left so I pulled the right wheel off to see what was up and found the oil cooler had burst and soaked the pads in oil!
[URL=http://thumbsnap.com/TncTK2hx]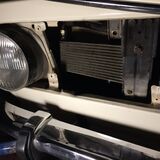
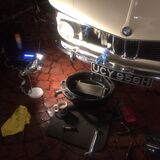
Determined to make the track day I pulled out the oil cooler connected the hoses together so the oil just looped back into the engine.
I then managed to get some pads and fit them the night before Mallory.

Unfortunately it kept over heating after 1 or 2 laps due to the lack of oil cooler.
However it was still a good day and I narrowly avoided the wall after at spin at the hairpin.

Looks like that rebuild is needed!
Today a mate and I took the gearbox and engine out.
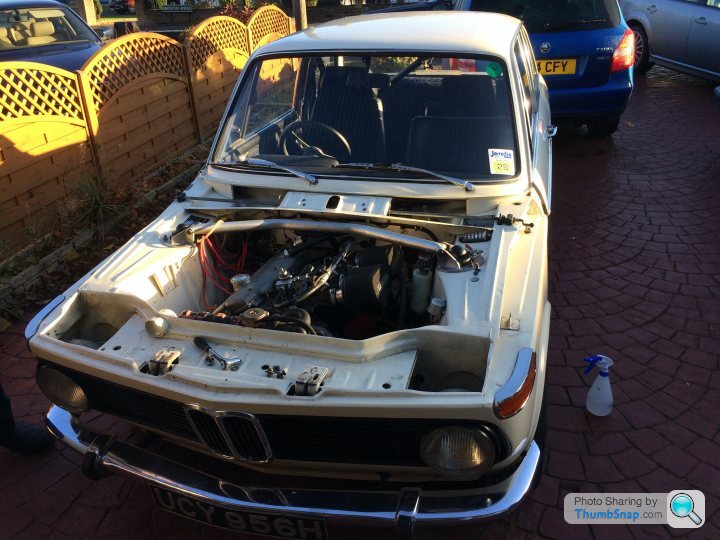
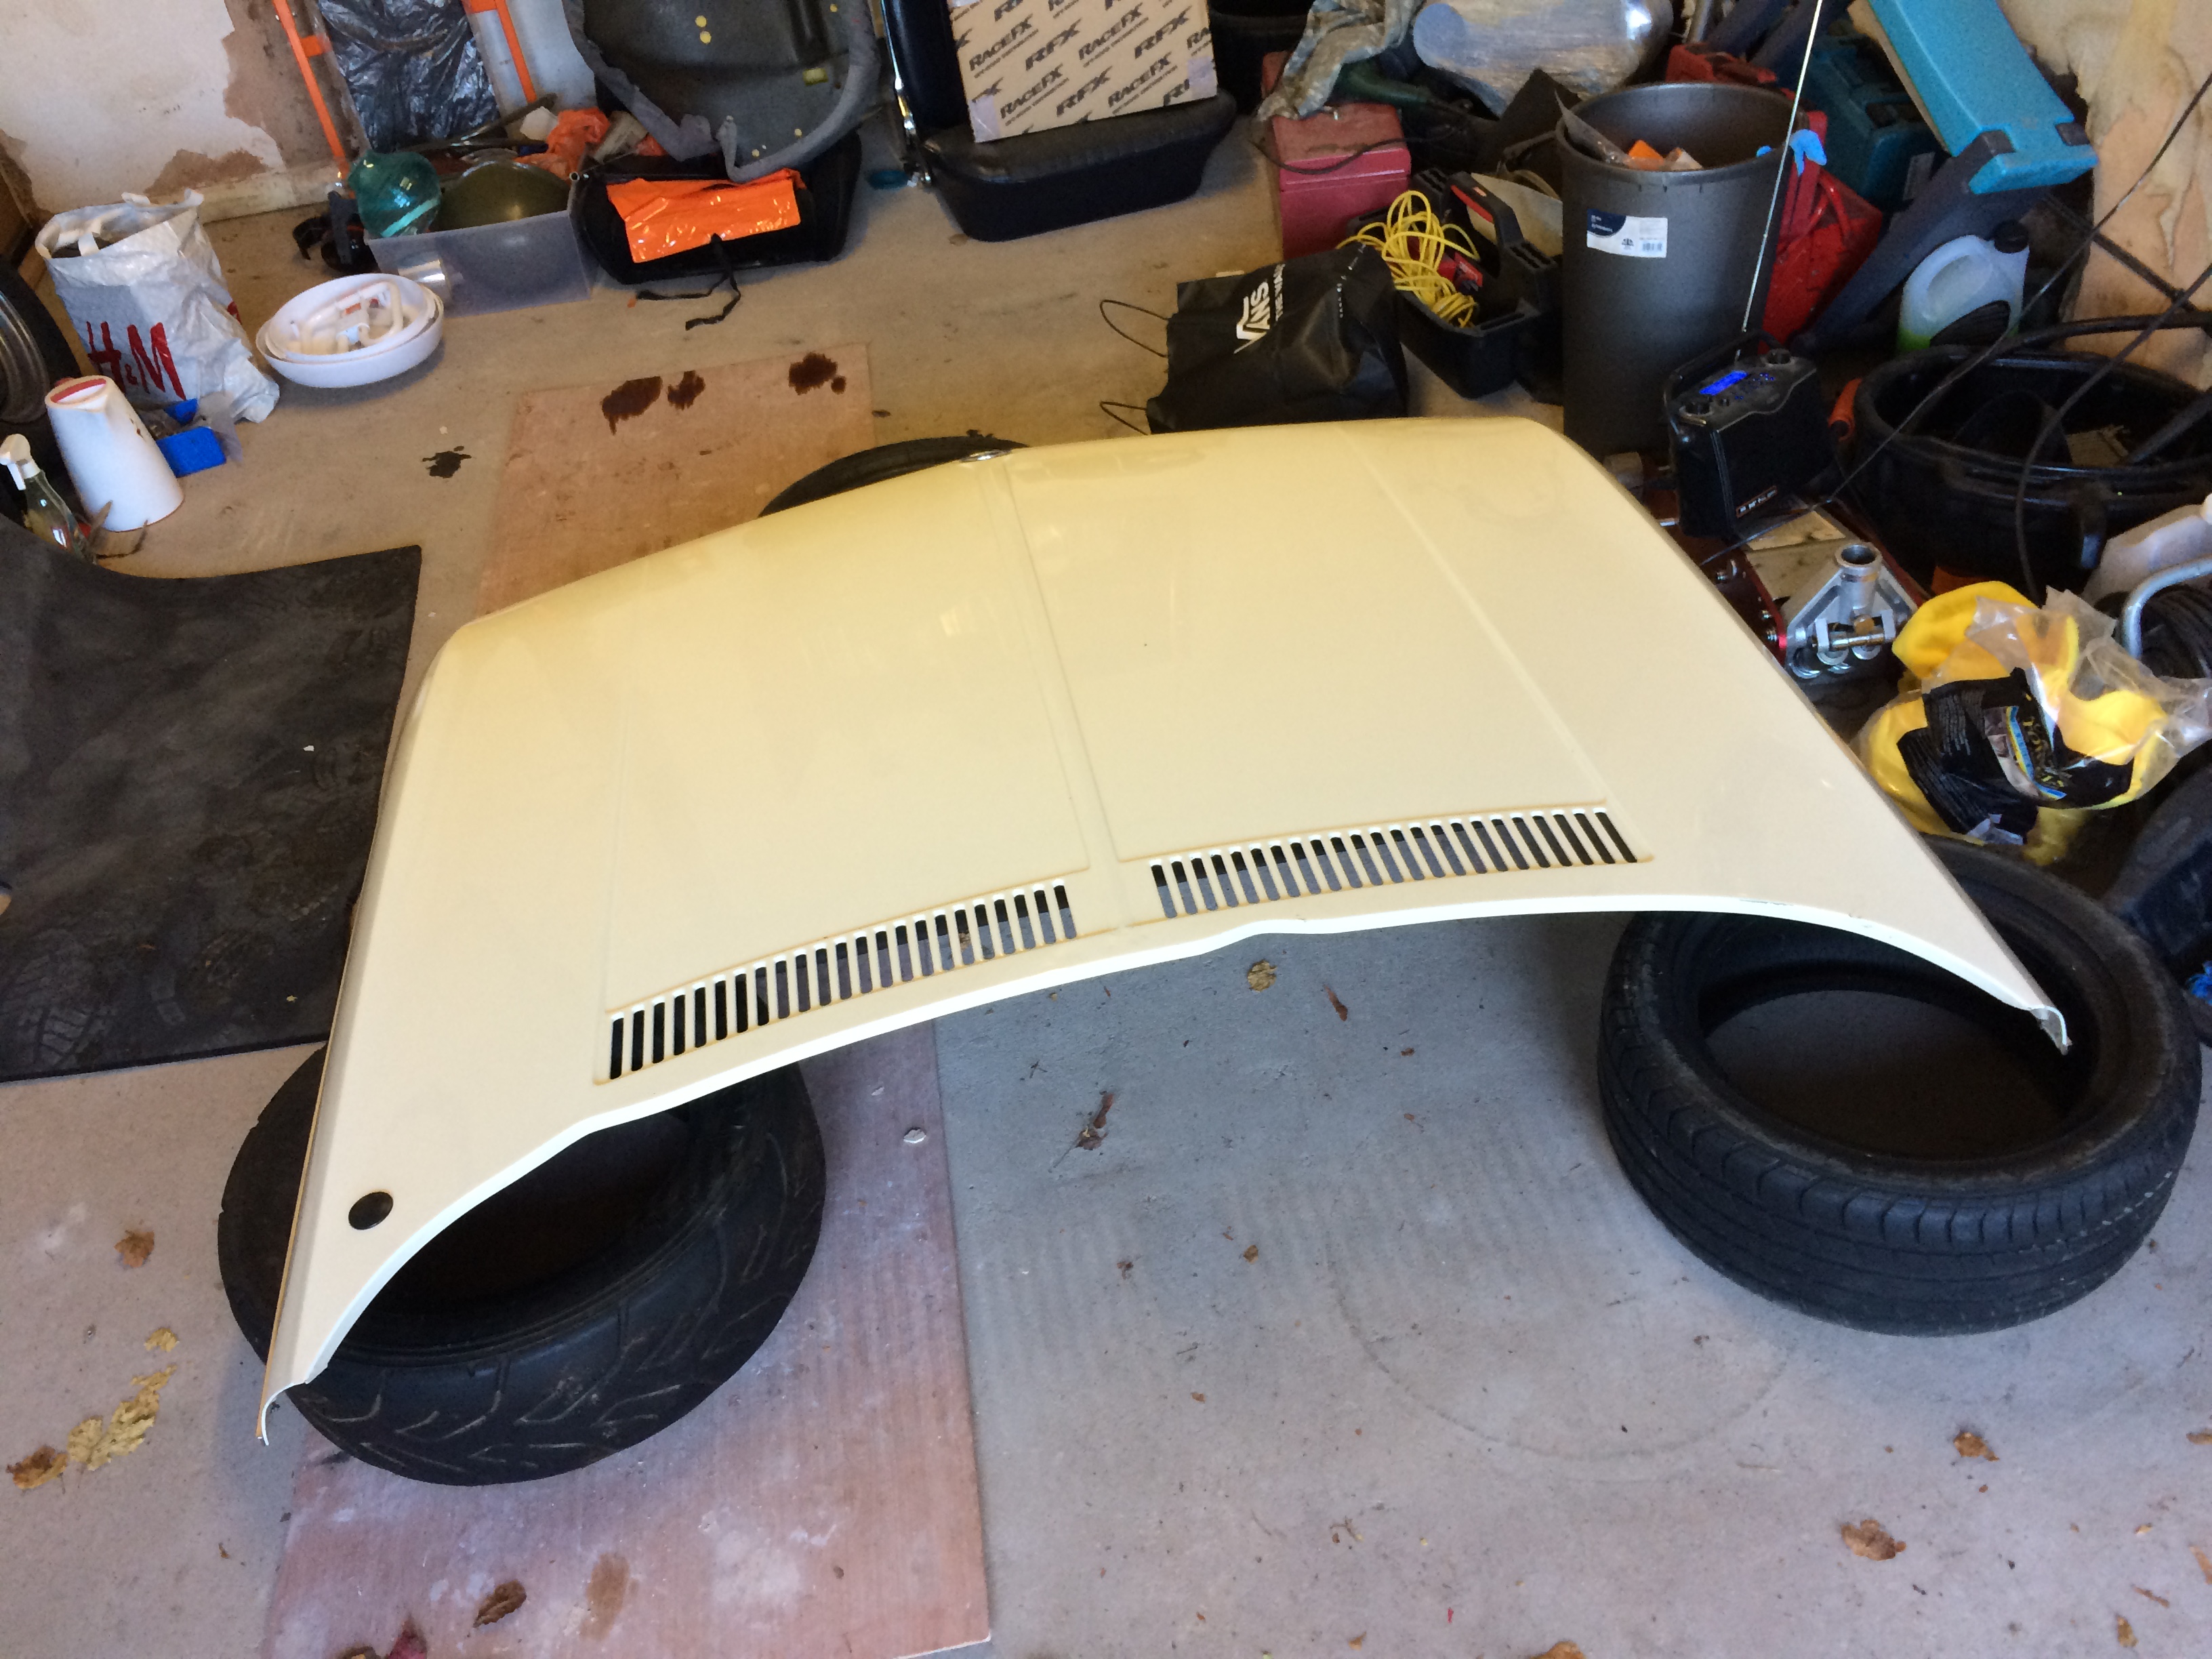
Bonnet off for access
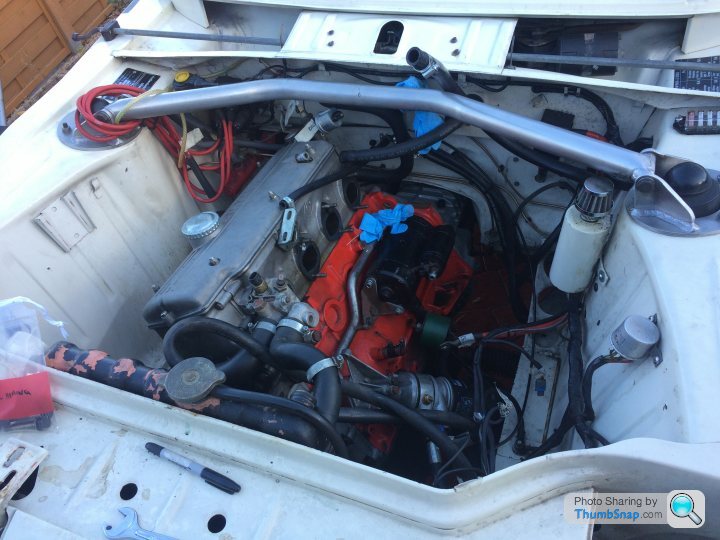
Stripping of ITBs and ancillaries.
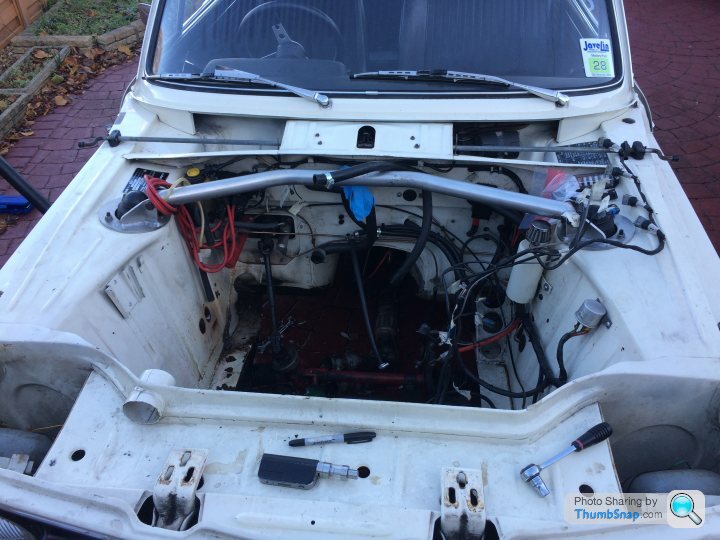
It's out! Was a bit of a pig to get out but we managed.
I'll put it on the engine stand tomorrow so I can start work.
For the rebuild I'm not changing pistons and rods as per my original plan.
This is partly due to cost and partly because I'd like to try rebuilding it myself as I've never done it & don't want to cut my teeth with a few grands worth of custom engine parts!
So it's just strip and rebuild the head, the piston rings and the bottom end bearings.
Progress will be slow as I've never stripped and built an engine before.
I went to retro engineering today to pic up some bits ( will upload a photo later) & drop my gearbox off.
I bought;
Big end bearings
Full gasket set
Piston rings
Mocal Cast oil cooler (supposed to be a lot stronger than the one I burst)
Windage plate & additional sump gasket
Rear main oil seal
Once I've stripped the head the valve guides will be checked and I'll also get some valve stem seals (retro eng didn't have these in
stock As I have an e30 318 head)
Left on the list to get is;
"Tropical" radiator and maybe a better fan.
Thermostat sandwich plate for the oil cooler
Get the sump baffled.
Cam sprocket drilled and slotted for timing
If anyone has any advice at all I'm all ears.
Unsure if people are interested as it's not the most exciting build on PH but at least I can log everything here.
After getting the gearbox back from being rebuilt it was found that I needed 2 bearings replacing. However the crunch in 3rd was still there and it started to develop when changing down into 2nd too.
There was nothing obvious when the GB was apart and It was agreed that when I pulled the engine in winter it'd go back to be opened up again.
Fast forward to November and I thought I'd go to Mallory park for one last track day before the engine rebuild.
I changed the brake pads a week before and started using the car for work so I could bed them in.
2 days before the track day the car was pulling heavily to the left so I pulled the right wheel off to see what was up and found the oil cooler had burst and soaked the pads in oil!
[URL=http://thumbsnap.com/TncTK2hx]
Determined to make the track day I pulled out the oil cooler connected the hoses together so the oil just looped back into the engine.
I then managed to get some pads and fit them the night before Mallory.
Unfortunately it kept over heating after 1 or 2 laps due to the lack of oil cooler.
However it was still a good day and I narrowly avoided the wall after at spin at the hairpin.
Looks like that rebuild is needed!
Today a mate and I took the gearbox and engine out.
Bonnet off for access
Stripping of ITBs and ancillaries.
It's out! Was a bit of a pig to get out but we managed.
I'll put it on the engine stand tomorrow so I can start work.
For the rebuild I'm not changing pistons and rods as per my original plan.
This is partly due to cost and partly because I'd like to try rebuilding it myself as I've never done it & don't want to cut my teeth with a few grands worth of custom engine parts!
So it's just strip and rebuild the head, the piston rings and the bottom end bearings.
Progress will be slow as I've never stripped and built an engine before.
I went to retro engineering today to pic up some bits ( will upload a photo later) & drop my gearbox off.
I bought;
Big end bearings
Full gasket set
Piston rings
Mocal Cast oil cooler (supposed to be a lot stronger than the one I burst)
Windage plate & additional sump gasket
Rear main oil seal
Once I've stripped the head the valve guides will be checked and I'll also get some valve stem seals (retro eng didn't have these in
stock As I have an e30 318 head)
Left on the list to get is;
"Tropical" radiator and maybe a better fan.
Thermostat sandwich plate for the oil cooler
Get the sump baffled.
Cam sprocket drilled and slotted for timing
If anyone has any advice at all I'm all ears.
Edited by EddyBee on Friday 25th November 23:16
AH Fabrications for new radiator. Excellent quality and very reasonably priced.
What oil are you planning to use? I found m10's far better on quality mineral oil as opposed to synthetic/semi synthetic stuff.
In the future, maybe keen an eye out for an s14 crank and some m30/3.5 rods and pistons? (Given something like 2302cc from memory, albeit a terrible one)
What oil are you planning to use? I found m10's far better on quality mineral oil as opposed to synthetic/semi synthetic stuff.
In the future, maybe keen an eye out for an s14 crank and some m30/3.5 rods and pistons? (Given something like 2302cc from memory, albeit a terrible one)
Scottos definitely get one, they're such good fun. A few people can't understand why I sold my S2K for one until they see it or come for a ride in it. Ok it's no as fast but it's so much more fun!
Slightly bald; I bought some e21 recaros only the drivers one is fitted at the moment as I need the webbing strap hooks for the passenger seat base. They also need a retrim but will do for now.
Power wise it's 150bhp at the moment hopefully I'll see a bit of an increase on that when I've got some more compression (new piston rings)
I'm only doing a refresh at this point, unless I find anything badly worn when I strip the engine.
I've done a few bits to the engine but nothing worth posting up at the moment. Just doing bits and bobs after work, however 12 hour shifts don't give me much play time.
Hopefully by the weekend i'll have done enough to be worth updating.
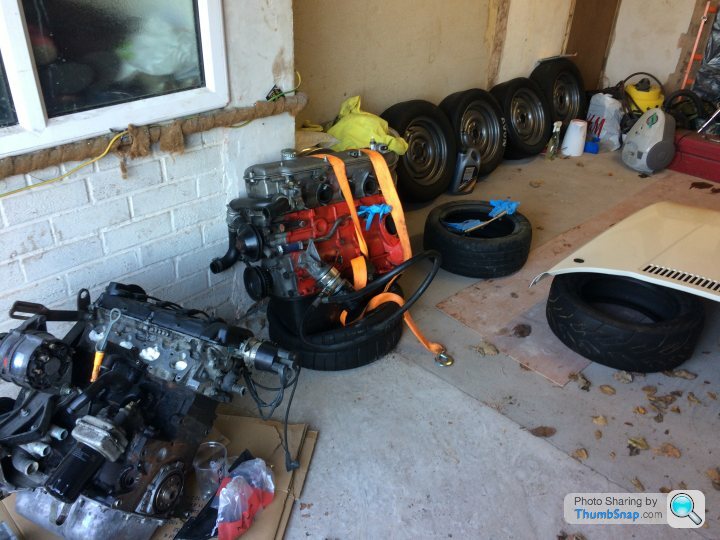
Managed to get a fair bit done this weekend.
You'll have to excuse the mess in my garage I need to sort it out!
I've taken loads of pictures but they're not all that interesting just the same engine with some bits removed.
Sump removed
 image free hosting
 image free hosting
Clutch & fly wheel off
 image free hosting
Clutch looks to be in quite good condition
 image free hosting
Rocker cover removed (mug for size haha)
 image free hosting
Cam pulley removed and sent to retro engineering to be slotted as vernier pulleys aren't available off the shelf
 image free hosting
Head off. There's a lot of carbon build up but all normal apparently.
 image free hosting
Turned the engine round so I could remove a rod cap and inspect the bearings
 image free hosting
 image free hosting
 image free hosting
 image free hosting
Now the fun bit. Removing the rockers.
Find the biggest drift you have.
 image free hosting
Loosen all the adjusters on the rockers and open up the valve clearances.
Remove the 8 circlips (1 per rocker) from under the retaining washers (hard to see but they're to the right of the picture on the rocker shaft)
 image free hosting
Circlips
 image free hosting
Hammer the rocker shafts out of the head then get annoyed as your long drift isn't long enough.
 image free hosting
Label and individually bag the rockers & components
 image free hosting
Adapt and overcome lack of drift length and remove all the rockers
 image free hosting
Pull the cam out
 image free hosting
I really enjoyed stripping the engine down. Feels like I'm making progress
I'll be taking the head to retro engineering to see if the valve guides need doing. They're also going to take a look at the rod bearing as I don't know what sort of wear is normal. Then they can advise how far I take the rebuild (i have new rod bearings but if the mains need doing I may upgrade a few more bits)
Sorry for such a long post but I'm a complete novice to engine stripping/rebuilding so it's a big learning curve for me.
If anyone has any tips (or questions) I'm all ears.
You'll have to excuse the mess in my garage I need to sort it out!
I've taken loads of pictures but they're not all that interesting just the same engine with some bits removed.
Sump removed
image free hostingimage free hostingClutch & fly wheel off
image free hostingClutch looks to be in quite good condition
image free hostingRocker cover removed (mug for size haha)
image free hostingCam pulley removed and sent to retro engineering to be slotted as vernier pulleys aren't available off the shelf
image free hostingHead off. There's a lot of carbon build up but all normal apparently.
image free hostingTurned the engine round so I could remove a rod cap and inspect the bearings
image free hostingimage free hostingimage free hostingimage free hostingNow the fun bit. Removing the rockers.
Find the biggest drift you have.
image free hostingLoosen all the adjusters on the rockers and open up the valve clearances.
Remove the 8 circlips (1 per rocker) from under the retaining washers (hard to see but they're to the right of the picture on the rocker shaft)
image free hostingCirclips
image free hostingHammer the rocker shafts out of the head then get annoyed as your long drift isn't long enough.
image free hostingLabel and individually bag the rockers & components
image free hostingAdapt and overcome lack of drift length and remove all the rockers
image free hostingPull the cam out
image free hostingI really enjoyed stripping the engine down. Feels like I'm making progress
I'll be taking the head to retro engineering to see if the valve guides need doing. They're also going to take a look at the rod bearing as I don't know what sort of wear is normal. Then they can advise how far I take the rebuild (i have new rod bearings but if the mains need doing I may upgrade a few more bits)
Sorry for such a long post but I'm a complete novice to engine stripping/rebuilding so it's a big learning curve for me.
If anyone has any tips (or questions) I'm all ears.
I was just reading the last post and thinking that you know a lot more than I do about engines. Then I read that you're a nice at engine rebuilding.. You still know more than I do.
Good on you getting stuck in. Looking forward to the updates.
I always loved a 2002. I sometimes see a lovely silver one that lives fairly local to me, always looks great seeing it on the road.
There was no excessive wear on the big end or main bearings so that's good news. They'll still be replaced mind
However it seems my valve guides are ok & so are the stem seals.
Oil may be getting out around the valve guides.
Apparently this can happen if guides aren't cleaned properly before removal.
Carbon build up on them broaches the head as they're knocked out creating a gap for oil to leak through.
I'll find out more after the head is cleaned....
Engine is finally fully stripped!
Again I'll apologise as the pictures will just be of the same old engine minus a few components and me trying to avoid saying "*insert engine part* removed"
Valve compressor ordered & put use.

Unfortunately the tool wasn't deep enough so I had to put a socket on it to get a bit more reach.
Fine for removing the collets but will be no good for installation.

The head was now fully disassembled and I dropped it off for soda blasting along with the valves. (Forgot to get pics after blasting. Will take some later)

Onto the bottom end.
Crank pulley removed (I really need to throw that oil cooler away)

Water pump impeller is quite rusty. I'll see if it can be cleaned up, if not I'll probably get a new one.

Cam chain & oil pump chain

Chain guide is split so will have to be renewed.

Here's where I ran into a problem.
The sprocket for the oil pump should be held on with a locking tab, mine was welded on & the chain has no removable links. This meant I couldn't remove it as there wasn't enough slack to slip the chain off.
I didn't want to damage the pump as I was unsure which pump I have & some are expensive.
Tried to drill a link out of the chain with a cobalt drill bit and it just laughed. Absolutely nothing happened! I thought I'd continue with the rest of the engine & come back to this later.

Took the Pistons out.
The piston rings are very different to the replacement ones I have so I may not have '02 Pistons. I'll have to find out.

Back to the pump.
I was going to cut the chain off, however I could just about get a 17mm spanner in to undo the main bearing caps. This meant I could remove the crank with the pump.
I can't reinstall it this way as I won't be able to torque the cap however it'll give me time to workout if my pump is an expensive m3 one or standard.
I could put a chain on with a removable link but I've been advised against it

Crank removed

Empty block!


Hopefully I'll find time today to steam clean the block & find out what Pistons & oil pump I have.
Next on the cards is to work out my compression ratio by measuring the volume of the combustion chambers the piston dome/protrusion above deck height, crushed head gasket height cylinder volume, stroke etc
I'll write it up as I do it as I can't remember it all off hand. It's written down for when I do it.
Once this is done I can give the figures to retro engineering and they'll work out what can be skimmed off the head.
However it seems my valve guides are ok & so are the stem seals.
Oil may be getting out around the valve guides.
Apparently this can happen if guides aren't cleaned properly before removal.
Carbon build up on them broaches the head as they're knocked out creating a gap for oil to leak through.
I'll find out more after the head is cleaned....
Engine is finally fully stripped!
Again I'll apologise as the pictures will just be of the same old engine minus a few components and me trying to avoid saying "*insert engine part* removed"
Valve compressor ordered & put use.
Unfortunately the tool wasn't deep enough so I had to put a socket on it to get a bit more reach.
Fine for removing the collets but will be no good for installation.
The head was now fully disassembled and I dropped it off for soda blasting along with the valves. (Forgot to get pics after blasting. Will take some later)
Onto the bottom end.
Crank pulley removed (I really need to throw that oil cooler away)
Water pump impeller is quite rusty. I'll see if it can be cleaned up, if not I'll probably get a new one.
Cam chain & oil pump chain
Chain guide is split so will have to be renewed.
Here's where I ran into a problem.
The sprocket for the oil pump should be held on with a locking tab, mine was welded on & the chain has no removable links. This meant I couldn't remove it as there wasn't enough slack to slip the chain off.
I didn't want to damage the pump as I was unsure which pump I have & some are expensive.
Tried to drill a link out of the chain with a cobalt drill bit and it just laughed. Absolutely nothing happened! I thought I'd continue with the rest of the engine & come back to this later.
Took the Pistons out.
The piston rings are very different to the replacement ones I have so I may not have '02 Pistons. I'll have to find out.
Back to the pump.
I was going to cut the chain off, however I could just about get a 17mm spanner in to undo the main bearing caps. This meant I could remove the crank with the pump.
I can't reinstall it this way as I won't be able to torque the cap however it'll give me time to workout if my pump is an expensive m3 one or standard.
I could put a chain on with a removable link but I've been advised against it
Crank removed
Empty block!
Hopefully I'll find time today to steam clean the block & find out what Pistons & oil pump I have.
Next on the cards is to work out my compression ratio by measuring the volume of the combustion chambers the piston dome/protrusion above deck height, crushed head gasket height cylinder volume, stroke etc
I'll write it up as I do it as I can't remember it all off hand. It's written down for when I do it.
Once this is done I can give the figures to retro engineering and they'll work out what can be skimmed off the head.
Cheers Mark. I did the llandow track day with James and got some welding done at his place.
Retro Engineering use an m3 pump
In their racing m10 engines & according to them that's the pump I have so I'll have to try and grind the welds off the nut to remove the sprocket.
Retro Engineering use an m3 pump
In their racing m10 engines & according to them that's the pump I have so I'll have to try and grind the welds off the nut to remove the sprocket.
Edited by EddyBee on Friday 30th December 20:09
Edited by EddyBee on Friday 30th December 20:10
EddyBee said:
Scottos definitely get one, they're such good fun. A few people can't understand why I sold my S2K for one until they see it or come for a ride in it. Ok it's no as fast but it's so much more fun!
I've given James at JFI a shout to see if he knows of anything but sadly he doesnt at the moment. I think if/ when the right one pops up i'll just have to take the plunge!Looks like you're getting on well with this currently! If it ends up doing your head in and you want rid then give me a shout haha
EddyBee said:
Cheers Mark. I did the llandow track day with James and got some welding done at his place.
Retro Engineering use an m3 pump
In their racing m10 engines & according to them that's the pump I have so I'll have to try and grind the welds off the nut to remove the sprocket.
Graham Bahr (google to see his m10/s14 powered cars) uses m10 pumps in his race s14 and they're certainly up to the job if you can't get your old one off. Retro Engineering use an m3 pump
In their racing m10 engines & according to them that's the pump I have so I'll have to try and grind the welds off the nut to remove the sprocket.
Edited by EddyBee on Friday 30th December 20:09
Edited by EddyBee on Friday 30th December 20:10
Scottos, I don't think James at JFI sells cars anymore. He builds cars for customers but doesn't seem to build one without a buyer already in place (if that makes sense?) An idea may be to try and find a car and get him to mod it?
Or keep an eye on the 02 forum (which by yours posts over there I'm guessing you are)
If you find yourself near the Midlands let me know and you can come for a spin.
Mark you owe me a few days of my life back!
I'm about half way through graham bahr's 57 page E30 thread! It's a great read (although this is dry sumped so i haven't even found what i was looking for!) although i've salvaged my pump now.
I got the head back from soda blasting so i was off to Retro Engineering to borrow their industrial jet wash to clean the old oil and grime off the block and clean the soda off the head.

Head Before

After

Block before

After (crap pic i know i was cold & wet)

Block was left at Retro Eng to be honed and to get rid of a few blemishes in the cylinder walls
Whilst i was waiting for the block to be honed I thought I'd spray the Rocker cover.
A few coats of PJ1 high temp textured paint and i think it looks quite smart.

Dry


I got a call to say the block had been honed & i could pop in to work out the compression ratio of the engine, and try to figure out I was going to do rebuild wise.
Armed with some equations I'd found online (And Nigel who builds racing cars) I started trying to figure out what the CR was.
Starting with the combustion chambers


I didn't get many pictures of me doing the block


Maths! (I'm sure the majority of you know more about this than myself, but if anyone wants to know the process just ask and i'll try my best to explain what i learned)

CR worked out to be a hair over 10:1 (which i believe is standard)
My goal is 11.3:1 or 11.4:1.
As for upgrades a few people may think this is over kill or a waste, however I've thought about it for the last few months and i have a plan! (i'm still open to ideas mind so feel free to suggest something else)
The plan is to get longer rods and high compression pistons made along with a head skim, but leave the head how it is (apart from guides and seals)
Reasons being that to go any further with the head I'd need a lumpier cam which means I'd to buy billet rockers.
I could do this but if later on i want more power I'll have to strip the bottom end again.
This way allows me to build a good solid bottom end to work from. Over time I can build up another head with a bigger cam and billet rockers, then swap the heads at a later date.
I'd like to do it all at once but I just can't afford to do it. I'd also like an M3 crank, but they're pretty expensive too!
I'm fully aware sticking with an M10 isn't the easiest or cheapest way to get more power but I really don't want to change the engine.
In non engine related news I've managed to get hold of an early front grill & early kidney grill I just need an early centre section of the front panel.
Grill will look like this:

I'm also off to America next month so i'm taking full advantage of being over there and I've ordered a Carpet, as a girl out there makes them to order. It's being delivered to where I'm staying and will be coming home my suitcase!
I've gone for the same as what was originally fitted like in this pic (obviously in RHD)
https://2.bp.blogspot.com/-7CTfwdBfZh8/WBP_ZHP52oI...
As I've said before I'm new to all this engine stuff and Retro Engineering have been a great help teaching me how to measure my CR, giving advice and lending me their jet wash!
Or keep an eye on the 02 forum (which by yours posts over there I'm guessing you are)
If you find yourself near the Midlands let me know and you can come for a spin.
Mark you owe me a few days of my life back!
I'm about half way through graham bahr's 57 page E30 thread! It's a great read (although this is dry sumped so i haven't even found what i was looking for!) although i've salvaged my pump now.
I got the head back from soda blasting so i was off to Retro Engineering to borrow their industrial jet wash to clean the old oil and grime off the block and clean the soda off the head.
Head Before
After
Block before
After (crap pic i know i was cold & wet)
Block was left at Retro Eng to be honed and to get rid of a few blemishes in the cylinder walls
Whilst i was waiting for the block to be honed I thought I'd spray the Rocker cover.
A few coats of PJ1 high temp textured paint and i think it looks quite smart.
Dry
I got a call to say the block had been honed & i could pop in to work out the compression ratio of the engine, and try to figure out I was going to do rebuild wise.
Armed with some equations I'd found online (And Nigel who builds racing cars) I started trying to figure out what the CR was.
Starting with the combustion chambers
I didn't get many pictures of me doing the block
Maths! (I'm sure the majority of you know more about this than myself, but if anyone wants to know the process just ask and i'll try my best to explain what i learned)
CR worked out to be a hair over 10:1 (which i believe is standard)
My goal is 11.3:1 or 11.4:1.
As for upgrades a few people may think this is over kill or a waste, however I've thought about it for the last few months and i have a plan! (i'm still open to ideas mind so feel free to suggest something else)
The plan is to get longer rods and high compression pistons made along with a head skim, but leave the head how it is (apart from guides and seals)
Reasons being that to go any further with the head I'd need a lumpier cam which means I'd to buy billet rockers.
I could do this but if later on i want more power I'll have to strip the bottom end again.
This way allows me to build a good solid bottom end to work from. Over time I can build up another head with a bigger cam and billet rockers, then swap the heads at a later date.
I'd like to do it all at once but I just can't afford to do it. I'd also like an M3 crank, but they're pretty expensive too!
I'm fully aware sticking with an M10 isn't the easiest or cheapest way to get more power but I really don't want to change the engine.
In non engine related news I've managed to get hold of an early front grill & early kidney grill I just need an early centre section of the front panel.
Grill will look like this:
I'm also off to America next month so i'm taking full advantage of being over there and I've ordered a Carpet, as a girl out there makes them to order. It's being delivered to where I'm staying and will be coming home my suitcase!
I've gone for the same as what was originally fitted like in this pic (obviously in RHD)
https://2.bp.blogspot.com/-7CTfwdBfZh8/WBP_ZHP52oI...
As I've said before I'm new to all this engine stuff and Retro Engineering have been a great help teaching me how to measure my CR, giving advice and lending me their jet wash!
Edited by EddyBee on Wednesday 25th January 00:48
Gassing Station | Readers' Cars | Top of Page | What's New | My Stuff