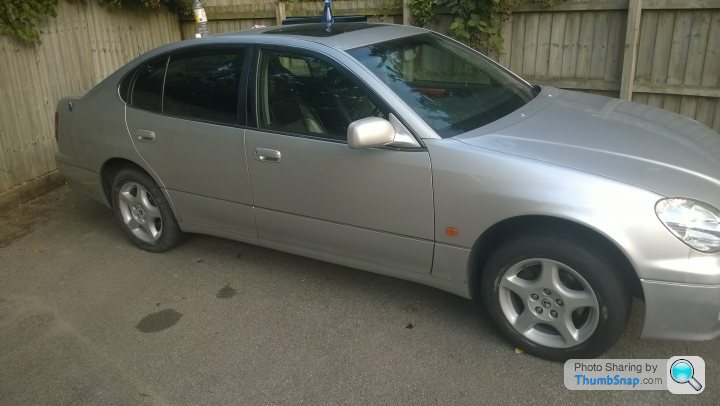
bargain bucket big boy bruiser cruiser - Lexus GS300
Discussion


I've done a bit of trawling online and found the following:
1) Windscreen washer pumps regularly go and are located just below the washer bottle. They usually fail due to spillage when your topping up. The excess fluid runs down the side of the reservoir and soaks through the pump and causes corrosion. These are press fit on, and the pipes are also press fit. This sounds like a pain in the arse location wise, but further reading reveals that to get to this, all you have to do is remove the wheel and arch liner, and its tucked just under there.... The pumps are readily available on ebay and one is now on order for the grand sum of £14.95 inclusive of postage.
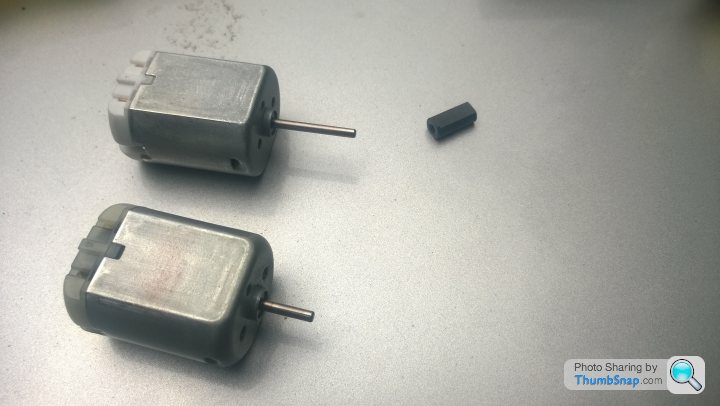
2) The door locks are available on Ebay from car breakers for around £30. I have looked around and other online users have been quoted £220 from Lexus PER LOCK (new) plus fitting! However, I might have the same issue in a few months with the actuators failing. So instead of forking out the £60 for used locks, I've simply bought replacement motors and a micro gear puller for £12. This does mean a bit of extra work though. This involves removing the door cards, speakers, exterior door handle, window, loosen the mechanism and finally remove the lock mech. Once this has been removed you then have to set about pulling apart the lock mechanism, pull off the gears and replace the motor, then re-assemble it all back together!
I'm hoping that it wont be a total arse of a job.
1) Windscreen washer pumps regularly go and are located just below the washer bottle. They usually fail due to spillage when your topping up. The excess fluid runs down the side of the reservoir and soaks through the pump and causes corrosion. These are press fit on, and the pipes are also press fit. This sounds like a pain in the arse location wise, but further reading reveals that to get to this, all you have to do is remove the wheel and arch liner, and its tucked just under there.... The pumps are readily available on ebay and one is now on order for the grand sum of £14.95 inclusive of postage.
2) The door locks are available on Ebay from car breakers for around £30. I have looked around and other online users have been quoted £220 from Lexus PER LOCK (new) plus fitting! However, I might have the same issue in a few months with the actuators failing. So instead of forking out the £60 for used locks, I've simply bought replacement motors and a micro gear puller for £12. This does mean a bit of extra work though. This involves removing the door cards, speakers, exterior door handle, window, loosen the mechanism and finally remove the lock mech. Once this has been removed you then have to set about pulling apart the lock mechanism, pull off the gears and replace the motor, then re-assemble it all back together!
I'm hoping that it wont be a total arse of a job.


So my new washer pump arrived yesterday in the post and I was granted an hour or so this eve to fit it.
With the car jacked up on axle stands I removed the front nearside wheel, lower cover and arch liner. I'm incredibly impressed by the Toyota/Lexus build quality and everything seems well bolted together. There is no corrosion worth a mention and everything looks clean, tidy and well protected!
With the covers off the pumps are easily accessible and it was a jiffy before I pulled of the old one and fitted the new one. I connected up the wiring only at first to make sure it worked. The pumpni removed looked surprisingly good! I got the missus to come out and pull the wiper stick towards you, activating the washers and wiper momentarily. Nothing. Nada. Bugger.
I looked over all the fuses and everything was intact. I continued anyway and finished the job. Using a hair drier to release the push on hoses. Still nothing worked.
I got back in the drivers seat to ensure I wasn't being thick, but also to try and work out what was wrong, hopefully nothing serious. My worst fears were correct... I'm deffinately losing it.
I found a little push button on the end of the stalk. I gave it a little push and the washers fired into life.
WHY ARENT ALL CAR CONTROLS THE SAME! On my other cars when you pull the wiper stalk towards you, it washes and wipes. On the plus side I know there's a new pump on there, and a spare that is almost certainly working. On the downside I spent an hour and a half messing around when I could have been doing something else.
Lesson learned RTFM!
Trabi601 said:
(Learned this the hard way in my FIL's S-Type - the MIL was having issues with something, so I grabbed her keys to have a look, and got pinned against the steering wheel)
Funnily enough, I was discussing this very topic yesterday with my friend. He used to work at JLR and there was a whole fleet of pool cars and test cars. He said the favourite prank was to set the seat all the way forwards, up and the seat back tilted forward and the steering wheel furthest down and toward the driver. Then set this into the memory for the key! Then move the seat and steering wheel back to the normal position.When the next person gets in and inserts the key, well you get the picture.... And you cant stop it once its in motion! You have yo wait for it to stop, then reset it.
Well the first "big spend" on the Lexus happened this evening. I'd booked it in for a full air con health check and diagnostics. They empty whatever is in there, vacuum out all the sludge and crap that's built up. Check all controls, fuses, wiring, compressor and pipes, put a dye in and pressure the system up to 160psi for half an hour and check the system for leaks.
Good news was that they said everything looked good and they detected no leaks.
So they re-gassed the system and checked everything was working. The total spend came in at around £130, which may seem expensive, but I didn't want to leave it to a bunch of cowboys. The guys I took it to only do air conditioning and they really know what they're doing.
I set the climate control to a cool, but not freezing 19degs and cruised on home.
My god what a brilliant car!
The guys did say that there may be a tiny leak that they couldn't detect, and if it loses its cold over the coming weeks/month then take it back. He said there's still some dye in the system so if there is a leak, at least it will be obvious!
Next and final thing on the car is the rear door lock motors for the central locking!
With the big boot the Lexus was drafted in this afternoon to do the post gardening tip trip(s).
I made sure not to pack the refuse sacks too tightly so as to make just enough to warrant two trips. 12 sacks of garden waste allowed 6 sacks per trip. I'd worked out that I could fit 6 sacks on the plastic boot liner. Any more and I'd need to put them on an un-protected part of the boot floor or, heaven forbid, inside...
With around 7hrs in the garden in the heat today hacking away at brambles and pulling up weeds, the refreshed climate control was absolutely bliss. Classis FM (I'm only 25 ffs), shades, GS300, I felt cool as f k....
k....
Then a lincoln town car (non limo) pulled up next to me at the lights and the Lexus all of a sudden felt small...

I made sure not to pack the refuse sacks too tightly so as to make just enough to warrant two trips. 12 sacks of garden waste allowed 6 sacks per trip. I'd worked out that I could fit 6 sacks on the plastic boot liner. Any more and I'd need to put them on an un-protected part of the boot floor or, heaven forbid, inside...
With around 7hrs in the garden in the heat today hacking away at brambles and pulling up weeds, the refreshed climate control was absolutely bliss. Classis FM (I'm only 25 ffs), shades, GS300, I felt cool as f
k.... Then a lincoln town car (non limo) pulled up next to me at the lights and the Lexus all of a sudden felt small...
Well this weekend was the first proper test of motorway cruising as we travelled from our house over to the in-laws for the weekend. As such I brimmed the tank on Friday as we were leaving and brimmed it again just now on arrival back to our home-town.
Results are an average of almost exactly 32mpg. With about 60/40 split of motorway/dual carriageways and A-roads. I'm pretty pleased with that tbh. Most of the motorway was at an indicated 75 on the cruise with the occasional roadworks @ 50. And the A-roads equally civilised. However, I still haven't got fed up of burying my foot in the carpet and getting that full 220bhp whoosh up to licence endangered territory. I imagine without these antics, an average of 35 on a tank should be easily achievable.
One of the rear door locks has also sprung into life. My guess is that I was a bit sticky, so I'll pull the doorcard off and give it a spray of WD40 anyway to ease things up a little.
My motors and gear puller arrived for the other door lock when I eventually get round to it. I'll update with images when I do it!
All good so far - what a bargain.
Over and out
Well folks, today was the day to change the door lock motors the wife went out last night with her mates and I was on taxi duty. So I knew today was going to be a right off for anything that involved her input as she nurses the hangover - in fact, she's still in bed now at 3.30pm
I noticed at some point during the week that the lock that was broken, then came to life again, has stopped working again. So the job was for both rear doors...
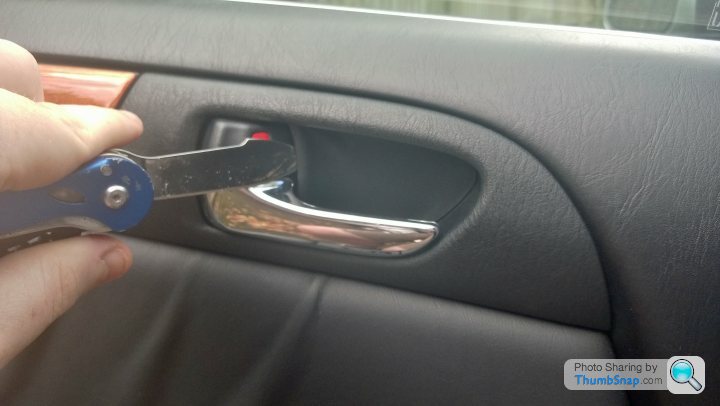
First off was removal of the door card, sounds simple I know, but there's always one screw under a piece of removable trim that's really good at hiding. This was no different....
Firs one was under the door handle... Sneaky.
The next one was under the window switch/ash tray module...
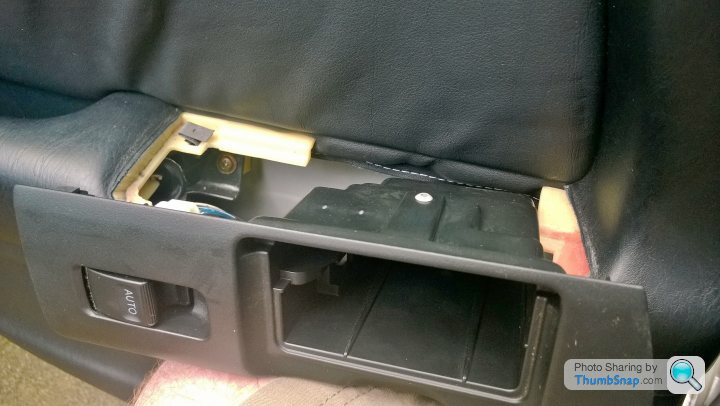
With this undone and the ashtray and switch disconnected and out (yes, the ashtray does have a courtesy light), the rest of the screws are visible and can be removed.
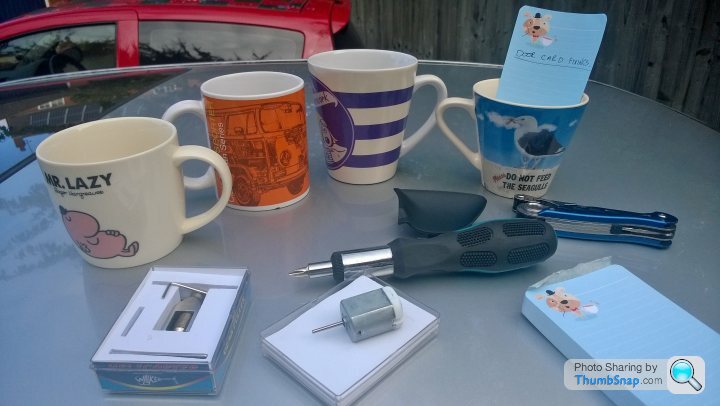
Here's my super technical fixing organiser!
With a little force, the remaining trim pins come free and it then needs a gentle knock to free... And the doorcard comes off...
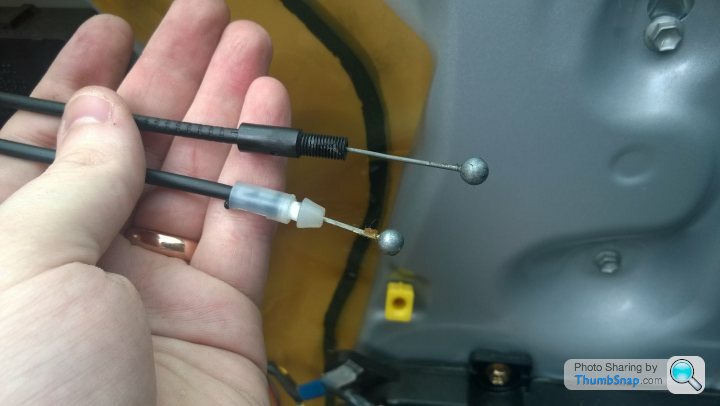
This allows you to get to the door release cables and remove the clip for the door light and lift away.
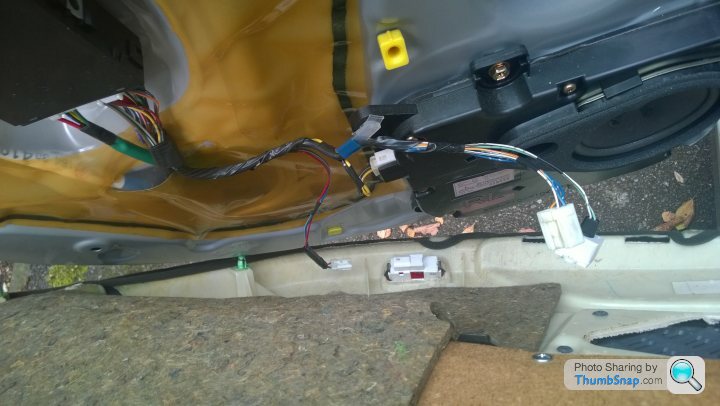
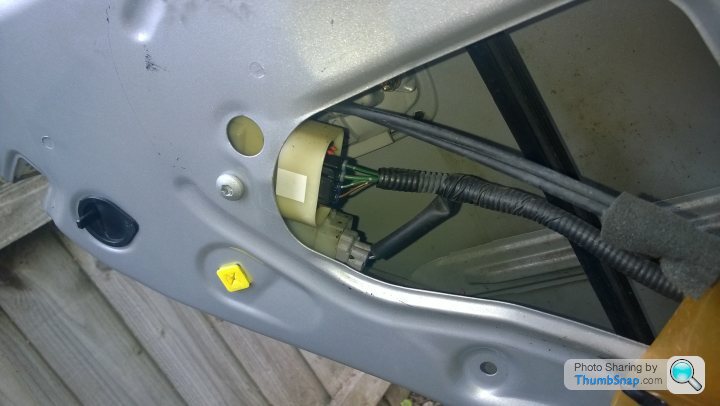
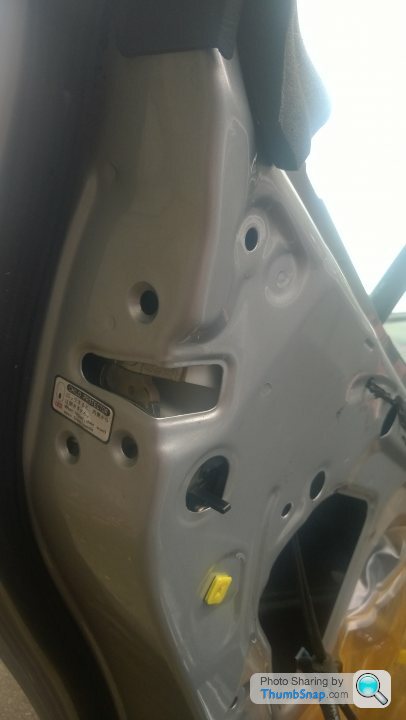
With the protective plastic sheeting pulled back you can now get to the door lock and latch mechanism. 4x Torx30 hold this in place, one on the inner door skin, and 3 in the door shut.
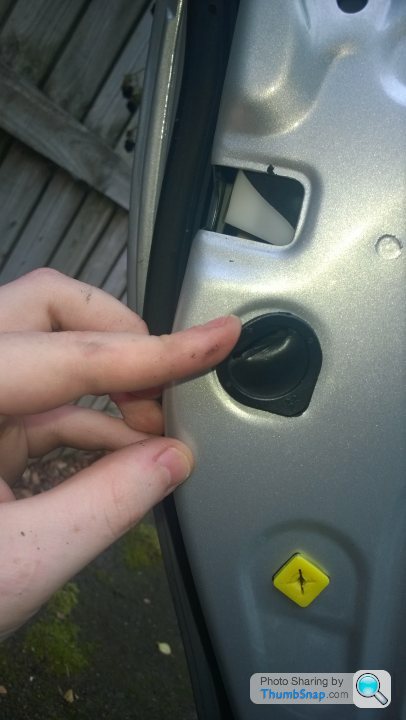
There's also the child lock switch, which has a protective rubber grommet that is easily removed too...
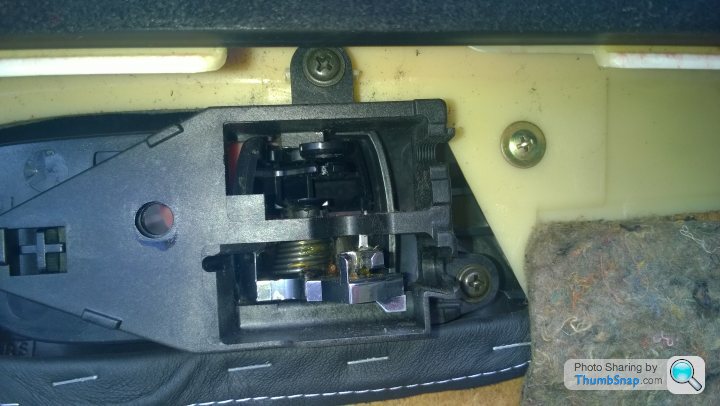
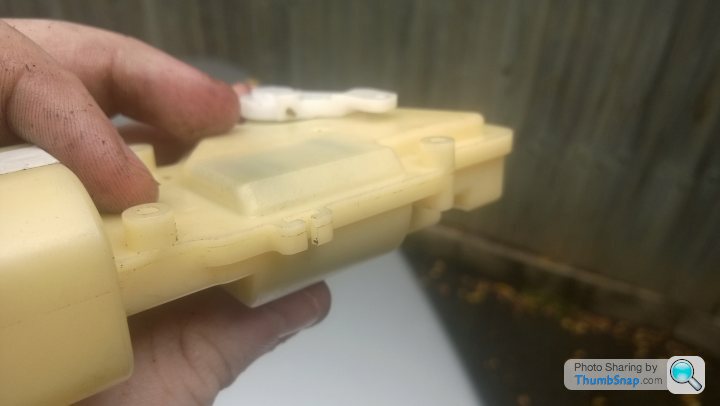
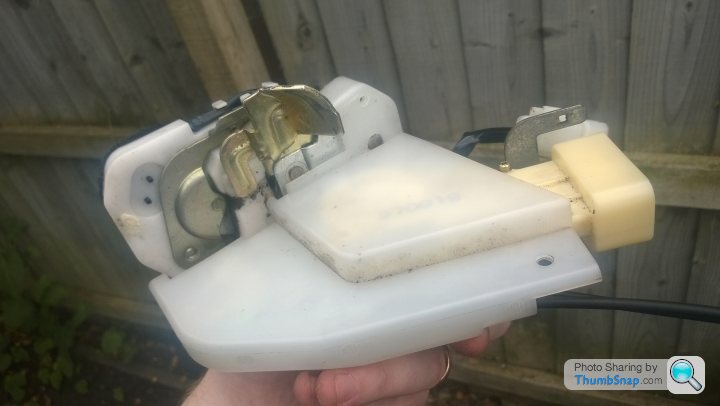
After considerable swearing, jiggling, pulling, twisting etc, the lock came free and I could finally see what I was dealing with.
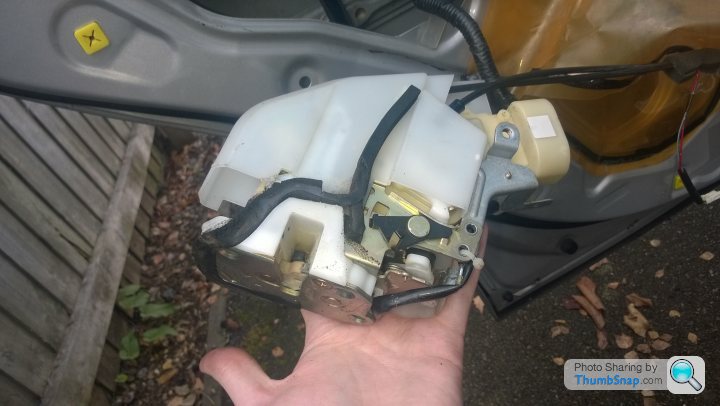
Its a fair old beast! I mean, I've worked with door latches and motors in the past, but this is massive!
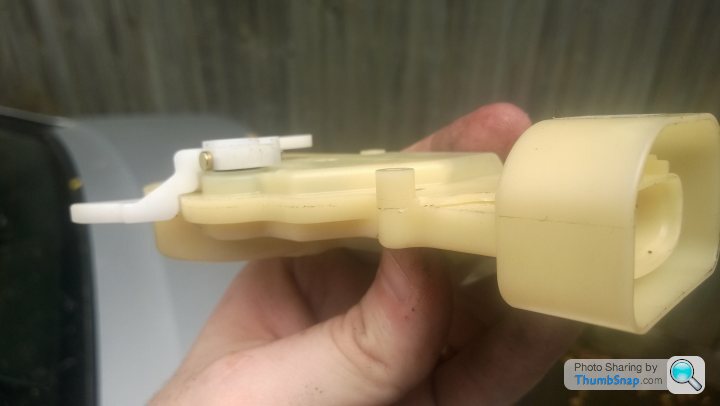
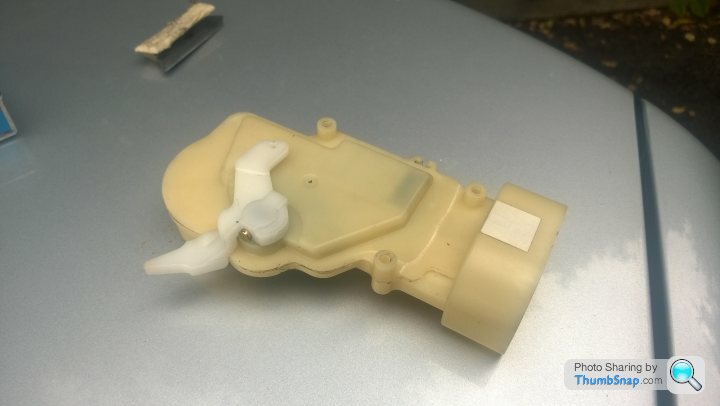
After removing the flexible protective cover, we can finally see the actuator/motor mechanism that does the business..
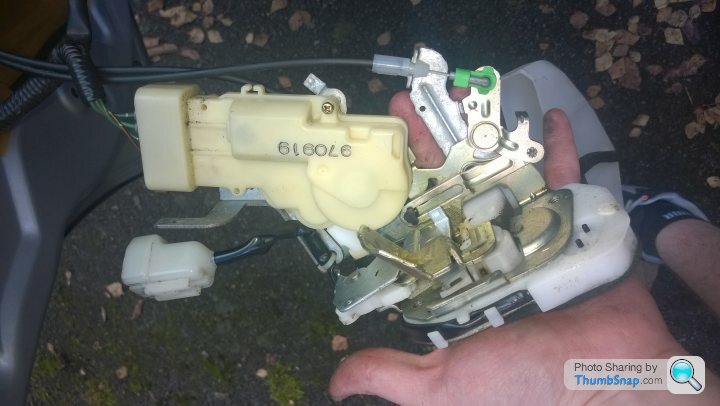
After removing a few more fixings and the dogleg cable end, the actuator housing comes free...
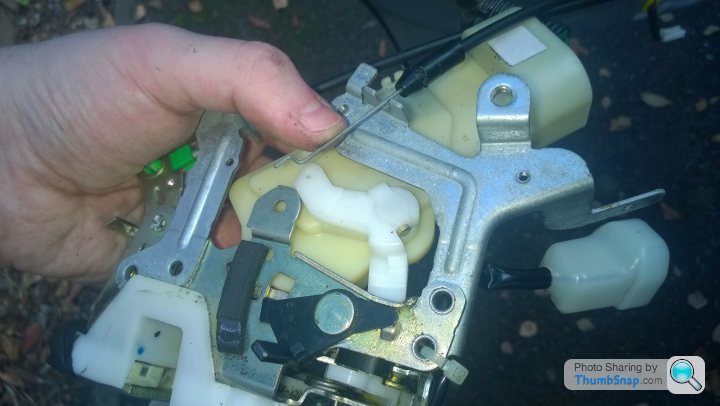
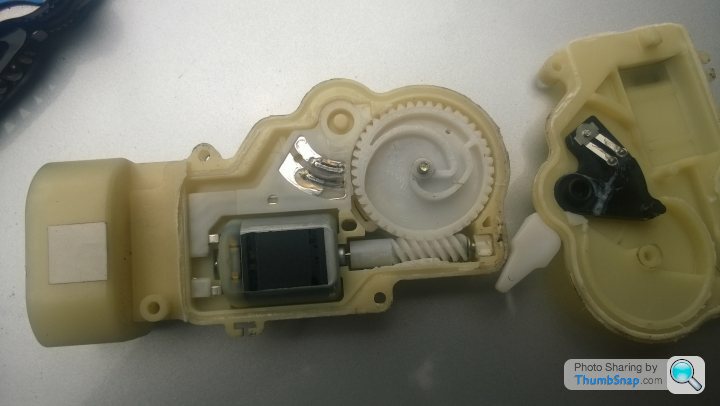
This is where the process becomes a bit more labour intensive... You need to vey carefully cut along the plastic weld and pry the 2 halves of the casing apart without breaking anything important. This alone probably takes the best part of 45mins...
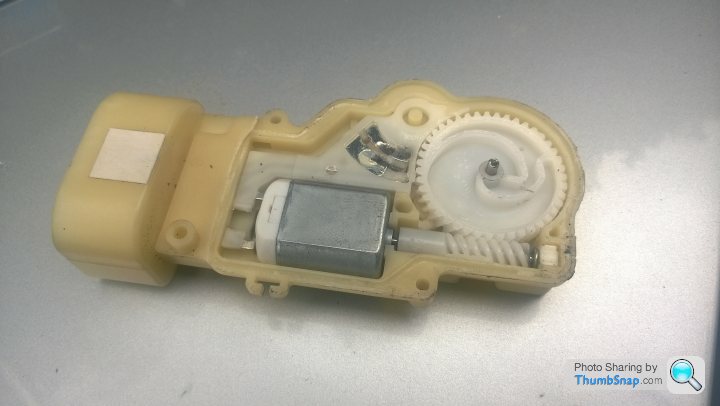
With the housing apart you can see all the internal gubbins, but its only the motor that's gone, so that's the bit to be replaced!
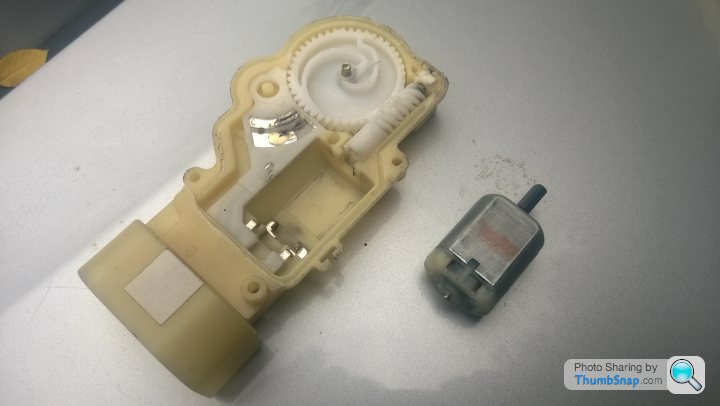
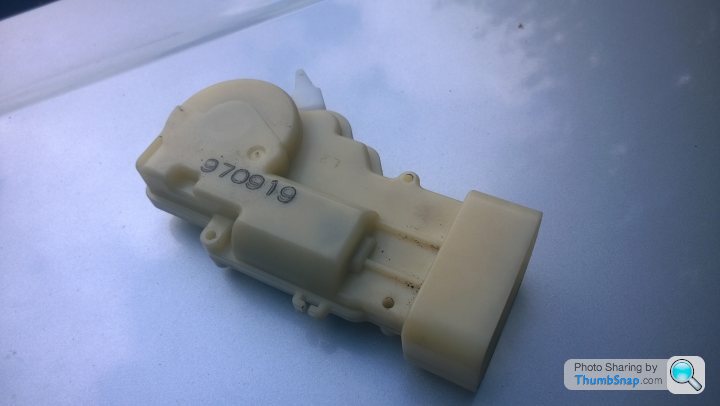
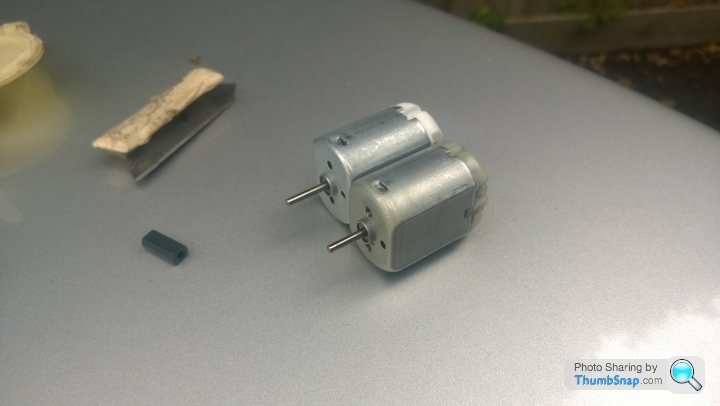
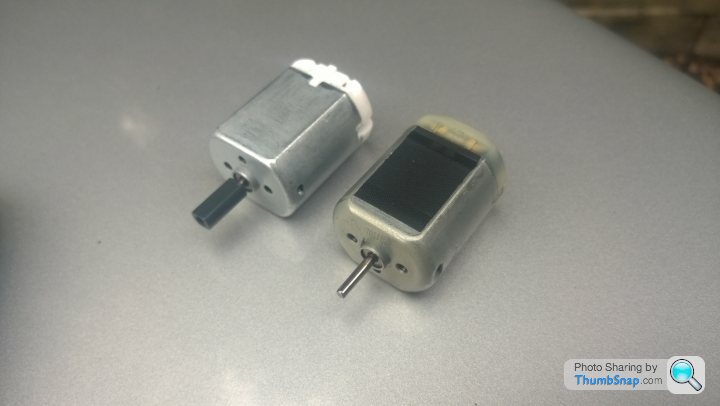
With the motor now out, we need to swap the gear over from the old motor to the new one. My new motor had a longer shaft, but a very quick visit from mr Angle Grinder soon sorted that out. My ebay special gear puller worked its magic too!

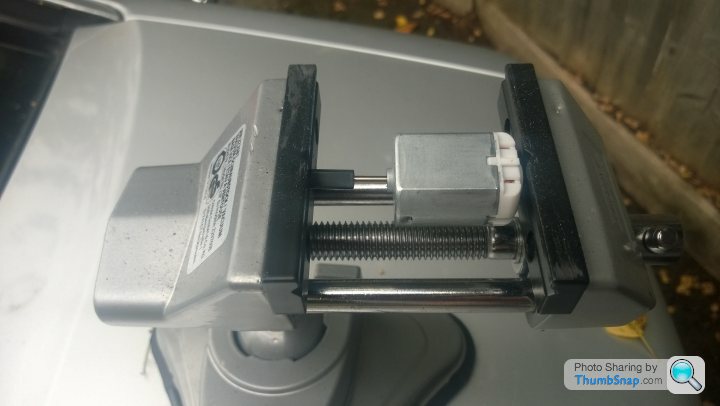
With a little assistance from my small vice, the new motor with end fitting was ready to go in...
All back together!
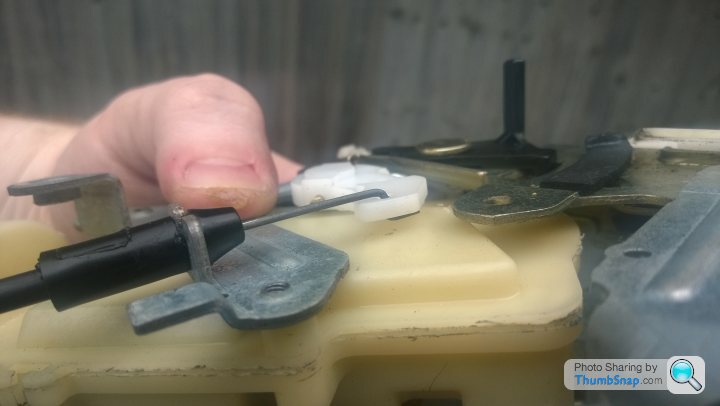
Feed the dogleg back through and align/engage all the levers!

Put the cover back on...
And put back in the door...
At this point I tested it out to make sure it all worked! However, when I pressed lock, it unlocked, and vise versa. I must have had the lock in and out at least 3 times trying to find out what id done wrong, figuring I must have put I back together with a lever in the wrong position. It turns out that the motors I bought were opposite polarity. So i cut and swapped over the cables in the door and it worked perfectly!
The whole job took about 4.5hrs for both doors, although the first door was about three hours as I didn't know what I was doing and the fact I spent a lot of time to work out about the wrong polarity!
Both door locks bow work perfectly and I'm very pleased. Total cost was about £20 for the 2 motors from Japan, and the gear puller from china, both ebay specials!
I noticed at some point during the week that the lock that was broken, then came to life again, has stopped working again. So the job was for both rear doors...
First off was removal of the door card, sounds simple I know, but there's always one screw under a piece of removable trim that's really good at hiding. This was no different....
Firs one was under the door handle... Sneaky.
The next one was under the window switch/ash tray module...
With this undone and the ashtray and switch disconnected and out (yes, the ashtray does have a courtesy light), the rest of the screws are visible and can be removed.
Here's my super technical fixing organiser!
With a little force, the remaining trim pins come free and it then needs a gentle knock to free... And the doorcard comes off...
This allows you to get to the door release cables and remove the clip for the door light and lift away.
With the protective plastic sheeting pulled back you can now get to the door lock and latch mechanism. 4x Torx30 hold this in place, one on the inner door skin, and 3 in the door shut.
There's also the child lock switch, which has a protective rubber grommet that is easily removed too...
After considerable swearing, jiggling, pulling, twisting etc, the lock came free and I could finally see what I was dealing with.
Its a fair old beast! I mean, I've worked with door latches and motors in the past, but this is massive!
After removing the flexible protective cover, we can finally see the actuator/motor mechanism that does the business..
After removing a few more fixings and the dogleg cable end, the actuator housing comes free...
This is where the process becomes a bit more labour intensive... You need to vey carefully cut along the plastic weld and pry the 2 halves of the casing apart without breaking anything important. This alone probably takes the best part of 45mins...
With the housing apart you can see all the internal gubbins, but its only the motor that's gone, so that's the bit to be replaced!
With the motor now out, we need to swap the gear over from the old motor to the new one. My new motor had a longer shaft, but a very quick visit from mr Angle Grinder soon sorted that out. My ebay special gear puller worked its magic too!
With a little assistance from my small vice, the new motor with end fitting was ready to go in...
All back together!
Feed the dogleg back through and align/engage all the levers!
Put the cover back on...
And put back in the door...
At this point I tested it out to make sure it all worked! However, when I pressed lock, it unlocked, and vise versa. I must have had the lock in and out at least 3 times trying to find out what id done wrong, figuring I must have put I back together with a lever in the wrong position. It turns out that the motors I bought were opposite polarity. So i cut and swapped over the cables in the door and it worked perfectly!
The whole job took about 4.5hrs for both doors, although the first door was about three hours as I didn't know what I was doing and the fact I spent a lot of time to work out about the wrong polarity!
Both door locks bow work perfectly and I'm very pleased. Total cost was about £20 for the 2 motors from Japan, and the gear puller from china, both ebay specials!
TotalControl said:
Impressive work. I think I may need to give this a shot on my SAAB. Certainly inspires confidence.
Cheers, there was quite a good video for the front door motor replacement on youtube that I used as a guide. There were quite a few differences, but the actuator housing bit was the same, and that was the bit I was most unsure about, so that was handy.Think the next job is to refurb the wheels as they are crying out for attention.
In other news, I have a new job that has a 50mile commute (100mile a day, until we move somewhere a little closer), so hms lexustrious will be picking up that journey! I couldn't think of a better way to do it for £700!
With the long commute, I may get the cambelt done too, it wad only done 40,000 miles ago, but that was 2004, so the degradation over 12years means its probably worth a refresh.
Well apparently the OHs hangover was here to stay another day, so I got another day on the cars instead of being a pack horse around the shops.
So, it was wheel refurb on the menu for todays antics!
I only managed to get three done, but I'm off work wed/thur/fri so ill finish it off then.
I only fully documented the worst wheel, so here goes...
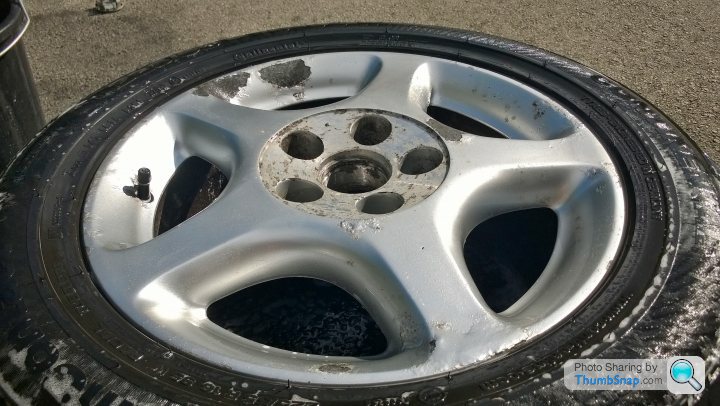
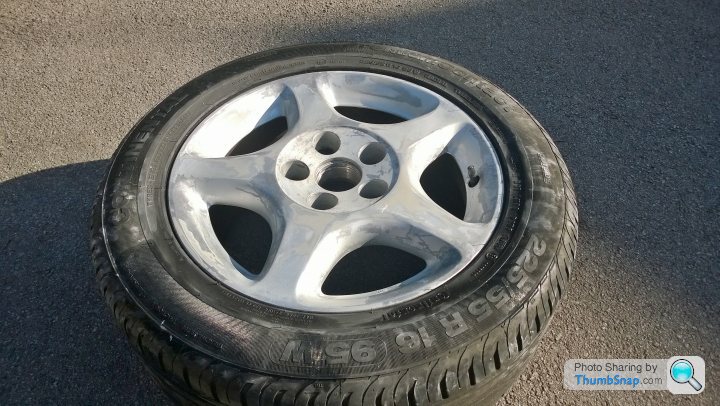
The two rear wheels seem much worse than the fronts. Not sure why, they just are. There is no kerbing to the wheel, which is good, but not unexpected as they are nice chunky tyres and the rim doesn't protrude.
As the wheel came off the car...

After a clean up, we can see the extent of the corrosion...

So it was into that garage, and out with the Stanley blade, scraping off all the loose, flakey paint...
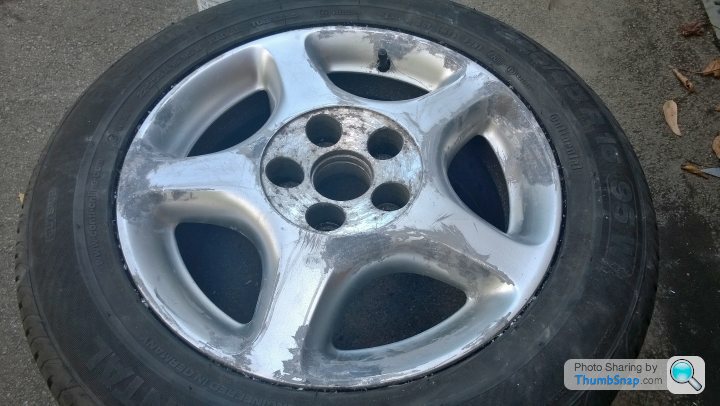
With all the flakey paint now off, it was time to smooth I all off. After much wet and dry, and half a litre of elbow grease...
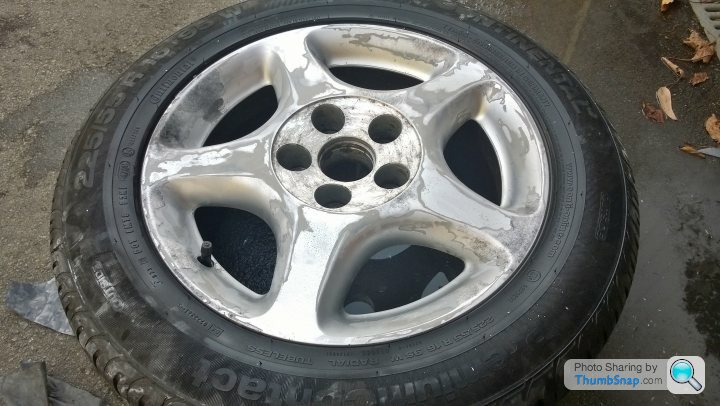
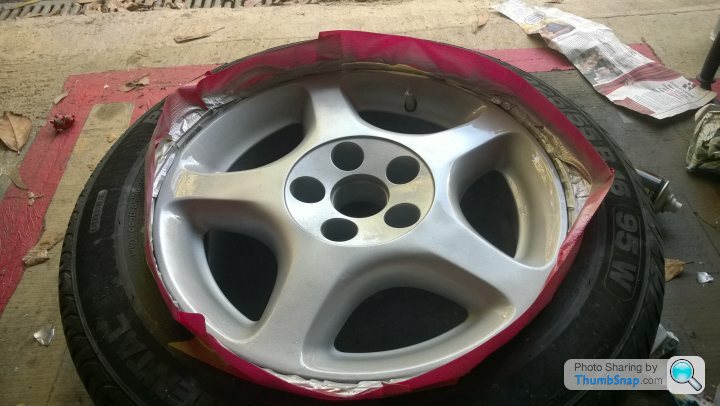
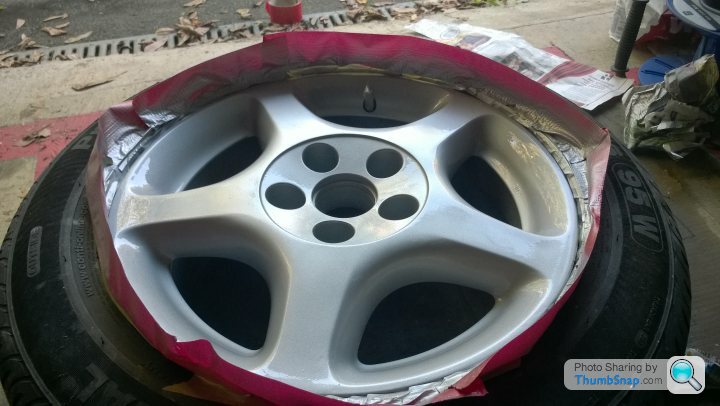
Time to mask up!
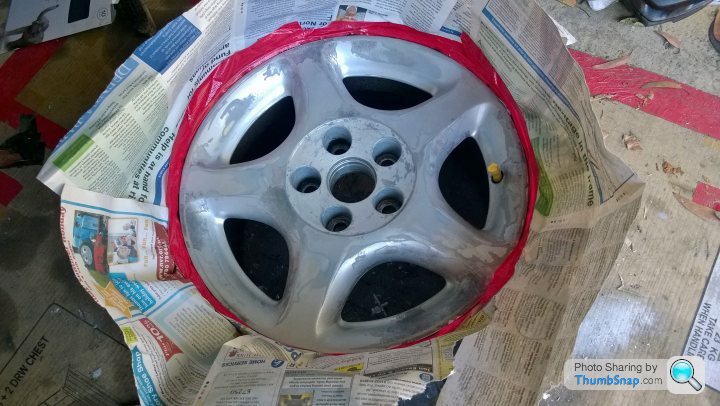
After a few coats of primer I noticed a few areas that needed additional work...
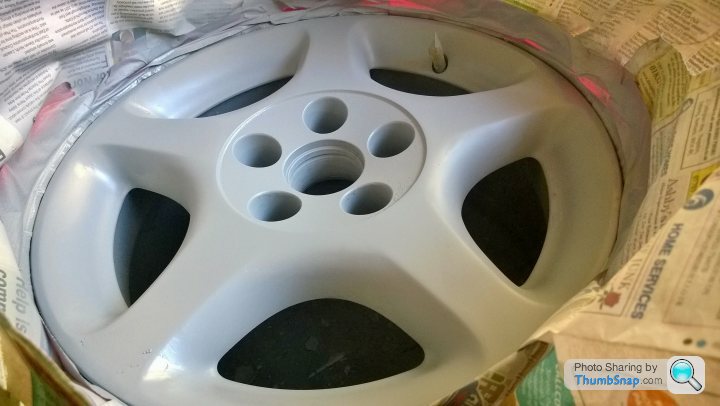
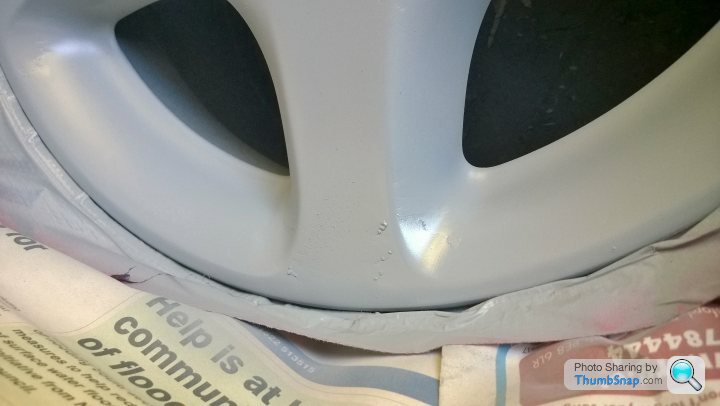

After a bit more sanding and a change of masking, it was time for the first coat of paint...
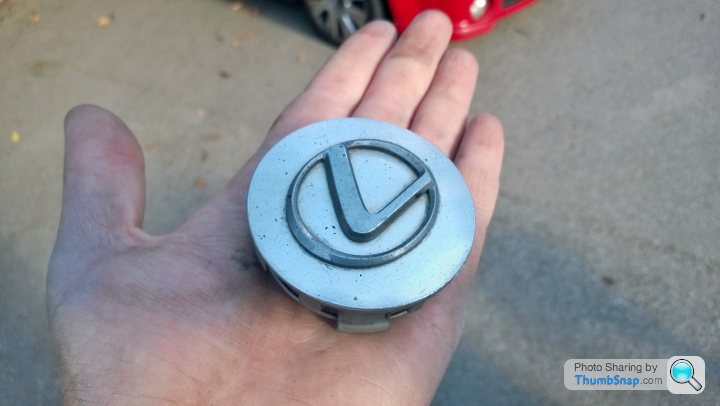
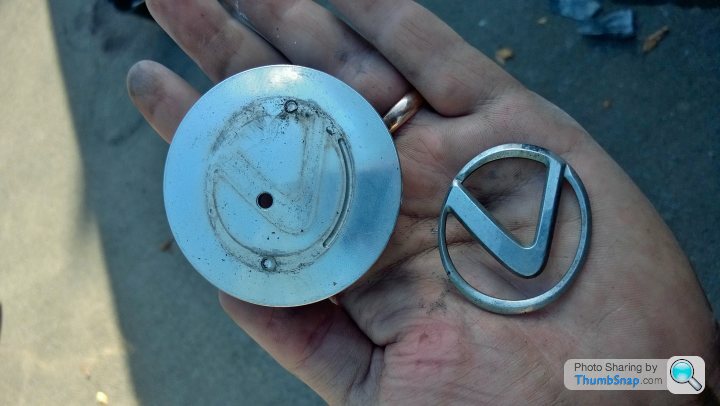
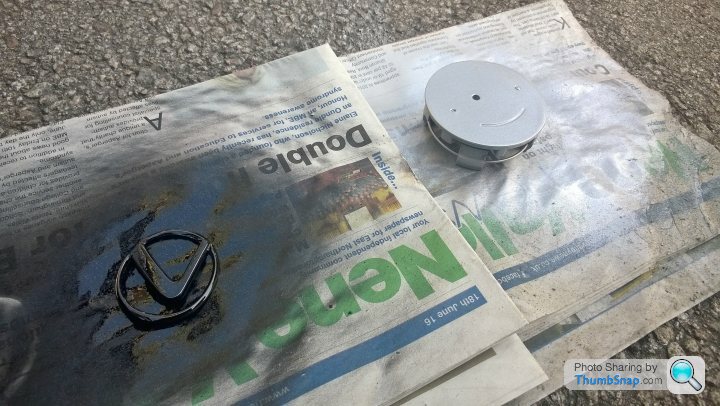
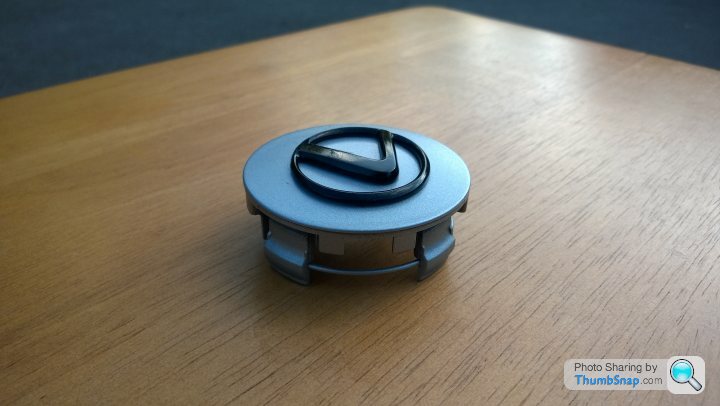
In between layers of paint, it was time to prepare the wheel centres.
Aaaand, back together....
After a bit more paint.... Not perfect, but pretty pleased, and a damn sight better than previous!
With centres back in!

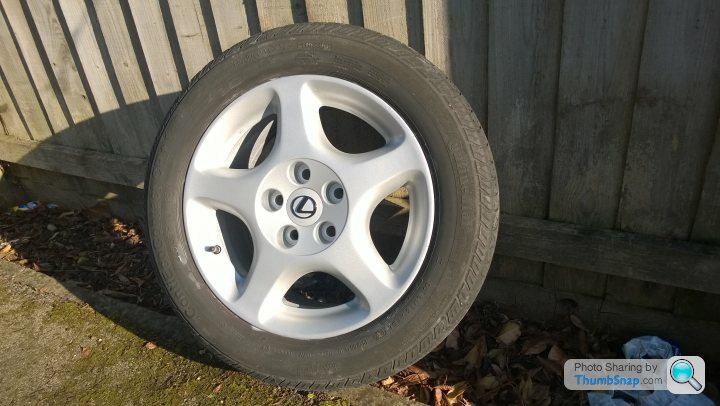
And lined up!

So, it was wheel refurb on the menu for todays antics!
I only managed to get three done, but I'm off work wed/thur/fri so ill finish it off then.
I only fully documented the worst wheel, so here goes...
The two rear wheels seem much worse than the fronts. Not sure why, they just are. There is no kerbing to the wheel, which is good, but not unexpected as they are nice chunky tyres and the rim doesn't protrude.
As the wheel came off the car...
After a clean up, we can see the extent of the corrosion...
So it was into that garage, and out with the Stanley blade, scraping off all the loose, flakey paint...
With all the flakey paint now off, it was time to smooth I all off. After much wet and dry, and half a litre of elbow grease...
Time to mask up!
After a few coats of primer I noticed a few areas that needed additional work...
After a bit more sanding and a change of masking, it was time for the first coat of paint...
In between layers of paint, it was time to prepare the wheel centres.
Aaaand, back together....
After a bit more paint.... Not perfect, but pretty pleased, and a damn sight better than previous!
With centres back in!
And lined up!
Window tint on order!
I've gone for legal 70% LVT for the front windows
And a suitably shady 30% on the rear... I refrained from the 1% chrome limo spec... Haha.
Should arrive before the end of the week, ready for fitting on Friday or over the weekend!
I feel like a disappointment for not going full murderer spec on this car, matt black wrap, matt black wheels and 1% black window tint all over....
Edited by Ambleton on Tuesday 30th August 21:32
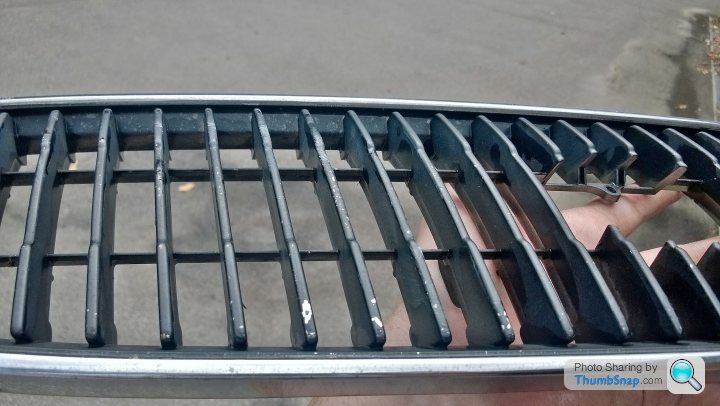
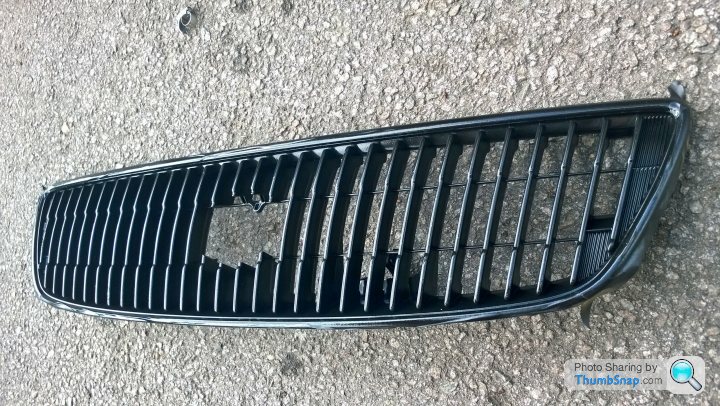
Another thing that was annoying me about the Lexus was the grill. In general it was okay, but it just looked a bit tired, no surprise after 18 years!
So I gave it a bit of a refresh!
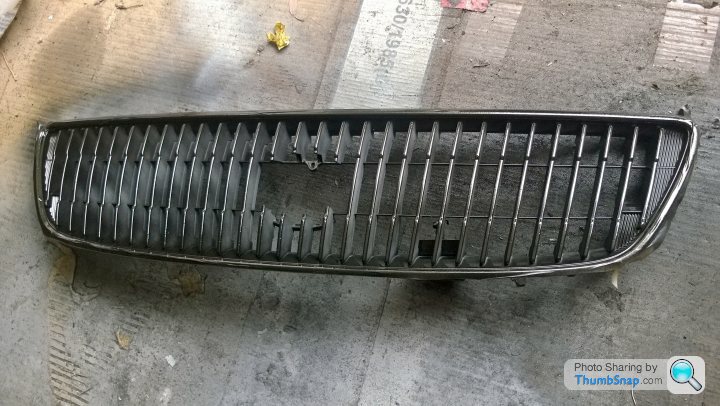
Straight off the car!
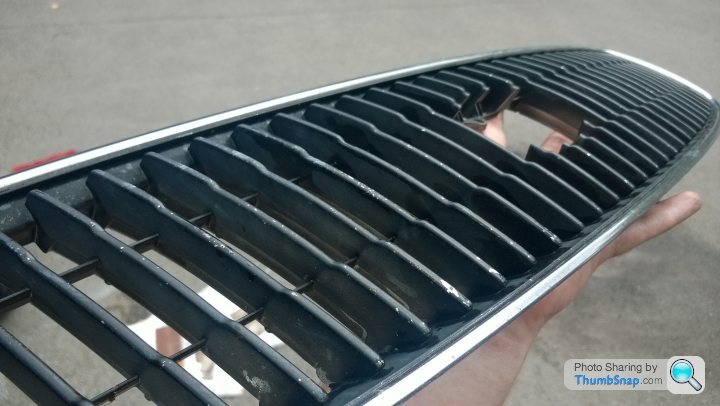
After a clean, and scour, time to mask up...
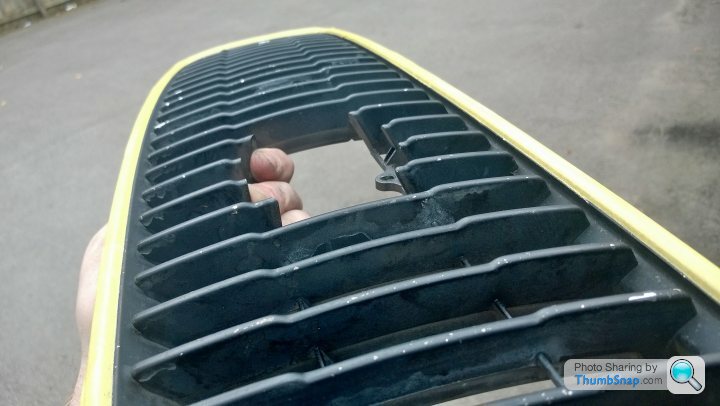
After one or two light coats..
All the black on...
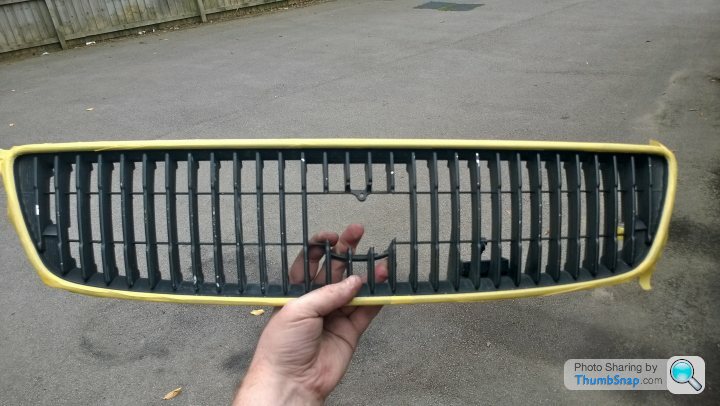
After a couple of coats of matt lacquer...
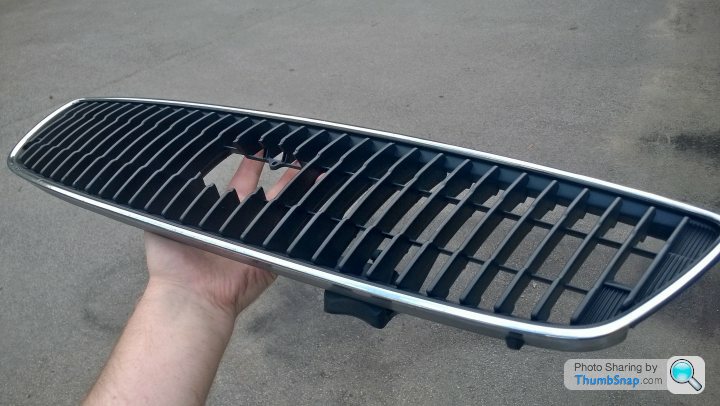
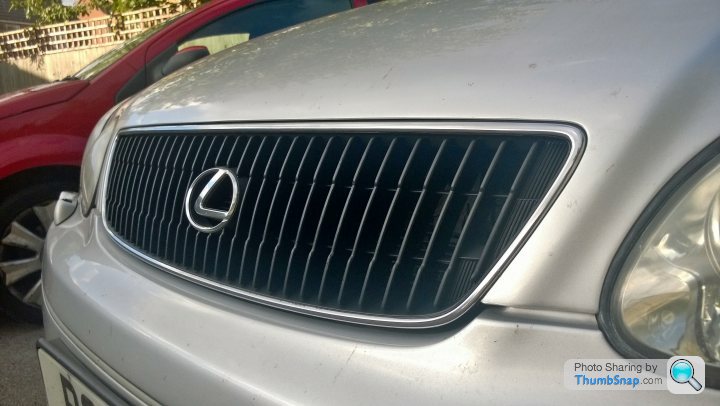
And fitted!
So I gave it a bit of a refresh!
Straight off the car!
After a clean, and scour, time to mask up...
After one or two light coats..
All the black on...
After a couple of coats of matt lacquer...
And fitted!
carinaman said:
Thanks for the update. I'm not sure I'd have got that actuator apart and back together again.
MPG doesn't sound too bad either.
The actuator housing was a bit of a ball ache to be honest. The trick is to keep your patience, cutting a little deeper on each pass of the Stanley blade. MPG doesn't sound too bad either.
The temptation is to localise your efforts to one area, then once you're through, bosh in a big flat head screwdriver and open it up like a tin'o'beans.
Problem with this is the housing material is actually very brittle and will break easily, scattering the mechanism bits to the wind.
Once id done the first one, the second was much easier.
You might be right... I'll see what its like when it turns up...
If it "looks okay" I might hedge my bets. I'm not not going to put any film on the windscreen, just the side windows. Still unsure in the rear screen whether to tint or not... I'll review when I'm doing it. Again, ebay specials, so not the end of the world if it looks crap and I end up binning it all anyway. Think the total spend was something like £17....
If it "looks okay" I might hedge my bets. I'm not not going to put any film on the windscreen, just the side windows. Still unsure in the rear screen whether to tint or not... I'll review when I'm doing it. Again, ebay specials, so not the end of the world if it looks crap and I end up binning it all anyway. Think the total spend was something like £17....
EJH said:
maybe a whiff of golf club gangsta
What's your point? shalmaneser said:
What a lovely big bus!
Excellent bit on hands-on work going on too!
Cheers! There's something deeply satisfying about returning something to its once former glory. In general its very good, but with a little effort, and very little outlay, can be made excellent!Excellent bit on hands-on work going on too!
I dread to think of the cost of this was new in 1998.
Edited by Ambleton on Thursday 1st September 22:46
Well the window tint arrived this morning and I had a go at fitting it tonight. As far as window tinting goes you have 3 options.
1) pay someone else to do it
2) don't do it
3) try and do it yourself, swear at it a lot, end up throwing 95% of it away, and ending up with a tolerable finish.
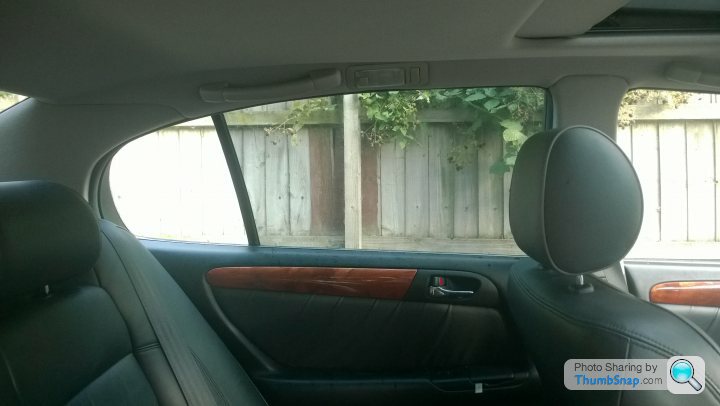
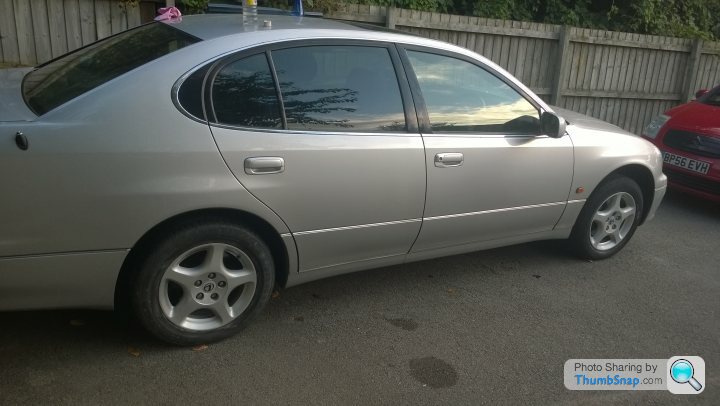
I started with the 30% on the rear door windows. Actually, this wasn't too bad and I got the hang of this pretty well.
After id successfully done the rear door windows, I got a bit cockey and thought id try my luck qt the rear windscreen...
The angle of the rear screen is surprisingly shallow and I ended up sticking the film to itself and everything apart from the window. I threw that one away and had another go using a slightly different tactic. The outcome of this was exactly the same as the first attempt. So I threw that away too (~3.5m if tint film) and gave up. Now I'm going to go down to the pub... Anyway, the rear doors are done and look good in my opinion.
I welcome the comments of hate and chav tat - bring it on you miserable bunch of fkers!
1) pay someone else to do it
2) don't do it
3) try and do it yourself, swear at it a lot, end up throwing 95% of it away, and ending up with a tolerable finish.
I started with the 30% on the rear door windows. Actually, this wasn't too bad and I got the hang of this pretty well.
After id successfully done the rear door windows, I got a bit cockey and thought id try my luck qt the rear windscreen...
The angle of the rear screen is surprisingly shallow and I ended up sticking the film to itself and everything apart from the window. I threw that one away and had another go using a slightly different tactic. The outcome of this was exactly the same as the first attempt. So I threw that away too (~3.5m if tint film) and gave up. Now I'm going to go down to the pub... Anyway, the rear doors are done and look good in my opinion.
I welcome the comments of hate and chav tat - bring it on you miserable bunch of f
kers!Well I've just ordered a pair of clear side repeaters for the wings as the orange ones are a bit "in your face".
These were standard on a lot of Toyotas including the Carolla, Supra, Rav4 etc, and also a standard fitment on the Lexus RX 4x4 of the later era... the first gen ones had the side repeaters on the bumper.
Hopefully will make an improvement to the looks.
These were standard on a lot of Toyotas including the Carolla, Supra, Rav4 etc, and also a standard fitment on the Lexus RX 4x4 of the later era... the first gen ones had the side repeaters on the bumper.
Hopefully will make an improvement to the looks.
Gassing Station | Readers' Cars | Top of Page | What's New | My Stuff