1996 Mercedes SL 600
Discussion


leef44 - really appreciated, thank you.
illmonkey - I have read of other people having the leakage issue. My kit comes with 2 reservoir lids that fit but only one of them was specifically for use with "Ate" (the manufacturer) master cylinders. There are also a variety of rubber seals that come with the kit and you need to use the correct one. Brake fluid dripping on paintwork in inaccessible areas is not an amusing thought.
I will also add that these little maintenance projects are a very important part of my mental well-being. I suffer with anxiety and this car maintenance stuff is one of the few things that gets me focused on living in the moment and not worrying so much about life.I find that car maintenance stress is vastly preferable to work and real-world stress!
alabbasi said:
Hereward said:
I have also noticed the 722.6 gearbox kickdown sometimes results in a long pause before a rough engagement of the lower gear so I am wondering if I should check out the conductor plate solenoids. Perhaps I should replace the kickdown switch first. I can't really be arsed to delve back in to the gearbox again but it may be a Winter project.
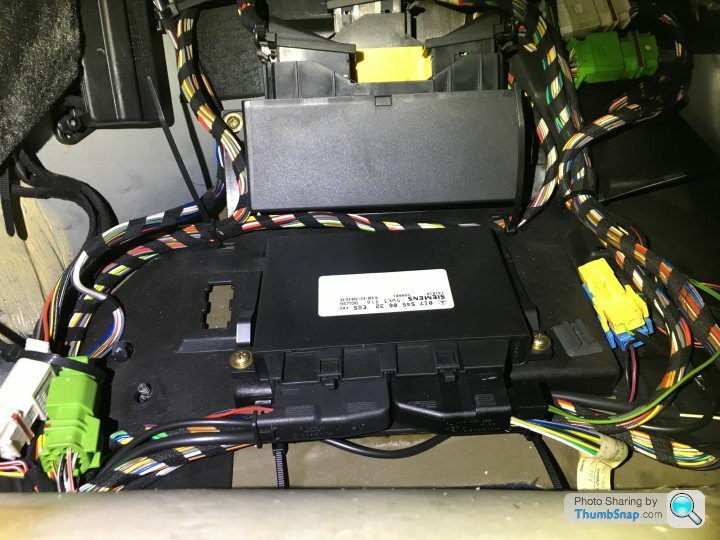
There's a common issue with the electrical plug on those 722.6 transmissions which can leak at the pins. ATF would then travel up the wires and onto the TCU which I think is in the passenger side foot well on the left hand drive cars (not sure about RHD). Remove it and inspect it to see if it's oily at the pins. The plug should be replaced every time you change the fluid . It costs about $15 for a replacement here in the US.
This is the control module under the front left carpet:
The gearbox does seem a bit smoother since I topped up the ATF but it still occasionally pauses then clonks in to gear on kickdown from what I think is 5 to 3. No issues when dropping a single gear.
Interesting...I've had a another look and there is a slight oily residue in the area. I have cleaned all the connectors with electrical contact cleaner and will test the gearbox again. The pilot bushing is definitely dry, I inspected that a few weekends ago.
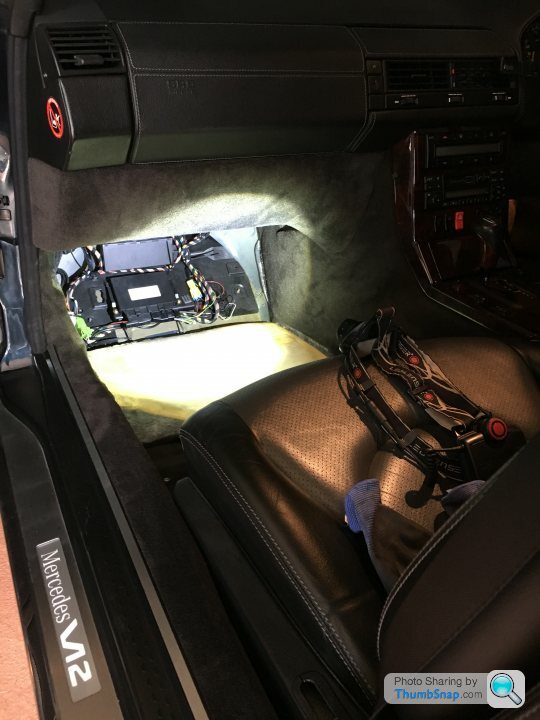
This is a 5 minute job - slide back the seat, peel back the footwell carpet and remove the plastic protective cover to reveal the modules:
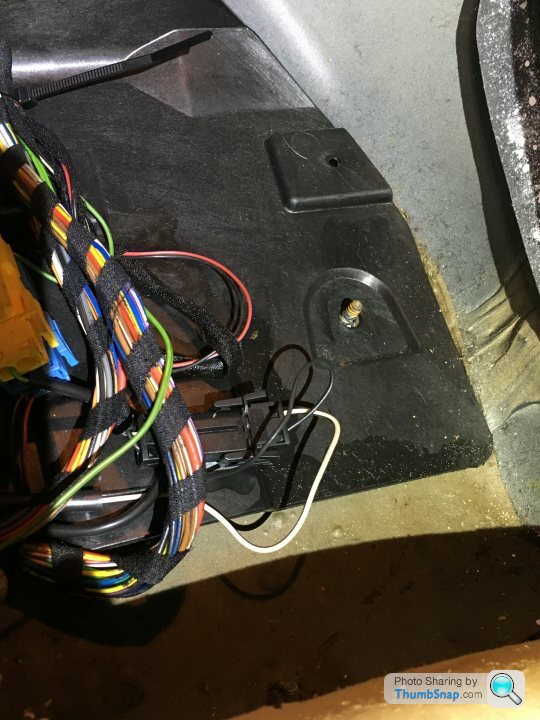
Note the oily residue on the black plastic:
Thanks for raising this, alabbasi, I had ruled it out. Definitely easier access than the conductor plate solenoids! Let's see if the degreasing made any difference...
This is a 5 minute job - slide back the seat, peel back the footwell carpet and remove the plastic protective cover to reveal the modules:
Note the oily residue on the black plastic:
Thanks for raising this, alabbasi, I had ruled it out. Definitely easier access than the conductor plate solenoids! Let's see if the degreasing made any difference...
Edited by Hereward on Saturday 23 March 11:30
Today I tested a spare Adaptive Damping System (ADS) ECU that I purchased a few years ago. I assume these parts are going to get harder to source as the years go by so I purchased a used ECU on Ebay from Germany for 255 Euros so that I would have a spare.
My existing ECU is totally fine. It's the original unit, manufactured in Week 40 of 1996. The spare ECU was manufactured in Week 44 of Year 2000.
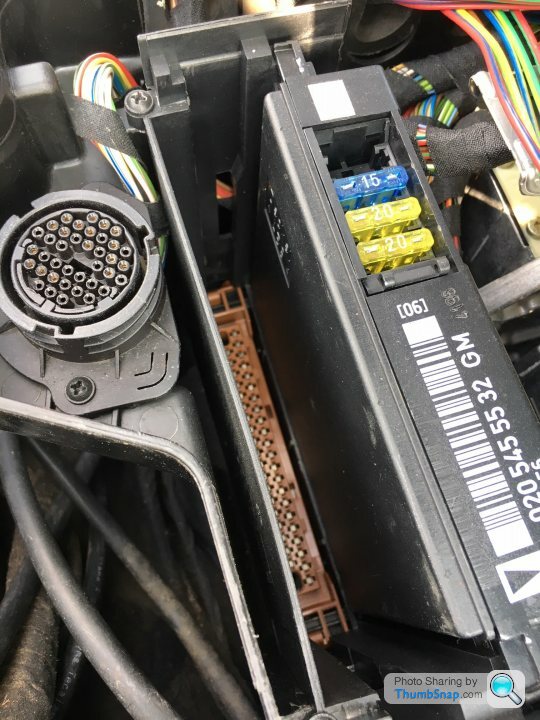
The ADS control module is mounted in an engine bay bulkhead housing next to the 38 pin diagnostics socket (My car is Dec 1996 build):

Prise it out gently and simply push the new one in:
Original and replacement:

There is no need to calibrate or synchronise replacement control modules, just plug and play. A test drive confirmed no issues.
There is so much incorrect information about ADS on the internet. It's simple hydraulic principles. I don't understand how owners and professionals alike can get it so wrong when diagnosing issues.
My existing ECU is totally fine. It's the original unit, manufactured in Week 40 of 1996. The spare ECU was manufactured in Week 44 of Year 2000.
The ADS control module is mounted in an engine bay bulkhead housing next to the 38 pin diagnostics socket (My car is Dec 1996 build):
Prise it out gently and simply push the new one in:
Original and replacement:
There is no need to calibrate or synchronise replacement control modules, just plug and play. A test drive confirmed no issues.
There is so much incorrect information about ADS on the internet. It's simple hydraulic principles. I don't understand how owners and professionals alike can get it so wrong when diagnosing issues.
Hello. Very little tinkering to report.
Maintenance-wise I pulled out a spark plug to check the condition and that has been it.
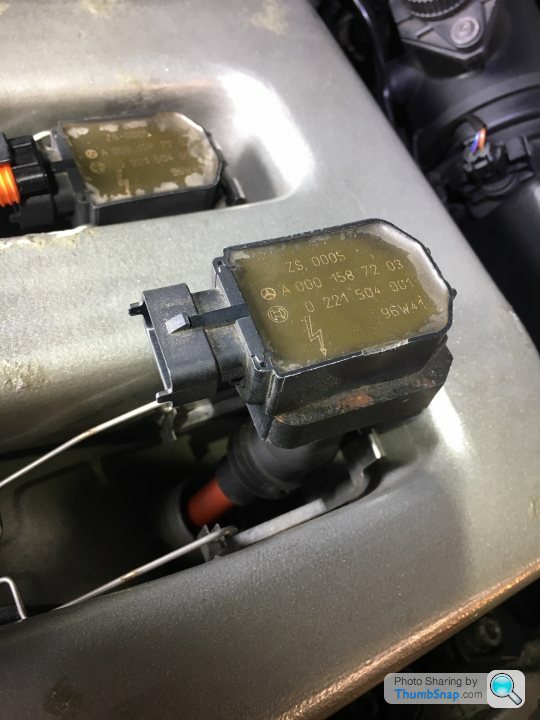
This engine has one spark plug and one pencil coil per cylinder. Other Merc V12 variants have (I think) 2 plugs per cylinder (dual spark) and also coil packs, which is a rail of 6 coils combined as a single unit, one for each bank of the V. The coil packs are known to fail and are expensive to replace. Luckily my car's engine is basic tech and access is easy to all 12 plugs.
My pencil coils are all original 1996 components so have done well.
This is a pencil coil unplugged, unclipped and carefully pulled out:
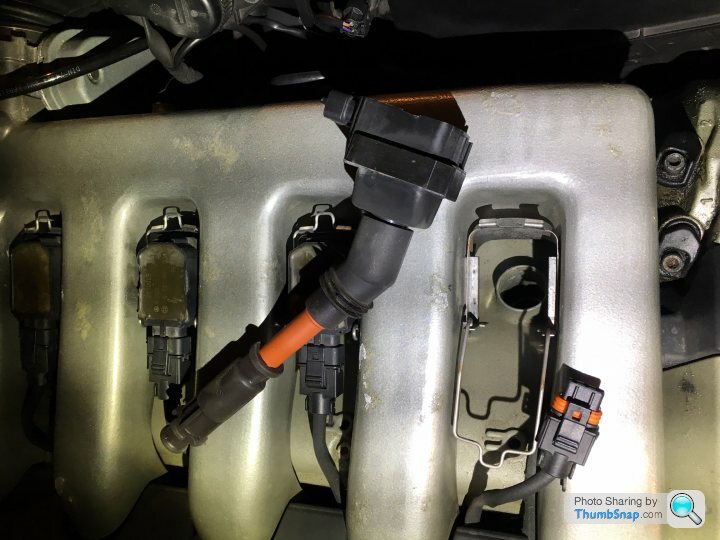
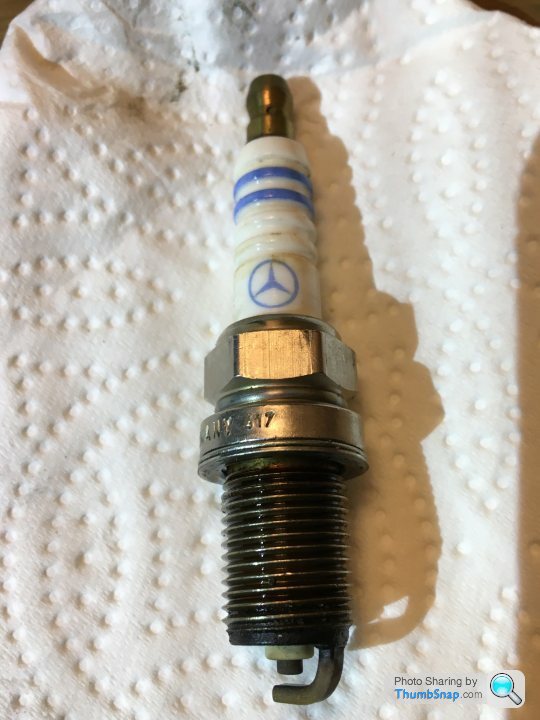
I removed a spark plug for a visual check. Looks to be in beautiful condition so I simply refitted it. Replacement plugs are basic Bosch F8DC4; they cost less than 2 quid each. Who says these engines are expensive to maintain?! Going forward I will simply inspect a plug once every year or so.
Maintenance-wise I pulled out a spark plug to check the condition and that has been it.
This engine has one spark plug and one pencil coil per cylinder. Other Merc V12 variants have (I think) 2 plugs per cylinder (dual spark) and also coil packs, which is a rail of 6 coils combined as a single unit, one for each bank of the V. The coil packs are known to fail and are expensive to replace. Luckily my car's engine is basic tech and access is easy to all 12 plugs.
My pencil coils are all original 1996 components so have done well.
This is a pencil coil unplugged, unclipped and carefully pulled out:
I removed a spark plug for a visual check. Looks to be in beautiful condition so I simply refitted it. Replacement plugs are basic Bosch F8DC4; they cost less than 2 quid each. Who says these engines are expensive to maintain?! Going forward I will simply inspect a plug once every year or so.
Edited by Hereward on Saturday 1st June 11:36
What a bizarre day. Having not posted for a few months and then providing a dull spark plug update this morning, I can report I have cured the kickdown issue that I have suffered for a year or two.
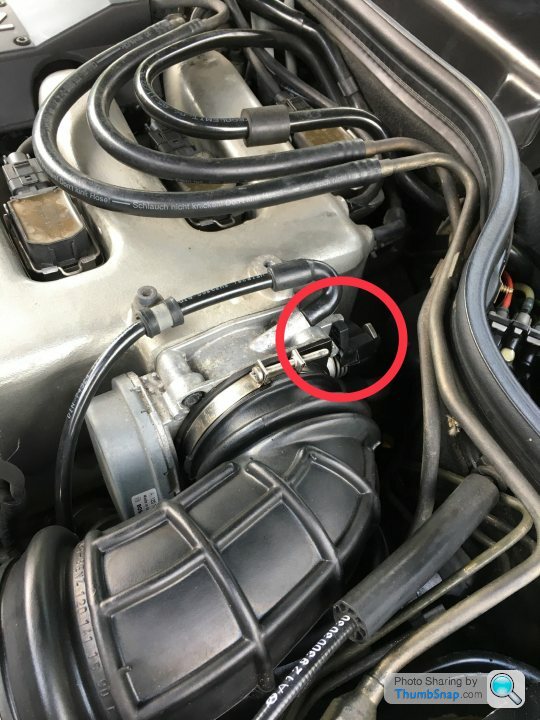
I started the car this afternoon and it immediately went in to limp mode, with the BAS/ESP light illuminated and a rough high idle. I turned the engine off then turned the key to position 2 and looked under the bonnet. I could only hear one of the two throttle bodies humming, the nearside one was dead. Pre-facelift throttle bodies are problematic but these ones were meant to be very reliable. A few taps with rubber mallet didn't wake it up.
I then noticed an external plastic portion of the butterfly valve housing stuck open against a bolt and it all made sense.
A few years ago I had replaced the cracked rubber boot between the MAF and the throttle body. At the same time I replaced the threaded bolt on the jubilee clip that attached the boot to the throttle body since the head on the original one was rounding off. I had used a bolt that was 1cm too long and it had been catching on the external spring-loaded plastic portion butterfly valve, preventing or slowing the opening of the valve.
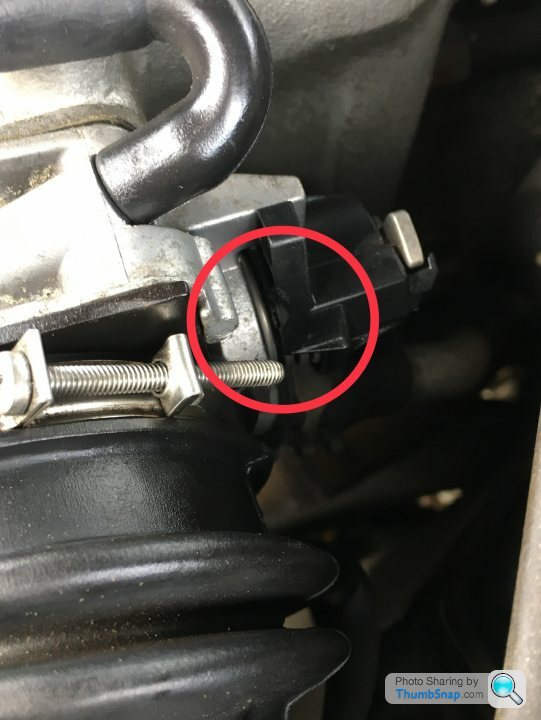
I moved the bolt out of the way and re-started the car and all was fine. I went for a drive and used aggressive kickdown and the gearchanges are now instant and totally smooth - the throttle body butterfly valve is now free to move instantly to wide-open throttle position with no delay as it fights against the tip of the bolt.
Nearside throttle body with the affected area circled:
Close-up showing gouged butterfly valve and offending bolt:
I started the car this afternoon and it immediately went in to limp mode, with the BAS/ESP light illuminated and a rough high idle. I turned the engine off then turned the key to position 2 and looked under the bonnet. I could only hear one of the two throttle bodies humming, the nearside one was dead. Pre-facelift throttle bodies are problematic but these ones were meant to be very reliable. A few taps with rubber mallet didn't wake it up.
I then noticed an external plastic portion of the butterfly valve housing stuck open against a bolt and it all made sense.
A few years ago I had replaced the cracked rubber boot between the MAF and the throttle body. At the same time I replaced the threaded bolt on the jubilee clip that attached the boot to the throttle body since the head on the original one was rounding off. I had used a bolt that was 1cm too long and it had been catching on the external spring-loaded plastic portion butterfly valve, preventing or slowing the opening of the valve.
I moved the bolt out of the way and re-started the car and all was fine. I went for a drive and used aggressive kickdown and the gearchanges are now instant and totally smooth - the throttle body butterfly valve is now free to move instantly to wide-open throttle position with no delay as it fights against the tip of the bolt.
Nearside throttle body with the affected area circled:
Close-up showing gouged butterfly valve and offending bolt:
bolidemichael said:
Excellent stuff! How satisfying... so is the next step to replace the bolt and the gouged our butterfly valve? Is there a part number for the bolt?
Hello. Nope, it's all sorted. I simply rotated the jubilee clip a few cm so the bolt no longer fouls on the valve components and all is good. I had a few minutes of imagining having to source a new/refurbed throttle body, so this is a massive relief.Happy New Year. I may curse myself by uttering this but all is going well since the resolution of the jammed throttle body. I haven't being using her as much as I would like due to the miserable weather.
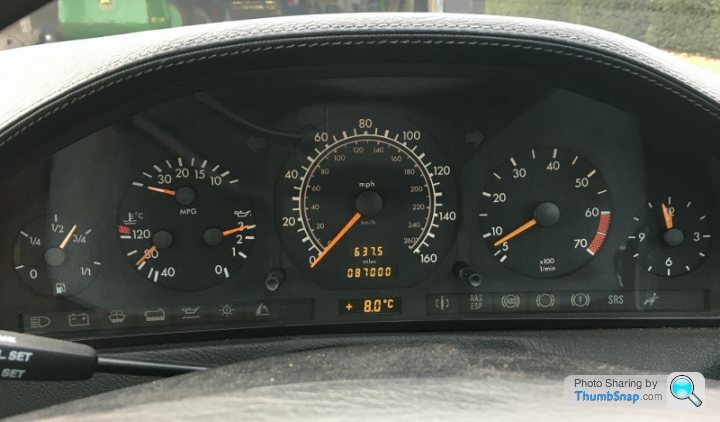
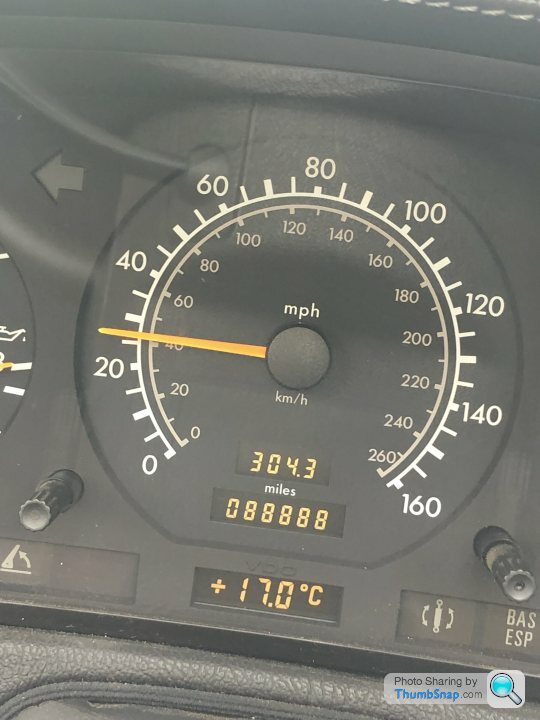
87,000 miles:
After examining one spark plug last year I thought it would be prudent to give them all an inspection. Access is very easy on this engine; for each cylinder simply remove the pencil coil and whip out the plug. All coils are original 1996 items:
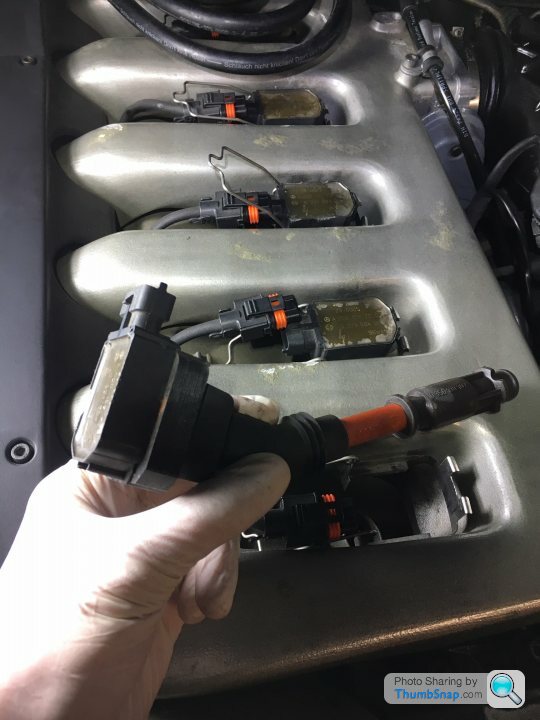
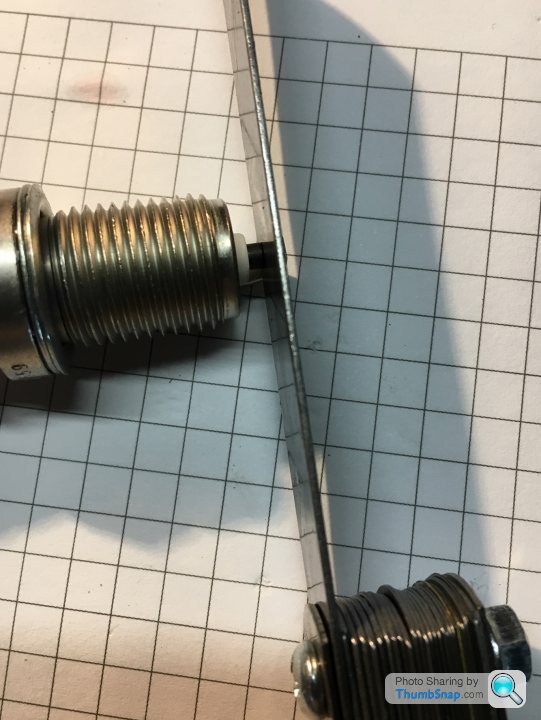
Feeler gauge in use. All plugs were in great condition with the correct gap of 0.80mm (not 8mm as you may read on some Merc forums!)
However, a few of the spark plug wells had engine oil in them. This suggests gasket failure so the intake manifold and valve covers may need to come off at some point. I will keep an eye on it.
A recent oil change. The car had only done about 2,000 miles since the previous one. I used a Mann filter this time. Well regarded filters but it didn't seem quite as well made as the OEM Hengst filters I had used until now. I think I will go back to Hengst filters next time:
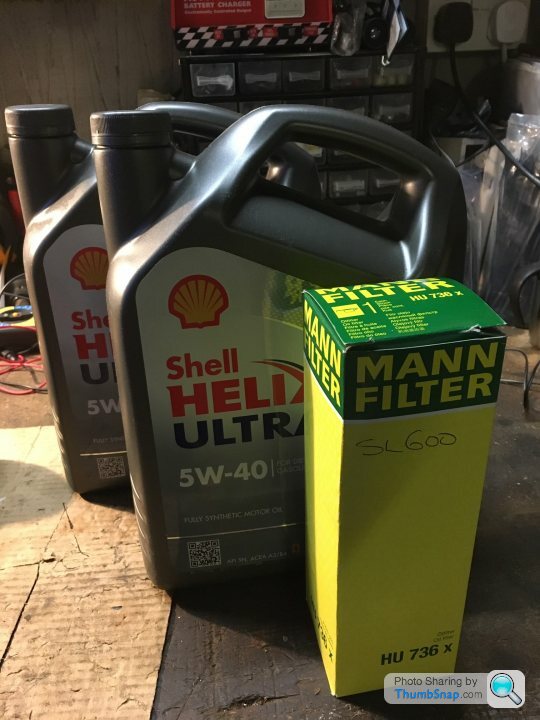
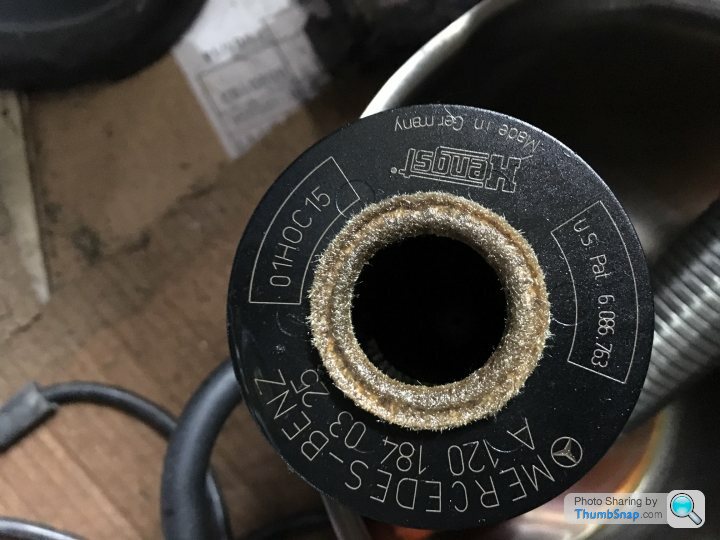
To access the oil filter cartridge housing the nearside air intake needs to be removed:

I managed to crack a headlight lense but found a used pair of lenses on Ebay:
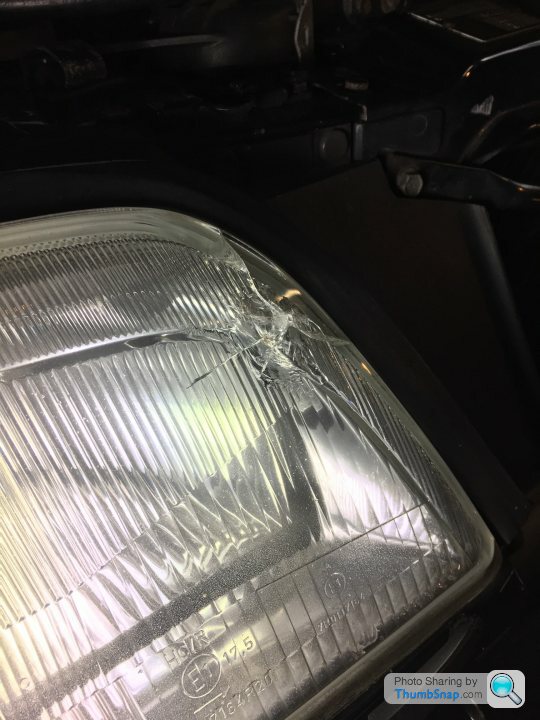
It's a simple job to remove the headlight unit and swap over the lense. However, as with all cars of this age, the job takes twice as long since you will use the opportunity to clean grubby nooks and crannies and treat any local surface rust:
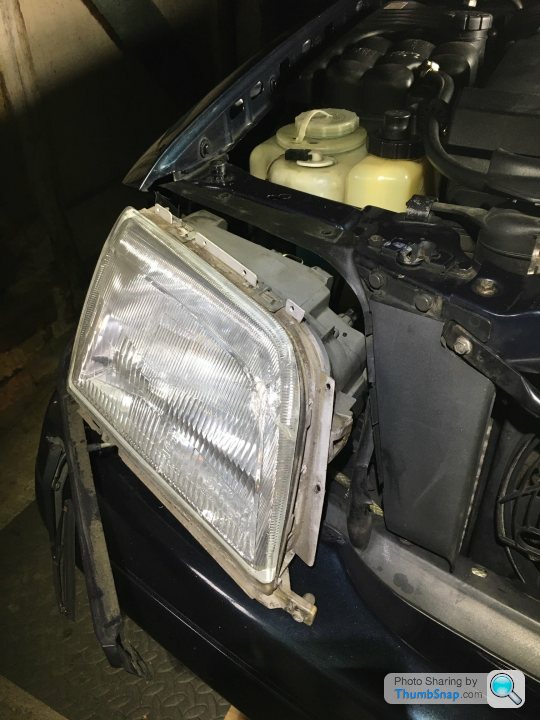
The reservoir next to the screenwash is for the suspension's hydraulic fluid:
87,000 miles:
After examining one spark plug last year I thought it would be prudent to give them all an inspection. Access is very easy on this engine; for each cylinder simply remove the pencil coil and whip out the plug. All coils are original 1996 items:
Feeler gauge in use. All plugs were in great condition with the correct gap of 0.80mm (not 8mm as you may read on some Merc forums!)
However, a few of the spark plug wells had engine oil in them. This suggests gasket failure so the intake manifold and valve covers may need to come off at some point. I will keep an eye on it.
A recent oil change. The car had only done about 2,000 miles since the previous one. I used a Mann filter this time. Well regarded filters but it didn't seem quite as well made as the OEM Hengst filters I had used until now. I think I will go back to Hengst filters next time:
To access the oil filter cartridge housing the nearside air intake needs to be removed:
I managed to crack a headlight lense but found a used pair of lenses on Ebay:
It's a simple job to remove the headlight unit and swap over the lense. However, as with all cars of this age, the job takes twice as long since you will use the opportunity to clean grubby nooks and crannies and treat any local surface rust:
The reservoir next to the screenwash is for the suspension's hydraulic fluid:
bolidemichael said:
Come on Hereward, you must've been indulging in some fettling during lockdown! 
Hello and apologies for the slow replies. I do not receive notifications for this thread.Very little to report. Touch wood she is behaving perfectly and the to-do list remains mercifully short.
The car has always had the infamous wobbly rear view mirror glass. Coupled with a broken interior light switch in the roof console I decided to tackle both concurrently. Here follows the usual format of excruciatingly dull close-ups.
Step 1 is to rip everything off the roof:
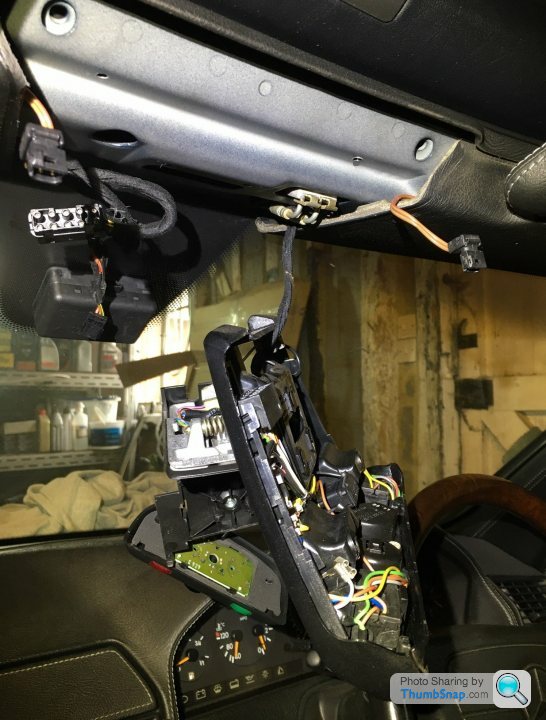
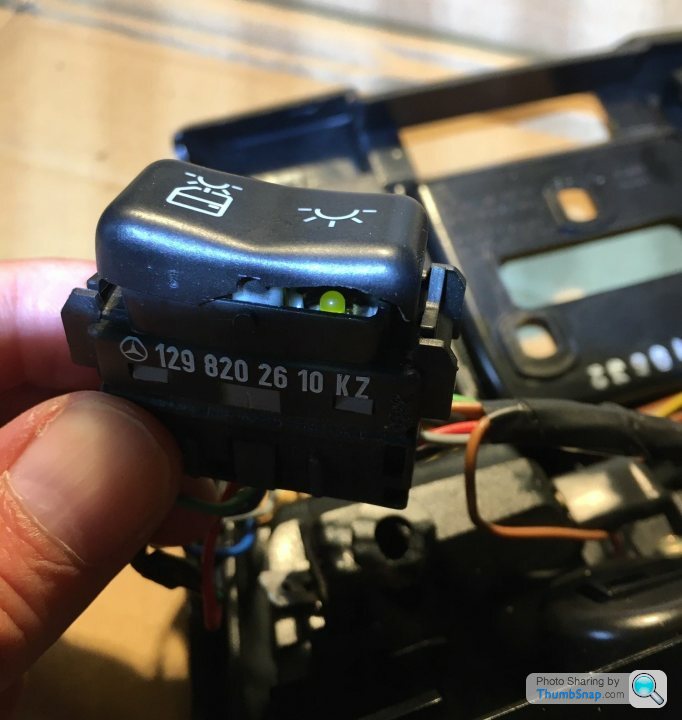
This is the broken light switch in question. I cannot quite fathom how it broke in this manner. Perhaps an over-exuberant finger jab:

The mirror glass wobbles when the spring clips retaining posts break inside the mirror housing. My car has a replacement windscreen so perhaps their fate was sealed when the unit was removed during the replacement process:

The fixing solution is to Dremel some slots where the end of the clips can be wedged in to, thus restoring spring pressure against the back of the glass. This involves bending one end of the clip. Of course this resulted in me snapping one clip, rendering it too short.
However, using remarkable (for me) lateral thinking I can confirm that a collar stiffener from a Charles Tyrwhitt business shirt makes a better-than-OEM replacement clip. I am confident that my SL is unique in the annals of Mercedes-Benz fettling with such a bespoke arrangement. Here we have the spring clips nicely slotted in to position against the back of the mirror glass:

Umm...that's about it. I really need to drive it more...
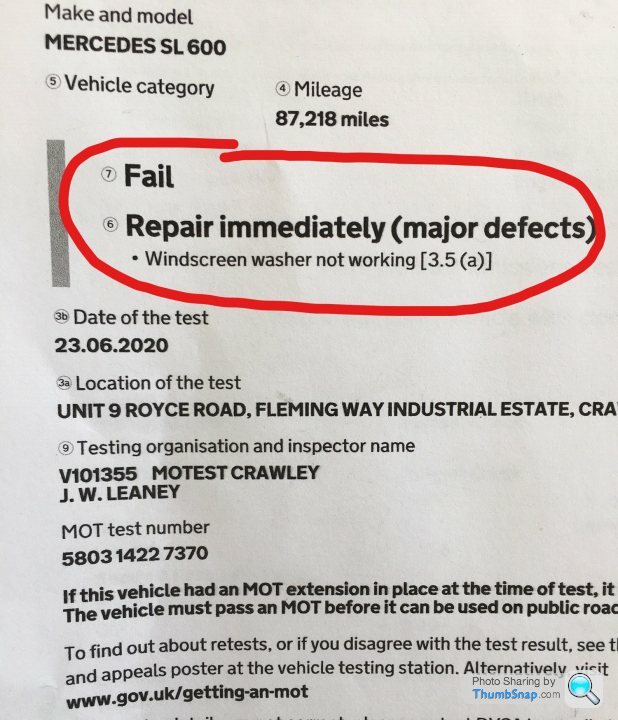
Crazy scenes at the MOT testing station.
Despite the MOT extension due to lock down I thought it would be wise to get the MOT done early. The test centres are quiet (and will now remain so every June for a few years) and come September they are going to be super busy.
The car scraped through on CO emissions but embarrassingly failed due to a dead screenwash pump. I never use the screenwash and I didn't think to test it before the MOT. It had died of since it was last used at the previous MOT. I cannot recall a previous MOT failure on any car.
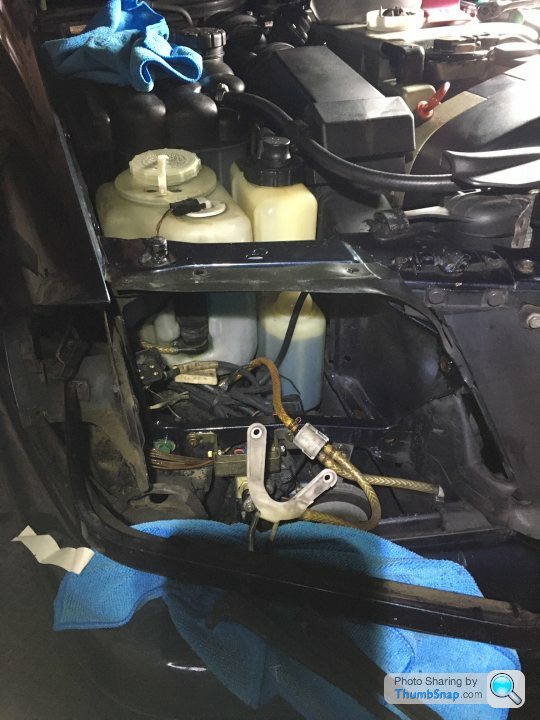
Even by my standards these pics are excruciatingly dull but I want to show the thought that went in to the design of the screenwash reservoir
I needed to test the voltage going to the pump to confirm it was indeed the pump that had died. The engine bay is packed tight so my initial thought was to remove the headlight to gain access to the pump. However, an exploratory lift of the reservoir showed it had been designed to lift straight out vertically. It is not bolted in place at all; a groove down its side slots it in to place on a bracket shared with the hydraulic suspension reservoir and all the piping and electrical cables are long enough to permit vertical removal.
This shows the disconnected dead pump that sends screenwash to the windscreen:
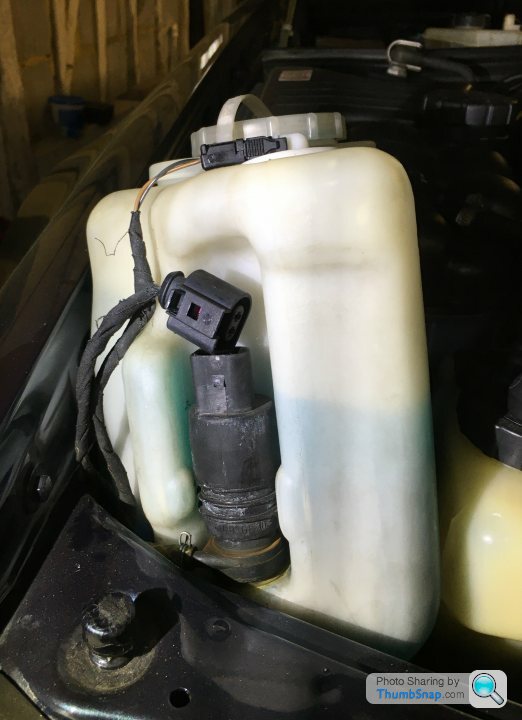
This angle shows the bracket the reservoirs slot on to (Yellow circle). The Green circle is the pump to the headlight washers, the Red circle is the dead pump to the windscreen jets:

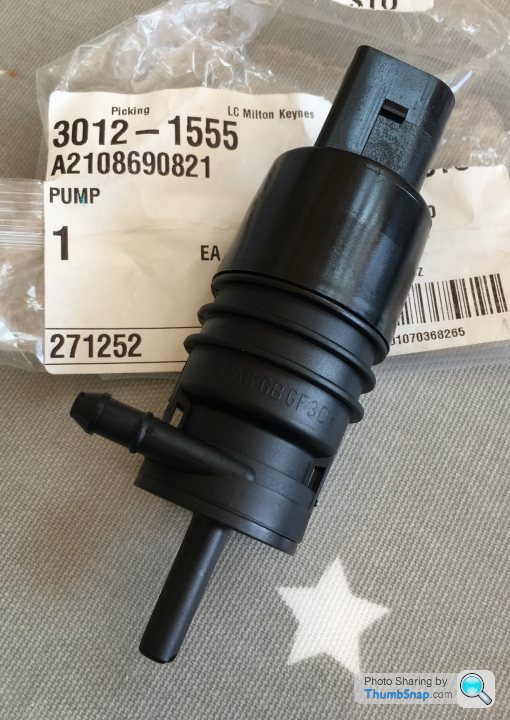
New pump that the main dealer had in stock:
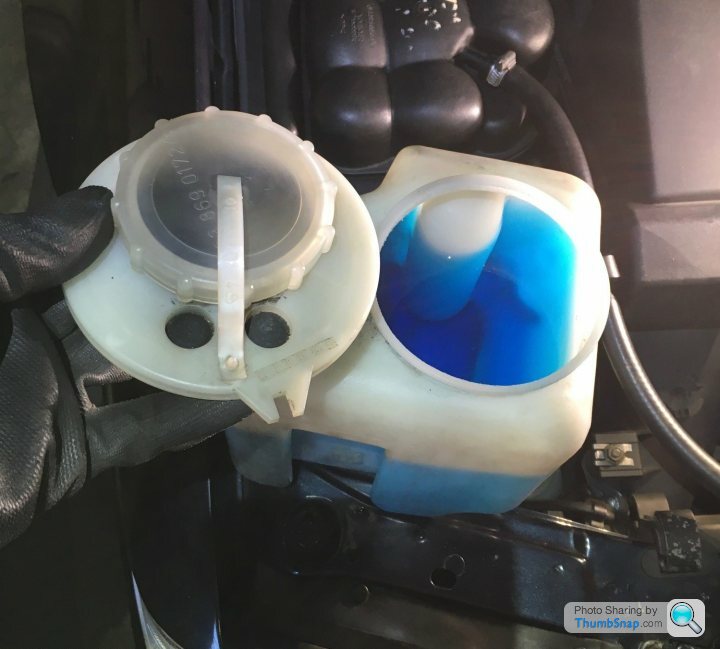
As well as a screw cap the reservoir also has a large circular lid that be totally pulled off to enable easy access inside for cleaning out if necessary. Not sure why they didn't just make it a single cap/lid but that's attention to detail for you:
All quickly sorted and the re-test passed. Nice to learn something else about this car. Luckily it wasn't the column stalk that had died, that would have been very tedious to fix.
Despite the MOT extension due to lock down I thought it would be wise to get the MOT done early. The test centres are quiet (and will now remain so every June for a few years) and come September they are going to be super busy.
The car scraped through on CO emissions but embarrassingly failed due to a dead screenwash pump. I never use the screenwash and I didn't think to test it before the MOT. It had died of since it was last used at the previous MOT. I cannot recall a previous MOT failure on any car.
Even by my standards these pics are excruciatingly dull but I want to show the thought that went in to the design of the screenwash reservoir
I needed to test the voltage going to the pump to confirm it was indeed the pump that had died. The engine bay is packed tight so my initial thought was to remove the headlight to gain access to the pump. However, an exploratory lift of the reservoir showed it had been designed to lift straight out vertically. It is not bolted in place at all; a groove down its side slots it in to place on a bracket shared with the hydraulic suspension reservoir and all the piping and electrical cables are long enough to permit vertical removal.
This shows the disconnected dead pump that sends screenwash to the windscreen:
This angle shows the bracket the reservoirs slot on to (Yellow circle). The Green circle is the pump to the headlight washers, the Red circle is the dead pump to the windscreen jets:
New pump that the main dealer had in stock:
As well as a screw cap the reservoir also has a large circular lid that be totally pulled off to enable easy access inside for cleaning out if necessary. Not sure why they didn't just make it a single cap/lid but that's attention to detail for you:
All quickly sorted and the re-test passed. Nice to learn something else about this car. Luckily it wasn't the column stalk that had died, that would have been very tedious to fix.
bolidemichael said:
I don't know why you insist on prefacing your posts with a warning of nerd content. It's your MO and it keeps up coming back for more!
Well explained, well maintained. Out of interest, since the vehicle had failed the MOT, were you still able to drive it, as the previous one hadn't expired?
Too kind, thank you.Well explained, well maintained. Out of interest, since the vehicle had failed the MOT, were you still able to drive it, as the previous one hadn't expired?
I need to drive the damn thing. A proper European adventure like your wonderful thread. The engine is ideal for demolishing long distances and then the retractable roof is ideal for taking in the scenery pottering around on the twisty bits. Or, weirdly, it may make more sense to fit the panoramic roof to improve motorway refinement if covering large distances. The fabric roof lets in a lot of road noise at motorway speed and this may become wearisome hour after hour. The hardtop turns the car in to a GT rather than a boulevard cruiser.
When it had failed the MOT I was not allowed to drive it other than to and from a place of repair and to and from the testing station. It all worked out well; I had replaced the part within a few hours of the fail and then passed the re-test the next morning since they were so quiet.
Zonergem said:
That pic beautifully encapsulates what the SL is all about. And it also highlights what an enigma the SL600 is. They shoe-horned an engine designed (for their saloon cars) to destroy autobahns in to a car that does not belong on the autobahn.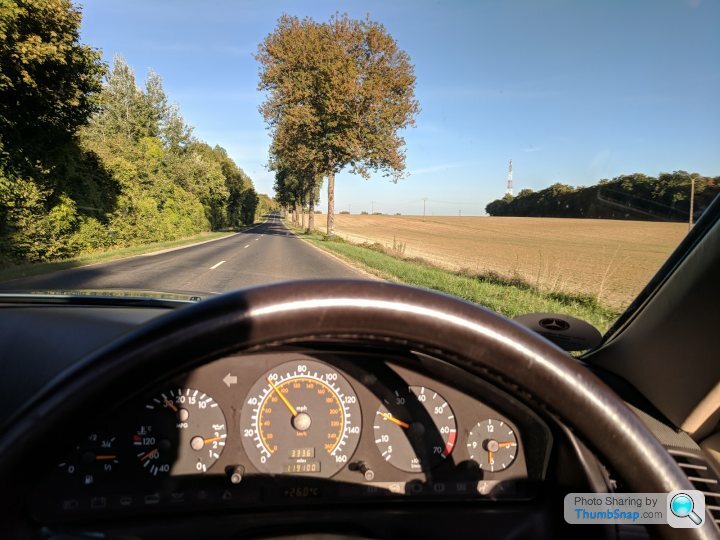
Objectively it's an odd match of engine to vehicle. Subjectively it's a glorious 12 inch (cylinder) willy-waving contest!
r129sl said:
The twin lidded washer bottle is intended to accommodate washer water heating. On LHD models, a coolant hose loops in and out of the washer bottle through those small circles in the larger lid; the smaller lid obviously is just for refilling...
Brilliant stuff! I wondered what those two black rubber grommets were for. I thought they were designed to blow in case of fluid expansion/icing.bolidemichael said:
r129sl said:
Oh for a European road trip! Back in my youth, when covering 1000 miles at a stretch running at 125mph, I would often install the hardtop, the little fold up stand in the boot, and remove it when I arrived at my destination.
This is the ideal, assuming one has a place to store the hardtop upon arrival.Crikey, the 3 years since my last updates have flown. And what a tumultuous 3 years it has been on this crazy planet 
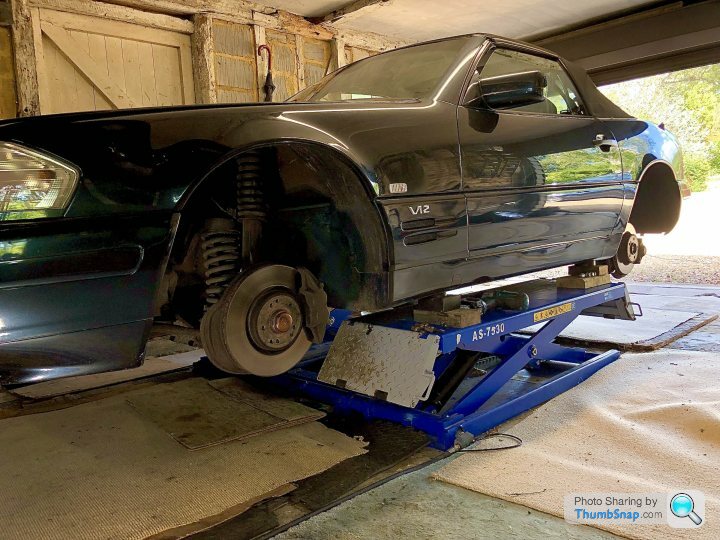
The SL is not getting enough use under my custodianship, something I must put right. The MOT history reveals ~500 miles per year, which is simply unacceptable. She runs the risk of slowly turning into a barnfind:
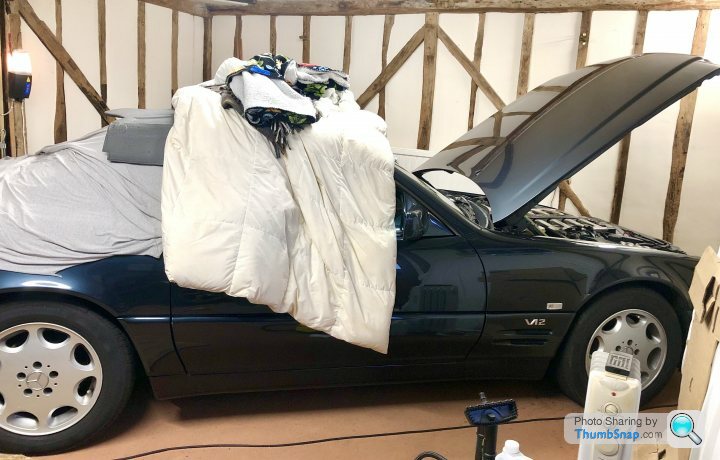
Nick Leeson afficionados will understand:
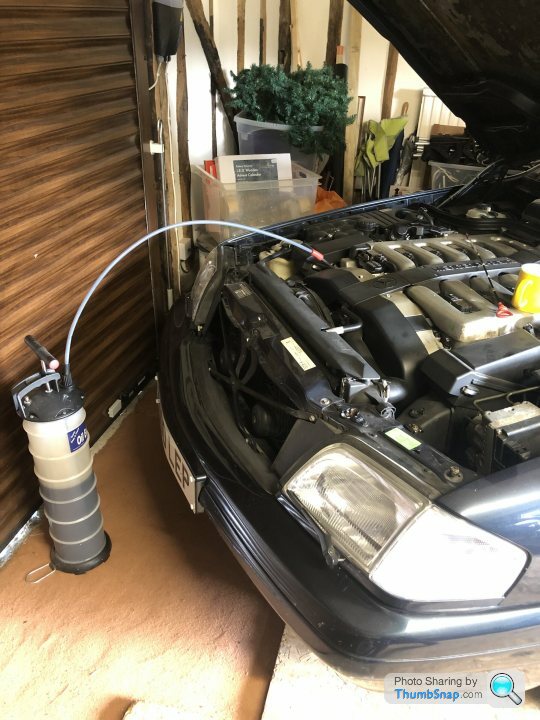
Despite the low annual mileage I do an oil and filter change every 12 months:
Hydraulic fluid for the ADS suspension changed too. Very simple job and it's a no-brainer to keep this fluid fresh and clean:

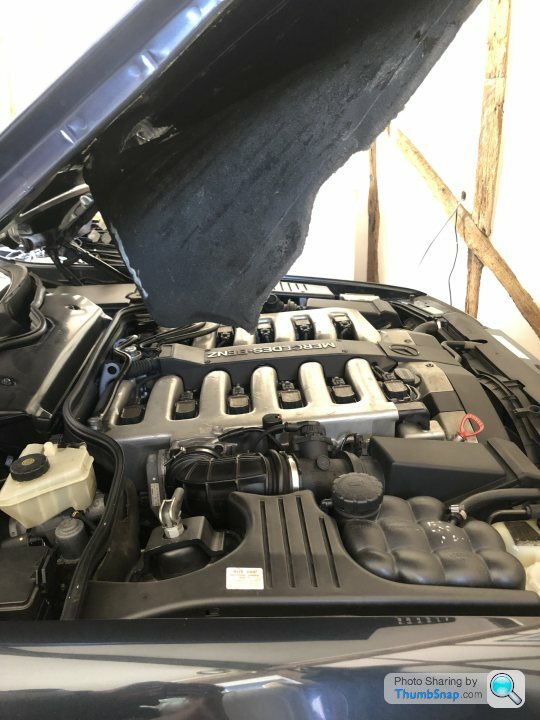
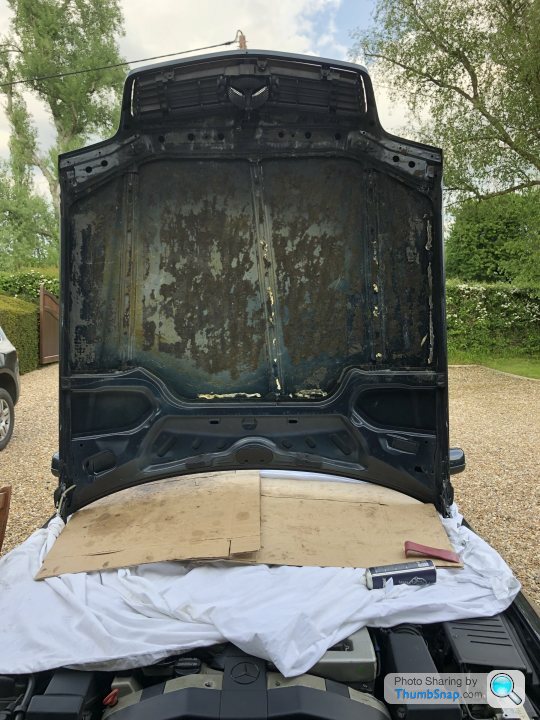
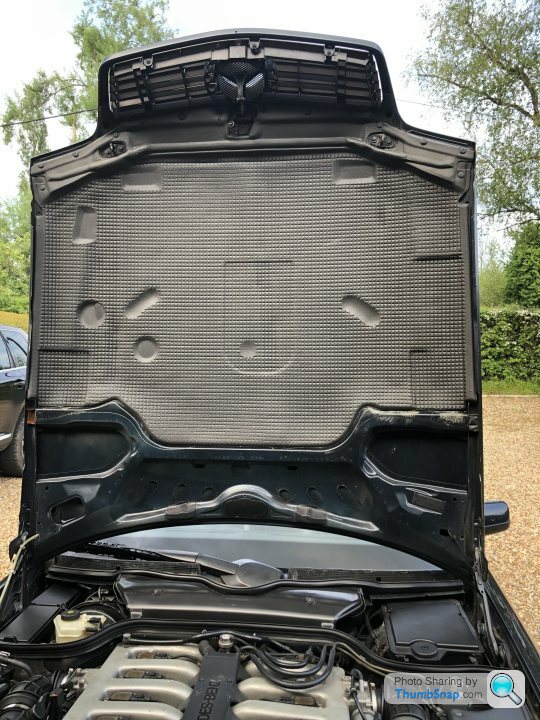
The bonnet foam pad was starting to crumble so I removed it, cleaned the bonnet underside and fitted a new OEM pad:
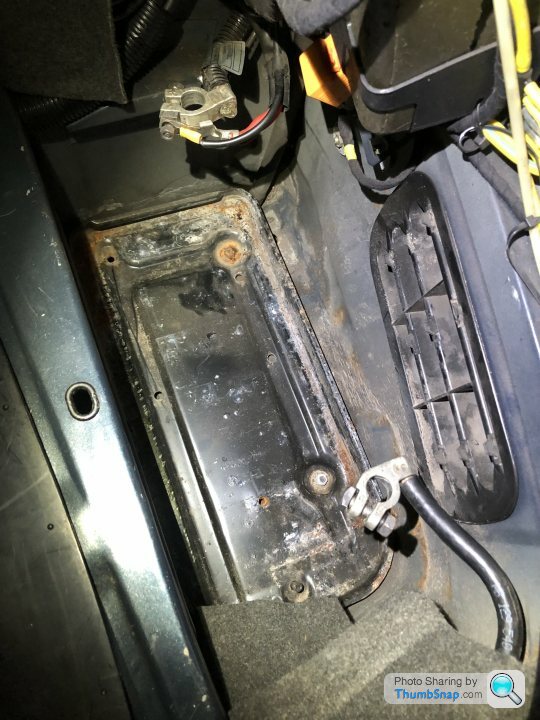
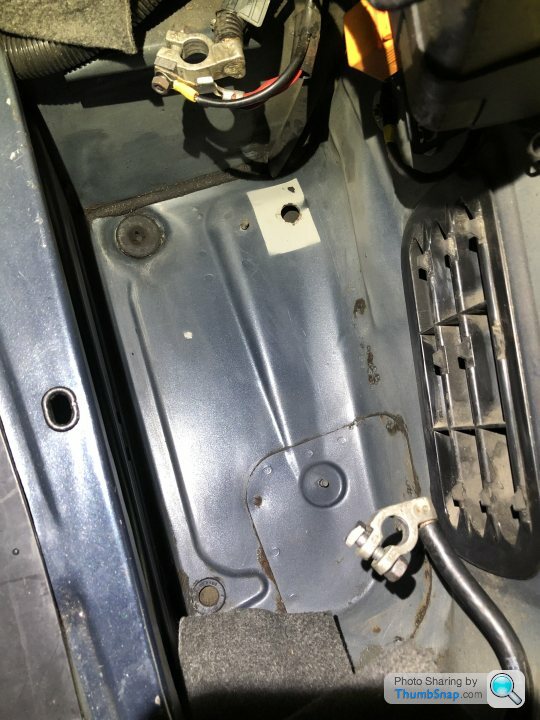
I removed the battery tray and spruced it up with a fresh coat of paint. The bodywork under the tray was mint, no nasty surprises there. I sprayed some ACF-50 so that it can creep in to the seams:
In the next few months I will change the coolant and the brake fluid.
The SL is not getting enough use under my custodianship, something I must put right. The MOT history reveals ~500 miles per year, which is simply unacceptable. She runs the risk of slowly turning into a barnfind:
Nick Leeson afficionados will understand:
Despite the low annual mileage I do an oil and filter change every 12 months:
Hydraulic fluid for the ADS suspension changed too. Very simple job and it's a no-brainer to keep this fluid fresh and clean:
The bonnet foam pad was starting to crumble so I removed it, cleaned the bonnet underside and fitted a new OEM pad:
I removed the battery tray and spruced it up with a fresh coat of paint. The bodywork under the tray was mint, no nasty surprises there. I sprayed some ACF-50 so that it can creep in to the seams:
In the next few months I will change the coolant and the brake fluid.
tobinen said:
Good to hear it's still OK. I have to replace my insulation so a timely post. From where did your source yours? The SL Shop has a kit for £100 which is tempting
I purchased the pad from Mercedes and got roasted for £186 for it. Then another £20 or so for the 3M adhesive spray.I don't think you can go wrong with the SL Shop's kit at that price, I should have gone down that route.
These foam pads don't like the engine heat (or maybe it's the adhesive that fails?). My previous one was fitted when I first acquired the car (2016) so didn't last long, especially given my limited use, plus the fact I always store the car with the bonnet open (thus minimising heat degradation) to deter mice.
Edited by Hereward on Friday 2nd June 14:33
Time for a mundane servicing update:
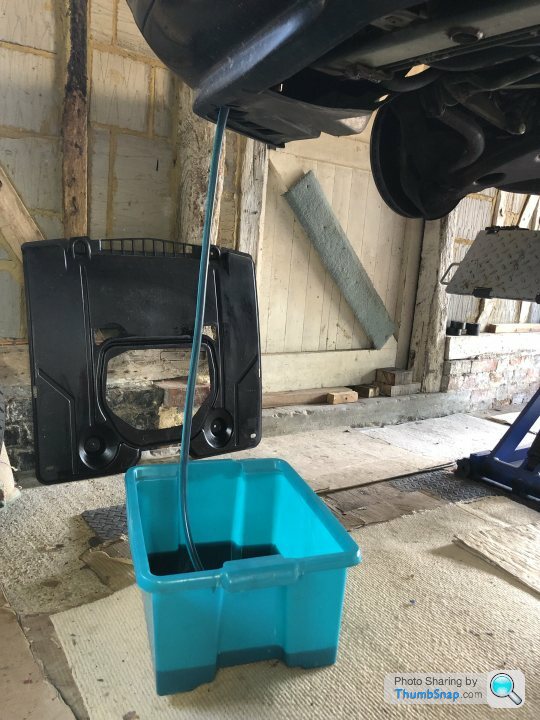
The coolant was partially drained and refilled. The system holds about 20 litres. I drained out about 9 litres from the radiator. There is a useful drain point at the bottom corner of the radiator. Simply push on a length of hose and open the valve with pliers. All very civilised with not a single drop of spillage. The old coolant looked really clean so I didn't worry about flushing or trying to fully drain the engine block.
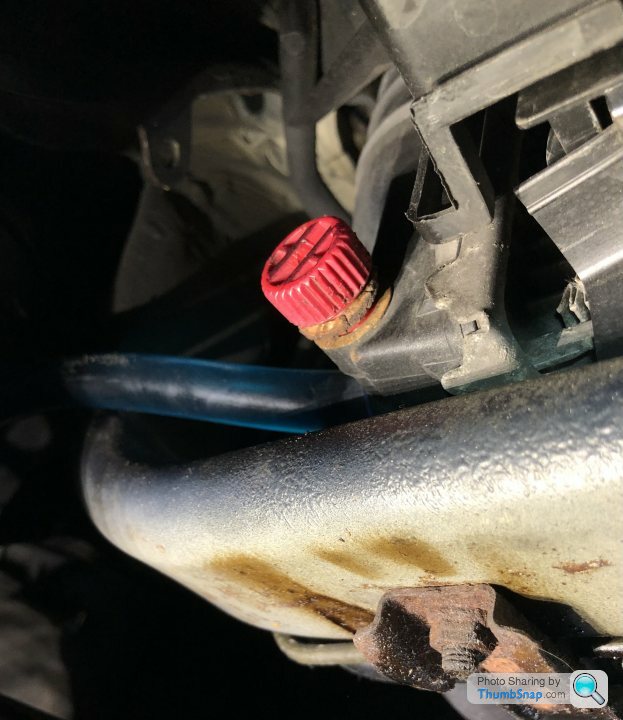
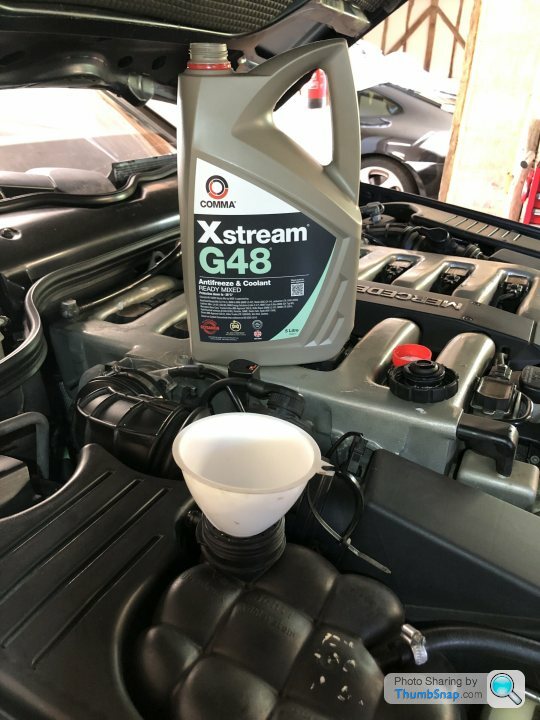
The required coolant specification is Mercedes 325.0 (concentrate) or 326.0 (ready mix). Comma's G48 (made under licence from BASF) meets the 326.0 spec.
I changed the brake fluid and also tightened up the parking brakes inside the rear discs since their efficiency was close to the limit at the last MOT.
General inspection under the car showed nothing of concern. I gave everything a fresh coat of Bilt Hamber wax. The slight oil leak from the engine casing also provides additional corrosion protection
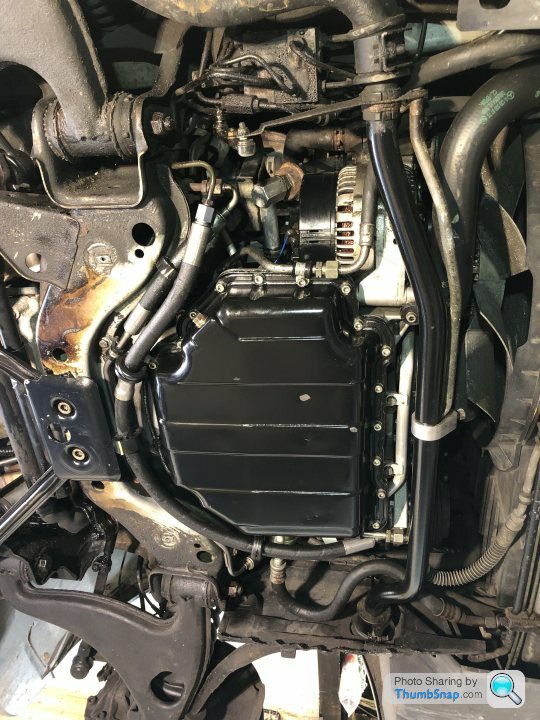
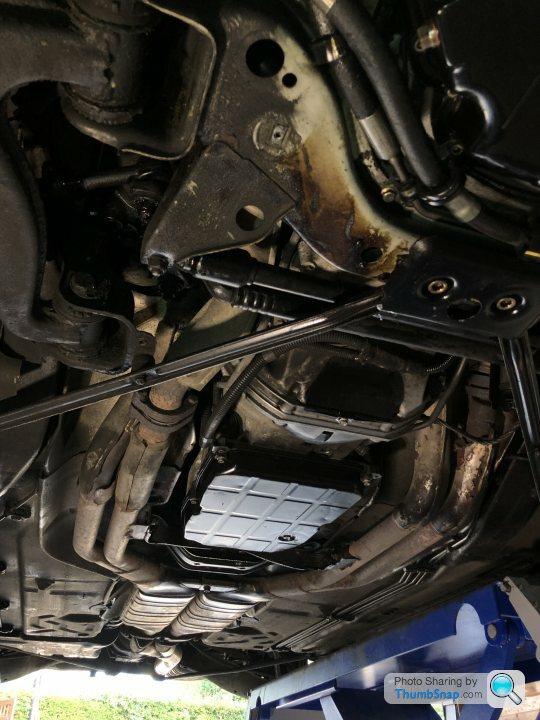
Routine servicing on this car is remarkably simple. Access to all fluids, filters, bulbs and spark plugs is excellent.
The coolant was partially drained and refilled. The system holds about 20 litres. I drained out about 9 litres from the radiator. There is a useful drain point at the bottom corner of the radiator. Simply push on a length of hose and open the valve with pliers. All very civilised with not a single drop of spillage. The old coolant looked really clean so I didn't worry about flushing or trying to fully drain the engine block.
The required coolant specification is Mercedes 325.0 (concentrate) or 326.0 (ready mix). Comma's G48 (made under licence from BASF) meets the 326.0 spec.
I changed the brake fluid and also tightened up the parking brakes inside the rear discs since their efficiency was close to the limit at the last MOT.
General inspection under the car showed nothing of concern. I gave everything a fresh coat of Bilt Hamber wax. The slight oil leak from the engine casing also provides additional corrosion protection
Routine servicing on this car is remarkably simple. Access to all fluids, filters, bulbs and spark plugs is excellent.
Gassing Station | Readers' Cars | Top of Page | What's New | My Stuff