Caterham Seven 360R
Discussion


Nearly a week since the last update.
With the car being pretty much mechanically done, it's mainly been fiddly cosmetic jobs to do.
Previously fed up with the front cycle wings I thought I may as well crack on with the rear wings instead.
Pretty simple, just time consuming messing about with rubber 'P' trim.
I started off by sticking the trim to the back of the carbon stone protectors:

Then it was a case of offering the protectors up to the wings, drilling holes into the wings, and riveting everything into place:

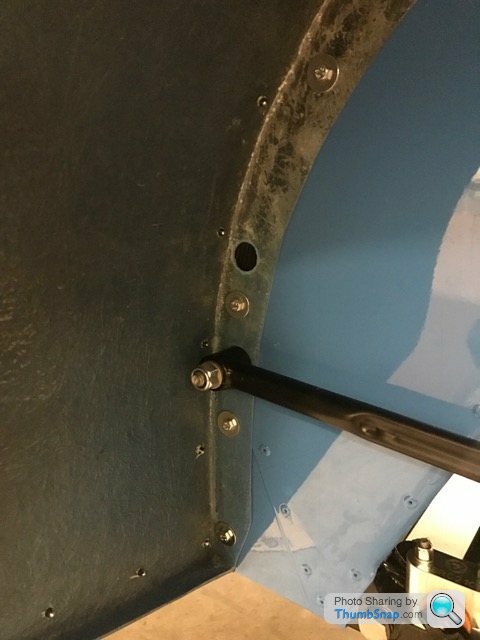
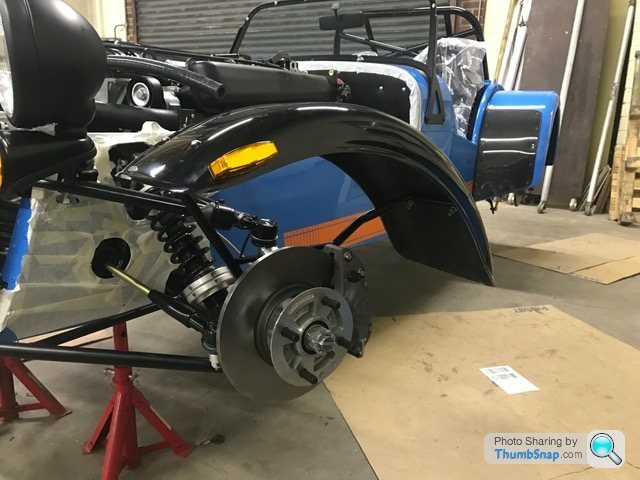
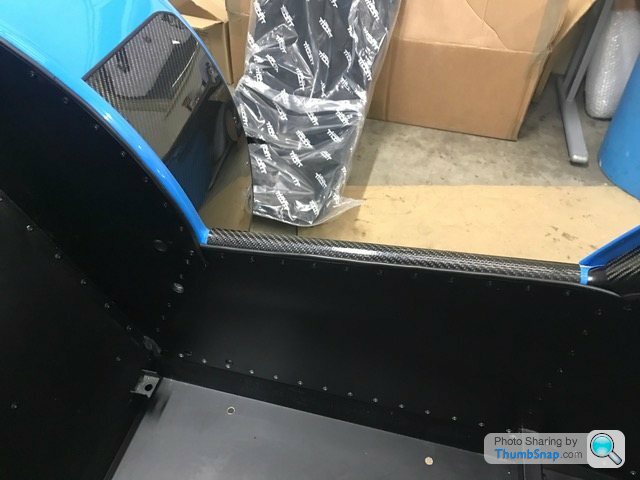
Now the wings had to be attached to the car itself. Everything was pre-drilled here - the wings just needed bolting into place with more 'P' trim between them and the car body. The trim requires V slots cutting into it when it has a corner to go round:

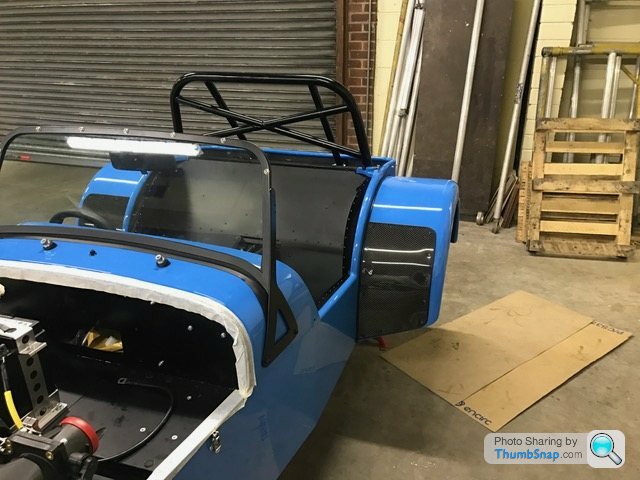
There are slightly larger pre-drilled holes in the wings. These are for the rear radius arms to go through. Most people cut into the holes making a slot that sits onto the arms. Instead, I unbolted the arms, fitted the wings, and then torqued them back up again. Looks neater to me this way. Queue lots of cracking sounds as I tightened!
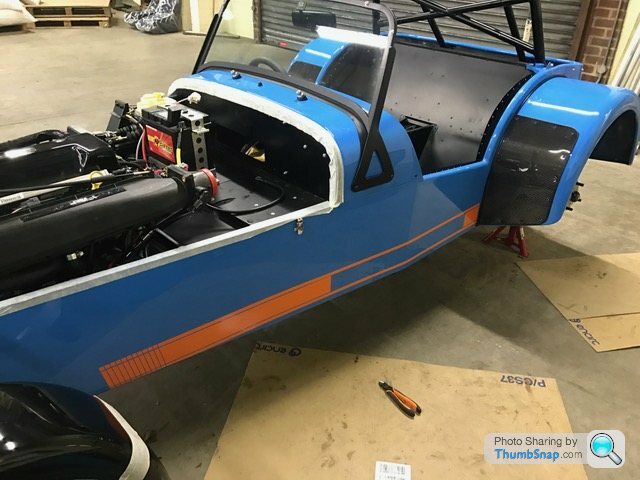
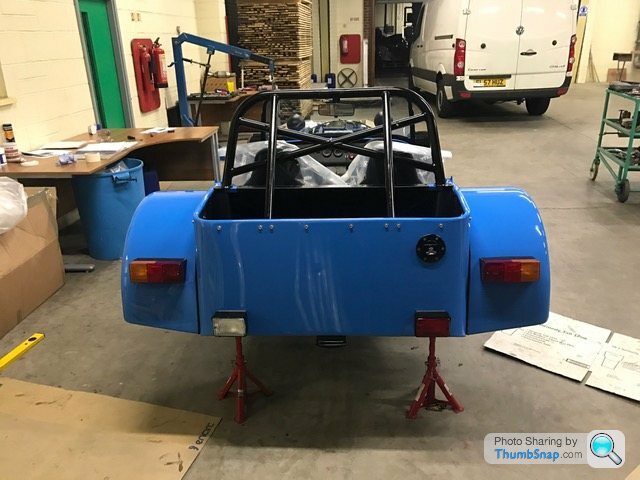
Starting to look more like a Caterham now:

As a reward I decided to stick the side stripes on:


I might have to re-do these if it bothers me when the car is on the road. I stuck them on parallel to the ground rather than following the lines of the car. Didn't realise this until I stood back...
Now to revisit the front cycle wings.
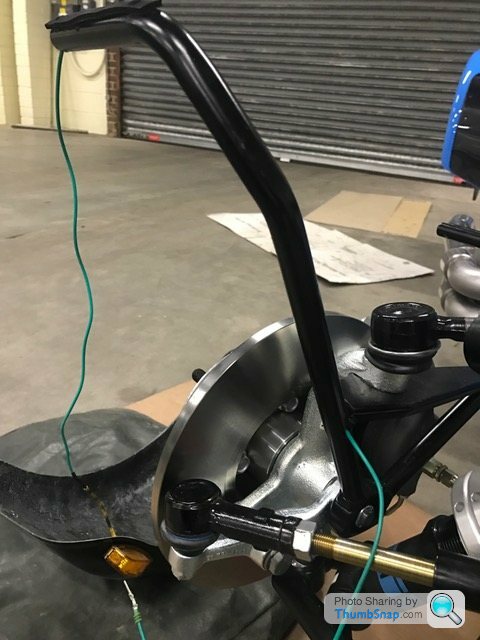
Using a right angle drill, I drilled up through the wingstays and through the wings. Now they were ready to go on. But not before the side repeaters were fitted. Once I had got the first repeater into a wing. I took it apart again and made a rubbing to tranfer over onto the other wing ensuring they'd be near enough a mirror image of each other:


Now the dreaded job of threading the repeater wire through the wingstay. I put some welding wire up through the stay, attached it to the repeater wire and pulled it through. This went well until the wire needed to exit the stay. The spade connector on the end of the wire is a bit long to get out of the hole. Eventually I managed to hook a bit more welding wire round the connector pulling it out enough to grab it with some pliers:
Then I heat-shrinked the wire protruding from the wingstay and slipped a couple of bits of washer hose over to stop it chafing on the chassis on its way into the engine bay:


Job done - repeat on the other side.
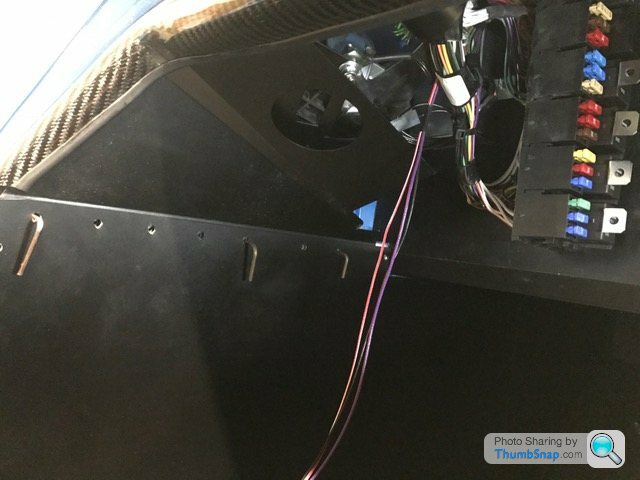
With the front end wiring all sorted, it was time to move to the back.
The rear light clusters needed screwing into the rear wings. Pretty simple job with minimal fuss.
I stripped the lights down to their bases and lined them to the wings. To ensure they were level, I put a spirit level across the boot of a car, noted the bubble was slightly off to the right and replicated this on the bases:
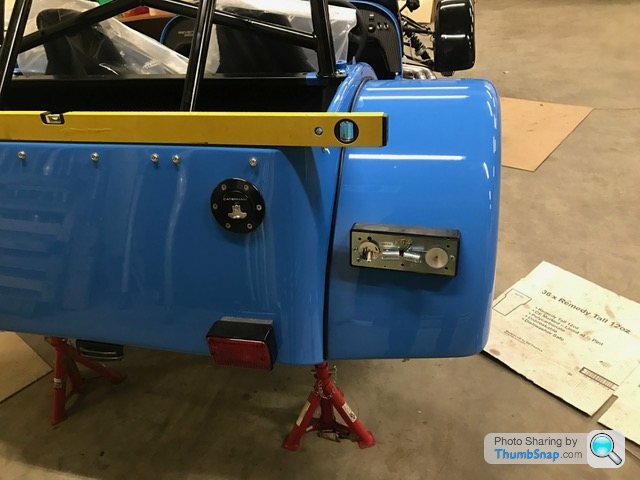
Four self tappers (more horrible cracking noises) into each base ended up with this:
As another reward, I decided to do some more sticking:

On went the number plate light:

For some reason, I still hadn't fitted the air intake yet. No time like the present and all that...

No instructions for this but it's pretty self explanatory. Really helps that the correct fixings come in the same box.
Another job I wasn't looking forward to was fitting the knee trims and sill protectors. I read somewhere that is was a massive faff getting everything lined up, especailly the knee trims.
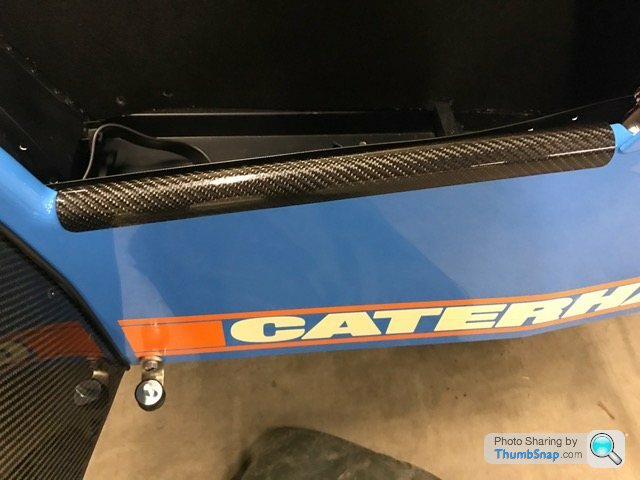
Wasn't too bad in the end. I just used some thicker welding wire to poke through the cockpit skin, and into the knee trims and finally into the chassis. This held everything in place whilst I slid the 'P' trim in between the trims and cockpit skin then riveted everything into place.
The sill protectors were more straightforward. Luckily I had a spare pair of hands to hold them in place whilst I drilled and riveted.

Next up was to rivet (there's a theme here) three popper bases into the footwell, fix three popper heads into the rubber matts, then (you guessed it) pop the matts into place.
That's it for now.
The car is being collected by Caterham on Tuesday (28th) so It's all systems go at the moment!
More next time...
With the car being pretty much mechanically done, it's mainly been fiddly cosmetic jobs to do.
Previously fed up with the front cycle wings I thought I may as well crack on with the rear wings instead.
Pretty simple, just time consuming messing about with rubber 'P' trim.
I started off by sticking the trim to the back of the carbon stone protectors:
Then it was a case of offering the protectors up to the wings, drilling holes into the wings, and riveting everything into place:
Now the wings had to be attached to the car itself. Everything was pre-drilled here - the wings just needed bolting into place with more 'P' trim between them and the car body. The trim requires V slots cutting into it when it has a corner to go round:
There are slightly larger pre-drilled holes in the wings. These are for the rear radius arms to go through. Most people cut into the holes making a slot that sits onto the arms. Instead, I unbolted the arms, fitted the wings, and then torqued them back up again. Looks neater to me this way. Queue lots of cracking sounds as I tightened!
Starting to look more like a Caterham now:
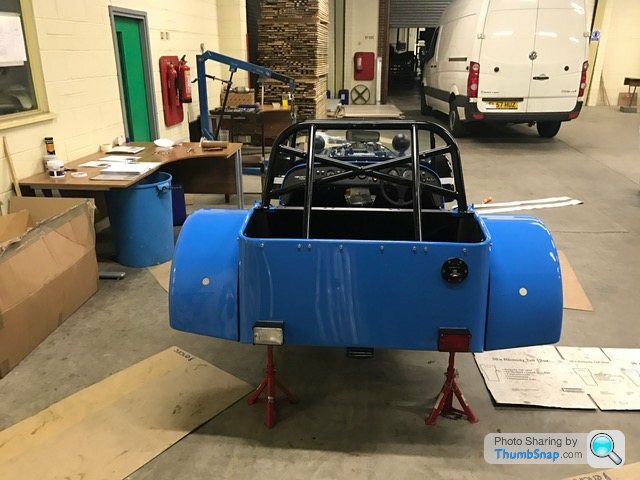
As a reward I decided to stick the side stripes on:
I might have to re-do these if it bothers me when the car is on the road. I stuck them on parallel to the ground rather than following the lines of the car. Didn't realise this until I stood back...
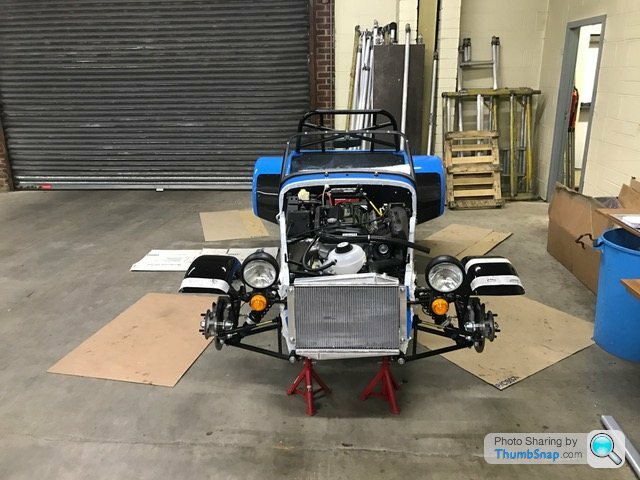
Now to revisit the front cycle wings.
Using a right angle drill, I drilled up through the wingstays and through the wings. Now they were ready to go on. But not before the side repeaters were fitted. Once I had got the first repeater into a wing. I took it apart again and made a rubbing to tranfer over onto the other wing ensuring they'd be near enough a mirror image of each other:
Now the dreaded job of threading the repeater wire through the wingstay. I put some welding wire up through the stay, attached it to the repeater wire and pulled it through. This went well until the wire needed to exit the stay. The spade connector on the end of the wire is a bit long to get out of the hole. Eventually I managed to hook a bit more welding wire round the connector pulling it out enough to grab it with some pliers:
Then I heat-shrinked the wire protruding from the wingstay and slipped a couple of bits of washer hose over to stop it chafing on the chassis on its way into the engine bay:
Job done - repeat on the other side.
With the front end wiring all sorted, it was time to move to the back.
The rear light clusters needed screwing into the rear wings. Pretty simple job with minimal fuss.
I stripped the lights down to their bases and lined them to the wings. To ensure they were level, I put a spirit level across the boot of a car, noted the bubble was slightly off to the right and replicated this on the bases:
Four self tappers (more horrible cracking noises) into each base ended up with this:
As another reward, I decided to do some more sticking:
On went the number plate light:
For some reason, I still hadn't fitted the air intake yet. No time like the present and all that...
No instructions for this but it's pretty self explanatory. Really helps that the correct fixings come in the same box.
Another job I wasn't looking forward to was fitting the knee trims and sill protectors. I read somewhere that is was a massive faff getting everything lined up, especailly the knee trims.
Wasn't too bad in the end. I just used some thicker welding wire to poke through the cockpit skin, and into the knee trims and finally into the chassis. This held everything in place whilst I slid the 'P' trim in between the trims and cockpit skin then riveted everything into place.
The sill protectors were more straightforward. Luckily I had a spare pair of hands to hold them in place whilst I drilled and riveted.
Next up was to rivet (there's a theme here) three popper bases into the footwell, fix three popper heads into the rubber matts, then (you guessed it) pop the matts into place.
That's it for now.
The car is being collected by Caterham on Tuesday (28th) so It's all systems go at the moment!
More next time...
Edited by ECG1000 on Wednesday 22 February 16:28
Great progress!
Are going to get the engine fired up before Caterham take it away? Is that to get it through the IVA? (If it's still called that)
Random question, I assume Caterham fit the rear fog and reverse lights? Just wondering if there is scope to move them in a little, the gap can look odd when running a shorter private plate.
scz4 said:
Great progress!
Are going to get the engine fired up before Caterham take it away? Is that to get it through the IVA? (If it's still called that)
Random question, I assume Caterham fit the rear fog and reverse lights? Just wondering if there is scope to move them in a little, the gap can look odd when running a shorter private plate.
Thank you Are going to get the engine fired up before Caterham take it away? Is that to get it through the IVA? (If it's still called that)
Random question, I assume Caterham fit the rear fog and reverse lights? Just wondering if there is scope to move them in a little, the gap can look odd when running a shorter private plate.

There might be a tiny bit of scope to move the lights in a touch. I'd imagine it'll be only a few mm though. Then you'd have to re-drill into the body which could end up being messy due to the proximity of the proposed new holes to the old. Don't forget there's a big hole for all the wires to go through.
After putting all the necessary fluids in last night, I had a go at starting the car. No dice sadly...
I checked and double checked all the connections and everything seemed fine but still nothing. In the end, we cheated and put a wire directly from the battery + terminal to the starter solenoid. Thankfully the engine turned over and registered oil pressure. A small victory but I went to bed fairly disappointed.
After a quick chat with Derek this morning, it turns out the immobiliser wasn't disarming (indicated by a flashing red light on dash) - the wires for this coil are around the ignition barrel.
Anyway, I put down the phone and went for another try: Key in the ignition, turn to position 2, push the immobiliser fob up against the wire, red light out, press starter button and grin widely as the engine turns over!
Next job is to get it running....
Edited by ECG1000 on Thursday 23 February 12:09
marcusgrant said:
fantastic, look great.
How many hours do you think you'll have put in once complete?
Thank you. How many hours do you think you'll have put in once complete?
I honestly have no idea... Started on the 6th of January and hope to be finished on the 28th of February. I've had a couple of 10 hour stints on it, otherwise it's been 4 to 5 hour slogs on an evening after work. There's been a week's skiing thrown in there and most weekends spent away.
At a wild guess, I'd say the 80 hour prediction from Caterham could be correct...
Who knows though, time seems to go very quickly whenever I pick up a spanner!
Well, the car is finished. Sort of.... We'll get to that in a bit.
After the last update, all that was left to do was put all the necessary fluids in and press the starter button.
Only got one photo during this process:

Anyway, as I'd mentioned before I had a little hiccup getting the engine to turn over. Turned out to be an immobiliser issue that was easily sorted.
With oil pressure registering, it was time to re-connect the inertia switch (so the fuel pump will work) and fire her up for the first time.
Key to position II, hear fuel pump prime, press starter button, engine turns over....turns over....nothing. I'd sort of expected this thinking that maybe the engine needed time to suck fuel through the pipes.
So I repeated the above process and still nothing... And again....nothing.
Hmmm, I'd read somewhere a lot of fuel is needed in the tank on the initial start up. There was about 10 litres in to start off with, so I filled it up to about 30.
Still couldn't get the bloody thing to start!
I put the battery on charge (since it had taken a bit of hammer relentlessly turning the starter motor over) and pottered around the car doing IVA stuff like sticking rubber trim to the front cycles wings.
It was getting quite late now but I thought I'd give it one more try. This time it did start but only ran on one cylinder....sounding like a tarmac roller.
I checked and re-checked all the connections in the engine bay and nothing was amiss. At that point, I called it a day hoping that I could ring Caterham in the morning and they'd have a miraculous answer for me which would spark the car into life.
As I found out the next day, this was not the case. They think it's an ECU issue. Something that will be sorted during the post build check.
Pretty disappointed as the 'first start' is THE landmark moment when building your own car but there's not much else I can do.
After this drama, all that was left to do was fit the transmission tunnel cover, gearknob, harnesses and seats:
In went the lap belts and tunnel cover. These both must be fitted before the seats due to restricted access!

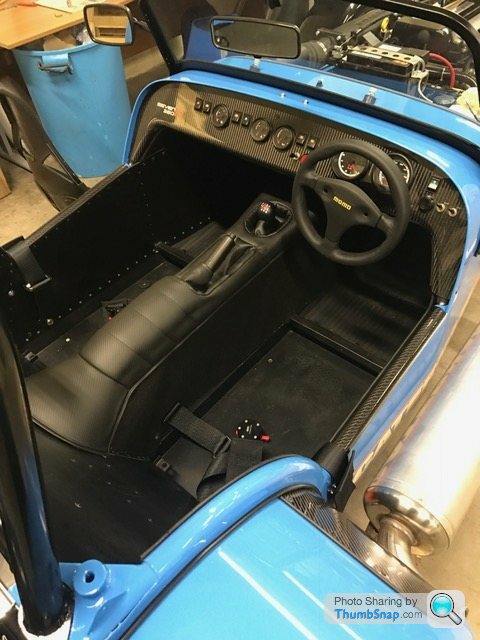
Then the seats and shoulder straps:


All pretty easy if a little fiddly.
I ended up gluing the bolts (that fix the seat rails to the chassis) to the rails making it easier lining them up with the holes in the floor.
So that, was it... the car is pretty much done. If only it would f-ing start!

As a finishing touch, I stuck on the remaining go-faster stripes:


I've still got the brakes and clutch to bleed once more but I couldn't resist sticking some wheels on:
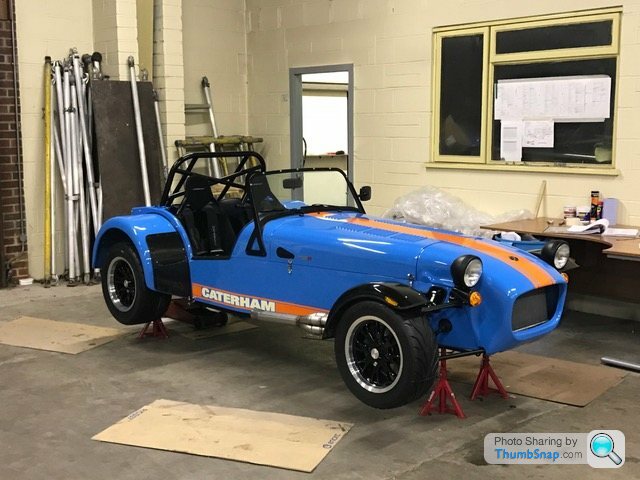
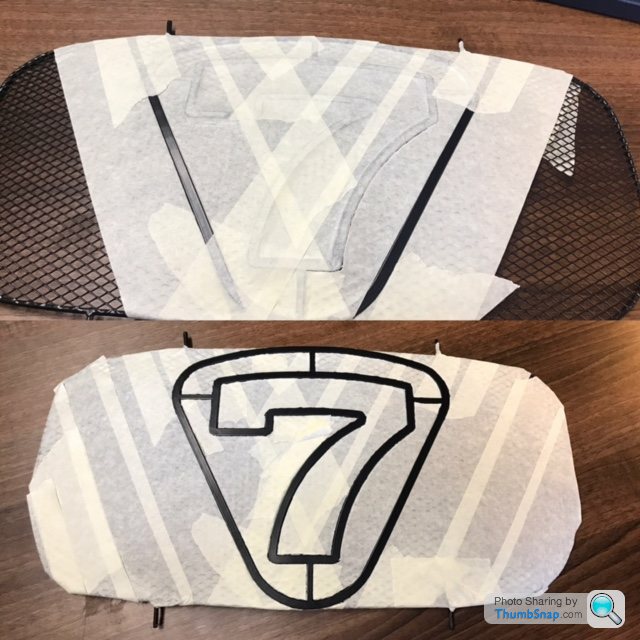
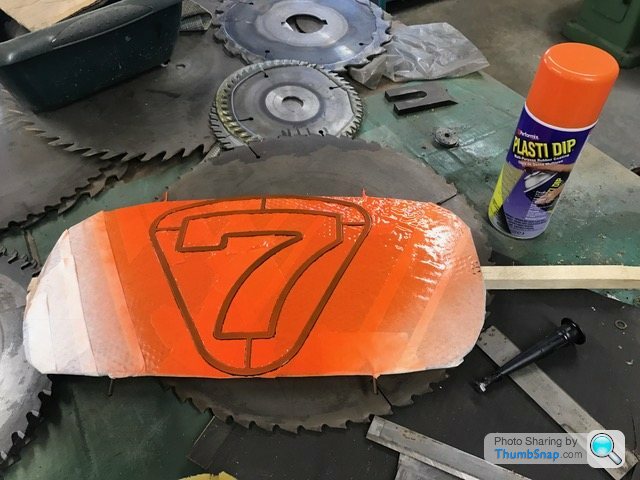
You may have spotted the lack of front grill. I'm in the process of spraying the '7' orange to match the stripes:
I'll upload a picture of this fitted later once the car is sitting on terra firma.
Going to have one more crack at starting later too. I took the rear silencer off last night and noticed un-burnt fuel lining the collector pipe. This leads me to believe the problem is something to do with spark, or lack thereof. Might be something simple like the spark plugs are gobbed etc. If not, then I'll leave it to the pros down at Caterham unless anyone has any bright ideas...?!
After the last update, all that was left to do was put all the necessary fluids in and press the starter button.
Only got one photo during this process:
Anyway, as I'd mentioned before I had a little hiccup getting the engine to turn over. Turned out to be an immobiliser issue that was easily sorted.
With oil pressure registering, it was time to re-connect the inertia switch (so the fuel pump will work) and fire her up for the first time.
Key to position II, hear fuel pump prime, press starter button, engine turns over....turns over....nothing. I'd sort of expected this thinking that maybe the engine needed time to suck fuel through the pipes.
So I repeated the above process and still nothing... And again....nothing.
Hmmm, I'd read somewhere a lot of fuel is needed in the tank on the initial start up. There was about 10 litres in to start off with, so I filled it up to about 30.
Still couldn't get the bloody thing to start!
I put the battery on charge (since it had taken a bit of hammer relentlessly turning the starter motor over) and pottered around the car doing IVA stuff like sticking rubber trim to the front cycles wings.
It was getting quite late now but I thought I'd give it one more try. This time it did start but only ran on one cylinder....sounding like a tarmac roller.
I checked and re-checked all the connections in the engine bay and nothing was amiss. At that point, I called it a day hoping that I could ring Caterham in the morning and they'd have a miraculous answer for me which would spark the car into life.
As I found out the next day, this was not the case. They think it's an ECU issue. Something that will be sorted during the post build check.
Pretty disappointed as the 'first start' is THE landmark moment when building your own car but there's not much else I can do.
After this drama, all that was left to do was fit the transmission tunnel cover, gearknob, harnesses and seats:
In went the lap belts and tunnel cover. These both must be fitted before the seats due to restricted access!
Then the seats and shoulder straps:
All pretty easy if a little fiddly.
I ended up gluing the bolts (that fix the seat rails to the chassis) to the rails making it easier lining them up with the holes in the floor.
So that, was it... the car is pretty much done. If only it would f-ing start!
As a finishing touch, I stuck on the remaining go-faster stripes:
I've still got the brakes and clutch to bleed once more but I couldn't resist sticking some wheels on:
You may have spotted the lack of front grill. I'm in the process of spraying the '7' orange to match the stripes:
I'll upload a picture of this fitted later once the car is sitting on terra firma.
Going to have one more crack at starting later too. I took the rear silencer off last night and noticed un-burnt fuel lining the collector pipe. This leads me to believe the problem is something to do with spark, or lack thereof. Might be something simple like the spark plugs are gobbed etc. If not, then I'll leave it to the pros down at Caterham unless anyone has any bright ideas...?!
_Neal_ said:
Sorry to hear of your starting issues, but if it helps the car does look superb, great work!
Maybe some kind of cool head checkover of coils, ignition wiring, plugs may yield something, otherwise I'm sure Caterham will have it sorted quickly.
Thanks mate! Maybe some kind of cool head checkover of coils, ignition wiring, plugs may yield something, otherwise I'm sure Caterham will have it sorted quickly.
I took out the coils and spark plugs last night and turned the engine over. All plugs have a good spark. Hmmmm more head scratching... So there's fuel and spark but no bang... I'm guessing (wildly) that maybe the injectors are 'injecting' at the wrong time perhaps?
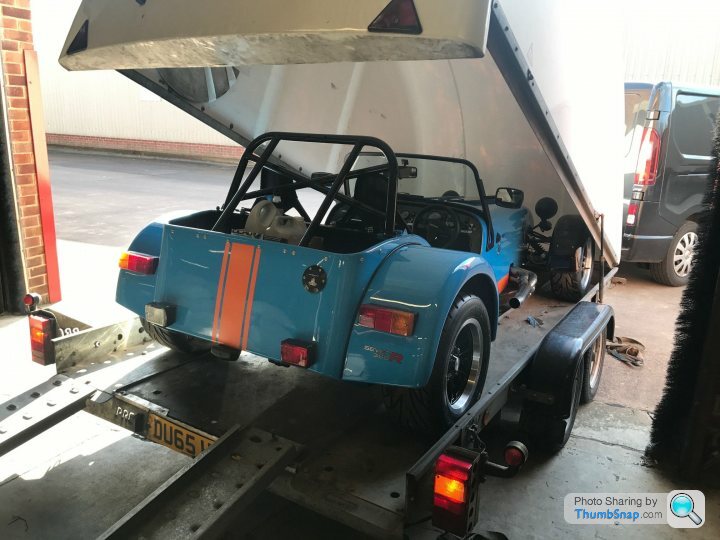
Anyway, I'll leave that for Caterham to sort out. Talking of which, the car was collected this morning to be taken off for it PBC and IVA.
The eagle has landed:

Off down to Donington:
So that is essentially IT. For now anyway....
Still got the weather gear to fit, - they take it all off for the IVA test so didn’t rush to fit it - then it's 500 miles of running in. I'll probably change the oil after that and start driving the car with intent.
Until next time.... Or as Vinnie Jones would say “It’s been emotional”....

ECG1000 said:
I took out the coils and spark plugs last night and turned the engine over. All plugs have a good spark. Hmmmm more head scratching... So there's fuel and spark but no bang... I'm guessing (wildly) that maybe the injectors are 'injecting' at the wrong time perhaps?
Yeah, sure Caterham will sort it. I'm guessing ECU/injector issue as you say. Good luck with the IVA!
TheDukeGTi said:
Amazing how quickly you got this done! Looks awesome. Good luck with the IVA!
Thanks mate! Fingers crossed it makes it through ok.Greg_D said:
that does look great, it's a credit to you
Thank you! Catweazle said:
Well done ECG1000.
Cheers!toastyhamster said:
Nice one, been looking forward to the updates. Was with a customer today, turns out he has a Westfield as a sprint car and won his championship last year, cue lots of ooh and ahhing at various sideways pictures on his phone while the account manager got bored.
Cheers mate. I successfully manage to bore my girlfriend whenever I mention the word Caterham!
FELIX_5 said:
Well done, top work! I've really enjoyed this thread, in fact, I've enjoyed it so much, any chance you can buy another one so we can go through it all again?! 
Thank you! Glad you enjoyed the thread. I'd definitely like to build another one day. I'm working on persuading any of my mates to buy one, then I can lend a hand putting it together.Tickle said:
Great read! Look forward to seeing pics of it out in the wild. Enjoy OP, you have earned it.
Thank you very much. It means a lot!I'll be sure to keep the thread updated with pictures of the car out and about, plus any changes I make to it.
p1stonhead said:
This.
It would take me years
Honestly, it's all nuts and bolts with a bit of fiddling thrown in for fun. Prior to the Caterham, the most in depth thing I'd done to a car is changing the lower wishbone bushes on my GT86. It would take me years
Peanut Gallery said:
Congrats! - looks ace!
n_const said:
Car looks cracking and a good read. Good luck with the IVA.
Thanks mate. IVA test taking place tomorrow morning!_Neal_ said:
Yeah, sure Caterham will sort it. I'm guessing ECU/injector issue as you say.
Good luck with the IVA!
Cheers!Good luck with the IVA!
It turned out to be a faulty injector. All sorted now
Thank you everyone for the kind words. It really does mean a lot! I've really enjoyed building the car and would like to think I've learnt a bit in doing so.
With nothing to build on an evening, I've found myself looking for things to tinker with. Good job the front pads on my 86 need changing! That's a job for tonight.
Thread here if anyone's interested: http://www.pistonheads.com/gassing/topic.asp?h=0&a...
Gassing Station | Readers' Cars | Top of Page | What's New | My Stuff