Caterham Seven 360R
Discussion


Small update from last night's effort.
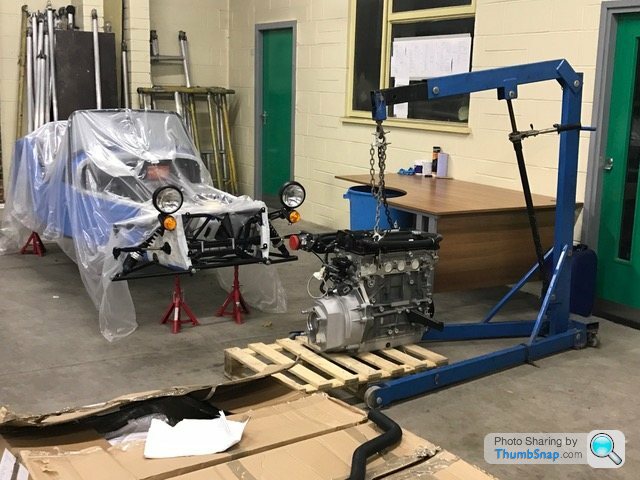
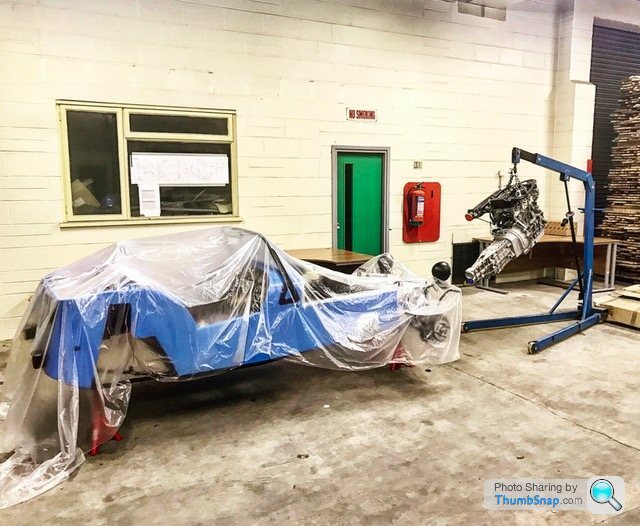
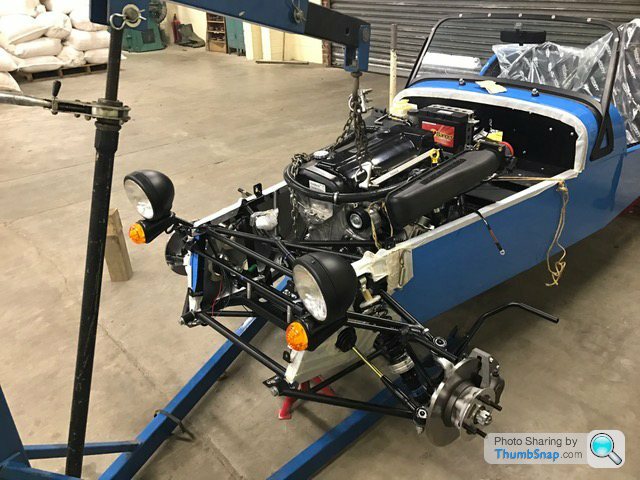
The plan was to get this slotted in:
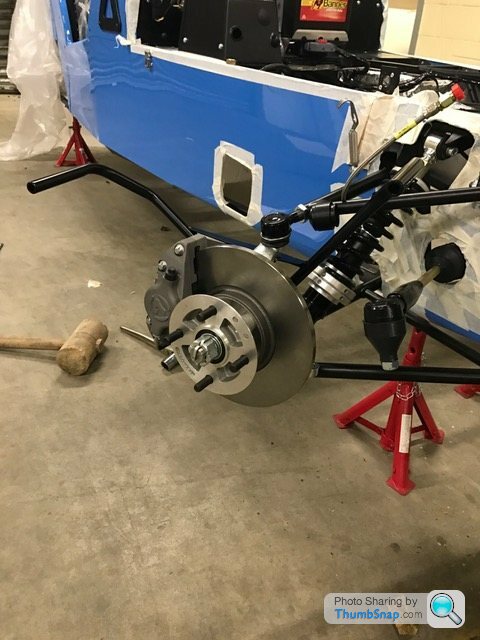
But first of all, I wanted to finish off the suspension/wishbone assembly once and for all.
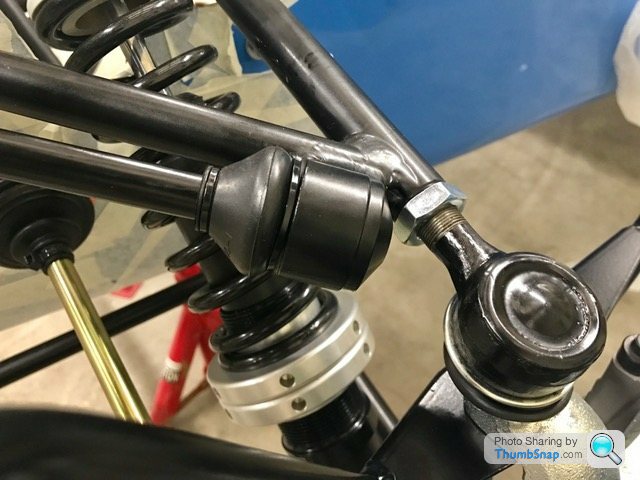
This started off as fastening the upright into the lower wishbone. Then the nut and washer on the stub axle had to come off with the washer being replaced by the wing-stay with a new nyloc nut securing it.
Next the upper wishbone has to be leant on with a fair bit of force, pushed through the top of the upright and wingstay then secured by another nyloc nut. And finally fitting the steering arm into place at the front of the upright.
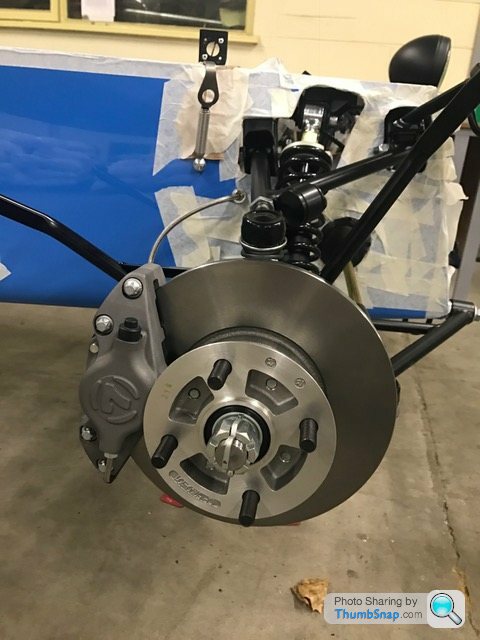
End result:
All pretty straight forward stuff. One minor snag... the nut that secures the upper wishbone into the upright has very little room below it but requires a deep socket due to the ball joint bolt being so long. I got it as far as it would go with a 'shallow' socket and a thin wrench half in, then had to finish the rest off with an adjustable spanner.
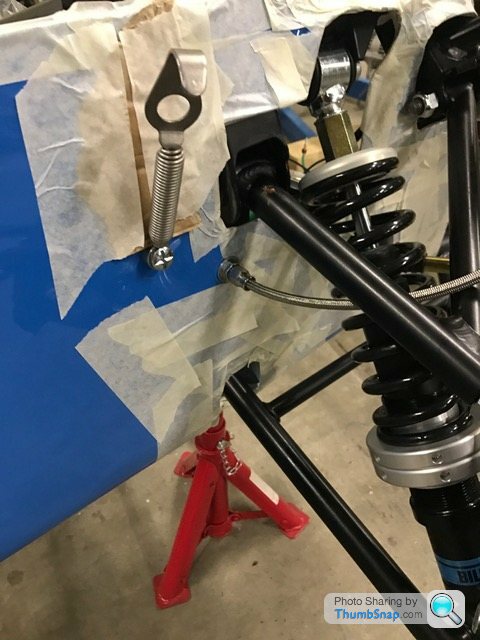
Next up, brake lines.
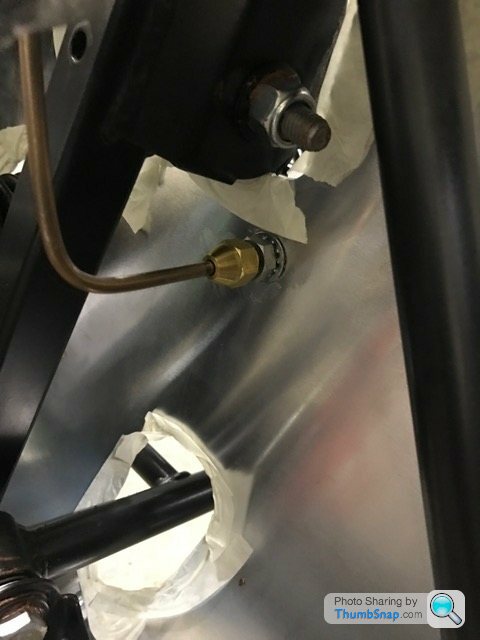
Nice simple, straight forward step. Flexible hose screwed into the caliper, then into a hole on the outside of the car body, secured by a nut on the inside. Then simply screw the copper brake pipe onto the braided line end protruding from the outside in.
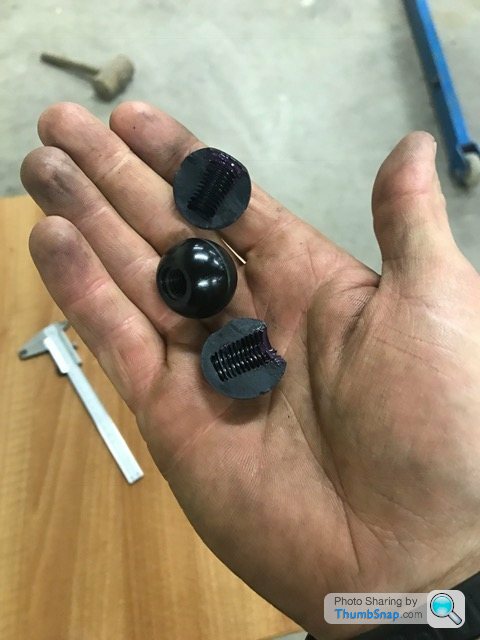
The last part of the front suspension system is the anti-roll bar. It slots into the cups on the front legs of the upper wishbones. I got a bit heavy handed here and broke one of the ARB ball ends so rain stopped play so to speak. As soon as the replacement from Caterham arrives, this will be fitted and finished
Engine in...well almost.
I had someone (who knows what they're doing) help me with this due to it being in my opinion, the most important step of the assembly.
First off, the bell-housing bolts need torqueing up. For some reason Caterham leave these finger tight despite the instructions telling you not to remove the bell-housing.
The gearbox slotted in fairly easily and most of the bolts torqued up without fuss. There were a few that required an allen key to be cut short allowing proper access.
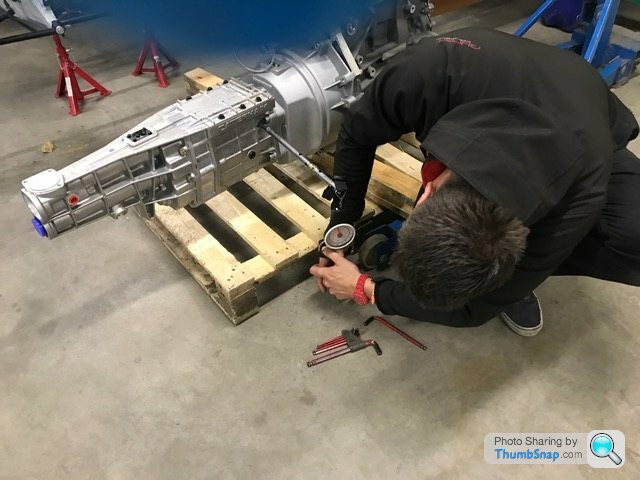
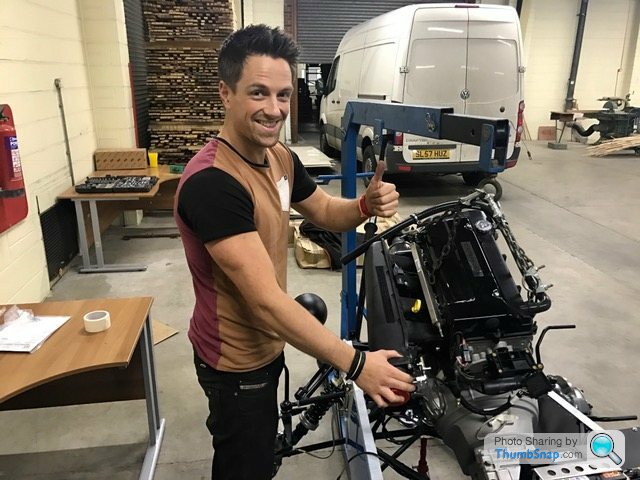
Me getting creative with torqueing methods:
Now here's where we both got confused. The instructions 'instruct' you to remove the alternator and starter motor before fitting the engine but on the next page where it talks about plumbing the cooling pipes (again before fitting), it says the alternator and starter motor must be attached...
The words that are supposed to guide you on how to plumb all the hoses around the engine are pretty poor and misguiding to be honest. We spent a fair amount of time scratching our heads at this point. Then a bright idea was sparked to fit the engine with the majority of the pipes detached and worry about it later.
I've since found a very good map/plan of the cooling system so hopefully will know what I'm doing next time!
So, horns (no access to do this after fitting engine), rubber mounts and earth lead bolted into chassis. Now where is the bolt that secures the gearbox to the gearbox mount? Ah, it's missing...
It was nearing midnight at this point so we called it a day.
A slightly fruitful and slightly frustrating evening...
Hopefully the next update will be a more interesting affair with better words and photos!
Soon.....
The plan was to get this slotted in:
But first of all, I wanted to finish off the suspension/wishbone assembly once and for all.
This started off as fastening the upright into the lower wishbone. Then the nut and washer on the stub axle had to come off with the washer being replaced by the wing-stay with a new nyloc nut securing it.
Next the upper wishbone has to be leant on with a fair bit of force, pushed through the top of the upright and wingstay then secured by another nyloc nut. And finally fitting the steering arm into place at the front of the upright.
End result:
All pretty straight forward stuff. One minor snag... the nut that secures the upper wishbone into the upright has very little room below it but requires a deep socket due to the ball joint bolt being so long. I got it as far as it would go with a 'shallow' socket and a thin wrench half in, then had to finish the rest off with an adjustable spanner.
Next up, brake lines.
Nice simple, straight forward step. Flexible hose screwed into the caliper, then into a hole on the outside of the car body, secured by a nut on the inside. Then simply screw the copper brake pipe onto the braided line end protruding from the outside in.
The last part of the front suspension system is the anti-roll bar. It slots into the cups on the front legs of the upper wishbones. I got a bit heavy handed here and broke one of the ARB ball ends so rain stopped play so to speak. As soon as the replacement from Caterham arrives, this will be fitted and finished
Engine in...well almost.
I had someone (who knows what they're doing) help me with this due to it being in my opinion, the most important step of the assembly.
First off, the bell-housing bolts need torqueing up. For some reason Caterham leave these finger tight despite the instructions telling you not to remove the bell-housing.
The gearbox slotted in fairly easily and most of the bolts torqued up without fuss. There were a few that required an allen key to be cut short allowing proper access.
Me getting creative with torqueing methods:
Now here's where we both got confused. The instructions 'instruct' you to remove the alternator and starter motor before fitting the engine but on the next page where it talks about plumbing the cooling pipes (again before fitting), it says the alternator and starter motor must be attached...
The words that are supposed to guide you on how to plumb all the hoses around the engine are pretty poor and misguiding to be honest. We spent a fair amount of time scratching our heads at this point. Then a bright idea was sparked to fit the engine with the majority of the pipes detached and worry about it later.
I've since found a very good map/plan of the cooling system so hopefully will know what I'm doing next time!
So, horns (no access to do this after fitting engine), rubber mounts and earth lead bolted into chassis. Now where is the bolt that secures the gearbox to the gearbox mount? Ah, it's missing...
It was nearing midnight at this point so we called it a day.
A slightly fruitful and slightly frustrating evening...
Hopefully the next update will be a more interesting affair with better words and photos!
Soon.....
5harp3y said:
This is my dream, build a car from a kit with tons of room to do it!
Indeed, I've somehow managed to build 2 cars in a modern single garage. Carefully edging round the car unless I have wheels on and can push it out onto the drive to do something that requires greater levels of access.Very small update...
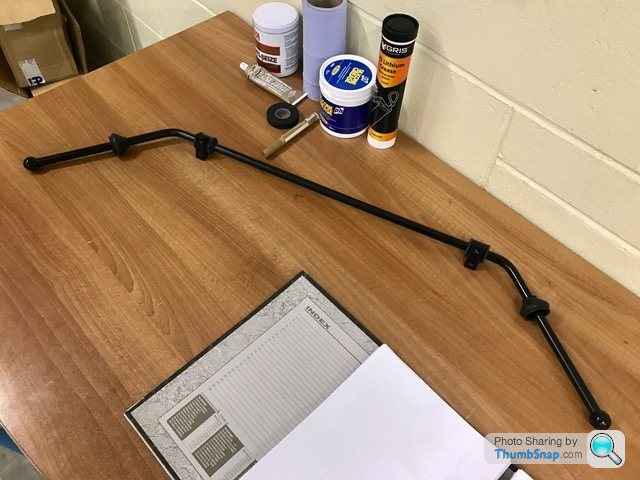
The replacement for the ARB ball end that I broke the other day arrived in the post this morning.
Quick 10 minute job over lunchtime.
Assembled ARB ready to go on.
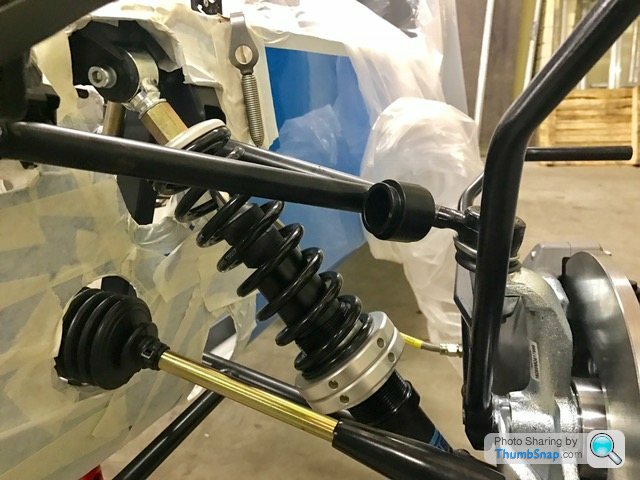
Cup on wishbone the ball sits in.
Brackets bolt to chassis:
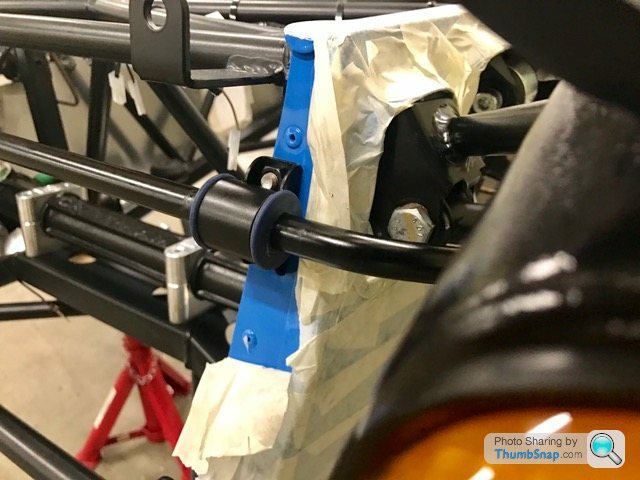
Finally in place with a bit of gentle persuasion.
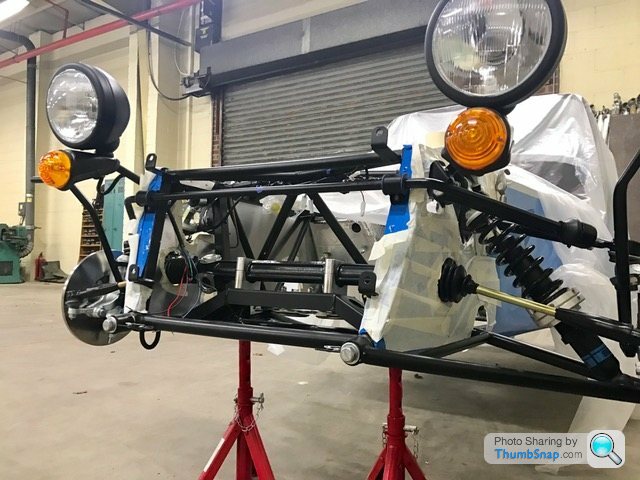
That's a big tick through front suspension section at long last! Plenty more to do on the rest of the car now!
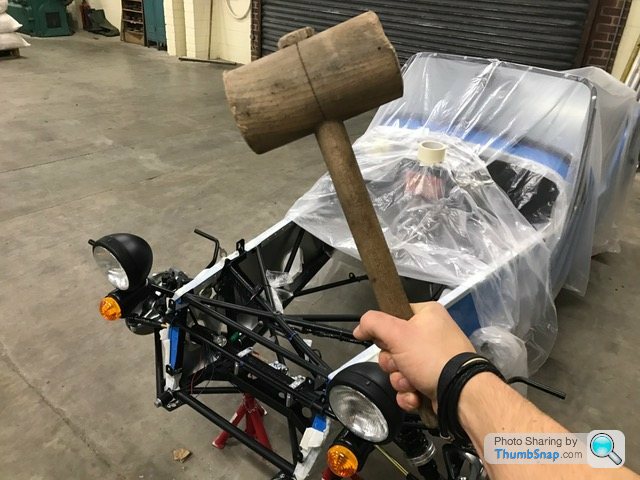
Think it's about time I introduce my most trusted tool, always there for me in times of need.
Ladies and Gentlemen.... The Persuader:
The replacement for the ARB ball end that I broke the other day arrived in the post this morning.
Quick 10 minute job over lunchtime.
Assembled ARB ready to go on.
Cup on wishbone the ball sits in.
Brackets bolt to chassis:
Finally in place with a bit of gentle persuasion.
That's a big tick through front suspension section at long last! Plenty more to do on the rest of the car now!
Think it's about time I introduce my most trusted tool, always there for me in times of need.
Ladies and Gentlemen.... The Persuader:
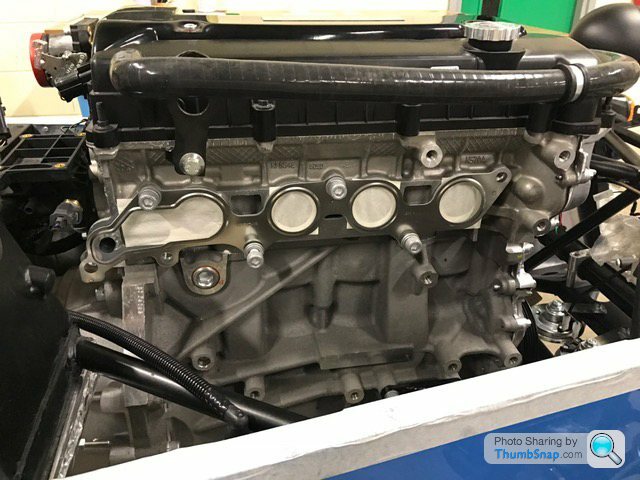
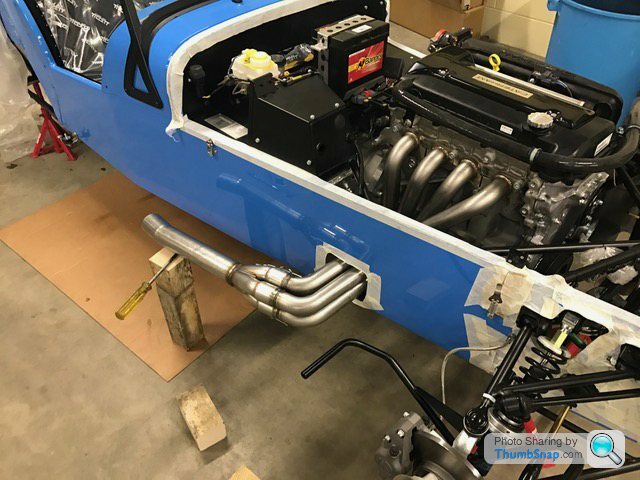
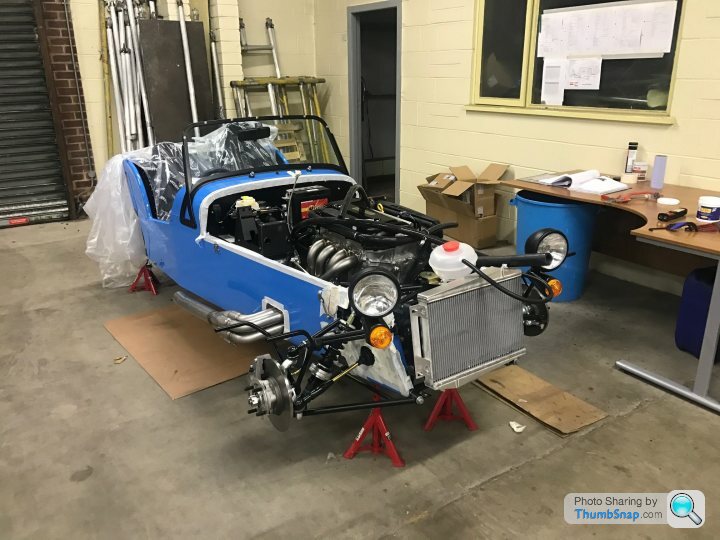
Something quite big has been shoehorned into the car...

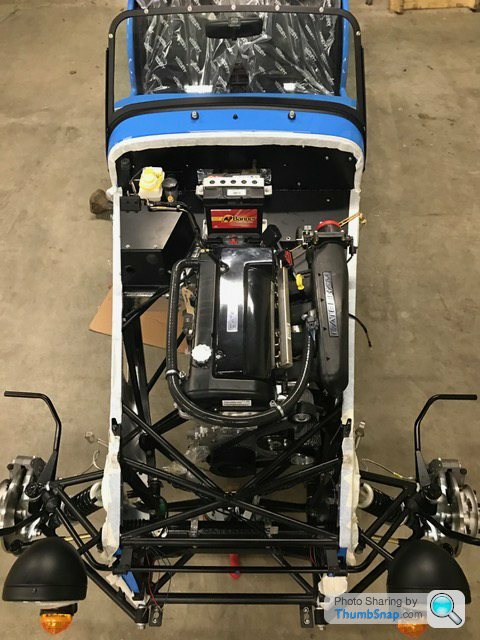
Wasn't as daunting as I expected it to be. I suppose this is at the easier end of the scale looking at a modern car where the engine disappears off into the bulkhead. Never the less, a milestone for me.
The instructions advise you to take off the starter motor and alternator. We decided we knew better and removed the right hand engine mount instead. This plan was semi-scuppered when the engine was about a third of the way in. So humble pie was eaten, alternator off, followed by a lot of toing and froing, then eventually the engine was on its mounts.
Whilst lowering the block in, the thought did cross my mind how mental this thing is going to be to drive. To me, a Caterham is basically a load of square section welded around an engine that's far too big for the car! God knows what a 620 would be like!
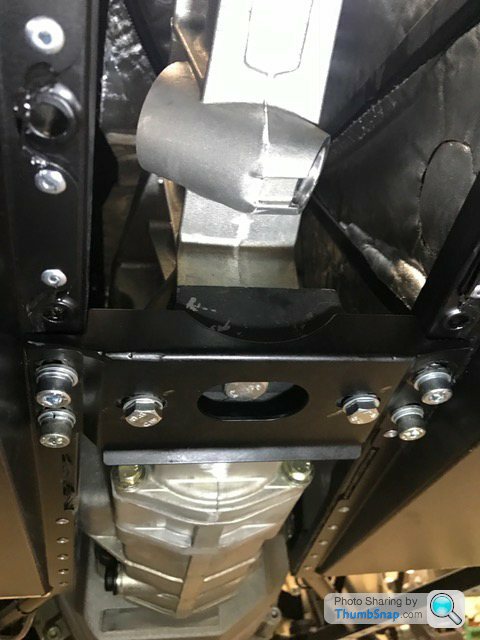
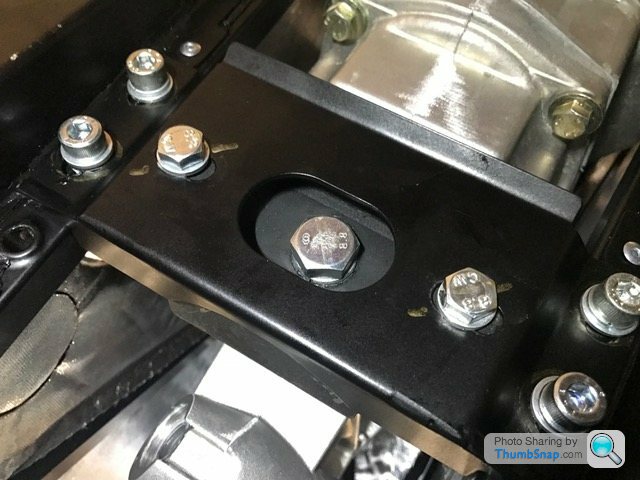
I wasn't home and dry just yet. It was now time for the gearbox mount to be bolted to the chassis, then the gearbox to the mount. All pretty straight forward although there was an hour's worth of fiddling about trying to get the gearbox to sit centrally in the transmission tunnel. This involved me lying underneath the car with The Persuader and a wooden door wedge. Got there in the end with the helps of some measuring callipers.
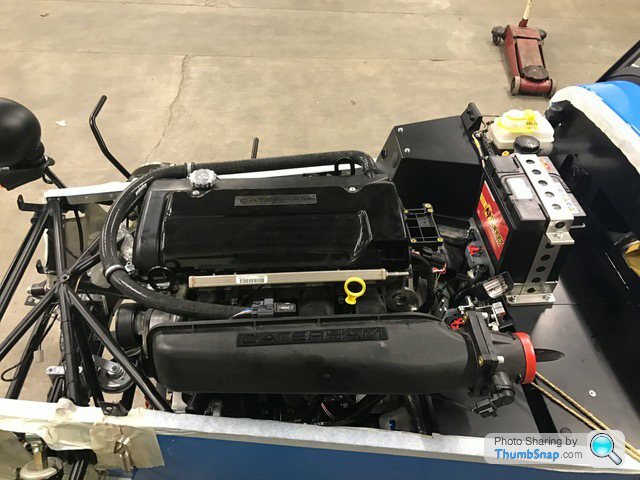
After this, everything was torqued up and the alternator bolted back into place.
Felt pretty chuffed having 'done a big thing' so celebratory doughnuts were called upon:
https://www.youtube.com/watch?v=iXKTtbTQDtU
I should really have sorted the cooling system out at this point but am still struggling to figure out what pipes go where! Plus, I couldn't ignore the pile of shiny exhaust bits could I?
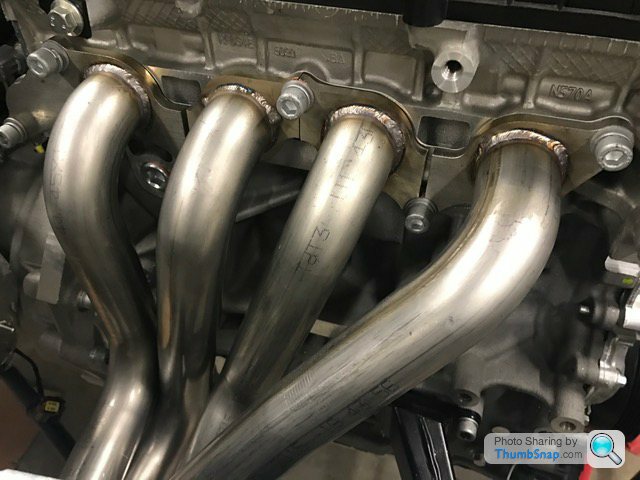
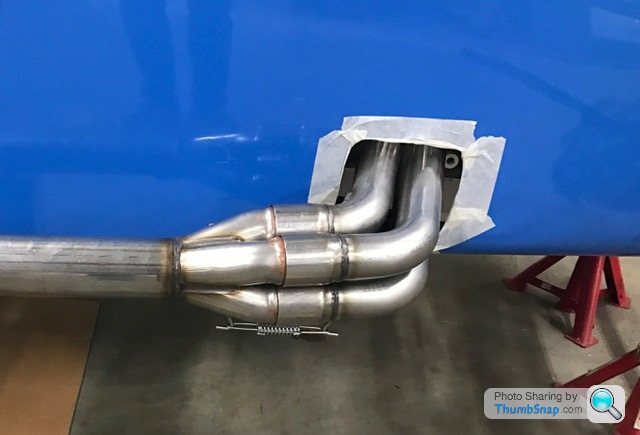
On with the manifold first, or primaries as the instructions call them. The manifold is in 4 separate bits that require feeding through a hole in the side of the car in a certain sequence. All went pretty smooth until the last pipe which was a bit of a squeeze.
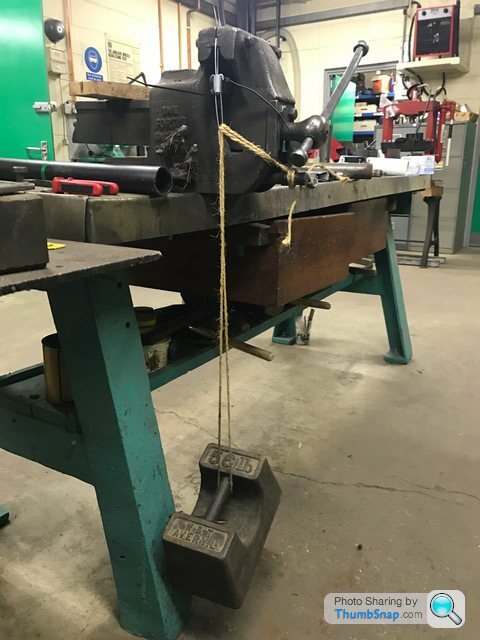
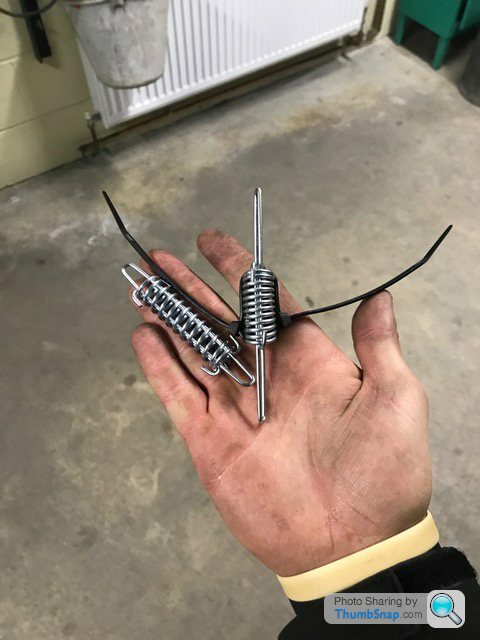
Then the collector pipe slots onto the manifold on the outside of the car. It's held in place by two spring clamp things. The springs require completely compressing before they can fit over the tabs on the manifold and collector.
Luckily a vice and an old weight were close to hand:
 |http://thumbsnap.com/4TED9A2l[/url]
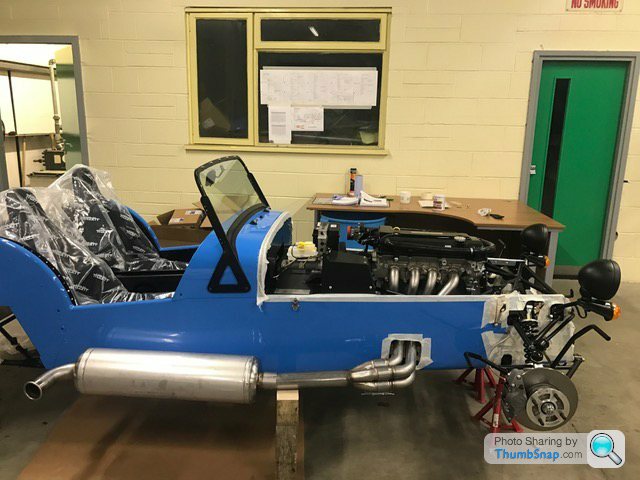
Had to slip the silencer on for the full effect:
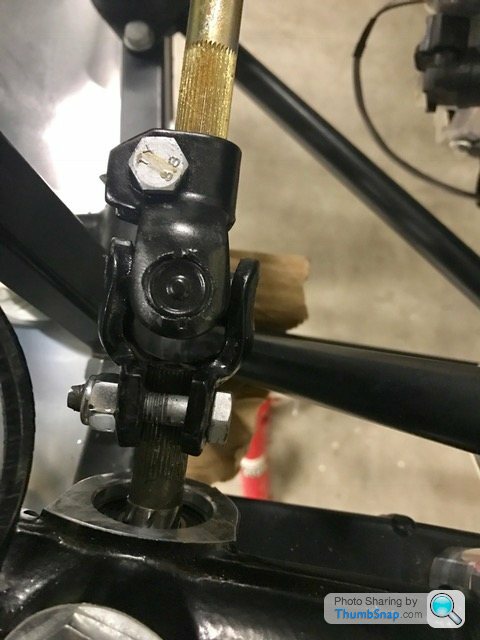
Now to tackle the steering columns and wheel.
I'd previously read on someone's blog that this is a royal pain in the arse, and I couldn't agree more!
The universal joint slips over the spline on the rack and a bolt slots through the joint holding everything in place. The bolt will go through one hole fine bit is misaligned with next. Even using mole grips to squeeze the joint together didn't help. In the end I took the bolt to a grinder to make a nice chamfered end then got The Persuader out again. This did the trick!
Then I slid the lower steering column through the dashboard, pedal box, engine bay and into the universal joint. The bolt went through very easily at that end.
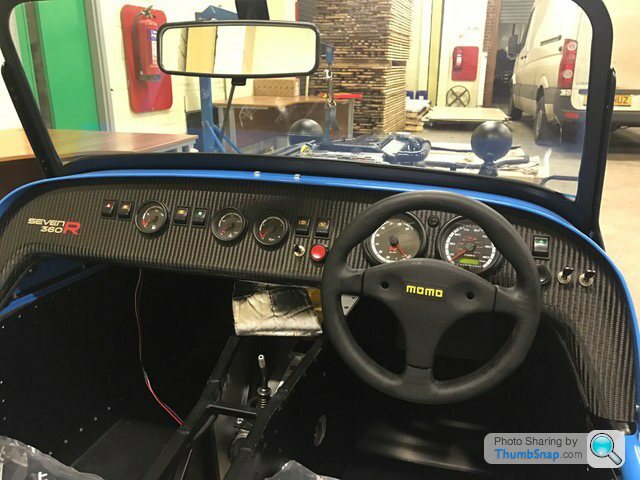
Next, the upper steering column had to follow the route of the lower to connect to it. With it having a larger diameter than the lower column this proved tricky. The problem being the lower bush inside the dashboard tunnel the column has to slide through. Every time I tried this, a plastic sleeve kept on falling out of the bush. I wrestled with this problem for a good hour which I was not happy about. Eventually luck prevailed and the upper column mated with the lower. Clamped into place:

Not a bad view:
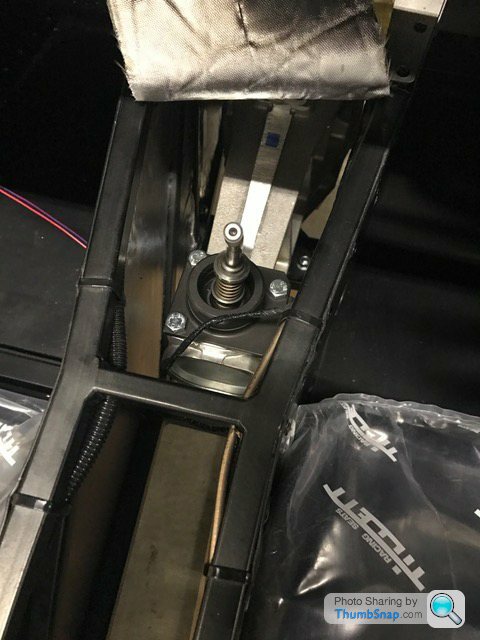
Whilst I was in the cockpit, I screwed the gearstick into the gearbox:
That's it for now!
Apologies for the posing pictures... When submitting for an IVA test you have to present photos of you working on the car to prove it's an amateur build.
More next time...
Wasn't as daunting as I expected it to be. I suppose this is at the easier end of the scale looking at a modern car where the engine disappears off into the bulkhead. Never the less, a milestone for me.
The instructions advise you to take off the starter motor and alternator. We decided we knew better and removed the right hand engine mount instead. This plan was semi-scuppered when the engine was about a third of the way in. So humble pie was eaten, alternator off, followed by a lot of toing and froing, then eventually the engine was on its mounts.
Whilst lowering the block in, the thought did cross my mind how mental this thing is going to be to drive. To me, a Caterham is basically a load of square section welded around an engine that's far too big for the car! God knows what a 620 would be like!
I wasn't home and dry just yet. It was now time for the gearbox mount to be bolted to the chassis, then the gearbox to the mount. All pretty straight forward although there was an hour's worth of fiddling about trying to get the gearbox to sit centrally in the transmission tunnel. This involved me lying underneath the car with The Persuader and a wooden door wedge. Got there in the end with the helps of some measuring callipers.
After this, everything was torqued up and the alternator bolted back into place.
Felt pretty chuffed having 'done a big thing' so celebratory doughnuts were called upon:
https://www.youtube.com/watch?v=iXKTtbTQDtU
I should really have sorted the cooling system out at this point but am still struggling to figure out what pipes go where! Plus, I couldn't ignore the pile of shiny exhaust bits could I?
On with the manifold first, or primaries as the instructions call them. The manifold is in 4 separate bits that require feeding through a hole in the side of the car in a certain sequence. All went pretty smooth until the last pipe which was a bit of a squeeze.
Then the collector pipe slots onto the manifold on the outside of the car. It's held in place by two spring clamp things. The springs require completely compressing before they can fit over the tabs on the manifold and collector.
Luckily a vice and an old weight were close to hand:
|http://thumbsnap.com/4TED9A2l[/url]Had to slip the silencer on for the full effect:
Now to tackle the steering columns and wheel.
I'd previously read on someone's blog that this is a royal pain in the arse, and I couldn't agree more!
The universal joint slips over the spline on the rack and a bolt slots through the joint holding everything in place. The bolt will go through one hole fine bit is misaligned with next. Even using mole grips to squeeze the joint together didn't help. In the end I took the bolt to a grinder to make a nice chamfered end then got The Persuader out again. This did the trick!
Then I slid the lower steering column through the dashboard, pedal box, engine bay and into the universal joint. The bolt went through very easily at that end.
Next, the upper steering column had to follow the route of the lower to connect to it. With it having a larger diameter than the lower column this proved tricky. The problem being the lower bush inside the dashboard tunnel the column has to slide through. Every time I tried this, a plastic sleeve kept on falling out of the bush. I wrestled with this problem for a good hour which I was not happy about. Eventually luck prevailed and the upper column mated with the lower. Clamped into place:
Not a bad view:
Whilst I was in the cockpit, I screwed the gearstick into the gearbox:
That's it for now!
Apologies for the posing pictures... When submitting for an IVA test you have to present photos of you working on the car to prove it's an amateur build.
More next time...
Edited by ECG1000 on Sunday 22 January 13:52
Fantastic build thread, would love to partake in something like this with my son and my old man, both would be in their element!
Might be wrong, but I Don't think I've seen a thread on here like it before, be fantastic to see a video of the first startup attempt and driving it out of the workshop for the maiden voyage!
Keep the updates coming!
Might be wrong, but I Don't think I've seen a thread on here like it before, be fantastic to see a video of the first startup attempt and driving it out of the workshop for the maiden voyage!
Keep the updates coming!
md. said:
Fantastic build thread, would love to partake in something like this with my son and my old man, both would be in their element!
Might be wrong, but I Don't think I've seen a thread on here like it before, be fantastic to see a video of the first startup attempt and driving it out of the workshop for the maiden voyage!
Keep the updates coming!
Thank you very much! Might be wrong, but I Don't think I've seen a thread on here like it before, be fantastic to see a video of the first startup attempt and driving it out of the workshop for the maiden voyage!
Keep the updates coming!
It is a lot of fun but can be quite frustrating at times especially when you're stuck due to a vague description in the instructions. But once you solve the problem and assemble another step of the car, it's a good sense of satisfaction.
I'll be making a video at the first turn of the key (or should I say push of the button) for sure.
Peanut Gallery said:
Cracking thread, congrats!
Would love to help - but could you just move your workshop up to NE Scotland please?
Enjoy!
Thank you Would love to help - but could you just move your workshop up to NE Scotland please?
Enjoy!

I'll definitely be venturing up to Scotland once it's built!
Spent most of yesterday afternoon and evening messing about with pipes. Yep, it was time to tackle the cooling system I'd been putting off all weekend.
I didn't take any 'during' photos due to it being so fiddly and instructions so unclear.
Luckily (as mentioned earlier) I found a drawn out plan of where the pipes are supposed to go. A fellow builder very kindly made it during their struggle:

Once I'd worked out where everything went the main frustration was the hose clips provided. When completely opened up, they were barely big enough to fit over some of the connected pipes. Undoing them further resulted in them popping open completely.
Luckily we use a lot of hose clips on the machines at work so I robbed a few slightly bigger ones when faced with a stubborn hose!
After a good few hours wrestling about on the floor I ended up with this:
The eagle eyed amongst you will notice a few hoses too long and a couple not connected. Some require cutting down so I just wanted to double check with Caterham I've done everything right before I start slicing.
More next time...
Edited by ECG1000 on Monday 23 January 14:46
Gassing Station | Readers' Cars | Top of Page | What's New | My Stuff