Caterham Seven 360R
Discussion


Great build - really enjoying it. I have one already (k series), but I love tinkering.
You can get clear indicators from Demon Tweeks. IIRC they are the same as Landrover Defender parts, so available cheaply from various places. Needs an orange bulb, obviously and is a five minute job. I'm trying out an LED indicator behind a clear lens in a carbon pod - should be much lighter than the standard offering. Every gram counts of course. I blame mwstewart.
Again, IIRC, the rear lights are off a caravan. The rubber blocks are not entirely high-tech. Metal or carbon replacements can be had.
There's a chap popped up on the facebook Caterham group called Herberts Vinyls who's offering stripes, side stripes etc at very reasonable prices, though you fit them yourself. I've got a set, but I'm yet to fit as it's too cold in the garage and the vinyl's a bit brittle when very cold, apparently.
Smitters said:
Great build - really enjoying it. I have one already (k series), but I love tinkering.
.
There's a chap popped up on the facebook Caterham group called Herberts Vinyls who's offering stripes, side stripes etc at very reasonable prices, though you fit them yourself. I've got a set, but I'm yet to fit as it's too cold in the garage and the vinyl's a bit brittle when very cold, apparently.
Thank you very much!.
There's a chap popped up on the facebook Caterham group called Herberts Vinyls who's offering stripes, side stripes etc at very reasonable prices, though you fit them yourself. I've got a set, but I'm yet to fit as it's too cold in the garage and the vinyl's a bit brittle when very cold, apparently.
Great shout on Herbert's Vinyl's. Will definitely be getting some stripes there! Saves the faff of having to measure.

Smitters said:
No worries. I really like the idea of a man who hasn't finished building the car, but is already considering the modifications...
I'd considered the idea before even buying the car 
No updates for a week or so now. Got a busy couple of nights ahead of me then off away for a week. I'll make up for it upon my return.
Oh...almost forgot. Fitted the handbrake and cable last night. A very minor job so didn't bother with photographs

Thank you for the kind words.
Managed to finally spend some time on the Caterham again having been out of the country for a week and busy with other stuff open my return.
The next stage on the advised build sequence is to prepare and fit the (dreaded) diff. From what I've read, this is a two person job unless you are fortunate enough to have three arms.
So whilst I waited for help to arrive, I decided to rivet the brake lines to the de-dion tube for fitment after the diff.
This required loosely bolting on the de-dion ears:
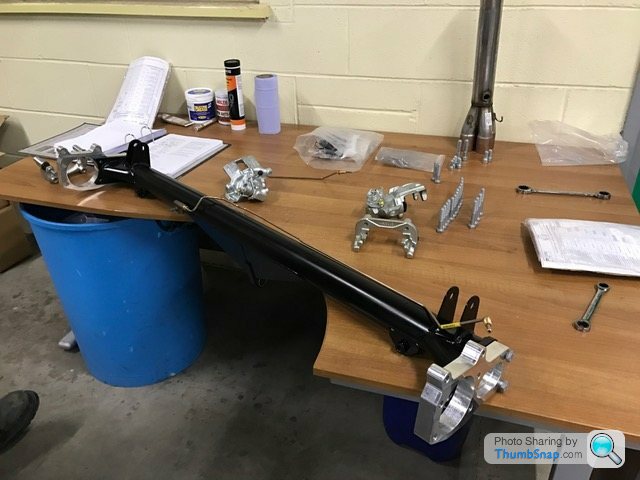
Followed by the brake calipers:
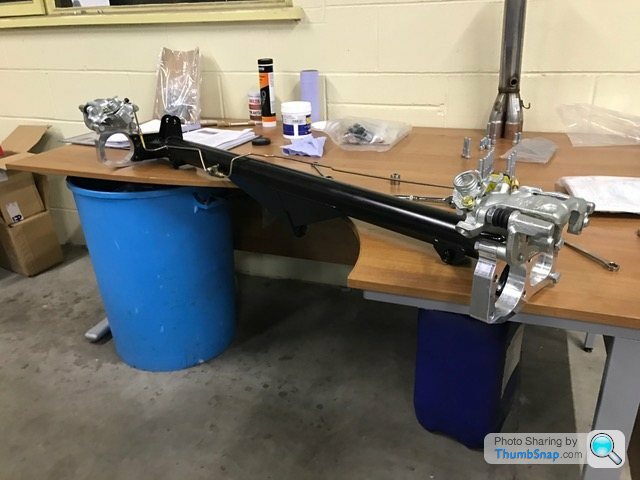
The calipers and ears have to come off again afterwards to make it easier slotting the tube through the chassis. The initial fitment is necessary to ensure the brake lines are lined up properly before riveting them.
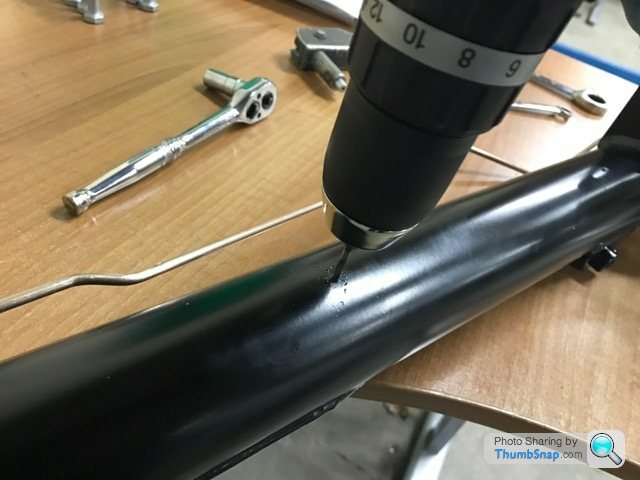
There are pre-drilled holes in the tube but they need a tiny bit of opening out (due to paint) to accept the rivets:
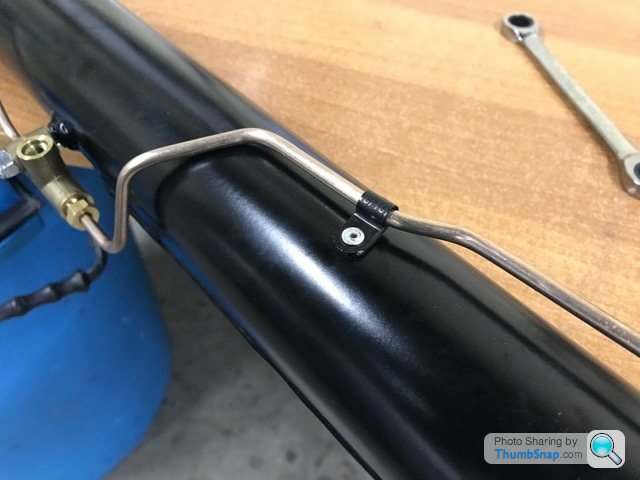
All done:
Now onto the dreaded diff...
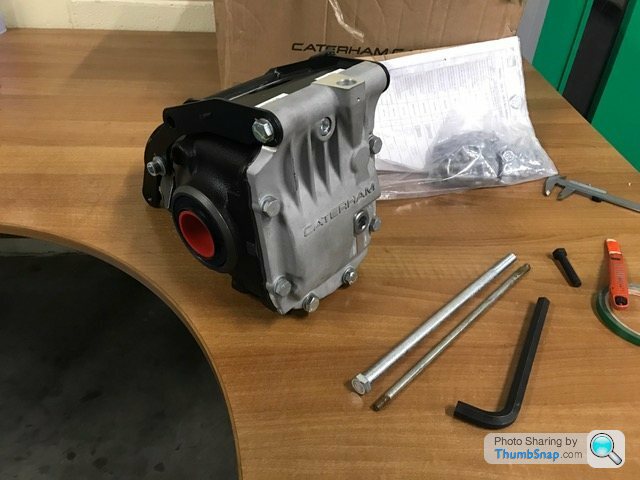
I've heard a lot of horror stories about this being a tw4t of a job so was braced for impact!
First, the prop shaft needs inserting into the transmission tunnel. Impossible to do if the engine and diff are bolted to the car already. Worth remembering if you are doing a build!
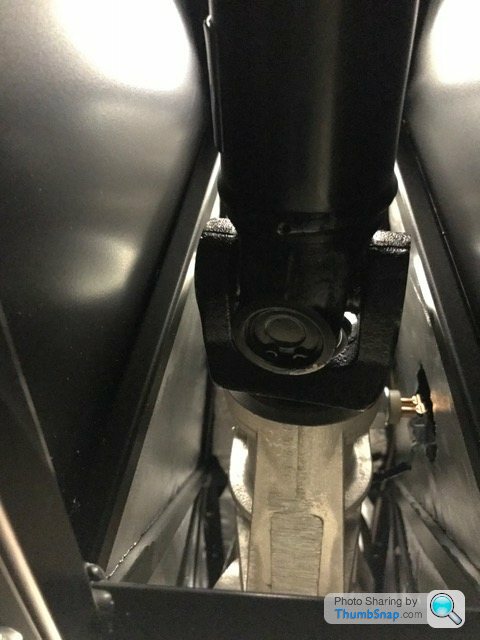
Then the diff needs jacking up to its mounts in the chassis. The instructions advise slotting a thin bar or long screwdriver through the uppermost mount to get the diff roughly into position. A bit awkward due to tiny clearances...
We did this, then screwed the lower cap head bolts into the lower mounts. More awkwardness here getting the diff to line up with the chassis mounts.
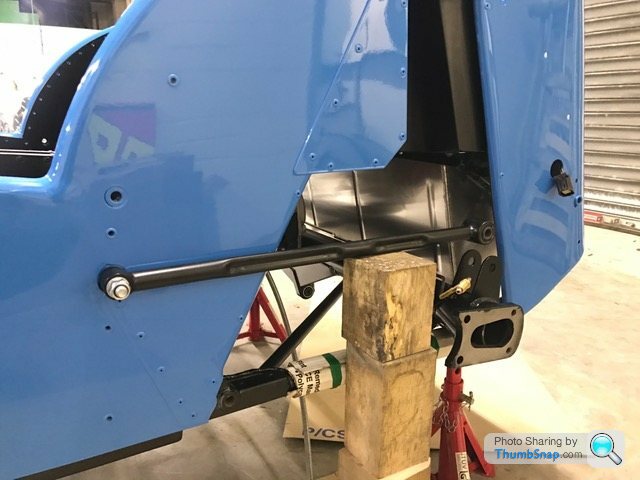
Got there eventually:
At this point the jack had been discarded in favour of an old pillar jack thing that was lying around at work. I suspect Noah used this when building his boat! Turned out to be very useful in the end.
Now with the two lower bolts in, it was measuring time. The diff needs to be as central as possible.

After an hour or so of lying on my back messing about with shim washers, we were 1mm out, which is within tolerance!
Now time for the even more dreaded top bolt. Every blog I've read describes this as being an impossible job. With the lower bolts in, the diff gets pulled down which miss-aligns it with the upper mount, making it impossible to shove the long bolt through.
I slackened off the lower bolts a bit and lined up a torch so it was shining through the upper mounts of the chassis and diff. Then, using the pillar jack (thing), I jacked the diff up a few turns so I could see light all the way through the mounts, then a bit more to get everything lined up as centrally as possible. This actually worked out quite well and allowed for the long bolt to be shoved though one side of the diff....but not all the way through.
While this was happening, my trusty assistant was on the lathe making these:
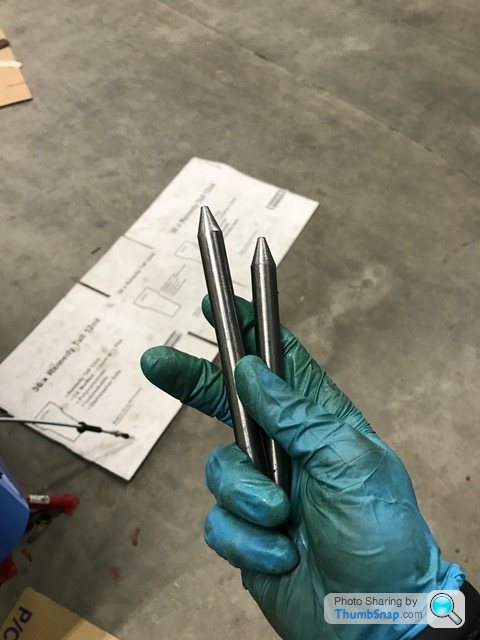
Inch diameter stakes (same diameter at the long bolt).
The idea was to hammer these in either side of the diff to get everything lined up correctly, then chase one side through with the long bolt.
Turned out to be a good idea because it worked first time! I'd even remembered to put the shim washers in before the stakes so it was job done.
I do have a slight nagging feeling I've done something wrong due to how smoothly it went. No doubt this will be highlighted in the post build inspection...
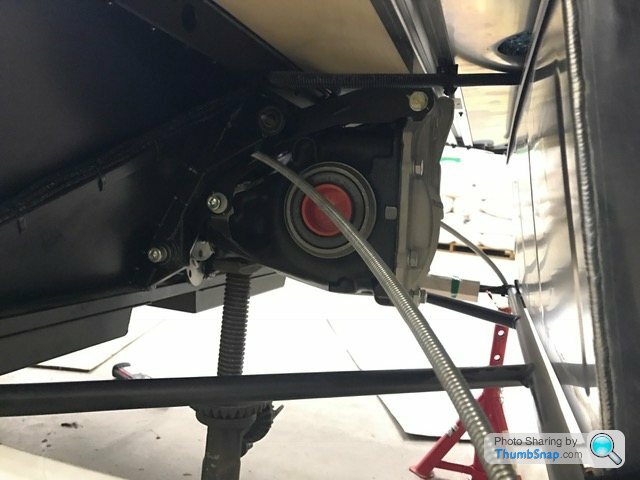
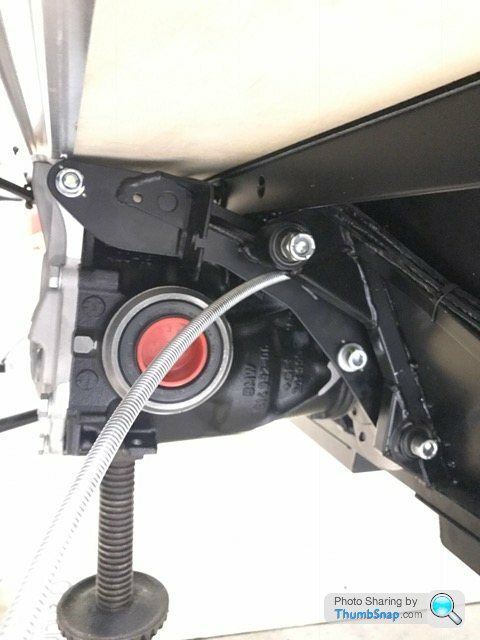
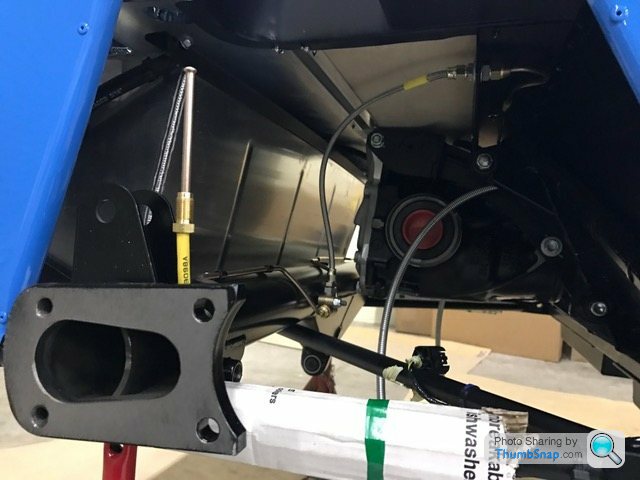
Now to bolt the prop-shaft to the diff. Fairly easy, if a little tight. Really helped having someone above putting the car into and out of gear to help torque the bolts up.
Job jobbed... as they say:
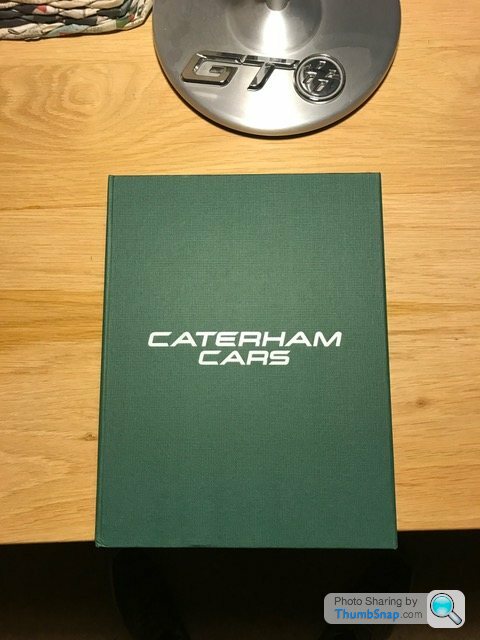
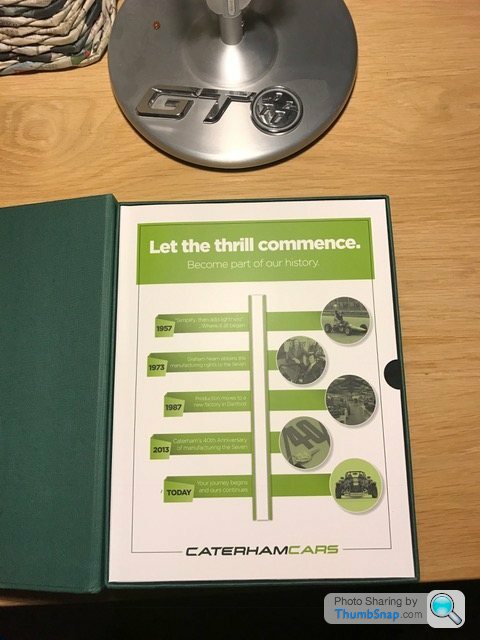
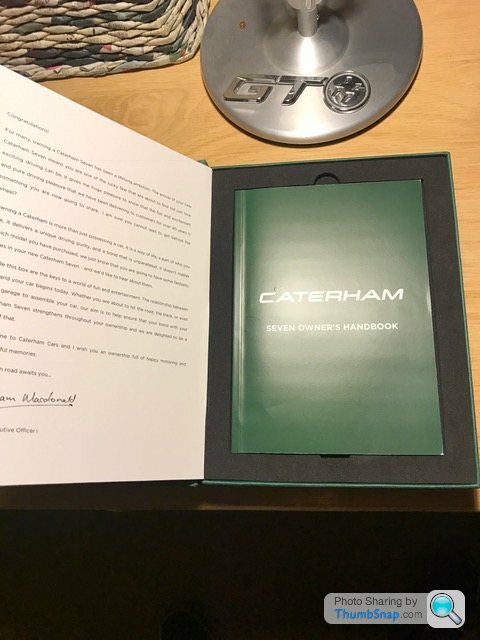
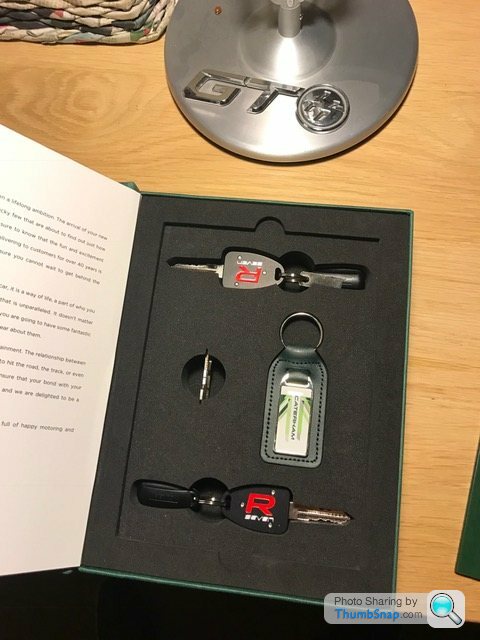
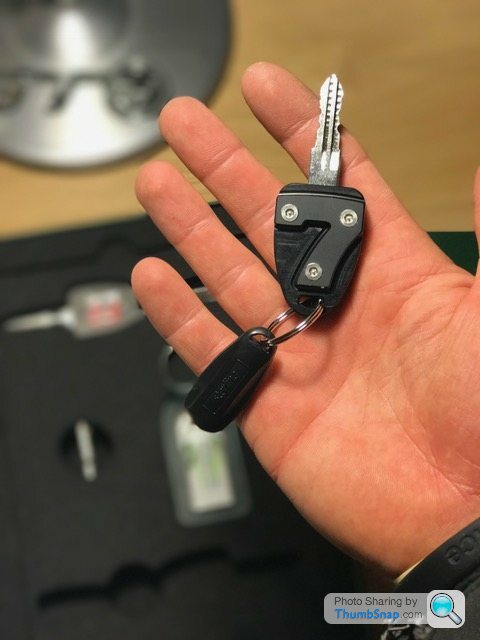
Then it was off home for bed. Although I was greeted with a parcel from the Caterham dealer. They had forgotten to give me the keys for my car when I collected it...!
I quite like the presentation of the key box so thought I'd share it:
More next time...
- ******************************************************************
Managed to finally spend some time on the Caterham again having been out of the country for a week and busy with other stuff open my return.
The next stage on the advised build sequence is to prepare and fit the (dreaded) diff. From what I've read, this is a two person job unless you are fortunate enough to have three arms.
So whilst I waited for help to arrive, I decided to rivet the brake lines to the de-dion tube for fitment after the diff.
This required loosely bolting on the de-dion ears:
Followed by the brake calipers:
The calipers and ears have to come off again afterwards to make it easier slotting the tube through the chassis. The initial fitment is necessary to ensure the brake lines are lined up properly before riveting them.
There are pre-drilled holes in the tube but they need a tiny bit of opening out (due to paint) to accept the rivets:
All done:
Now onto the dreaded diff...
I've heard a lot of horror stories about this being a tw4t of a job so was braced for impact!
First, the prop shaft needs inserting into the transmission tunnel. Impossible to do if the engine and diff are bolted to the car already. Worth remembering if you are doing a build!
Then the diff needs jacking up to its mounts in the chassis. The instructions advise slotting a thin bar or long screwdriver through the uppermost mount to get the diff roughly into position. A bit awkward due to tiny clearances...
We did this, then screwed the lower cap head bolts into the lower mounts. More awkwardness here getting the diff to line up with the chassis mounts.
Got there eventually:
At this point the jack had been discarded in favour of an old pillar jack thing that was lying around at work. I suspect Noah used this when building his boat! Turned out to be very useful in the end.
Now with the two lower bolts in, it was measuring time. The diff needs to be as central as possible.
After an hour or so of lying on my back messing about with shim washers, we were 1mm out, which is within tolerance!
Now time for the even more dreaded top bolt. Every blog I've read describes this as being an impossible job. With the lower bolts in, the diff gets pulled down which miss-aligns it with the upper mount, making it impossible to shove the long bolt through.
I slackened off the lower bolts a bit and lined up a torch so it was shining through the upper mounts of the chassis and diff. Then, using the pillar jack (thing), I jacked the diff up a few turns so I could see light all the way through the mounts, then a bit more to get everything lined up as centrally as possible. This actually worked out quite well and allowed for the long bolt to be shoved though one side of the diff....but not all the way through.
While this was happening, my trusty assistant was on the lathe making these:
Inch diameter stakes (same diameter at the long bolt).
The idea was to hammer these in either side of the diff to get everything lined up correctly, then chase one side through with the long bolt.
Turned out to be a good idea because it worked first time! I'd even remembered to put the shim washers in before the stakes so it was job done.
I do have a slight nagging feeling I've done something wrong due to how smoothly it went. No doubt this will be highlighted in the post build inspection...
Now to bolt the prop-shaft to the diff. Fairly easy, if a little tight. Really helped having someone above putting the car into and out of gear to help torque the bolts up.
Job jobbed... as they say:
Then it was off home for bed. Although I was greeted with a parcel from the Caterham dealer. They had forgotten to give me the keys for my car when I collected it...!
I quite like the presentation of the key box so thought I'd share it:
More next time...
Edited by ECG1000 on Thursday 9th February 16:44
FELIX_5 said:
Great thread, really enjoying it! That key box is lovely, but can't believe they forgot to give you the keys when you picked the car up!! Pretty crucial.... 

I know what you mean. However, having got to this stage, it really didn't surprise me. Let's called it "British Flair"
Little bit more progress last night.
It was time to get the rear suspension/axle assembly started.
Luckily I have found a very useful blog of a fellow builder which has some nice pictures in and good descriptions. This really helps fill in the blanks where the instructions can leave you guessing: 'Use bolt (18) from fastener pack 30ZA011C'------- "Oh, you mean bolt (3) from fastener pack 30ZA011B"...
First job was to feed the de-dion tube through the chassis. Not too tricky will a little bit of twisting and limbo-ing here and there. Just had to be careful not to pinch the brake lines.
Once that was in place, the brake hose bolts to the chassis and connects up to the hard line that runs down the transmission tunnel.
Now the radius arms need to go on. All pretty straight forward again cross referencing the blog and instructions. The smaller ends of the arms attach to a bolt you poke through the bodywork from inside the chassis. There are a choice of two holes. I'm told the lower one is more in favour of handling, whilst the upper is more for comfort... We shall see.
Wooden blocks in place as the arms need torqueing up parallel to the ground.
The larger ends then slot into the brackets on the de-dion tube to be bolted in place. When I say slot, it's more like shove - very hard. Nothing the persuader couldn't handle though...

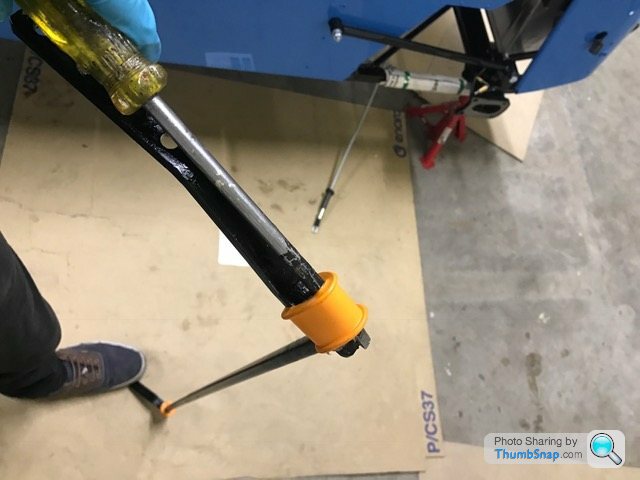
Onto the rear anti-roll-bar.
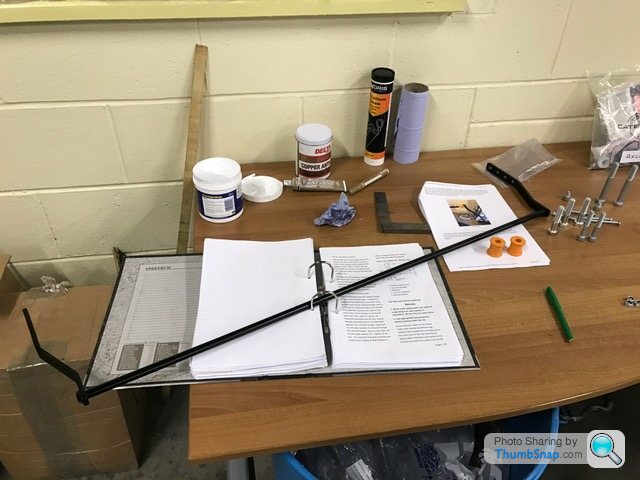
First job is to slide the rubber bushes into place. This requires Forcing them round a right angle. With the rubber being so tight, it's very hard work unless you know a little trick. Blog to the rescue again, a well aimed flat headed screw driver helps to prise them round the right angle.
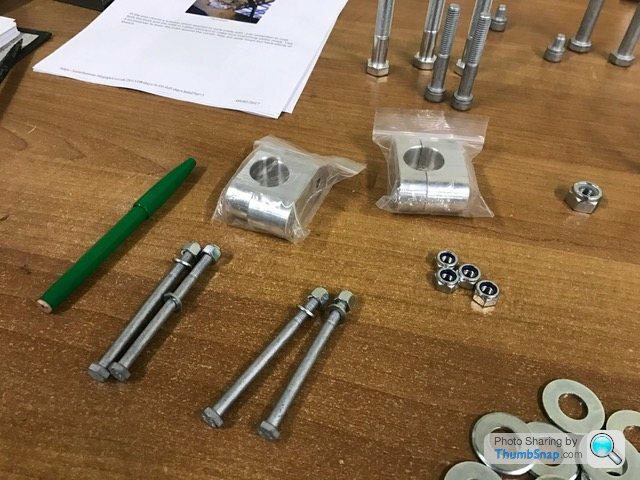
Now to clamp the ARB to the chassis. This process uses two sets of paired clamps - just like the steering rack, only smaller. I'm once bitten twice shy on this one so was very careful not to mix them up.

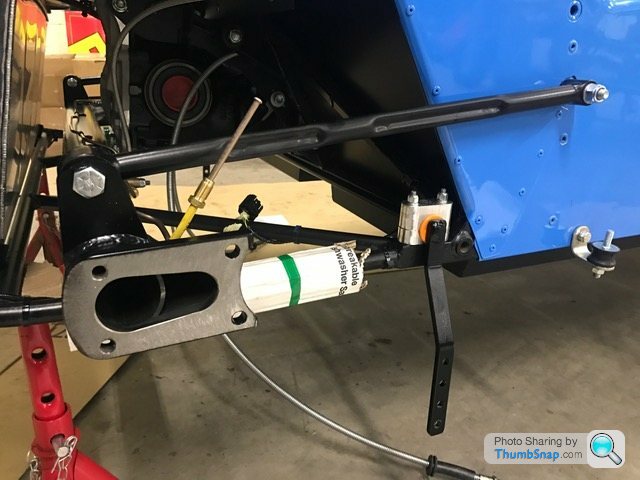
A-Frame time. More 'centralise' as the instructions put it. More lying on my back fiddling with shim washers, as I put it.
The tip of the 'A' bolts simply to the buttress on the de-dion tube.
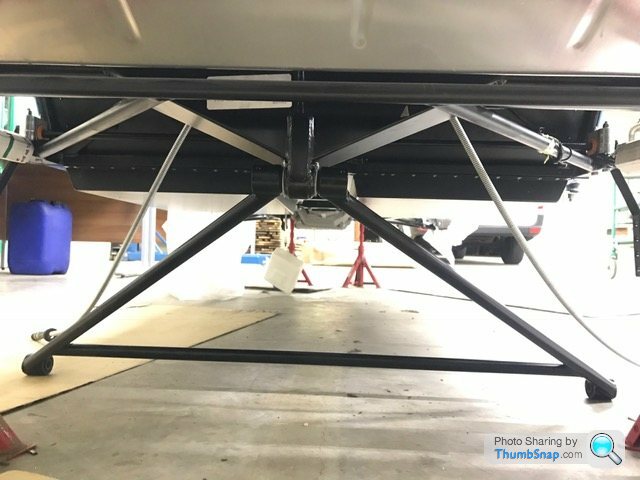
Then the forward ends need attaching to the chassis with a combination of shim washers slotted in with the aim of centralising the de-dion tube.
Got there in the end within the 2mm +/- tolerance specified within the manual. Although I wouldn't object to it being looked over in the post build inspection..
That was it for the night.
Next on the list is to fit the roll hoop, followed by the rear spring/damper units. This can't be done in reverse order due to the relevant bolts for each item getting in the way of each other.
Lots of green ticks!

When I got home, I paid Herbert's Vinyl's (thanks for the heads up Smitters!) for my stripes at a fraction of the cost the factory charge. Just hope I can stick them on straight.
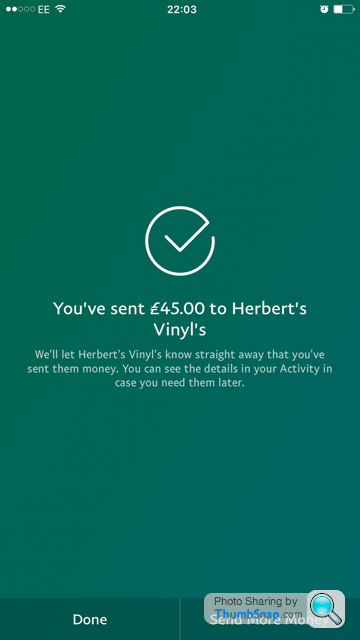
For the eagle eyed amongst you, you may notice a lack of copper slip being used on bolts... I'm using silicone grease instead. It's supposed to ward off rusted bolts better so I'm told by someone who has been assembling and dismantling cars for years. Silicone on everything unless it's likely to get hot, then the copper comes out. Time will tell...
More next time!
It was time to get the rear suspension/axle assembly started.
Luckily I have found a very useful blog of a fellow builder which has some nice pictures in and good descriptions. This really helps fill in the blanks where the instructions can leave you guessing: 'Use bolt (18) from fastener pack 30ZA011C'------- "Oh, you mean bolt (3) from fastener pack 30ZA011B"...
First job was to feed the de-dion tube through the chassis. Not too tricky will a little bit of twisting and limbo-ing here and there. Just had to be careful not to pinch the brake lines.
Once that was in place, the brake hose bolts to the chassis and connects up to the hard line that runs down the transmission tunnel.
Now the radius arms need to go on. All pretty straight forward again cross referencing the blog and instructions. The smaller ends of the arms attach to a bolt you poke through the bodywork from inside the chassis. There are a choice of two holes. I'm told the lower one is more in favour of handling, whilst the upper is more for comfort... We shall see.
Wooden blocks in place as the arms need torqueing up parallel to the ground.
The larger ends then slot into the brackets on the de-dion tube to be bolted in place. When I say slot, it's more like shove - very hard. Nothing the persuader couldn't handle though...
Onto the rear anti-roll-bar.
First job is to slide the rubber bushes into place. This requires Forcing them round a right angle. With the rubber being so tight, it's very hard work unless you know a little trick. Blog to the rescue again, a well aimed flat headed screw driver helps to prise them round the right angle.
Now to clamp the ARB to the chassis. This process uses two sets of paired clamps - just like the steering rack, only smaller. I'm once bitten twice shy on this one so was very careful not to mix them up.
A-Frame time. More 'centralise' as the instructions put it. More lying on my back fiddling with shim washers, as I put it.
The tip of the 'A' bolts simply to the buttress on the de-dion tube.
Then the forward ends need attaching to the chassis with a combination of shim washers slotted in with the aim of centralising the de-dion tube.
Got there in the end within the 2mm +/- tolerance specified within the manual. Although I wouldn't object to it being looked over in the post build inspection..
That was it for the night.
Next on the list is to fit the roll hoop, followed by the rear spring/damper units. This can't be done in reverse order due to the relevant bolts for each item getting in the way of each other.
Lots of green ticks!
When I got home, I paid Herbert's Vinyl's (thanks for the heads up Smitters!) for my stripes at a fraction of the cost the factory charge. Just hope I can stick them on straight.
For the eagle eyed amongst you, you may notice a lack of copper slip being used on bolts... I'm using silicone grease instead. It's supposed to ward off rusted bolts better so I'm told by someone who has been assembling and dismantling cars for years. Silicone on everything unless it's likely to get hot, then the copper comes out. Time will tell...
More next time!
Edited by ECG1000 on Friday 10th February 12:48
scz4 said:
Glad you're back in town, that was a long 2 weeks without an update 
Do you mind sharing the useful blogs you're referencing as you go?
Cheers mate! Yeah, I was itching to get back. Ski holidays take it out of you a bit though...Do you mind sharing the useful blogs you're referencing as you go?
I've bookmarked these (plenty more available if you Google):
http://caterham360rbuildblog.blogspot.co.uk/2016/0...
https://caterhamssr.blogspot.co.uk/2013/08/days-9-...
http://www.caterham-build.co.uk/index.php?cat=&...
There is the Lotus 7 club which I'm in no doubt has a huge wealth of knowledge. It requires a subscription fee to join giving you access to everything.
For some reason I've been trying to resist joining until I've built the car. No doubt I'll be kicking myself when I do - might have made the build a lot easier and given Derek at Caterham a break from all my questions!
scz4 said:
Brilliant! I'll add that to my list. Thank you!bobski1 said:
Where about are you based? I wouldn't mind lending a hand on a weekend or 20?
I'm just outside of Huddersfield if that helps? Hopefully it won't be taking me 20 more weekends though!Update time!
First job after last time's effort was to finish off the rear end.
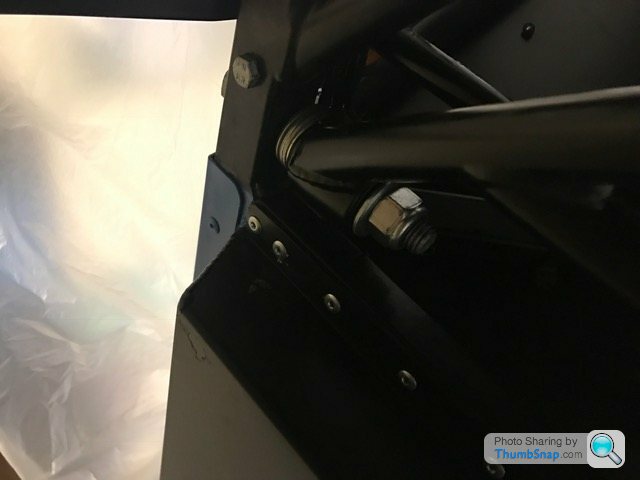
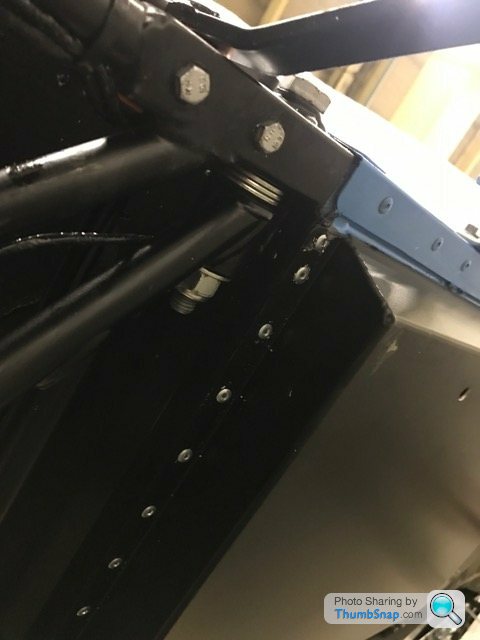
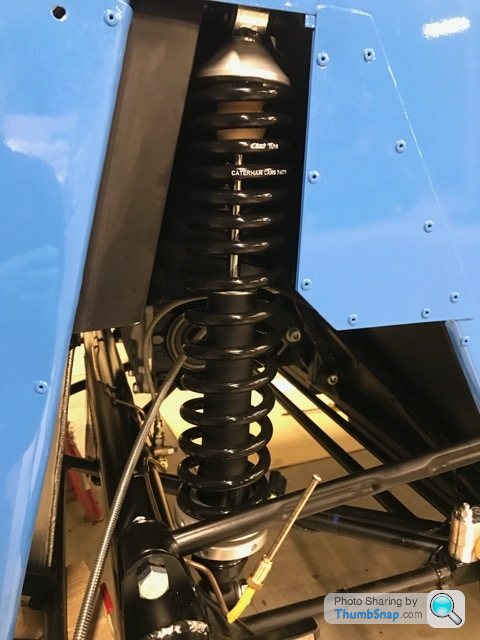
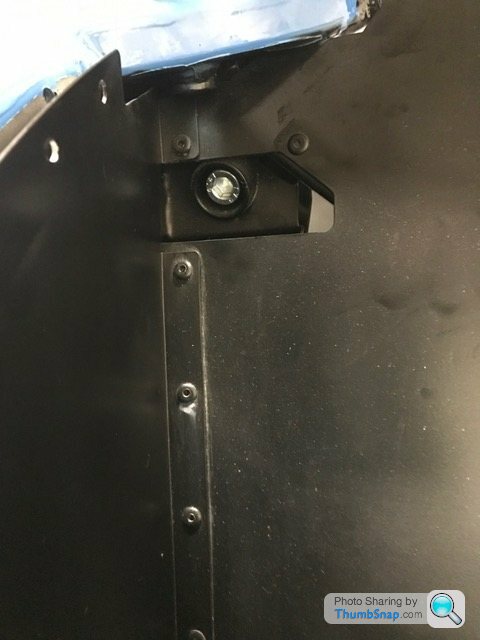
This started with fitting the rear spring/damper units. Fairly straight forward job. Sleeves have to be slotted into the top mounts which are then lined up into the brackets in the chassis. Cap head bolts get inserted through the rear bulkhead then through the top-mount.
The lower mount then bolts to the de-dion tube. All went pretty smoothly.
Now it was the driveshafts.
Slotted into pace:
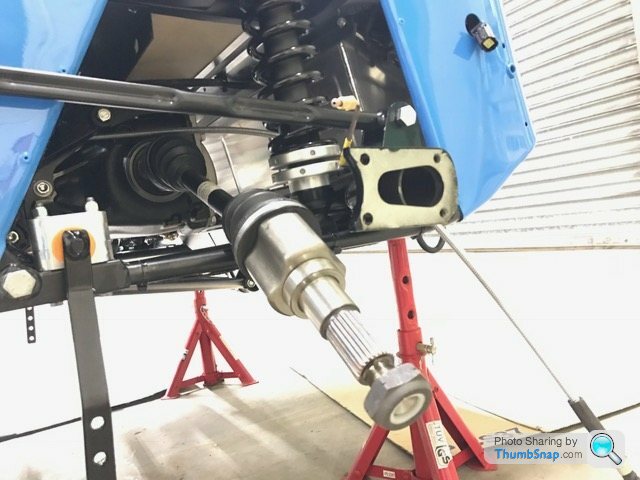
Then the de-dion ears get placed over the driveshafts and bolted to the tube ends with the aid of a drop or two of Loctite:

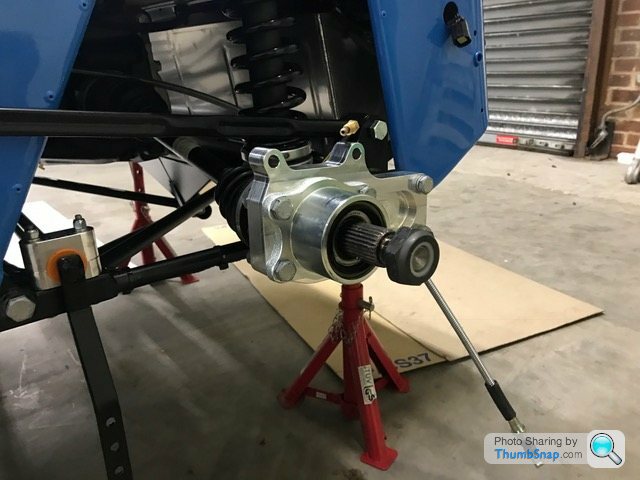
The rear hubs go on next.
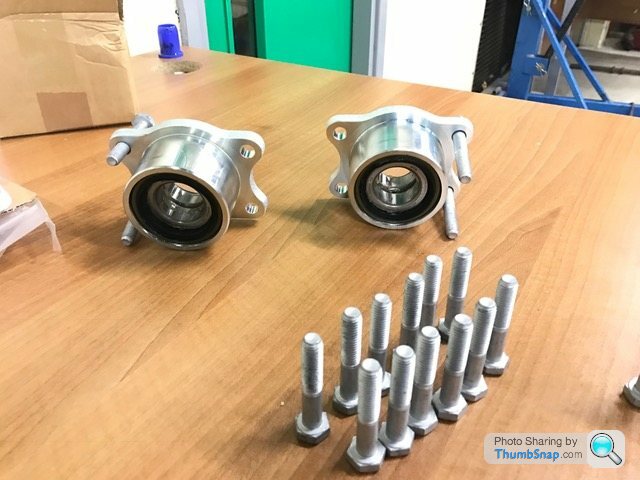
These slip over the driveshafts and bolt into the de-dion ears. When flush with the ears, the driveshafts are held firmly in place.
Now the ARB end brackets attach to the inboard side of the ears. These are in place to take the ARB drop links and also the speed sensor:
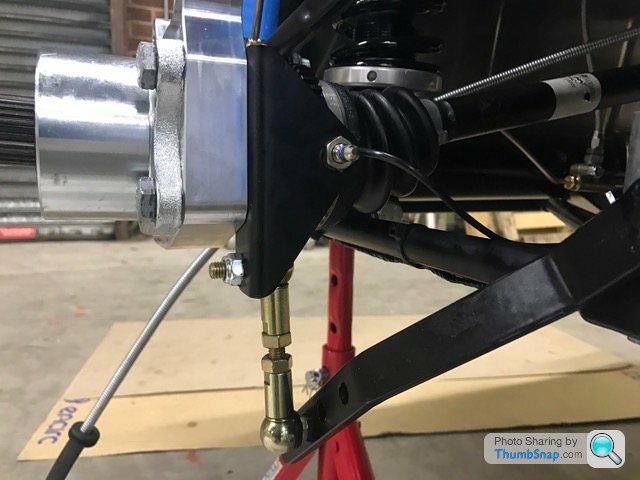
The instructions tell you to fix a hexagonal spacer onto the bracket which allows you to then fit the drop link in the state it comes out of the box. Reading one of the blogs, it looks like the spacer idea has been binned. Instead you just rotate one end of the drop link 180 degrees.
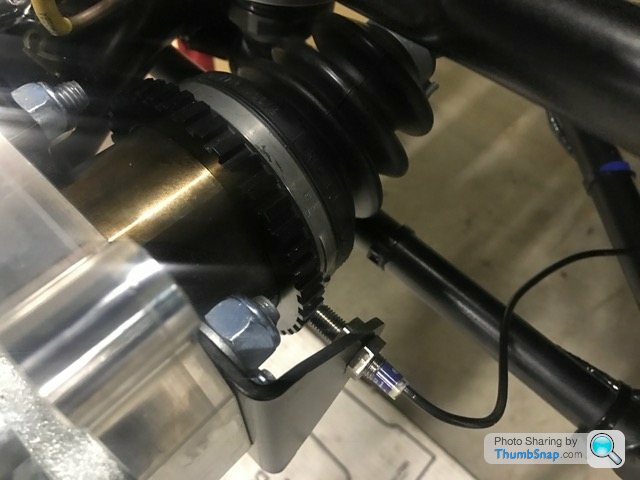
The speed sensor needs to be 1mm away from the driveshaft. I found a washer that was exactly 1mm thick and used that as a guide. Time will tell how far wrong I am with that measurement!
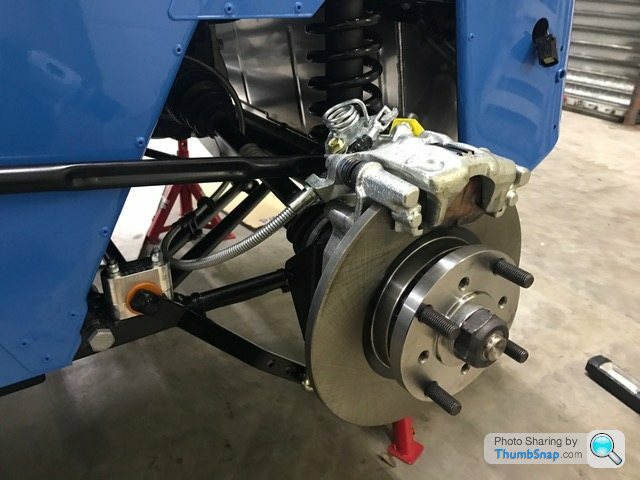
Next the disks go on. These just slip over the driveshafts and sit against the hubs.
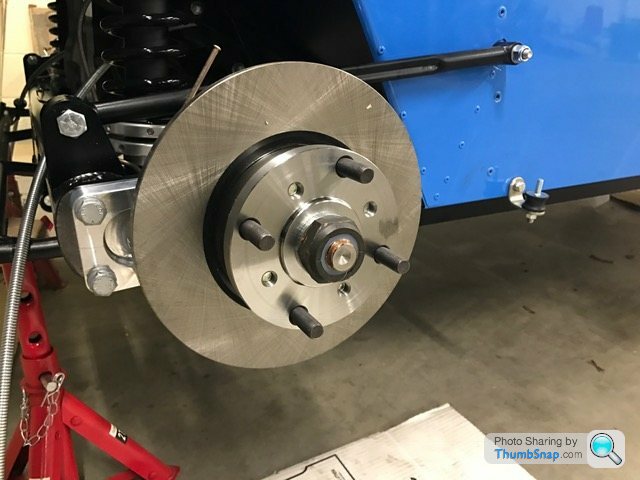
Once the discs are on, a thrust (think that's what they're called) washer and 41mm nyloc nut fasten everything together. This nut needs tightening to 250nm once the brakes are fully functional. I've done it up as tight as I can for now.
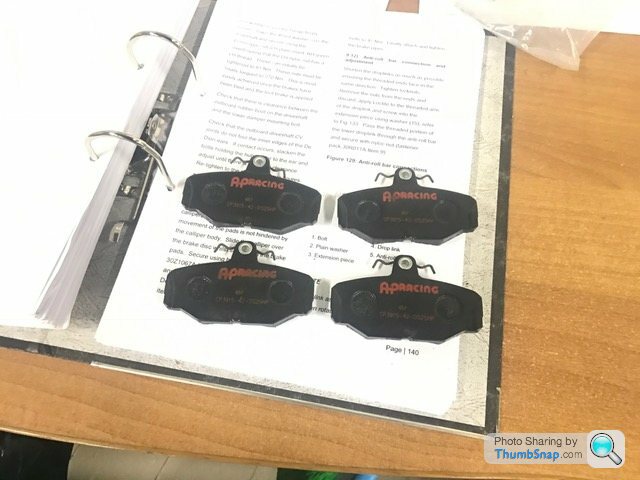
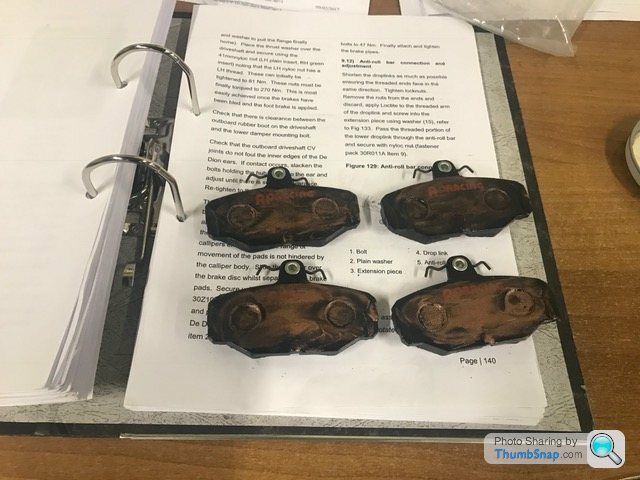
Onto the pads, calipers and handbrake cables. All pretty straight forward again - just common sense fitting everything together.
I had to slacken the handbrake adjuster to fit the cables to the calipers. No idea how I'm going to adjust it when the car is on the road. The wheel you rotate (to tighten/loosen) is wedged between the diff and chassis make it extremely hard to turn.
Now the car is mechanically pretty much done! Bar a couple of minor jobs I need to do.
Almost forgot, I bolted the roll bar on before the dampers.

I supposed I should really think about putting some fluids in a starting it up soon...
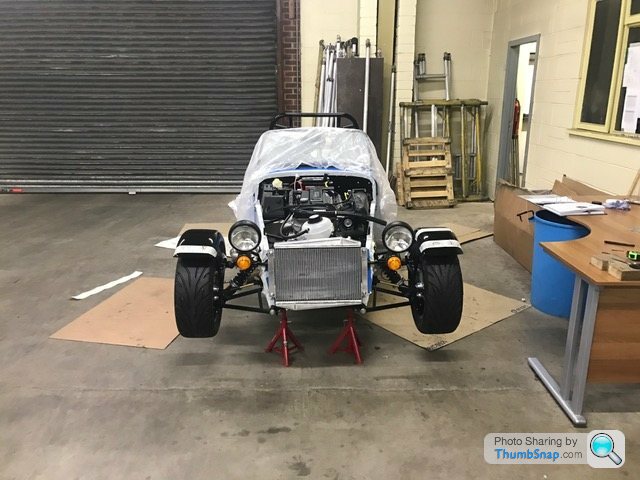
Once help had arrived, we had a go at fitting the front cycle wings. I've read some people just bond theirs on so they don't have bolts sticking through the wing. Whilst this may look nicer, I think it will be more practical using the bolts so removal (when needed) of the wing is easy.
Anyway, this is a massive ball-ache of a job! The wings are supposed to be marked for you so it's plain to see where to drill the holes. Mine weren't... This required a lot of measuring and gentle tweaks of the wing positions. Luckily my helper is very good at measuring and likes to do things thoroughly. If I'd attempted this alone, I would have just lined everything up by eye and hoped it was straight.
Drilling the wing-stays:
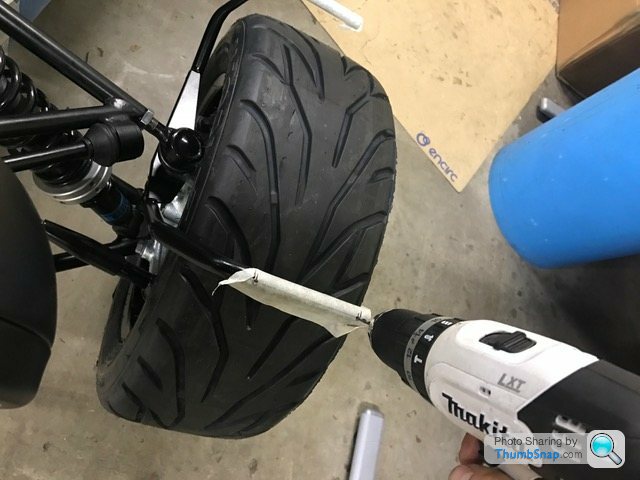
After a couple of hours measuring, marking, more measuring and more marking, we had four holes in each wing-stay and one in each wing.
The wings were pinned to their respective wing-stays with the hope I could get underneath with the drill, poke the drill-bit through the holes in the stay and drill three new holes in each wing.
Unfortunately the front discs and calipers get in the way and I don't have the correct sockets to remove them! We called it a day here and will return with a right angle drill to finish the job. Then it will be fixing the side repeaters and wiring them in.
More next time...
First job after last time's effort was to finish off the rear end.
This started with fitting the rear spring/damper units. Fairly straight forward job. Sleeves have to be slotted into the top mounts which are then lined up into the brackets in the chassis. Cap head bolts get inserted through the rear bulkhead then through the top-mount.
The lower mount then bolts to the de-dion tube. All went pretty smoothly.
Now it was the driveshafts.
Slotted into pace:
Then the de-dion ears get placed over the driveshafts and bolted to the tube ends with the aid of a drop or two of Loctite:
The rear hubs go on next.
These slip over the driveshafts and bolt into the de-dion ears. When flush with the ears, the driveshafts are held firmly in place.
Now the ARB end brackets attach to the inboard side of the ears. These are in place to take the ARB drop links and also the speed sensor:
The instructions tell you to fix a hexagonal spacer onto the bracket which allows you to then fit the drop link in the state it comes out of the box. Reading one of the blogs, it looks like the spacer idea has been binned. Instead you just rotate one end of the drop link 180 degrees.
The speed sensor needs to be 1mm away from the driveshaft. I found a washer that was exactly 1mm thick and used that as a guide. Time will tell how far wrong I am with that measurement!
Next the disks go on. These just slip over the driveshafts and sit against the hubs.
Once the discs are on, a thrust (think that's what they're called) washer and 41mm nyloc nut fasten everything together. This nut needs tightening to 250nm once the brakes are fully functional. I've done it up as tight as I can for now.
Onto the pads, calipers and handbrake cables. All pretty straight forward again - just common sense fitting everything together.
I had to slacken the handbrake adjuster to fit the cables to the calipers. No idea how I'm going to adjust it when the car is on the road. The wheel you rotate (to tighten/loosen) is wedged between the diff and chassis make it extremely hard to turn.
Now the car is mechanically pretty much done! Bar a couple of minor jobs I need to do.
Almost forgot, I bolted the roll bar on before the dampers.
I supposed I should really think about putting some fluids in a starting it up soon...
Once help had arrived, we had a go at fitting the front cycle wings. I've read some people just bond theirs on so they don't have bolts sticking through the wing. Whilst this may look nicer, I think it will be more practical using the bolts so removal (when needed) of the wing is easy.
Anyway, this is a massive ball-ache of a job! The wings are supposed to be marked for you so it's plain to see where to drill the holes. Mine weren't... This required a lot of measuring and gentle tweaks of the wing positions. Luckily my helper is very good at measuring and likes to do things thoroughly. If I'd attempted this alone, I would have just lined everything up by eye and hoped it was straight.
Drilling the wing-stays:
After a couple of hours measuring, marking, more measuring and more marking, we had four holes in each wing-stay and one in each wing.
The wings were pinned to their respective wing-stays with the hope I could get underneath with the drill, poke the drill-bit through the holes in the stay and drill three new holes in each wing.
Unfortunately the front discs and calipers get in the way and I don't have the correct sockets to remove them! We called it a day here and will return with a right angle drill to finish the job. Then it will be fixing the side repeaters and wiring them in.
More next time...
Gassing Station | Readers' Cars | Top of Page | What's New | My Stuff