Classic Aston Martin V8's
Discussion


January 2016 update from the restorer
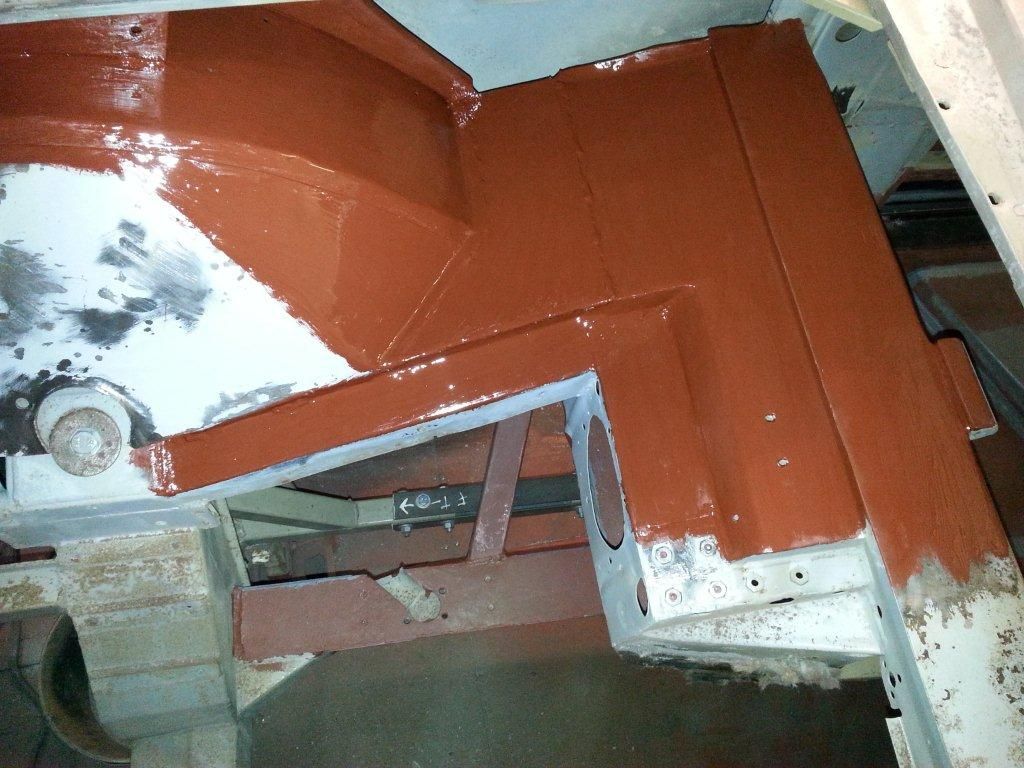
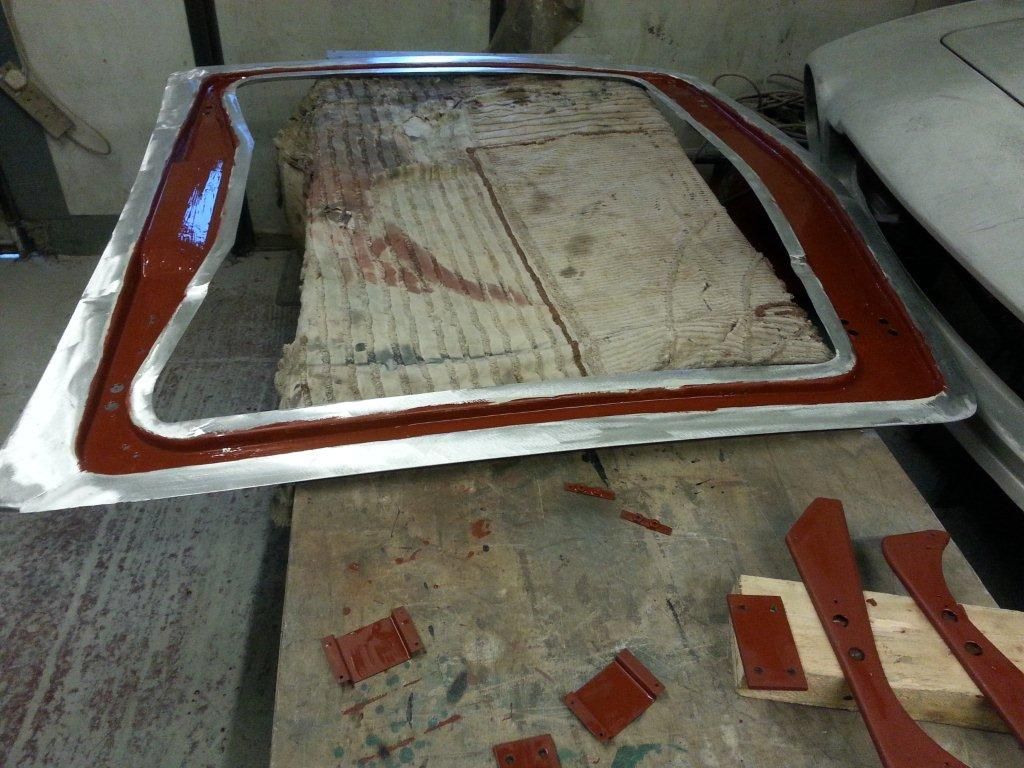
Sills: These have been painted inside before welding, all helps in the combat against corrosion.
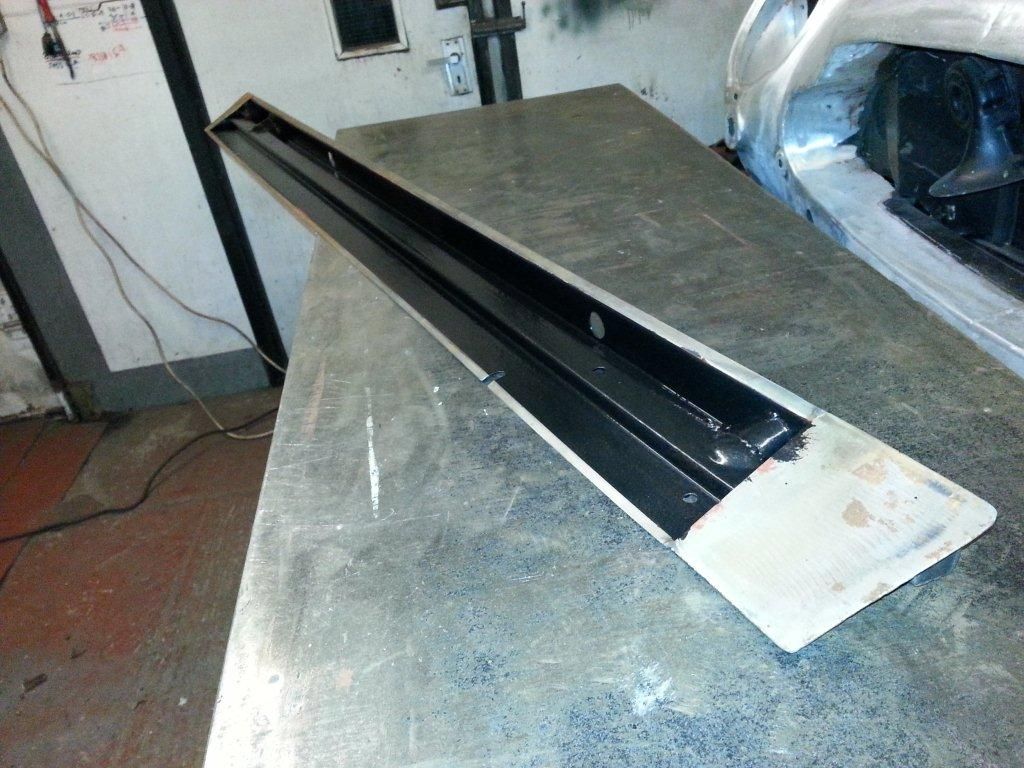
Radius rod location: Again painted inside before final side cover
welding.
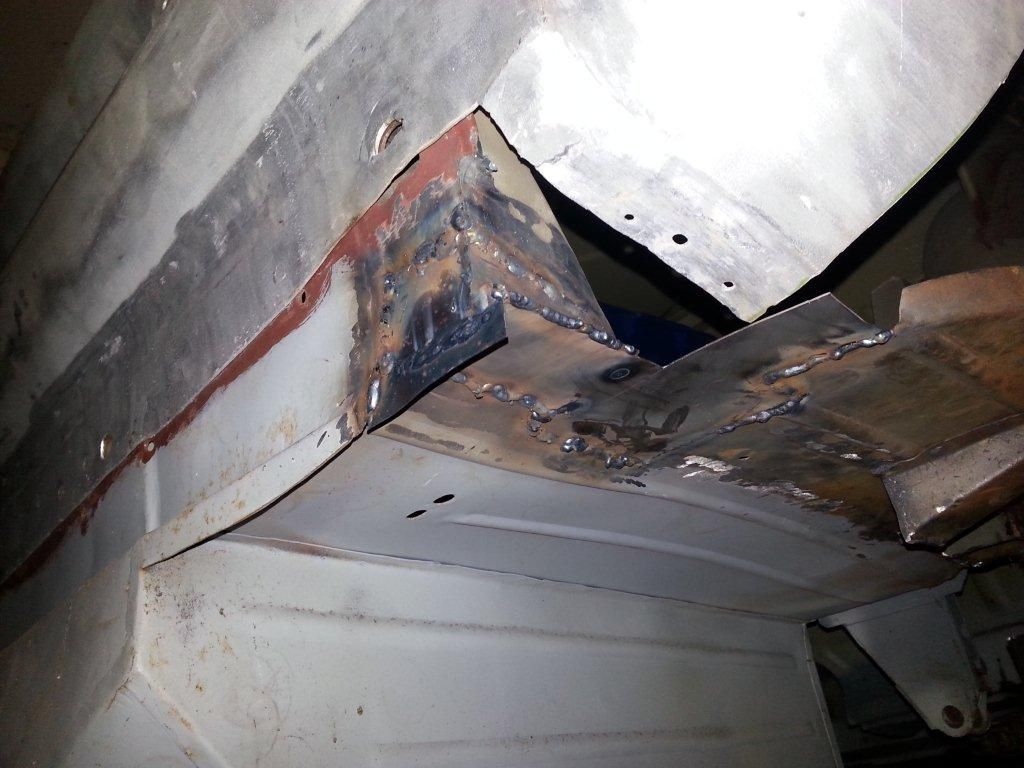
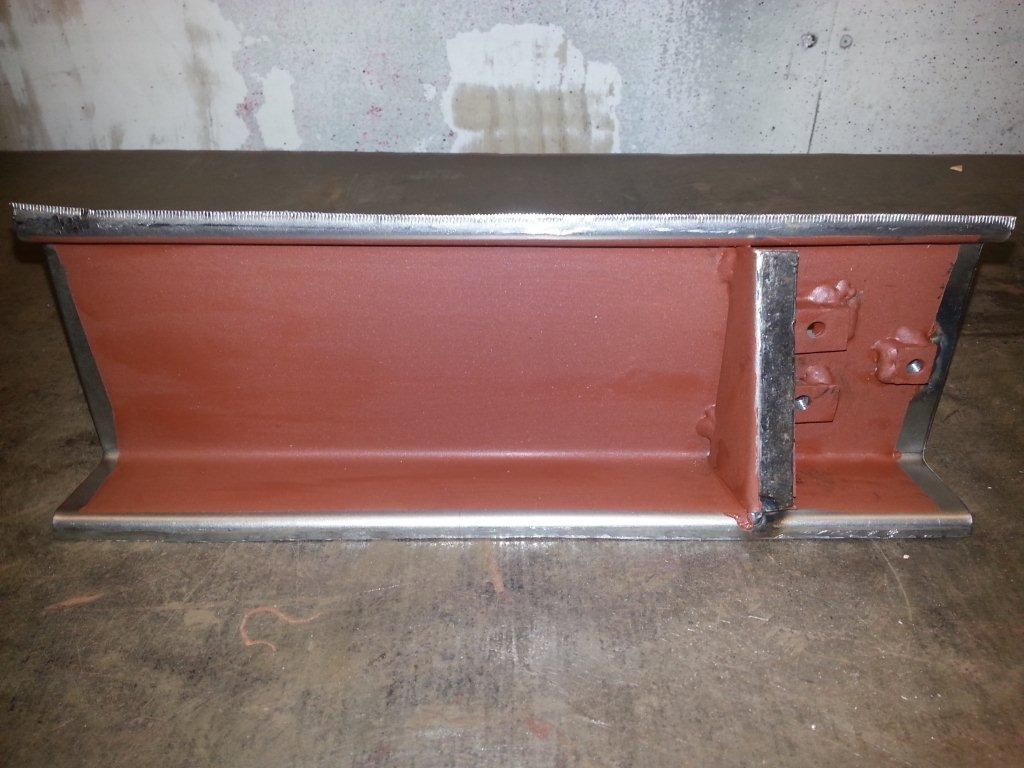
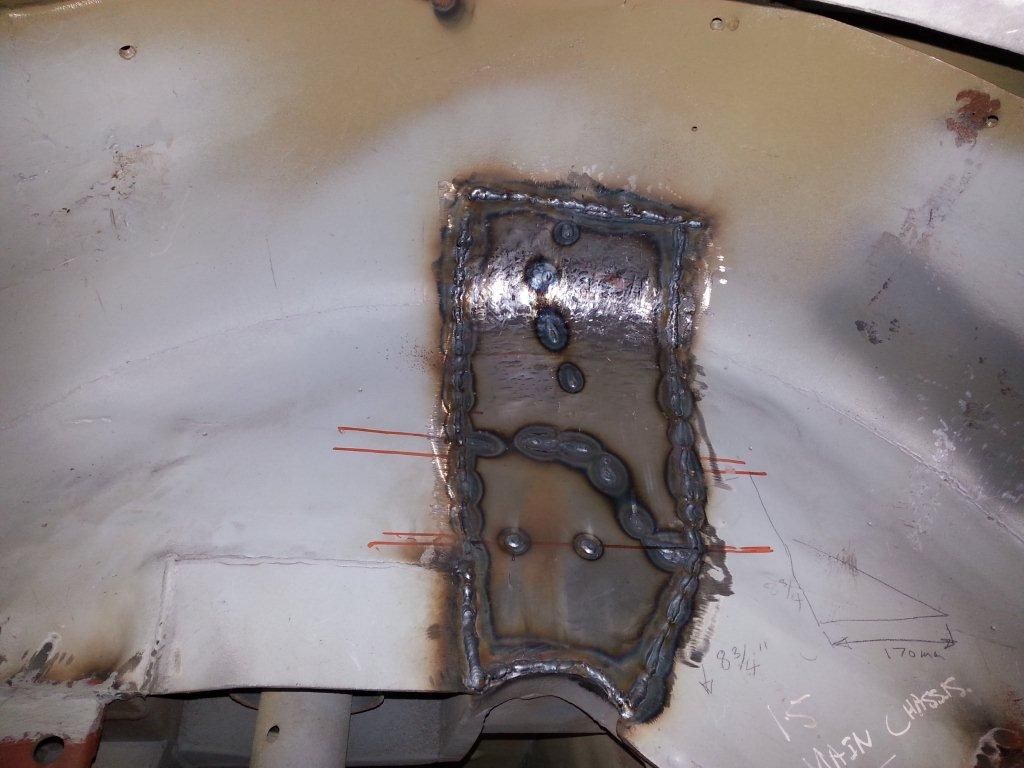
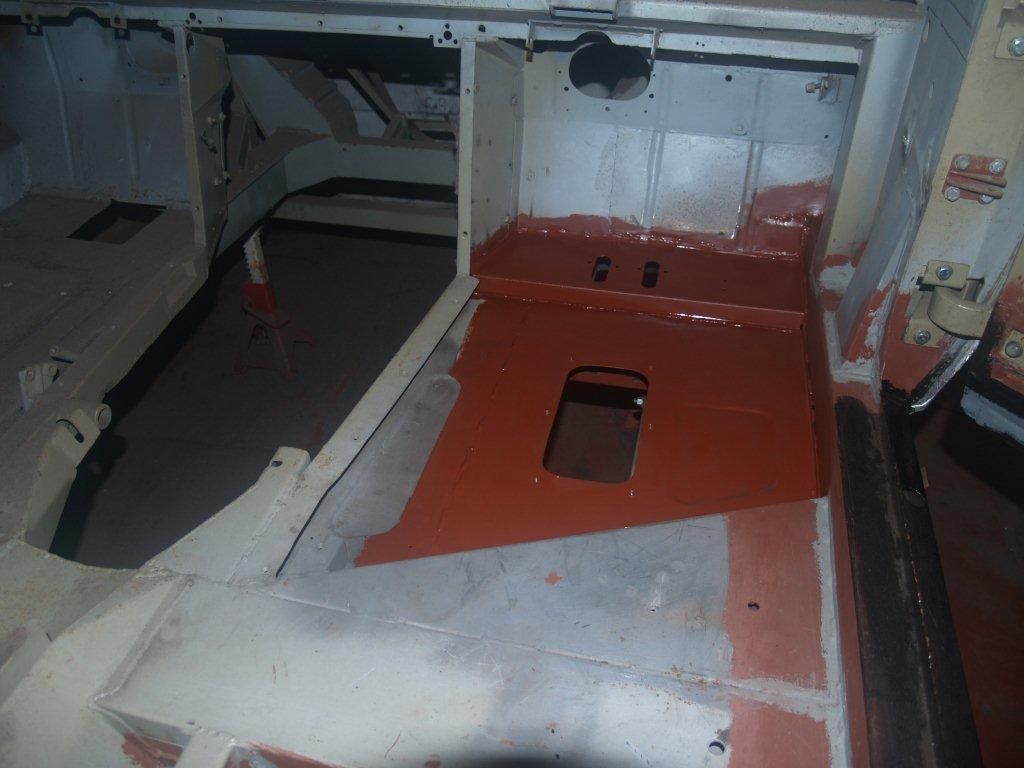
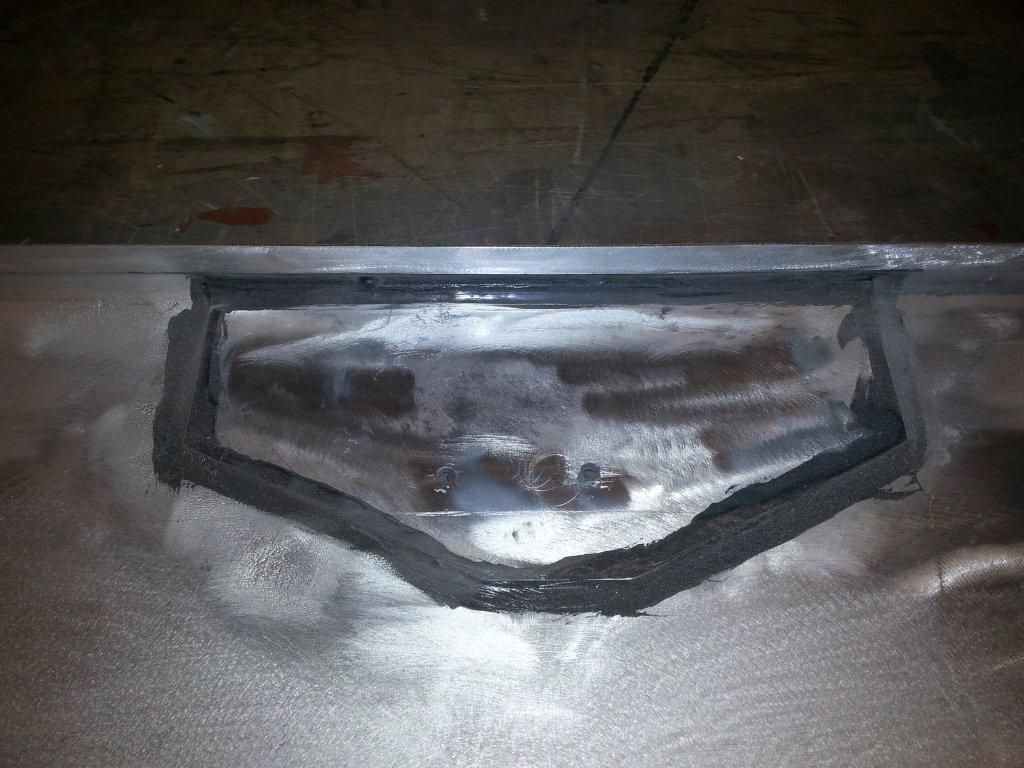
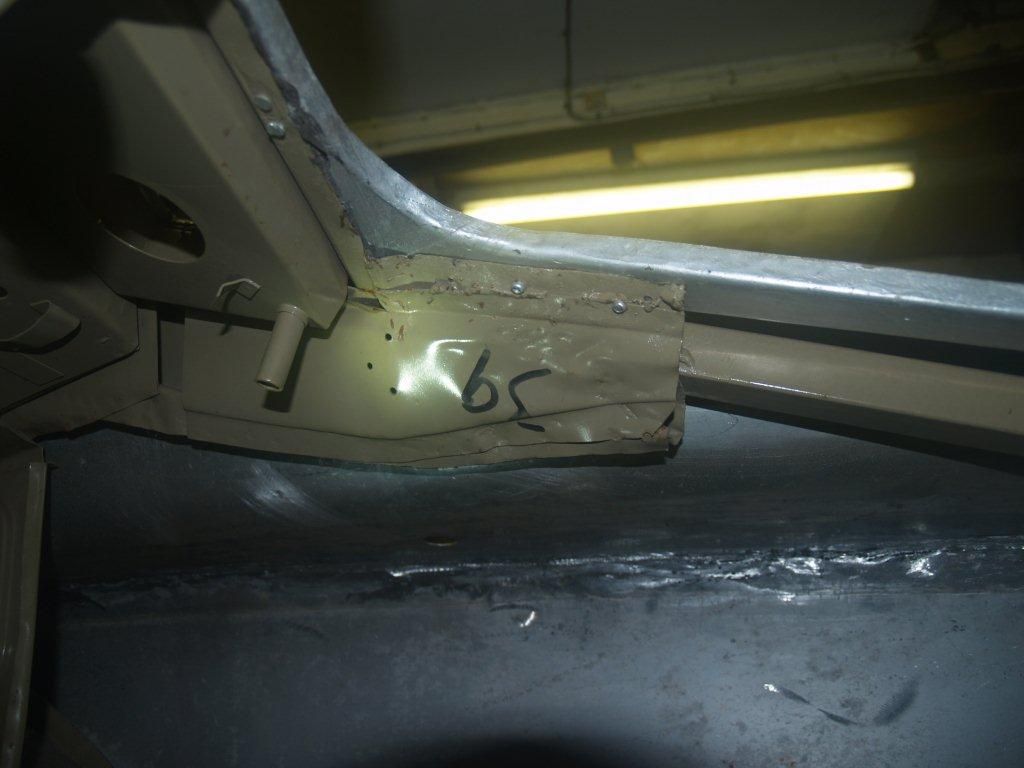
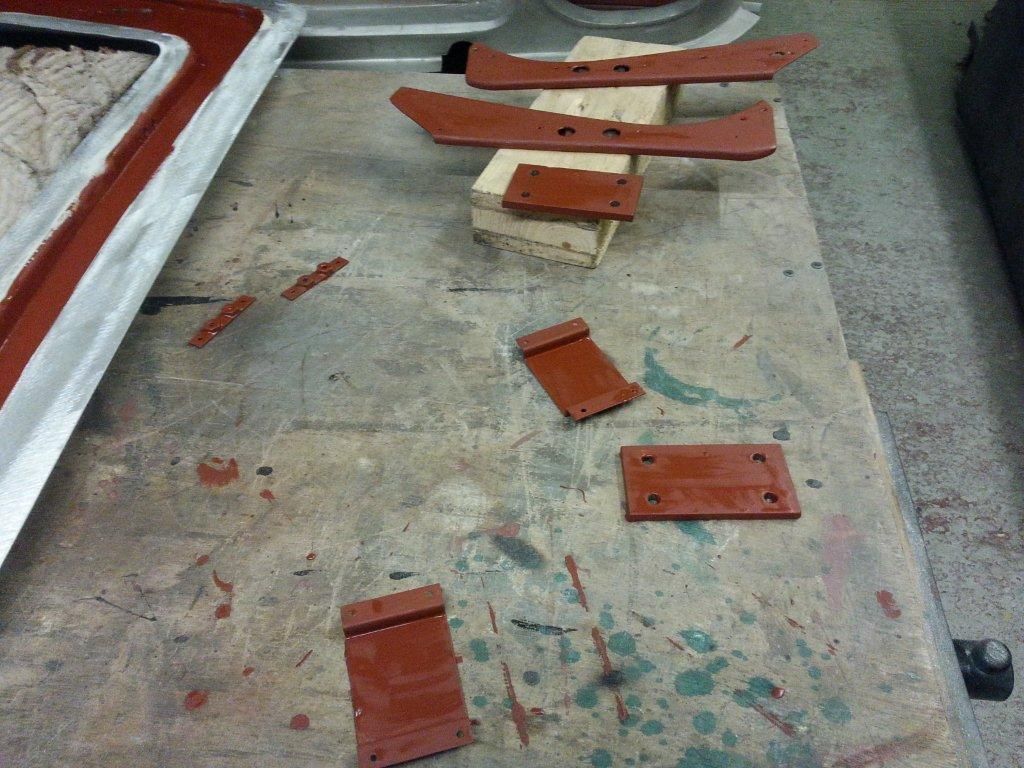
Boot floor rail and support plate: This had been repaired, badly, and the rust could be seen through the first cut out. On seeing the condition, and the fact that the boot floor inside was distorted (but salvageable) once the old rail was removed, a new rail was made and attached after some interior sections replaced. The support plate, identified with the four holes which originally held the original lever arm shocks, was bent. corroded and miss-shaped so I decided to replace at the highest point.
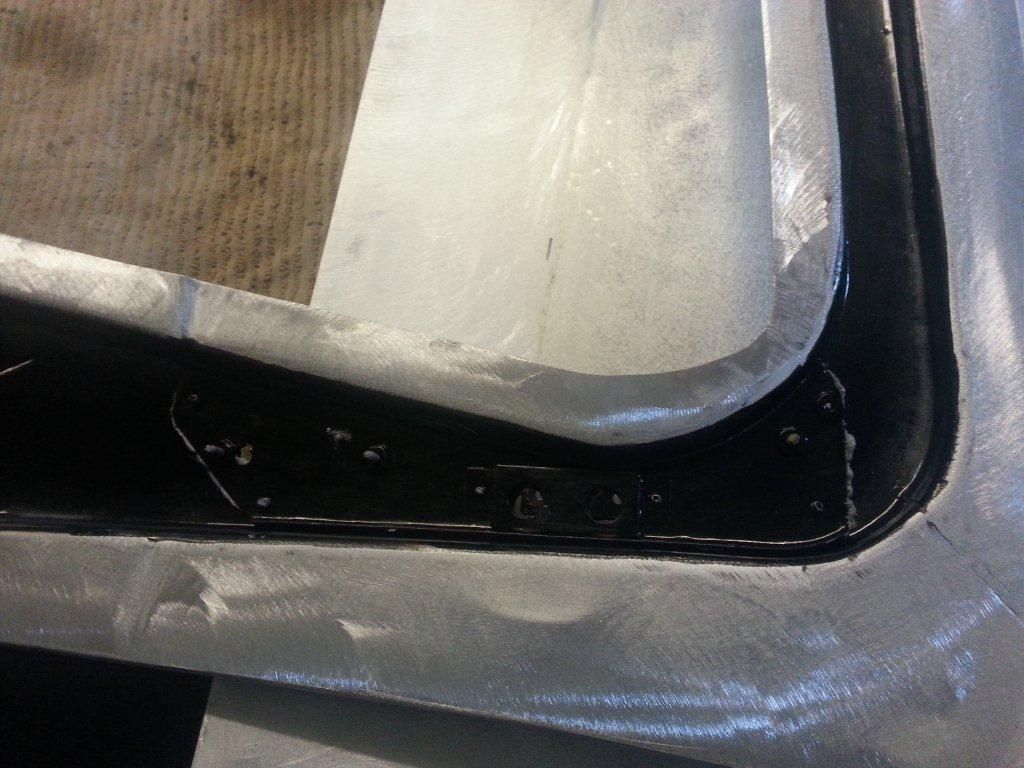
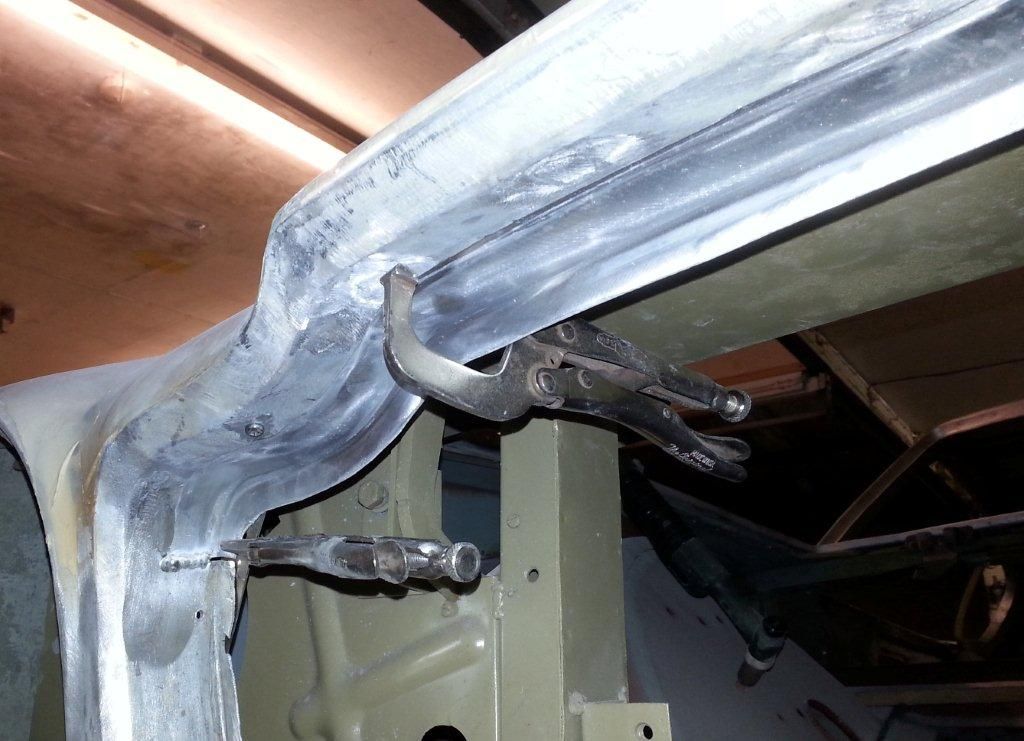
Door hinge: During setting up for position of the profiled sill, ensuring sufficient gap to the door at lowest edge, it became clear that the top hinge has excessive clearance, therefore will need refurbishment. The NS unit will probably need doing too. A job for the list.
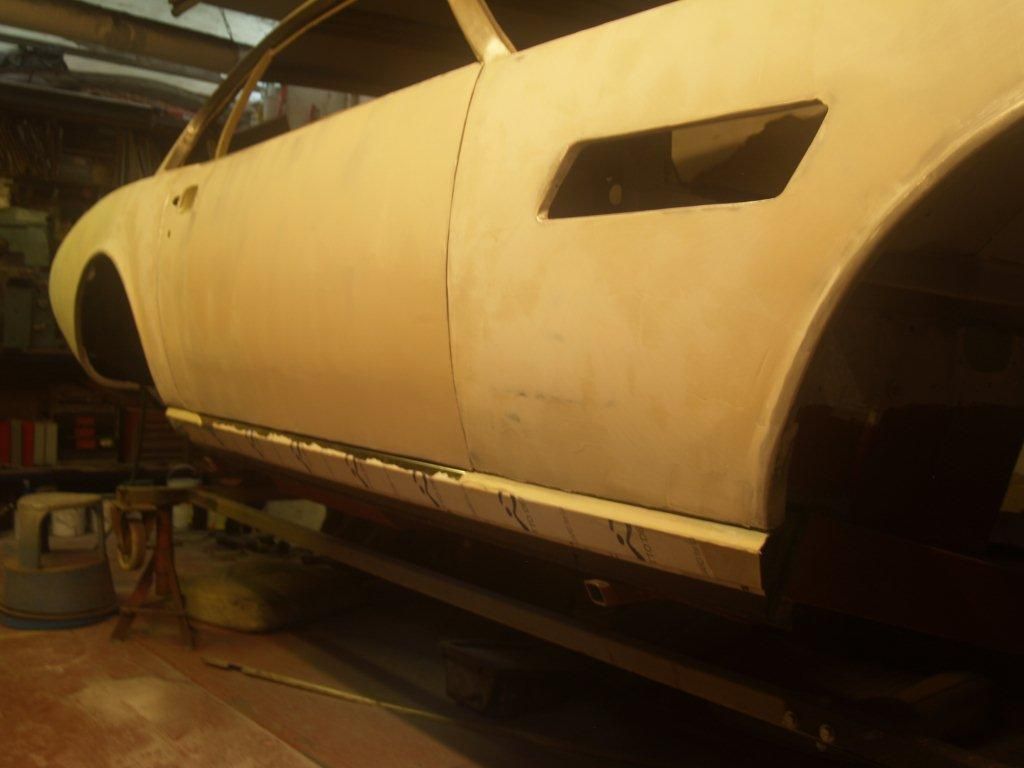
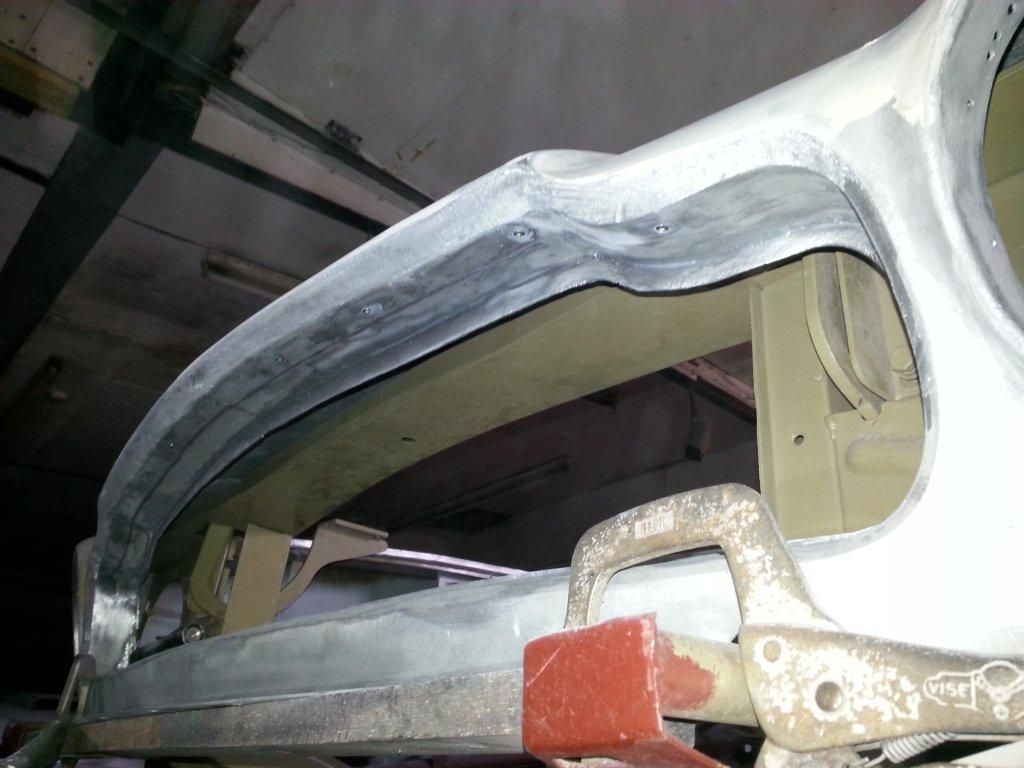
Stainless steel sill covers: When setting up the sills, I loosely clip the top stainless cover in place to give an overall view and check there is an even gap to the door, this to me is quite a focal point and needs to look right. During this operation I noticed that the top cut outs where the lower edge of the quarter panels pass through - had been cut to the horizontal fold or slightly beyond, which should leave a lip nearer the width of the quarter panel fold edge usually 8- 12 mm. This visually will show a larger gap and not help to keep out dirt falling inside.
I could weld a section in place, but over this length if fully welded will distort - making more work. Therefore, we decided to replace them with new ones.
Sills: These have been painted inside before welding, all helps in the combat against corrosion.


Radius rod location: Again painted inside before final side cover
welding.


Boot floor rail and support plate: This had been repaired, badly, and the rust could be seen through the first cut out. On seeing the condition, and the fact that the boot floor inside was distorted (but salvageable) once the old rail was removed, a new rail was made and attached after some interior sections replaced. The support plate, identified with the four holes which originally held the original lever arm shocks, was bent. corroded and miss-shaped so I decided to replace at the highest point.


Door hinge: During setting up for position of the profiled sill, ensuring sufficient gap to the door at lowest edge, it became clear that the top hinge has excessive clearance, therefore will need refurbishment. The NS unit will probably need doing too. A job for the list.
Stainless steel sill covers: When setting up the sills, I loosely clip the top stainless cover in place to give an overall view and check there is an even gap to the door, this to me is quite a focal point and needs to look right. During this operation I noticed that the top cut outs where the lower edge of the quarter panels pass through - had been cut to the horizontal fold or slightly beyond, which should leave a lip nearer the width of the quarter panel fold edge usually 8- 12 mm. This visually will show a larger gap and not help to keep out dirt falling inside.
I could weld a section in place, but over this length if fully welded will distort - making more work. Therefore, we decided to replace them with new ones.
March 2016 – Update from the restorer
OS Sill: This is all finished along with the A and B post, primer painted and joints are sealed.
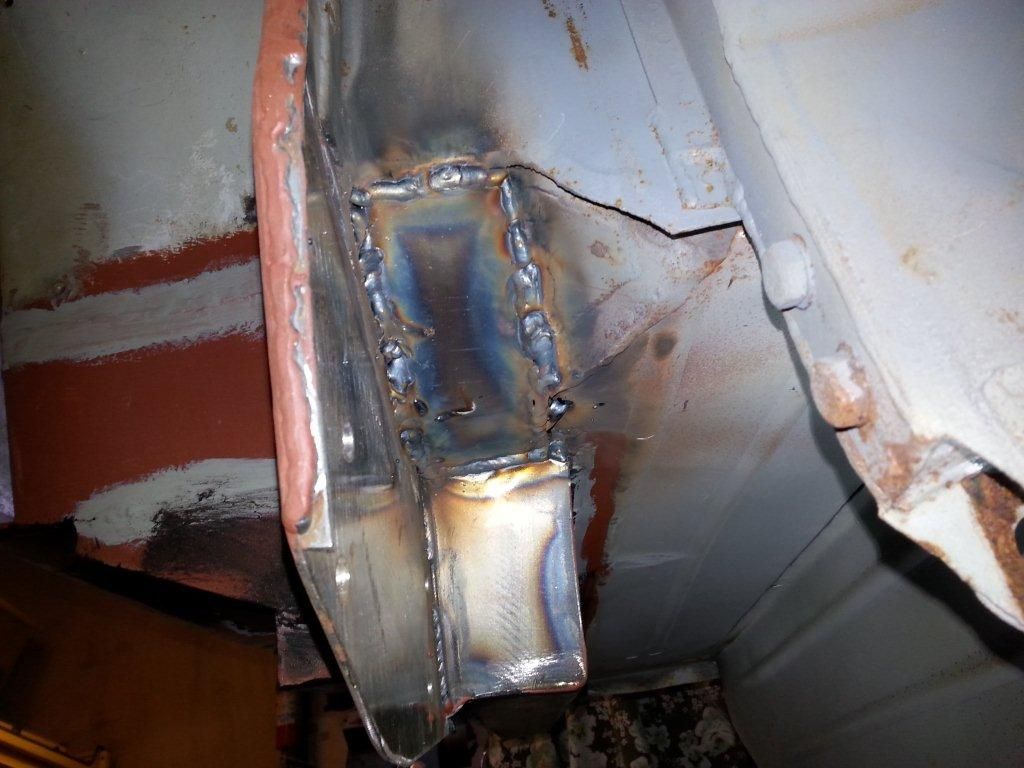
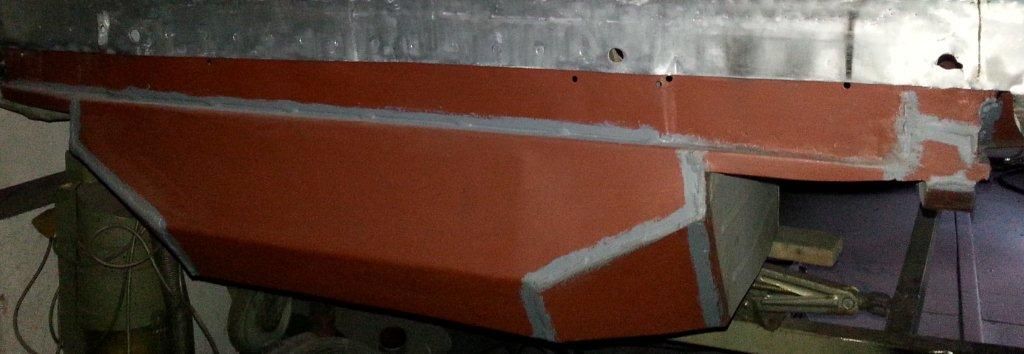
OS Bum panel: although the original was reasonably sound, the supporting member to the rear which also supports the hand brake cable was corroded and was best being replaced. Replacing the member required a new bum panel too, the previous panel was distorted from previous repairs.
NSR floor panel: As the car came with a new panel this is now welded in place, but beforehand needed some cleaning up as previously stored in slightly damp conditions. All welded in place and finished with primer with edges sealed as usual.
Door Hinges: in the process of setting up the door for best fit to adjacent quarters, it became clear the hinges were worn. Initially after rebuilding the lower hinge which initially seamed to only one, the top hinge required reworking too. Both are refitted assembled with lubrication and holes for future lubrication which there was a lack of.
OSR Quarter: I have made a start of returning this to the original shape after removing the sections which emulated the flip tail shape. All is going reasonably well but the corner section where the light is located will need re-fabricating as original shape has unfortunately been destroyed by over welding in the course of previously making the flip tail corner shape.
Boot lid: Bolted to the hinges and adjusted for best position, all aligns reasonably well - giving me a line to work to with the quarter panel edge. At some point the boot lid skin will need to be removed from the aluminium frame for re-bonding together as the side seams are split.
OS Sill: This is all finished along with the A and B post, primer painted and joints are sealed.

OS Bum panel: although the original was reasonably sound, the supporting member to the rear which also supports the hand brake cable was corroded and was best being replaced. Replacing the member required a new bum panel too, the previous panel was distorted from previous repairs.


NSR floor panel: As the car came with a new panel this is now welded in place, but beforehand needed some cleaning up as previously stored in slightly damp conditions. All welded in place and finished with primer with edges sealed as usual.

Door Hinges: in the process of setting up the door for best fit to adjacent quarters, it became clear the hinges were worn. Initially after rebuilding the lower hinge which initially seamed to only one, the top hinge required reworking too. Both are refitted assembled with lubrication and holes for future lubrication which there was a lack of.

OSR Quarter: I have made a start of returning this to the original shape after removing the sections which emulated the flip tail shape. All is going reasonably well but the corner section where the light is located will need re-fabricating as original shape has unfortunately been destroyed by over welding in the course of previously making the flip tail corner shape.
Boot lid: Bolted to the hinges and adjusted for best position, all aligns reasonably well - giving me a line to work to with the quarter panel edge. At some point the boot lid skin will need to be removed from the aluminium frame for re-bonding together as the side seams are split.
April 2016 - Update
OSR Inner wing top repair: This area had caught my eye several times and closer inspection revealed a previous unsound repair. All corrosion was cut out and replaced as required.
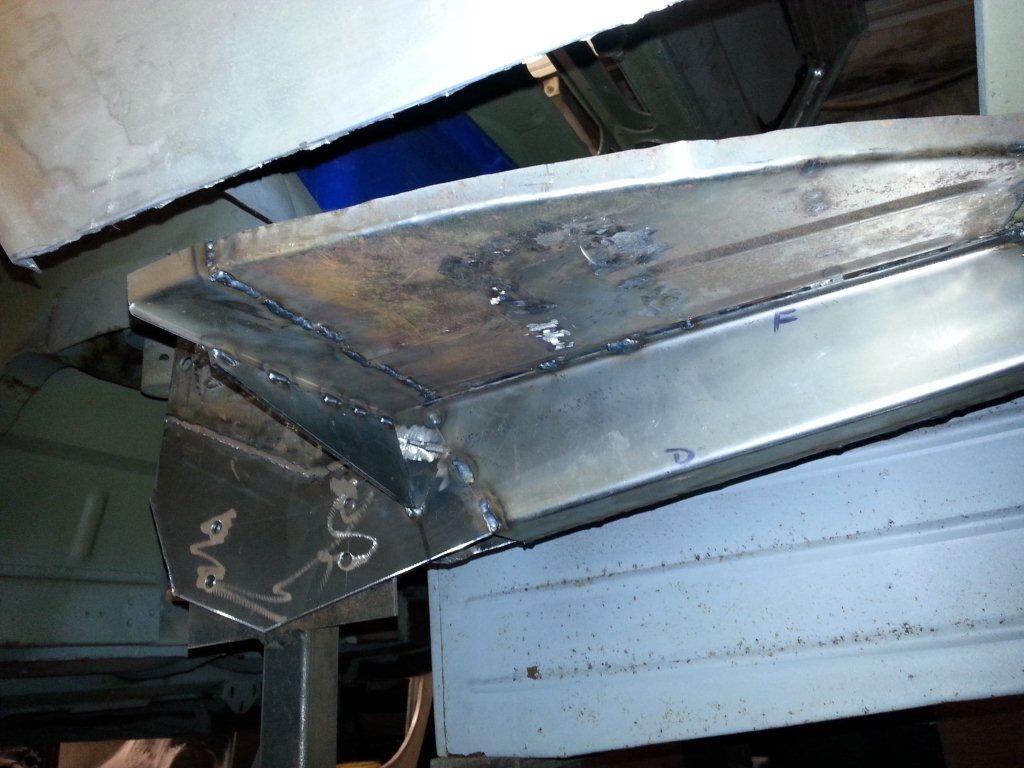
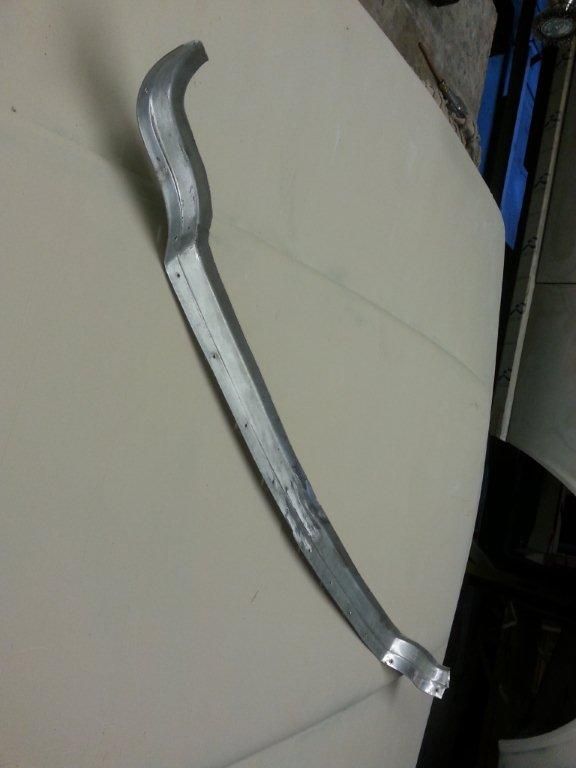
NS Boot rail end repair: Remaining section to be replaced here as being bent and corroded.
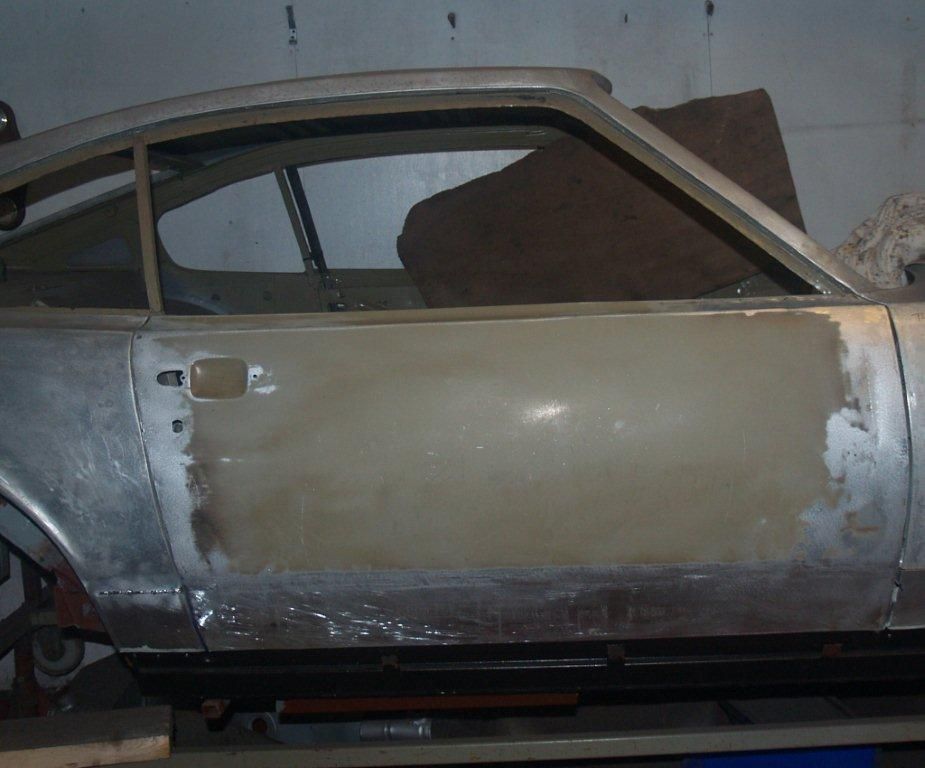
OS Door: After making the new aluminium lower quarters and in the process of setting up for position and alignment with the door for welding, which showed the door bottom not to be straight along the bottom edge in both planes. Closer inspection showed the door to have been previously repaired with a new bottom with distortion and leaving some corroded sections in place.
Removing the door skin has revealed a poorly repaired bottom section, which is in the process of being fully refurbished and straightened along with new lowers section to the door skin as well.
I appreciate the rust repairs do not make the most exciting reading but I thought it important to illustrate that even a superficially good shell can hide all manner of issues.
OSR Inner wing top repair: This area had caught my eye several times and closer inspection revealed a previous unsound repair. All corrosion was cut out and replaced as required.


NS Boot rail end repair: Remaining section to be replaced here as being bent and corroded.

OS Door: After making the new aluminium lower quarters and in the process of setting up for position and alignment with the door for welding, which showed the door bottom not to be straight along the bottom edge in both planes. Closer inspection showed the door to have been previously repaired with a new bottom with distortion and leaving some corroded sections in place.
Removing the door skin has revealed a poorly repaired bottom section, which is in the process of being fully refurbished and straightened along with new lowers section to the door skin as well.


I appreciate the rust repairs do not make the most exciting reading but I thought it important to illustrate that even a superficially good shell can hide all manner of issues.
July 2016 Update
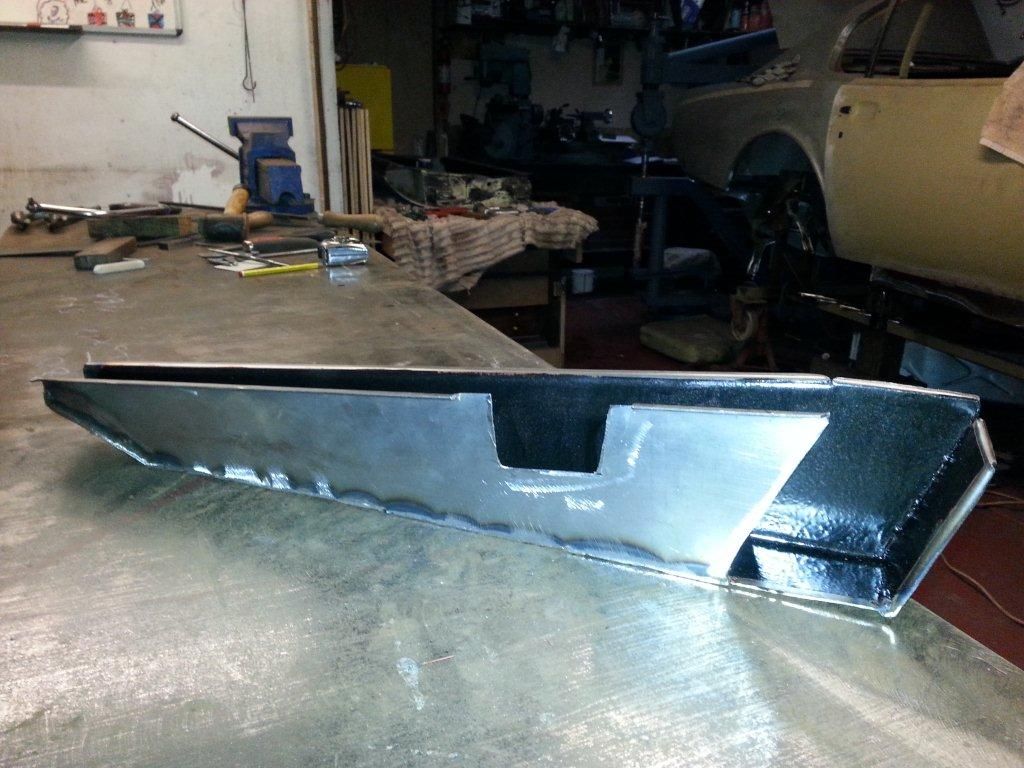
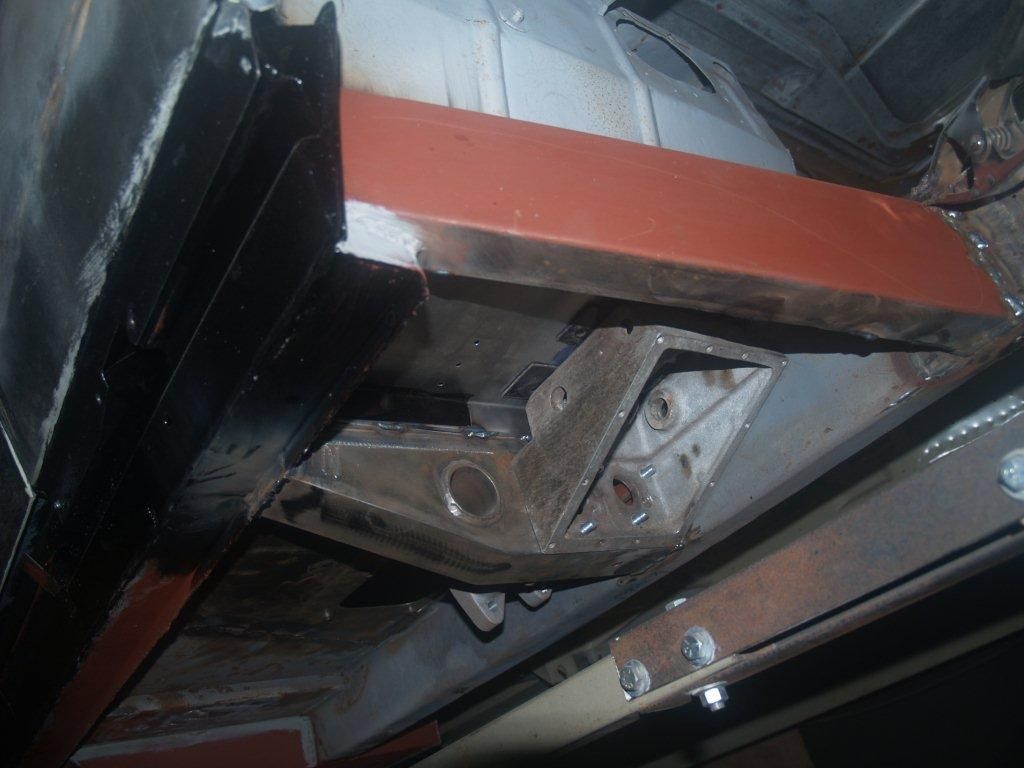
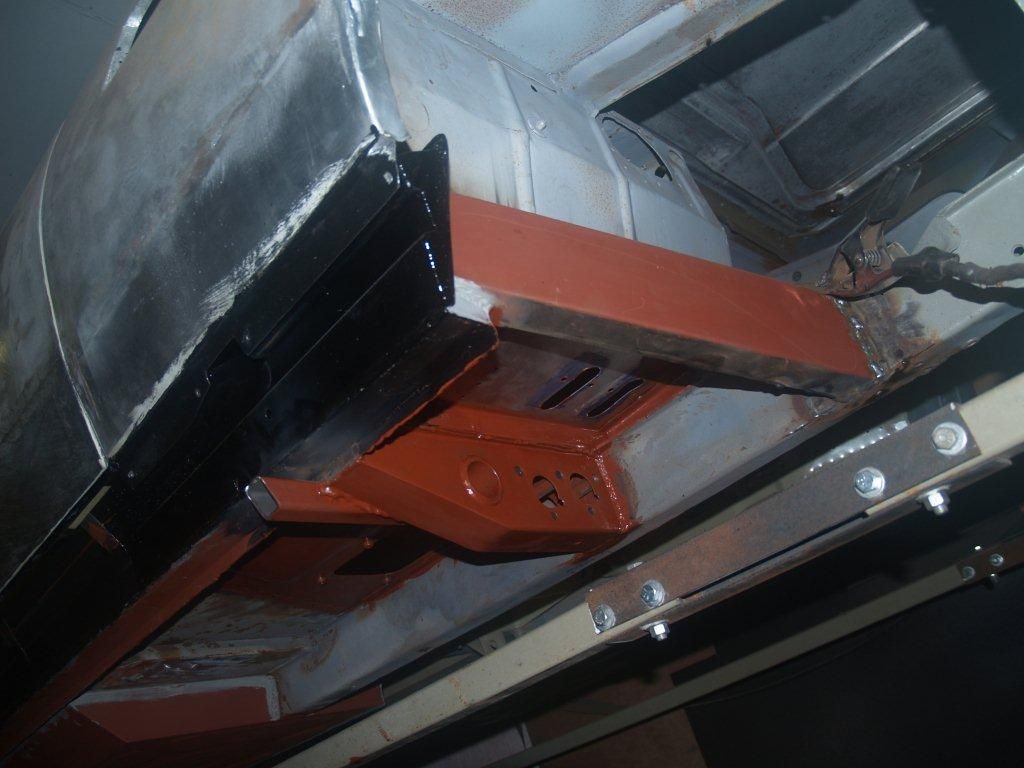
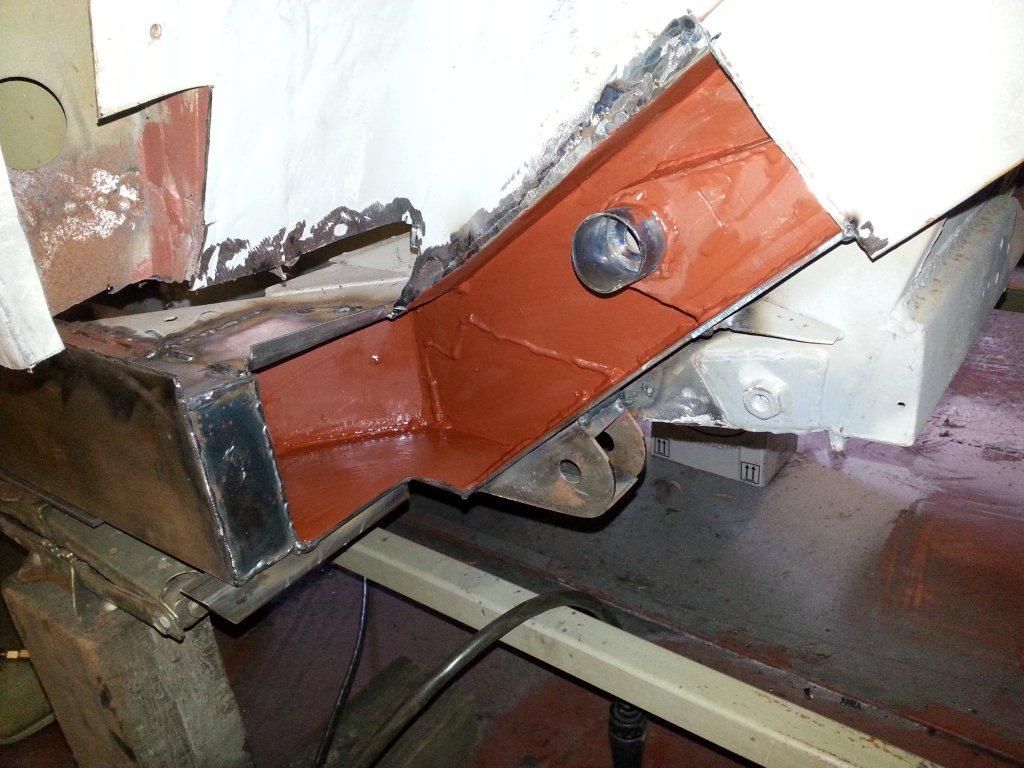
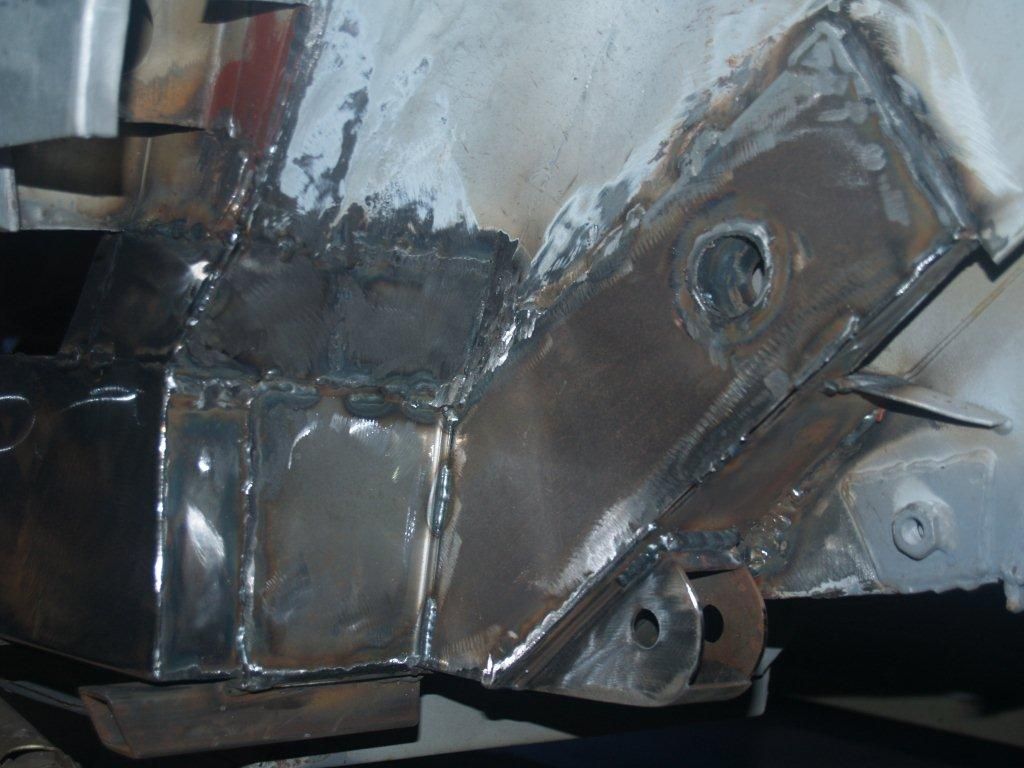
Pedal Box out-rigger: Now having the pedal box and new studded bracket, this member has been set in place and welded. It was just as well I had these castings it gave me the opportunity to check all went together freely, but the through holes in the new steel cross member which these two castings straddled in position - were slightly out of position. However; with careful fileing I was able to give extra clearance to the member before welding in place. Enlarging these holes would have been quite difficult afterwards being so confined. The pedal box floor is all set in place too and primer painted.
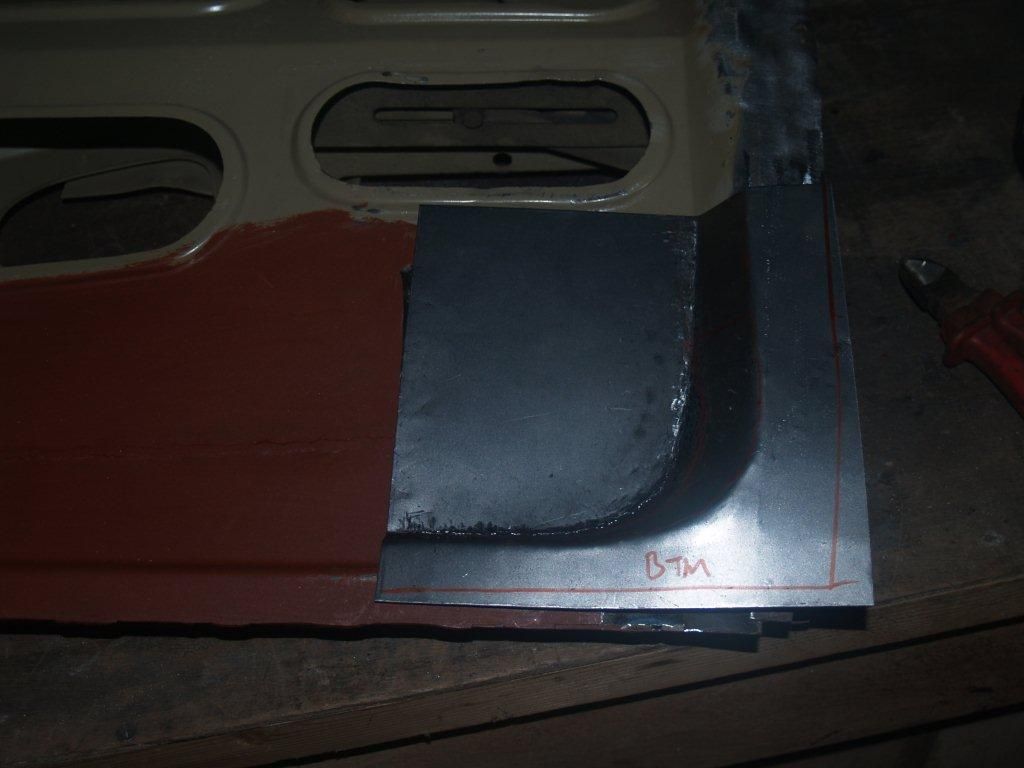
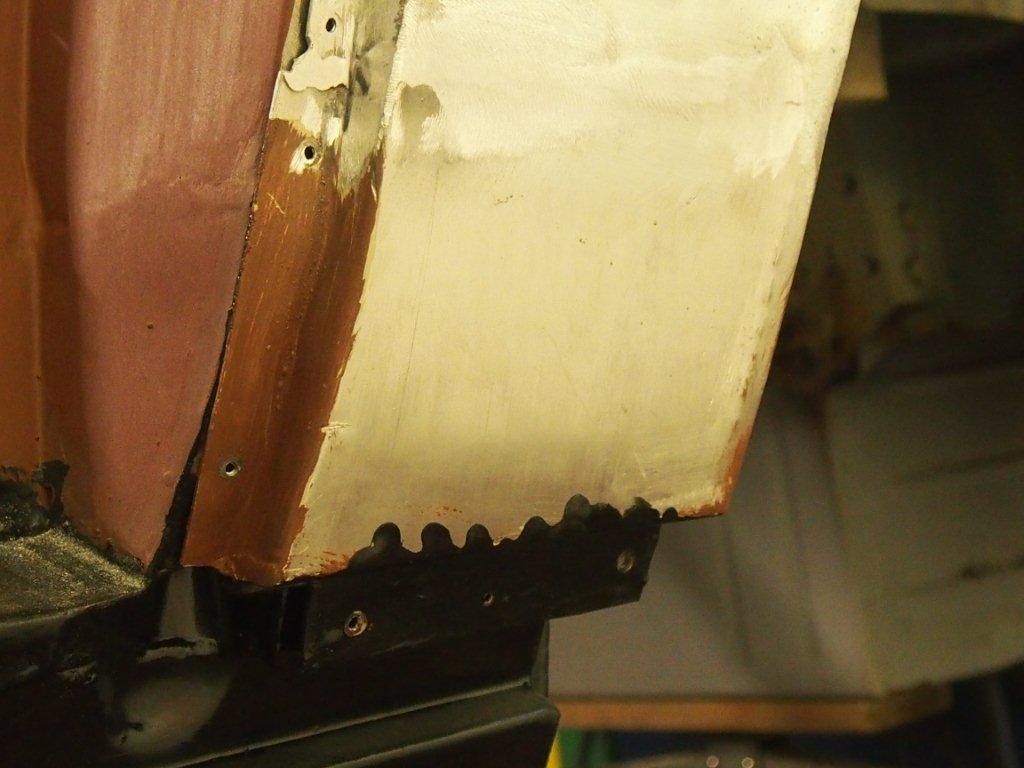
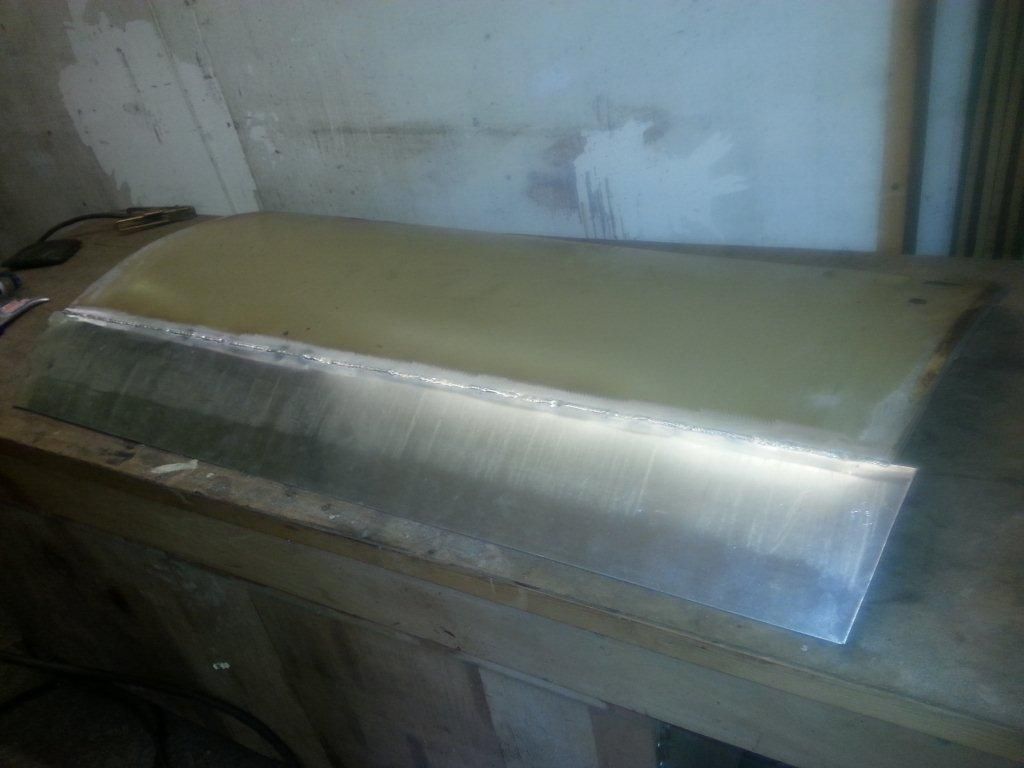
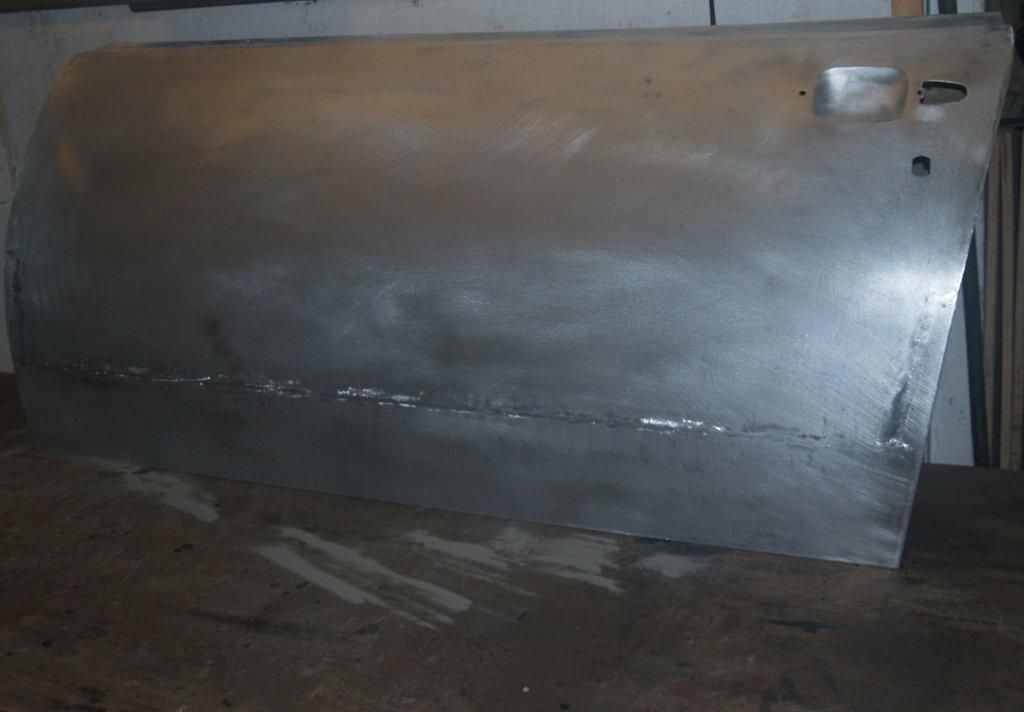
OS Door: In the last update I had removed the door skin as the lower section was not very straight and I had my doubts about its condition. The steel frame had previously been repaired, but the standard was not good enough and inner facing sections required replacing. The steel previously replaced section required straightening before further sections could be replaced. The door skin was corroded to the bottom so the 5-6" was replaced along its length and giving me the opportunity to finish with a nice straight bottom edge. Before fitting the door skin it was painted in primer and finished in black paint to resist further corrosion as best possible.
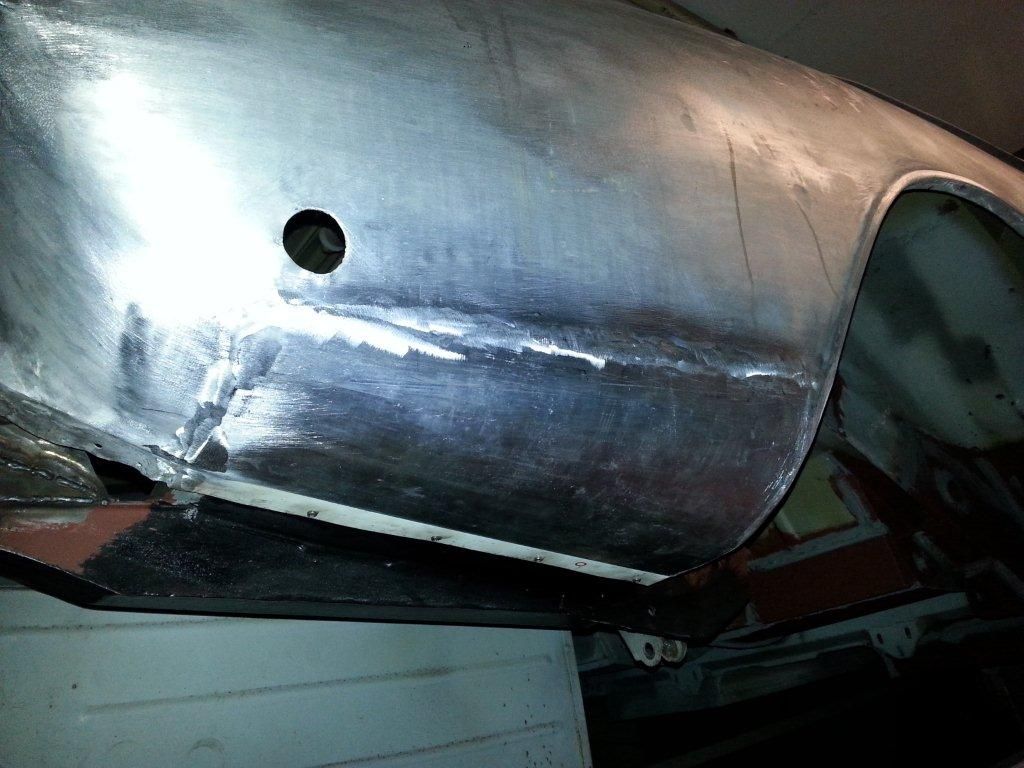
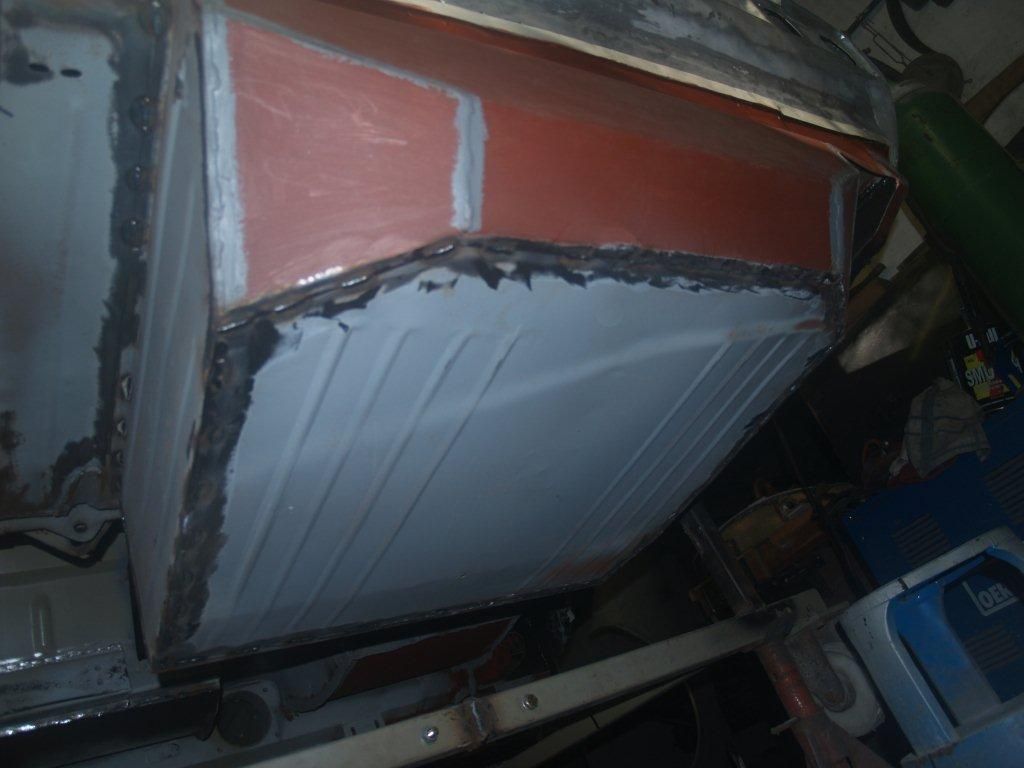
OS Side: New aluminium sections for the lower quarters above the sill line have been made and welded in place, after the inner sides were painted. The new stainless steel sill cover has also carefully been set in place giving even clearance to the door and quarter panel lower edges.
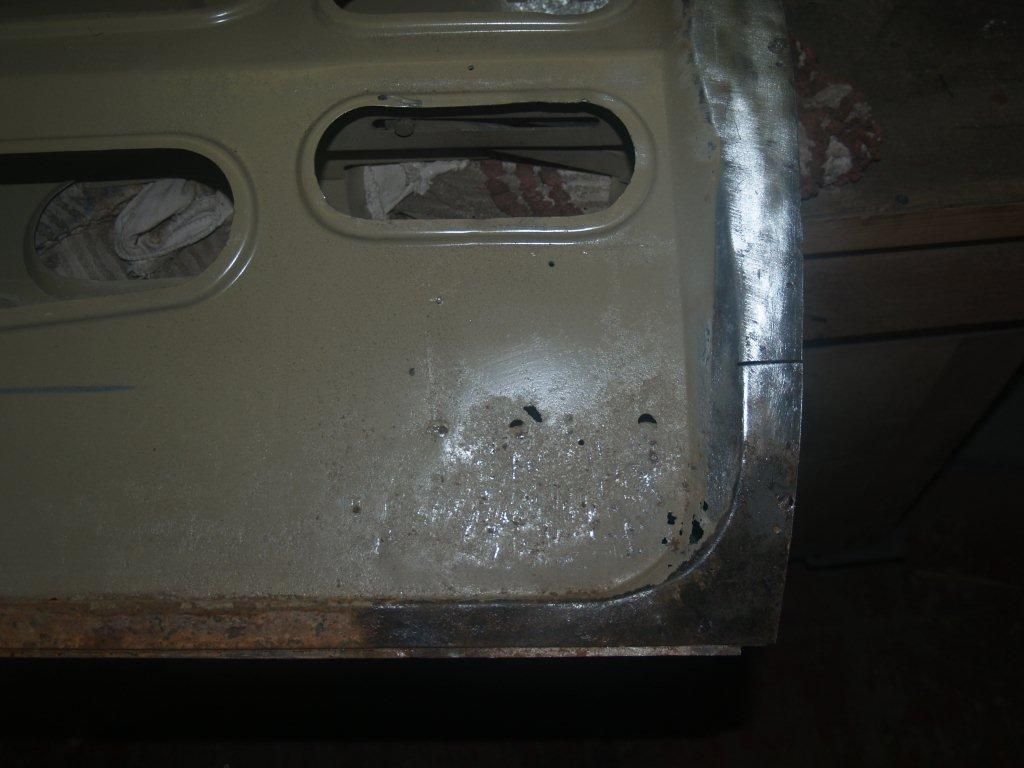
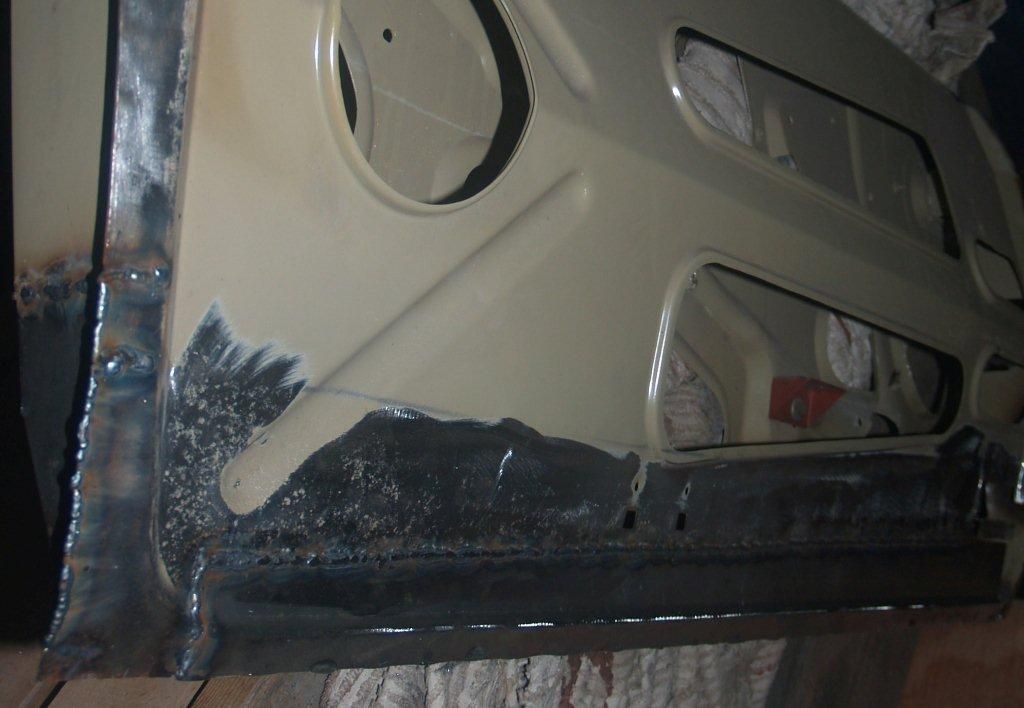
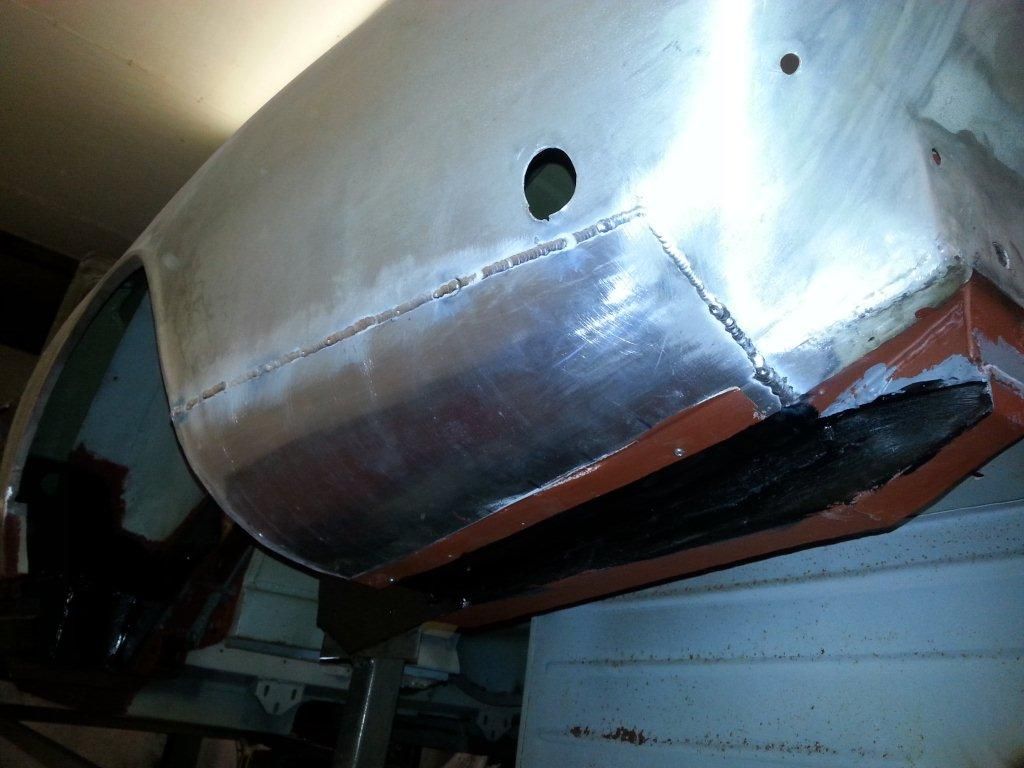
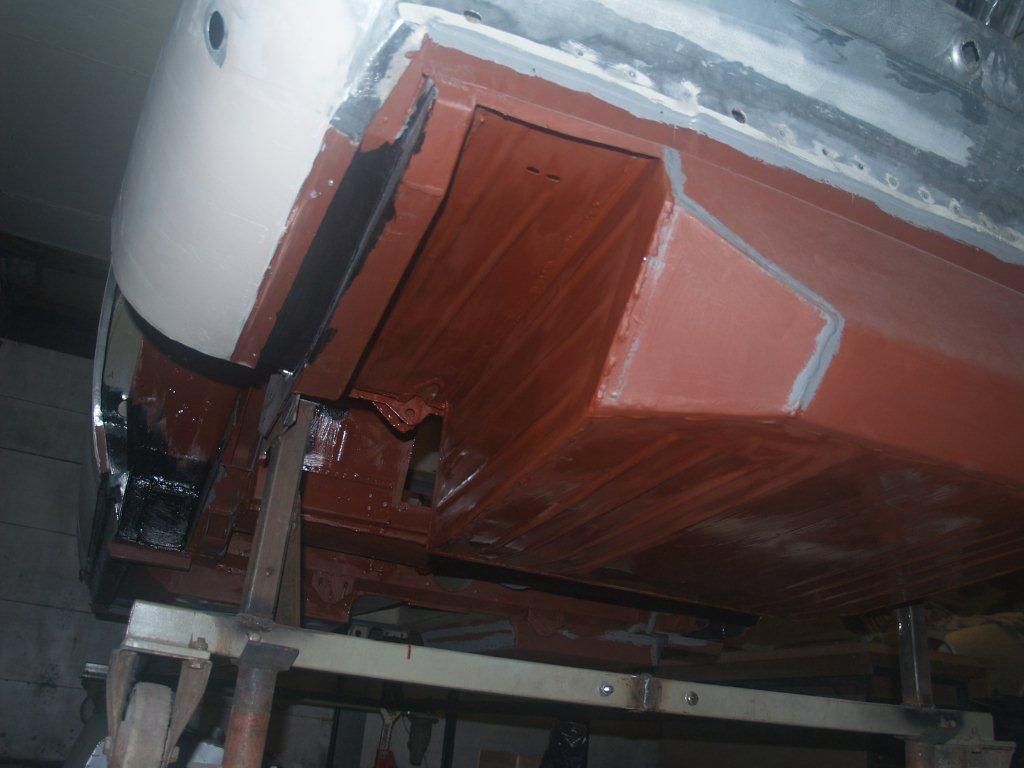
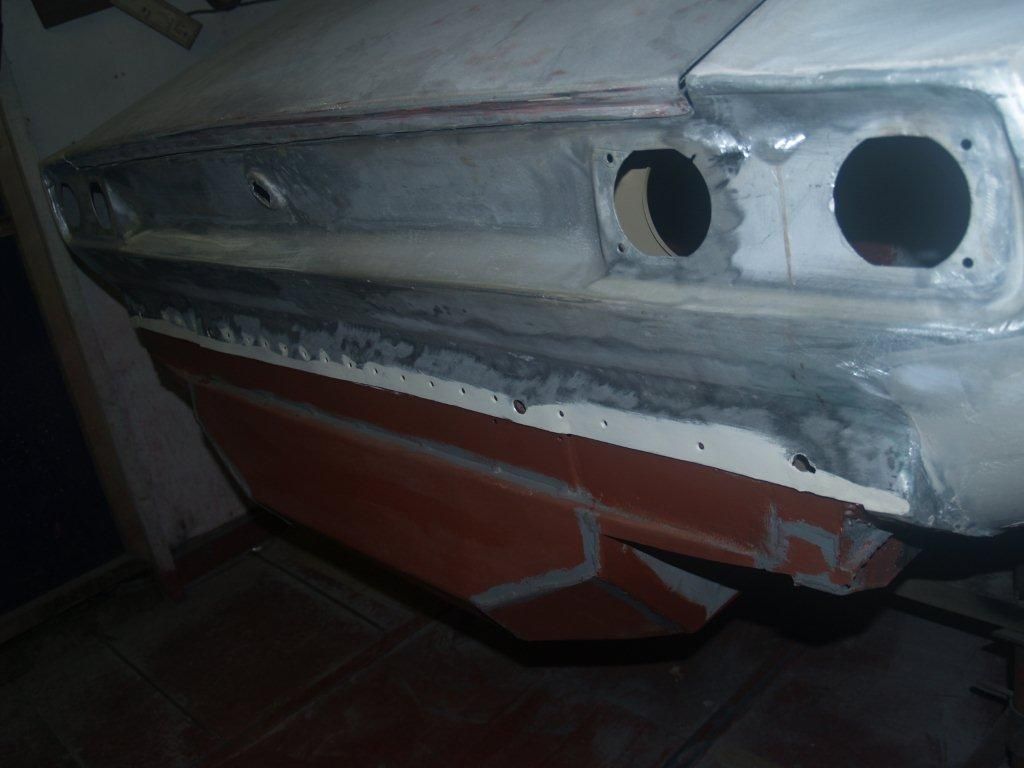
OSR quarter underside: This panel section which is located below the rear bumper line needed replacing, the inside had been attacked getting worse closer to the lowest edge where moisture and dirt often collects past the inner wing covers. this is quite a common place for corrosion.
Steel rear panel: Although previous structural repair work replaced full panels, the welding of the joints is inconsistent and not finished properly. While working only on the offside at the moment (given limited floor space) these suspect areas have been thoroughly cleaned, rewelded and finished in primer and sealed. Further areas will need similar rework to be satisfactory.
Engine Bay: This is another area having been partly finished by previous repairs, which is demonstrated by lifting primer due to surface rust. This entire area will need thoroughly cleaning of which I have started to the OS and applied primer to areas where I am satisfied.
Boot lid: Like most Astons of this age, the bonnet and boot lid were made of two aluminium sections glued together with araldite. Over the years moisture and corrosion has crept into the joints and often shown by splits. This boot lid was no exception. After splitting, the two halves were thoroughly cleaned, the hinge bracket support plates inside were cleaned and re-riveted in place but the latch securing plate was remade and riveted in place too. The boot lid was re-bonded together yesterday.
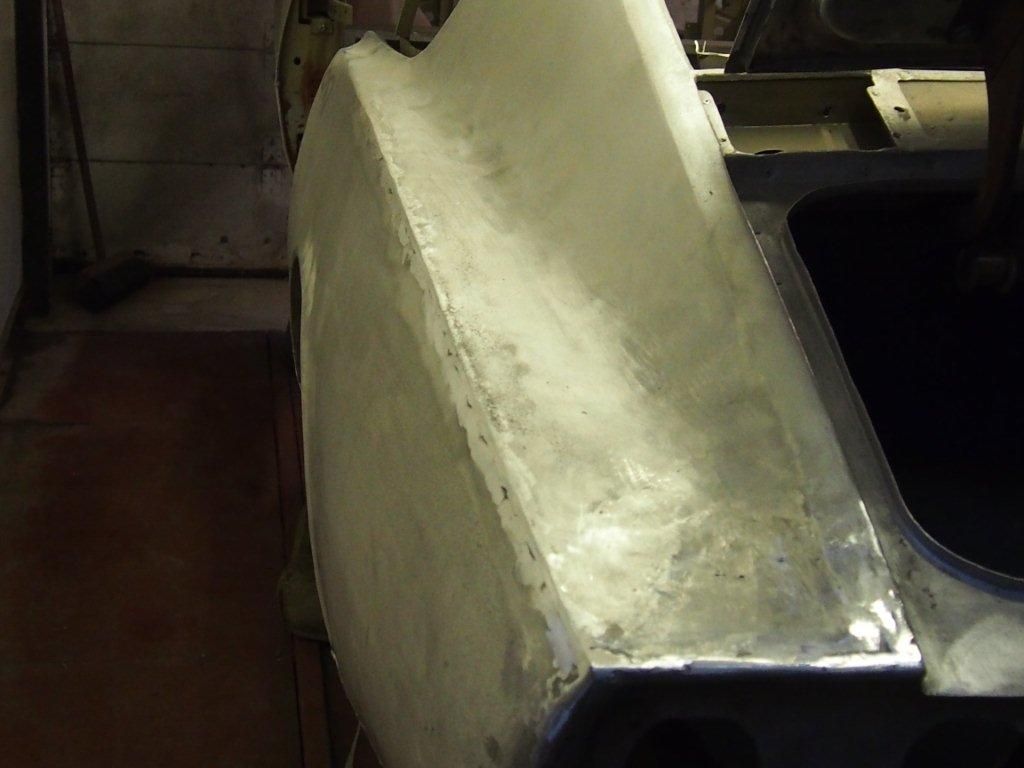
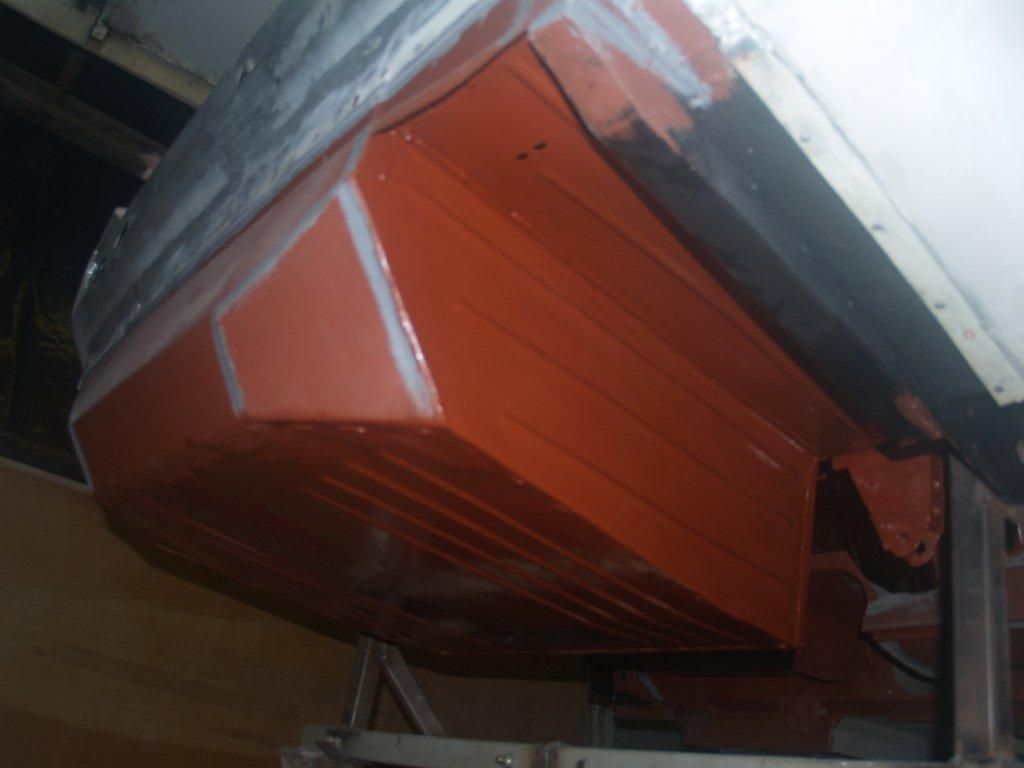
OSR quarter: The transformation to the original shape with welding, shaping etc to this side, is finished and I have started applying filler to finish. At some point in the cars history damage has occurred to this corner, not surprising really as many have, which was shown by the condition of the steel supporting member located beside the OS fuel filler - inside the boot. To gain some limited access to the aluminium quarter to shape, this damaged member was removed and replaced afterwards although access to this area was somewhat confined.

OS Side: While work is limited to working on the OS, I have started applying filler to this side before the whole process working on the steelwork etc restarts to the nearside.
Pedal Box out-rigger: Now having the pedal box and new studded bracket, this member has been set in place and welded. It was just as well I had these castings it gave me the opportunity to check all went together freely, but the through holes in the new steel cross member which these two castings straddled in position - were slightly out of position. However; with careful fileing I was able to give extra clearance to the member before welding in place. Enlarging these holes would have been quite difficult afterwards being so confined. The pedal box floor is all set in place too and primer painted.


OS Door: In the last update I had removed the door skin as the lower section was not very straight and I had my doubts about its condition. The steel frame had previously been repaired, but the standard was not good enough and inner facing sections required replacing. The steel previously replaced section required straightening before further sections could be replaced. The door skin was corroded to the bottom so the 5-6" was replaced along its length and giving me the opportunity to finish with a nice straight bottom edge. Before fitting the door skin it was painted in primer and finished in black paint to resist further corrosion as best possible.


OS Side: New aluminium sections for the lower quarters above the sill line have been made and welded in place, after the inner sides were painted. The new stainless steel sill cover has also carefully been set in place giving even clearance to the door and quarter panel lower edges.

OSR quarter underside: This panel section which is located below the rear bumper line needed replacing, the inside had been attacked getting worse closer to the lowest edge where moisture and dirt often collects past the inner wing covers. this is quite a common place for corrosion.

Steel rear panel: Although previous structural repair work replaced full panels, the welding of the joints is inconsistent and not finished properly. While working only on the offside at the moment (given limited floor space) these suspect areas have been thoroughly cleaned, rewelded and finished in primer and sealed. Further areas will need similar rework to be satisfactory.

Engine Bay: This is another area having been partly finished by previous repairs, which is demonstrated by lifting primer due to surface rust. This entire area will need thoroughly cleaning of which I have started to the OS and applied primer to areas where I am satisfied.


Boot lid: Like most Astons of this age, the bonnet and boot lid were made of two aluminium sections glued together with araldite. Over the years moisture and corrosion has crept into the joints and often shown by splits. This boot lid was no exception. After splitting, the two halves were thoroughly cleaned, the hinge bracket support plates inside were cleaned and re-riveted in place but the latch securing plate was remade and riveted in place too. The boot lid was re-bonded together yesterday.


OSR quarter: The transformation to the original shape with welding, shaping etc to this side, is finished and I have started applying filler to finish. At some point in the cars history damage has occurred to this corner, not surprising really as many have, which was shown by the condition of the steel supporting member located beside the OS fuel filler - inside the boot. To gain some limited access to the aluminium quarter to shape, this damaged member was removed and replaced afterwards although access to this area was somewhat confined.


OS Side: While work is limited to working on the OS, I have started applying filler to this side before the whole process working on the steelwork etc restarts to the nearside.

If you're going to have an addiction, then bringing 70's and 80's DBS and V8 Astons back to life is a good one (though maybe not for the bank balance!). It's a shame the rust is so bad on these cars and even replacing the sills, for example, seems to be a job for every decade you keep the car.
Looking forward to seeing the end result.
Looking forward to seeing the end result.
CQ8 said:
I appreciate the rust repairs do not make the most exciting reading but I thought it important to illustrate that even a superficially good shell can hide all manner of issues.
I'm enjoying following the body repairs and I think a lot of other people are too. Proper craftsmanship is never boring 
I'm comfortable with the use of filler, it's not excessive and I'm not sure what other option there is. Lead loading? Lots of potential problems with that. These cars are over 40 years old, restoration techniques have changed significantly in this time.
October 2016 Update from the restorer
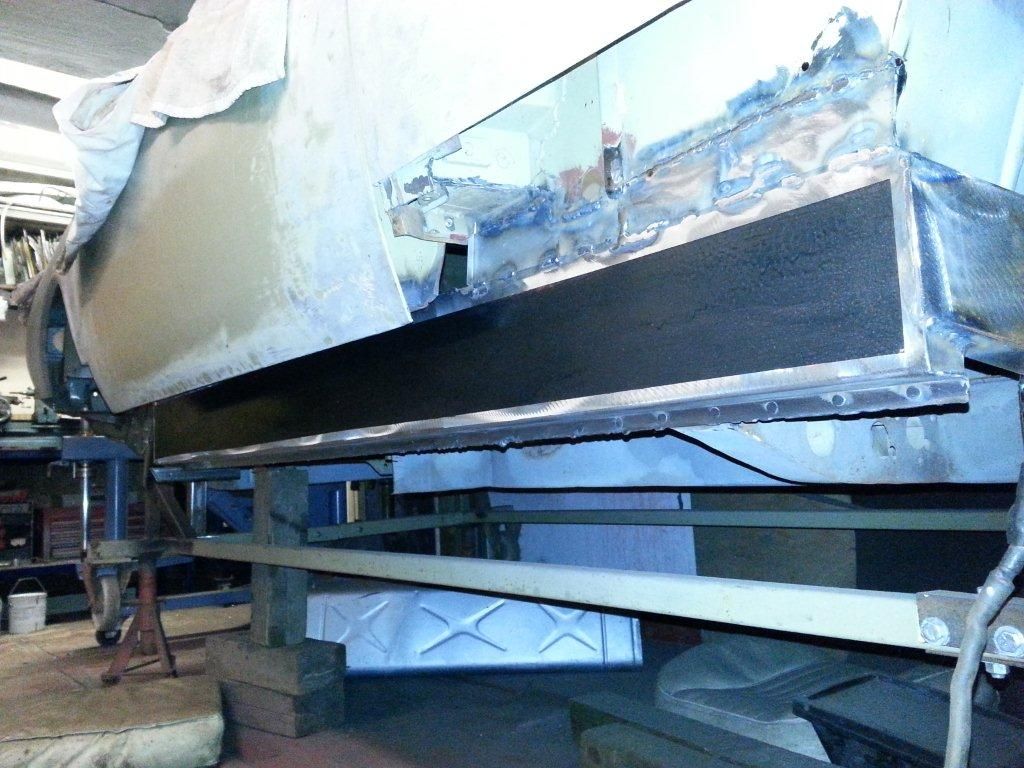
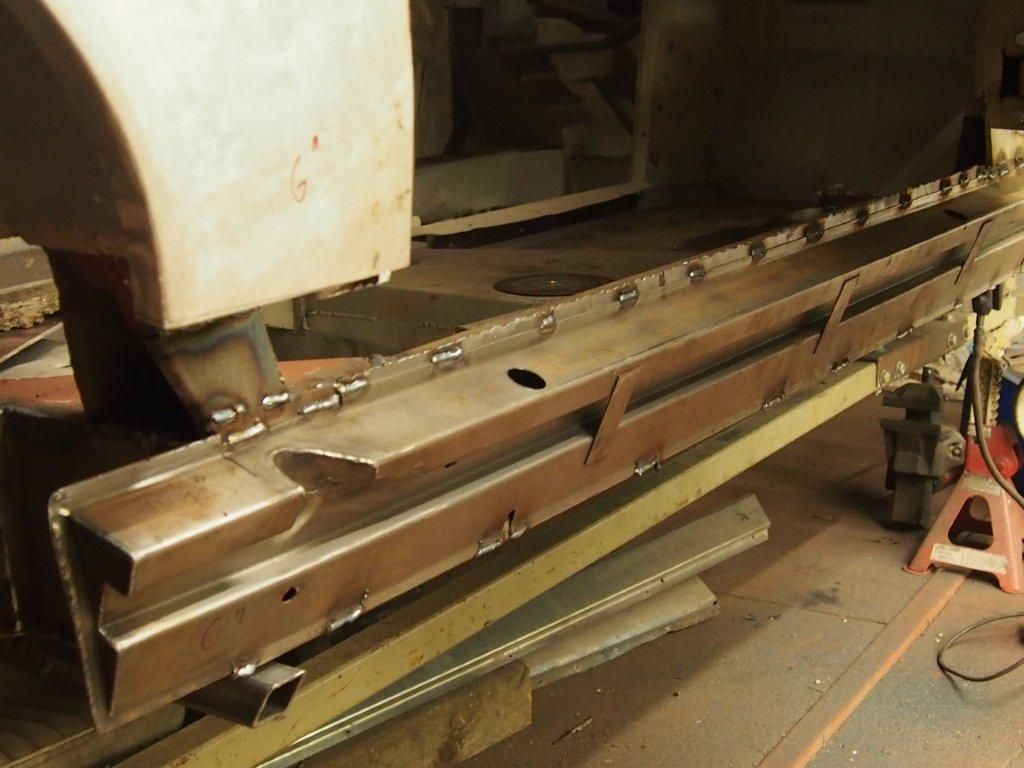
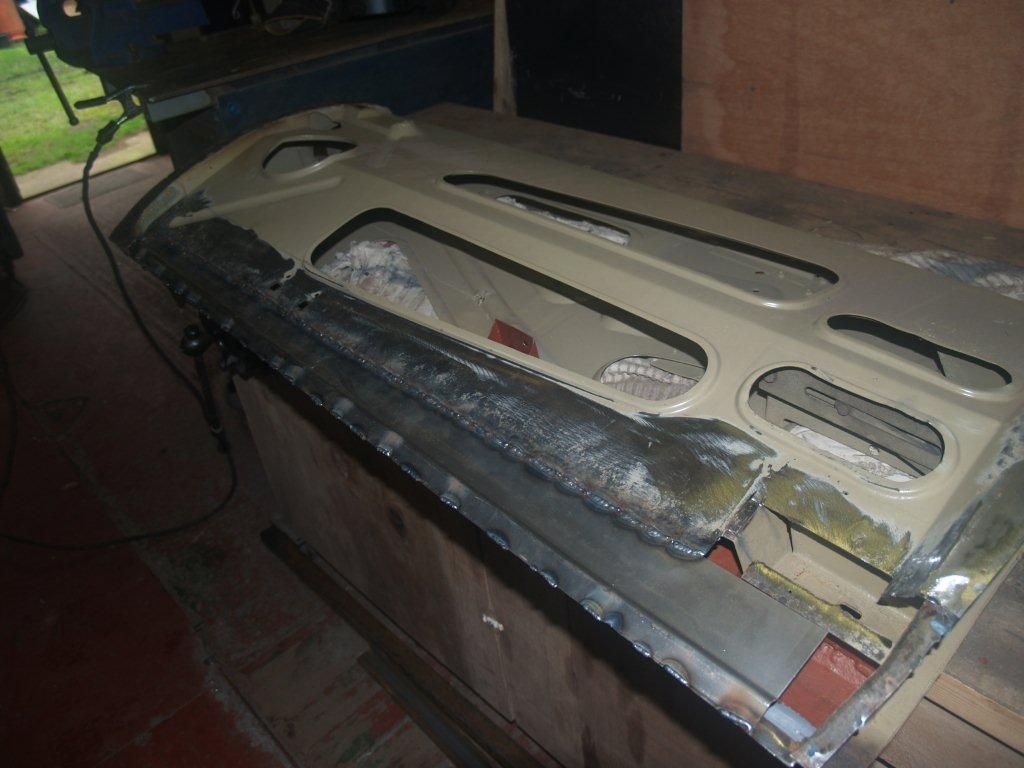
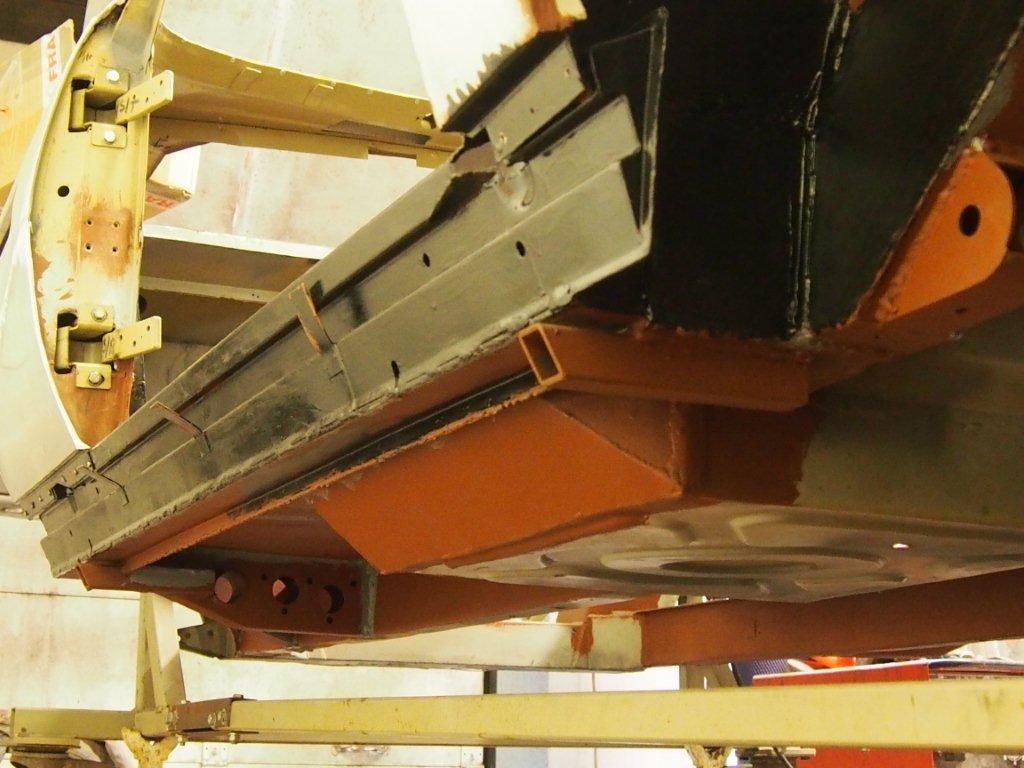
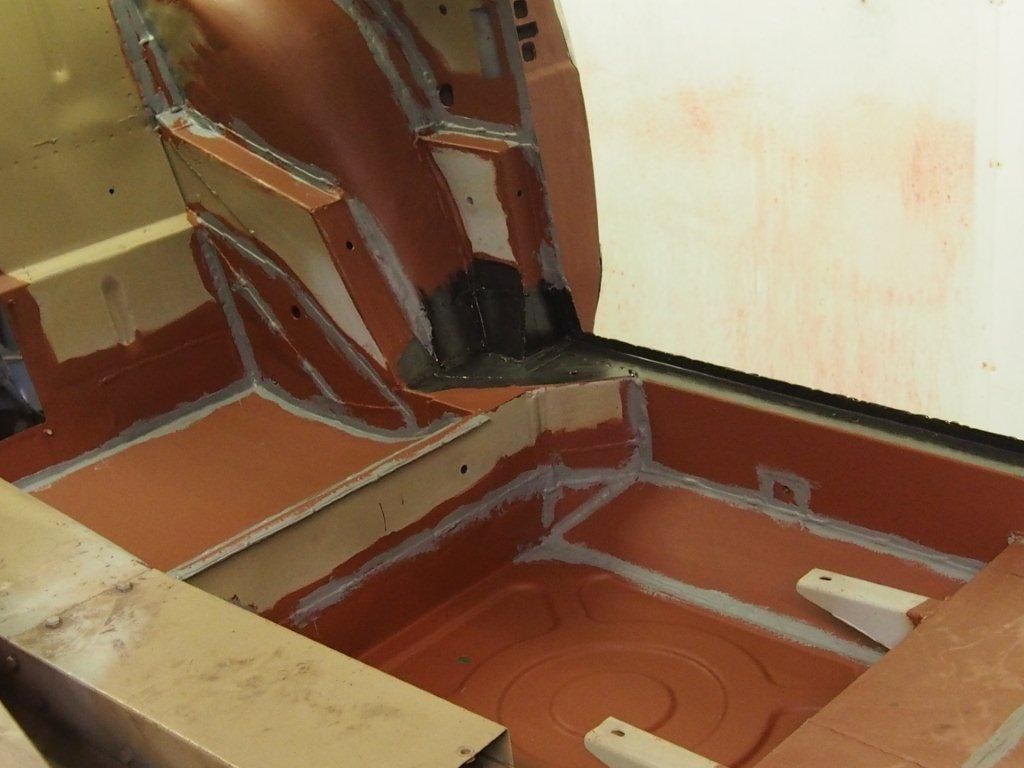
NS Steelwork: Most of the structural steelwork is finished to the nearside, this includes radius rod area, sill, out riggers, floors and the rear boot rail etc:
NS A & B Posts
NS Sills
NS Radius Rod
NS Boot floor
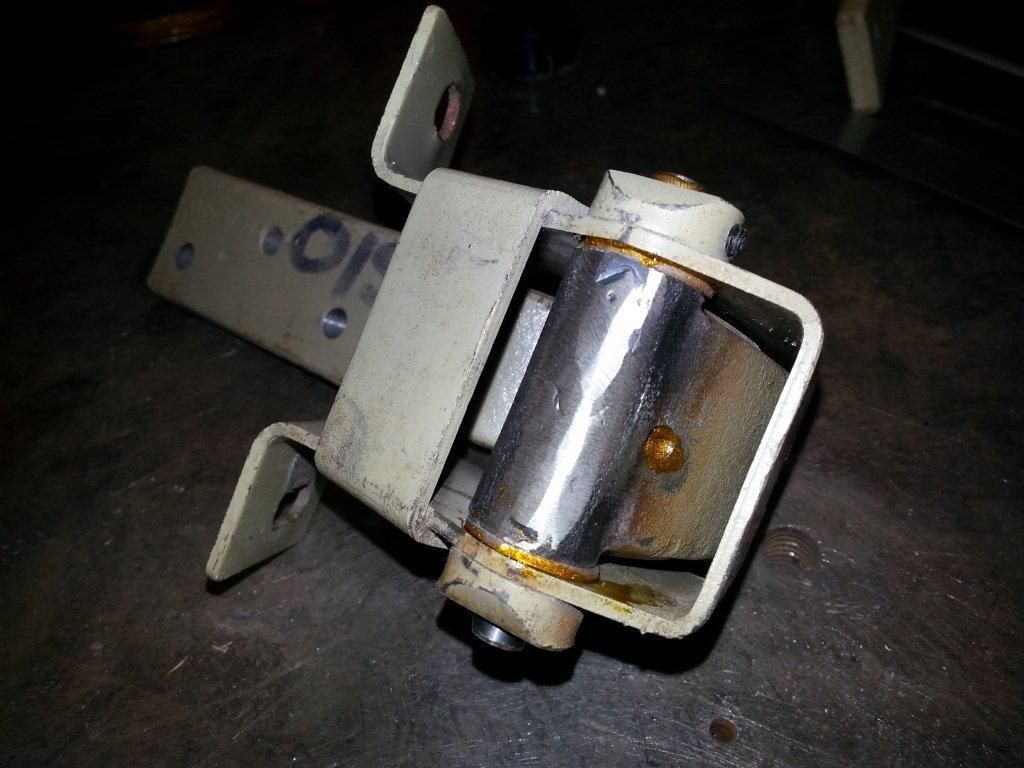
NS door hinges: initially fitting the door to check the general fit and shape, it was clear the hinges were slack with wear. As with the OS these required making new bronze bushes, pins and lubricated on assembly. The door refitting demonstrated further inspection was required with the hinges which were slightly bent. Straightening these quickly showed an improved door alignment and fit.
NS Door: despite this door having been repaired before, which left something to be desired, the bottom edge was not straight and the outer skin folded edge barely covered the steel frame. The skin was removed revealing serious corrosion to the steel frame and the skin also corroded to the lower 5 inches at least. The steel frame required the bottom replacing which gave me access to the lower hinge location for reconstruction. Fortunately the top hinge location only required sectional repairs. Prior to the skin being refitted, the insides were primer and black painted for future resistance to corrosion.

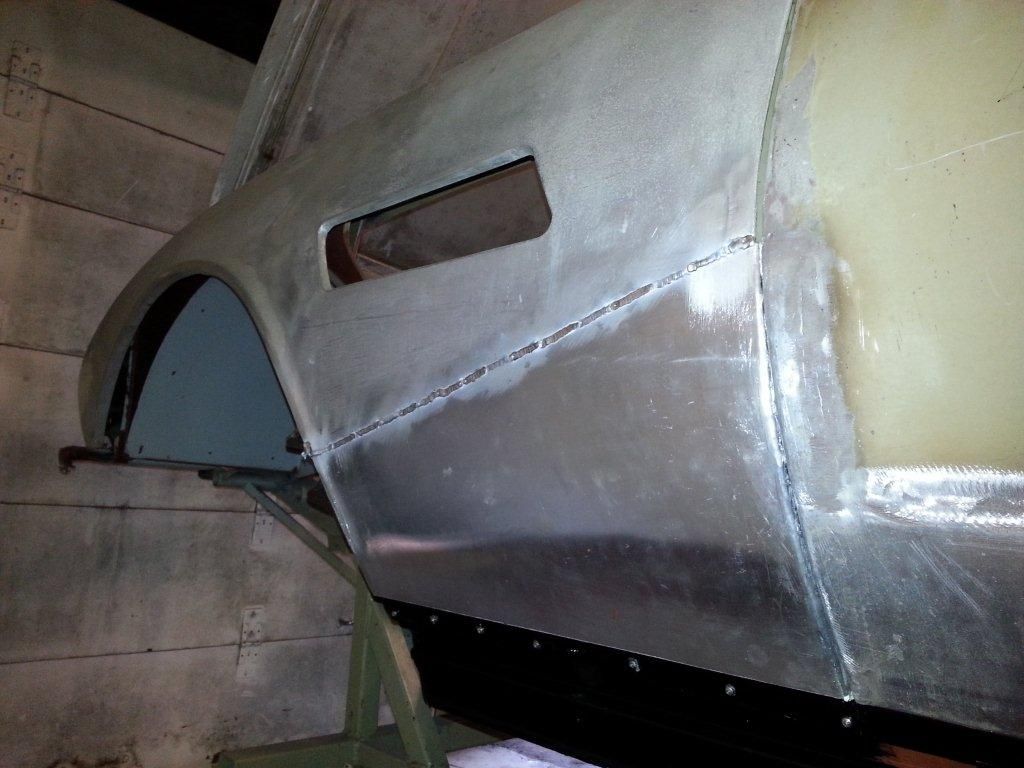
NS Lower aluminium quarters above sill line: Both these panel sections have been remade and just welded. As with other panels these were painted on the inside before welding. As you can see the front section has been welded higher towards the door edge, this is to accommodate a crack running up the A post edge and this was the easiest way to resolve the problem.
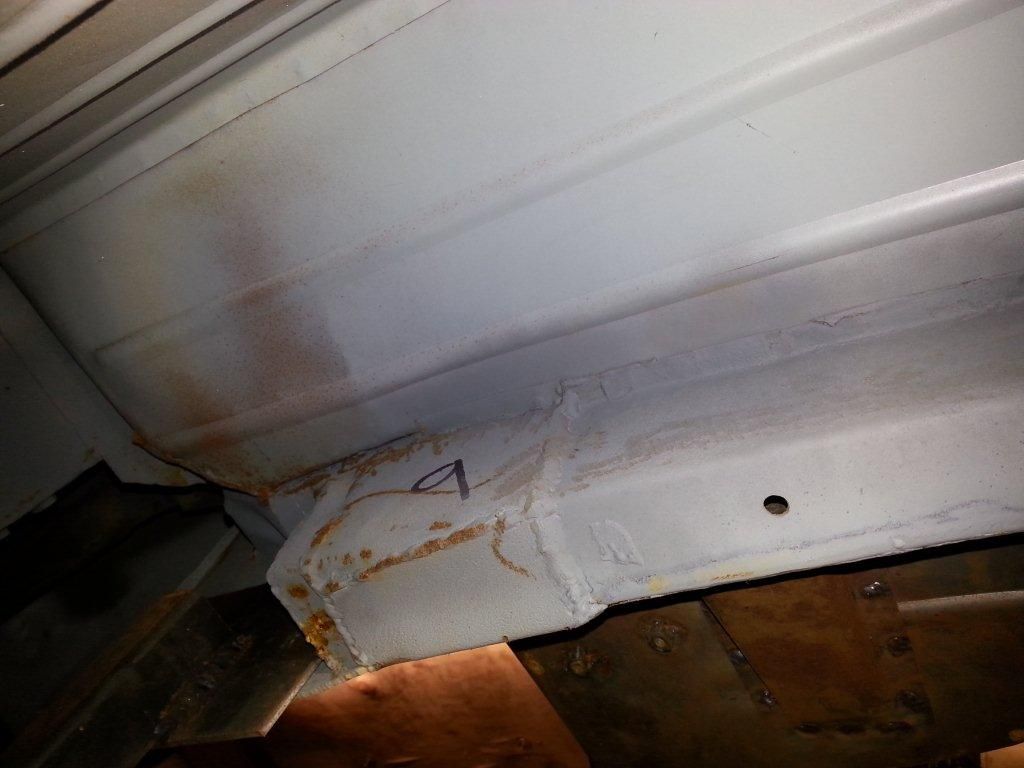
NSR Floor panel: this panel only required the angled section which attaches to the sill replacing. This area has been thoroughly cleaned, primered with all joints sealed.
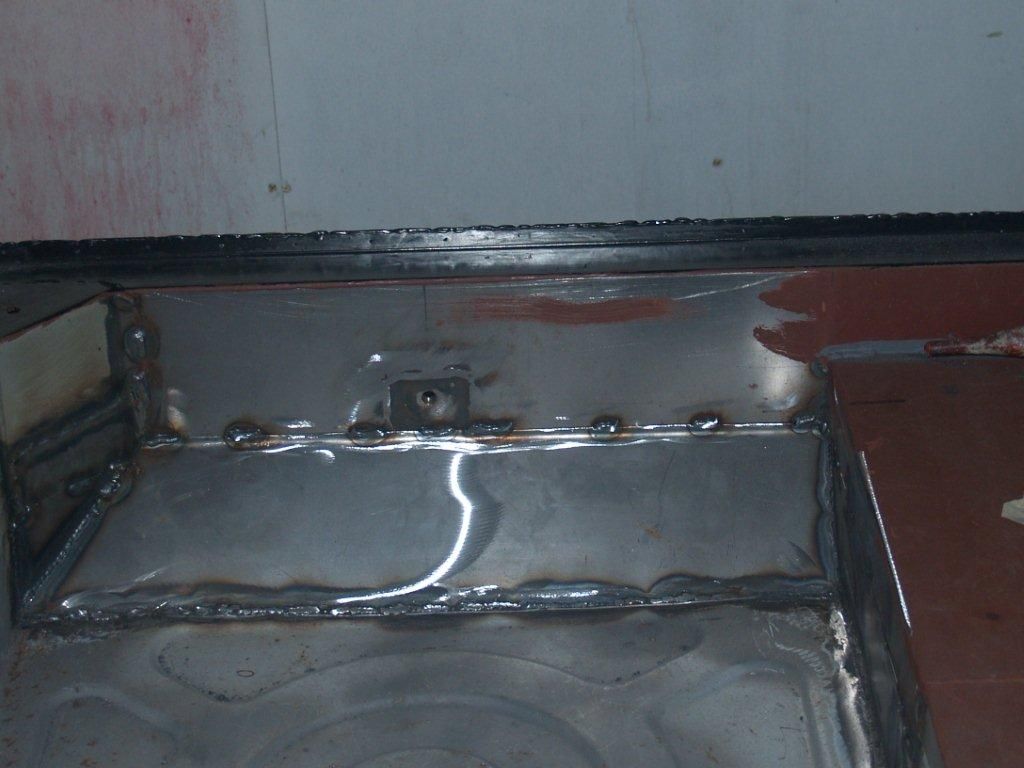
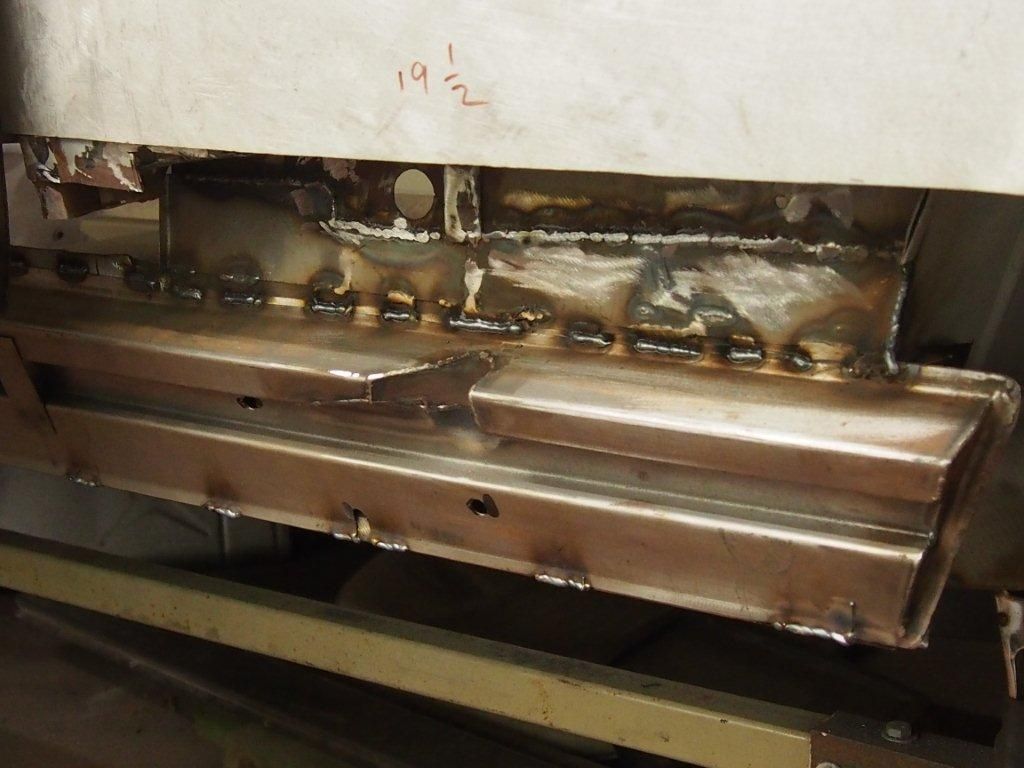
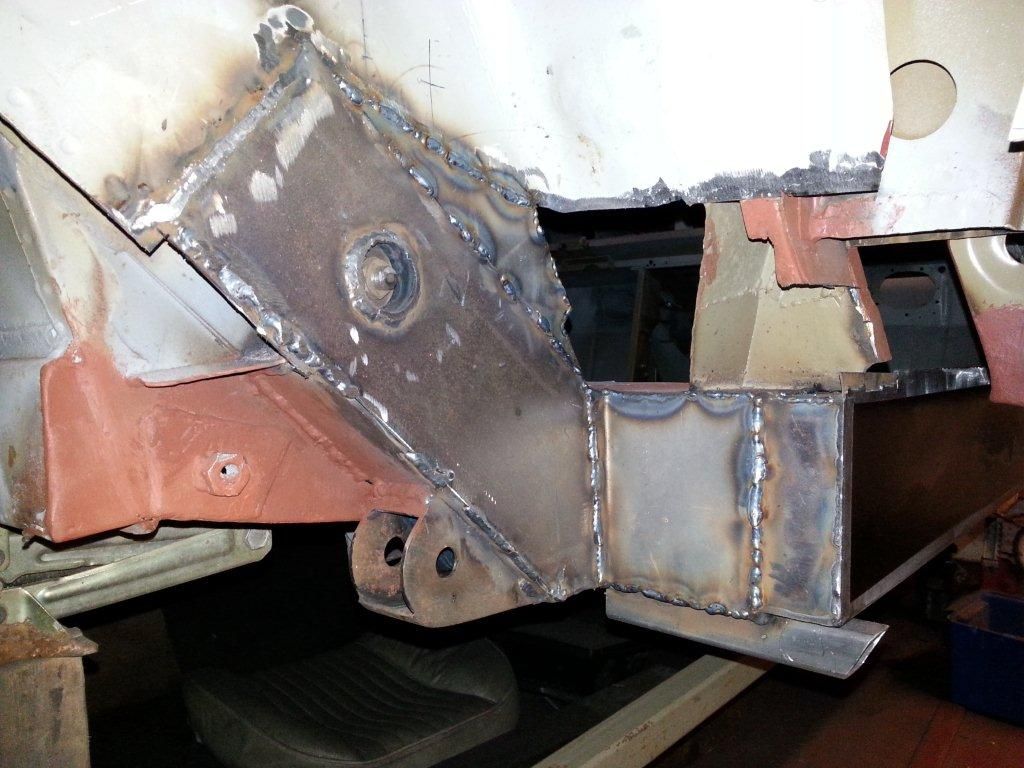
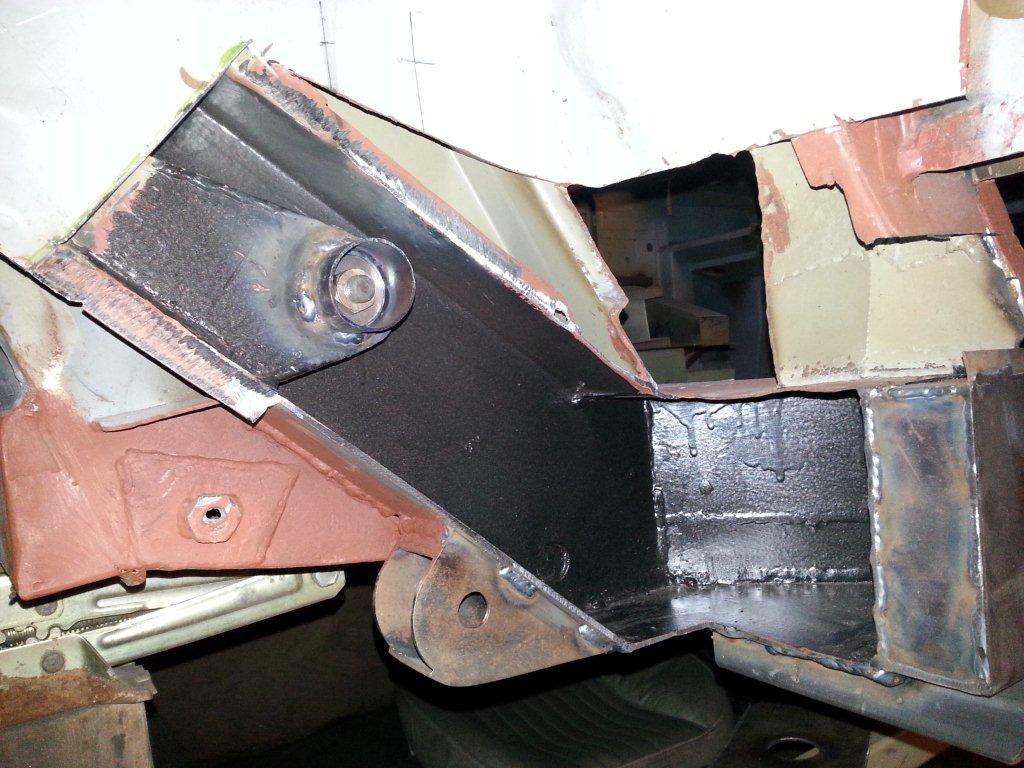
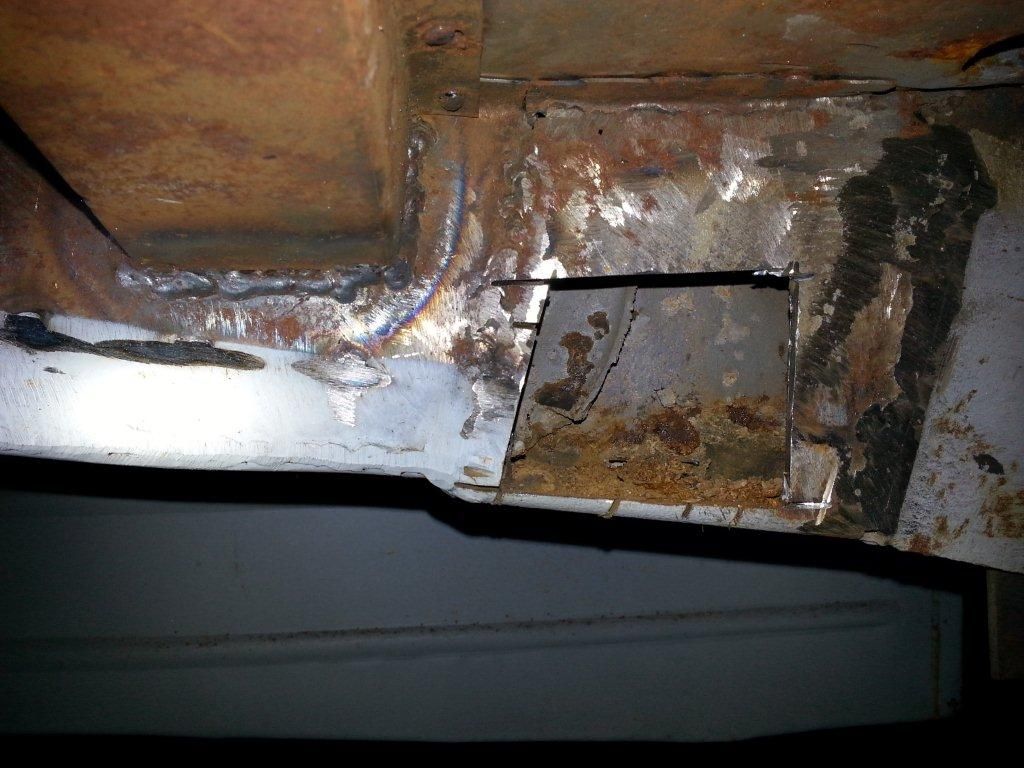
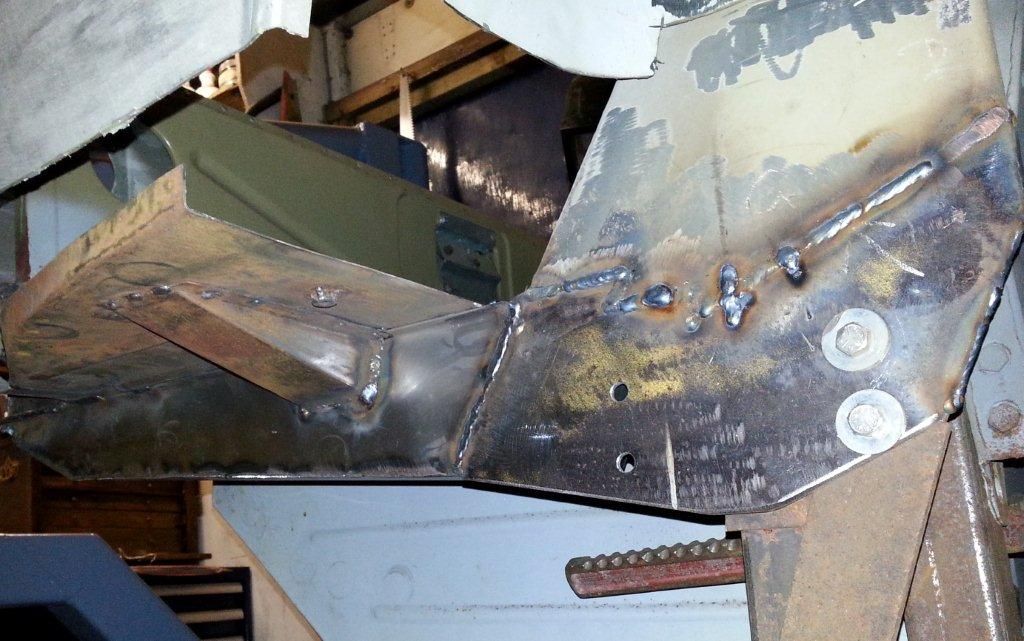
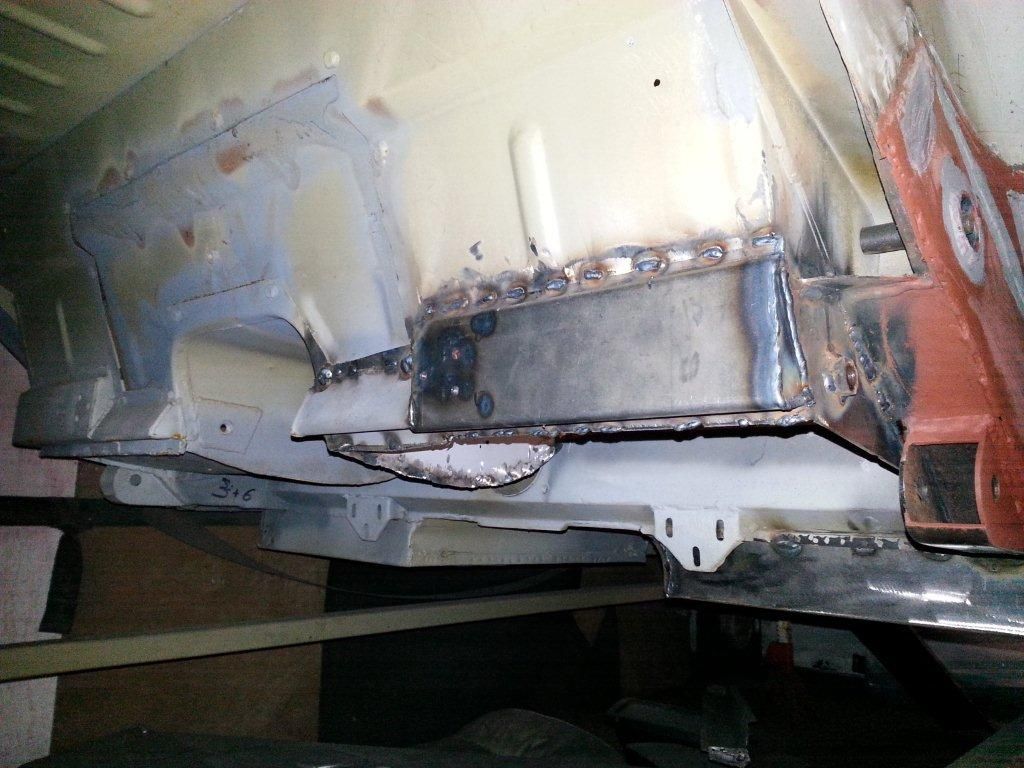
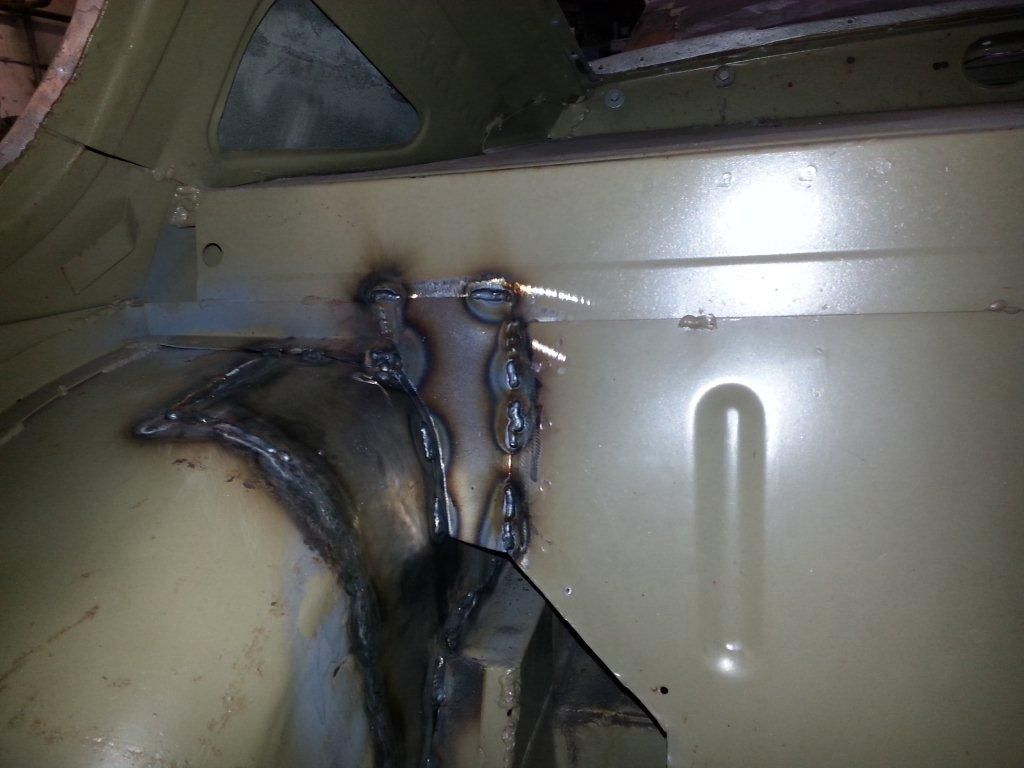
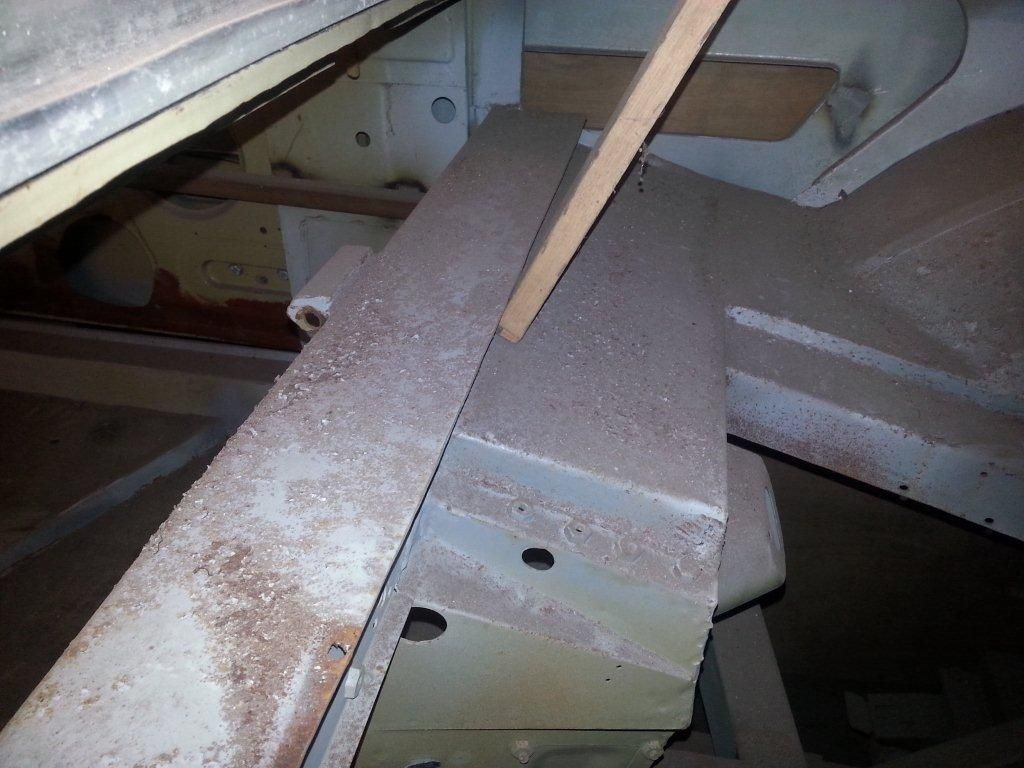
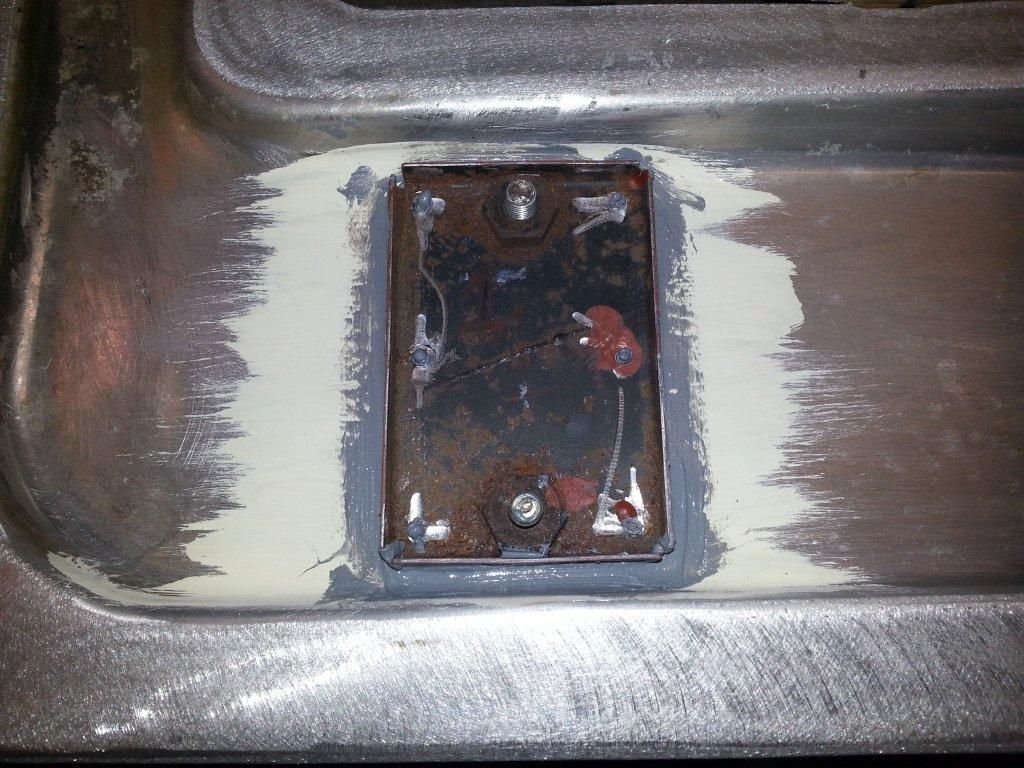
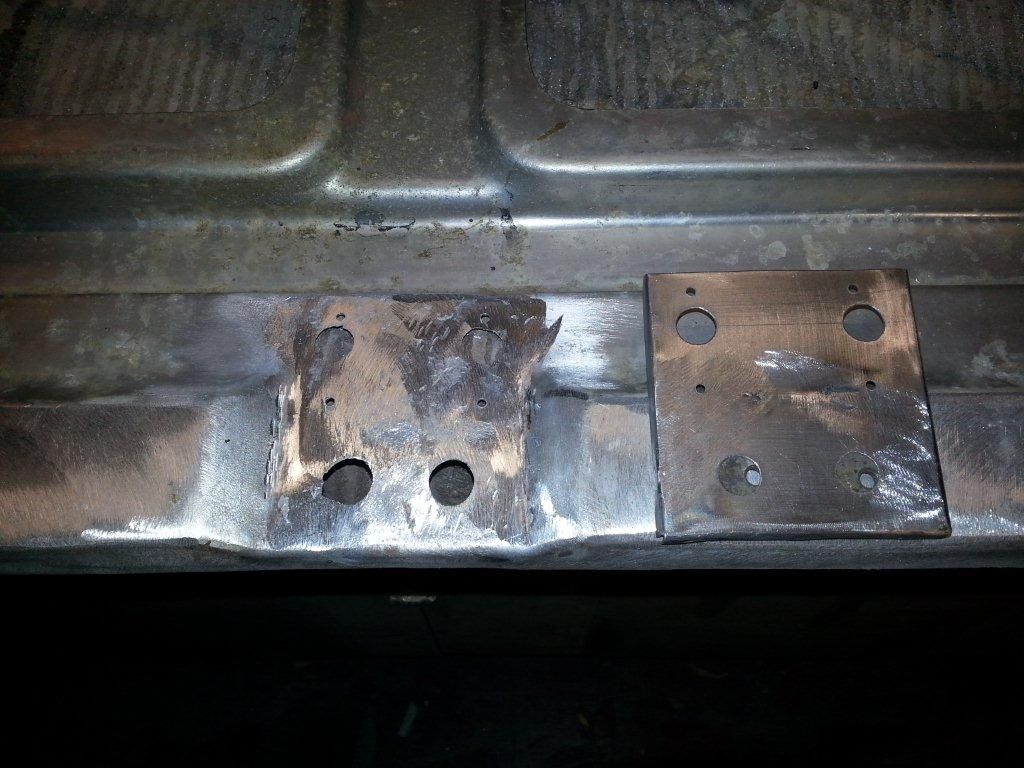
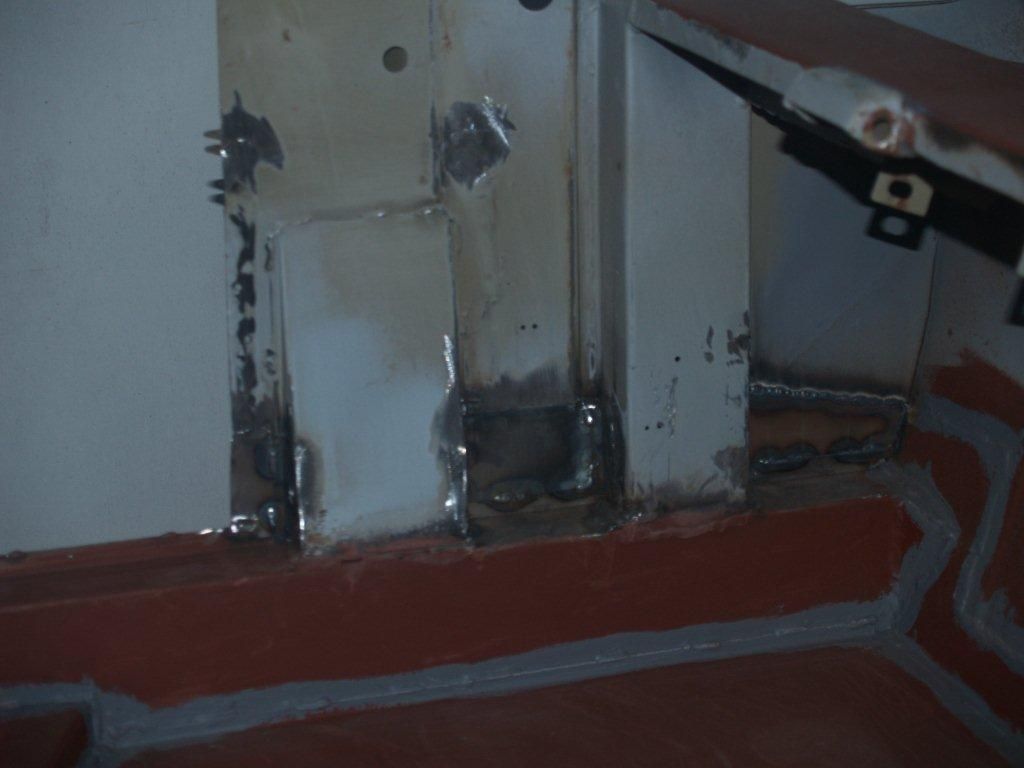
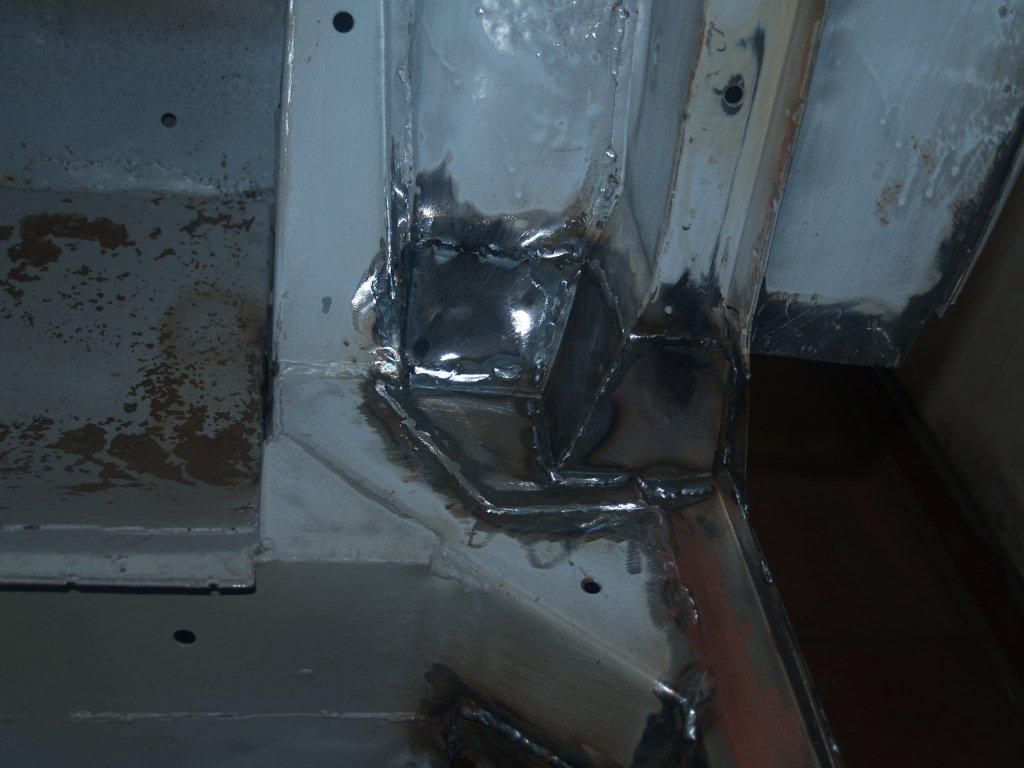
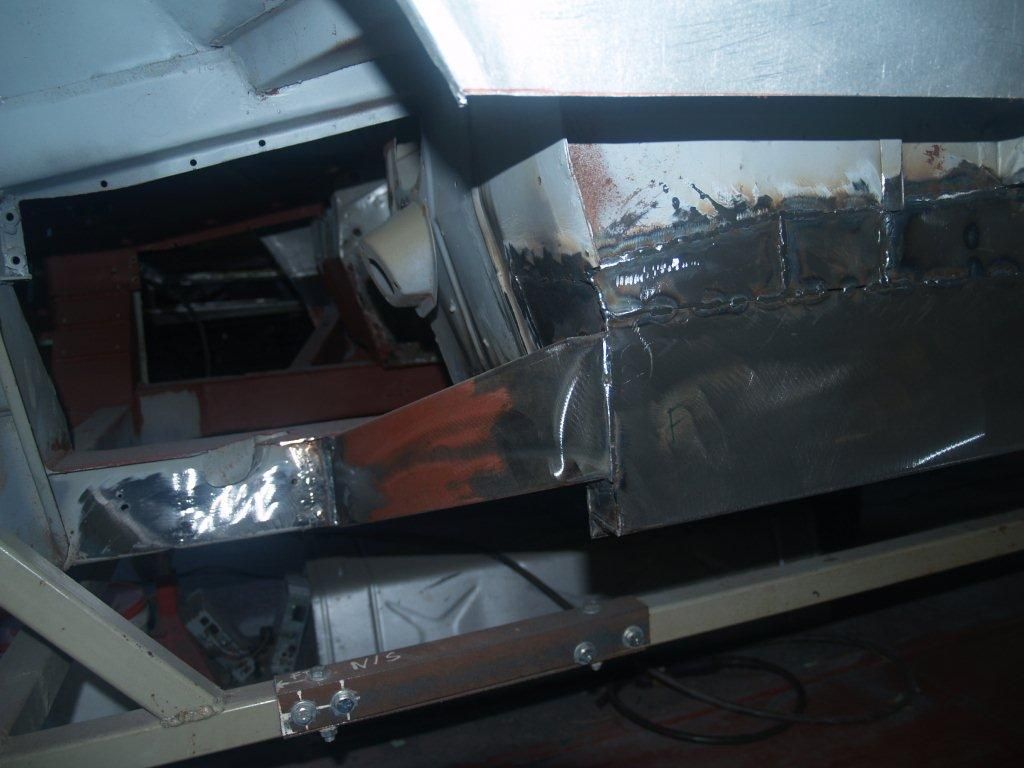
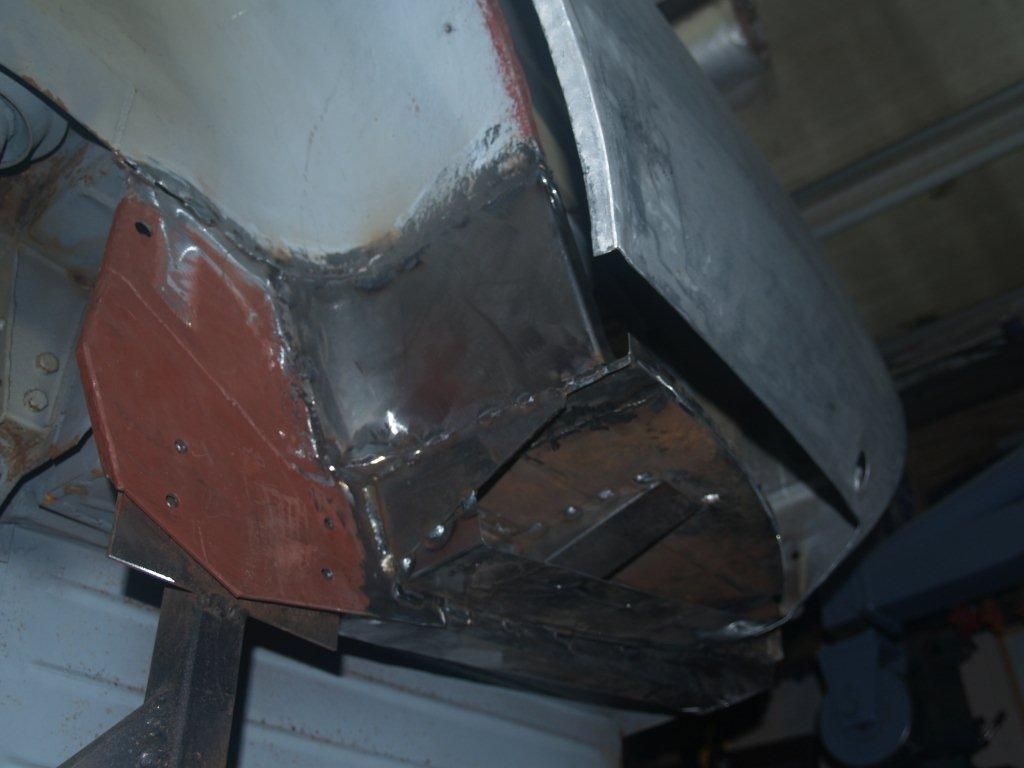
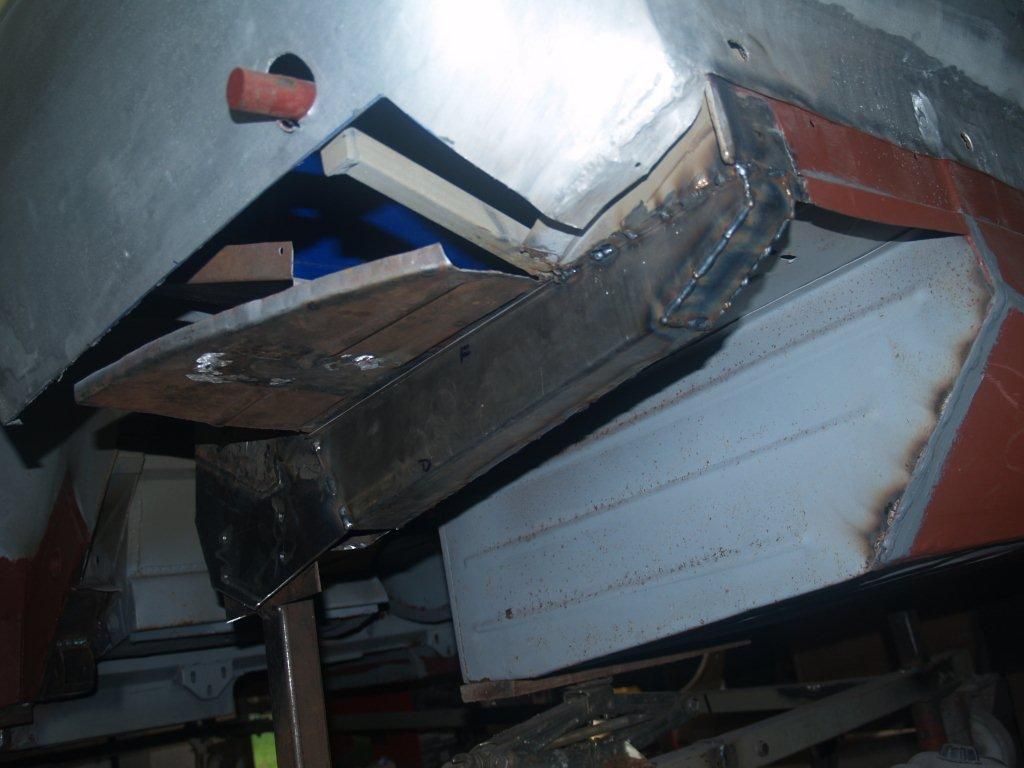
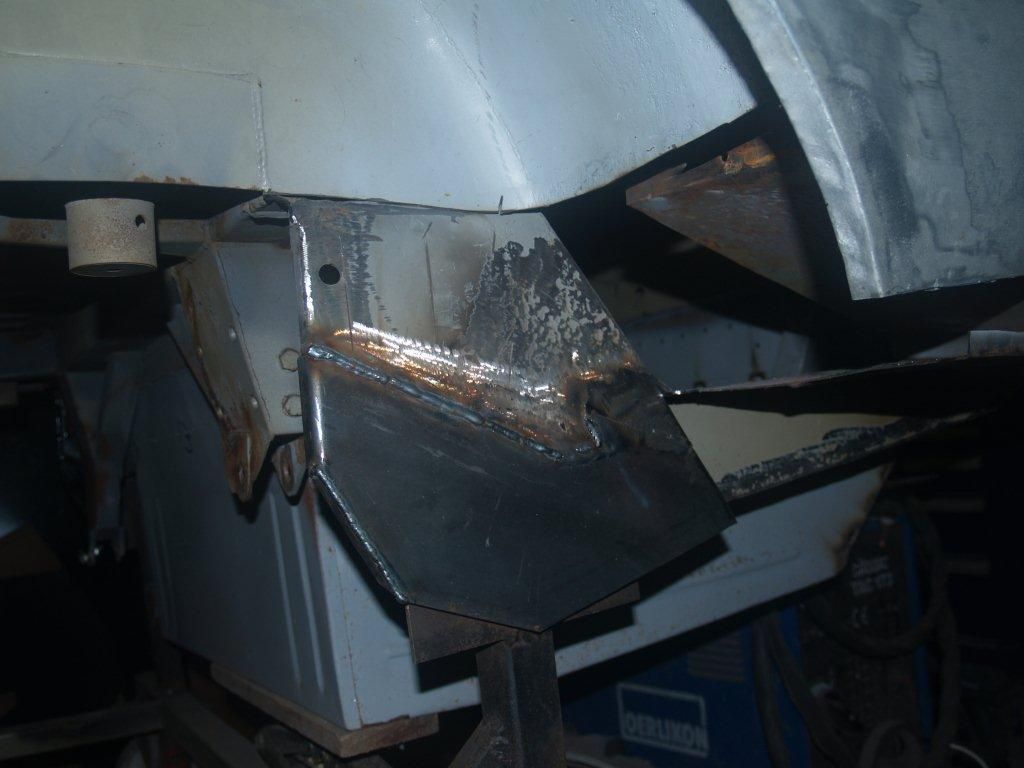
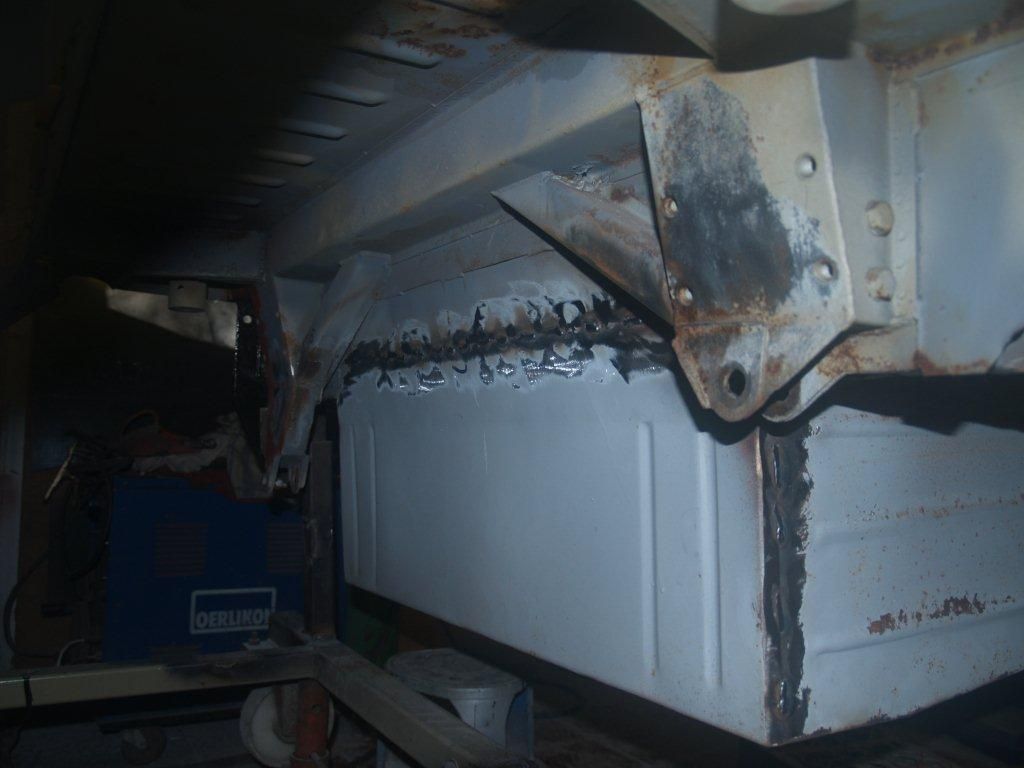
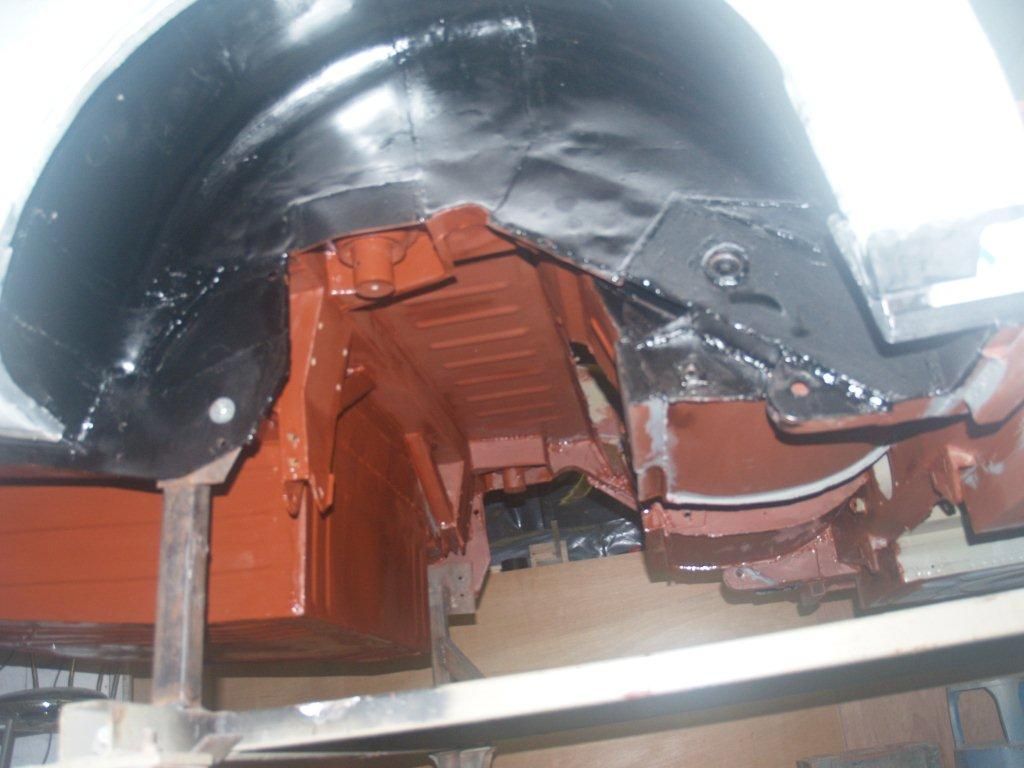
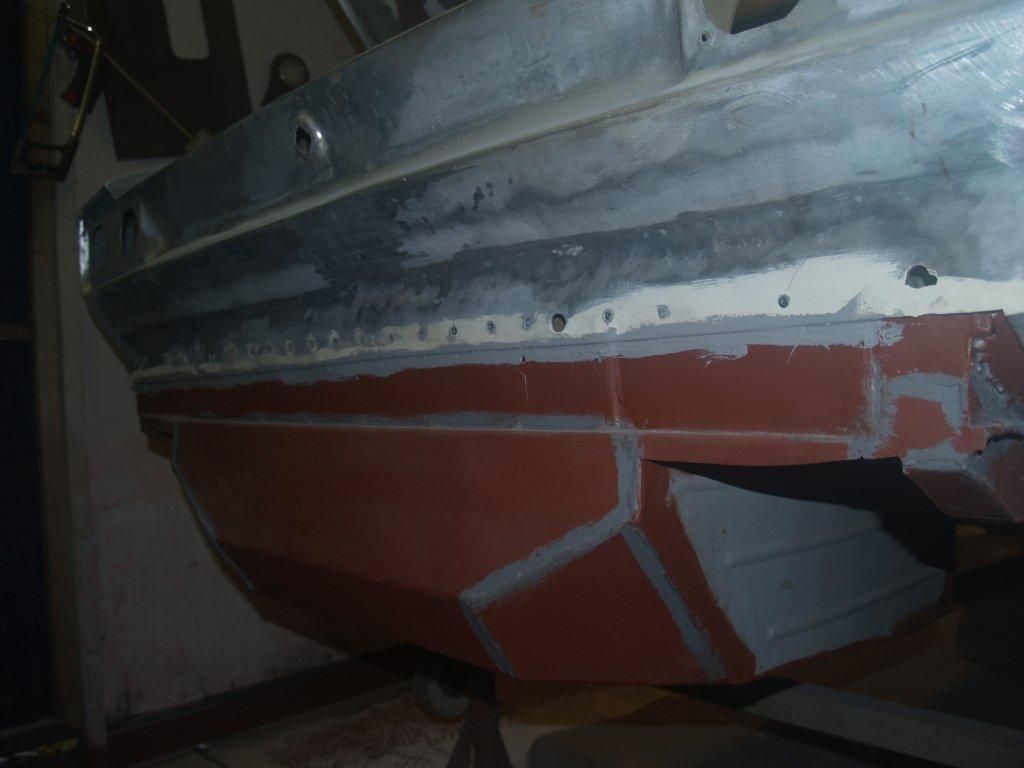
NS Boot Rail & Shock absorber plate:I had given this area thought for sometime before proceeding. The boot rail had been repaired but the question was 'how good'. The shock plate looked odd and after cleaning it became clear that a piece of sheet steel had been welded over the top to conceal the corrosion, it had to be replaced! Removing and renewing required the boot rail to be part removed which proved to be justified as this was not to the standard befitting of this project. Adjoining sections to the inner wing and boot floor side panel have been replaced too.
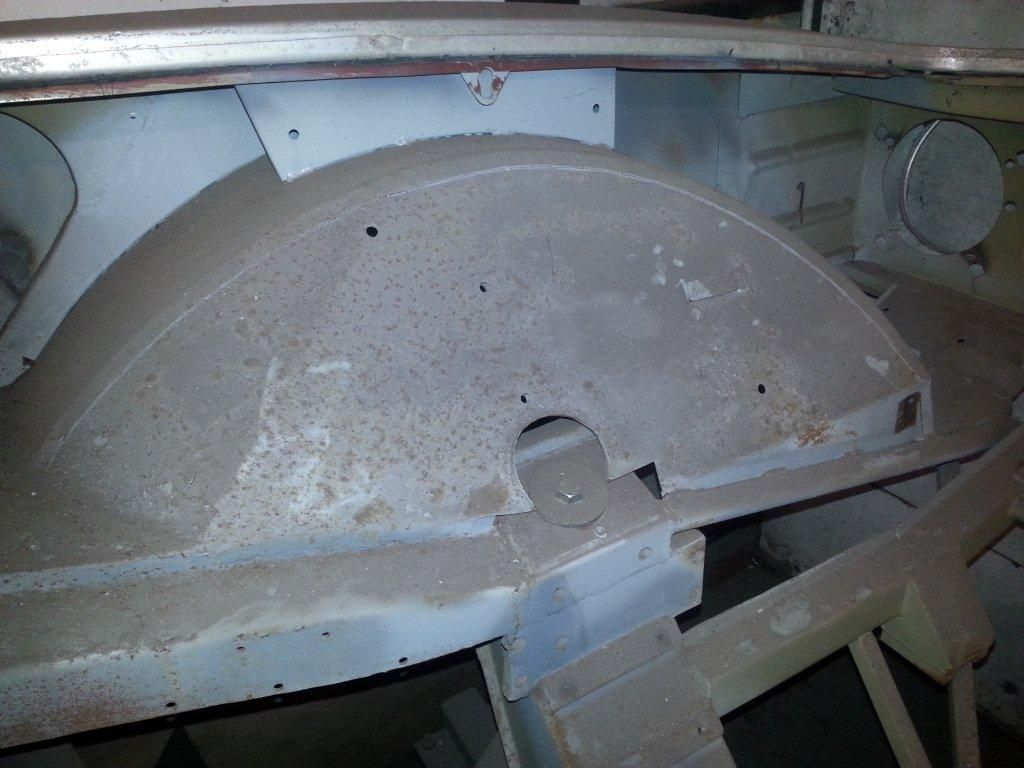
NSR Lower aluminium quarter, below bumper line: To gain access to the boot rail, this section was removed and showed corrosion to the inside so a new panel was shaped and now welded in place. Again it has been painted to the inside before welding.
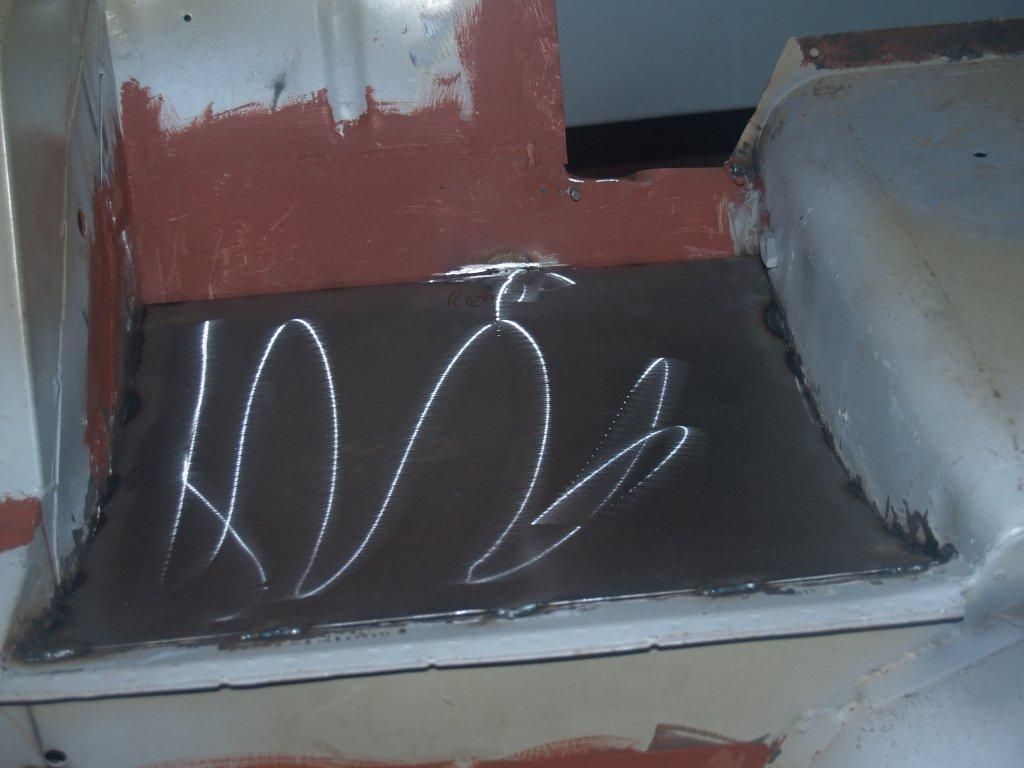
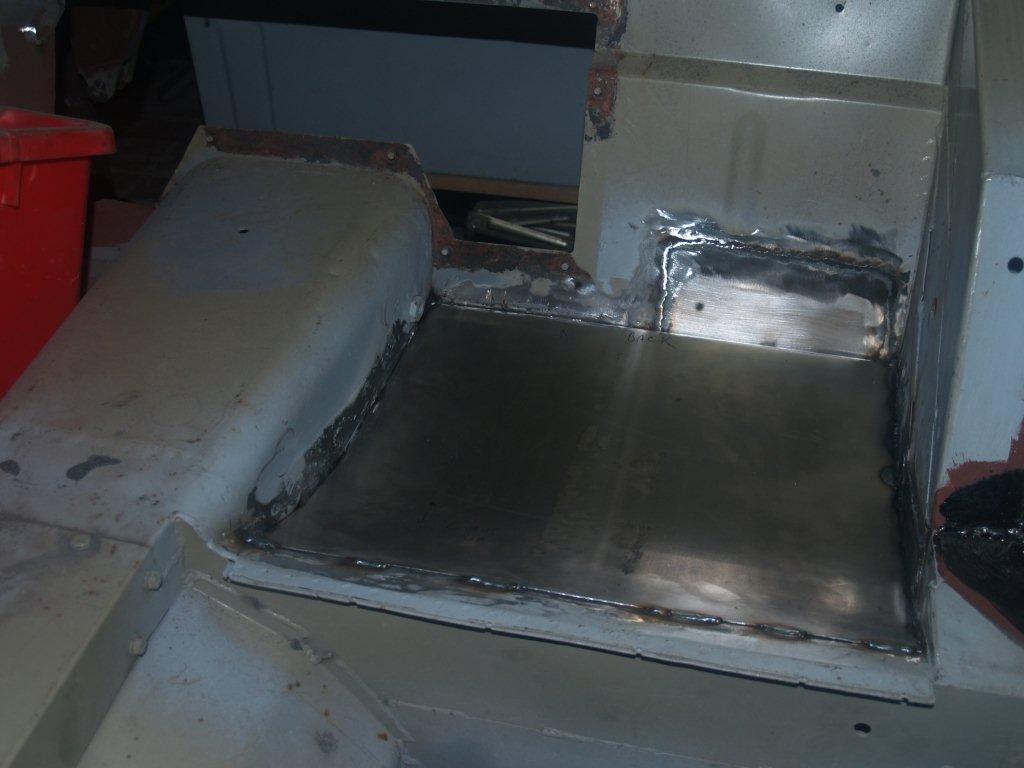
NSR Seat panel: This has been replaced with a new panel I made, again removing the old section gave me access to repair the adjoining back panel where the handbrake cable securing is located.
NSR Upper aluminium quarter reshape: All added sections which made the poorly shaped 'flip tail' conversion have been removed and the panel re-welded to the length required along with the section to the rear around the rear light location.
Although the aluminium quarters front and rear to the nearside have new sections welded in place, the next stage is to dress and shape to finish before commencing to the next stage.
October 2016 Update from the restorer
NS Steelwork: Most of the structural steelwork is finished to the nearside, this includes radius rod area, sill, out riggers, floors and the rear boot rail etc:
NS A & B Posts


NS Sills


NS Radius Rod


NS Boot floor


NS door hinges: initially fitting the door to check the general fit and shape, it was clear the hinges were slack with wear. As with the OS these required making new bronze bushes, pins and lubricated on assembly. The door refitting demonstrated further inspection was required with the hinges which were slightly bent. Straightening these quickly showed an improved door alignment and fit.

NS Door: despite this door having been repaired before, which left something to be desired, the bottom edge was not straight and the outer skin folded edge barely covered the steel frame. The skin was removed revealing serious corrosion to the steel frame and the skin also corroded to the lower 5 inches at least. The steel frame required the bottom replacing which gave me access to the lower hinge location for reconstruction. Fortunately the top hinge location only required sectional repairs. Prior to the skin being refitted, the insides were primer and black painted for future resistance to corrosion.


NS Lower aluminium quarters above sill line: Both these panel sections have been remade and just welded. As with other panels these were painted on the inside before welding. As you can see the front section has been welded higher towards the door edge, this is to accommodate a crack running up the A post edge and this was the easiest way to resolve the problem.

NSR Floor panel: this panel only required the angled section which attaches to the sill replacing. This area has been thoroughly cleaned, primered with all joints sealed.


NS Boot Rail & Shock absorber plate:I had given this area thought for sometime before proceeding. The boot rail had been repaired but the question was 'how good'. The shock plate looked odd and after cleaning it became clear that a piece of sheet steel had been welded over the top to conceal the corrosion, it had to be replaced! Removing and renewing required the boot rail to be part removed which proved to be justified as this was not to the standard befitting of this project. Adjoining sections to the inner wing and boot floor side panel have been replaced too.


NSR Lower aluminium quarter, below bumper line: To gain access to the boot rail, this section was removed and showed corrosion to the inside so a new panel was shaped and now welded in place. Again it has been painted to the inside before welding.

NSR Seat panel: This has been replaced with a new panel I made, again removing the old section gave me access to repair the adjoining back panel where the handbrake cable securing is located.

NSR Upper aluminium quarter reshape: All added sections which made the poorly shaped 'flip tail' conversion have been removed and the panel re-welded to the length required along with the section to the rear around the rear light location.

Although the aluminium quarters front and rear to the nearside have new sections welded in place, the next stage is to dress and shape to finish before commencing to the next stage.
March 2017 Update
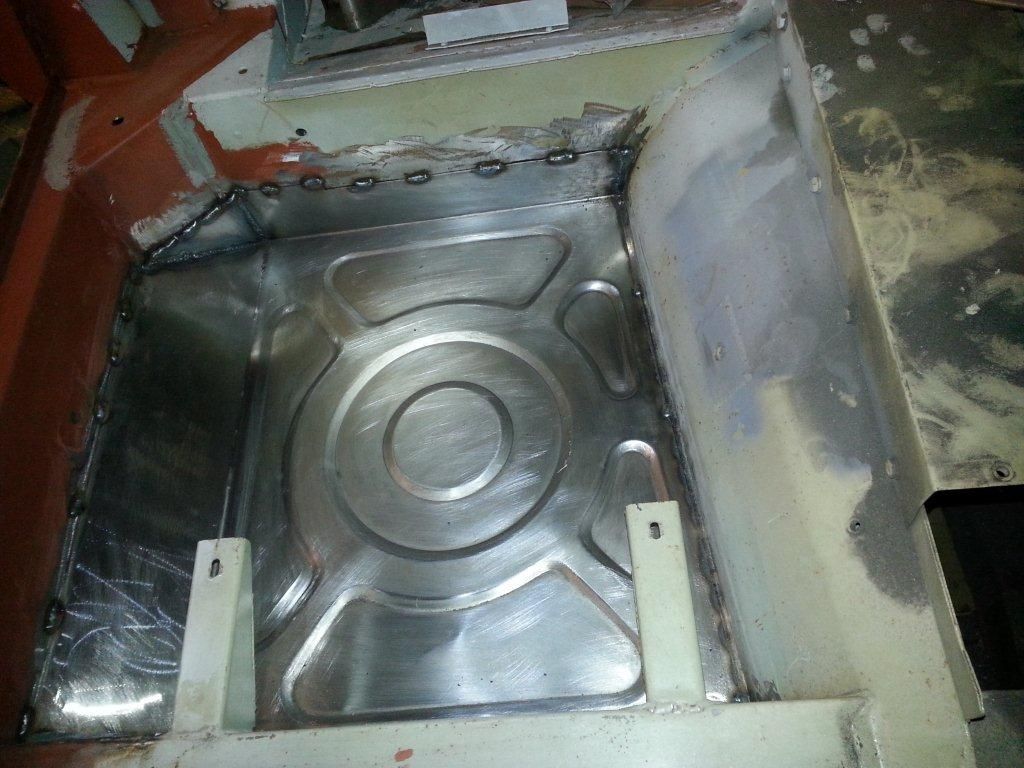
Boot floor: Although this area had been previously replaced, the surface condition and welds were unsatisfactory. Previously the car had been stored in damp conditions and with only a light coat of primer paint surface rust developed everywhere. The previous welds too were quite unsatisfactory with only tack welds in some places and now welded properly, surfaces prepared and painted with a generous coat of primer finished with sealed joints.

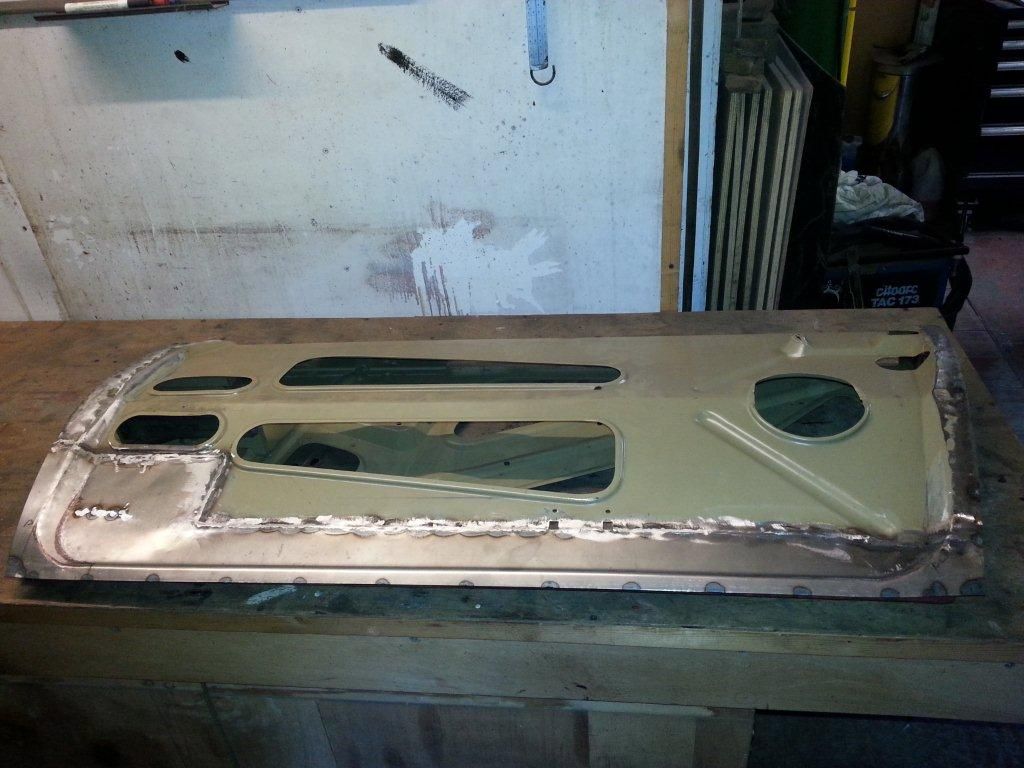
Bonnet: Being the largest and last panel to be closely scrutinised, it became clear that attempts had been made by welding edges together to stop the skin and frame from splitting. As with the boot lid, the skin and frame were originally glued together with araldite - but over time and moisture these panels split. Therefore splitting the bonnet was required, exposing inside showing the location or the hinges to be cracked and required welding . Steel inserts which are located inside the bonnet cavity were cleaned and painted along with the inside of the cavity before the skin and frame were re-bonded together.
Boot and bonnet aperture: In the runoff gallery the aluminium quarters are joined here to the steel frame with rivets. These rivets had been previously replaced by larger 4mm rivets, originally smaller 1/8", but were scruffy and poorly fitted. I have replaced all with stainless steel rivets, applied with sealant to reduce unsightly corrosion at these locations.
Grille aperture : When preparing the front panel, it became clear the location for the grille was miss-shaped which required straightening with the front panel. The supporting strip which was loosely riveted to the front panel underside, was removed to straighten and re-weld where it was joined in the middle. The previous loose fitting rivet holes were welded up too, re-drilled and fitted together with stainless steel rivets of coarse.
Rear Panel : As with the other secured edges, this one was not different and the previous again oversize 4mm rivets were removed and replaced with stainless steel countersink rivets giving a neater appearance. Bottom edge of the panel has been sealed to reduce corrosion between the two also.
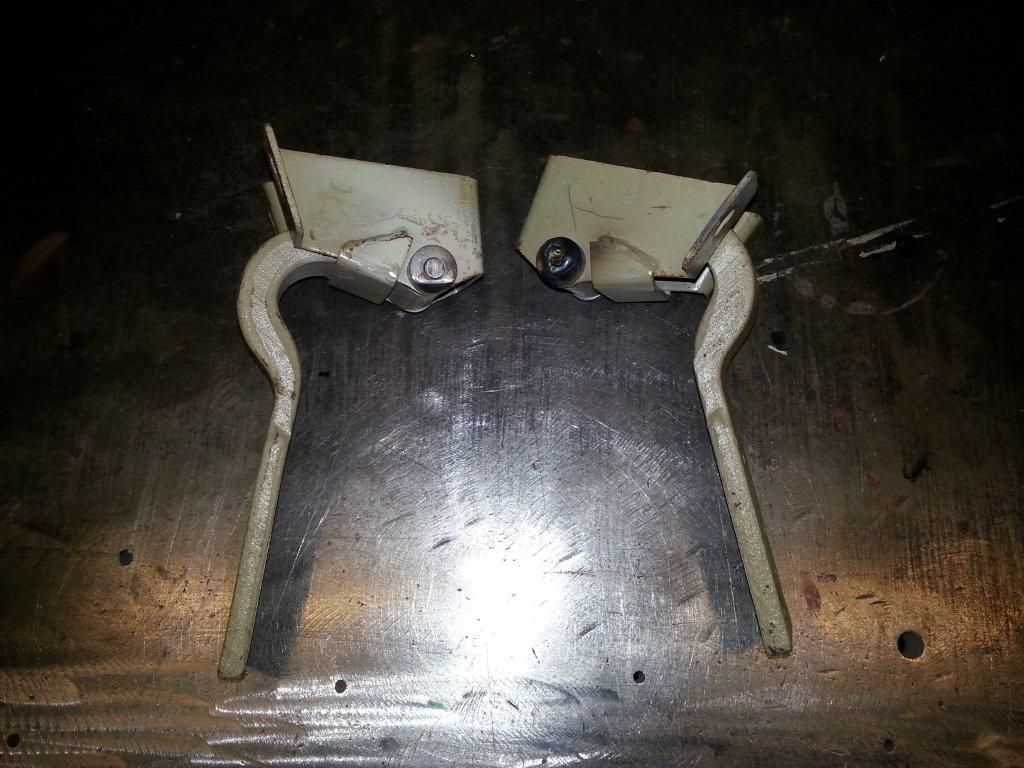
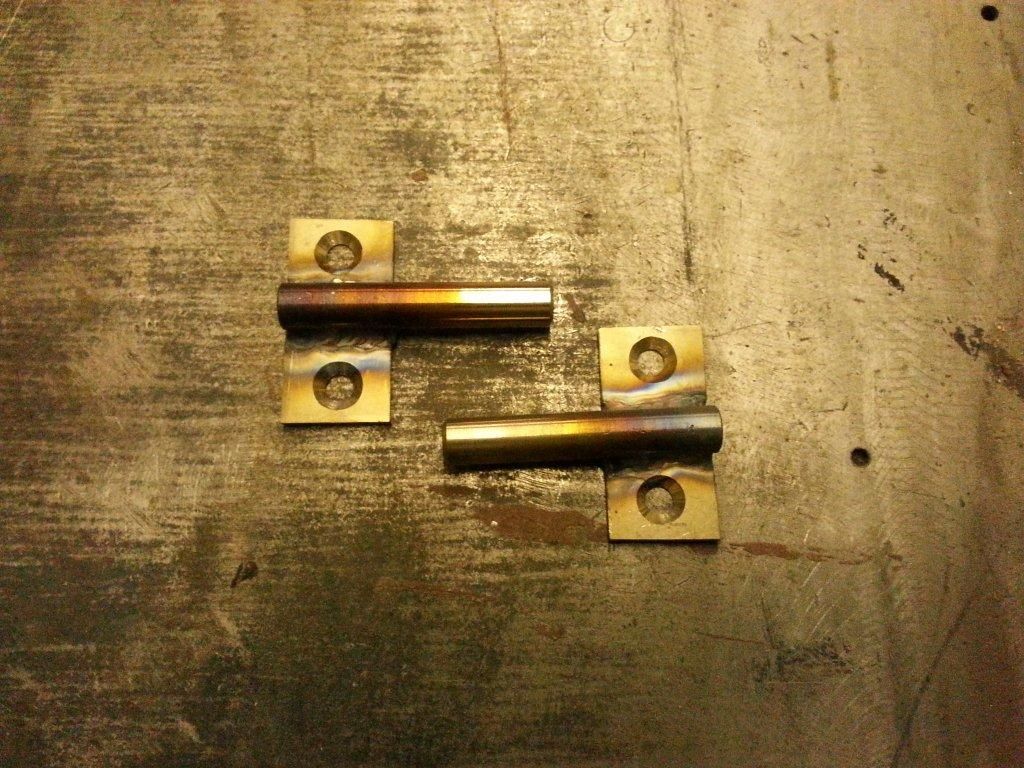
Bonnet Pins: These were not attached to the bonnet but are often scruffy looking, so as required to hold bonnet closed - I made a pair in stainless steel which will not require painting. Although not original, the painted pins become scruffy with constant contact with the latches.
Boot floor: Although this area had been previously replaced, the surface condition and welds were unsatisfactory. Previously the car had been stored in damp conditions and with only a light coat of primer paint surface rust developed everywhere. The previous welds too were quite unsatisfactory with only tack welds in some places and now welded properly, surfaces prepared and painted with a generous coat of primer finished with sealed joints.


Bonnet: Being the largest and last panel to be closely scrutinised, it became clear that attempts had been made by welding edges together to stop the skin and frame from splitting. As with the boot lid, the skin and frame were originally glued together with araldite - but over time and moisture these panels split. Therefore splitting the bonnet was required, exposing inside showing the location or the hinges to be cracked and required welding . Steel inserts which are located inside the bonnet cavity were cleaned and painted along with the inside of the cavity before the skin and frame were re-bonded together.


Boot and bonnet aperture: In the runoff gallery the aluminium quarters are joined here to the steel frame with rivets. These rivets had been previously replaced by larger 4mm rivets, originally smaller 1/8", but were scruffy and poorly fitted. I have replaced all with stainless steel rivets, applied with sealant to reduce unsightly corrosion at these locations.

Grille aperture : When preparing the front panel, it became clear the location for the grille was miss-shaped which required straightening with the front panel. The supporting strip which was loosely riveted to the front panel underside, was removed to straighten and re-weld where it was joined in the middle. The previous loose fitting rivet holes were welded up too, re-drilled and fitted together with stainless steel rivets of coarse.


Rear Panel : As with the other secured edges, this one was not different and the previous again oversize 4mm rivets were removed and replaced with stainless steel countersink rivets giving a neater appearance. Bottom edge of the panel has been sealed to reduce corrosion between the two also.


Bonnet Pins: These were not attached to the bonnet but are often scruffy looking, so as required to hold bonnet closed - I made a pair in stainless steel which will not require painting. Although not original, the painted pins become scruffy with constant contact with the latches.

Thought I would update this thread.
Things ground to a halt last year with the bodywork but after Christmas I decided to get back on the case to push things on and I'm pleased to say progress is being made.
Unfortunately, thanks to Photobucket all the previous photo links are broken so here's a brief recap:
1972 Aston Martin V8 Project (as bought)
 AM V8 2
It came with the original engine that had been rebuilt but not run
 AM V8 10
We removed and reshaped the rear to get rid of the incorrect flip tail
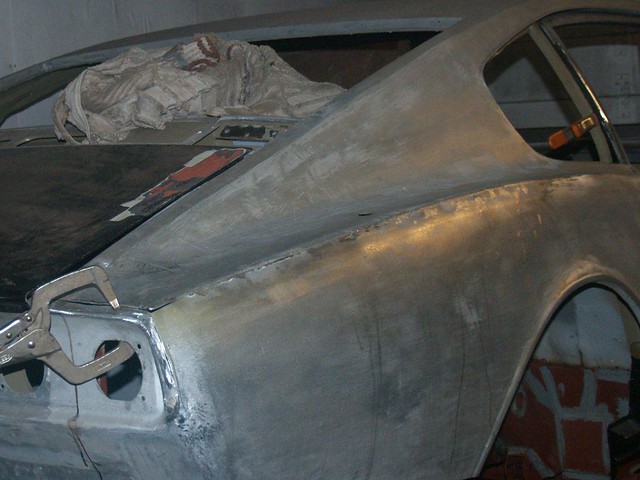 OSR quarter (12)
Lots of repairs to the shell including welding in the sills
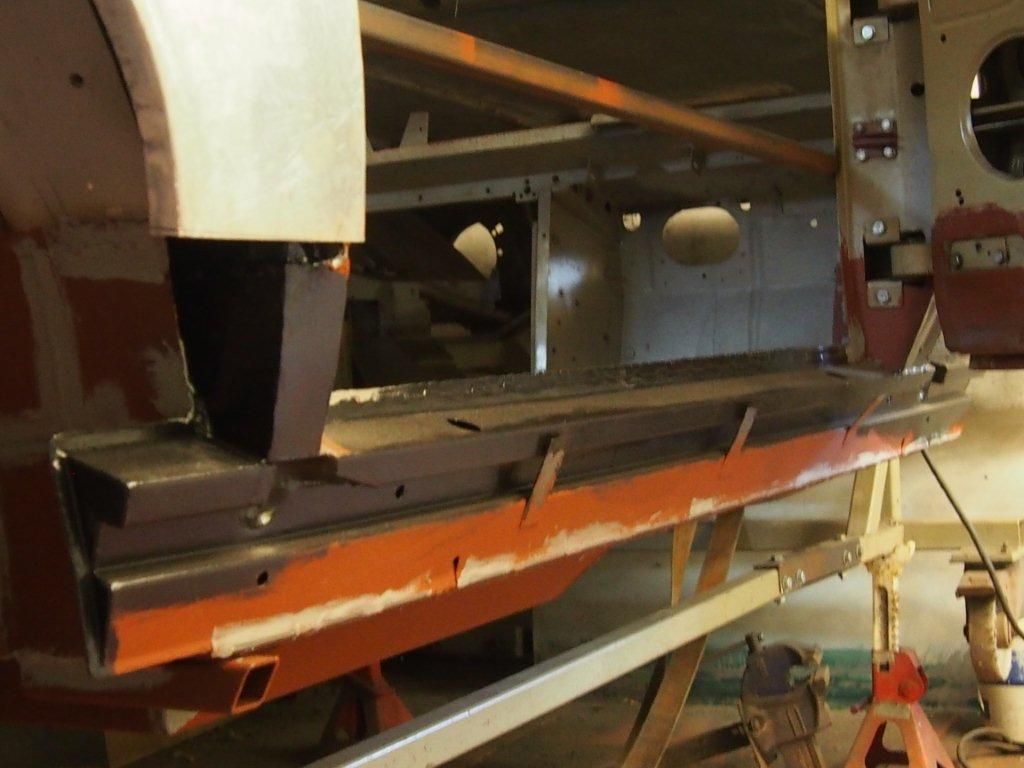
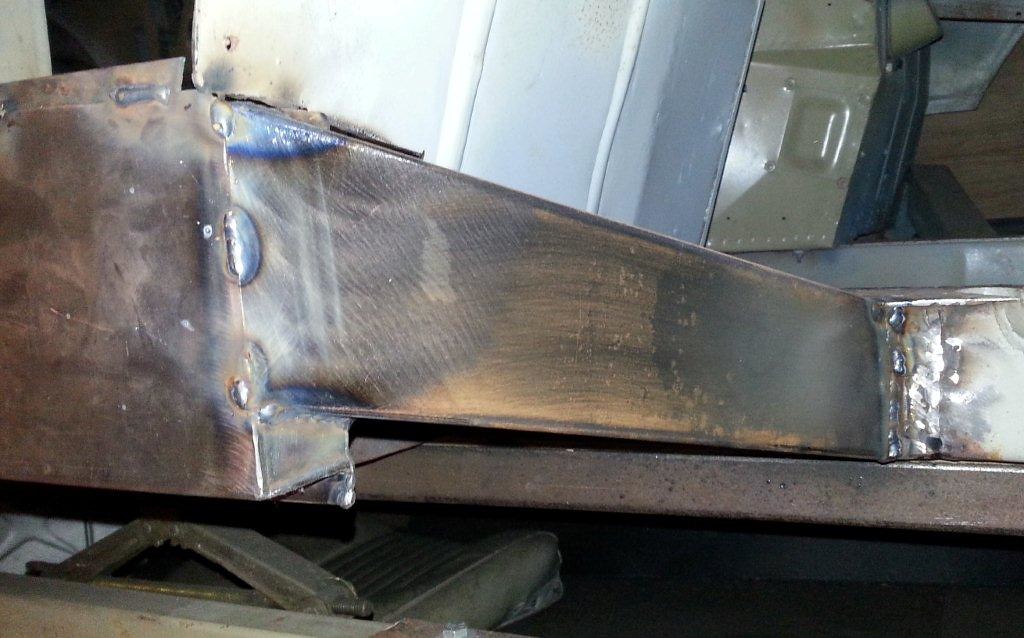 OS Out-rigger
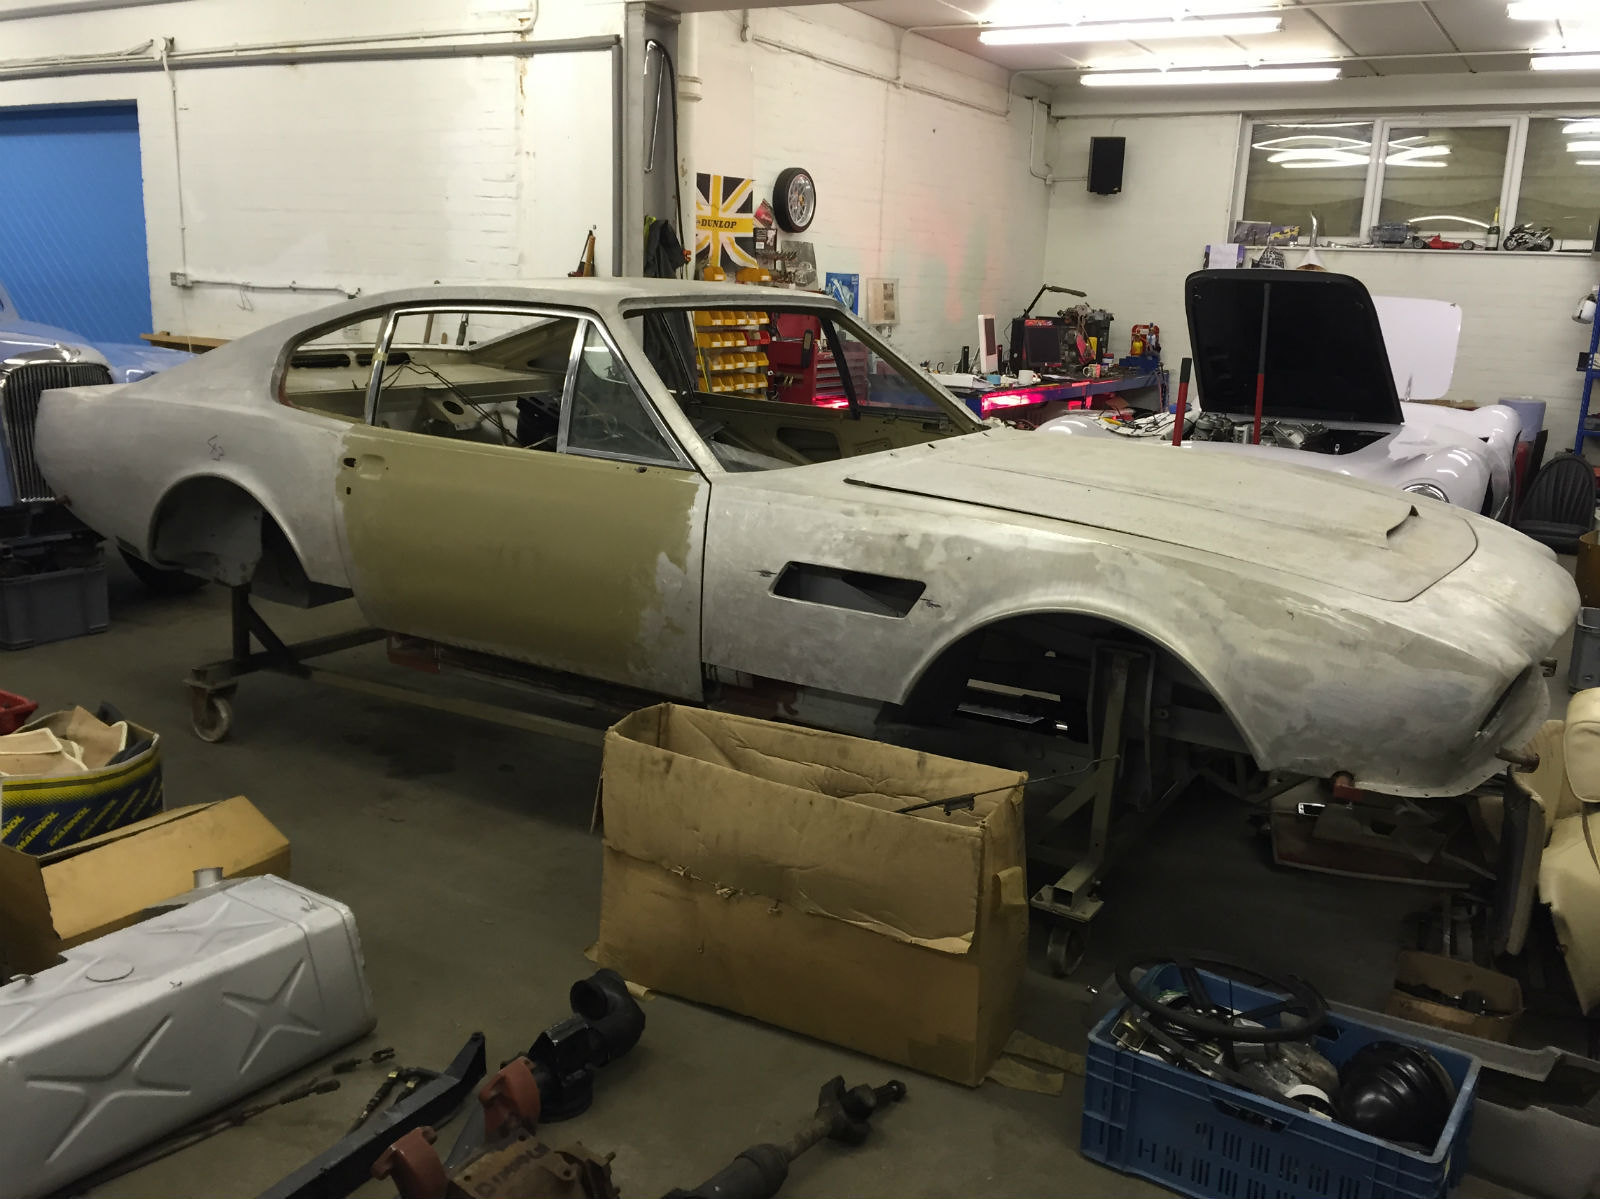
That brings things upto date. All repairs to the body are now finished and the shell is now in primer and curing...
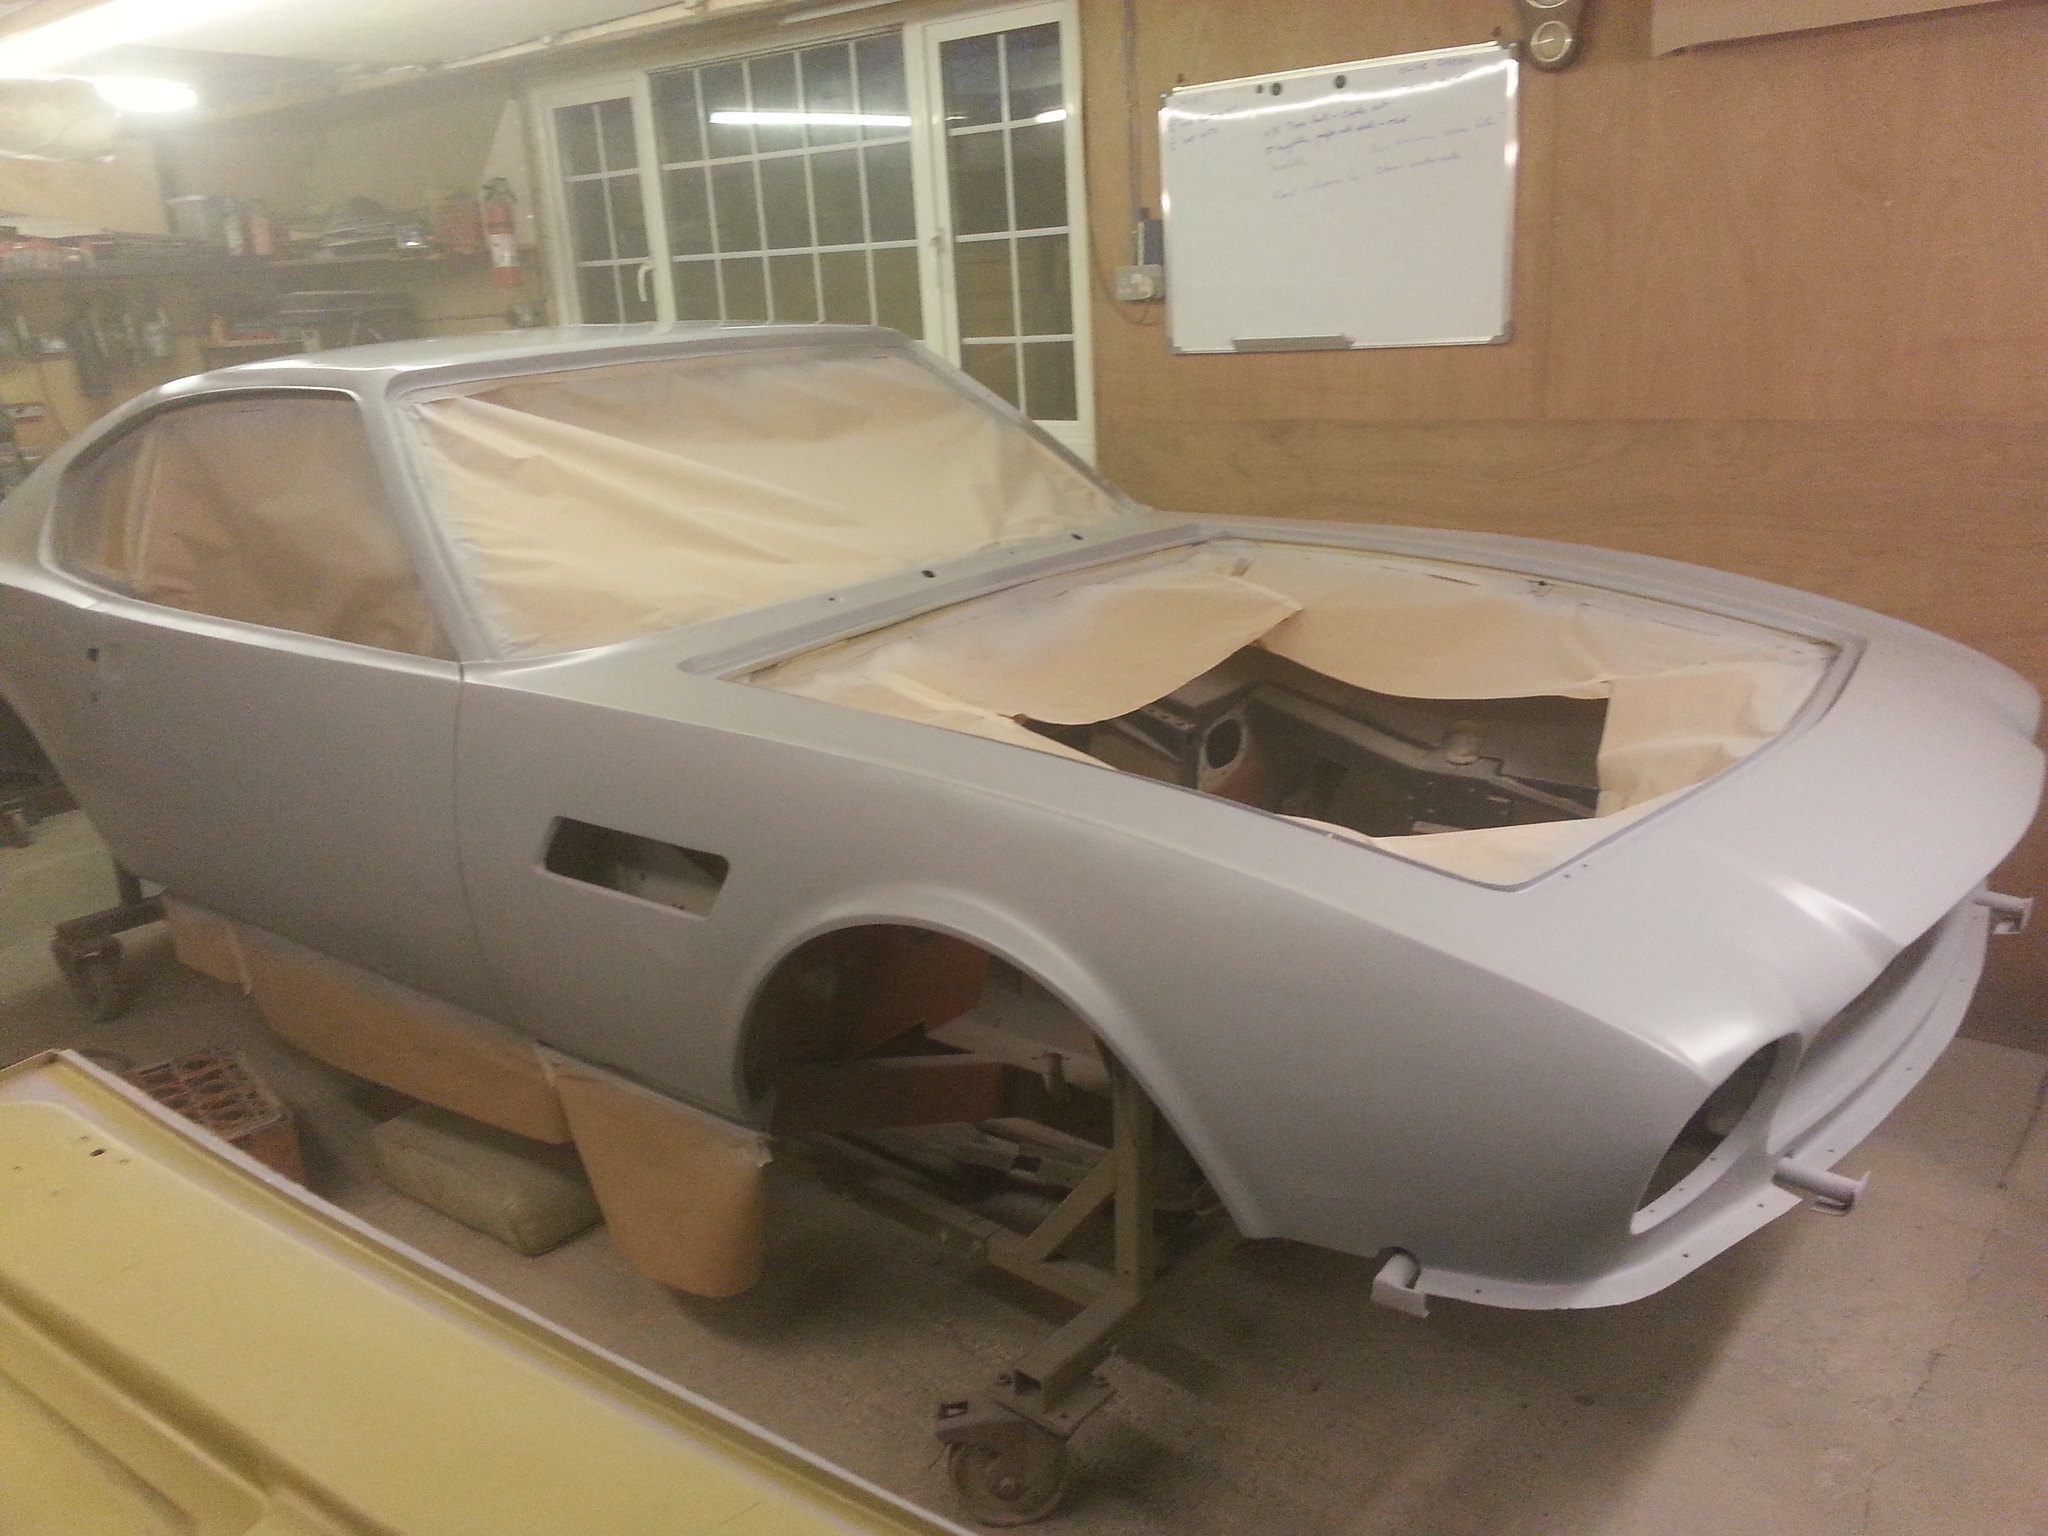 20180403_195114
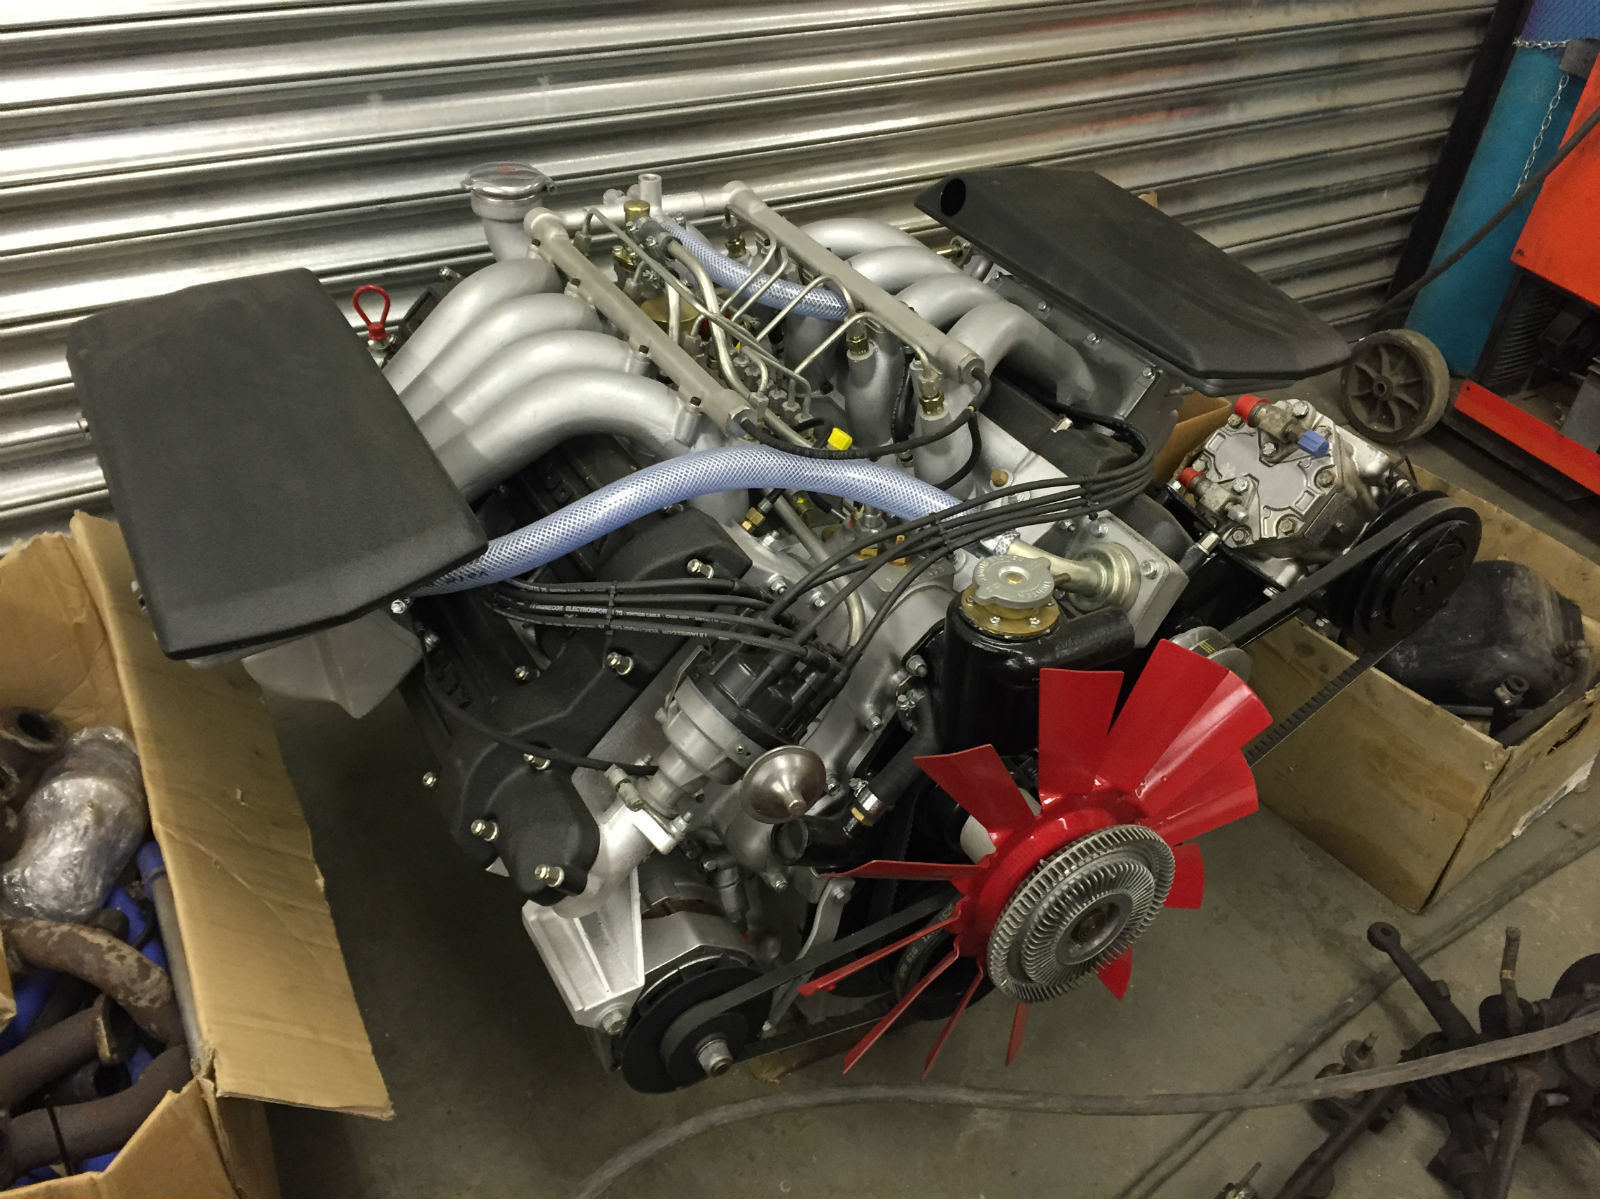
We've had the engine on the dyno and it runs well, which is a relief as it has not been run since it was rebuilt 4 or 5 years ago. The engines heat cycles are ok, we did a power run and it's over 340bhp and thats without maximum throttle. Once it's in the car, we'll put it on the rolling road and test it some more.
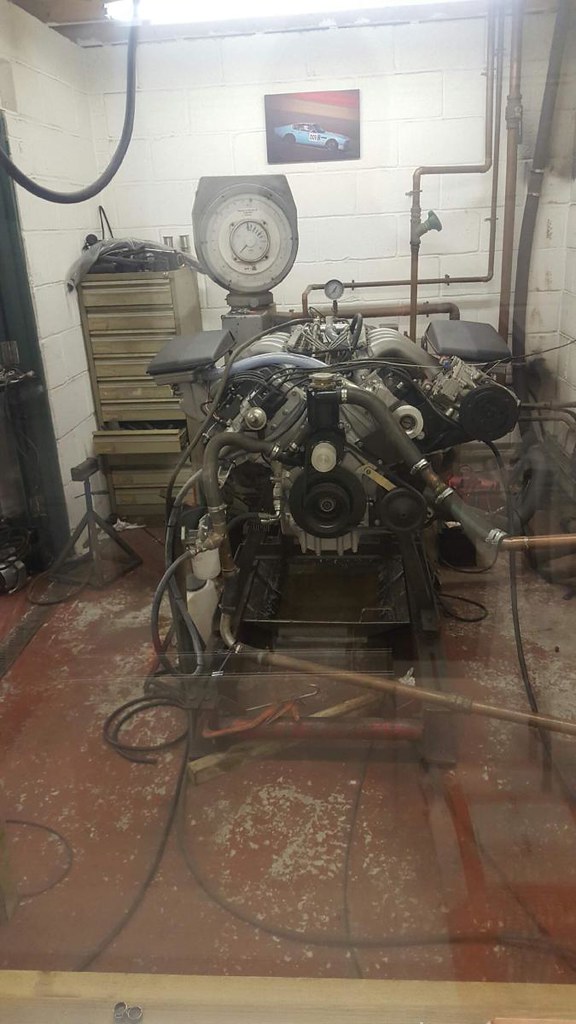 Engine on dyno
I've also been slowly picking up more of the missing parts. Latest acquisition was these badges for the wing vents from another AMOC member.
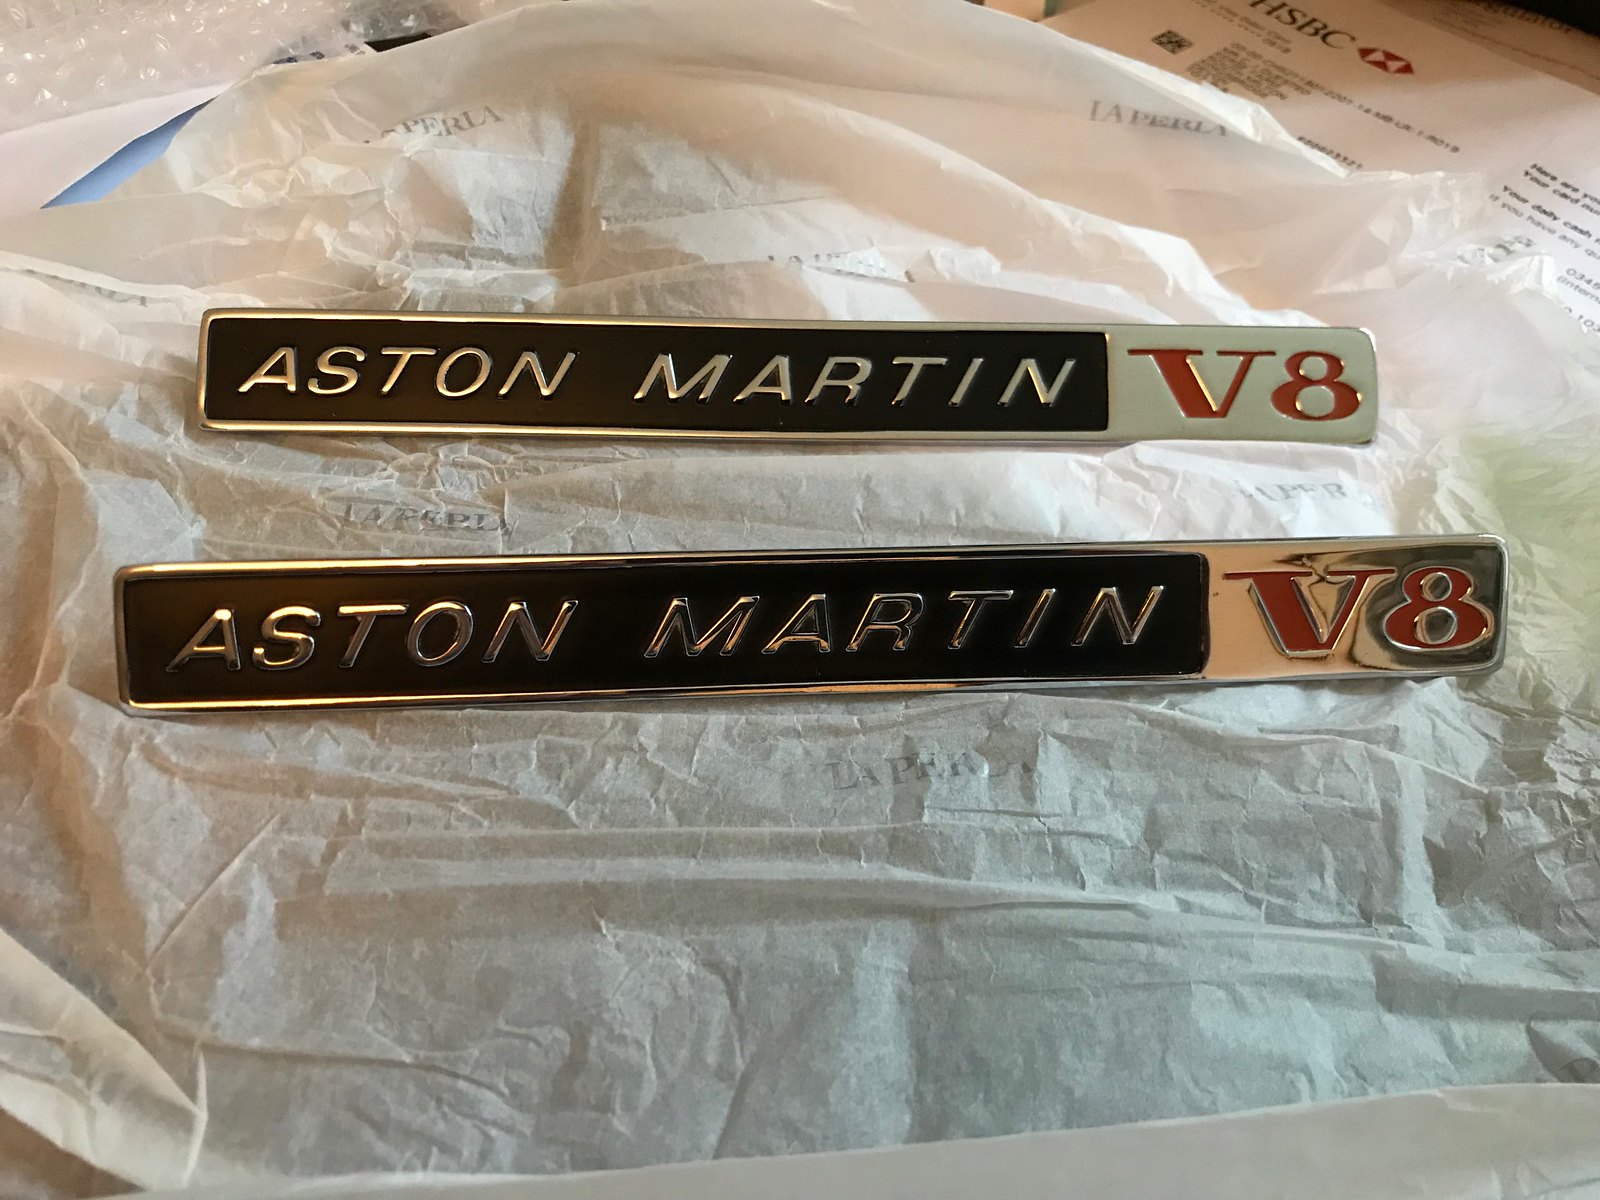 IMG_0563
Things ground to a halt last year with the bodywork but after Christmas I decided to get back on the case to push things on and I'm pleased to say progress is being made.
Unfortunately, thanks to Photobucket all the previous photo links are broken so here's a brief recap:
1972 Aston Martin V8 Project (as bought)
AM V8 2It came with the original engine that had been rebuilt but not run
AM V8 10We removed and reshaped the rear to get rid of the incorrect flip tail
OSR quarter (12)Lots of repairs to the shell including welding in the sills
OS Out-riggerThat brings things upto date. All repairs to the body are now finished and the shell is now in primer and curing...
20180403_195114We've had the engine on the dyno and it runs well, which is a relief as it has not been run since it was rebuilt 4 or 5 years ago. The engines heat cycles are ok, we did a power run and it's over 340bhp and thats without maximum throttle. Once it's in the car, we'll put it on the rolling road and test it some more.
Engine on dynoI've also been slowly picking up more of the missing parts. Latest acquisition was these badges for the wing vents from another AMOC member.
IMG_0563Edited by CQ8 on Sunday 8th April 16:27
Once the painting is finished, one of the first things to be fitted will be a new wiring loom. The wiring loom for mine was missing but even if it had been there I would have ordered a new one, putting back 46 year old wiring would not be a sensible idea! The new loom is only available from Autosparks and is custom made. Not cheap at £1700 but nothing is on these cars. Lead time is 6-8 weeks so hopefully it will be ready for mid-May.
The dashboard assembly will also be going in quite soon after painting as well so in preparation I had all these items recovered. There's quite a few individual pieces but I have pull together a complete set from what came with the car and the bits I sourced from the ex race car. These are now ready to be collected from the trimmers.
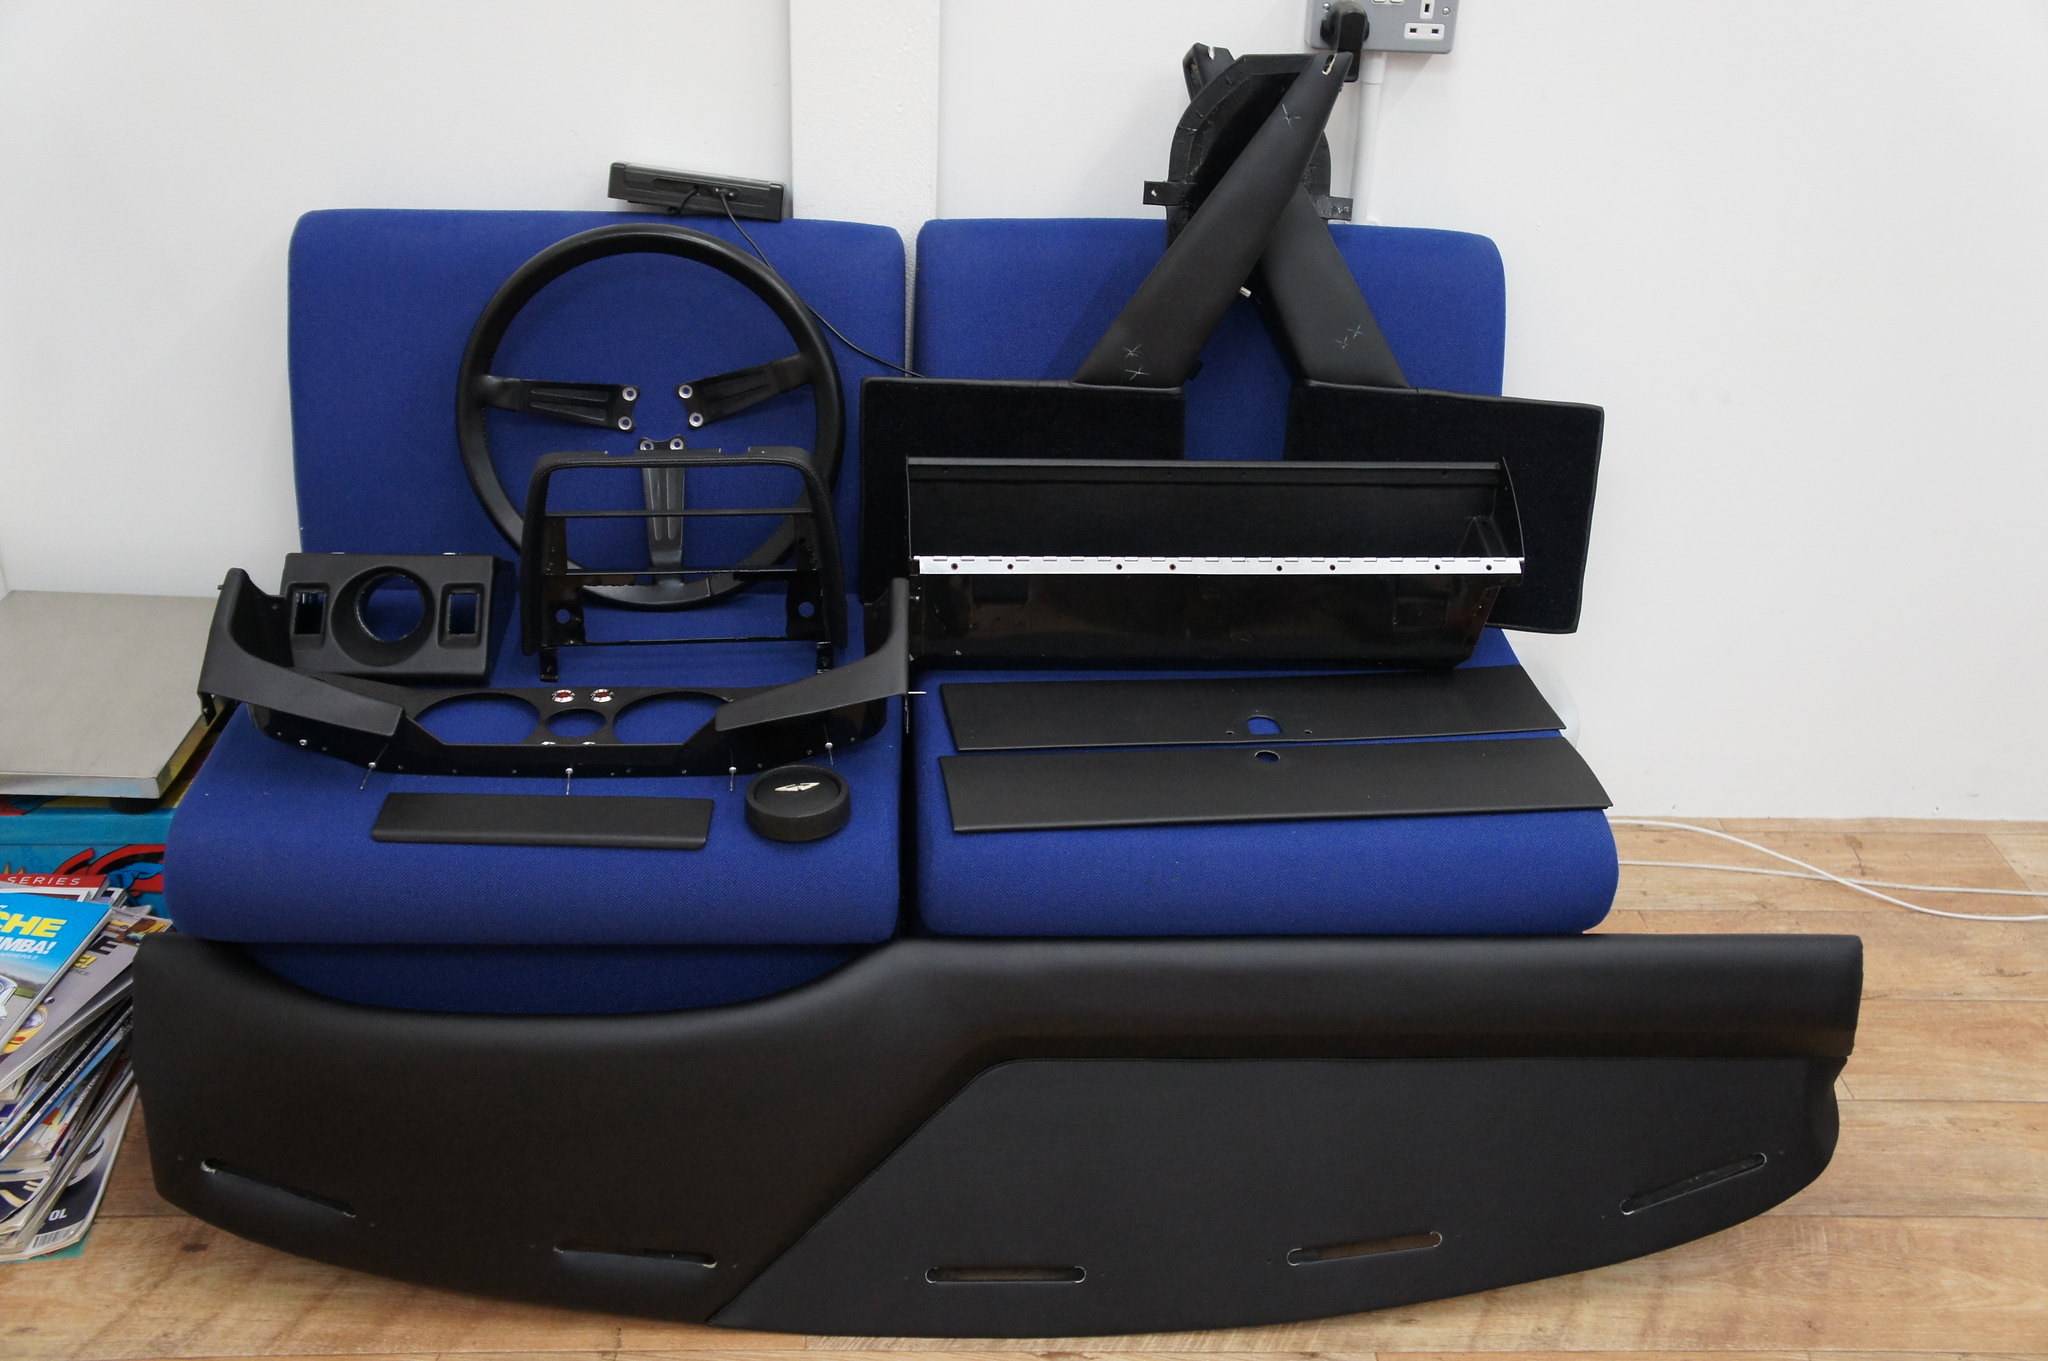 DSC05785
The dashboard assembly will also be going in quite soon after painting as well so in preparation I had all these items recovered. There's quite a few individual pieces but I have pull together a complete set from what came with the car and the bits I sourced from the ex race car. These are now ready to be collected from the trimmers.
DSC05785Gassing Station | Readers' Cars | Top of Page | What's New | My Stuff