BMW 330CI E46 Build thread
Discussion


shalmaneser said:
I was under the impression it was tweaking the intake cam gave the best midrange gain, the exhaust cam changes are mainly for emissions? Certainly my 996 only has advance on the intake cam...
I think you will get on great with the 996 calipers, I fitted them to my E46 M3 and they were mega on track, along with CSL discs (~345?) they were totally fade free even on standard pads, and they look great. Funnily enough, they're not great on the 996 and need some fancy track day pads to avoid fade...
You're correct the inlet cam makes a massive difference:I think you will get on great with the 996 calipers, I fitted them to my E46 M3 and they were mega on track, along with CSL discs (~345?) they were totally fade free even on standard pads, and they look great. Funnily enough, they're not great on the 996 and need some fancy track day pads to avoid fade...

But interestingly when I did also do some exhaust adjustment testing on the standard ECU we did notice a bump in the mid range torque by moving the exhaust timing but much smaller gains to be had. In the end I've left it fixed so save retiming the engine, but I will at some point.
Prep for Oulton Park
On went the calipers with the standard 330 discs for the time being, after Oulton I'm probably going to move to a 340 or 345mm CSL disc. Dropped in the RS29 pads too.


Gave the whole car a once over, completed bolt checked the car front the rear, went over a lot of the car with the paint pen, swapped the brake fluid for some fresh fluid and we were ready for Oulton Park
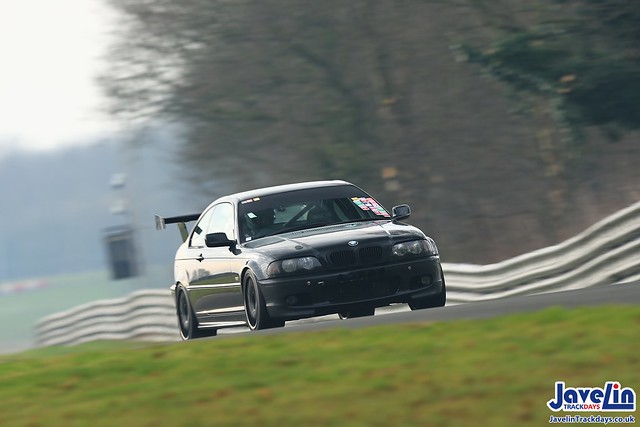
Perfect track conditions appeared on the morning, it was a mid week track day so it was pretty quiet. Early morning picture before sighting laps showing some blue sky.

The car ran flawlessly all day, with the only adjustments being made were to drop the tyre pressures down when the car warmed up after a couple of sessions and to experiment with some damper settings, moved around some of the damper settings going 3-4 clicks harder and then softer from my current dry settings to see how the car handled. Found some interesting results especially moving the rear any firmer than it's current setting.


Impressions of the brakes.
I wasn't sure what to expect with the brakes so I approached the morning with an open mind. Took the morning to get used to the brakes, found myself letting off the brakes a little during the middle of the braking zone as I was braking too early initially as I built up confidence, I wouldn't say there is a big difference in braking power as I'm still using the standard 325mm rotor, what I did notice was an more consistent pedal and braking effort. The braking definitely felt more controlled, interestingly looking back at the logs the maximum braking pressure in the front circuit was reaching 1400psi where previously on the old brake set up I was only using around 1200psi.
Couple of theories - More consistent braking enabled me to get on the brakes with more confidence and better braking balance between front calipers enabled higher pressures and braking to be utilised.
Stiffer calipers translating to better pedal feel allowed for more brake pressure to be consistently applied to the brakes.
Final thoughts are that I'm happy with the brakes, I was gaining confidence and kept pushing the braking later and later, in the afternoon finding myself over braking and taking off too much speed, something which rarely happened with the standard brakes as relied a lot on trail braking into the corners to ensure enough speed was scrubbed off.
In the afternoon sessions I did experiment with throttle position values on the deceleration, changing the TPS from approx. 16% down to around 8% throttle opening when I let off at higher RPM with a theory of creating more vacuum under deceleration, I know the engine only needs 4% throttle opening to idle, hard to say from the driving if this made much difference but what I can tell from the logs is that the manifold pressure on the logged map sensor is considerably lower now as it drops below the lowest reading on the ECU built in map sensor, something to experiment with and log in the future but long term I'm looking at fitting a vacuum pump to give more consistent vacuum to the servo and control over the braking.
Always get comments about the wind, yes next time the car goes out it will have a new splitter again to match the spoiler, understeer was more noticeable at Oulton this time out on corner entry, I also plan to add some more camber to the front after looking at the tyre wear over a longer period of time.

The car ran all day till the chequered flag just before 5 o'clock, clocking up just shy of 140 miles on track if i remember correctly.

Just caught the last of the winter evening sun
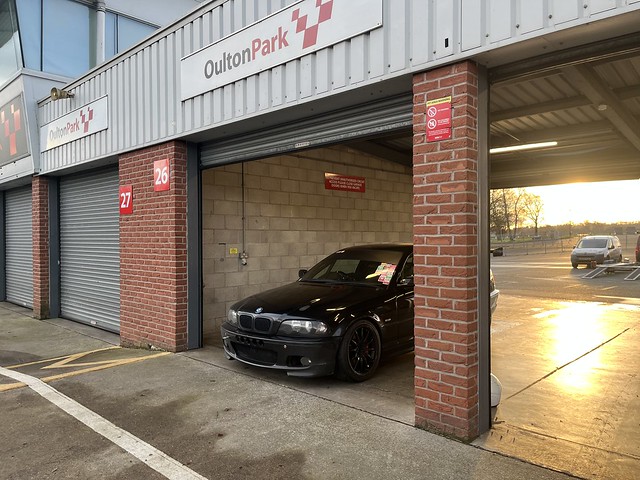
First pitlane photo I've grabbed in a while. Great to see all cars lapping all day with only minor issues all around

Managed to put together a few videos from the afternoon, most sessions had a passenger in throughout the afternoon but it was nice to be sub 2 minutes consistently with a passenger in.
https://youtu.be/aW3izTlOCeg
Cadwell Park
Tried not to leave it too long and get some more use of the car early in the year this year. The car was pretty well spot on at Oulton Park in Feb and didn't need anything off the back of it, The car has quick check over, a new splitter, I had fitted a vac pump to run the brake servo but didn't end up using it in the end, will write more about this in the future...
Vacuum pump

Track day prep complete with new 12mm splitter this time rather than the 18mm version, I have however added some aluminum bracing to it but using the same mounts as the previous two.
Video from a mixture of sessions throughout the day.
https://youtu.be/6kHkeXFcjY0
I did purchase a few of the photos from the MSVT day so it's a shame not to share them.


Tried not to leave it too long and get some more use of the car early in the year this year. The car was pretty well spot on at Oulton Park in Feb and didn't need anything off the back of it, The car has quick check over, a new splitter, I had fitted a vac pump to run the brake servo but didn't end up using it in the end, will write more about this in the future...
Vacuum pump
Track day prep complete with new 12mm splitter this time rather than the 18mm version, I have however added some aluminum bracing to it but using the same mounts as the previous two.
Video from a mixture of sessions throughout the day.
https://youtu.be/6kHkeXFcjY0
I did purchase a few of the photos from the MSVT day so it's a shame not to share them.
Summer Update:
In the background I've been working on building a garage to give me a proper space to actually work on things, the old garage being more of a workspace. It's taken a while as I've been renovating the house at the same time as well as doing car bits here and there
Foundation in place.

Walls and roof going on

Finally there and time to move in the car in

Sat on wet wheels no spacers or splitter to be able to get it on the trailer... ready for some TLC

I've been writing a list of jobs which I've wanted to do to the car over the last couple of years but a lot of them were either little jobs I've put off or jobs which would take longer than a day which I didn't fancy doing on the drive anymore.
Started off with the old M54 Oil pump - Back ground goes like this for anyone that's not been following:
Standard pump - Rattled loose
Vac kit - Rattled loose
Vac kit + lockwire - Worn the gear and vibrated the oil pump bolts out causing low pressure
New engine was fitted with a new damper and tensioner fitted to the oil pump chain with a M54 OEM Shaft with the nut lock wired x2, so I wanted to see the current condition of the oil pump after a year and half on track,

Dropped off the sump, oil pump nut looking good so far, everything as it was when I built the engine.

Can just see the oil pump chain tensioner in the top of the photo

Good opportunity to go through the whole car now it's in the garage and check everything over, found a few issues

Started to order some replacements bits and service items

Ordered an PAS tank off a Z3 to relocate it onto the lower chassis leg, similar to the way it is in the E36 which is mounted on the engine mount, I have the S54 oil filter housing which doesn't have the factory mounts for the res, so it's been floating there on a range of home made brackets and zip ties for the last few days

Next job was retiming the engine up - When I moved to standalone ECU I ran the exhaust cam at a fixed position and never ran exhaust vanos, Decided to retime the engine so I can turn back on the Exhaust vanos with a view to change cam position mid range as I used to on the MS43 ecu and increase a little more mid range torque

Removed the rear dampers to go up a spring rate from the 350 to 400 springs as well as increasing the rear ride height slightly, going to clean the dampers, check all the rose joints ready for refitting.

AR1's have gone now and have been replaced by a set of Michelin Slicks

Other jobs ticked off:
- Replacement wiper blades
- Removed all the track day stickers
- Replacement sun strip
- Tidied up the drivers door card and lifted glass back to correct height
- Fixed the constant warning for boot open since I mounted the boot on aero catches with the spoiler, trying to reduce the amount of engine lights on down to Zero! without using tape!
- Clutch and brake inputs into the ECU fixed - Brake over CANBUS and Clutch wiring added - Possibility to use rev matching on the ECU, either way the functionality is there for future use.
Plenty more to come but an update was in order!
In the background I've been working on building a garage to give me a proper space to actually work on things, the old garage being more of a workspace. It's taken a while as I've been renovating the house at the same time as well as doing car bits here and there
Foundation in place.
Walls and roof going on
Finally there and time to move in the car in
Sat on wet wheels no spacers or splitter to be able to get it on the trailer... ready for some TLC
I've been writing a list of jobs which I've wanted to do to the car over the last couple of years but a lot of them were either little jobs I've put off or jobs which would take longer than a day which I didn't fancy doing on the drive anymore.
Started off with the old M54 Oil pump - Back ground goes like this for anyone that's not been following:
Standard pump - Rattled loose
Vac kit - Rattled loose
Vac kit + lockwire - Worn the gear and vibrated the oil pump bolts out causing low pressure
New engine was fitted with a new damper and tensioner fitted to the oil pump chain with a M54 OEM Shaft with the nut lock wired x2, so I wanted to see the current condition of the oil pump after a year and half on track,
Dropped off the sump, oil pump nut looking good so far, everything as it was when I built the engine.
Can just see the oil pump chain tensioner in the top of the photo
Good opportunity to go through the whole car now it's in the garage and check everything over, found a few issues
Started to order some replacements bits and service items
Ordered an PAS tank off a Z3 to relocate it onto the lower chassis leg, similar to the way it is in the E36 which is mounted on the engine mount, I have the S54 oil filter housing which doesn't have the factory mounts for the res, so it's been floating there on a range of home made brackets and zip ties for the last few days
Next job was retiming the engine up - When I moved to standalone ECU I ran the exhaust cam at a fixed position and never ran exhaust vanos, Decided to retime the engine so I can turn back on the Exhaust vanos with a view to change cam position mid range as I used to on the MS43 ecu and increase a little more mid range torque
Removed the rear dampers to go up a spring rate from the 350 to 400 springs as well as increasing the rear ride height slightly, going to clean the dampers, check all the rose joints ready for refitting.
AR1's have gone now and have been replaced by a set of Michelin Slicks
Other jobs ticked off:
- Replacement wiper blades
- Removed all the track day stickers
- Replacement sun strip
- Tidied up the drivers door card and lifted glass back to correct height
- Fixed the constant warning for boot open since I mounted the boot on aero catches with the spoiler, trying to reduce the amount of engine lights on down to Zero! without using tape!
- Clutch and brake inputs into the ECU fixed - Brake over CANBUS and Clutch wiring added - Possibility to use rev matching on the ECU, either way the functionality is there for future use.
Plenty more to come but an update was in order!
richardracer said:
Hi Tom,
Can you share your spring and antiroll bar rates/dimensions please? Co-incidentally, I was re-reading your thread on Thursday looking for spring rates.
Thanks in advance
Richardracer
Just updated the spec list for you:Can you share your spring and antiroll bar rates/dimensions please? Co-incidentally, I was re-reading your thread on Thursday looking for spring rates.
Thanks in advance
Richardracer
Springs 750/400 (Was previously running a 350 rear)
OEM Front and rear roll bars.
BMW E46 M54 - 7200RPM Limit
Custom M54 > S50 Exhaust adaptor plates
S50B32 Exhaust manifold
ECU Master Black ECU
2.5” Custom Stainless Exhaust
Custom M54 > M50 inlet manifold
Schrick 272/256 Camshafts
Vac Motorsport Valve springs and retainers
CNC Ported head
Vac Motorsport M54 Oil Pump Kit
BMW Oil Pump Tensioner
ARP Head bolts
ARP Rod Bolts
S54 Oil Filter housing with AN10 oil take off for cooler
AN10 lines with 19 Row Oil Cooler
Single Mass Flywheel and Clutch.
3.73 Shorter FD Rear Diff with Quaife diff
Custom Solid subframe and diff mounts
Vac motorsport inner spring arm bush
Millway Motorsport RTAB
Custom solid mounted camber arms
Gaz Gold adjustable Dampers 750F/400R Linear springs
Gaz Gold adjustable Front top mounts
Gaz Gold Solid Rear top mounts.
Michelin S8L Slicks 25/64/18
Uniroyal Rainsports 255/35/18
Team Dynamic 1.2’s
Safety devices 330 Challenge Cage – 16 Point weld in cage with rear strut brace
Porche 996 front calipers with RSL29 Pads
RC5 Rear pads
1250kg
270bhp/258ftlbs
Another few weeks of finishing off small jobs.
Collected a few track day stickers over the last couple of years, time to clear the windscreen and get fresh sun strip on there too, the hot summers sun has taken its toll on the vinyl and its started to crack. Appears that MSVT and Javalin get the votes for the most attended track days.

Popped on some fresh wiper blades, the ones on the left appear to be genuine BMW they're like leather now, god knows how long they've been on the car, way before I bought it in 2018.

Full service finished with a new air filter, still running the factor M54 airbox, no benefit in changing from what I've seen when testing, also ran it on the dyno in the past with no air filter and no difference in power so just a standard Bosch filter going in.

Team dynamics fitted with the Michelin slicks fitted, wanted to check the clearance of the tyre against the shock and the slicks measure up pretty much exactly the same as a 255 AR1.

What I did notice was how light the wheels felt with the slicks fitted. I thought I'd give them a quick weigh and see what the difference was, I also found the weights from 2019 when I first fitted the TD's
24.7kg MV1 with RSR 8.5J
23.0kg TD1.2 with RSR 9J
19.5kg TD1.2 with Michelin Slick
What I have forgot to measure was the AR1 vs the RSR but I would imagine it's in the same ball park, however the Michelins slicks and TD's coming in at 19.5kg had me a little shocked, had to go back and weight them again just to check.
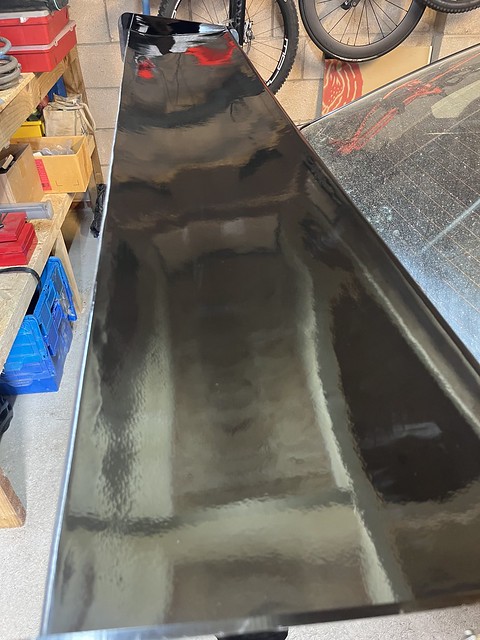
E46 has had a good wash and a tidy up, a couple of the panels have had a polish, the resin of the spoiler was looking very white from the water sitting in it when it was stored outside before the garage, mid way through polishing.

Much better
350lbs rear springs removed and replaced with the 400lbs springs which I removed when I first started using the car, see how it drives with a firmer rear spring, this is back to the recommended spring rates I was recommended when building the car but I used to suffer with a lot of oversteer in the early days but we have much better suspension set up, kinematics and tyre grip now.

Bit of an interesting spot when looking at some data from the logger this week.
I have always logged swirl pot pressure as well as fuel pressure to the fuel rail.
-I am used to seeing the swirl pot maintain around 7psi unless I am WOT when it drops down to around 2/3psi in the Pot as the injectors are using more fuel from the rail so less fuel is returning back to the pot.
Anyway spotted the other day that the pot was at 0psi even at idle, popped a set of mole grips on the return line from the pot to the main tank expecting the pressure to peak as the pot was being filled by the in tank pump but unable to return back to the tank, nothing, went through a usual simple diagnosis processed, swapped the pot pressure sensor, nope, used the plug from the oil pressure sensor to read the pot pressure, nope.
Popped the seat out of the car to gain access to the fuel tank.

Used the laptop to run the fuel pumps - one in tank pump to feed the swirl pot and the second fuel pump which takes fuel from the swirl pot to feed the rail. Could hear the pump running but still no pressure.
Pulled out the in tank pump and swapped it for the spare one I have, put it all back together and well, 9psi at the pot at idle again. I guess the data pointed towards the start of the intake pump failing. Glad I spotted this now ahead of Cadwell next week. Will keep an eye on the pressures on the day but I hope that's it fixed.

Made up a smaller restrictor on the lathe to go in the line from the swirl pot back to the main tank, should reduce the flow down and build a little more pressure in the tank and add a little bit of load onto the in tank pump so it's not running at full speed with no pressure being built.

Quick test running the pumps brings the pressure at idle up towards 15-20psi.
Whilst I had the drivers seat out, good time to give it a wipe over and hoover, removed the foot plates on both sizes, gave them a clean and replaced the grip tape on the drivers side.

One of the last jobs is to check/adjust the alignment, set up the string kit this evening, will finish it off over the weekend. Expecting the front toe to be well off, as

Alignment
Initial set up 2018
Front
3 degrees of camber
parallel toe.
Rear
2 degrees of camber
1mm toe in
2019 Set up
Front
3 degrees of camber
0.5mm toe out (Each side)
Rear
2.2 degree Camber
0.5mm toe in (Each Side)
Earlier in the year I adjusted the strut tops to gain more camber after watching the AR1's wear over a full set slightly more camber was needed. Now we're somewhere in the region of 3.5-3.8 degrees of front camber now but need to reset the toe to take this into consideration, that's a job for the weekend...
Collected a few track day stickers over the last couple of years, time to clear the windscreen and get fresh sun strip on there too, the hot summers sun has taken its toll on the vinyl and its started to crack. Appears that MSVT and Javalin get the votes for the most attended track days.
Popped on some fresh wiper blades, the ones on the left appear to be genuine BMW they're like leather now, god knows how long they've been on the car, way before I bought it in 2018.
Full service finished with a new air filter, still running the factor M54 airbox, no benefit in changing from what I've seen when testing, also ran it on the dyno in the past with no air filter and no difference in power so just a standard Bosch filter going in.
Team dynamics fitted with the Michelin slicks fitted, wanted to check the clearance of the tyre against the shock and the slicks measure up pretty much exactly the same as a 255 AR1.
What I did notice was how light the wheels felt with the slicks fitted. I thought I'd give them a quick weigh and see what the difference was, I also found the weights from 2019 when I first fitted the TD's
24.7kg MV1 with RSR 8.5J
23.0kg TD1.2 with RSR 9J
19.5kg TD1.2 with Michelin Slick
What I have forgot to measure was the AR1 vs the RSR but I would imagine it's in the same ball park, however the Michelins slicks and TD's coming in at 19.5kg had me a little shocked, had to go back and weight them again just to check.
E46 has had a good wash and a tidy up, a couple of the panels have had a polish, the resin of the spoiler was looking very white from the water sitting in it when it was stored outside before the garage, mid way through polishing.
Much better
350lbs rear springs removed and replaced with the 400lbs springs which I removed when I first started using the car, see how it drives with a firmer rear spring, this is back to the recommended spring rates I was recommended when building the car but I used to suffer with a lot of oversteer in the early days but we have much better suspension set up, kinematics and tyre grip now.
Bit of an interesting spot when looking at some data from the logger this week.
I have always logged swirl pot pressure as well as fuel pressure to the fuel rail.
-I am used to seeing the swirl pot maintain around 7psi unless I am WOT when it drops down to around 2/3psi in the Pot as the injectors are using more fuel from the rail so less fuel is returning back to the pot.
Anyway spotted the other day that the pot was at 0psi even at idle, popped a set of mole grips on the return line from the pot to the main tank expecting the pressure to peak as the pot was being filled by the in tank pump but unable to return back to the tank, nothing, went through a usual simple diagnosis processed, swapped the pot pressure sensor, nope, used the plug from the oil pressure sensor to read the pot pressure, nope.
Popped the seat out of the car to gain access to the fuel tank.
Used the laptop to run the fuel pumps - one in tank pump to feed the swirl pot and the second fuel pump which takes fuel from the swirl pot to feed the rail. Could hear the pump running but still no pressure.
Pulled out the in tank pump and swapped it for the spare one I have, put it all back together and well, 9psi at the pot at idle again. I guess the data pointed towards the start of the intake pump failing. Glad I spotted this now ahead of Cadwell next week. Will keep an eye on the pressures on the day but I hope that's it fixed.
Made up a smaller restrictor on the lathe to go in the line from the swirl pot back to the main tank, should reduce the flow down and build a little more pressure in the tank and add a little bit of load onto the in tank pump so it's not running at full speed with no pressure being built.
Quick test running the pumps brings the pressure at idle up towards 15-20psi.
Whilst I had the drivers seat out, good time to give it a wipe over and hoover, removed the foot plates on both sizes, gave them a clean and replaced the grip tape on the drivers side.
One of the last jobs is to check/adjust the alignment, set up the string kit this evening, will finish it off over the weekend. Expecting the front toe to be well off, as
Alignment
Initial set up 2018
Front
3 degrees of camber
parallel toe.
Rear
2 degrees of camber
1mm toe in
2019 Set up
Front
3 degrees of camber
0.5mm toe out (Each side)
Rear
2.2 degree Camber
0.5mm toe in (Each Side)
Earlier in the year I adjusted the strut tops to gain more camber after watching the AR1's wear over a full set slightly more camber was needed. Now we're somewhere in the region of 3.5-3.8 degrees of front camber now but need to reset the toe to take this into consideration, that's a job for the weekend...
Not quite the Cadwell Park update I was hoping for, been avoiding posting this bit for a while but hoping to get some feedback on a few things later on...
Arrived at the circuit from the hotel nice and early, perfect conditions were on the cards for the day with MSV.

Was hoping for a really positive day with a few changes I wanted to test, ECU tweaks, Michelin slicks and the firmer rear springs.

Sighting laps went without a problem and the circuit was live pretty swiftly with it being low numbers, not sold out despite it being the holidays.
Session 1 - Went out and got some heat into the tyres and started to get use to how they felt, instantly confidence inspiring, car felt good and I turned on the autoblip on the downshifts, something I wanted to experiment with as the ECU has the capability and I am already to heel and toe but it would be nice to focus purely on brake pressure and braking towards the limit of grip to improve the stopping distances in the car.
Session 2 - Upped the auto blip duration to 0.8 second up from 0.4second and it felt pretty much perfect, have to remember to bring the clutch up to the top of the pedal stroke when doing multiple down changes but it was pretty much seamless only needing a few more adjustments.
Session 3 - I had noticed the car seemed a bit bouncy so I checked the damper settings, must have miss set them as the rears were turned up close to max, for reference I normally run the Gaz about 14-12 clicks from full out of 22 and that's a pretty happy spot I've found over the years, bearing in mind I'd gone to a slightly stiffer rear spring, (back to the standard spring the coilovers came with) I set the dampes to 10 clicks from full, slightly more rebound to control the stiffer spring was the thought.
Session 4 - Starting to get into the groove of it and had a good session following a couple of Caterhams, car felt better in person than it looks in the video, my observations were that the car is way bouncier than it was earlier in the year and since changing the rear springs it's lifting the inside wheel a lot on mid corners resulting in some slip of the inside tyre on corner exit which the Quaife diff cannot deal with, shame it's not got a plated diff.
Comparing back to Febs videos from Cadwell this is much worst and likely down to the stiffer springs as that's the most dramatic variable that's changed, possibly causing the front right corner to dip and unweight the rear inside wheel?
For next time it goes out I'll be going back to the set up earlier in the year with the softer springs and try a session without a rear ARB and see how that performs.
Well session 4 was brought to an abrupt stop...
https://www.youtube.com/watch?v=5lnc72VCkc4
On the pit straight changing from 3rd to 4th 7080rpm the oil pump shaft has snapped. I've continued to run the engine for 25 seconds before noticing the oil pressure was zero and turning off the engine.
So many people have asked already about the set up:
OEM oil pump and shaft this time with two pieces of lock wire, I do have an oil pump tensioner fitted to the block. I ended up as this point due to the following failures
VAC bolt came loose
VAC bolt lock wired, hardened shaft chewed the softer gear
oil pump housing bolts vibrated loose causing lower oil pressure max 40psi.
Turned the engine off as soon as I noticed and rolled down the straight towards the marshalls point on the right hand side, not wanting to pull down the steep slope at the marshalls point at the bottom of the dip, its pretty steep, I've been there before and no powersteering, I also didn't want to get stopped in the bottom of the dip, decided to roll it up onto the straight where the car was clearly visible and roll it off the circuit onto the grass.

Stripped the front end and got the sump off on Sunday.
As we pretty much thought, snapped the shaft clean, spot were the gear has shot off to, upwards into the tensioner and the crank

Lockwire did it's job, the nut didn't come loose this time!

Next job was to check some bearings. Despite only running for 25 seconds without oil pressure, the damage happens pretty quickly.

After seeing those bearings, the job changed to removing the engine so I can strip it, clean everything properly and rebuild the bottom end

As it currently stands:
I've organised for a different aftermarket oil pump set up to be fitted, will document this a bit more when it's finished and back with me.
I've ordered bearings, seals and gaskets to rebuild the bottom end when I have all the right bits
I will be fitted a harmonic damper to the engine after this final failure. We'll see what the future holds with one of those
While the engine is out, might as well use the time do a few more jobs, so i'll start working on that over the next few weeks while waiting for engine parts.
Arrived at the circuit from the hotel nice and early, perfect conditions were on the cards for the day with MSV.
Was hoping for a really positive day with a few changes I wanted to test, ECU tweaks, Michelin slicks and the firmer rear springs.
Sighting laps went without a problem and the circuit was live pretty swiftly with it being low numbers, not sold out despite it being the holidays.
Session 1 - Went out and got some heat into the tyres and started to get use to how they felt, instantly confidence inspiring, car felt good and I turned on the autoblip on the downshifts, something I wanted to experiment with as the ECU has the capability and I am already to heel and toe but it would be nice to focus purely on brake pressure and braking towards the limit of grip to improve the stopping distances in the car.
Session 2 - Upped the auto blip duration to 0.8 second up from 0.4second and it felt pretty much perfect, have to remember to bring the clutch up to the top of the pedal stroke when doing multiple down changes but it was pretty much seamless only needing a few more adjustments.
Session 3 - I had noticed the car seemed a bit bouncy so I checked the damper settings, must have miss set them as the rears were turned up close to max, for reference I normally run the Gaz about 14-12 clicks from full out of 22 and that's a pretty happy spot I've found over the years, bearing in mind I'd gone to a slightly stiffer rear spring, (back to the standard spring the coilovers came with) I set the dampes to 10 clicks from full, slightly more rebound to control the stiffer spring was the thought.
Session 4 - Starting to get into the groove of it and had a good session following a couple of Caterhams, car felt better in person than it looks in the video, my observations were that the car is way bouncier than it was earlier in the year and since changing the rear springs it's lifting the inside wheel a lot on mid corners resulting in some slip of the inside tyre on corner exit which the Quaife diff cannot deal with, shame it's not got a plated diff.
Comparing back to Febs videos from Cadwell this is much worst and likely down to the stiffer springs as that's the most dramatic variable that's changed, possibly causing the front right corner to dip and unweight the rear inside wheel?
For next time it goes out I'll be going back to the set up earlier in the year with the softer springs and try a session without a rear ARB and see how that performs.
Well session 4 was brought to an abrupt stop...
https://www.youtube.com/watch?v=5lnc72VCkc4
On the pit straight changing from 3rd to 4th 7080rpm the oil pump shaft has snapped. I've continued to run the engine for 25 seconds before noticing the oil pressure was zero and turning off the engine.
So many people have asked already about the set up:
OEM oil pump and shaft this time with two pieces of lock wire, I do have an oil pump tensioner fitted to the block. I ended up as this point due to the following failures
VAC bolt came loose
VAC bolt lock wired, hardened shaft chewed the softer gear
oil pump housing bolts vibrated loose causing lower oil pressure max 40psi.
Turned the engine off as soon as I noticed and rolled down the straight towards the marshalls point on the right hand side, not wanting to pull down the steep slope at the marshalls point at the bottom of the dip, its pretty steep, I've been there before and no powersteering, I also didn't want to get stopped in the bottom of the dip, decided to roll it up onto the straight where the car was clearly visible and roll it off the circuit onto the grass.
Stripped the front end and got the sump off on Sunday.
As we pretty much thought, snapped the shaft clean, spot were the gear has shot off to, upwards into the tensioner and the crank
Lockwire did it's job, the nut didn't come loose this time!
Next job was to check some bearings. Despite only running for 25 seconds without oil pressure, the damage happens pretty quickly.
After seeing those bearings, the job changed to removing the engine so I can strip it, clean everything properly and rebuild the bottom end
As it currently stands:
I've organised for a different aftermarket oil pump set up to be fitted, will document this a bit more when it's finished and back with me.
I've ordered bearings, seals and gaskets to rebuild the bottom end when I have all the right bits
I will be fitted a harmonic damper to the engine after this final failure. We'll see what the future holds with one of those
While the engine is out, might as well use the time do a few more jobs, so i'll start working on that over the next few weeks while waiting for engine parts.
 ks.. That sucks!
Curious, which oil pump kit did you go for?
Went with the Achillies kit myself and haven't had a problem with it after a number of sessions and dyno time.
As for harmonic balancers, had i not got a deal on an Alpina B3 item, the Ross performance ones from Austraila worked out about half the price of an ATI one even with import charges.
Went with the Achillies kit myself and haven't had a problem with it after a number of sessions and dyno time.
As for harmonic balancers, had i not got a deal on an Alpina B3 item, the Ross performance ones from Austraila worked out about half the price of an ATI one even with import charges.
richardracer said:
Hi Tom,
Sorry to hear about your oil pump failure. Good luck with your proposed solution and rebuilding the engine.
Regards
Richardracer
Cheers Rich, Got straight on with it, might as well get it fixed and get back out in it again rather than leaving it parked in the garage, try and get out again in 2023.Sorry to hear about your oil pump failure. Good luck with your proposed solution and rebuilding the engine.
Regards
Richardracer
Sf_Manta said:
Curious, which oil pump kit did you go for?
Went with the Achillies kit myself and haven't had a problem with it after a number of sessions and dyno time.
As for harmonic balancers, had i not got a deal on an Alpina B3 item, the Ross performance ones from Austraila worked out about half the price of an ATI one even with import charges.
Will post a bit more on this when I've got the bits back I've ordered with some photos. I've gone with the Hopwood motorsport solution, sent them my pump but waiting for it back. Time will tell. I do have a habit of testing these well...Went with the Achillies kit myself and haven't had a problem with it after a number of sessions and dyno time.
As for harmonic balancers, had i not got a deal on an Alpina B3 item, the Ross performance ones from Austraila worked out about half the price of an ATI one even with import charges.
The lock wired solution has been in since august 2021 when I rebuilt the engine due to the bad honing on the block. I did know that it would fail are some point in the future and knew that when that time came I would address the issues properly.
First step was assessing the damage properly.
Pulled the engine out and popped it on the stand, was nice to do this in the new garage rather than on the driveway which I've been used to.

Pulled the rod caps off and the main caps

All the big ends damaged, obviously once there was no oil pressure there is contact between the crank and the bearing material rather than it being separated by a film of oil.

Main bearings, in good condition as I would expect for this engine, similar to all the M54 engines I've stripped in the past, these would probably go again.

However I had spotted some more damage on the hub on the front of the crank and with all the big ends being trashed I wanted to give the oil galleries in the crank a good clean before putting new bearings in, any material in the crank would get pushed back into the bearings on the first start up so wanted to make sure it was clean before rebuilding. Pulled the crank out

The damage from the oil pump gear shooting upwards into the crank. Luckily I already have a spare of these sat on the shelf I removed from a M54B25 crank before I threw it in the skip

Turned the engine over on a stand and some of the cam camps off to have a look at the condition of the cams and the trays/caps, still traces of oil under the caps and on the cams when removing the cam caps which I a good sign.

Checked the crank over for any damage and all looks good, given it a good clean inside and out. popped it on the shelf ready for going back in the engine when the time comes

Turning my attention to this over the next week or so, first job though was fitting some additional lighting to the garage, my initial placement of the garage lights was less than ideal for when the bonnet was up, so a light fitted directly over the engine bay and a second one directly over the work bench where I'll be doing the engine assembly. Going to strip the bay this week, give it a through clean and paint it in gloss black to match the inside of the car, probably loose the washer bottle while at it too as it does nothing but leak from where I blocked off the port for the head light washer pump.

Engine just waiting for parts for the bottom end rebuild and new shiny but more importantly and hopefully more reliable bits for the future engine for the E46. This being engine revision 4.

looks like you got away with pretty minimal damage all things considered.
Was bizarrely stressful watching the vid of the failure, seeing the oil pressure drop and you continue driving. Maybe a big low oil pressure light is something worth considering? So many things that you're concentrating while on track apart from the dials! Can the ECU cut power when it detects a drop in pressure? I guess it could end up pretty dangerous if power drops to zero with no warning...
Was bizarrely stressful watching the vid of the failure, seeing the oil pressure drop and you continue driving. Maybe a big low oil pressure light is something worth considering? So many things that you're concentrating while on track apart from the dials! Can the ECU cut power when it detects a drop in pressure? I guess it could end up pretty dangerous if power drops to zero with no warning...
shalmaneser said:
looks like you got away with pretty minimal damage all things considered.
Was bizarrely stressful watching the vid of the failure, seeing the oil pressure drop and you continue driving. Maybe a big low oil pressure light is something worth considering? So many things that you're concentrating while on track apart from the dials! Can the ECU cut power when it detects a drop in pressure? I guess it could end up pretty dangerous if power drops to zero with no warning...
Easy to do with ECU to have it cut the engine is oil pressure drops below a target for a set period of time, all customisable, I do worry about something like that happening though and it cutting the engine completely at the wrong time like you say so maybe use it to bring it a rev limiter which would be a good indication to check oil pressure, I only use lower limiters for oil and coolant temps which only ever effect the first session normally.Was bizarrely stressful watching the vid of the failure, seeing the oil pressure drop and you continue driving. Maybe a big low oil pressure light is something worth considering? So many things that you're concentrating while on track apart from the dials! Can the ECU cut power when it detects a drop in pressure? I guess it could end up pretty dangerous if power drops to zero with no warning...
While waiting for engine parts to turn up I thought I might as well continue to make the car better than it was before, one thing that has bugged me for years was the engine bay. I helped a friend paint their engine bay a while ago when painting the inside of the car and it looked so much fresher.
Heres how it started with all the wiring and fuel lines pulled back, normally all well hidden with the engine in as it sits under the inlet manifold.
Pulled out the ECU and engine wiring harness, nice that it all just unplugs now and the ECU comes out of the fuse box with the engine harness.

Made a decision that I would only paint the main engine bay, the two sections behind the strut tops are hidden with the fuse box and the ABS/Master cylinder and that's where I decided to draw the line as I didn't want to start to strip the inside of the car too,
Masked up anything that I didn't want to remove and masked up the body work

Gave the engine bay a good sand, wipe down and a coat of 2K gloss black, much easier in the garage with the compressor set up, made myself a booth around the car and set up extraction.

Started adding some of the engine bay brackets back into the engine bay, obviously with a nice clean engine bay everything is going to need tidying up before it is fitted back, starting with the mounting plate for the swirl pot

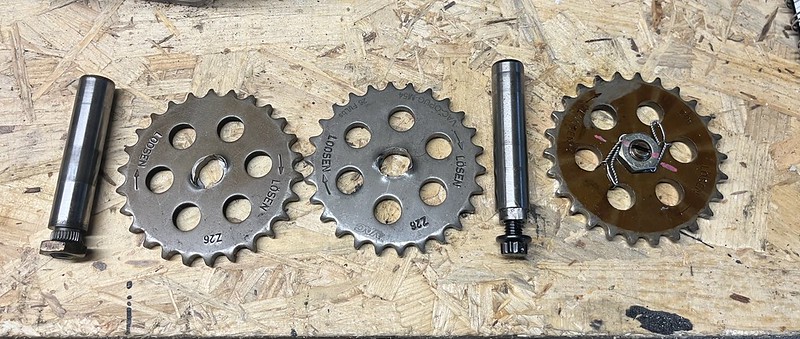
Received my rebuilt oil pump back from Hopwood Motorsport

Noticed the 3 exterior plus middle fixing bolt, supplied with Nord lock washers for the bolts
Additionally to accommodate the shaft the front of the oil pump has been machined down to create clearance for the additional larger design of the area behind the gear.

Combining the oil pump with the proper solution for dealing with the harmonics of the M54B30 engine, I have also received my MRT damper mounting hub to go with an ATI Damper. I've known one of these has been needed for a long time but was putting it off, little bit like using the OEM oil pump shaft with lock wire, I knew it would fail one day and when the time came I would replace it with a better solution so here we are.

I have placed an order for the ATI Super Damper, I am just waiting on delivery from America. Will get some photos and information on that when it arrives. Next job now it to start to get the engine back together over the next week or so.
Engine refresh continues...
Given the crank another good clean with brake cleaner and blown out the journals with the compressor. Replacement gear hub on the nose of the crank

Delivery of parts for the bottom end.
Front and rear casings, new oil pump chain, main and big end bearings, new sump gasket.

Main bearings in the block

Main cap bearings

Compared with the mains bearings I removed after two years of use and running without oil pressure
Checked the main bearing clearances.
BMW clearance - 0.020 - 0.058
Happy to be within that range, tighter than the 0.050 but not quite 0.038

Rod bearings fitted
BMW clearance - 0.020 - 0.050
Same again with the rod bearings - right in the midle of 0.050/0.038

Bottom end all torqued down

After the damage from Cadwell the chain had done some flapping around and some of the links were showing some damage. Silly not to replace it £15

Hopwood Motorsport oil pump fitted, taken the oil pump bolts out one by one and added lock tight and torqued up for piece of mind.

Pump fully fitted, all 4 bolts fitted with locktight, the 3 exterior bolts are also supplied with Nordlock washers, oil pump tensional all checked and refitted.

Front timing covers refitted with new gaskets and sump fitted, not timed the engine up yet, just assembled all the vanos assembly in position ready for timing when the flywheel is fitted

Still waiting for the ATI Super Damper to arrive from America so using the old OEM one for the moment, another angle for the new oil pump.

Usual process of fitting the flywheel, clutch, gearbox and exhaust manifold. Much easier to build it back up out of the car and put it back in in one lump, gearbox mount fist then get the subframe under the engine on the engine mounts and lift it up into position with the crane.

Made a start on putting the engine back into the engine bay, I can do the engine timing now and start to work through slowly checking everything over and assembling the remainder of the engine bay. Spotted a few bits I want to tidy up along the way before they go back in.
There is an OEM plastic cover which separated the swirl pot from the engine bay and a plate and filter which covers the fan under the scuttle, will look a lot tidier when the engine bay is put together properly. More of that this week in the evenings.

Given the crank another good clean with brake cleaner and blown out the journals with the compressor. Replacement gear hub on the nose of the crank
Delivery of parts for the bottom end.
Front and rear casings, new oil pump chain, main and big end bearings, new sump gasket.
Main bearings in the block
Main cap bearings
Compared with the mains bearings I removed after two years of use and running without oil pressure
Checked the main bearing clearances.
BMW clearance - 0.020 - 0.058
Happy to be within that range, tighter than the 0.050 but not quite 0.038
Rod bearings fitted
BMW clearance - 0.020 - 0.050
Same again with the rod bearings - right in the midle of 0.050/0.038
Bottom end all torqued down
After the damage from Cadwell the chain had done some flapping around and some of the links were showing some damage. Silly not to replace it £15
Hopwood Motorsport oil pump fitted, taken the oil pump bolts out one by one and added lock tight and torqued up for piece of mind.
Pump fully fitted, all 4 bolts fitted with locktight, the 3 exterior bolts are also supplied with Nordlock washers, oil pump tensional all checked and refitted.
Front timing covers refitted with new gaskets and sump fitted, not timed the engine up yet, just assembled all the vanos assembly in position ready for timing when the flywheel is fitted
Still waiting for the ATI Super Damper to arrive from America so using the old OEM one for the moment, another angle for the new oil pump.
Usual process of fitting the flywheel, clutch, gearbox and exhaust manifold. Much easier to build it back up out of the car and put it back in in one lump, gearbox mount fist then get the subframe under the engine on the engine mounts and lift it up into position with the crane.
Made a start on putting the engine back into the engine bay, I can do the engine timing now and start to work through slowly checking everything over and assembling the remainder of the engine bay. Spotted a few bits I want to tidy up along the way before they go back in.
There is an OEM plastic cover which separated the swirl pot from the engine bay and a plate and filter which covers the fan under the scuttle, will look a lot tidier when the engine bay is put together properly. More of that this week in the evenings.
Another weekend gives me a free Saturday to keep working on the car.
I've learnt now it's easier to time the car up in the engine bay now as I can't fit the flywheel while the engine is on the engine stand. Popped the rocker cover off and timed the engine up using the standard BMW tools.

Started to put the rest of the engine auxiliaries back on. Didn't take long for the curse of the aluminum engine block to strike. Pulled a thread out of one of the oil filter housing bolts, yes I was using a torque wrench.

Partly due to bad design. This bolt hole in particular has a locating dowl in the first section of the hole so the thread engagement is less than the rest of the bolts.
Drilled out the hole, fitted a helicoil to the stripped hole and found a bolt which was 10mm longer and got the filter housing back on


Spent a bit of time adjusting the ported adaptor I use to go from the M50 inlet to the M54 head. I spent hours on one years ago, one of the nicer laser cut versions but someone offered to buy it and I ended up making another version for myself, Bit more tidying up on the ports and matching it perfectly between the m54/m5o profiles

Got the paint and the compressor out again. Painted the front cross bar which holds all the radiator pack, coolers and head lights, comes in a strange off black colour in a flat matt paint too,

Started to build up the rest of the engine bay to get to the point where I can run the car.
 #
#
With all the coolant hoses and oil coolers fitted, It was time to get the car running.
Removed the spark plugs and unplugged the injectors.
Cranked the car over to 30-40 seconds on the starter motor until I could see a solid 20psi of oil pressure when cranking.
Popped the spark plugs back in and turned the key.
Ran the car for 10-15 minutes. Got it up to temp. Turned it on and off a few times and checked all the temps and figures on the laptop.
Made a few changes while I was in there. Dropped the rev limited down to 7,000rpm for the time being. I don't need to rev it that high in future. Increased the blip duration on the down shift rev matching.

Front end back together and intake fitted. Some of it will have to come off again but the more parts fitted to the car the less I have knocking around the garage.

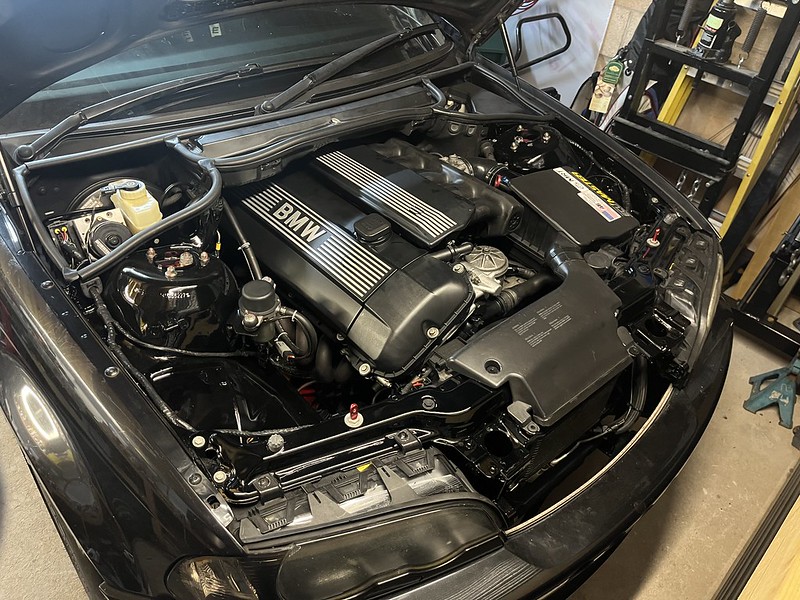
Little shot of the engine bay.
So glad I took the time to paint it while the engine was out, looks so much tidier and cleaner now
We'll see how long it stays like that, only take one wet track day to ruin it!

Open to suggestions from the people in the know on the following...
Prior to going to Cadwell I changed to a firmer spring on the rear, looking at photos of the car in corners it always looked like the rear was lower than the front and was hoping to help turn in and rotation with a stiffer rear spring. The wing is only set a 3 deg for reference, it's perfect in the faster corners but sometime felt a little understeery in corner entry, however that was on the old AR1's not the Dunlop Slicks.
What I found at Cadwell is with the stiffer rear spring the inner wheel is lifting and slipping coming out of corners even out of Charlies two onto the back straight it's slipping the inner right wheel, even with a diff, that's the limit of a Quaife. I was going to go back to a softer rear spring like I've ran for the past 4ish years but before that I'm going to run the car with the stiffer spring and without the rear antiroll bar to allow the wheels to move more independently and hopefully allow the inner wheel to remain on the ground with enough traction to get the Quaife diff working correctly.
Will take the softer springs and the ARB to Oulton if it doesn't work and need to revert back to an old set up.

I've learnt now it's easier to time the car up in the engine bay now as I can't fit the flywheel while the engine is on the engine stand. Popped the rocker cover off and timed the engine up using the standard BMW tools.
Started to put the rest of the engine auxiliaries back on. Didn't take long for the curse of the aluminum engine block to strike. Pulled a thread out of one of the oil filter housing bolts, yes I was using a torque wrench.
Partly due to bad design. This bolt hole in particular has a locating dowl in the first section of the hole so the thread engagement is less than the rest of the bolts.
Drilled out the hole, fitted a helicoil to the stripped hole and found a bolt which was 10mm longer and got the filter housing back on
Spent a bit of time adjusting the ported adaptor I use to go from the M50 inlet to the M54 head. I spent hours on one years ago, one of the nicer laser cut versions but someone offered to buy it and I ended up making another version for myself, Bit more tidying up on the ports and matching it perfectly between the m54/m5o profiles
Got the paint and the compressor out again. Painted the front cross bar which holds all the radiator pack, coolers and head lights, comes in a strange off black colour in a flat matt paint too,
Started to build up the rest of the engine bay to get to the point where I can run the car.
#With all the coolant hoses and oil coolers fitted, It was time to get the car running.
Removed the spark plugs and unplugged the injectors.
Cranked the car over to 30-40 seconds on the starter motor until I could see a solid 20psi of oil pressure when cranking.
Popped the spark plugs back in and turned the key.
Ran the car for 10-15 minutes. Got it up to temp. Turned it on and off a few times and checked all the temps and figures on the laptop.
Made a few changes while I was in there. Dropped the rev limited down to 7,000rpm for the time being. I don't need to rev it that high in future. Increased the blip duration on the down shift rev matching.
Front end back together and intake fitted. Some of it will have to come off again but the more parts fitted to the car the less I have knocking around the garage.
Little shot of the engine bay.
So glad I took the time to paint it while the engine was out, looks so much tidier and cleaner now
We'll see how long it stays like that, only take one wet track day to ruin it!
Open to suggestions from the people in the know on the following...
Prior to going to Cadwell I changed to a firmer spring on the rear, looking at photos of the car in corners it always looked like the rear was lower than the front and was hoping to help turn in and rotation with a stiffer rear spring. The wing is only set a 3 deg for reference, it's perfect in the faster corners but sometime felt a little understeery in corner entry, however that was on the old AR1's not the Dunlop Slicks.
What I found at Cadwell is with the stiffer rear spring the inner wheel is lifting and slipping coming out of corners even out of Charlies two onto the back straight it's slipping the inner right wheel, even with a diff, that's the limit of a Quaife. I was going to go back to a softer rear spring like I've ran for the past 4ish years but before that I'm going to run the car with the stiffer spring and without the rear antiroll bar to allow the wheels to move more independently and hopefully allow the inner wheel to remain on the ground with enough traction to get the Quaife diff working correctly.
Will take the softer springs and the ARB to Oulton if it doesn't work and need to revert back to an old set up.
d_a_n1979 said:
Such a cracking build 
What are the advantages on the M50 inlet over the OEM M54 one?
To be honest I found a more consistent smoother power curve with the M50, and I also prefer the simplicity of the M50 manifold, decided to stick with it with my Schrick cams and here we are.What are the advantages on the M50 inlet over the OEM M54 one?
Mikeeb said:
Sounds like you’re getting towards the limit of performance with the setup you have. The Quaife is a lovely gentle way to get the benefits of a locking diff on the road but on track they are quite compromised. You might need to consider a proper locking diff.
Yeah I totally agree. Long term maybe change to a plated diff, I will try it without the antiroll bar to see if it helps keeping the tyres on the floor which is the main thing I've found with the Quaife.Not a lot been happening over the last few weeks. Been waiting for a super damper from America for 6 weeks.

Mounting this to the engine using the MRT M54 damper installation kit from Finland
This is a very tight fit on the crank, ended up heating it in the oven for 20 minutes to get some heat into it and pulling it on using the crank bolt.

Super Damper installed with a shorter belt, fingers crossed this is a fix for the Harmonic issues with the M54B30 crank combined with a better quality oil pump design and the tensioner.
Not been a cheap fix to rebuilt the engine but hopefully it's worth it in the long run damper and mounting kit coming in at £600

Overall rebuild costs from the oil pump failure
£340 Damper
£250 Damper fitting kit
£260 Rebuilt Oil Pump Kit
£125 Main bearings, rod bearings, sump gasket, front and rear housing seals
£70 Oil, filter and power steering fluid.
Just over £1000 to do a bottom end refresh and hopefully future proof the bottom end now with the best fixes I can find on the market.
Engine back all back together, looking much cleaner for painting the engine bay.
Pretty much set for the weekend at Oulton Park on Saturday, could do with giving it a clean, and judging by the weather put the wet tyres on.
Oulton Part 18th November
Normally we've got away with good weather over the years with a dry cold winter track day but this time a little bit of rain over night and temps around the 10-12 degree meant that the track was wet for the majority of the day but only a sessions worth of a drying line before we got 5 minutes rain to take that away from us, this meant it was a compete days running on wet tyres. Bonus was that as it wasn't raining all day so no spray to contend with.
Suspension set up.
From 2019/20 to middle of 2023 I found a suspension set up that worked for me, was really balanced and never really needed any adjustments, however I did write about this earlier in the year that I felt with all the car changes, it was starting to lack something so I went for slightly different spring rates for Cadwell in the summer, and well I could see from the video that I had made the handling worst in the rear end and the drive out over corners was effected by the stiffer rear springs.
For Oulton I decided to stick with the stiffer rear springs and do away with the rear anti roll bar, yet to test it properly in the dry but in the wet and on a dry line with wet tyres on I can say that the rear end grip and drive out of corners was much better than previous so I think it could be a step in the right direction, something I'll be continuing to look at next year but for now I am really happy with the car handling and how it drove around Oulton.
Good session from the afternoon chasing a group of friends who where all in hot hatches.
Earlier in the year when I was at Cadwell Park a friend gave me the keys to his Mini R56, I took it out for a session in the afternoon to see what it was like to drive front wheel drive again, with the E46 back working it was good to get out for a session together, both cars a really equally matched now so it's going to make for a fun 2024!
Finally last session of the afternoon with a passenger
It was really good that the car ran all day with the new bottom end, the car was flawless and I spent the day adjusting and improving the logger code which has been completely rewrote this year from scratch so we've just been ironing out as few teething issues, I always say it's been a good day when I haven't taken any photos, well besides this one giving the car a once over at lunchtime.


Another winter Oulton Park track day complete. Looking forward to next year, will be giving the car a once over in the next few weeks to look for any issues, give it a good wash and see what if any adjustments I want to make before next year, well that's a bit of a lie, I already have a list!

Yet to have a look through the MSV photos, will have a look at those in the week and see if there are any on there worth purchasing.
Normally we've got away with good weather over the years with a dry cold winter track day but this time a little bit of rain over night and temps around the 10-12 degree meant that the track was wet for the majority of the day but only a sessions worth of a drying line before we got 5 minutes rain to take that away from us, this meant it was a compete days running on wet tyres. Bonus was that as it wasn't raining all day so no spray to contend with.
Suspension set up.
From 2019/20 to middle of 2023 I found a suspension set up that worked for me, was really balanced and never really needed any adjustments, however I did write about this earlier in the year that I felt with all the car changes, it was starting to lack something so I went for slightly different spring rates for Cadwell in the summer, and well I could see from the video that I had made the handling worst in the rear end and the drive out over corners was effected by the stiffer rear springs.
For Oulton I decided to stick with the stiffer rear springs and do away with the rear anti roll bar, yet to test it properly in the dry but in the wet and on a dry line with wet tyres on I can say that the rear end grip and drive out of corners was much better than previous so I think it could be a step in the right direction, something I'll be continuing to look at next year but for now I am really happy with the car handling and how it drove around Oulton.
Good session from the afternoon chasing a group of friends who where all in hot hatches.
Earlier in the year when I was at Cadwell Park a friend gave me the keys to his Mini R56, I took it out for a session in the afternoon to see what it was like to drive front wheel drive again, with the E46 back working it was good to get out for a session together, both cars a really equally matched now so it's going to make for a fun 2024!
Finally last session of the afternoon with a passenger
It was really good that the car ran all day with the new bottom end, the car was flawless and I spent the day adjusting and improving the logger code which has been completely rewrote this year from scratch so we've just been ironing out as few teething issues, I always say it's been a good day when I haven't taken any photos, well besides this one giving the car a once over at lunchtime.
Another winter Oulton Park track day complete. Looking forward to next year, will be giving the car a once over in the next few weeks to look for any issues, give it a good wash and see what if any adjustments I want to make before next year, well that's a bit of a lie, I already have a list!
Yet to have a look through the MSV photos, will have a look at those in the week and see if there are any on there worth purchasing.
Gassing Station | Readers' Cars | Top of Page | What's New | My Stuff