1958 Austin A35 - the family heirloom...
Discussion


Bobupndown said:
Nice little project and all the nicer given its long family history.
Will watch with interest.
Where was it first registered, is that it's original registration?
Staffordshire (E) was registered location, and yes, still on its original plate, which is quite nice (but also makes sense) as Leek (where Billy and Eileen resided and Billy had his garage) is in Staffordshire, so a nice link.Will watch with interest.
Where was it first registered, is that it's original registration?
Edited by Ambleton on Thursday 17th August 19:04

THE ROAD TO RUST : PT1
On Monday and Tuesday eve I thought I'd start stripping the front end down to get a better idea of the corrosion.
The front wings are bolt on and so are (in theory) dead easy to remove.
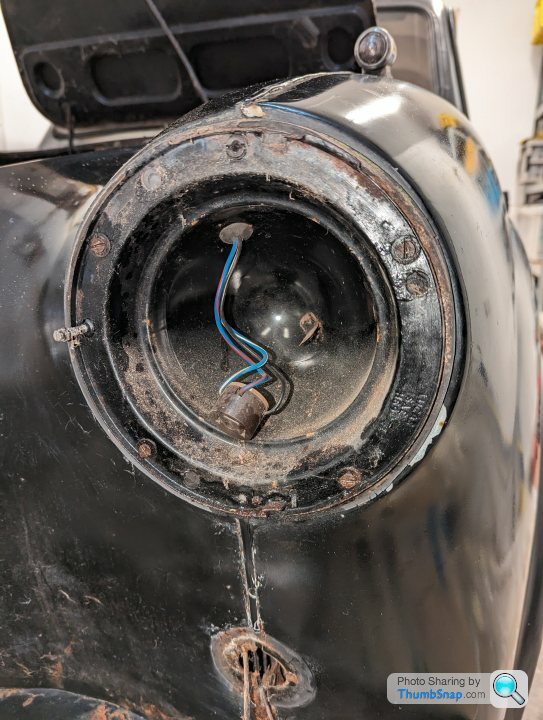
First, the lights come off. Sidelights, indicators, main headlights. Sidelights and indicators came out without any dramas and I was on a bit of a roll. Naturally all other fasteners are seized up solid.
I carefully ground the heads off the headlight bowls and they popped out too.
At this point I turned my attention to the LHS outer wing. All the fasteners down the A-post apart from one snapped straight away so I drilled them out. The other bolts along the top and forward edge were all seized up and after cutting one or two off from inside of the wing I got fed up and moved my attention elsewhere....
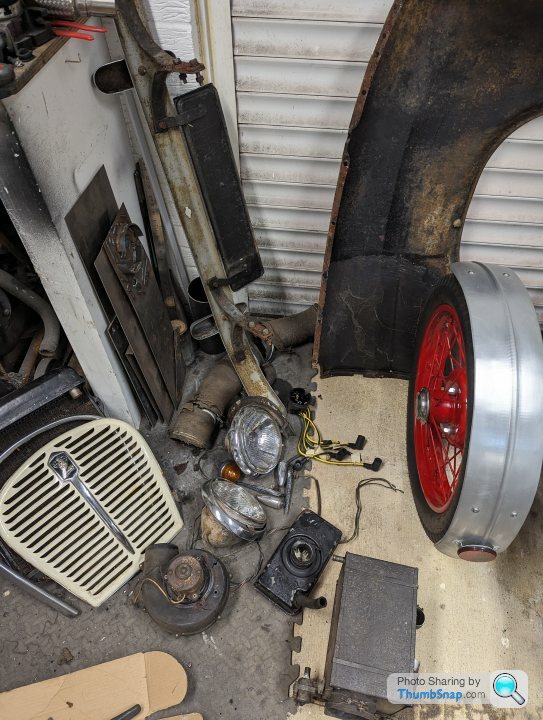
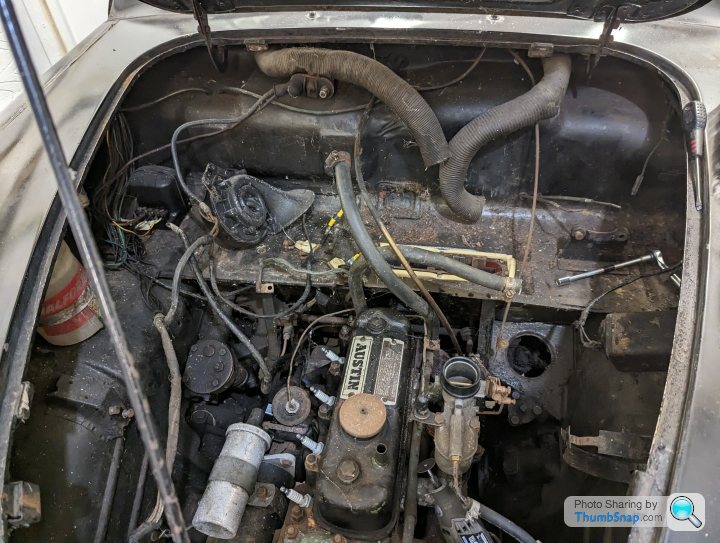
The front grille. To remove the front grille the radiator needs to come out. So I took the air filter off the carb and cabin air ducting out (helps with access) drained the radiator and got that out. It's held in with four bolts and none were seized - hurrah. It's looking a bit sorry for itself however.

I'm undecided on what to do with the radiator. Wether to just replace it with a new aluminium one or just get this one re-cored and pressure tested.
Once the rad is out you can access the fasteners for the chrome grille surround/frame and the grille itself. Some snapped, but most came off unscathed.
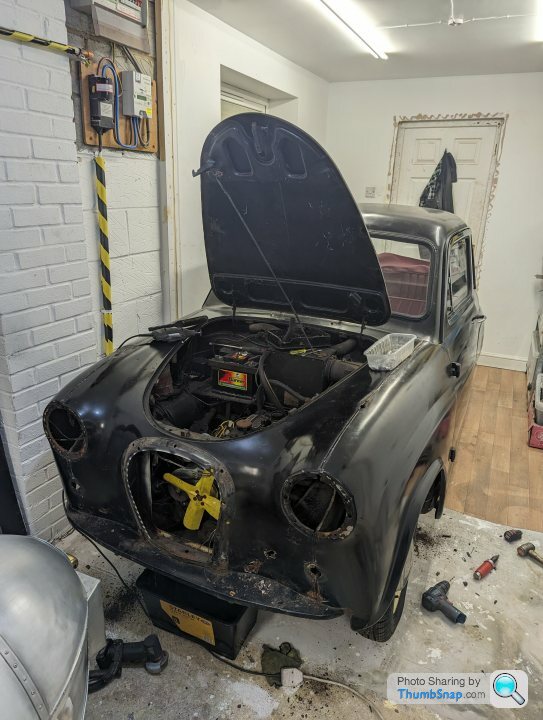
The front bumper was also removed without issue...
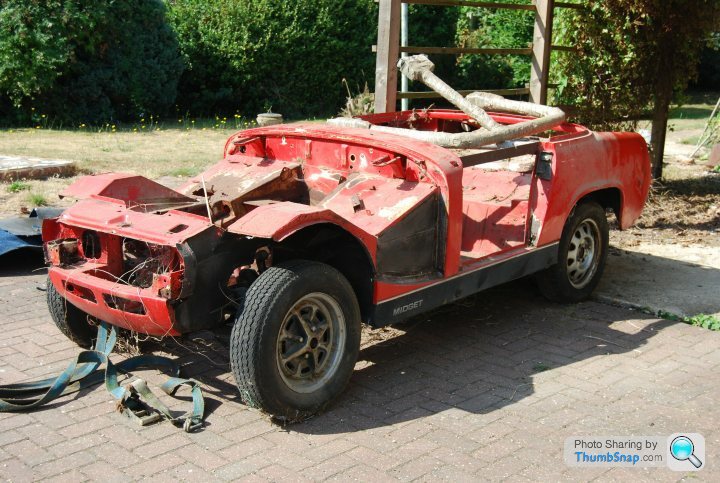
It looks a little sad without its face
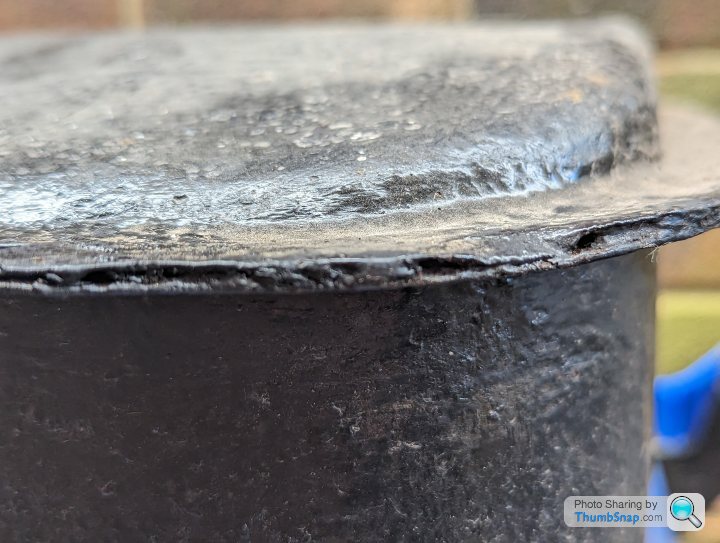
At this point my attention went back to the LHS outer wing.... Between the wing and the body is a T section rubber strip to hide the shut gap. Here's a snap of the RHS of the area in question.
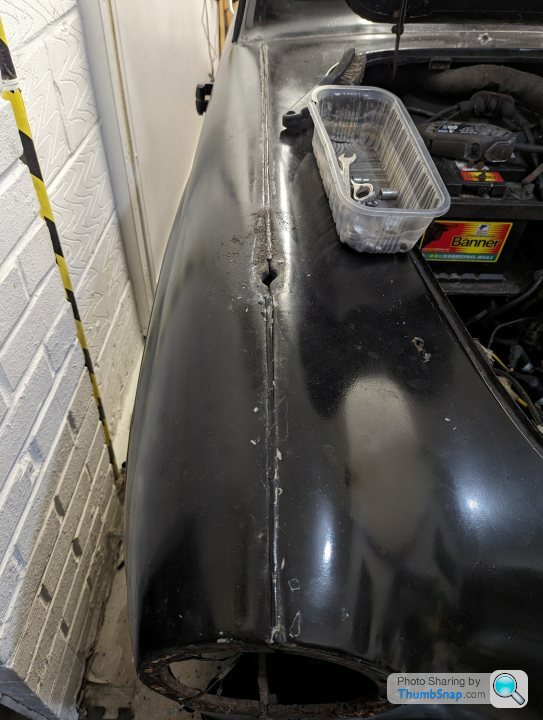
I had a smort idea - if I run (carefully) my angle grinder with a 0.8mm cutting disc down the centre of the trim, I'll cut through all of the fasteners and not damage the body too much... IT WORKS! well that saves a load of messing about!
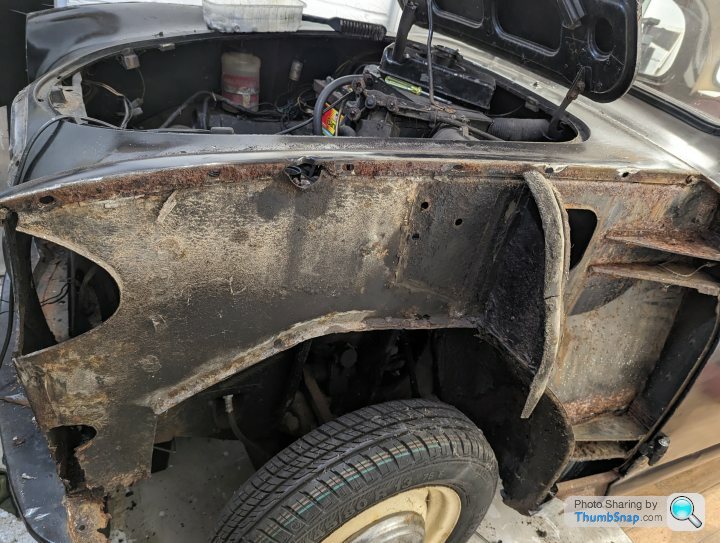
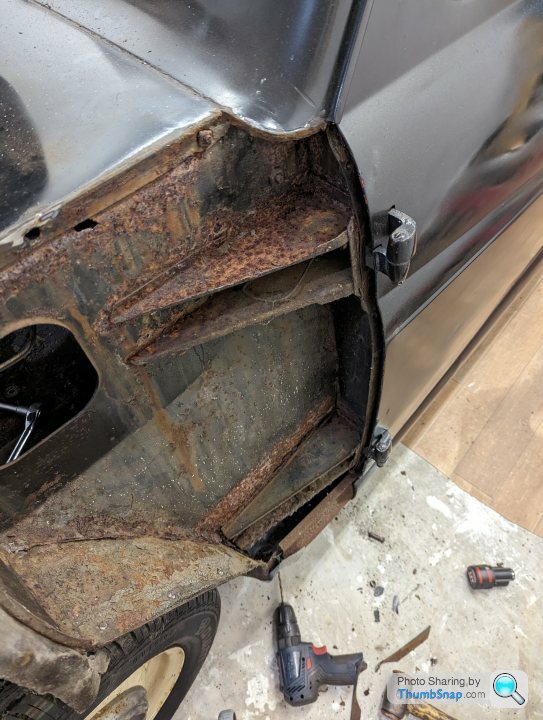
And the front left wing is free!

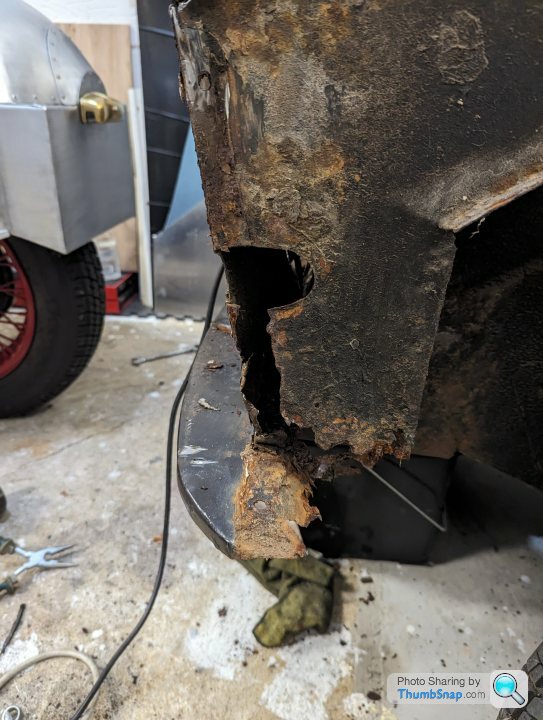
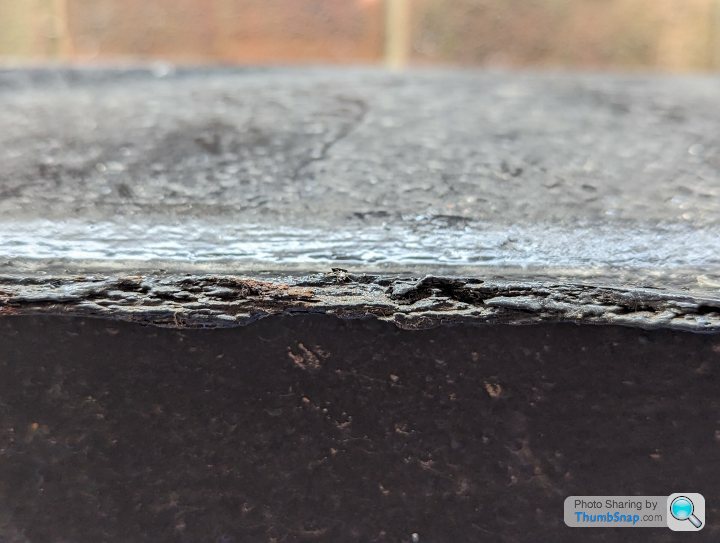
Oh dear... There's quite a lot of rust
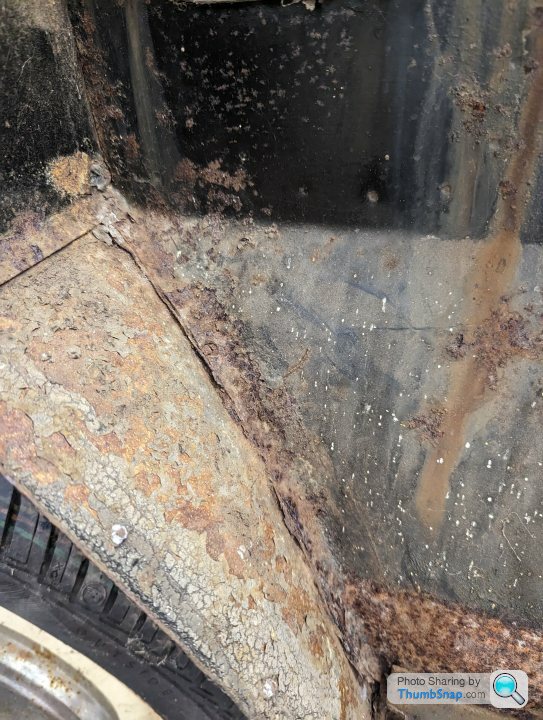
I think about 20yrs ago a local garage (to my in-laws) did the sills on the A35. The inner sill looks like it's just been smashed up into rust and all the other corrosion blissfully ignored....
Front lower panel behind indicator and LHS of valance panel
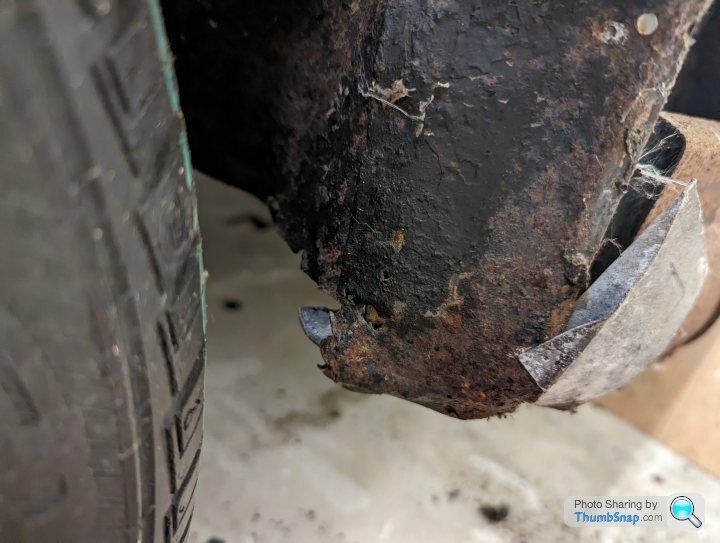
Upper door hinge area
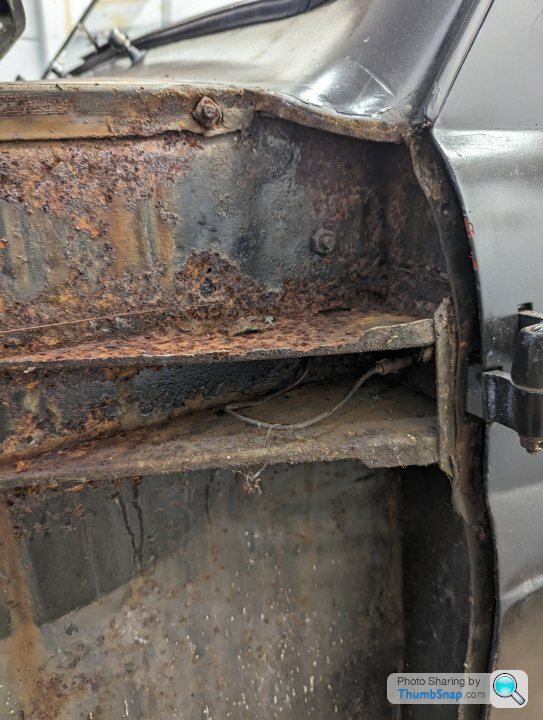
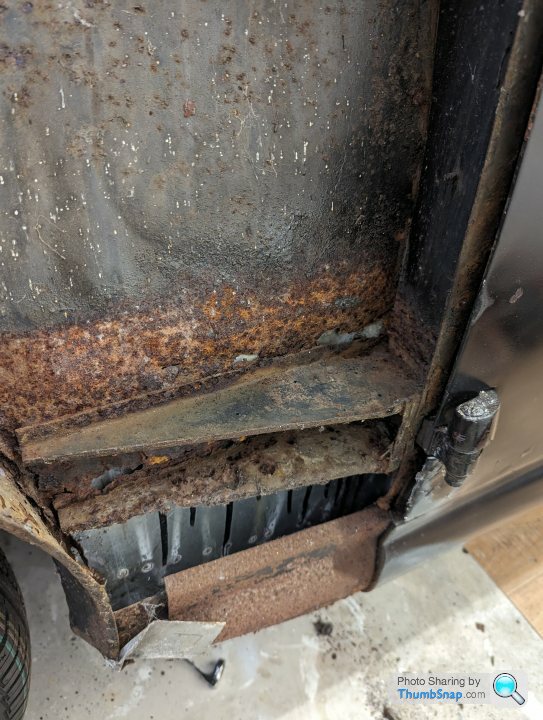
Lower door hinge area

Front inner wing
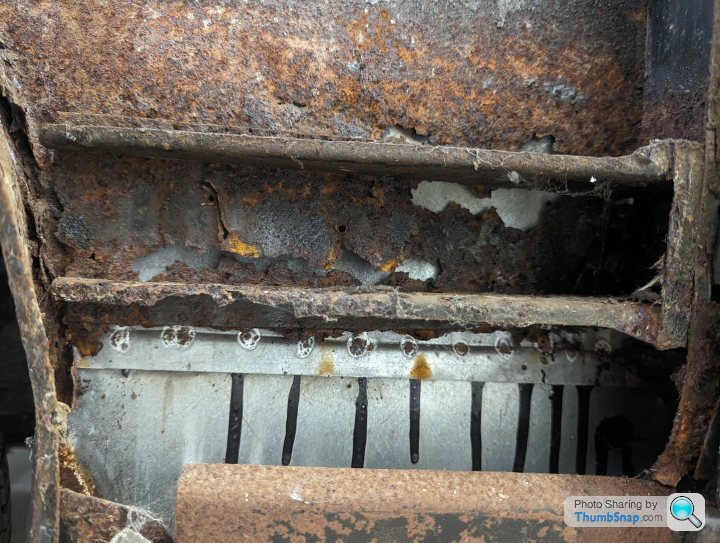
Arch to sill
Rear of inner wing
Don't get me wrong. I've seen a lot worse. But it's still quite daunting at this early stage
On Monday and Tuesday eve I thought I'd start stripping the front end down to get a better idea of the corrosion.
The front wings are bolt on and so are (in theory) dead easy to remove.
First, the lights come off. Sidelights, indicators, main headlights. Sidelights and indicators came out without any dramas and I was on a bit of a roll. Naturally all other fasteners are seized up solid.
I carefully ground the heads off the headlight bowls and they popped out too.
At this point I turned my attention to the LHS outer wing. All the fasteners down the A-post apart from one snapped straight away so I drilled them out. The other bolts along the top and forward edge were all seized up and after cutting one or two off from inside of the wing I got fed up and moved my attention elsewhere....
The front grille. To remove the front grille the radiator needs to come out. So I took the air filter off the carb and cabin air ducting out (helps with access) drained the radiator and got that out. It's held in with four bolts and none were seized - hurrah. It's looking a bit sorry for itself however.
I'm undecided on what to do with the radiator. Wether to just replace it with a new aluminium one or just get this one re-cored and pressure tested.
Once the rad is out you can access the fasteners for the chrome grille surround/frame and the grille itself. Some snapped, but most came off unscathed.
The front bumper was also removed without issue...
It looks a little sad without its face
At this point my attention went back to the LHS outer wing.... Between the wing and the body is a T section rubber strip to hide the shut gap. Here's a snap of the RHS of the area in question.
I had a smort idea - if I run (carefully) my angle grinder with a 0.8mm cutting disc down the centre of the trim, I'll cut through all of the fasteners and not damage the body too much... IT WORKS! well that saves a load of messing about!
And the front left wing is free!
Oh dear... There's quite a lot of rust
I think about 20yrs ago a local garage (to my in-laws) did the sills on the A35. The inner sill looks like it's just been smashed up into rust and all the other corrosion blissfully ignored....
Front lower panel behind indicator and LHS of valance panel
Upper door hinge area
Lower door hinge area
Front inner wing
Arch to sill
Rear of inner wing
Don't get me wrong. I've seen a lot worse. But it's still quite daunting at this early stage
Edited by Ambleton on Friday 18th August 06:01
Sensing a lot of angle grinder use in my future I've just popped down to my local Arco on my lunch break and treated myself to a proper pair of over ear defenders, goggles and some dust masks.
Normally I'm fairly blasé when it comes to safety equipment, but i like my ears and eyes and if I'm using a grinder for prolonged periods then I should probably suit up. My pal once got a bit of rust stuck under his eyelid when he was under his car grinding away so I'd rather not have to go through that ordeal.
Whilst I was down at the industrial retail park I popped into Toolstation and got a few more cut off discs and strip discs.
Edited by Ambleton on Friday 18th August 12:54
Well... Another hour or two in the garage this evening and a few more bits removed.
Battery, blower and heater matrix off. I have damaged the blower during removal but I'm fairly sure it can be bonded back together. The plastic had gon awfully brittle and I've snapped a bit off
The little stack of parts is getting bigger and bigger. I need to get some tote boxes and large clear bags and start labelling stuff now I think.
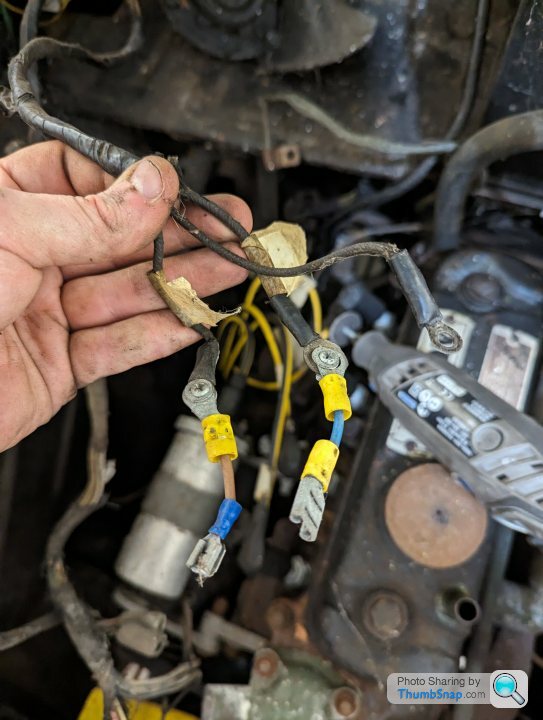
One of my favourite things when dismantling old stuff is the amount of cowboy bodges you find to "just keep going". A temporary fix turns into a permanent solution, like these ~100mm cable extensions...
I got a bit further than this but not much:
It's also obvious to me now why the hinge supports behind the wing always turn to cornflakes... The roof and A-pillar drain channels run right down to the wing split area and so any and all water will be directed into the void and soak those plates and trapping the moisture.... Perfect.

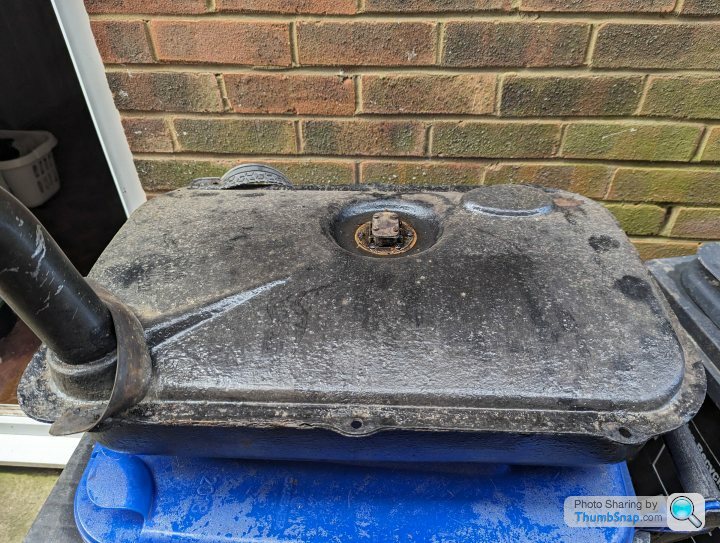
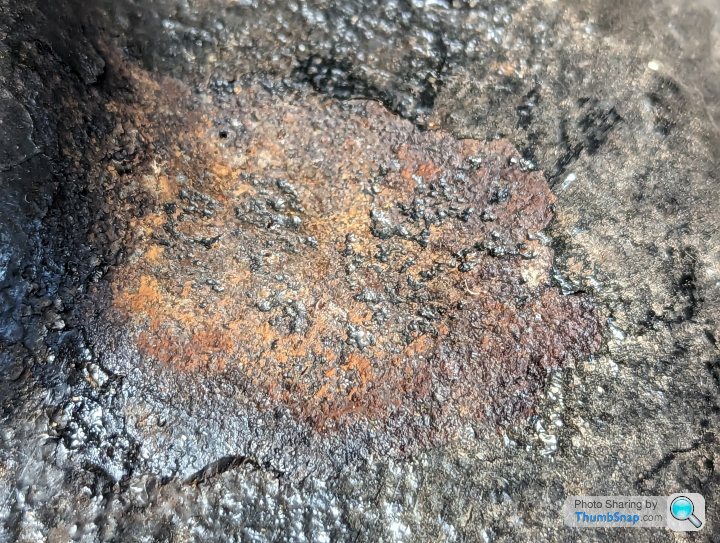
In addition I also raised the back of the car, drained and dropped the fuel tank. It has a few pin holes in it so instead of trying to repair it, it'll need replacing. Some people do weld fuel tanks after several flushes and then filling with CO² gas, but it's not worth it imo.
Battery, blower and heater matrix off. I have damaged the blower during removal but I'm fairly sure it can be bonded back together. The plastic had gon awfully brittle and I've snapped a bit off
The little stack of parts is getting bigger and bigger. I need to get some tote boxes and large clear bags and start labelling stuff now I think.
One of my favourite things when dismantling old stuff is the amount of cowboy bodges you find to "just keep going". A temporary fix turns into a permanent solution, like these ~100mm cable extensions...
I got a bit further than this but not much:
It's also obvious to me now why the hinge supports behind the wing always turn to cornflakes... The roof and A-pillar drain channels run right down to the wing split area and so any and all water will be directed into the void and soak those plates and trapping the moisture.... Perfect.
In addition I also raised the back of the car, drained and dropped the fuel tank. It has a few pin holes in it so instead of trying to repair it, it'll need replacing. Some people do weld fuel tanks after several flushes and then filling with CO² gas, but it's not worth it imo.
Edited by Ambleton on Saturday 19th August 07:35
I was planning on K series engine/Mazda 6 speed 'box for this project,
Unfortunately I suffered a minor stroke so that level of DiY is now a distant dream!
OP, a car in bits takes up a lot more room than a complete one, would stripping a bit, fixing, rebuilding and moving on work for you?
Unfortunately I suffered a minor stroke so that level of DiY is now a distant dream!
OP, a car in bits takes up a lot more room than a complete one, would stripping a bit, fixing, rebuilding and moving on work for you?

ferret50 said:
I was planning on K series engine/Mazda 6 speed 'box for this project,
Unfortunately I suffered a minor stroke so that level of DiY is now a distant dream!
OP, a car in bits takes up a lot more room than a complete one, would stripping a bit, fixing, rebuilding and moving on work for you?
Oh yes, I imagine a Kseries Mazda box midget would change a lot of boy racers smug faces. Would be fairly lairy too I'd have thought!Unfortunately I suffered a minor stroke so that level of DiY is now a distant dream!
OP, a car in bits takes up a lot more room than a complete one, would stripping a bit, fixing, rebuilding and moving on work for you?
I know a car in bits takes more room but not sure there's much way around it. There's not much to the little A anyway. Once the wings are off and engine and box out that's pretty much it I think. The interior can come out too but in order to keep it rolling the suspension, brakes and steering need to remain. So that's pretty much it.

and31 said:
Excellent thread-this will be a hoot to drive with a tasty 1275 lump!!
That's the plan. I don't want to go too fiery with the engine. 75-80bhp would be nice. Don't need to go mad but originally the A35 had about 34bhp. I suspect today that's more like 20-25bhp so 75bhp and a heap more torque would be very welcome!Hagus said:
Had one when when I was 17 or 18 (early 90’s) drove round in a constant 4 wheel drift on the crossplies ?? sweet 948 did 78 mph on the clock slipstreaming a box van ??
When I adjusted the brakes I got maybe half a dozen reasonable stops…
Fantastic project ??
Ha. Nice, although I suspect your Speedo might have been over reading a tad When I adjusted the brakes I got maybe half a dozen reasonable stops…
Fantastic project ??

I'm hoping the upgrade to midget front discs and rear hydraulic drums should make for a more sure footed brake feel and reasonable stopping distance!
Ambleton said:
and31 said:
Excellent thread-this will be a hoot to drive with a tasty 1275 lump!!
That's the plan. I don't want to go too fiery with the engine. 75-80bhp would be nice. Don't need to go mad but originally the A35 had about 34bhp. I suspect today that's more like 20-25bhp so 75bhp and a heap more torque would be very welcome!80bhp will make a very tractable engine and be lovey to drive.
Gassing Station | Readers' Cars | Top of Page | What's New | My Stuff