1958 Austin A35 - the family heirloom...
Discussion


A welding saga - Bessie strikes back
The apparently simple door repair has turned into a bit of an epic. The whole bottom of the door inner and outer was gone.
With the previous outer repair cut free, you can see the inner has also had a previous repair thats gone.
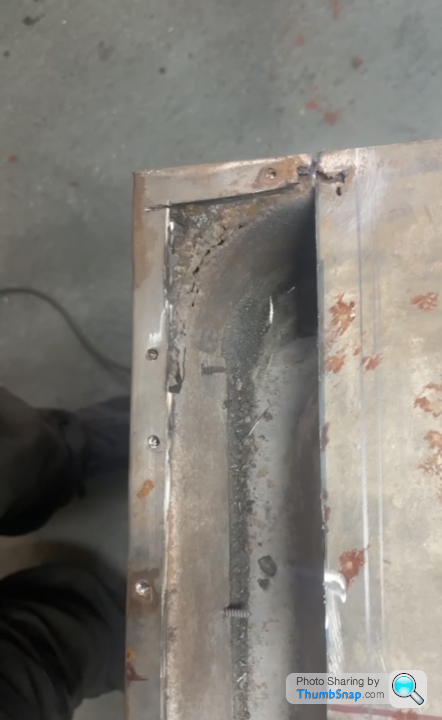

So, let's focus on door inner repairs first (brain: play "du hast by Rammstein to go with photo montage)
Door bottom

Front lower corner and hinge mount area

Be free my pretties!

On to rear of door inner skin:


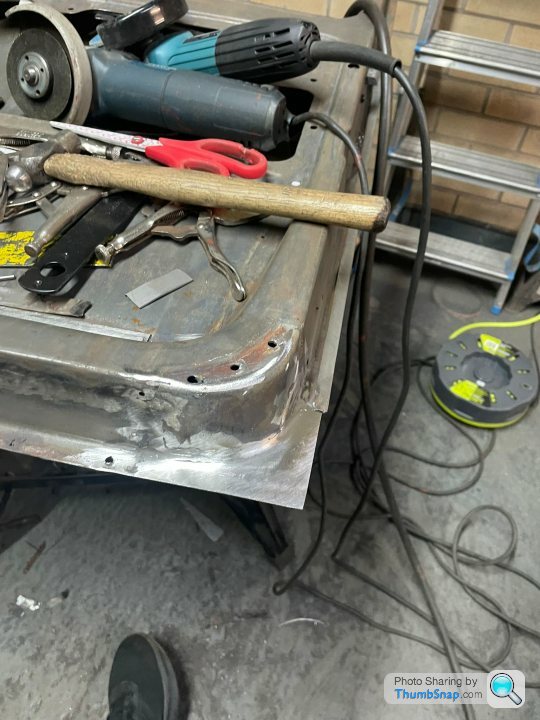
With the inner skin repaired, the outer skin could finally be offered, gapped to the sill and welded in, with the flanges knocked over and repaired to look OE
Isn't this just a thing of beauty?!
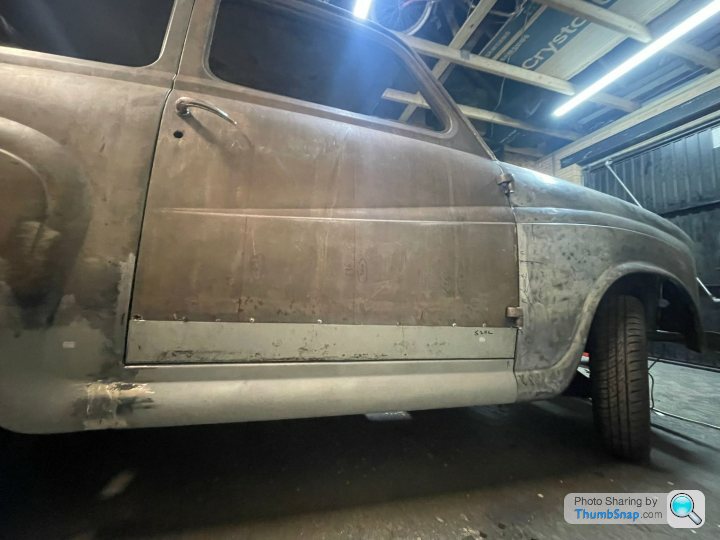
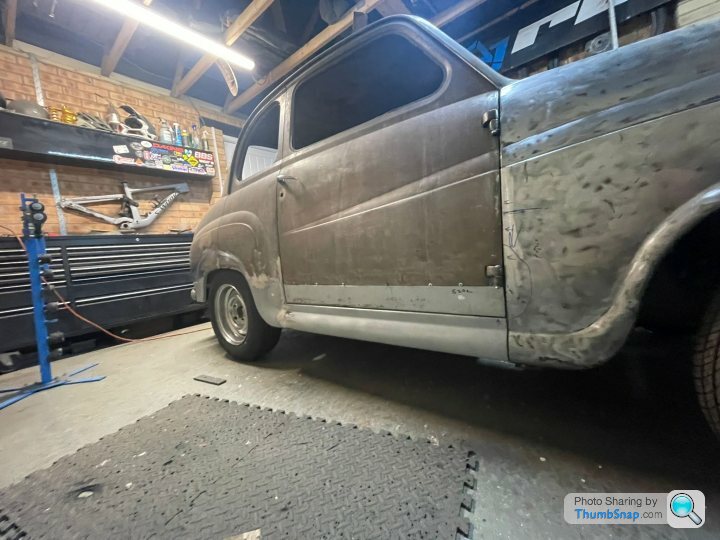

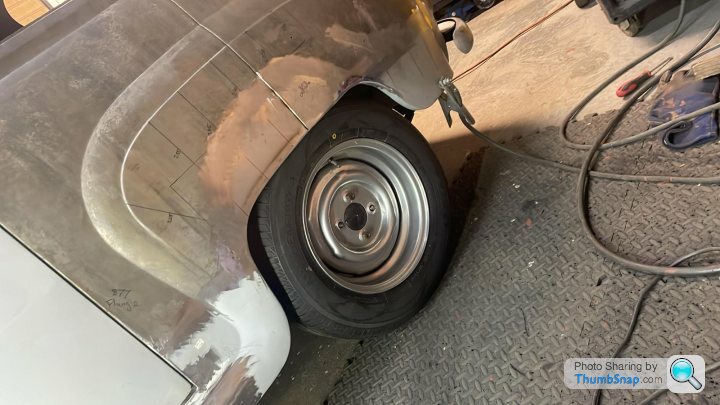
You might have also noticed the new wheels were also fitted to the reae for size. They fill out the arches beautifully and look a lot better than the standard wheels.

I'm getting super excited about her returning home now. It's getting very close!!!!
The apparently simple door repair has turned into a bit of an epic. The whole bottom of the door inner and outer was gone.
With the previous outer repair cut free, you can see the inner has also had a previous repair thats gone.
So, let's focus on door inner repairs first (brain: play "du hast by Rammstein to go with photo montage)
Door bottom
Front lower corner and hinge mount area
Be free my pretties!
On to rear of door inner skin:
With the inner skin repaired, the outer skin could finally be offered, gapped to the sill and welded in, with the flanges knocked over and repaired to look OE
Isn't this just a thing of beauty?!
You might have also noticed the new wheels were also fitted to the reae for size. They fill out the arches beautifully and look a lot better than the standard wheels.
I'm getting super excited about her returning home now. It's getting very close!!!!

Aaaaand she's coming home today!
She's not 100% finished but any other little bits I can do myself. What's left are very minor jobs. Bits of bracketry, tidying up weld, few minor bonnet repairs etc.
The reason she's not staying longer is two fold.
One - I can't keep blowing through the cash at the rate I have been.
Two - my tame welder pal has other projects he needs to crack on with. Mine has over run by at least 5weeks!
Excited to get her back though!


Apologies for the update delay ladies and gentlemen.
I've had a few things on this week.
First off I'd like to say a mega big thanks to my welder pal. He put in a proper shift on this car, which, really, shouldn't have been saved. If anyone reading this has a major project car that needs saving, or a restomod, or anything really that requires a some serious welding work let me know and I'll put you in touch. He's cheaper than most other businesses and he does a bloody good job!
I had a bit of project dread earlier in the week as I assessed the car and thought - what have I done! With a car that still needs a tonne of work and a load of money spending on it and yet the only road is to mercilessly trudge forward.
Really it's probably got abot two weeks worth of small welding jobs. Multiple gaps, bonnet repairs, capping bits, flanges, small holes to weld up, seatbelt mounts, pedalbox area etc. about half to do immediately and half to do during dry build (like the pedalbox. Seatbelt, handbrake mounts, panhard rod etc).
First off - collection day:

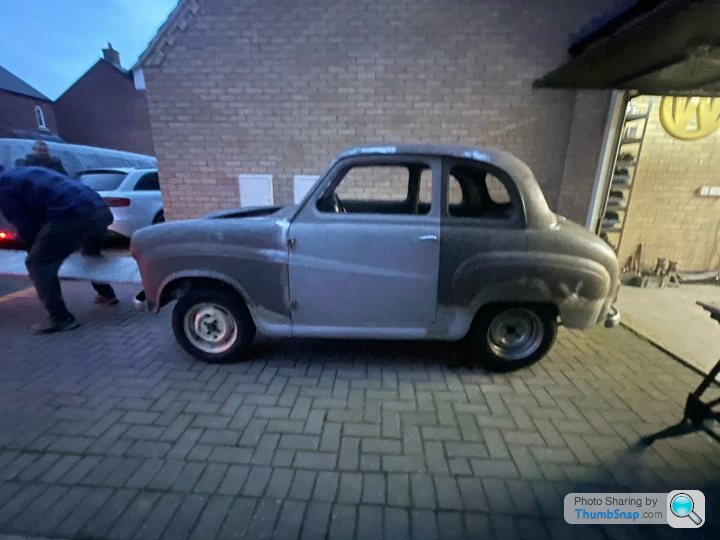

A few things to note that need addressing. I've gone for phat tyres. Probably too fat tbh (175). They rub on the rear arches but I think some gentle massaging and a trim of the flange should resolve it. I can always stiffen the flange/arch back up with some 4mm rod welded in on the inside - this is quite a common tactic. I could just fit narrower tyres but I think the wide bois look absolutely mega
In other news ive had a few other items turn up!
Refurbished Gearbox with oil lip seal conversion:

A recored 3row radiator:

My 3.9 diff re-torqued and given the once over:

I've also managed to get my grubby little mitts on an A40 Farina pedalbox. These accept the mini master cylinders I have and required no mods to fit. I was going to fit a mini one but it requires a bit of dicking about.
I've had a few things on this week.
First off I'd like to say a mega big thanks to my welder pal. He put in a proper shift on this car, which, really, shouldn't have been saved. If anyone reading this has a major project car that needs saving, or a restomod, or anything really that requires a some serious welding work let me know and I'll put you in touch. He's cheaper than most other businesses and he does a bloody good job!
I had a bit of project dread earlier in the week as I assessed the car and thought - what have I done! With a car that still needs a tonne of work and a load of money spending on it and yet the only road is to mercilessly trudge forward.
Really it's probably got abot two weeks worth of small welding jobs. Multiple gaps, bonnet repairs, capping bits, flanges, small holes to weld up, seatbelt mounts, pedalbox area etc. about half to do immediately and half to do during dry build (like the pedalbox. Seatbelt, handbrake mounts, panhard rod etc).
First off - collection day:
A few things to note that need addressing. I've gone for phat tyres. Probably too fat tbh (175). They rub on the rear arches but I think some gentle massaging and a trim of the flange should resolve it. I can always stiffen the flange/arch back up with some 4mm rod welded in on the inside - this is quite a common tactic. I could just fit narrower tyres but I think the wide bois look absolutely mega
In other news ive had a few other items turn up!
Refurbished Gearbox with oil lip seal conversion:
A recored 3row radiator:
My 3.9 diff re-torqued and given the once over:
I've also managed to get my grubby little mitts on an A40 Farina pedalbox. These accept the mini master cylinders I have and required no mods to fit. I was going to fit a mini one but it requires a bit of dicking about.
Edited by Ambleton on Saturday 9th March 17:51
Today I've been beavering away doing a few jobs.
First off was to tidy up the floors and knock off the top of the welds...

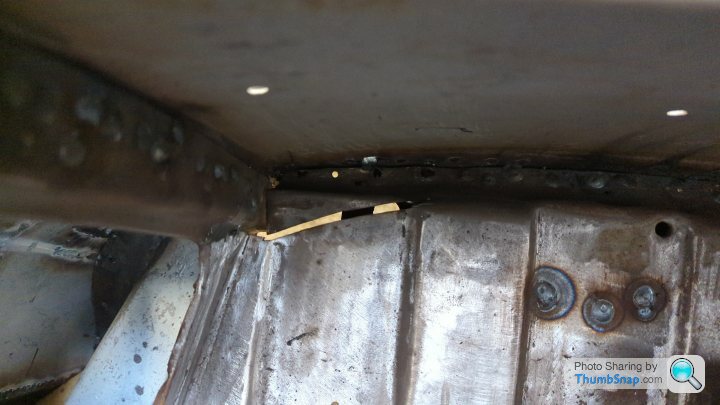
Next up was a strip on the footwell shelf in the engine bay. Not sure why, but a historic repair had been trimmed off short and left an open sliver.

Various window surround repairs and flanges rebuild.


A trimmed gap in the boot floor. This was just a total oversight from my welder pal but it's all sorted now. He was so wrapped up in everything a few bits here and there are hardly a suprise!
Little historic repair patch on the floor...

Bonnet repairs. This is not the original bonnet as that one had rottet badly years ago. This one has had the hinge mound brackets pretty ruthlessly torn off so those areas needed repairing along with a few other bits.


First off was to tidy up the floors and knock off the top of the welds...
Next up was a strip on the footwell shelf in the engine bay. Not sure why, but a historic repair had been trimmed off short and left an open sliver.
Various window surround repairs and flanges rebuild.
A trimmed gap in the boot floor. This was just a total oversight from my welder pal but it's all sorted now. He was so wrapped up in everything a few bits here and there are hardly a suprise!
Little historic repair patch on the floor...
Bonnet repairs. This is not the original bonnet as that one had rottet badly years ago. This one has had the hinge mound brackets pretty ruthlessly torn off so those areas needed repairing along with a few other bits.
Few minor updates. Hopefully can share some more photos tomorrow.
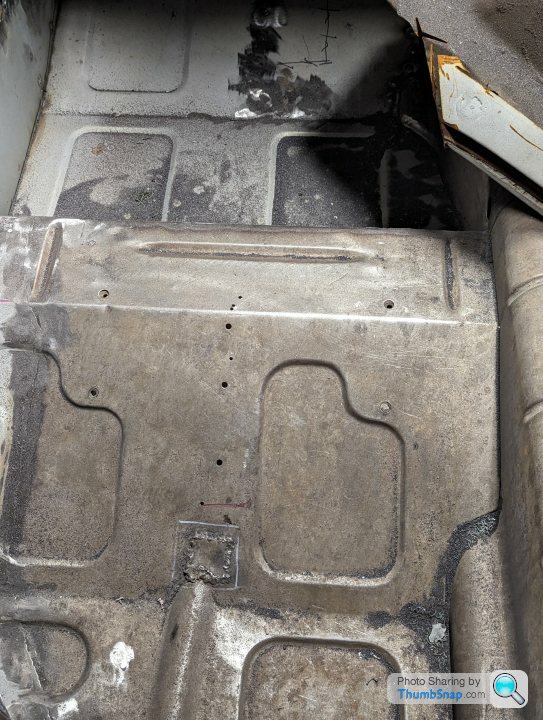
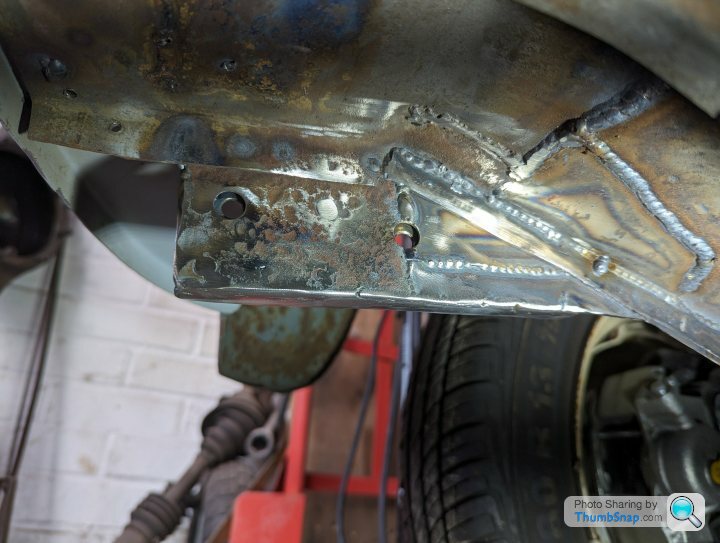
Got a few more patches/repairs done on the underside. I can't remember what these brackets were for originally, but I do know I don't need them. So I've whipped those off and (shock) there was corrosion/holes behind, so that's been repaired.

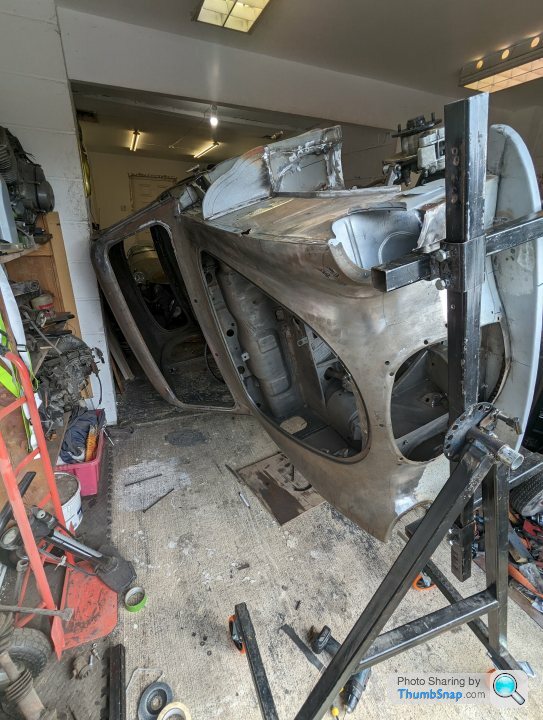
Lying on the flat of my back with the car above me as I'm cutting, grinding and welding is no fun so I went on the hunt for a rotisserie. I found one on Facebook marketplace and am currently modifying it/improving it for the little A to go on. This should make life a whole lot easier. Not only for Welding and suspension mods, but also seam sealing and underbody protection once e-coated.
Welding nice, clean, fresh thick steel on the rotisserie frame/brackets is bliss compares to thin rusty old bodywork...
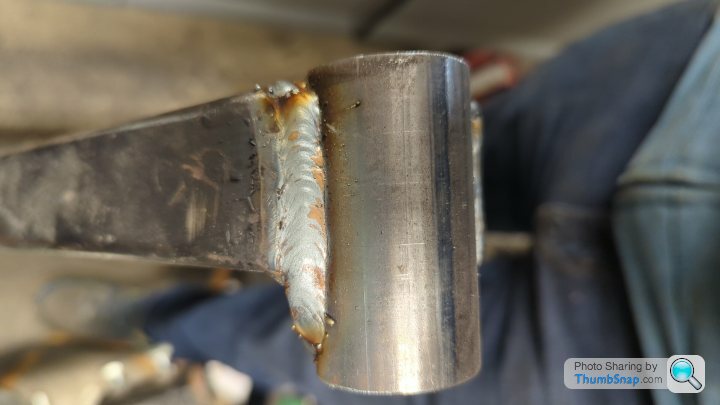
I've decided to bolt the rotisserie onto the shell bumper mounts. The rear ones are pretty substantial but the front ones need a bit more meat on the bone. To increase the strength I got some 2mm plate and folded two return flanges into it to reinforce the whole area. One side made and ready to weld up... Making the next side and my vice breaks. Dowh.
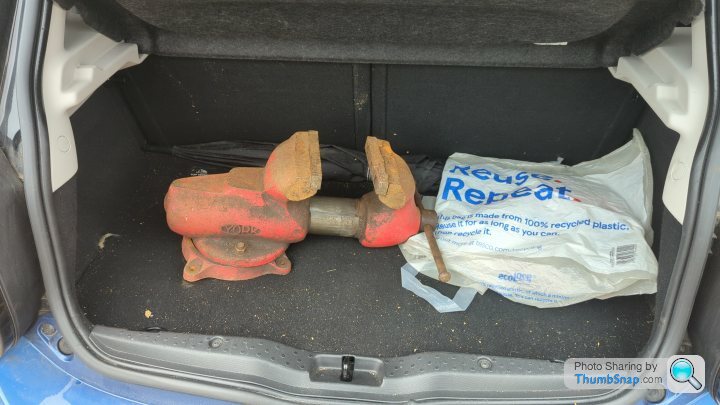
My trusty old Record Vice has had some serious abuse over the years and the casting has just given up and cracked.
Back onto the selling pages of Facebook, gumtree etc and I come across a local ad listed within the last 24hrs. Two photos and a basic description "old York vice for sale". A quick Google tells me they're still made and quite expensive, and it's likely 80mm or 100mm jaws. With a good idea of its size I turn up at the sellers gaffe to find it's a massive 150mm jaw model (no longer made) and about twice the size I was expecting. Woops. Something tells me this might be a challenge to break!
One of the fasteners on a floating jaw has broken and someone had attempted a weld on it but they had broken off (obviously). It's cleaned up quite nicely with the nasty bits dressed back and lubricated. It could probably do with some new jaws at some point but for now it's fine. It really is a behemoth.


Got a few more patches/repairs done on the underside. I can't remember what these brackets were for originally, but I do know I don't need them. So I've whipped those off and (shock) there was corrosion/holes behind, so that's been repaired.
Lying on the flat of my back with the car above me as I'm cutting, grinding and welding is no fun so I went on the hunt for a rotisserie. I found one on Facebook marketplace and am currently modifying it/improving it for the little A to go on. This should make life a whole lot easier. Not only for Welding and suspension mods, but also seam sealing and underbody protection once e-coated.
Welding nice, clean, fresh thick steel on the rotisserie frame/brackets is bliss compares to thin rusty old bodywork...
I've decided to bolt the rotisserie onto the shell bumper mounts. The rear ones are pretty substantial but the front ones need a bit more meat on the bone. To increase the strength I got some 2mm plate and folded two return flanges into it to reinforce the whole area. One side made and ready to weld up... Making the next side and my vice breaks. Dowh.
My trusty old Record Vice has had some serious abuse over the years and the casting has just given up and cracked.
Back onto the selling pages of Facebook, gumtree etc and I come across a local ad listed within the last 24hrs. Two photos and a basic description "old York vice for sale". A quick Google tells me they're still made and quite expensive, and it's likely 80mm or 100mm jaws. With a good idea of its size I turn up at the sellers gaffe to find it's a massive 150mm jaw model (no longer made) and about twice the size I was expecting. Woops. Something tells me this might be a challenge to break!
One of the fasteners on a floating jaw has broken and someone had attempted a weld on it but they had broken off (obviously). It's cleaned up quite nicely with the nasty bits dressed back and lubricated. It could probably do with some new jaws at some point but for now it's fine. It really is a behemoth.

Claireatkinson9 said:
Shout out for the gearbox builder required here ??
Not just the gearbox either Claire!Rad, diff, gearbox, trunnion/king pin reaming+shimming, plus loads of other bits n bobs n panels. Anyone needing A35 parts or services, if Claire ain't got it, she knows someone who will!
Righty....
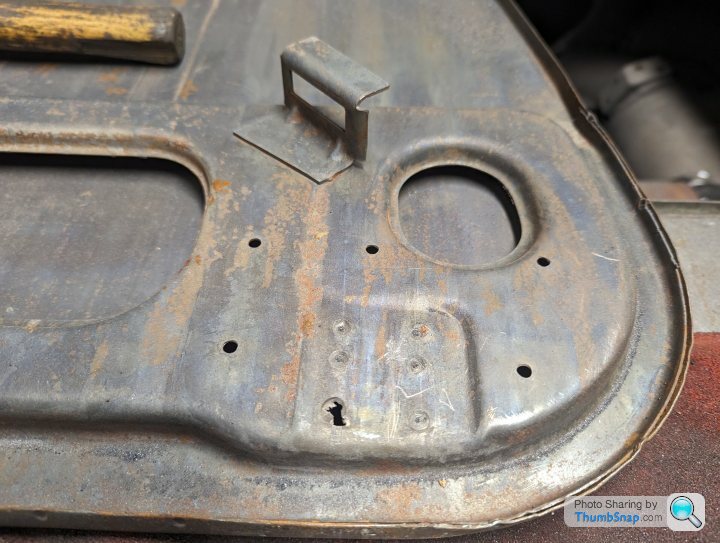
Here are aforementioned stock bumper brackets:

The bumper brackets slot between the main vertical plate and the thin, disintegrating inner bracket. This should have a Z shape fold in and be spotted to the main part. Clearly you can see these are basically non existent any more and I'm not really sure what they offer other than a nice little dirt trap on thin metal.
I sacked these off.

Tidied up the area on both sides....


Folded up a channel in some 2mm plate and drilled holes for the bumper mounts and for plugs...

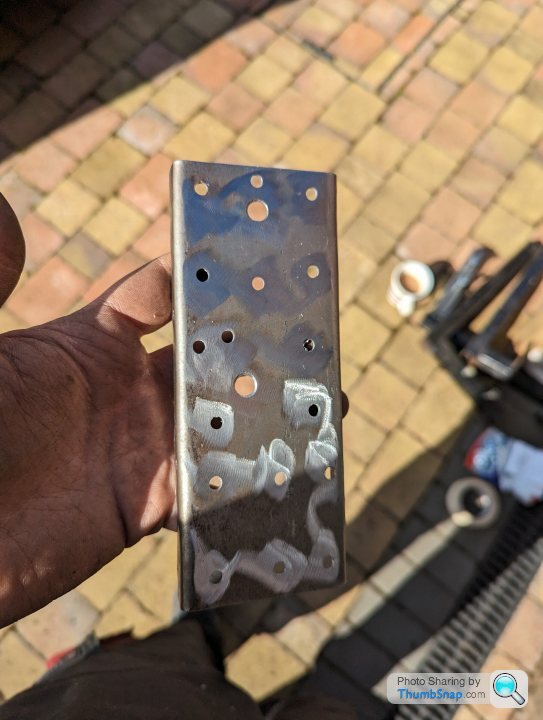
And boshed it in place...

It's not original, but it's really stiff.
I repaired a few windscreen flange return areas too but no photos of those.
I decided to start tackling the boot lid. I have two. The original is shot in way more places than the other I have. The general shape and shuts were already don't by my welder pal but the lower left corner was rotted.

Amazingly this was the one are on the original boot lid that wasn't b ksed. So I unpicked it and carefully cut out the section I needed. It wasn't totally perfect though so I did a few small repairs to the patch...
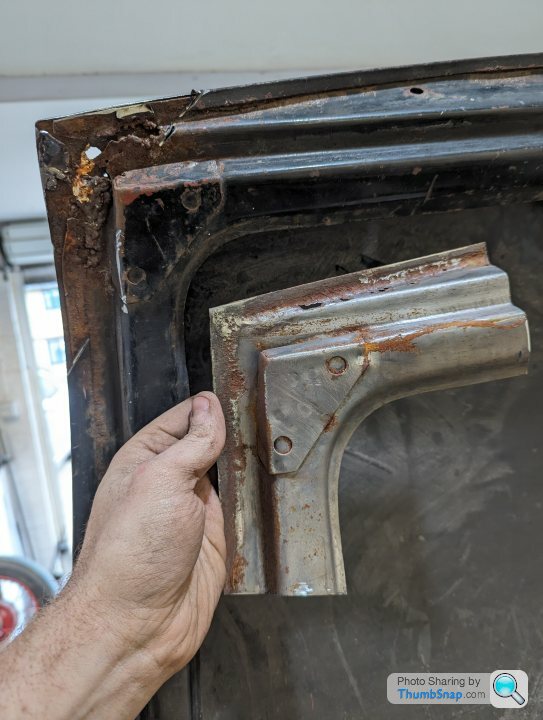


Outer skin repaired first...
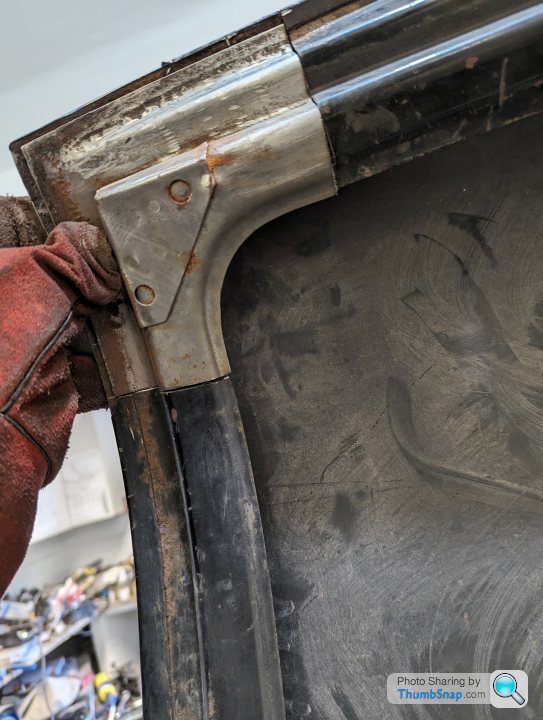

This was as far as I got before being called in for tea. I'll finish it in the week.
Here are aforementioned stock bumper brackets:
The bumper brackets slot between the main vertical plate and the thin, disintegrating inner bracket. This should have a Z shape fold in and be spotted to the main part. Clearly you can see these are basically non existent any more and I'm not really sure what they offer other than a nice little dirt trap on thin metal.
I sacked these off.
Tidied up the area on both sides....
Folded up a channel in some 2mm plate and drilled holes for the bumper mounts and for plugs...
And boshed it in place...
It's not original, but it's really stiff.
I repaired a few windscreen flange return areas too but no photos of those.
I decided to start tackling the boot lid. I have two. The original is shot in way more places than the other I have. The general shape and shuts were already don't by my welder pal but the lower left corner was rotted.
Amazingly this was the one are on the original boot lid that wasn't b
ksed. So I unpicked it and carefully cut out the section I needed. It wasn't totally perfect though so I did a few small repairs to the patch...Outer skin repaired first...
This was as far as I got before being called in for tea. I'll finish it in the week.
 wouldn't be surprised if it weighed a significant proportion of the A35 shell!
Despite the blustery weather I had a productive day today.
Got some new castors fitted to the rotisserie (the ones fitted had mostly collapsed as they were a bit st). Did the final few mods and got the A35 mounted on it, which was a bit of a game but not too bad. I'm not particularly happy mounting it on the shell bumper mounts but it seems ok.

It's amazing how easy a job is when you have all the right gear though! Not lying on the flat of your back, welding 8" above your face, as it's raining down molten metal, trying to fight against gravity is an absolute blessing!

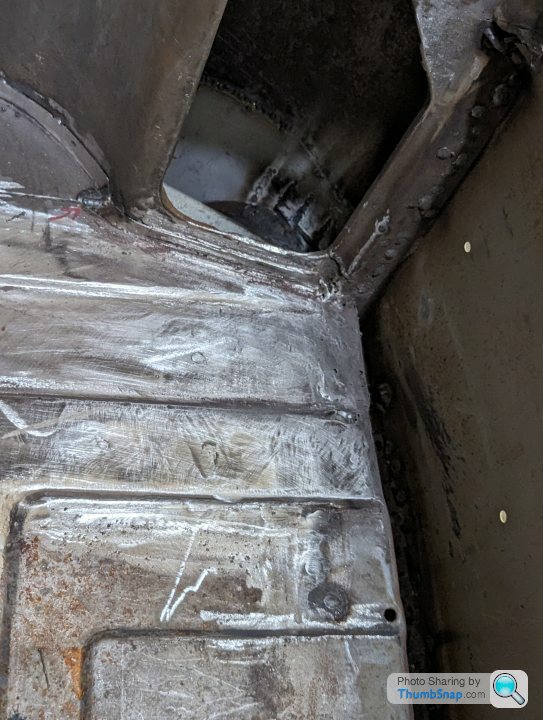
Seam welded around the new/old seat pan.
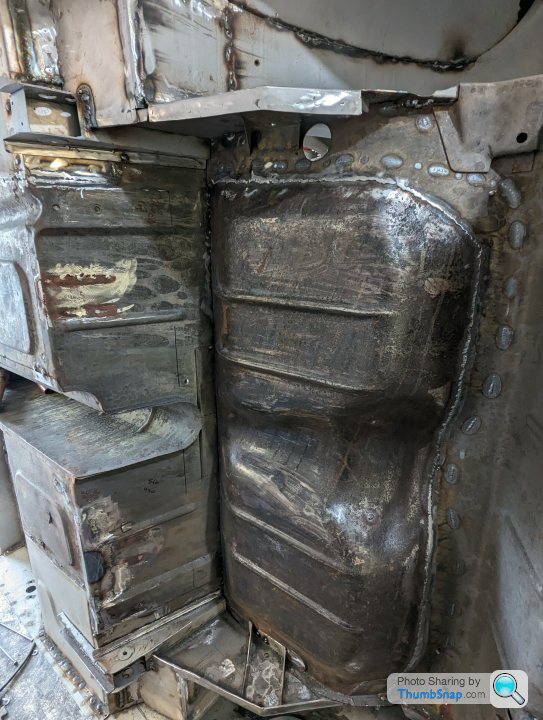

Got lots of little fill in bits like this to do!


Got some new castors fitted to the rotisserie (the ones fitted had mostly collapsed as they were a bit s
t). Did the final few mods and got the A35 mounted on it, which was a bit of a game but not too bad. I'm not particularly happy mounting it on the shell bumper mounts but it seems ok.It's amazing how easy a job is when you have all the right gear though! Not lying on the flat of your back, welding 8" above your face, as it's raining down molten metal, trying to fight against gravity is an absolute blessing!
Seam welded around the new/old seat pan.
Got lots of little fill in bits like this to do!
Can I just take a moment for anyone still reading this to make a PSA.
Please please whenever working, grinding/sanding, cutting etc WEAR EYE PROTECTION.
I have just come back from the emergency eye clinic at my local hospital.
Yesterday afternoon I started getting pain in my right eye. I called 111 at 4pm and I didn't get a call back until gone 11pm, when I was already asleep and in bed. I went this morning to the hospital.
Turns out that on Friday or Saturday I likely got a shard of metal embedded in my eyeball. I didn't feel it at the time. The pain I felt yesterday and in the evening was that shard of metal rusting into my eyeball.
After about a minute with a hyperdermic needle and swab scratching and poking into the eyeball the piece of metal was removed. I felt immediate relief.
He then went back in with another tool that I can only describe as a tiny Dremel or vibro etch/engraving tool to remove the rust and rust stained flesh. This was bloody awful. Realistically it was probably for around 30-40 seconds. It felt like 20minutes.
I'm now back at home, eye welded shut and patched over for the next 24hrs, then cream 4 times a day for 3 days and every night for 2 weeks....
Eye protection is not a joke. I've learned my lesson.
Gassing Station | Readers' Cars | Top of Page | What's New | My Stuff