Twin Plenum Vitesse restoration
Discussion


Not much (if any) progress to report, been collecting and sorting a few bits.
Firstly, starting to strip the split rims:
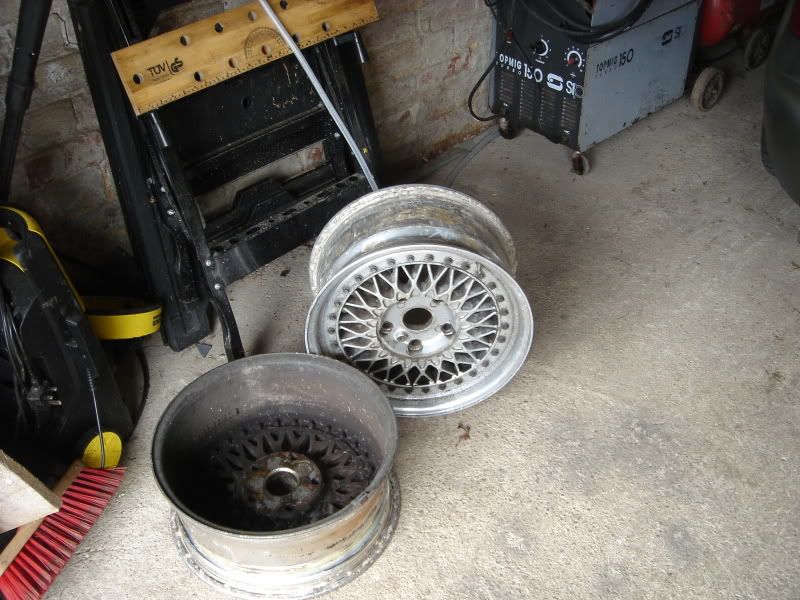
Lots of bolts then getting the centres blasted and re-painted.
It's been so long since the original engine was in the car I just want to get it running again. So, I've got a set of SU's off ebay:
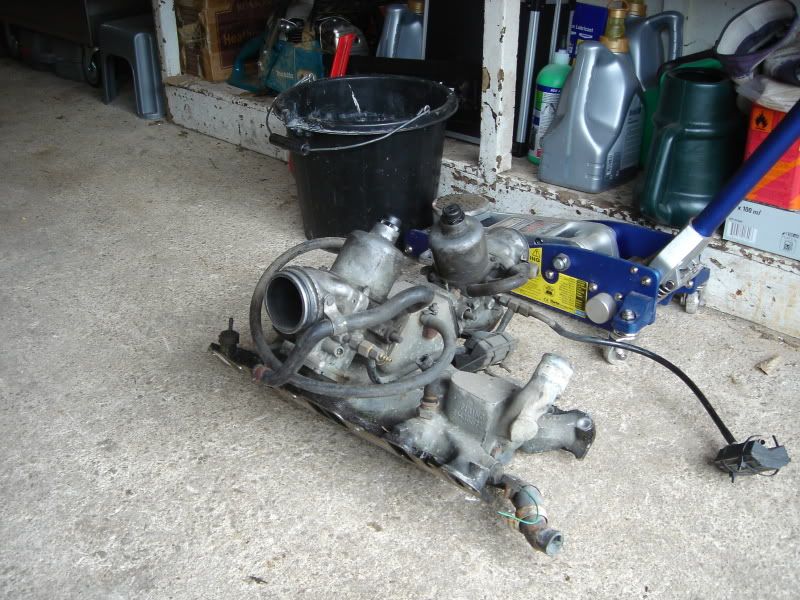
Plus a pair of K&N's:

These and a plastic can of petrol should enable me to get it running. Once that's sorted I can turn my attention to the injection set-up and the fuel lines, tank, pump etc.
I borrowed a carb V8 off a chum for a while as it made it easier to shift, especially when moving house. That had to go back but the dizzy as a Mallory points job, very simple to wire up. Will be interesting to see what's required on the Rover electronic set-up.
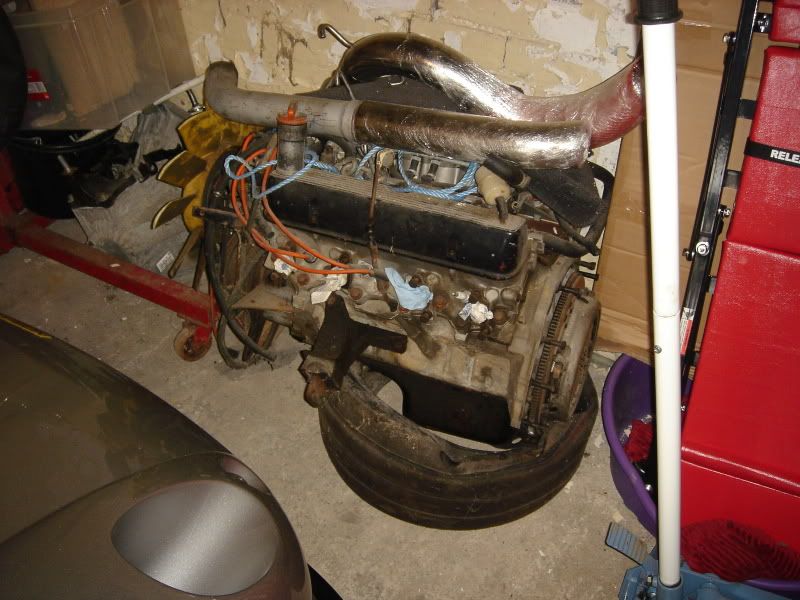
Had a look at the 4.5 V8 as well as it's not done much since it was re-built about 5 years ago (could be longer, can't remember). I also had a mooch through the spares that dad collected and found another ported inlet manifold, 45mm trumpet base and 72mm single plenum!! If you're looking for this sort of thing, let me know.
Time is the big problem at the moment, very busy on the house. I suppose the big thing will be to get the engine back in and get it running. I want to do some more work on the shell and get some decent rust protection into it. I've got a load of cavity wax to inject and will use shutz on the underside. Before the shutz goes on I plan to paint the inner arch lips with POR15 for extra protection.
So, not an update a such, more a view on my current thought process.
Firstly, starting to strip the split rims:
Lots of bolts then getting the centres blasted and re-painted.
It's been so long since the original engine was in the car I just want to get it running again. So, I've got a set of SU's off ebay:
Plus a pair of K&N's:
These and a plastic can of petrol should enable me to get it running. Once that's sorted I can turn my attention to the injection set-up and the fuel lines, tank, pump etc.
I borrowed a carb V8 off a chum for a while as it made it easier to shift, especially when moving house. That had to go back but the dizzy as a Mallory points job, very simple to wire up. Will be interesting to see what's required on the Rover electronic set-up.
Had a look at the 4.5 V8 as well as it's not done much since it was re-built about 5 years ago (could be longer, can't remember). I also had a mooch through the spares that dad collected and found another ported inlet manifold, 45mm trumpet base and 72mm single plenum!! If you're looking for this sort of thing, let me know.
Time is the big problem at the moment, very busy on the house. I suppose the big thing will be to get the engine back in and get it running. I want to do some more work on the shell and get some decent rust protection into it. I've got a load of cavity wax to inject and will use shutz on the underside. Before the shutz goes on I plan to paint the inner arch lips with POR15 for extra protection.
So, not an update a such, more a view on my current thought process.
Using these:

I turned this:
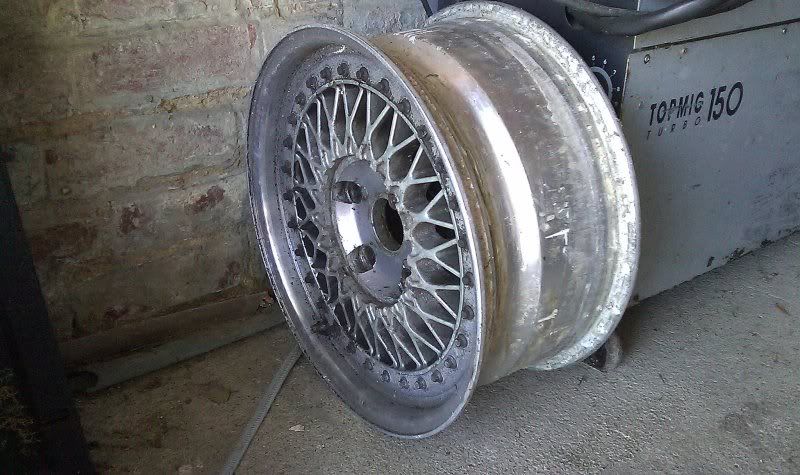
Into this:
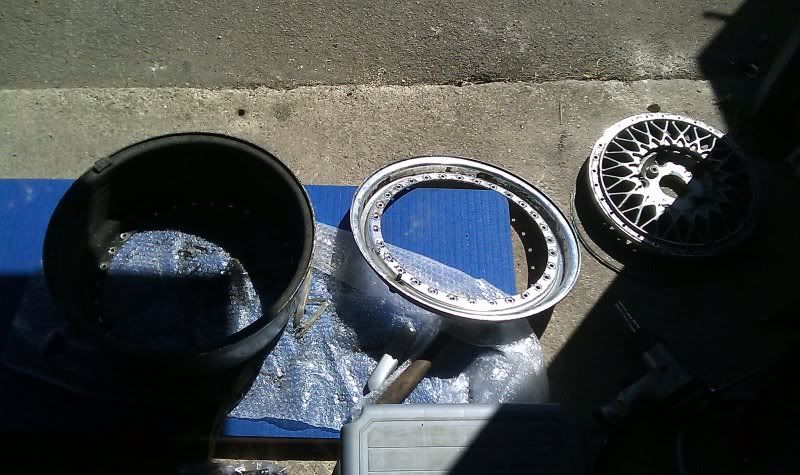
Apologies for the poor quality phone camera pics.
So, the centres will go back to Compomotive for re-painting. They only charge £20 per wheel for re-building, very tempting!
I would think about spraying them myself but I'm nut sure I fancy stripping all the paint off unless someone knows an easy way? There is a small amount of alloy surface corrosion as well so I think blasting might be the best way forward.
I turned this:
Into this:
Apologies for the poor quality phone camera pics.
So, the centres will go back to Compomotive for re-painting. They only charge £20 per wheel for re-building, very tempting!
I would think about spraying them myself but I'm nut sure I fancy stripping all the paint off unless someone knows an easy way? There is a small amount of alloy surface corrosion as well so I think blasting might be the best way forward.
So, what have I done since the last update? Not a lot really. The loan V8 that I had in the car to move it about has come out and is off my garage floor and back with its owner. I need to focus on getting the front wiring looms back in place and then I can finally reunite the 4.5 V8 with the rest of the car. It’s been out for 5 years or so now and during the house move I’ve lost one of the engine mounts, so a new one has been sourced.
I’ve spent a lot of time thinking about a shopping list to get the final bits and bobs, given the cost so far and the amount of parts I’ve stockpiled I’m still vaguely annoyed the list is so long:
Thrust bearing
Anti roll bushes
Fan switch
Fuel lines
Inlet manifold gasket
Thermo housing plus switch
Flexible clutch hose
Hand brake flexible boot
Box seal kit plus speedo drive
Exhaust manifold gaskets
Exhaust hanging rubbers
Handbrake cable
Stainless brake hoses
Small gear lever cap
Bulkhead rubber panel
Fuel filter
ATF
Diff oil
I’ve got to pop the engine back in, sort out a new (programmable) ECU, fuel lines and tank back in and the last of the electrics. Oh, and fully prep the underside against the elements. If I had two weeks I think I could have it finished, but with the business, Thrust Towers and LMT I never seem to have any free time.
I’m still thinking of another SD1 for track day fun, done in the ’85 BTCC Bastos scheme, natch…
Dropped the split rims off with the manufacturers (Compomotive) to be re-built. I'm going for a slightly larger outer rim (0.5 inch wider) to fill the arches a bit more. Including the new outer rims the bill is going to come to an eye watering £972.00
To console me, they did say that to buy a new set would be £2.5k plus VAT.
To console me, they did say that to buy a new set would be £2.5k plus VAT.
Let's talk exhausts.
I have a very nice full stainless system for the Vitesse including tubular manifolds. These can get b d hot and raise under bonnet temperatures a lot, not good for keeping the block cool, induction temps and perishable items like rubber engine mounts. Traditionally the solution is to use exhaust wrap, thus:
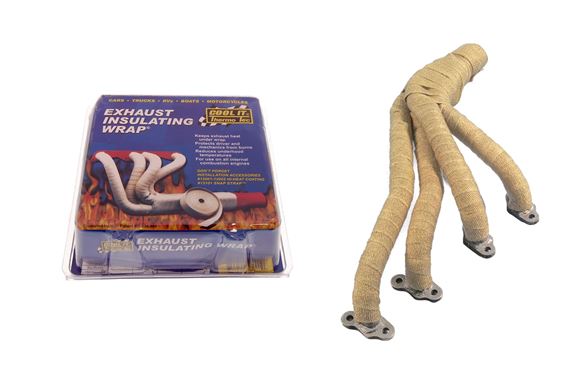
But this is a pain to apply and can look a bit st with time/oil/knocks etc. Also, being a V8 you need two lots and it's over £100 with the stainless steel ties on top of that. So, I've been looking in ceramic coatings, thus:

£576 + VAT.
I'll probably go for the wrap, it seems they're equally effective and that price difference is a lot to stomach.
I have a very nice full stainless system for the Vitesse including tubular manifolds. These can get b
d hot and raise under bonnet temperatures a lot, not good for keeping the block cool, induction temps and perishable items like rubber engine mounts. Traditionally the solution is to use exhaust wrap, thus: But this is a pain to apply and can look a bit s
t with time/oil/knocks etc. Also, being a V8 you need two lots and it's over £100 with the stainless steel ties on top of that. So, I've been looking in ceramic coatings, thus: £576 + VAT.
I'll probably go for the wrap, it seems they're equally effective and that price difference is a lot to stomach.
I'm pretty interested in this at present:
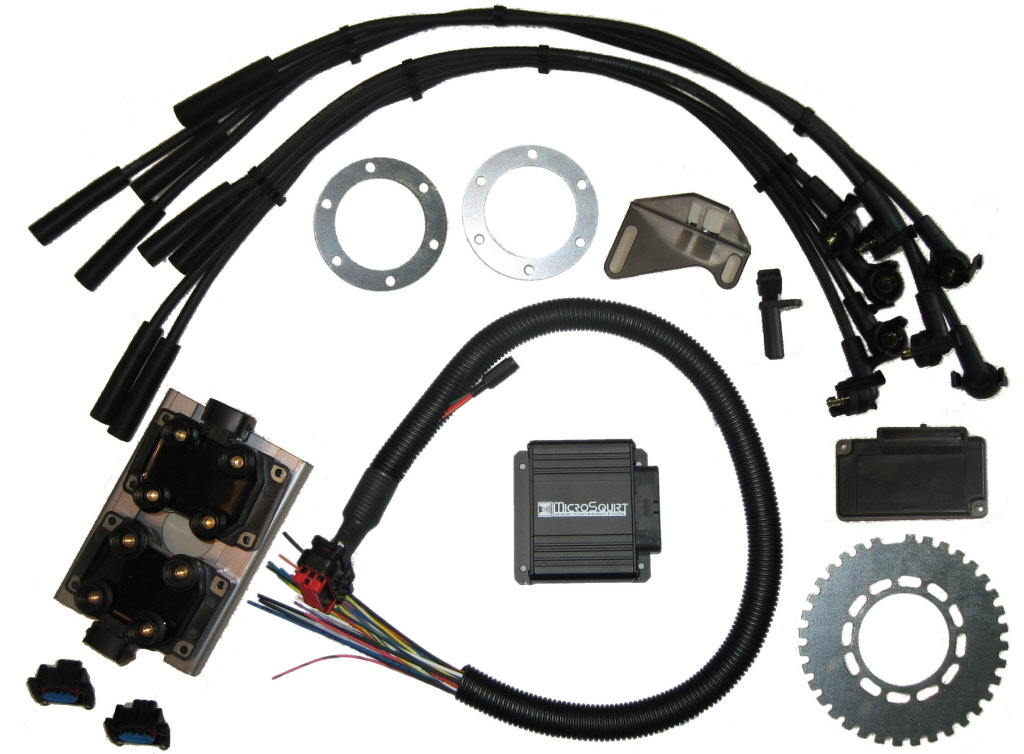
•Microsquirt ECU
•Pair of new coil packs
•8mm Silicone spark plug leads
•Coil pack bracket
•Rover V8 trigger wheel kit
•Rover-specific crank sensor bracket
•New crank sensor
•Throttle sensor
•EDIS ignition module
•Loom kit
£599 - which seems like good value.
•Microsquirt ECU
•Pair of new coil packs
•8mm Silicone spark plug leads
•Coil pack bracket
•Rover V8 trigger wheel kit
•Rover-specific crank sensor bracket
•New crank sensor
•Throttle sensor
•EDIS ignition module
•Loom kit
£599 - which seems like good value.
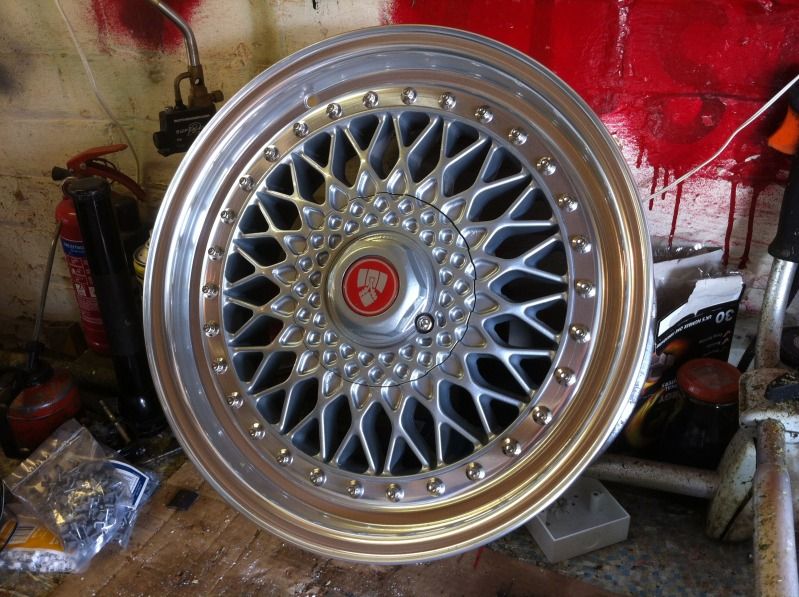
Wheels now finished:
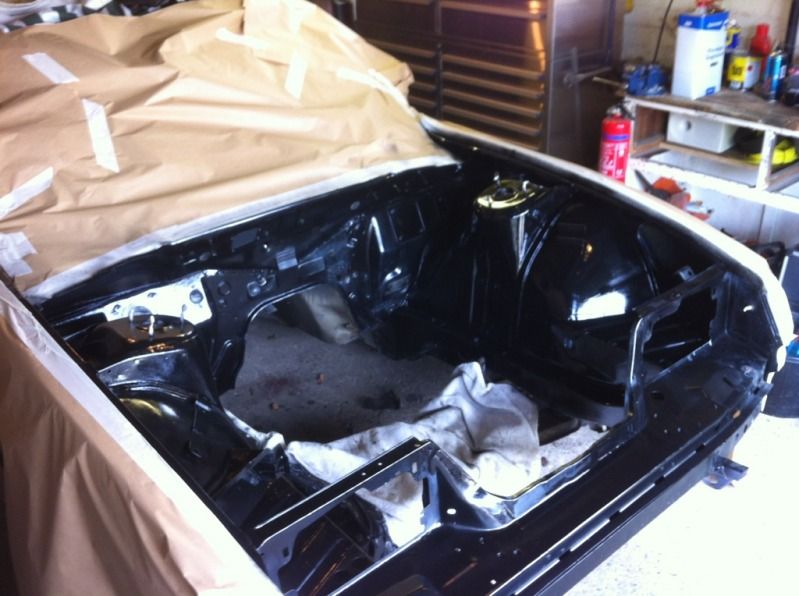
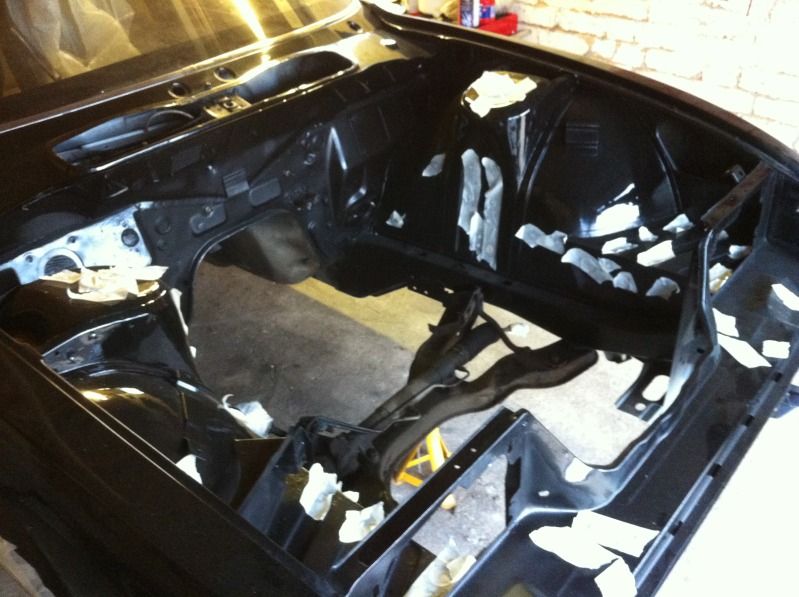
When I had the car sprayed I dropped in a basic carb'd 3.5 so I could move it about, as such he couldn't paint the engine bay. Did it myself last weekend and am pretty pleased with the results. I've got to flat it back and pop another couple of coats down, but it's well on the way:
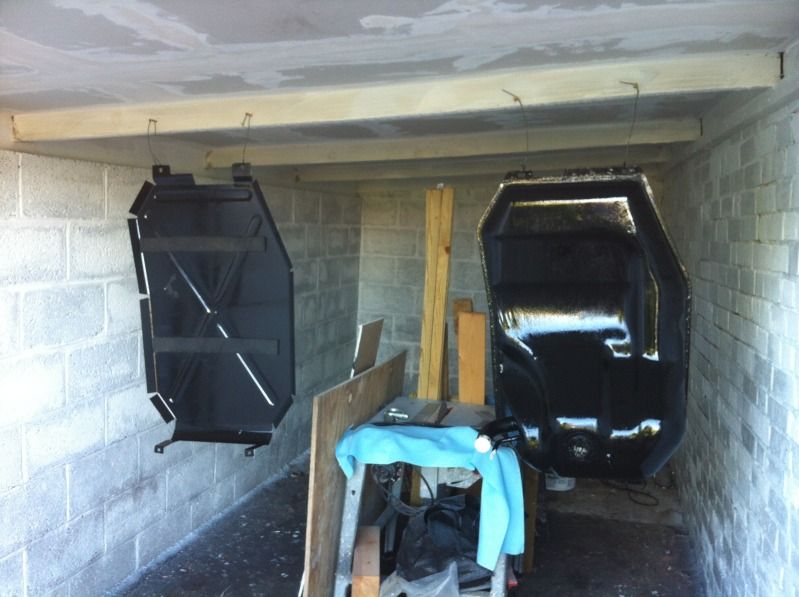
Also, have done the tank and tank guard, anti-rust undercoat and nice top coat:
When I had the car sprayed I dropped in a basic carb'd 3.5 so I could move it about, as such he couldn't paint the engine bay. Did it myself last weekend and am pretty pleased with the results. I've got to flat it back and pop another couple of coats down, but it's well on the way:
Also, have done the tank and tank guard, anti-rust undercoat and nice top coat:
More progress:
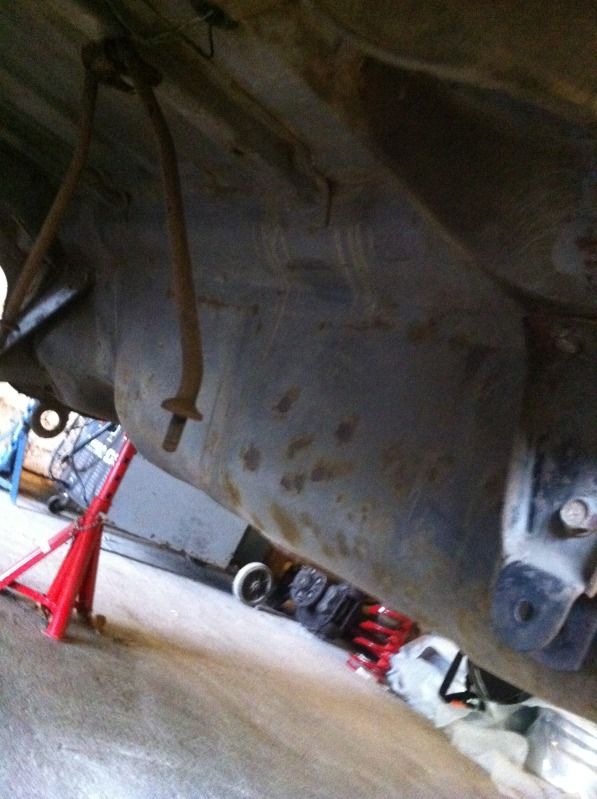
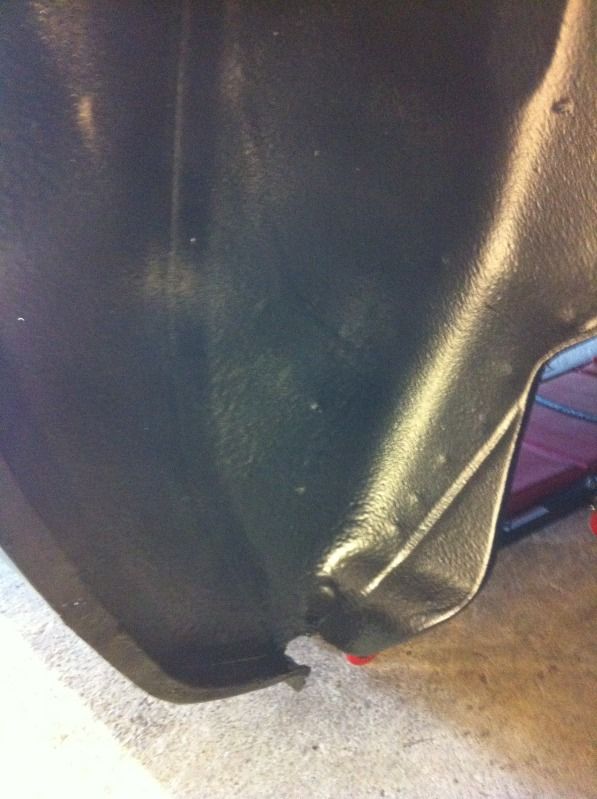
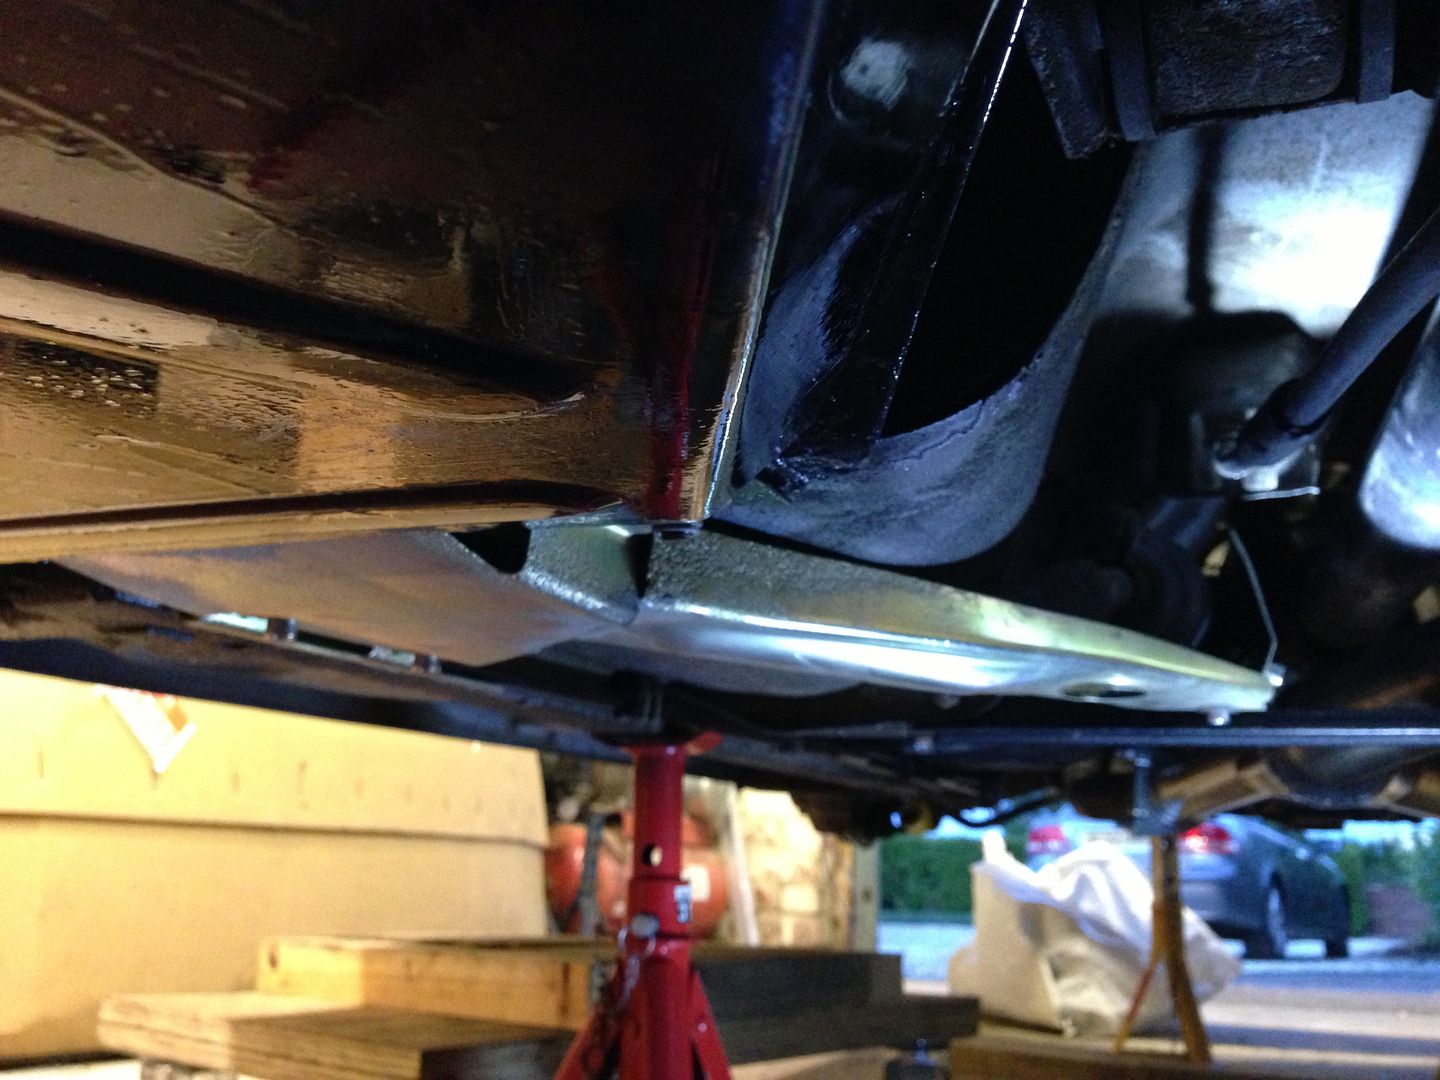
Car up nice and high to get access to the underside. As I had to move it about this wasn't finished at the same time the rest of the bodywork was:

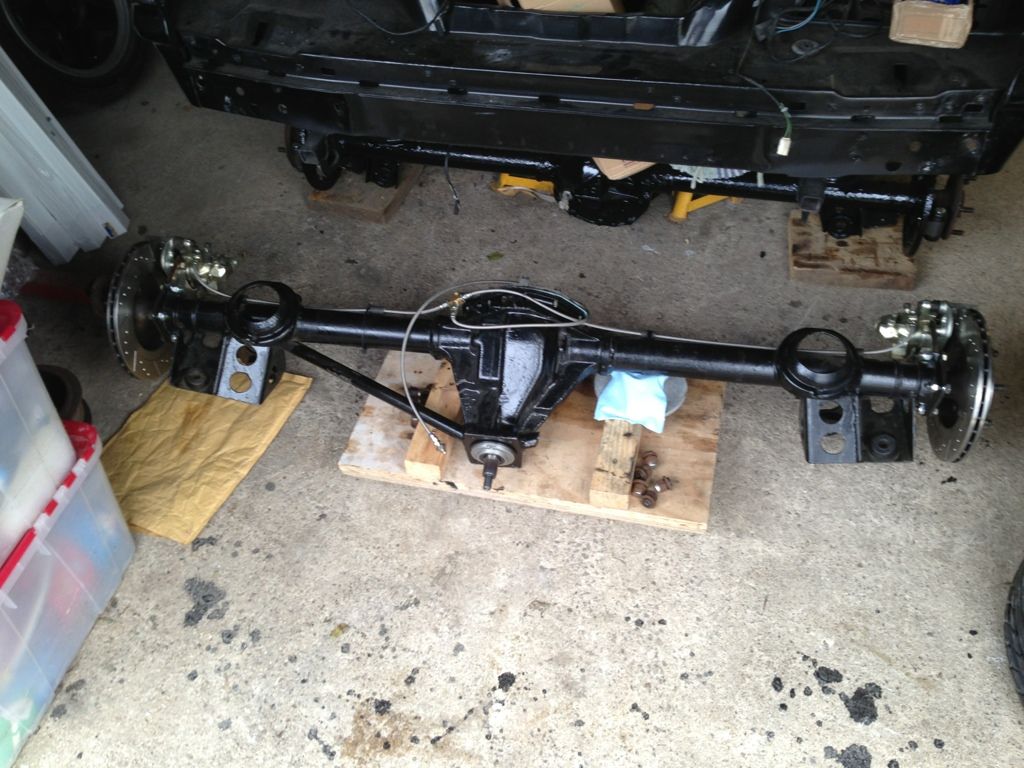
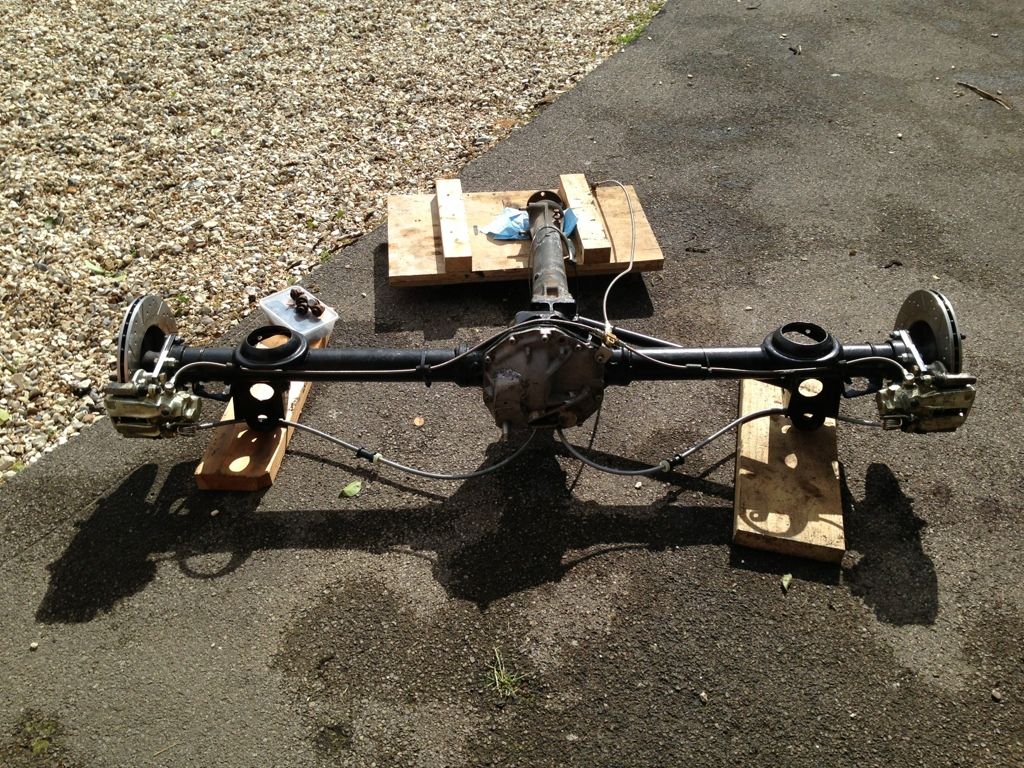
Axle out, will strip, clean and replace brake lines etc:
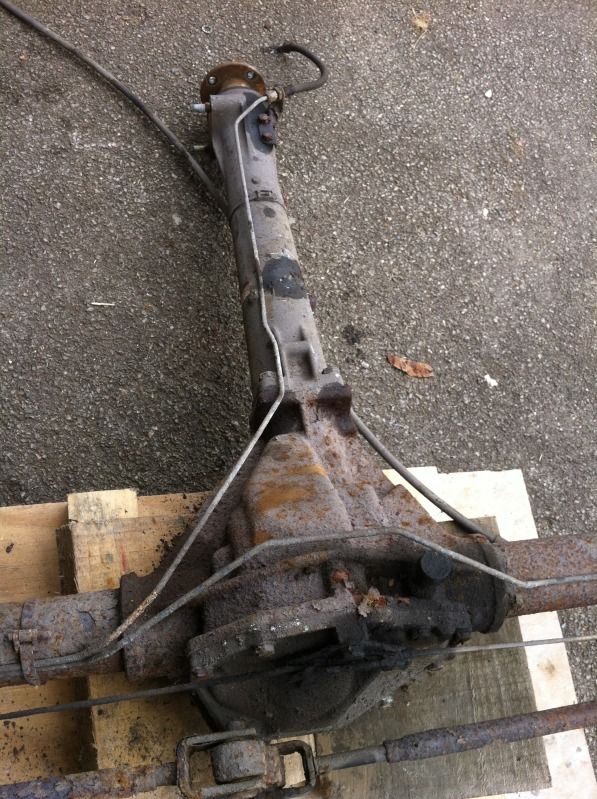
I gave it (the underside) a good clean when I did the body a couple of years back, clearly it's not moved much since so only fairly minor surface rust. The underside was in pretty reasonable shape, remarkable considering how bad the rest of it was. A persistent oil leak kindly protected it over the years, messy to clean off though - borrowed an industrial steam cleaner from a chum.

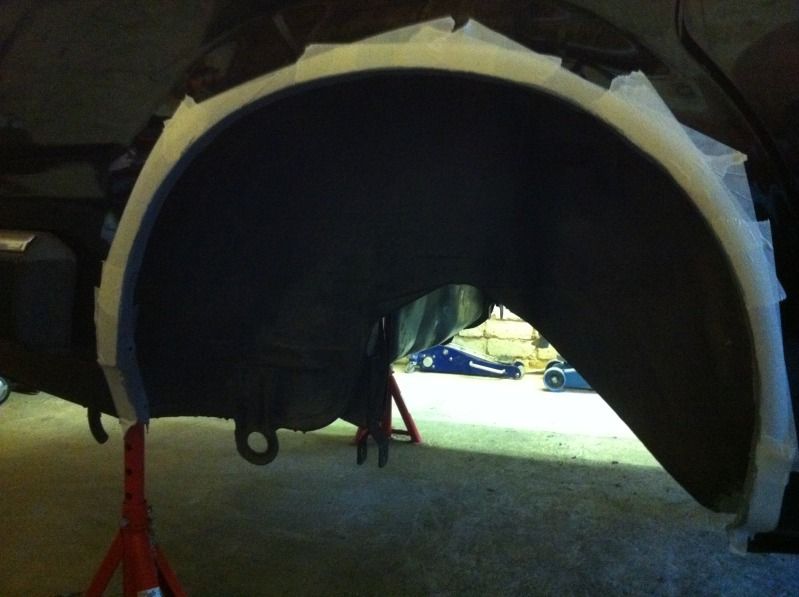
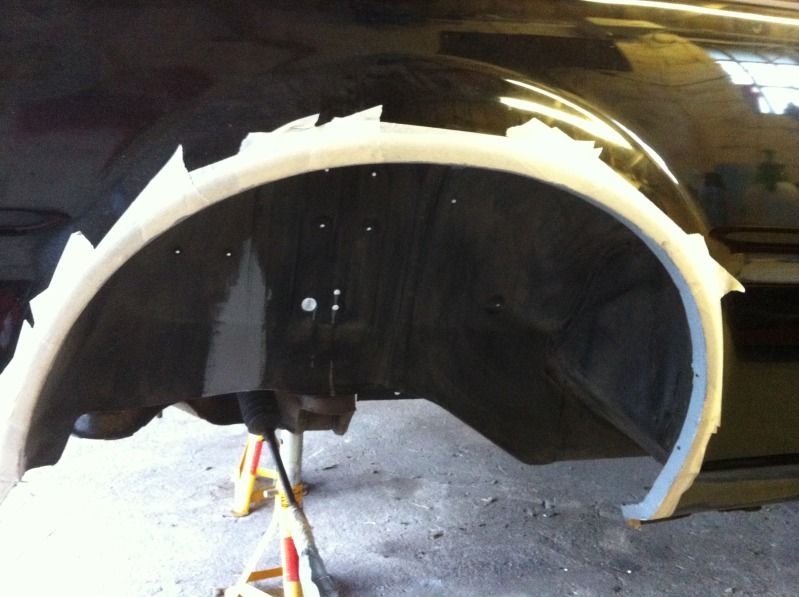
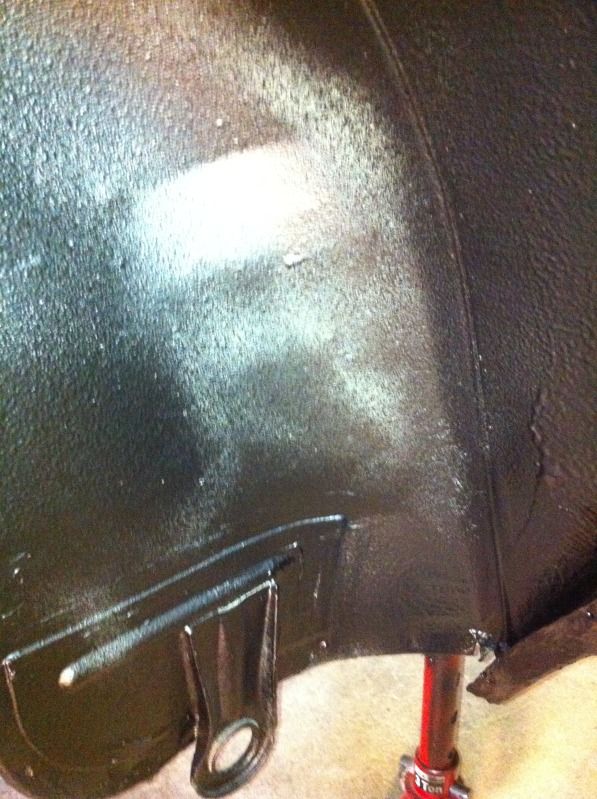
Lovely new paint protected as I'm going to re-underseal the whole car:
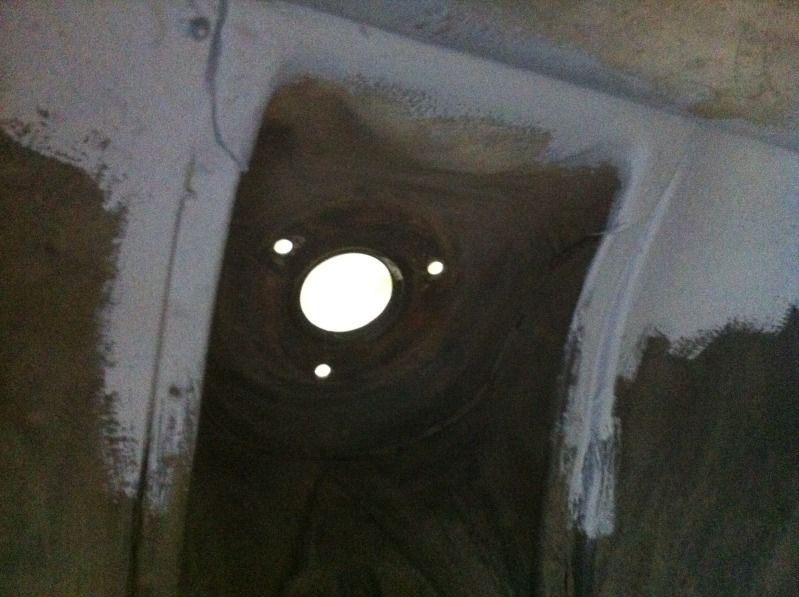
First few coats of zinc on the trouble spots:
Engine bay all nice and shiny:
Car up nice and high to get access to the underside. As I had to move it about this wasn't finished at the same time the rest of the bodywork was:
Axle out, will strip, clean and replace brake lines etc:
I gave it (the underside) a good clean when I did the body a couple of years back, clearly it's not moved much since so only fairly minor surface rust. The underside was in pretty reasonable shape, remarkable considering how bad the rest of it was. A persistent oil leak kindly protected it over the years, messy to clean off though - borrowed an industrial steam cleaner from a chum.
Lovely new paint protected as I'm going to re-underseal the whole car:
First few coats of zinc on the trouble spots:
Engine bay all nice and shiny:
Thanks for all the kind comments 
Some pictures:
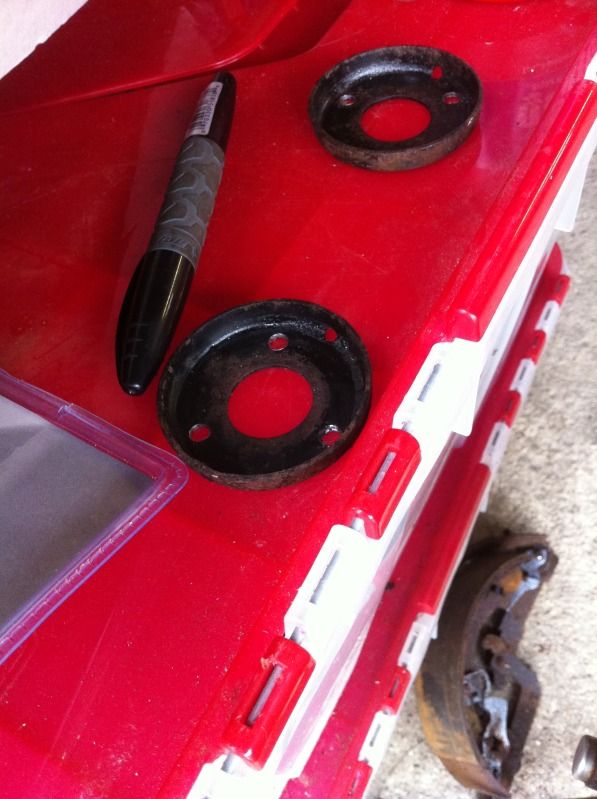
The axle has support cups for the trailing arm bushes, these frequenlty rot off. I cut some off a couple of scrap cars from a support beam, exactly the same peice of pressed steel. So, spot welds drilled out and welded onto the axle.
Will take a picture of the finished article as now all cleaned up and painted.
All body work now competed as arches and underside painted and sealed.

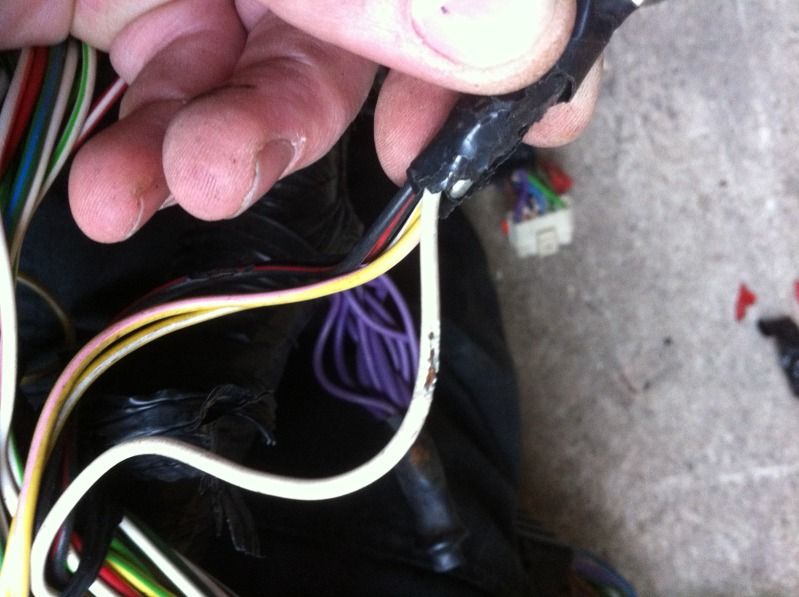
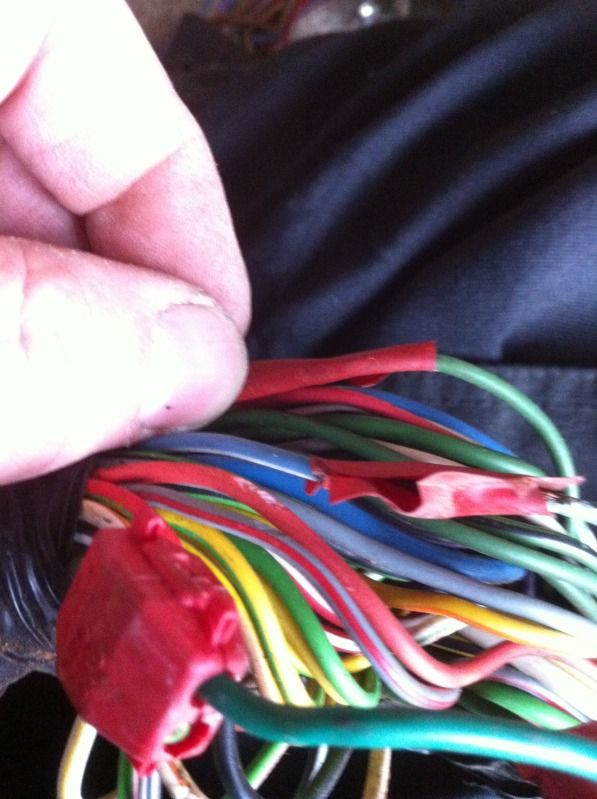
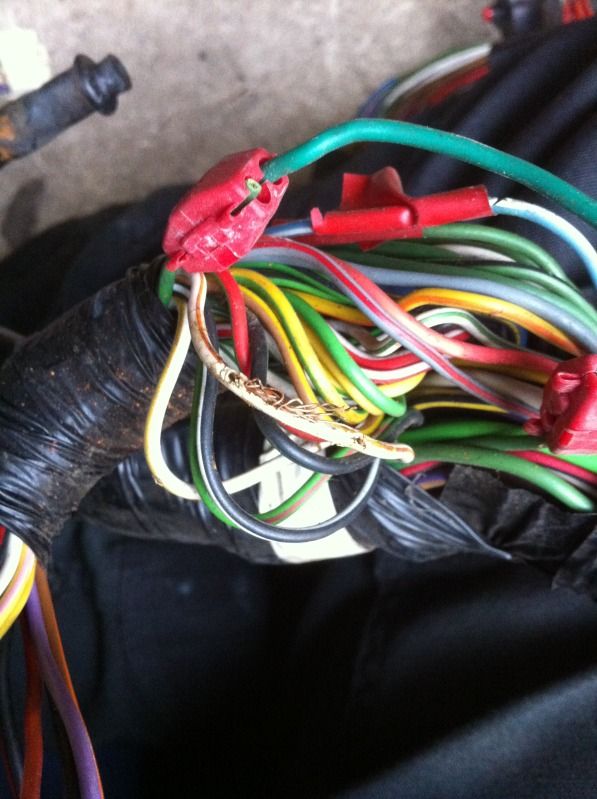
Lots of loom damage from mice, quite a few burnt out wires. About a day of cutting and replcing. The connectors must have been where Dad did some remedial work in the past:
Some pictures:
The axle has support cups for the trailing arm bushes, these frequenlty rot off. I cut some off a couple of scrap cars from a support beam, exactly the same peice of pressed steel. So, spot welds drilled out and welded onto the axle.
Will take a picture of the finished article as now all cleaned up and painted.
All body work now competed as arches and underside painted and sealed.
Lots of loom damage from mice, quite a few burnt out wires. About a day of cutting and replcing. The connectors must have been where Dad did some remedial work in the past:
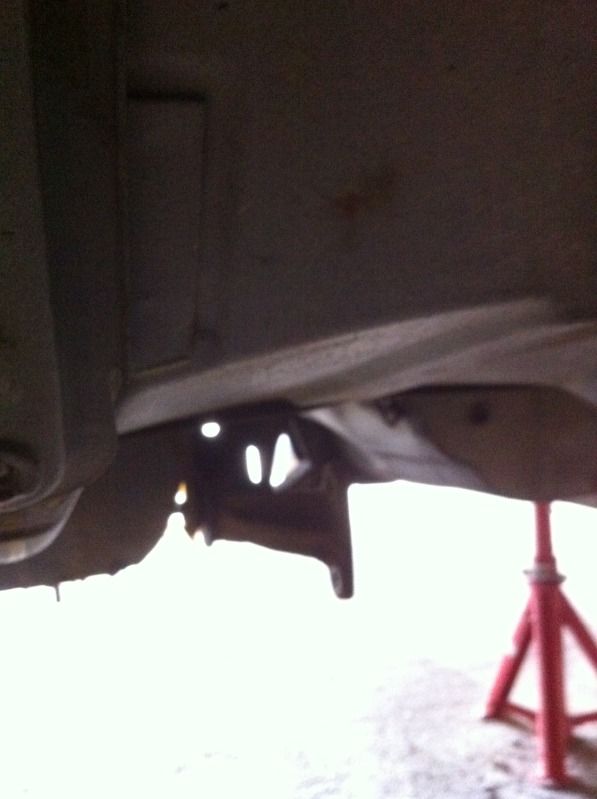
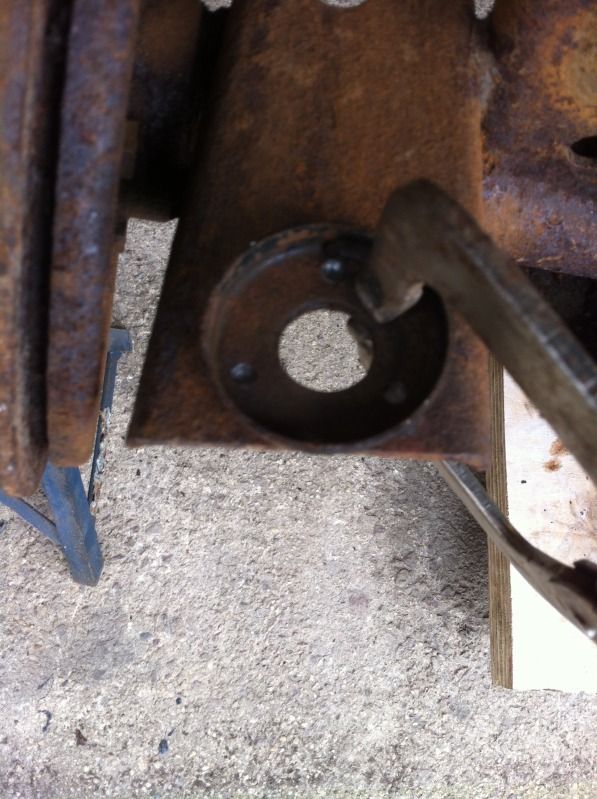
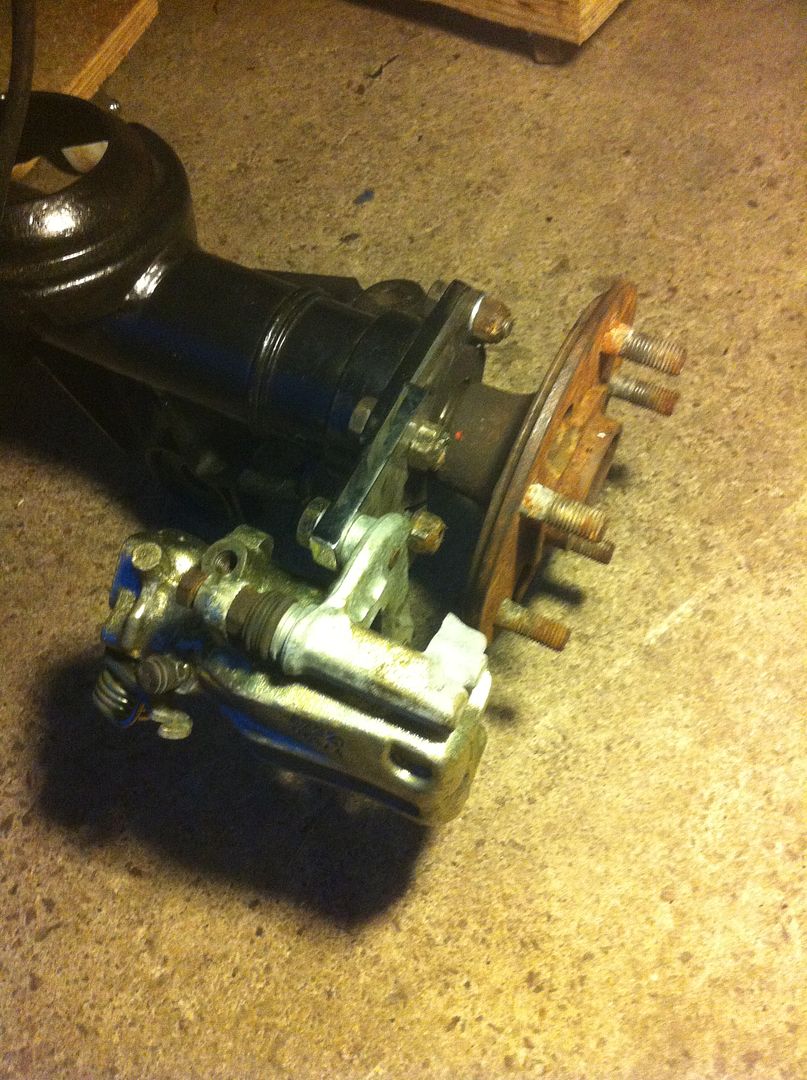
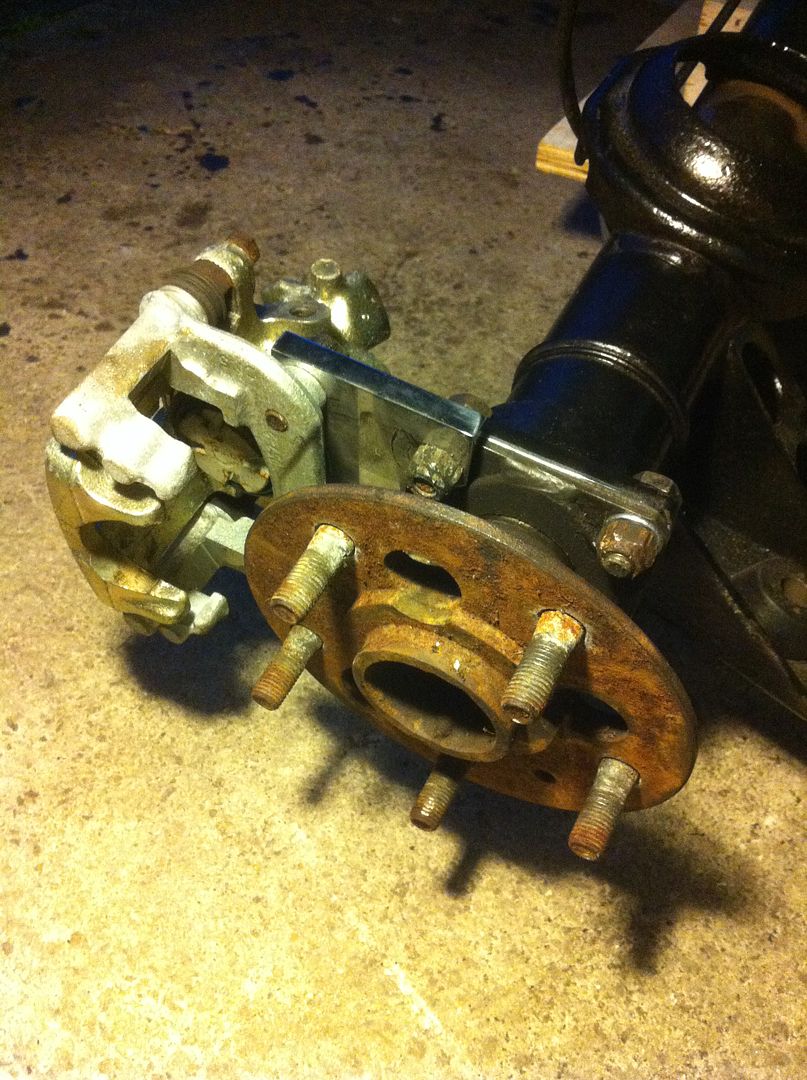
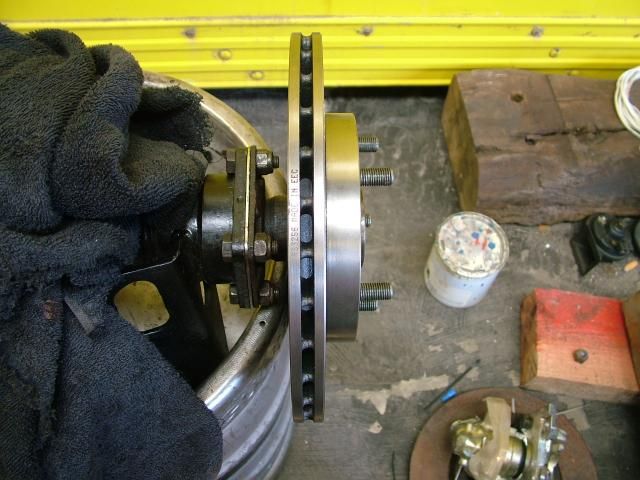
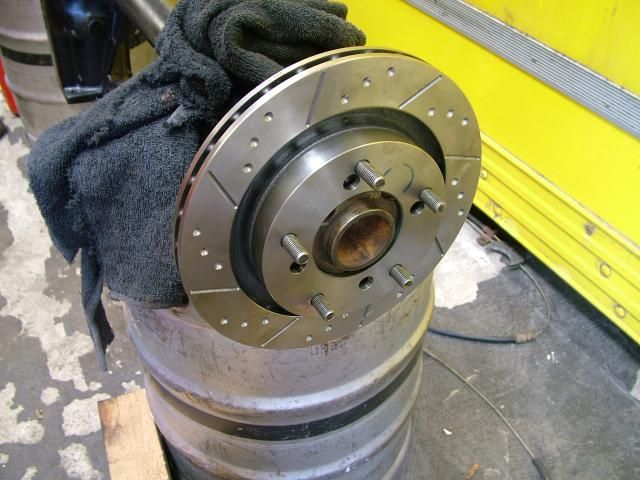
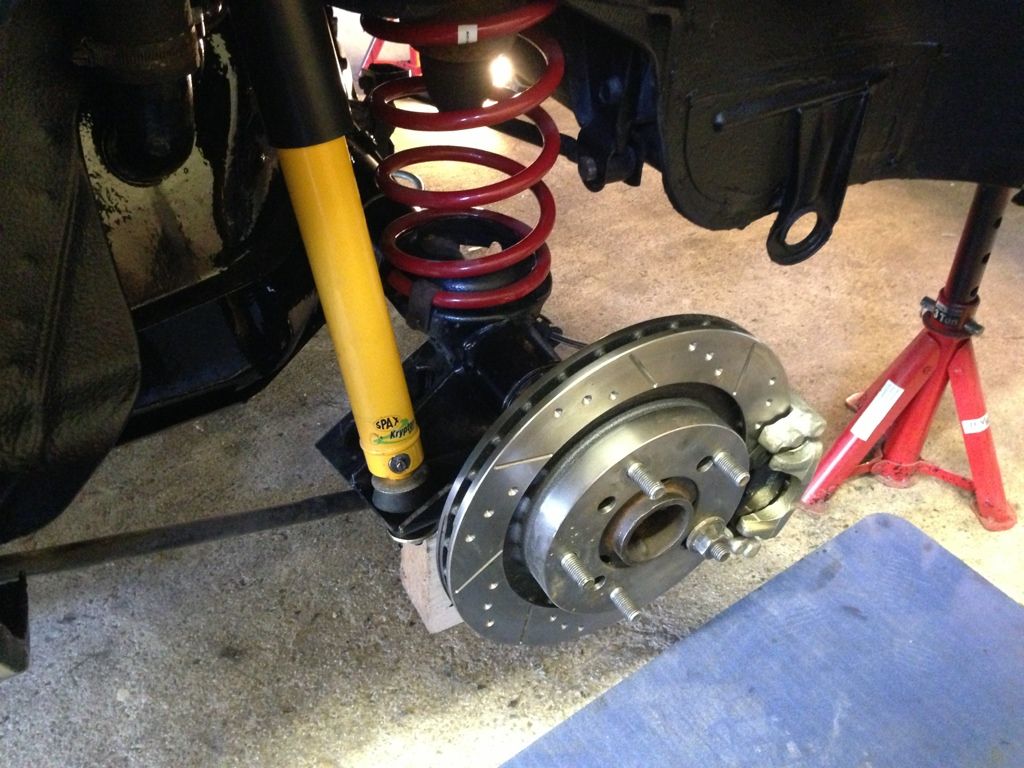
Any one know which calipers these are? I'm about 99% certain they're Sierra Cosworth rear calipers, but for vented or solid discs?
The gap in the carrier is 22mm, vented discs are 20, solids are 10mm. Looks too big for solid, but what will hold more will hold less...
I'm using them on my the Vitesse for a rear disc conversion, ignore the bolts, just mocking them up at the minute.
The gap in the carrier is 22mm, vented discs are 20, solids are 10mm. Looks too big for solid, but what will hold more will hold less...
I'm using them on my the Vitesse for a rear disc conversion, ignore the bolts, just mocking them up at the minute.
nismo48 said:
Hi there and awesome work and hats off to you..
Regards the gap in calipers..Allowing for brake pads/shims
think the gap suits solid discs..
The rear discs on all Sierras from memory were all solid..
With vented discs up front..
Happy New Year and keep the posts coming..!!
The Cosworth 4x4 had vented discs on the rear, 273mm wide. The spacing looks right for the 273mm wide and the 20mm thickness of the disc but not the offset.Regards the gap in calipers..Allowing for brake pads/shims
think the gap suits solid discs..
The rear discs on all Sierras from memory were all solid..
With vented discs up front..
Happy New Year and keep the posts coming..!!
Megaflow said:
The caliper does not look right for a 20mm thick disc, a 20mm thick disc would almost fill that caliper leaving no room for the brake pads.
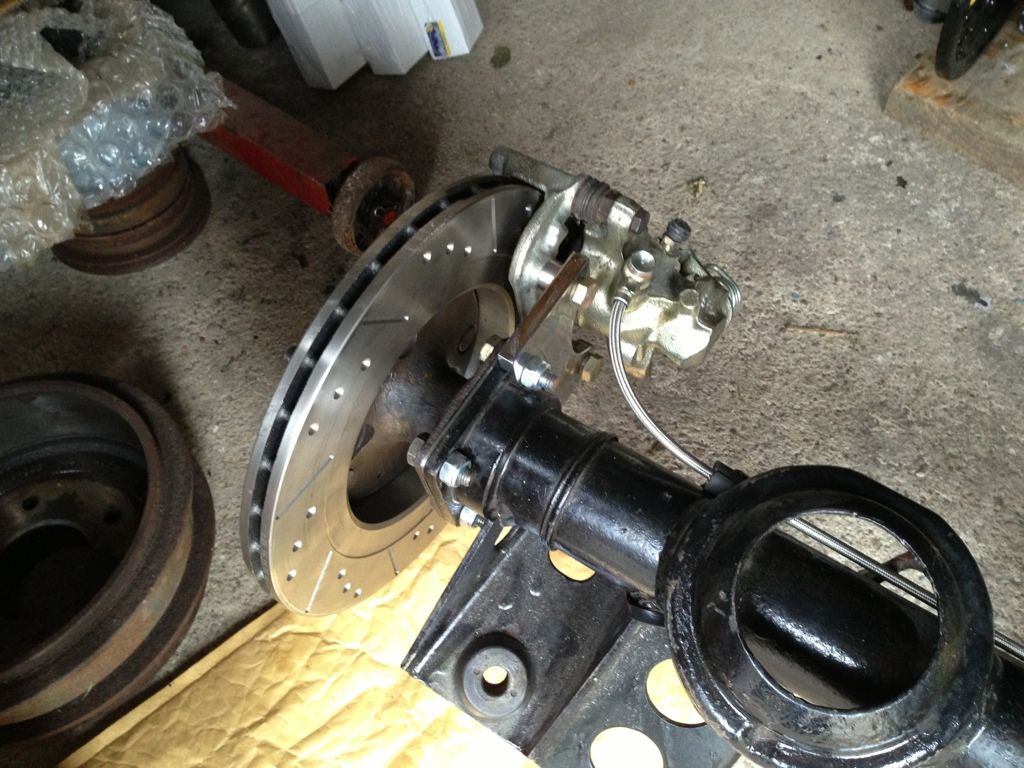
Have confirmed it's a caliper for a vented disc. The carrier fits either side of the disc and the caliper holds the pads so the gap is a bit misleading.Managed to get a couple of hours last weekend, my 2 year old helping me as well.
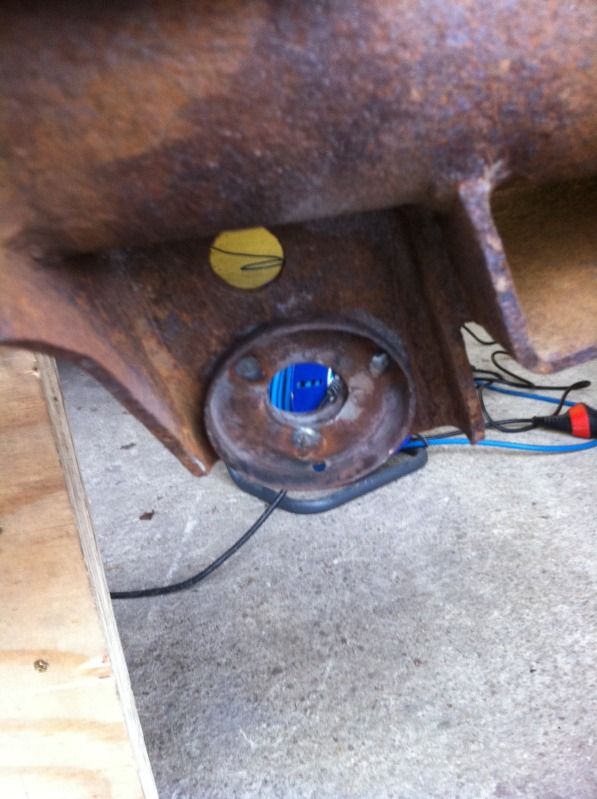
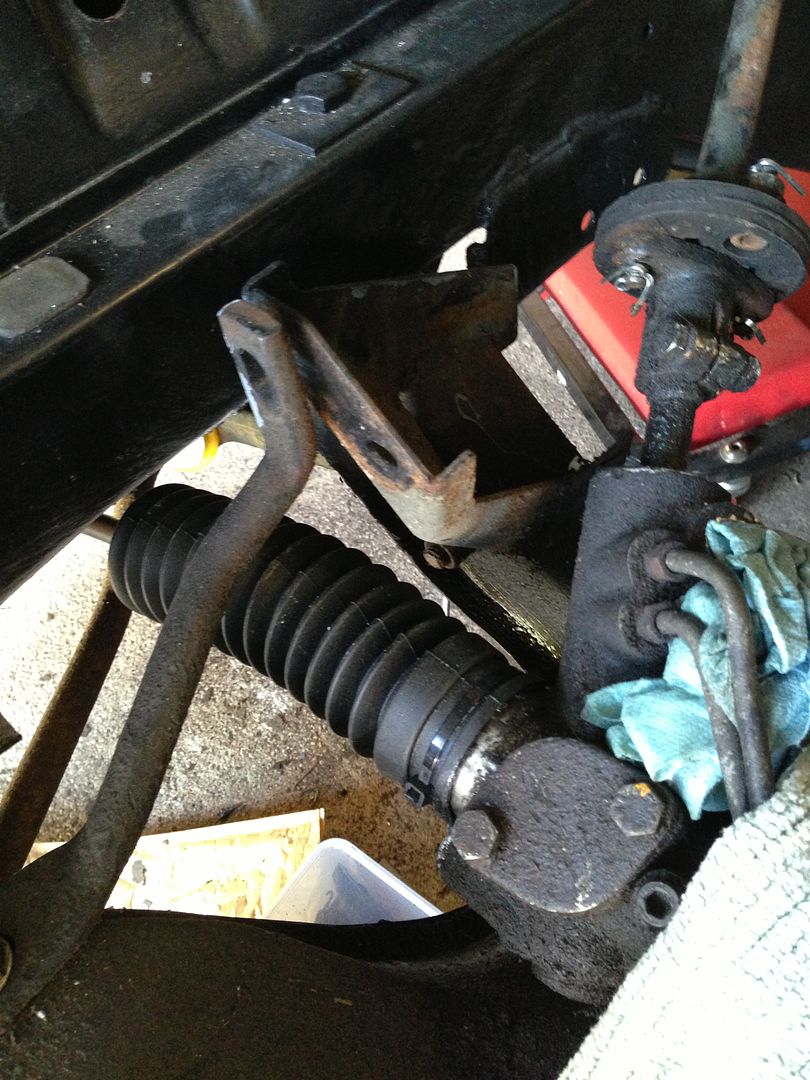
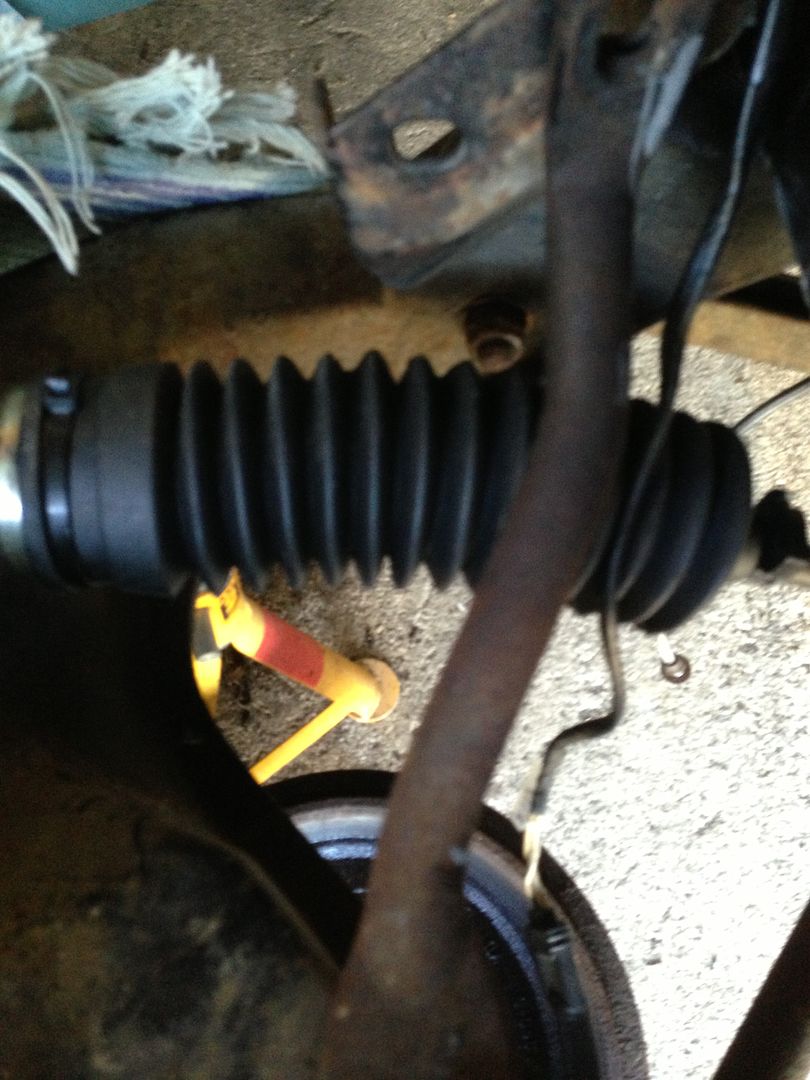
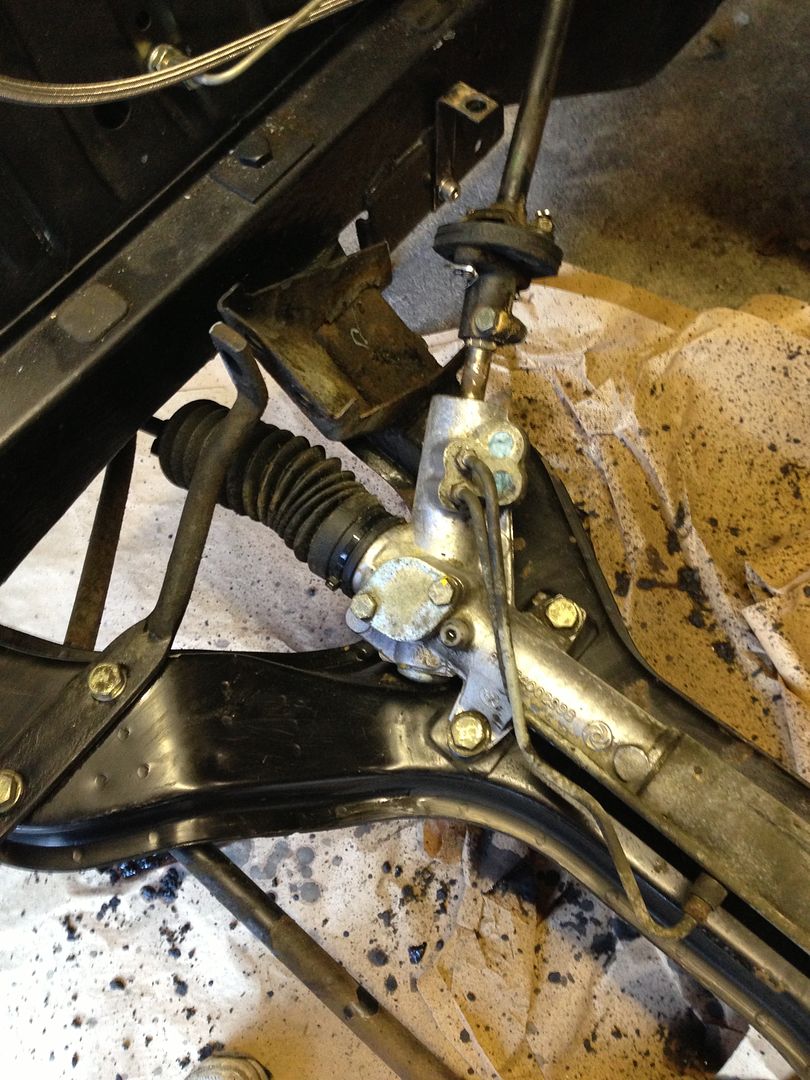
New flexible steering coupling and new boots on the steering rack, I can now clean the rest of it up without worrying about dirt getting into the moving parts:
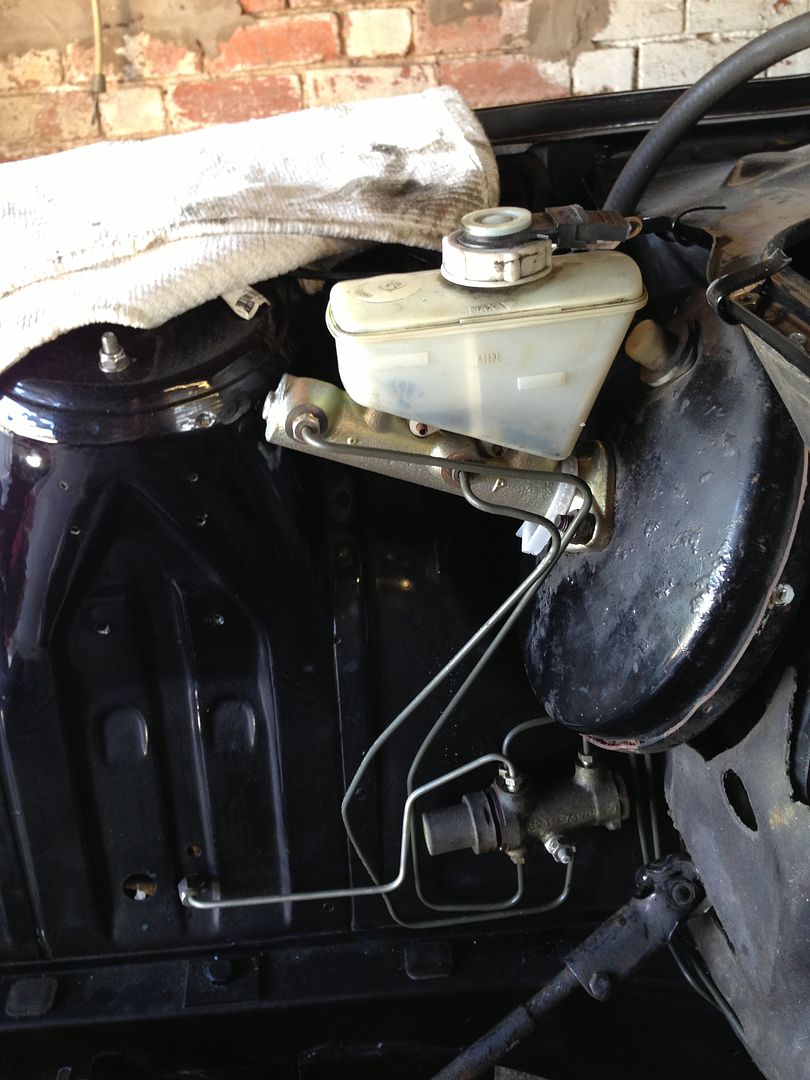
Plumbed in the new master cylinder, this has a larger bore to cope with the lager calipers front and rear (reduces pedal travel). I'll take it apart again to clean and paint the servo. On the original the pipes exit on the opposite side:
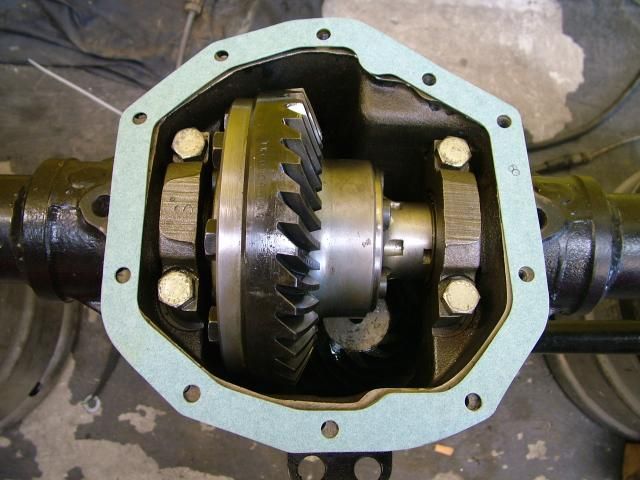
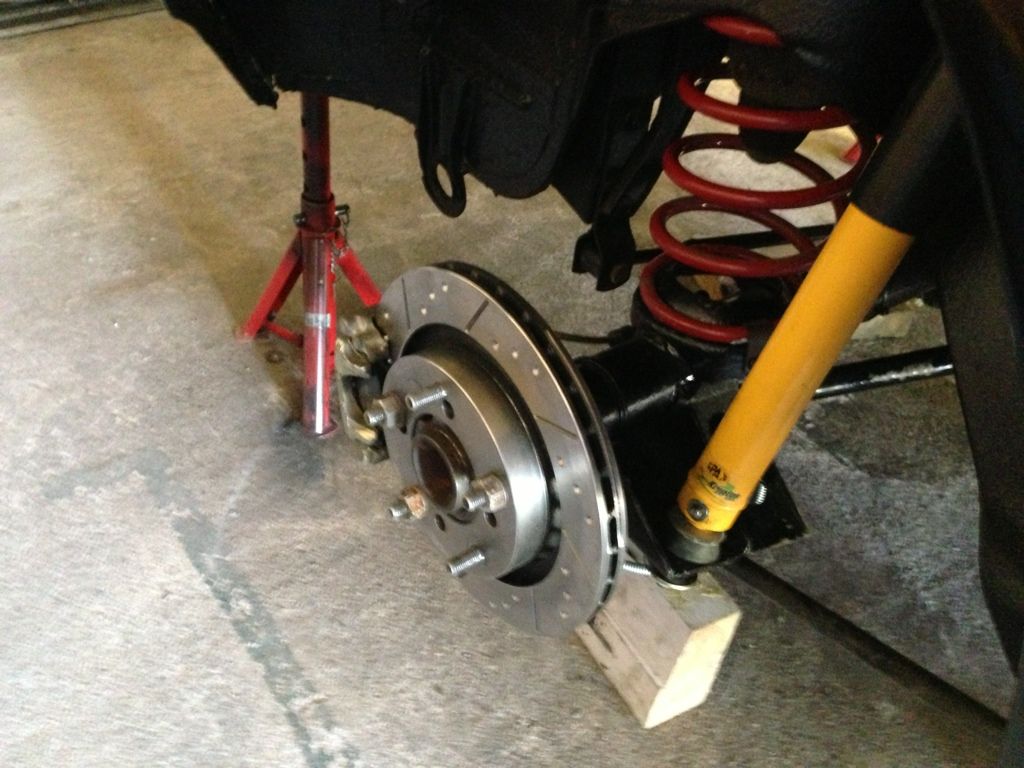
The rear disc conversion is coming along, the quaife LSD is in and shimmed and the discs are on:
New flexible steering coupling and new boots on the steering rack, I can now clean the rest of it up without worrying about dirt getting into the moving parts:
Plumbed in the new master cylinder, this has a larger bore to cope with the lager calipers front and rear (reduces pedal travel). I'll take it apart again to clean and paint the servo. On the original the pipes exit on the opposite side:
The rear disc conversion is coming along, the quaife LSD is in and shimmed and the discs are on:
I fitted the LSD and disc axle at the weekend, very happy with it I am too.
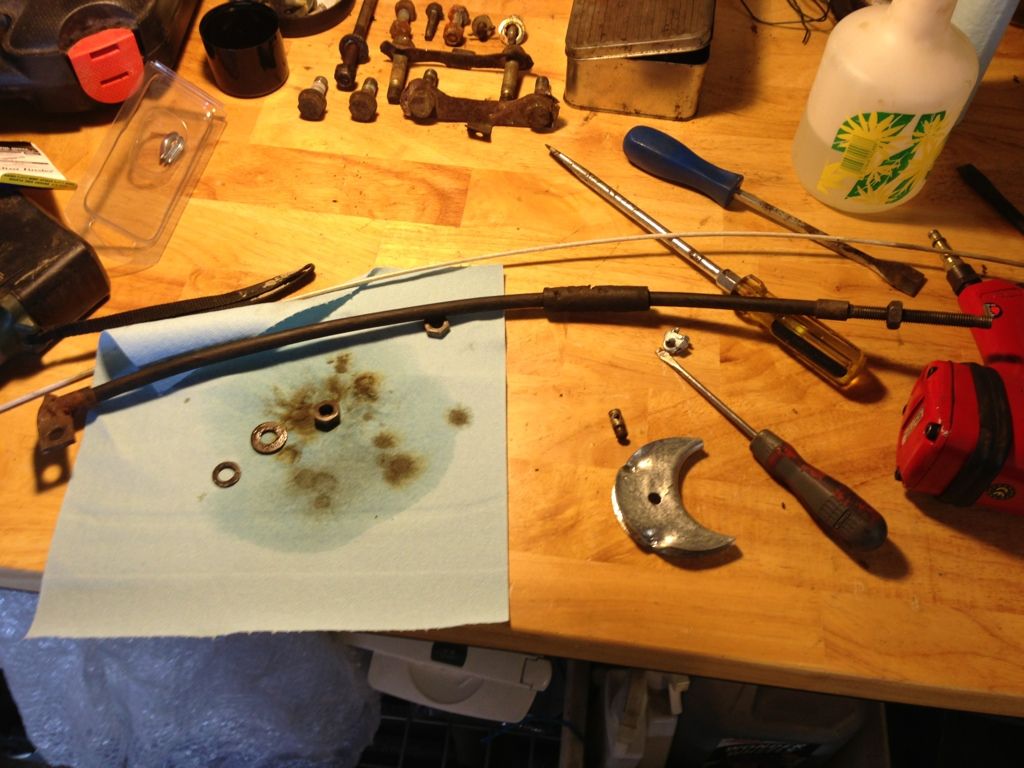
First I had to make up a handbrake cable to fit, I used the front half of the SD1 item cut down and a bracket to hold it to the lower bolt on the torque tube to body mount. This was then mated to the back half of a Sierra (disc type) cable:
The hydraulic lines use Aeroquip hoses, T'd on the back casing and then brought forward to meet the standard fixed line in the transmission tunnel.
Then it went back into the car with minimal fuss and fully poly-bushed trailing arms (both ends) and Watts linkage:
Front brakes are on, this uses much larger Jaguar discs, the SD1 has quite a larger PCD so it's difficult to see how big they are.
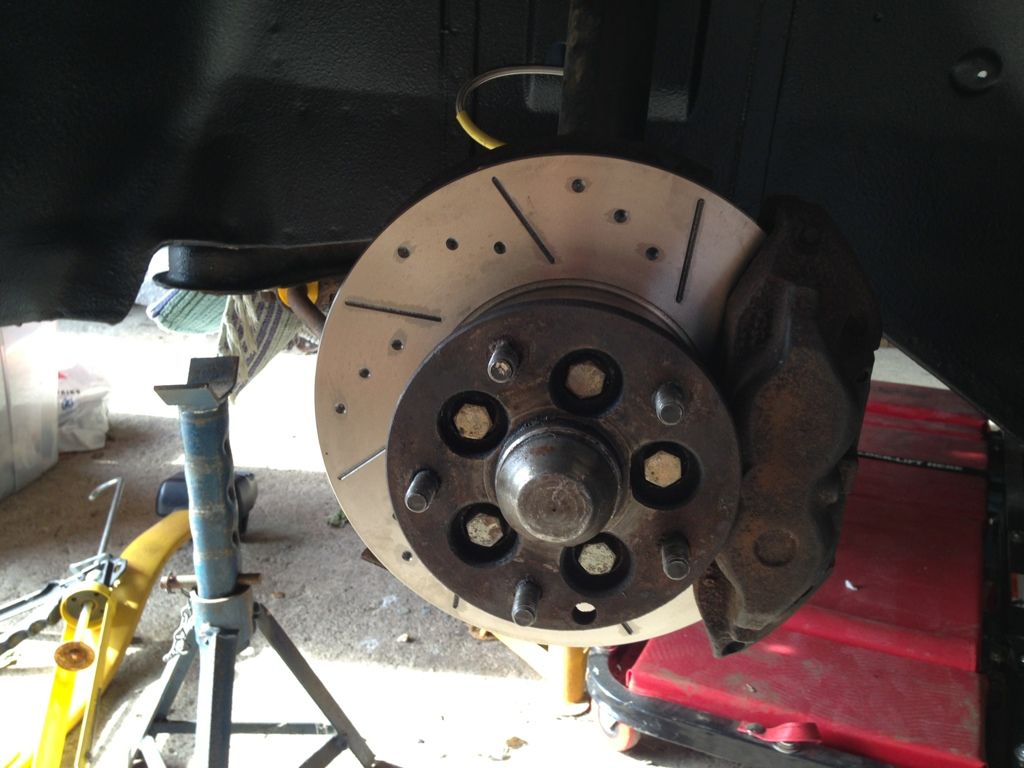
The calipers have been re-built just not painted, can't decide on colour so will leave it for now and see how I feel.
The system has been a complete pain to bleed, both with pressure bleeder, vacuum bleeder and the traditional pedal method. Being all new pipes and completely fresh calipers it's bone dry and full of air. Leaving it to settle overnight and then another bleed was a massive improvement in getting air out, I think another go at some point this week will have a rock hard pedal.
Got a day over the weekend and made significant progress, very pleased
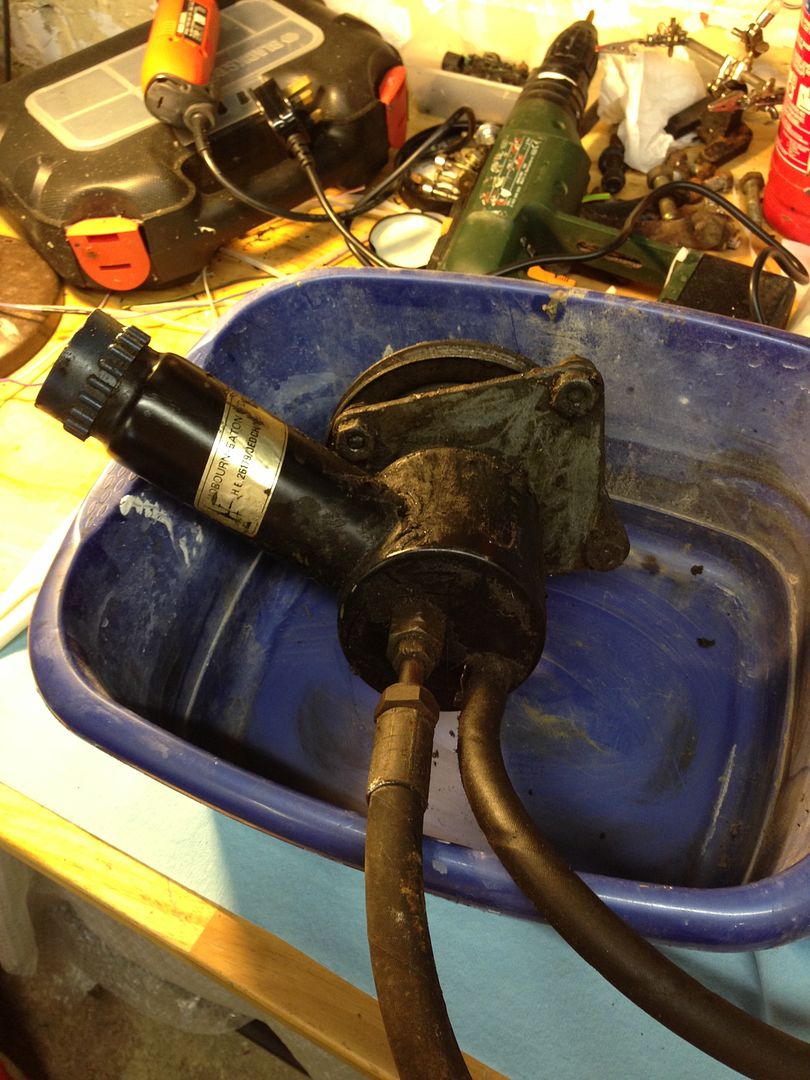
Power steering rack and cross-member cleaned up:
Power steering pump and pipes cleaned (forgot to take an 'after' picture):
Clutch and exhaust manifolds fitted. Gearbox cleaned, fluid changed and mated to engine, gearbox loom cleaned and re-taped:
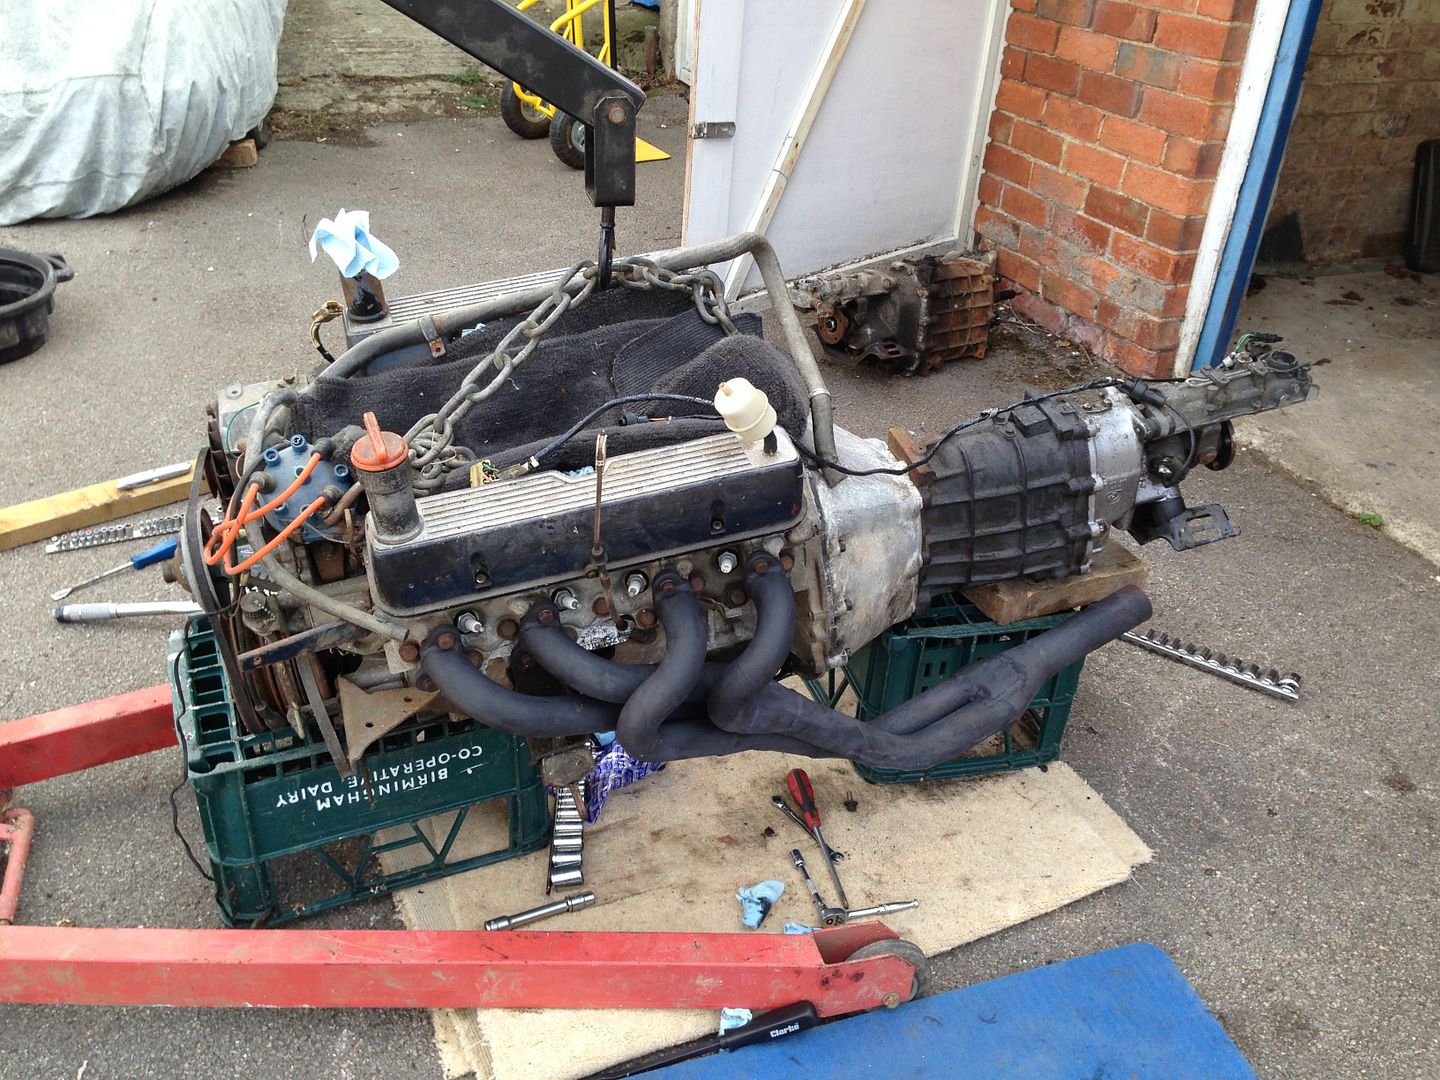
The whole lot back into the car:
I managed to re-built the clutch slave and master cylinders one evening last week so they went back in too and the whole lot bled last night.
All in all, a busy but productive day.
Power steering rack and cross-member cleaned up:
Power steering pump and pipes cleaned (forgot to take an 'after' picture):
Clutch and exhaust manifolds fitted. Gearbox cleaned, fluid changed and mated to engine, gearbox loom cleaned and re-taped:
The whole lot back into the car:
I managed to re-built the clutch slave and master cylinders one evening last week so they went back in too and the whole lot bled last night.
All in all, a busy but productive day.
More progress!
Prop shaft and exhaust system are back on:
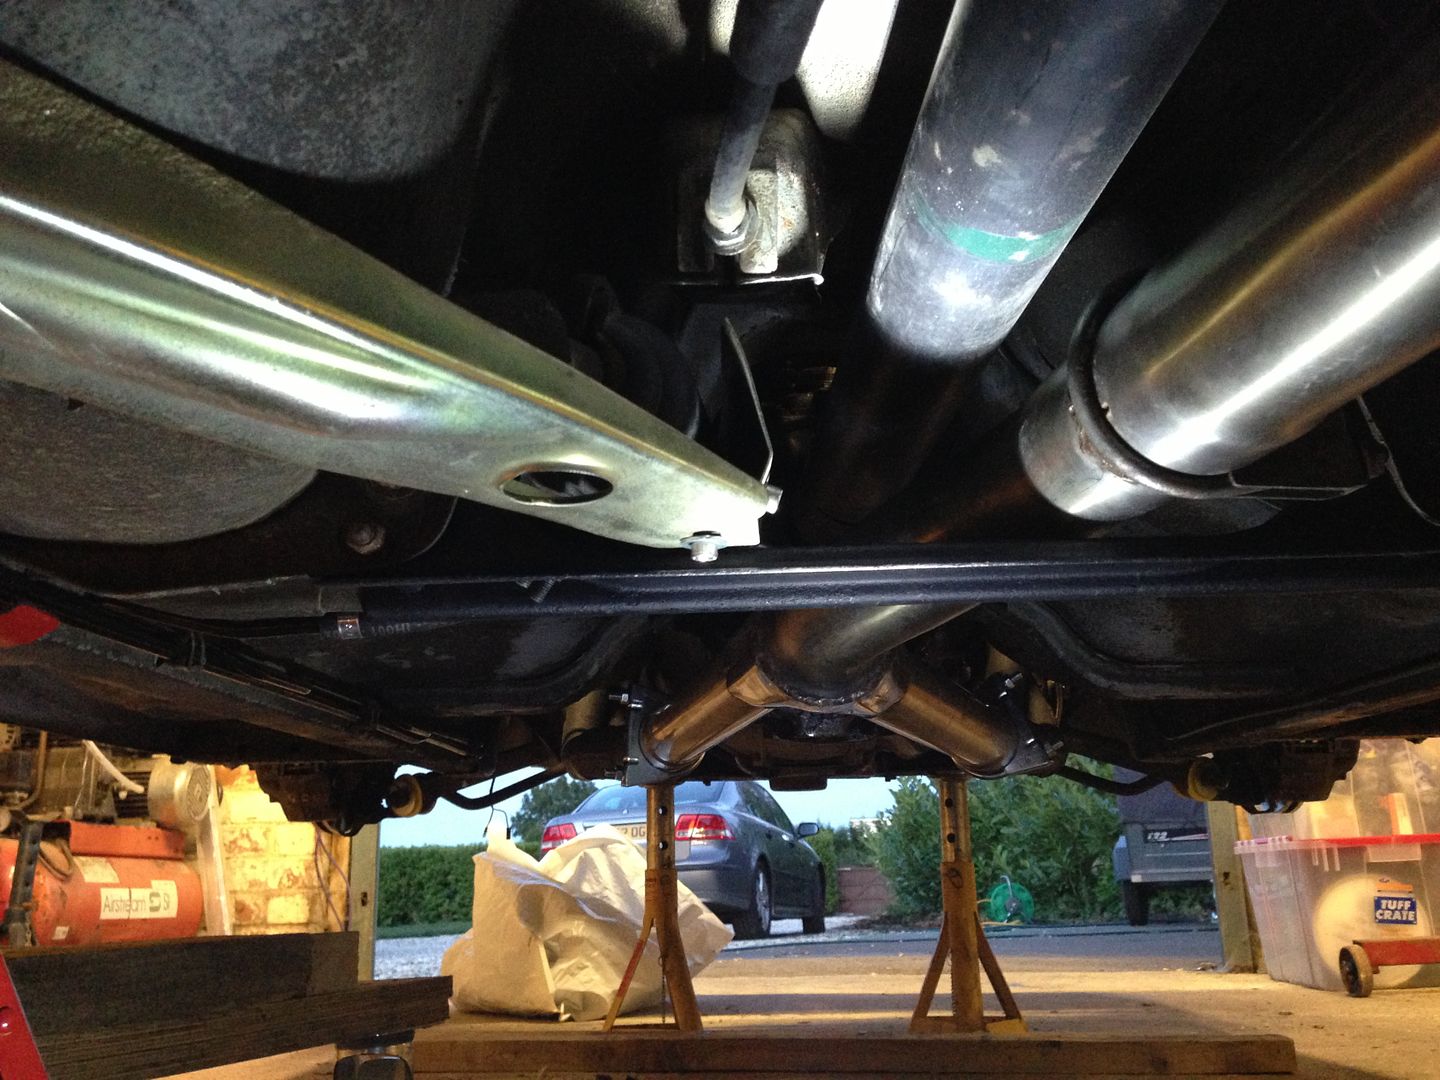
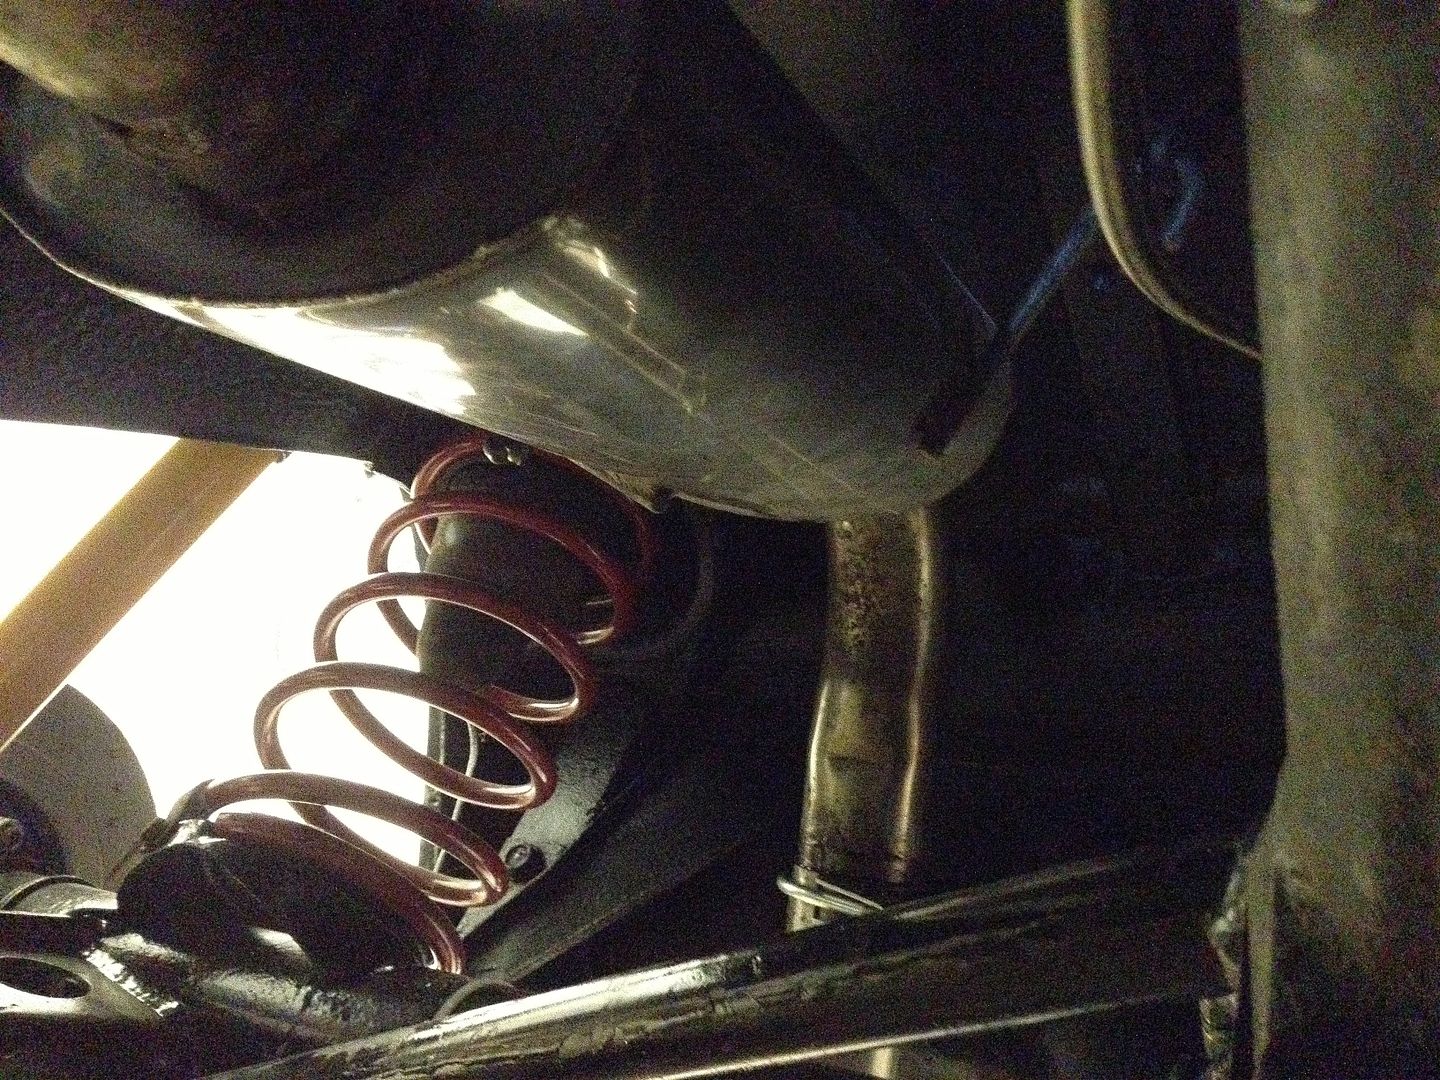
The prop is the black tube with the green paint in the first picture, good clean and it's in great shape.
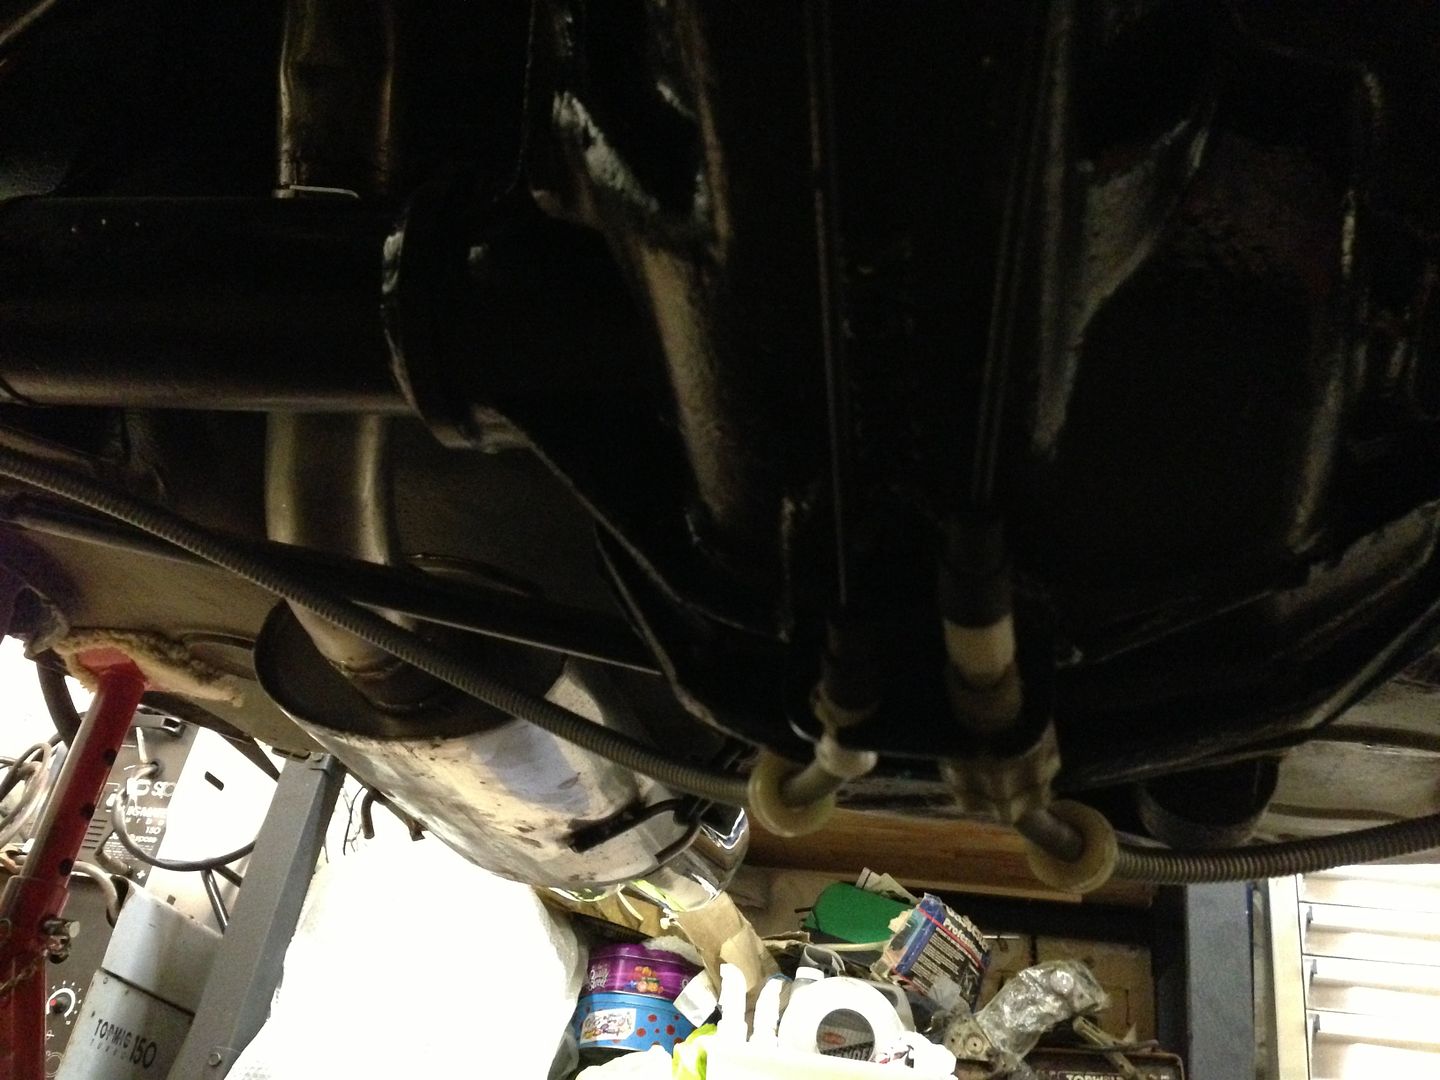
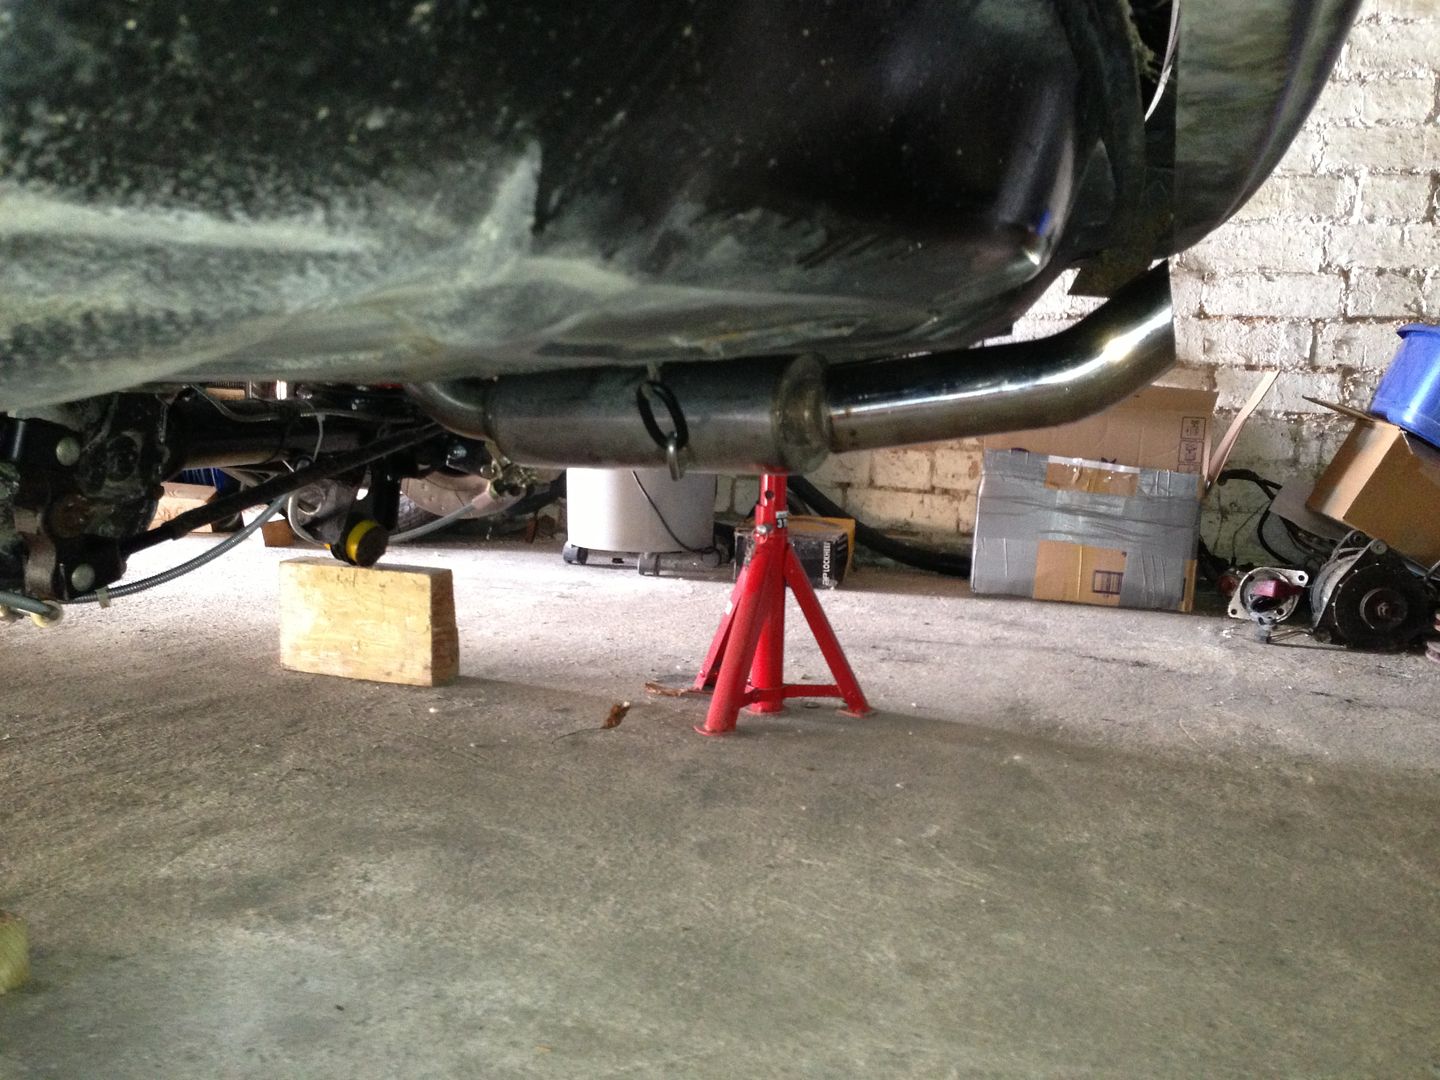
After cleaning I'm amazed how good the condition of the exhaust is, the stainless parts particularly so. It cost Dad a fortune years back and still looks like it'll do the business. Odd in the last picture the underside looks all dusty, it's not, it's under seal but it looks grey - must be the flash.
Picture of the fuel pump, shields and tank, all back in a little while ago but forgot to take picture:
I also filled the engine oil, changed the filter and primed the oil pump via the distributor drive using the special tool.
Prop shaft and exhaust system are back on:
The prop is the black tube with the green paint in the first picture, good clean and it's in great shape.
After cleaning I'm amazed how good the condition of the exhaust is, the stainless parts particularly so. It cost Dad a fortune years back and still looks like it'll do the business. Odd in the last picture the underside looks all dusty, it's not, it's under seal but it looks grey - must be the flash.
Picture of the fuel pump, shields and tank, all back in a little while ago but forgot to take picture:
I also filled the engine oil, changed the filter and primed the oil pump via the distributor drive using the special tool.
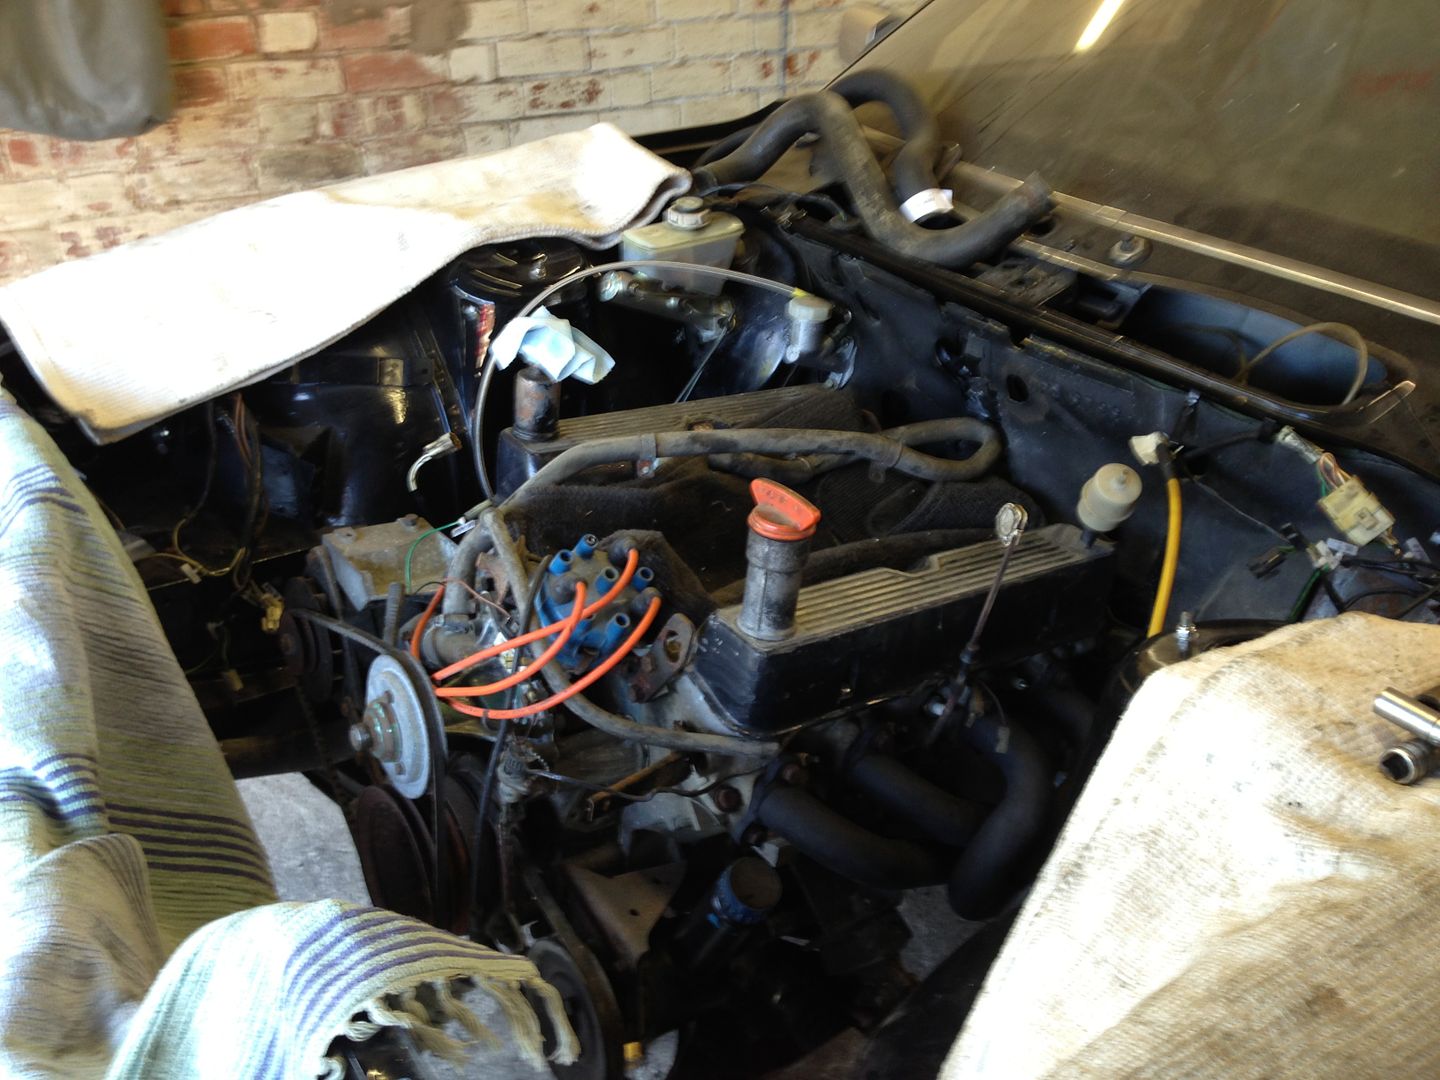
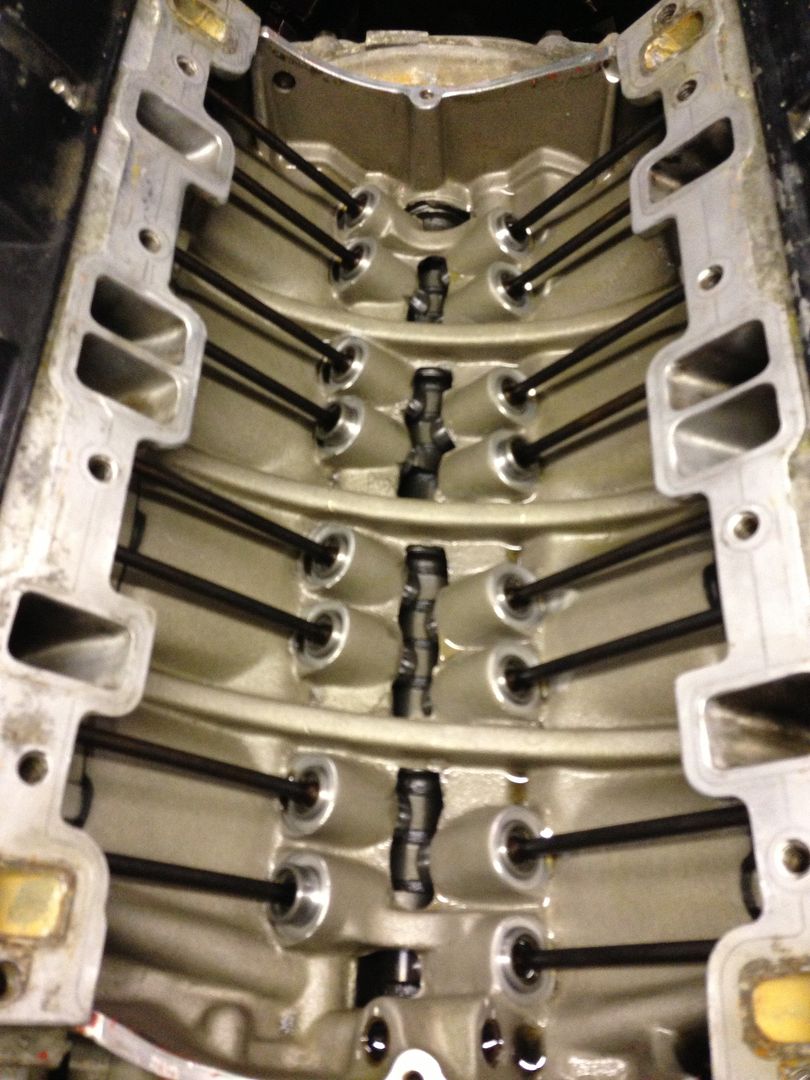
I took the inlet manifold off as it meant I could get the block lifted much higher on the engine crane and make putting it back in the car, whilst 2 foot in the air, much easier.
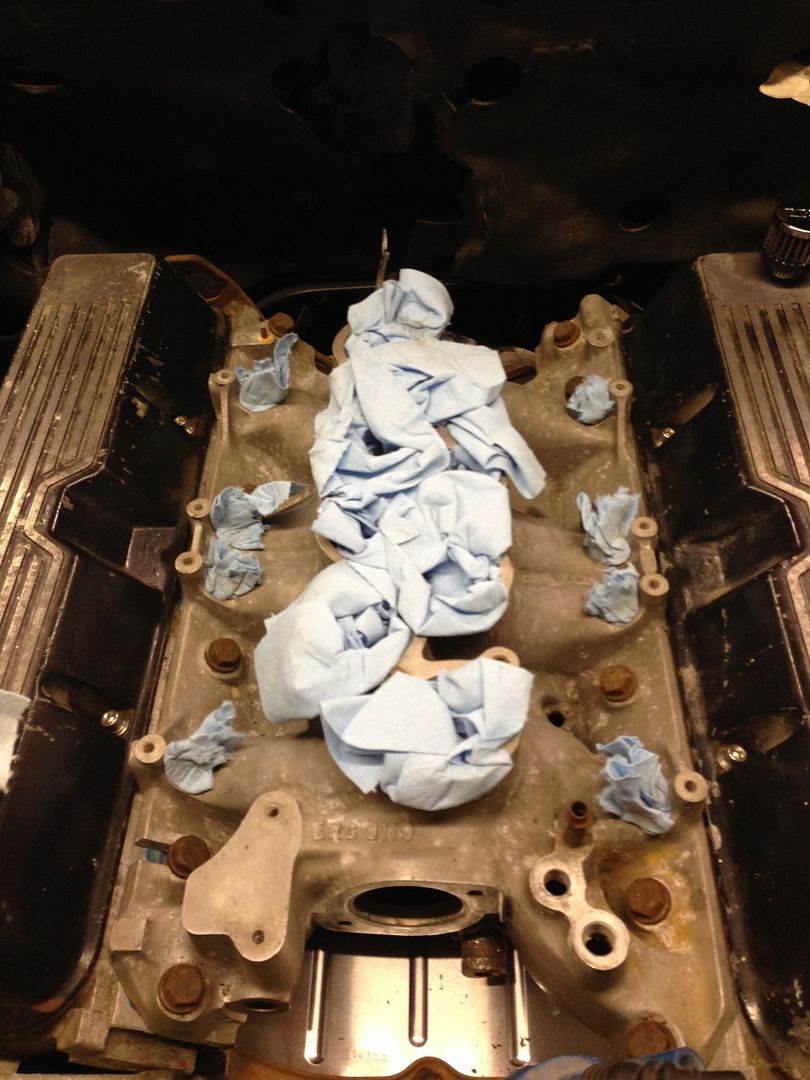
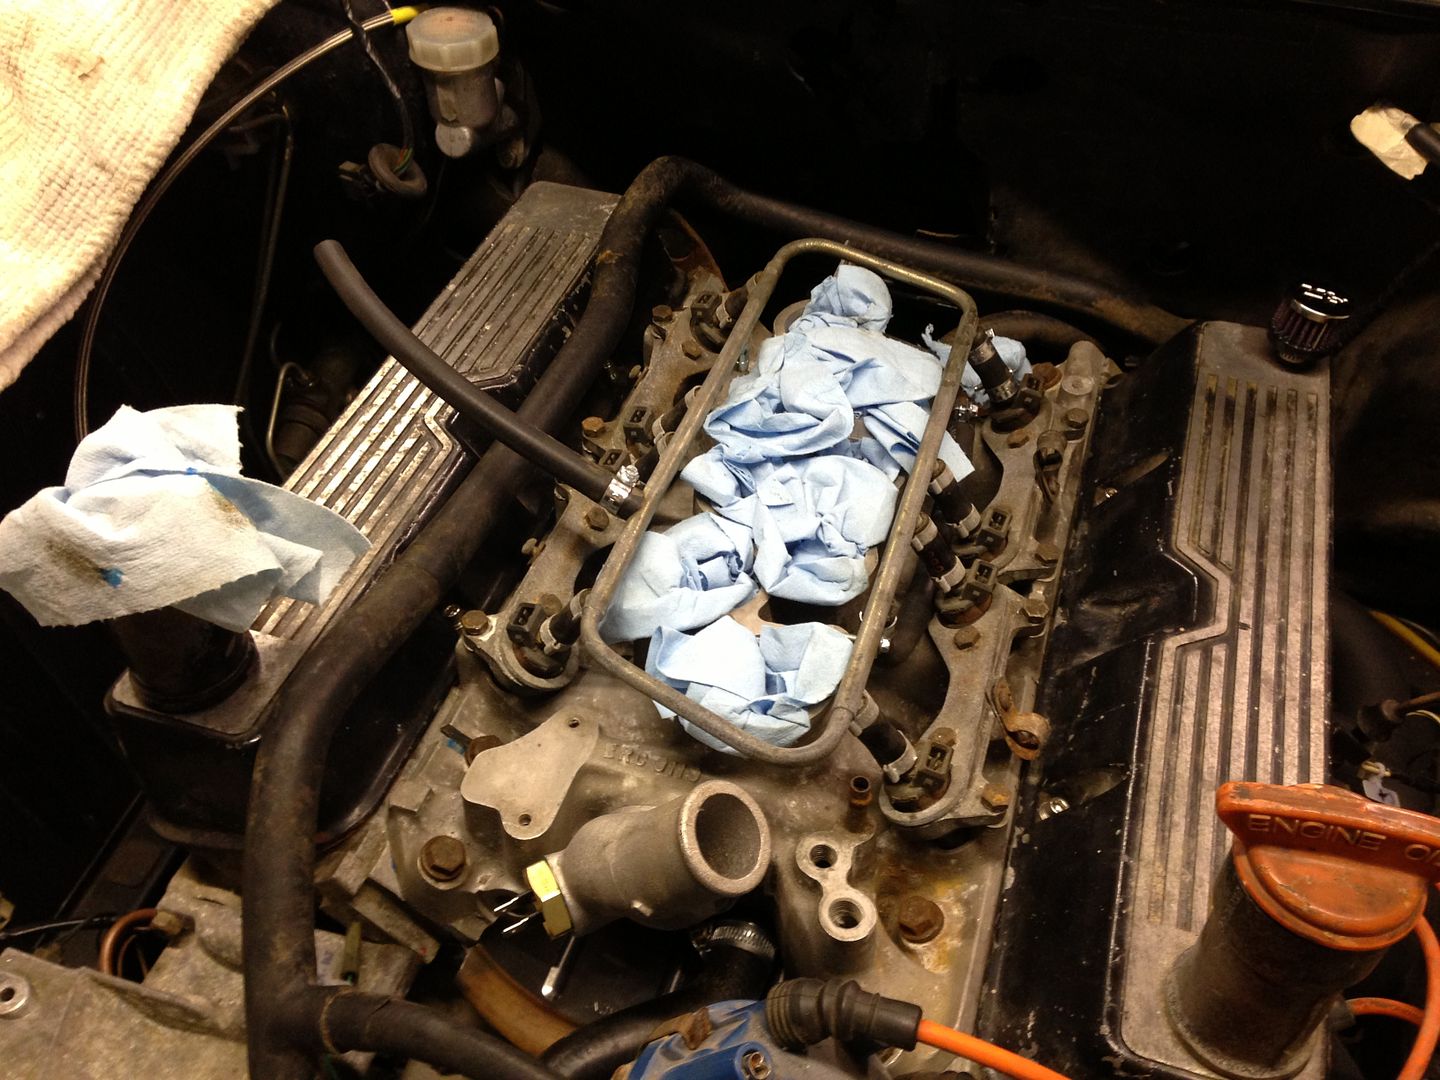
As such I had to replace the inlet manifold gasket, easy job and reassuring to see that the engine I built nearly 15 years ago still looks to be clean and crud free on the inside:
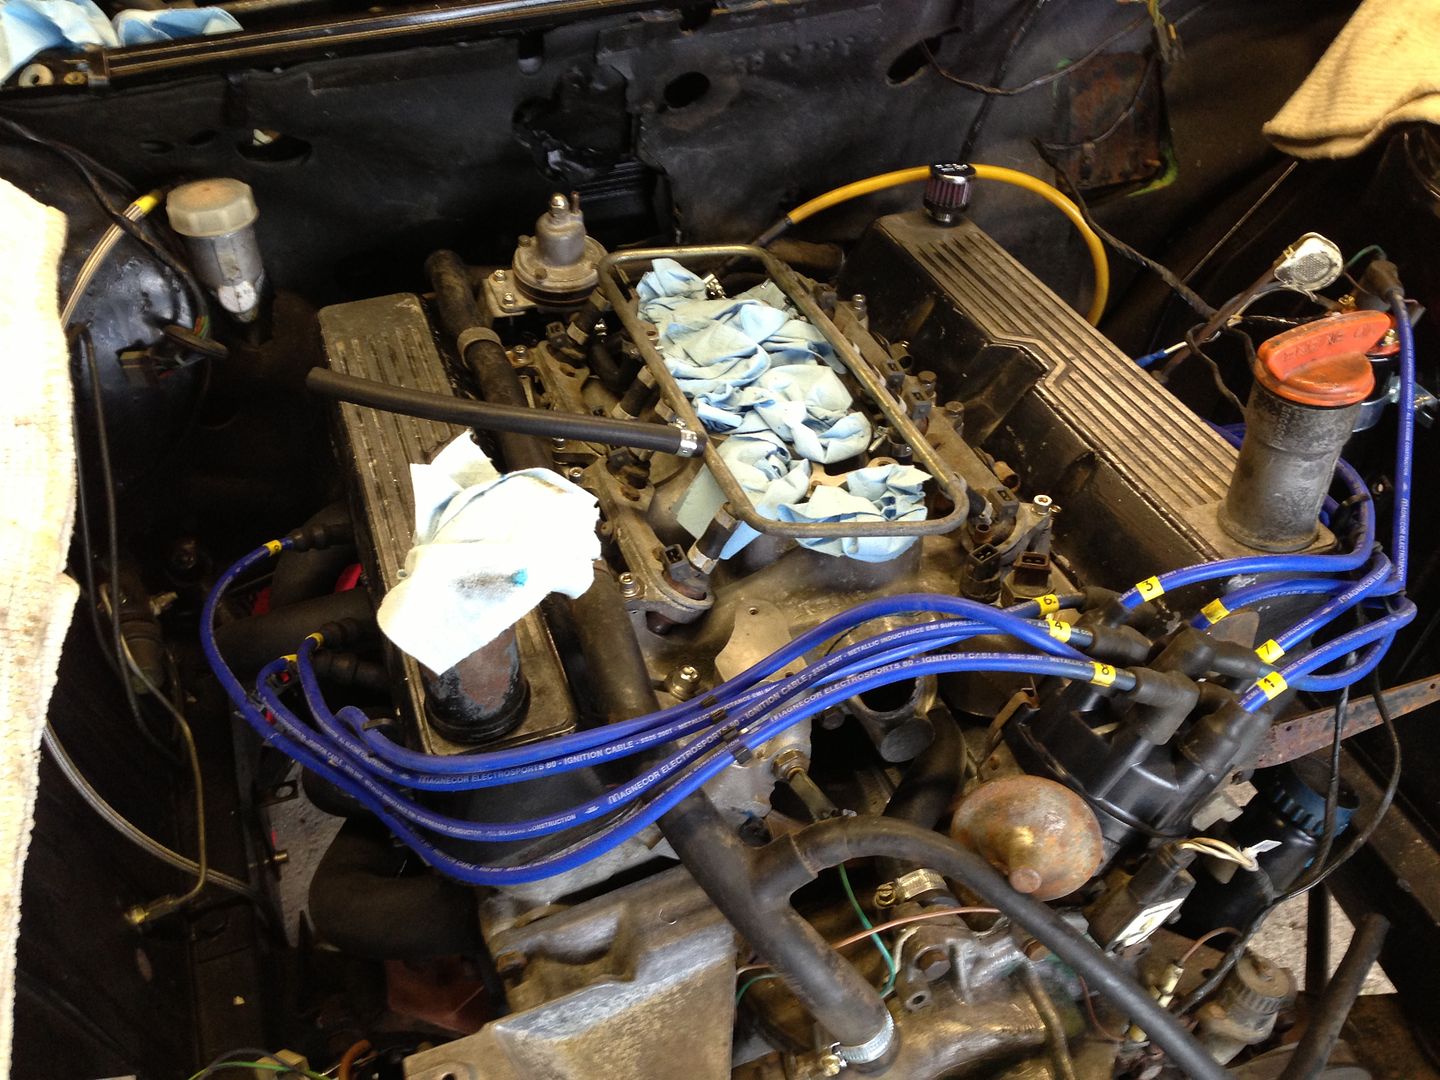
New gasket and (very ported) inlet manifold back on:
Fuel rail and sundries fitted:
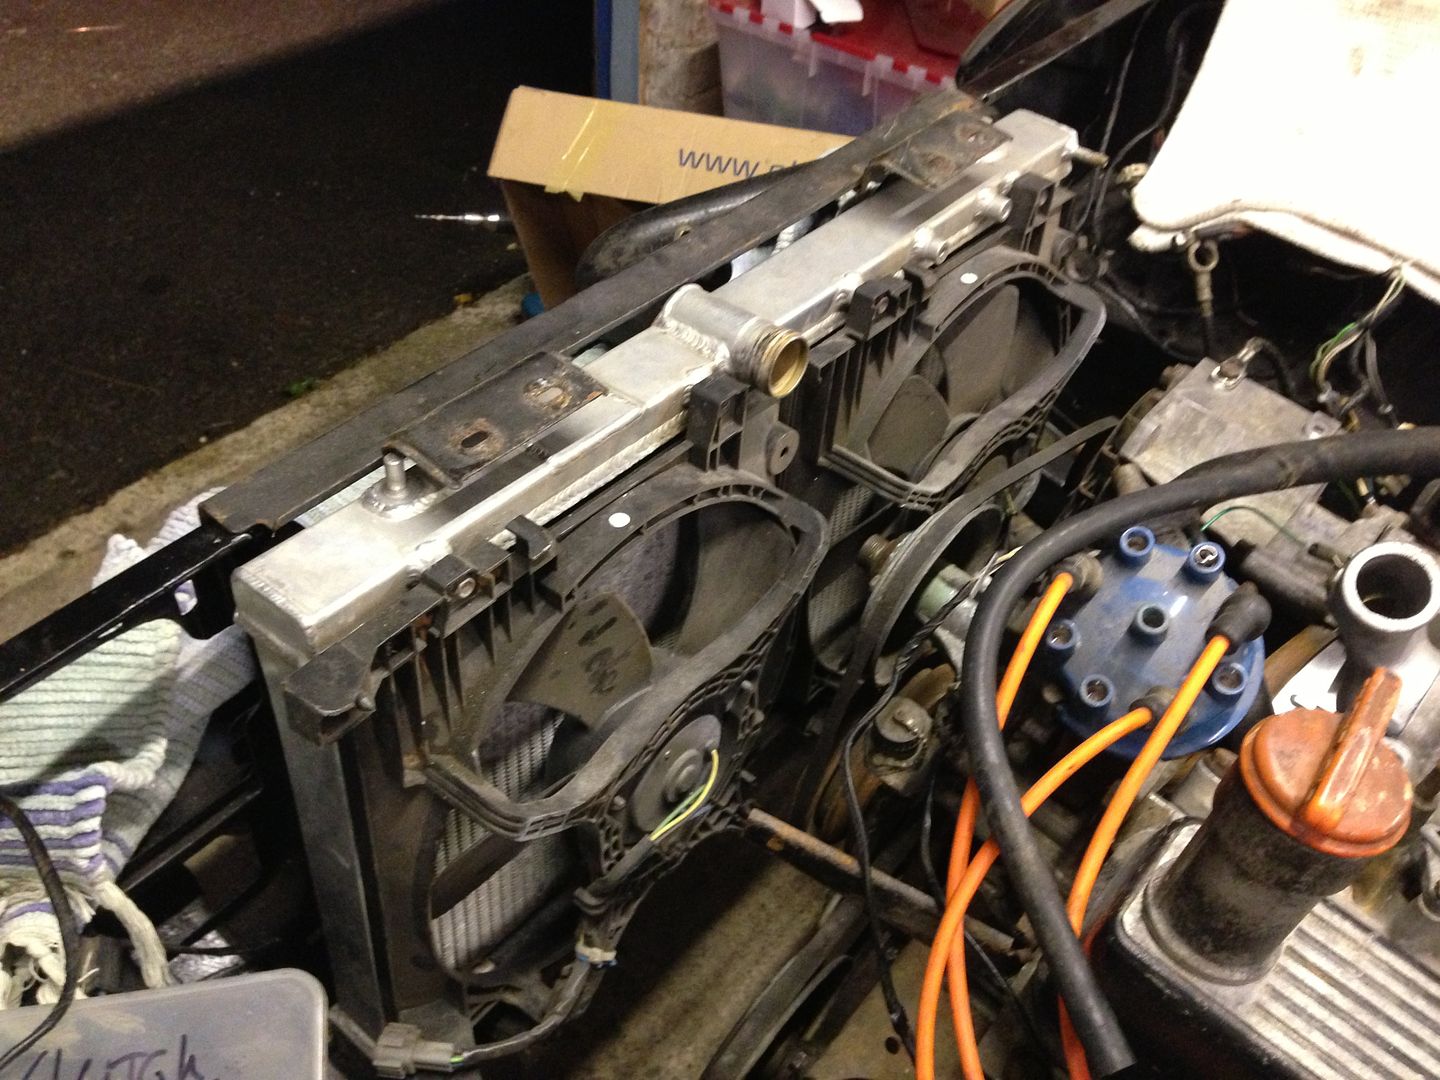
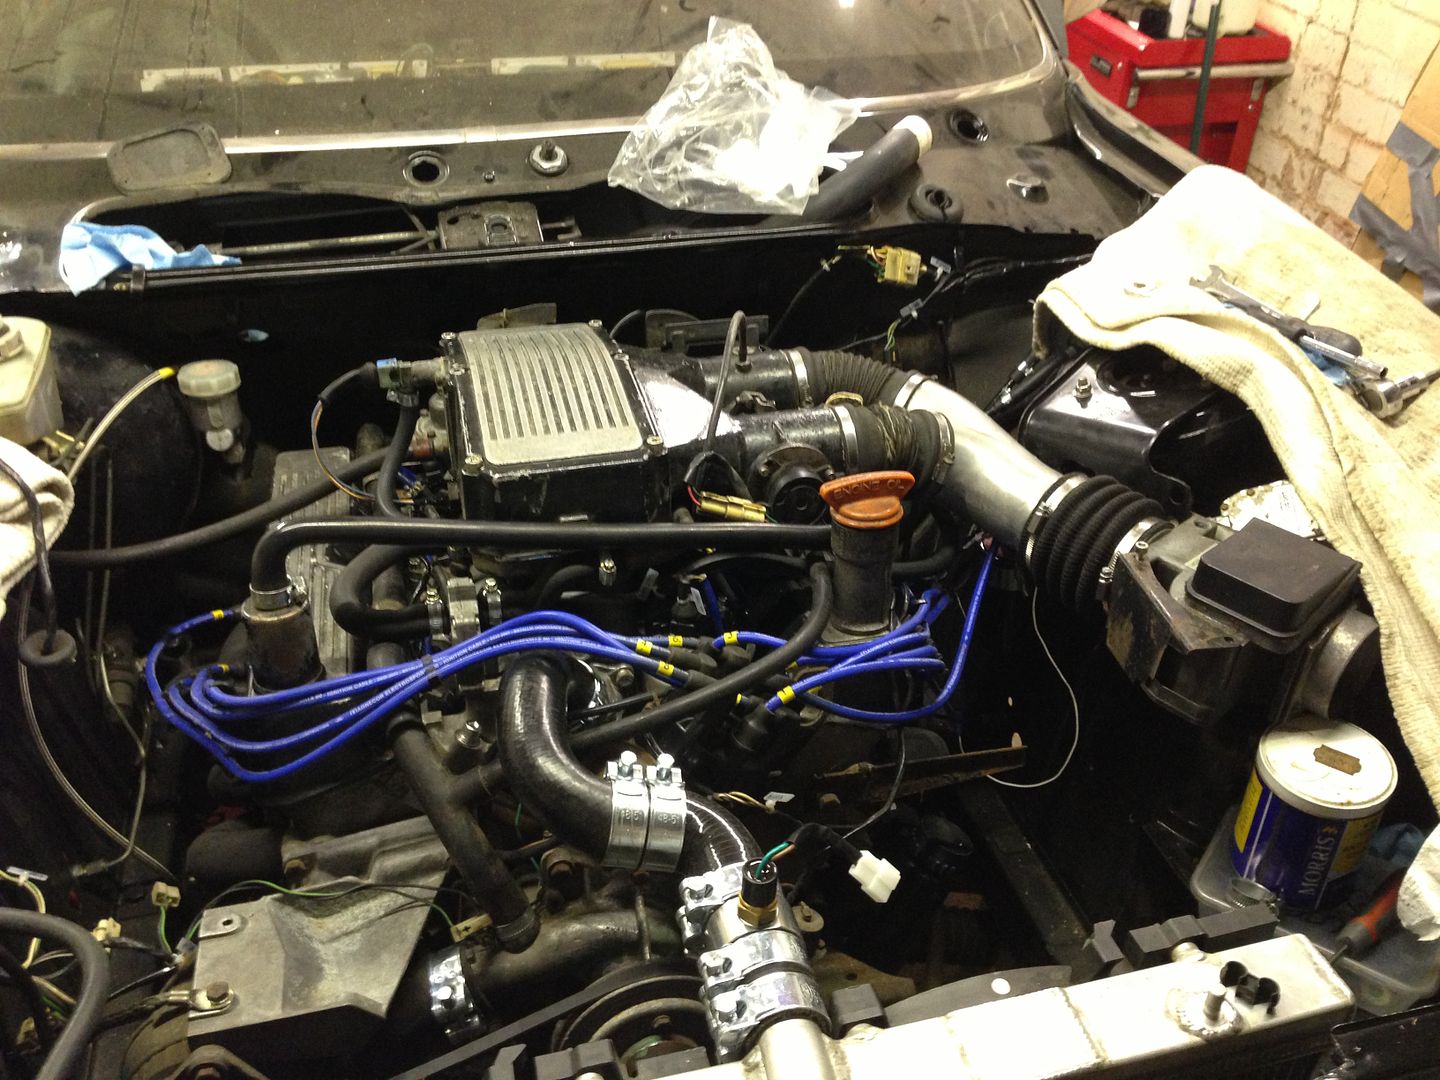
I'm adapting a very swanky aluminium radiator from a Impreza super turbo special thing, hoses in the wrong place though:
Adjustable fuel pressure regulator, water hoses, fuel interconnects, new HT leads, distributor cap and rotor arm on:
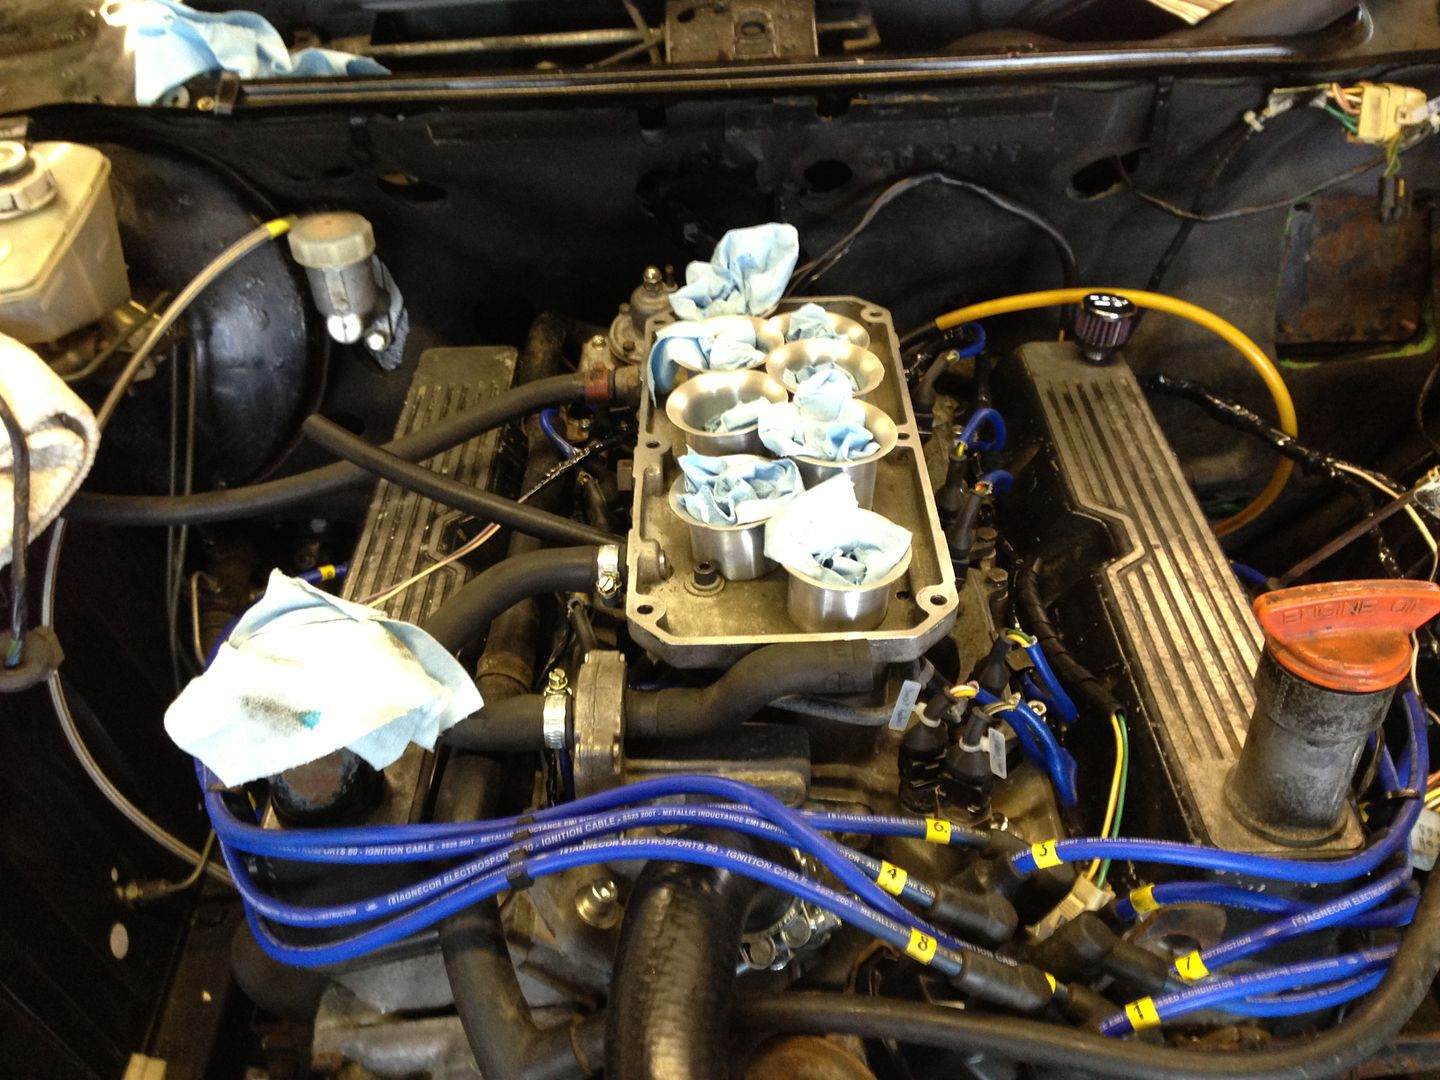
Trumpet base (ported from 38mm to 45mm each and extra air valve on:
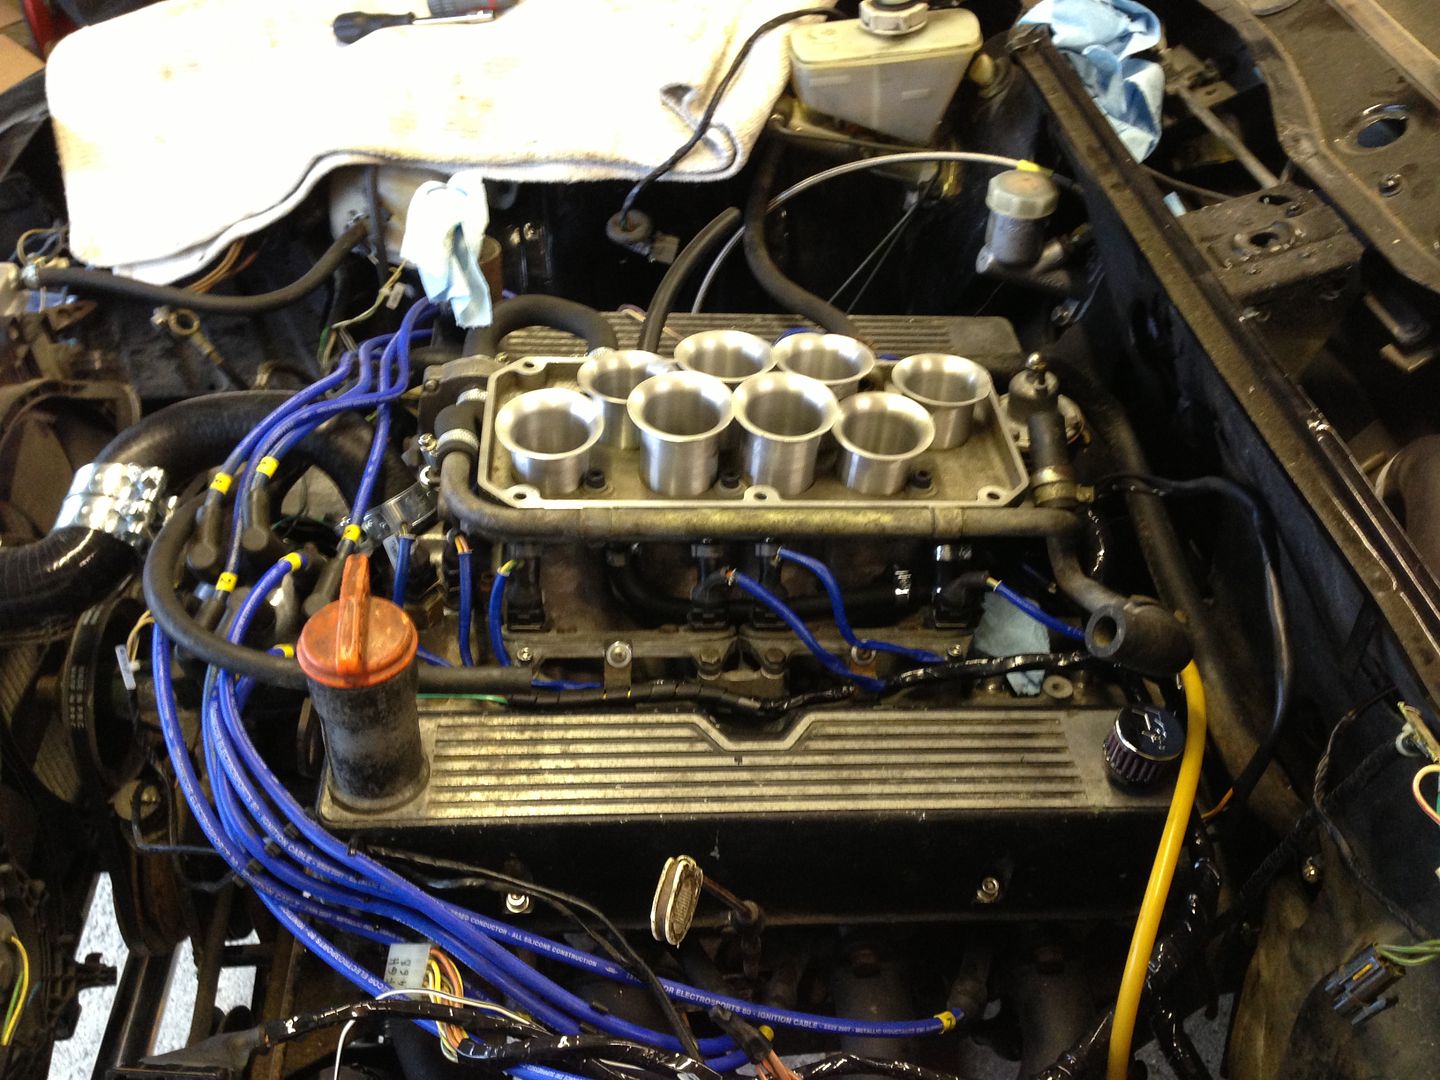
Twin Throttle plenum on, also full injection wiring loom:
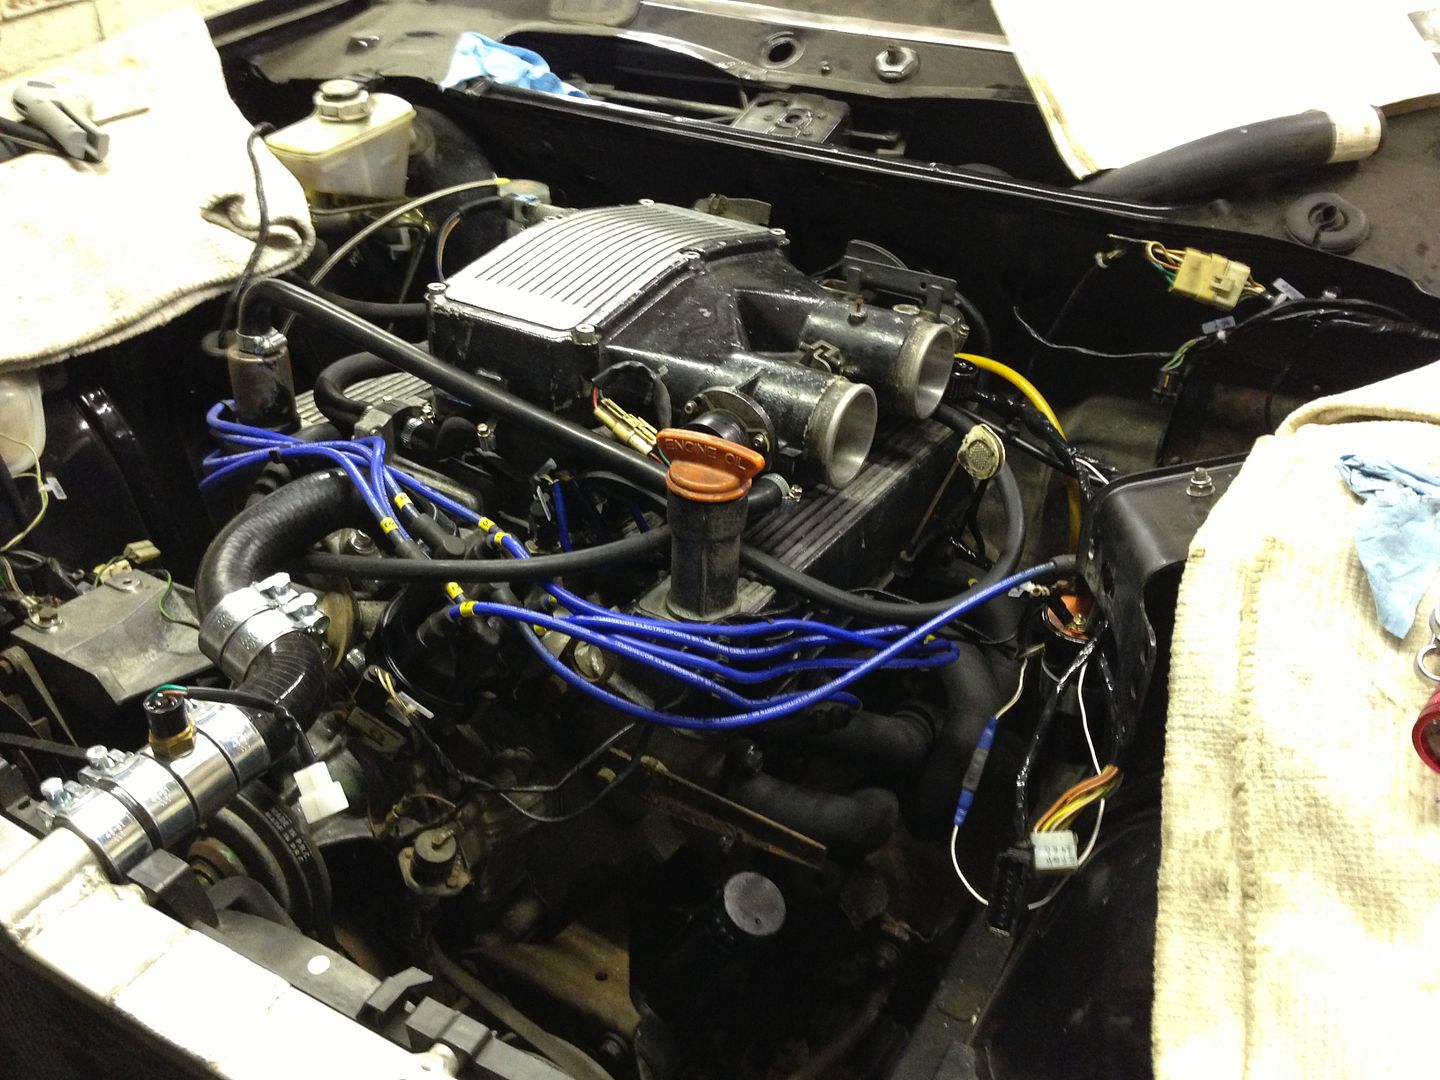

Y piece and air flow meter back on:
I have another plenum top and pair of rocker covers which I'm going to clean up and replace the ones on there at some point, 15 years of sitting about have left them looking a little scruffy. They'll clean up perfectly but it'll mean I can just swap one set for the other.
As such I had to replace the inlet manifold gasket, easy job and reassuring to see that the engine I built nearly 15 years ago still looks to be clean and crud free on the inside:
New gasket and (very ported) inlet manifold back on:
Fuel rail and sundries fitted:
I'm adapting a very swanky aluminium radiator from a Impreza super turbo special thing, hoses in the wrong place though:
Adjustable fuel pressure regulator, water hoses, fuel interconnects, new HT leads, distributor cap and rotor arm on:
Trumpet base (ported from 38mm to 45mm each and extra air valve on:
Twin Throttle plenum on, also full injection wiring loom:
Y piece and air flow meter back on:
I have another plenum top and pair of rocker covers which I'm going to clean up and replace the ones on there at some point, 15 years of sitting about have left them looking a little scruffy. They'll clean up perfectly but it'll mean I can just swap one set for the other.
Gassing Station | Readers' Cars | Top of Page | What's New | My Stuff