Twin Plenum Vitesse restoration
Discussion


dib851 said:
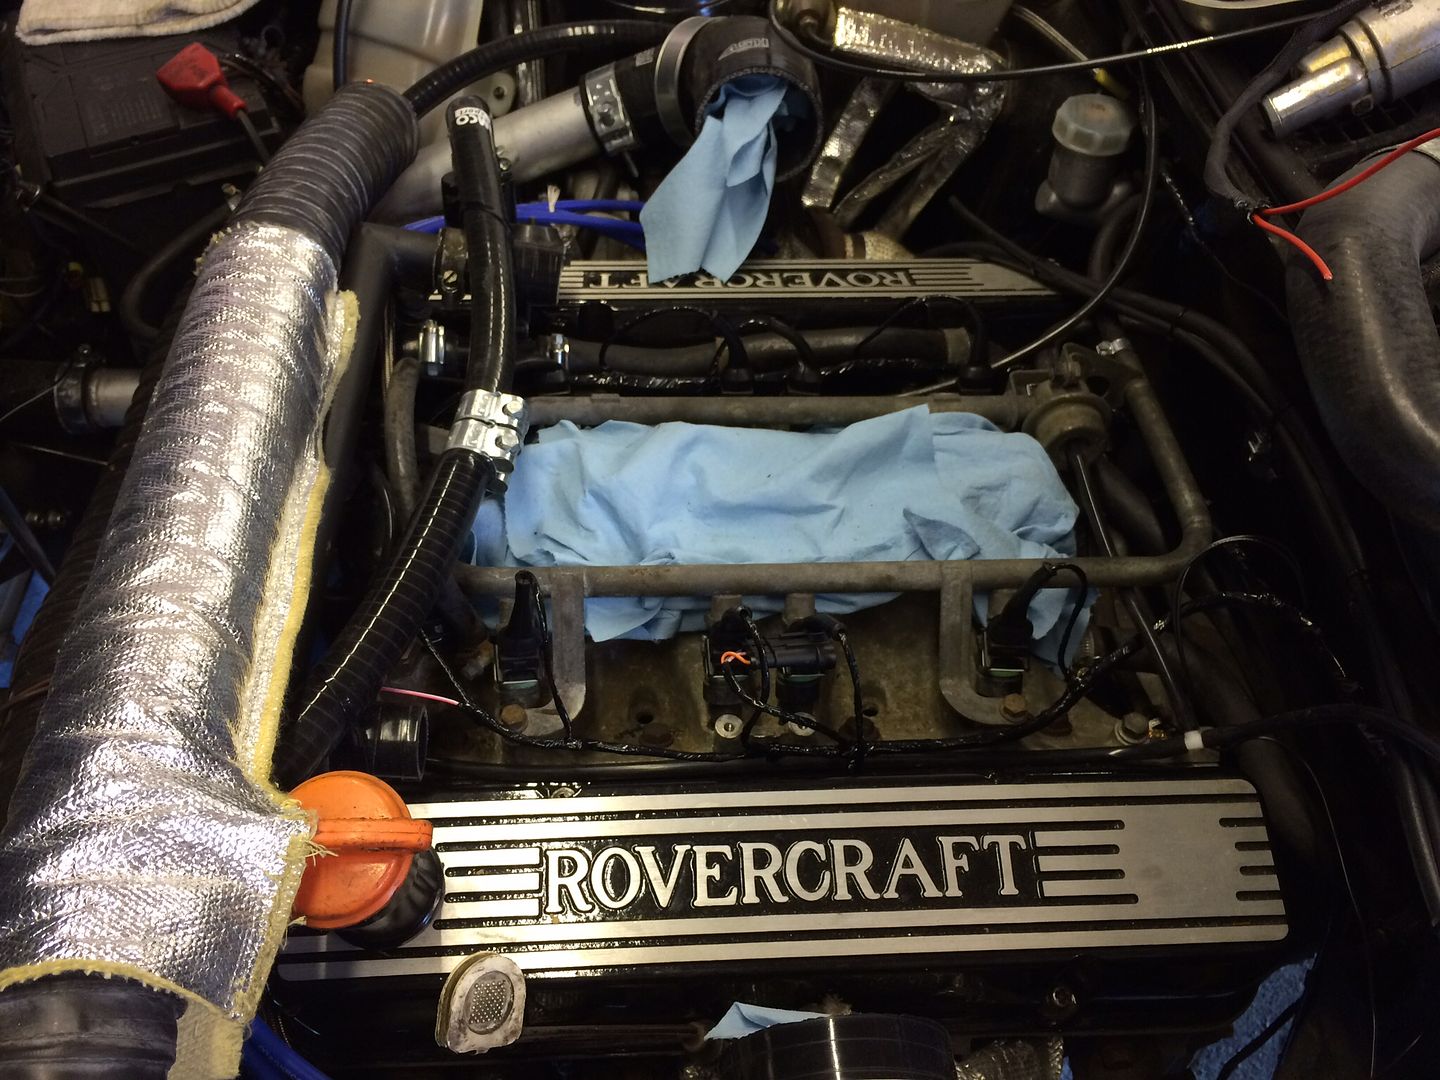
I was just having a little look about, reminiscing a little I guess, and I cam across this post. The weird thing is I used to work at Rovercraft (during the Tony Marsh / Phil Eaves twin turbo era) and I don't remember ever seeing these rocker covers with 'Rovercraft' cast into them??
They're quite a bit taller than standard covers, so I assume they're for high lift/solid lifters.I don't suppose you have any details or brochures from back in the day? (I'm interested on any Rovercraft TT info you have)
Thanks!
I though it was about time I updated this thread with my progress:
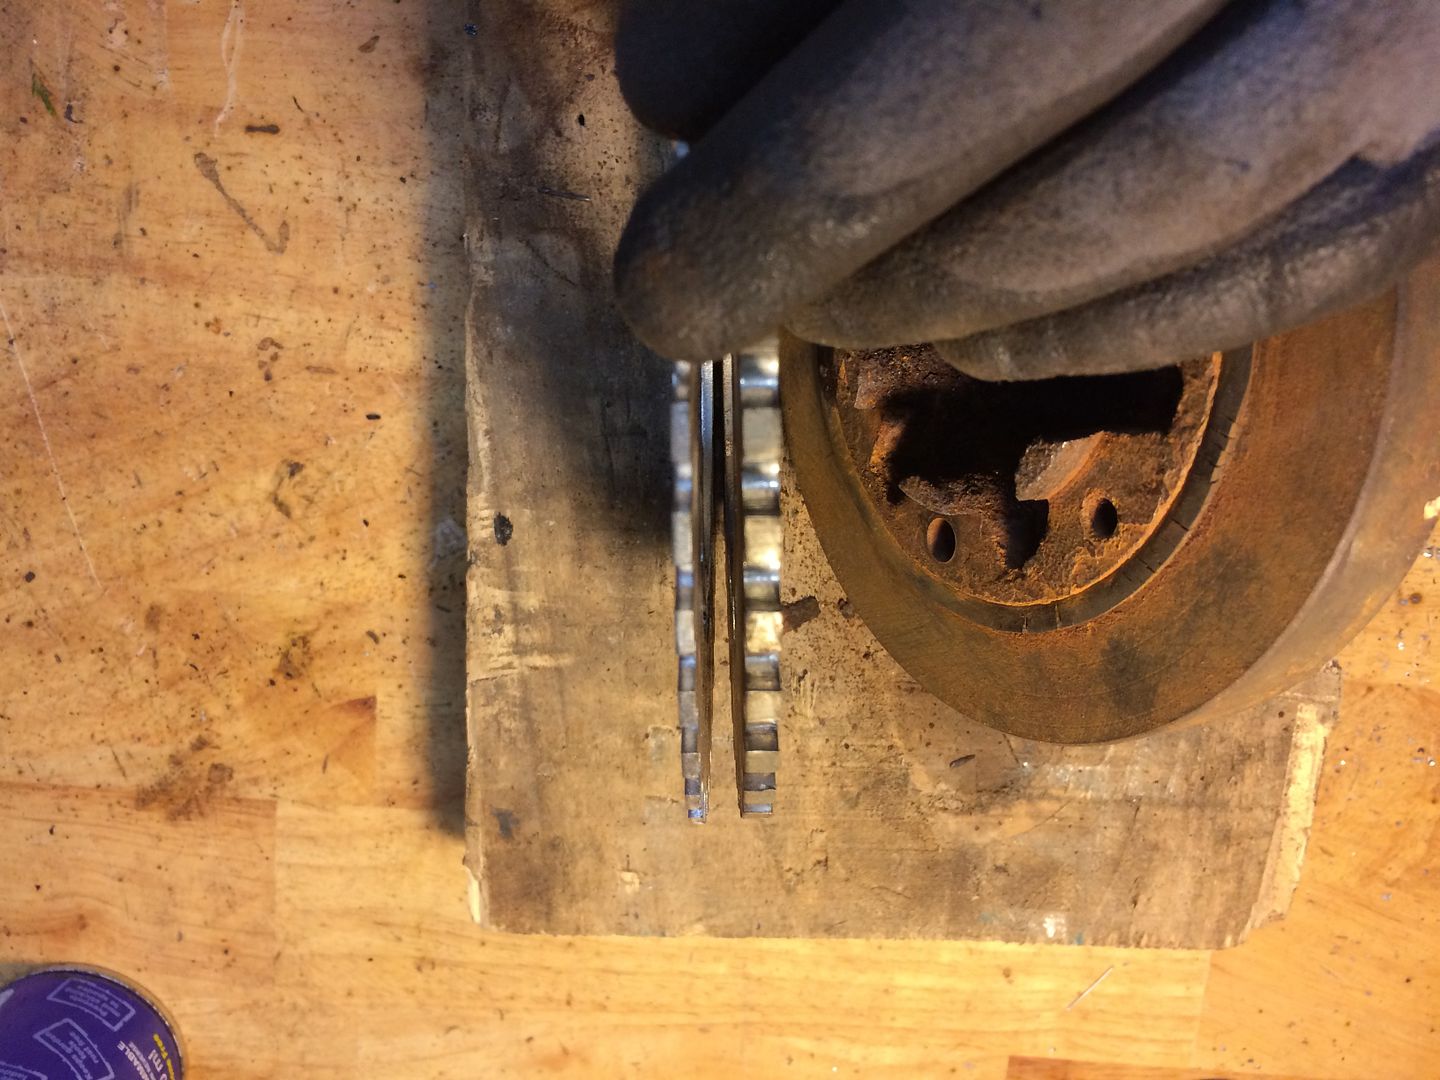
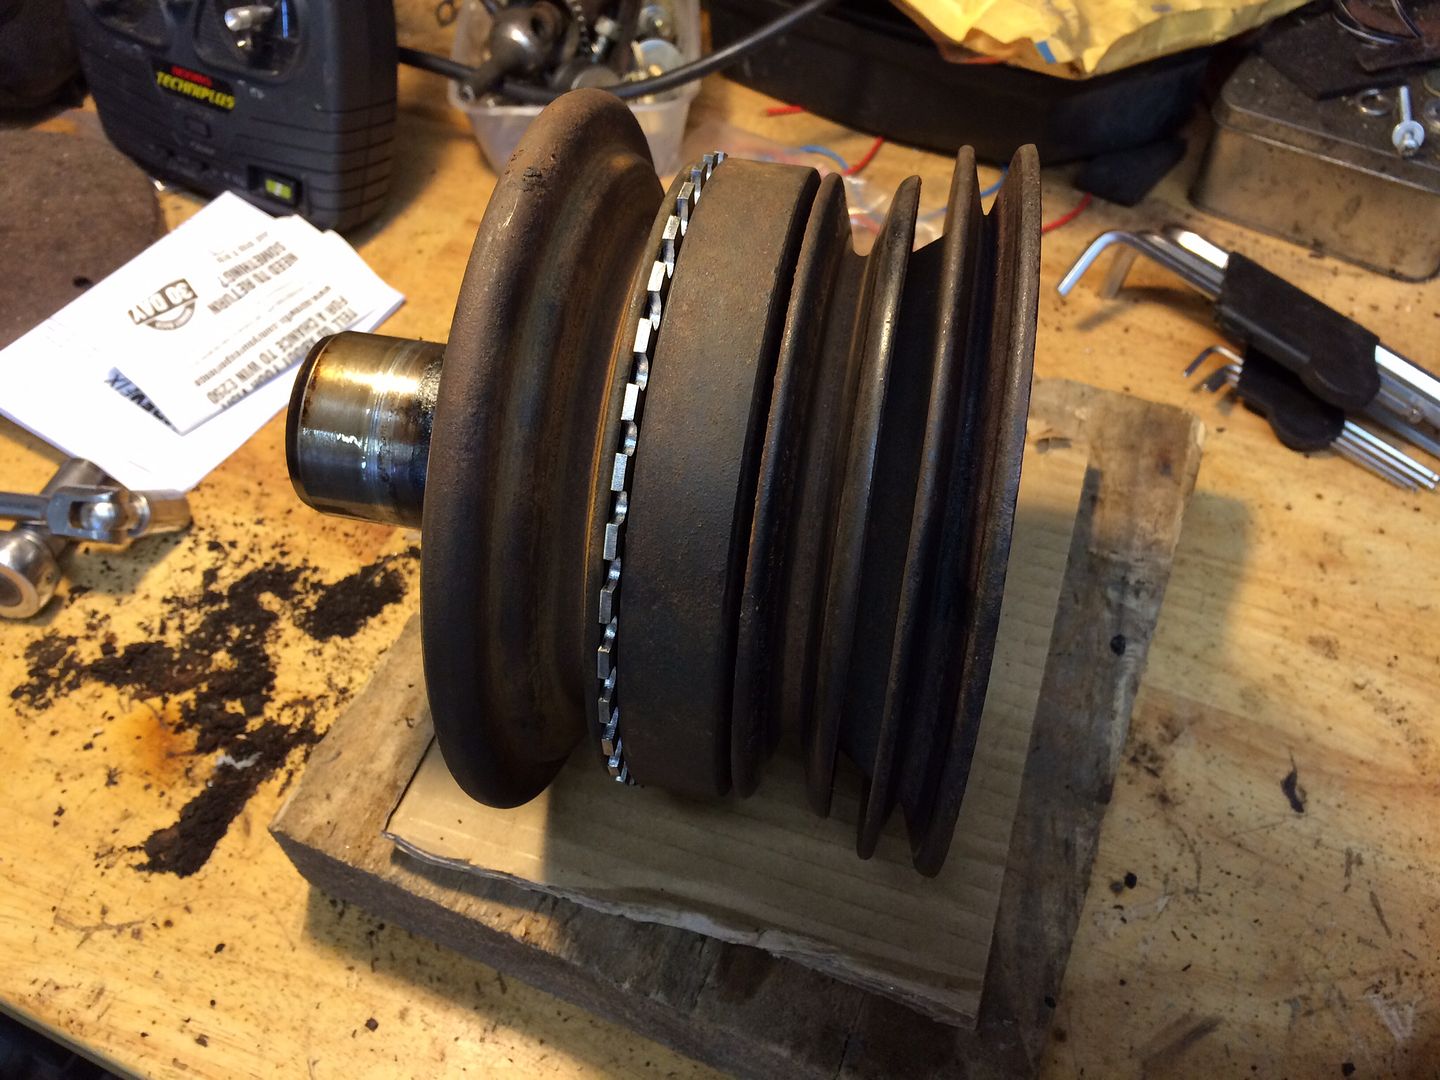
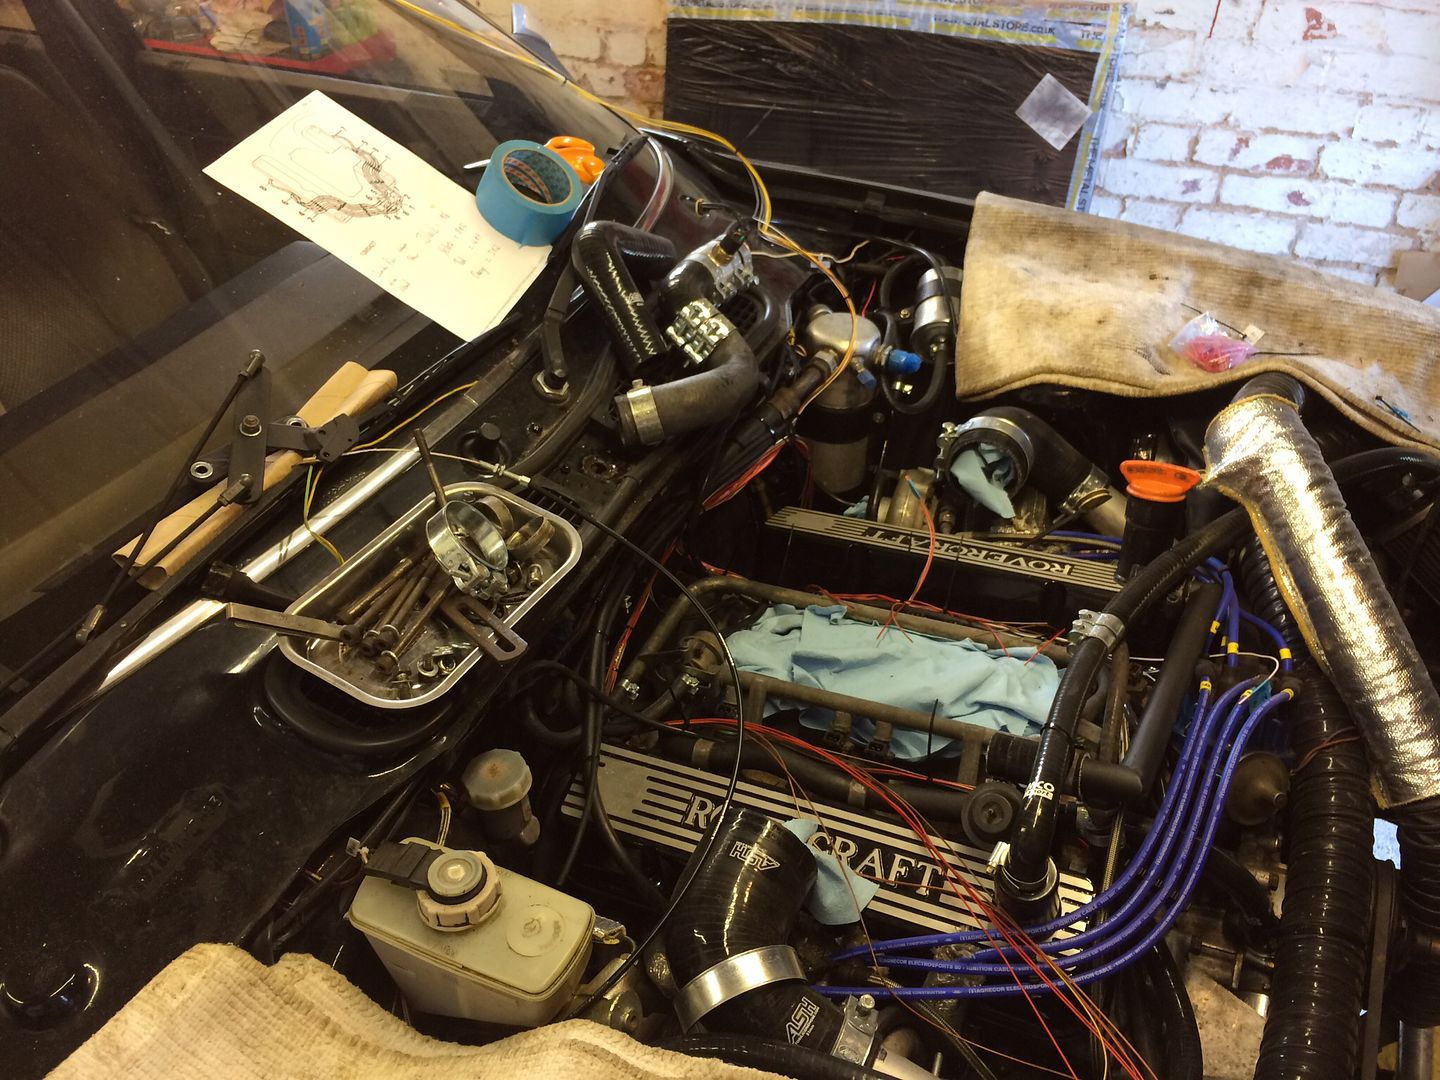
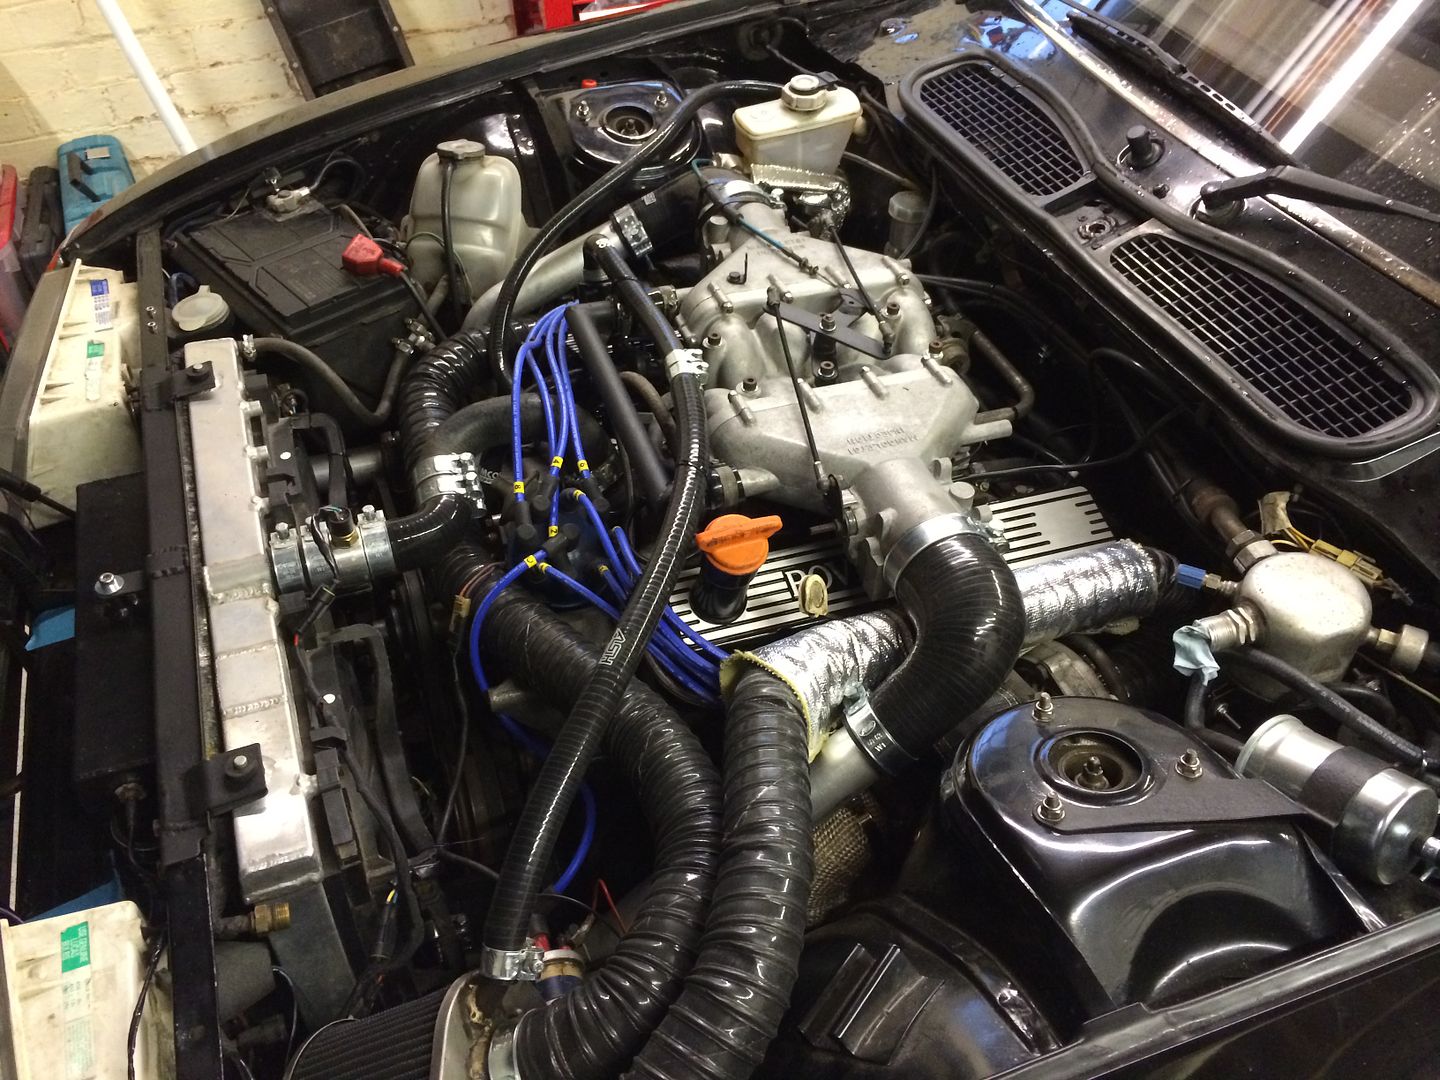
As part of fitting the new Omex 710 ECU I have to fit a trigger wheel so that the ECU can determine the current degree of rotation of the engine. This is accomplished by a 36-1 trigger wheel, each notch representing 10 degrees of a complete rotation.
Standard ones are pretty thick at around 6mm, I've fitted one at 2.5mm which keeps the power steering belt in alignment as it's sandwiched in the front pulley. (If anything it's improved the alignment slightly)
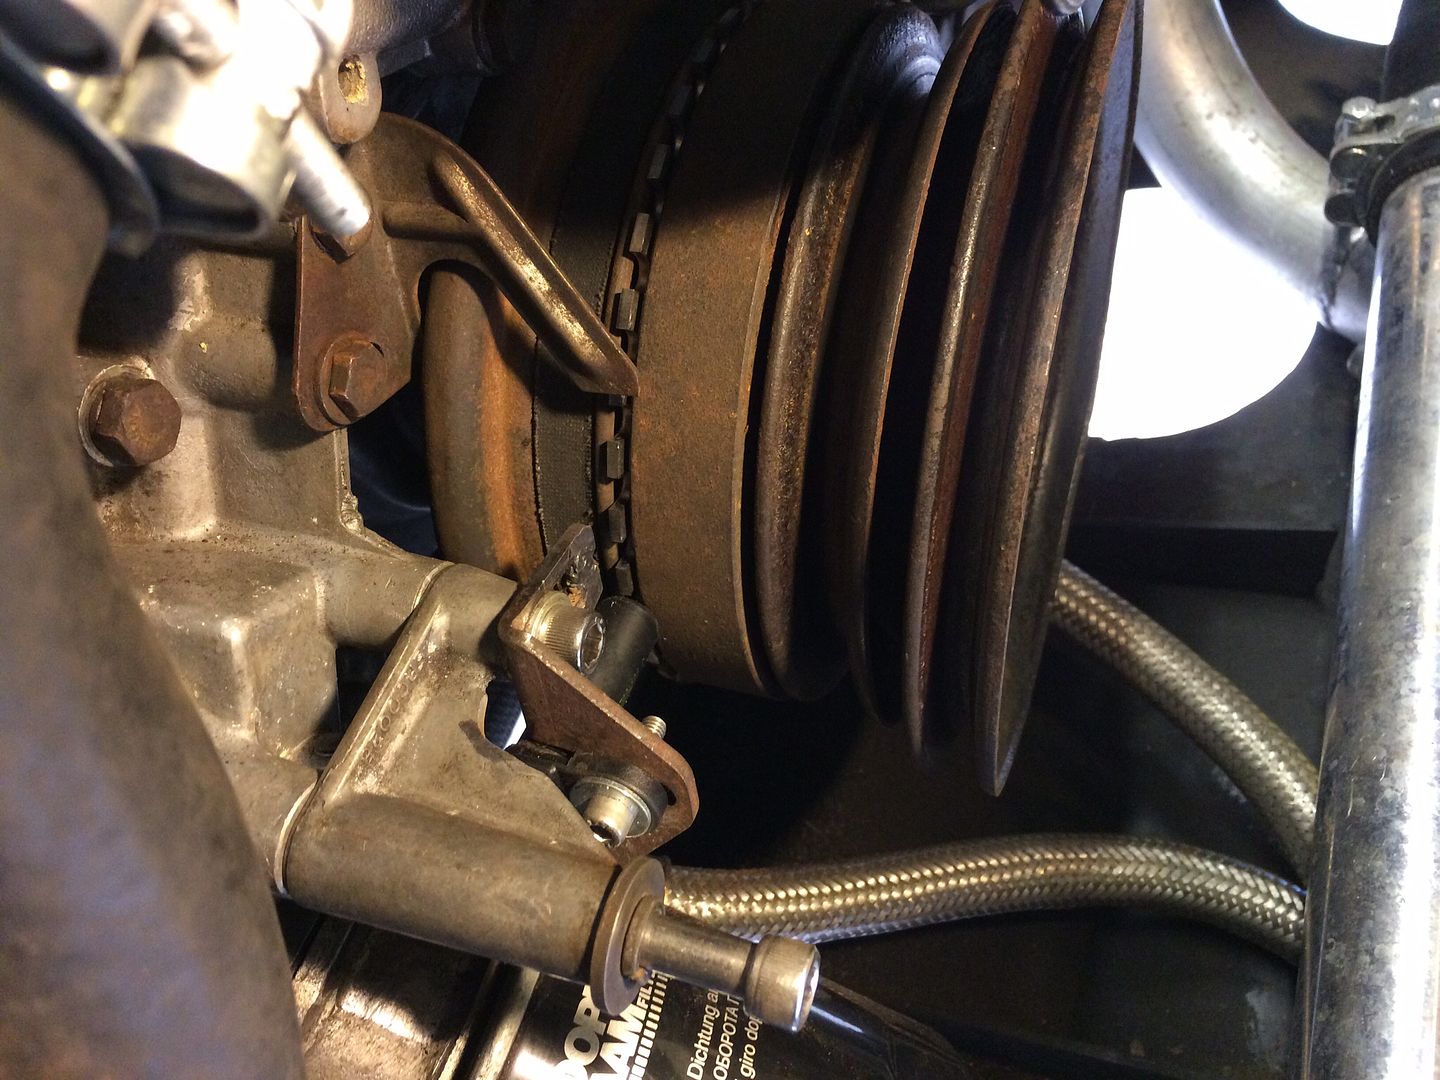
I also had to make a bracket to hold a VR sensor <0.5mm away from the wheel:
New air temp sensor fitted into the intercooler:

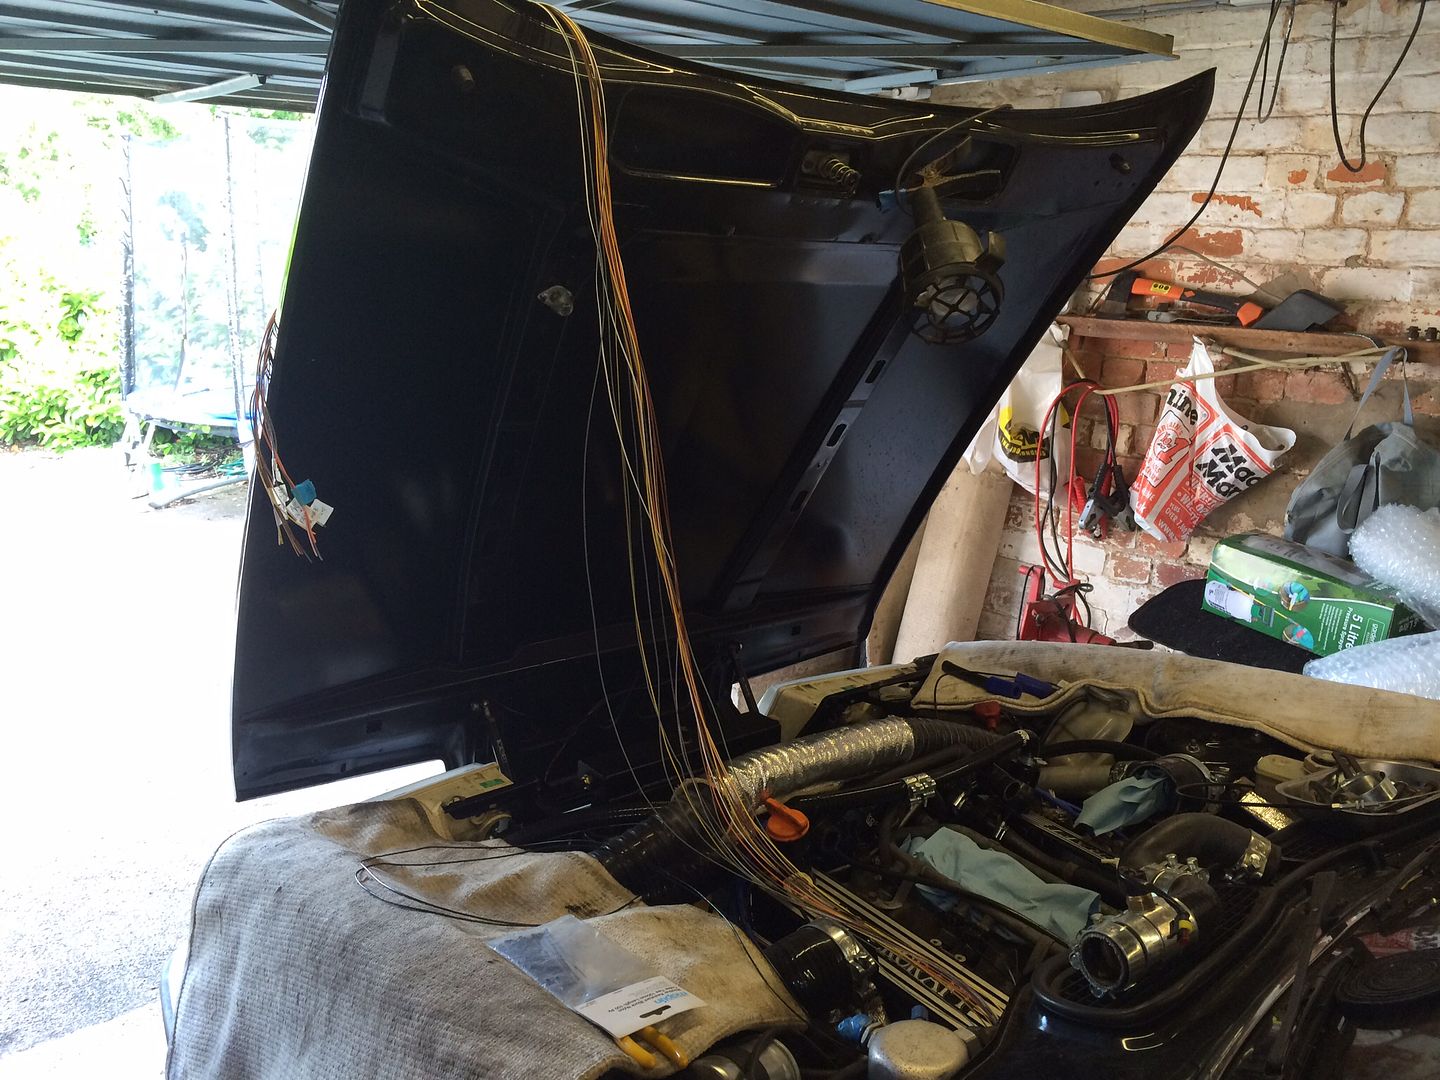
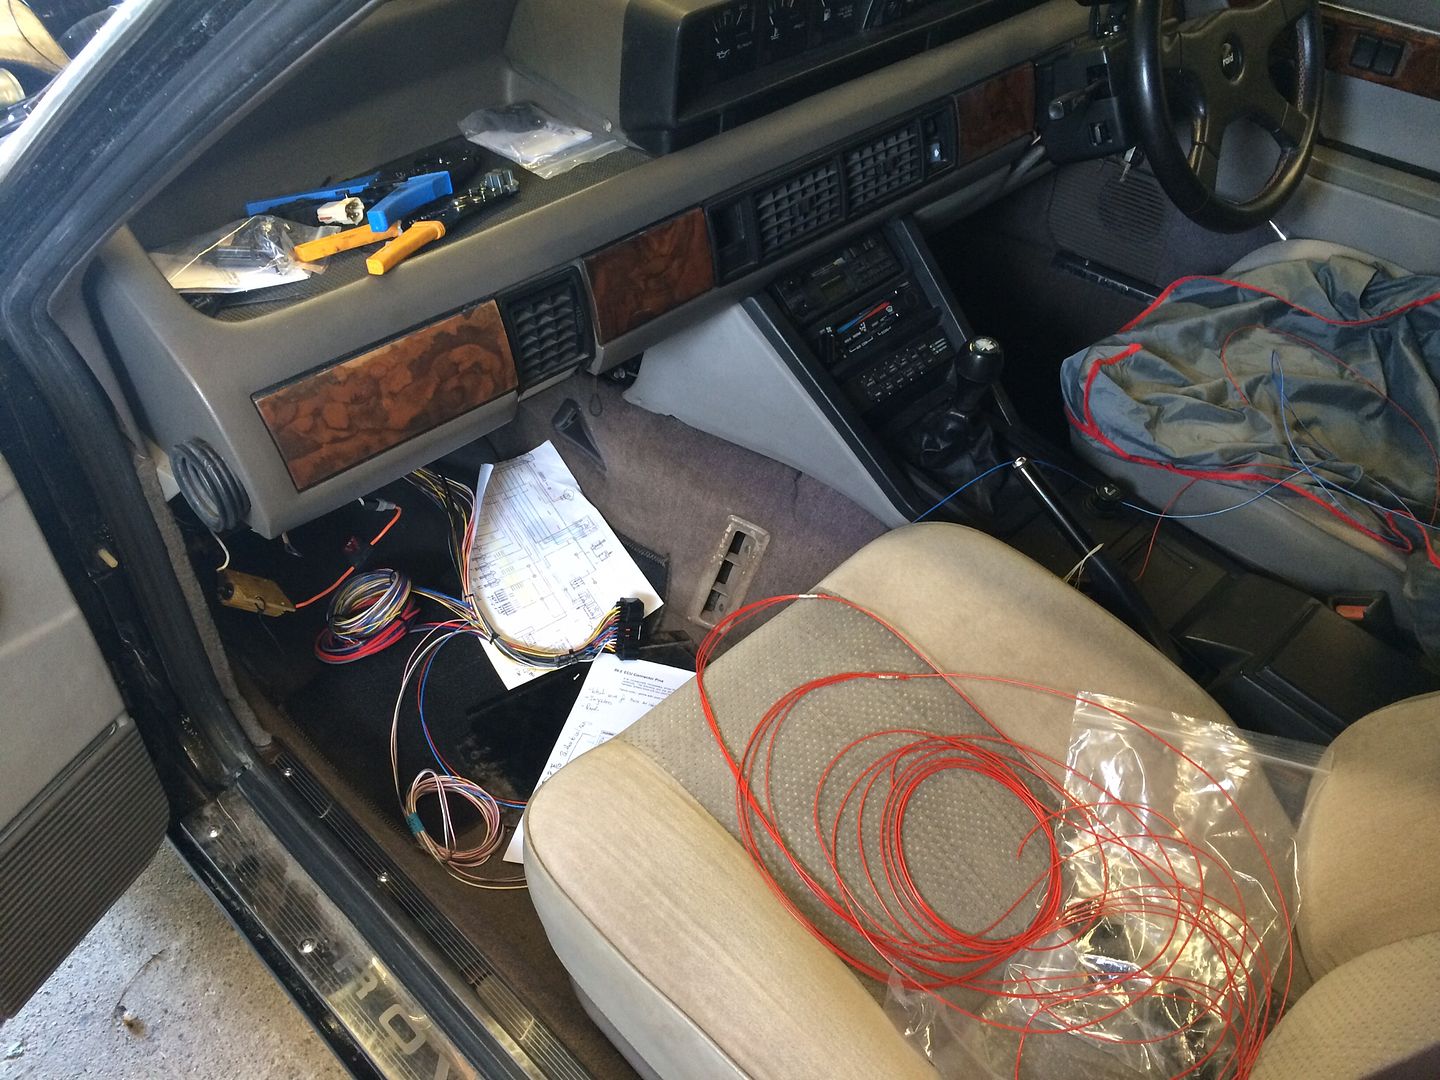
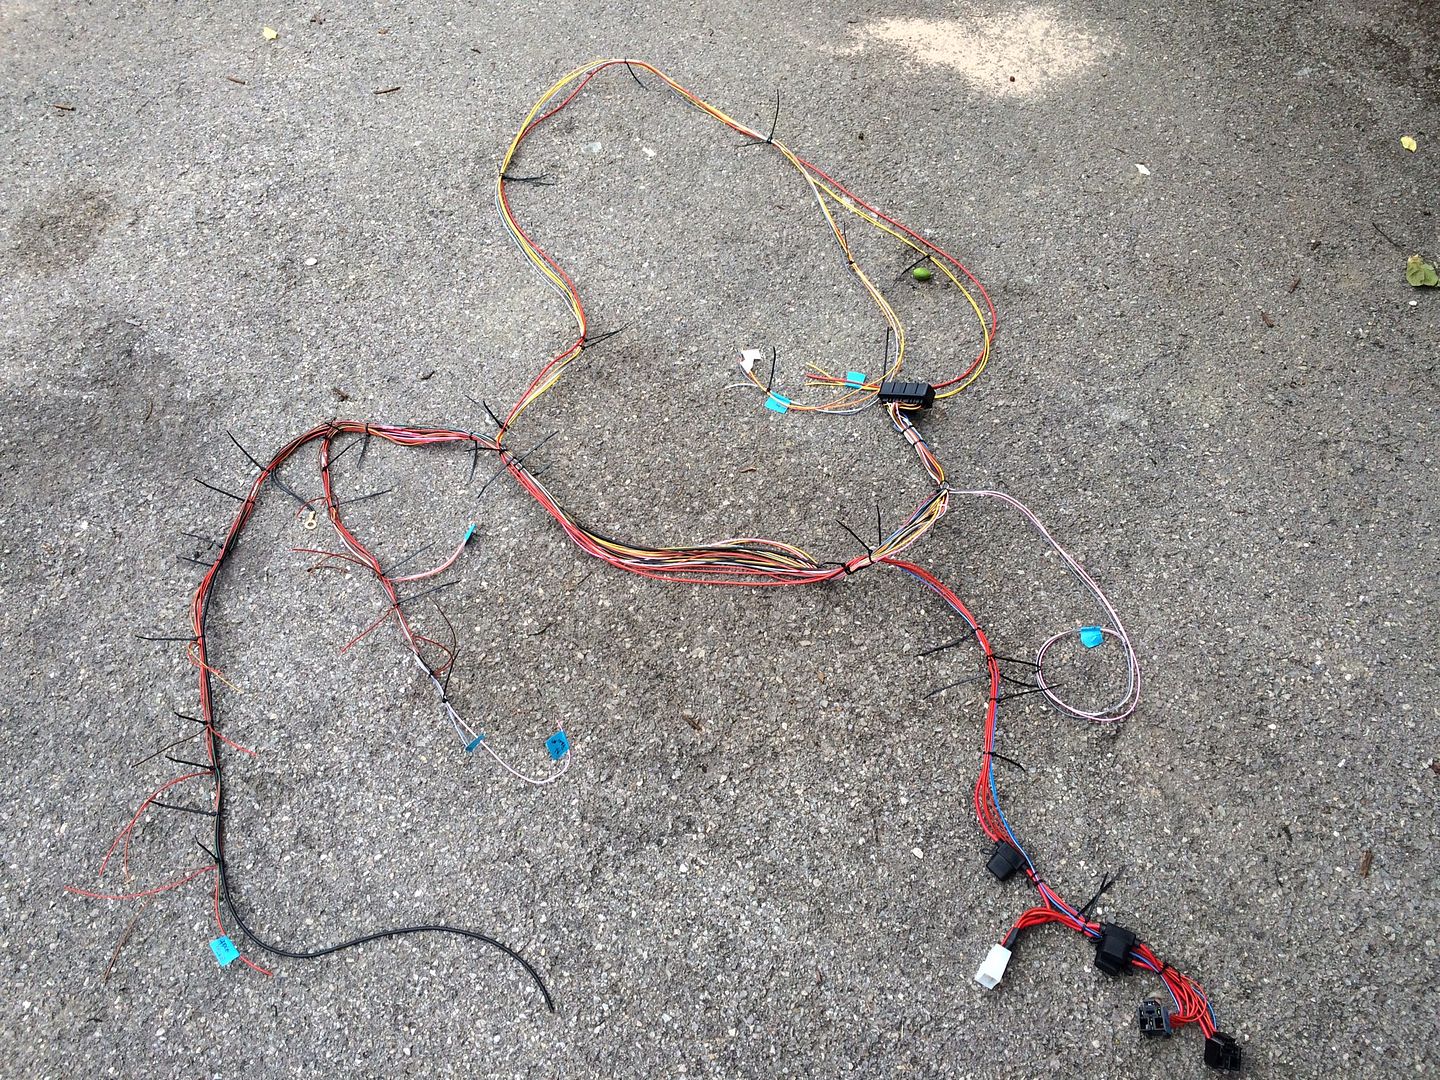
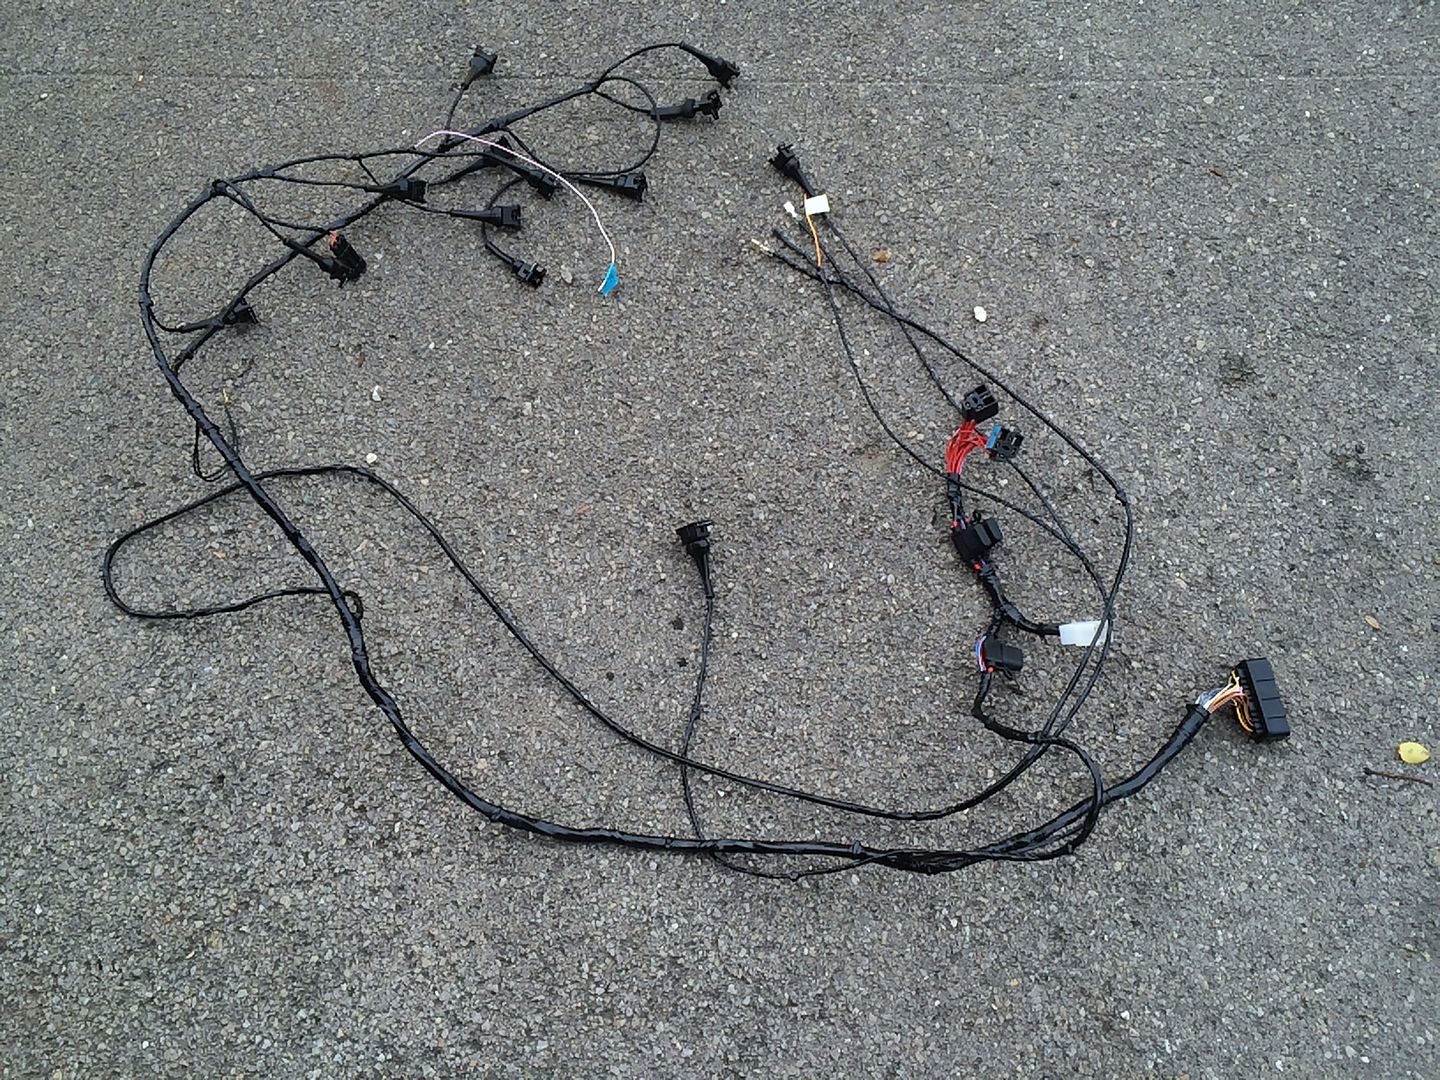
I've made the new ECU loom (from scratch):
As part of fitting the new Omex 710 ECU I have to fit a trigger wheel so that the ECU can determine the current degree of rotation of the engine. This is accomplished by a 36-1 trigger wheel, each notch representing 10 degrees of a complete rotation.
Standard ones are pretty thick at around 6mm, I've fitted one at 2.5mm which keeps the power steering belt in alignment as it's sandwiched in the front pulley. (If anything it's improved the alignment slightly)
I also had to make a bracket to hold a VR sensor <0.5mm away from the wheel:
New air temp sensor fitted into the intercooler:
I've made the new ECU loom (from scratch):
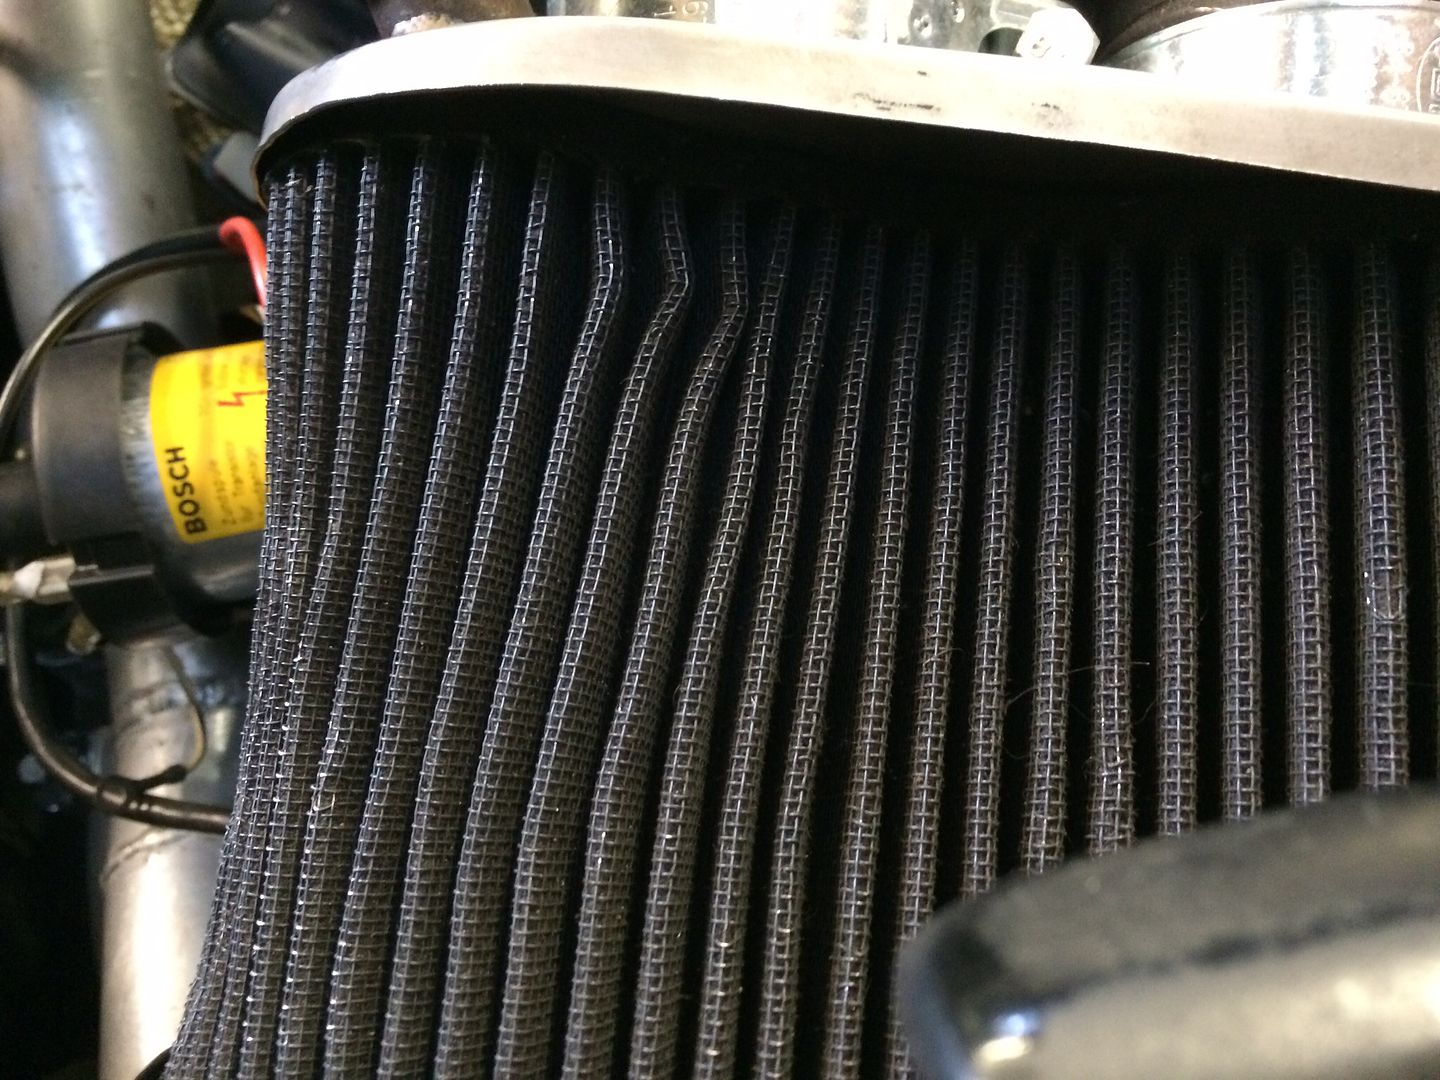
The air intakes were getting sucked flat as was the air filter, originally they looked like this (for the turbo build):
This was the start before the sides on the filter went almost flat:
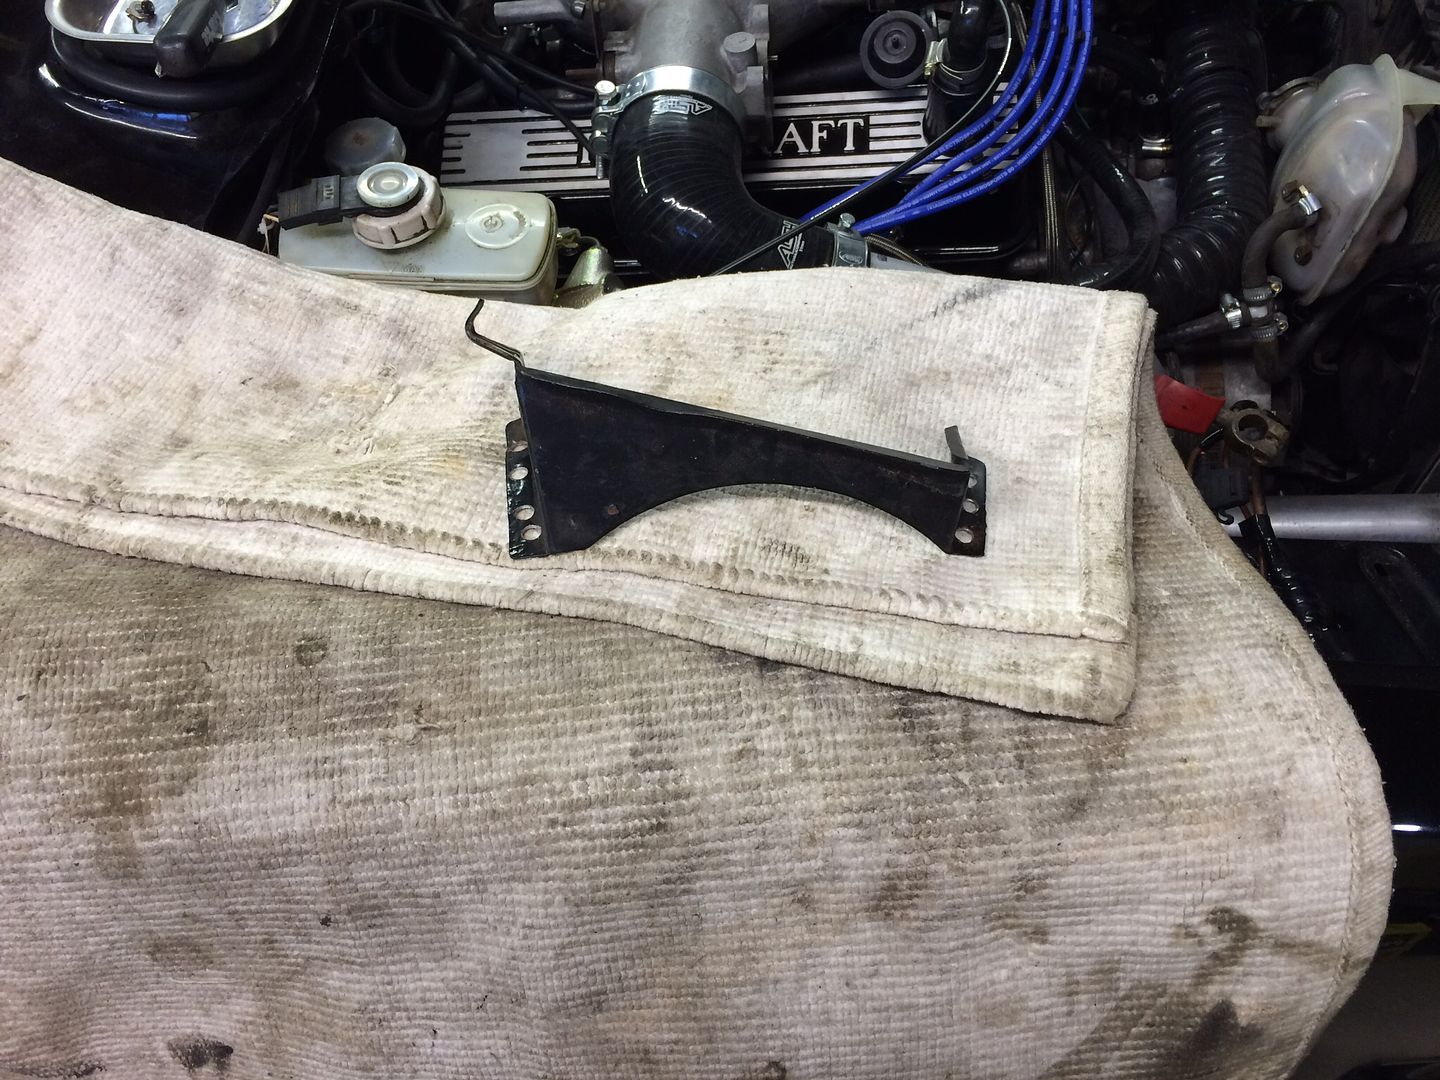
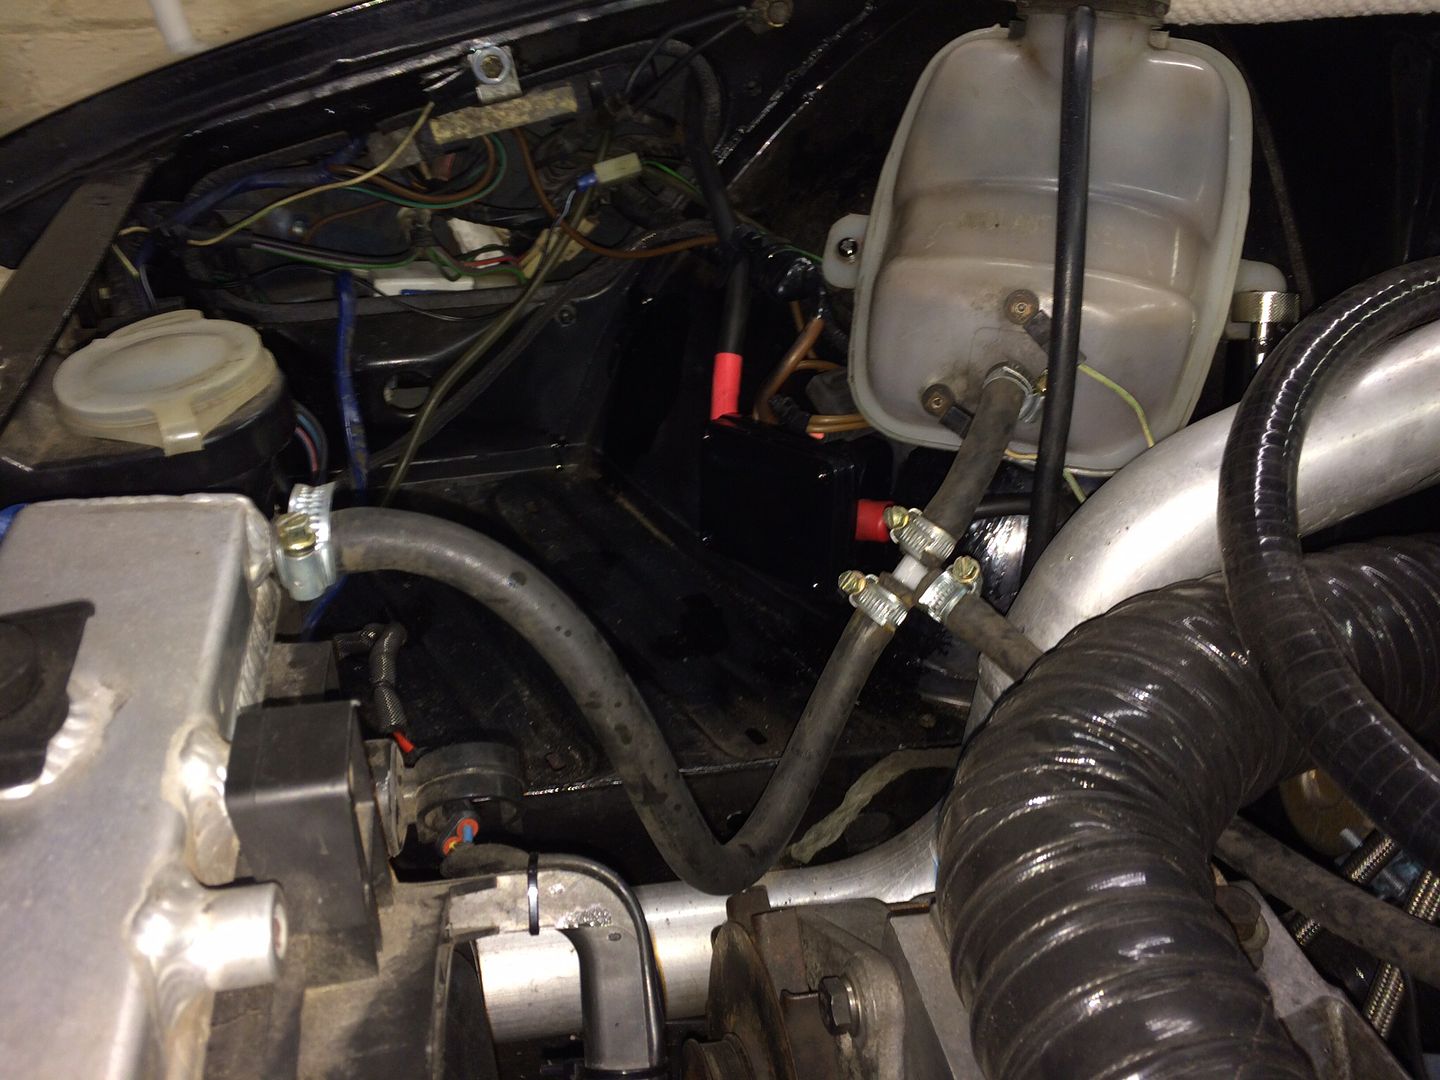
I need to separate the feeds to either side of the intake and have two filters, this meant moving the battery to the boot.
First out was the bracket/stay that the battery is held against, drill the spot welds and out it came:
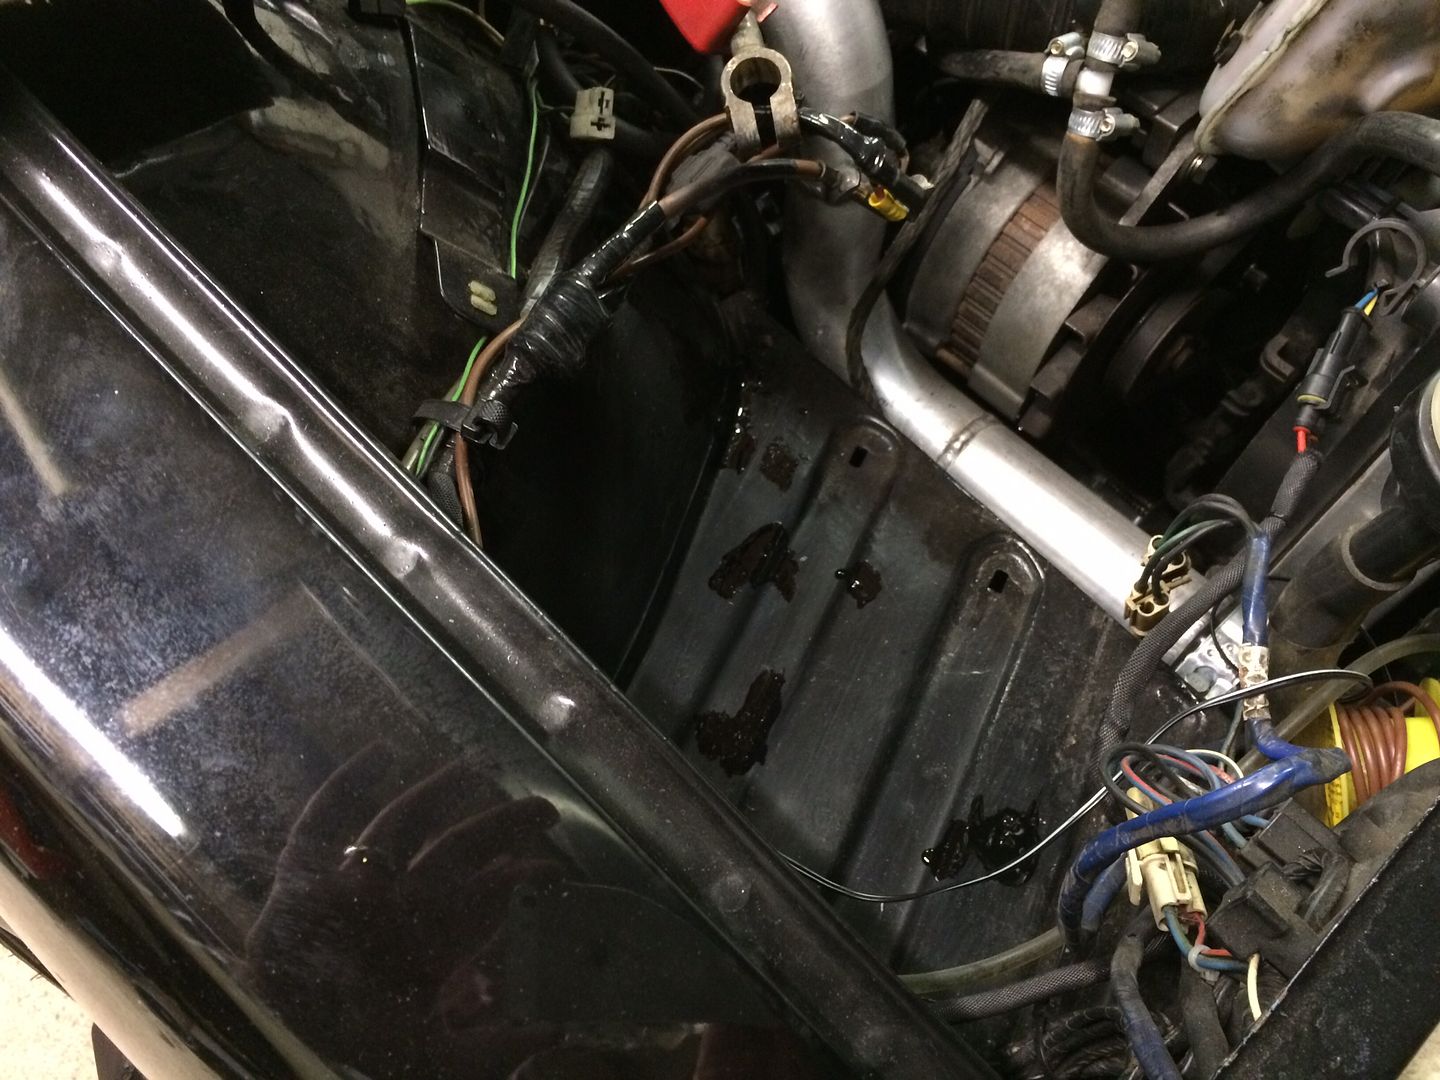
Then connect the positive terminal under the bonnet to a long (and very thick) cable that runs through the inner wing, under the carpet (seats and carpet had to come out) into the inner rear wing and then finally into the boot. Not the best picture but you can see the box on the inner wheel arch where the cables are joined:
Then I made a new housing in the boot from two lengths of angle alloy and clamped the battery into position. I welded a stud into the body to take the negative connection and connected it all up:
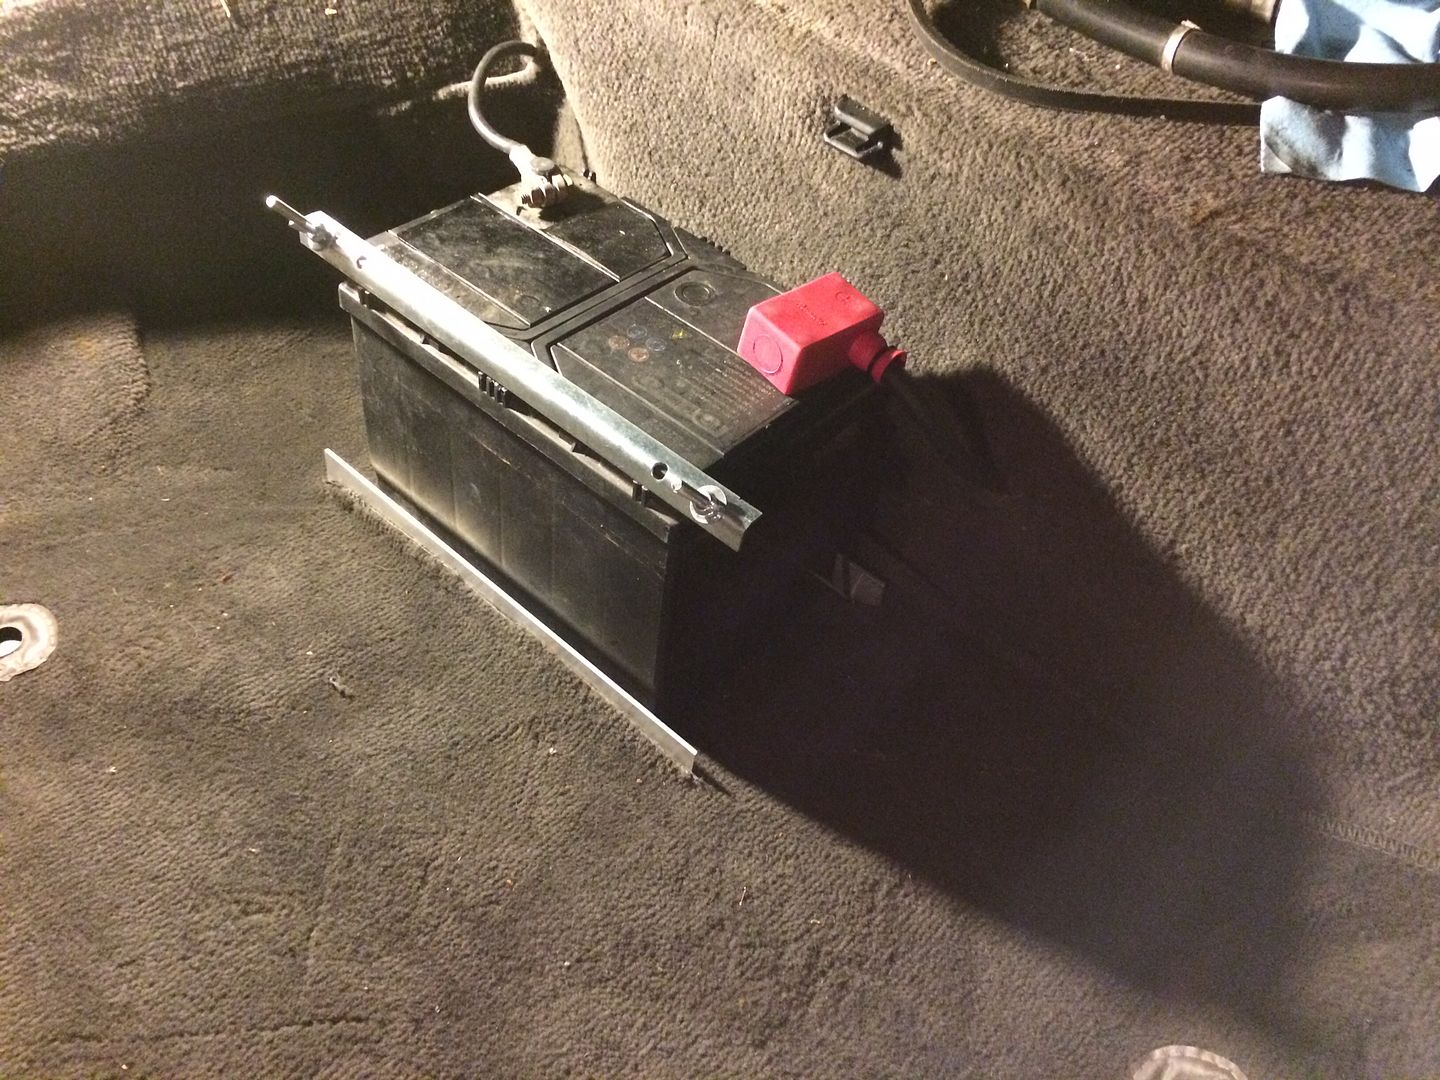
Sounds like a quick job but it took several hours to get it neat and safe.
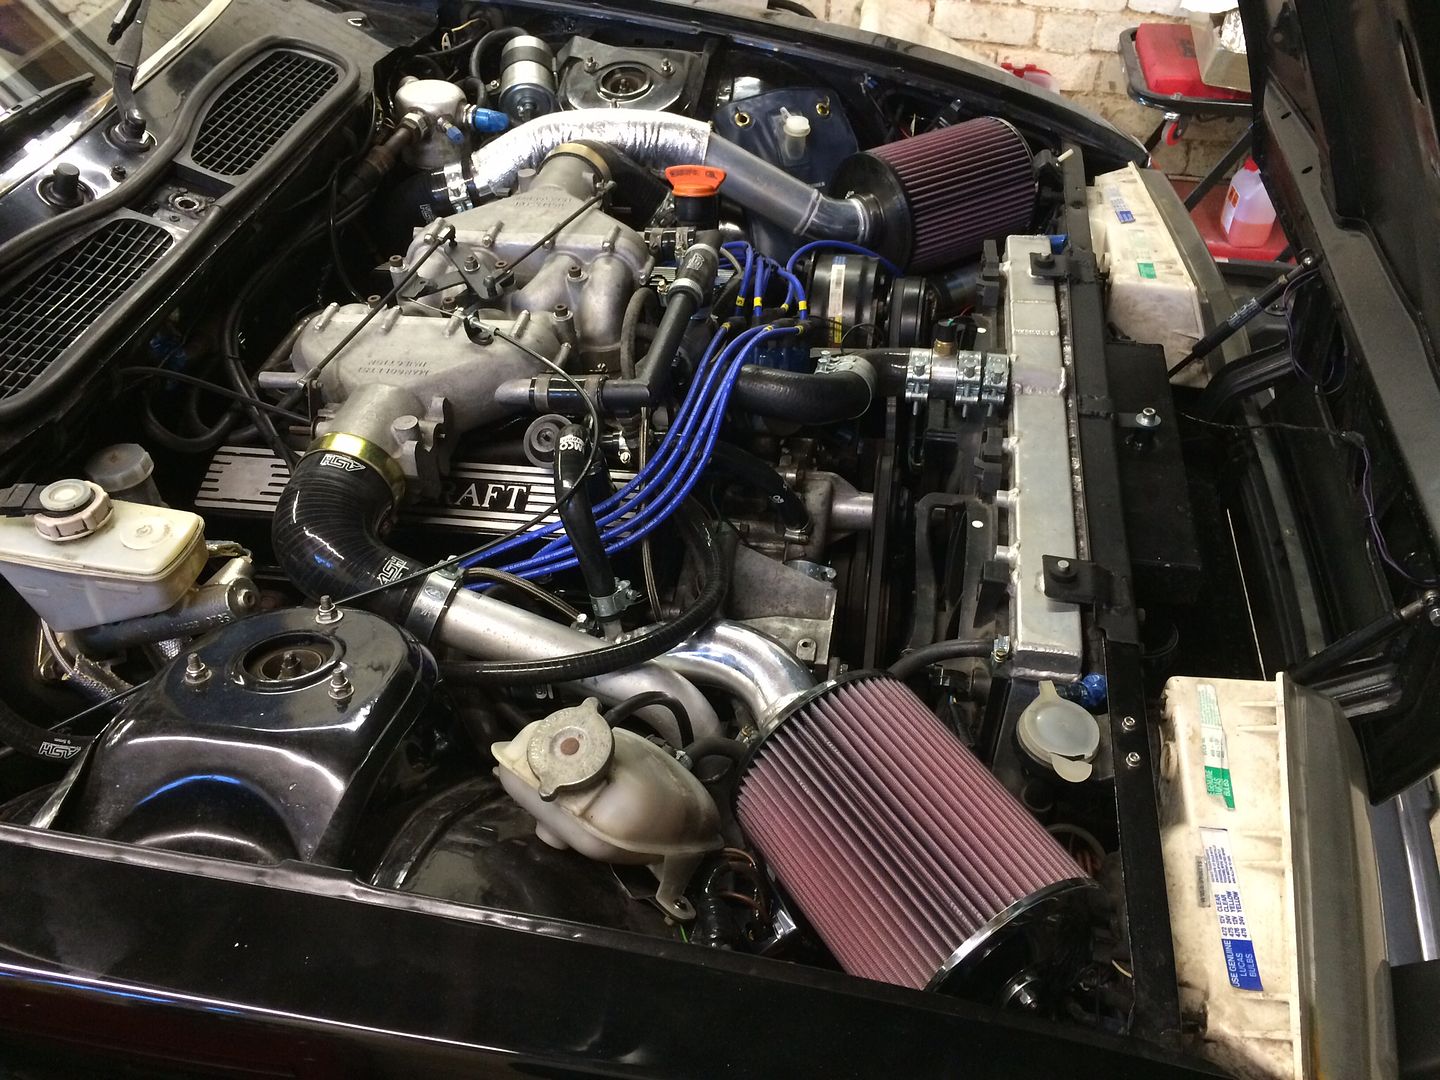
Then the new hard pipes could be made up and twin filters:
[/quote]
New exhaust:
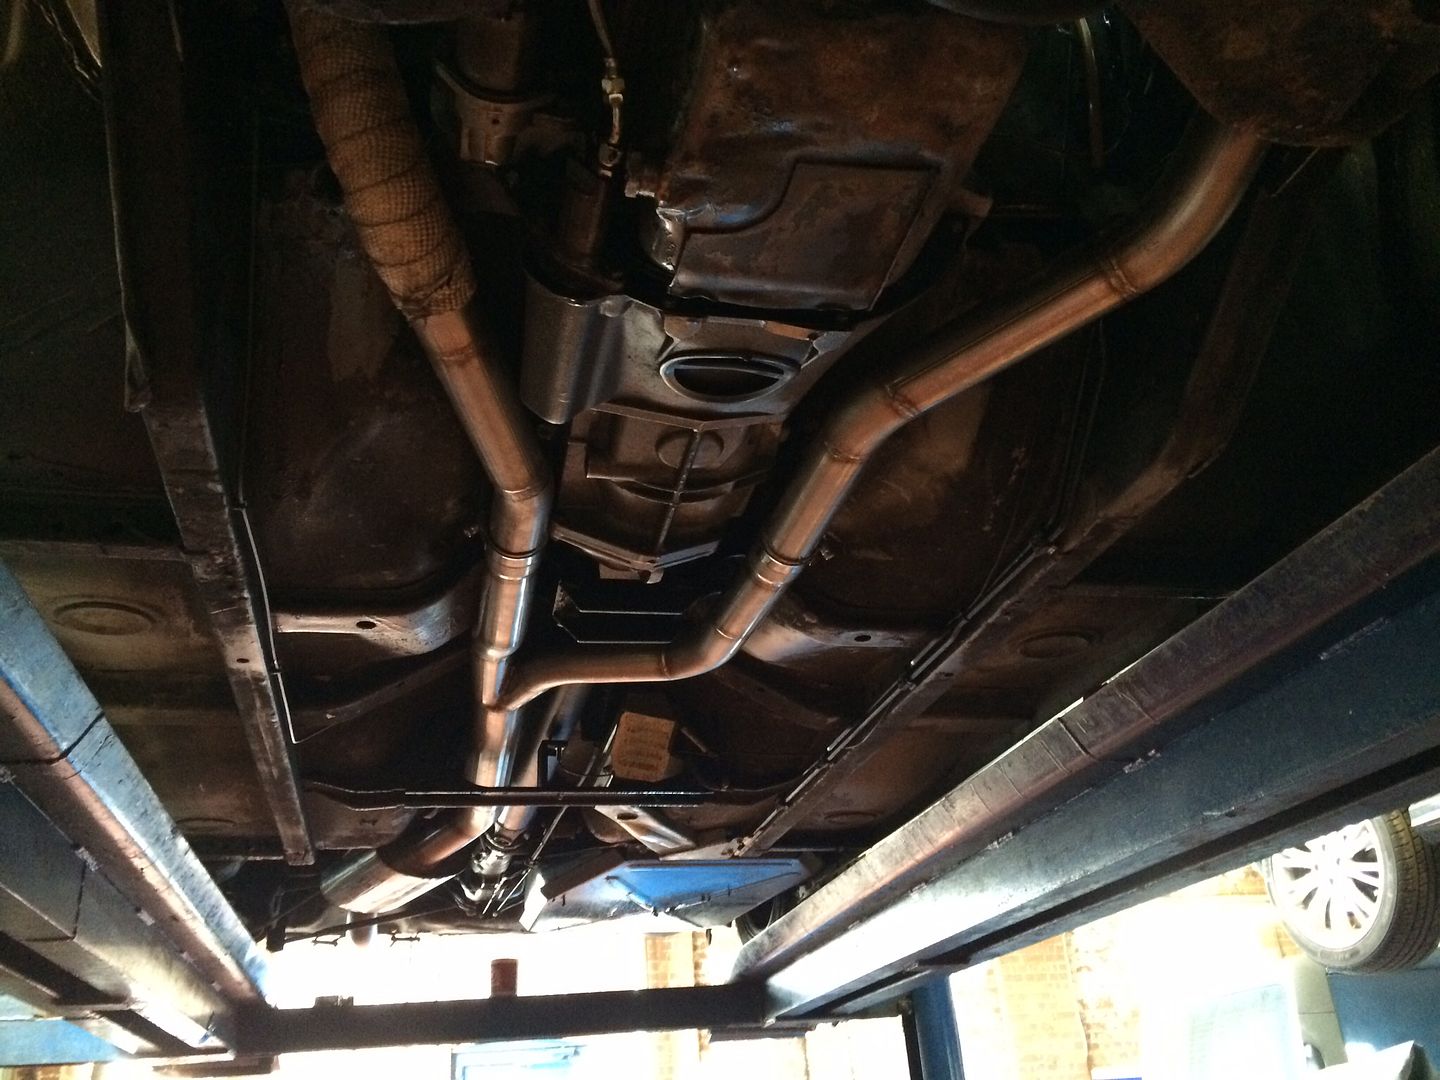
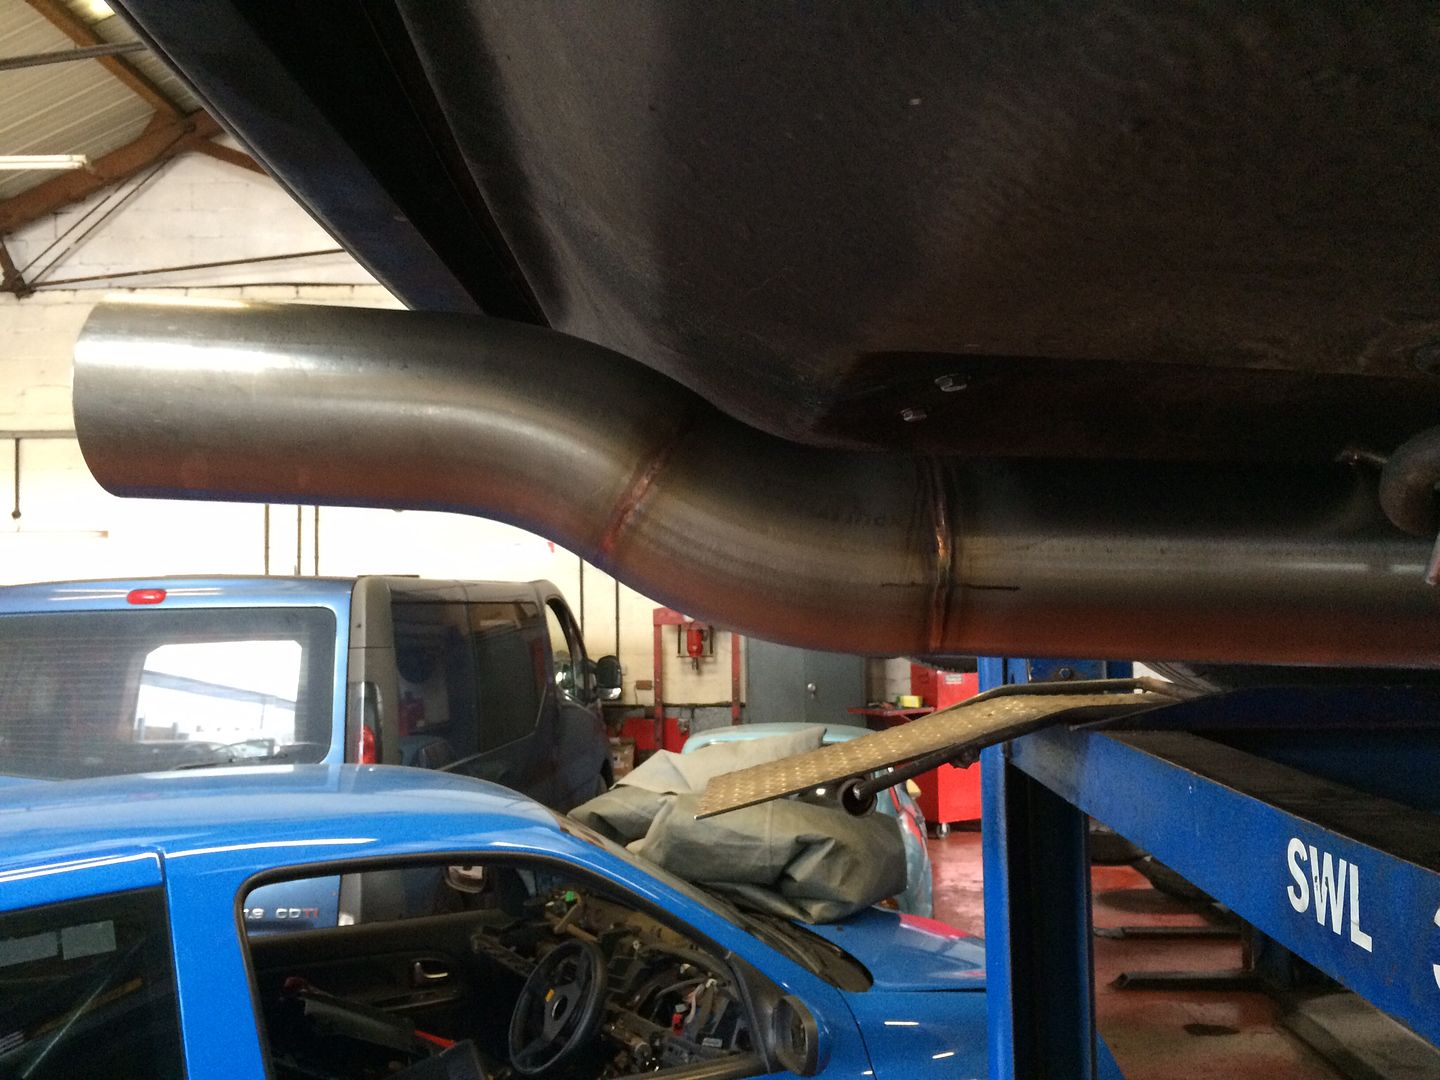
The result is 480 bhp with 0.8 bar boost, drives beautifully with excellent road manners (aside from the fairly brutal paddle clutch).
I'm over the moon with it, worth all the time, money and hassle!
This was the start before the sides on the filter went almost flat:
I need to separate the feeds to either side of the intake and have two filters, this meant moving the battery to the boot.
First out was the bracket/stay that the battery is held against, drill the spot welds and out it came:
Then connect the positive terminal under the bonnet to a long (and very thick) cable that runs through the inner wing, under the carpet (seats and carpet had to come out) into the inner rear wing and then finally into the boot. Not the best picture but you can see the box on the inner wheel arch where the cables are joined:
Then I made a new housing in the boot from two lengths of angle alloy and clamped the battery into position. I welded a stud into the body to take the negative connection and connected it all up:
Sounds like a quick job but it took several hours to get it neat and safe.
Then the new hard pipes could be made up and twin filters:
[/quote]
New exhaust:
The result is 480 bhp with 0.8 bar boost, drives beautifully with excellent road manners (aside from the fairly brutal paddle clutch).
I'm over the moon with it, worth all the time, money and hassle!

Love this thread. And a million times better than my old V8 SD1.
I bet for example that you don't have a bucket of water in each glovebox, rust round the rear washer, a speedo that works on a Thurday, sagging roofliner and semi-central locking and not forgetting a wiring loom that seems to be "pick a colour, any colour" during build.
Plus all the other things that made them great. I would have another one tomorrow.
 king amazing! Great job OP!
Gassing Station | Readers' Cars | Top of Page | What's New | My Stuff