My Indigo Blue Throttle Bodied 106 Rallye
Discussion


dom9 said:
MrMoonyMan said:
Worst comes to worst I've got a garage (st.albans) I could move my long term project car out of to make sure you don't sell this!
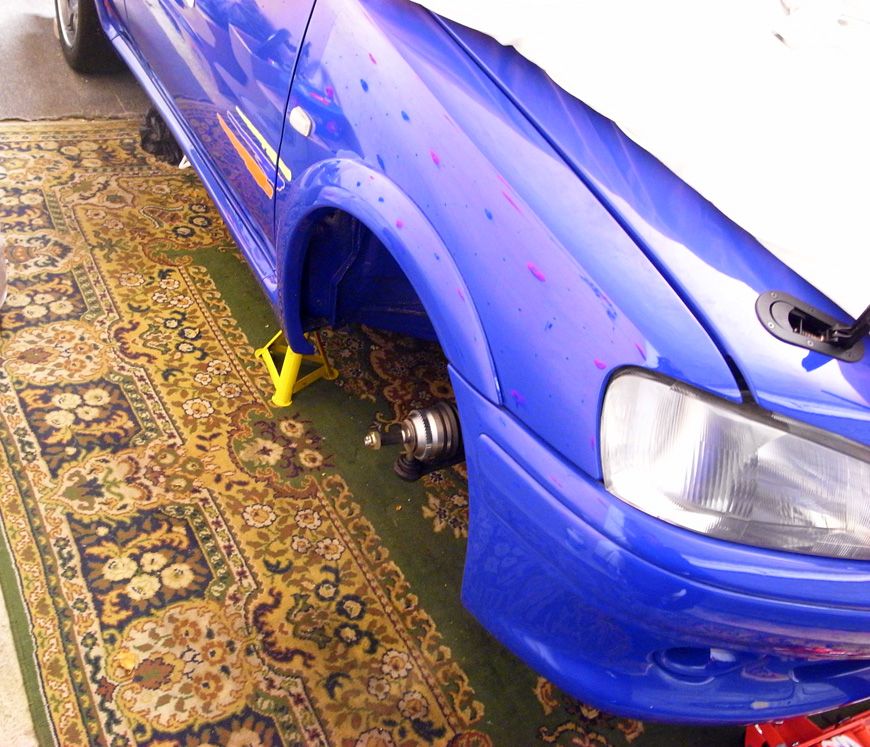
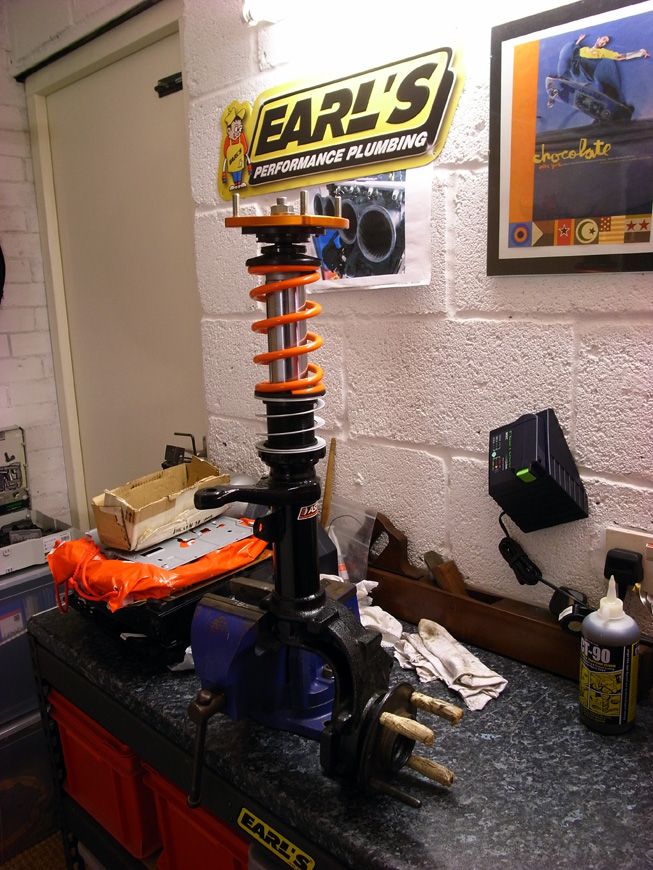
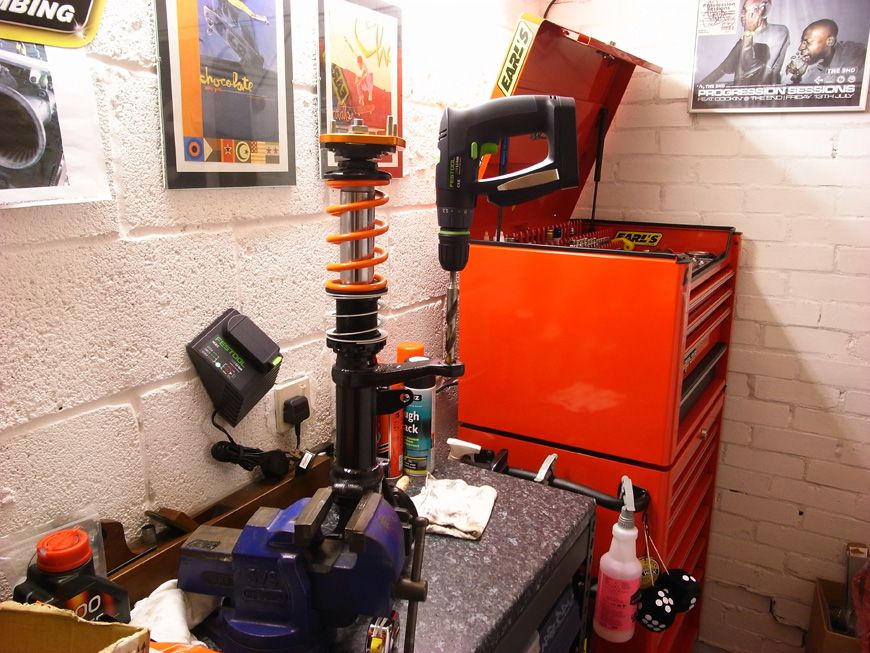
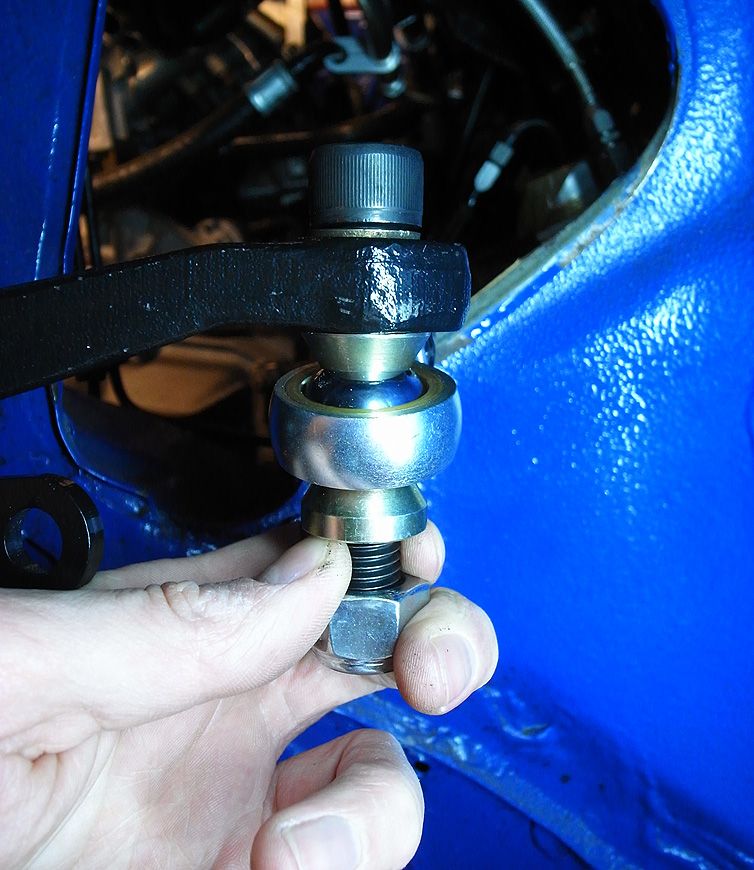
This is what PH is all about - what a fantastic offer!You'll be pleased to know I got my finger out and did a bit more on this tonight. Jacked it up and took the suspension off (again) *sigh* as need to drill out the struts to accept the 14mm Track rod end bolts.
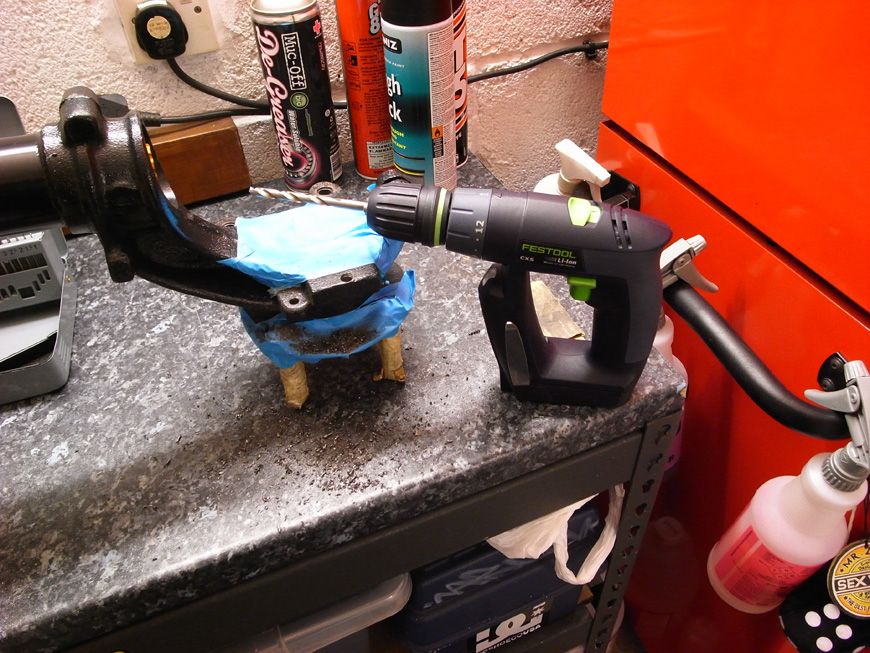
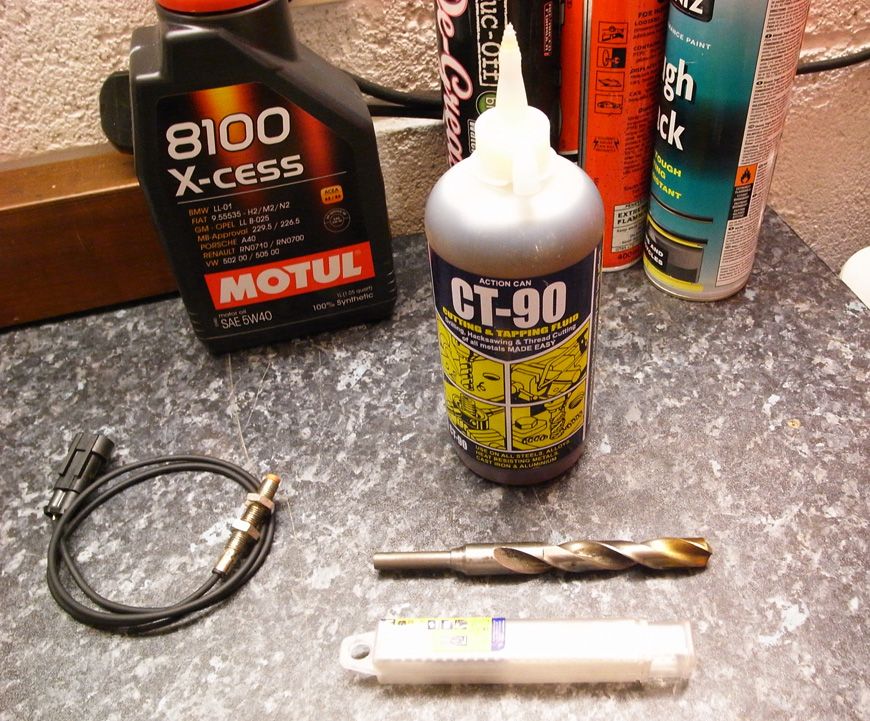
I also need to drill the hole for the speed sensor which I envisage being an arse of a job. I can't remember how it was on my old struts when bob @ wire wizard did it, as I never took a photo arrrgh! But, I'm pretty sure it was drilled through the strut to take the reading off the hub. The area is super thick steel though so gonna be a test for my little festool drill. We shall see. It's small and mighty and German so should be able to get through it! I have been surprised by it's power before!
I need a 14mm step drill for the strut holes too, for the new track arms, but want to buy a good quality step drill bit as I loathe cheap nasty tools that don't work well. I bought a smaller expensive one a few years back from the motor factors in Silverstone (made in England of course), and it would cut through kryptonite it's excellent! Unfortuntely the only ones I can see online are cheap-ass 'Silverline' and the like. I could do with it fitting the 8mm chuck of my festool but don't think you can get them that small.
Few more updates from the week/weekend.
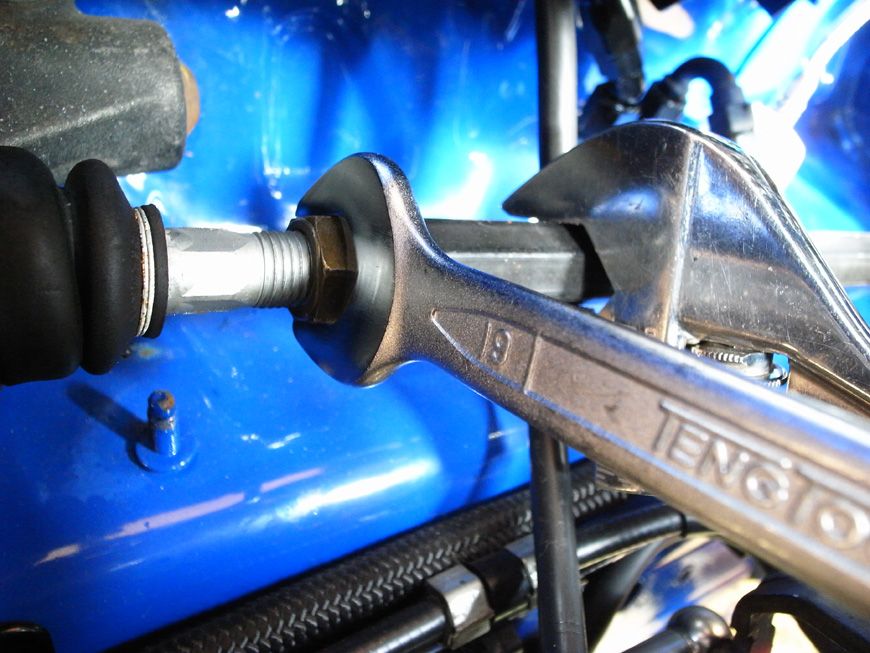
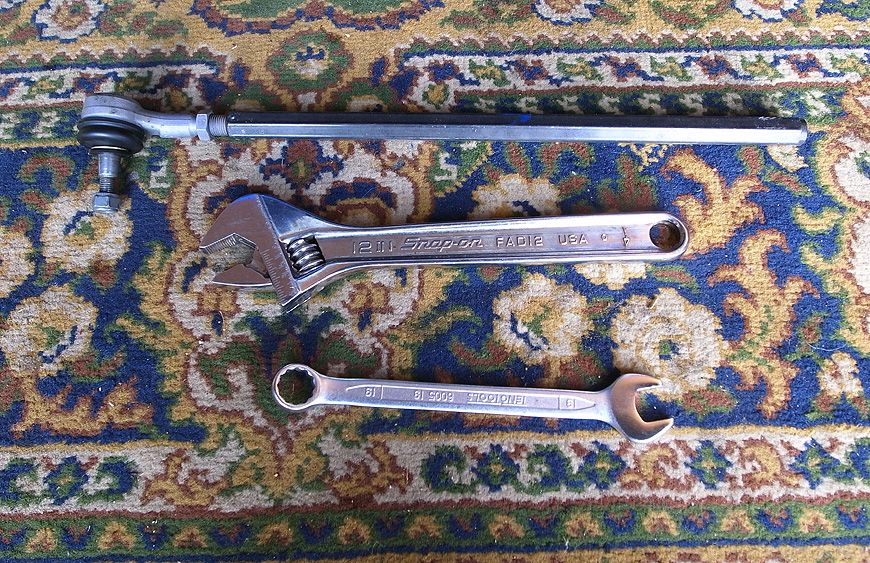
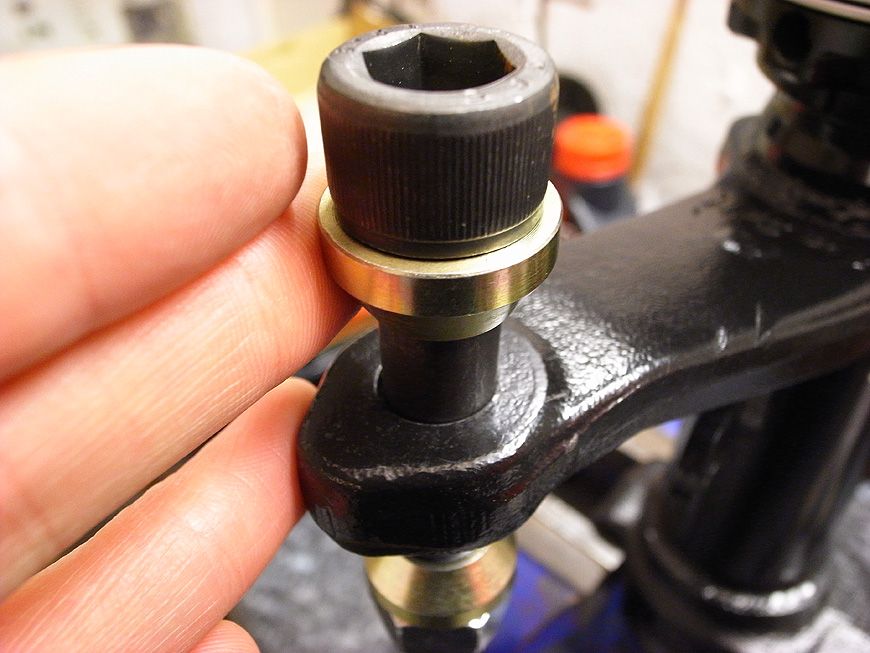
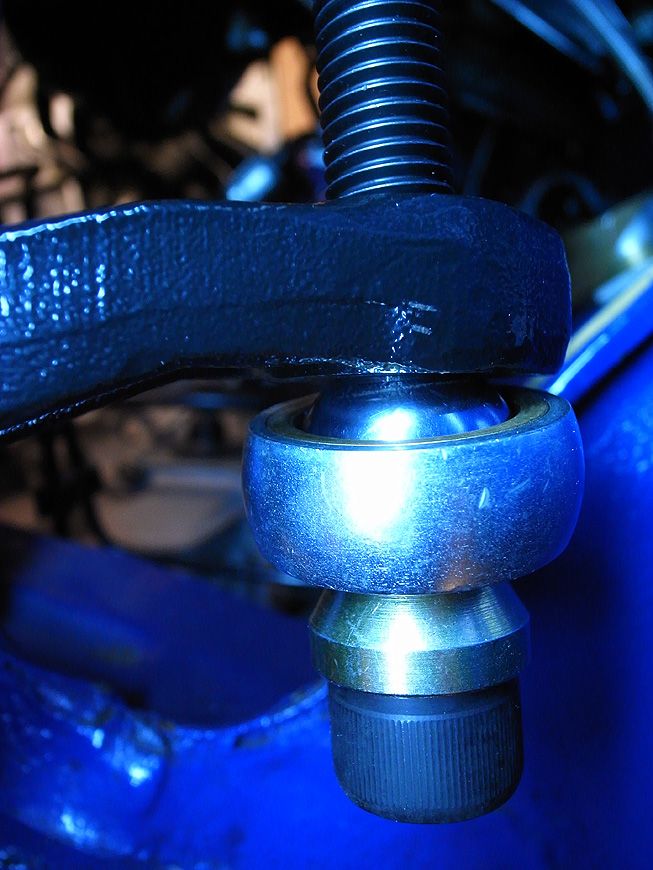
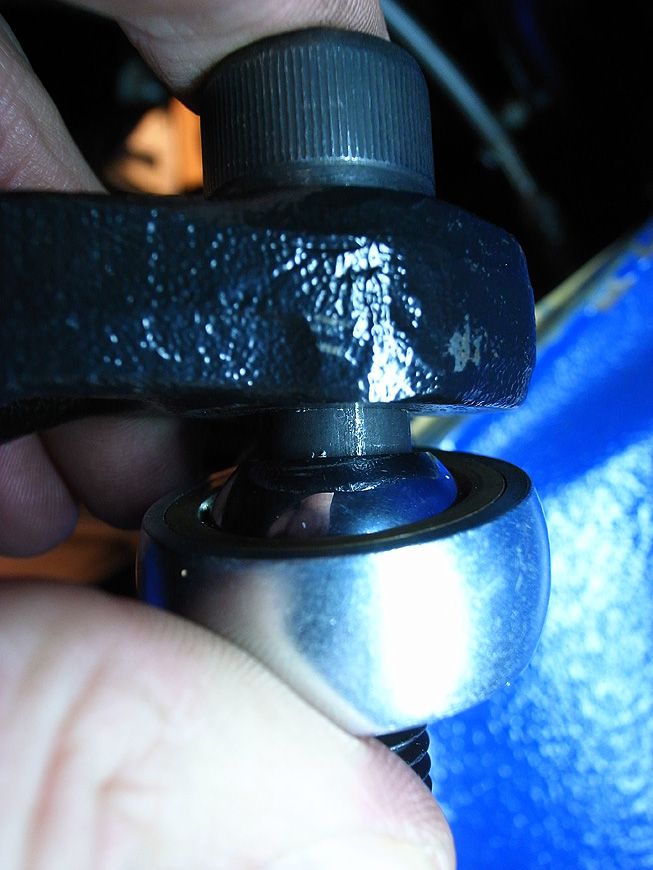
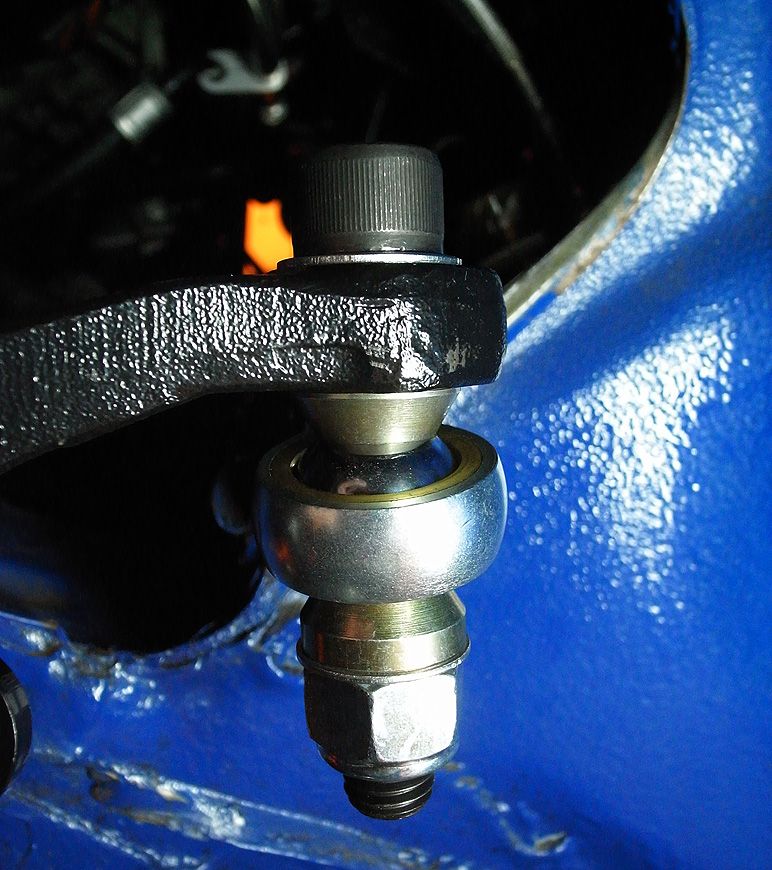
Got on with fitting my new 'TR' Rose Jointed Track Rod ends (Tommy Rallye ones). Had a tough time getting the old steering arms off, but when I reliased which way to undo the nuts that helped, then I was unable to undo them with relative ease!
Few pics:
Suspension off again *sigh*
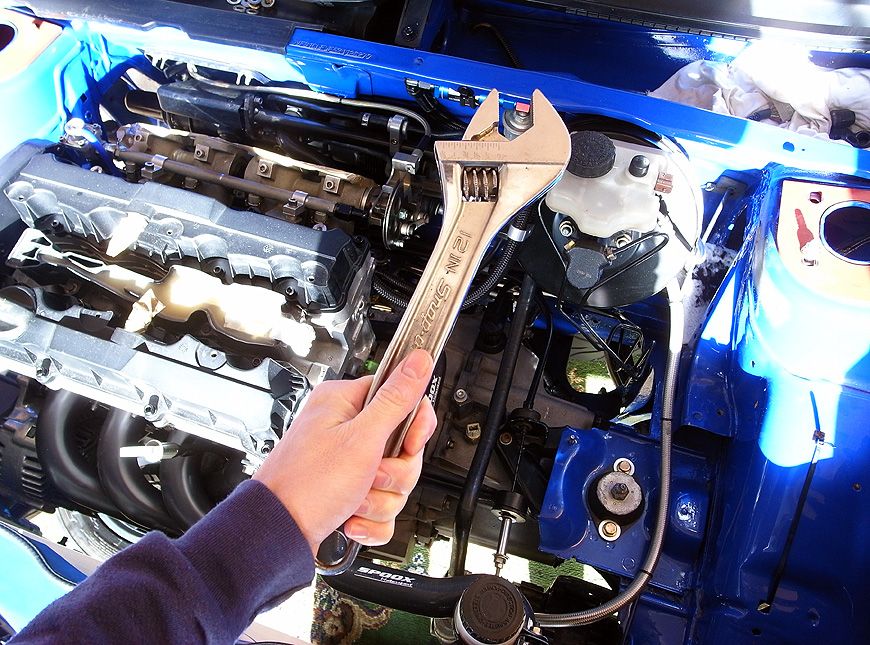
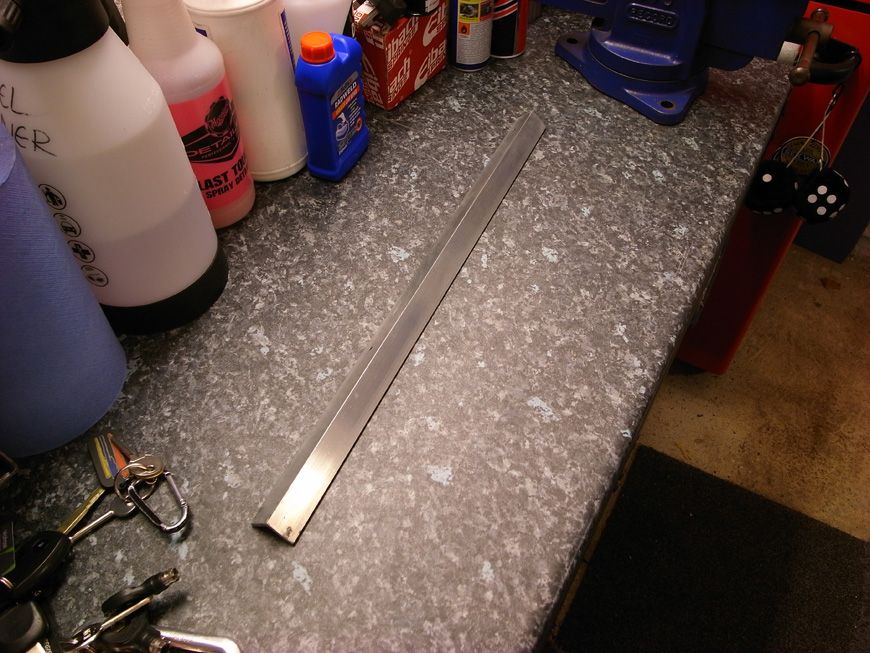
When the rest of the troops in the toolbox aren't man enough for the job, you gotta dig out 'the Daddy' - 12 inches of pure steel!
Coming off:
Can see the size of the spanner against the steering arm!
New steering arm. Put some copper slip on the bolts to ensure they will be easy to remove next time if further adjustment/faffing is required:
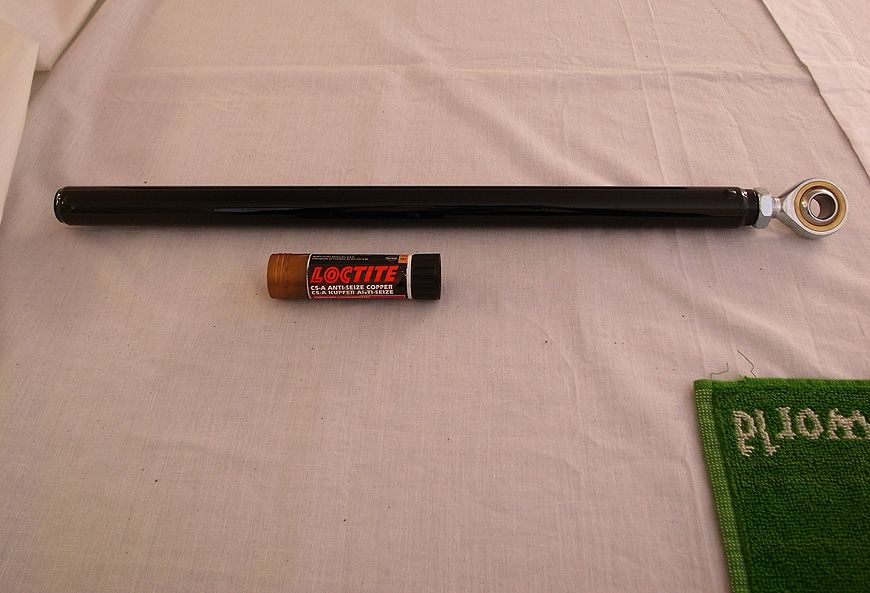
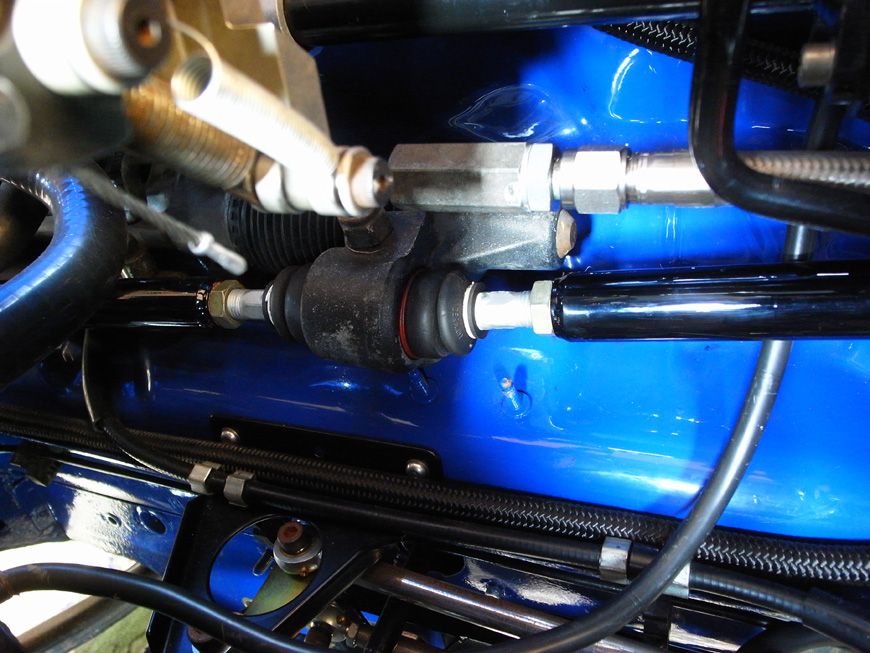
Fitted:
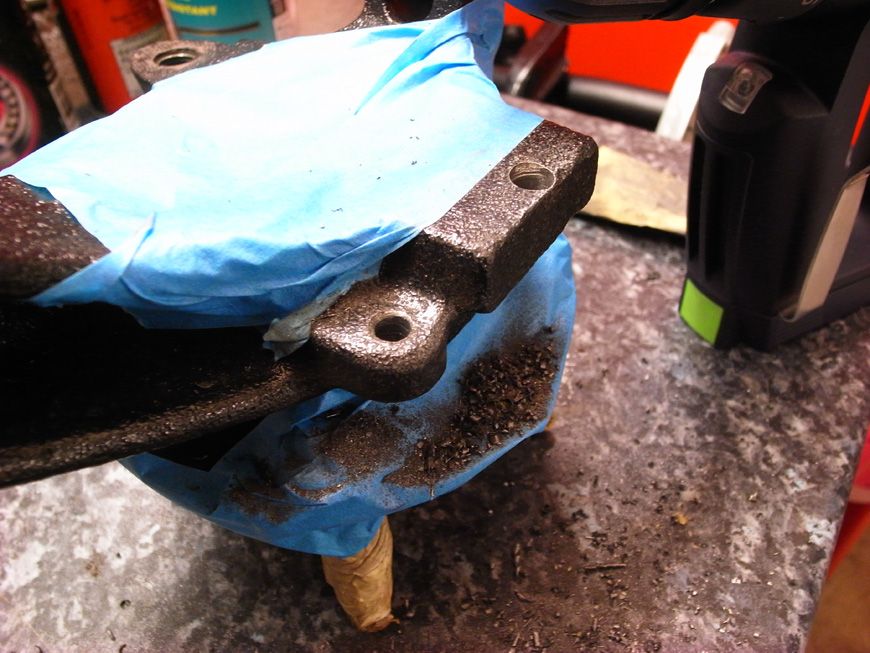
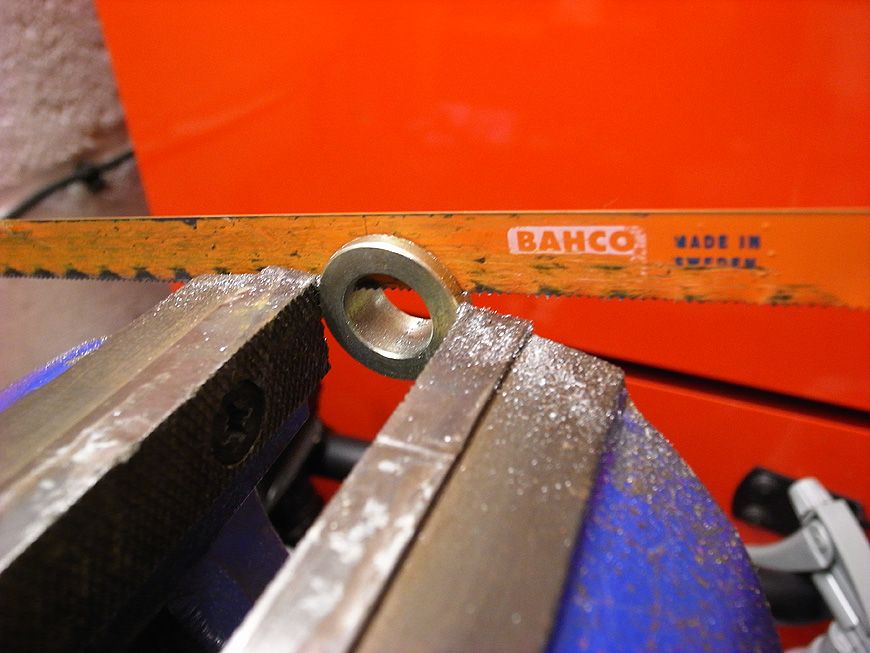
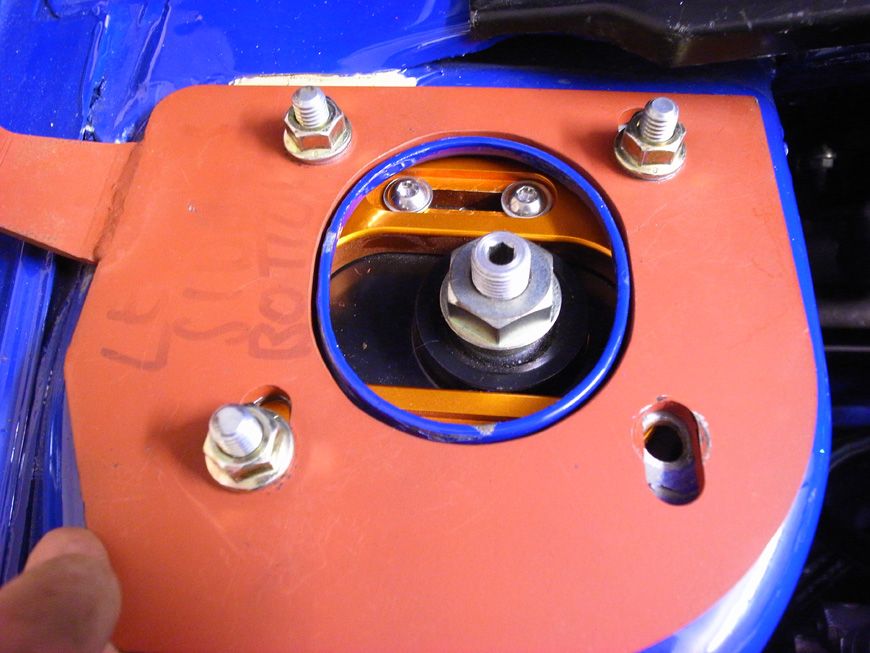
Next onto drilling the strut to fit the speed sensor. My old struts had a similar set up, but I forgot to take a photo at the time. However, pretty sure this is how it was fitted:
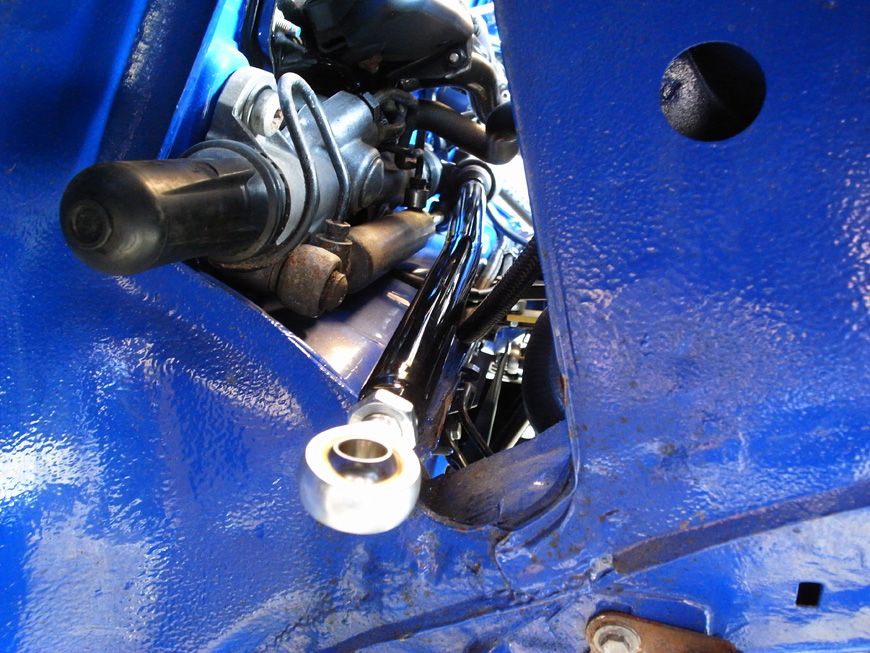
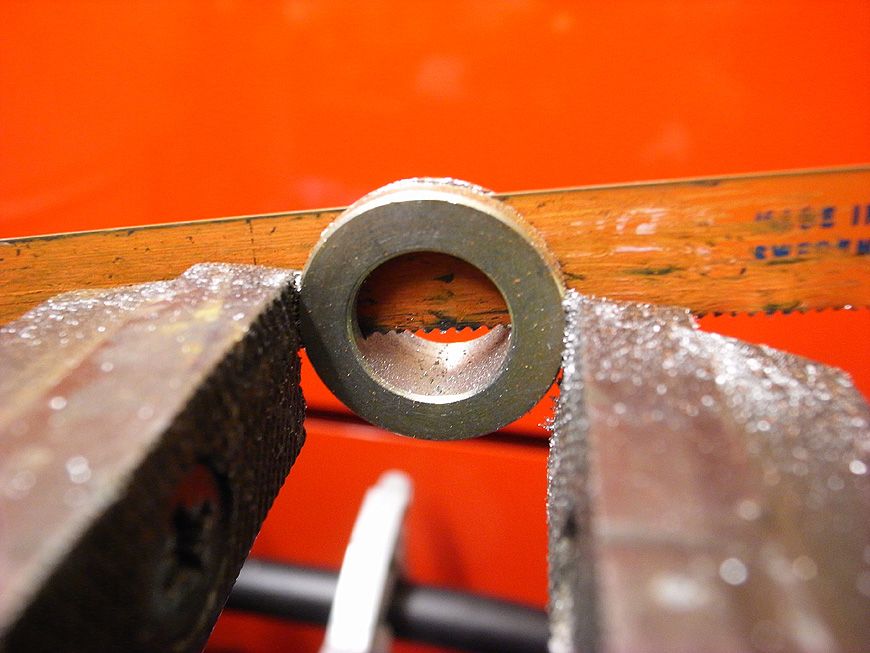
Hole drilled:
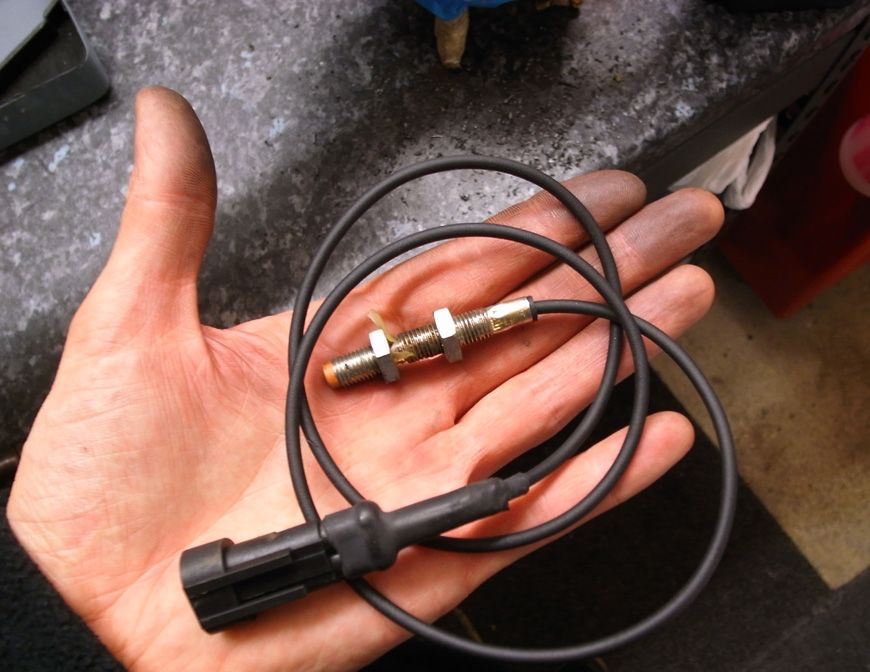
Old speed sensor (broke it removing the damn thing so will need a replacement - another bloody one hundred pounds!):
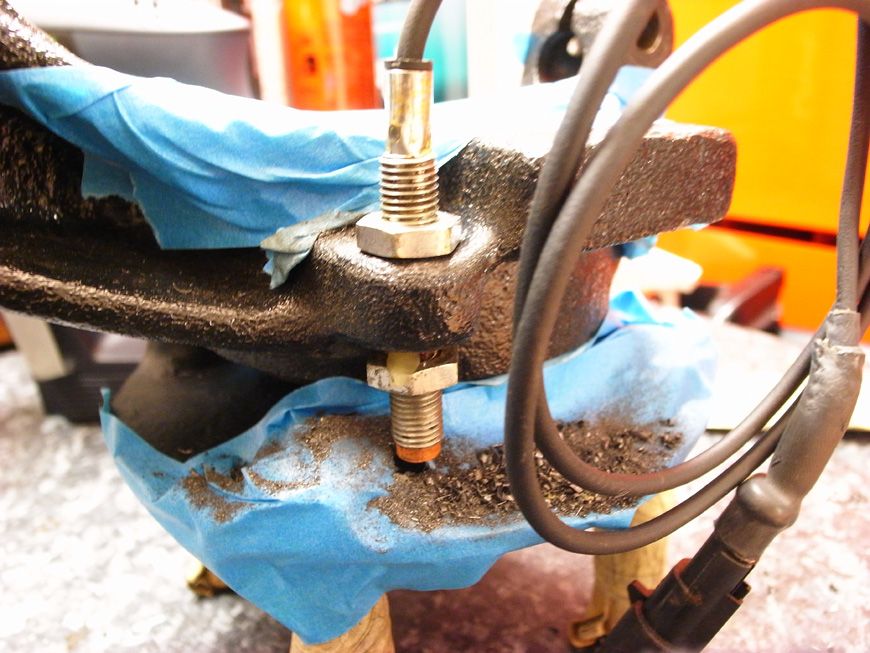
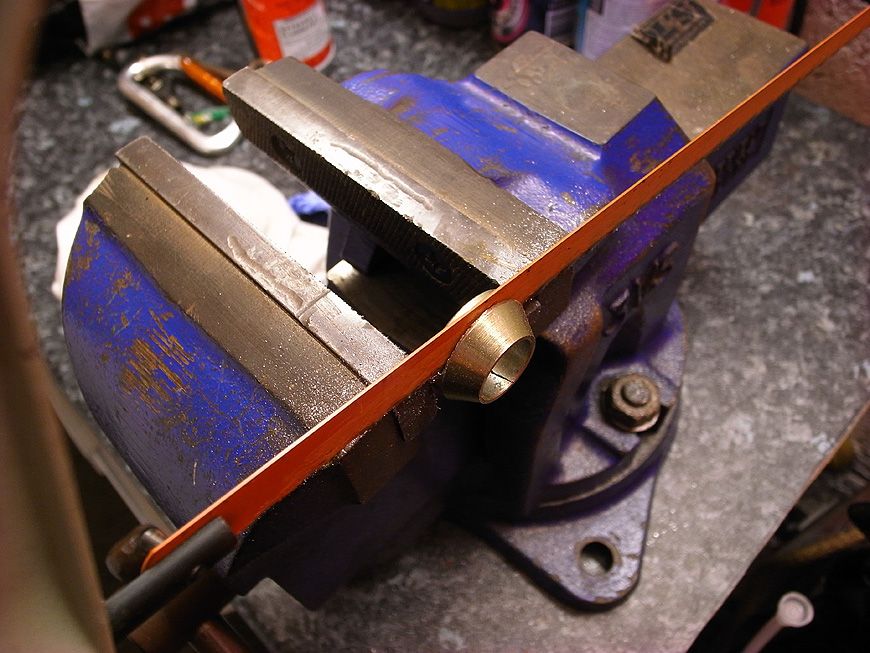
This is how it will mount on the strut:
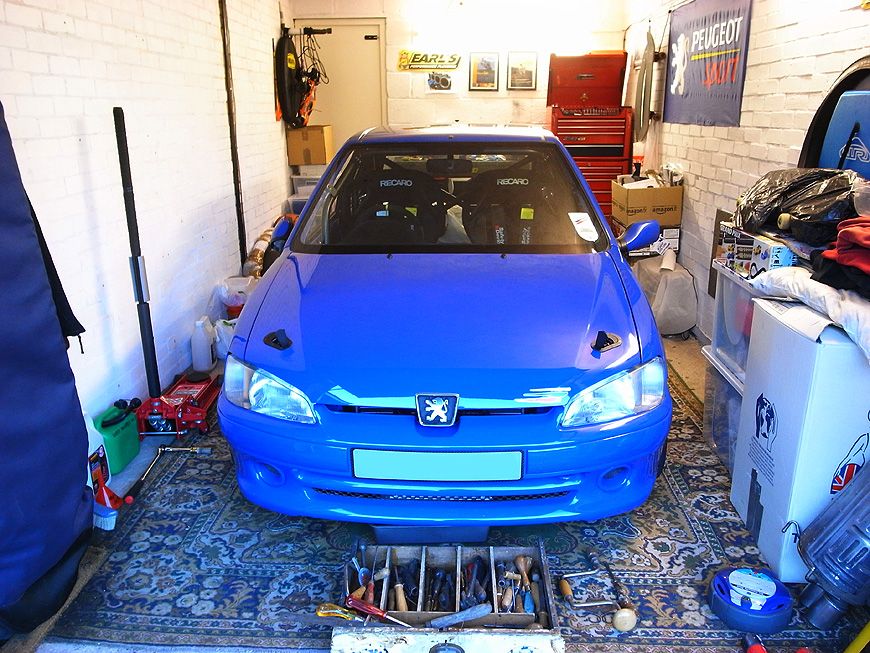
And how the car curently sits:
Next job is to drill out the holes where track rods ends bolt through. Standard ones taper from about 12mm to 8mm, the new bolts are 14mm. However, the chuck on my drill is only 8mm (doh), so my good pal Stu who works at a machine shop is sending me a 14mm drill bit next week that he has machined down to 8mm at the shank end for me (top man thank you!!) so will finish these next week and get them back on.
One tool I have realised that I am missing while doing this job is a big F-off pry bar. Getting the lower arms in and out is an arse of a job, not made much easier by not having a pry bar. I used a big screw drvier instead but will be investing in a pry bar I think!!
Got on with fitting my new 'TR' Rose Jointed Track Rod ends (Tommy Rallye ones). Had a tough time getting the old steering arms off, but when I reliased which way to undo the nuts that helped, then I was unable to undo them with relative ease!
Few pics:
Suspension off again *sigh*
When the rest of the troops in the toolbox aren't man enough for the job, you gotta dig out 'the Daddy' - 12 inches of pure steel!
Coming off:
Can see the size of the spanner against the steering arm!
New steering arm. Put some copper slip on the bolts to ensure they will be easy to remove next time if further adjustment/faffing is required:
Fitted:
Next onto drilling the strut to fit the speed sensor. My old struts had a similar set up, but I forgot to take a photo at the time. However, pretty sure this is how it was fitted:
Hole drilled:
Old speed sensor (broke it removing the damn thing so will need a replacement - another bloody one hundred pounds!):
This is how it will mount on the strut:
And how the car curently sits:
Next job is to drill out the holes where track rods ends bolt through. Standard ones taper from about 12mm to 8mm, the new bolts are 14mm. However, the chuck on my drill is only 8mm (doh), so my good pal Stu who works at a machine shop is sending me a 14mm drill bit next week that he has machined down to 8mm at the shank end for me (top man thank you!!) so will finish these next week and get them back on.
One tool I have realised that I am missing while doing this job is a big F-off pry bar. Getting the lower arms in and out is an arse of a job, not made much easier by not having a pry bar. I used a big screw drvier instead but will be investing in a pry bar I think!!
philmh said:
The world will end before he finishes it lol.
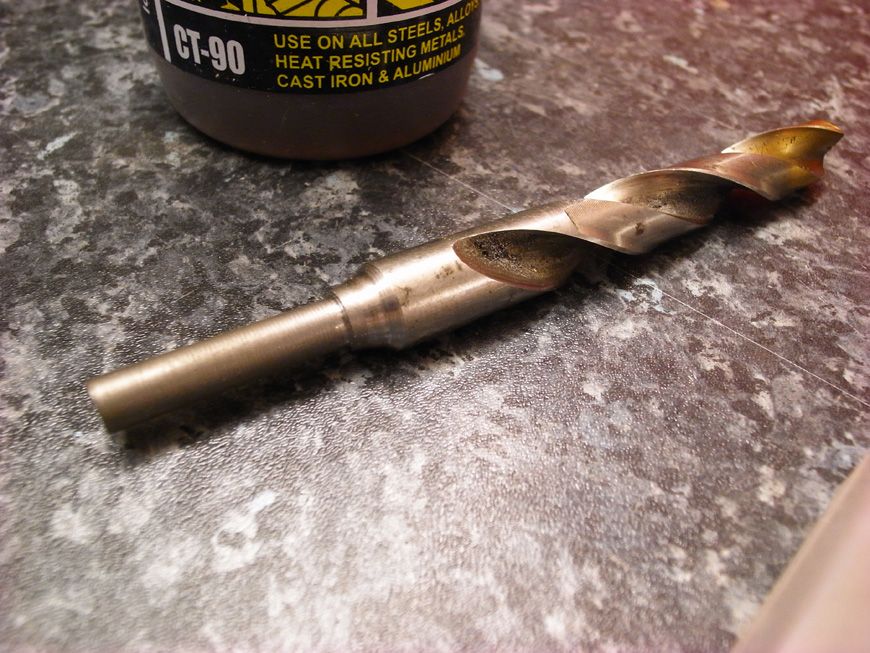
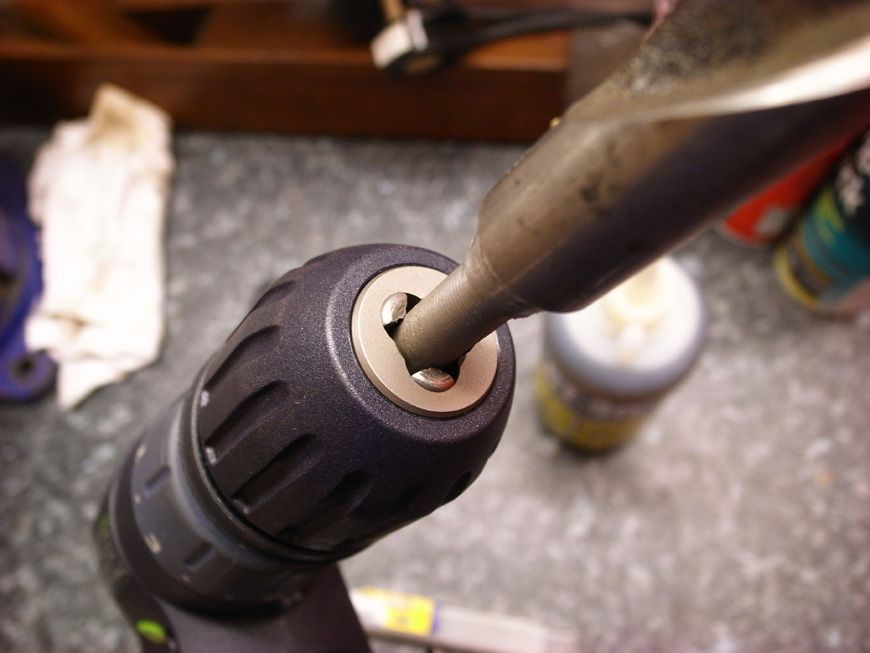
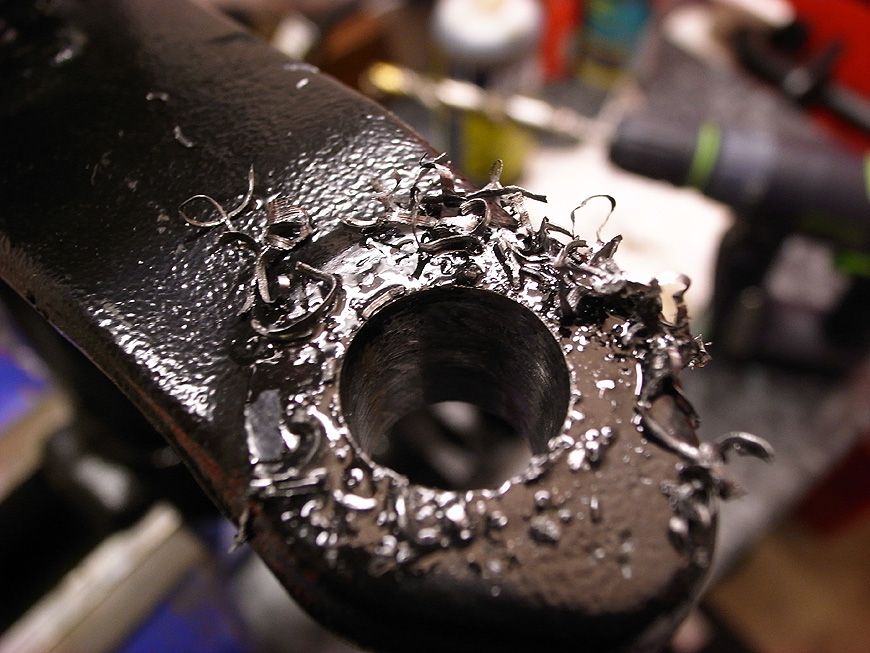
Oi! I will get it done...eventually!A few more updates tonight. Stew in his eternal kindness custom made me a drill bit that I could use to drill out my struts to 14mm (well he supplied and machined down the shank to 8mm, and also gave me some cutting oil so I have to say a massive thanks to him AGAIN for helping me out - top lad)

So tonight I got both struts drilled out, cleaned up, and fitted one complete back onto the car. Also fitted the track rod end but would you believe in my arsenal of tools I don't have an allen key that fits the bolt - doh! So will need to buy one before I nip them up tight.
Anyways pics as follows:
Drill and cutting oil:
8mm Shank:
Fits in - result!
Strut in vice ready for drilling:
In progress:
Drilled out:
Cleaned up - quite a clean hole actually, the oil works a treat:
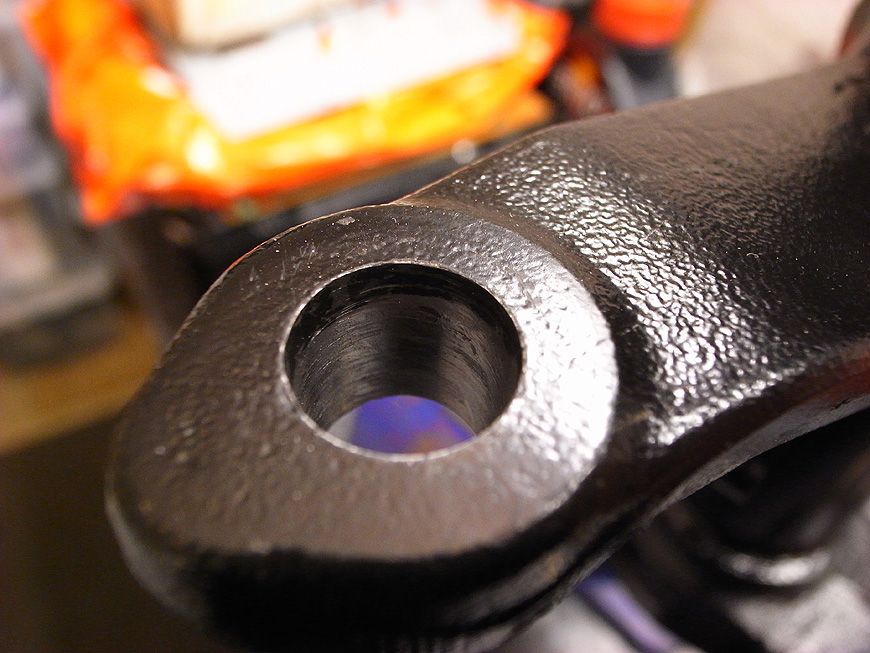
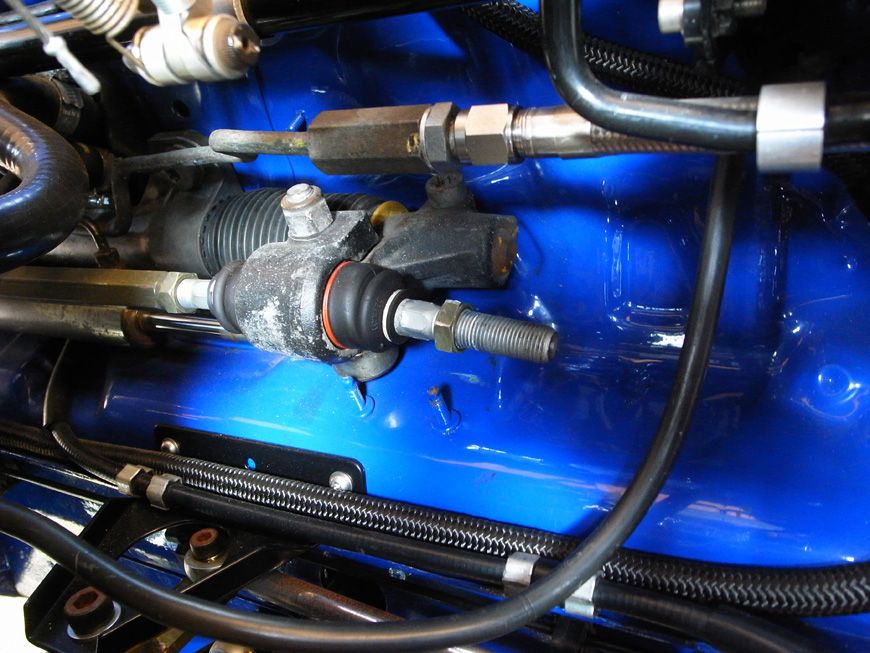
Track rod end bolt through:
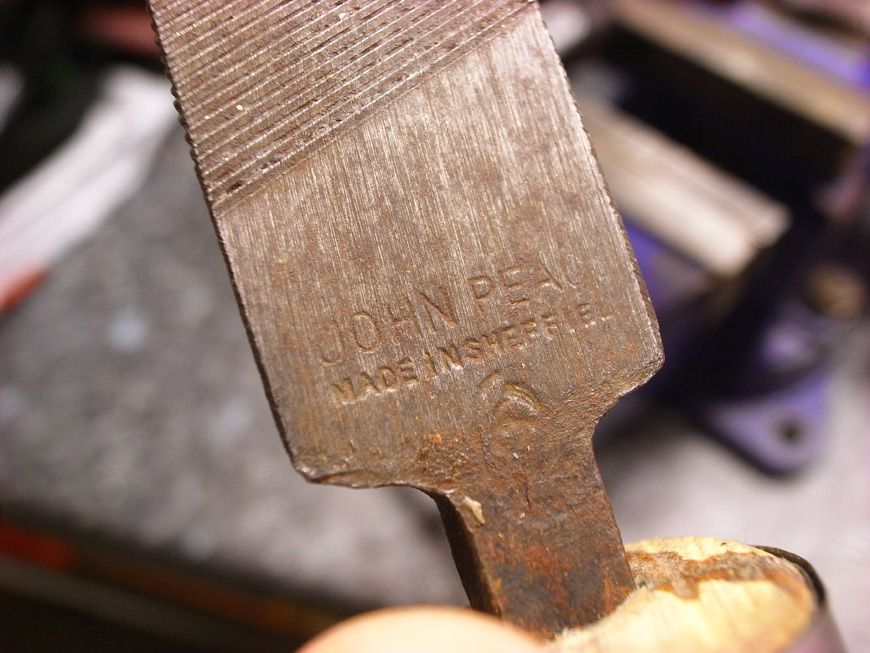
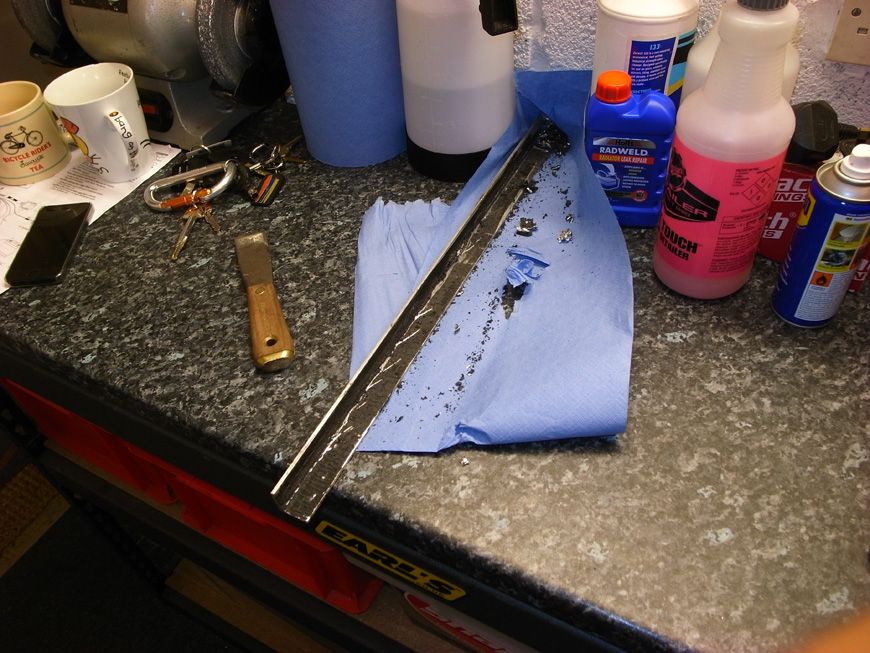
And finally a completely unrelated snap of a file my Dad gave me - it's ancient but such a good tool, super useful. Can't beat old english tools!
Will get on with the other side of the suspension tomorrow, then set up the camber and toe in roughly. Then got to start re-fitting the wiring. Arrrrgh why did I take it out!
Lewis
Beedub said:
absolutely stunning.... you would NEVER... forgive yourself if you sold this..... whatever you own afterwards you would regret it, this things is a keeper, do what you have to and enjoy it.....
Thank you It does test my resolve at times I must say, but hopefully it's rewarding to drive once I get it running properly! Trying to make a push on it now.
neilbauer said:
Just found this thread, lovely work
cheersCopied and pasted boys:
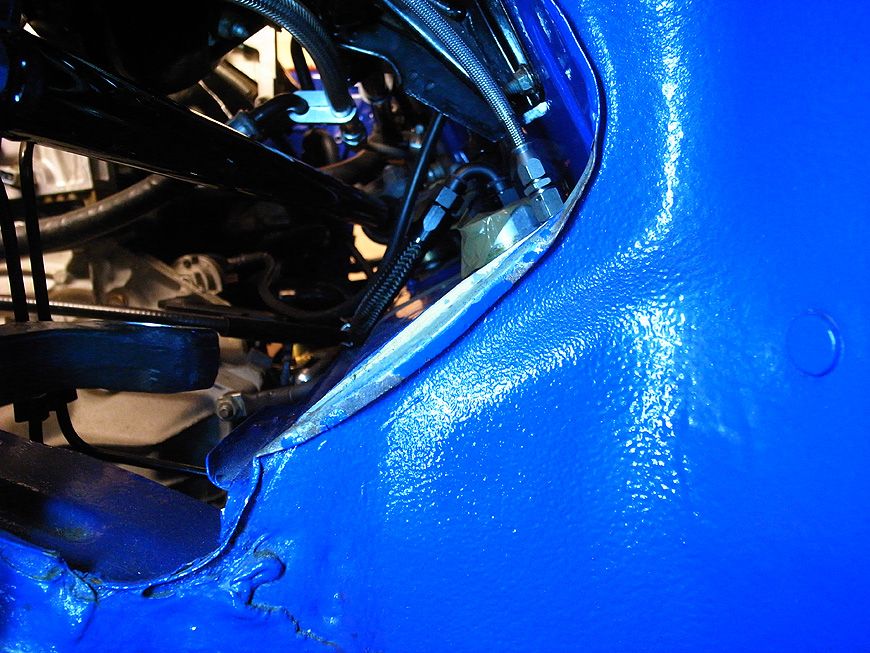
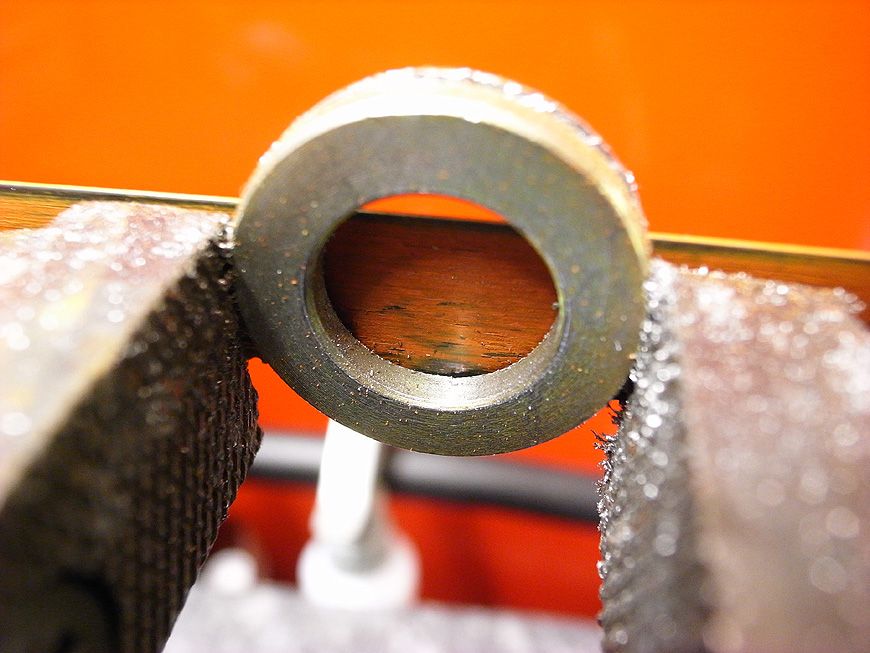
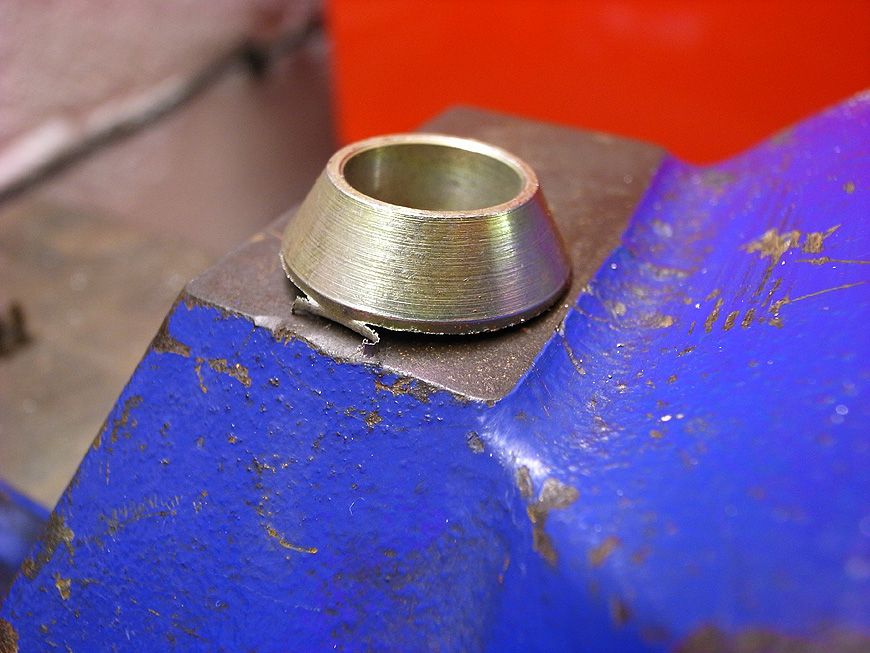
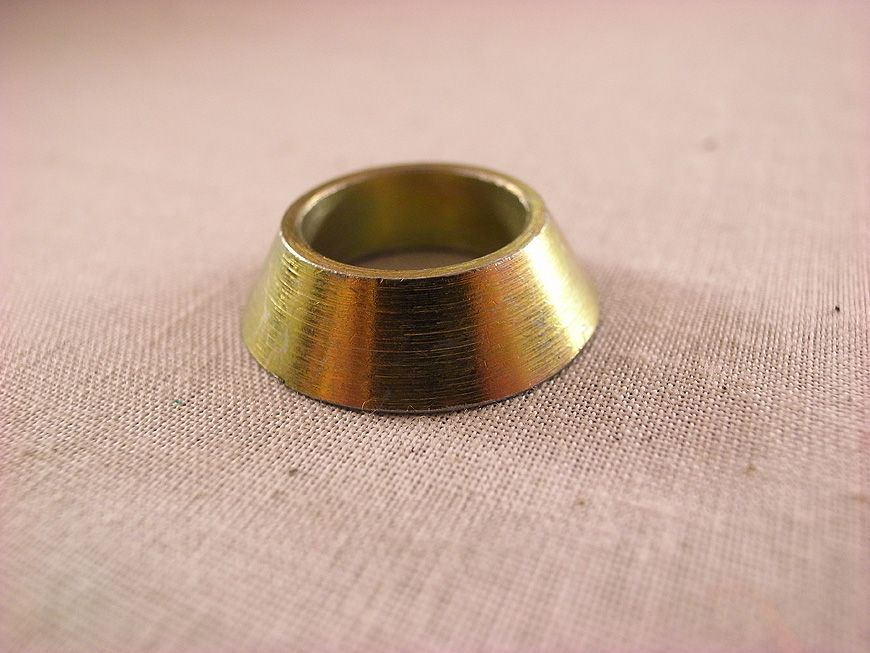
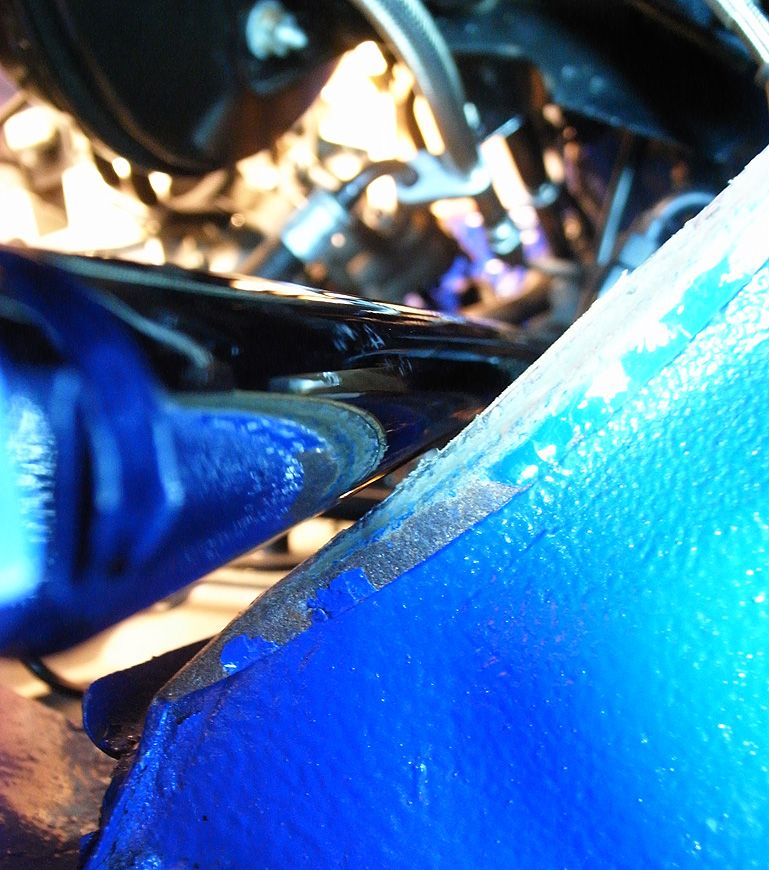
Ok, so in an attempt to try and fit my steering arms upside down and reduce the steep steering arm angle, I have hammered the chassis down a bit tonight, pretty much as far as it can be done without buggering it completely. The seam seal has split a little, so will cut it off and go over it with some more, or gasket seal or something just to fill the gap and prevent water ingress.
I reckon if I machine down one of the spacers (the gold ones that fit between the rose joint and the strut arm) it would just about fit and perhaps touch slightly when jacked up, but not so much that it would damage or bend/put excessive stress on the arms.
Pics as follows:
So hammered down they fit without the spacer like so:
Same as above but chassis in focus:
Rosejoint:
Cracked sealer:
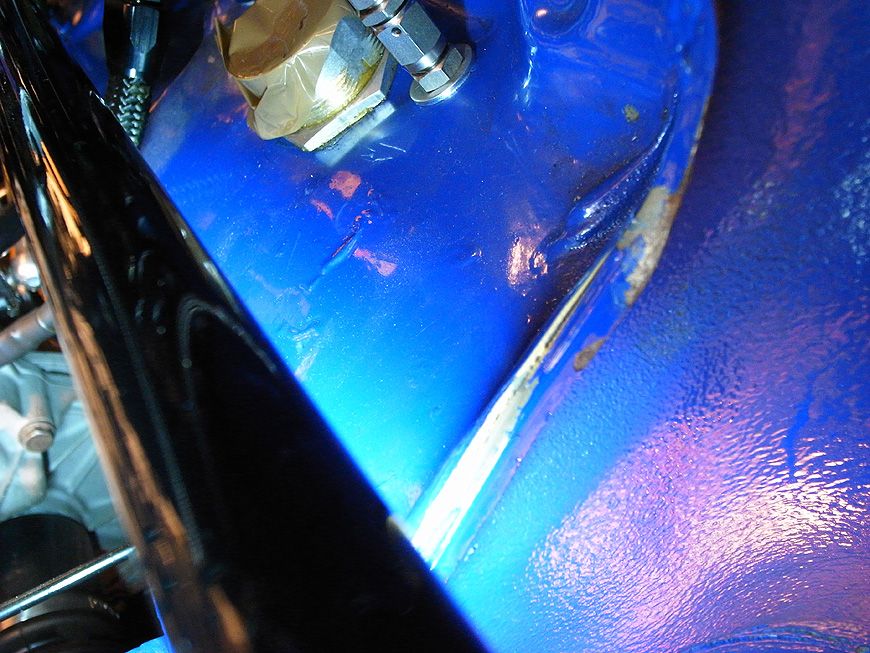
Hammered down some more. I will tidy those corners up tomorrow. I was in a rush to get back upstairs the wife had cooked me a steak, it was going cold and I was starving!
If I could get the conical spacer machined to this size it would just fit and allow a few mm clearance against the chassis - tight like a tiger!
Also I figured that the camber is what screws up the toe in. I have lessened the camber and now the wheels are just about matching. Would need shorter arms if I set the camber more aggressively.
fiatpower said:
Gasket sealer won't do the job very well. Use something like Sikaflex 221:
http://www.uksealants.co.uk/sikaflex-221-adhesive-...
Ok thanks dude. I may just buy some seal sealer and do it properly to be honest now! http://www.uksealants.co.uk/sikaflex-221-adhesive-...
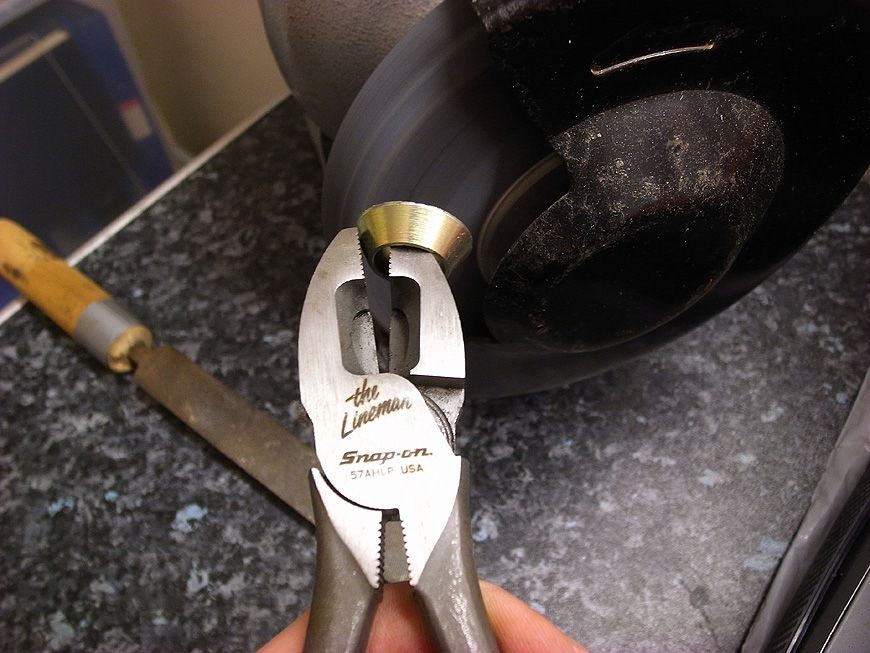
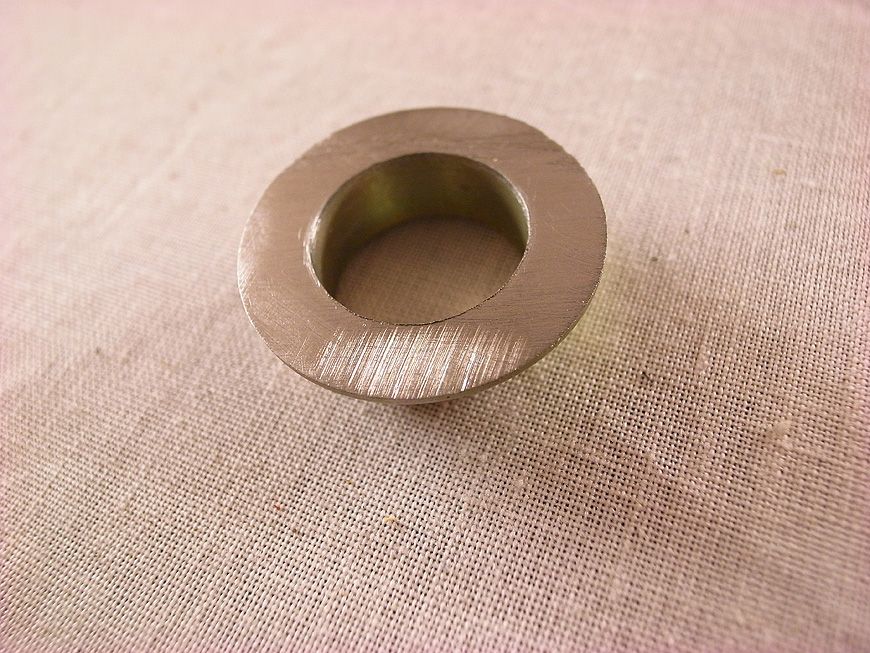
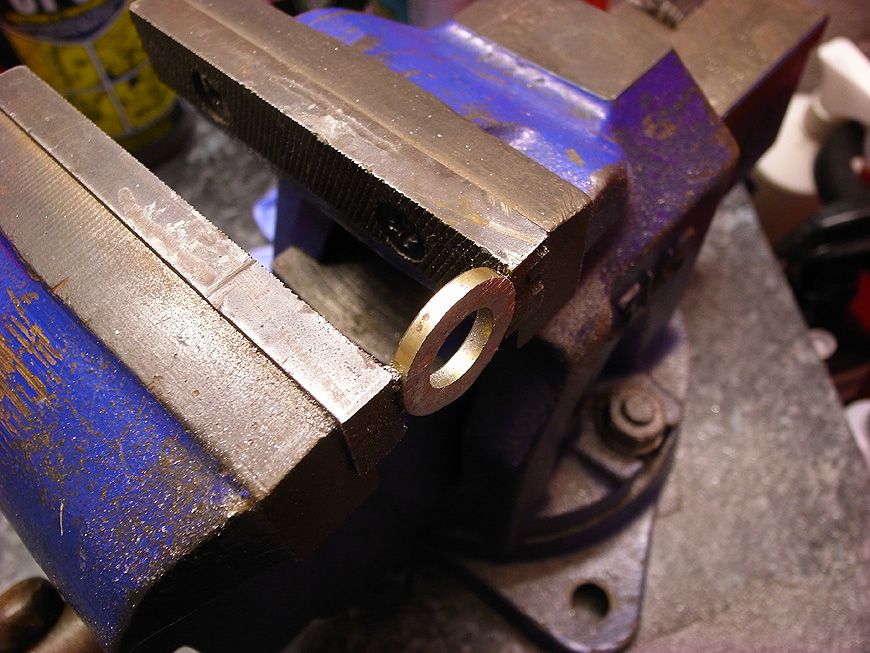
Ok, so I spent the weekend hammering my chassis (sounds wrong that!) and trying to get the steering arms to fit on without knocking at full droop (more innuendos!)
Initially I was going to get some smaller mis-alignment spacers made up, but I ended up doing it the old fashioned way and cutting them down with a hacksaw. Unfortunately my blades weren't the sharpest as I used them sorting the Civic exhaust, so it was hard work. However, got there in the end, and success, they fit!
Next problem is addressing the toe in. The steering arms are still too long so the wheels point outwards despite the fact the are wound all the way in. I have been speaking to Tommy and I think we are going to cut them down slightly then he will weld them up and repaint them for me, top man. Think it's just the AST's putting a spanner in the works, as no one else has this exact set up and no one else has experienced these issues! Never mind, I will get around it. Also going to crack on refitting the loom again this week. Feeling enthusiastic about the car again which is good, and I am actually enjoying working on it too
Anyways, enough babble, here are some photos:
Doing it the old fashioned way (side note, if you don't own a vice, get one, best/most useful tool ever!!)
Getting there:
Motivational tunes to aid with the cutting!
Phew:
Done!
Refining the finish. Also used a file and sandpaper after this:
Complete:
Et voila, c'est parfait!
Tight, but, but she fits:
Small bit that I removed:
All tightened up (will come off again for cutting the arms down - arrgh!):
That's all for tonight!
Lewis
Thanks guys.
Ok, so it appears that I was being a muppet regarding the steering arms and confusing myself, after one of the smart chaps on the forum pointed out a mistake with my statement - DOH! (Thanks to Phillipm!)
So I managed to get everything on and the steering arms lined up (pretty much). Also setting the camber and messing about with the AST's wasn't an easy job, so it involved measuring from the edge of the strut to the edge of the nut using an allen key, marking with tape then trying to match it with the other side. I did have the idea of my mini magnetic spirit level on the brake discs, so may do that also to check they're equal. They look about right by my eye, although will get them set up properly once it's running.
So that sorted, started to put my loom back in. Bit of a fiddly job, and time consuming cable tying it all back together but it's getting there. Stupidly I did not take photos before removal, so there are a few connections i'm unsure of, for example the starter motor and the altenator one's (think the Altenator may be ok as the holes on the connectors and small and large so can match them easily, but I am a bit stumped with the one on the starter motor. May take some pics and see if any of you boys can assist.
A few unexciting pics of the work:
Steering arms adjusted:
Right wheel:
Left wheel:
Wiring:
Overall though I am enjoying working on it and feel quite stoked on it again. Really going to crack on with it and aim to get the thing working this year. I have been saying this since 2010 would you believe! Went through my thread today fully, cannot believe I have faffed on it for so long but money and other constraints haven't helped either!! Ho hum!
PhillipM said:

So, both my babies got some love today - Honda had it's new headlight and machine polished them both so they look new. Anyway, that's another blog so will update that too!
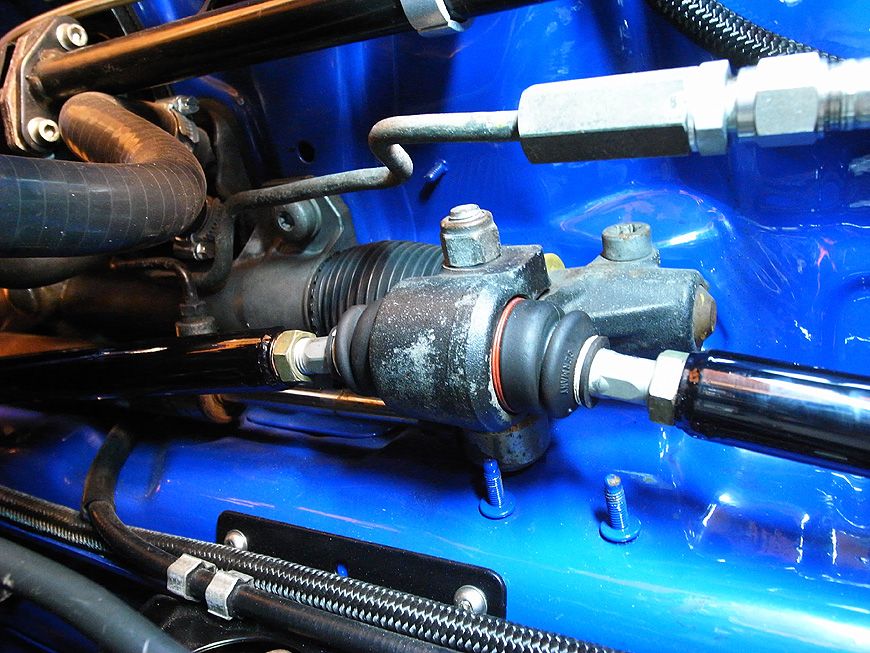
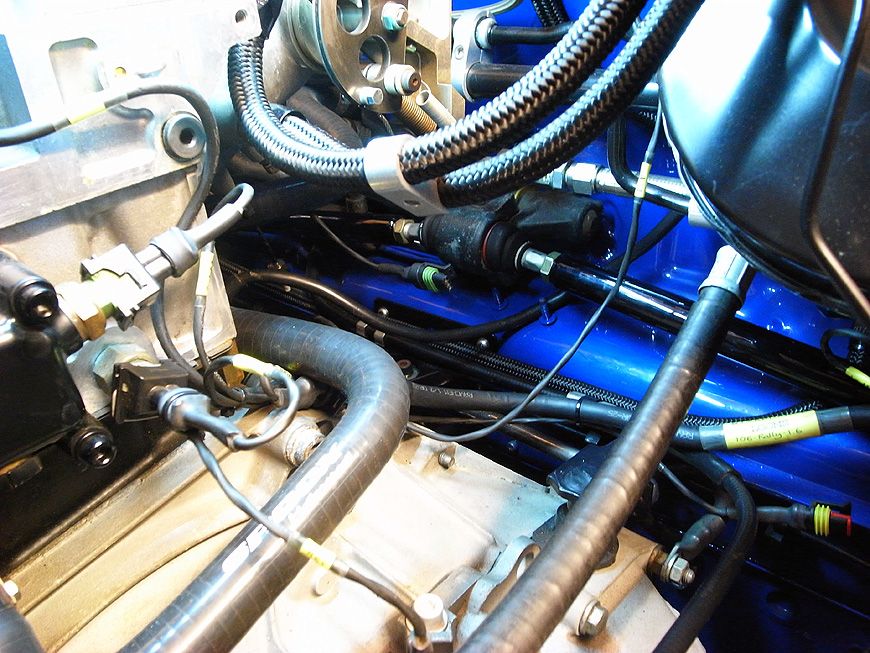
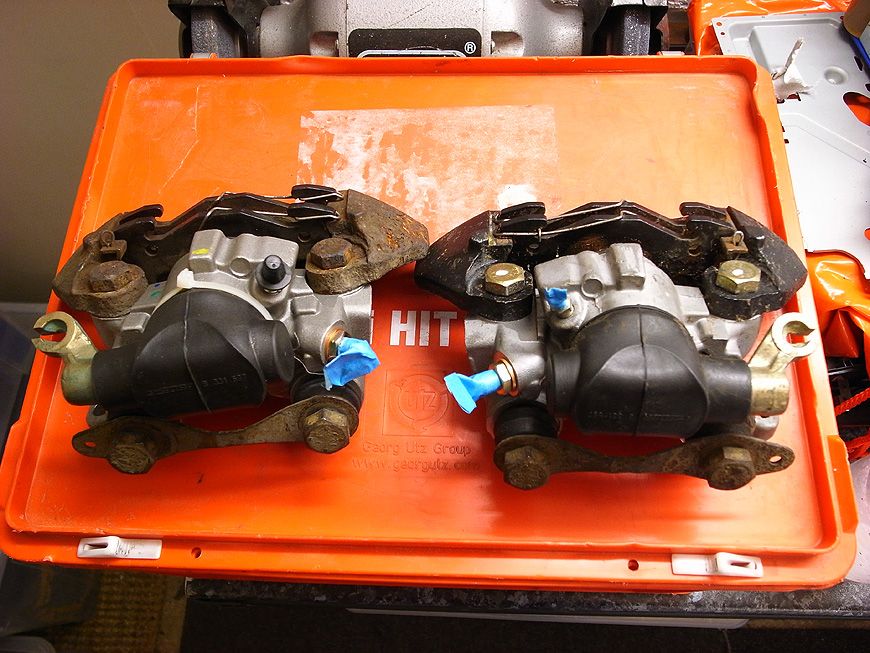
Finished putting the loom back into the Rallye tonight so that's all done. Also re-routed a few bits and made it even more tidy, so looks awesome now! Gotta put the exhaust back on, trumpets back and other bits back on, wire the wiper motor in, empty out the fuel tank (not looking forward to that), get a new battery, fit my speed sensor, sort out the rear calipers, and a few other bits, but not much left now!
Few snaps:
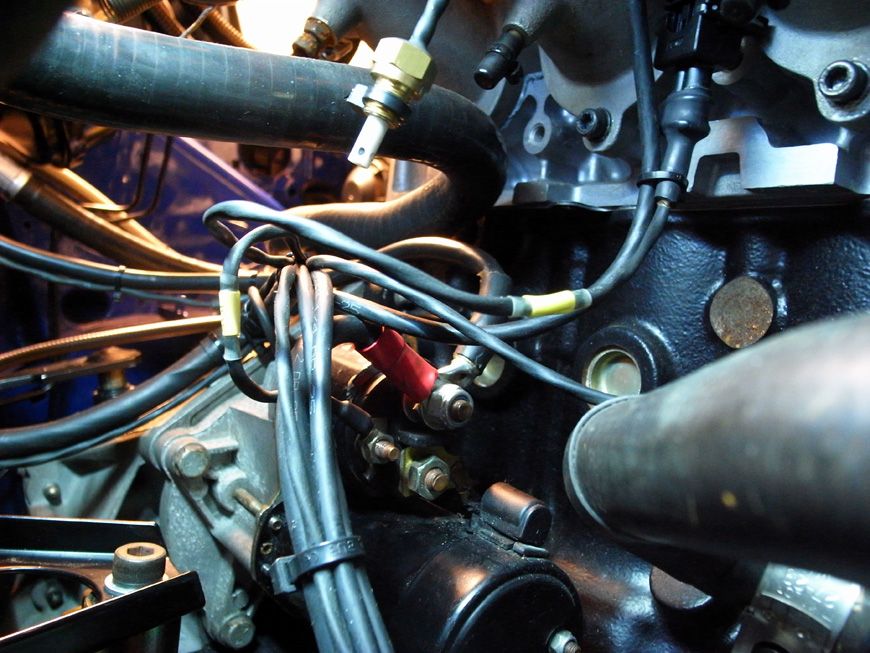
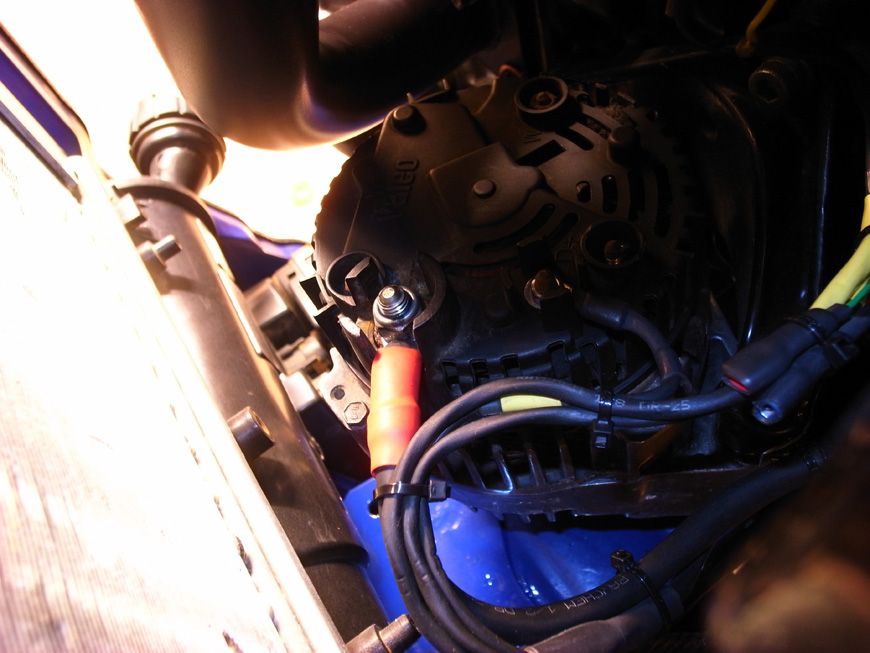
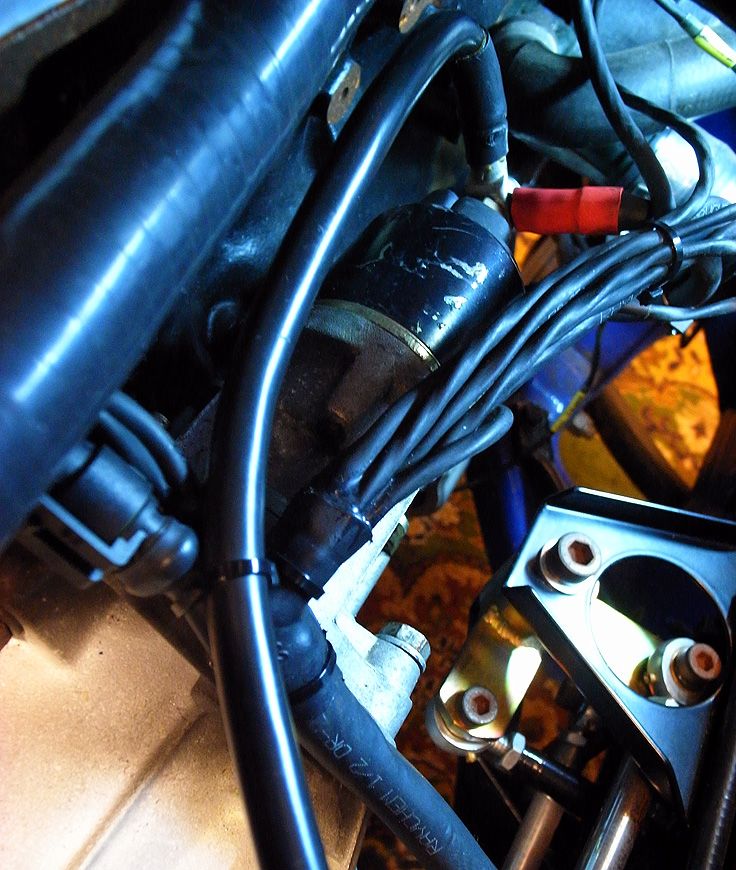
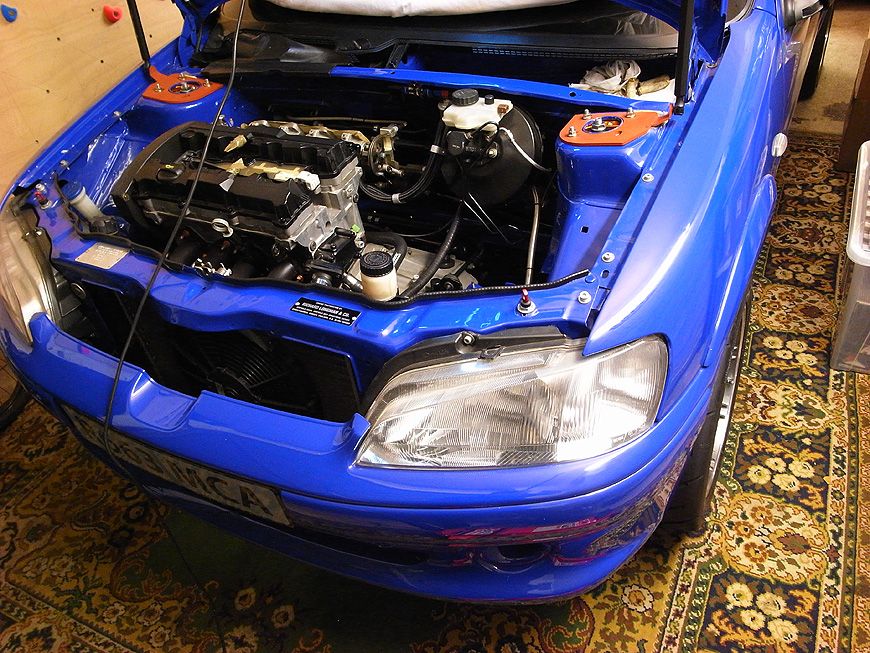
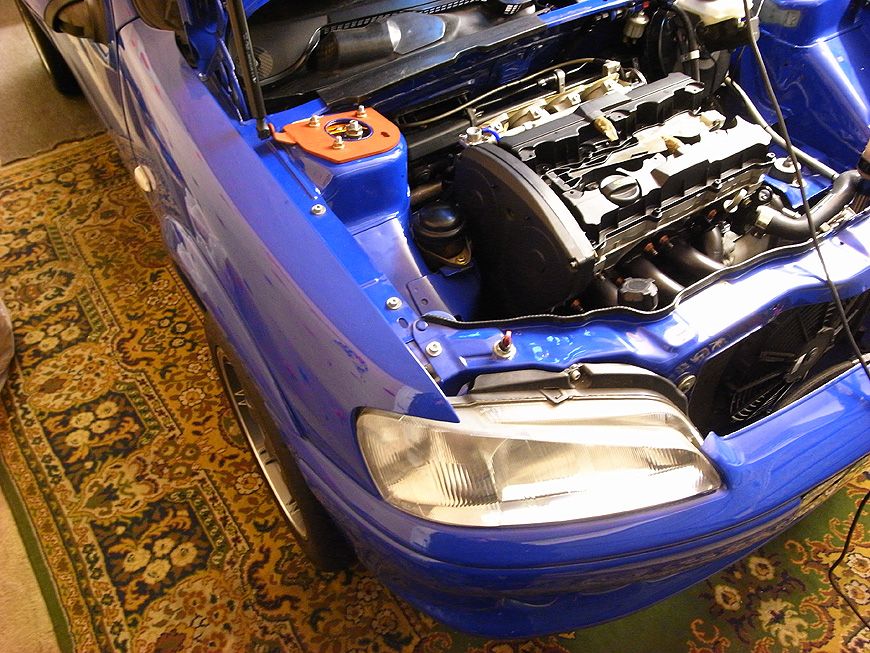
These pics are mainly for reference so if the engine blows up and I have to remove it then I can remember how things go back in!
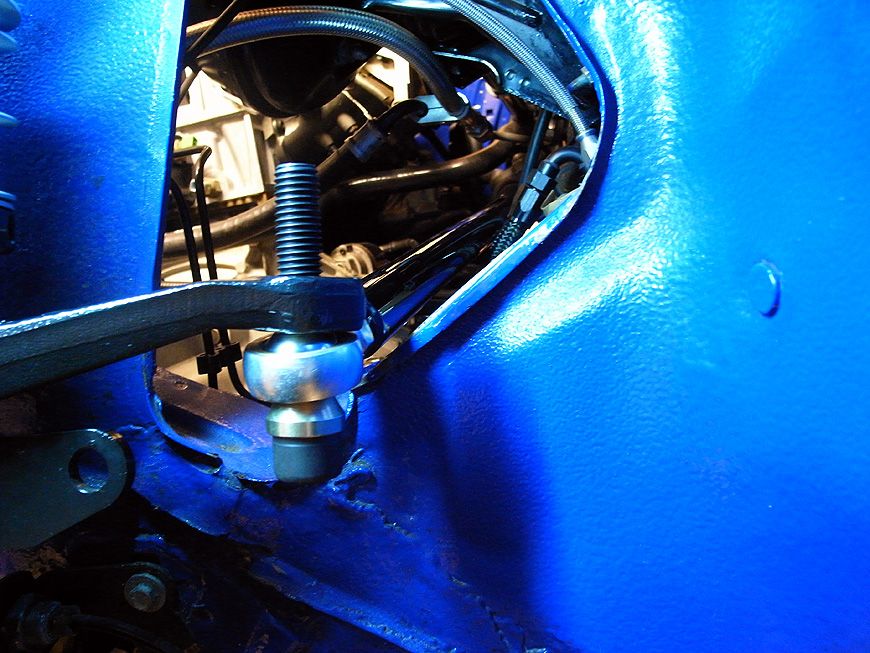
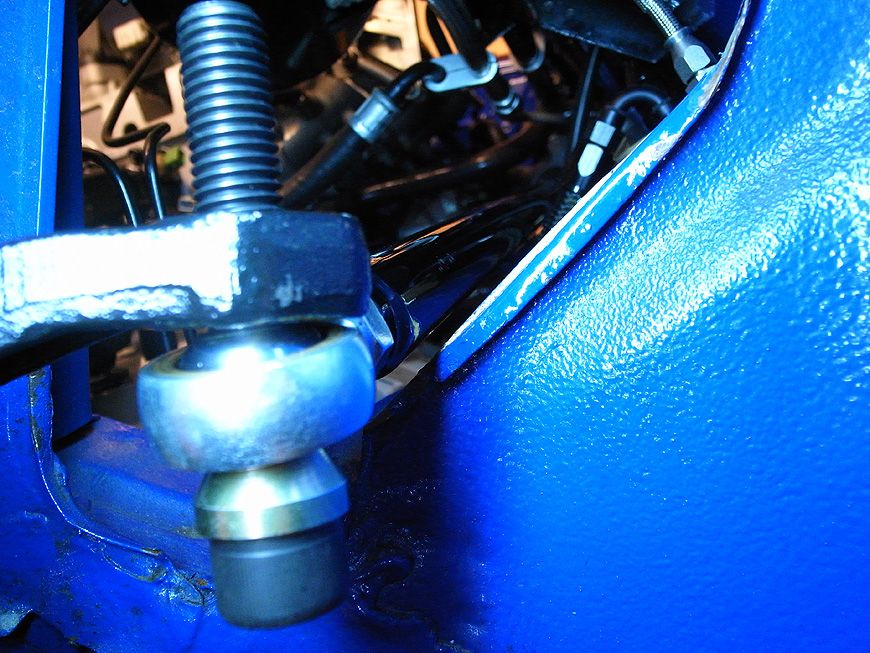
Will update with a few more pics tonight, but have been cracking on with this recently. Still having grief with my steering arms. They are now wound all the way in following several attempts to get both wheels straight, and are still a touch long in that both the front wheels have a bit too much toe in. It's to do with the amount of camber set by the AST's. If you look at this picture of Dans you will see he has the camber set to the least aggressive setting, whereas mine somewhere in the middle moves the part of the strut that the track end bolts to quite far in which in turn means the steering arms are a bit too long. It's difficult to explain:
Dans:

Mine:
Anyway, will sort that later as trying to get it running first.
In the meantime I have been to Earls and got the brake line fittings I needed, made up the rear lines, fitted those, refitted the rear calipers, refitted the exhaust, refitted and tidied the loom, fitted the lambda sensor for the STACK AFR but but need to decide on a cunning method to route the wiring into the cabin to plug it into the actual connector block from the loom connected to the AFR. Also still need to wire that in, will need help with that. Got to empty the fuel tank and fill with fresh fuel (an arse of a job which I am not excited about), buy a new battery, fill engine with all fluids, and that's pretty much it. Mapping then.
I have a lot going on and the pressure is currently. We are buying a house and it has no garage so need to get this running so I can store it somewhere, either that or it will have to go to my brothers garage temporarily and then be sold or broken which I [U]REALLY[/U]do not want to do. We are getting married in August so trying to arrange that and sort it all out. My fiances father is extremely ill so we have been seeing him a lot recently and that takes time and is also very upsetting / stressful for all involved. Tough times and am gutted we could not find a property within budget that has a garage, but life has to move on. Seeing this illness destroy a mans life has made me think about the future more and kids, so that will be next on the agenda, although I am trying my hardest to ensure the Rallye features in these future plans. If we do have some offspring one day and it's a boy, I one day imagine taking him for a blast in the Rallye and introducing him to this hobby/obsession that has given me so much pleasure over the years, albeit with a lot of arse-ache in the meantime, but hey, that's all the fun of it right!?
Will keep you guys posted.
Dans:
Mine:
Anyway, will sort that later as trying to get it running first.
In the meantime I have been to Earls and got the brake line fittings I needed, made up the rear lines, fitted those, refitted the rear calipers, refitted the exhaust, refitted and tidied the loom, fitted the lambda sensor for the STACK AFR but but need to decide on a cunning method to route the wiring into the cabin to plug it into the actual connector block from the loom connected to the AFR. Also still need to wire that in, will need help with that. Got to empty the fuel tank and fill with fresh fuel (an arse of a job which I am not excited about), buy a new battery, fill engine with all fluids, and that's pretty much it. Mapping then.
I have a lot going on and the pressure is currently. We are buying a house and it has no garage so need to get this running so I can store it somewhere, either that or it will have to go to my brothers garage temporarily and then be sold or broken which I [U]REALLY[/U]do not want to do. We are getting married in August so trying to arrange that and sort it all out. My fiances father is extremely ill so we have been seeing him a lot recently and that takes time and is also very upsetting / stressful for all involved. Tough times and am gutted we could not find a property within budget that has a garage, but life has to move on. Seeing this illness destroy a mans life has made me think about the future more and kids, so that will be next on the agenda, although I am trying my hardest to ensure the Rallye features in these future plans. If we do have some offspring one day and it's a boy, I one day imagine taking him for a blast in the Rallye and introducing him to this hobby/obsession that has given me so much pleasure over the years, albeit with a lot of arse-ache in the meantime, but hey, that's all the fun of it right!?
Will keep you guys posted.
Edited by Track_Cit on Wednesday 9th April 14:30
Ok, so I have quiet of late but I have been busy.
Few things, had to go to Earls and get some more bits to redo the rear brake lines as the thread was different on the replacement caliper I bought on ebay. Tangent - I took a day off work to go there, and at the trade counter I was confronted with the most mechanically knowledgeable woman ever (or at least that I have ever met in my lifetime). At first I wrongly assumed she was a receptionist, that was until she brought her hands up from under the counter, picked up the caliper whilst wearing mechanics gloves, and then proceeded to tell me in detail what thread they are and what i'd need etc - I fell in love immediately!
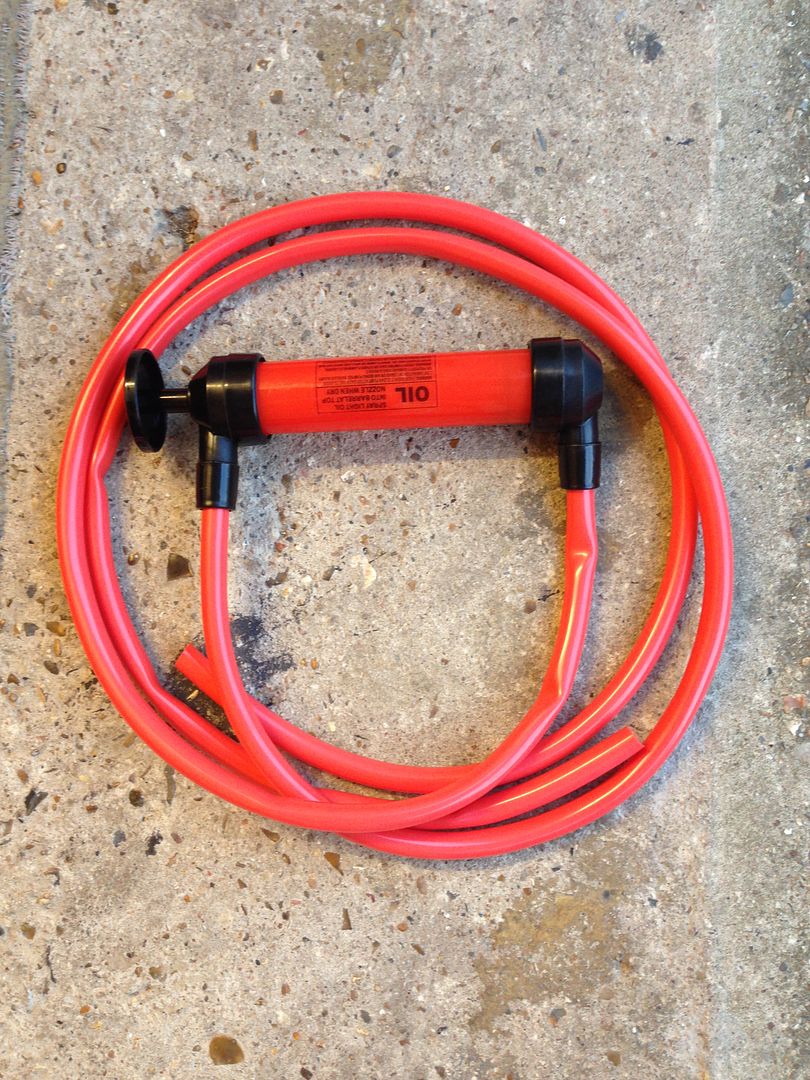
So now I have sorted the rear lines, bled the brakes (another arse-ache job, as when bleeding the new caliper it became apparent that the bleed nipple was blocked. The fools had used grease when screwing it in, which was in turn blocking the small hole for the fluid to pass out through. Had to remove it entirely, stem the leaking fluid from the caliper, clean and blow out the nipple with a cunning DIY device made from my bike pump, football valve and a piece of rubber tube, and once that was done I refitted it and bled that caliper without issue. I've also put in some new gearbox oil in, wired in the Wiper Motor (pics to come as they're not uploaded yet), put in some new engine oil, and drained out the old petrol. Another cunning little ebay tool (£10) and it worked a treat! Just need to dispose of the old fuel now - any ideas (keep it sensible lol!)
I just need to wire in my AFR, get some coolant, get a new battery and fit it, and hopefully it will be good to go. That's discounting mapping and any teething issues I may have.
Also not sure if i've said before but I will be moving and there was a possibility i'd have to sell the rallye. However, i've amanged to find a garage to rent so that's bonus. No lighting or power, but it's better than nothing. I will make do!
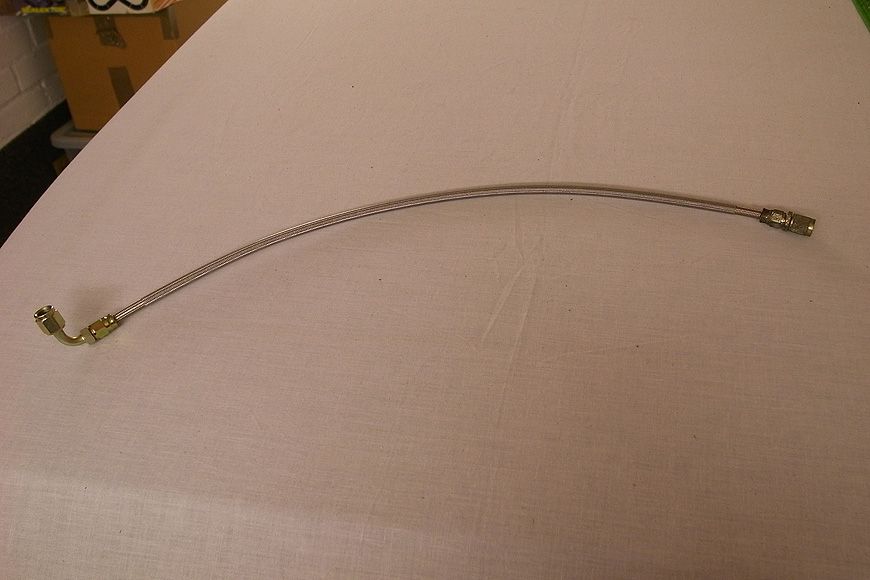
Here are some photo's anyways:
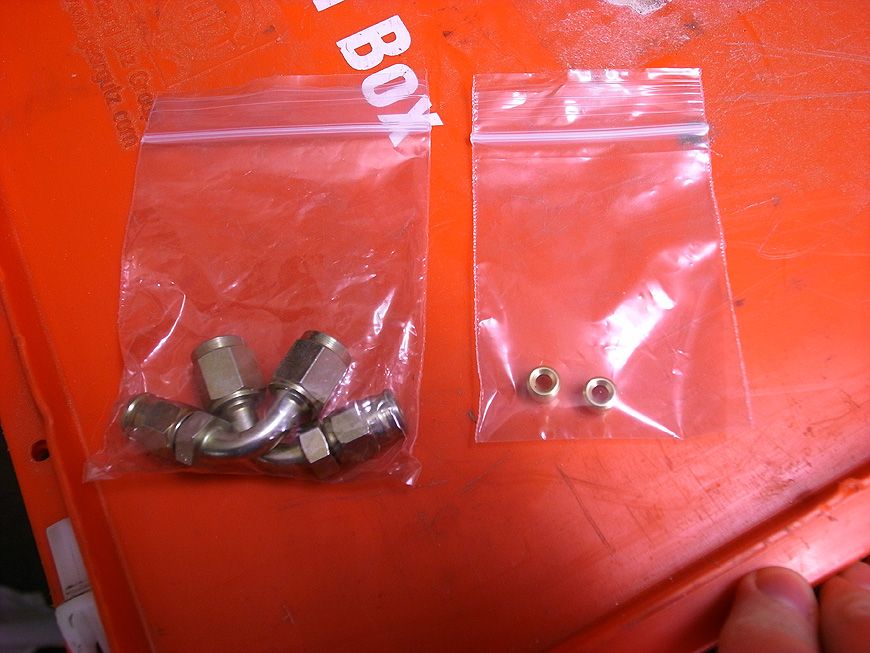
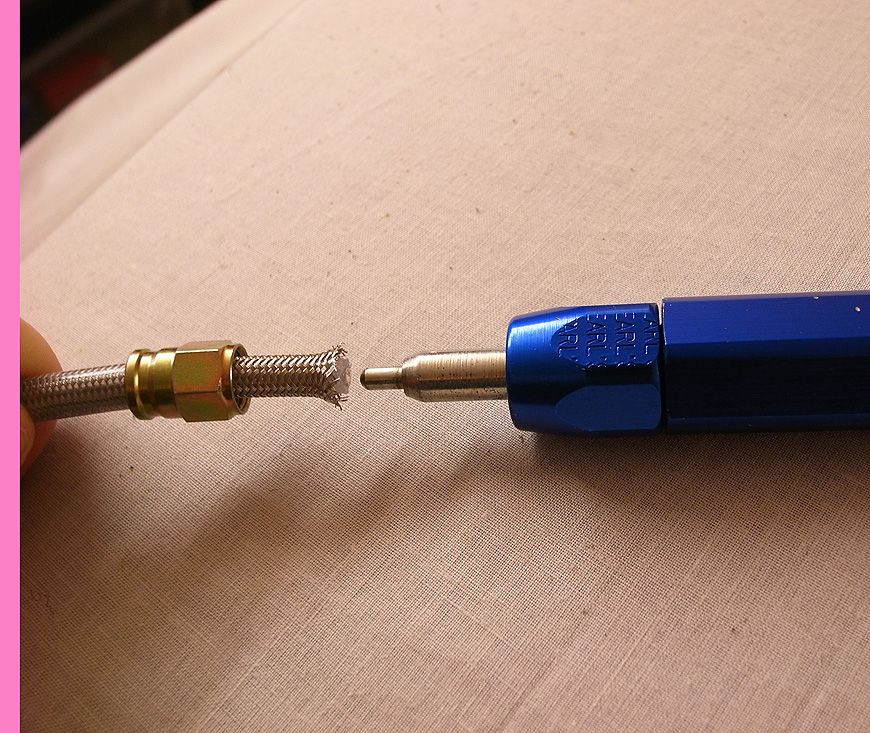
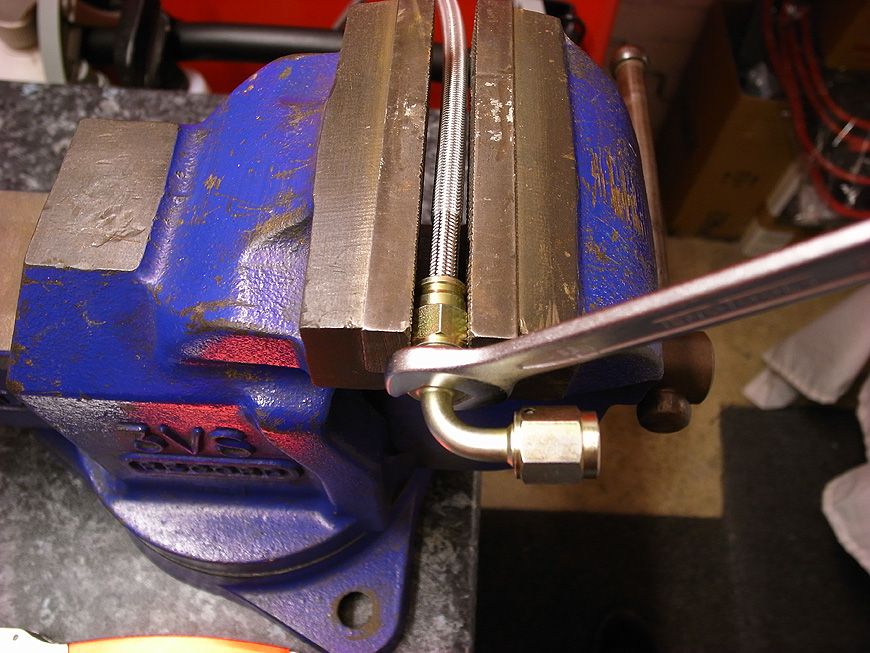
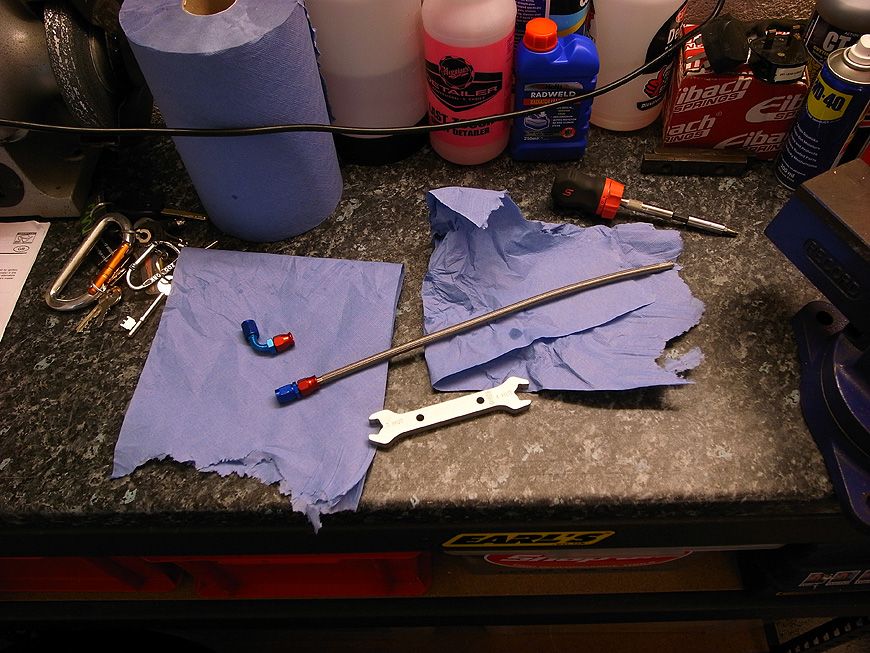
Brake line stuff (making them up):
Calipers:
New bits:
Cutting the hose and preparing the end for the olive:
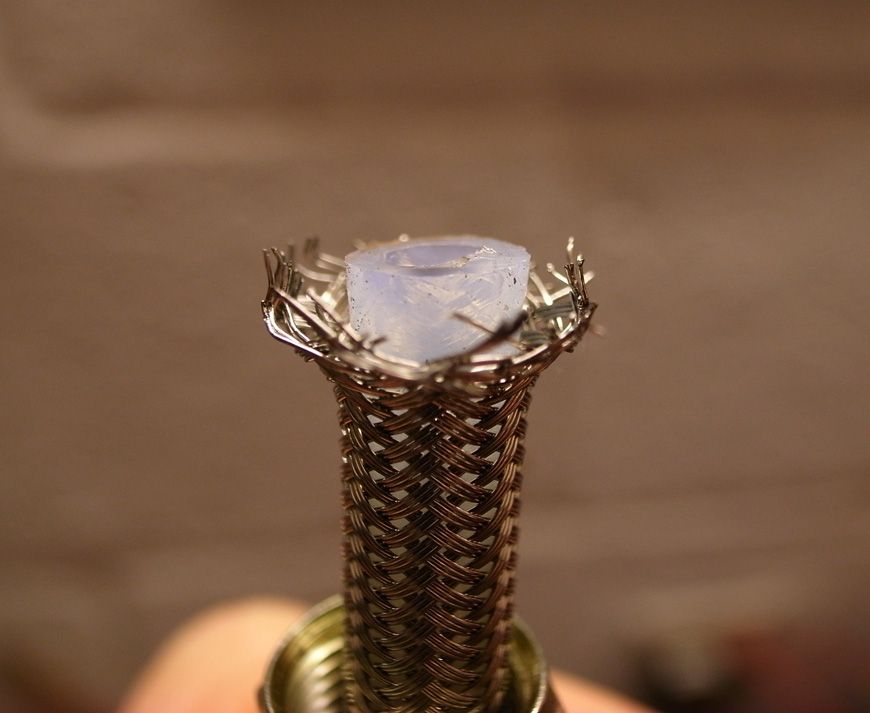
Earls tool to push on the olive (requires serious force so I would suggest using assembly lube which I don't have)

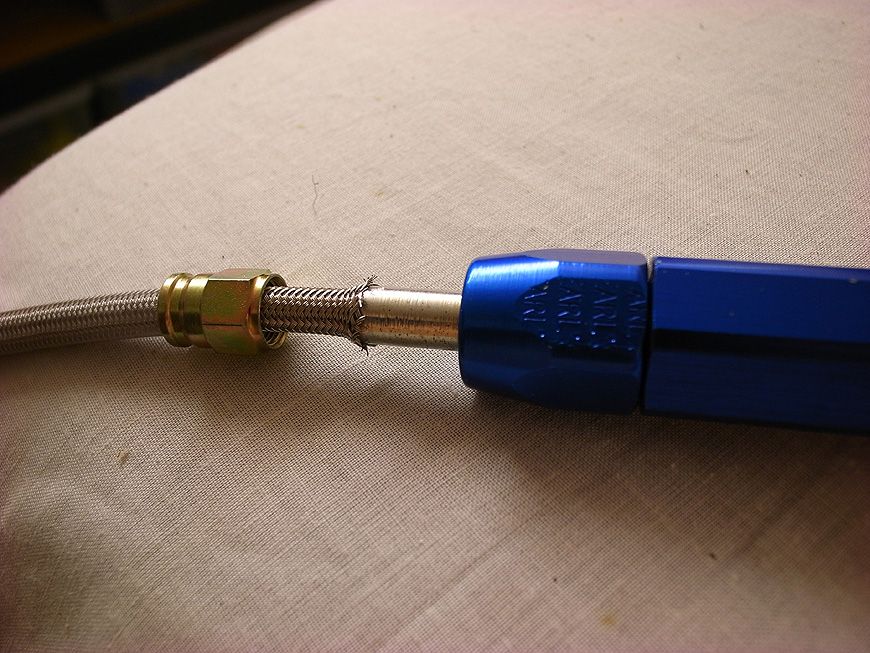
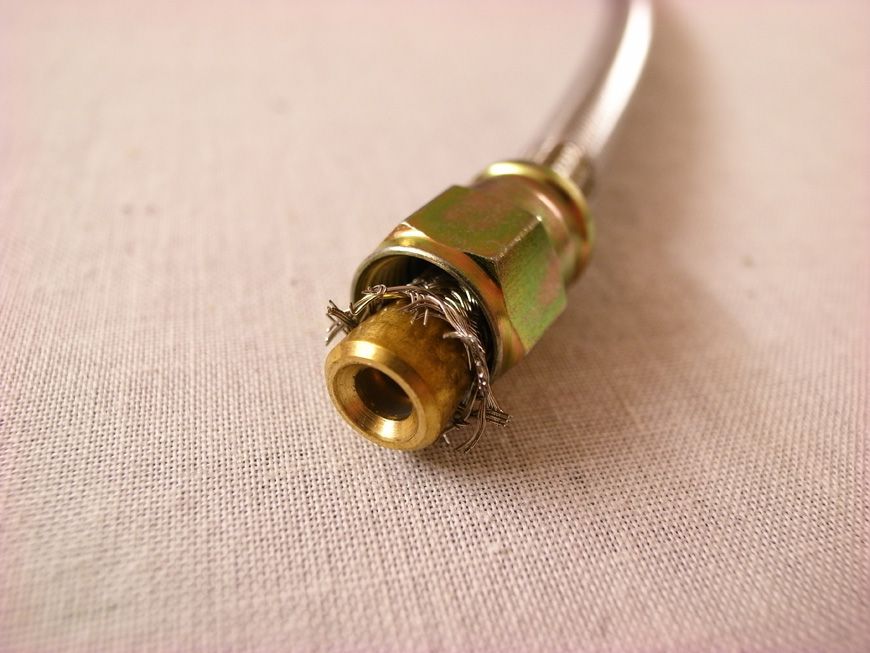
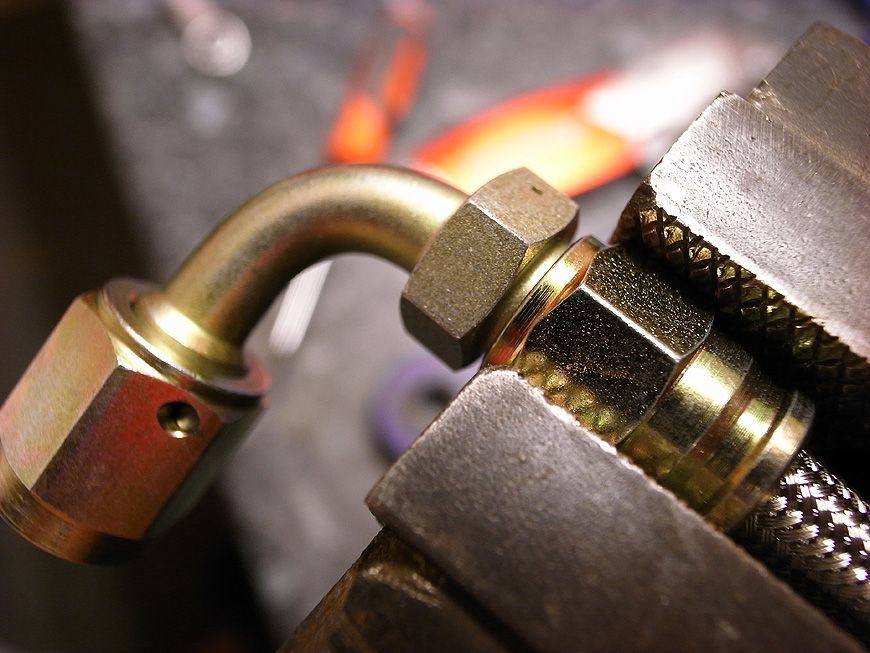
Done (two in total):
Fuel drainage - excuse the pics, used my iphone:
Starting:
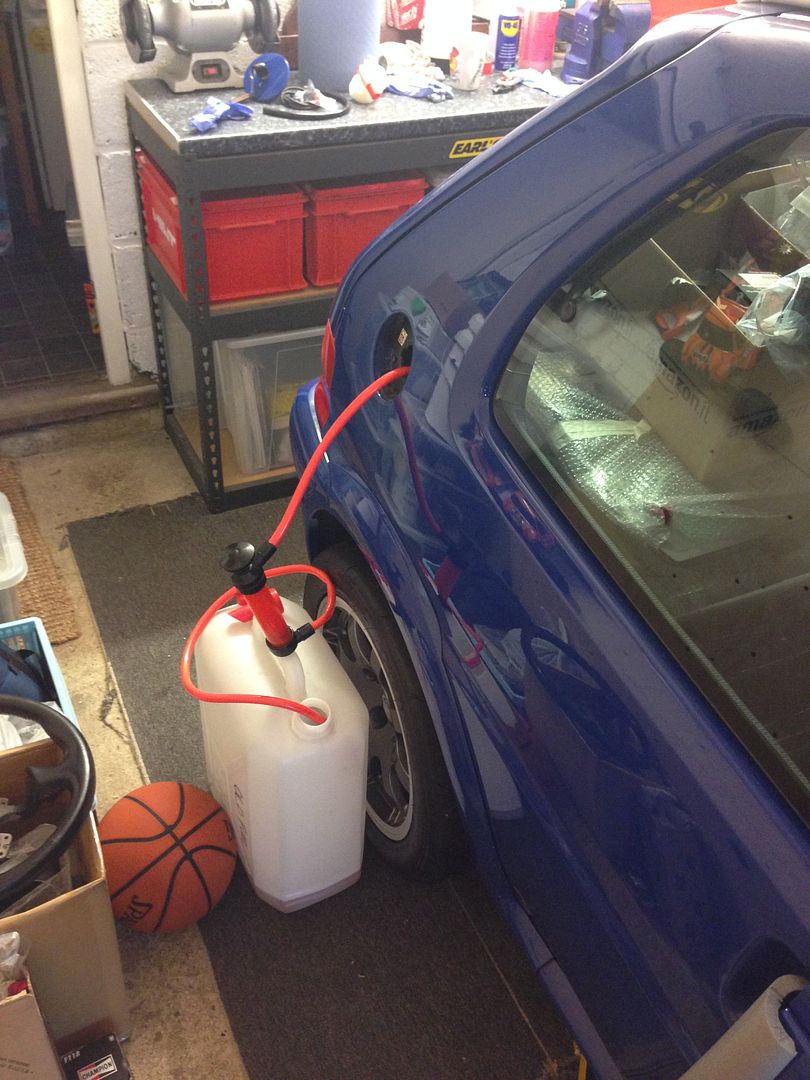
Getting there:

Will upload pics of the wiper motor wiring later on.
Few things, had to go to Earls and get some more bits to redo the rear brake lines as the thread was different on the replacement caliper I bought on ebay. Tangent - I took a day off work to go there, and at the trade counter I was confronted with the most mechanically knowledgeable woman ever (or at least that I have ever met in my lifetime). At first I wrongly assumed she was a receptionist, that was until she brought her hands up from under the counter, picked up the caliper whilst wearing mechanics gloves, and then proceeded to tell me in detail what thread they are and what i'd need etc - I fell in love immediately!
So now I have sorted the rear lines, bled the brakes (another arse-ache job, as when bleeding the new caliper it became apparent that the bleed nipple was blocked. The fools had used grease when screwing it in, which was in turn blocking the small hole for the fluid to pass out through. Had to remove it entirely, stem the leaking fluid from the caliper, clean and blow out the nipple with a cunning DIY device made from my bike pump, football valve and a piece of rubber tube, and once that was done I refitted it and bled that caliper without issue. I've also put in some new gearbox oil in, wired in the Wiper Motor (pics to come as they're not uploaded yet), put in some new engine oil, and drained out the old petrol. Another cunning little ebay tool (£10) and it worked a treat! Just need to dispose of the old fuel now - any ideas (keep it sensible lol!)
I just need to wire in my AFR, get some coolant, get a new battery and fit it, and hopefully it will be good to go. That's discounting mapping and any teething issues I may have.
Also not sure if i've said before but I will be moving and there was a possibility i'd have to sell the rallye. However, i've amanged to find a garage to rent so that's bonus. No lighting or power, but it's better than nothing. I will make do!
Here are some photo's anyways:
Brake line stuff (making them up):
Calipers:
New bits:
Cutting the hose and preparing the end for the olive:
Earls tool to push on the olive (requires serious force so I would suggest using assembly lube which I don't have)
Done (two in total):
Fuel drainage - excuse the pics, used my iphone:
Starting:
Getting there:
Will upload pics of the wiper motor wiring later on.
Max_Torque said:
If you didn't stick those sharp stainless steel braid wires into your thumbs at least 5 tines during making up a single hose end, you're not a proper race mechanic....... ;-)
In short, yes! This tool helps minimise spiked fingers, but you still do it! I only bled the once on this occasion..TB Rich said:
I cannot believe you haven't finished this yet! I've been through 3 cars now since I sold my TB'd Rallye (Rallye_Rich from the RR & SSC forums a good few years ago!), though some how now back in French tat again
Did Chris (Bic) ever finish his?
Ha ha....it is very close now honestly! Did Chris (Bic) ever finish his?
Bic sold his to another guy on the Rallye Reg, so hopefully it will see tarmac again, although it will be in a few years as it costs big money to build a motor like that (as you know).
Do you miss yours? That was the first throttle bodies rallye I ever saw!
Ok, haven't done anything for a while on this as busy sorting my wedding and house buying and moving out - full steam ahead.
Annoyingly I put the stack dash back in last night and saw that my internal rear brake lines are f king leaking again?! Cannot fathom how as they were pressure tested at earls and found to be ok....may nip up the connectors and just see whether that's the issue. I am fking hating brake lines now!
I also flicked the cable back onto the battery and there is still life in it - or at least enough to fire the dash up. Will try and wire the AFR to my fuel pump switch over the weekend. I am guessing I can just wire the live into the switch so that the AFR comes on when I flick the fuel pump switch?
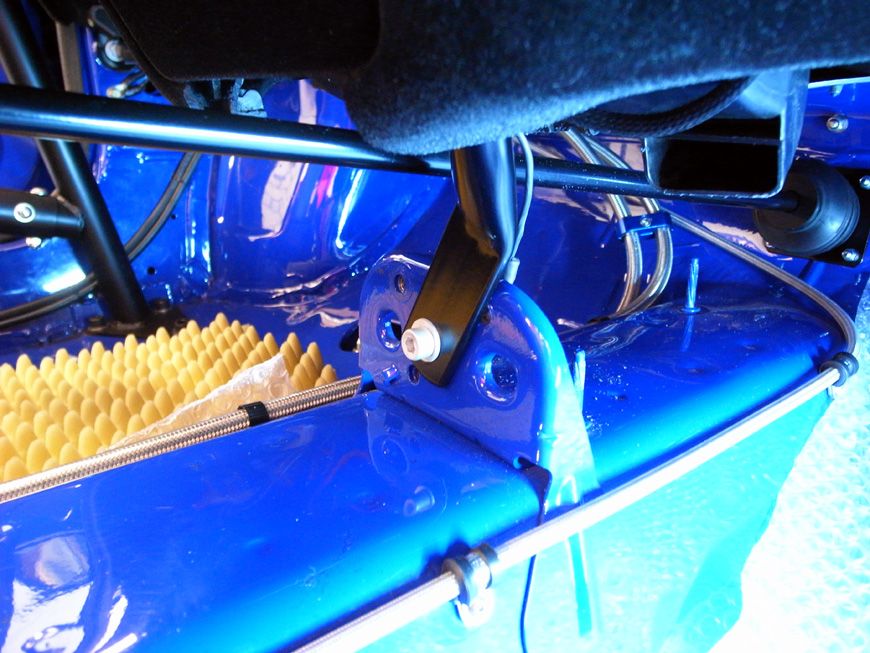
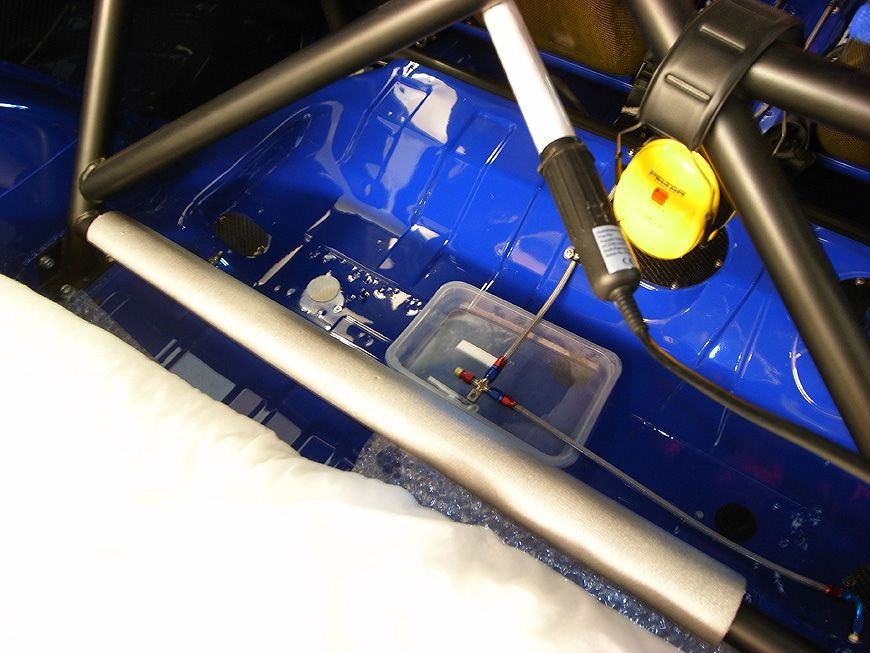
Also put sealant on the panels where I had knocked them flat to accommodate the new steering arms too. And Tommy shortened them and sent them back to me so I have re-fitted them since.
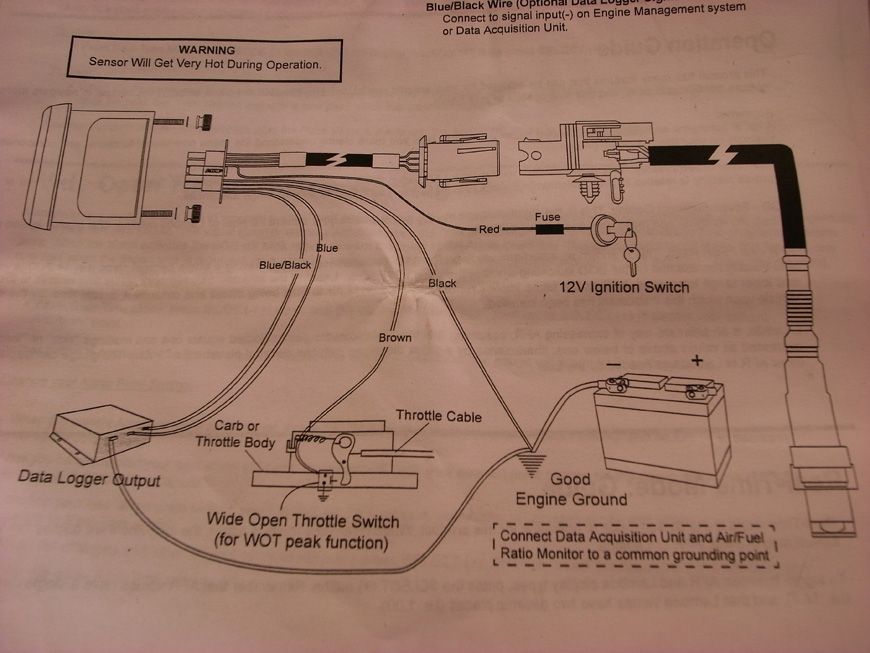
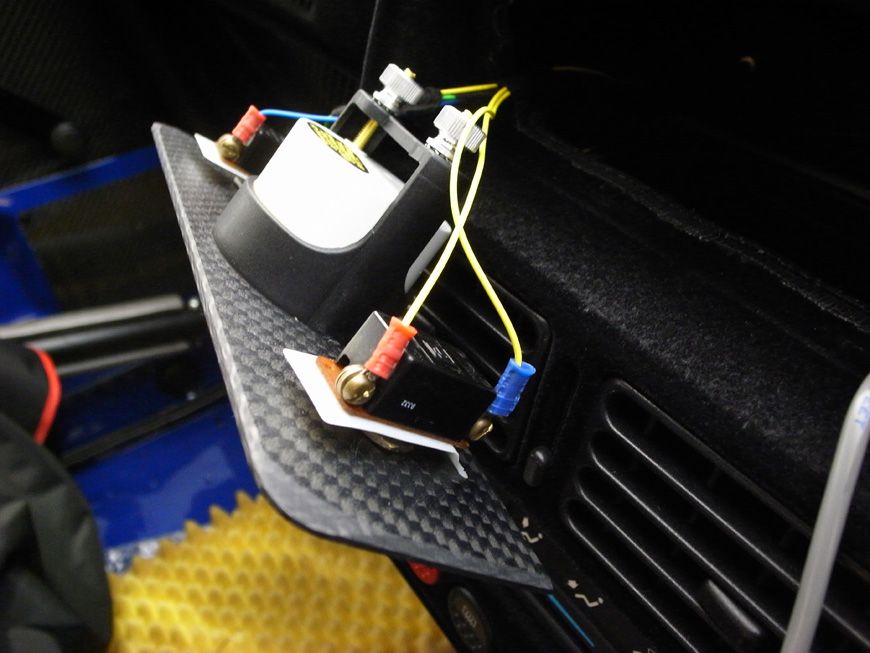
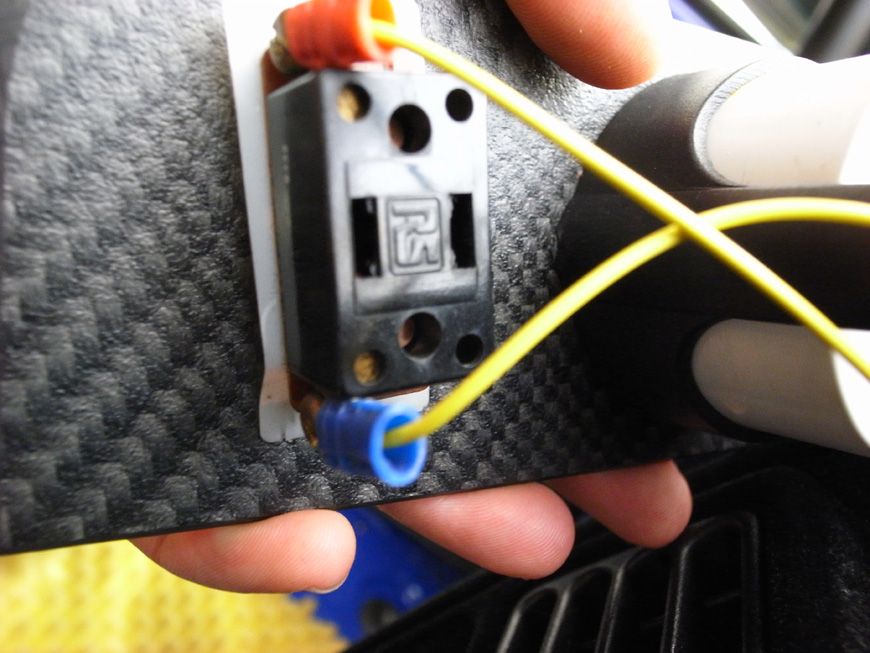
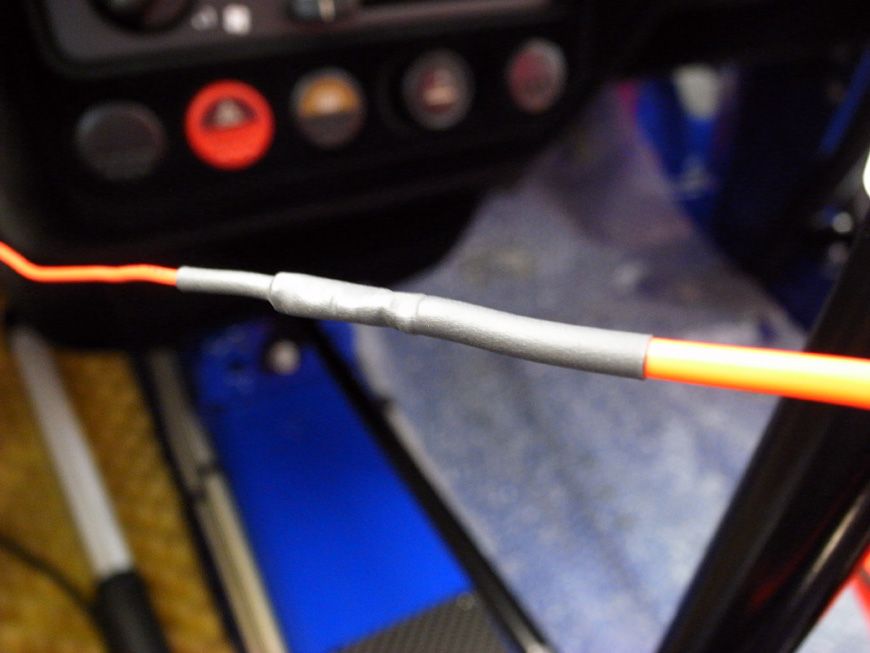
Regarding wiring in of my AFR, the idea I had is to wire it into the fuel pump switch on the carbon panel where the radio was. I just need to find somewhere to connect the earth wire. I assume these switches will be fused somewhere?
Here are the pics and the idea:
Annoyingly I put the stack dash back in last night and saw that my internal rear brake lines are f
king leaking again?! Cannot fathom how as they were pressure tested at earls and found to be ok....may nip up the connectors and just see whether that's the issue. I am fking hating brake lines now!I also flicked the cable back onto the battery and there is still life in it - or at least enough to fire the dash up. Will try and wire the AFR to my fuel pump switch over the weekend. I am guessing I can just wire the live into the switch so that the AFR comes on when I flick the fuel pump switch?
Also put sealant on the panels where I had knocked them flat to accommodate the new steering arms too. And Tommy shortened them and sent them back to me so I have re-fitted them since.
Regarding wiring in of my AFR, the idea I had is to wire it into the fuel pump switch on the carbon panel where the radio was. I just need to find somewhere to connect the earth wire. I assume these switches will be fused somewhere?
Here are the pics and the idea:
Quick update tonight, had a busy and productive weekend on the Rallye. Wired in AFR properly and got that working, did coolant, discovered teething issues as follows:
1. Rad appears to be leaking - will use rad weld I think for now until I get a new rad (unless anyone recommends against it on my engine?)
2. Brake lines are leaking again inside the cabin (rear t piece as before). No idea how as they were pressure tested at earls and came back ok. However, they defo leak but have a day off tomorrow so will go to earls and get more hose to redo them.
Finally, I only went and got it working today! Took it for a blast up the road but was a bit sketchy with no brakes and no PAS (another thing I need to sort). Otherwise I love it. Seriously insane I forgot how fun a small extremely noisy car is!
More to come, and will get pics up tomorrow.
Lewis
1. Rad appears to be leaking - will use rad weld I think for now until I get a new rad (unless anyone recommends against it on my engine?)
2. Brake lines are leaking again inside the cabin (rear t piece as before). No idea how as they were pressure tested at earls and came back ok. However, they defo leak but have a day off tomorrow so will go to earls and get more hose to redo them.
Finally, I only went and got it working today!
Took it for a blast up the road but was a bit sketchy with no brakes and no PAS (another thing I need to sort). Otherwise I love it. Seriously insane I forgot how fun a small extremely noisy car is! More to come, and will get pics up tomorrow.
Lewis
shalmaneser said:
Don't use radweld on a Longmans engine!
No I decided against it!!Ok so I have had a productive few days. Also highlights how heinous my luck has been with a lot of stuff. On my (2 minute) maiden voyage I only managed to get a fecking puncture - can you believe it??!! Pulled a big shard of metal out the tyre this afternoon. Anyway, I can get it repaired so no biggie. Just annoying.
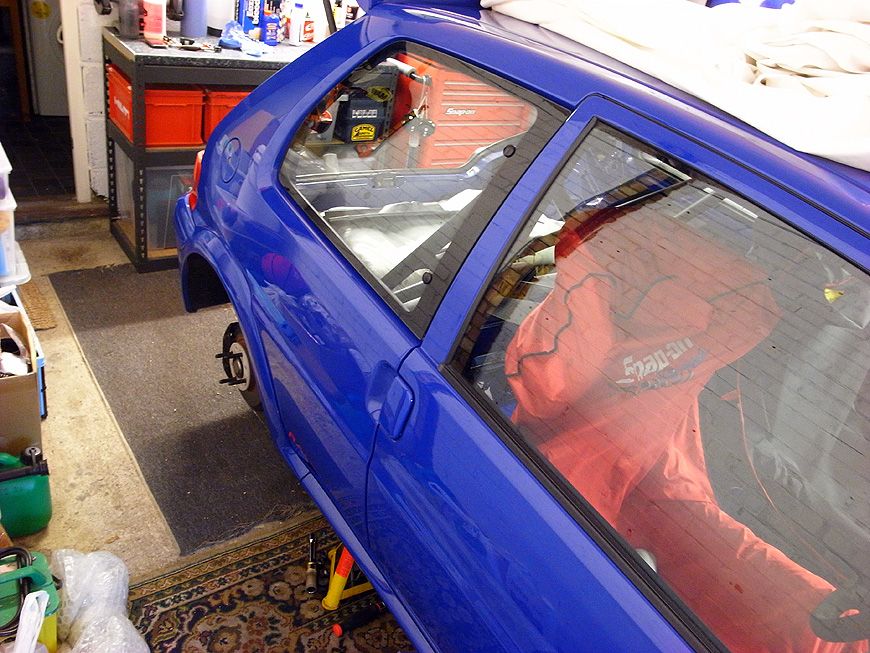
So this weekend and today as I had the day off work (woo), I investigated the leaky rear brake line, made up a new one as I think it was just one side at fault (we shall see). Wired in my AFR which I pretty much did already but needed a fuse and a few small bits to sort, removed my fan assembly and ripped out the leaky rad. It was definitely leaking as you pour fluid it, it pisses straight out again at the bottom. Every goddamn thing I have pretty much replaced now. Also hoovered her out and gave her a clean and wax as she needed some love. Dusty and haggard she was.
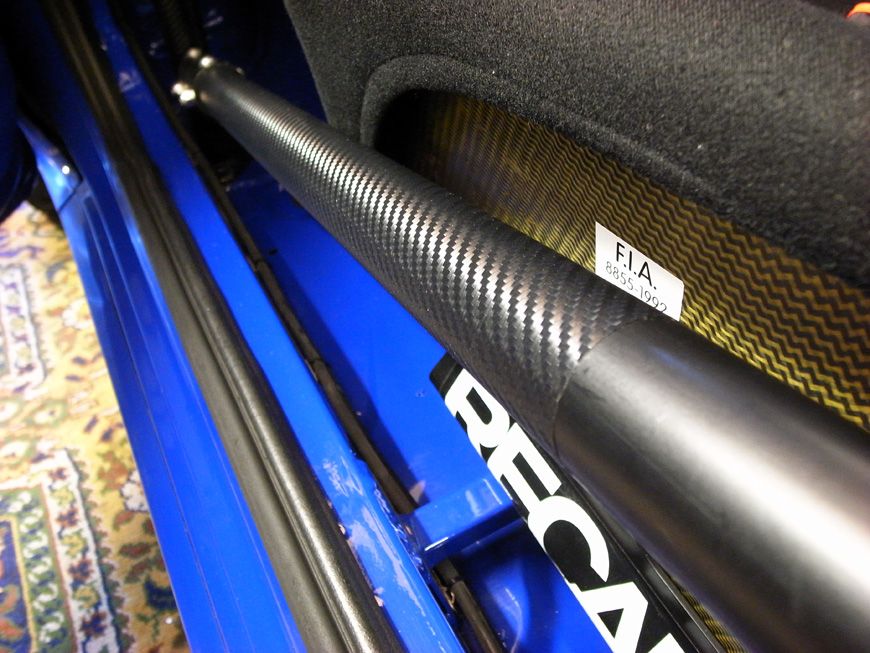
Also put some carbon vinyl on the door bars of the cage to stop it getting bashed and scuffed when getting in and out (with my long pins swinging about it's unavoidable)!
Here are pics of the work anyway:
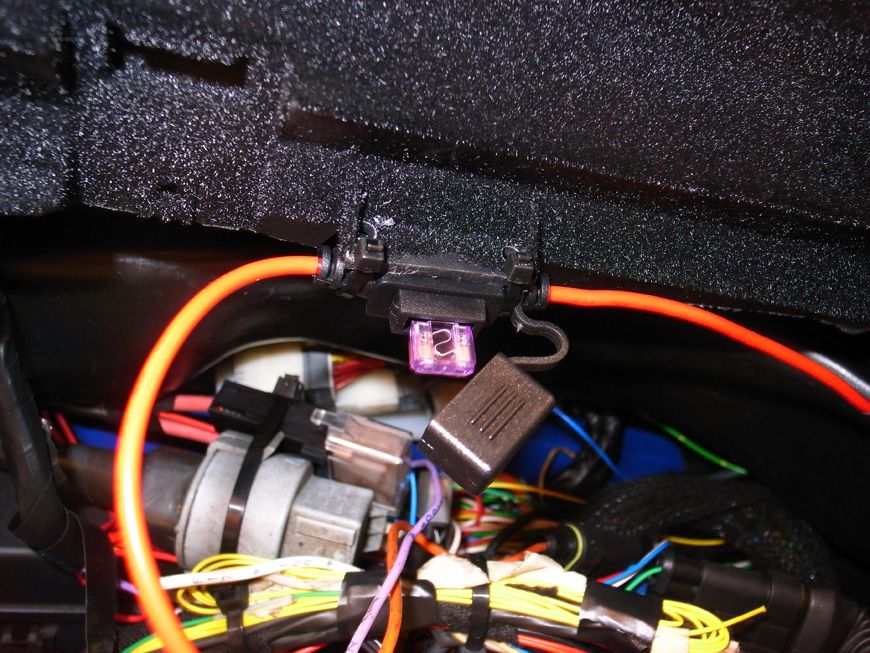
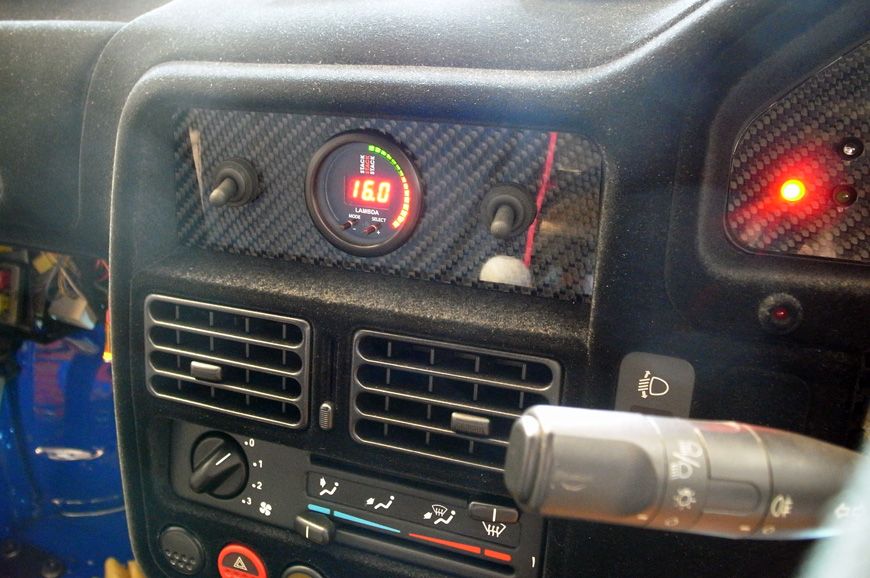
First up is in line fuse for the STACK AFR:
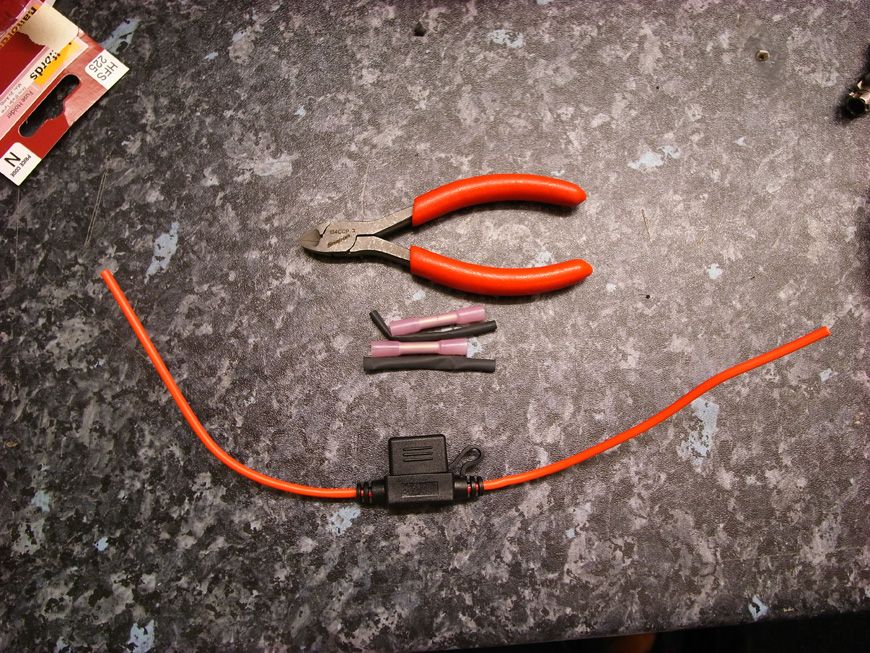
Connected:
Cable tied up behind dash complete with 3A fuse fitted as per instructions (excuse the snakes wedding in the back it's all out of sight when the carbon panel is back on):
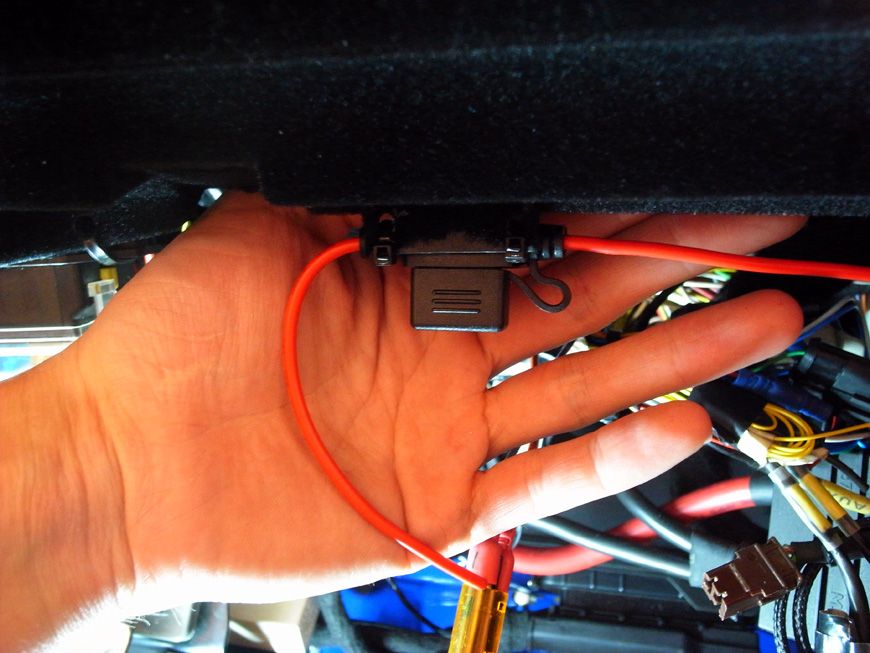
Earthed behind dash support bar - cunningly hidden:
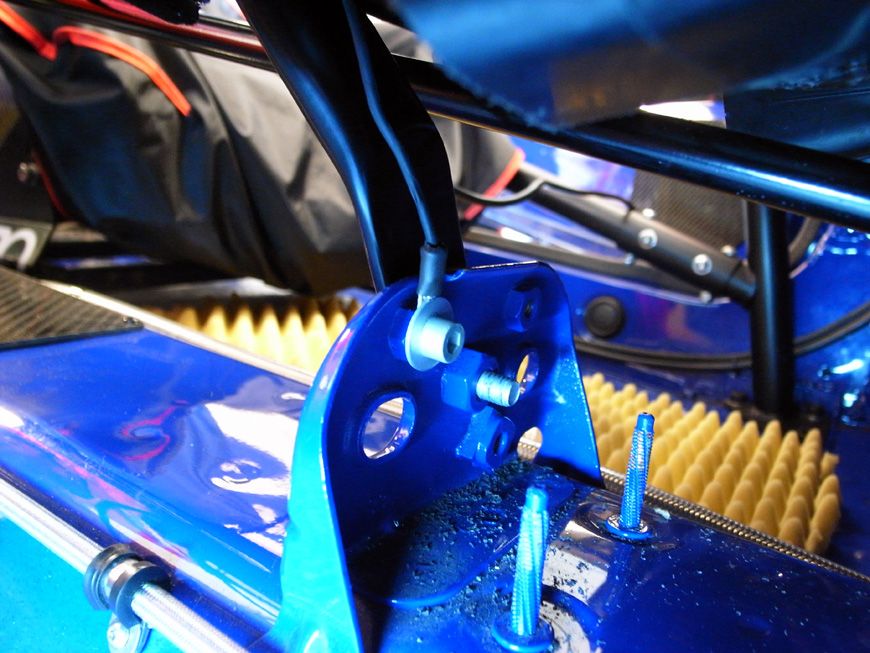
Working:

Carbon on door bars:
Cleaned out inside:
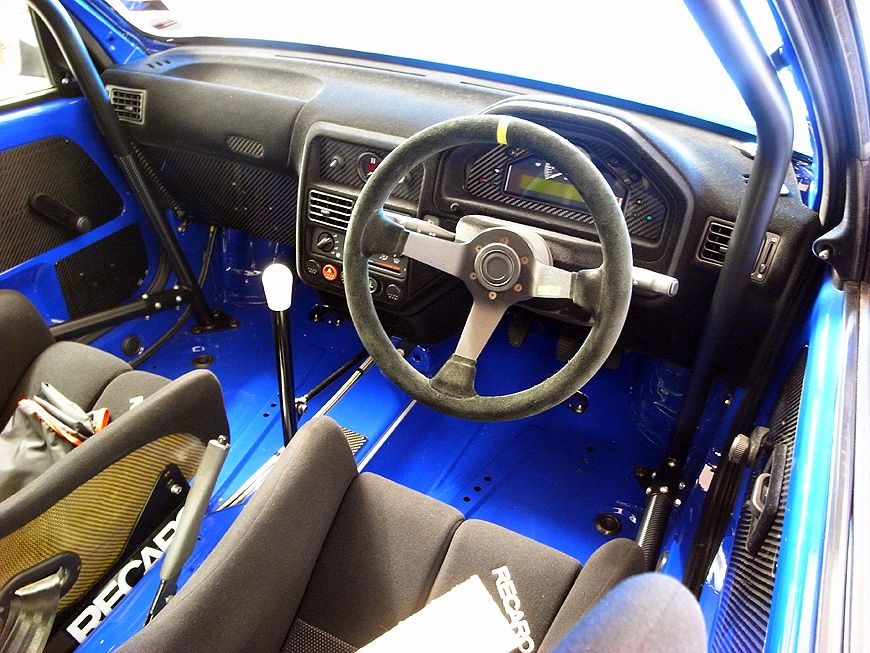

Looking hard:
Wax 'curing'
Leaky Rad:
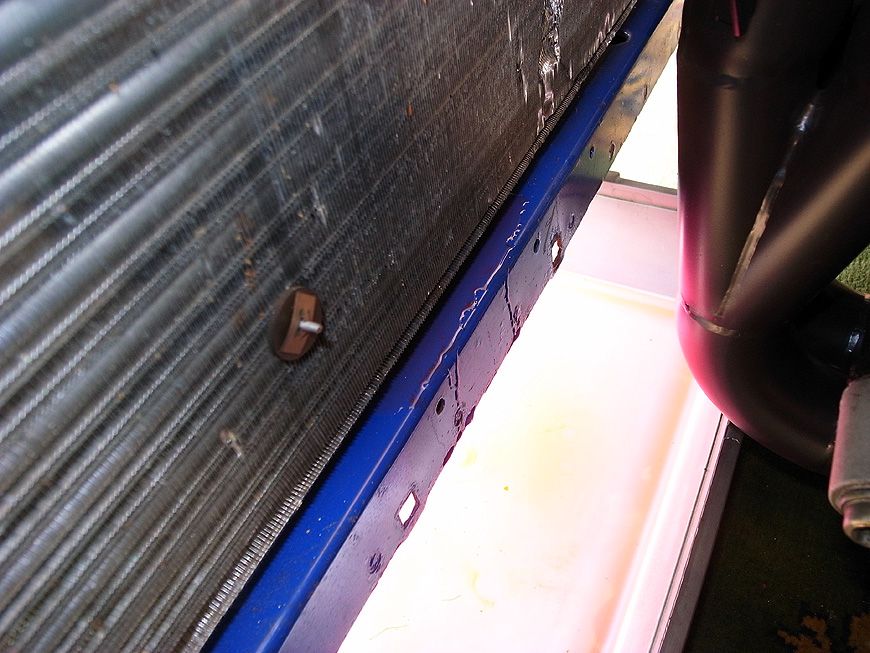
Removed:
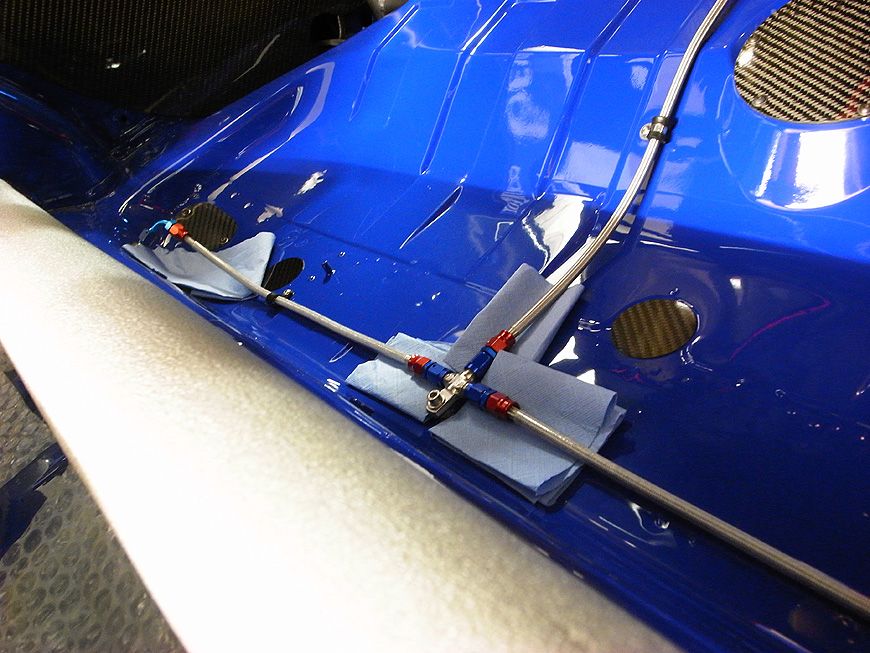
Redoing the rear line:
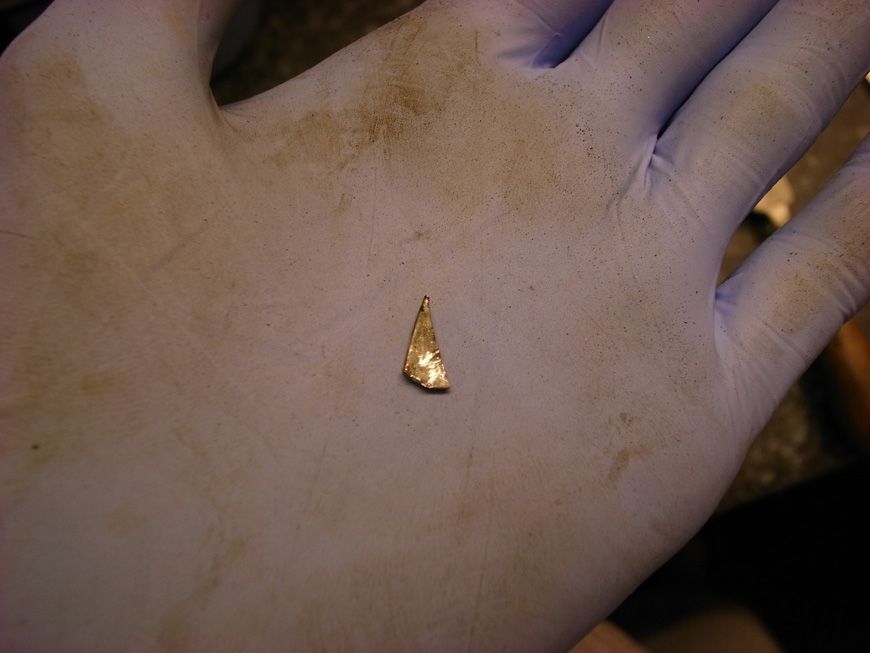
The big ass bit of metal in my tyre:
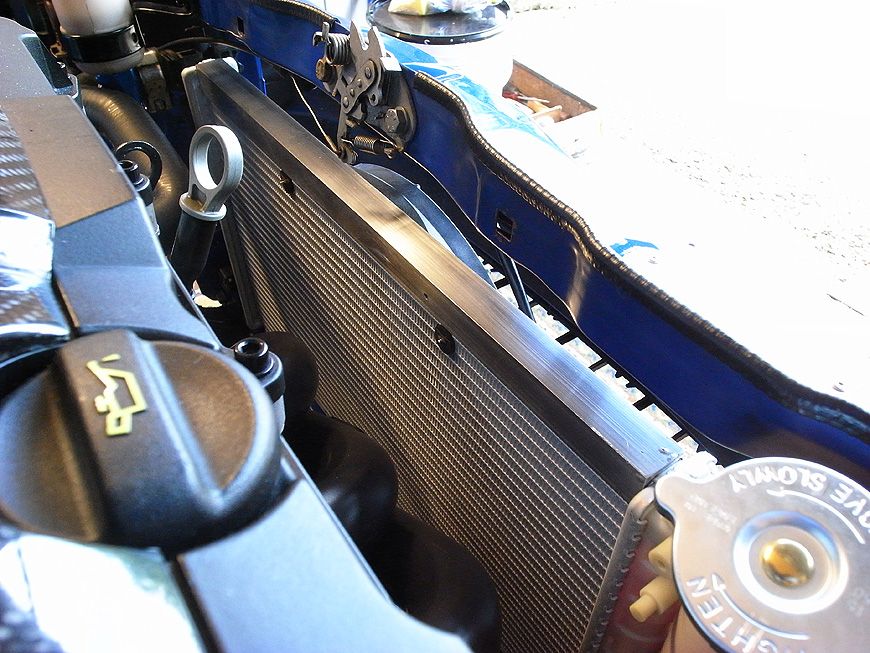
And lastly, my current Nissens rad had this piece of alloy bonded over the top making it look very tidy. Not sure if Hank fitted this or what, but the new models don't appear to have it on the photo's so I chiseled it off (was tough) and cleaned it a bit to bond on the top of the new rad. Unless spending £500 on a prop alloy rad, most of them appear quite ugly so this should at least aid to make it look cleaner and neater:
So next up is the following:
Buy new rad
Buy more coolant
Buy brake fluid
Bleed brakes
Flt new rad and fan and fill with coolant
Mapping
Maybe fit a battery isolator so I can just disconnect it that way to stop the battery running down, as at the moment I am undoing the terminal all the time. Can't believe it started on that battery. It hasn't been run in years (the battery), and the previous ones I had died after a short period of inactivity. Sweet. I am feeling excited about it again now. That short drive yesterday made me realise how awesome it is. God damn the noise it makes is unbelievable!
That's all for now,
Lewis.
Edited by Track_Cit on Monday 14th July 23:15
MrMoonyMan said:
Looks much better, not surprised that drive spurred you on.
In the first 300 miles of a fully rebuilt car I've had an engine blow up, punctured tyre and many many other annoying problems so I fully sympathise with your pain. That puncture is just typical!
Taxed n tested for the last bit of summer?
Thanks! Hopefully I don't experience the blown engine problem that would NOT be cool! In the first 300 miles of a fully rebuilt car I've had an engine blow up, punctured tyre and many many other annoying problems so I fully sympathise with your pain. That puncture is just typical!
Taxed n tested for the last bit of summer?
Ok, so more work on this last night.
I took the supposedly punctured tyre/wheel to a tyre place on the way home from work yesterday and apparently it wasn't punctured after all? So he pumped it up a bit and just need to keep an eye on it. It's possible that it lost pressure being sat around for ages - we will see.
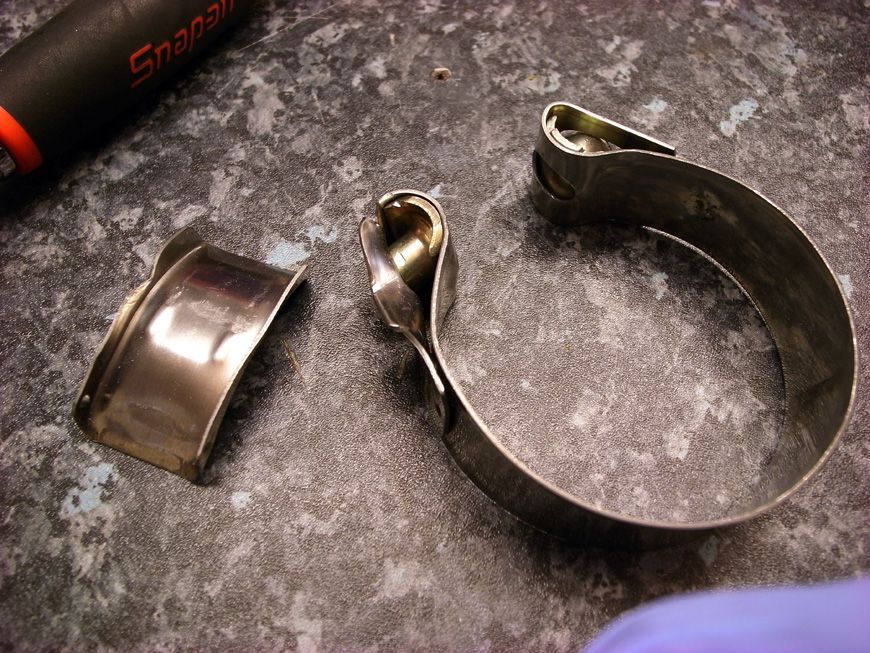
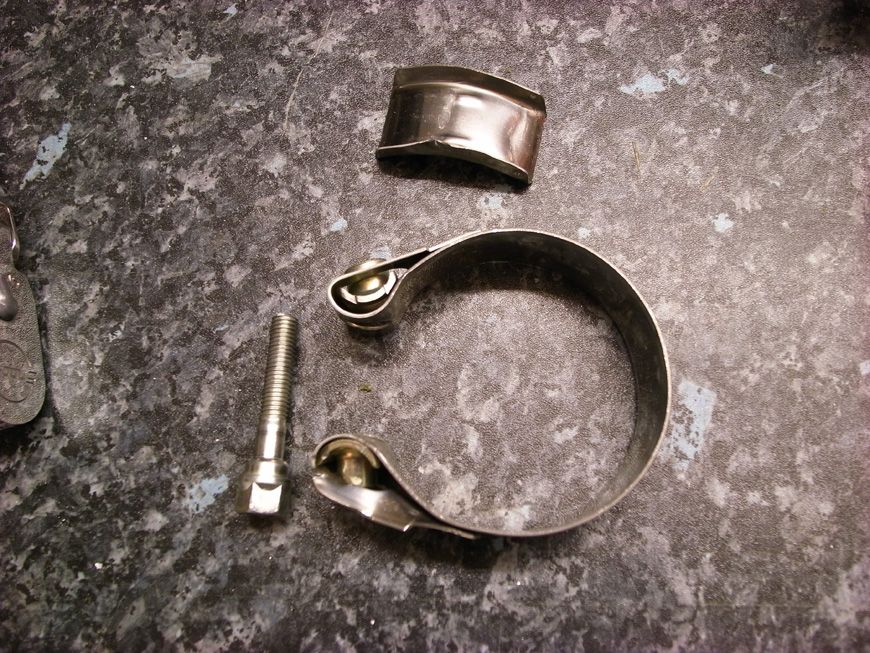
After my little outing on Sunday I also noticed that i'd caught my exhaust clamp while reversing into the garage. At first I wondered what the hell it was, as was trying to reverse in and it wouldn't budge. Then after a few seconds I realised that the clamp must have been catching the floor lock. Sure enough, it was.
This is the culprit:
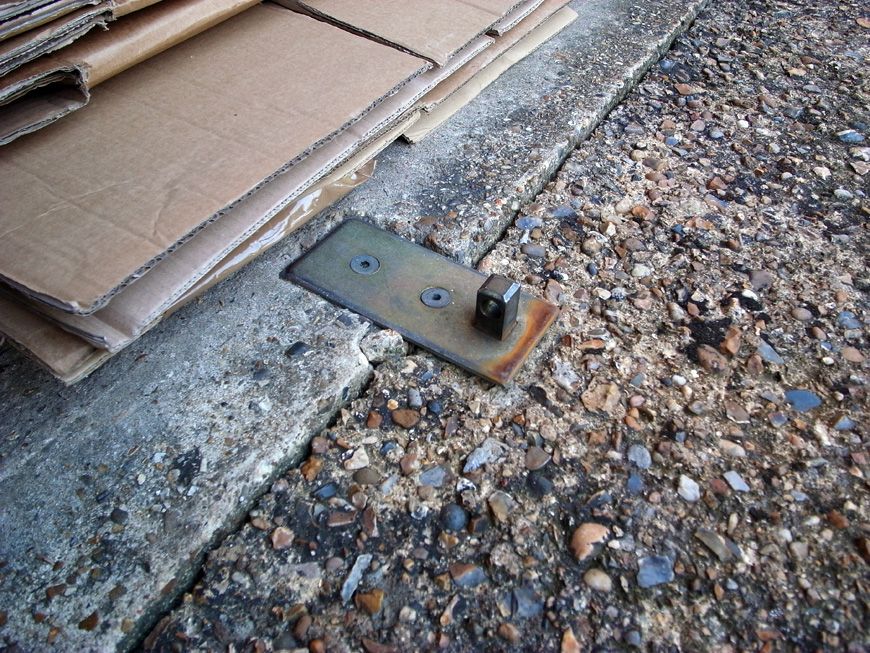
And it caught just here:
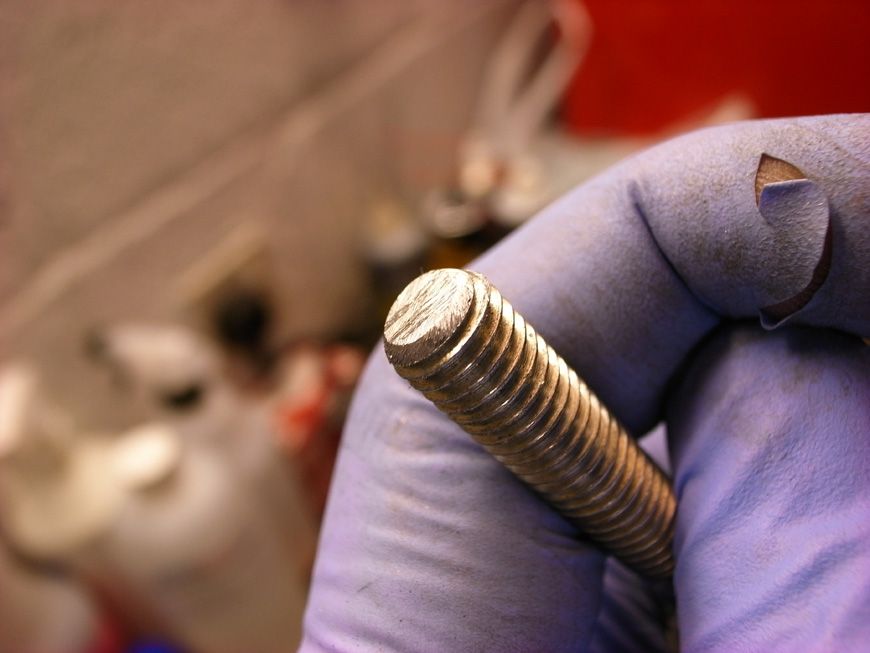
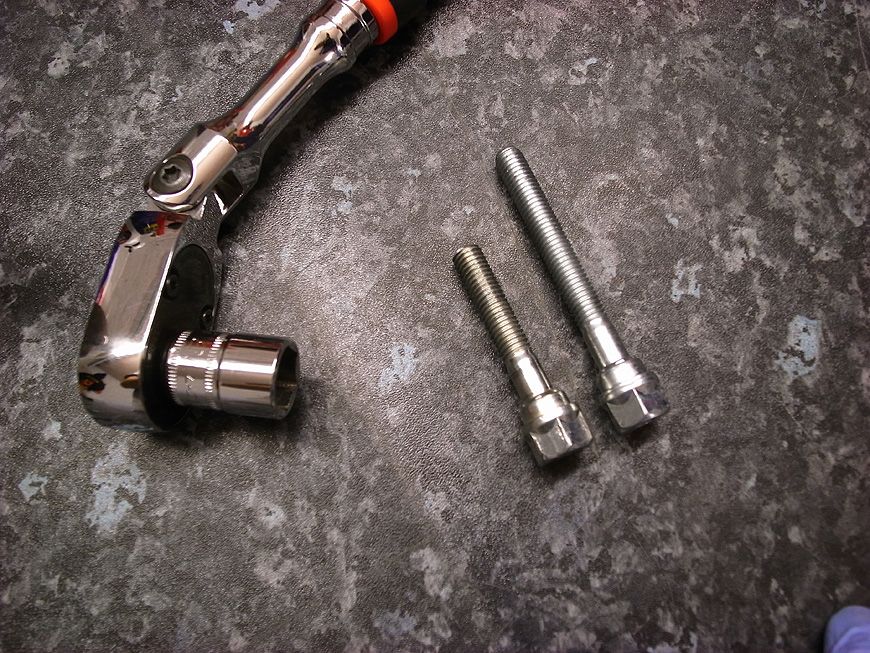
It's pretty much buggered the clamp so will buy and other and position it differently. I also cut the bolt down to allow this, as it's far too long as standard:
Cutting down the bolt (ps: if you don't own a vice buy one - invaluable tool)

Finishing it:
So much shorter now and will fit to a new clamp (yet to buy):
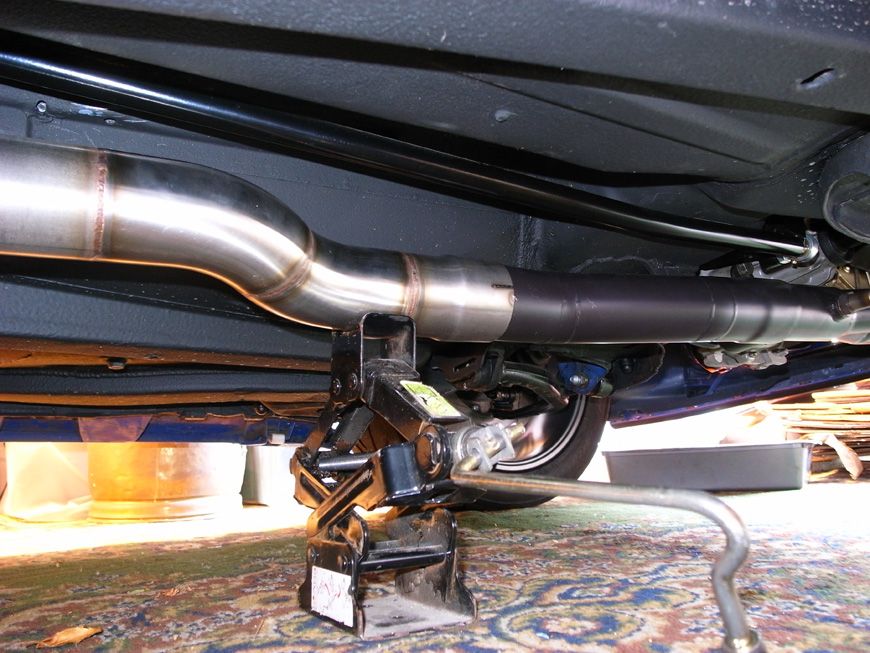
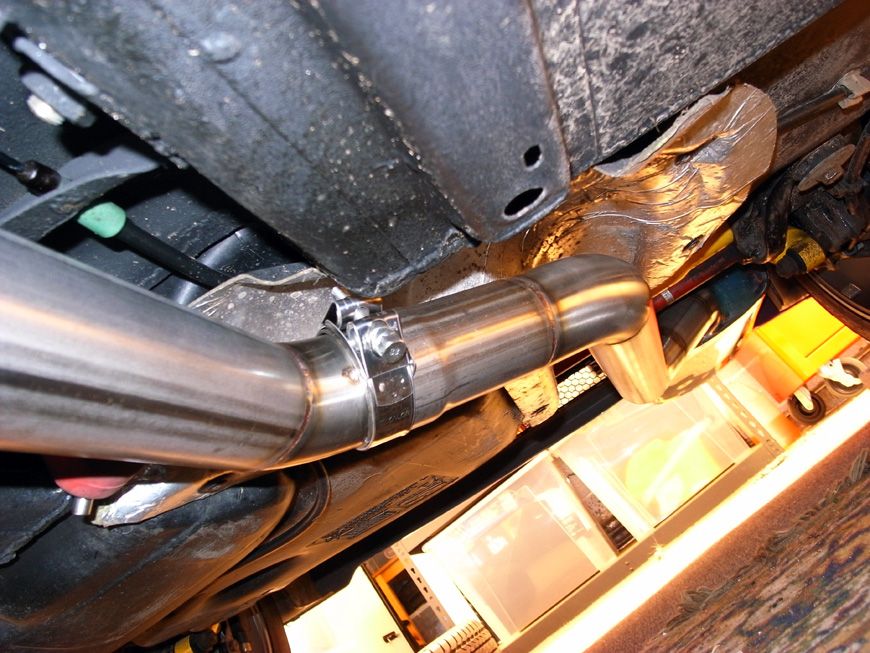
Meanwhile I did the same on the rear clamp and turned it round so it's not likely to catch anything. Although it's not that low really, did it just as a precaution:
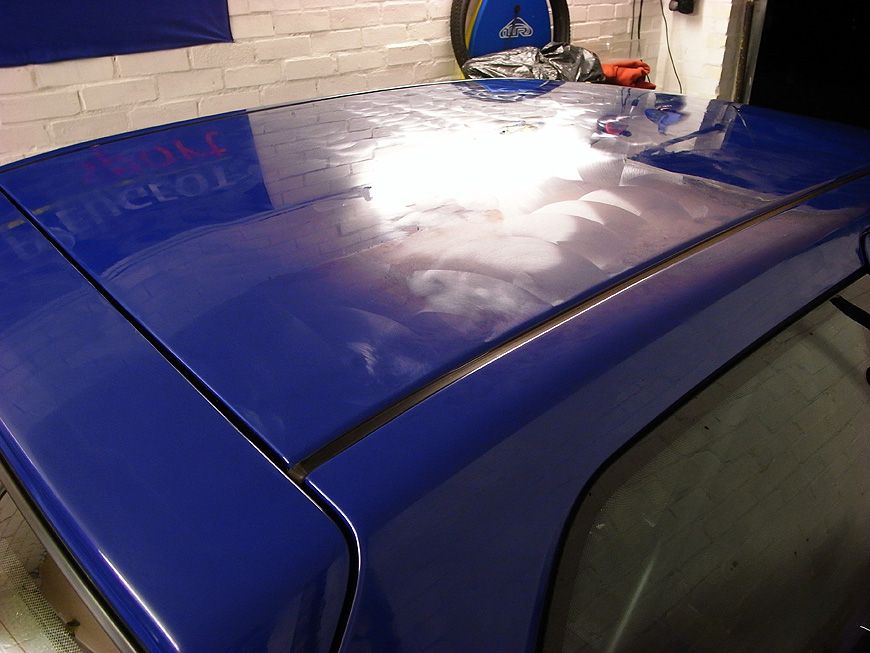
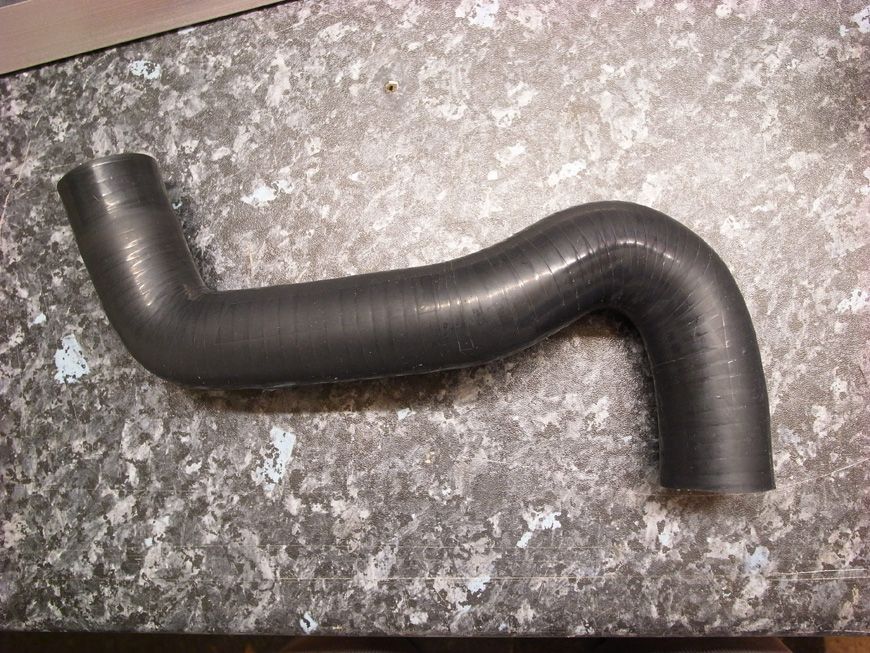
I have never been a fan of the Spoox Motorsport logo on my rad hose, it looks a bit chavvy, so a it was off I took the opportunity to lose the logo. Used the wife's nail varnish remover that stuff is evil. I have used it in the past to take logos off bikes frames etc, really strong.
Before (already taken one logo off):
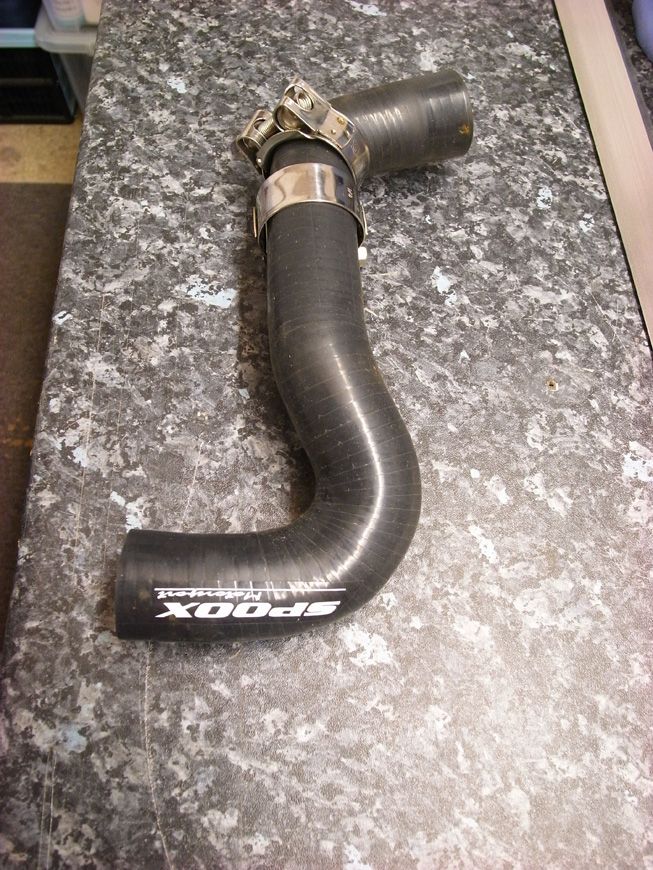
After (OEM and subtle):
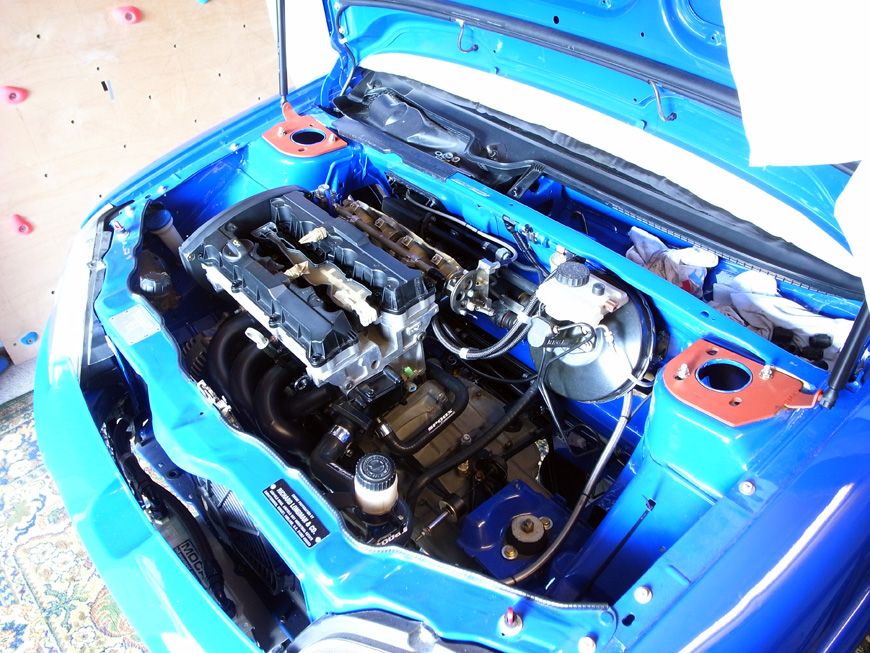
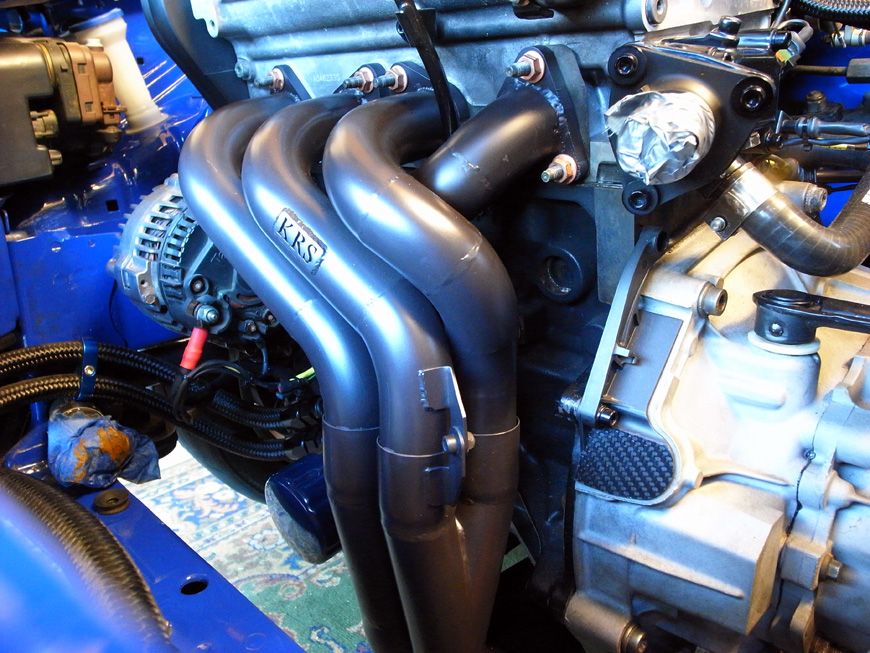
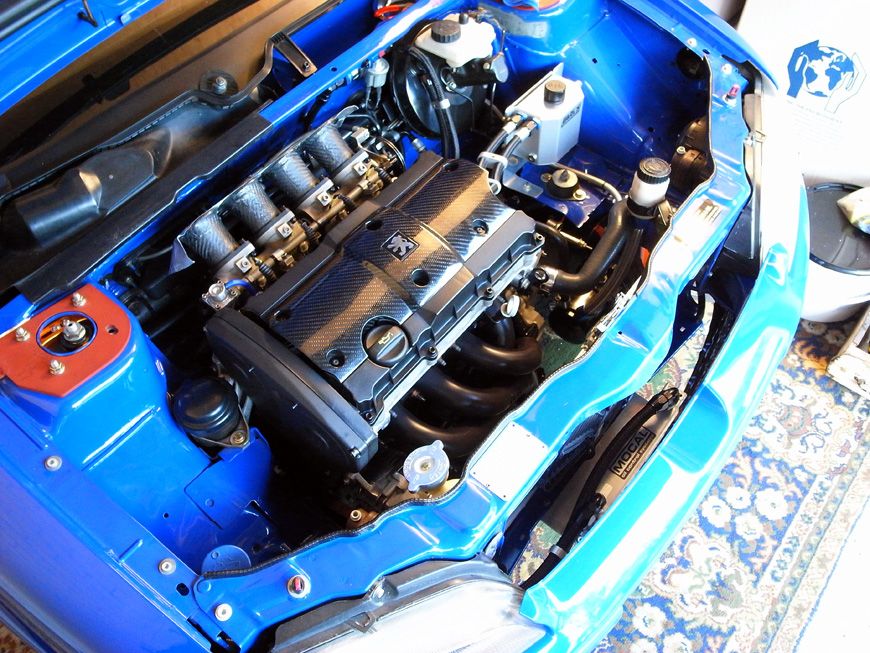
Finally, gratuitous manifold shot while the rad is off - looks awesome!
Bought a rad today so that should land shortly, then just need brake fluid, new exhaust clamp and a few other bits. Also have to wire and fit my speed sensor still too, but a little unsure as the ones I have (kindly supplied by a mate) have three wires and my current one only has two?

More to come soon!
Quick teaser. Got it fired up again tonight to check the new rad and add more coolant. Also bled the brakes but still have air in the system but so far the lines don't seem to be leaking which is good. I will add all the photo's of the work tomorrow, but here is a teaser vid for now. Got the AFR working too which is cool. As you can see she is running really rich. Almost intoxicated myself with it running in the garage lol :idiot:
Also I must apologise in advance for the heinous portrait video - I only realised this after i'd taken it - sorry guys!
Onto the car, you can hear she revs up super quickly with that lightened flywheel. It's a real beast. The wife was not happy and said it was vibrating the glasses in the kitchen cupboard upstairs - sweet
https://www.youtube.com/watch?v=1meFcfk50zo&list=UUW0X695QQxiMsqwQqpTkgJA
Nikko 40691 said:
That'll fix it.
https://www.youtube.com/watch?v=1meFcfk50zo&li...
Lovely car by the way, I had a VTS on Bodies and I still miss the 'bwaaarp'
Thank you mate https://www.youtube.com/watch?v=1meFcfk50zo&li...
Lovely car by the way, I had a VTS on Bodies and I still miss the 'bwaaarp'
Here are the photo's / updates from the jobs I have been doing.
New rad - bought and fitted
Brake fluid - bought and bled brakes (still a lot of air in there though I think so will need doing again - arrgh)
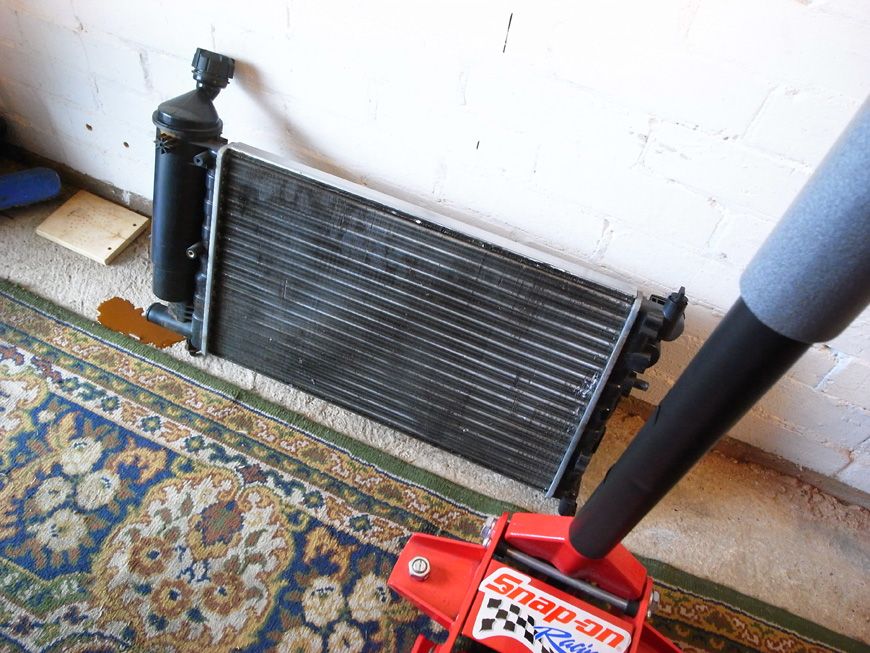
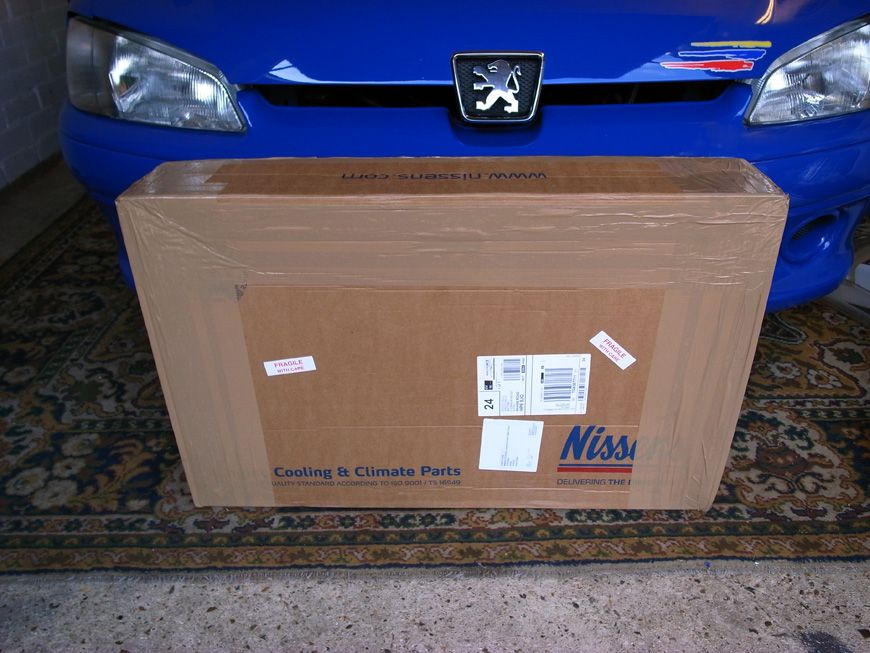
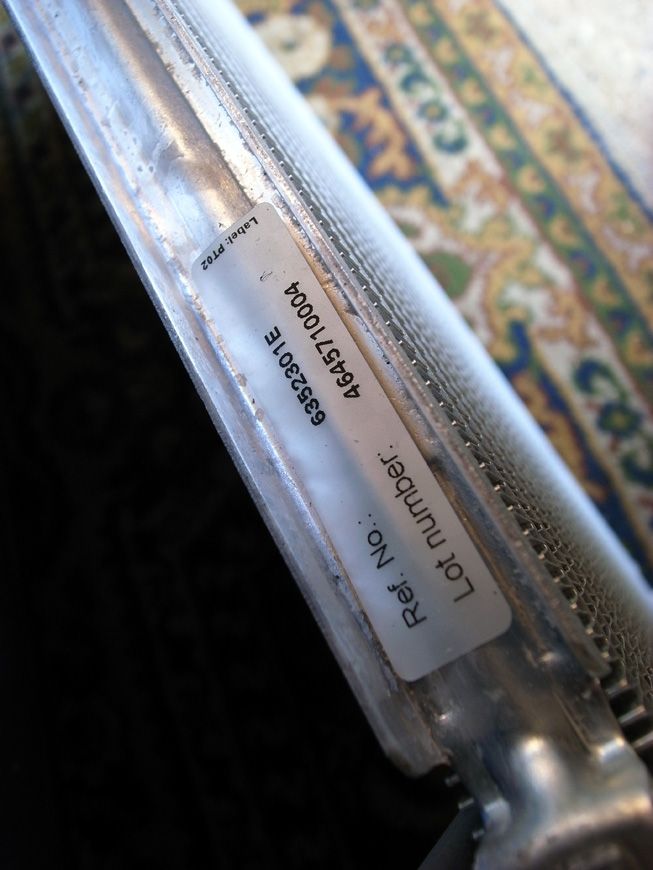
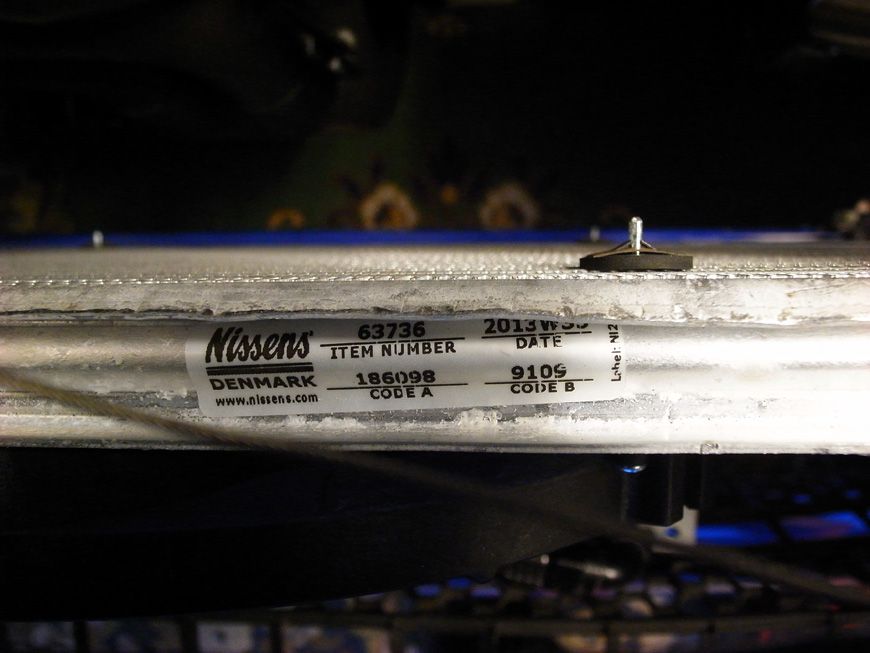
So, excellent service from 106 parts. Ordered the replacement rad and it arrived within 2 days:
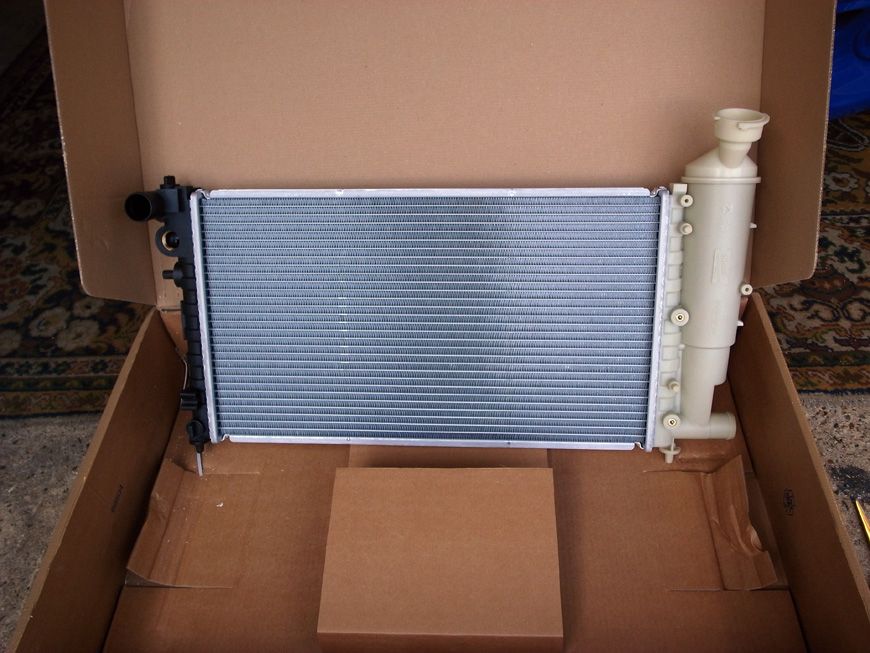
Accessories:
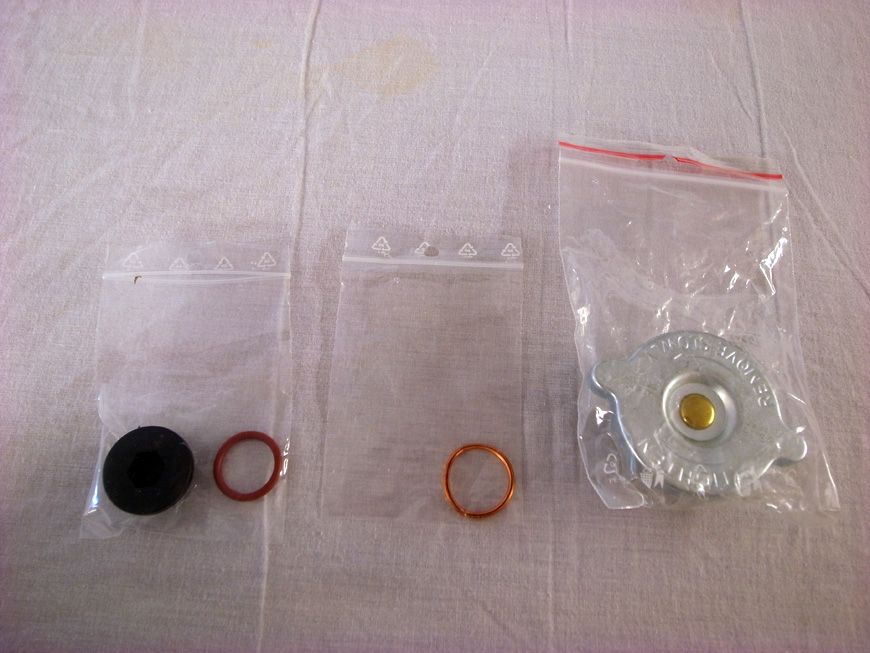
Model details:

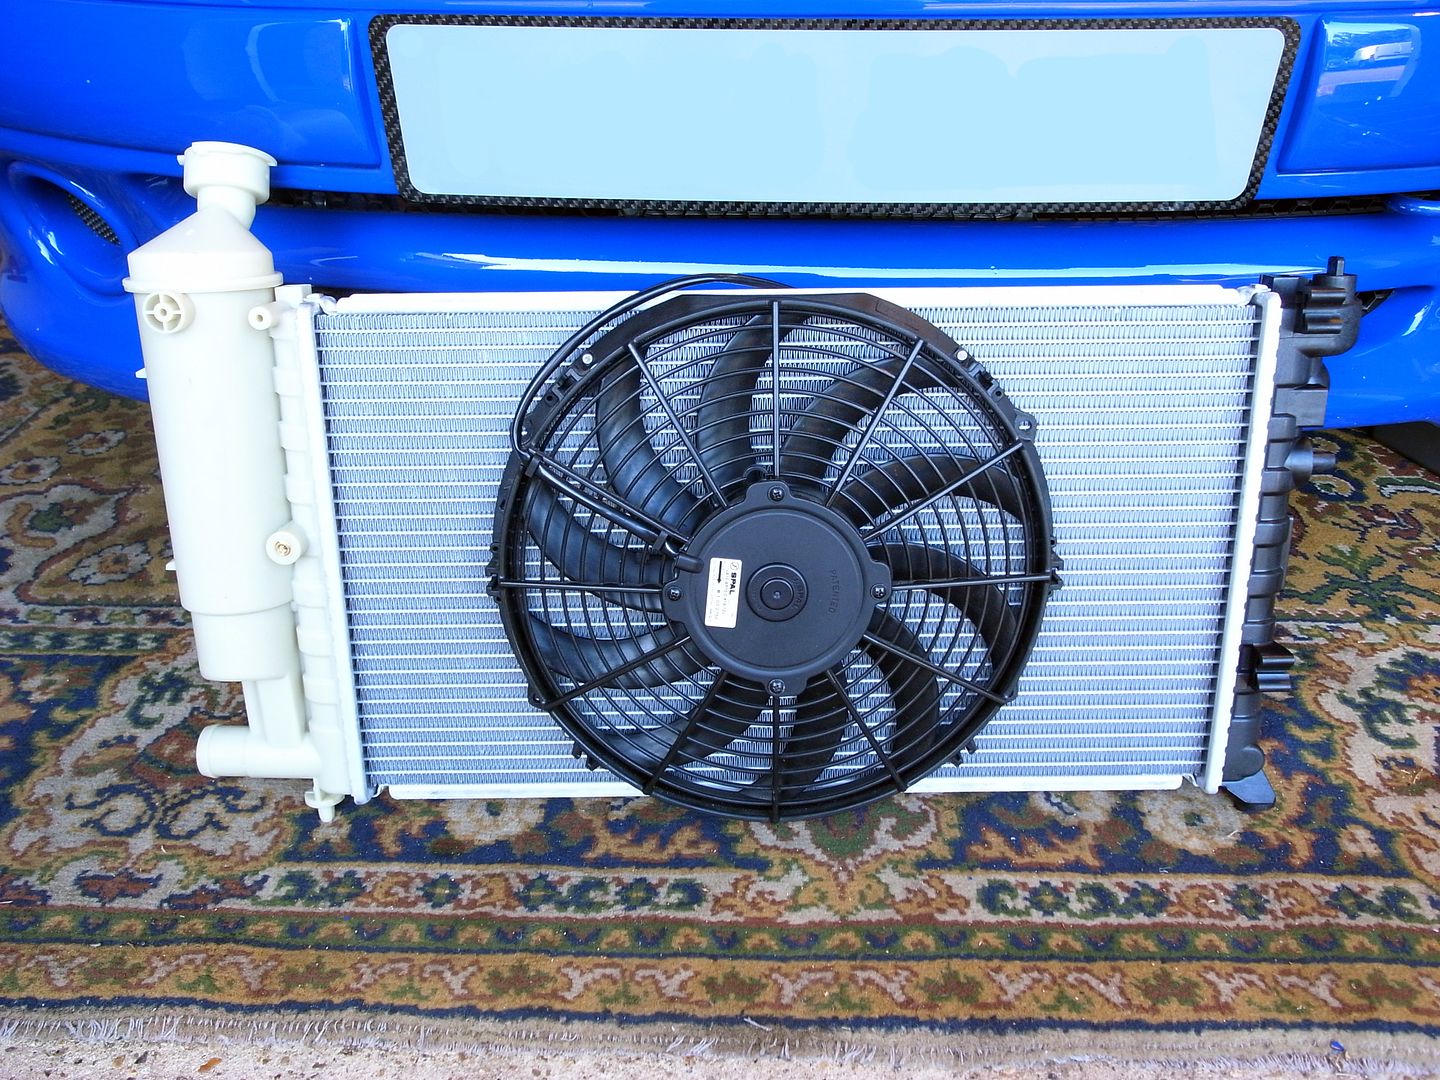
Then came the process of fitting the fan. All easy, just needed to be careful not to damage the pipes when refitting these pins:
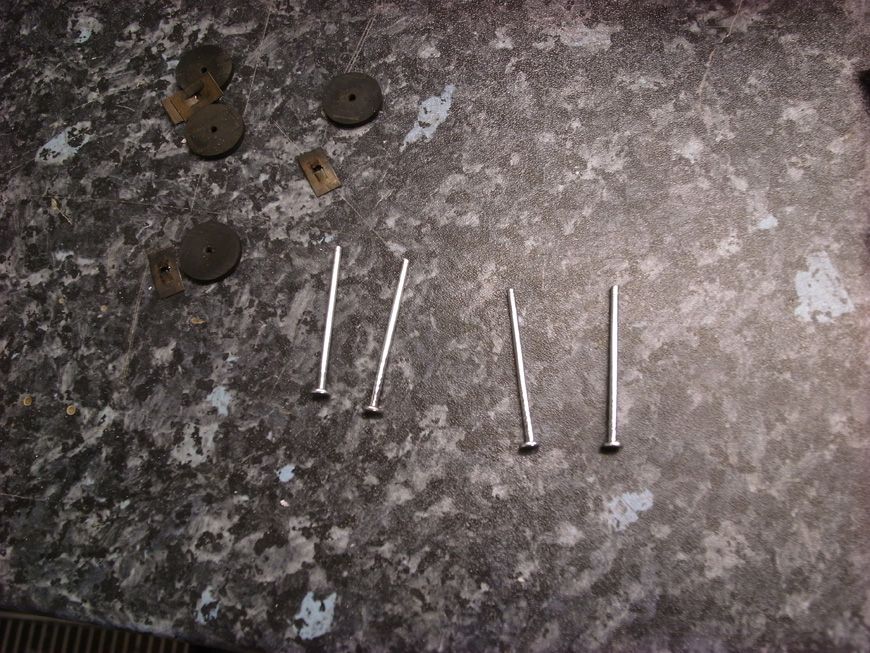
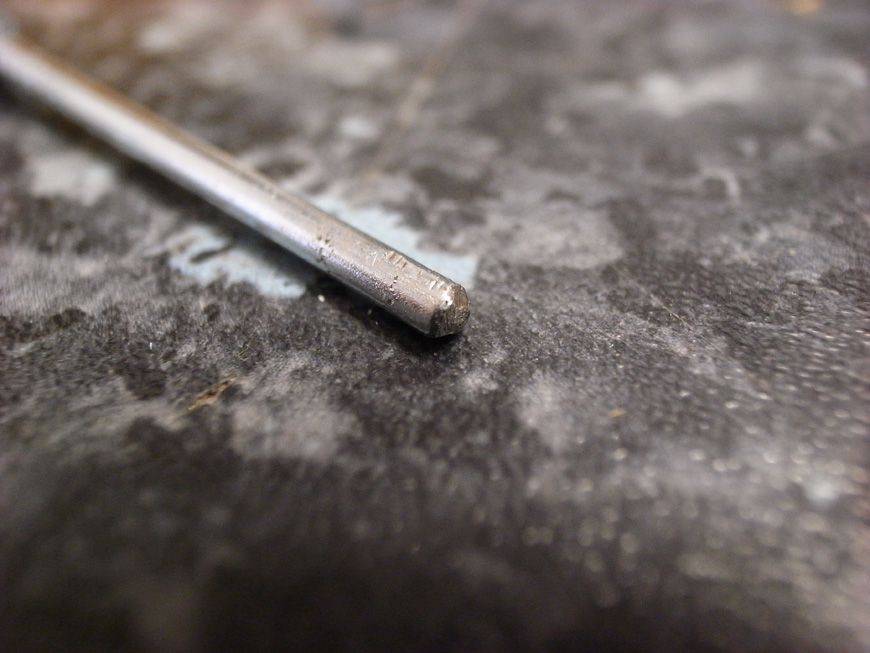
Also they protruded a lot and you could catch your arm on them when reaching down by the manifold, so I cut them down further and rounded off the ends on the bench grinder - no more torn to shreds arms!
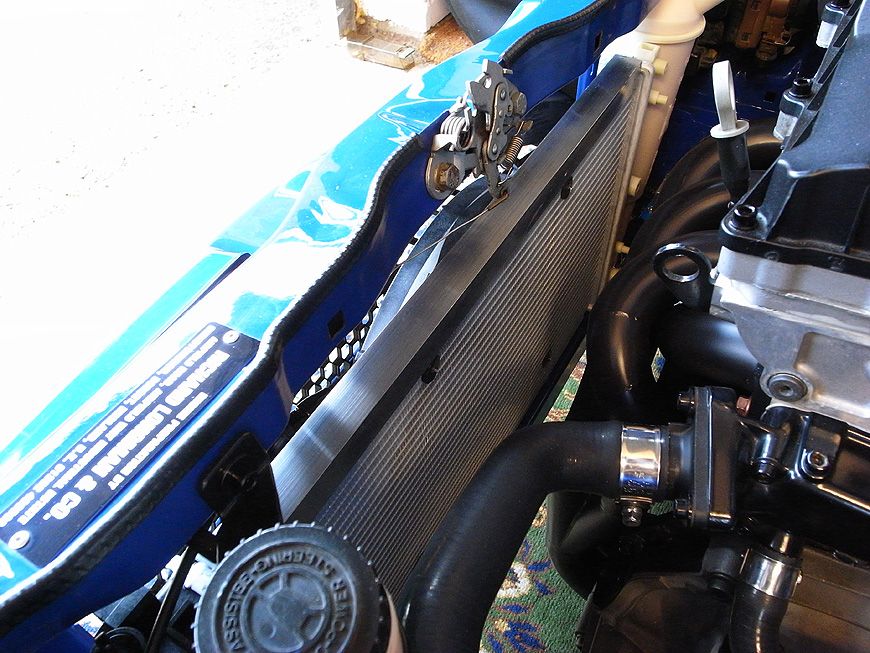
Fan fitted up nicely:
All back in (was right arse to get the bottom rad hose back on - a lot of sweating, swearing and grunting!)

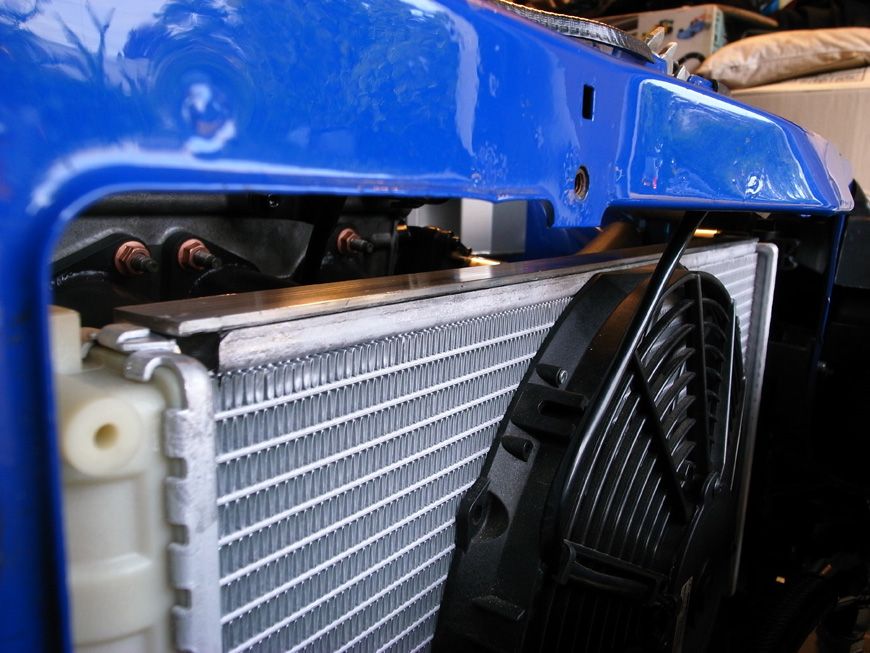
Then it came to refitting the alloy angle piece back on top of it to finish it off. Wasn't that straightforward. I had to gently persuade the top front lip almost flat in order for it to sit properly, then bonded on with some black silicon adhesive like so:
Looks way better with this fitted:
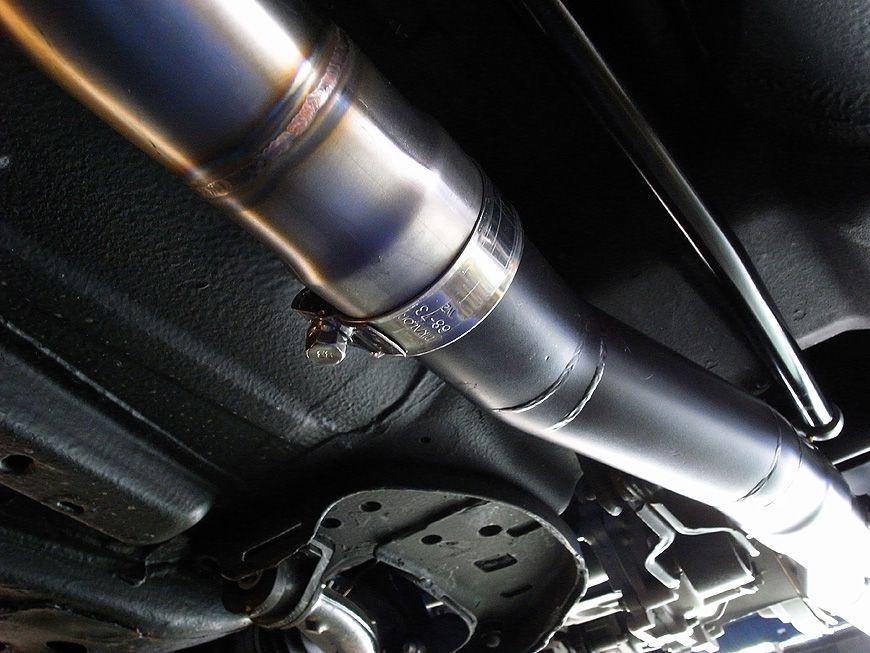
Then replaced the broken exhaust clamp and cut the bolt down a but. This was another pain. Takes a mega amount of force of this section of pipe to clamp it properly and stop it moving so may need some further tweakage at a later date. However, for now I have just tightened it using the might of Thor and it's pretty solid:
In place:

Then brake bleeding:
The fluid:
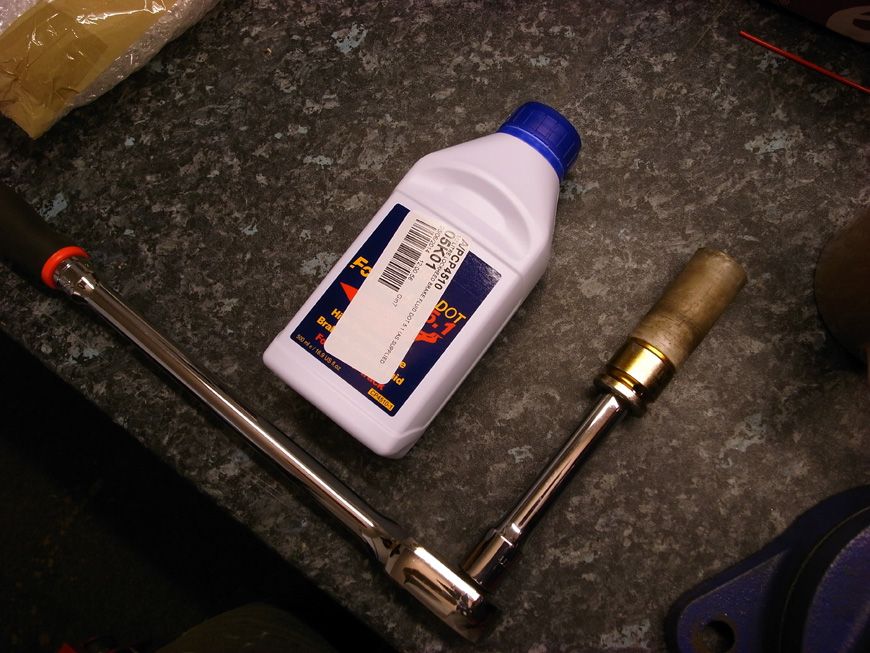
Put some paper towels under each fitting to check for leaks and track down any. Hopefully there aren't as I am sick of damn brake lines now!
That's all for now.
Need to sort wiper motor then figure why my PAS isn't working. Then all that's needed is mapping and MOT!
New rad - bought and fitted
Brake fluid - bought and bled brakes (still a lot of air in there though I think so will need doing again - arrgh)
So, excellent service from 106 parts. Ordered the replacement rad and it arrived within 2 days:
Accessories:
Model details:
Then came the process of fitting the fan. All easy, just needed to be careful not to damage the pipes when refitting these pins:
Also they protruded a lot and you could catch your arm on them when reaching down by the manifold, so I cut them down further and rounded off the ends on the bench grinder - no more torn to shreds arms!
Fan fitted up nicely:
All back in (was right arse to get the bottom rad hose back on - a lot of sweating, swearing and grunting!)
Then it came to refitting the alloy angle piece back on top of it to finish it off. Wasn't that straightforward. I had to gently persuade the top front lip almost flat in order for it to sit properly, then bonded on with some black silicon adhesive like so:
Looks way better with this fitted:
Then replaced the broken exhaust clamp and cut the bolt down a but. This was another pain. Takes a mega amount of force of this section of pipe to clamp it properly and stop it moving so may need some further tweakage at a later date. However, for now I have just tightened it using the might of Thor and it's pretty solid:
In place:
Then brake bleeding:
The fluid:
Put some paper towels under each fitting to check for leaks and track down any. Hopefully there aren't as I am sick of damn brake lines now!
That's all for now.
Need to sort wiper motor then figure why my PAS isn't working. Then all that's needed is mapping and MOT!
Gassing Station | Readers' Cars | Top of Page | What's New | My Stuff