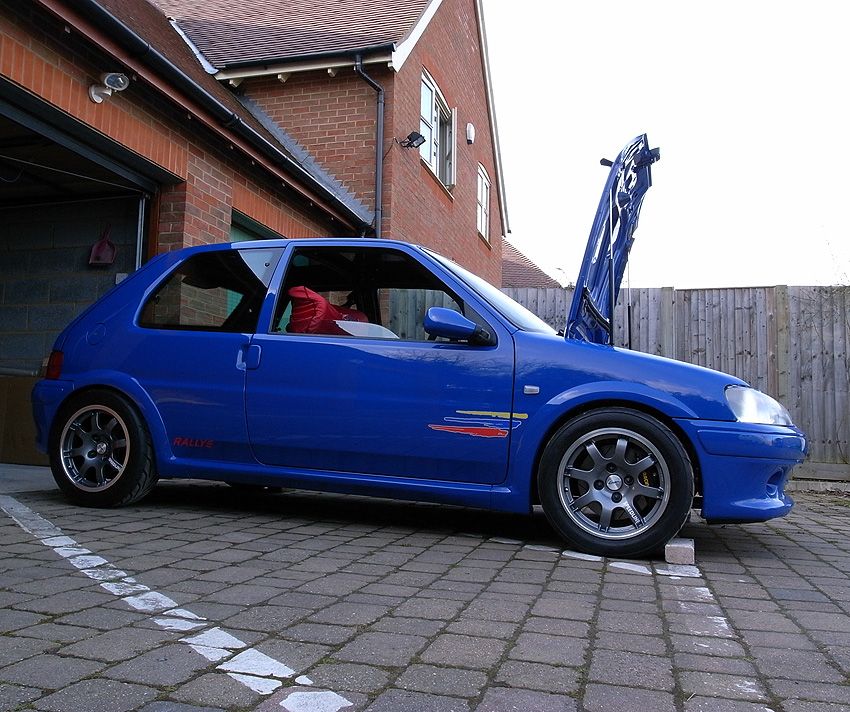
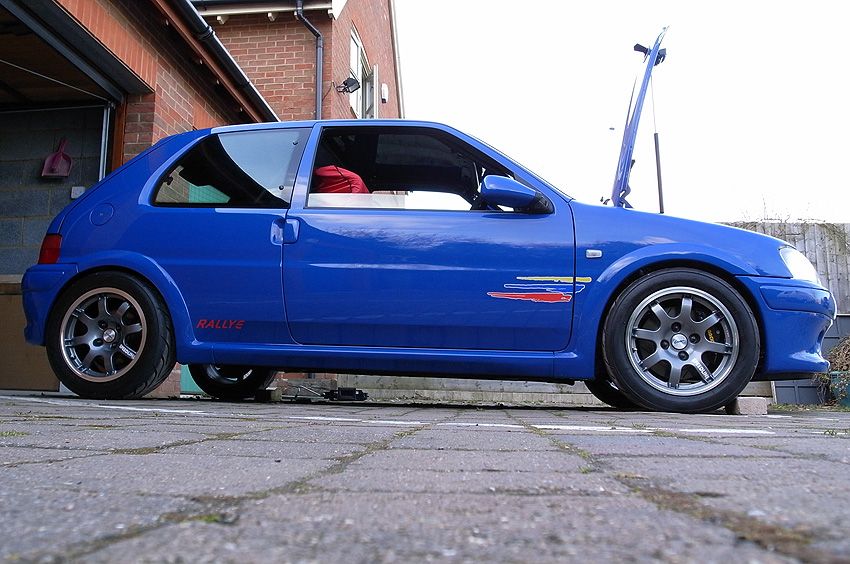
My Indigo Blue Throttle Bodied 106 Rallye
Discussion


Cheers guys - I just enjoy all the little touches and detail. I kinda ponder it over in my mind and just come up with little things to 'finish it off' so to speak. Maybe I don't have enough to worry about! 
I got the gearknob somewhere online, i'm sorry I can't remember where exactly now....
Sprayed the Quick Shift with the final coat today - excuse the terrible pics they are phone pics. The finish is pretty damn smooth, i'll get some good pics tomorrow with my camera:
I got the gearknob somewhere online, i'm sorry I can't remember where exactly now....
Sprayed the Quick Shift with the final coat today - excuse the terrible pics they are phone pics. The finish is pretty damn smooth, i'll get some good pics tomorrow with my camera:
I don't think so!
It still needs an exhaust to be driveable, and as I recently lost my job that will have to wait for a while....
Few more updates tonight anyway.
I actually did a lot of small jobs tonight but alas I forgot my camera again, and my phone was low on battery and it would only take a few snaps!
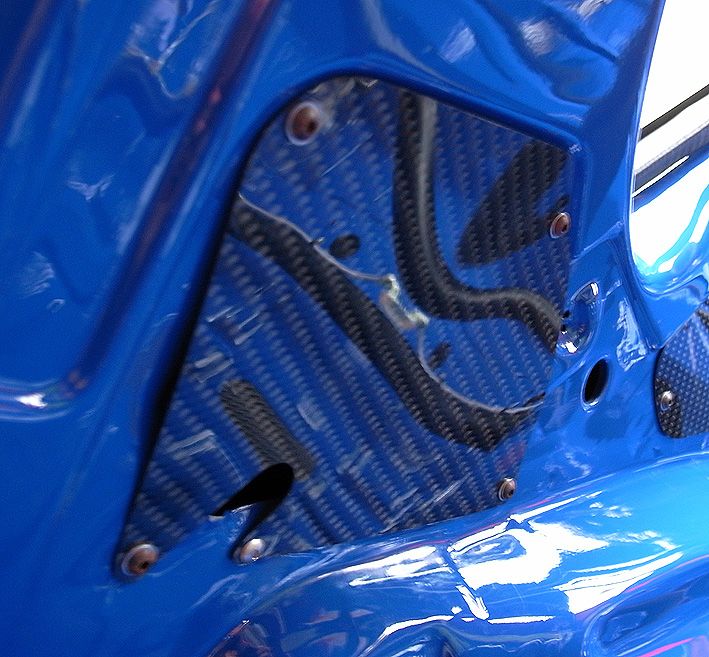
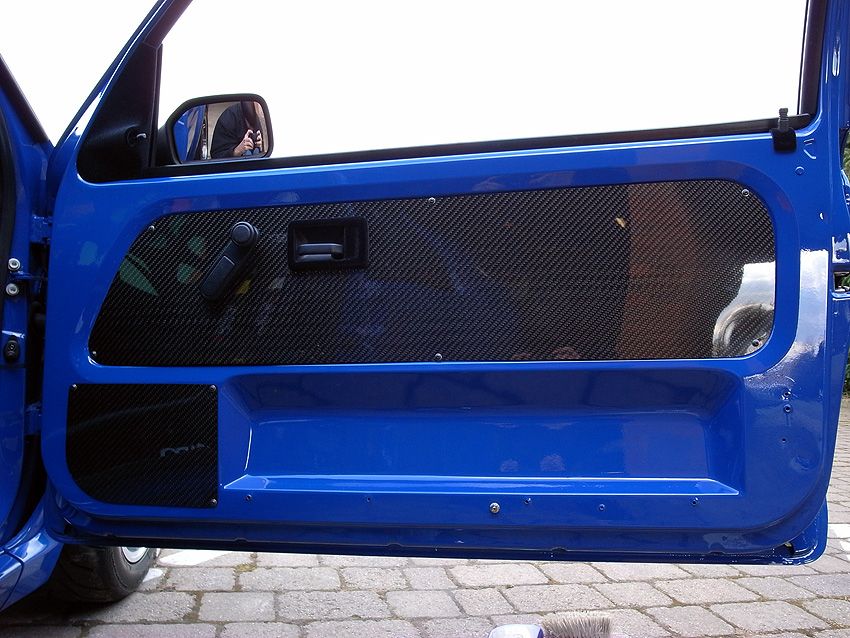
Basically I fitted all my new silver hose clamps from Earls, fitted a new piece of carbon over the rear seat belt bracket area as Bob removing every single piece of wiring so had to get a new peice of carbon without a hole in for wiring! I also fitted the new black quickshift. Looks pretty nice I think. I will put some pics of it fitted up in a few days. I also had some carbon off Streamline (Bic) for the speaker holes so I will fit that over the weekend. Really pleased with how she's shaping up now!
Here are the pics of the quickshift anyway (again turd phone pics). The finish is pretty damn smooth, although the paint isn't hugely robust despite the fact it's meant to be chip proof etc...never mind. If it starts to flake i'll polish it again!
More pics soon!
Lewis
It still needs an exhaust to be driveable, and as I recently lost my job that will have to wait for a while....
Few more updates tonight anyway.
I actually did a lot of small jobs tonight but alas I forgot my camera again, and my phone was low on battery and it would only take a few snaps!
Basically I fitted all my new silver hose clamps from Earls, fitted a new piece of carbon over the rear seat belt bracket area as Bob removing every single piece of wiring so had to get a new peice of carbon without a hole in for wiring! I also fitted the new black quickshift. Looks pretty nice I think. I will put some pics of it fitted up in a few days. I also had some carbon off Streamline (Bic) for the speaker holes so I will fit that over the weekend. Really pleased with how she's shaping up now!
Here are the pics of the quickshift anyway (again turd phone pics). The finish is pretty damn smooth, although the paint isn't hugely robust despite the fact it's meant to be chip proof etc...never mind. If it starts to flake i'll polish it again!
More pics soon!
Lewis
i redid that and used a lot less. Not an expert on engine building!
Few more updates today - I managed to get some pics of all the bits i've been doing. Also feeling a bit pissed off as I seem to be finding leaks everywhere...bloody passenger driveshaft seal is leaking oil, I appear to have a leak on the caliper - or at least I noticed a drip of brake fluid on the bottom of one so wiped it clean to see if it appears again. I also saw another big drop of oil on the bottom of the gearbox, so I hope to god that's not leaking or it'll be back to pug1off for them to fix properly! As well as this, my sump is still leaking so the t ts that welded it in the first place obviously didn't do it properly. And finally some of the brake lines inside the car appear to be leaking, or 'sweating' from the joins where the fittings go into the T piece on the back bench. These were meant to be fitted by an 'expert' so i'm not happy about that! If you want anything done properly you have to do it yourself. So as well as the exhaust, I have this long list of st to sort out....so I am feeling pissed off but never mind...
Anyway, rant over, here are the constructive pics of today. I had to remove the inner arches too as they were catching the tyres on full lock now it is lower. It's only by doing this that I noticed all these damn leaks!
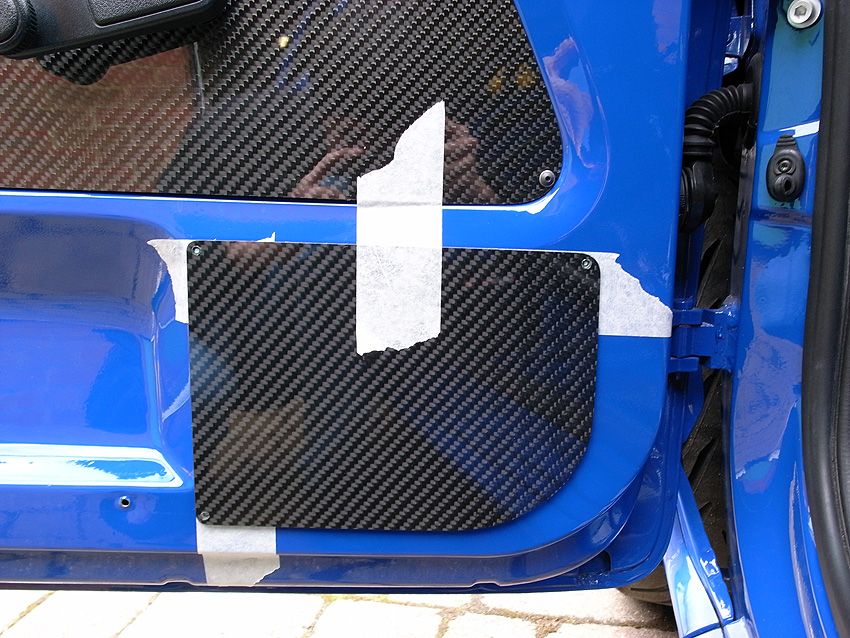
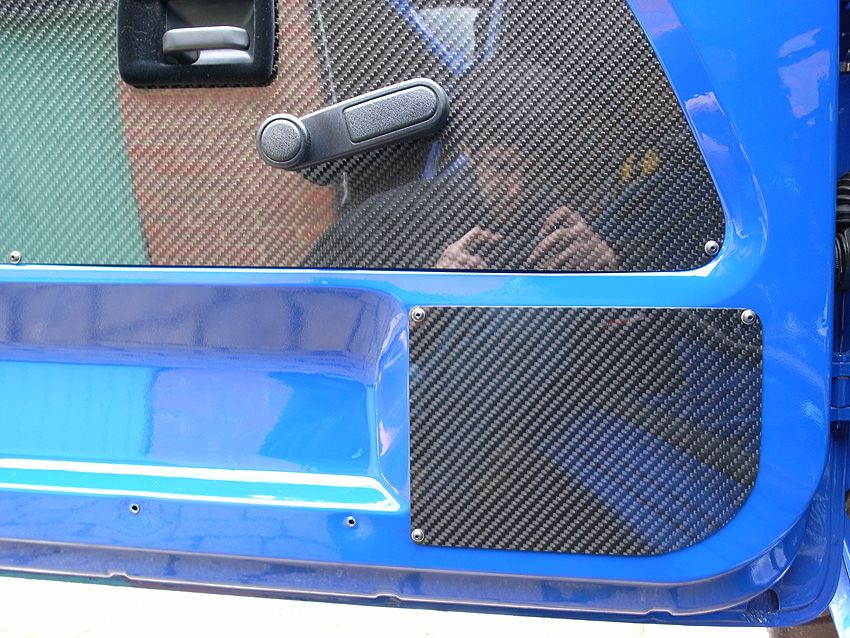
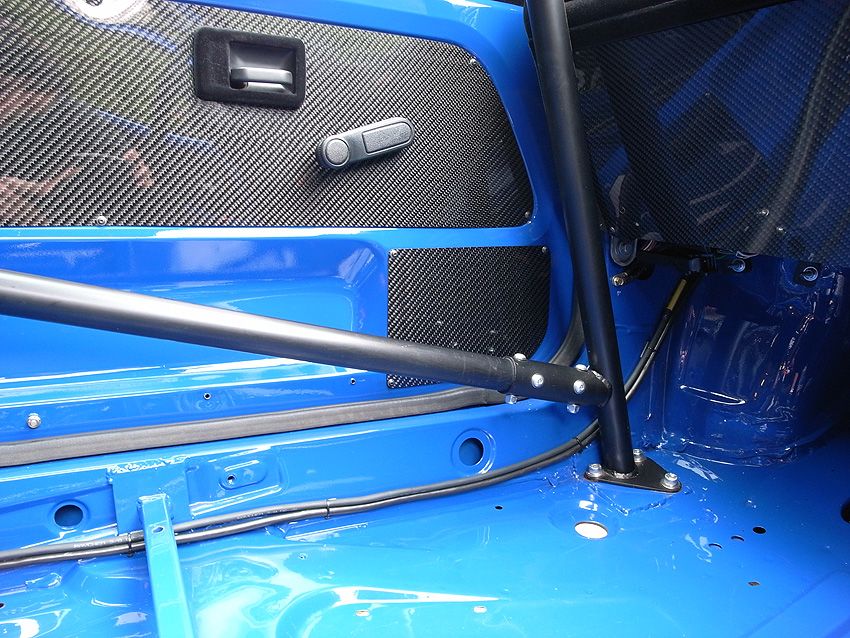
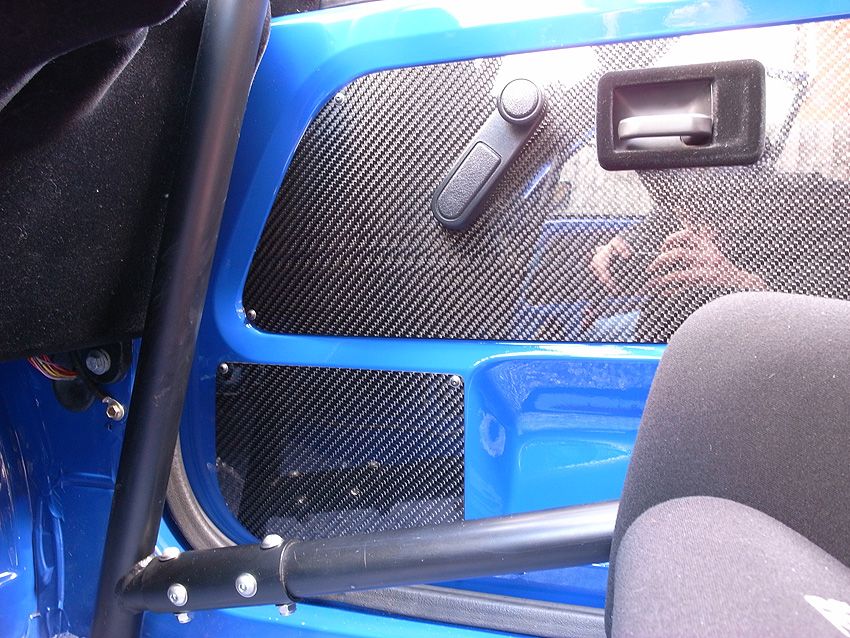
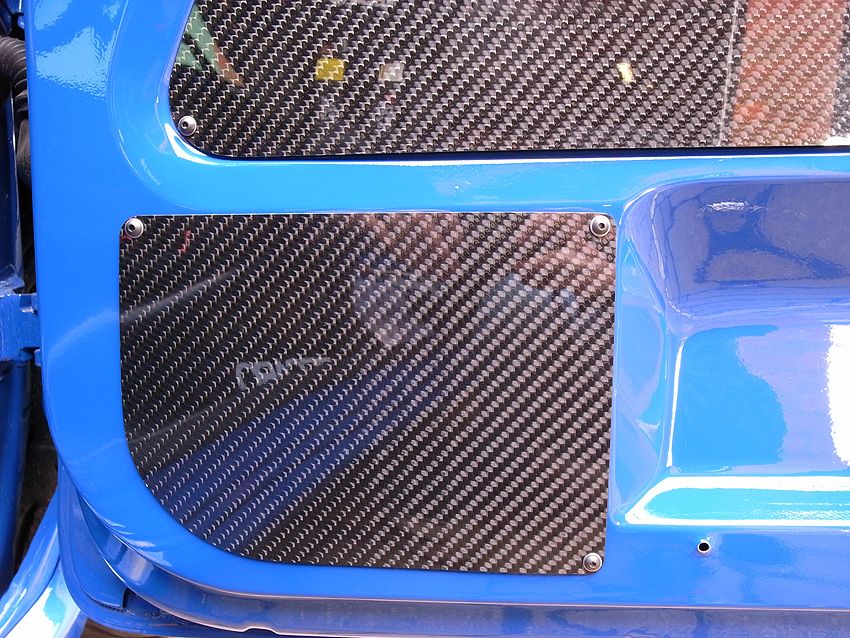
Also got some more carbon bits, and another piece for where Bob removed the wiring from the rear.
Pics:
Before:
After:
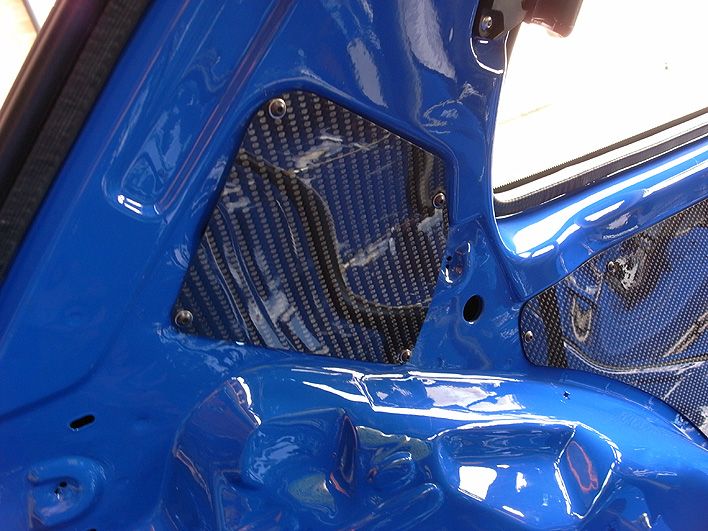
No Wiring in the rear now:
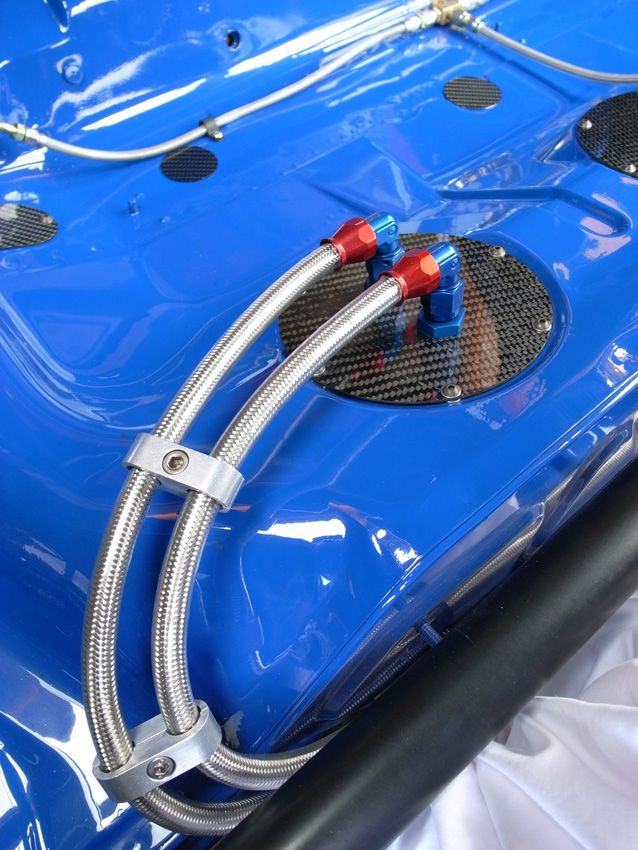
Swapped the hose clamps with silver throughout:
Black Quickshift:
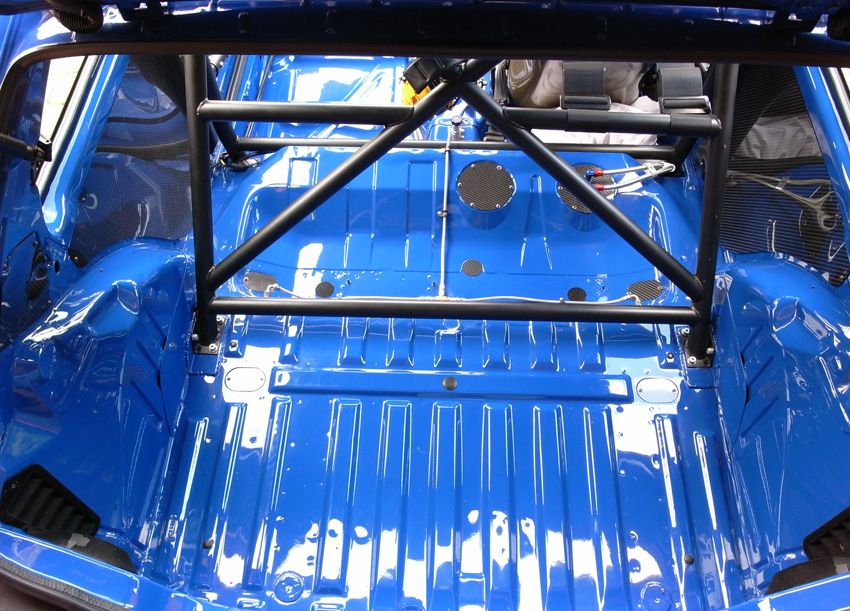
Carbon Speaker Hole Covers:
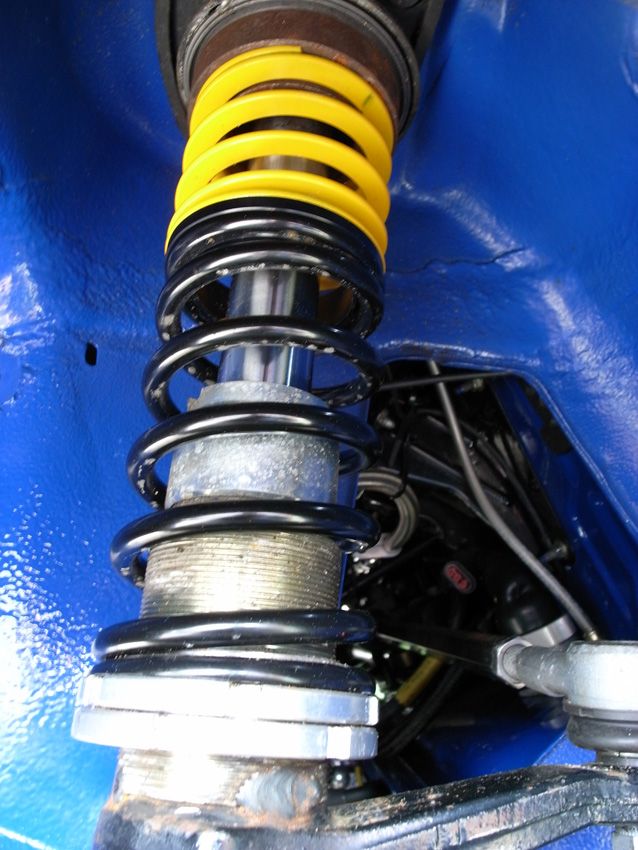
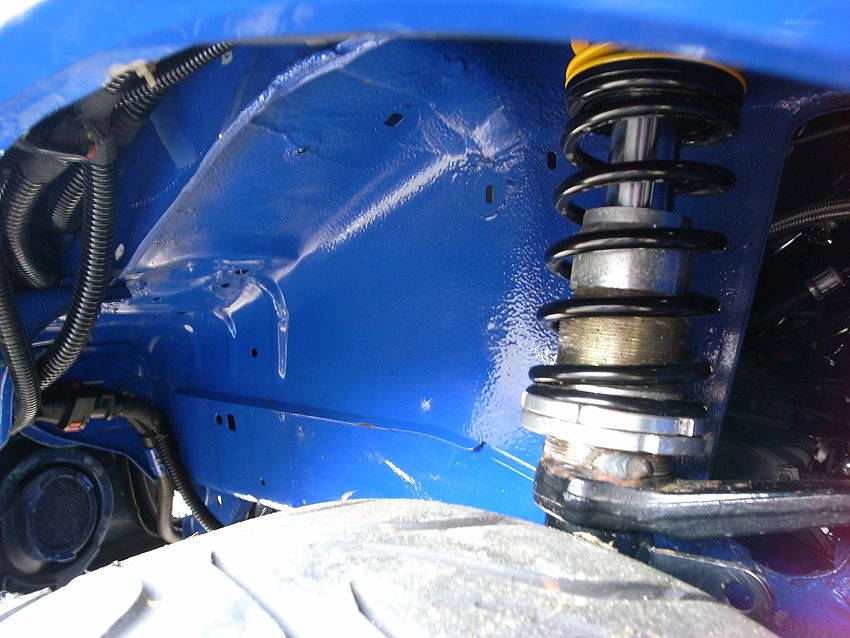
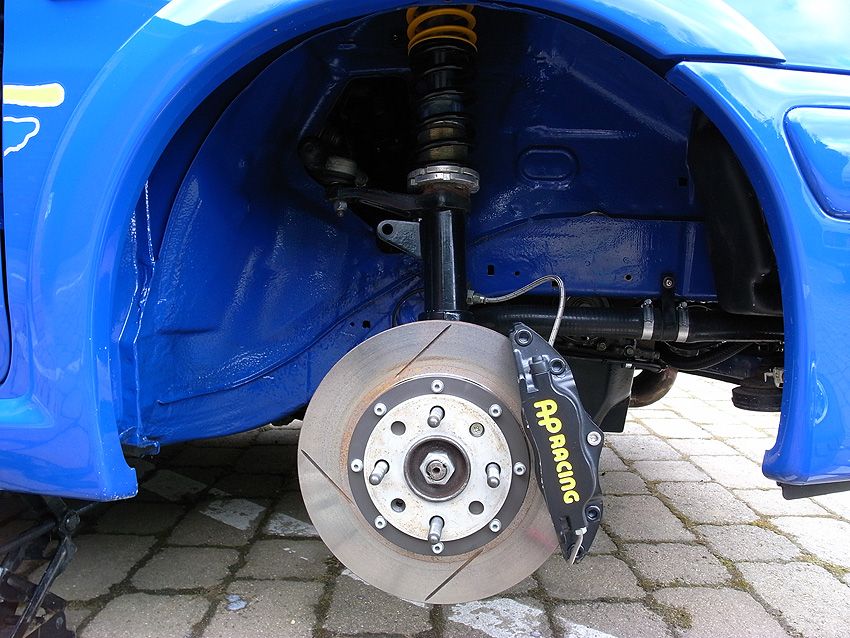
New Faulkner Springs and arch liners removed:
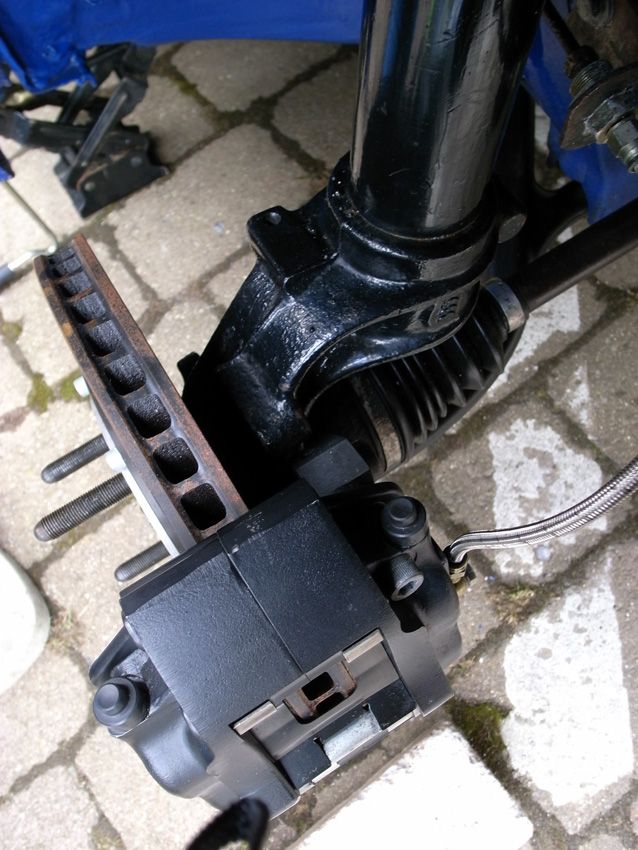
Big (Leaky ass) Brakes:
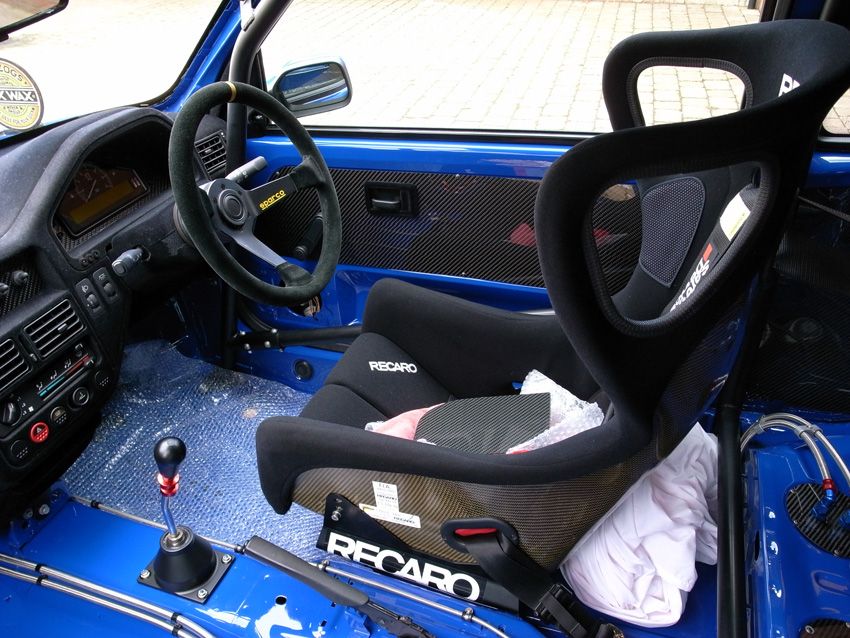
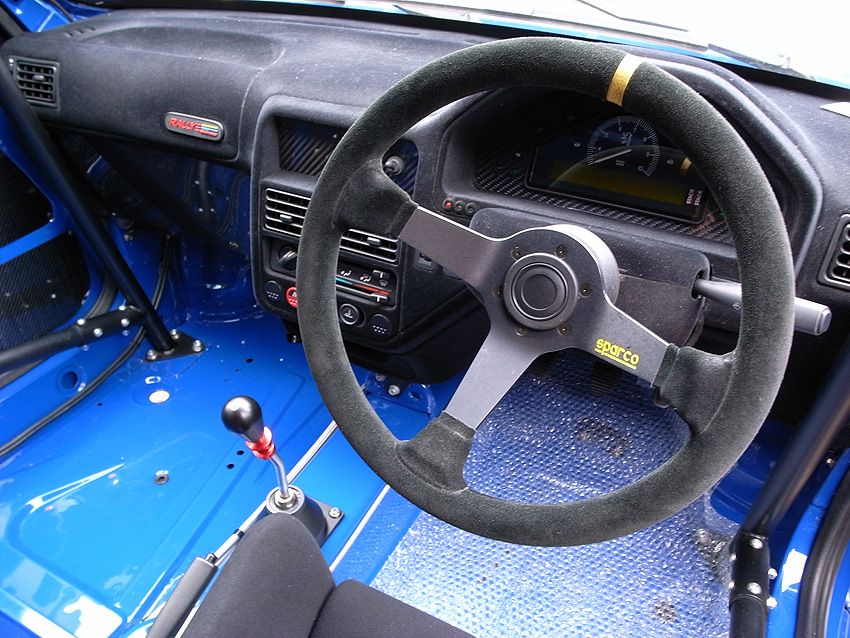
Interior:
That's all for now. I am feeling a bit gutted i've had so many bloody problems, it's like i'm jinxed. I'm going to go through the whole car myself I think and sort all the st out. Obviously Bob's work is all mint, this is all stuff that's out of our control....still, they send these things to test us right?
Few more updates today - I managed to get some pics of all the bits i've been doing. Also feeling a bit pissed off as I seem to be finding leaks everywhere...bloody passenger driveshaft seal is leaking oil, I appear to have a leak on the caliper - or at least I noticed a drip of brake fluid on the bottom of one so wiped it clean to see if it appears again. I also saw another big drop of oil on the bottom of the gearbox, so I hope to god that's not leaking or it'll be back to pug1off for them to fix properly! As well as this, my sump is still leaking so the t
ts that welded it in the first place obviously didn't do it properly. And finally some of the brake lines inside the car appear to be leaking, or 'sweating' from the joins where the fittings go into the T piece on the back bench. These were meant to be fitted by an 'expert' so i'm not happy about that! If you want anything done properly you have to do it yourself. So as well as the exhaust, I have this long list of st to sort out....so I am feeling pissed off but never mind...Anyway, rant over, here are the constructive pics of today. I had to remove the inner arches too as they were catching the tyres on full lock now it is lower. It's only by doing this that I noticed all these damn leaks!
Also got some more carbon bits, and another piece for where Bob removed the wiring from the rear.
Pics:
Before:
After:
No Wiring in the rear now:
Swapped the hose clamps with silver throughout:
Black Quickshift:
Carbon Speaker Hole Covers:
New Faulkner Springs and arch liners removed:
Big (Leaky ass) Brakes:
Interior:
That's all for now. I am feeling a bit gutted i've had so many bloody problems, it's like i'm jinxed. I'm going to go through the whole car myself I think and sort all the s
t out. Obviously Bob's work is all mint, this is all stuff that's out of our control....still, they send these things to test us right?It'll be fine dude - these things will be sucking the paint off the scuttle!
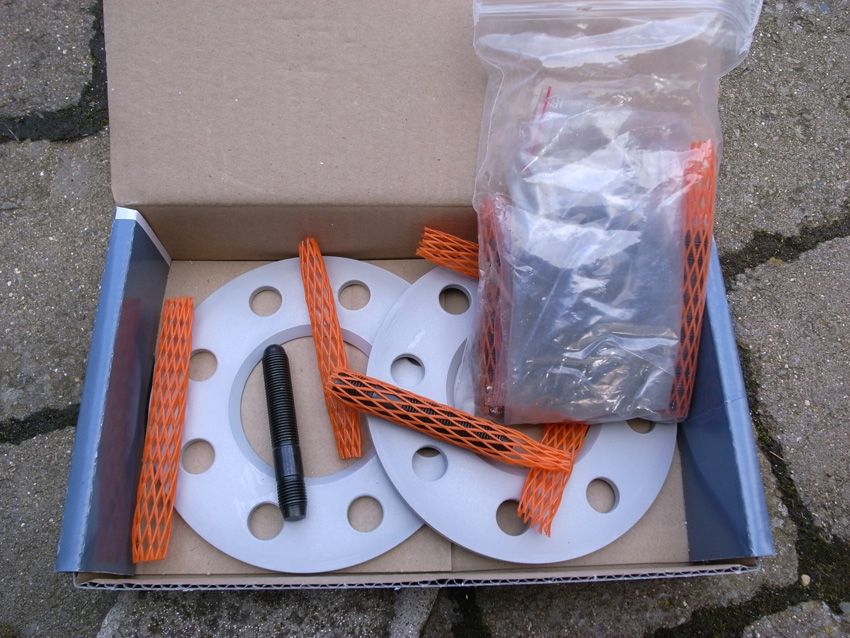
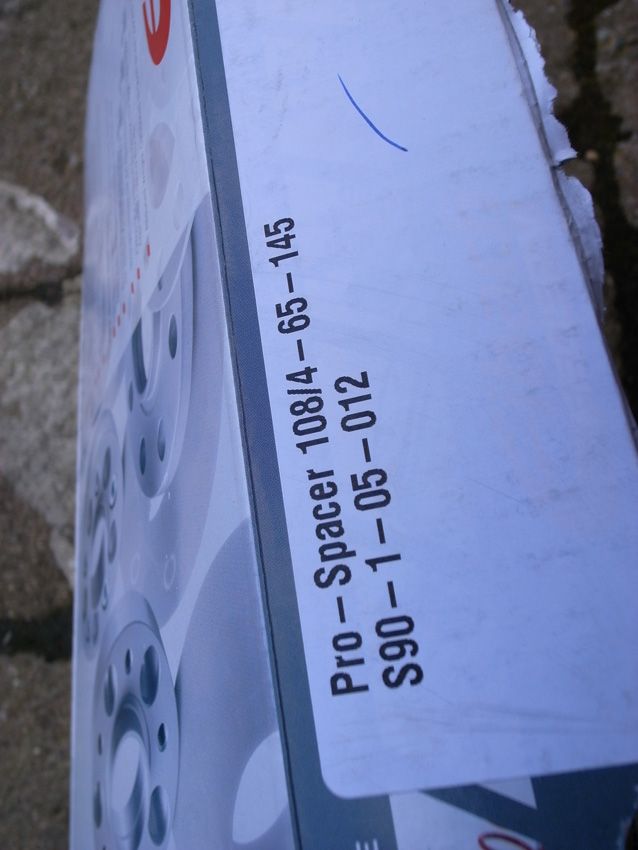
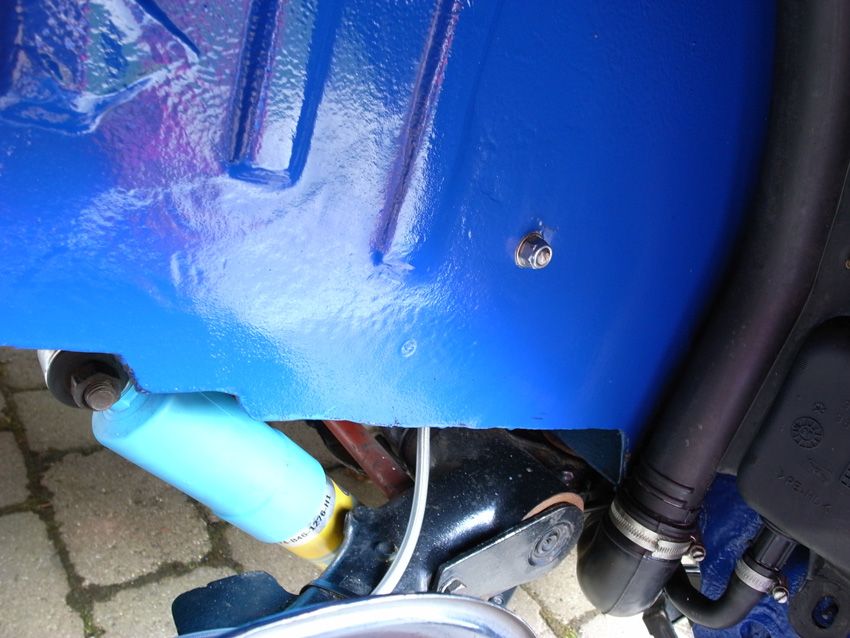
Few more updates today. Did a couple of small jobs and fitted my pug sport stud conversion on the rear, along with some 5mm Eibach spacers so it's matching the front in terms of track etc. I also ground off another little lip in the bay on the scuttle and painted it up. Did want to make a start re-doing the brake lines but I didn't get around to that. It's only leaking one side inside the cabin but probably just gonna redo the whole lot (internally) with Earls fittings just to be sure!
Here are the pics anyway.
Stud conversion:
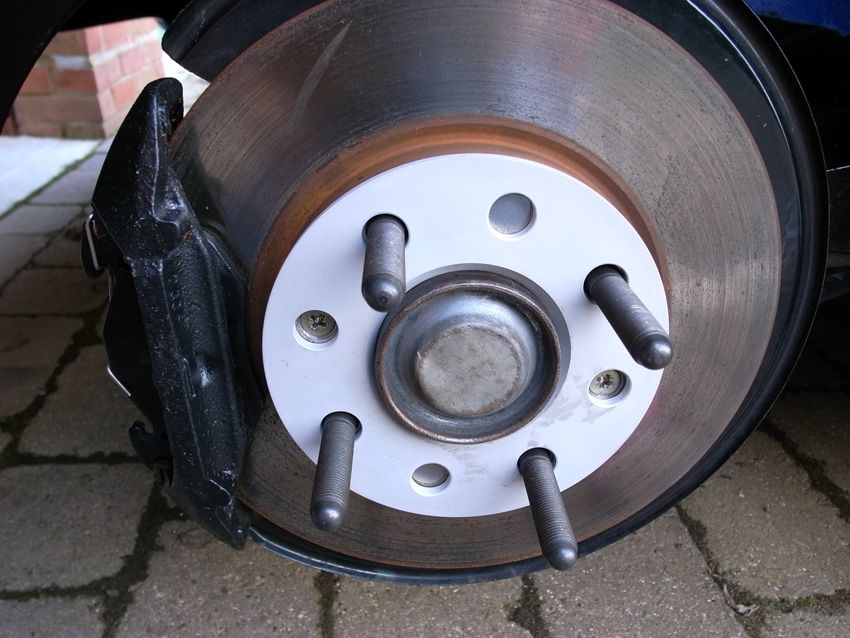
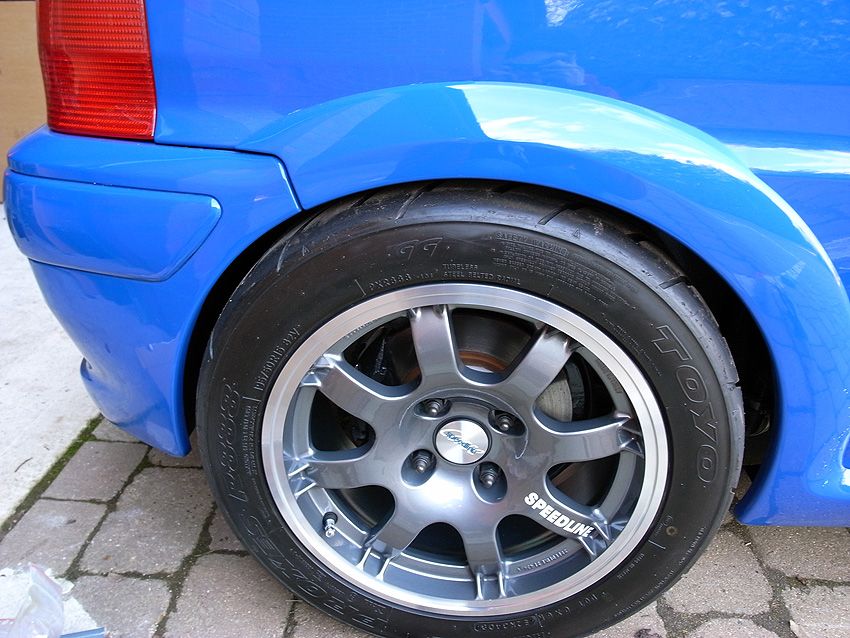
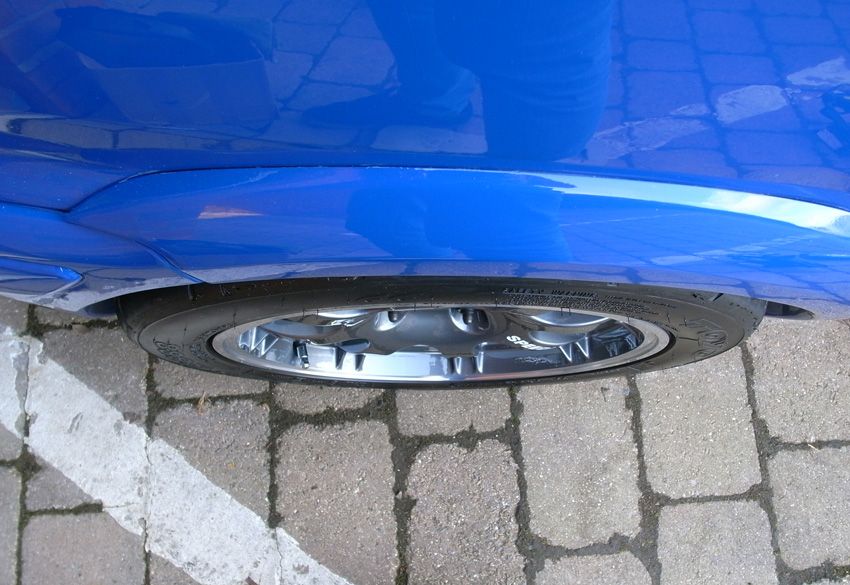
'Tyre poke':
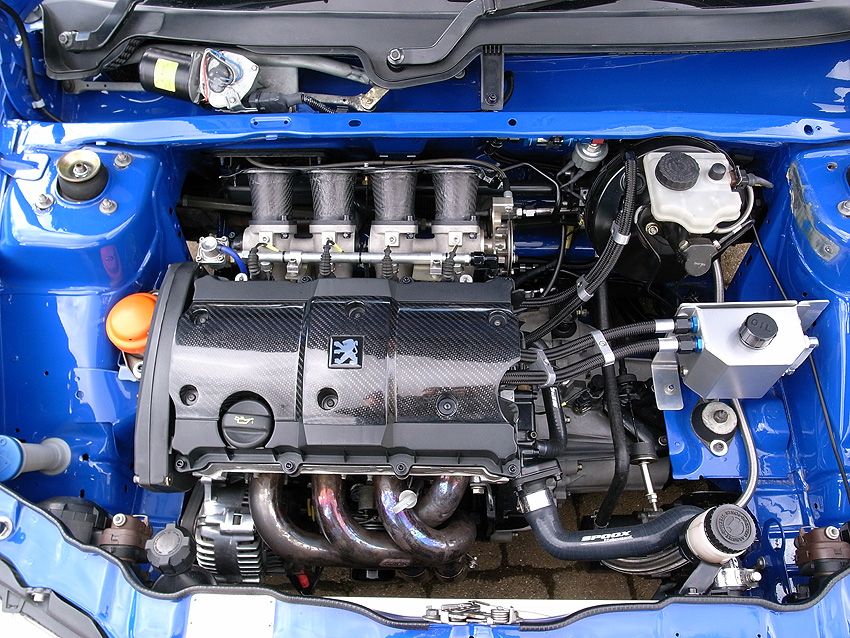
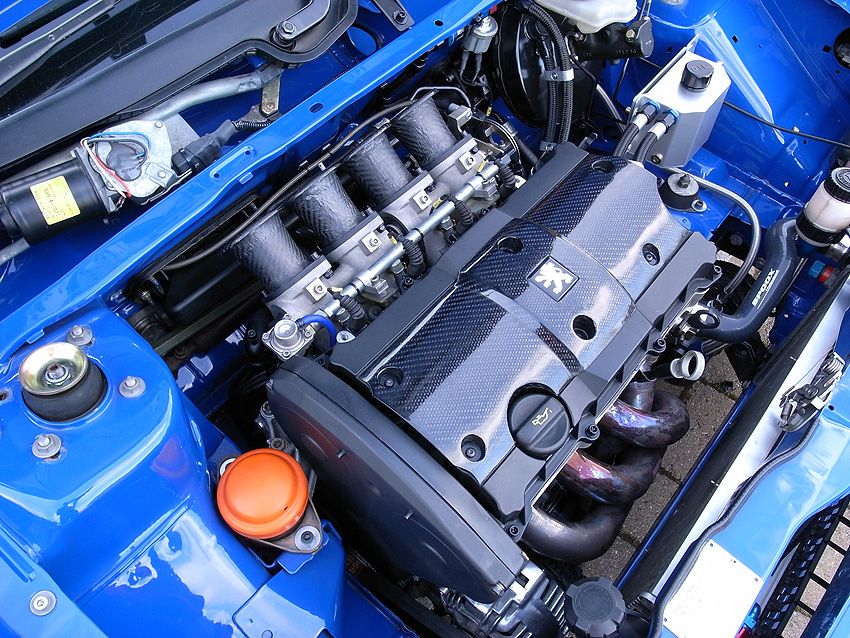
Some general engine and car snaps:


Removal of lip on scuttle - I still have to do the other one too. If I decide to use a wiper motor cover I have a cunning plan to avoid the requirement of this unsightly lip!
GONE and painted:

I also removed the pikey sticker off the wiper motor but didn't get any pics of that. The bay is starting to look really tidy now. She's getting there at last!
Thanks
Lewis
Few more updates today. Did a couple of small jobs and fitted my pug sport stud conversion on the rear, along with some 5mm Eibach spacers so it's matching the front in terms of track etc. I also ground off another little lip in the bay on the scuttle and painted it up. Did want to make a start re-doing the brake lines but I didn't get around to that. It's only leaking one side inside the cabin but probably just gonna redo the whole lot (internally) with Earls fittings just to be sure!
Here are the pics anyway.
Stud conversion:
'Tyre poke':
Some general engine and car snaps:
Removal of lip on scuttle - I still have to do the other one too. If I decide to use a wiper motor cover I have a cunning plan to avoid the requirement of this unsightly lip!
GONE and painted:
I also removed the pikey sticker off the wiper motor but didn't get any pics of that. The bay is starting to look really tidy now. She's getting there at last!
Thanks
Lewis
Thanks for the words of support lads!
Of course it will get driven, you have to give me a chance to finish the thing first. I have a full time job and many other commitments to attend to so I can only do so much to complete it in the time I have spare. Also money doesn't grow on trees otherwise it would be done a long time ago. I have a few niggley problems still to fix, so i'm doing little jobs at the same time to improve the car as a whole. Besides, I enjoy the build aspect of the project also. Faffing with cars is my forte!
Of course it will get driven, you have to give me a chance to finish the thing first. I have a full time job and many other commitments to attend to so I can only do so much to complete it in the time I have spare. Also money doesn't grow on trees otherwise it would be done a long time ago. I have a few niggley problems still to fix, so i'm doing little jobs at the same time to improve the car as a whole. Besides, I enjoy the build aspect of the project also. Faffing with cars is my forte!
Few more updates anyway. I collected my newly flocked dash from Bic yesterday (thanks again) and had another look around the Streamline workshop which is coming along nicely now. Then proceeded home to remove the cage and fit the new dash. Most of it went well with the cage removal, and it was surprisingly easy until I got to the main hoop bar on the passenger side. The bloody sleeve would NOT come off without force so I had to hammer it off with the help of a screwdriver. Hassle but it came off in the end without any damage. Then removing the old dash was a total bd too, and fitting the new one was a total bd, but I got it all done in the end so i'm pleased! It looks WAY better now but it was too dark to take pics of it fitted so i'll get some more this weekend and stick them up. Also got pics of my new brake lines and the stripped down/tidied wiper motor area.
Here are the pics anyway.
Flocked stuff:


Comparison between the old and new (this is why I keep harping on about how much better central blast cleaning stuff looks when flocked!) The blacker looking one is C.B.C's work...


Here are my brake lines - still need to p clip them and finish them off but you get the idea. They are much straighter than before too.
Previous:
Now:


And here's the wiper motor with re-routed wiring and tidied up:


Some shots of the dash removal.
Starting off:

TOTAL NIGHTMARE!

I will get some of the new dash tomorrow hopefully. I also realised that as this dash is a 1 Litre one of summat that the recessed area where the Rallye badge goes is a different size, so I need to get another bit for there and have it flocked again - argh! You live and learn though eh?
d too, and fitting the new one was a total bd, but I got it all done in the end so i'm pleased! It looks WAY better now but it was too dark to take pics of it fitted so i'll get some more this weekend and stick them up. Also got pics of my new brake lines and the stripped down/tidied wiper motor area. Here are the pics anyway.
Flocked stuff:
Comparison between the old and new (this is why I keep harping on about how much better central blast cleaning stuff looks when flocked!) The blacker looking one is C.B.C's work...
Here are my brake lines - still need to p clip them and finish them off but you get the idea. They are much straighter than before too.
Previous:
Now:
And here's the wiper motor with re-routed wiring and tidied up:
Some shots of the dash removal.
Starting off:
TOTAL NIGHTMARE!
I will get some of the new dash tomorrow hopefully. I also realised that as this dash is a 1 Litre one of summat that the recessed area where the Rallye badge goes is a different size, so I need to get another bit for there and have it flocked again - argh! You live and learn though eh?
Edited by Track_Cit on Sunday 11th April 15:17
thanks very much 
I get all my carbon from Streamline Carbon - they do amazing quality sheets and would cut it for you if you have a template. They have the tools you see so it would be a much better finish if you let them do it! I have made my own things which I cut with a fine saw but it takes a lot of sanding after to get the edges mint.
I get all my carbon from Streamline Carbon - they do amazing quality sheets and would cut it for you if you have a template. They have the tools you see so it would be a much better finish if you let them do it! I have made my own things which I cut with a fine saw but it takes a lot of sanding after to get the edges mint.
Cheers dude!
A few more updates this weekend (and a fine one it has been so far too!)
Wiped up the area where my sump has cracked on the corner and bodged it with some gasket seal to prevent any further leaks. The crack i tiny so this will do the job fine, as I can't afford to buy a new sump just now and have it re-made, so this will do until I have more dosh spare. Also took some pics of the dash and cage all back in, the brakes finished off, and my hand after I had a go at it with a hack saw (made a note not to do that again as it hurt a lot!) I also had to make a carbon blank for where the Rallye badge on the dash goes, as the dash I have has a smaller recess so the Rallye badge wouldn't fit. Bit gutting but the blank looks cool so i'm pleased. I also tried Pete's black catch tank out to see how it looked as I was considering getting mine powder coated too, but I prefer the silver I think so i'll be keeping it like that!
Here's the pics anyway.
Brake lines inside now complete:


You can also see here this is where my ECU lives up under the dash:


Here's the sump crack:

Cleaned up and sorted:


Black Catch Tank:


Back to Silver:


Some general shots:


Also tried to get her started again now the sump is sorted, but the race battery is dead and it will not start or do anything even trying to jump it off the van, so need to get Bob to come over again and see what's up with that!
A few more updates this weekend (and a fine one it has been so far too!)
Wiped up the area where my sump has cracked on the corner and bodged it with some gasket seal to prevent any further leaks. The crack i tiny so this will do the job fine, as I can't afford to buy a new sump just now and have it re-made, so this will do until I have more dosh spare. Also took some pics of the dash and cage all back in, the brakes finished off, and my hand after I had a go at it with a hack saw (made a note not to do that again as it hurt a lot!)
I also had to make a carbon blank for where the Rallye badge on the dash goes, as the dash I have has a smaller recess so the Rallye badge wouldn't fit. Bit gutting but the blank looks cool so i'm pleased. I also tried Pete's black catch tank out to see how it looked as I was considering getting mine powder coated too, but I prefer the silver I think so i'll be keeping it like that!Here's the pics anyway.
Brake lines inside now complete:
You can also see here this is where my ECU lives up under the dash:
Here's the sump crack:
Cleaned up and sorted:
Black Catch Tank:
Back to Silver:
Some general shots:
Also tried to get her started again now the sump is sorted, but the race battery is dead and it will not start or do anything even trying to jump it off the van, so need to get Bob to come over again and see what's up with that!

Thanks very much fellas!
It seems I may need to get new battery then as this one wouldn't even jump using my van battery...may need to get my wiring guy to check it over as I could've disconnected something during the dash removal...pain in the backside but never mind! Appreciate the tip though mate
Err just need to re-bleed the brakes, buy an exhaust, replace a leaky drive shaft seal and she's good to go. Could do with a map fettle also as it's very rich at the moment. I already had the sump welded once and supposedly pressure tested but there we go!
According to some people once you've had oil on the metal even after cleaning the weld doesn't take the surface properly so it's best to start from scratch with a new sump. Unfortunately I can't afford that right now, so the make shift repair will have to make do for a while
Edited by Track_Cit on Sunday 11th April 15:25
Edited by Track_Cit on Sunday 11th April 15:26
Lol I have been trying to get a black cover for that mount but i'd need to buy a whole new one - something for the future methinks
Little update tonight. I was worried I had buggered something when I removed the dash as it wouldn't start, but it turned out to be that my race battery is fully dead, so need to get a trickle charger to try and restore some life in it, or replace it if it's actually dead. I used my van battery in the car to start her up for a while tonight again....well GOOD GOD I cannot believe how much of a beast it is every time I start it, especially without an exhaust lol! It's fking INSAINELY LOUD! Actually scares me just being near it, I cannot wait to drive it! Anyway I only had it running for like 5 mins, and my neighbor came out and said the noise was reverberating through his whole house and I had to turn it off - oops! I was revving it a little too, I couldn't resist! Anyways i'll get a trickle charger and see if I can renew this battery, if not, it's time for a new one....
My oil sump repair seems to have worked too so i'm pleased with that also
Little update tonight. I was worried I had buggered something when I removed the dash as it wouldn't start, but it turned out to be that my race battery is fully dead, so need to get a trickle charger to try and restore some life in it, or replace it if it's actually dead. I used my van battery in the car to start her up for a while tonight again....well GOOD GOD I cannot believe how much of a beast it is every time I start it, especially without an exhaust lol!
It's fking INSAINELY LOUD! Actually scares me just being near it, I cannot wait to drive it! Anyway I only had it running for like 5 mins, and my neighbor came out and said the noise was reverberating through his whole house and I had to turn it off - oops! I was revving it a little too, I couldn't resist! Anyways i'll get a trickle charger and see if I can renew this battery, if not, it's time for a new one....My oil sump repair seems to have worked too so i'm pleased with that also
Thanks mate. I did try a trickle charger but it wasn't having any of it like you say. So you think a halfords yoke will do the job and revive it, as a new batter is £80!
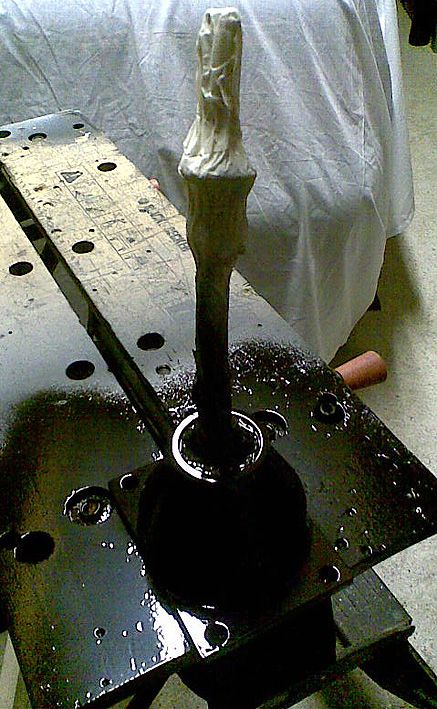
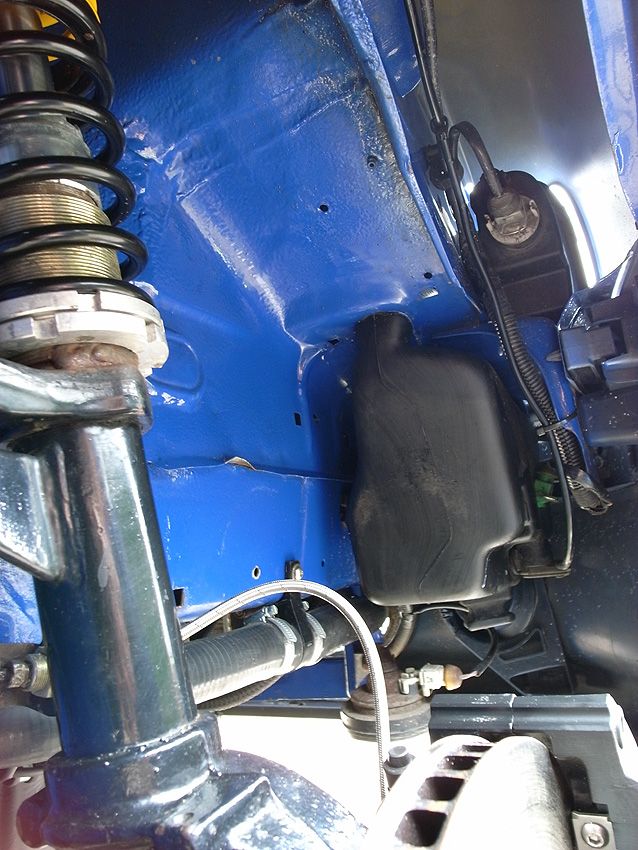
More updates tonight. Finally got my new topmounts from Temple Rallye Sport, so had an evening of cleaning them and 'finishing them off' so to speak, as they weren't quite up to my anal standards! I'm still figuring out how i'm going to mount them, but the design is quite cunning, I just need to work out a way to tighten the sleeve nut once it's on the damper without the damper piston just twisting on me. I'll explain further down with the pics.
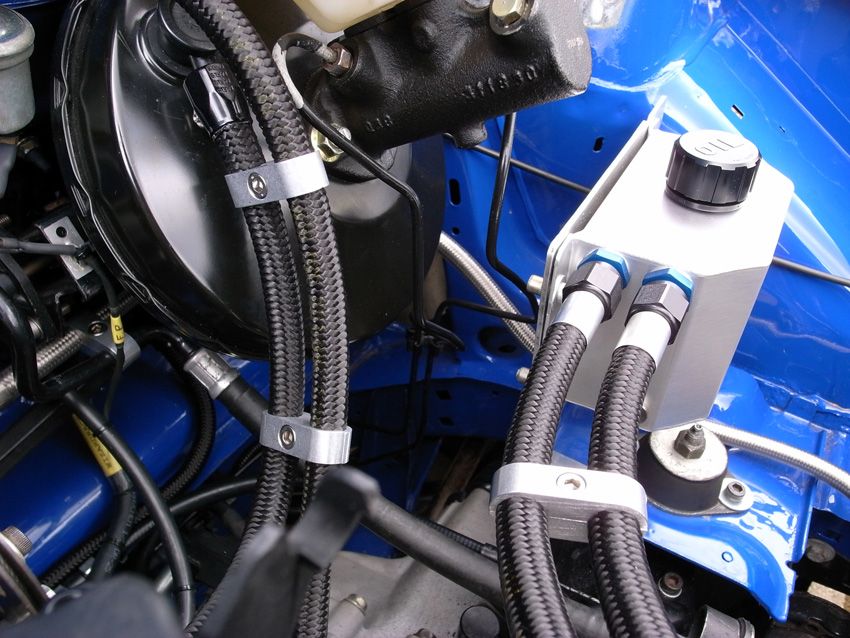
I also fitted my black Earls oil Cooler fittings and cleaned up the piece of ally that it mounted to as it was a little haggard looking (actually I did this at the weekend but only had time to 'document it' tonight...
Also I trimmed down one of the fuel lines leading to the fuel rail, so it's sitting a lot better now and also a touch less distance for the fuel to travel. There was a big loop in it before and it was un-necessary!
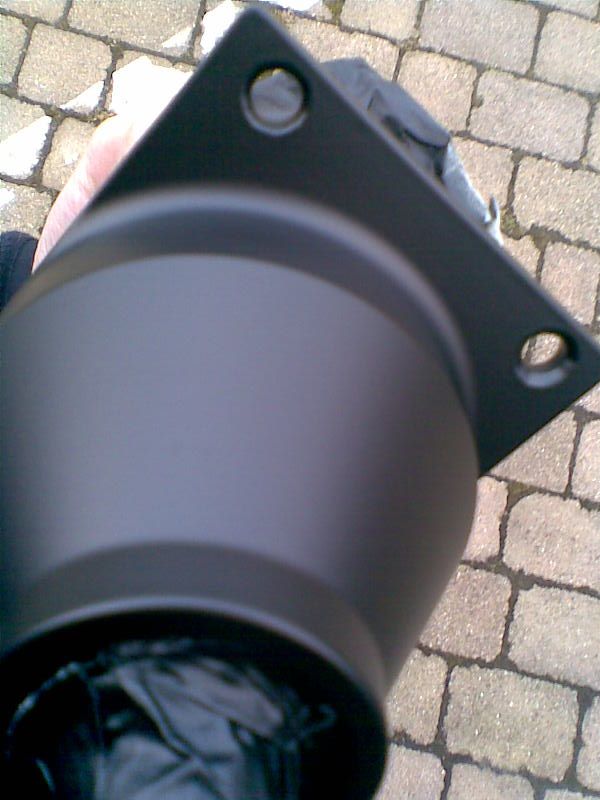
Here are the top mounts:

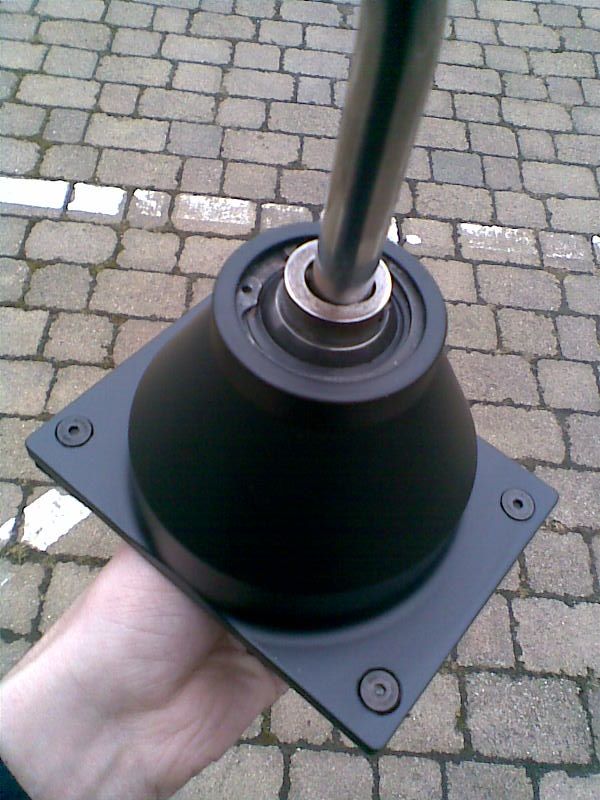
Sleeve Nut, but threaded inside at the bottom, and it screws onto the existing thread on the damper as demonstrated in the 3rd (for illustrative purposes only):


Then the mount slides over the sleeve nut:

And you fit a washer over the top and secure the whole assembly down with a top nut. It'll probably be tricky to fit them in this manner but i'll work something out:

A little work on them to finish them off - rounded the corners, and spent ages polishing them up. They came up almost like new so i'm dead chuffed. Only managed to finish one but i'll do the other one over the weekend.
Before and after:


Done:

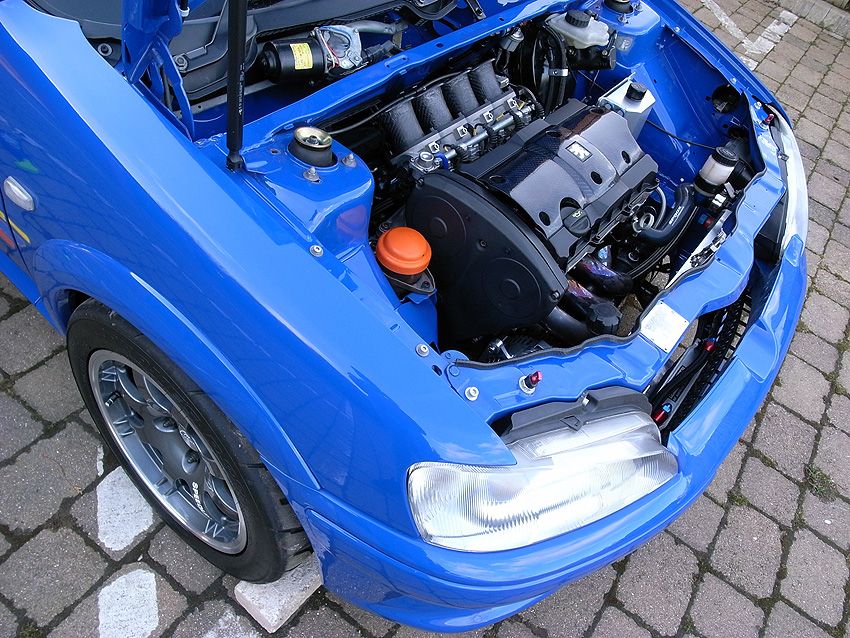
Due to popular demand, I also finally changed the heinous orange engine mount cap to a nice black one supplied by good ole Mankee (thanks again mate) so it looks way nicer now!


Here's the reduced length fuel line:

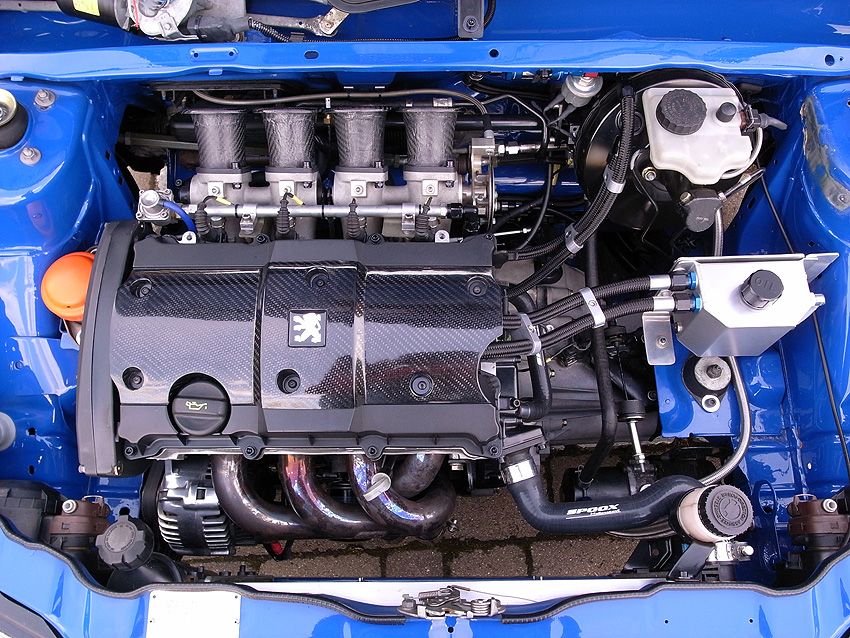
And a gratuitous trumpet shot:

And finally the oil cooler fittings and cleaned bracket:


Lastly, I FINALLY managed to source a matching seat after a lot of negotiating with a guy from Germany (ebay) so that should be on the way next week. It's not quite as mint in terms of condition as my other one, it has some scratches etc, but they are so rare I thought i'd just bite the bullet and buy it, and get it flatted and re-lauqured if required, by Streamline Carbon, as they're not deep marks. So getting there!!
More updates tonight. Finally got my new topmounts from Temple Rallye Sport, so had an evening of cleaning them and 'finishing them off' so to speak, as they weren't quite up to my anal standards!
I'm still figuring out how i'm going to mount them, but the design is quite cunning, I just need to work out a way to tighten the sleeve nut once it's on the damper without the damper piston just twisting on me. I'll explain further down with the pics. I also fitted my black Earls oil Cooler fittings and cleaned up the piece of ally that it mounted to as it was a little haggard looking (actually I did this at the weekend but only had time to 'document it' tonight...
Also I trimmed down one of the fuel lines leading to the fuel rail, so it's sitting a lot better now and also a touch less distance for the fuel to travel. There was a big loop in it before and it was un-necessary!
Here are the top mounts:
Sleeve Nut, but threaded inside at the bottom, and it screws onto the existing thread on the damper as demonstrated in the 3rd (for illustrative purposes only):
Then the mount slides over the sleeve nut:
And you fit a washer over the top and secure the whole assembly down with a top nut. It'll probably be tricky to fit them in this manner but i'll work something out:
A little work on them to finish them off - rounded the corners, and spent ages polishing them up. They came up almost like new so i'm dead chuffed. Only managed to finish one but i'll do the other one over the weekend.
Before and after:
Done:
Due to popular demand, I also finally changed the heinous orange engine mount cap to a nice black one supplied by good ole Mankee (thanks again mate) so it looks way nicer now!
Here's the reduced length fuel line:
And a gratuitous trumpet shot:
And finally the oil cooler fittings and cleaned bracket:
Lastly, I FINALLY managed to source a matching seat after a lot of negotiating with a guy from Germany (ebay) so that should be on the way next week. It's not quite as mint in terms of condition as my other one, it has some scratches etc, but they are so rare I thought i'd just bite the bullet and buy it, and get it flatted and re-lauqured if required, by Streamline Carbon, as they're not deep marks. So getting there!!
Thanks guys!
Martin - yes they fit fine, they're not as large as they seem in the photos.
Took a few pics tonight of my manifold that I polished up, and the fuel rail also. Found a good technique when doing the top mounts so decided to employ it on a few other parts!
Came up quite well I thought.
BEFORE:
AFTER:


Martin - yes they fit fine, they're not as large as they seem in the photos.
Took a few pics tonight of my manifold that I polished up, and the fuel rail also. Found a good technique when doing the top mounts so decided to employ it on a few other parts!
Came up quite well I thought.
BEFORE:
AFTER:
Cheers guys.
I used a cunning technique - actually stumbled upon it completely by accident in all honesty!
I tired fine wire wool on the manifold before and it didn't work....I then combined the wire wool with 'PEEK' metal polish, and when you wipe the residue off after it leaves a really nice clean shine. It's great stuff! Hope that helps you
She's nearly there stu - money is tight now so can't afford to slash out on it like before... and I still need an exhaust which isn't cheap!
little update, I am seriously lucky and managed to source another matching seat, in kevlar too which is awesome. After a lot of wheeling and dealing I managed to sort a deal with a guy off ebay germany, and he shipped it over for me last week. It's not as mint as my other one, but i fully cleaned the fabric with shampoo last night and it's come like new. There are some areas of slight laquar peel but I will probably get streamline to flat it and redo it at some point. Still it's pretty nice overall, and i'm pleased to find a matching one as these are rare as hens teeth! I think it was out of an E30 M3 DTM car too, so heritage yo!
Here's the shots anyways:


So all I need now is the following:
1) Buy Exhaust
2) Buy Airbox & trumpets (or filter of some sort)
3) Sort Leaky CV boot
4) Investigate where the fluid drip is coming from on the passenger side caliper
I hope I don't need to send the caliper back to AP...I can see them moaning saying that i've ground it therefore the warranty will be void, but the 'leak' seems to be coming from the back so it's clearly nothing to do with my mods to the caliper. All the hoses and connectors are tight too so I don't know what the problem is, although it seems to be forming on the bottom of the pipe that joins the two parts of the caliper together. I will post up some pics soon...
little update, I am seriously lucky and managed to source another matching seat, in kevlar too which is awesome. After a lot of wheeling and dealing I managed to sort a deal with a guy off ebay germany, and he shipped it over for me last week. It's not as mint as my other one, but i fully cleaned the fabric with shampoo last night and it's come like new. There are some areas of slight laquar peel but I will probably get streamline to flat it and redo it at some point. Still it's pretty nice overall, and i'm pleased to find a matching one as these are rare as hens teeth! I think it was out of an E30 M3 DTM car too, so heritage yo!
Here's the shots anyways:
So all I need now is the following:
1) Buy Exhaust
2) Buy Airbox & trumpets (or filter of some sort)
3) Sort Leaky CV boot
4) Investigate where the fluid drip is coming from on the passenger side caliper
I hope I don't need to send the caliper back to AP...I can see them moaning saying that i've ground it therefore the warranty will be void, but the 'leak' seems to be coming from the back so it's clearly nothing to do with my mods to the caliper. All the hoses and connectors are tight too so I don't know what the problem is, although it seems to be forming on the bottom of the pipe that joins the two parts of the caliper together. I will post up some pics soon...
thanks mate!
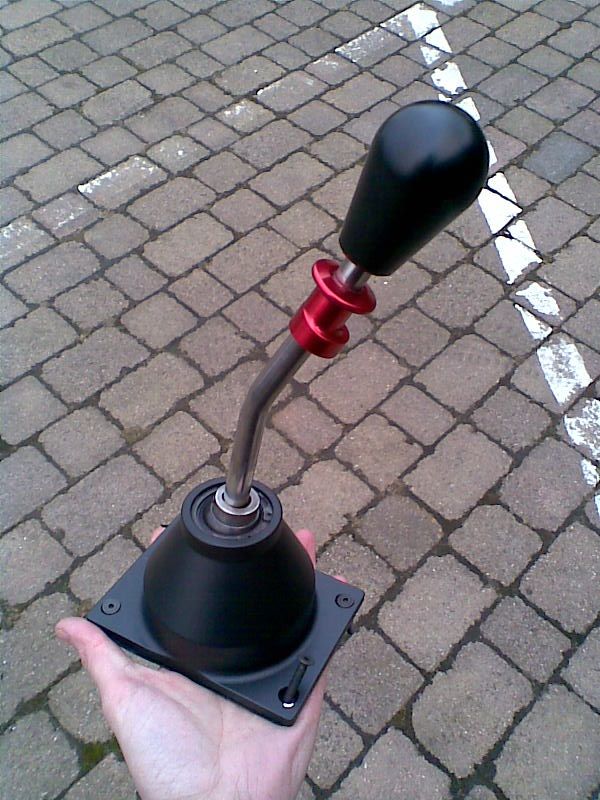
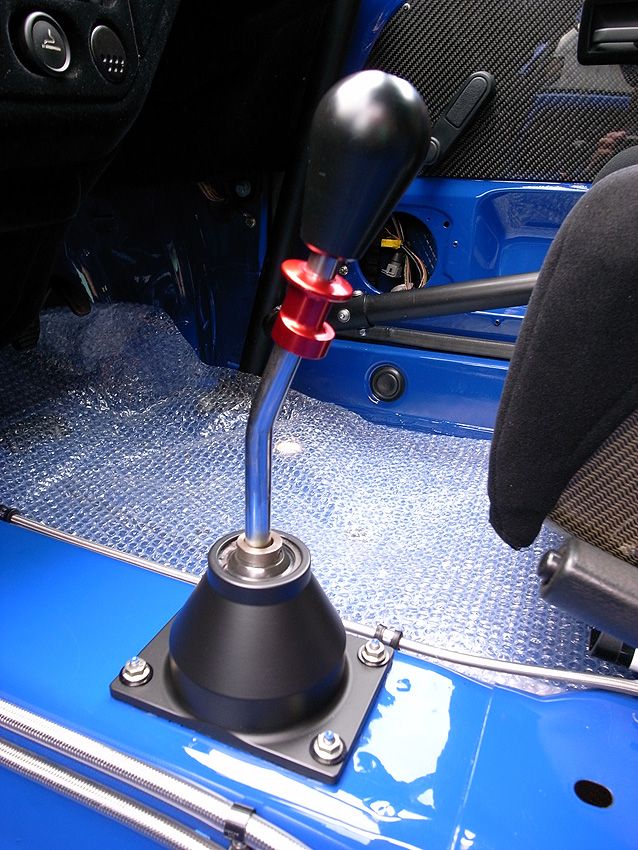
A few more little updates today anyway. I found a really good local machine shop so I got them to broach my top sleeve nuts so I can hold them whilst tightening them now. Also tried up my seat for fitment, as I still need some side mounts to bolt it in. Also made a new gearstick, by straightening a spare one I had lying around, and fitting it all together again. The reach is actually spot on, and the gear change feels perfect now. The flash makes it look a little wonky but it is dead straight, you can just tell it's a bent stick straightened. I'll probably get a new length of stainless rod now I know it feels ok, I was just concerned it would be too far to reach in first and third etc, but it's dead on. Pleased! Also it's a lot taller so nearer the wheel for quick changes.
Pics:
Broached Top Nuts:


Seats:


Gearstick:


A few more little updates today anyway. I found a really good local machine shop so I got them to broach my top sleeve nuts so I can hold them whilst tightening them now. Also tried up my seat for fitment, as I still need some side mounts to bolt it in. Also made a new gearstick, by straightening a spare one I had lying around, and fitting it all together again. The reach is actually spot on, and the gear change feels perfect now. The flash makes it look a little wonky but it is dead straight, you can just tell it's a bent stick straightened. I'll probably get a new length of stainless rod now I know it feels ok, I was just concerned it would be too far to reach in first and third etc, but it's dead on. Pleased!
Also it's a lot taller so nearer the wheel for quick changes. Pics:
Broached Top Nuts:
Seats:
Gearstick:

you can adjust by using the second mounting holes dude
Few little updates. I got some new sidemounts for my passenger seat and had a stab at fitting it tonight. I fking hate fitting fking seats, WHAT a nightmare! Hank must've been drunk when he drilled the holes as they are skewif on one side, but they also don't line up with my side mounts as they are different seats of course, so I had to bugger about filing the holes out to get the bolts lined up. It's just about in anyways. Ideally i'd like to get new seat rails welded in but that's gonna have to wait (I want a weld in cage eventually so maybe i'll do it all at once!)
Also got a little piece of 'rare motorsport heritage' in the form of a little Longman Engine plaque off Bic (for an extortionate price of course!) to really finish off the bay, so thanks to him:

That's all for now!
Few little updates. I got some new sidemounts for my passenger seat and had a stab at fitting it tonight. I f
king hate fitting fking seats, WHAT a nightmare! Hank must've been drunk when he drilled the holes as they are skewif on one side, but they also don't line up with my side mounts as they are different seats of course, so I had to bugger about filing the holes out to get the bolts lined up. It's just about in anyways. Ideally i'd like to get new seat rails welded in but that's gonna have to wait (I want a weld in cage eventually so maybe i'll do it all at once!) Also got a little piece of 'rare motorsport heritage' in the form of a little Longman Engine plaque off Bic (for an extortionate price of course!)
to really finish off the bay, so thanks to him:That's all for now!
Hi mate, they are just a 'pure' hifi set up! 
Pic here:

Few little updates. I have now ordered all the bits I need (hopefully) to get it running properly.
New CV Boot (£40 from Pug!)
Brake Fluid - To bleed the system now the lines are replaced
Exhaust reducer - to bodge the pugsport on which i'm getting saturday
New Battery - Ordering today as my current one is D.E.A.D
So i'm HOPING to have it working for FCS, but i'm very busy at the moment, with home life and work so it all depends how i fair for time. Not gonne rush and bodge stuff just for the sake of getting it to the show, there's always TRAX after all...
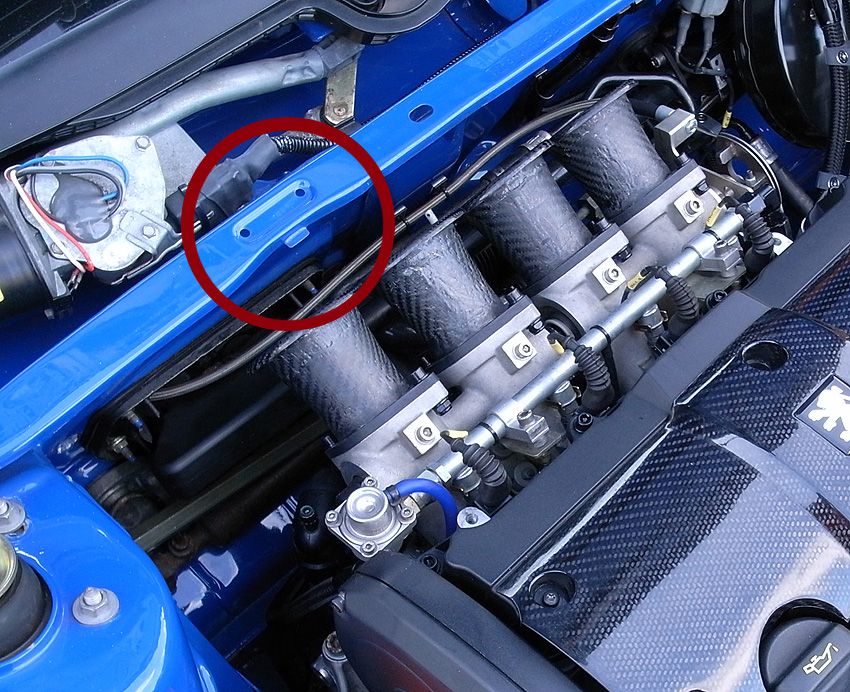
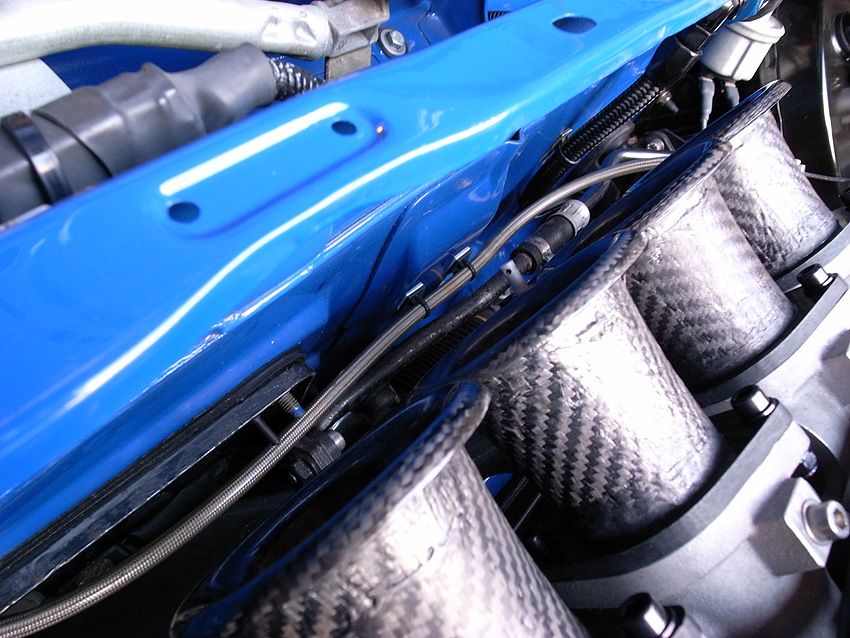
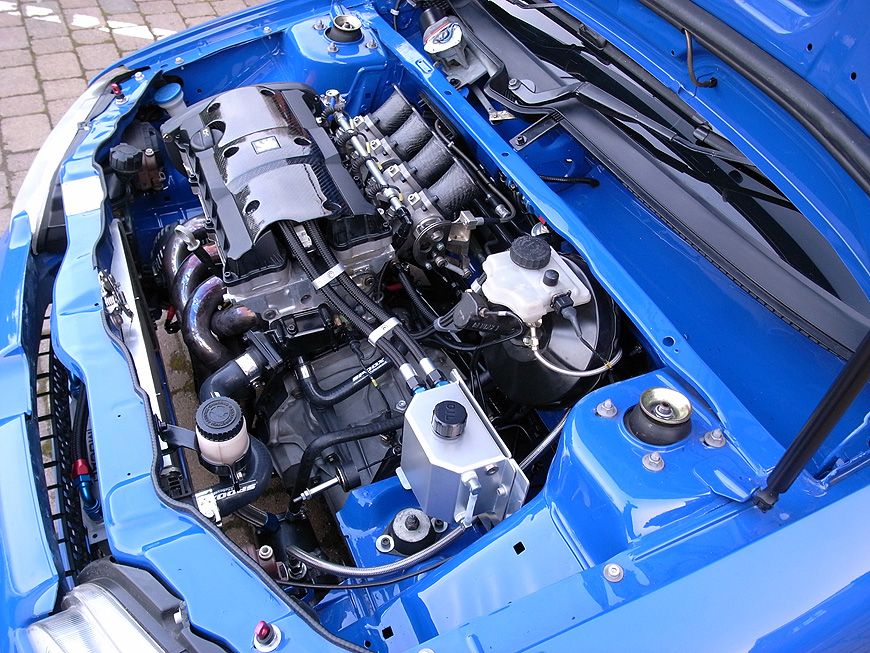
Last night I fitted my Longman plaque. Also refined my oil catch tank bracket a bit as it was a little untidy with the cable pull for the bonnet trailing across the bay. So I cut a notch underneath, trimmed the sides, lined everything up and cable tied it under the PAS hose and it looks a lot better now I think. Here are the pics anyway, iphone so a bit turd, but ho hum:
[U]BEFORE:[/U]
[U]AFTER:[/U]


Pic here:
Few little updates. I have now ordered all the bits I need (hopefully) to get it running properly.
New CV Boot (£40 from Pug!)
Brake Fluid - To bleed the system now the lines are replaced
Exhaust reducer - to bodge the pugsport on which i'm getting saturday
New Battery - Ordering today as my current one is D.E.A.D
So i'm HOPING to have it working for FCS, but i'm very busy at the moment, with home life and work so it all depends how i fair for time. Not gonne rush and bodge stuff just for the sake of getting it to the show, there's always TRAX after all...
Last night I fitted my Longman plaque. Also refined my oil catch tank bracket a bit as it was a little untidy with the cable pull for the bonnet trailing across the bay. So I cut a notch underneath, trimmed the sides, lined everything up and cable tied it under the PAS hose and it looks a lot better now I think. Here are the pics anyway, iphone so a bit turd, but ho hum:
[U]BEFORE:[/U]
[U]AFTER:[/U]
Edited by Track_Cit on Friday 4th June 14:01
Gassing Station | Readers' Cars | Top of Page | What's New | My Stuff