My Indigo Blue Throttle Bodied 106 Rallye
Discussion


Right, well I haven't QUITE got my greasy paws on the car itself yet!!
BUT, I thought i'd start a blog so things are up and running, as i started to do a few bits to the engine tonight and managed to get some good pics of the ports/angle of the pug sport bodies etc etc.
As most of you know I was building up a nice Citroen, but unfortunately I had to abandon this project and sell it on to a friend to finish as I just haven't had the time to commit to as of late - you can read the full thread here if you are interested:
My Little Citroen Machine
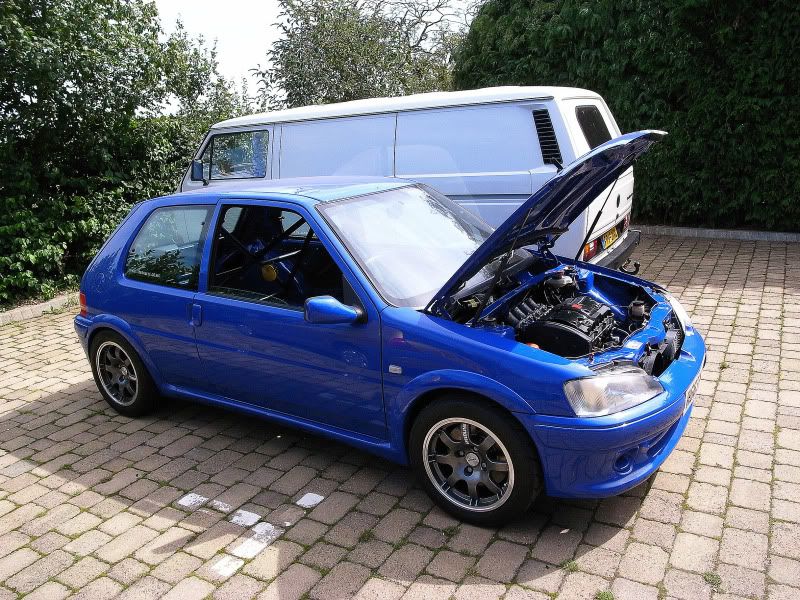
Anyway, that aside, here is my next project! A fully restored 106 Rallye with cage, coilovers, fully stripped to a shell and resprayed - basically a similar concept to the Saxo just less work to do! Pics of the car to follow at a later date (once I pick it up).
PART 1:
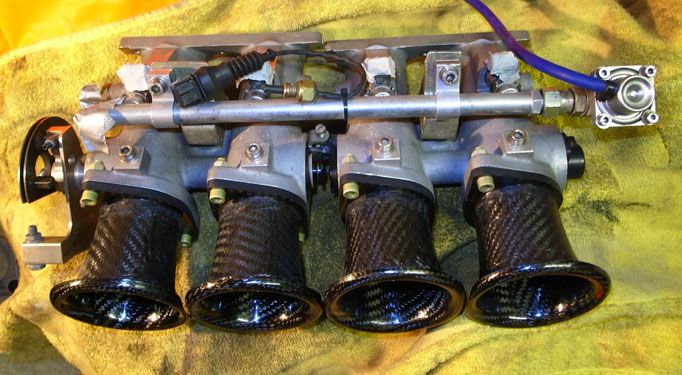
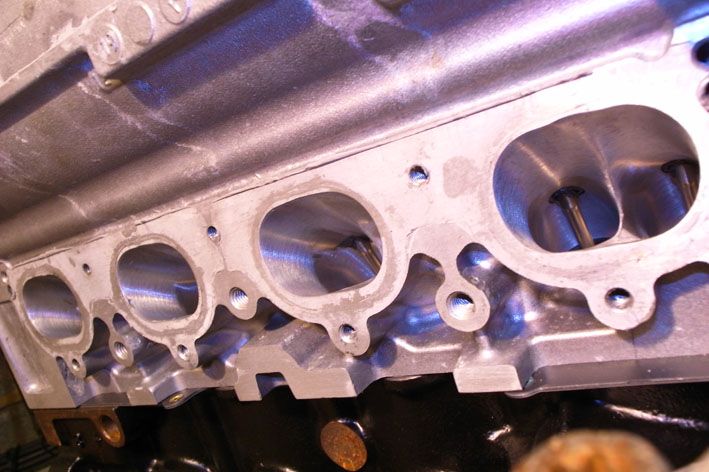
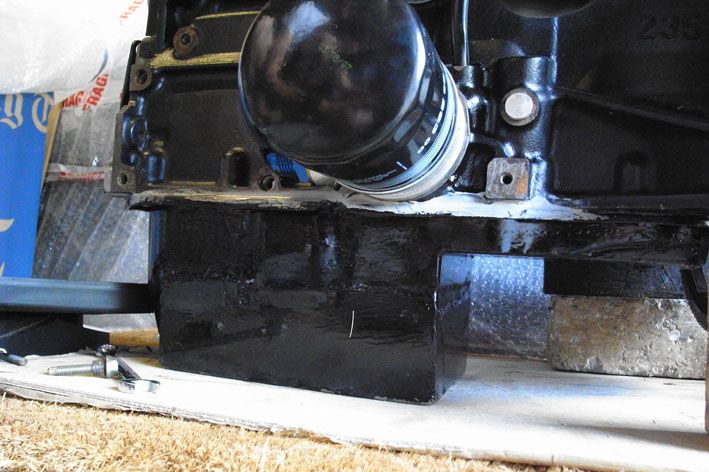
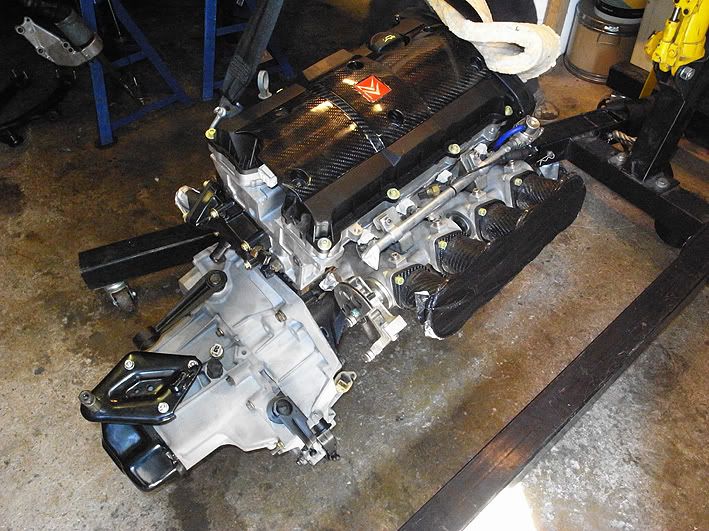
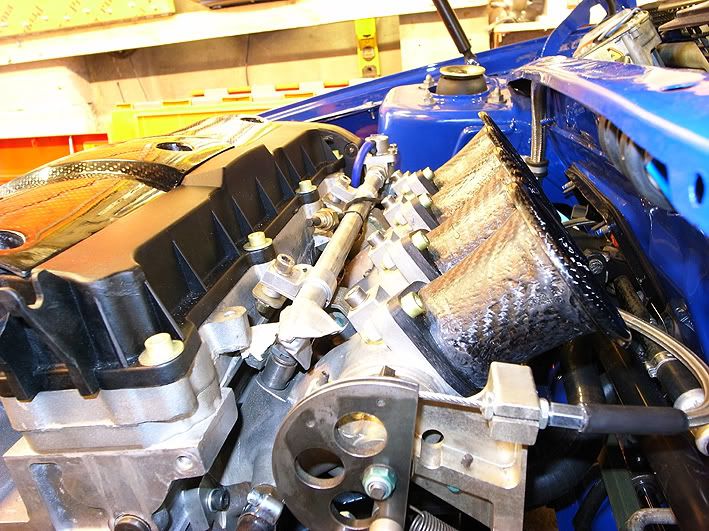
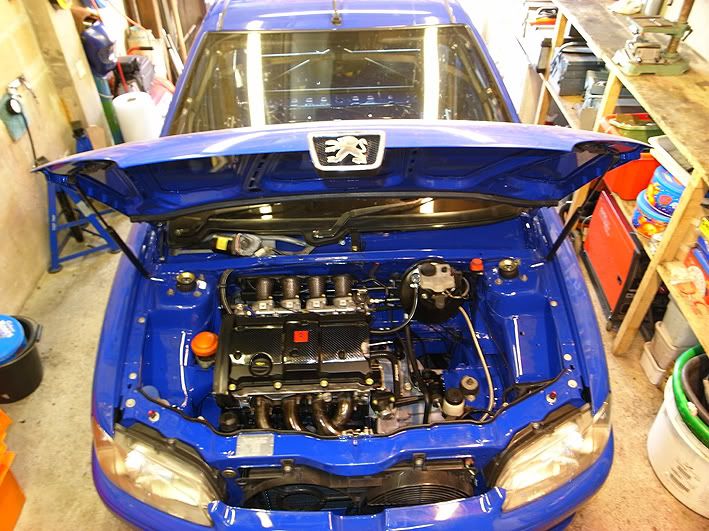
As i'd removed the inlet recently to get the Carbon Trumpets made by Streamline Carbon, I had to re-bond the bodies back onto the engine to seal them properly again. Below are a few pics of the engine with the intakes loosley bolted on, prior to the re-seal process, then pics of the bonding itself, then a pic of it all sorted.
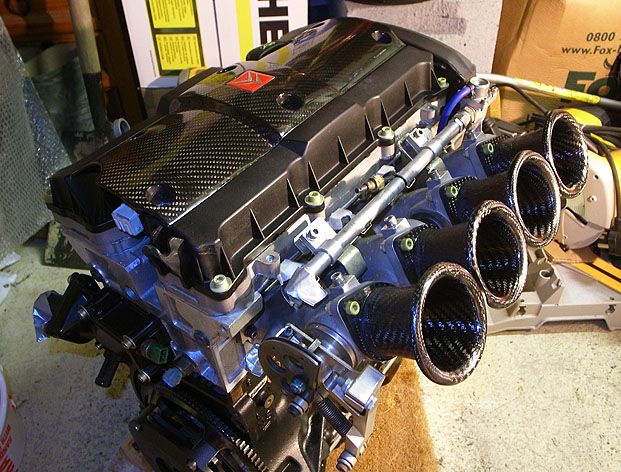
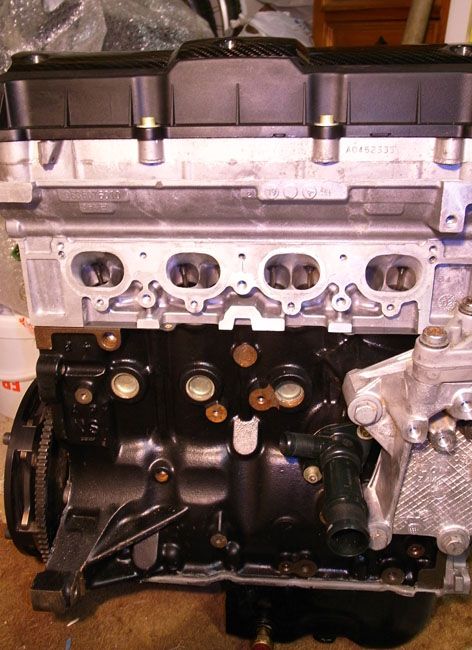
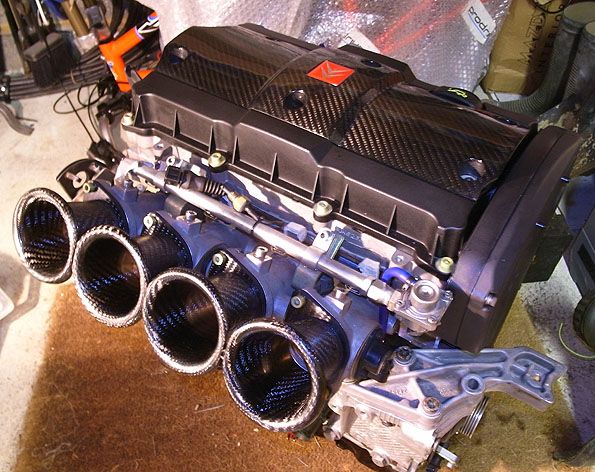
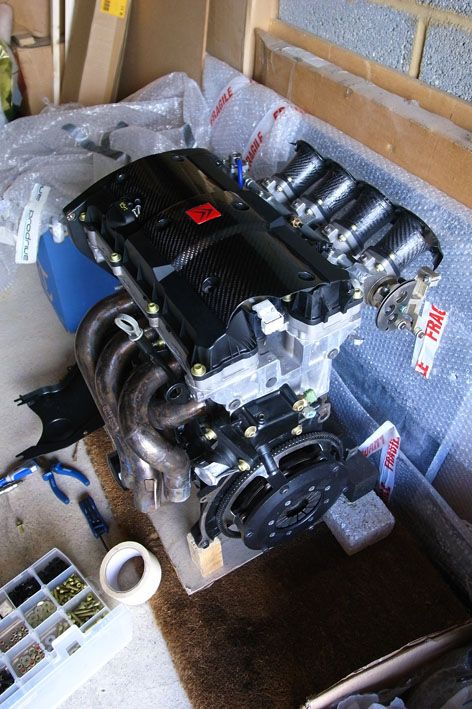
Here she is unveiled again (it's almost like a statue than a race engine!):
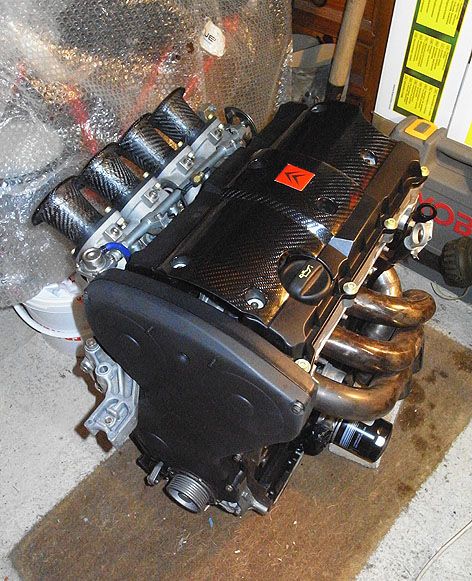
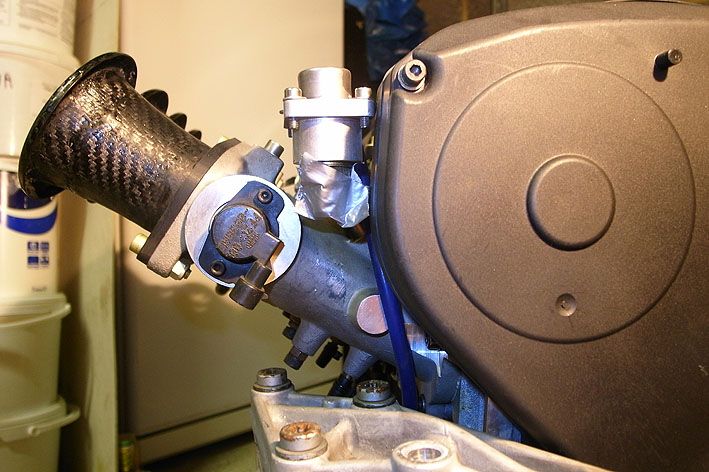
Angle of the Direct to head Pug Sport Throttle Bodies:
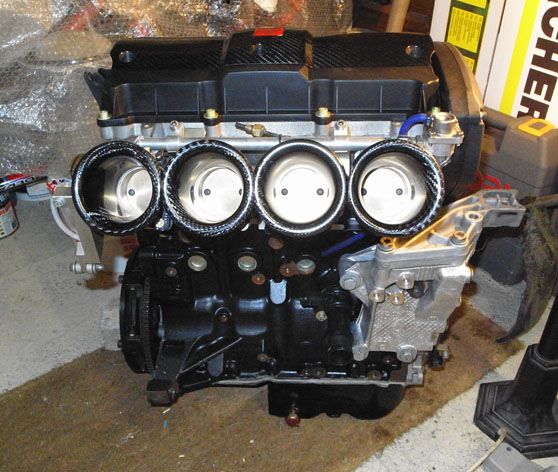
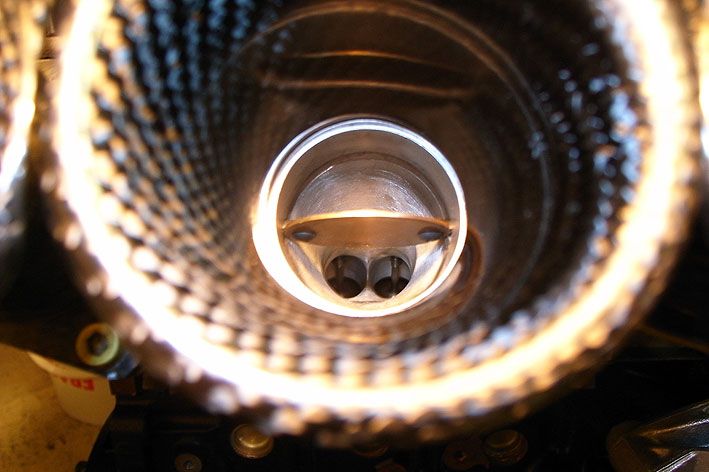
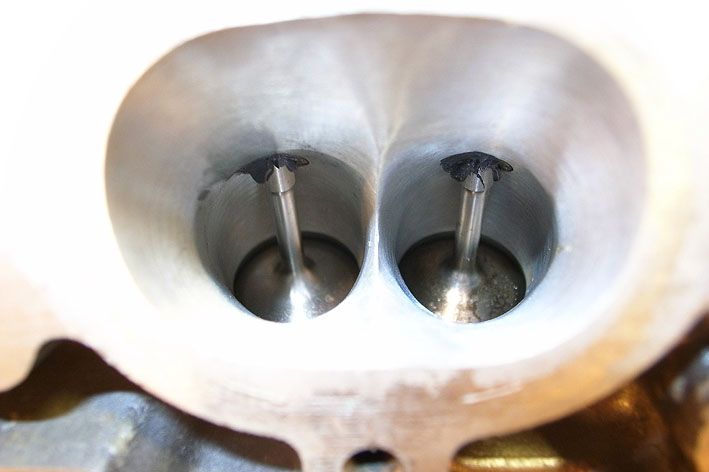
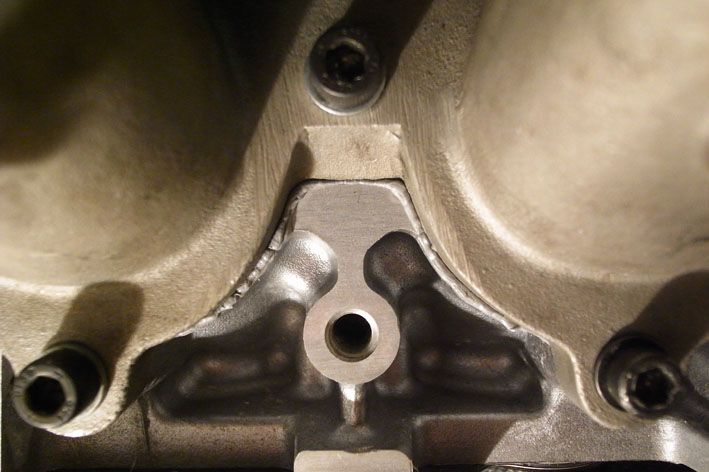
Close of up of port down intake:
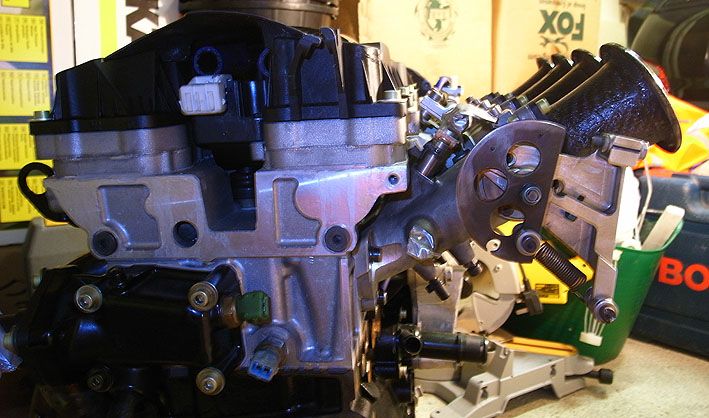
Intakes off:
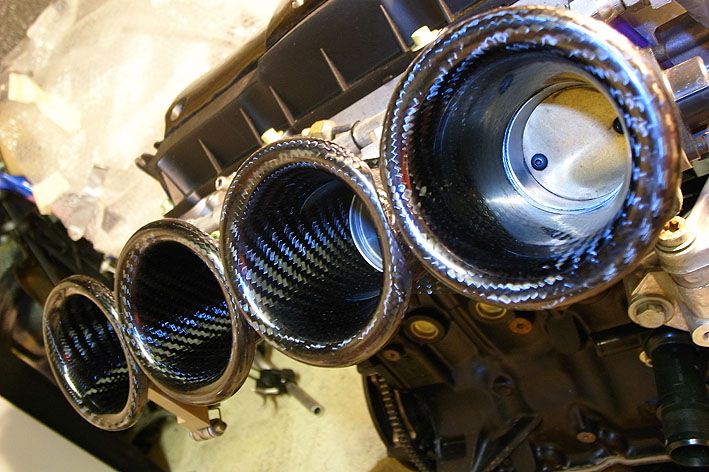
Close up of Porting:
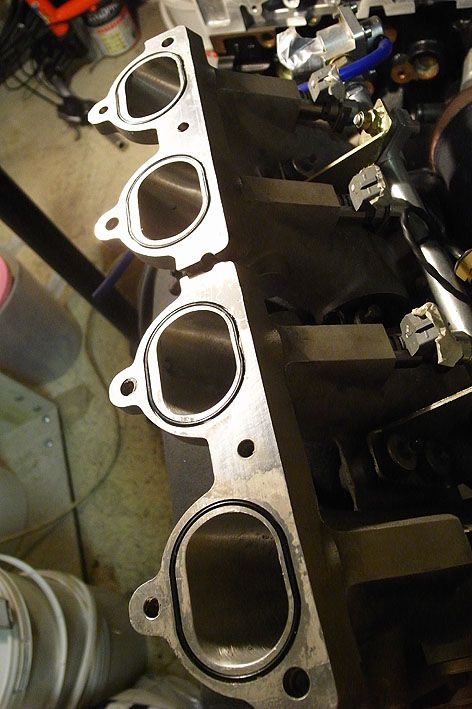
Work in progress:
Cleaned Face:
Cleaned face of intakes (Old sealant removed etc):
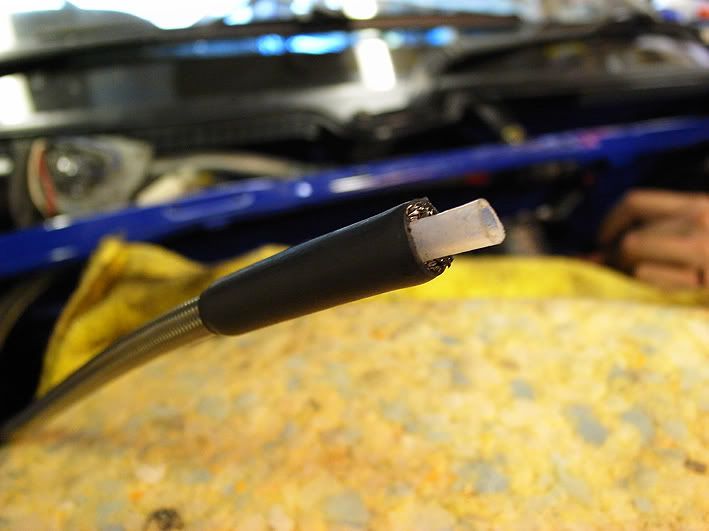
The Sealant:
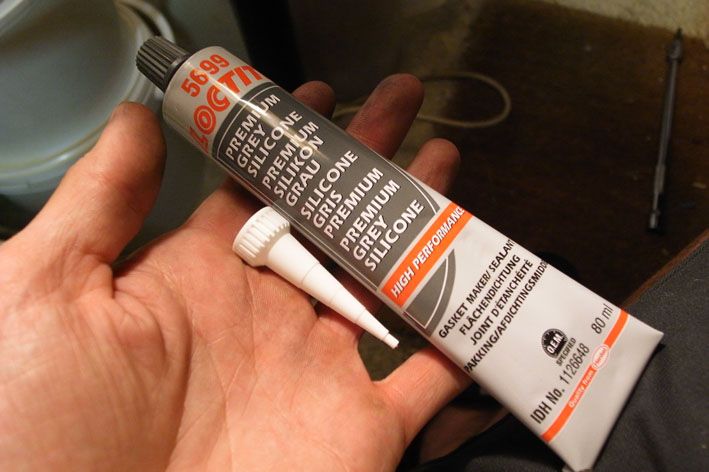
Apply to both surfaces carefully:
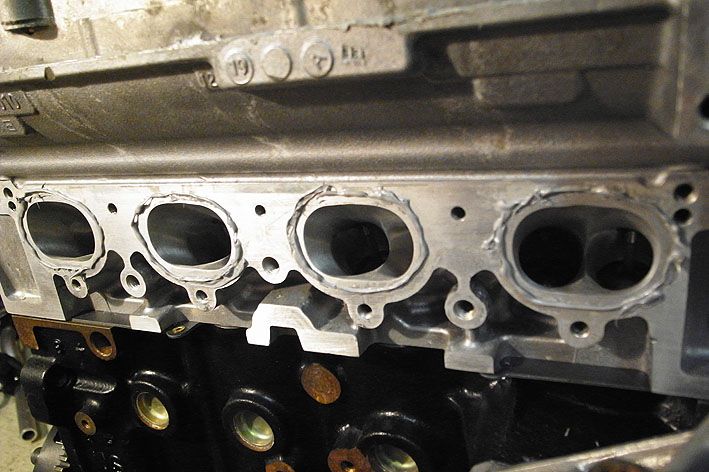
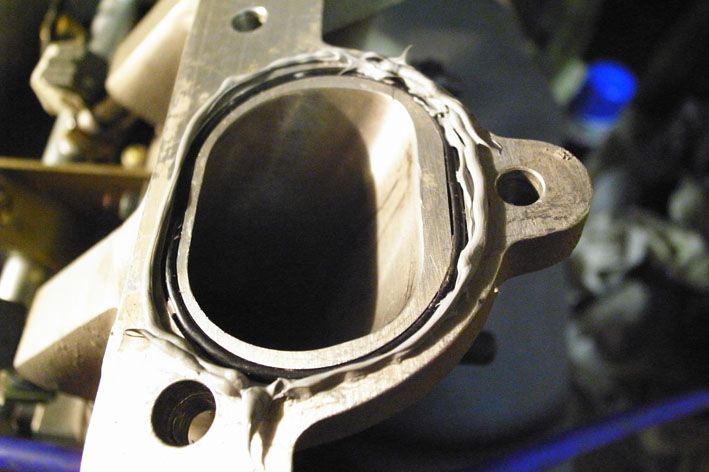
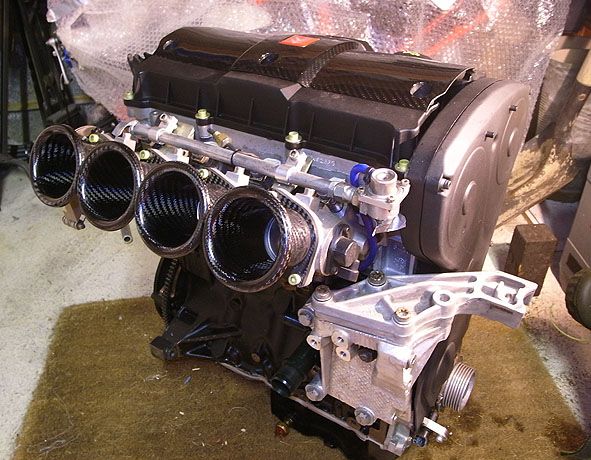
All bolted back on, and none seeped into the ports either!:
And all done:
Next thing is to collect the car, fit the engine and box (with the help of Hank), get Bobby (wire wizard) to get it running, then fit my seat, brakes and steering wheel to it and we should be good to go **Fingers crossed**
BUT, I thought i'd start a blog so things are up and running, as i started to do a few bits to the engine tonight and managed to get some good pics of the ports/angle of the pug sport bodies etc etc.
As most of you know I was building up a nice Citroen, but unfortunately I had to abandon this project and sell it on to a friend to finish as I just haven't had the time to commit to as of late - you can read the full thread here if you are interested:
My Little Citroen Machine
Anyway, that aside, here is my next project! A fully restored 106 Rallye with cage, coilovers, fully stripped to a shell and resprayed - basically a similar concept to the Saxo just less work to do! Pics of the car to follow at a later date (once I pick it up).
PART 1:
As i'd removed the inlet recently to get the Carbon Trumpets made by Streamline Carbon, I had to re-bond the bodies back onto the engine to seal them properly again. Below are a few pics of the engine with the intakes loosley bolted on, prior to the re-seal process, then pics of the bonding itself, then a pic of it all sorted.
Here she is unveiled again (it's almost like a statue than a race engine!):
Angle of the Direct to head Pug Sport Throttle Bodies:
Close of up of port down intake:
Intakes off:
Close up of Porting:
Work in progress:
Cleaned Face:
Cleaned face of intakes (Old sealant removed etc):
The Sealant:
Apply to both surfaces carefully:
All bolted back on, and none seeped into the ports either!:
And all done:
Next thing is to collect the car, fit the engine and box (with the help of Hank), get Bobby (wire wizard) to get it running, then fit my seat, brakes and steering wheel to it and we should be good to go **Fingers crossed**
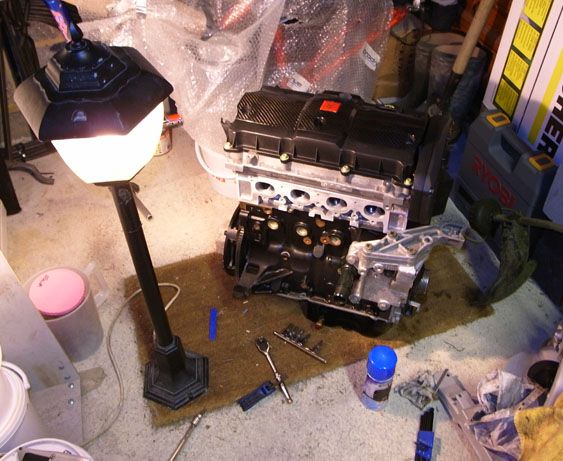
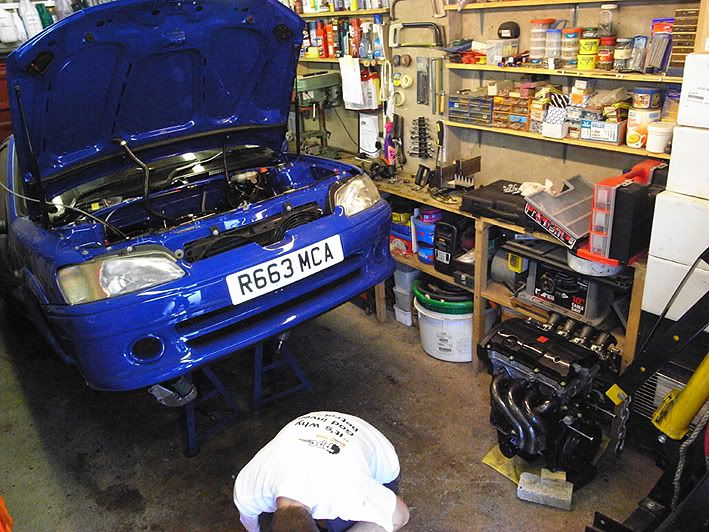
A few more pics from the weekend too - the Saxo is now out of the garage and i've moved the engine to the front so I can now see hat i'm doing when working on it!
Cam Pulleys:
Modified & baffled Sump:
All ready to be fitted now:
I am on holiday now for two weeks but once i'm back i'll get this updated again asap - looking forward to getting the Rallye now!
Lewis
Cam Pulleys:
Modified & baffled Sump:
All ready to be fitted now:
I am on holiday now for two weeks but once i'm back i'll get this updated again asap - looking forward to getting the Rallye now!
Lewis

Right i've had a chance to do a bit more of a proper write up regarding the engine installation so here it is:
I loaded up the van on saturday with all the parts - engine, gearbox, Grp N wishbones, Steering, and other various nuts and bolts etc and then got up pretty early on the Sunday to head to Hanks gaff in Newport Wales. Bit of a debacle en route as I didn't have enough dosh for the severn bridge (assumed it would be about £3 and it turned out to £15!) So anyway they let me through and I just had to pay by post instead...and if you don't pay within the week it goes up to £90!!! Robbin' b
 ds!
ds!
That aside, I got to Hanks about elevenish and we made a start straight away.
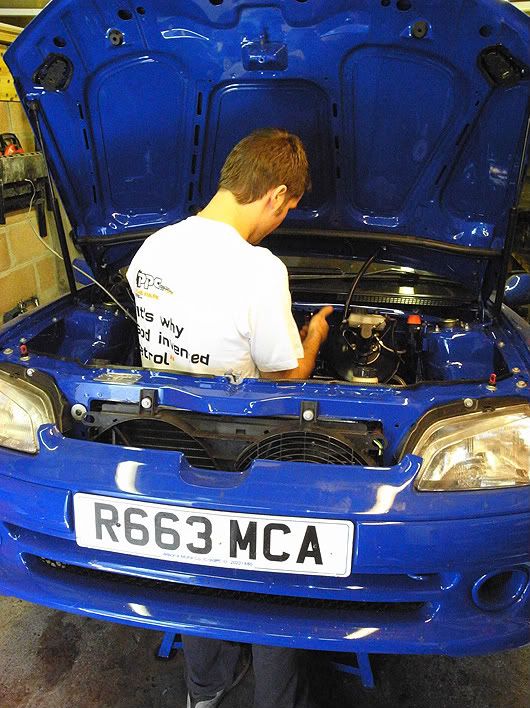
First Job was to check all the hoses in the bay were ready, and to remove the old Fuel pressure regulator that Hank had installed for his engine - mine already has one so we did away with that. 2nd pic shows Hank modeling the latest fashion in Wales, otherwise known as the '106 Rallye Frock'!
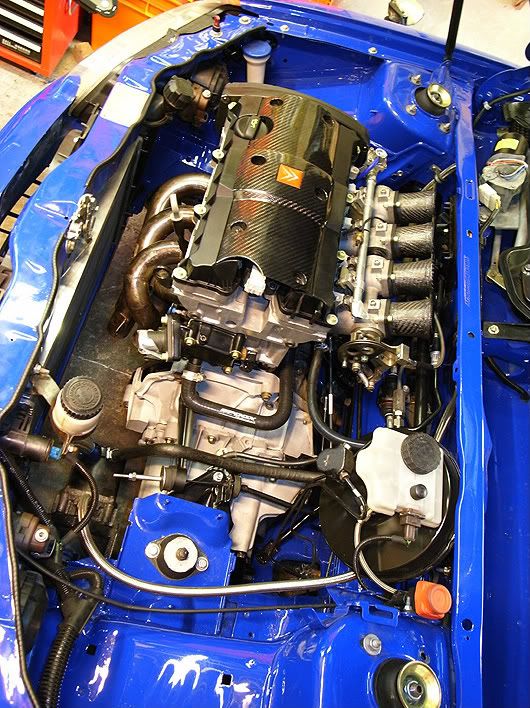
2nd job was to mate the engine to the Gearbox - this was done without too much trouble once we had lifted the engine up a little using the crane, and then located the input shaft into the clutch. We then bolted everything up and checked it was all tight etc:
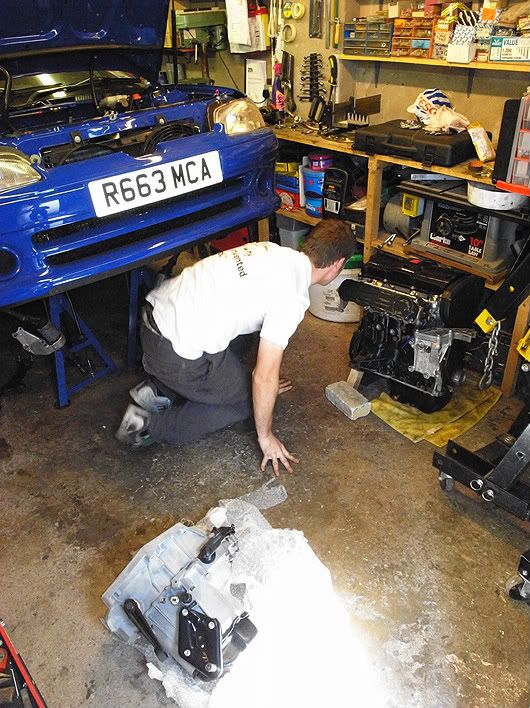
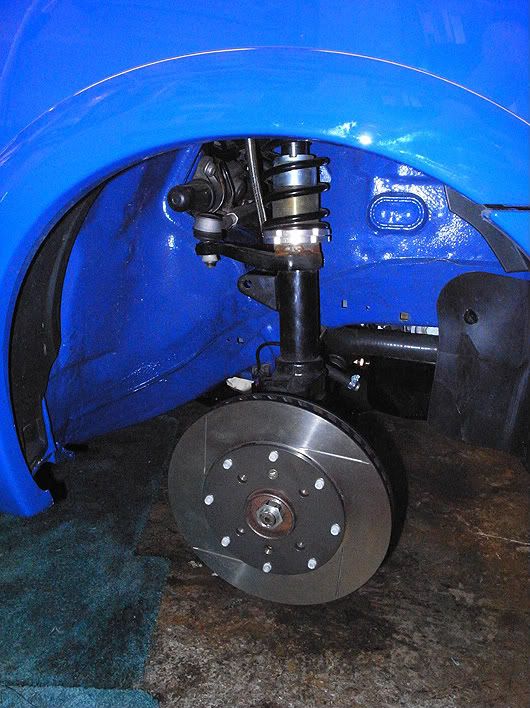
Next job was to try the brakes on the car to see if they fitted...needless to say they didn't, but the discs sure looked sexual regardless:
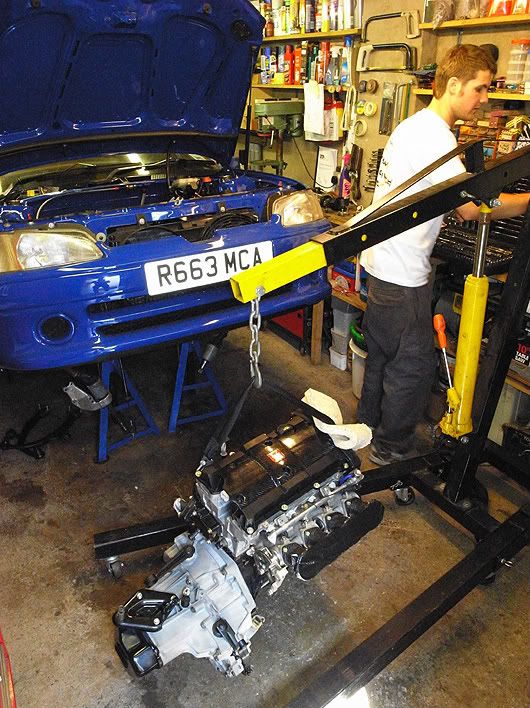
Next up was the actual engine fitment. ALthough the pics give the impresion that this was an easy task, while it was relatively straight forward there was a lot of heaving and fecking about to move it into postion while we lowered the car down onto it using the crane, all the while trying not to scratch or break anything (which we managed fine!)
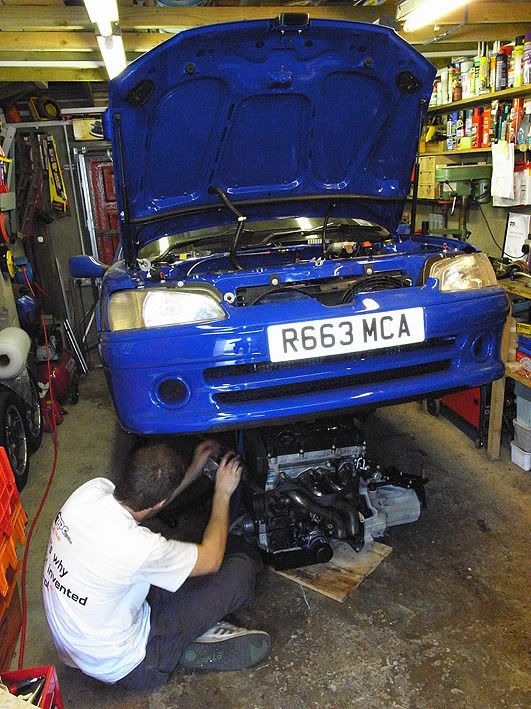
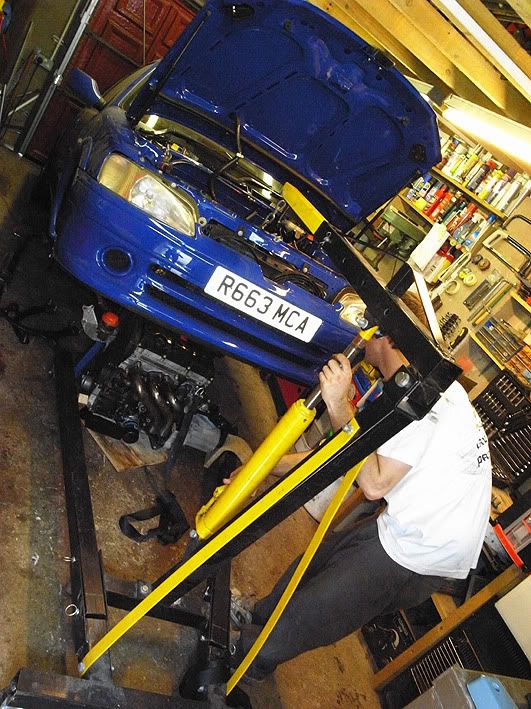
We then 'simply' lowered the car to the ground, and pulled the engine up into place using the crane, then onto then bolted it all in:
We then had to modify the throttle cable to fit, which we did. Meanwhile Hank discovered he had somehow implaed himself with some braided hose in his leg - stings like a bh!

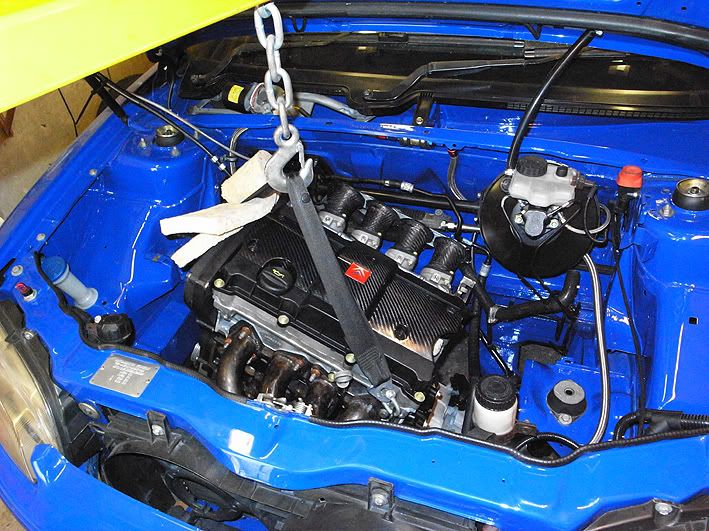
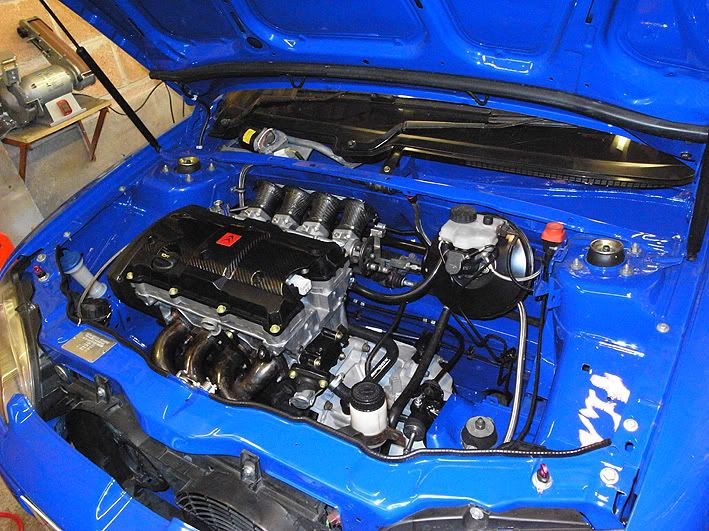
After that we connected pretty much everything else, fitted the wishbones, checked it all and we were done! All that was left to do was admire our handiwork.
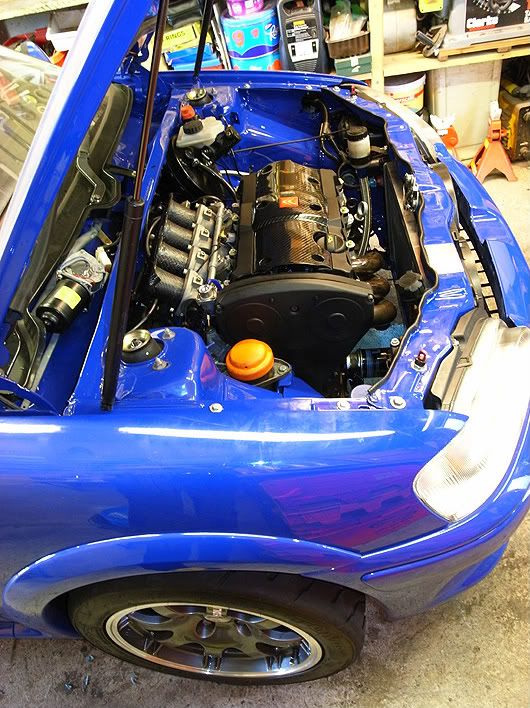
The car get's delivered to my house this weekend so more updates to come.
Watch this space!
I loaded up the van on saturday with all the parts - engine, gearbox, Grp N wishbones, Steering, and other various nuts and bolts etc and then got up pretty early on the Sunday to head to Hanks gaff in Newport Wales. Bit of a debacle en route as I didn't have enough dosh for the severn bridge (assumed it would be about £3 and it turned out to £15!)
So anyway they let me through and I just had to pay by post instead...and if you don't pay within the week it goes up to £90!!! Robbin' bds! That aside, I got to Hanks about elevenish and we made a start straight away.
First Job was to check all the hoses in the bay were ready, and to remove the old Fuel pressure regulator that Hank had installed for his engine - mine already has one so we did away with that. 2nd pic shows Hank modeling the latest fashion in Wales, otherwise known as the '106 Rallye Frock'!
2nd job was to mate the engine to the Gearbox - this was done without too much trouble once we had lifted the engine up a little using the crane, and then located the input shaft into the clutch. We then bolted everything up and checked it was all tight etc:
Next job was to try the brakes on the car to see if they fitted...needless to say they didn't, but the discs sure looked sexual regardless:
Next up was the actual engine fitment. ALthough the pics give the impresion that this was an easy task, while it was relatively straight forward there was a lot of heaving and fecking about to move it into postion while we lowered the car down onto it using the crane, all the while trying not to scratch or break anything (which we managed fine!)
We then 'simply' lowered the car to the ground, and pulled the engine up into place using the crane, then onto then bolted it all in:
We then had to modify the throttle cable to fit, which we did. Meanwhile Hank discovered he had somehow implaed himself with some braided hose in his leg - stings like a b
h! After that we connected pretty much everything else, fitted the wishbones, checked it all and we were done! All that was left to do was admire our handiwork.
The car get's delivered to my house this weekend so more updates to come.
Watch this space!
Edited by Track_Cit on Thursday 13th August 01:08
Defcon5 said:
Utterly brilliant. Will there be ebough room for a filter on top of the TBs?
It is a bit tight but you can get an air box in there. I was looking at doing the same to my old Rallye and we were thinking of cutting the scuttle and bonnet back a bit and having a cold air feed and air box coming in through the back of the engine bay so you had better flow into the trumpets but it works fine either way.Right, a few updates tonight:
I have done a more comprehensive list of work but i haven't had time to do a proper write up, and my laptop is dead so currently using my g/f's cumbersome pc...anyways, that aside, here are some snaps and a list of work done so far:
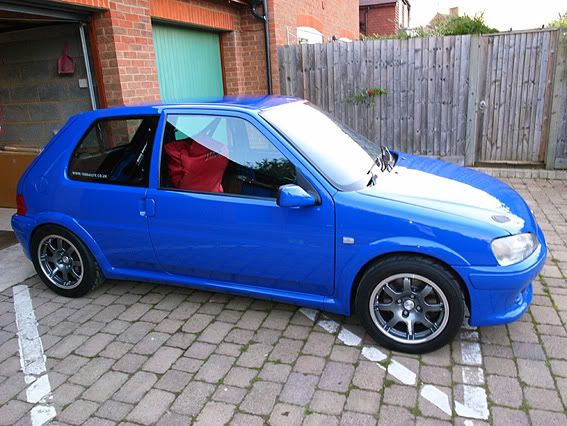
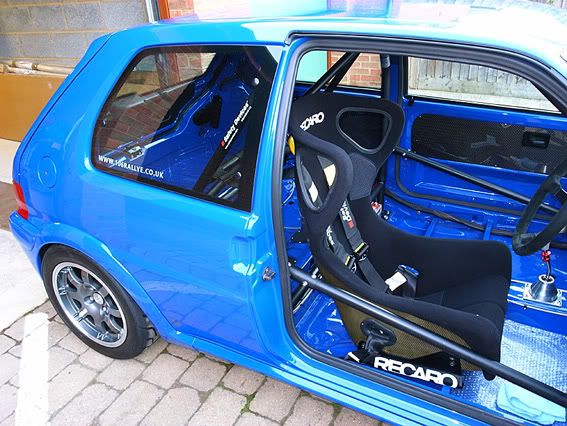
All bolts changed for lightweight aluminum one's where safe to do so, otherwise stainless steel or black high tensile socket head bolts were used. I fitted the seat, steering wheel, harnesses, and quick shift, and roof ariel blank too, and swapped all the stainless bolts in the cabin for back one's to tone it down a little. Also removed the map pockets as I don't really like them, plus the flock was peeling too! I also washed it so it's like new again now. I cannot emphasise how pleased i am with the car - pics do not do it justice, it's absolutely stunning in the flesh! Also swapped the jubilee clips for proper strong motorsport items - pics to follow. Spent two days working on it so far and got most of the small jobs done that I had in mind.
Here it is on it's arrival:
I washed it and did some work that night, now onto the next day:
Coming out of 'bed' for the evenings work:
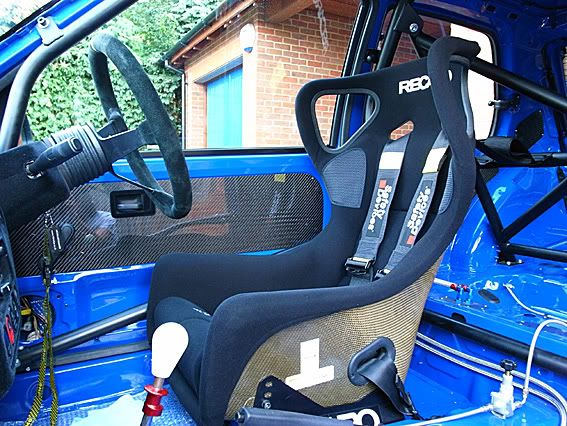
Seat Fitted:
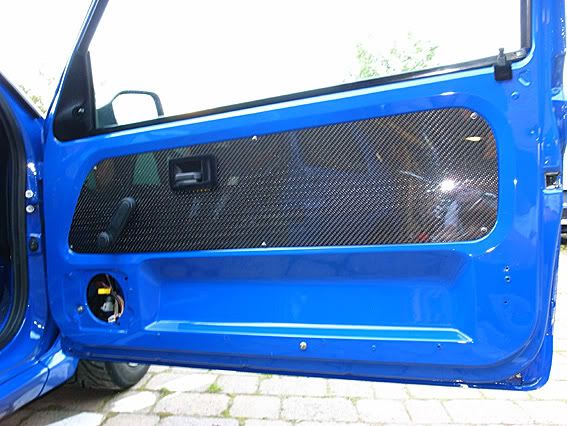
Doorcards with black bolts & removed map pockets:
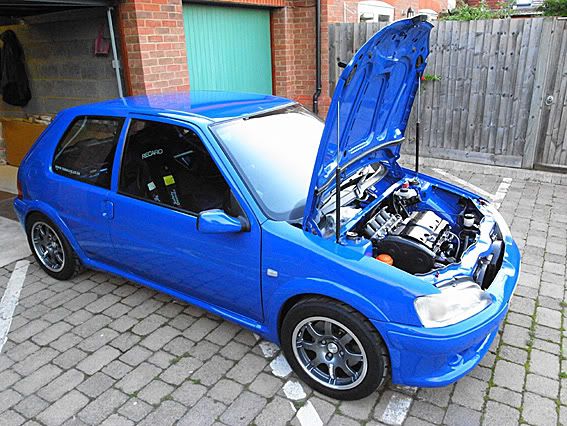
Overall quick snap:
Like I said i will do a proper write up when i get a chance!!
Things to do still:
Lewis
I have done a more comprehensive list of work but i haven't had time to do a proper write up, and my laptop is dead so currently using my g/f's cumbersome pc...anyways, that aside, here are some snaps and a list of work done so far:
All bolts changed for lightweight aluminum one's where safe to do so, otherwise stainless steel or black high tensile socket head bolts were used. I fitted the seat, steering wheel, harnesses, and quick shift, and roof ariel blank too, and swapped all the stainless bolts in the cabin for back one's to tone it down a little. Also removed the map pockets as I don't really like them, plus the flock was peeling too! I also washed it so it's like new again now. I cannot emphasise how pleased i am with the car - pics do not do it justice, it's absolutely stunning in the flesh! Also swapped the jubilee clips for proper strong motorsport items - pics to follow. Spent two days working on it so far and got most of the small jobs done that I had in mind.
Here it is on it's arrival:
I washed it and did some work that night, now onto the next day:
Coming out of 'bed' for the evenings work:
Seat Fitted:
Doorcards with black bolts & removed map pockets:
Overall quick snap:
Like I said i will do a proper write up when i get a chance!!
Things to do still:
- Buy new alternator
- Get exhaust system made
- Fit brakes/sort brakes out
- Get wiring loom done
Lewis
Edited by Track_Cit on Tuesday 18th August 00:27
Edited by Track_Cit on Tuesday 18th August 18:13
Gassing Station | Readers' Cars | Top of Page | What's New | My Stuff