Discussion


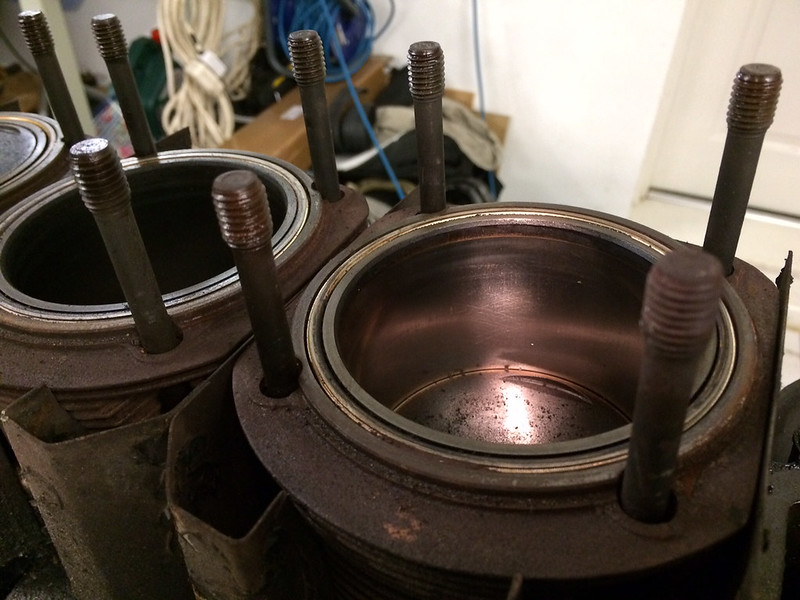
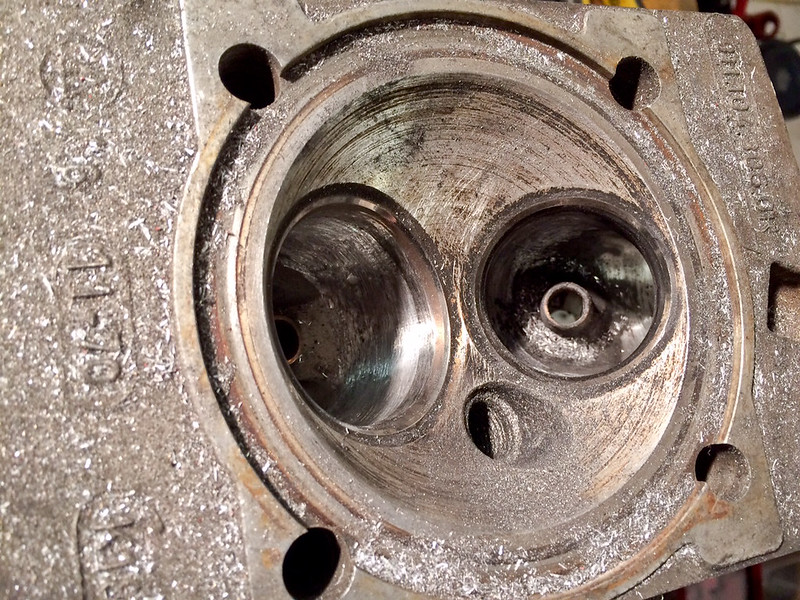
Nothing scary so far on the LH bank, hone marks still evident, no obvious lip (save the carbon build up)
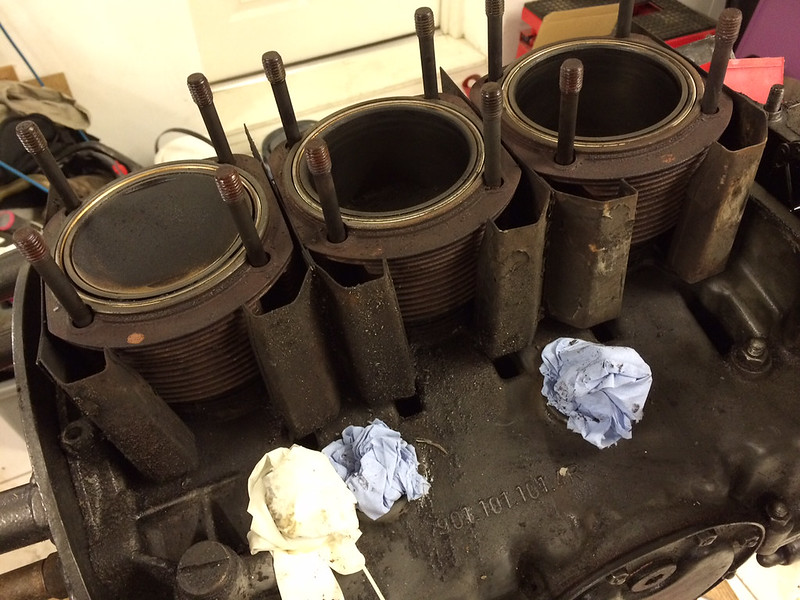
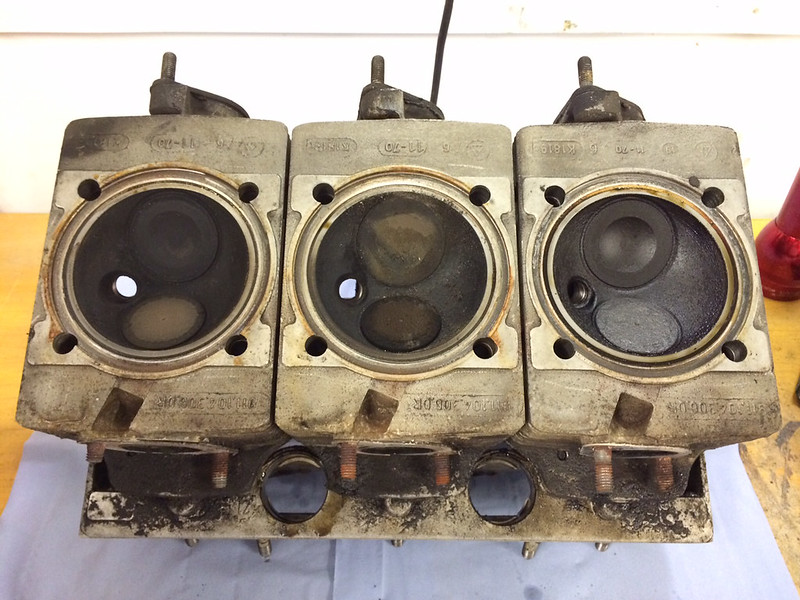
Some heads with more carbon than others, which correlates to the state of the plugs.
Heads and cambox are coming apart tomorrow so I'll see how much wear is evident in there. I know at least one cam lobe is pitted.
Some heads with more carbon than others, which correlates to the state of the plugs.
Heads and cambox are coming apart tomorrow so I'll see how much wear is evident in there. I know at least one cam lobe is pitted.
After much pointless debate I decided to open it properly this afternoon.
'Where there is doubt, there is no doubt' should be the moto for this one.
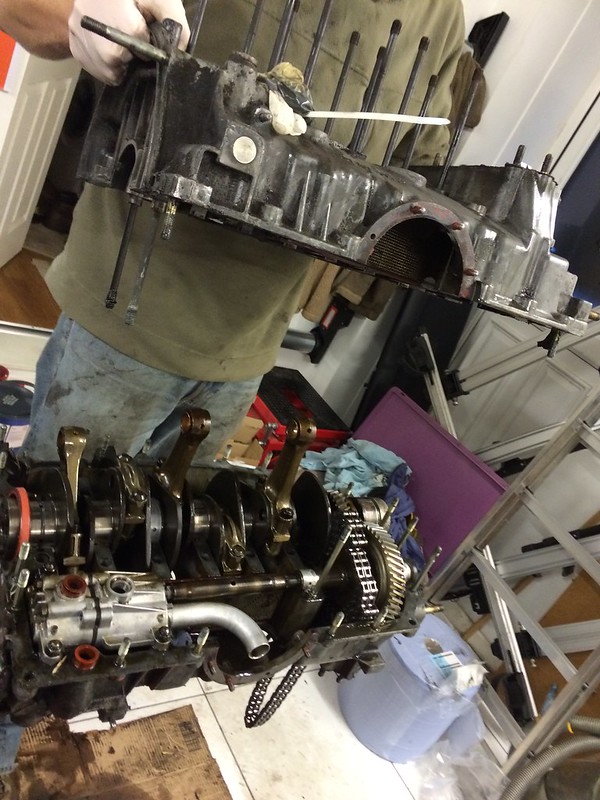
It turns out this was a good call:
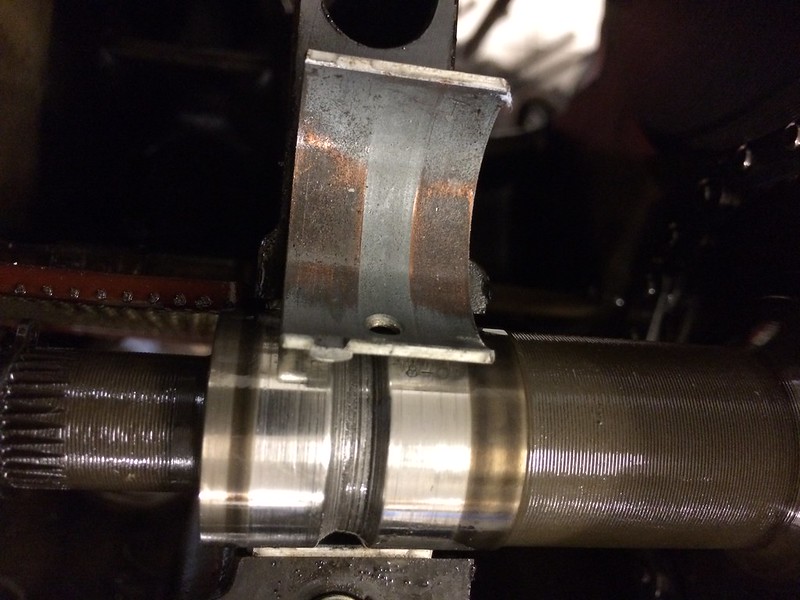
Worn main bearings - Although just hanging in there
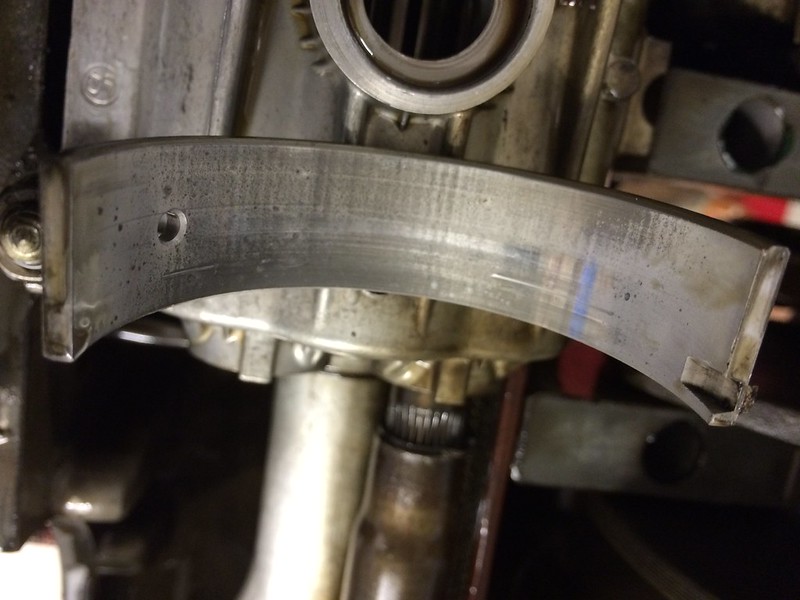
Completely shot intermediate shaft bearing:
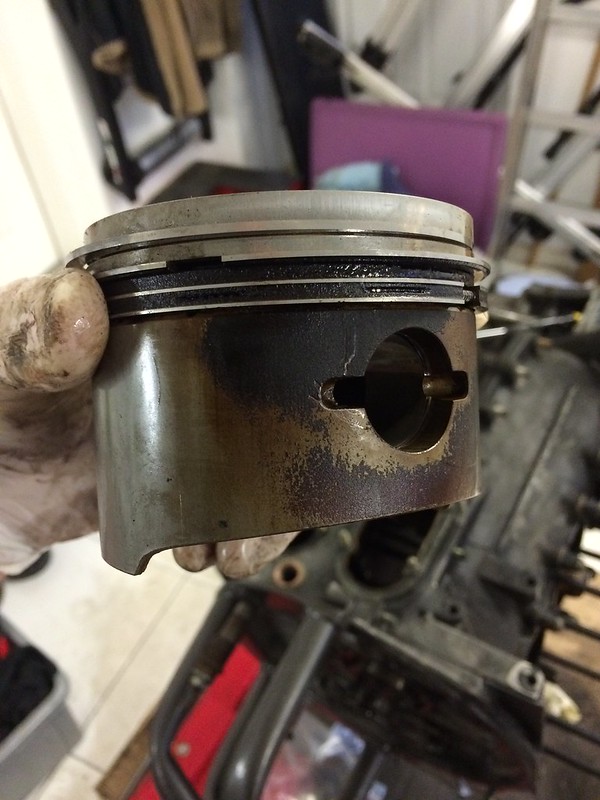
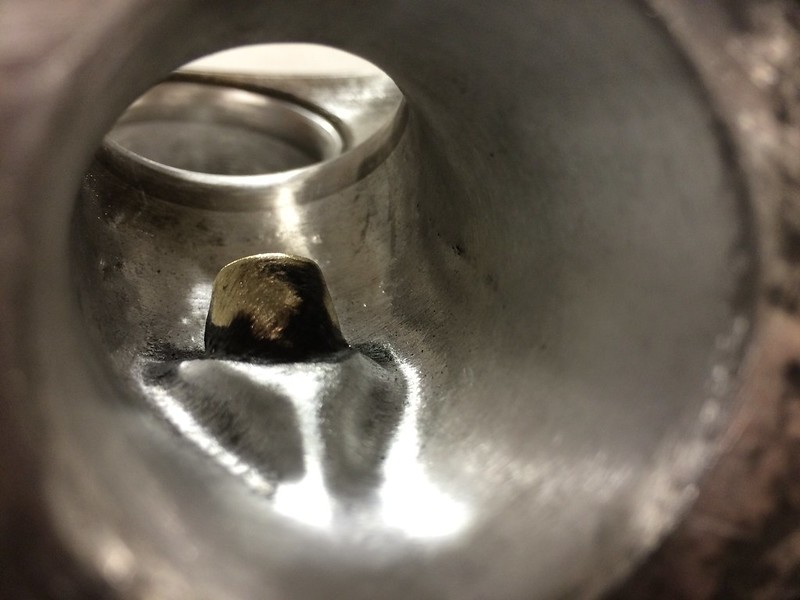
Not entirely certain you should have carbon build up on the side of the piston... Two are like this.
This all trebles the cost of the rebuild (as is the norm for these things), but all good in the long term.
Stopped now for a beer after all that so crank out and rods off will have to wait for tomorrow.
'Where there is doubt, there is no doubt' should be the moto for this one.
It turns out this was a good call:
Worn main bearings - Although just hanging in there
Completely shot intermediate shaft bearing:
Not entirely certain you should have carbon build up on the side of the piston... Two are like this.
This all trebles the cost of the rebuild (as is the norm for these things), but all good in the long term.
Stopped now for a beer after all that so crank out and rods off will have to wait for tomorrow.

 Keep the updates coming please!
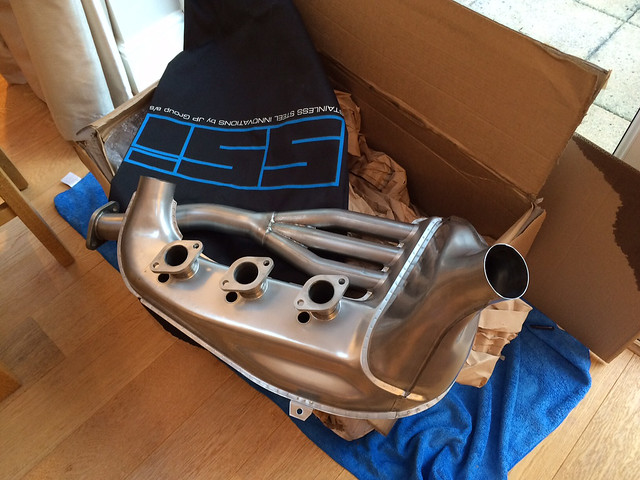
Evening, The exhausts have turned up, a few months early but at least I have time to recover from that expenditure...
I've had all the cylinders measured this week and luckily they all turned out to be in spec. A little surprising considering the wear elsewhere but I'll take that particular cost saving quite gladly. So a hone and new rings on the pistons should be enough.
I've pulled all the exhaust studs out now and need to finish helicoiling the remains, then it's time for cleaning up, bead blasting and thinking about the really big parts bill to put it back together...
Small update as progress is slow due to lack of time in the garage.
I've few hours spent enthusiastically de-coking the heads. With a die grinder.
I'll get them blasted to clean the rest of the carbon off and then look at replacing the valve guides and reaming to size. Unfortunately it looks like all the valves are worn well outside spec so that adds another couple of pounds to the bill. Luckily the exhaust valves aren't sodium filled or anything as they would be expensive... Oh no wait. They are!
Basic material removal and seat blending with the carbide burr (be careful... it's like a hot knife through melted butter on aluminium!)
Finished with fabric backed sandpaper mounted in the end of a slotted bolt. First head done.
I'm not going for polished as it A: Won't make the slightest difference and B: Can't be arsed!
Probably worth a whole +0.01hp...but it makes you feel like you tried anyway.
Onto the cylinders and the abrasive bunch of grapes has turned up:
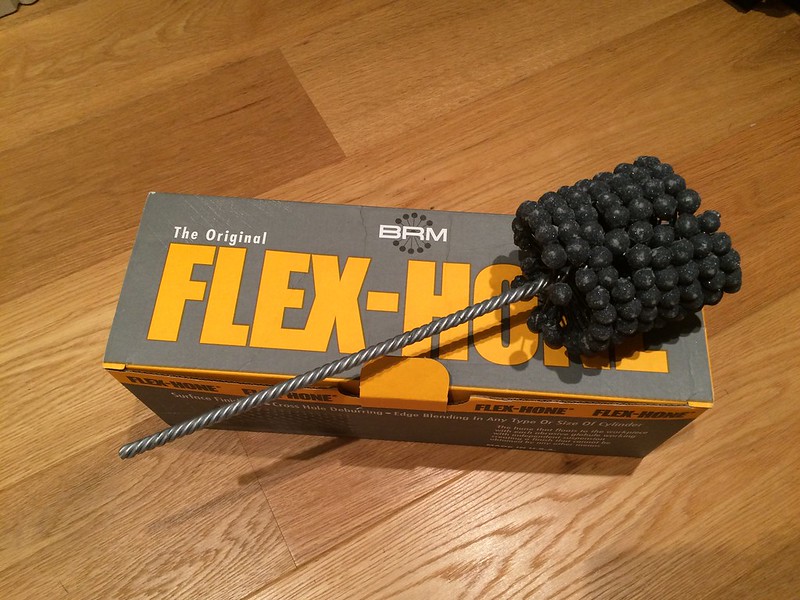
So along with finishing the porting/cleaning another evening of fun awaits learning how to perfect the 30deg cross hatch without making the cylinders 2mm larger...
I've few hours spent enthusiastically de-coking the heads. With a die grinder.
I'll get them blasted to clean the rest of the carbon off and then look at replacing the valve guides and reaming to size. Unfortunately it looks like all the valves are worn well outside spec so that adds another couple of pounds to the bill. Luckily the exhaust valves aren't sodium filled or anything as they would be expensive... Oh no wait. They are!
Basic material removal and seat blending with the carbide burr (be careful... it's like a hot knife through melted butter on aluminium!)
Finished with fabric backed sandpaper mounted in the end of a slotted bolt. First head done.
I'm not going for polished as it A: Won't make the slightest difference and B: Can't be arsed!
Probably worth a whole +0.01hp...but it makes you feel like you tried anyway.
Onto the cylinders and the abrasive bunch of grapes has turned up:
So along with finishing the porting/cleaning another evening of fun awaits learning how to perfect the 30deg cross hatch without making the cylinders 2mm larger...
aww999 said:
Keep up the good work Gary. What did you mean by "sandpaper in a slotted bolt" - is that like a make-you-own flapper disc or cartridge roll?
It's make your own cartridge roll, a M6 bolt with a hacksaw slot down the middle and the head cut off Longer lengths of sandpaper will self centre within the port and are good for the main round areas. Shorter lengths can be used with a bit of pressure for the bits around the valve guides and around the corners. As it wears you tear the end off and start again. I used 60 and 120 grit. 120 spun at a good speed gives quite a polish, certainly good enough for me.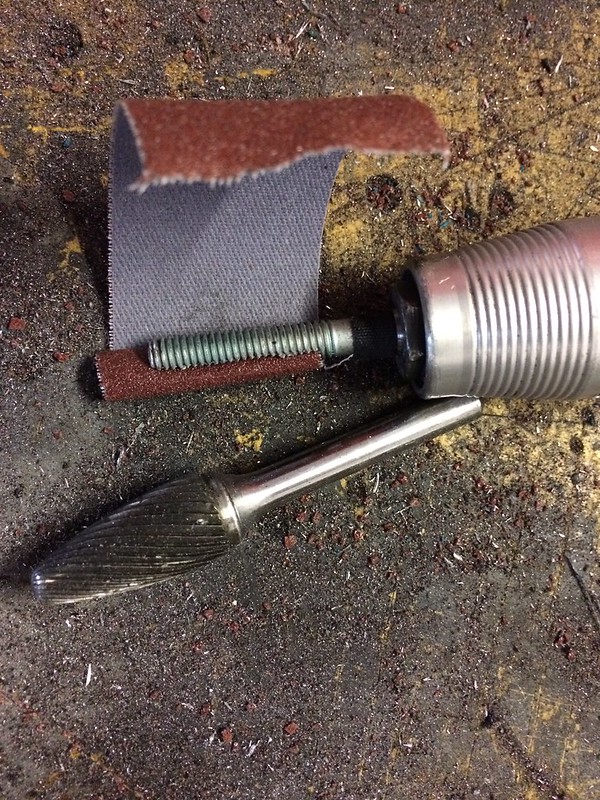
edit: I really must clean my workbench...
The split nut and emery paper is a variant on an old engineers' trick I learned donkey's years ago as a kid. Back them I used a big chunky split pin and emery paper, same game. It's a case of using what you have.
Nice work, BTW. Hopefully by pulling it to bits now you will replace the wearing bits without needing to regrind cranks and the like.
Nice work, BTW. Hopefully by pulling it to bits now you will replace the wearing bits without needing to regrind cranks and the like.
iSore said:
Is it a 2.4 unit? From memory, the T 2.4 had a really low compression (8 to 1) so if you're buying new pistons, it might be worth going for S ones that were 8.5:1 or others that will bump it up to 9:1 to give it a bit more Vim.
It is the low compression T. The barrels and pistons aren't worn beyond saving (hone & new rings) so for budget reasons it will be going back together as it is. Having said that I haven't worked out the plan for rescuing the worn cams at the moment. If I have to buy new then I can't see me buying a 'T' cam grind, it will be an 'E' which would work really nicely with a higher compression ratio... So... Pistons are around £700.As with all engine tuning it's a slippery slope once you start.
battered said:
The split nut and emery paper is a variant on an old engineers' trick I learned donkey's years ago as a kid. Back them I used a big chunky split pin and emery paper, same game. It's a case of using what you have.
Nice work, BTW. Hopefully by pulling it to bits now you will replace the wearing bits without needing to regrind cranks and the like.
The split bolt method I picked up as an apprentice many years back. Buying the premade cartridge rolls seems a very expensive way of doing the same job!Nice work, BTW. Hopefully by pulling it to bits now you will replace the wearing bits without needing to regrind cranks and the like.
The crank all looks good, so yes I'd agree just in time
gary71 said:
Not entirely certain you should have carbon build up on the side of the piston... Two are like this.
Did both the affected pistons have gummed up oil control rings?I guess they are two piece oil control rings, The Opel six bangers that I am fond of have a similar two piece Oil control ring and they easily clog up - I fitted three piece Goetz oil control rings and last time I ripped it apart it certainly showed no signs of do the same again
Still loving your work
Gassing Station | Readers' Cars | Top of Page | What's New | My Stuff