WRX RA powered VW 1303 beetle cabrio with a bit of Porsche
Discussion


Bit overdue an update!
Plenty of stone chip was sprayed on underneath the wings and then high build primer, final colour and clear before letting the paint settle for a week or so and then refitting them.
I actually got some stonechip overspray on the air damn so ended up giving that a full coat along with satin black paint as it could do with the protection anyway.
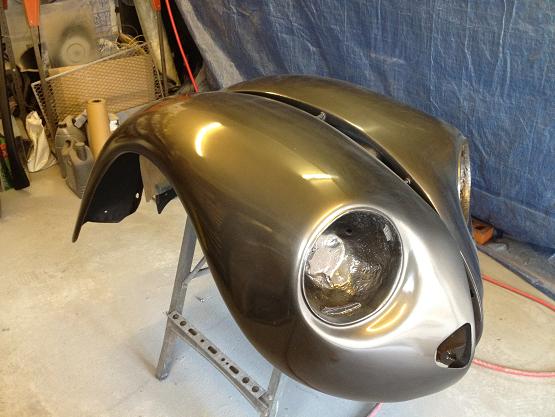
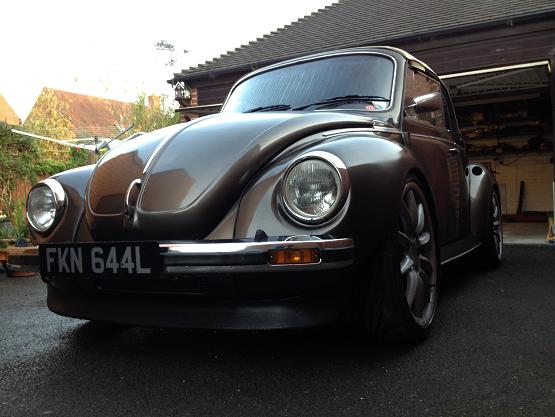
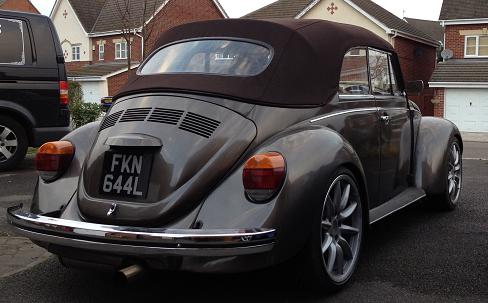
All re-fitted!
I don't think the car looks noticeably different but with the wheel spacers and re-done steering rack with adjustable end stops I now have a lot more steering lock as well as a much more predictable and nice feeling balance to the car.There was far too much negative scrub radius with everything forced inboard to fit under stock width wings.
Another mod I've done is switch to smaller 5/8" brake master cylinders along with a calculated balance bar position and this has made the brakes MUCH more confidence inspiring with less pedal effort and a bit more travel!
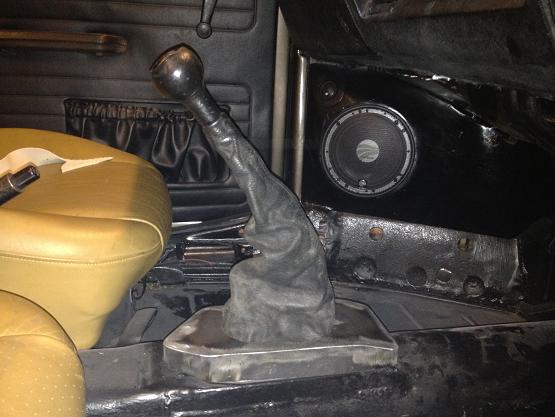
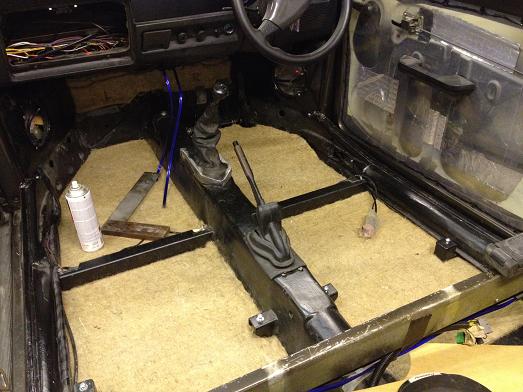
I made up this metal cover to cover the shifter base and allow trimming, still not sure how I will do it but it's a start.
I've been putting this off for a while... The old vinyl roof shrunk whilst in storage folded up so when I came to close it on the car the stress broke the wooden bow over the rear window. This meant a new bow and roof!
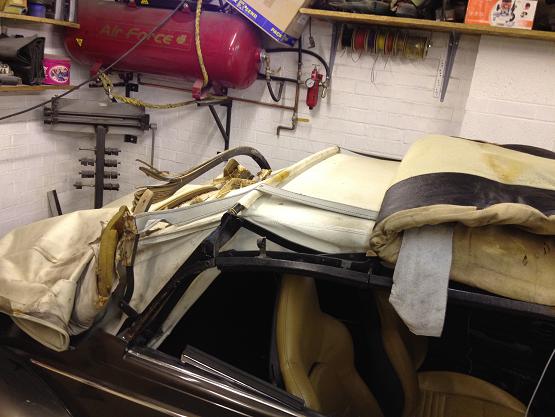
Bow from the original tooling was sourced from Germany along with a new roof outer skin, in Sonnenland (similar to mohair) this time around and a change of colour. A fair amount of repair of sound deadening material as well as repainting sections of the roof frame were done at the same time.
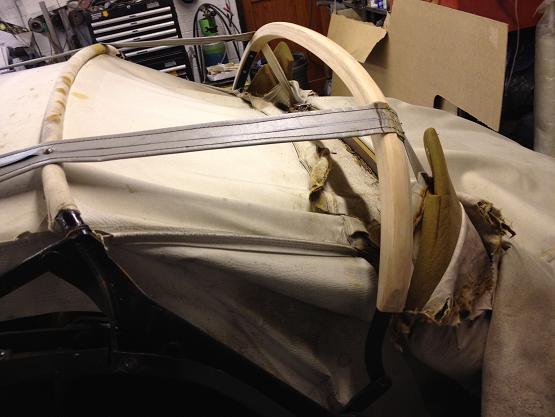
Here's the roof ready for it's new outer skin. The foam strip over the bow is to cover up the staples holding fabric to the bow and stop wear on the outer hood.
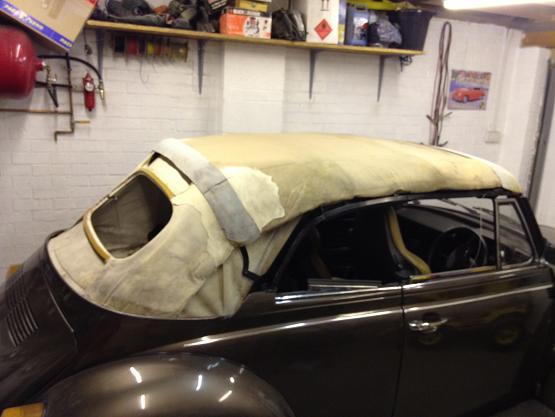
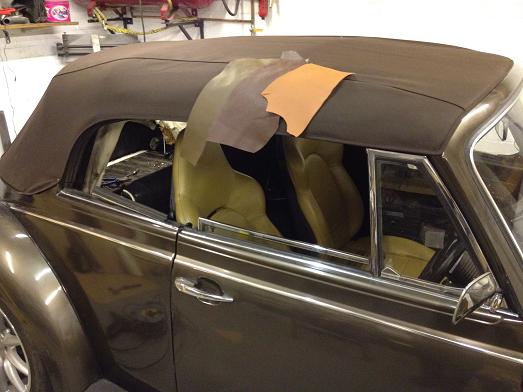
Almost there! I'm letting it all settle for a few days now before I get the knife out and cut the rear window aperture out. All seals and wires are refitted in this picture, just a couple of screws to fit at the base of the C pillars to take up any final slack in the material.
Plenty of stone chip was sprayed on underneath the wings and then high build primer, final colour and clear before letting the paint settle for a week or so and then refitting them.
I actually got some stonechip overspray on the air damn so ended up giving that a full coat along with satin black paint as it could do with the protection anyway.
All re-fitted!
I don't think the car looks noticeably different but with the wheel spacers and re-done steering rack with adjustable end stops I now have a lot more steering lock as well as a much more predictable and nice feeling balance to the car.There was far too much negative scrub radius with everything forced inboard to fit under stock width wings.
Another mod I've done is switch to smaller 5/8" brake master cylinders along with a calculated balance bar position and this has made the brakes MUCH more confidence inspiring with less pedal effort and a bit more travel!
I made up this metal cover to cover the shifter base and allow trimming, still not sure how I will do it but it's a start.
I've been putting this off for a while... The old vinyl roof shrunk whilst in storage folded up so when I came to close it on the car the stress broke the wooden bow over the rear window. This meant a new bow and roof!
Bow from the original tooling was sourced from Germany along with a new roof outer skin, in Sonnenland (similar to mohair) this time around and a change of colour. A fair amount of repair of sound deadening material as well as repainting sections of the roof frame were done at the same time.
Here's the roof ready for it's new outer skin. The foam strip over the bow is to cover up the staples holding fabric to the bow and stop wear on the outer hood.
Almost there! I'm letting it all settle for a few days now before I get the knife out and cut the rear window aperture out. All seals and wires are refitted in this picture, just a couple of screws to fit at the base of the C pillars to take up any final slack in the material.
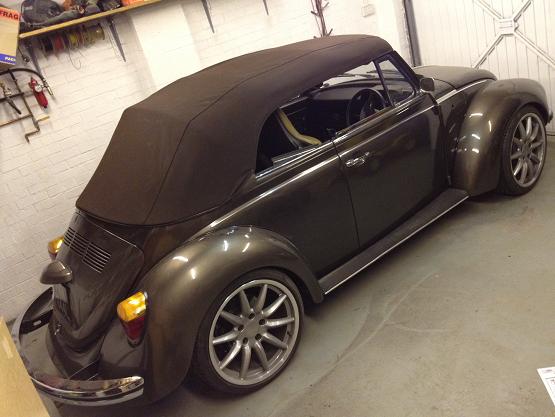
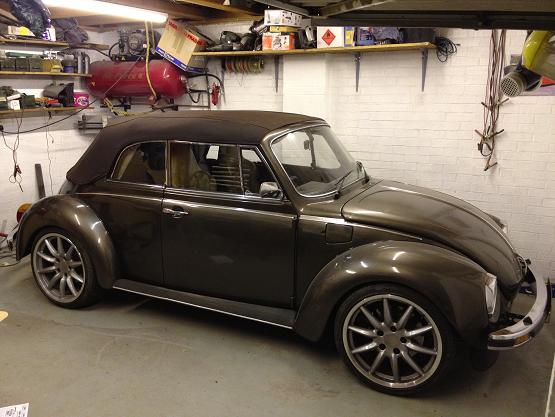
Roof just about done now...
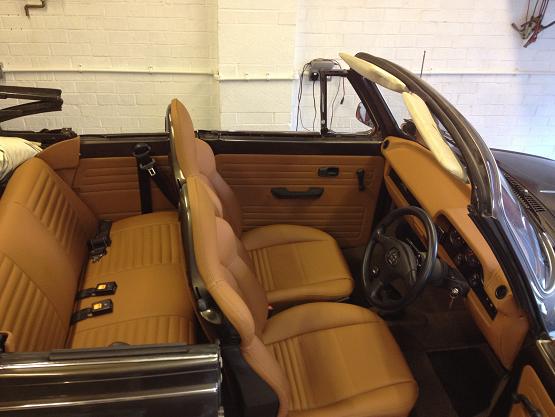
I'm going for the light tan colour leather on the right for the interior, I was originally going to go for a cocoa colour but having thought about it I think it would be too much of the same and some contrast is called for.
Seat backs are a bit marked and as the seats will soon be dismantled for trim now is the perfect time to colour-code the backs to body colour.
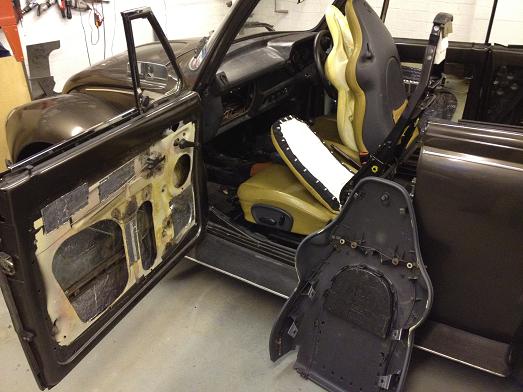
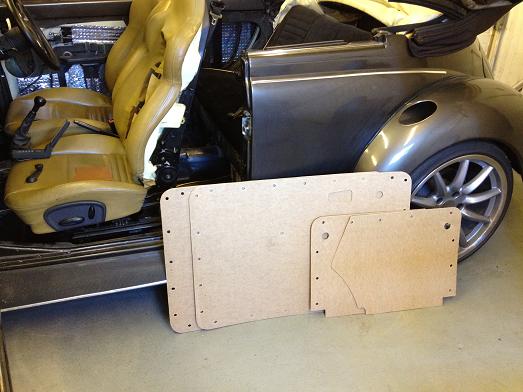
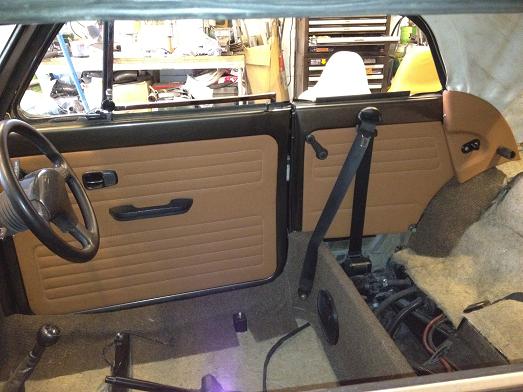
The old trim panels were moisture damaged so I've made up some new ones. I will also be making some new moisture barriers to keep these ones dry!! You can also see in the background I've put sound deadening in the door panels
These are the cut-down aluminium Porsche 944 spring plate covers with much wider aftermarket urethane bushes to better locate the spring plates.
I'm going for the light tan colour leather on the right for the interior, I was originally going to go for a cocoa colour but having thought about it I think it would be too much of the same and some contrast is called for.
Seat backs are a bit marked and as the seats will soon be dismantled for trim now is the perfect time to colour-code the backs to body colour.
The old trim panels were moisture damaged so I've made up some new ones. I will also be making some new moisture barriers to keep these ones dry!! You can also see in the background I've put sound deadening in the door panels
These are the cut-down aluminium Porsche 944 spring plate covers with much wider aftermarket urethane bushes to better locate the spring plates.

Seat backs after a lot of work with paint stripper, etch and high-build primer
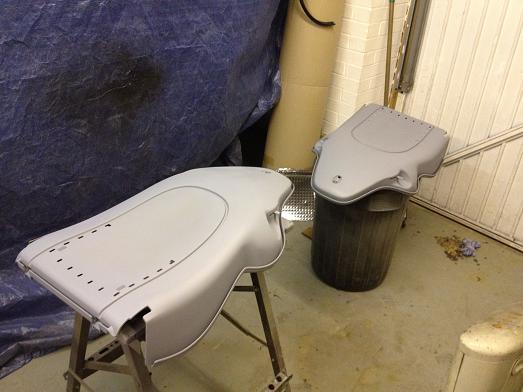
before finally getting the body colour top coats..

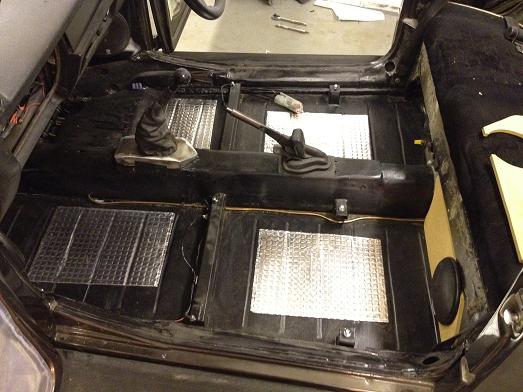
More sound deadening pads fitted to the floor panels and new MDF trim panels made up to fit speakers under the back seat
Door membranes to stop the new door panels suffering from water damage (I've also painted them in yacht varnish before I give them to the trimmer)
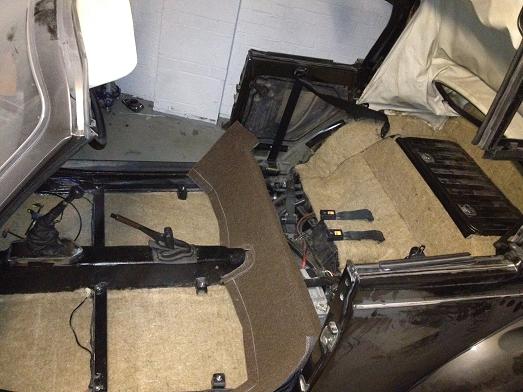
Automotive underlay cut to shape for the floor, only lightly glued in case they need to be removed to dry out if I ever get caught out by rain!
The first piece of carpet going in. I've spent far too much time planning the layout in my head to minimise joins and exposed edges to give it a more OEM look.
First panel finished...

Then on to the tunnel section. I bonded on a metal reinforcement to the handbrake hole, this means I can fit the standard type rubber which will hide the cut edge nicely and the hole won't get opened up. A bit of foam also stops any potential rattles.

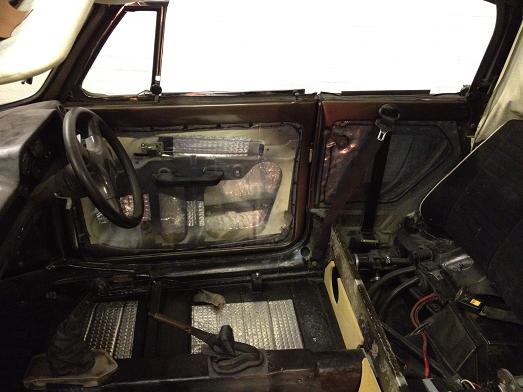
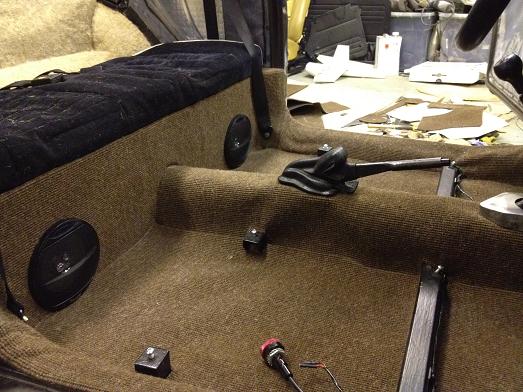
Passenger bit now done, just behind the back seat to sort out. Still undecided what to do about under the bonnet
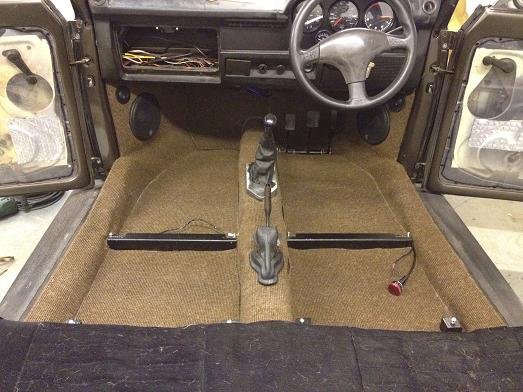
Front end done. The floor and bulkhead panels will go to the trimmer to have the edges bound.
before finally getting the body colour top coats..
More sound deadening pads fitted to the floor panels and new MDF trim panels made up to fit speakers under the back seat
Door membranes to stop the new door panels suffering from water damage (I've also painted them in yacht varnish before I give them to the trimmer)
Automotive underlay cut to shape for the floor, only lightly glued in case they need to be removed to dry out if I ever get caught out by rain!
The first piece of carpet going in. I've spent far too much time planning the layout in my head to minimise joins and exposed edges to give it a more OEM look.
First panel finished...
Then on to the tunnel section. I bonded on a metal reinforcement to the handbrake hole, this means I can fit the standard type rubber which will hide the cut edge nicely and the hole won't get opened up. A bit of foam also stops any potential rattles.
Passenger bit now done, just behind the back seat to sort out. Still undecided what to do about under the bonnet
Front end done. The floor and bulkhead panels will go to the trimmer to have the edges bound.
 Top marks!!


The old engine is still i the corner under a bench, I'll probably open it up later on. I'm fairly sure the cause of failure was oil starvation due to a fault on the oil pick-up pipe.
I've been trying to keep myself busy while the trimmer has been doing exactly nothing! I'm following up a lead on a new one now I have got my parts back.
LSD as received with the gearbox when I bought it, bit of an unknown quantity!
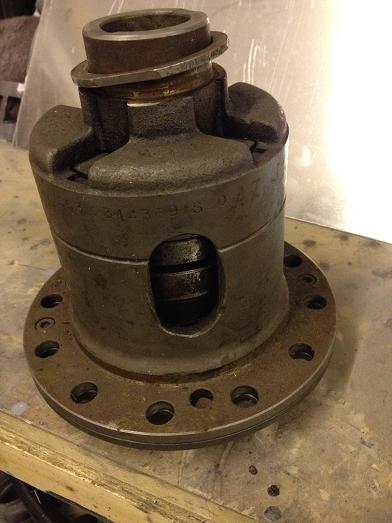

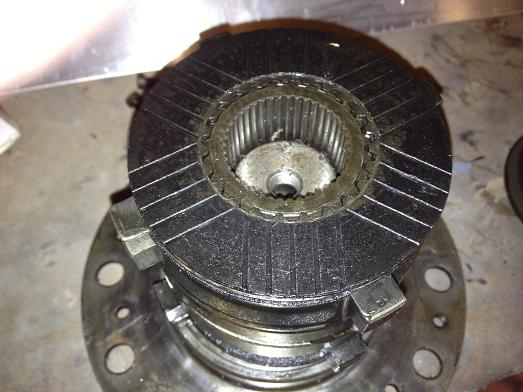
The ramps show it is out of a 964 RS/turbo which means 20% lock on acceleration and 100% lock on overun. This has really helped the car feel much more predictable and also stable, especially after the suspension unloads after hard acceleration. I was going to have a go at fitting it myself but was unable to measure everything accurately enough. The trans had different brands of bearing either side of the differential so during the swap I had to replace: bearings, ring gear bolts (longer on LSDs), seals, oil, shims. With labour that lot added up to £580!!!
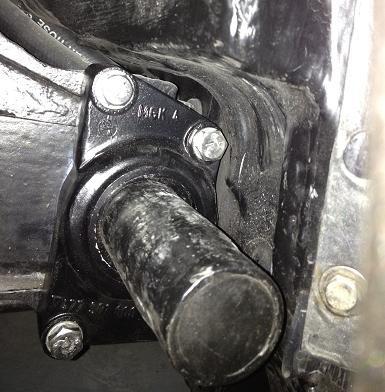
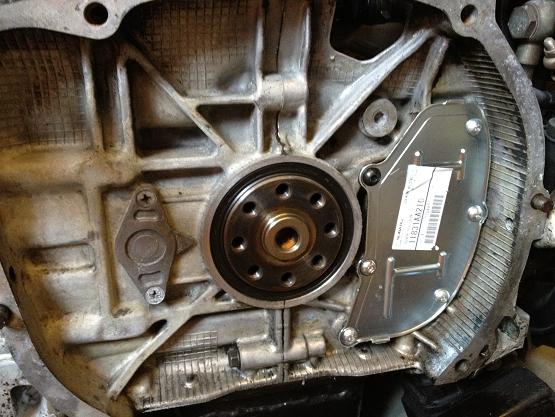
The main reason for taking the engine out (other than boredom waiting for the trimmer), was to sort out a minor oil leak coming from behind the engine, a very common fault with subarus.

Here's the updated subaru part, steel plate and new screws fitted with a sealant. The black screw is supplied with dry loctite on it, forgot to look why, probably as it was a through hole so needed sealing?
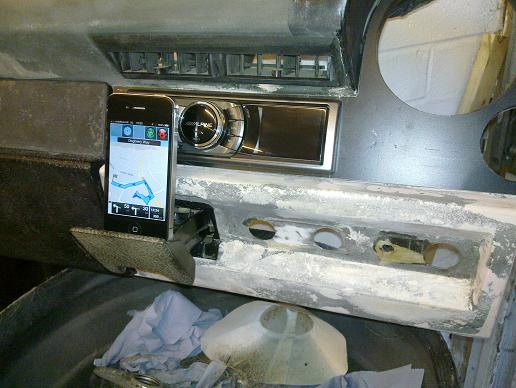
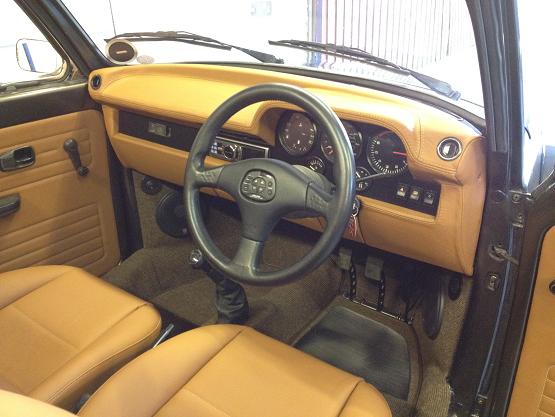
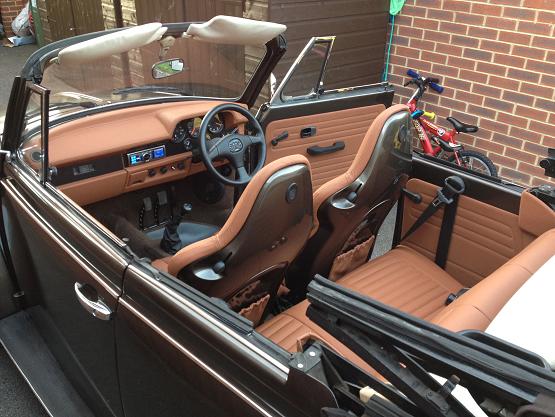
After being messed about by 'Car Audio Centre' for the best part of two months (avoid them at all costs!!) I bought a secondhand head unit from a friend. I wanted Alpine to go with my steering wheel controls. I ended up with an IDA-X001 which is a media head unit with graphic display and ipod/iphone controls. Rather than use a wire and screen mount I have hacked up a dock which fits snuggly into the ashtray with minimal mods.
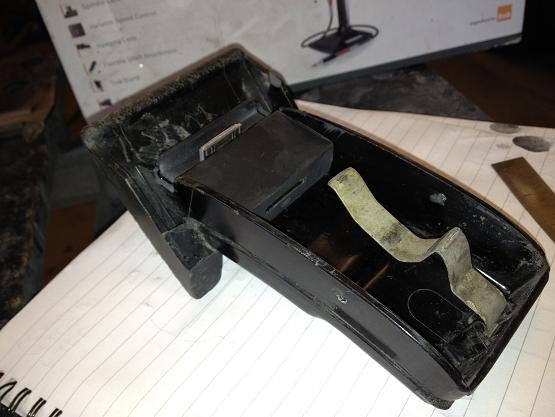
Happy with how it looks! Lucky this head unit has the main control centrally so out of the way of the phone. I'll use it for satnav and music as well as keeping my phone charged.
I've been trying to keep myself busy while the trimmer has been doing exactly nothing! I'm following up a lead on a new one now I have got my parts back.
LSD as received with the gearbox when I bought it, bit of an unknown quantity!
The ramps show it is out of a 964 RS/turbo which means 20% lock on acceleration and 100% lock on overun. This has really helped the car feel much more predictable and also stable, especially after the suspension unloads after hard acceleration. I was going to have a go at fitting it myself but was unable to measure everything accurately enough. The trans had different brands of bearing either side of the differential so during the swap I had to replace: bearings, ring gear bolts (longer on LSDs), seals, oil, shims. With labour that lot added up to £580!!!
The main reason for taking the engine out (other than boredom waiting for the trimmer), was to sort out a minor oil leak coming from behind the engine, a very common fault with subarus.
Here's the updated subaru part, steel plate and new screws fitted with a sealant. The black screw is supplied with dry loctite on it, forgot to look why, probably as it was a through hole so needed sealing?
After being messed about by 'Car Audio Centre' for the best part of two months (avoid them at all costs!!) I bought a secondhand head unit from a friend. I wanted Alpine to go with my steering wheel controls. I ended up with an IDA-X001 which is a media head unit with graphic display and ipod/iphone controls. Rather than use a wire and screen mount I have hacked up a dock which fits snuggly into the ashtray with minimal mods.
Happy with how it looks! Lucky this head unit has the main control centrally so out of the way of the phone. I'll use it for satnav and music as well as keeping my phone charged.
You're not the first to say that, this project seems to be getting more people drawn in than others! My original plan was to build it and then play with engines for a while rather than full builds but scooby tuning can get very pricey, bang for bucks this set up will be hard to beat. I'll have to finish it first and then see how I feel.. I've just had a rough tot up of the main costs, bit frightening, but I suppose it has been drawn out over a few years for this one.
The old 944 CVs were clicking a bit and my plan was to upgrade to 930 CVs anyway. Here are the bits needed for conversion; new stub axles, I already had G50 trans drive-flanges, custom length axles (16 1/4") in 28 spline to match the CVs.
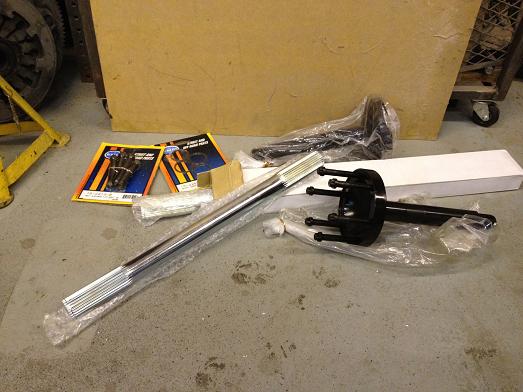
Here are the GKN CVs, I cleaned up the flanges that came with my gearbox but needed an extra pair. After getting up off the floor after being quoted £120 each from Porsche I found some cheaper options from prolinx.

CVs are being 'clocked' as this gives them the best alignment relative to each other, just like you do with a UJ.
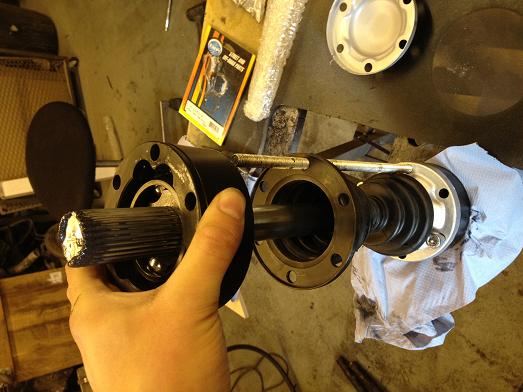
All ready to go on the car
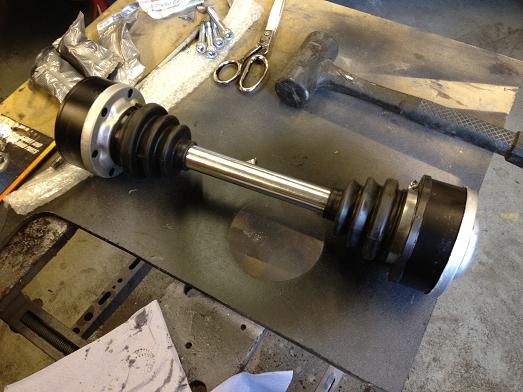
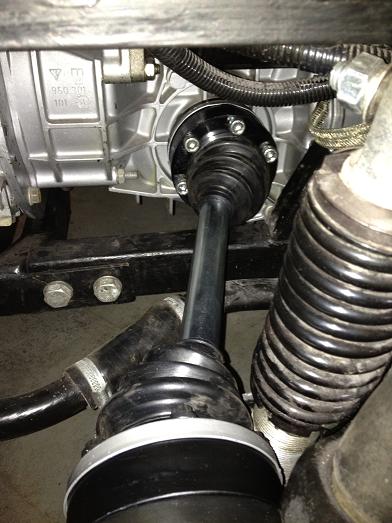
And fitted!
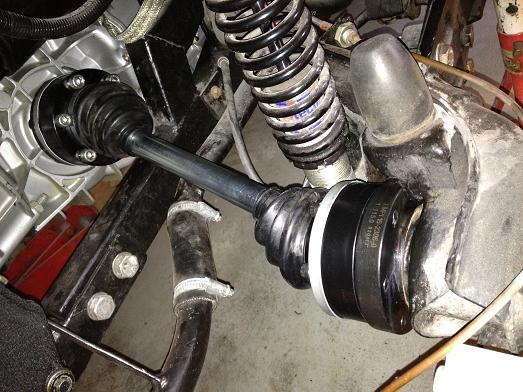
Clearance is very tight to the coil-over but is pass-able (this is worst case compression clearance). I spent ages trying to get some smaller motorsport CV boots from GKN only to find that they had stopped making the size I needed!
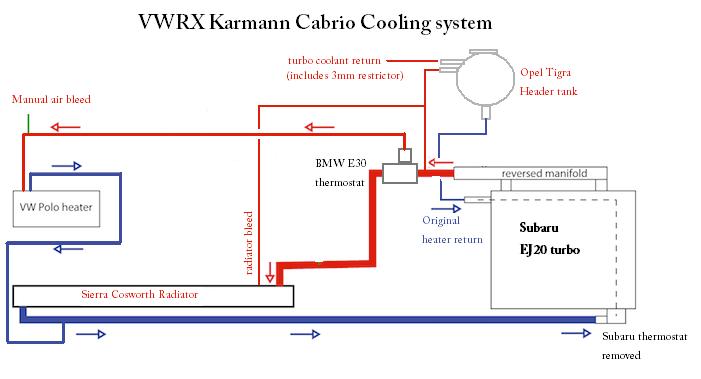
I've been asked so many times about my cooling system I've finally modified a schematic to show how it is all plumbed up. This system works perfectly, gets up to temperature fast and stays at a constant temperature. The other bonus is that I don't even have to bleed the system from an empty fill as it is completely self bleeding!
Here are the GKN CVs, I cleaned up the flanges that came with my gearbox but needed an extra pair. After getting up off the floor after being quoted £120 each from Porsche I found some cheaper options from prolinx.
CVs are being 'clocked' as this gives them the best alignment relative to each other, just like you do with a UJ.
All ready to go on the car
And fitted!
Clearance is very tight to the coil-over but is pass-able (this is worst case compression clearance). I spent ages trying to get some smaller motorsport CV boots from GKN only to find that they had stopped making the size I needed!
I've been asked so many times about my cooling system I've finally modified a schematic to show how it is all plumbed up. This system works perfectly, gets up to temperature fast and stays at a constant temperature. The other bonus is that I don't even have to bleed the system from an empty fill as it is completely self bleeding!
After 9 weeks of chasing, my second trimmer only managed to get the door panels and roof hinge covers done... I've now bitten the bullet and gone with a very good guy I've used before, just more expensive, but I know that he will do very good work and for my deadline which is the end of June.
I also had issues with the iphone dock, it seems the docks aren't straight through electrically and Alpine have a particular way of connecting together. I tried opening it up and making more connections but it still doesn't work... Any ideas?!?
Gassing Station | Readers' Cars | Top of Page | What's New | My Stuff