Craig's 328i Sport - e36 Track Car Build Thread
Discussion


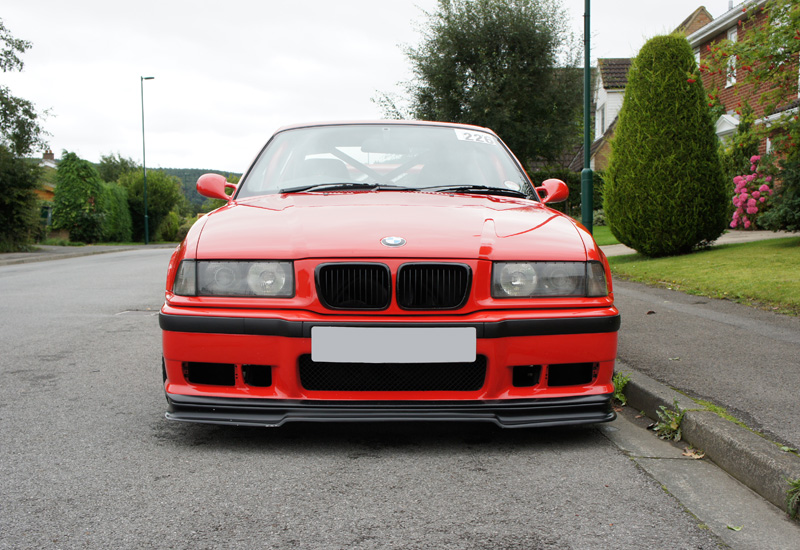
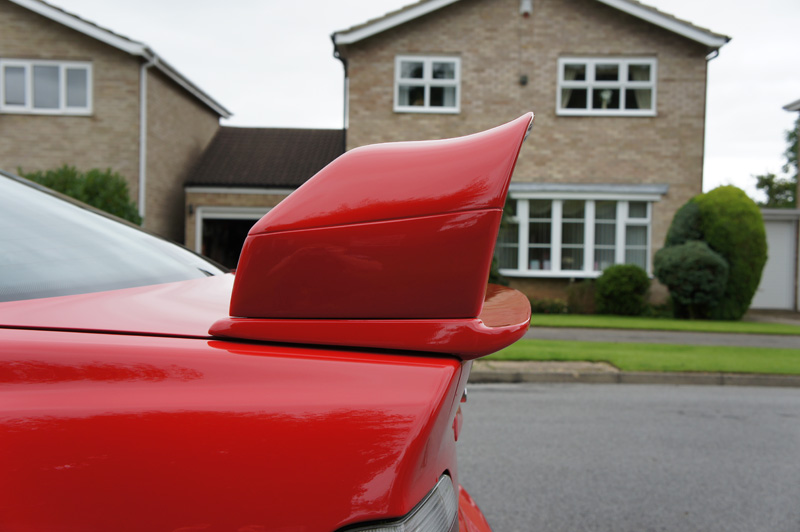
IMO the GTR spoiler looks very odd without the GT splitter, which was removed by a rabbit the other night!
I've just took delivery of a replacement splitter and in the process of painting it, once its on i'll get some photo's of the complete car then people can pass judgement. I think mated to the splitter its a perfect combination, but you can't do one without the other.
I've just took delivery of a replacement splitter and in the process of painting it, once its on i'll get some photo's of the complete car then people can pass judgement. I think mated to the splitter its a perfect combination, but you can't do one without the other.
I am, I just can't help it talk about getting carried away!!
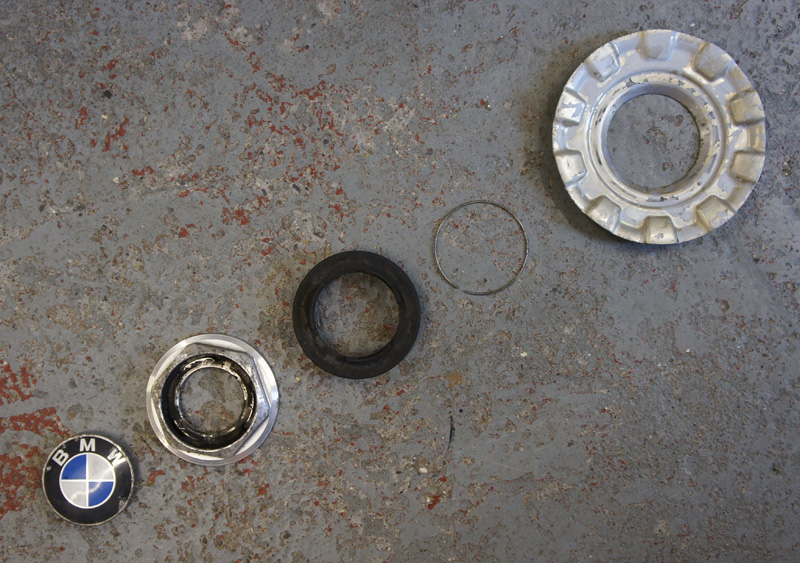
The final touch to the interior arrived today, this was one item that took a lot of finding / research but it’s defiantly been worth it... it is a genuine BMW badge which I cross referenced as been the right size after hours of trawling t’interweb it’s not a cheap replica badge that never looks right, it’s the read deal!!


The final touch to the interior arrived today, this was one item that took a lot of finding / research but it’s defiantly been worth it... it is a genuine BMW badge which I cross referenced as been the right size after hours of trawling t’interweb it’s not a cheap replica badge that never looks right, it’s the read deal!!
It's cost more than first planned but it isnt overly excessive, I've got a full spread sheet of the build costs and the costs from running it last year and although its quite a bit there is a lot that has gone into the car too.
The wheel is a 75mm dish, I'm quite tall and feel as though I maybe should have gone with the 90mm but its nothing a wheel spacer wouldnt sort out. Best to play it safe and go for a medium dish then space it to suit.
The wheel is a 75mm dish, I'm quite tall and feel as though I maybe should have gone with the 90mm but its nothing a wheel spacer wouldnt sort out. Best to play it safe and go for a medium dish then space it to suit.
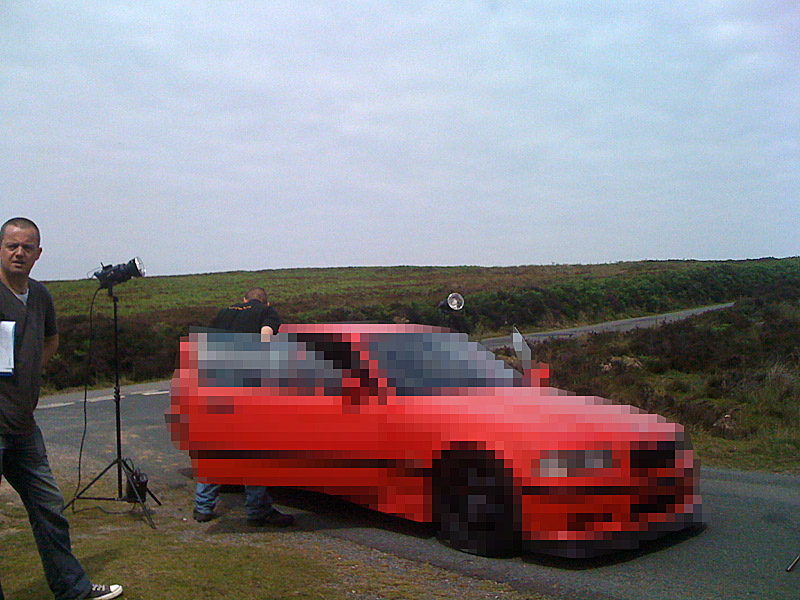
Finally after all the wet weather we’ve had a nice dry patch which allowed me to spend most of last Monday having the long awaited photo shoot with Total BMW, was an interesting day with some cool photo’s been taken. As soon as the feature has been released the photographer will be sending me all the shots which I’ll be sure to post in this thread, there’s some great action shots too.
I’ve been using the car over the last few days to check she’s still running fine and so far so good, there is one or two niggles that have to be rectified; first off was the battery has gone weak due to lack of use so this has been replaced, the next is a small electrical issue the car will never turn off ‘Ignition 1’ so the clock, trip meter and stereo always want to stay on... I’m thinking this may just be the ignition barrel switch has gone faulty.
With D-Day looming, 15th July, I’ve decided to leave the current suspension on the car and even run the current Falken FK-452 road tyres. This was how the car was last used in October at Spa-Francorchamps and although I would prefer a more track focus suspension set up and to run a set of Kumho V70s’s, I really think I just need to start using the car again and fettle it again after a few outings.
I can already see a full brake up-grade / overhaul including a set of 4 pot callipers, bigger front discs and new brake lines all round, maybe even an ABS removal too.
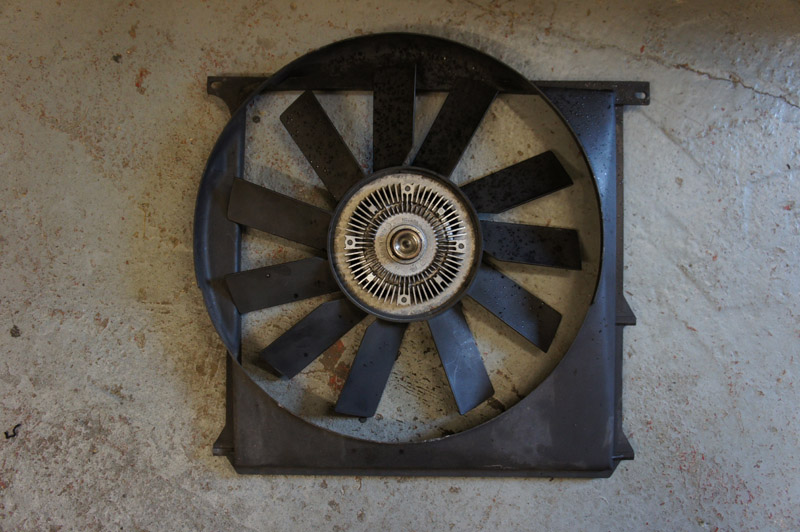
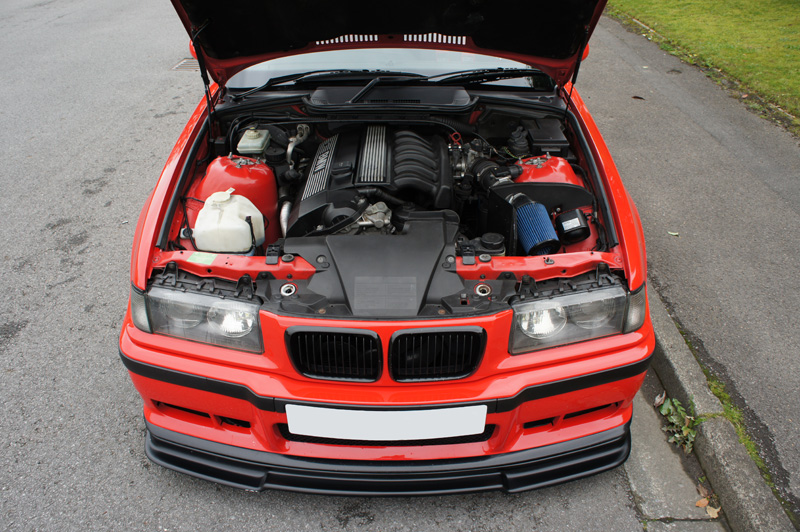
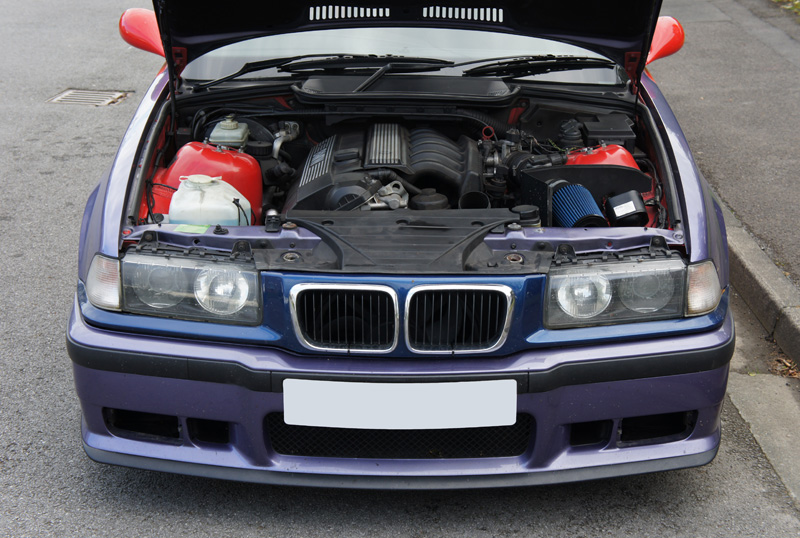
Now the pretty pictures were over with, it was time to get down and dirty with the car again starting with, as previously mentioned; Viscous Fan Removal.
I figured with my car having A/C I could get away by replacing the current 92 degree thermostat for an 80 degree thermostat from the M30 engine at the same time I’d fit the lower 80/88 fan switch, this would allow the A/C radiator fan to be used as an engine cooling fan when stuck in traffic. The parts and tools required for this job are as follows;
- 80c Thermostat (from M30 engine)
- 80/88c Fan Switch (from M44 engine)
- Thermostat Gasket
- Thermostat Housing Gasket
- Fan Switch Crush Washer
- Coolant Drain Plug Crush Washer
- 32mm Spanner
- Larger Screw Driver
- 10mm Socket
- 13mm Socket
- 50/50 Mix of Coolant & Distilled Water
First up was to remove the viscous fan, this was done by locking the water pump with a large screw driver (or the BMW approved tool if you’re feeling flush) and then using the 32mm spanner on the viscous coupling, remembering that it’s a left handed thread. With this loose the fan could be dropped out the way and the plastic fan cowling could be removed too.
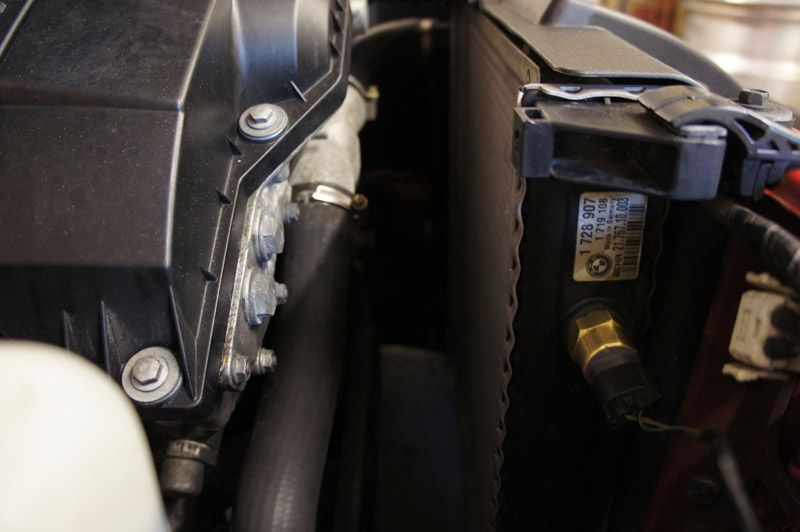
Next up was the drain the coolant, this is done by loosening the plug on the bottom of the radiator and removing the drain plug from the drivers’ side of the engine, just under the headers near the oxygen sensor. Once the coolant was fully drained both plugs were re-fitted. Next the thermostat housing was removed; this was simple it’s only held on by three 10mm bolts and two 13mm bolts that hold the engine removal bracket.
With the housing removed the new thermostat could be fitted, and everything put back together using the correct gaskets, also remember to make note of the ‘up-arrow’ on the thermostat make sure its mounted the correct way round! It’s worth noting that if your water pump has never been replaced, it would be worth replacing this at the same time for the superseded item that has a metal impellor as the plastic ones are prone to failing.
Now onto the fan switch; like everything else this only takes a matter of minutes to change, simply un-screw the old and replace with the new. The only modification you will need to make here is to the plug that connects to the switch, you need to cut off a small tab using a sharp Stanley knife blade, this will be made clear when you look at the two switches together and try to connect the new one to an un-modified plug.
With all the above done you’re now ready to fill it up with coolant, bleed it through and enjoy your latest modification. Once bled, I tested my car and it got up to temp, then when stood the fan kicked in, it cools off a touch then it cut back out whilst the temp gauge stayed slap bang in the middle where I wanted it to be, so I see this as a very successful way of doing the viscous fan delete modification.

I figured with my car having A/C I could get away by replacing the current 92 degree thermostat for an 80 degree thermostat from the M30 engine at the same time I’d fit the lower 80/88 fan switch, this would allow the A/C radiator fan to be used as an engine cooling fan when stuck in traffic. The parts and tools required for this job are as follows;
- 80c Thermostat (from M30 engine)
- 80/88c Fan Switch (from M44 engine)
- Thermostat Gasket
- Thermostat Housing Gasket
- Fan Switch Crush Washer
- Coolant Drain Plug Crush Washer
- 32mm Spanner
- Larger Screw Driver
- 10mm Socket
- 13mm Socket
- 50/50 Mix of Coolant & Distilled Water
First up was to remove the viscous fan, this was done by locking the water pump with a large screw driver (or the BMW approved tool if you’re feeling flush) and then using the 32mm spanner on the viscous coupling, remembering that it’s a left handed thread. With this loose the fan could be dropped out the way and the plastic fan cowling could be removed too.
Next up was the drain the coolant, this is done by loosening the plug on the bottom of the radiator and removing the drain plug from the drivers’ side of the engine, just under the headers near the oxygen sensor. Once the coolant was fully drained both plugs were re-fitted. Next the thermostat housing was removed; this was simple it’s only held on by three 10mm bolts and two 13mm bolts that hold the engine removal bracket.
With the housing removed the new thermostat could be fitted, and everything put back together using the correct gaskets, also remember to make note of the ‘up-arrow’ on the thermostat make sure its mounted the correct way round! It’s worth noting that if your water pump has never been replaced, it would be worth replacing this at the same time for the superseded item that has a metal impellor as the plastic ones are prone to failing.
Now onto the fan switch; like everything else this only takes a matter of minutes to change, simply un-screw the old and replace with the new. The only modification you will need to make here is to the plug that connects to the switch, you need to cut off a small tab using a sharp Stanley knife blade, this will be made clear when you look at the two switches together and try to connect the new one to an un-modified plug.
With all the above done you’re now ready to fill it up with coolant, bleed it through and enjoy your latest modification. Once bled, I tested my car and it got up to temp, then when stood the fan kicked in, it cools off a touch then it cut back out whilst the temp gauge stayed slap bang in the middle where I wanted it to be, so I see this as a very successful way of doing the viscous fan delete modification.
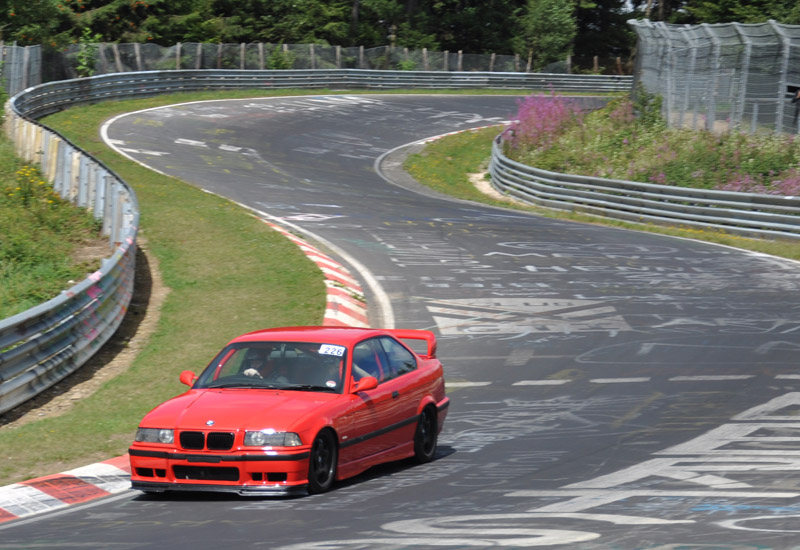
Here’s a quick report from the cars first major outing of the year, a track day at the Nurburgring.
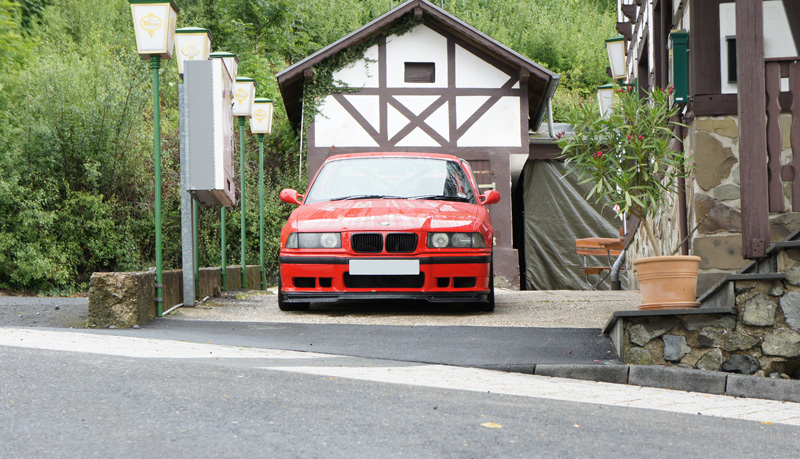
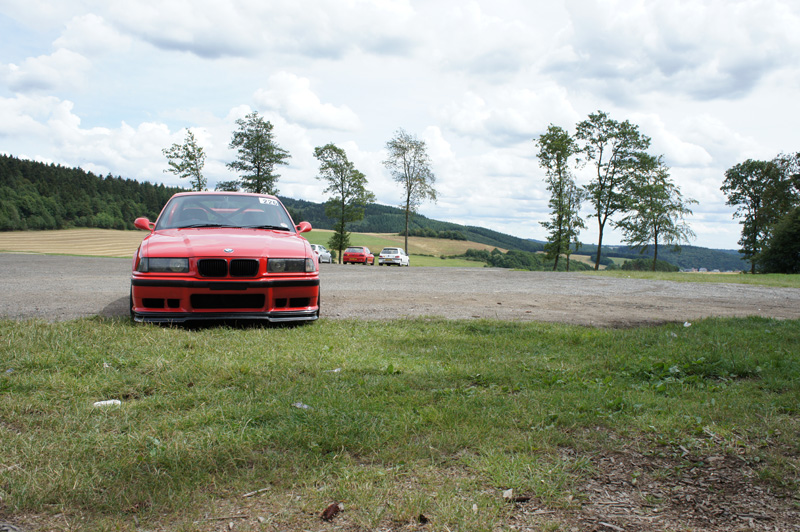
Set off on Friday 15th on route to Hull to catch the overnight ferry to Rotterdam, arrived in Germany on the afternoon of the 16th after a flawless drive of over 340 miles. The drive over was the car’s first long run for over 8 months so it was a great relief that nothing went wrong. Here are a few pictures of my car outside the hotel, for anyone who is planning a trip to the ‘Ring I highly recommend staying at Hotel Burgstube with Martin & Heidi the service you receive is first rate, it’s always a pleasure to stay there!

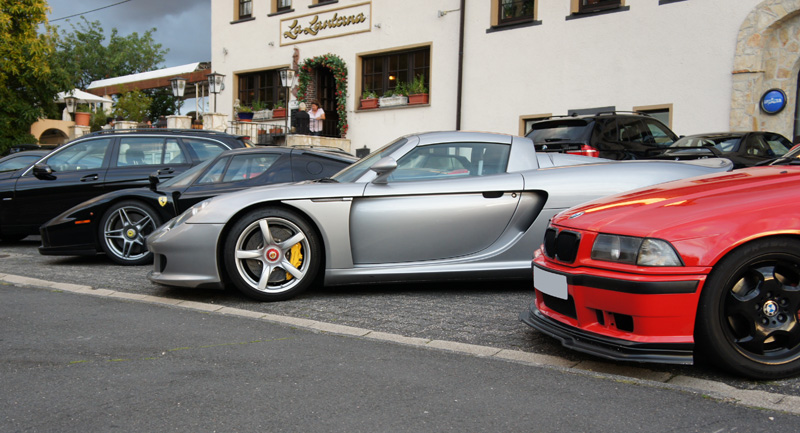
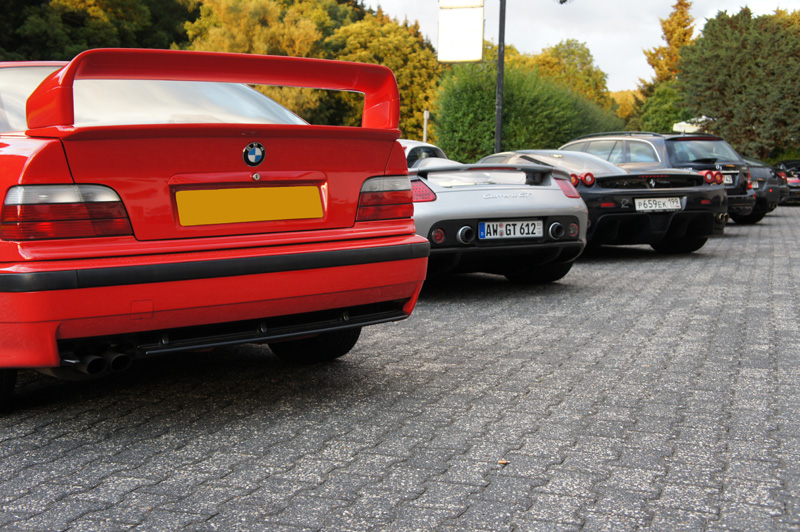
Sunday was a day of Touristenfarten, we spent the day spectating and taking photos as I was saving the car for Monday’s track day. Later than night we decided to head out to Mullenbach for dinner at one of my favourite places; LaLanterna where the car was also left in good company.
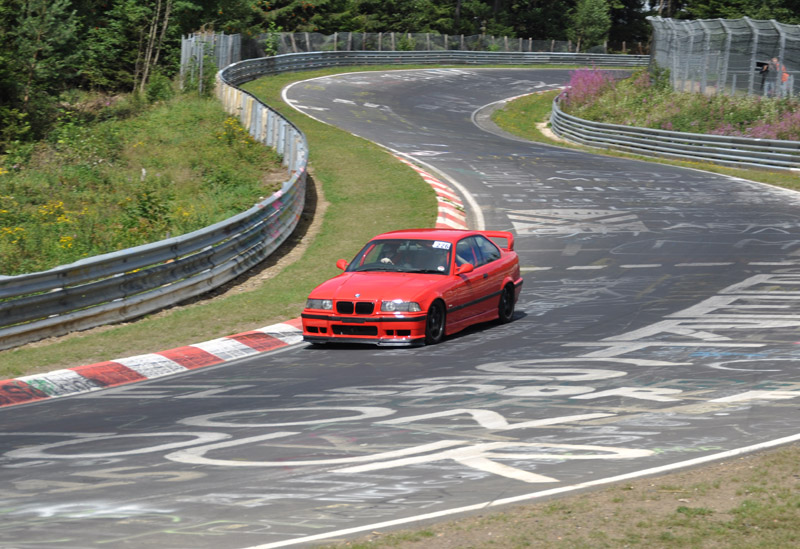
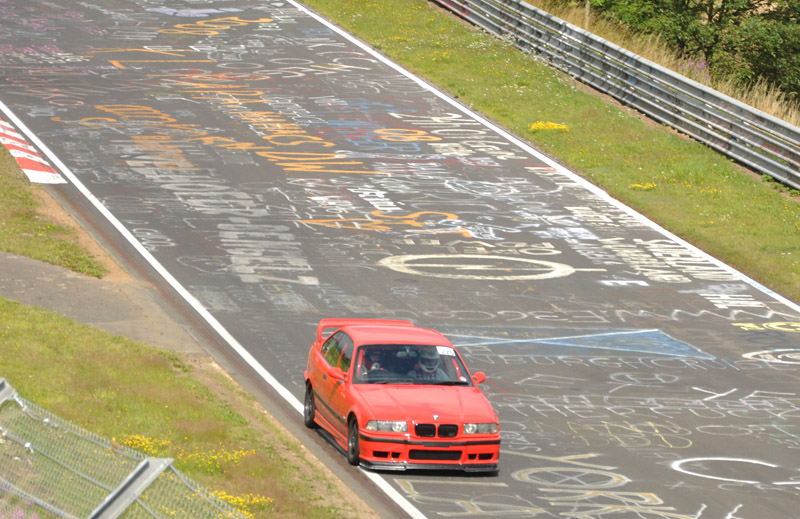
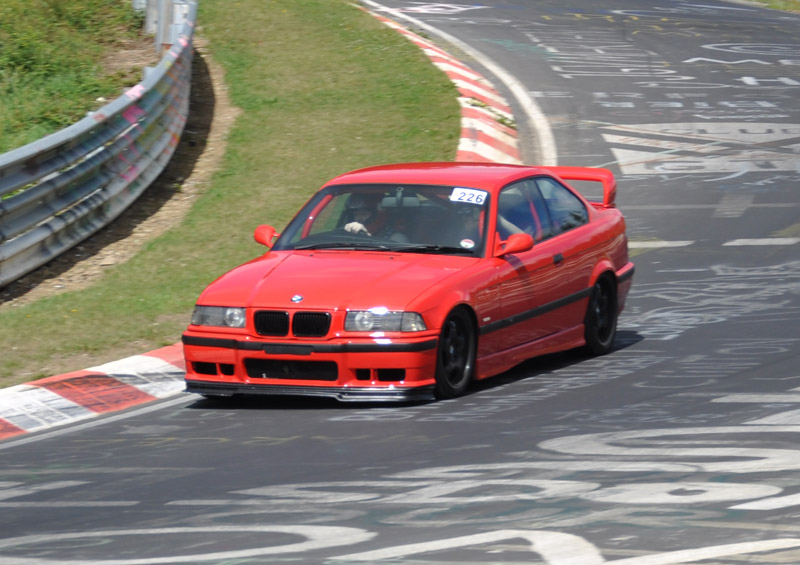
Monday morning came fast; it was day one of a double header track day at the Nurburgring. The weather had been a bit hit and miss all weekend, but fortunately for me it was pretty sunny with only the odd showery spell.
The car again performed without so much as a niggle, and completed 264.6 miles on track, so around 18 laps. Here are a few pictures taken by a friend who just happened to have his camera handy whilst having lunch, thanks Johnny.
Rest of the holiday was spent relaxing, final picture of the car loaded up and ready for the journey home.
It still amazes me how well this car does perform, the overall value for money factor is exceptional... remember I used to heavily track a brand new Lotus Exige S and an M3 CSL.
I’ve now hit a point with the car where I feel as if I’m at its limits of the parts it’s currently running. I’m going to take it on a few more track days where I don’t know the track, that way I won’t keep getting frustrated knowing how I want the car to feel, turn and brake... after that I’m thinking the car is going to get progressed slightly further, to an even more track focused chassis set-up.
Ideas which I have floating around my head are;
- KW V3 Clubsports
- Porsche 4-Pot Callipers / AP Racing Brakes
- Semi-Slick / Slicks on Spare BBS Rims
But we’ll see what comes in time, happy just to be using the car for the moment... and yes, it’s my daily driver too.
Set off on Friday 15th on route to Hull to catch the overnight ferry to Rotterdam, arrived in Germany on the afternoon of the 16th after a flawless drive of over 340 miles. The drive over was the car’s first long run for over 8 months so it was a great relief that nothing went wrong. Here are a few pictures of my car outside the hotel, for anyone who is planning a trip to the ‘Ring I highly recommend staying at Hotel Burgstube with Martin & Heidi the service you receive is first rate, it’s always a pleasure to stay there!
Sunday was a day of Touristenfarten, we spent the day spectating and taking photos as I was saving the car for Monday’s track day. Later than night we decided to head out to Mullenbach for dinner at one of my favourite places; LaLanterna where the car was also left in good company.
Monday morning came fast; it was day one of a double header track day at the Nurburgring. The weather had been a bit hit and miss all weekend, but fortunately for me it was pretty sunny with only the odd showery spell.
The car again performed without so much as a niggle, and completed 264.6 miles on track, so around 18 laps. Here are a few pictures taken by a friend who just happened to have his camera handy whilst having lunch, thanks Johnny.
Rest of the holiday was spent relaxing, final picture of the car loaded up and ready for the journey home.
It still amazes me how well this car does perform, the overall value for money factor is exceptional... remember I used to heavily track a brand new Lotus Exige S and an M3 CSL.
I’ve now hit a point with the car where I feel as if I’m at its limits of the parts it’s currently running. I’m going to take it on a few more track days where I don’t know the track, that way I won’t keep getting frustrated knowing how I want the car to feel, turn and brake... after that I’m thinking the car is going to get progressed slightly further, to an even more track focused chassis set-up.
Ideas which I have floating around my head are;
- KW V3 Clubsports
- Porsche 4-Pot Callipers / AP Racing Brakes
- Semi-Slick / Slicks on Spare BBS Rims
But we’ll see what comes in time, happy just to be using the car for the moment... and yes, it’s my daily driver too.
News in brief; got bored, clean bolts...
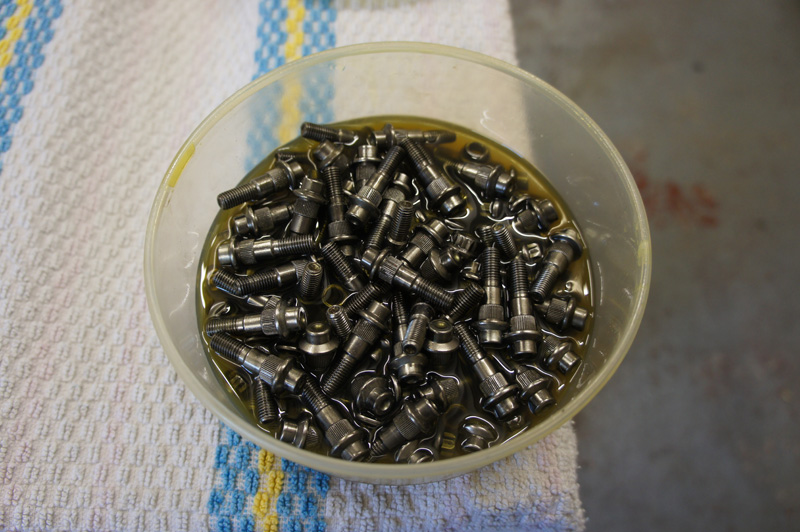
Used a bench grinder with a wire wheel attached to it to painstakingly clean 160 nuts and bolts, take precautions such as safety glasses as those little wires like flying all over the shop, most ended up stuck in my torso!!
Once cleaned, all threads were checked and a few nuts and bolts had minor thread imperfections removed by use of a tap and die set or thread file. I also split the BBS centres down so there is no plastic left in the centre cap lock nut, this will allow them to be acid dipped, shot blasted and powder coated.
Planning to powder coat them over the next few weeks... a local wheel specialist who appreciates the work I’ve put into the car is willing to let me help out with the refurbishment, whilst teaching me a few new skills along the way!!
M3 wheels fit on just fine without any issues or arch work, shells are the same baring the reinforcement plates on some M3's.
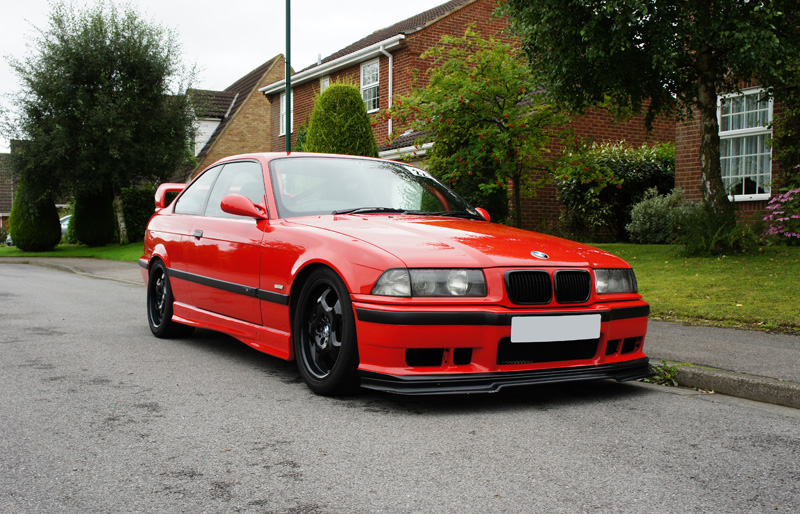
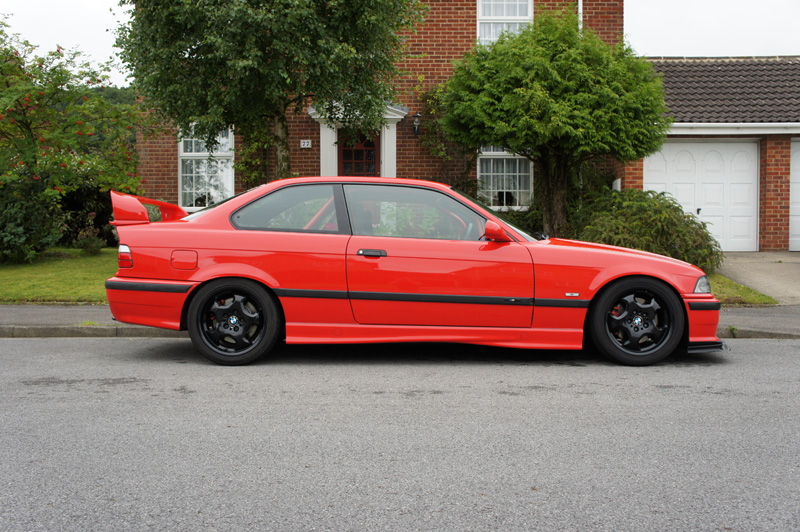
Just a few snaps of the car parked up outside the house, the neighbours must think ‘WTF!?’ sometimes especially when they see all 6ft3 of me jumping in and out of it over the roll cage daily.
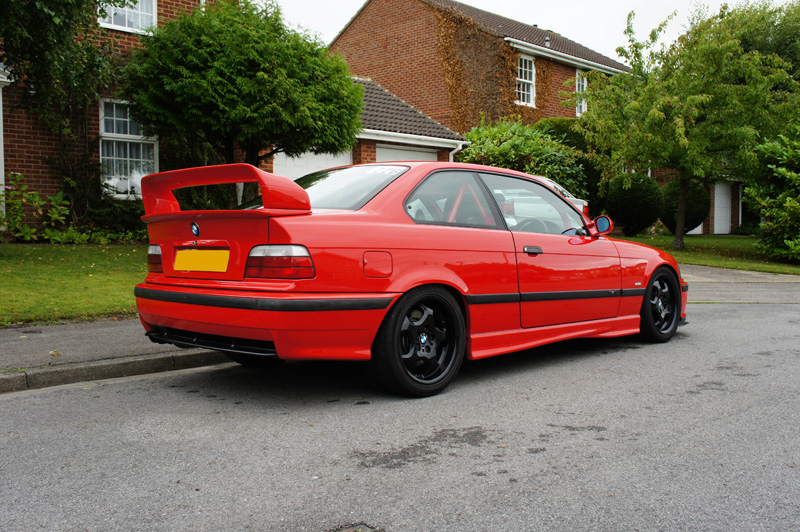
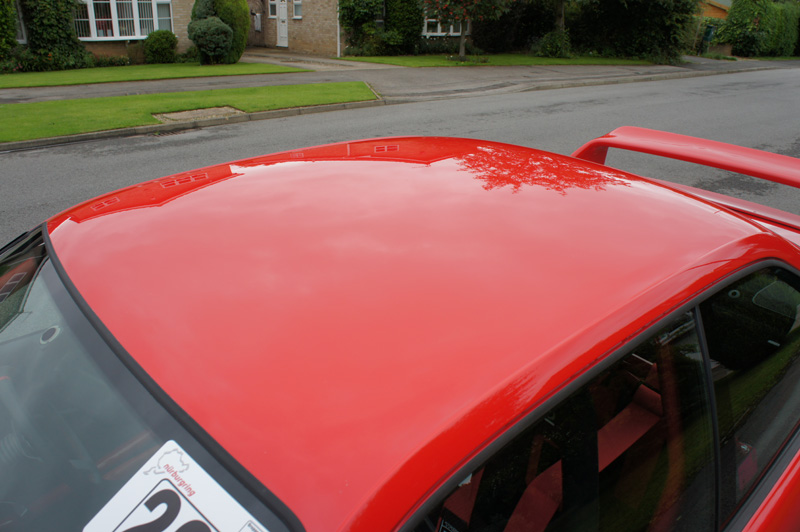

Just a few snaps of the car parked up outside the house, the neighbours must think ‘WTF!?’ sometimes especially when they see all 6ft3 of me jumping in and out of it over the roll cage daily.
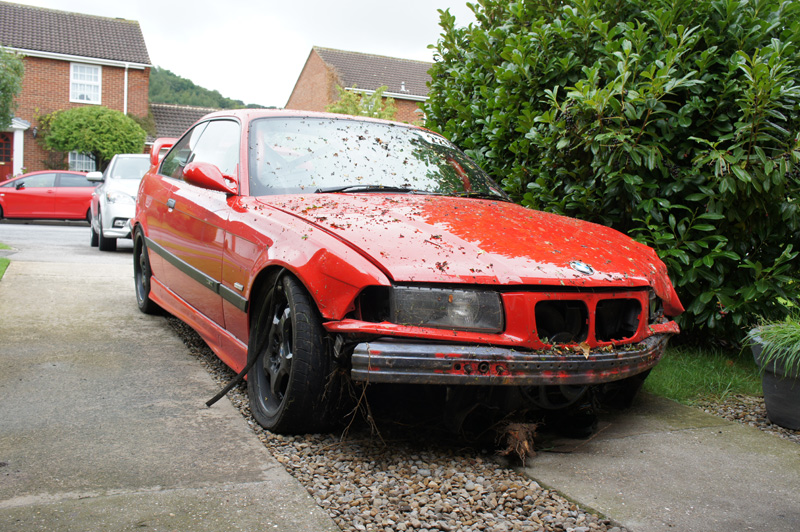
It’s with great sadness I post the following pictures;
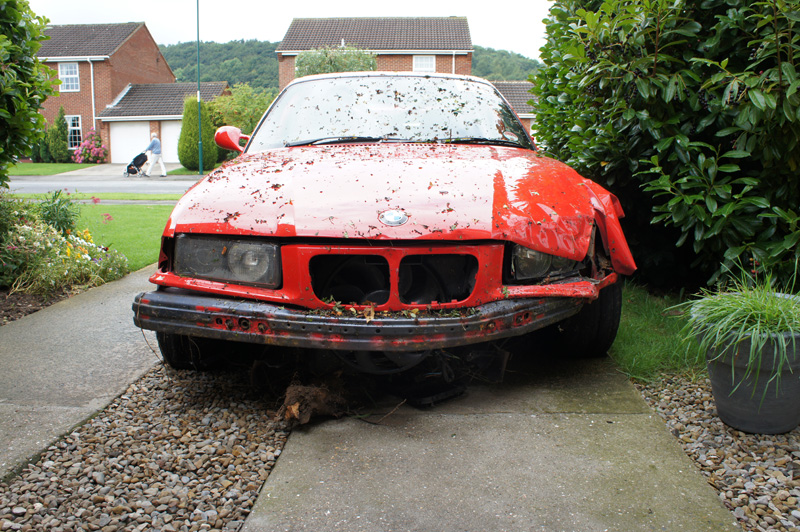

Driving home late last night, having been up since 04:00 due to work, I simply had a temporary lapse of concentration when on a road I’m vaguely familiar with.
I was travelling down a country lane in the rain and mild mist, this road has a T-junction in which I would normally turn right and then immediately left on to continue down the same road. On this night the junction appeared to come out of nowhere, bearing in mind I was only travelling at around 50mph, I panicked hit the brakes and just slid straight up a high kerb and into a tree-like hedge.
Gutted doesn’t really describe how I feel, I’ve crashed cars before and obviously felt bad about it but this literally feels heart breaking knowing how many hours worth of work has gone into the car over the last 20 months not to mentioned all the memories it’s made too.
I did a damage assessment this morning and to get the car back to where it was before it’ll need;
- 4x Wheels & Tyres
- 2x Front Wishbones
- 2x Anti-Roll Bar Drop Links
- 1x Rear Camber Arm
- Air Conditioning Radiator
- Power Steering Pipe
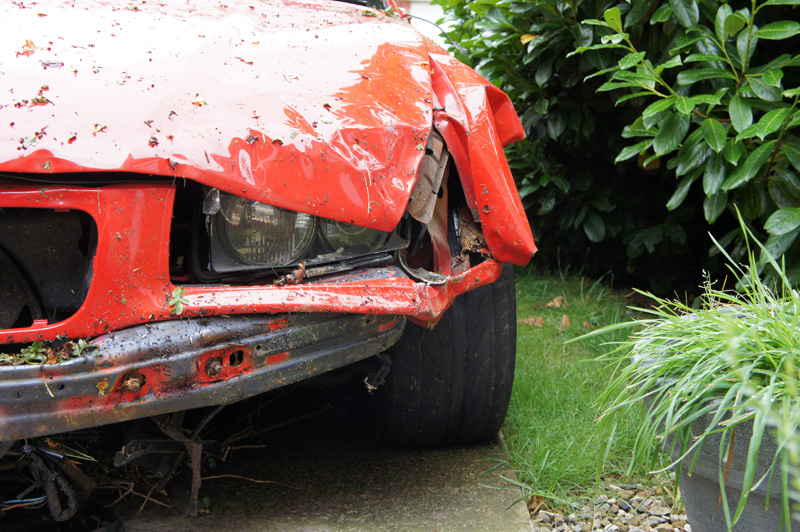
- Front Slam Panel & Bumper Bar
- Headlights & Indicators
- Bonnet & Grills
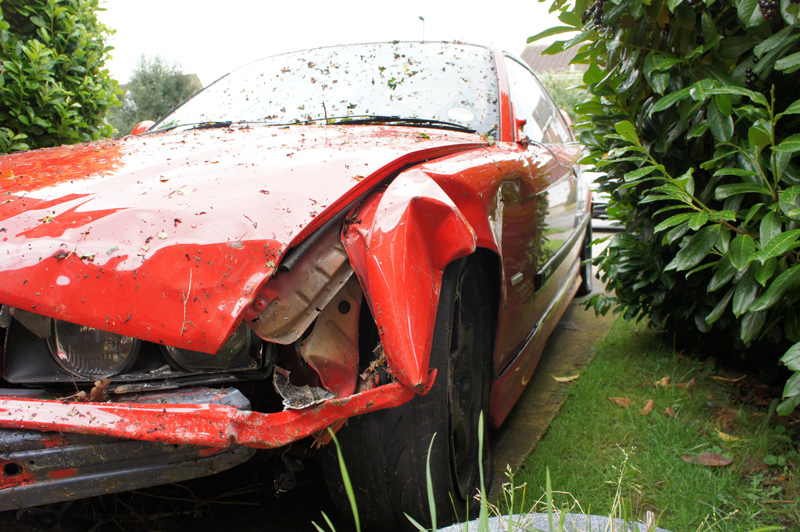
- 2x Wings & Arch Liners
- Inner Arch Work
- Front Splitters
- Paintwork
From the above list I can’t really see it been viable to repair the car, if I could do the bodywork side myself I think I’d have give it a go but this is one area I’ve always had to enlist the help of friendly body shops.
Maybe it’s time to break and move on?
Driving home late last night, having been up since 04:00 due to work, I simply had a temporary lapse of concentration when on a road I’m vaguely familiar with.
I was travelling down a country lane in the rain and mild mist, this road has a T-junction in which I would normally turn right and then immediately left on to continue down the same road. On this night the junction appeared to come out of nowhere, bearing in mind I was only travelling at around 50mph, I panicked hit the brakes and just slid straight up a high kerb and into a tree-like hedge.
Gutted doesn’t really describe how I feel, I’ve crashed cars before and obviously felt bad about it but this literally feels heart breaking knowing how many hours worth of work has gone into the car over the last 20 months not to mentioned all the memories it’s made too.
I did a damage assessment this morning and to get the car back to where it was before it’ll need;
- 4x Wheels & Tyres
- 2x Front Wishbones
- 2x Anti-Roll Bar Drop Links
- 1x Rear Camber Arm
- Air Conditioning Radiator
- Power Steering Pipe
- Front Slam Panel & Bumper Bar
- Headlights & Indicators
- Bonnet & Grills
- 2x Wings & Arch Liners
- Inner Arch Work
- Front Splitters
- Paintwork
From the above list I can’t really see it been viable to repair the car, if I could do the bodywork side myself I think I’d have give it a go but this is one area I’ve always had to enlist the help of friendly body shops.
Maybe it’s time to break and move on?
Thanks for all the positive comments, I’ve had chance today to strip off all the damaged parts and asses the state of the inner arch and chassis leg, the results are as follows;
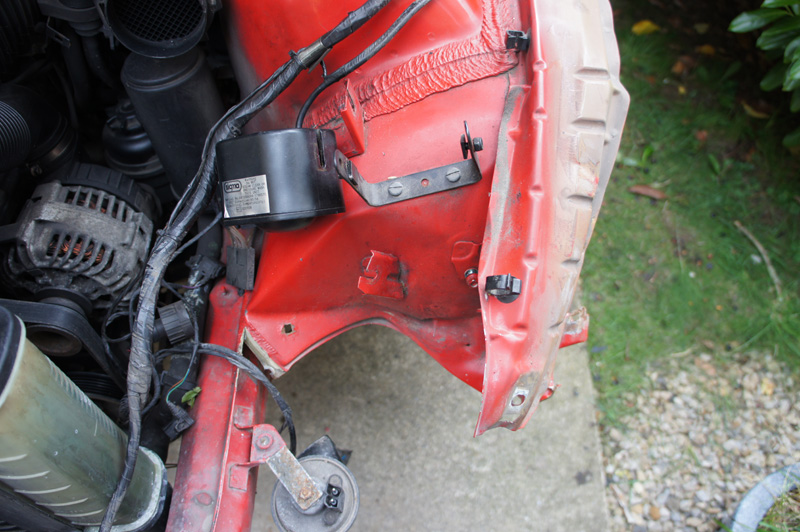
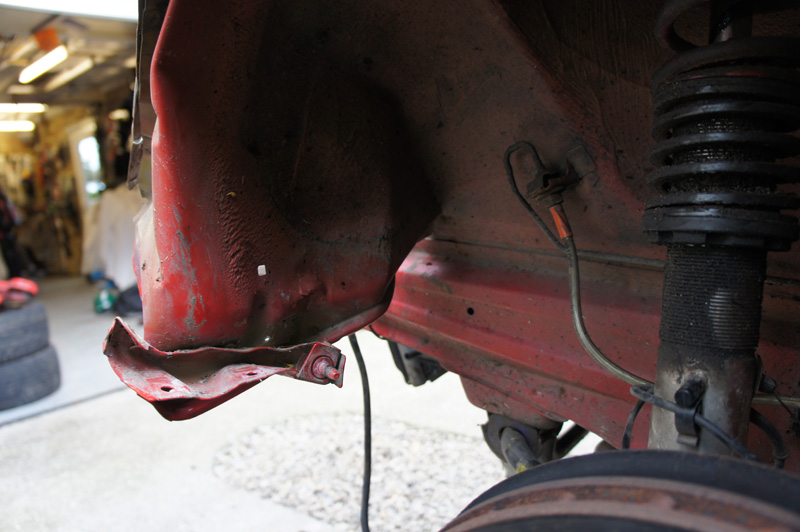
It doesn’t appear to have moved the chassis leg anywhere else other than where the front cross bolts to it, the inner arch is in a bit of a state but nothing structural has been affected. I’m thinking if I could get a body shop to repair the inner arch then the rest could be re-built by me.
I’m even thinking of attempting the spray work myself, kind of a ‘re-built to be driven’ attitude it’s had its photo shoot this time round spend a little less time worrying about the cosmetics then I won’t be so worried about using it properly and it receiving the odd battle scar.
I now need to price up some parts to see if it’s even worth considering, I might sweet talk a few BMW breakers to see if they’ll do me a deal on a bulk lot of parts. I’m hoping I can travel to the breaker and remove all the parts myself, that way I’ll be certain I have everything I need!!
Time for quite a positive update;
Mid-week I contacted Chris @ CR M-Tech regarding some bits, he informed me that he had an immaculate ’99 M3 3.2 Evo in ready for breaking, he mentioned that he’d seen the pictures of the my 328’s build and demise and would be more than happy for me to come down and break the car for bits myself as I had previously requested.
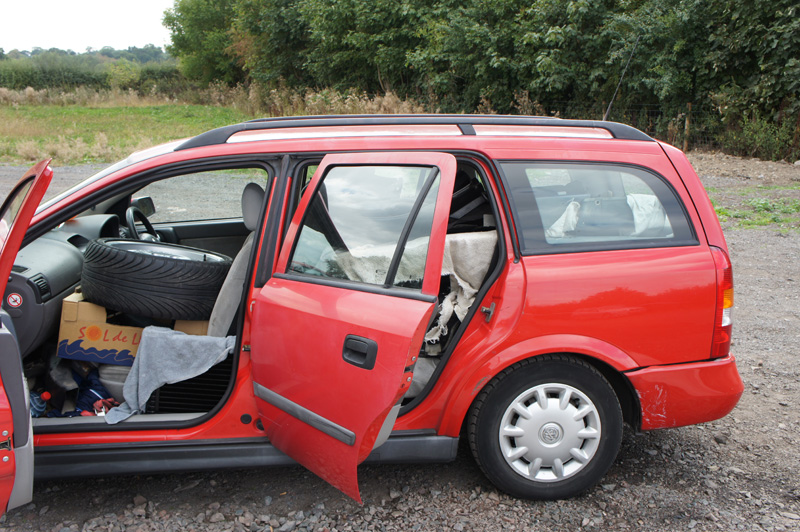
So, roll on 05:00 this morning when I fuelled up the trusty Astra Estate steed, purchased purposely for this job at an almighty price of £200.00 (with Tax and MOT!!) and set off on route to Shrewsbury. The journey down was pretty un-eventful as most parts runs are however I arrived in good time at 09:00 just as they’d opened for business.
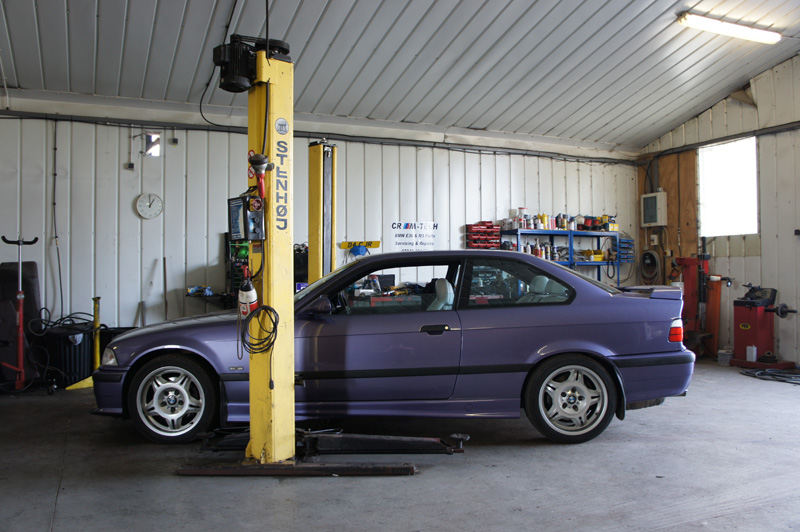
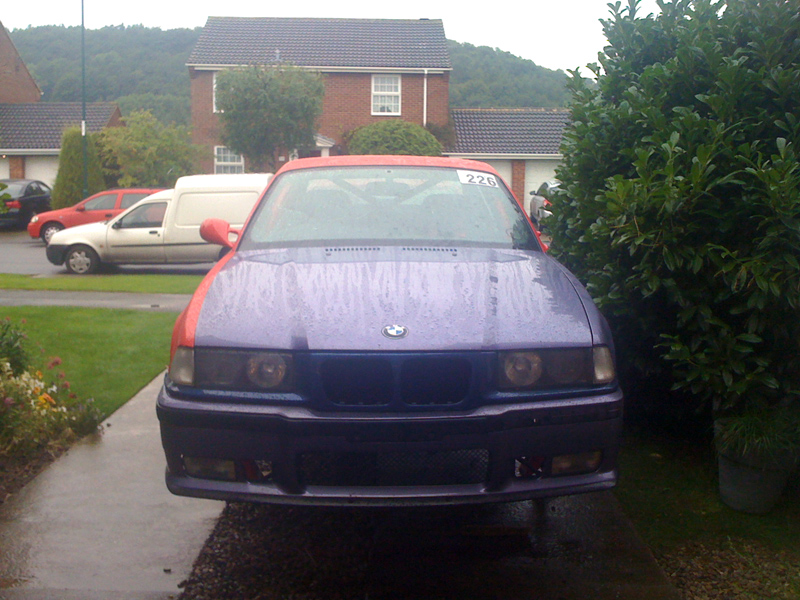
Next I was greeted by a stunning purple M3, the colour is one I’ve always had a soft spot for and thought it’d make a great track car, I was even more shocked when I found out this was the car to be broken... aside from the fact it was an SMG and had a sun-roof it was very, very tidy.
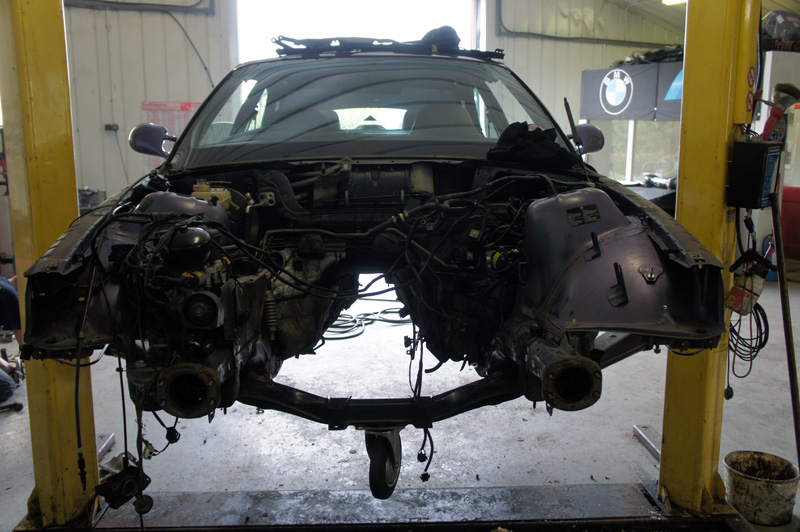
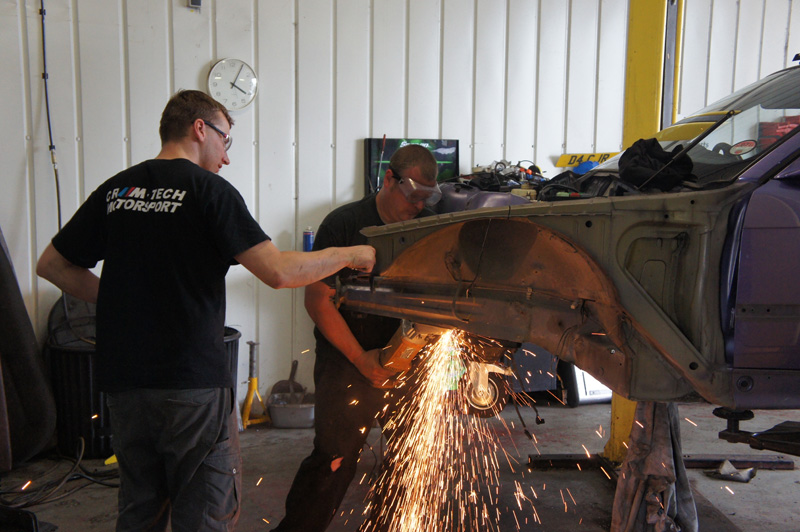
Work begun and within an hour it was missing most of the front end;

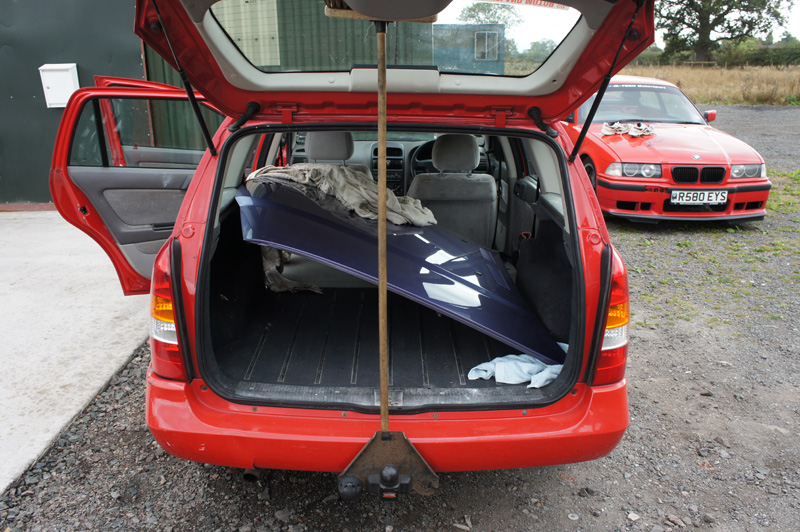
Next I tried the bonnet up for size in the Astra, to my amazement it fit which was a good as I really didn’t want to have to hire a van and hunt locally for a bonnet which would be in nowhere near as good condition as this one.
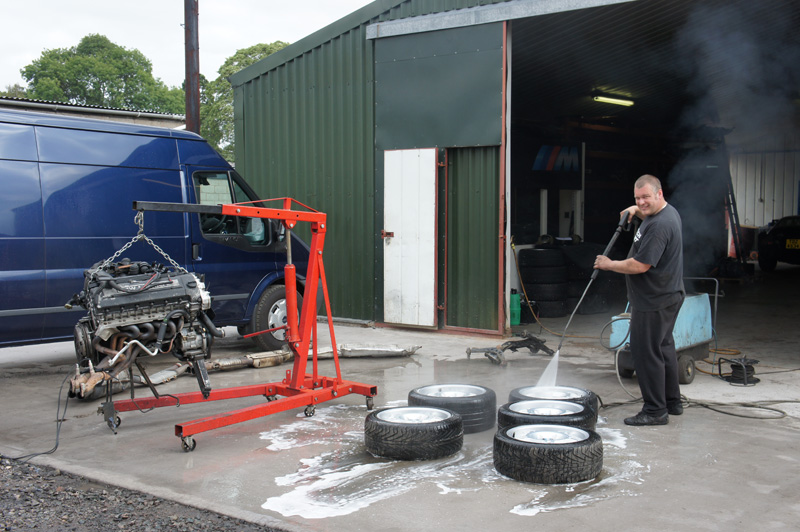
With the panels off, next it was time for the engine and gearbox. All this had to be removed as I wanted the front corner chassis to aid the repair of my own car. It was only a good few hours into the job and the engine was out ready to be split from the gearbox and cleaned.
Now it was finally time for the car to rest in pieces, what was a beautiful M3 was now banished to the world of scrap in less than a few minutes, all in aid of repairing a lesser 328i.
First up; grinder at the ready!!
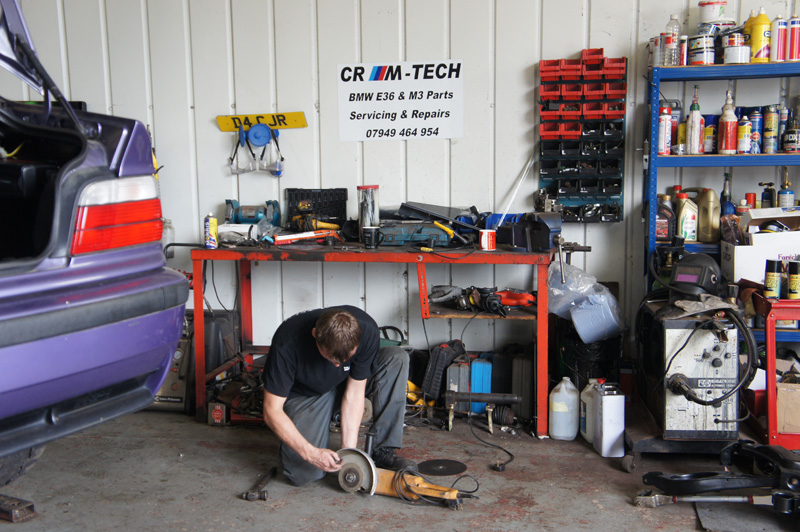
Ooooh and arrrr’s at the ready, it was now time to give the garage some light commencing with an array of orange and yellow sparks; sparklers ain’t half got better since I were a lad!

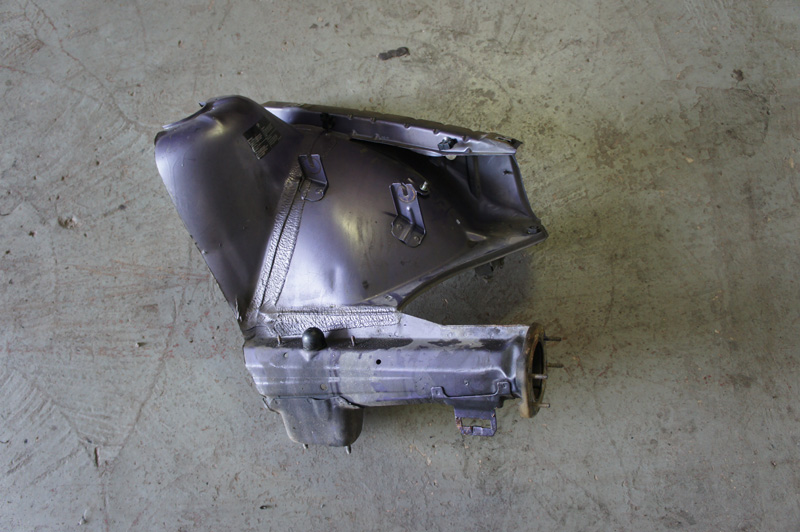
And here it is, one OEM BMW bandage ready to heal the 328’s wounds.
Back to what I mentioned earlier about the engine; cleaning. I couldn’t help but notice everything in Chris’s parts store was spotlessly clean and free from grease and grime usually associated with second hand parts from breakers.
It turns out, even though he doesn’t like to admit it, Chris has a cleaning obsession everything must be cleaned before it leaves the premises. Even though I wasn’t bothered, he insisted he cleaned all the parts before I left so that they were good to use straight away. I also noticed he was very anal about making sure all parts are supplied with the correct nuts and bolts, which was for me, a nice thing to see as I hate receiving parts only to find out I need to go buy a load of fitting hardware to mount the damn thing.
Next the Astra was loaded;
It may not look to bad but in this car there is as follows; bonnet, wings, bumper, crash panel, inner arch section, under trays, arch liners, wishbones, brake ducts, rear control arms, headlights, grill panels, aircon pre-rad, electric fan, a big box of bits and four wheels complete with tyres!
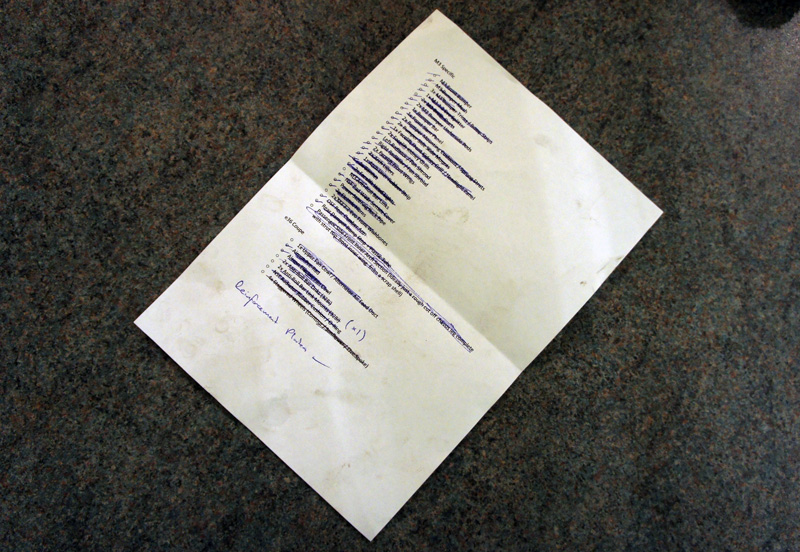
I got home and was able to cross off every single part I required off my list, and more!
I’d highly recommend Chris and CR M-Tech (cr.mtech@btinternet.com) for any of your e36 needs it was nice to deal with someone who also had a passion for the vehicles that were been broken. I liked how everything had to be right, if a part on the car wasn’t 100% it wasn’t allowed to be taken instead a perfect replacement was taken off the shelf, I also liked the fact he trusted me with his own tools and to disassemble the car at my own free will.... so I’d just like to say thanks Chris!!
Now... Let the re-build commence!!
Mid-week I contacted Chris @ CR M-Tech regarding some bits, he informed me that he had an immaculate ’99 M3 3.2 Evo in ready for breaking, he mentioned that he’d seen the pictures of the my 328’s build and demise and would be more than happy for me to come down and break the car for bits myself as I had previously requested.
So, roll on 05:00 this morning when I fuelled up the trusty Astra Estate steed, purchased purposely for this job at an almighty price of £200.00 (with Tax and MOT!!) and set off on route to Shrewsbury. The journey down was pretty un-eventful as most parts runs are however I arrived in good time at 09:00 just as they’d opened for business.
Next I was greeted by a stunning purple M3, the colour is one I’ve always had a soft spot for and thought it’d make a great track car, I was even more shocked when I found out this was the car to be broken... aside from the fact it was an SMG and had a sun-roof it was very, very tidy.
Work begun and within an hour it was missing most of the front end;
Next I tried the bonnet up for size in the Astra, to my amazement it fit which was a good as I really didn’t want to have to hire a van and hunt locally for a bonnet which would be in nowhere near as good condition as this one.
With the panels off, next it was time for the engine and gearbox. All this had to be removed as I wanted the front corner chassis to aid the repair of my own car. It was only a good few hours into the job and the engine was out ready to be split from the gearbox and cleaned.
Now it was finally time for the car to rest in pieces, what was a beautiful M3 was now banished to the world of scrap in less than a few minutes, all in aid of repairing a lesser 328i.
First up; grinder at the ready!!
Ooooh and arrrr’s at the ready, it was now time to give the garage some light commencing with an array of orange and yellow sparks; sparklers ain’t half got better since I were a lad!
And here it is, one OEM BMW bandage ready to heal the 328’s wounds.
Back to what I mentioned earlier about the engine; cleaning. I couldn’t help but notice everything in Chris’s parts store was spotlessly clean and free from grease and grime usually associated with second hand parts from breakers.
It turns out, even though he doesn’t like to admit it, Chris has a cleaning obsession everything must be cleaned before it leaves the premises. Even though I wasn’t bothered, he insisted he cleaned all the parts before I left so that they were good to use straight away. I also noticed he was very anal about making sure all parts are supplied with the correct nuts and bolts, which was for me, a nice thing to see as I hate receiving parts only to find out I need to go buy a load of fitting hardware to mount the damn thing.
Next the Astra was loaded;
It may not look to bad but in this car there is as follows; bonnet, wings, bumper, crash panel, inner arch section, under trays, arch liners, wishbones, brake ducts, rear control arms, headlights, grill panels, aircon pre-rad, electric fan, a big box of bits and four wheels complete with tyres!
I got home and was able to cross off every single part I required off my list, and more!
I’d highly recommend Chris and CR M-Tech (cr.mtech@btinternet.com) for any of your e36 needs it was nice to deal with someone who also had a passion for the vehicles that were been broken. I liked how everything had to be right, if a part on the car wasn’t 100% it wasn’t allowed to be taken instead a perfect replacement was taken off the shelf, I also liked the fact he trusted me with his own tools and to disassemble the car at my own free will.... so I’d just like to say thanks Chris!!
Now... Let the re-build commence!!
Progress... huge thanks to Iain Fitz who came down from the Scottish borders on his weekend off to help with the panel work, I say help he did most of the work whilst showing me the ropes along with way.
Below pictures just shows the panels offered up to the car, nothing has been tightened up or aligned yet. A quick test fit later showed it’d align right and then we called it a day ready for a Sunday roast to warm us up after getting soaked wet through.
Next step is to take everything back off, and re-build it again with all the bolts and clips in their correct locations and of course get some colour shot onto the panels.
Here’s a proper update to elaborate on the previous post’s repair work;
Upon arriving at my house, Iain and I decided it would be best if we first attempted to straighten the panels that were already on the car, this would eliminate any issue of miss-matching seam sealer and would keep the OEM under seal. We had great success with the inner arch, wing rail and bumper brackets, so much so that we didn’t need to use any of those panels off the purple section I’d previously sourced.
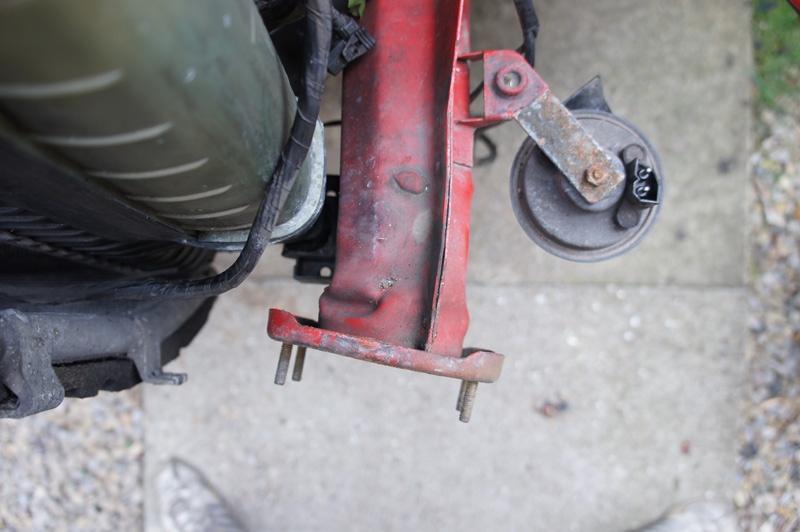
Next was to make sure the car was straight, fortunately I was lent a CD with all the e36 jig info which gave all the alignment and measurement information needed to check the car was still true, and it was the only casualty was the bumper support cup on the end of the chassis leg. We at first tried to pull this straight, and although there was a small bit of success we weren’t happy with it, it was not time to face facts and one again the grinder was out.
First a bit of spot the difference;
Before...

After...
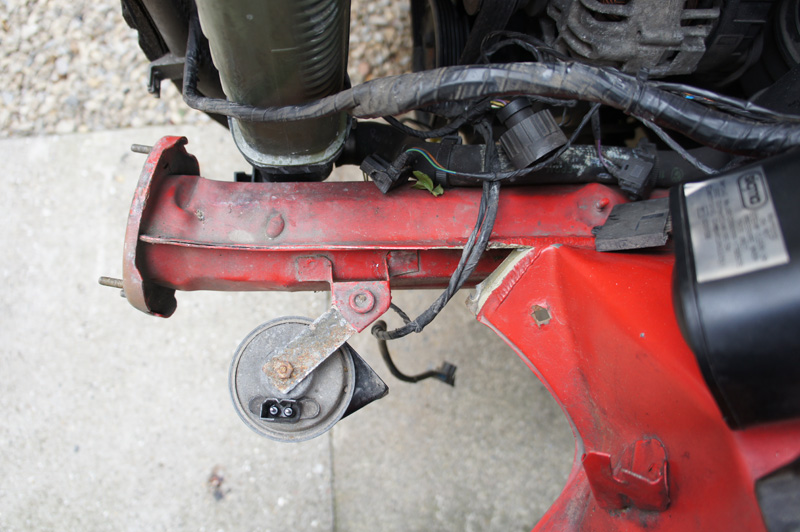
As you can see the only part used was the end cup, this was now to be welded onto my existing chassis leg. It was handy getting the whole sections as it allowed us to take measurements and cut correctly... measure twice, cut once.
Once welded, the welds were cleaned up with a grinder.

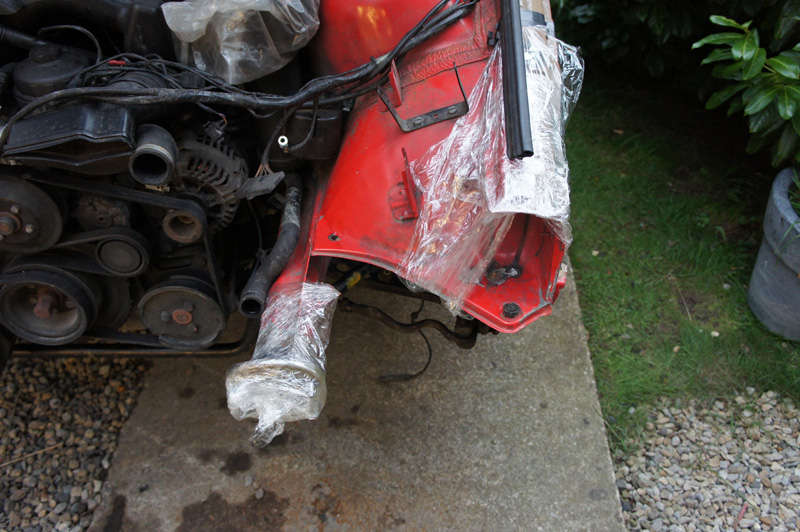
I wasn’t ready to prepare the surface and paint yet, so I used cling film to temporally protect the bare metal surface from the elements.
Today all the front end mechanics were done, new wishbones and anti-roll bar drop links fitted. I also took the time to strip down the front end and re-build everything using anti-seize compound and also re-lubricated the poly bushes which were surprisingly dry considering they’d only been fitted over a year ago.
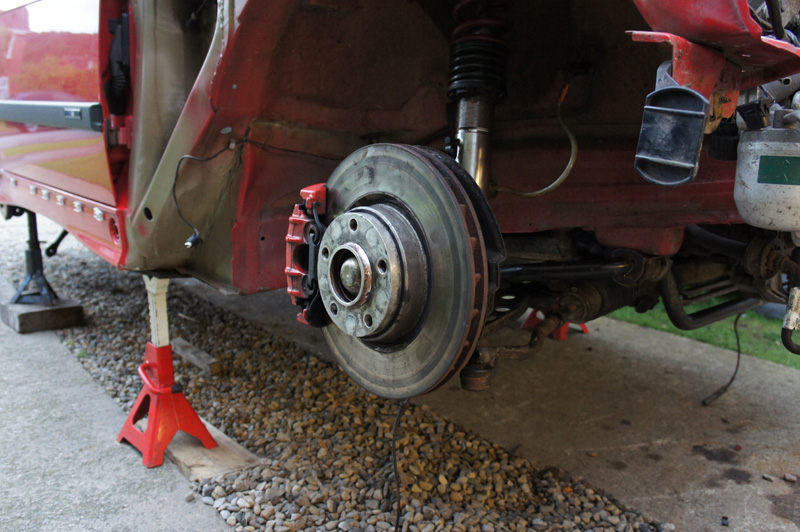
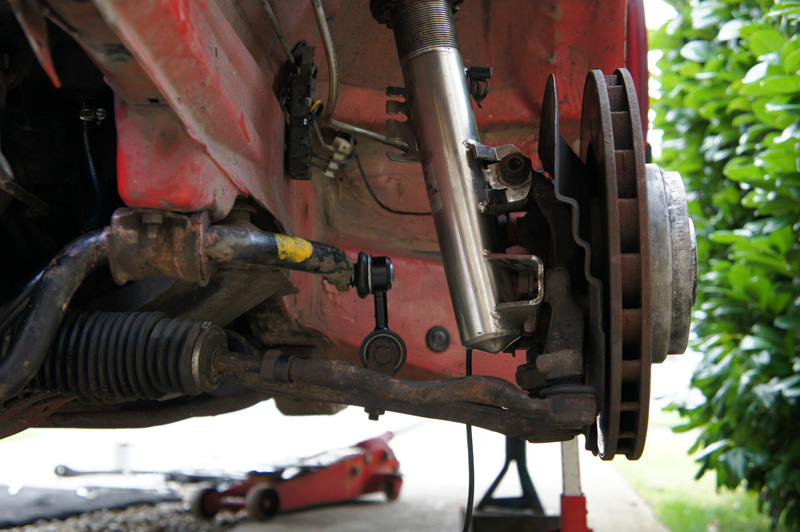
Unfortunately the power steering pump pipe got a bit bent by debris that was dragged under the car, so was replaced.
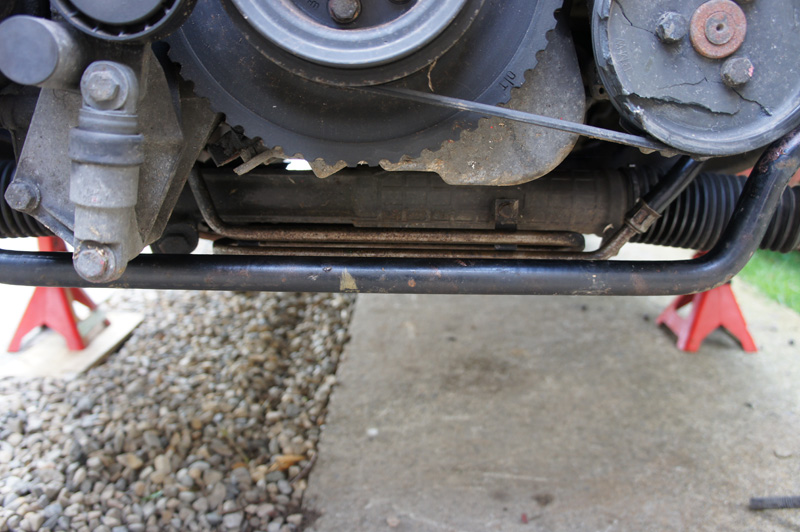
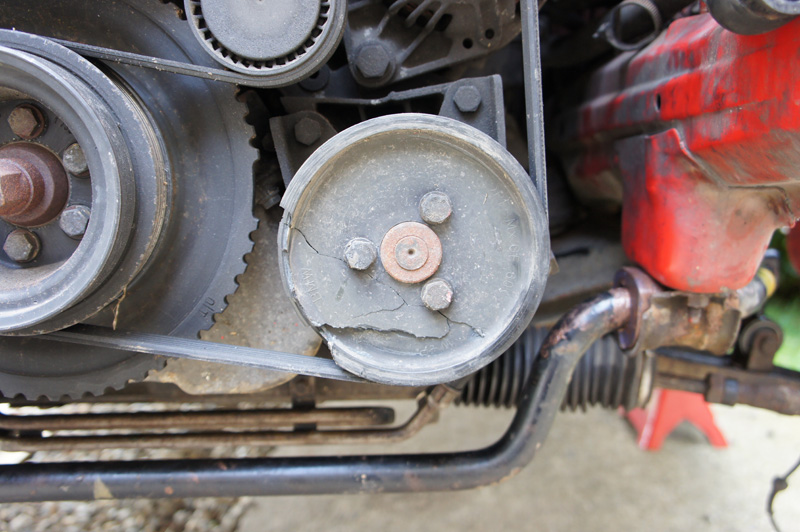
The plastic power steering pump pulley also took a knock, this too is to be replaced... obviously!!
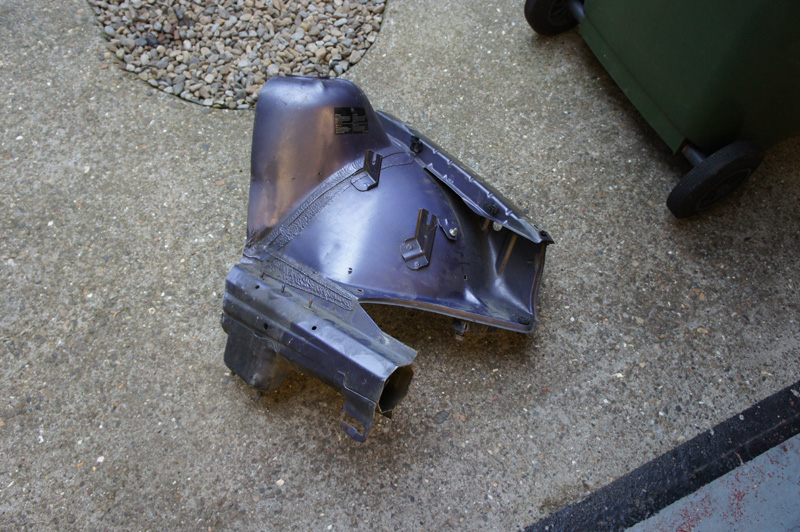
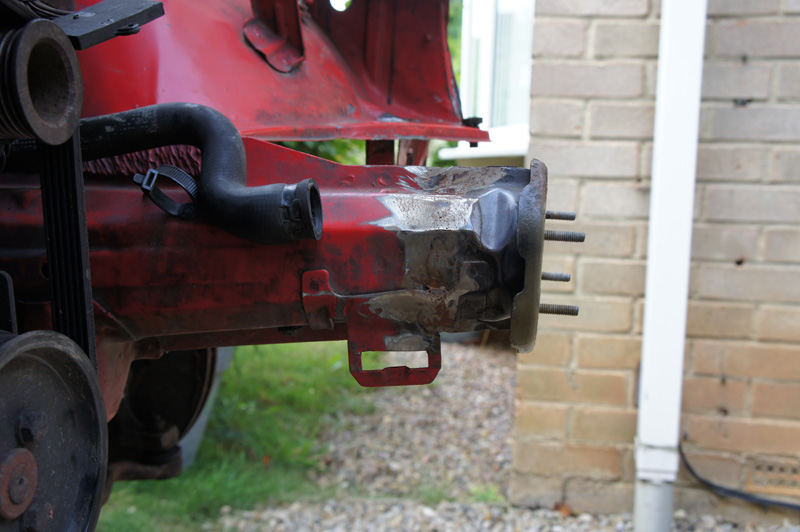
Next it was time to replace this;
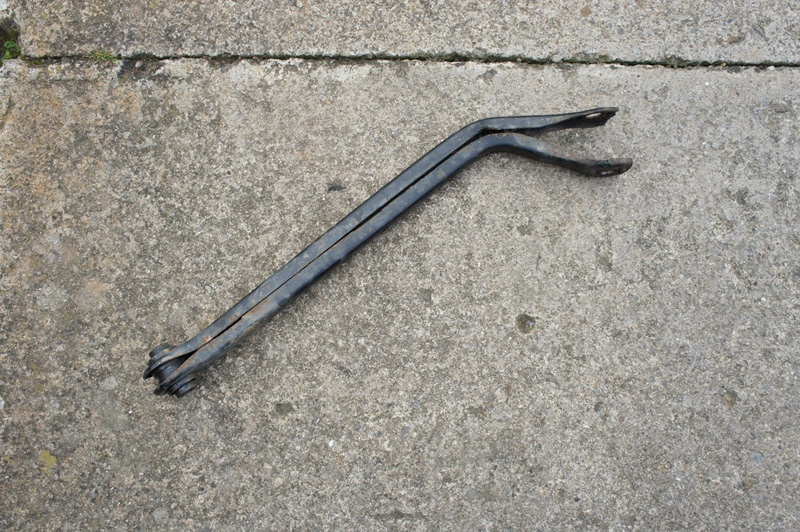
Believe it or not this DID NOT get bent in the accident, it got bent with the straps used to winch the vehicle onto the tow truck, there is a lesson to be learnt here as only after researching this did I find it was a common occurrence due to the arms been so weak and designed to fail in a knock.
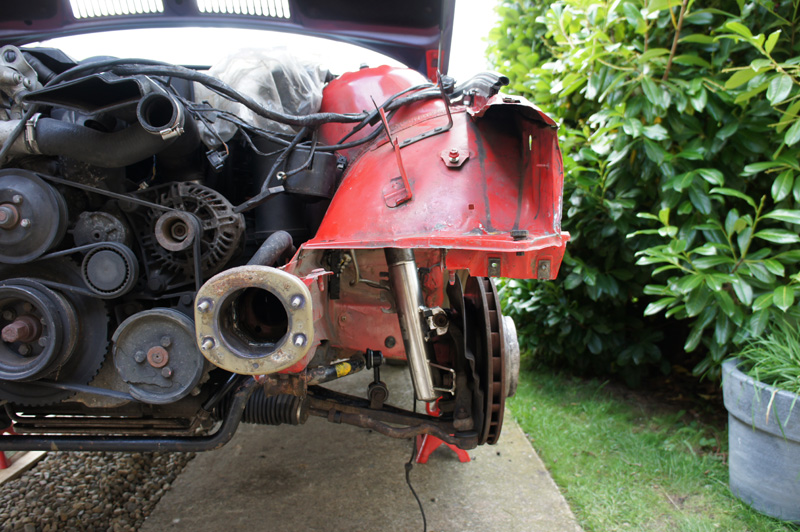
All the online jargon said due to running a large case differential there was no way this arm could be replaced without the whole rear arm been dropped or the differential lowered out of the car. Now I’ve replaced one before with a medium case differential and that was a royal pain in the back side, so I couldn’t see this task been any easier.
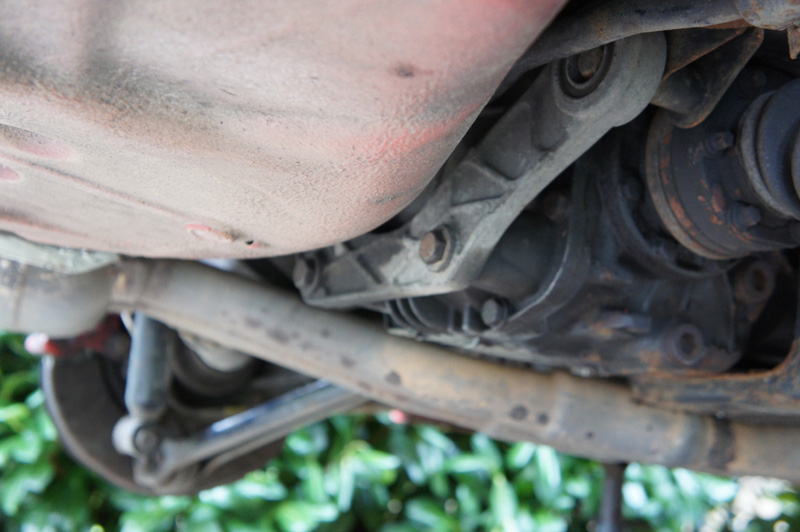
After removing the outer and inner control arm bolts it was obvious the diff was going to have to be moved, but I wasn’t convinced it’d have to come out. Instead I removed the two lower diff bolts (pictured below) which hold it to the rear support bracket, after that I used a trolley jack to lift it up, and a pry bar to move it across and the bolt just to say come out.
Job done, without half the hassle that was expected bonus!
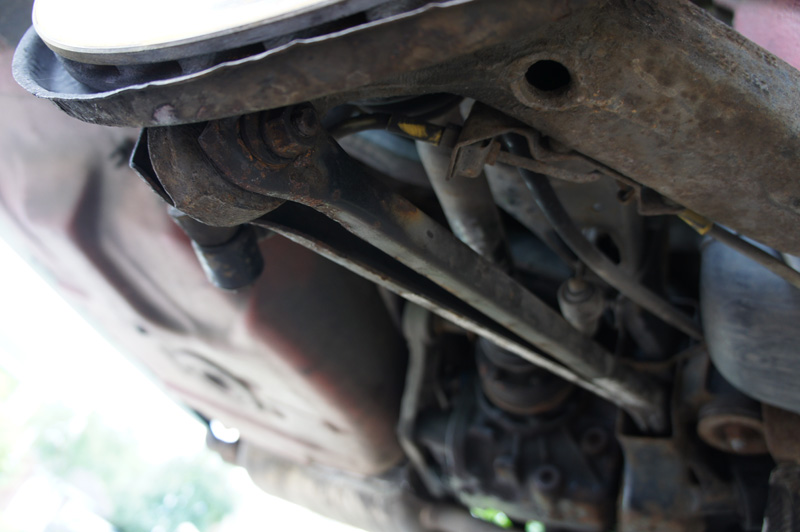
New arm in place, ready for the car to be re-geo’d.
As well as all the above, I also got round to starting the prep work on the inner panels but it started raining so quickly covered them back up and will hopefully get to resume work tomorrow!!
Upon arriving at my house, Iain and I decided it would be best if we first attempted to straighten the panels that were already on the car, this would eliminate any issue of miss-matching seam sealer and would keep the OEM under seal. We had great success with the inner arch, wing rail and bumper brackets, so much so that we didn’t need to use any of those panels off the purple section I’d previously sourced.
Next was to make sure the car was straight, fortunately I was lent a CD with all the e36 jig info which gave all the alignment and measurement information needed to check the car was still true, and it was the only casualty was the bumper support cup on the end of the chassis leg. We at first tried to pull this straight, and although there was a small bit of success we weren’t happy with it, it was not time to face facts and one again the grinder was out.
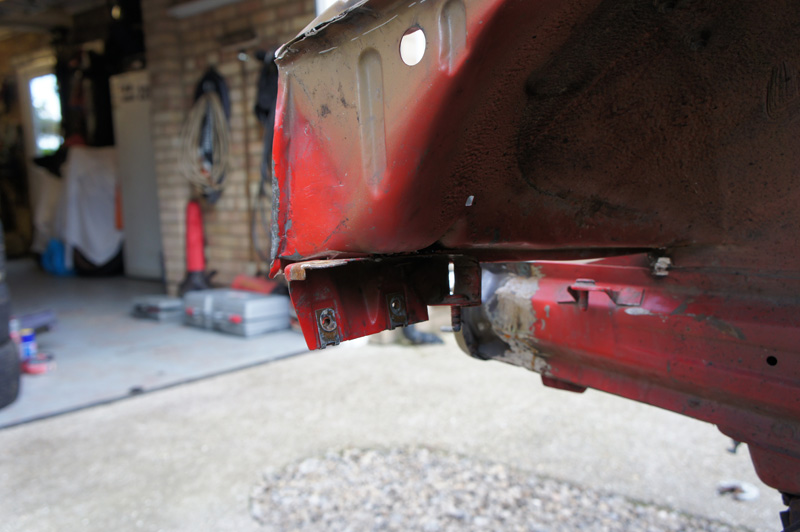
First a bit of spot the difference;
Before...
After...
As you can see the only part used was the end cup, this was now to be welded onto my existing chassis leg. It was handy getting the whole sections as it allowed us to take measurements and cut correctly... measure twice, cut once.
Once welded, the welds were cleaned up with a grinder.
I wasn’t ready to prepare the surface and paint yet, so I used cling film to temporally protect the bare metal surface from the elements.
Today all the front end mechanics were done, new wishbones and anti-roll bar drop links fitted. I also took the time to strip down the front end and re-build everything using anti-seize compound and also re-lubricated the poly bushes which were surprisingly dry considering they’d only been fitted over a year ago.
Unfortunately the power steering pump pipe got a bit bent by debris that was dragged under the car, so was replaced.
The plastic power steering pump pulley also took a knock, this too is to be replaced... obviously!!
Next it was time to replace this;
Believe it or not this DID NOT get bent in the accident, it got bent with the straps used to winch the vehicle onto the tow truck, there is a lesson to be learnt here as only after researching this did I find it was a common occurrence due to the arms been so weak and designed to fail in a knock.
All the online jargon said due to running a large case differential there was no way this arm could be replaced without the whole rear arm been dropped or the differential lowered out of the car. Now I’ve replaced one before with a medium case differential and that was a royal pain in the back side, so I couldn’t see this task been any easier.
After removing the outer and inner control arm bolts it was obvious the diff was going to have to be moved, but I wasn’t convinced it’d have to come out. Instead I removed the two lower diff bolts (pictured below) which hold it to the rear support bracket, after that I used a trolley jack to lift it up, and a pry bar to move it across and the bolt just to say come out.
Job done, without half the hassle that was expected bonus!
New arm in place, ready for the car to be re-geo’d.
As well as all the above, I also got round to starting the prep work on the inner panels but it started raining so quickly covered them back up and will hopefully get to resume work tomorrow!!
Don’t worry, I haven’t given up on the old girl... I’ve just been that busy with work and rushing to get the car finished in time for its final holiday of the year to the Nurburgring and Spa-Francorchamps that I’ve not had time to update this thread.
First off, I must apologise for the lack of pictures but as mentioned above time was not on my side so the last thing on my mind was stopping to take photos along the way, plus as dark nights loomed I often found myself laid on my back in the pitch black!
So, carrying on from the last update; I’ve managed to remove any imperfection to the surface, mask up the surrounding area and prepare the repaired panel for paint. First step was to acid etch prime the surface, for this I used Acid #8 from Halfords.
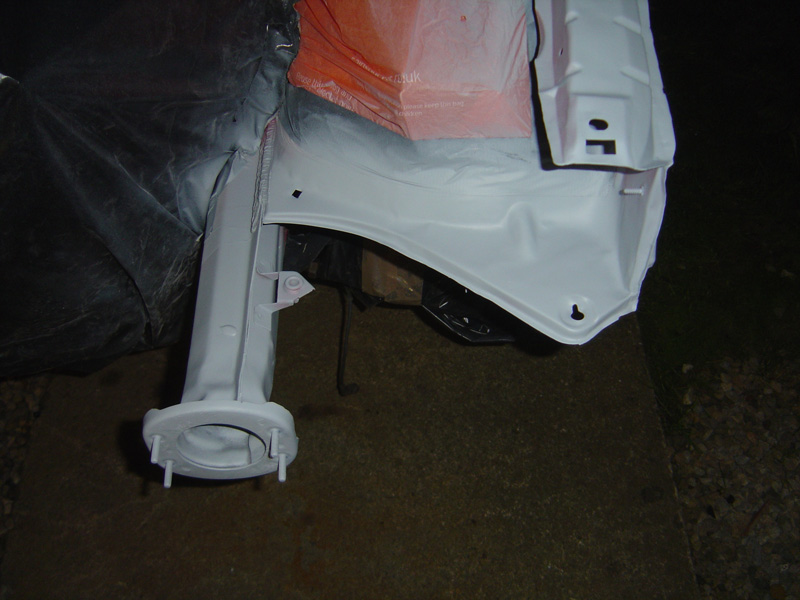
Next, not shown in the pictures there were several coats of Halfords Red Primer. The primer was then allowed to harden before been flatted down and painted with some colour matched Hellrot Red base coat.
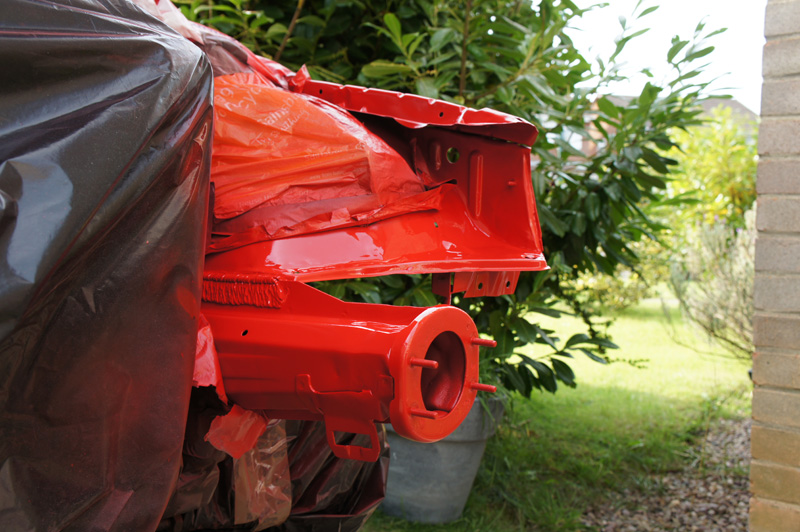
Whilst still tacky I removed the masking tape to avoid any flaking of the paint of harsh lines.
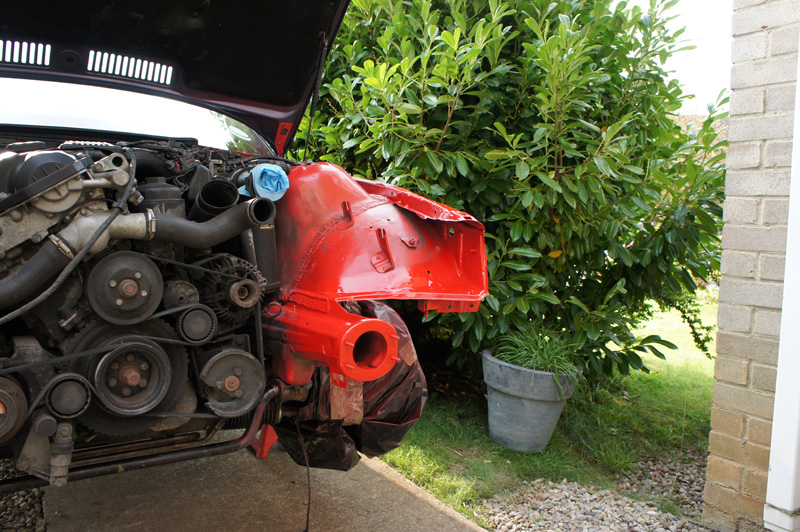
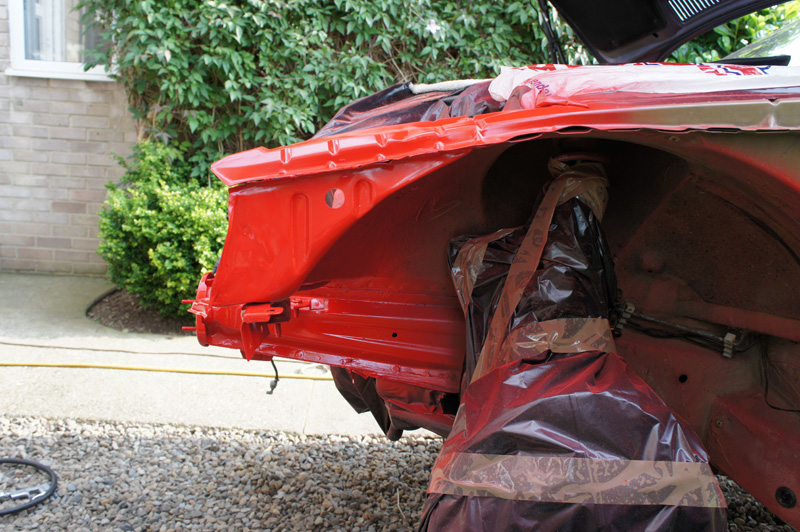
The final result, although it looks a little ‘glossy’ over the last few days of using the car it’s dulled down and blended in with the OEM finish quite nicely. Compared to how the car looked a few weeks ago, who’d have thought it’d have looked this good once again!
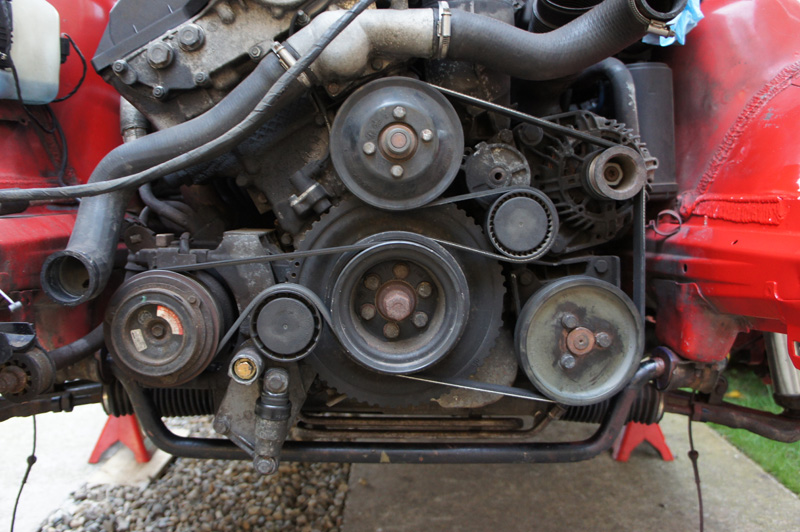
Next up was to replace the PAS pulley, which wasn’t too much of a task once I’d figured out how the tensioners worked.
Un-fortunately this is where the photo’s stop, here’s the repair once the car is all back together and a picture of the multi-coloured front end... afraid I just ran out of time when it came to getting the panels done in time for Spa, I was still doing the alignment and geometry 30 minutes before I was meant to leave on route to the ferry port.

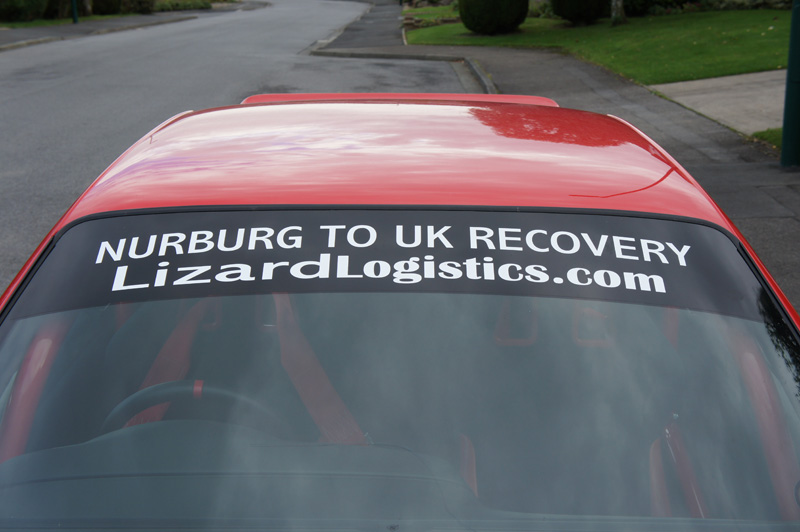
Next up, was the problem of vision, and lack of it! At this time of year the low sun and no sun visors was really causing a problem, fortunately Alex had a spare sun strip and was kind enough to donate it to me. This simple, yet effective measure saved me at the ‘Ring and Spa where without it I would have been pretty much blind 90% of the time.
And here’s a few pictures complete, just for good measure... the purple is really growing on me!
Winter plans, well where does the list end? Main priority will be to re-build the back axel and run some new brake lines, and of course paint it red again! Whilst I’m at it I really want to get some good 3-way suspension on there... rumour has it HSD & Track Culture are in the process of making an awesome yet affordable track set-up so I’m going to hang fire and see about giving these ago as after driving an e36 M3 with the normal HSD’s they really do seem like good value for money.
As always, stay tuned as even I don’t know where this one is heading!!
First off, I must apologise for the lack of pictures but as mentioned above time was not on my side so the last thing on my mind was stopping to take photos along the way, plus as dark nights loomed I often found myself laid on my back in the pitch black!
So, carrying on from the last update; I’ve managed to remove any imperfection to the surface, mask up the surrounding area and prepare the repaired panel for paint. First step was to acid etch prime the surface, for this I used Acid #8 from Halfords.
Next, not shown in the pictures there were several coats of Halfords Red Primer. The primer was then allowed to harden before been flatted down and painted with some colour matched Hellrot Red base coat.
Whilst still tacky I removed the masking tape to avoid any flaking of the paint of harsh lines.
The final result, although it looks a little ‘glossy’ over the last few days of using the car it’s dulled down and blended in with the OEM finish quite nicely. Compared to how the car looked a few weeks ago, who’d have thought it’d have looked this good once again!
Next up was to replace the PAS pulley, which wasn’t too much of a task once I’d figured out how the tensioners worked.
Un-fortunately this is where the photo’s stop, here’s the repair once the car is all back together and a picture of the multi-coloured front end... afraid I just ran out of time when it came to getting the panels done in time for Spa, I was still doing the alignment and geometry 30 minutes before I was meant to leave on route to the ferry port.
Next up, was the problem of vision, and lack of it! At this time of year the low sun and no sun visors was really causing a problem, fortunately Alex had a spare sun strip and was kind enough to donate it to me. This simple, yet effective measure saved me at the ‘Ring and Spa where without it I would have been pretty much blind 90% of the time.
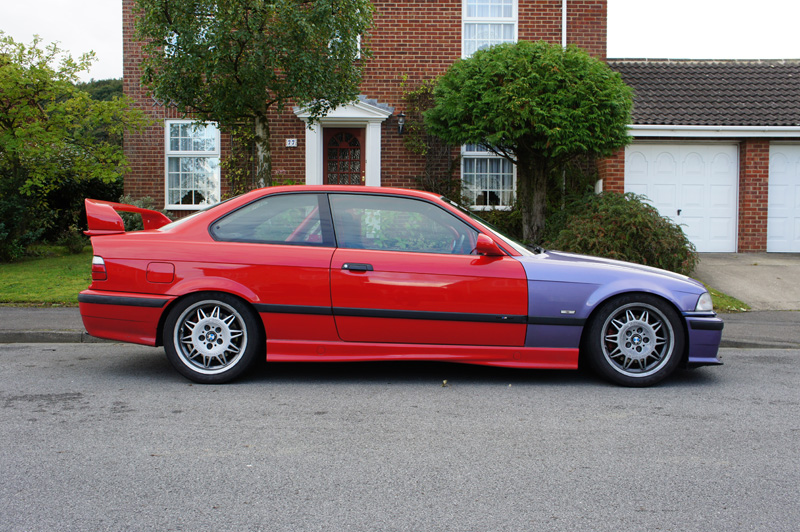
And here’s a few pictures complete, just for good measure... the purple is really growing on me!
Winter plans, well where does the list end? Main priority will be to re-build the back axel and run some new brake lines, and of course paint it red again! Whilst I’m at it I really want to get some good 3-way suspension on there... rumour has it HSD & Track Culture are in the process of making an awesome yet affordable track set-up so I’m going to hang fire and see about giving these ago as after driving an e36 M3 with the normal HSD’s they really do seem like good value for money.
As always, stay tuned as even I don’t know where this one is heading!!
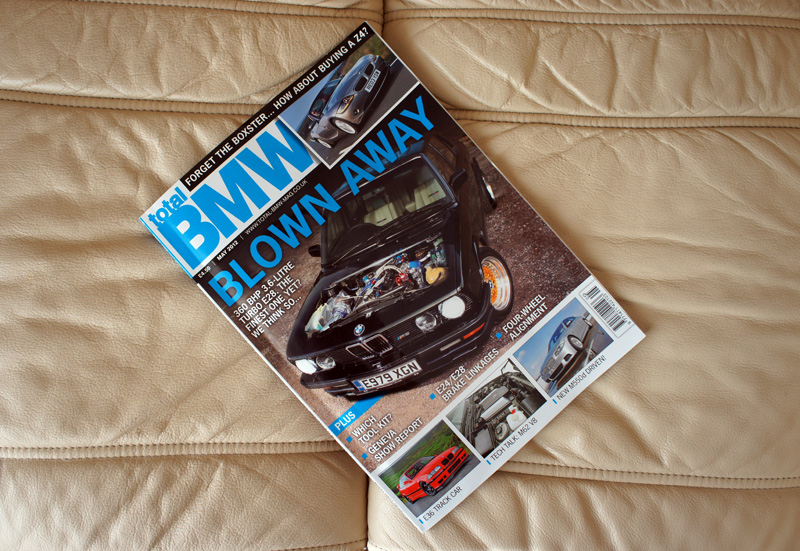
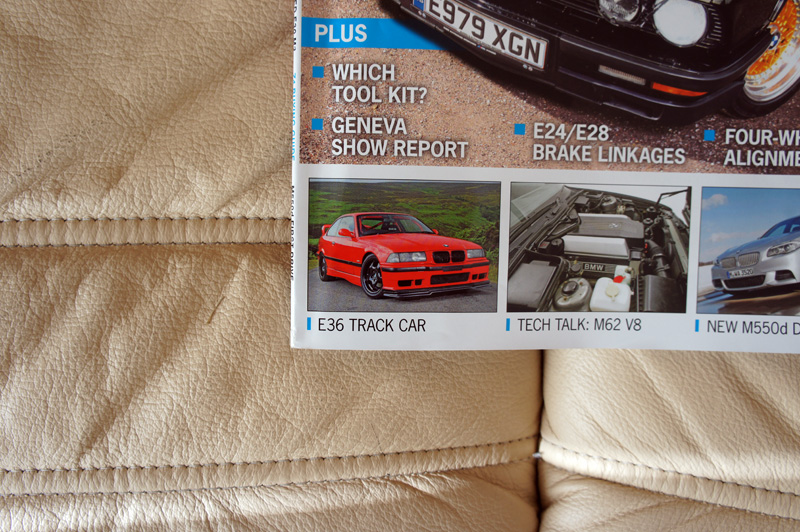
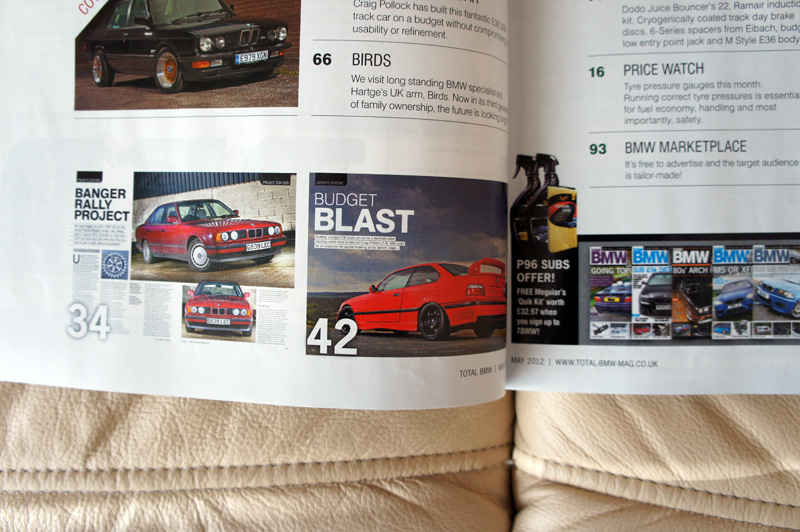
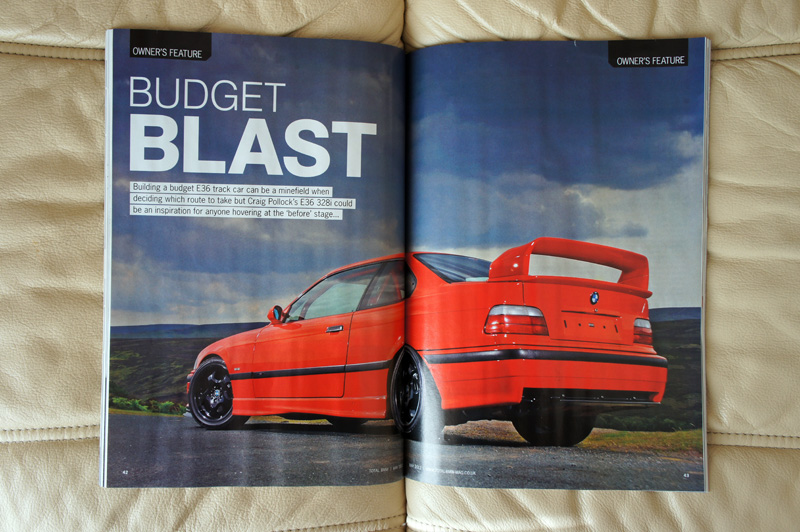
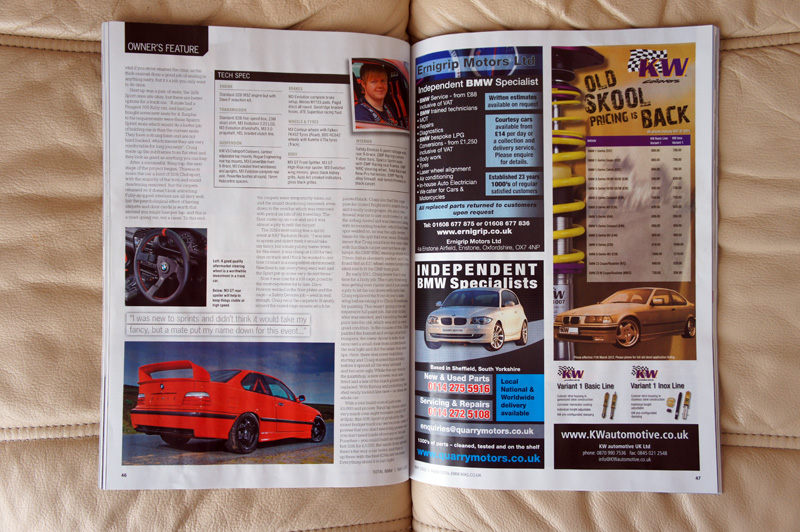
Well the long awaited magazine feature is here, it’s in this month’s Total BMW (May’s issue) and the feature is fantastic! The car has a small slot on the front cover, the inner index and a full centre spread five page feature, it’s all well written and the photo’s came out as expected to so I couldn’t be happier.

And as for an update, the TVR has been sold which leaves more time to play on the little e36 first plans obviously will be to get it all back to one colour and a GTR front splitter re-fitted. The BBS split rims are 90% complete, more on these shortly and I’ll have to get the BBS Sunflowers re-coloured to black or maybe even a light anthracite haven’t decided yet.
And as for an update, the TVR has been sold which leaves more time to play on the little e36 first plans obviously will be to get it all back to one colour and a GTR front splitter re-fitted. The BBS split rims are 90% complete, more on these shortly and I’ll have to get the BBS Sunflowers re-coloured to black or maybe even a light anthracite haven’t decided yet.
Thought I best update this thread as it’s been quite awhile since I have, in fact it’s been quite awhile since I’ve used the car too!
First off, the reasons for not updating this thread are described in the next picture;
Yes, bricks and mortar!
Basically I bought a house that ‘needed a quick spruce up’ this very quickly turned into gut the whole thing and start again. So, over the last few months I’ve fitted new internal doors, external doors, windows, French doors, re-pointed, re-plumbed and fitted new radiators to the whole house as well as rip out all the old decor and start again!
Obviously all this work has took up any spare time I was to have to spend on the BMW, and it’s still not done just yet but give it 6-weeks and it’ll be there.
One of the main plans, and the reason why I bought this specific house was because of the potential for a 3 car drive and an oversized double garage, again I was expecting to do this in the fall but the house work put the brakes on those plans.
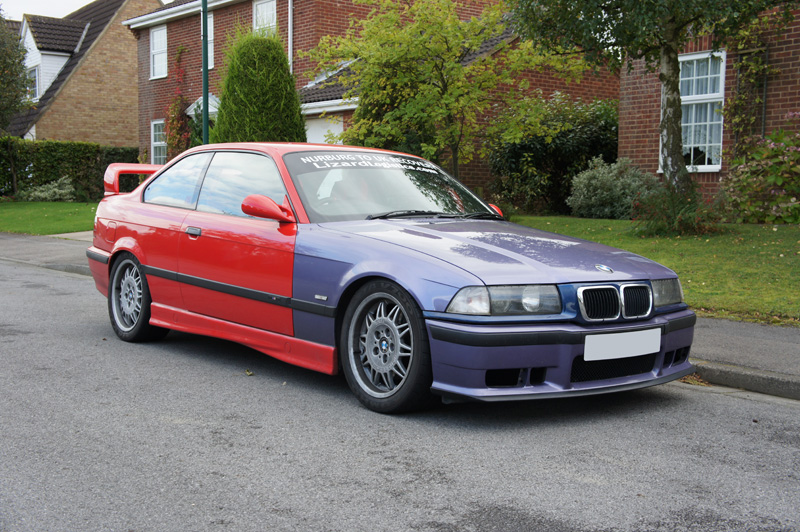
So, before knocking down the old garage I thought the best thing to do was utilise the old for now and get the BMW ready for some 2013 track days;
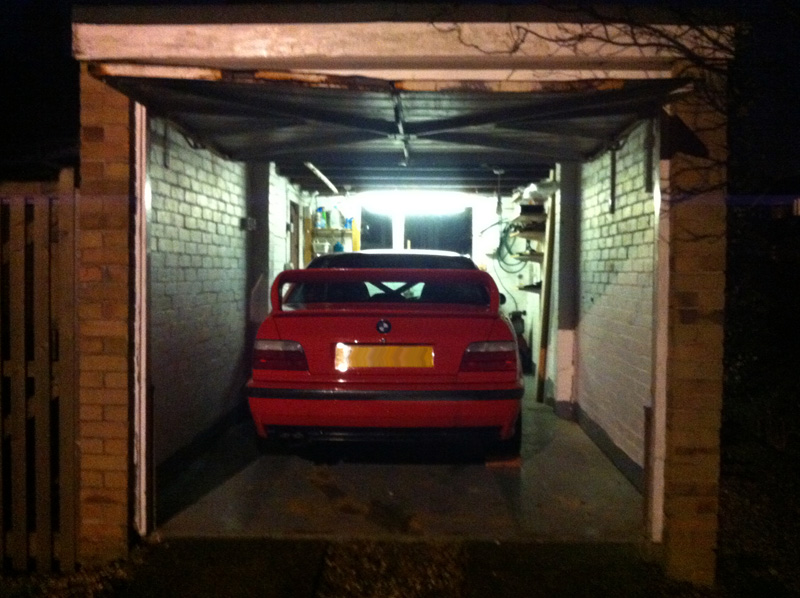
There she is, in all her purple and red glory.
Plans, well same as I planned last winter and never got round to; re-build the back axel and run some new brake lines, and of course paint it red again. Nothing too exciting but really looking forward to spending some time on the old girl, not to mention driving her!
First off, the reasons for not updating this thread are described in the next picture;
Yes, bricks and mortar!
Basically I bought a house that ‘needed a quick spruce up’ this very quickly turned into gut the whole thing and start again. So, over the last few months I’ve fitted new internal doors, external doors, windows, French doors, re-pointed, re-plumbed and fitted new radiators to the whole house as well as rip out all the old decor and start again!
Obviously all this work has took up any spare time I was to have to spend on the BMW, and it’s still not done just yet but give it 6-weeks and it’ll be there.
One of the main plans, and the reason why I bought this specific house was because of the potential for a 3 car drive and an oversized double garage, again I was expecting to do this in the fall but the house work put the brakes on those plans.
So, before knocking down the old garage I thought the best thing to do was utilise the old for now and get the BMW ready for some 2013 track days;
There she is, in all her purple and red glory.
Plans, well same as I planned last winter and never got round to; re-build the back axel and run some new brake lines, and of course paint it red again. Nothing too exciting but really looking forward to spending some time on the old girl, not to mention driving her!
Gassing Station | Readers' Cars | Top of Page | What's New | My Stuff