Craig's 328i Sport - e36 Track Car Build Thread
Discussion


Progress... huge thanks to Iain Fitz who came down from the Scottish borders on his weekend off to help with the panel work, I say help he did most of the work whilst showing me the ropes along with way.
Below pictures just shows the panels offered up to the car, nothing has been tightened up or aligned yet. A quick test fit later showed it’d align right and then we called it a day ready for a Sunday roast to warm us up after getting soaked wet through.
Next step is to take everything back off, and re-build it again with all the bolts and clips in their correct locations and of course get some colour shot onto the panels.


Here’s a proper update to elaborate on the previous post’s repair work;
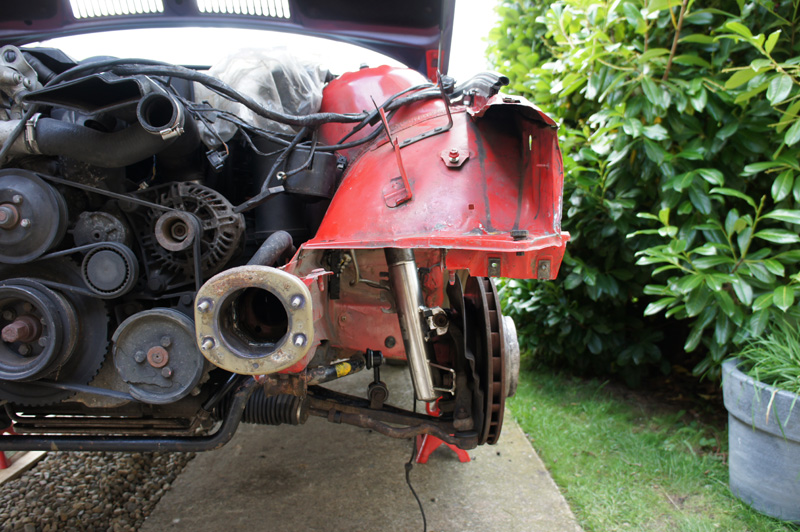
Upon arriving at my house, Iain and I decided it would be best if we first attempted to straighten the panels that were already on the car, this would eliminate any issue of miss-matching seam sealer and would keep the OEM under seal. We had great success with the inner arch, wing rail and bumper brackets, so much so that we didn’t need to use any of those panels off the purple section I’d previously sourced.
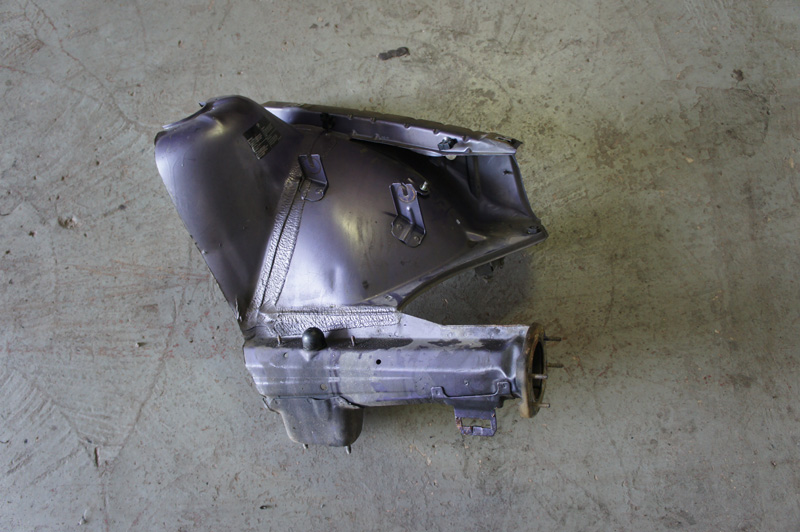
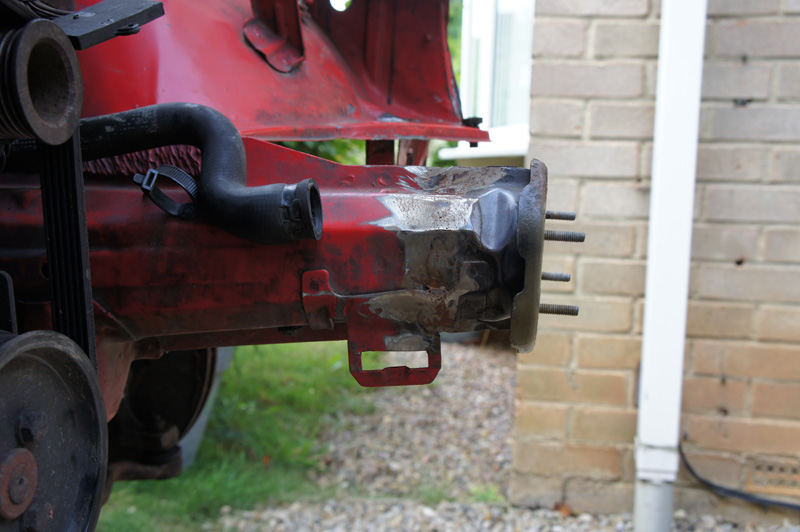
Next was to make sure the car was straight, fortunately I was lent a CD with all the e36 jig info which gave all the alignment and measurement information needed to check the car was still true, and it was the only casualty was the bumper support cup on the end of the chassis leg. We at first tried to pull this straight, and although there was a small bit of success we weren’t happy with it, it was not time to face facts and one again the grinder was out.
First a bit of spot the difference;
Before...
After...
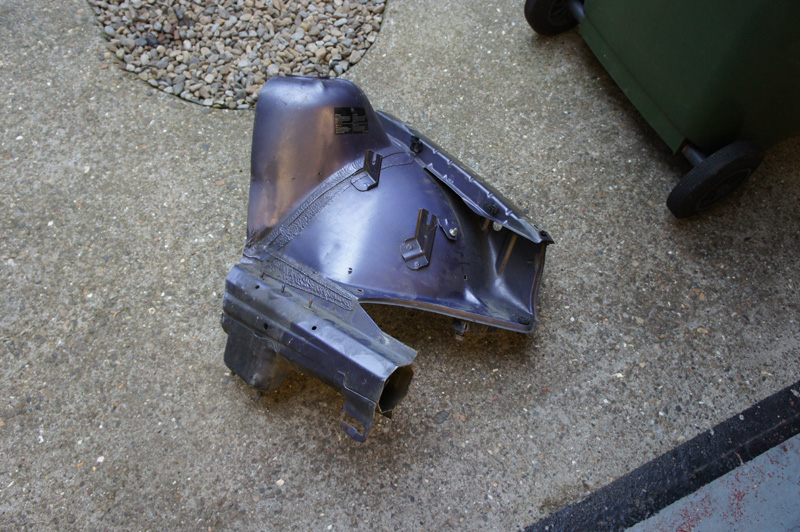
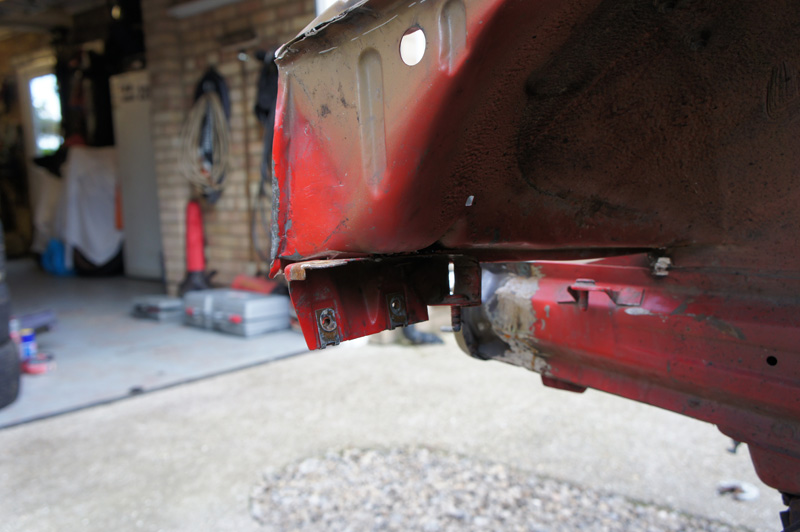
As you can see the only part used was the end cup, this was now to be welded onto my existing chassis leg. It was handy getting the whole sections as it allowed us to take measurements and cut correctly... measure twice, cut once.
Once welded, the welds were cleaned up with a grinder.

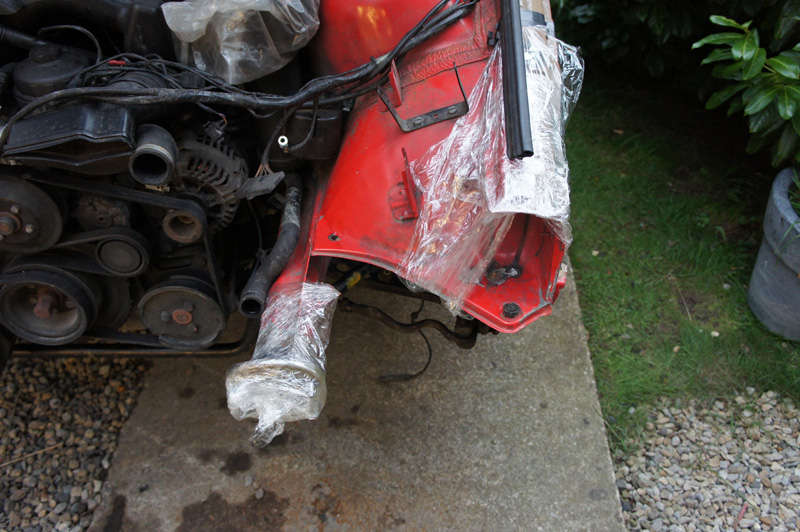
I wasn’t ready to prepare the surface and paint yet, so I used cling film to temporally protect the bare metal surface from the elements.
Today all the front end mechanics were done, new wishbones and anti-roll bar drop links fitted. I also took the time to strip down the front end and re-build everything using anti-seize compound and also re-lubricated the poly bushes which were surprisingly dry considering they’d only been fitted over a year ago.
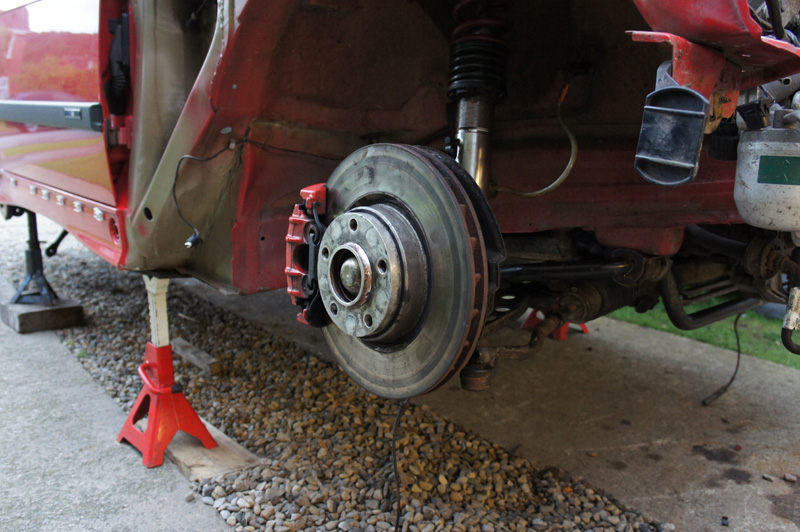
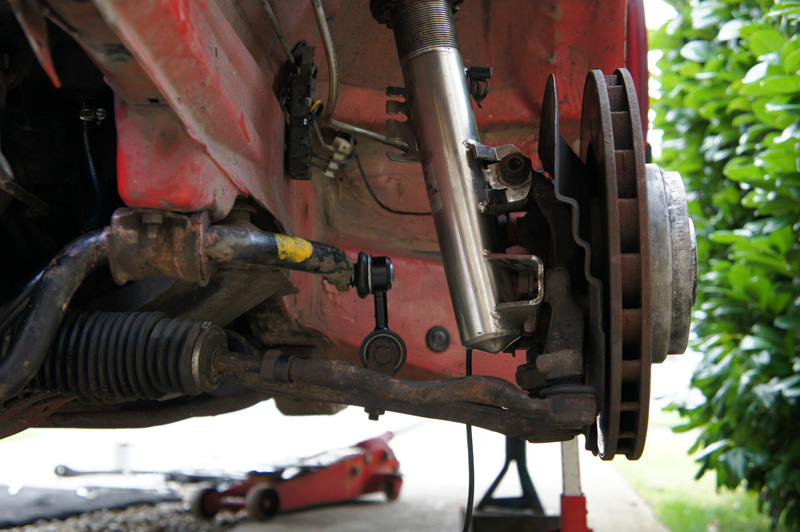
Unfortunately the power steering pump pipe got a bit bent by debris that was dragged under the car, so was replaced.
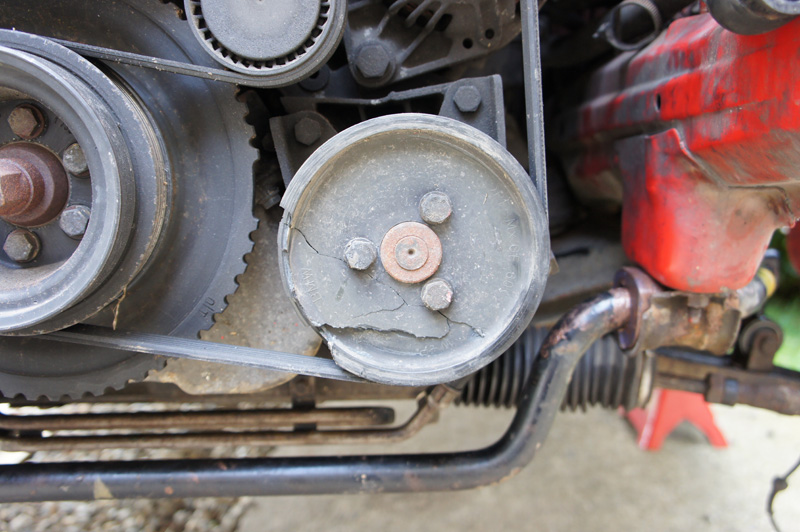
The plastic power steering pump pulley also took a knock, this too is to be replaced... obviously!!
Next it was time to replace this;
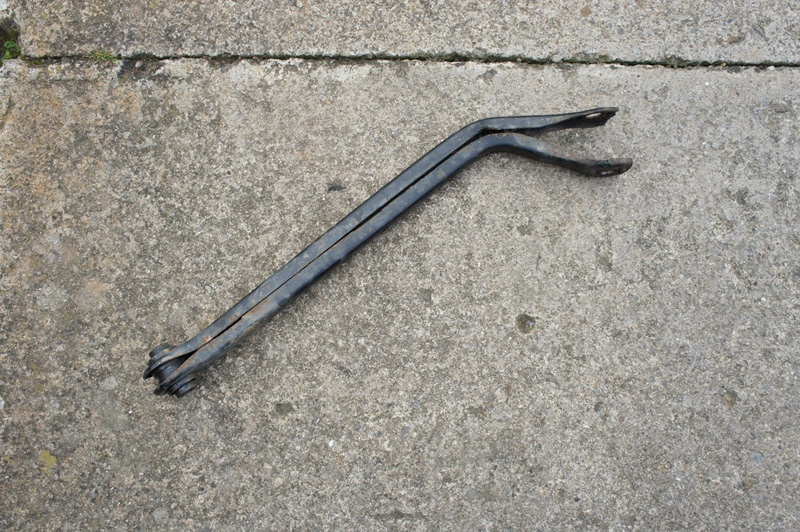
Believe it or not this DID NOT get bent in the accident, it got bent with the straps used to winch the vehicle onto the tow truck, there is a lesson to be learnt here as only after researching this did I find it was a common occurrence due to the arms been so weak and designed to fail in a knock.
All the online jargon said due to running a large case differential there was no way this arm could be replaced without the whole rear arm been dropped or the differential lowered out of the car. Now I’ve replaced one before with a medium case differential and that was a royal pain in the back side, so I couldn’t see this task been any easier.
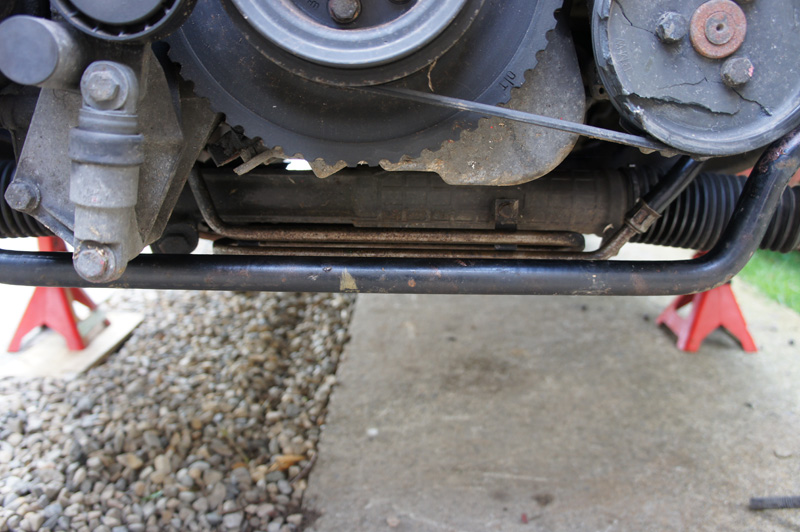
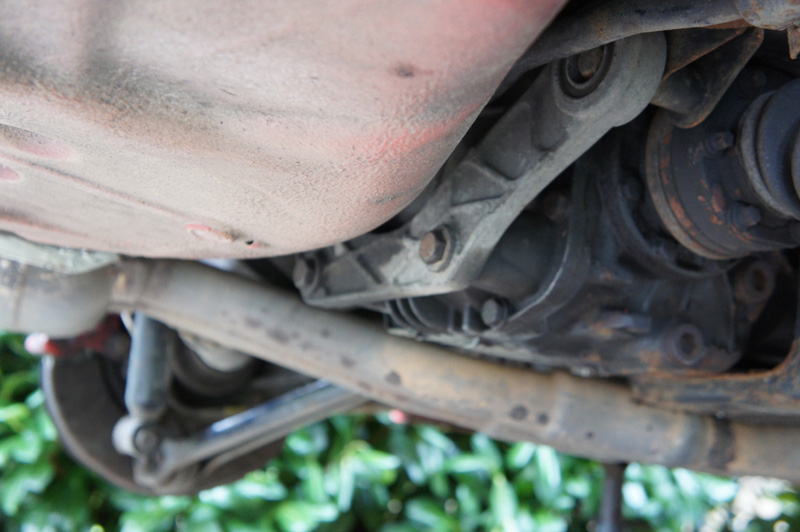
After removing the outer and inner control arm bolts it was obvious the diff was going to have to be moved, but I wasn’t convinced it’d have to come out. Instead I removed the two lower diff bolts (pictured below) which hold it to the rear support bracket, after that I used a trolley jack to lift it up, and a pry bar to move it across and the bolt just to say come out.
Job done, without half the hassle that was expected bonus!
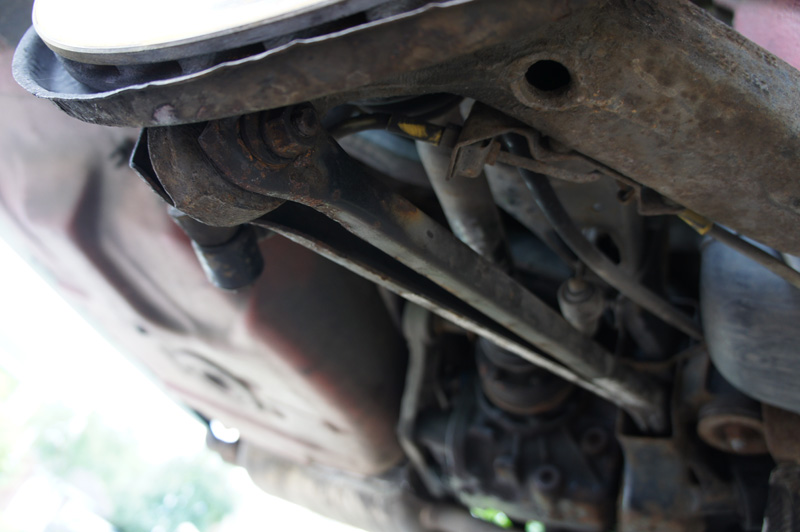
New arm in place, ready for the car to be re-geo’d.
As well as all the above, I also got round to starting the prep work on the inner panels but it started raining so quickly covered them back up and will hopefully get to resume work tomorrow!!
Upon arriving at my house, Iain and I decided it would be best if we first attempted to straighten the panels that were already on the car, this would eliminate any issue of miss-matching seam sealer and would keep the OEM under seal. We had great success with the inner arch, wing rail and bumper brackets, so much so that we didn’t need to use any of those panels off the purple section I’d previously sourced.
Next was to make sure the car was straight, fortunately I was lent a CD with all the e36 jig info which gave all the alignment and measurement information needed to check the car was still true, and it was the only casualty was the bumper support cup on the end of the chassis leg. We at first tried to pull this straight, and although there was a small bit of success we weren’t happy with it, it was not time to face facts and one again the grinder was out.
First a bit of spot the difference;
Before...
After...
As you can see the only part used was the end cup, this was now to be welded onto my existing chassis leg. It was handy getting the whole sections as it allowed us to take measurements and cut correctly... measure twice, cut once.
Once welded, the welds were cleaned up with a grinder.
I wasn’t ready to prepare the surface and paint yet, so I used cling film to temporally protect the bare metal surface from the elements.
Today all the front end mechanics were done, new wishbones and anti-roll bar drop links fitted. I also took the time to strip down the front end and re-build everything using anti-seize compound and also re-lubricated the poly bushes which were surprisingly dry considering they’d only been fitted over a year ago.
Unfortunately the power steering pump pipe got a bit bent by debris that was dragged under the car, so was replaced.
The plastic power steering pump pulley also took a knock, this too is to be replaced... obviously!!
Next it was time to replace this;
Believe it or not this DID NOT get bent in the accident, it got bent with the straps used to winch the vehicle onto the tow truck, there is a lesson to be learnt here as only after researching this did I find it was a common occurrence due to the arms been so weak and designed to fail in a knock.
All the online jargon said due to running a large case differential there was no way this arm could be replaced without the whole rear arm been dropped or the differential lowered out of the car. Now I’ve replaced one before with a medium case differential and that was a royal pain in the back side, so I couldn’t see this task been any easier.
After removing the outer and inner control arm bolts it was obvious the diff was going to have to be moved, but I wasn’t convinced it’d have to come out. Instead I removed the two lower diff bolts (pictured below) which hold it to the rear support bracket, after that I used a trolley jack to lift it up, and a pry bar to move it across and the bolt just to say come out.
Job done, without half the hassle that was expected bonus!
New arm in place, ready for the car to be re-geo’d.
As well as all the above, I also got round to starting the prep work on the inner panels but it started raining so quickly covered them back up and will hopefully get to resume work tomorrow!!
Don’t worry, I haven’t given up on the old girl... I’ve just been that busy with work and rushing to get the car finished in time for its final holiday of the year to the Nurburgring and Spa-Francorchamps that I’ve not had time to update this thread.
First off, I must apologise for the lack of pictures but as mentioned above time was not on my side so the last thing on my mind was stopping to take photos along the way, plus as dark nights loomed I often found myself laid on my back in the pitch black!
So, carrying on from the last update; I’ve managed to remove any imperfection to the surface, mask up the surrounding area and prepare the repaired panel for paint. First step was to acid etch prime the surface, for this I used Acid #8 from Halfords.
Next, not shown in the pictures there were several coats of Halfords Red Primer. The primer was then allowed to harden before been flatted down and painted with some colour matched Hellrot Red base coat.
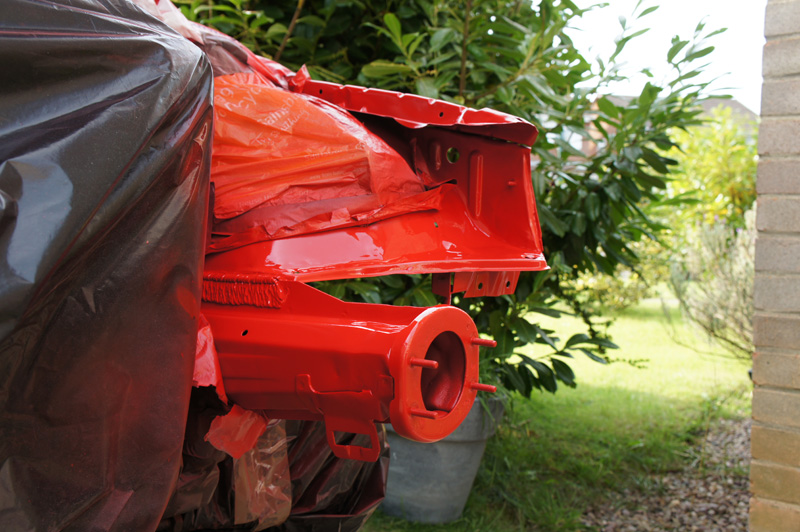
Whilst still tacky I removed the masking tape to avoid any flaking of the paint of harsh lines.
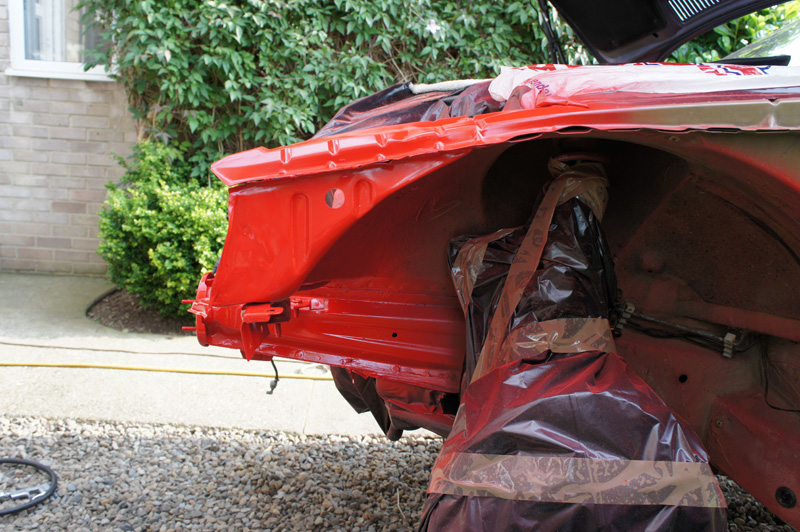
The final result, although it looks a little ‘glossy’ over the last few days of using the car it’s dulled down and blended in with the OEM finish quite nicely. Compared to how the car looked a few weeks ago, who’d have thought it’d have looked this good once again!
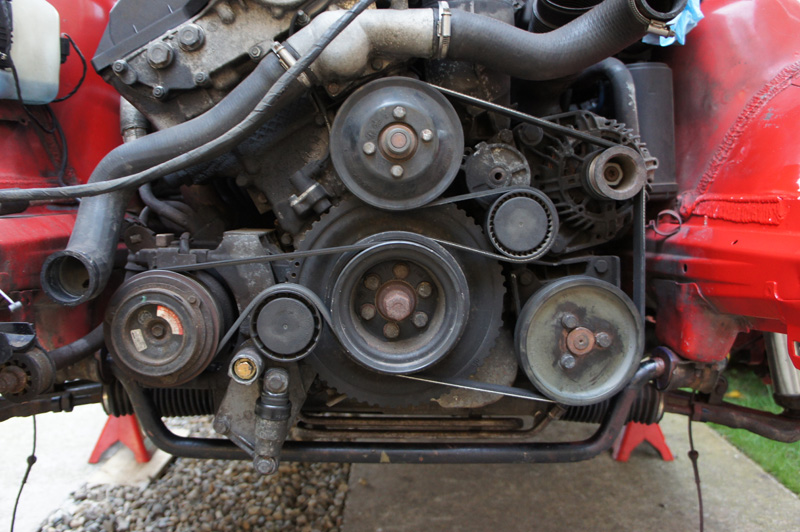
Next up was to replace the PAS pulley, which wasn’t too much of a task once I’d figured out how the tensioners worked.
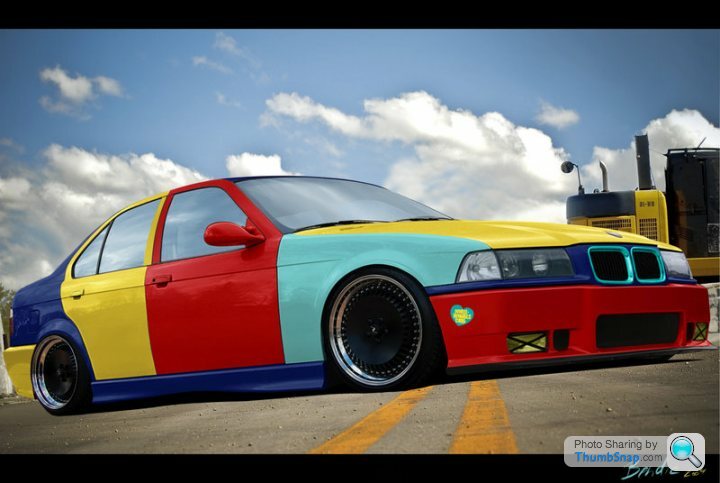
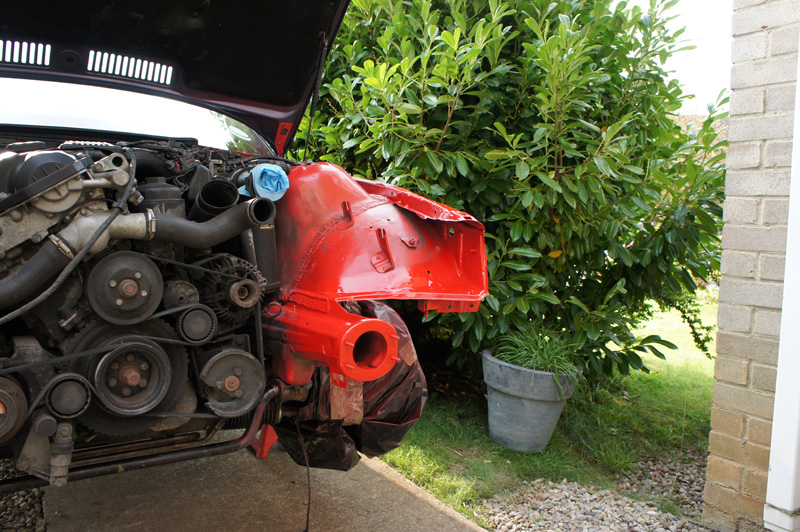
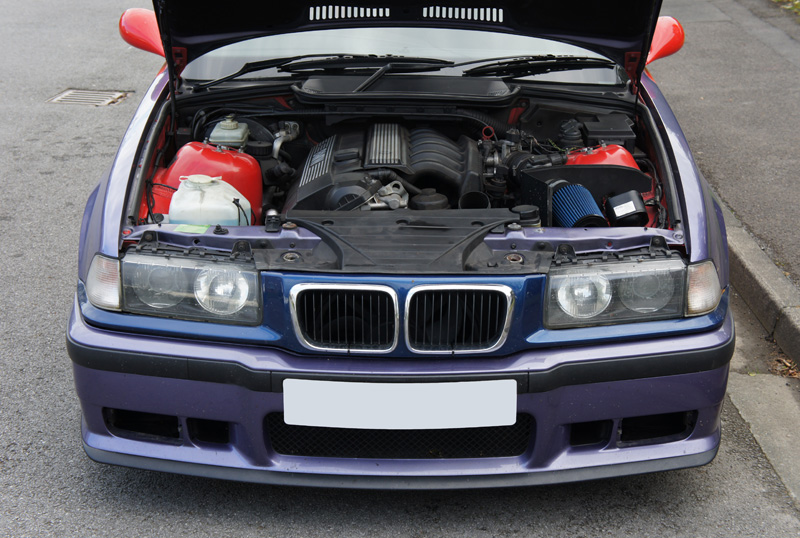
Un-fortunately this is where the photo’s stop, here’s the repair once the car is all back together and a picture of the multi-coloured front end... afraid I just ran out of time when it came to getting the panels done in time for Spa, I was still doing the alignment and geometry 30 minutes before I was meant to leave on route to the ferry port.

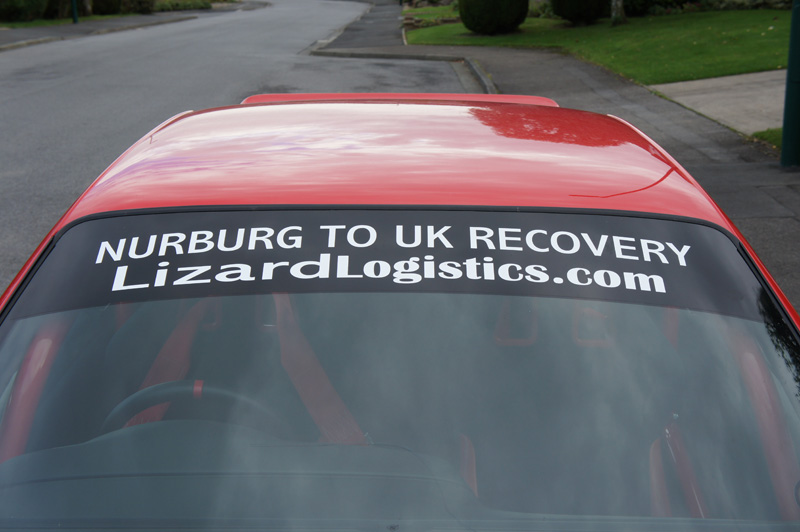
Next up, was the problem of vision, and lack of it! At this time of year the low sun and no sun visors was really causing a problem, fortunately Alex had a spare sun strip and was kind enough to donate it to me. This simple, yet effective measure saved me at the ‘Ring and Spa where without it I would have been pretty much blind 90% of the time.
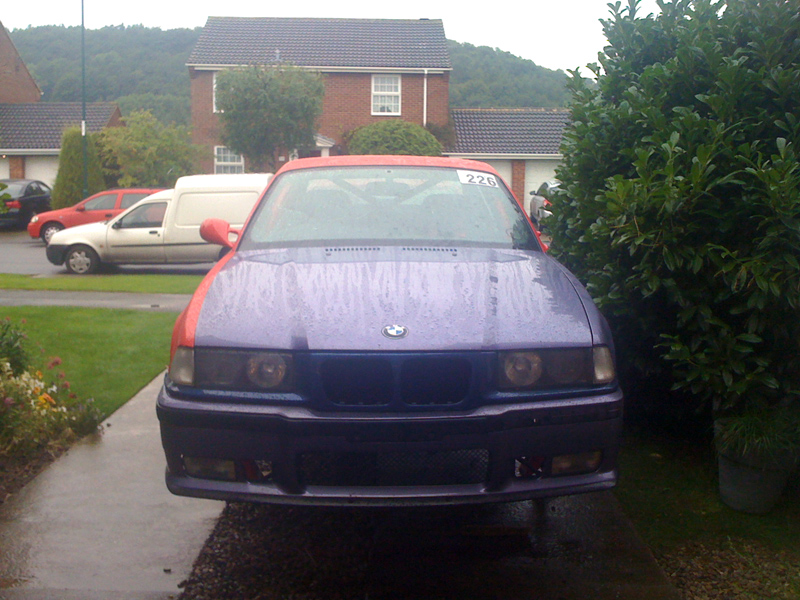
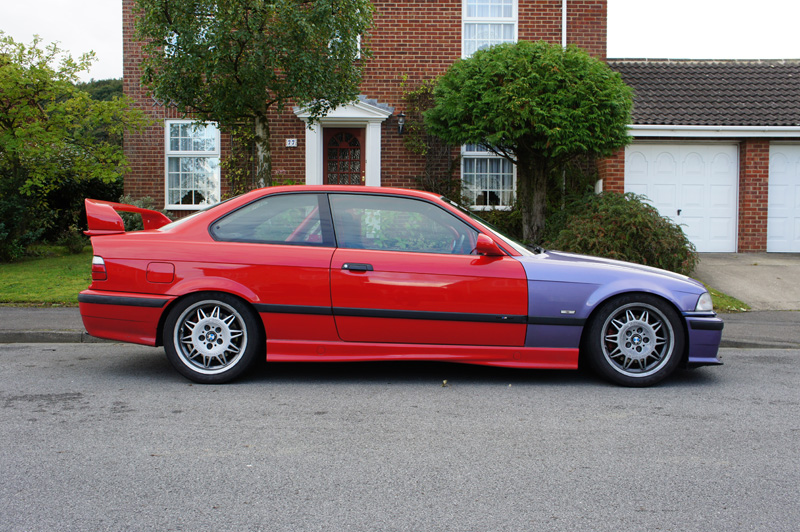
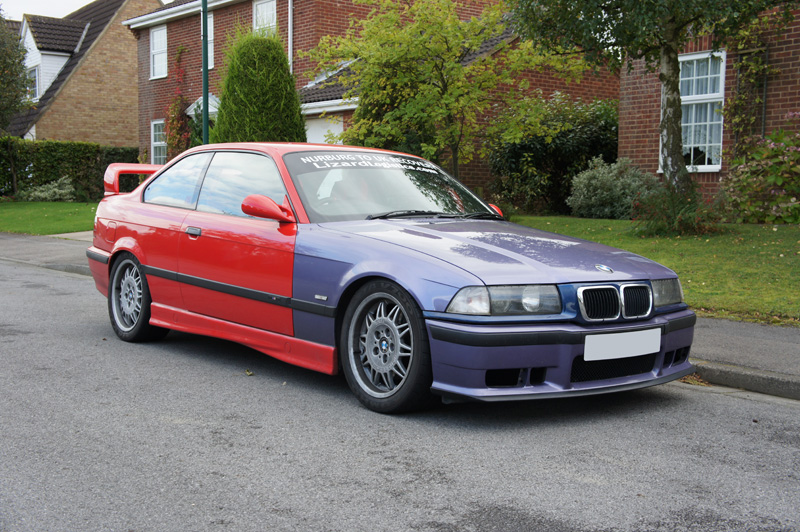
And here’s a few pictures complete, just for good measure... the purple is really growing on me!
Winter plans, well where does the list end? Main priority will be to re-build the back axel and run some new brake lines, and of course paint it red again! Whilst I’m at it I really want to get some good 3-way suspension on there... rumour has it HSD & Track Culture are in the process of making an awesome yet affordable track set-up so I’m going to hang fire and see about giving these ago as after driving an e36 M3 with the normal HSD’s they really do seem like good value for money.
As always, stay tuned as even I don’t know where this one is heading!!
First off, I must apologise for the lack of pictures but as mentioned above time was not on my side so the last thing on my mind was stopping to take photos along the way, plus as dark nights loomed I often found myself laid on my back in the pitch black!
So, carrying on from the last update; I’ve managed to remove any imperfection to the surface, mask up the surrounding area and prepare the repaired panel for paint. First step was to acid etch prime the surface, for this I used Acid #8 from Halfords.
Next, not shown in the pictures there were several coats of Halfords Red Primer. The primer was then allowed to harden before been flatted down and painted with some colour matched Hellrot Red base coat.
Whilst still tacky I removed the masking tape to avoid any flaking of the paint of harsh lines.
The final result, although it looks a little ‘glossy’ over the last few days of using the car it’s dulled down and blended in with the OEM finish quite nicely. Compared to how the car looked a few weeks ago, who’d have thought it’d have looked this good once again!
Next up was to replace the PAS pulley, which wasn’t too much of a task once I’d figured out how the tensioners worked.
Un-fortunately this is where the photo’s stop, here’s the repair once the car is all back together and a picture of the multi-coloured front end... afraid I just ran out of time when it came to getting the panels done in time for Spa, I was still doing the alignment and geometry 30 minutes before I was meant to leave on route to the ferry port.
Next up, was the problem of vision, and lack of it! At this time of year the low sun and no sun visors was really causing a problem, fortunately Alex had a spare sun strip and was kind enough to donate it to me. This simple, yet effective measure saved me at the ‘Ring and Spa where without it I would have been pretty much blind 90% of the time.
And here’s a few pictures complete, just for good measure... the purple is really growing on me!
Winter plans, well where does the list end? Main priority will be to re-build the back axel and run some new brake lines, and of course paint it red again! Whilst I’m at it I really want to get some good 3-way suspension on there... rumour has it HSD & Track Culture are in the process of making an awesome yet affordable track set-up so I’m going to hang fire and see about giving these ago as after driving an e36 M3 with the normal HSD’s they really do seem like good value for money.
As always, stay tuned as even I don’t know where this one is heading!!


This is a great thread, I've always liked E36s and will one day get another, they offer fantastic value for money and in my eyes they are one of the best looking BMWs, they look sharp and purposeful.
When reading through your thread I was gutted to see the crash pictures! Well done for getting it sorted, do you think you'll put an m3 engine in it at some point?
When reading through your thread I was gutted to see the crash pictures! Well done for getting it sorted, do you think you'll put an m3 engine in it at some point?
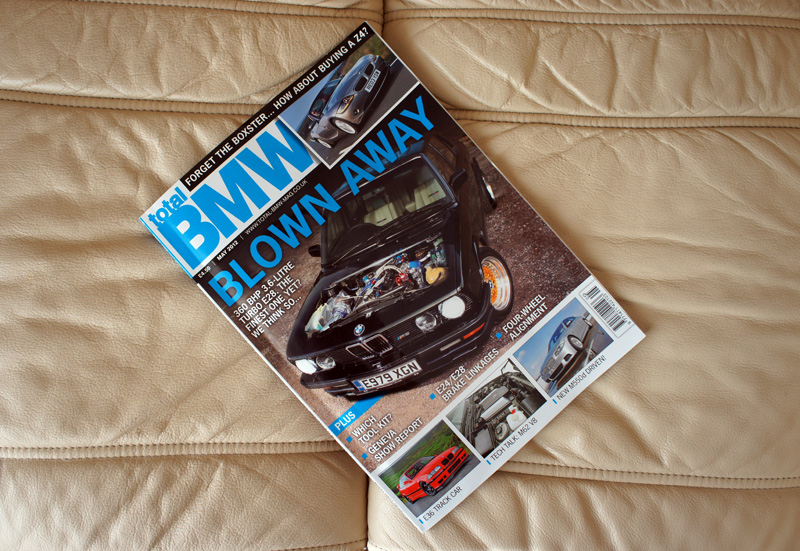
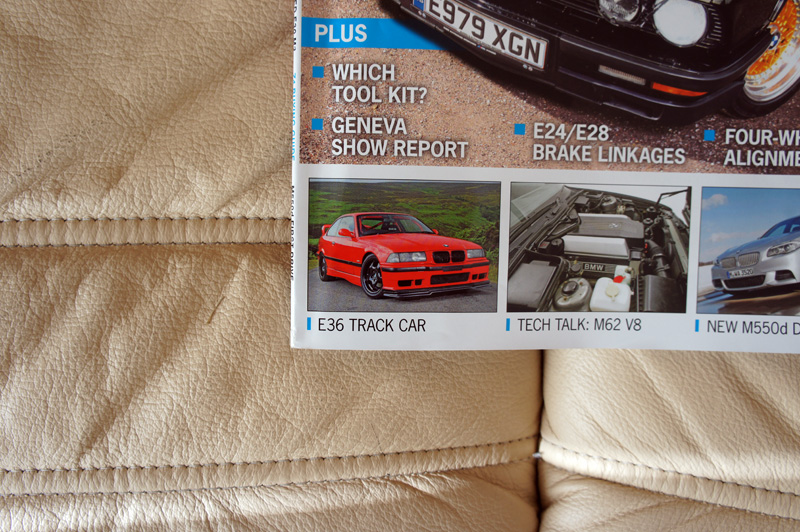
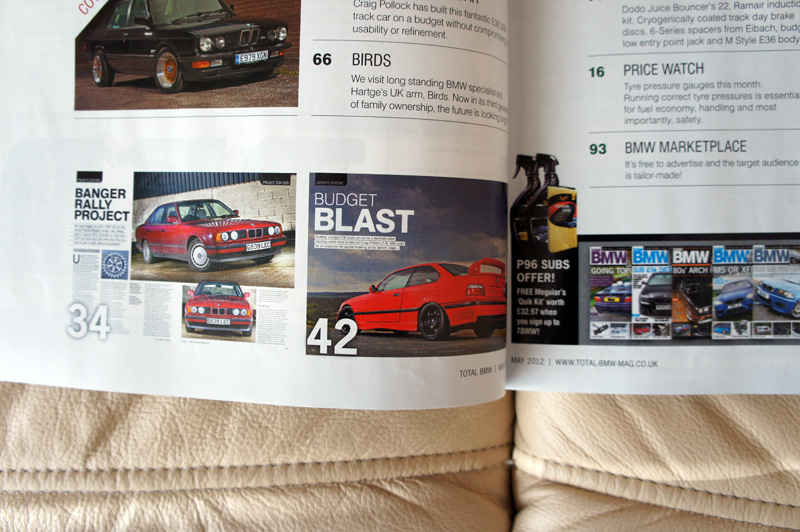
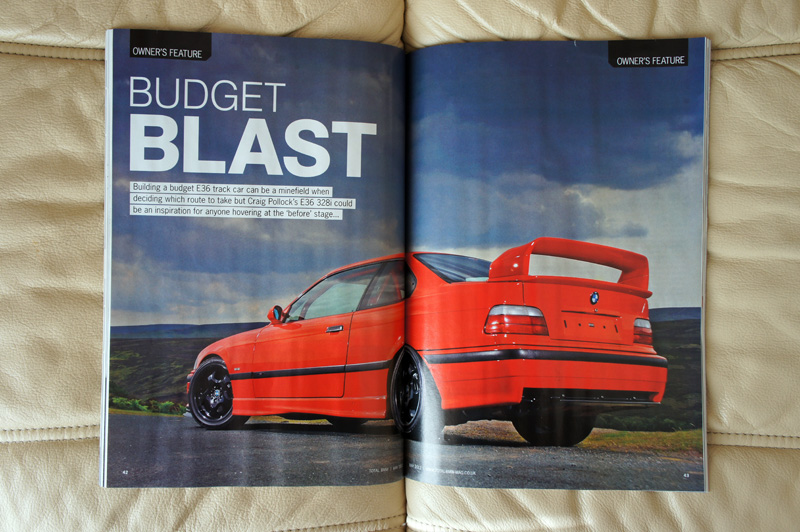
Well the long awaited magazine feature is here, it’s in this month’s Total BMW (May’s issue) and the feature is fantastic! The car has a small slot on the front cover, the inner index and a full centre spread five page feature, it’s all well written and the photo’s came out as expected to so I couldn’t be happier.

And as for an update, the TVR has been sold which leaves more time to play on the little e36 first plans obviously will be to get it all back to one colour and a GTR front splitter re-fitted. The BBS split rims are 90% complete, more on these shortly and I’ll have to get the BBS Sunflowers re-coloured to black or maybe even a light anthracite haven’t decided yet.
And as for an update, the TVR has been sold which leaves more time to play on the little e36 first plans obviously will be to get it all back to one colour and a GTR front splitter re-fitted. The BBS split rims are 90% complete, more on these shortly and I’ll have to get the BBS Sunflowers re-coloured to black or maybe even a light anthracite haven’t decided yet.
Gassing Station | Readers' Cars | Top of Page | What's New | My Stuff