Discussion


Right updates, updates updates
ive not done a huge amount to it as tbh it had to go on the back burner a bit but this is what i have done so far
I attempted to find a way to mount the full range drivers onto the a-pillar but no such luck, the build would fowl how the pillar fits so after a few other ideas i decided just to build pods on the dash
Firstly throw in my OEM pillars and mask the area up

Then make a fibgreglass mould - this was done on both sides of the dash

Then remove it (this is easier said than done and yes some resin did leech through the tape but glass cleaner soon sorted that out)
Once it has been removed, the tape stripped off it and any takyness has dried off place back on dash and position speakers

Hot glue the baffles into position, once glue is dry remove from car again and cut excess fibreglass off

Cover pods in fibreglass

While that is going on i retrimmed the a-pillars in Cream leatherette as well - OEM and trimmed up below

Body filler the pods ready for sanding to shape, pods hung up to dry as all sides had filler on them

At least now i know what i will look like as an old man due to the filler dust kicked up during sanding

Starting to take shape

White leatherette stuck to front of pods

Trimmed (badly - im teaching myself as i go and i am a bad bad pupil)

Both trimmed ready to try in the car

ive not done a huge amount to it as tbh it had to go on the back burner a bit but this is what i have done so far
I attempted to find a way to mount the full range drivers onto the a-pillar but no such luck, the build would fowl how the pillar fits so after a few other ideas i decided just to build pods on the dash
Firstly throw in my OEM pillars and mask the area up
Then make a fibgreglass mould - this was done on both sides of the dash
Then remove it (this is easier said than done and yes some resin did leech through the tape but glass cleaner soon sorted that out)
Once it has been removed, the tape stripped off it and any takyness has dried off place back on dash and position speakers
Hot glue the baffles into position, once glue is dry remove from car again and cut excess fibreglass off
Cover pods in fibreglass
While that is going on i retrimmed the a-pillars in Cream leatherette as well - OEM and trimmed up below
Body filler the pods ready for sanding to shape, pods hung up to dry as all sides had filler on them
At least now i know what i will look like as an old man due to the filler dust kicked up during sanding
Starting to take shape
White leatherette stuck to front of pods
Trimmed (badly - im teaching myself as i go and i am a bad bad pupil)
Both trimmed ready to try in the car
Edited by samuelellis on Saturday 19th October 01:32
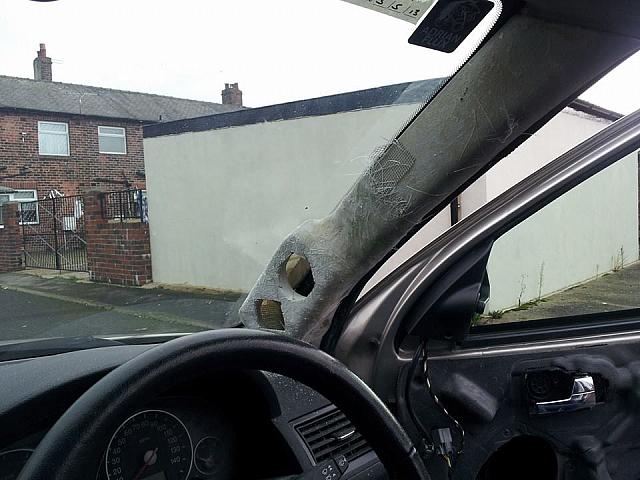
Cheers but the problem with custom fabrication is like me when you are teaching yourself you end up making some stuff that looks arse, I got the pods in the car but i am not a fan of them they look like those speaker boxes people used to screw to parcel shelves in the 80's as you can see below


So tomorrows job is to tear them down and re-design, ah well its a learning curve especially when you are self taught. I have a few ideas on how to do this so its not too bad
So tomorrows job is to tear them down and re-design, ah well its a learning curve especially when you are self taught. I have a few ideas on how to do this so its not too bad
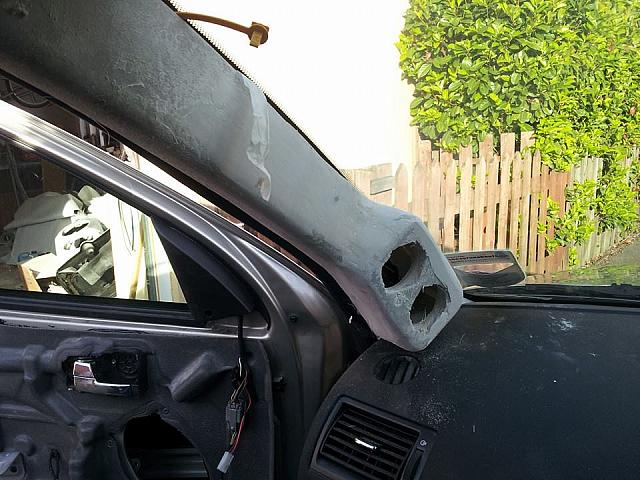
So todays work, as i said the pods looked a bit naff so tear them down, at the start of the day I had the trimmed pillars and the pods
So remove the leatherette on the pods and the pillars

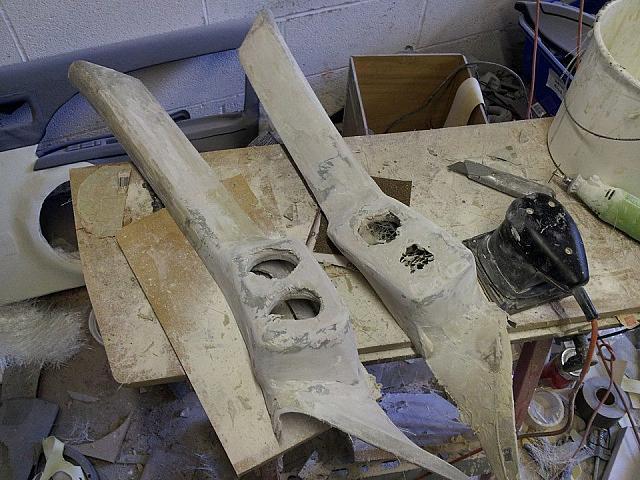
So cute off the front of the pods, as you can see i went a bit OTT with thickness of the fibreglass, i work by the mentality of build it strong

Break out the baffles

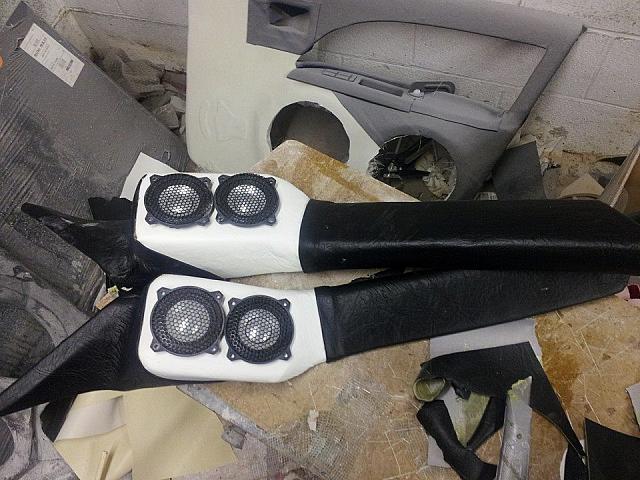
then time to position the speakers, i positioned them by eye and then used hot glue and wooden poles to hold the baffle in the position i want, same done on the drivers side

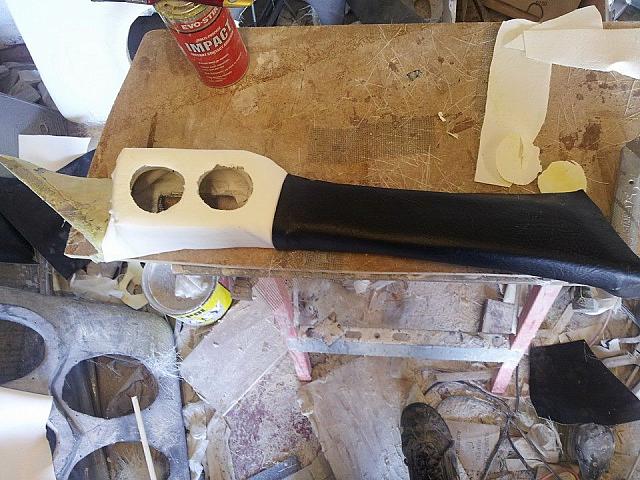
first layer of fibreglass

Test fit

First layer of filler, same on the other side

Not bad for just one days work - tomorrow is more filler and trimming
So remove the leatherette on the pods and the pillars
So cute off the front of the pods, as you can see i went a bit OTT with thickness of the fibreglass, i work by the mentality of build it strong
Break out the baffles
then time to position the speakers, i positioned them by eye and then used hot glue and wooden poles to hold the baffle in the position i want, same done on the drivers side
first layer of fibreglass
Test fit
First layer of filler, same on the other side
Not bad for just one days work - tomorrow is more filler and trimming
99Chimaera said:
just daft, a good car spoilt, you would been better to get a van.
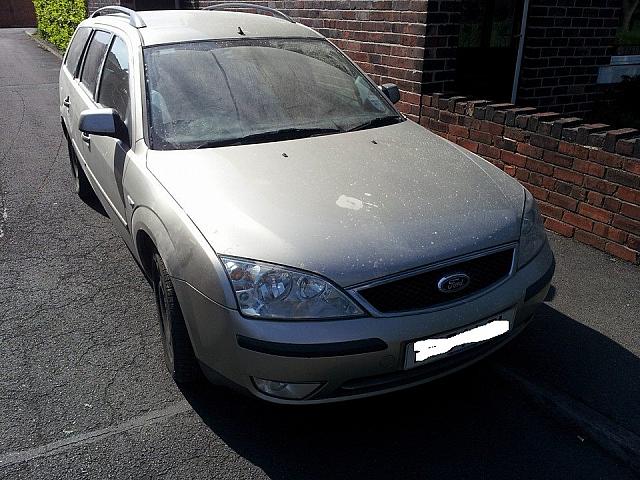
i did look for a van but have you ever tired buying a 2nd hand van? the 2nd hand van market had nothing really in budget, all high miles and showing them with absolutely zero creature comforts, plus as i commute in the car i wanted a couple of nicetys like climate control, cruse and as this replaced a mk3 mondeo hatch the famous Ford heated front windscreen.One of the reasons i went for this is that it was cheap and could carry the weight with no issue, plus i just think the Mk3 Mondeos are just a nice car. Yes i am aware that selling it on will be hard, but i dont ever intend to sell it. Its still comfortable, reaonably economical on the commute to work and even rides well, even when me and the Mrs start a family we will just buy another car for ferrying kids round in
Well todays work on it, not much. Did the final coat of filler and started preppring for trimming but the material i have is not stretchy enough so i decided to down tools and spend a day just thinking of ideas to trim them
16plates said:
Just sat and read through this whole topic - you're bonkers!
ICE like this is not something i've ever been interested in but i loved catching up with this - will keep my eye out for future updates
As my Mrs says it keeps me out of trouble, the only things i had to agree to is if i am using fibreglass or bodyfiller the clothes i am wearing have to go straight in the washer when i have finished and if i am working in the garage the side door to the garden has to be open so she can see me from the house (2 reasons for this, 1. if i injur myself with power tools help is quick to be got and 2 as a long term sufferer of depression who has tried to gas himself before my Mrs insists the garage needs to be vented at all times)ICE like this is not something i've ever been interested in but i loved catching up with this - will keep my eye out for future updates
So the latest updates, not a massive amount but some got done
some more fibreglass on the pillars now they are aimed
Filler
more filler
After getting it smooth, started trimming
Finished trimming
A bit more work needing to be done as the speaker holes are a bit snug and a bit of the trimming at the bottom is a bit rough but it wont be seen when they are fitted
So updates - not much has happened and not much will for a while
Unfortunatly over the weekend my garage got broken into - thankfully they did not nick much but due to the damage done to the door i can get get my car in and out until that is fixed
It feels like one step forward 2 steps back with this project sometimes
Unfortunatly over the weekend my garage got broken into - thankfully they did not nick much but due to the damage done to the door i can get get my car in and out until that is fixed
It feels like one step forward 2 steps back with this project sometimes
The Nur said:
Bloody hell, tough luck mate. What sort of stuff did they have away?
I got all excited when I saw this thread pop up Hope it all gets sorted for you.
They only got a couple of hand tools, its more the damage done to the garage, to force the door open as it is an up and over style the door was bent, the frame has been bent and pulled away from the garage itself, the motor mech shoved back/unknown if it still works and the supporting arms that hold the door are all bent so the only way I could secure it was to basically fix the door inplace solidly.I got all excited when I saw this thread pop up
Hope it all gets sorted for you.This means until i get the door replaced the only access i have to the garage is a small side door so I cant really work on the car
drophead said:
99Chimaera said:
just daft, a good car spoilt, you would been better to get a van.
I'm sure petrol heads everywhere are currently mourning the loss of the rare beast that is a diesel Ford estate.I get told that ive ruined the car quite often but its a mondeo estate they are 10 a penny and as i said before its still my daily driver
Ok so i got a new door on the garage so i can start using my garage again, sadly i did not have a massive amount of time to work on the car, so throw on the retro fusion hoodie

So after a bit of soldering and finessing i got one side apillar in
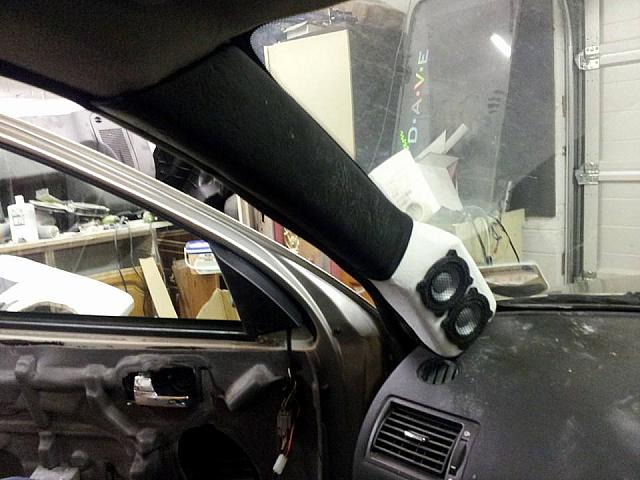
I know it does not look much but we all know what its like when a project has been running for a while and you have had a break from it you need to get back into it slowly
And i know it looks a bit box like but that is more due to the weird angle i too the photo. Im hoping tomorrow to get the other apillar in, the passenger doorcard on and some time sat working out sub enclosure sizes
So after a bit of soldering and finessing i got one side apillar in
I know it does not look much but we all know what its like when a project has been running for a while and you have had a break from it you need to get back into it slowly
And i know it looks a bit box like but that is more due to the weird angle i too the photo. Im hoping tomorrow to get the other apillar in, the passenger doorcard on and some time sat working out sub enclosure sizes

Again not a massive amount done but i got the drivers side pillar in

This was far harder than it should have been as i had to take a lot more trim than i intended out to run the cables for the speakers down under the dash
on the upside i did manage to get a billy bargain of an amp for the a-pillars, picked this up last night, surprised myself when it came up on the market as these are quite rare. This now means that my entire front end uses audio system twister amps, shame i cant put them all in a row but the two that run the front doors are massive so i wont have space
richtea78 said:
Massive? I used to have 2 Pheonix Gold M100s. They were massive 
Well the amps for the driver and passenger door are massive enough to stop me putting the pair of them and the smaller one i just bought in a row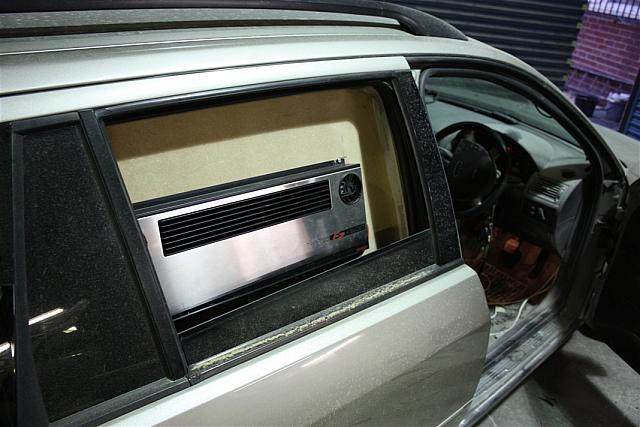
That is the amp for the drivers door, its brother is behind the other window on the passenger side. The small one for the pillars i bought is going to have to go in the boot
Not a massive amount done today but i got one door in and wired to the amp as a test

TBH im not all that happy with my trimming skills but nothing stopping me trying to build another set later on when i have refined my skills, just for people who do not know the mids in the door are two 10inch Ground zero PA mids and the apillar has two ground zero SQ full range drivers in them
Im waiting for some glue to dry on the drivers side so i can get that doorcard in and then i can look at trying to work out where to mount the processors and run wiring. Annoyingly i accidentally trod on the windowswitch so i have to wait for another to come from e-bay
THEN i might be able to look at the sub box
So updates
Both the driver and passenger doorcards are on, i need to take the passenger doorcard off again at some point to tighten up something i missed as it has a rattle
Then i have worked a bit on the boot, removed the epicentre (bass restoration device) from the rear of the wall and moved it to the side, also mounted the eqx to the other side as well as mounting the small AS Twister amp i bought for the apillars

from what i can see all the cabling will reach its new locations with no real issue and if i shift the sub amp down a bit more i will have space for both sub amps on the wall
So the next things to do so i can mark the front end as done are
-Replace missing grub scews from distribution block so i can hook the small amp up
-Re-route the cabling
-Cable up the small amp
-Tweaking and tuning the EQX (its a active crossover and equaliser)
-Remount the passenger door so it does not rattle
Both the driver and passenger doorcards are on, i need to take the passenger doorcard off again at some point to tighten up something i missed as it has a rattle
Then i have worked a bit on the boot, removed the epicentre (bass restoration device) from the rear of the wall and moved it to the side, also mounted the eqx to the other side as well as mounting the small AS Twister amp i bought for the apillars
from what i can see all the cabling will reach its new locations with no real issue and if i shift the sub amp down a bit more i will have space for both sub amps on the wall
So the next things to do so i can mark the front end as done are
-Replace missing grub scews from distribution block so i can hook the small amp up
-Re-route the cabling
-Cable up the small amp
-Tweaking and tuning the EQX (its a active crossover and equaliser)
-Remount the passenger door so it does not rattle


So todays work was to fit the new headunit.
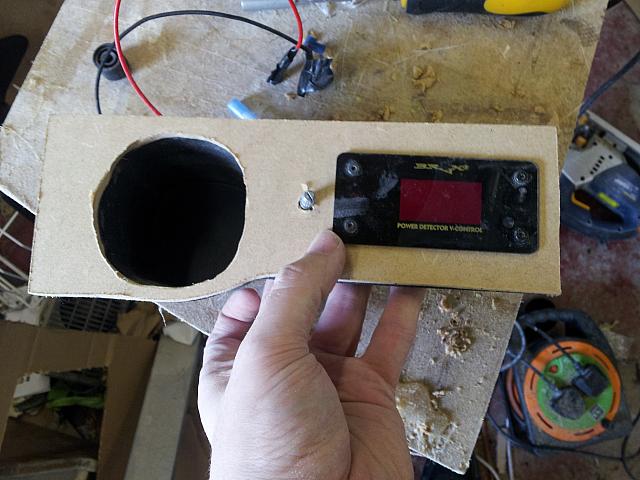
In order to fit the unit i needed someware else to mount my Voltmeter and epicentre controller so i set to work making a new trim panel, this is going where the cig lighter and ashtray goes usually
so cut some 6mm MDF to shape and roughly cut the hole for the cup holder
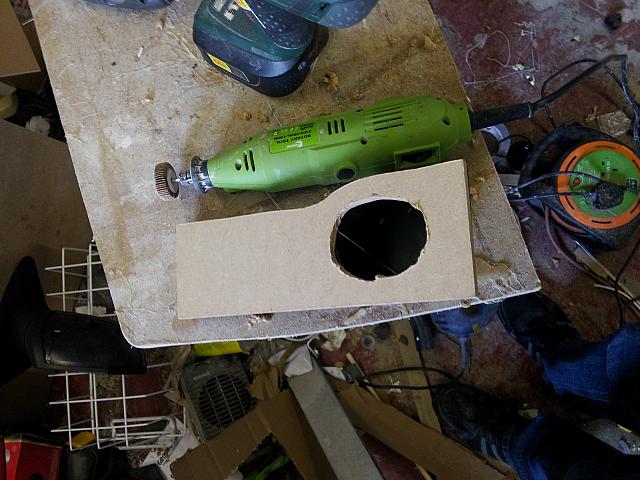
cut the mounting holes for the voltmeter and epicentre dial, the epicentre dial was especially hard as it is a potentiaometer so i had to sand bits of the MDF away a small amount at a time until i got it thin enough for the nut to screw onto the potentiometer on the other side
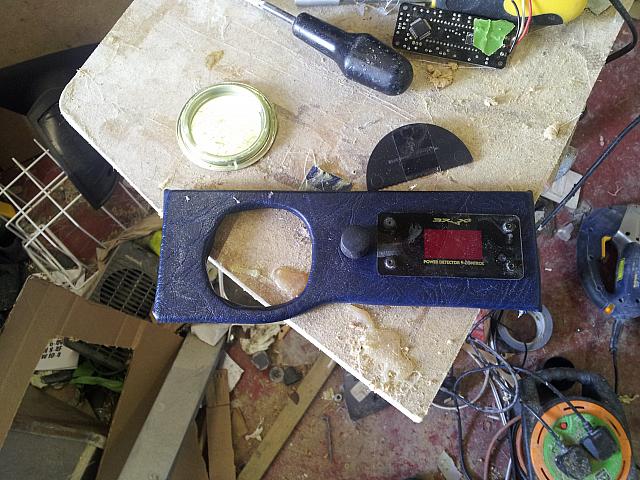
Now trimming, trimmed it in the same blue as the door insets
Now pull the old headunit and voltmeter out - Cable geddon
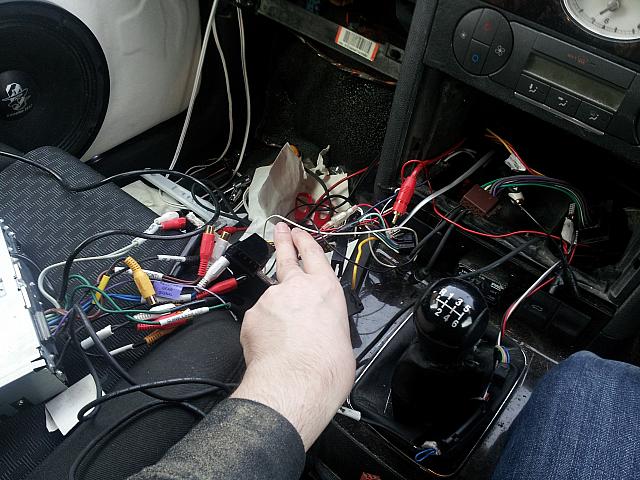
Now i did not get any shots of this point but i pulled up the fake wood trim around the gearstick so i could run the cables below it
Headunit in and playing
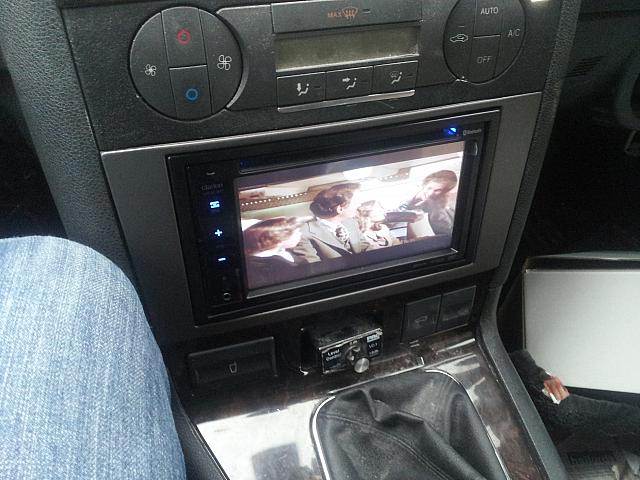
and a shot of the headunit and console trim
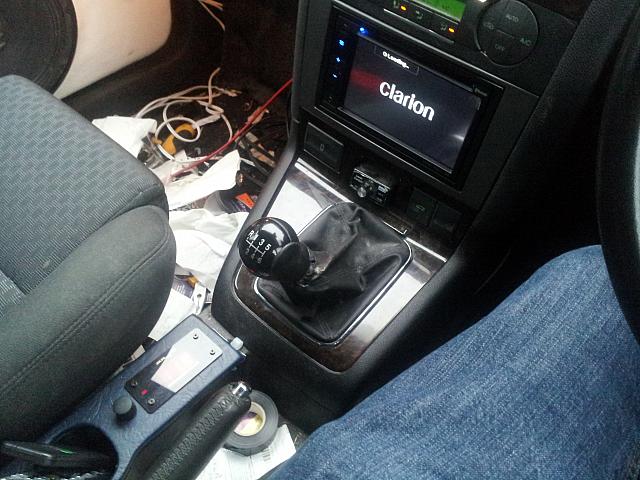
Some of trimming i have done is not brilliant but hey thats the joy of playing with cars, even if the job is not perfect you can look at it and say i made that
In order to fit the unit i needed someware else to mount my Voltmeter and epicentre controller so i set to work making a new trim panel, this is going where the cig lighter and ashtray goes usually
so cut some 6mm MDF to shape and roughly cut the hole for the cup holder
cut the mounting holes for the voltmeter and epicentre dial, the epicentre dial was especially hard as it is a potentiaometer so i had to sand bits of the MDF away a small amount at a time until i got it thin enough for the nut to screw onto the potentiometer on the other side
Now trimming, trimmed it in the same blue as the door insets
Now pull the old headunit and voltmeter out - Cable geddon
Now i did not get any shots of this point but i pulled up the fake wood trim around the gearstick so i could run the cables below it
Headunit in and playing
and a shot of the headunit and console trim
Some of trimming i have done is not brilliant but hey thats the joy of playing with cars, even if the job is not perfect you can look at it and say i made that
GC8 said:
What does your lass make of an estate car that doesn't have room for any shopping in it, at all?
She tolerates it, plus as you know ive got long legs so i can run away from her quicklyMatt 211988 said:
I thought the trend of stupid speakers and stuff had finished? :|
fair play for doing the work yourself etc.... but its a bit erm.... chavvy isnt it?
are you going to cruise down the high street blasting you're bass?
fair play for doing the work yourself etc.... but its a bit erm.... chavvy isnt it?
are you going to cruise down the high street blasting you're bass?
rb5er said:
Have you not decided this is all a bad idea yet?
nopeIts been a while since i updated the thread as it looks like not a massive amount has happened to the rebuild but a fair bit has, its just one of those massivly awkward jobs, admitedly i have been lax on the build as my Mrs treat me to a new toy - http://www.pistonheads.com/gassing/topic.asp?h=0&a... (yes thats right my Mrs bought me a Jag)
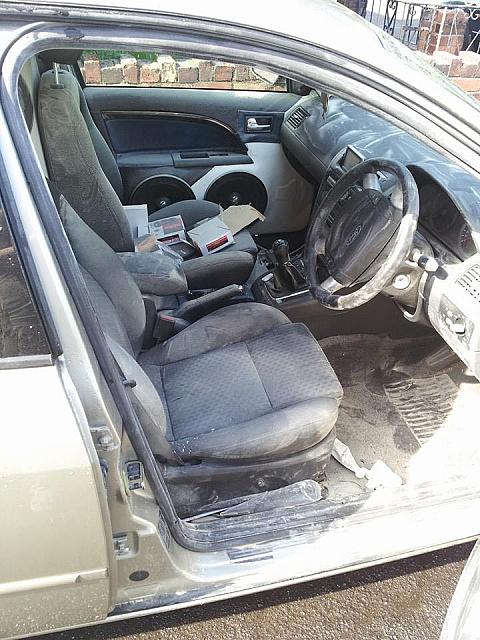
Before i update this thread with what i have been upto i have to say Ford, you thought of everything - a chip holder right in the dash

So Started cutting the old baffle out using my Jigsaw - killed more than a few blades and did not get far
Borrowed my dads bigger saw - agian didnt get very far

Had enough and borrwed my friends big evil scary recipricating saw - still left me with some to get rid of.
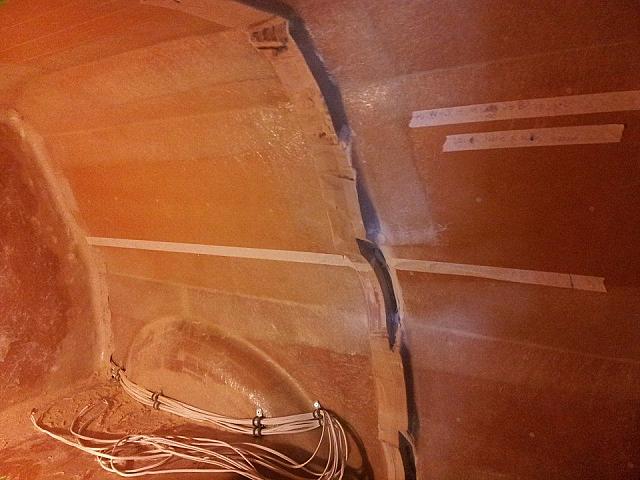
At this time i took 5mins to do some box size calcs and lay out some ideas in masking tape just to help visualise
Tried sanding some of the baffle away, shredded sand paper as soon as it looked at it
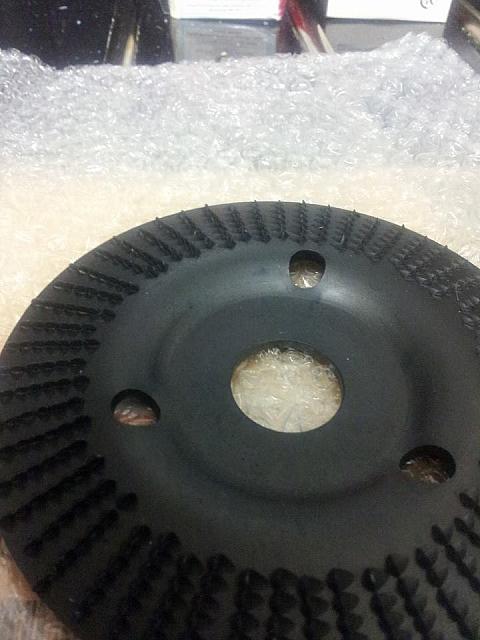
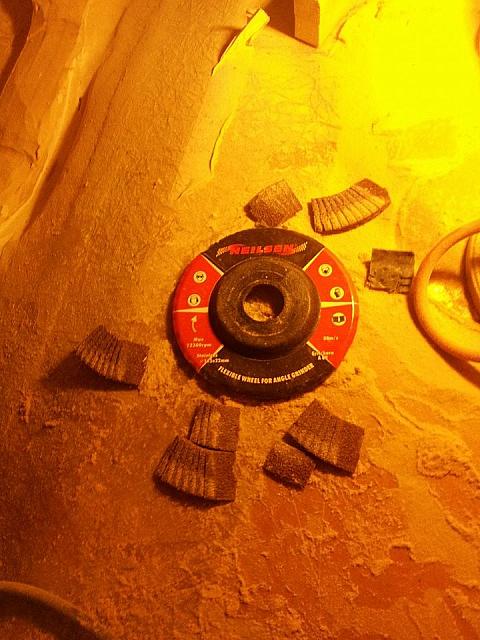
So nuclear option - borrow my dads angle grinder, get some flap discs as well as a rasp disk and attack it
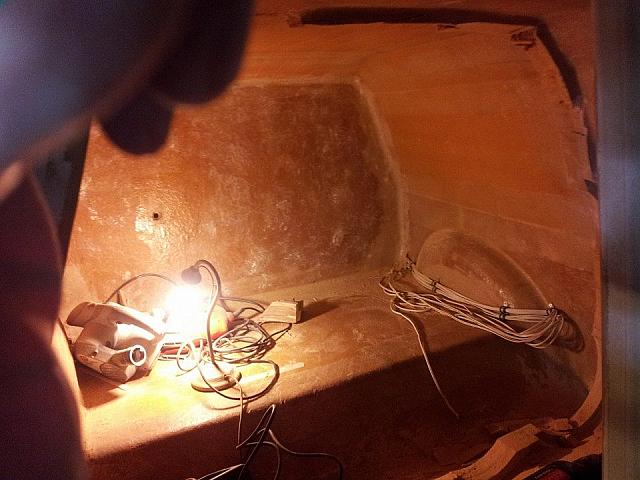
A few days of hell later and what needs to come out is now out. The reason it was so hard to get it to this point was the baffle was a few sheets of 18MM MDF, car body filler and a good 5mm layer of fibreglass resin and matting. As you can guess the dust created was impressive

These were ataken after some cleaning had been done
And always when working with MDF dust - safety first, the dust is go awful

Also power tools can be a risk as well, when a flap disk lets go it does in style and hurts like hell even though jeans so protect your eyes
So the list of things STILL to do is below
-Finish vaccing the sawdust from inside the carcase
-measure up the wood needed to attach to the sides of the carcase for the baffle to bolt to, then buy (if i have the cash)
-Measure up the strengthening wood beams that will go from the baffle to the base of the enclosure, get them at same time as baffles for side and install
-Fill up hole in rear wall where strengthening beam used to go
-Filler the entire carcase to make it as smooth as possible, then prime and paint under wood under the baffle
-Design a mockup of the port (port will be made in MDF - 2sheets of 18mm MDF thick)
-Work out cutlist for the woofer baffle (3 sheets of 18MM external ply thick)
-One baffle inplace fibreglass to carcase for extra strength
-Mount strengthening wood beams from woofer baffle to roof
-Remove old loading wall behind drivers seat (keeping this in until last possible minute to keep the carcase structure solid)
-Fibreglass, filler, prime and paint the visible bits of the enclosure
-Mount 2nd sub amp in boot, acquire wiring for it and install
-Wire a-pillars to amp
-Wire in EQ's etc
Before i update this thread with what i have been upto i have to say Ford, you thought of everything - a chip holder right in the dash
So Started cutting the old baffle out using my Jigsaw - killed more than a few blades and did not get far
Borrowed my dads bigger saw - agian didnt get very far
Had enough and borrwed my friends big evil scary recipricating saw - still left me with some to get rid of.
At this time i took 5mins to do some box size calcs and lay out some ideas in masking tape just to help visualise
Tried sanding some of the baffle away, shredded sand paper as soon as it looked at it
So nuclear option - borrow my dads angle grinder, get some flap discs as well as a rasp disk and attack it
A few days of hell later and what needs to come out is now out. The reason it was so hard to get it to this point was the baffle was a few sheets of 18MM MDF, car body filler and a good 5mm layer of fibreglass resin and matting. As you can guess the dust created was impressive
These were ataken after some cleaning had been done
And always when working with MDF dust - safety first, the dust is go awful
Also power tools can be a risk as well, when a flap disk lets go it does in style and hurts like hell even though jeans so protect your eyes
So the list of things STILL to do is below
-Finish vaccing the sawdust from inside the carcase
-measure up the wood needed to attach to the sides of the carcase for the baffle to bolt to, then buy (if i have the cash)
-Measure up the strengthening wood beams that will go from the baffle to the base of the enclosure, get them at same time as baffles for side and install
-Fill up hole in rear wall where strengthening beam used to go
-Filler the entire carcase to make it as smooth as possible, then prime and paint under wood under the baffle
-Design a mockup of the port (port will be made in MDF - 2sheets of 18mm MDF thick)
-Work out cutlist for the woofer baffle (3 sheets of 18MM external ply thick)
-One baffle inplace fibreglass to carcase for extra strength
-Mount strengthening wood beams from woofer baffle to roof
-Remove old loading wall behind drivers seat (keeping this in until last possible minute to keep the carcase structure solid)
-Fibreglass, filler, prime and paint the visible bits of the enclosure
-Mount 2nd sub amp in boot, acquire wiring for it and install
-Wire a-pillars to amp
-Wire in EQ's etc
Gassing Station | Readers' Cars | Top of Page | What's New | My Stuff