Taking the leather off the interior to redye, Please advise!
Discussion


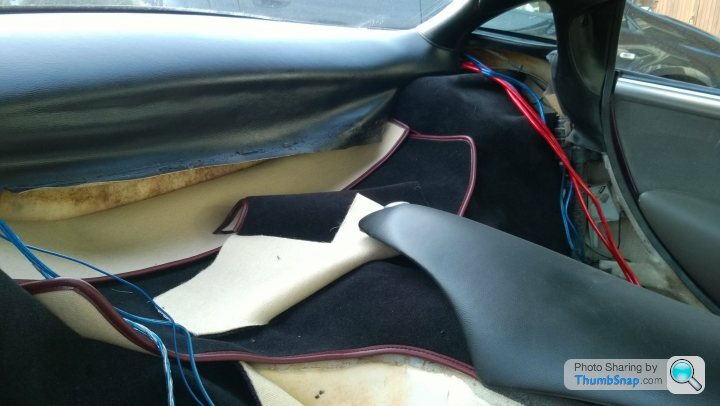
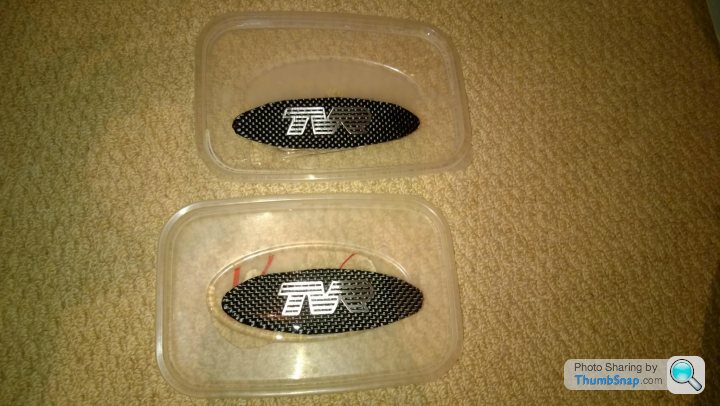
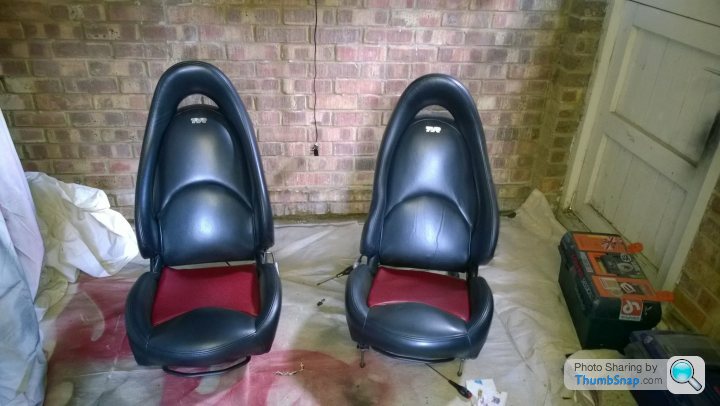
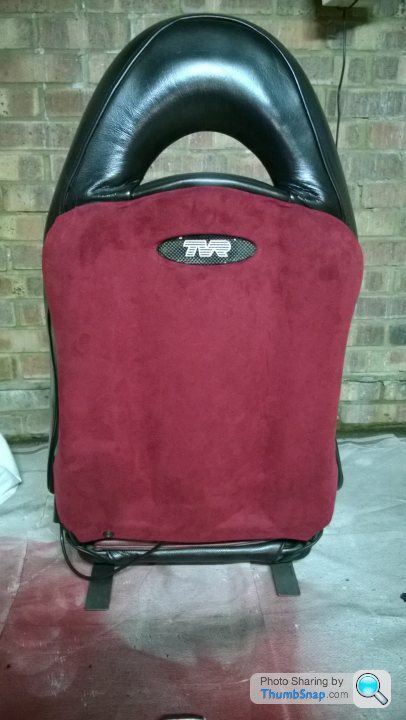
Audio cables for speakers/sub/power/head unit connection and remote fed through to the boot - was reasonably straight forward and only cut myself twice doing it! Finished creating carbon fibre and metal badges for the seat backs. Seat backs prepped ready for applying dark red alcantara to! Hopefully tomorrow carpet scissors arrive so I can start trimming carpet and velcroing it in! 
Dischordant said:
Cheers! =) Yep I just stuck it straight over the top using Trim-Fix Adhesive - worked fine - there is nothing to really take apart - There is only the one panel I've covered in black alcantara which is held on by one bolt that easily unscrews - you leave the actual metal mechanism attached to the roof - and that's it!
So when you get to the edges of the panel, how did you fold it over so neatly? Trying to remember, but aren't there rubber seals which would hide these edges?Are you doing the door cards and rear speaker panels in the same grey? I think I'd like to do mine in that shade too.
Keep up the good work! You've inspired me to refresh a bit of my leather. Bought some of that stuff which removes the leather colour and sealant at the weekend. Already have a small leather factory repair kit but never saw their instruction videos until recently so didn't know how to use it properly.
The rear has that tiny rubber strip that runs along it - the one that frequently comes unattached for most - at least mine has so I need to reattach it - well I have new seals ordered so will fix that in when it arrives (hopefully tomorrow). The front has no seal - on mine I just cut it to size - it's not perfect - it would probably look neater if I had folded it under now you mention it but when inside the car it isn't visible as it's slotted into the body anyway so no biggie. The sides fold over nicely so that parts easy.
Glad to hear I've inspired you to have a go!
The door cards will be dark red alcantra over the flocking with the leather dyed black - only reason I went with the light grey on the roof is because I didn't want to have a dark colour above me - and light grey doesn't clash horribly with my colour scheme as all the metal is a sort of light grey - at least that was my thinking.
Good luck with the repair! I've used the filler a few times now to touch up my leather during the repair - thin layers - sand it down at the end - it takes a few layers of colourant to change it from the default white it is but it does get there in the end =) The colour dries to a slightly different shade than wet - at least mine did - so when mixing to match the colour be sure to test it with a hair dryer to speed up the process.
Edited by Dischordant on Monday 19th May 20:55

Thanks Milky, I'm pleased I had the guts to go for it with little to no knowledge, I mean it's not perfect but I'm generally pleased with the result and the money saved!
The doors will be a challenge as to fit the 16s in I think I'll need to make the lower sections larger, and as I want to maintain the sweeping lines styling it means I need to now have a go at fibreglassing in the new shape! As a result instead of keeping the lower section leather on the door I will switch to having contrasting red/black alcantara on the lower and upper door sections.
The doors will be a challenge as to fit the 16s in I think I'll need to make the lower sections larger, and as I want to maintain the sweeping lines styling it means I need to now have a go at fibreglassing in the new shape! As a result instead of keeping the lower section leather on the door I will switch to having contrasting red/black alcantara on the lower and upper door sections.
Cheers! =) I've just done the seat backs in red alcantara - hopefully putting the seats back in tomorrow.
I have taken out one of the door cards - I'd have a go at changing the window felts but I'm worried about cocking it up - anyone done it before?
Then JUST have to get the speakers mounted with a bit of fibreglass work to get it to blend with the door - then cover those and refit!
Doubt I'll be able to do it this week as I need to wait for some parts and it's got its 12k service next Saturday. Will ask them to fit a new battery while they are at it as I think my current one is giving up the ghost.
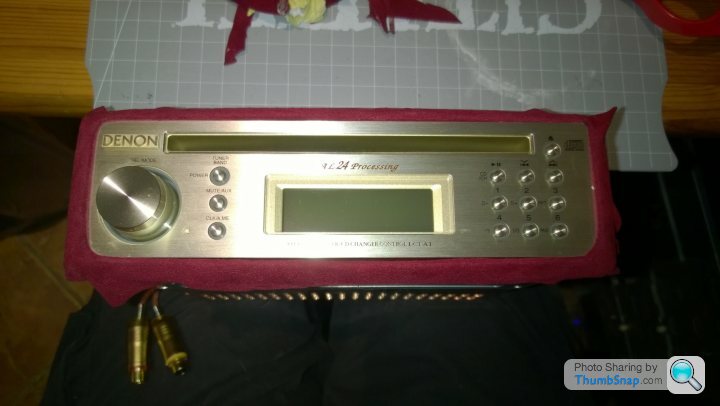
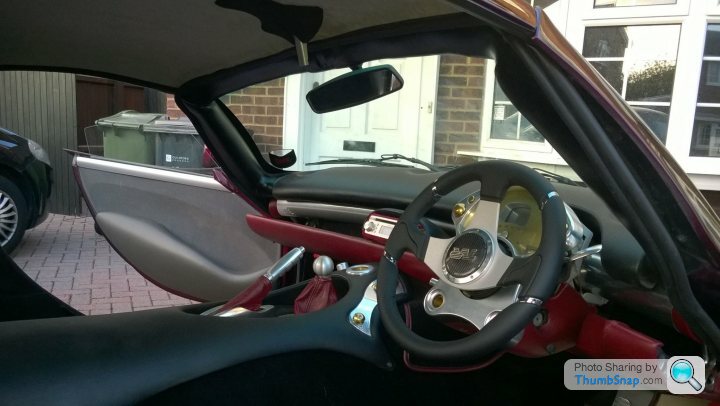
Cheers - I wanted a metal fronted head unit to match the interior but it turns out hardly any companies make them any more - so I got an old school denon one from japan second hand via the japanese equivalent of ebay. Was pretty cool - even the illumination is a similar yellow/green to the Tuscan. Was about £225 - but I think new it would have been silly money.
Dischordant said:
Cheers - I wanted a metal fronted head unit to match the interior but it turns out hardly any companies make them any more - so I got an old school denon one from japan second hand via the japanese equivalent of ebay. Was pretty cool - even the illumination is a similar yellow/green to the Tuscan. Was about £225 - but I think new it would have been silly money.
Just been looking. $2.5k new 
Looks ace, like you say, perfect for a Tuscan. I'll keep my eye out for one,
Do you mean the leather top section that plugs into the metal? Mine just kind of wedges in - though I guess you could take the bottom section off and velcro the top section from underneath to keep it attached - as you might have noticed I'm not a fan of gluing anything that may at any point need removing! Depending on the angle you have your steering wheel at, I find it stays in place on it's own at certain angles.
Gassing Station | Tuscan | Top of Page | What's New | My Stuff