Bonnet hinge conversion
Discussion


I'm not sure I'd reflect heat back down above the starter motor, alternator, injectors and throttle pots. It's difficult to know for sure, but that will reflect heat back down across the bay. I'd protect the vulnerable part of the bonnet over the exhaust manifolds but be cautious elsewhere.
I'm also nearing completion of this modification on my car and I have used a 24" square piece of self adhesive gold foil material like this:
http://www.demon-tweeks.co.uk/motorsport/heat-shie...
The material is centered over the exhaust manifold area but also extends over the cam cover etc. It's so thin there are no clearance issues and it gives the full bling/MacLaren F1 effect when the bonnet is opened. When I've completed the mod I'll post some pictures.
I finished the main bonnet conversion on my car today. I'll also get some pictures up but my main comments as follows:
The kit has high quality parts and Allan is extremely helpful when you hit an issue. You need a helper when taking the bonnet on and off and a large table/area covered with a blanket or something similar to protect the bonnet whilst it's being worked - especially when it is upside down. Whilst it's not hugely difficult or technical you really do need to be a practical sort of person familiar with hand tools - pop-rivet gun, drill, angle grinder or Dremel and you are very likely to have some challenges on the way. These are not perfectly symmetrical cars built to tight tolerances so there is a degree of 'fettling' required - there certainly was on my car. You also need a 'brave pill' when it comes to cutting the front off the bonnet moulding...In the end you have a bonnet that can be opened and closed by one person which allows good access to the engine bay.
The kit has high quality parts and Allan is extremely helpful when you hit an issue. You need a helper when taking the bonnet on and off and a large table/area covered with a blanket or something similar to protect the bonnet whilst it's being worked - especially when it is upside down. Whilst it's not hugely difficult or technical you really do need to be a practical sort of person familiar with hand tools - pop-rivet gun, drill, angle grinder or Dremel and you are very likely to have some challenges on the way. These are not perfectly symmetrical cars built to tight tolerances so there is a degree of 'fettling' required - there certainly was on my car. You also need a 'brave pill' when it comes to cutting the front off the bonnet moulding...In the end you have a bonnet that can be opened and closed by one person which allows good access to the engine bay.


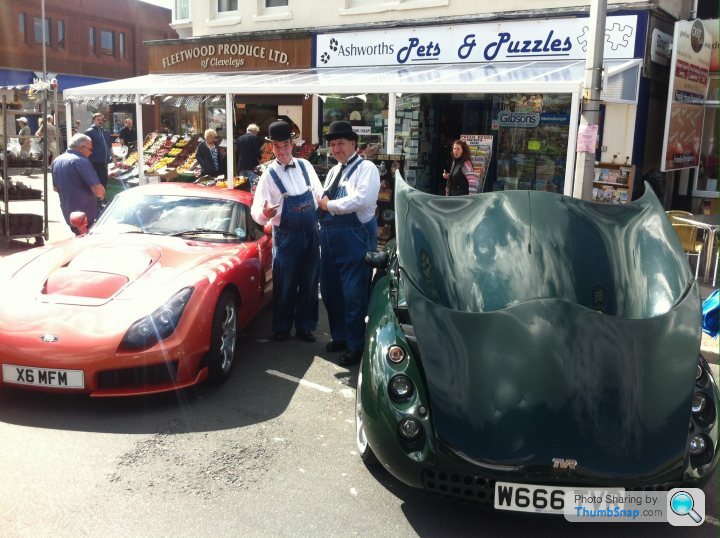
Here are a few more including side views as requested:
From this:

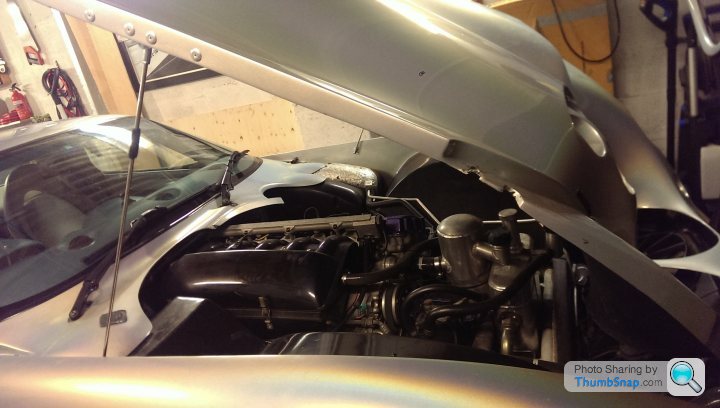
Then with the front service bonnet open:

Then with the main bonnet open as well:

There is then very access to the under bonnet area:

And:

The only awkward problem I had on my car was that the two centre mounts/studs were a very tight fit even just normally lifting the bonnet off let alone having it swing through an arc onto the studs. Maybe the moulding has shrunk slightly over time or maybe it wasn't a good fit as installed by TVR. Either way on both sides I had to reposition the bonnet mounts with a stainless plate each side drilled 10mm diameter and held on by two M4 stainless screws/washers/nuts. There is a significant difference in their locations side to side but now the bonnet opens smoothly with no hang ups and the panel gaps are even:

From this:
Then with the front service bonnet open:
Then with the main bonnet open as well:
There is then very access to the under bonnet area:
And:
The only awkward problem I had on my car was that the two centre mounts/studs were a very tight fit even just normally lifting the bonnet off let alone having it swing through an arc onto the studs. Maybe the moulding has shrunk slightly over time or maybe it wasn't a good fit as installed by TVR. Either way on both sides I had to reposition the bonnet mounts with a stainless plate each side drilled 10mm diameter and held on by two M4 stainless screws/washers/nuts. There is a significant difference in their locations side to side but now the bonnet opens smoothly with no hang ups and the panel gaps are even:


Would someone mind measuring the length of the long metal stays used to hold the bonnet up? I did my own conversion ages ago and originally fitted some gras struts towards the front of the car but found that when the bonnet was very hot, it was tending to move a little too much as the strut was still putting some pressure on it. I prefer the static struts!
Presuming that I just need some ali tube and a die set to put some threads on the end. I may contact Alan just to see if he can sell me them on their own as it'll probably work out the same cost!
Presuming that I just need some ali tube and a die set to put some threads on the end. I may contact Alan just to see if he can sell me them on their own as it'll probably work out the same cost!
Gassing Station | Tuscan | Top of Page | What's New | My Stuff