Chassis Refurb
Discussion


camel_landy said:
Yeeeesssss.....
For the time being, I'm trying to limit it to those things which can't be accessed easily with the body on and anthing badly corroded. So far I have:
M
Sounds pretty much like my list, if you swap a steering rack refurb for a brake caliper refurb and add a couple of brake disks and some new hubs and ball joints. For the time being, I'm trying to limit it to those things which can't be accessed easily with the body on and anthing badly corroded. So far I have:
- Bushes
- Brake lines
- Steering rack refurb
- One of the power steering fluid pipes
- Coolant pipe to expansion tank
- Aircon condenser
- Exhaust wrap on manifolds
- Heat shielding
- Couple of minor engine oil leaks
- Throttle cable
M
It's scary how fast the little bits add up though. Every bolt that can safely be replaced with stainless will be and everything that can't will be passivated zinc finished.
ukkid35 said:
Any news on your chassis refurb?
Well funny you should ask that as there have been various delays but on Friday I wandered down to the workshop to have a look... 
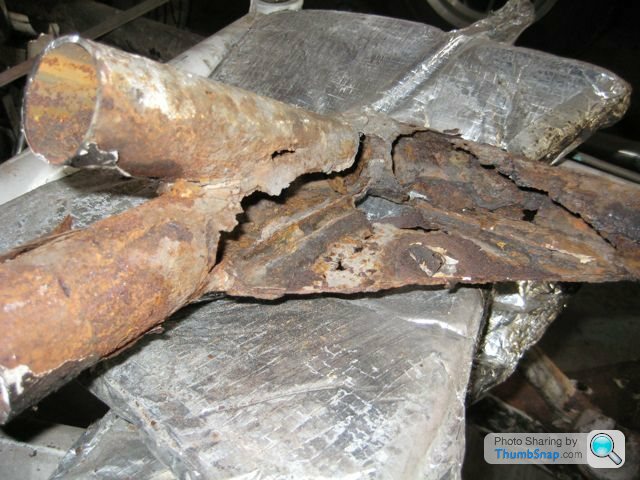
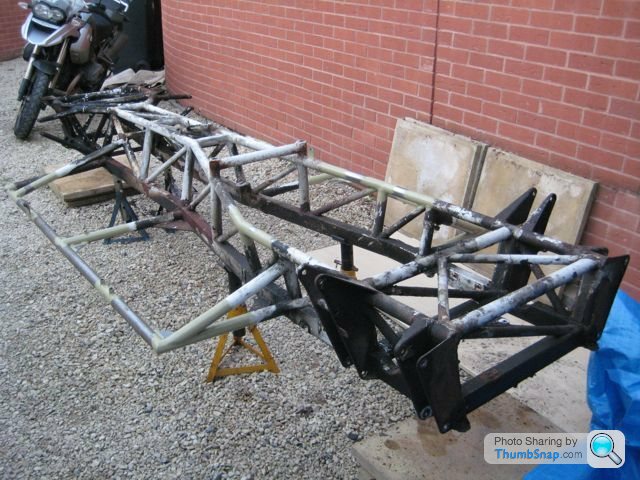
Here is one of the rotted out corners:
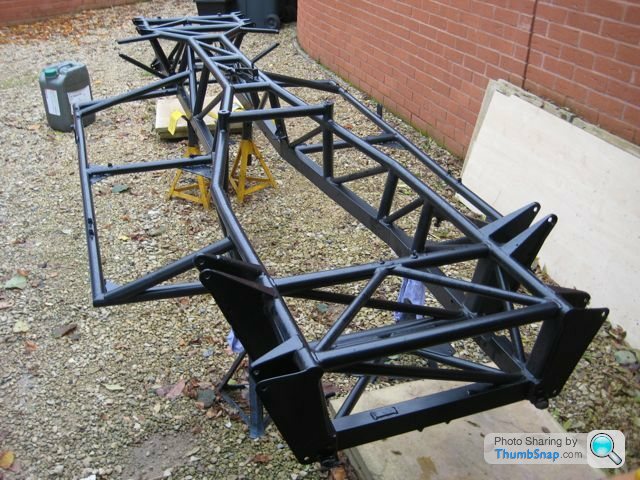
...and this is what it all looks like now:
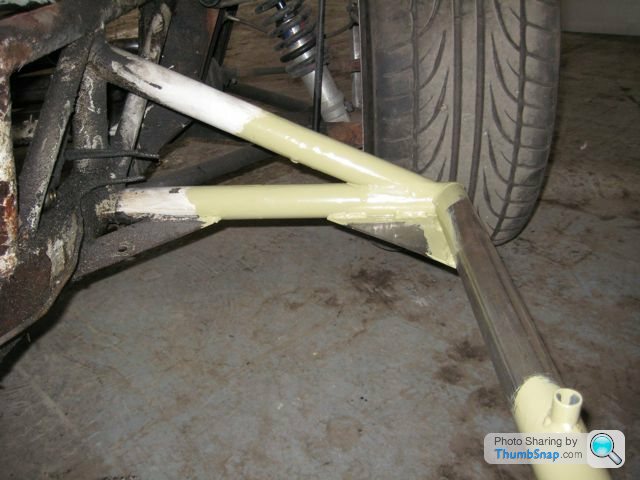
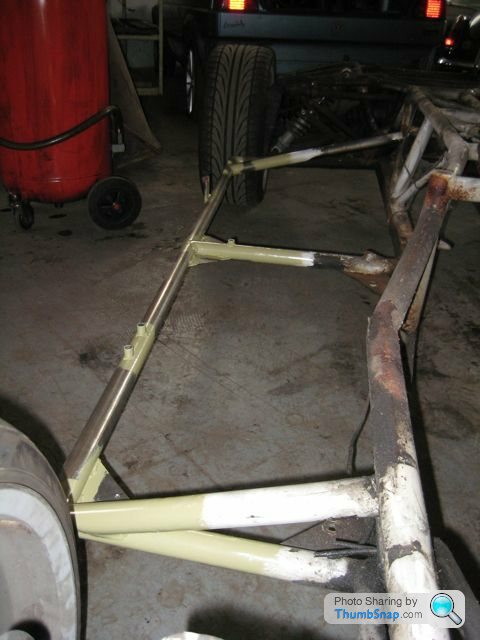
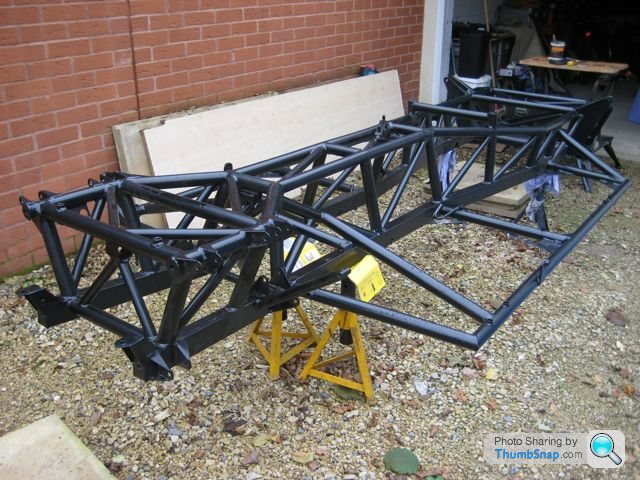
...and the other side:
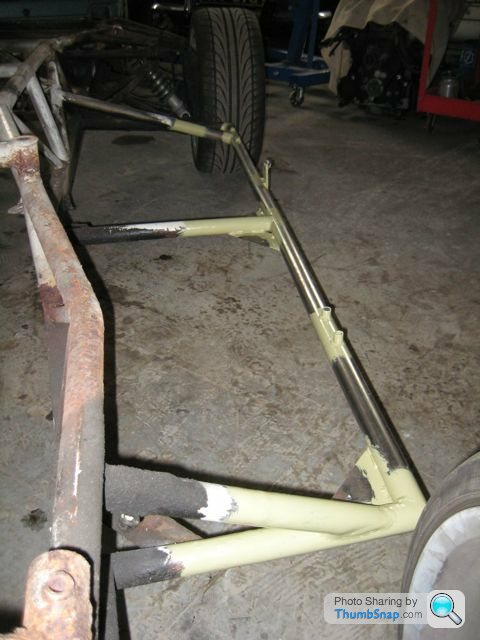
Before you ask; No, it isn't stainless... It's just high carbon steel, with a temporary primer on the joints. Also, before all the final welds were done, we took the opportunity to treat the insides with a splash of waxoyl.
There is a good chance that I'll get the chassis on my drive this week and I can start stripping it for powdercoating. If that's the case, then it'll be perfect timing as we're forecast some decent weather and I've got some time off work.
M
camel_landy said:
Jeeezzzz.... That steering rack is a right ***** to get out!!!
Just thought I'd share!
M
Much easier with flexi braded hoses, can’t see any photos of yours but I guess you have the hard copper colour pipes like me.Just thought I'd share!
M
Also, if someone could explain how you’re supposed to counter-hold the rack when undoing the track rods I’d be interested to hear.
Ah it just looks like the same as this stuff we use it at work all the time really good but was wondering why if it all mild steel( It can be ) . I am sure it will be some kind of primer that is just the same colour.
http://www.llewellyn-ryland.co.uk/downloads/durala...
http://www.llewellyn-ryland.co.uk/downloads/durala...


I bet you can't wait! This is on my list to do and gets shuffled up the priority ranking everytime I look underneath the car, just a shame the wifes priorities always trump mine  I have spoken to a few local companies about the zinc spray and the powder coat, but none come close to the prices you have, did these turn out to be accurate?
I have spoken to a few local companies about the zinc spray and the powder coat, but none come close to the prices you have, did these turn out to be accurate?...and now a couple more 'Before & After' shots. 
Before...
...and after.
I ended up going for a complete PowerFlex kit for the bushes, on the basis that it was just a lot easier ordering it in that way (cheaper too). My preference would have been to have rubber bushes on the hubs & wishbones with poly on the diff & ARBs but that was just going to be faff which I couldn't be bothered with at the time. The bushes are now mostly in and the first few bits have been nailed to the chassis.
Top Tip: When your hands are greasy, be careful when moving the rear hub assy as it hurts when it slips out of your hands and lands on your ankles!!!
For future reference, here are a couple of other threads started, talking about bushes and the arrangement of the front upper wishbone.
http://www.pistonheads.com/gassing/topic.asp?h=0&a...
http://www.pistonheads.com/gassing/topic.asp?h=0&a...
More updates later...
M
Before...
...and after.
I ended up going for a complete PowerFlex kit for the bushes, on the basis that it was just a lot easier ordering it in that way (cheaper too). My preference would have been to have rubber bushes on the hubs & wishbones with poly on the diff & ARBs but that was just going to be faff which I couldn't be bothered with at the time. The bushes are now mostly in and the first few bits have been nailed to the chassis.
Top Tip: When your hands are greasy, be careful when moving the rear hub assy as it
hurts when it slips out of your hands and lands on your ankles!!! For future reference, here are a couple of other threads started, talking about bushes and the arrangement of the front upper wishbone.
http://www.pistonheads.com/gassing/topic.asp?h=0&a...
http://www.pistonheads.com/gassing/topic.asp?h=0&a...
More updates later...
M
Gassing Station | Cerbera | Top of Page | What's New | My Stuff