Johns cerbera rebuild and upgrade
Discussion


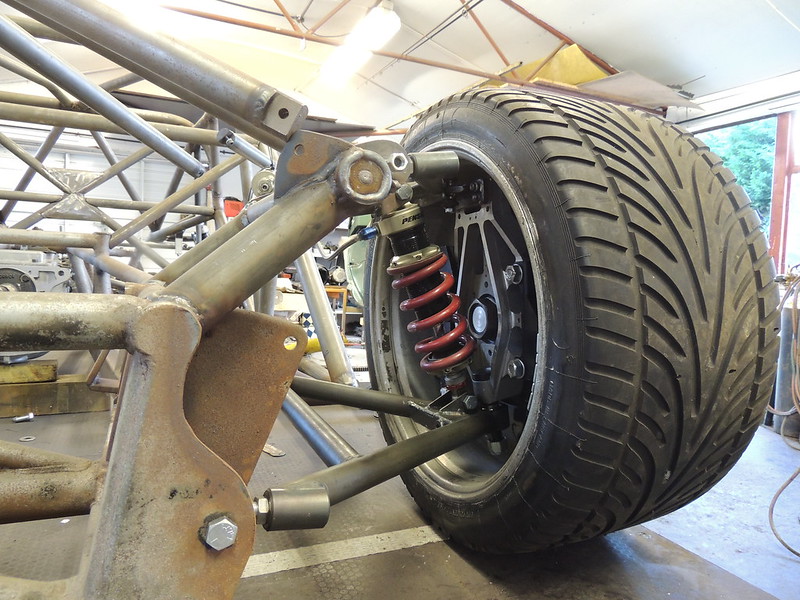
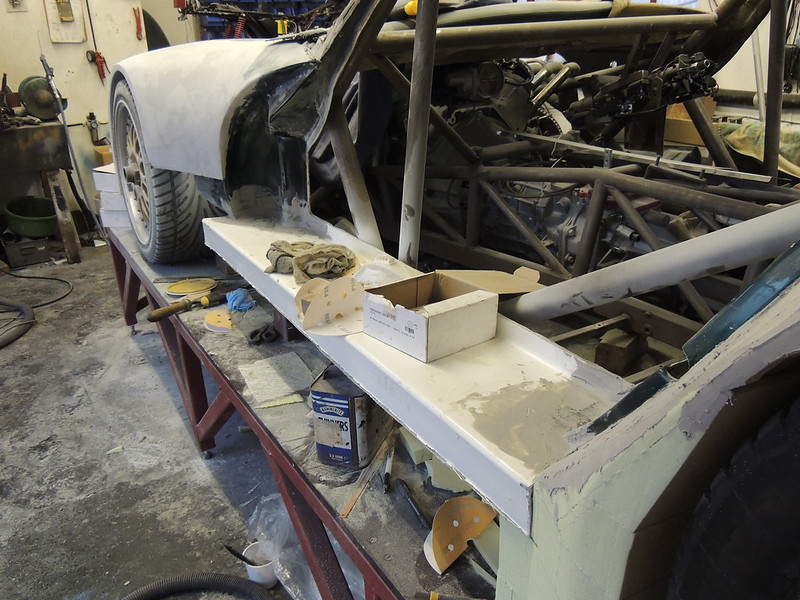
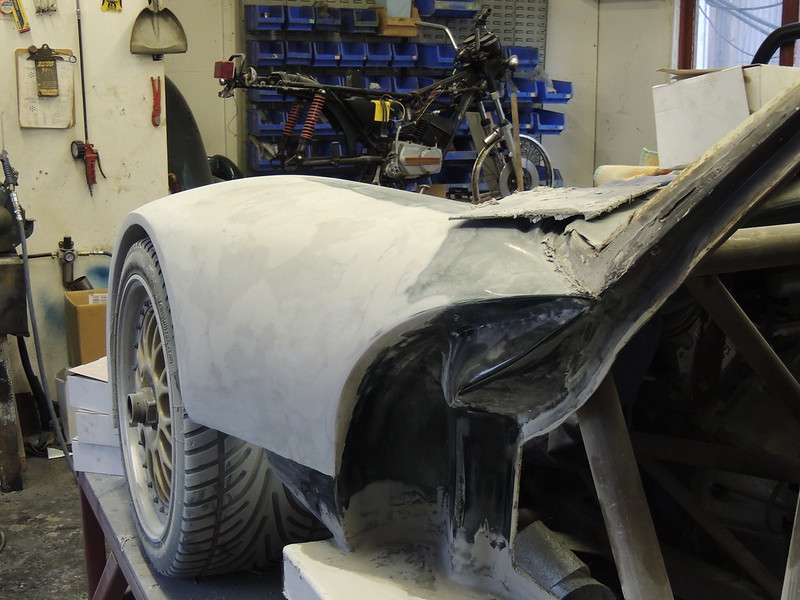
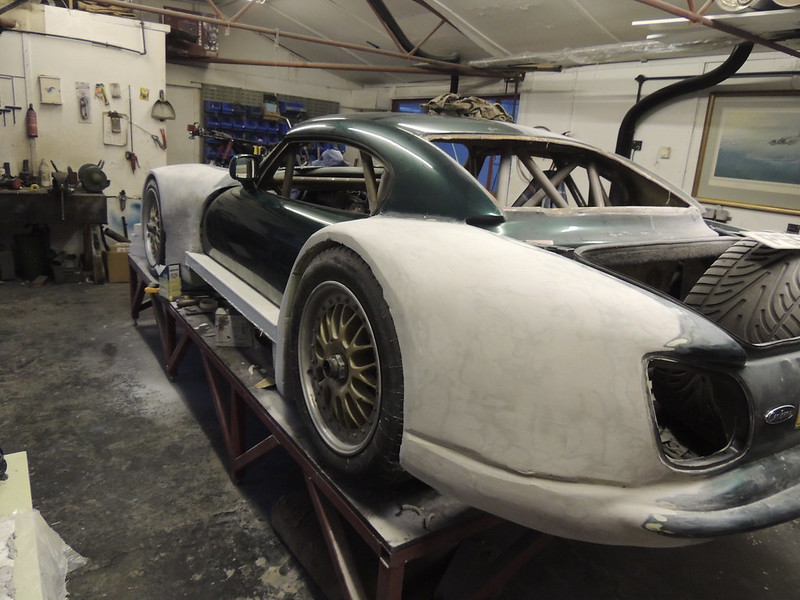
that is slightly lower than settled ride height which will be around 70mm front 95mm rear when finally set, and yes track/race car travel will be very limited 1100 lbs front springs 950 lbs for the rear massive 2in front arb 1/1/2in rear so very stiff got a fair bit further with the plug it now is mostly smoothed off ready for tissue skin.
shocks are penske with remote gas cylinder 3 way adjustable
john
 DSCN2288 by Brundall Motorsport, on Flickr
 DSCN2294 by Brundall Motorsport, on Flickr
john
DSCN2288 by Brundall Motorsport, on FlickrDSCN2294 by Brundall Motorsport, on Flickrthank you for all the enthusiasum , i left school at 16 started on a 5 year city and guilds course called mechanical engineering part 2 which covered everything from hydraulics to steam and everything inbetween but spending the largest part of my now 52 years of iron fighting as a self employed person you tend to learn very quickly needs must and all that and i still cant wait to get down the workshop most mornings.
john
john
first door sill out of the mould well pleased great surface.
https://photos.app.goo.gl/sIENMepNwvrEuNN62
john
https://photos.app.goo.gl/sIENMepNwvrEuNN62
john
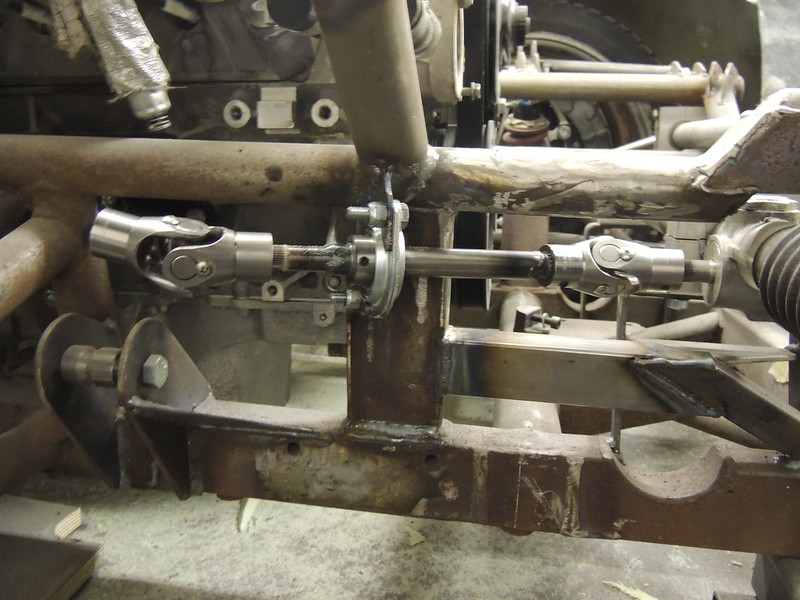
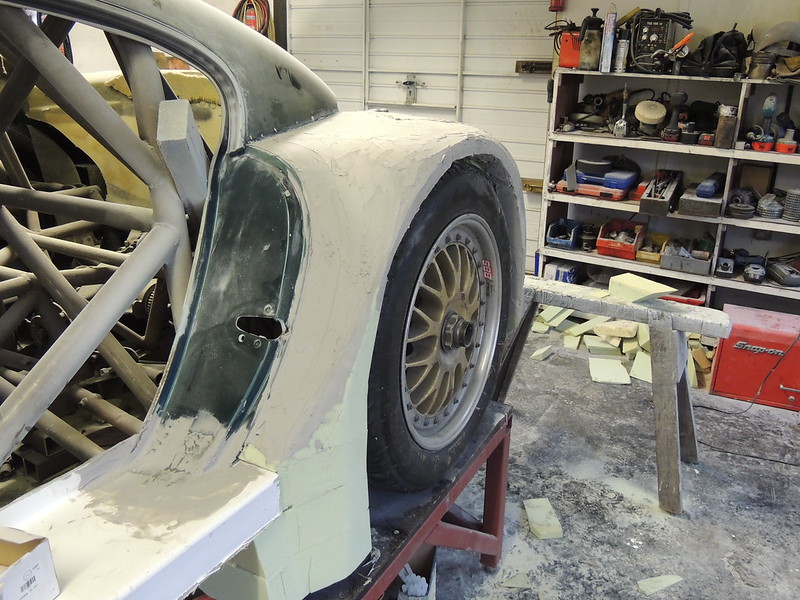
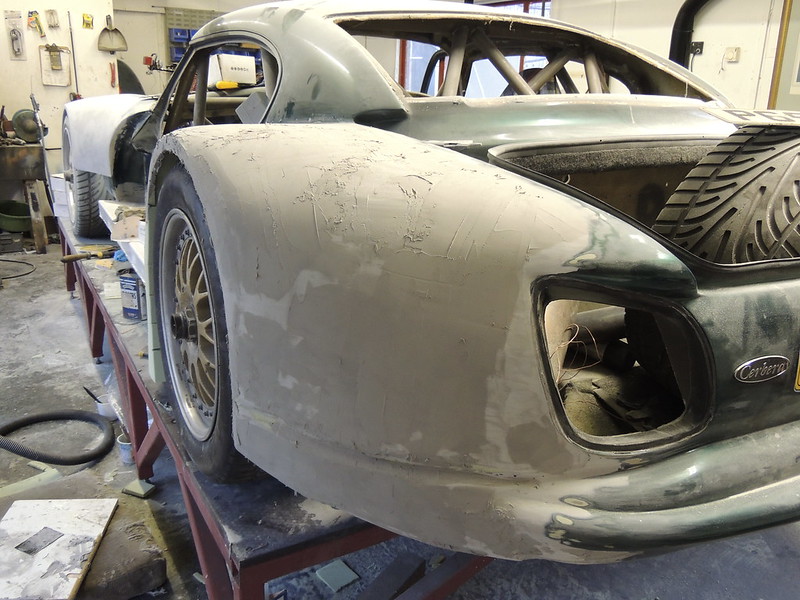
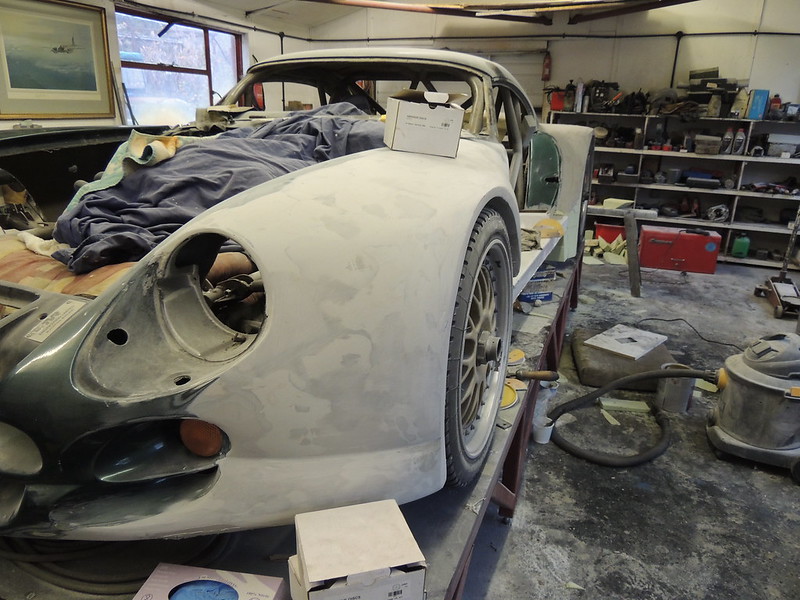
long time since i posted been busy restoring two wedges plus power steering to a griff etc. etc. but now having a concerted effort on the cerb finally finished the power steering column and the mounting for the power unit and lots of work to the n/s plugs for the new wings also laid up the bonnet with the cooling duct for the rad pics on that to follow but pics should give you a flavour of the work.
john
 DSCN2872 by Brundall Motorsport, on Flickr
 DSCN3096 by Brundall Motorsport, on Flickr
 DSCN3095 by Brundall Motorsport, on Flickr
 DSCN3094 by Brundall Motorsport, on Flickr
 DSCN3093 by Brundall Motorsport, on Flickr
 DSCN3091 by Brundall Motorsport, on Flickr
 DSCN3098 by Brundall Motorsport, on Flickr
 DSCN3099 by Brundall Motorsport, on Flickr
 DSCN3100 by Brundall Motorsport, on Flickr
 DSCN3102 by Brundall Motorsport, on Flickr
john
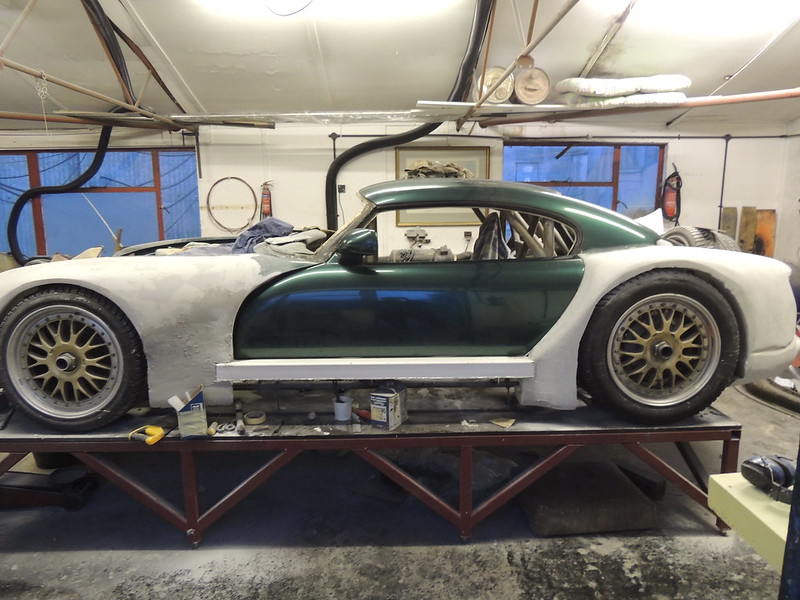
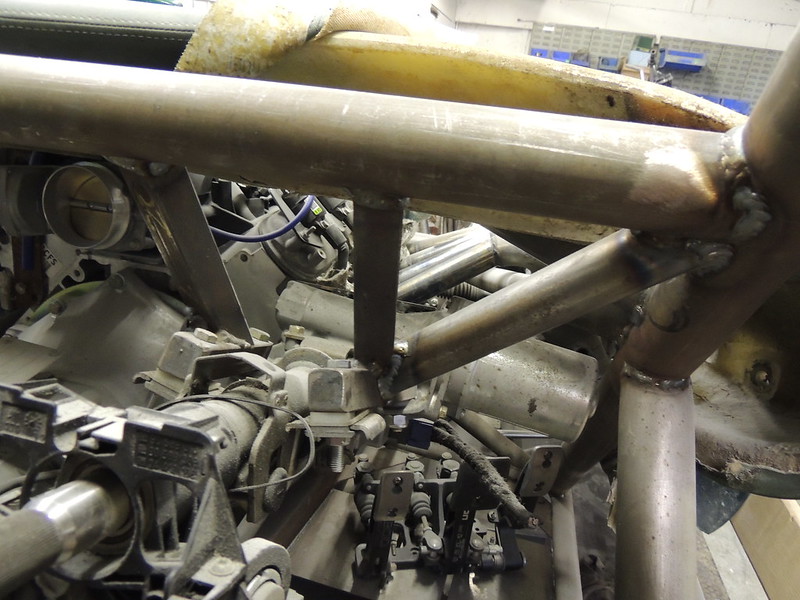
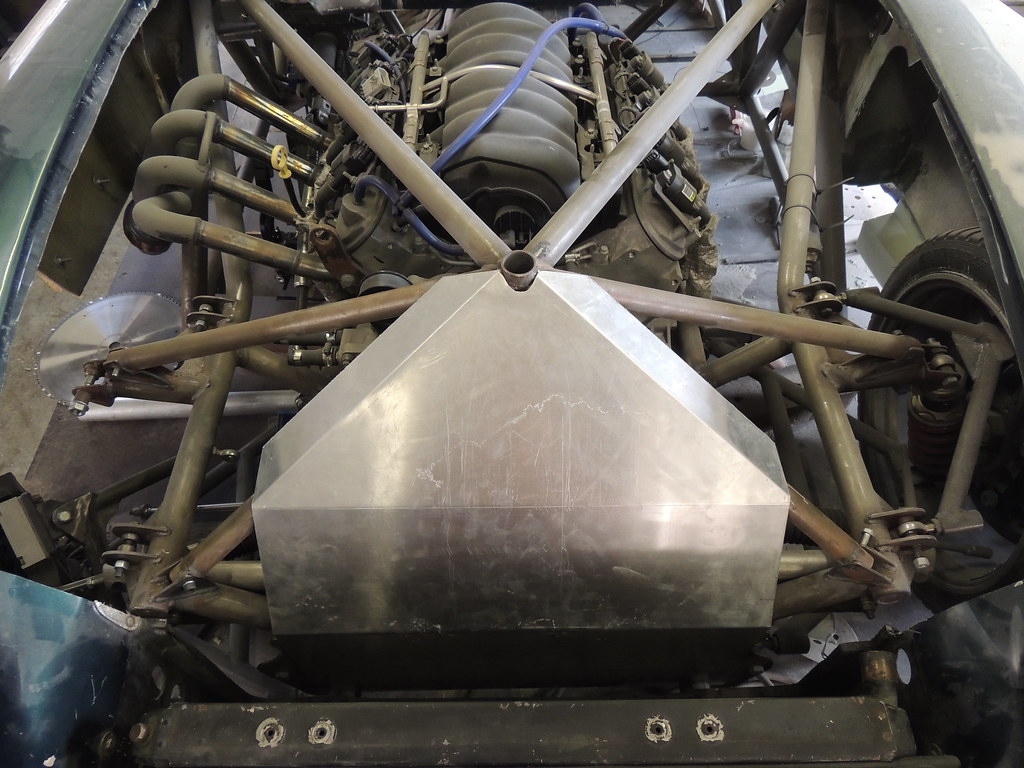
DSCN2872 by Brundall Motorsport, on FlickrDSCN3096 by Brundall Motorsport, on FlickrDSCN3095 by Brundall Motorsport, on FlickrDSCN3094 by Brundall Motorsport, on FlickrDSCN3093 by Brundall Motorsport, on FlickrDSCN3091 by Brundall Motorsport, on FlickrDSCN3098 by Brundall Motorsport, on FlickrDSCN3099 by Brundall Motorsport, on FlickrDSCN3100 by Brundall Motorsport, on FlickrDSCN3102 by Brundall Motorsport, on Flickrengine transmission etc. is all sorted its a chevvy ls3 producing 503 bhp and 475 ftlbs as far as i can remember all run in and mapped on emeralds engine dyno, i think pics etc. are back somwhere in the thread, driving onto a 56 magnum 6 speed box 8 1/4 diff, hollow gun barrel lathe turned drive shafts and mosler uprights hubs and brakes, bbs wheels.
john
john
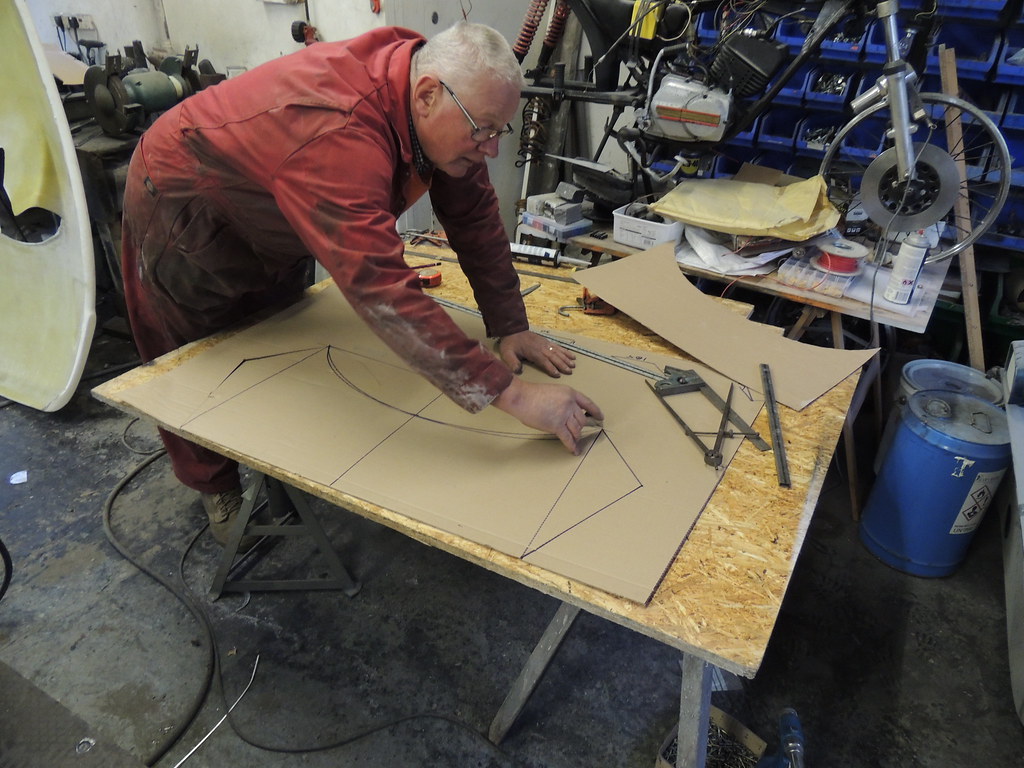
rob it starts off being done by eye to get a basic shape certainly when on the first stage building up the foam prior to filling and fairing, then we scribe vertical lines at precise distances along the (in this case wing) using a laser level nowadays used to use a plumb bob and use the shadow cast by a lamp, then make a template of that section and form the opposite wing to that shape at that station not easy but with practise not so bad.we will be performing this very soon so will take loads of pics and post on here.
john
john
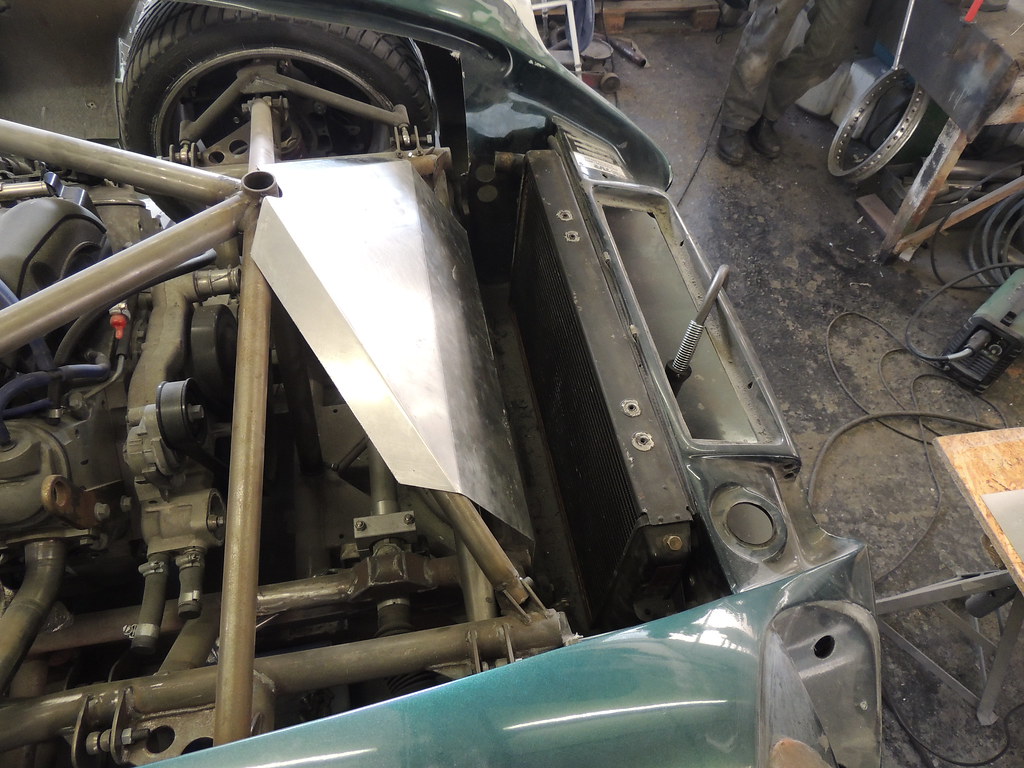
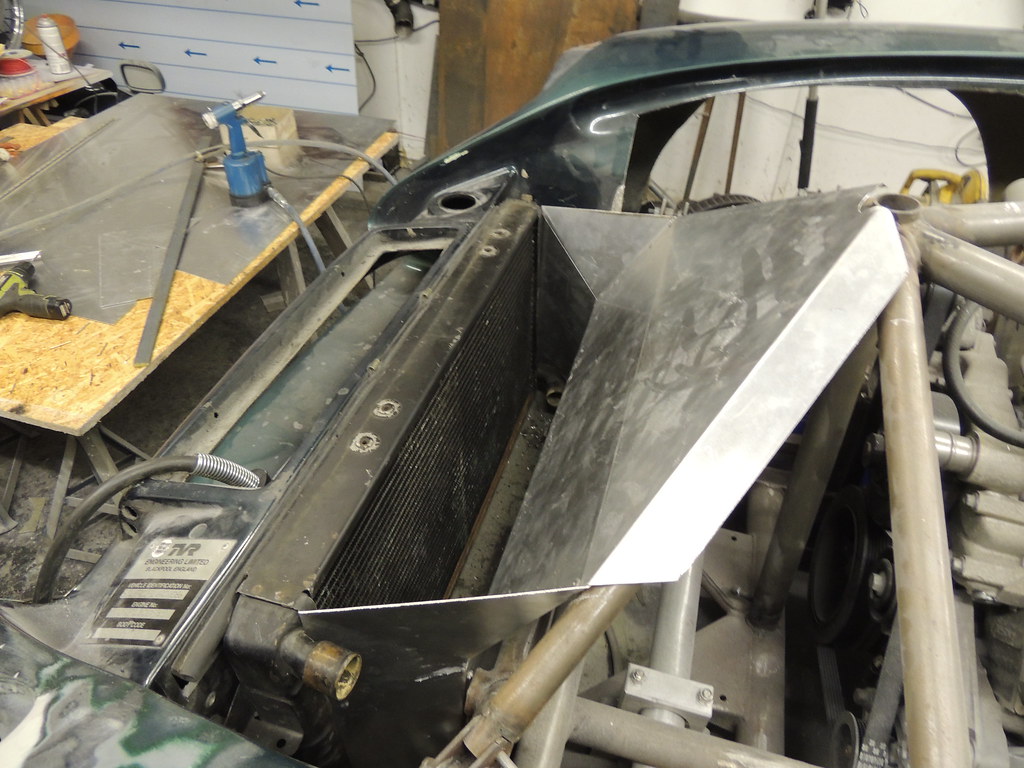
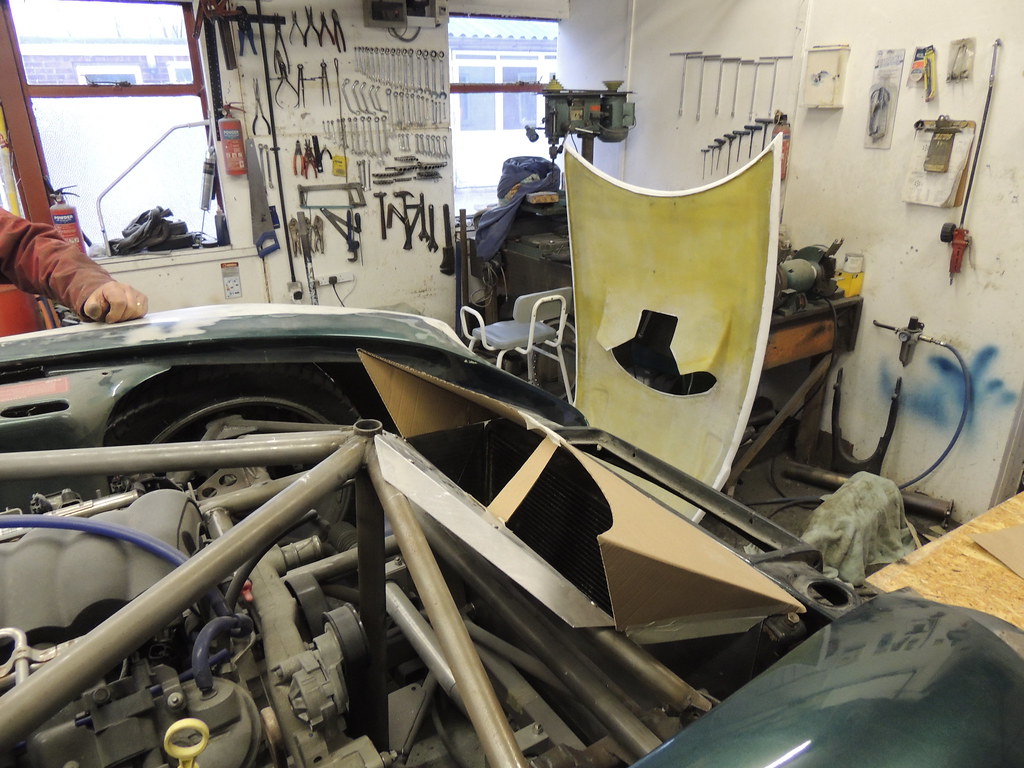
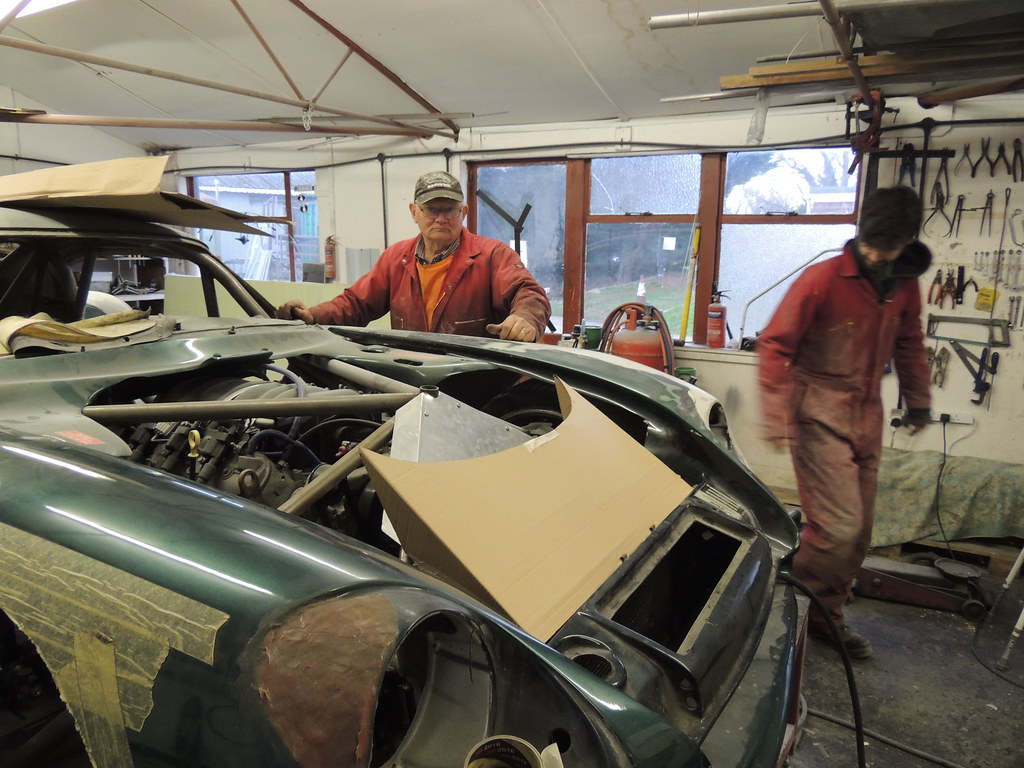
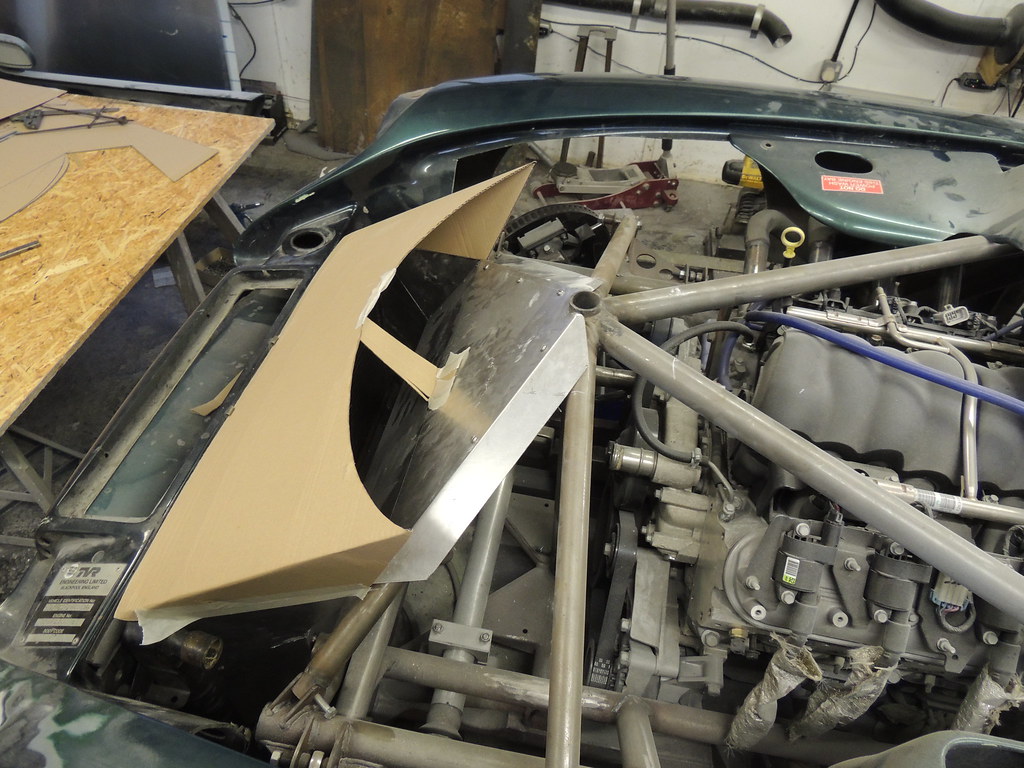
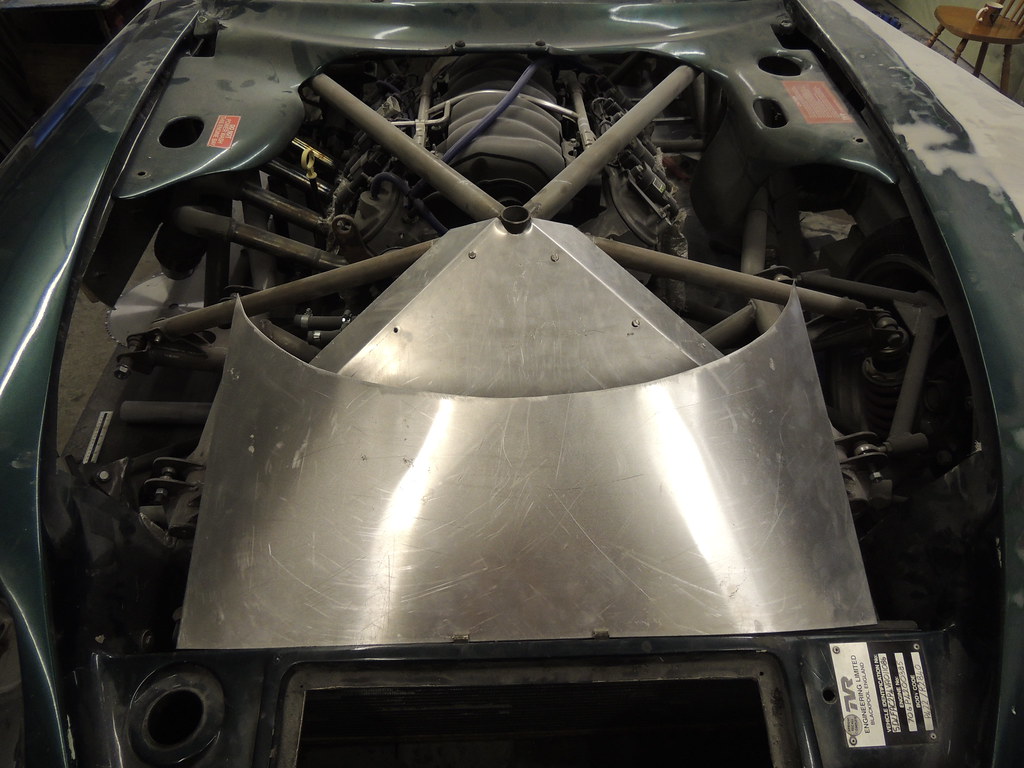
more work done finishing touches to thew plugs plus have nearly finished the air duct to carry the air from the rad out the bonnet outlet developing takes a lot of cardboard cutting etc. before the ally is finally cut but all worked out well.
john
 DSCN3104 by Brundall Motorsport, on Flickr
 DSCN3105 by Brundall Motorsport, on Flickr
 DSCN3106 by Brundall Motorsport, on Flickr
 DSCN3107 by Brundall Motorsport, on Flickr
 DSCN3108 by Brundall Motorsport, on Flickr
 DSCN3112 by Brundall Motorsport, on Flickr
 DSCN3113 by Brundall Motorsport, on Flickr
 DSCN3114 by Brundall Motorsport, on Flickr
 DSCN3115 by Brundall Motorsport, on Flickr
john
DSCN3104 by Brundall Motorsport, on FlickrDSCN3105 by Brundall Motorsport, on FlickrDSCN3106 by Brundall Motorsport, on FlickrDSCN3107 by Brundall Motorsport, on FlickrDSCN3108 by Brundall Motorsport, on FlickrDSCN3112 by Brundall Motorsport, on FlickrDSCN3113 by Brundall Motorsport, on FlickrDSCN3114 by Brundall Motorsport, on FlickrDSCN3115 by Brundall Motorsport, on FlickrEdited by Engineer1949 on Monday 17th December 20:09
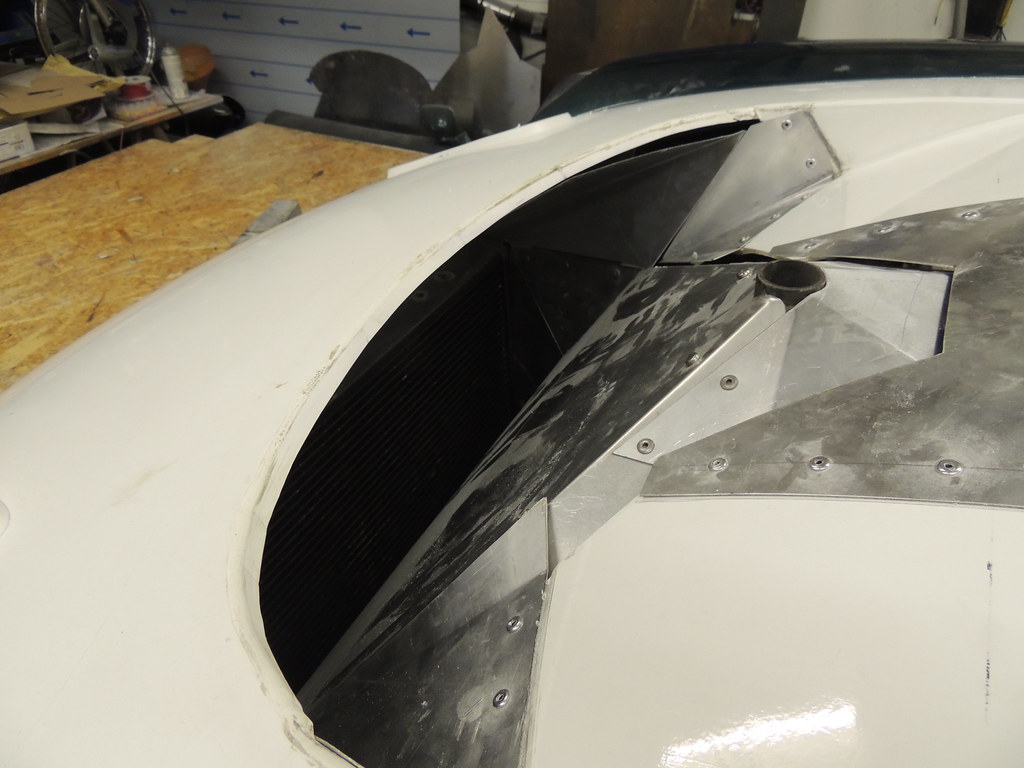
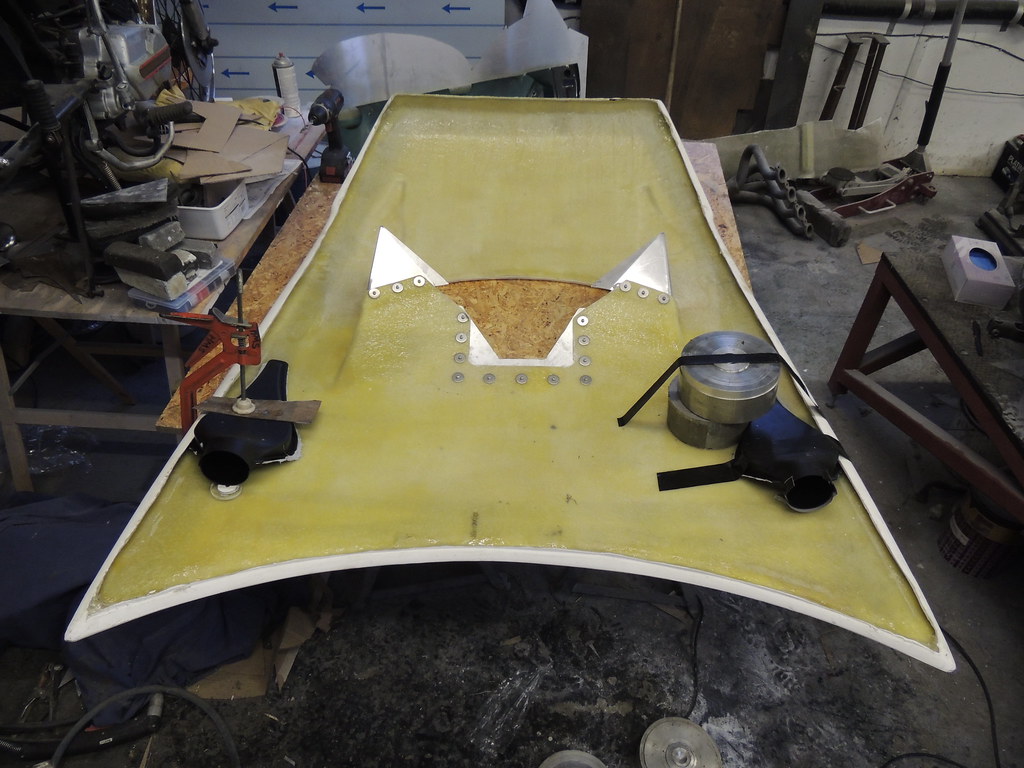
last update till the new year finished the air scoop for the rad, cleaned up the door sill mould and layed up the new sill 2 gelcoats and 12ozs of mat, then cut out the naca ducts for the engine intakes into the bonnet the moulds for the original place will be cut out and the bonnet faired in, next fixed the underside scoops in place, now got to make up the slash cut joints to mate up when the bonnet is in place.
john
 DSCN3121 by Brundall Motorsport, on Flickr
 DSCN3123 by Brundall Motorsport, on Flickr
 DSCN3126 by Brundall Motorsport, on Flickr
 DSCN3128 by Brundall Motorsport, on Flickr
 DSCN3129 by Brundall Motorsport, on Flickr
 DSCN3130 by Brundall Motorsport, on Flickr
 DSCN3131 by Brundall Motorsport, on Flickr
 DSCN3132 by Brundall Motorsport, on Flickr
john
DSCN3121 by Brundall Motorsport, on FlickrDSCN3123 by Brundall Motorsport, on FlickrDSCN3126 by Brundall Motorsport, on FlickrDSCN3128 by Brundall Motorsport, on FlickrDSCN3129 by Brundall Motorsport, on FlickrDSCN3130 by Brundall Motorsport, on FlickrDSCN3131 by Brundall Motorsport, on FlickrDSCN3132 by Brundall Motorsport, on FlickrGassing Station | Cerbera | Top of Page | What's New | My Stuff