My Story. Chassis Refurb.
Discussion


Landmark day today, my chassis is finally finished after many many months of hard work.
First the new outriggers were welded in,
then it went to be hot dip galvanized. The job done on the galv was beyond awful, the finish was so far from uniform that we spent many months sanding zinc buildup off every joint and every pipe. We got there after months of elbow grease and 3 burned out dremmels. Not to mention hundreds of pounds in abrasives.
After that it was off to the powder coaters who did a great job but through no fault of theirs the lacquer reacted. We rubbed the down the lacquer for another week solid to remove the reactions.
And at 3am this morning it was painted the exact colour I wanted and lacquered again.
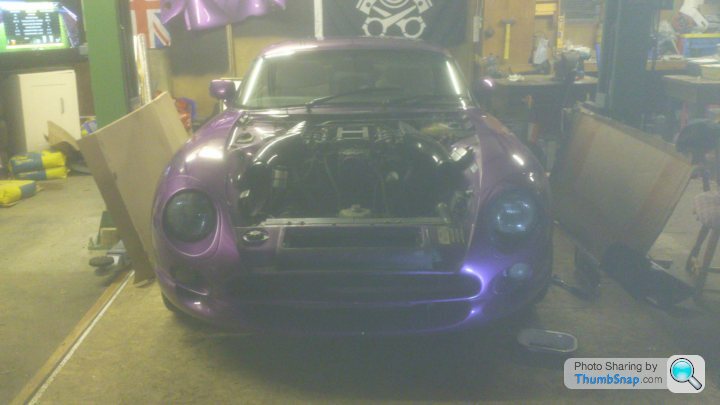
The holes visible in the pictures will be used to fill the chassis with cavity wax and then plugged with bungs.
Every pipe is uniform and every joint is as close to perfect as we could possibly make it.
It cost so much more than I expected and nearly killed my best mate who did the lions share of the work.
But today the smile on my face could have split my head in two.
In believe I probably have the best Cerbera chassis in existence anywhere. (although maybe not the lightest anymore )
)
Cant wait to start putting her back together.
I know you lot are pictures fiends so here you go and if you enjoy them half is much as i enjoyed being able to take them i'll be good with that.
Rob


First the new outriggers were welded in,
then it went to be hot dip galvanized. The job done on the galv was beyond awful, the finish was so far from uniform that we spent many months sanding zinc buildup off every joint and every pipe. We got there after months of elbow grease and 3 burned out dremmels. Not to mention hundreds of pounds in abrasives.
After that it was off to the powder coaters who did a great job but through no fault of theirs the lacquer reacted. We rubbed the down the lacquer for another week solid to remove the reactions.
And at 3am this morning it was painted the exact colour I wanted and lacquered again.
The holes visible in the pictures will be used to fill the chassis with cavity wax and then plugged with bungs.
Every pipe is uniform and every joint is as close to perfect as we could possibly make it.
It cost so much more than I expected and nearly killed my best mate who did the lions share of the work.
But today the smile on my face could have split my head in two.
In believe I probably have the best Cerbera chassis in existence anywhere. (although maybe not the lightest anymore
)Cant wait to start putting her back together.
I know you lot are pictures fiends so here you go and if you enjoy them half is much as i enjoyed being able to take them i'll be good with that.
Rob

Cheers fellas, glad you like i'm still smiling about it myself.
We weighed the chassis before it went for Galvanize just so that they couldnt rip us off.
Bare metal Cerbera chassis weights 83kg
Not sure what mine weighs now but at a guess i would say around 95kg and thats before filling the whole thing with cavity wax which I will do at some point.
We weighed the chassis before it went for Galvanize just so that they couldnt rip us off.
Bare metal Cerbera chassis weights 83kg
Not sure what mine weighs now but at a guess i would say around 95kg and thats before filling the whole thing with cavity wax which I will do at some point.
I totally admire your dedication, but this thread just confirms my determination to never do this job!
Your thread started a year ago, when you were just half way in! But life is too short, I want to keep using my car until the game is over. I will continue patching and slapping POR15 everywhere for as long as I can get away with it.
My car will always be a pale imitation of yours, but I can't see my car's chassis when I'm driving it.
ukkid35 said:
I totally admire your dedication, but this thread just confirms my determination to never do this job!
Your thread started a year ago, when you were just half way in! But life is too short, I want to keep using my car until the game is over. I will continue patching and slapping POR15 everywhere for as long as I can get away with it.
My car will always be a pale imitation of yours, but I can't see my car's chassis when I'm driving it.
Truth be told this the job was supposed to take 2 months and cost about 2k with me doing alot of the work myself. Once the chassis was off we realised just how much work needed doing. Started a couple of little jobs here and there and then finished them to a pretty high standard. Your thread started a year ago, when you were just half way in! But life is too short, I want to keep using my car until the game is over. I will continue patching and slapping POR15 everywhere for as long as I can get away with it.
My car will always be a pale imitation of yours, but I can't see my car's chassis when I'm driving it.
Once you go down that road its a slippery slope, because you want everything new. And every new job has to be as good as the last.
Unless you like doing this sort of s
 t I wouldnt recommend this to anyone.
On the bright side though we reckon my chassis should be good for 50+ years
iamrtl said:
I worked on the Cerb monday through thursday last week but I couldnt do the the weekend cause the missus was away (daddy daycare hilarity ensued).
Much of the stuff we have been doing up till now has been the slow and labourious stripping and prepping for paint. If I find it slow and labourious and i'm at it part time my friend who is doing the lions share must be driven to distraction.
But when I see the results of the labour I can see why he does it. My jaw hit the floor! Things are really starting to come together now.
Seems like all us Cerbera boys are picture wh0res.
So my fellow wh0res a treat for you.

Looks awesome! what type of paint did you useMuch of the stuff we have been doing up till now has been the slow and labourious stripping and prepping for paint. If I find it slow and labourious and i'm at it part time my friend who is doing the lions share must be driven to distraction.
But when I see the results of the labour I can see why he does it. My jaw hit the floor! Things are really starting to come together now.
Seems like all us Cerbera boys are picture wh0res.
So my fellow wh0res a treat for you.
Edited by Discopotatoes on Sunday 23 August 18:10

iamrtl said:
Truth be told this the job was supposed to take 2 months and cost about 2k with me doing alot of the work myself. Once the chassis was off we realised just how much work needed doing. Started a couple of little jobs here and there and then finished them to a pretty high standard.
Once you go down that road its a slippery slope, because you want everything new. And every new job has to be as good as the last.
Unless you like doing this sort of st I wouldnt recommend this to anyone.
On the bright side though we reckon my chassis should be good for 50+ years
Great build thread. Chassis was looking pristine. Any updates?Once you go down that road its a slippery slope, because you want everything new. And every new job has to be as good as the last.
Unless you like doing this sort of s
t I wouldnt recommend this to anyone.On the bright side though we reckon my chassis should be good for 50+ years
Gassing Station | Cerbera | Top of Page | What's New | My Stuff