What have you done to your car today......
Discussion


Hello all,
Not managed to get much done but here are a couple of shots of the instrument binnacle / switch gear.
I've covered the existing wood fascias with a carbon fibre look film. It actually looks more like stainless steel so I'm happy with that. SPA Oil pressure and water temp gauge finally fitted. Also, being colour blind I was struggling to see the LEDs in the switch gear so I've swapped them all out for higher output equivalents. They might actually be too bright now but I'll pass final judgement after a road test, etc.
I have some (but not all) LEDs left over so if anybody fancies doing the same then drop me a line and I'll bung 'em in the post


Incognegro said:
Great look on the LED switches do you mind letting me know what bulb figments are needed, I now know what I'd like to do in 2016 
OK Incognegro and OutlawFlat4,The LEDs required are as follows:
Light switch: 3mm Mega Green RS part no. 55-1670 3 off
Cold Fan switch: 3mm Blue RS part no.55-1478 2 off
Hot Fan switch: 3mm Super bright red RS part no. 2-8985 2 off
I also replaced the following:
Fog light switch: (as per hot fan LEDs) 2 off I'm not sure if these should be orange (being colour-blind) but I fitted red anyway
Rear de-mist light: 5mm red Maplin part no. WL27E 1 off
Aircon light: 5mm blue Maplin part no. JA24B 1 off
I bought at least 5 off of each (except the 5mm) so I had some spare if I dropped a b*llock, (which I did)
I would advise buying the LEDs from RS components as they are much much cheaper than Maplins. That said, I bought the 5mm ones from Maplin as there is a store close to where I work and I was too impatient....
The job itself is straightforward if a little fiddly. I would recommend a soldering iron with a small tip (maybe even pointed) to get the heat exactly where you need it so as to avoid damaging the circuit board. I would also recommend a solder sucker to remove the molten solder when removing the old LEDs. The idea being to get the circuit board holes free from solder so that installation of the new LEDs is nice and easy.
The cathode and anode of the LEDs are usually indicated by either a 'flat' on the side of the body (cathode -ve) or the longer of the two legs, anode +ve
If the LEDs you get don't have a flat and you've chopped the legs to length and forgotten which is which you can test them with a DVM.
I haven't got any pics I'm afraid, it didn't even cross my mind to take any. Obviously please feel free to drop me a line if you need any pointers.
HTH this helps
Cheers
Ian
Just coming up to one year of ownership of Speed Six. Downs: Long snagging list of bent ac pulley, multiple oil leaks (incl front crank seal replaced by houdini local guys without removing engine), cooling problem at idle (sorted by EWP, high flow Pacet fan and uprated Laminovo oil to water cooler), valve clearances done, TB balance, suspension settings a mile out, failed master cylinder, failed slave cylinder (Tilton replacement), driver's door latch falling down into rear panel (twice - not sure whether a down or an up as so much comedy involved in getting in passenger side and over central tunnel !!), length of time out of service. Ups: glorious engine and sport exhaust symphony, secure handling after geo adjusted by Kenny Brown and a Quaife diff (though rear end did break sideways on wet dual carriageway just by accelerating - in 4th!), trip to Central Scotland TVRCC in August, sailed through MOT last week, general performance and sculpted body and interior. Taking it out regularly over winter, always a pleasure. Twice as good as a Porker for half the price. Thanks to all for your excellent advice and support.
Finally put Cerb back into newly spruced resting place after its 12k tappets service.
Work done above service was new sagaris uprights fitted... Car now wears some red CP6600 calipers with 350x30mm discs, had my SP12s refurb end and coloured metallic gunmetal, under bonnet battery isolator switch fitted, 125amp fuse fitted, new red SS brake hoses, sorted the correct button for my Zyrtec handbrake grip, clutch needed serious adjusting and gear change is now easy.
The drive home from power was an absolute joy, by no means a cheap day at Power but wow I got what I paid for and am very happy!
...Now a MASSIVE thanks Ian, lights arrived yesterday (I'm gonna email you in the morning mate) ... I'll be getting the switches done in the not too distant future as I love the pic you've posted.
Anyone running any projects may wanna get I touch as I now have some CP5200s (4 bolt) wilt CL pads and a full set of braided hoses and a bottle of CL competition brake fluid up for grabs.
Edited by Incognegro on Friday 8th January 21:29
billybradshaw said:
Hello all,
Not managed to get much done but here are a couple of shots of the instrument binnacle / switch gear.
I've covered the existing wood fascias with a carbon fibre look film. It actually looks more like stainless steel so I'm happy with that. SPA Oil pressure and water temp gauge finally fitted. Also, being colour blind I was struggling to see the LEDs in the switch gear so I've swapped them all out for higher output equivalents. They might actually be too bright now but I'll pass final judgement after a road test, etc.
I have some (but not all) LEDs left over so if anybody fancies doing the same then drop me a line and I'll bung 'em in the post
What's the best way to remove the little panel with the blower knobs? Do you need to remove the dash cowling to get access? ThanksNot managed to get much done but here are a couple of shots of the instrument binnacle / switch gear.
I've covered the existing wood fascias with a carbon fibre look film. It actually looks more like stainless steel so I'm happy with that. SPA Oil pressure and water temp gauge finally fitted. Also, being colour blind I was struggling to see the LEDs in the switch gear so I've swapped them all out for higher output equivalents. They might actually be too bright now but I'll pass final judgement after a road test, etc.
I have some (but not all) LEDs left over so if anybody fancies doing the same then drop me a line and I'll bung 'em in the post
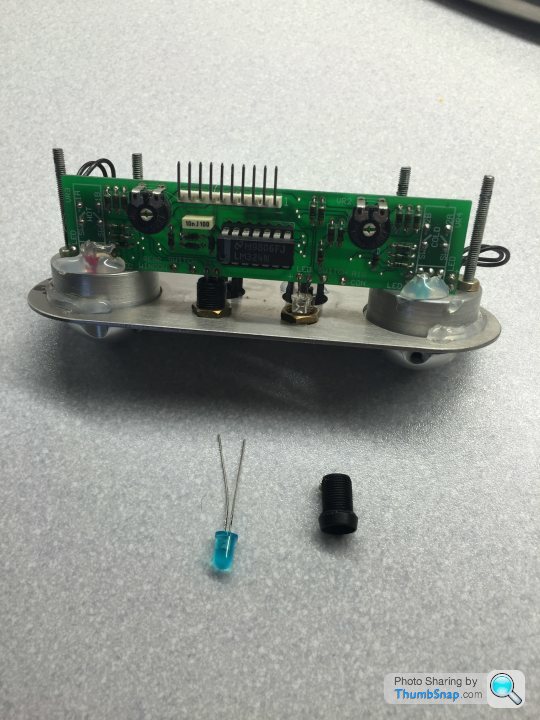
Removed the heater blower panel to reattach the ribbon cable 
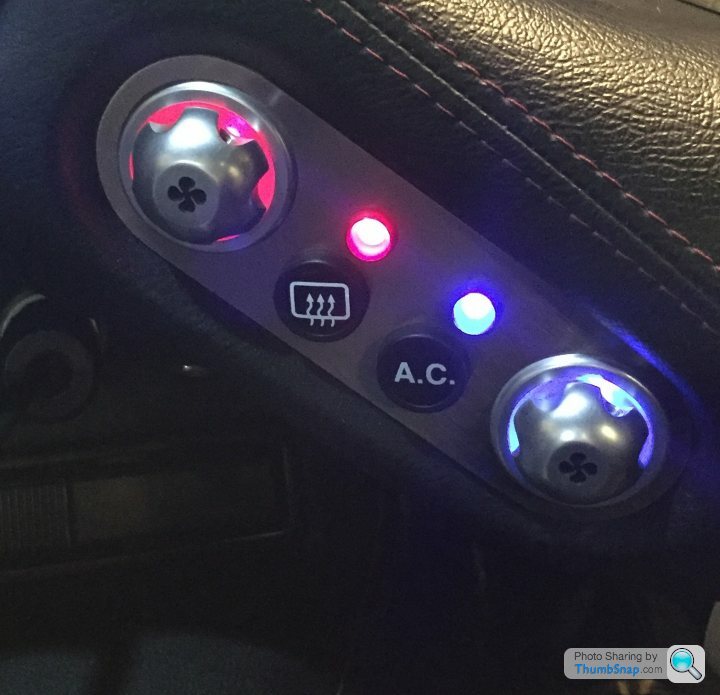
Discovered that one of the blue LEDs for the cold blower had come out of its hole (now I know why the light wasn't as bright as it once was) as shown at the top left of the pic below:
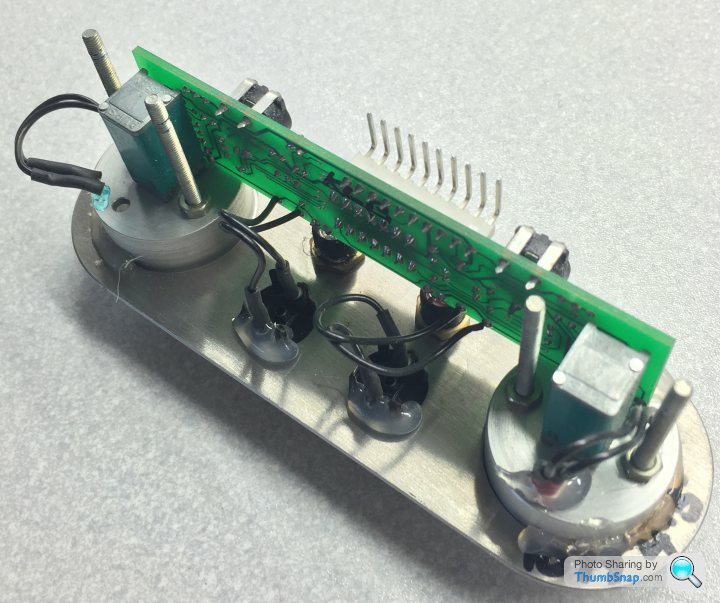
I also replaced the AC led for one that you can actually see..
It's not as bright as this photo makes out, it is a good match colour-wise for the knob illumination.
Sorry can't remember where I bought it from it was years ago
Just got to fit the remaining bracket and screws. The little nuts holding the panel on seem to be 7/32" (between 5mm and 6mm).
Next job is to fit headlight relays, replace dead bulbs and realign the offside dipped beam as it's a tad high.
Discovered that one of the blue LEDs for the cold blower had come out of its hole (now I know why the light wasn't as bright as it once was) as shown at the top left of the pic below:
I also replaced the AC led for one that you can actually see..
It's not as bright as this photo makes out, it is a good match colour-wise for the knob illumination.
Sorry can't remember where I bought it from it was years ago
Just got to fit the remaining bracket and screws. The little nuts holding the panel on seem to be 7/32" (between 5mm and 6mm).
Next job is to fit headlight relays, replace dead bulbs and realign the offside dipped beam as it's a tad high.
Edited by FarmyardPants on Sunday 17th January 15:50
billybradshaw said:
Exactly right. Finding the nuts is a bit of a fiddle, I think they're 6mm, could be smaller.
Ta
Ian
Ian just doing a sanity check on the bulbs you kindly sent to me (and thoughtfully labelled). Am I right in that I have 2xblue 2xGreen and 4xRed???Ta
Ian
When opening to view connections not sure if I mixed some up.
PS I'll be ordering some orange for the fogs like you suggested but want to make sure I have enough of all colours.
Thanks again.
Gassing Station | Cerbera | Top of Page | What's New | My Stuff