Airbox with Carbon Fibre ACT Trumpets and Dash Upgrades
Discussion


Just upgraded to one of Brendan's CF boxes and so am selling my OEM airbox off my 2005 T350C. Might be useful to someone as it has the ACT carbon fibre intake trumpets fitted. Importantly, the top is undamaged, the bottom has a small but repaired crack about 2" in length which doesn't affect operation. The bracket and latches are all fitted except for the front bracket on the lower air box half which I needed to transfer over. On Ebay #152273879227 with starting price less than the cost of the CF trumpets.
Regarding fitting Brendan's airbox - takes a few hours to do due to fitting the brackets and need to line things up. Also cutting the hole in the front rad duct for the front air feed is a bit fiddly to do neatly. In the end I used a dremel with grinding wheel to cut it from outside of the car through the vent aperture after making up a paper template to mark the hole. Worked well. Forget using a hacksaw blade.... Fixed the CF inlet trumpet in place with sikaflex from both sides. Also had to relocate the overflow tank to the opposite inner wing, but plenty of room for it next to the A/C drier. But no real problems if taking time.
Also put one of his CF dash binnacles on after having upgraded the dash LCD display with LeeT350C's upgraded versions (original plastic binnacle also on Ebay). Made up an external dash illumination power supply with day and night adjustments on to finally fix the problem with the dash lights going dim when the Xenon headlights are switched on (always been a problem since I fitted them). The day and nigh brightness can be adjusted independently via two PCB adjustable resistors.
C
Looking forward to seeing the pictures.
I intend giving Brendan a ring soon as I would prefer red hoses but not sure that's possible.
Are you saying the additional front vent is blanked off and needs to be cut out as that's what I'm hoping. So I could do that at a later date.
Does everything come in the kit like brackets, clips and the CF trumpet and additional pipework for front vent?
Did think about getting my one carbon dipped but it isn't in good condition so I'm going to see how yours sells as a possible 2nd option
Thanks, Gary
GazzaM100 said:
Looking forward to seeing the pictures.
I intend giving Brendan a ring soon as I would prefer red hoses but not sure that's possible.
Are you saying the additional front vent is blanked off and needs to be cut out as that's what I'm hoping. So I could do that at a later date.
Does everything come in the kit like brackets, clips and the CF trumpet and additional pipework for front vent?
Did think about getting my one carbon dipped but it isn't in good condition so I'm going to see how yours sells as a possible 2nd option
Thanks, Gary
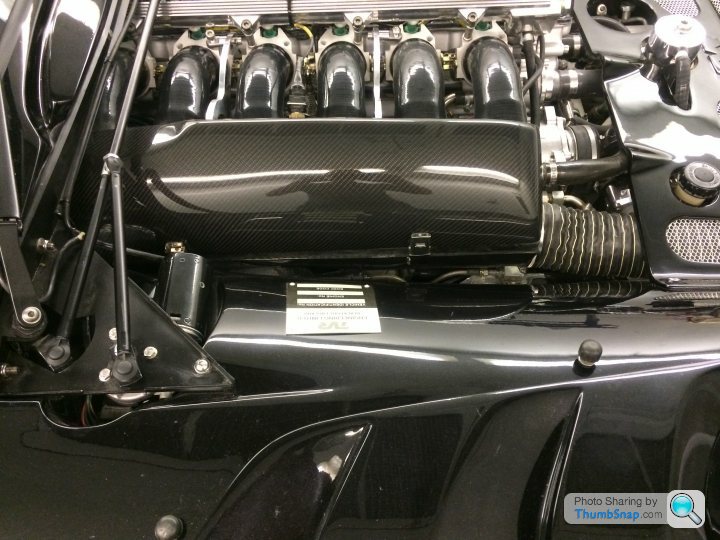
Here's mine recently done by Brendan...I intend giving Brendan a ring soon as I would prefer red hoses but not sure that's possible.
Are you saying the additional front vent is blanked off and needs to be cut out as that's what I'm hoping. So I could do that at a later date.
Does everything come in the kit like brackets, clips and the CF trumpet and additional pipework for front vent?
Did think about getting my one carbon dipped but it isn't in good condition so I'm going to see how yours sells as a possible 2nd option
Thanks, Gary
Edited by ShiDevil on Tuesday 11th October 12:24

GazzaM100 said:
Looking forward to seeing the pictures.
I intend giving Brendan a ring soon as I would prefer red hoses but not sure that's possible.
Are you saying the additional front vent is blanked off and needs to be cut out as that's what I'm hoping. So I could do that at a later date.
Does everything come in the kit like brackets, clips and the CF trumpet and additional pipework for front vent?
Did think about getting my one carbon dipped but it isn't in good condition so I'm going to see how yours sells as a possible 2nd option
Thanks, Gary
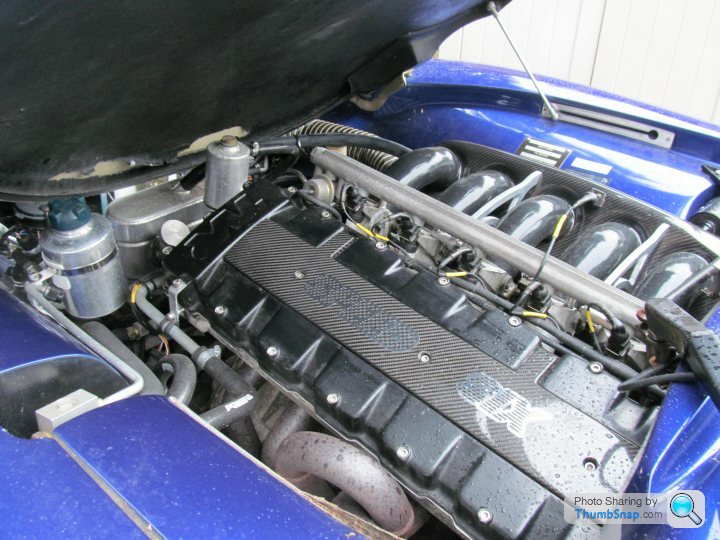
I've had mine done recently it's a fantastic bit of kit , I also wanted red Inlet hoses but Brendan doesn't do them so I went with blue.I intend giving Brendan a ring soon as I would prefer red hoses but not sure that's possible.
Are you saying the additional front vent is blanked off and needs to be cut out as that's what I'm hoping. So I could do that at a later date.
Does everything come in the kit like brackets, clips and the CF trumpet and additional pipework for front vent?
Did think about getting my one carbon dipped but it isn't in good condition so I'm going to see how yours sells as a possible 2nd option
Thanks, Gary

Buzz
ShiDevil said:
Maybe paint your camcover black or blue as per your car, it will look great  . Personally I'm not keen on the red colour on any car unless the car is red as the colour doesn't match. Personal choice I know
Agreed ... Why have you got a 4 litre 'S' red cam cover when it was a 3.6 (I guess) and is now a 4.3 ?. Personally I'm not keen on the red colour on any car unless the car is red as the colour doesn't match. Personal choice I know There was a time when red covers were painted to fool people
.
Looks good Craig
Did you use the original bracket to mount the expansion tank on the opposite wing? Any chance of a picture please?
Was it not possible to leave where it was? Can see it looks cramped there if you did.
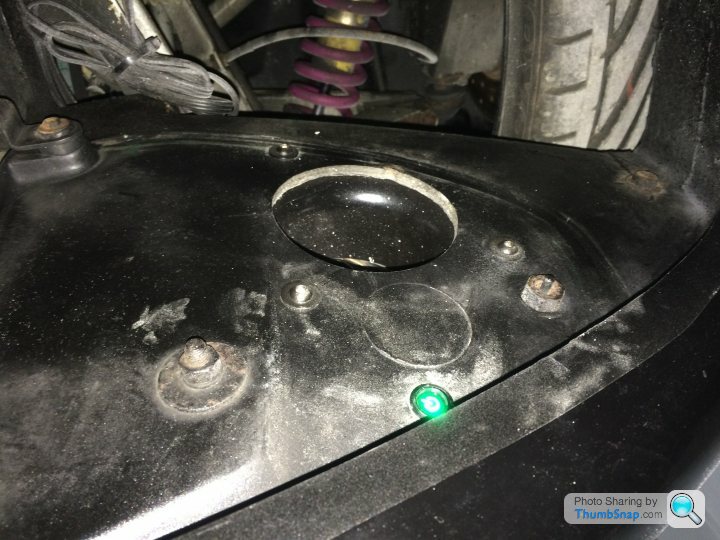
Glad to see mines not the only underside bonnet that's peeling lol
I'm having bonnet pins fitted Thursday to make its removal a one man job.
Did you use the original bracket to mount the expansion tank on the opposite wing? Any chance of a picture please?
Was it not possible to leave where it was? Can see it looks cramped there if you did.
Glad to see mines not the only underside bonnet that's peeling lol
I'm having bonnet pins fitted Thursday to make its removal a one man job.
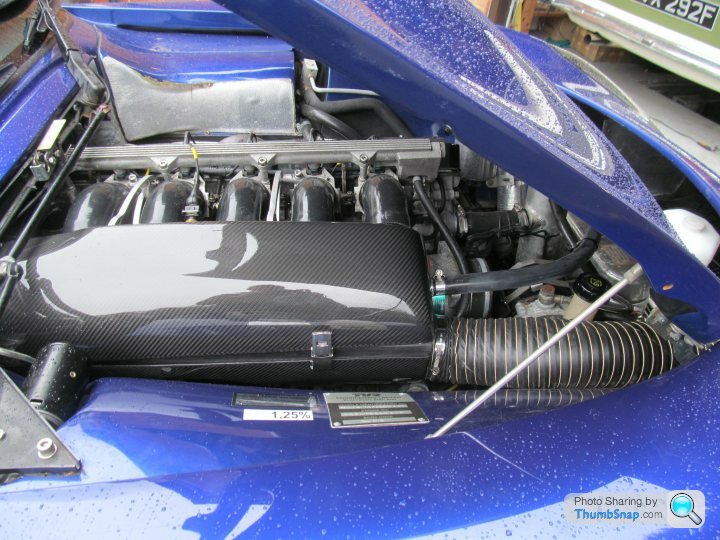
Hi - there wasn't room to leave the expansion tank in place because the front air inlet stub on the air box interferes with it. I guess if you are not fitting the front air feed then you could remove the stub and blank the hole off, although doing that on £1000 of brand new CF would grate a bit with me! To move it over I just removed the existing brackets and found a location just rearward of the aircon dryer. I fixed the body bracket with a couple of M6 rivnuts like the original mounting, but you could use some M6 or M8 bolts through the inner wing area. You might need to move the aircon dryer up or down a little in it's bracket to make sure the aircon pipe clears. It is also possible to use some large worm drive clips to attached the expansion tank to the swirl pot, but it seems to then make getting the oil reservoir cap off difficult.
The other thing that's worth mentioning, is that the rad panel intake duct is a bit too big for the flexi hose, meaning that it's near enough impossible to get the flexi pushed over in situ prior to putting a worm drive clip on. I clipped out a couple of coils of the reinforcing wire in the hose to just leave the flexible material. That's really strong and can then be secured in place.
Will try to get a better photo when it stops raining!
Regarding the underbonnet area, that's probably one for over winter. Have you worked out the best paint to use yet? Where did you get your bonnet pins from - I lost track of that thread but had thought it worth doing, either that or the fully opening bonnet option that was shown a year or two back.
C
Cheers for that information.
Have spoken to Brendan and I'm sure he mentioned a cap that blanks off the additional front feed until you get around to fitting the large hose.
Haven't ruled out your eBay Airbox yet but it's creeping up rapidly, I opened the bidding.
Bespoke are doing it Thursday and they get pins from Demon Tweeks for about £75. They replace the single nuts on the bonnet hinge you can see through the front vents when the bonnet is closed.
Not looked into the paint yet but if anyone knows?
What did you think of the CF binnacle from Brendan?
The binnacle was good and fitted well. Just used hot glue like the original to fix it to the dash unit. I wouldn't have bothered replacing it were it not for the fact that I had to separate off the old one to mount the new LCD unit it and modify the dash backlighting to fix my previous problem with the lights going dim when the HID headlights were switched on.
Separating the old binnacle was fine by following LeeT350C's instructions with the LCD upgrade. Basically just use a knife gently to ease off the old glue.
Will post a photo when I next get out to the car. Still raining!
C
Separating the old binnacle was fine by following LeeT350C's instructions with the LCD upgrade. Basically just use a knife gently to ease off the old glue.
Will post a photo when I next get out to the car. Still raining!
C
Cheers, think Brendan said they are £150? Tried buying yours to get it CF dipped then sell mine once fitted but got outbid in last seconds. Didn't go bad as would prefer real CF.
I've got one of Lee's new LCD screens to fit as well as Powers HID's but worried about having similar problems like yours with dimming.
Where was yours from?
I've got one of Lee's new LCD screens to fit as well as Powers HID's but worried about having similar problems like yours with dimming.
Where was yours from?
I bought my HID kit from Ebay, but it looked very similar to the ones that Dom sells. I tried a few things to fix the interference with the dash lights (i) putting ferrite filters on the feed line, (ii) direct earth to chassis, (iii) direct positive feed via relay from the battery. None of these worked. I spoke to Paul Smith and he thought it was EMC noise from the ballast boxes which doesn't get shielded from the ECU as the body is fibreglass. With this in mind I put another earth on the ballast boxes to see if that would help, but it made no difference. Also tried a large capacitor across the feedlines to take out any voltage spikes or dips during illumination of the lights.
I gather some others have had the same problem with aftermarket HIDs, but others have been fine.
To fix the problem, I unsoldered the 4 wires feeding the LED back lights from the PCB. Those are paired 2 + 2 (so 2 pairs of common wires one + and one -). Connected those to a strip LED 4 way connector and ran this out of the back of the dash to a small new circuit board. The new board basically has an adjustable voltage regulator (with large heat sink) set up with a relay. The relay is fed from the lights illumination circuit and flips between two different variable resistors which change the voltage on the regulator (and hence the LED brightness). You need ca 4.2V for normal daytime brightness. The only other thing needed is a capacitor and diode so that when you switch the lights on the dash doesn't go through an on-off cycle. The cap keeps the relay energised for a split second during the changeover. I fixed the pcb onto the back of the dash. The variable resistors to adjust day and night illumination level are on the PCB so once adjusted can't be changed without taking the dash off, but you could easily put some flyleads on and use dash mounted pots if you wanted them adjustable in normal use. So I think if you do fit HIDs and have the problem, there is a solution.
C
Gassing Station | Tamora, T350 & Sagaris | Top of Page | What's New | My Stuff