Bonnet slam panel/grille repair DB9/DBS series.
Discussion


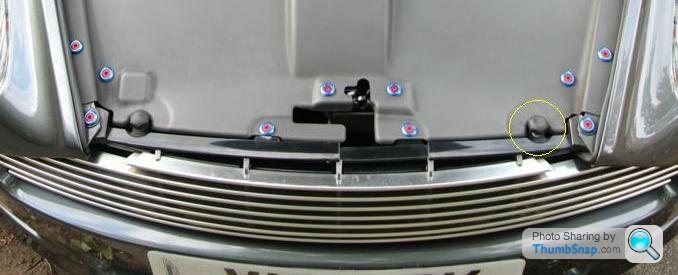
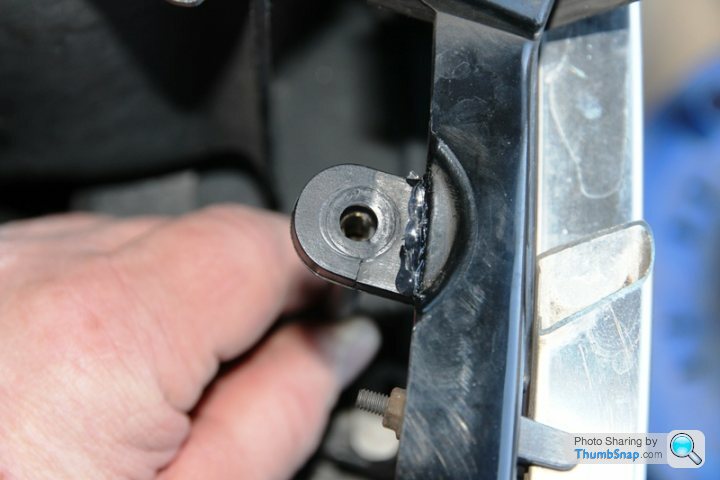
I noticed a few weeks ago that one of the bonnet support rubbers was very loose and appeared to be broken. I asked my dealer about it and he said it was very common and the only official repair was a replacement grille at around £1000.00, but he had heard of the technicians in the workshop glueing-in a wedge shape to support it. See the offending part here circled in yellow..........
After removing the radiator cover, I found the stop just hanging on by a tiny bit of plastic and as soon as the cover was removed, the stop came detached.

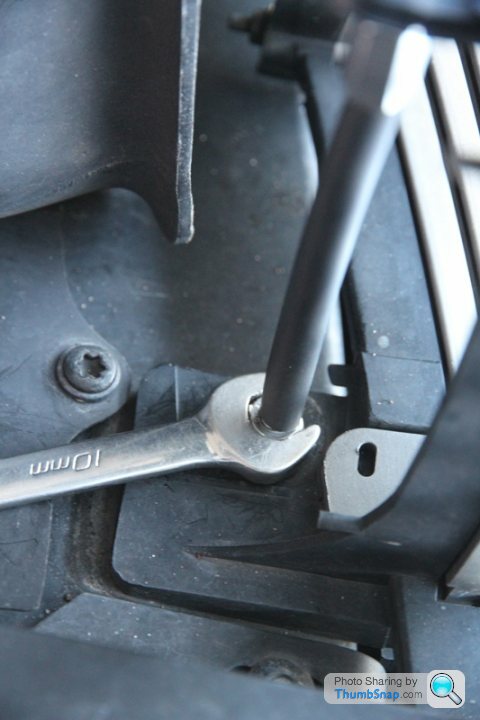
I noticed that just below, on the lower panel, there was a bolt holding the lower section of the grille to the front structure.
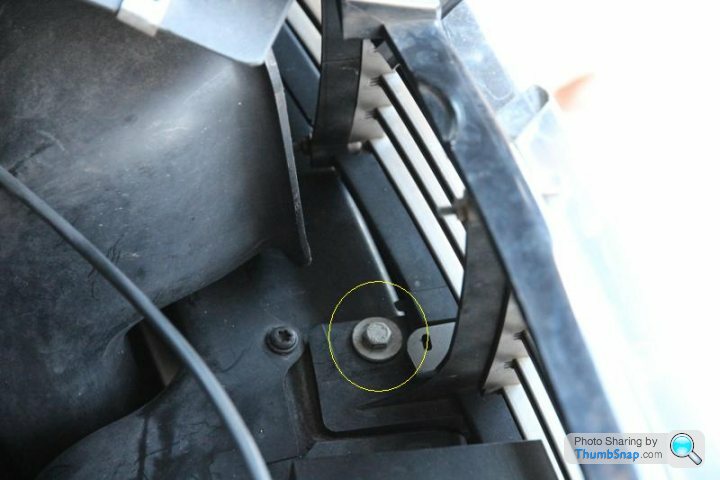
I removed the bolt to see where it located, and it is indeed, the main front structure.
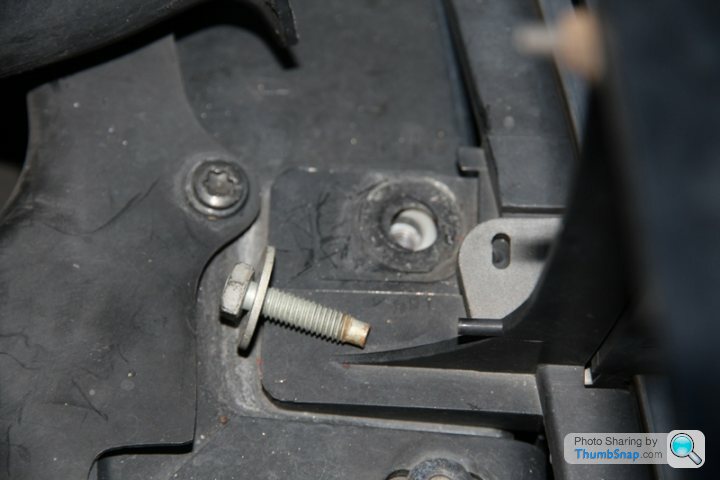
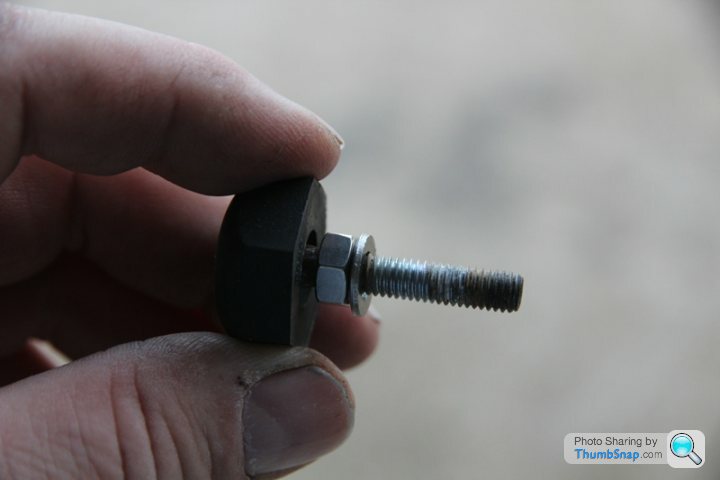
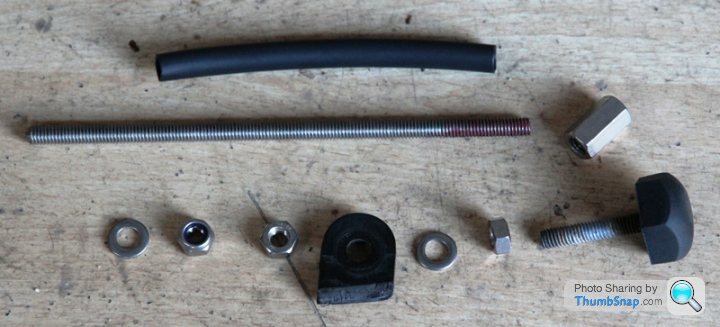
The bolt was an M6 so using a 150mm length of M6 studding and a nut and washer assembled as shown.......
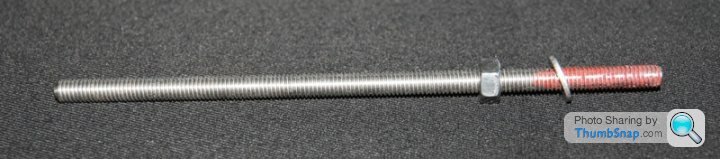
I screwed it in by hand about an inch or so into the thread.
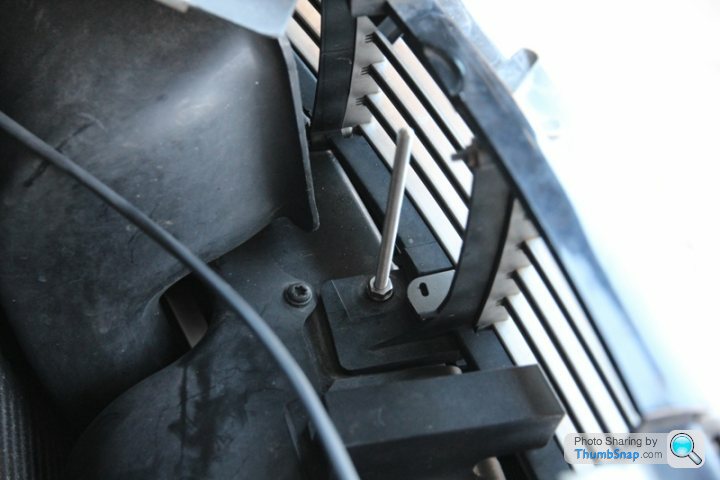
I then threaded on the M6 stud joiner a short way down the stud........
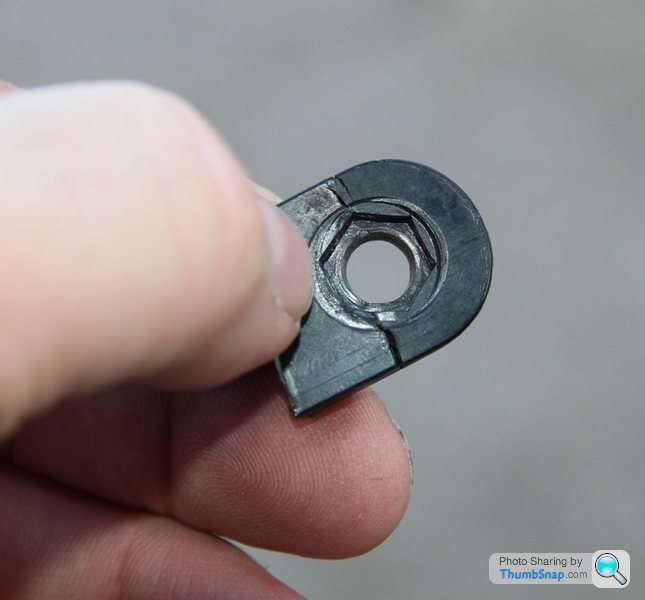
Here you can see that the underside of the broken plastic tab has a 10mm captive hexagon moulded in to locate and lock a standard M6 nut...........
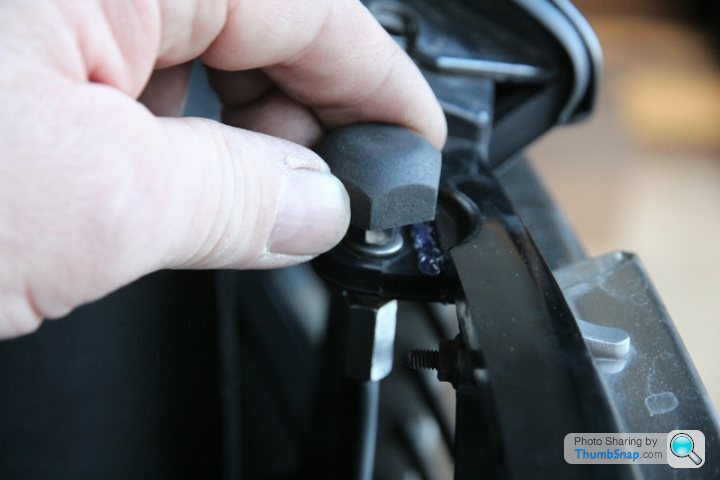
Using a hot glue gun, I refitted the broken tab...........
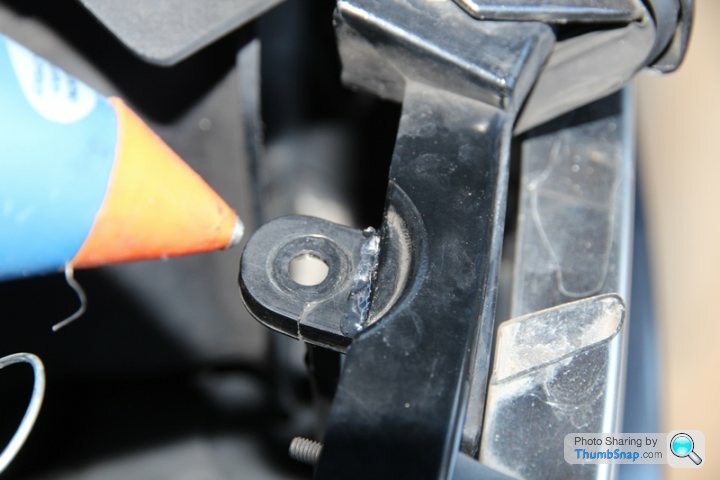
and astonishlingly luckily, the stud lines-up directly with the hole in the tab!!
I then preassembled another M6 nut and washer to the original bump-stop..........
and inserted back through the tab and into another M6 nut that would insert into the socket under the tab shown earlier
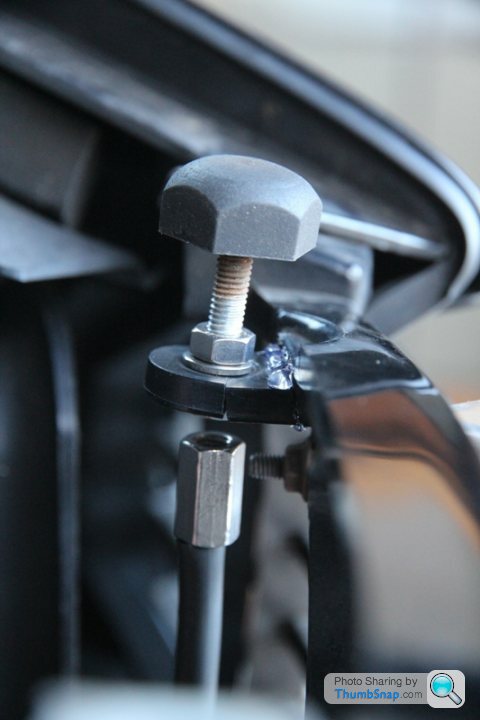
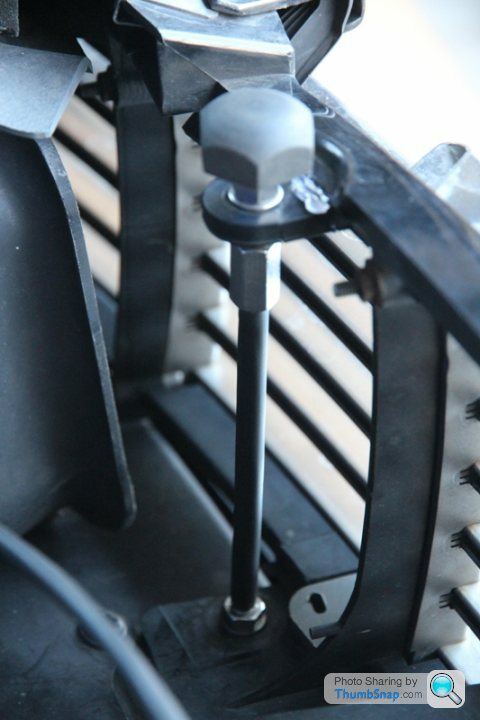
The hexagonal stud joiner can now be unscrewed up the stud, and engaged on the bump stop thread.........
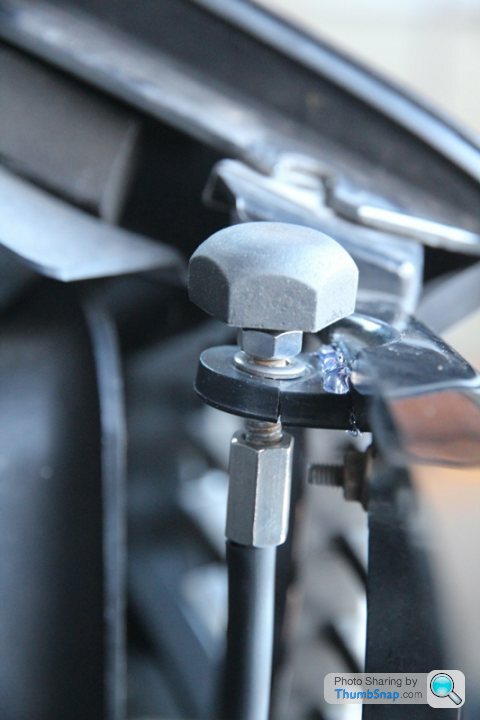
and the lower stud nut tightened to secure the stud once any height corrections have been made to its height beneath the bump-stop.
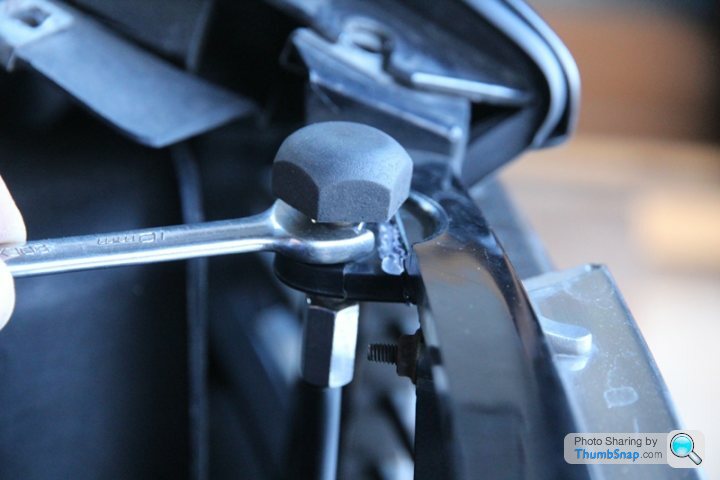
The bump-stop can now be adjusted for correct support height of the bonnet as normal.........
and then locked into position with the upper nut.
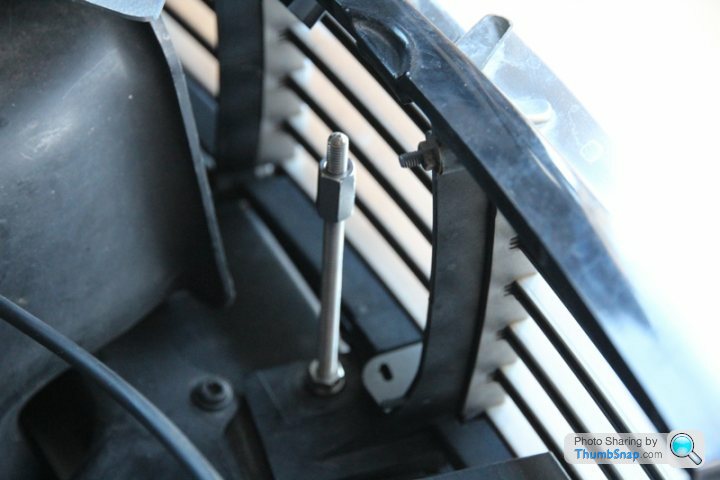
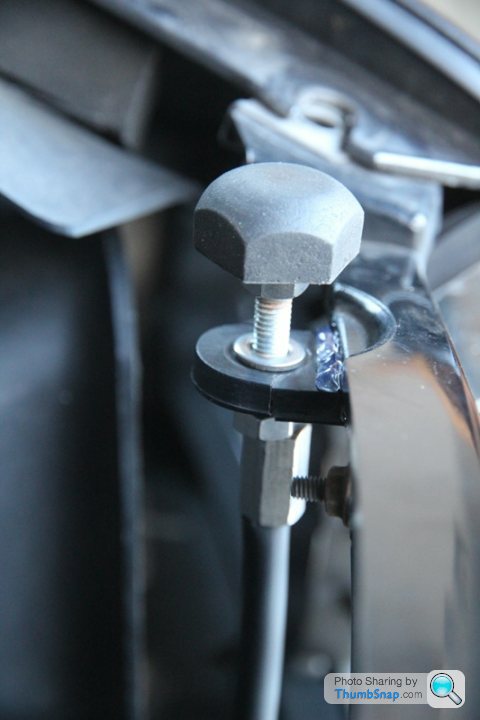
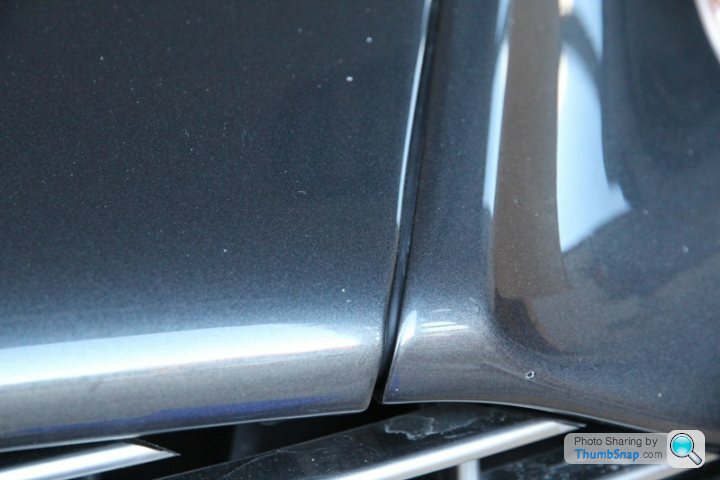
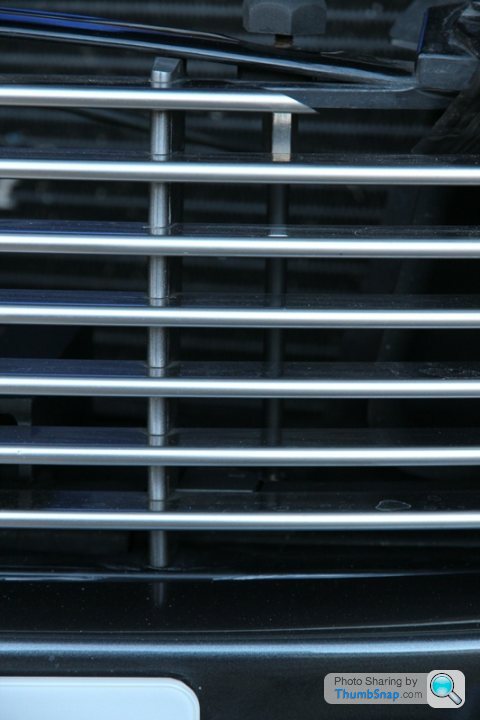
As I had used A4 stainless steel fasteners throughout, they were visible through the grille, so I cut a length of cable heatshrink to cover the exposed stud. The final assembly is substantially stronger than the original plastic grille tab.
which makes it very unobtrusive visually through the grille, seen here just to the right of the grille vertical member.
Total expenditure and parts list is M6 x 150mm studding, 3 x M6 nuts 2 x M6 washers, 1 x M6 stud joiner and a short length of heatshrink. The end result was so substantial, I replaced the other side anyway exactly the same but without the need to glue the tab back on! Total cost............under £20.00 and half an hour.
The final result is very strong and does not rely on the flimsy plastic tab to support the slam amd positioning of the bonnet leading edge or anyone inadvertantly leaning on it, but transfers the load directly through the stud onto the main front structure.
After removing the radiator cover, I found the stop just hanging on by a tiny bit of plastic and as soon as the cover was removed, the stop came detached.
I noticed that just below, on the lower panel, there was a bolt holding the lower section of the grille to the front structure.
I removed the bolt to see where it located, and it is indeed, the main front structure.
The bolt was an M6 so using a 150mm length of M6 studding and a nut and washer assembled as shown.......
I screwed it in by hand about an inch or so into the thread.
I then threaded on the M6 stud joiner a short way down the stud........
Here you can see that the underside of the broken plastic tab has a 10mm captive hexagon moulded in to locate and lock a standard M6 nut...........
Using a hot glue gun, I refitted the broken tab...........
and astonishlingly luckily, the stud lines-up directly with the hole in the tab!!
I then preassembled another M6 nut and washer to the original bump-stop..........
and inserted back through the tab and into another M6 nut that would insert into the socket under the tab shown earlier
The hexagonal stud joiner can now be unscrewed up the stud, and engaged on the bump stop thread.........
and the lower stud nut tightened to secure the stud once any height corrections have been made to its height beneath the bump-stop.
The bump-stop can now be adjusted for correct support height of the bonnet as normal.........
and then locked into position with the upper nut.
As I had used A4 stainless steel fasteners throughout, they were visible through the grille, so I cut a length of cable heatshrink to cover the exposed stud. The final assembly is substantially stronger than the original plastic grille tab.
which makes it very unobtrusive visually through the grille, seen here just to the right of the grille vertical member.
Total expenditure and parts list is M6 x 150mm studding, 3 x M6 nuts 2 x M6 washers, 1 x M6 stud joiner and a short length of heatshrink. The end result was so substantial, I replaced the other side anyway exactly the same but without the need to glue the tab back on! Total cost............under £20.00 and half an hour.
The final result is very strong and does not rely on the flimsy plastic tab to support the slam amd positioning of the bonnet leading edge or anyone inadvertantly leaning on it, but transfers the load directly through the stud onto the main front structure.
Edited by 8Tech on Sunday 9th February 19:35
V12Vanquish said:
Fantastic write up, thank you for taking the time to post the pictures etc.
If we had a load more of this and a bit less of the slagging off of various vendors etc, this forum would be a much better place.
and if every positive thread didn't always have to refer to the negatives maybe some of it would go away. Why hijack a positive thread to air grievances. If we had a load more of this and a bit less of the slagging off of various vendors etc, this forum would be a much better place.
OP - good post.


DB9VolanteDriver said:
Excellent work. Now I know exactly what to do if mine shows evidence of impending failure. Or maybe I'll just fix it proactively. Top marks to you.
And I agree...more of this kind of stuff and a little bit less of the endless 'banter' would improve this forum immeasurably.
+1And I agree...more of this kind of stuff and a little bit less of the endless 'banter' would improve this forum immeasurably.
Informative post,thanks Gerry.
Notice you have also lost the little grommet that fits at the end of the grille slats, turning it into a finger grater. It's one of the reasons I changed my grille to the later 5 bar.
A later grille or a second hand 7 bar frame might also have been the way to go, saving the additional structure and certainty a lot less than a £1000.
Admire the ingenuity but perhaps the glued repair looks a little incongruous in the same setting as that magnificent V12 engine. Interesting post nevertheless.

Old thread, but I wanted to give thanks to 8Tech for the excellent write-up. I had exactly the same problem with the bump-stop breaking off. Thanks to the clear step-by-step instructions and photos I was able to replicate the repair. In fact I did both sides while I was in there.
Thank you 8Tech
Thank you 8Tech
yvr said:
Old thread, but I wanted to give thanks to 8Tech for the excellent write-up. I had exactly the same problem with the bump-stop breaking off. Thanks to the clear step-by-step instructions and photos I was able to replicate the repair. In fact I did both sides while I was in there.
Thank you 8Tech
Old thread, but 8Tech gets my vote for MUP (most useful poster). Now off to check my bonnet supports..Thank you 8Tech
Gassing Station | Aston Martin | Top of Page | What's New | My Stuff