Discussion


Thanks Furrywoolyhatuk
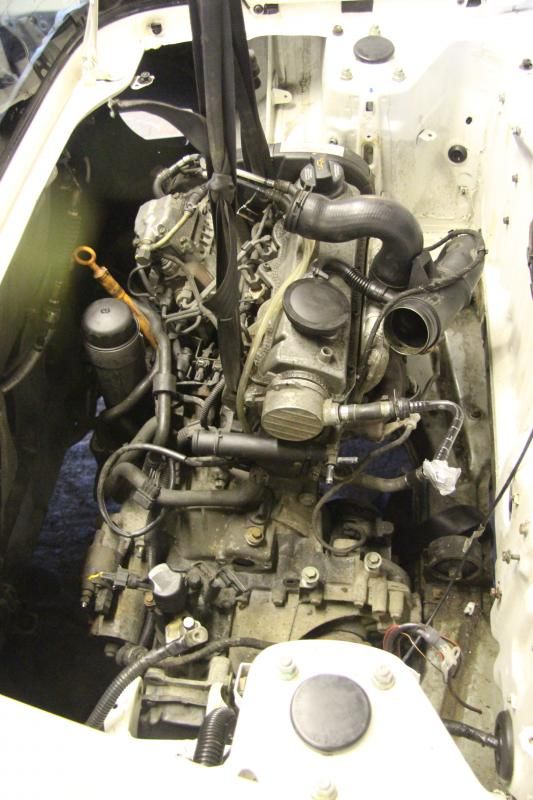
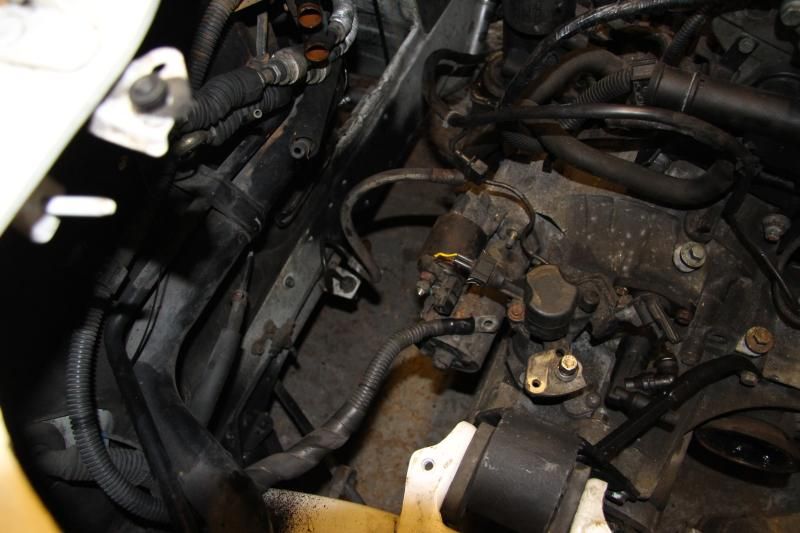
I got the engine in this morning. Very excited about that
Its only attached by one engine mount and mostly hanging on the crane, but it was a great success in terms of seeing how well it fits and checking where things might go:
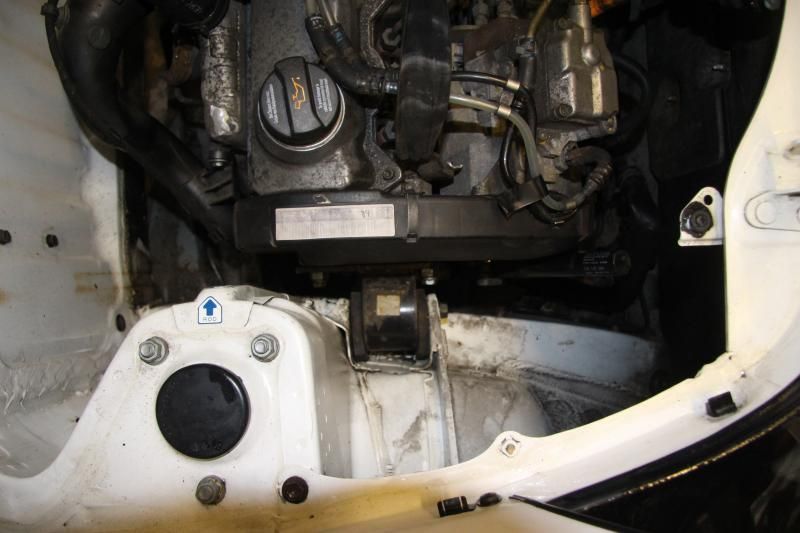
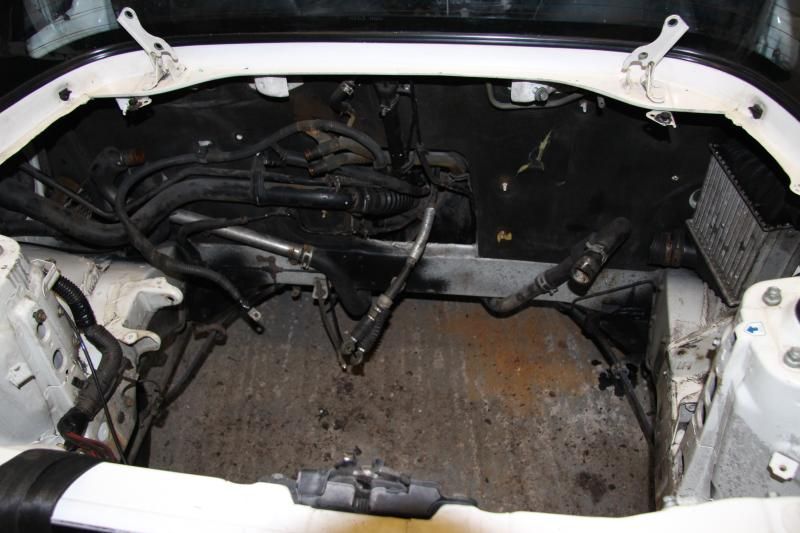
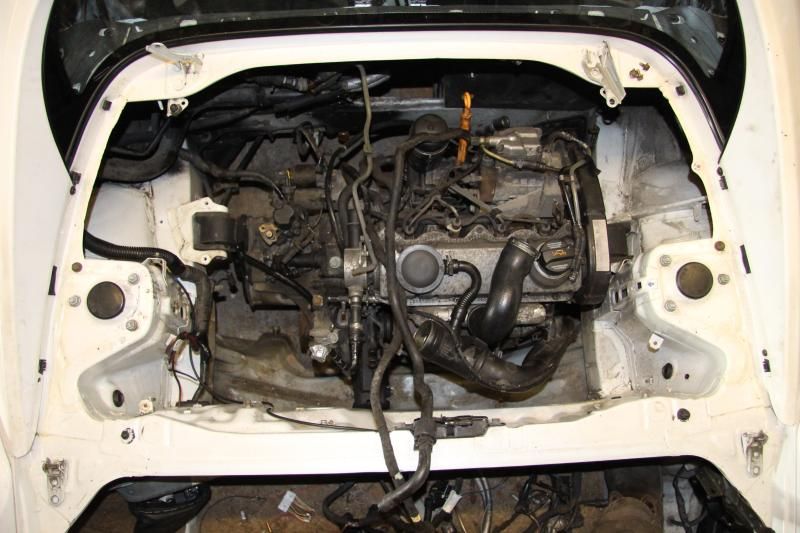
There is loads of room behind, I was worried about this area:
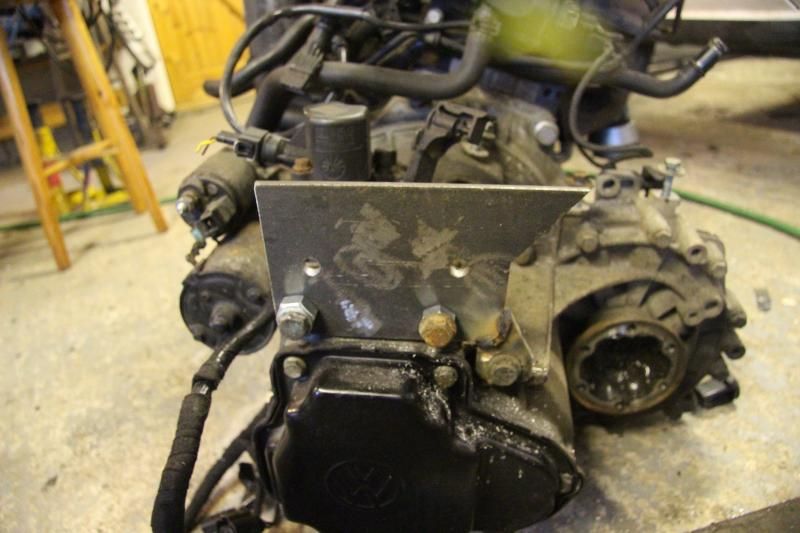
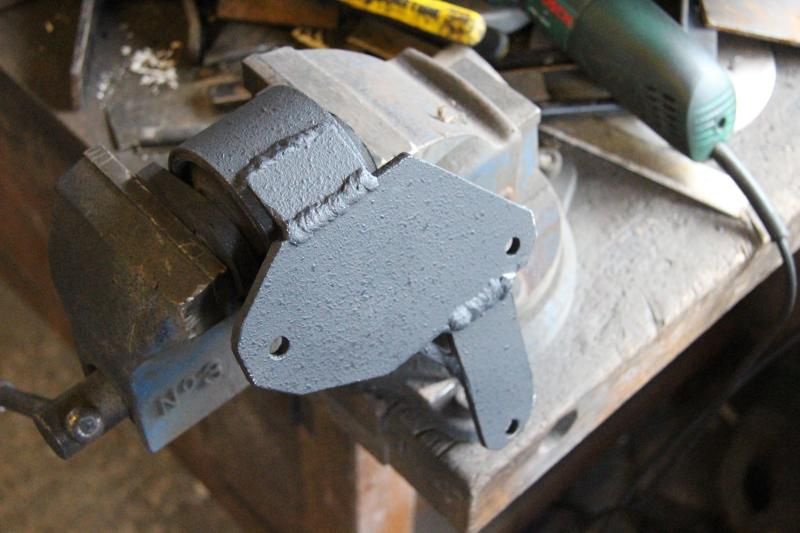
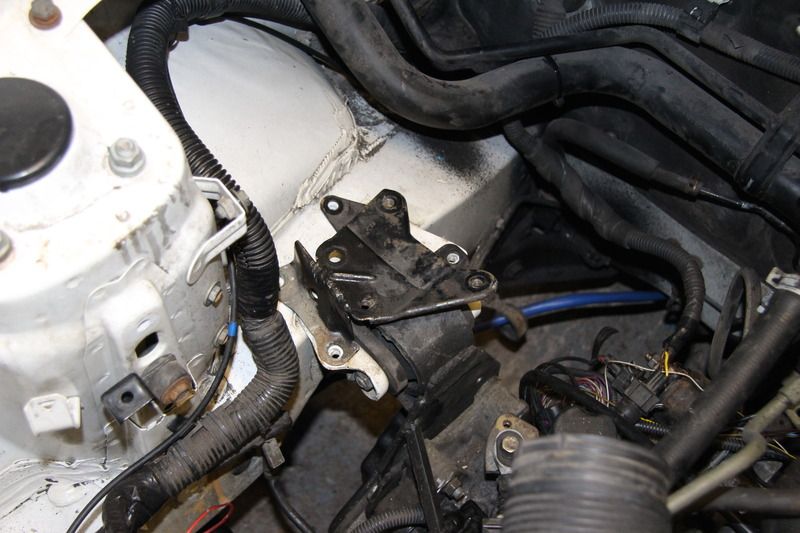
Then I took it back out and finished off the engine mount I had tacked on:

I drilled out one of the gearbox bolts that snapped off in the TDI gearbox (what a horrible job!)
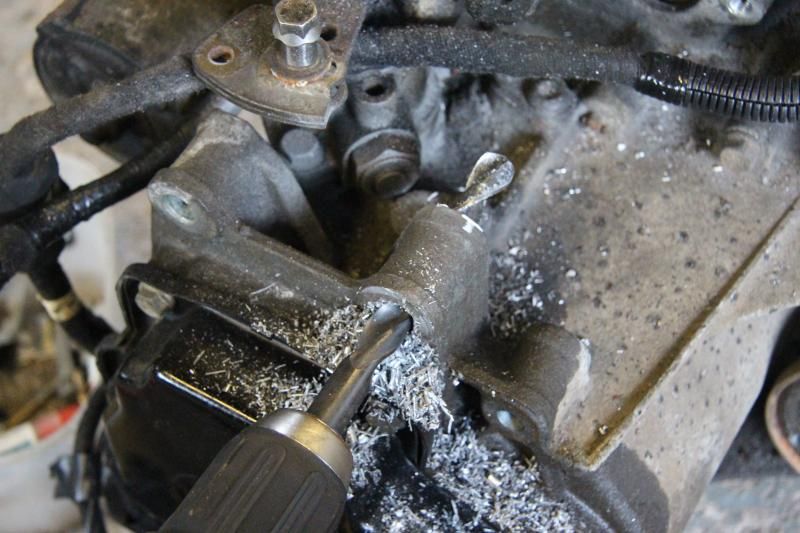
And began making the gearbox mount:
That's all for now
More to come
I got the engine in this morning. Very excited about that
Its only attached by one engine mount and mostly hanging on the crane, but it was a great success in terms of seeing how well it fits and checking where things might go:


There is loads of room behind, I was worried about this area:

Then I took it back out and finished off the engine mount I had tacked on:

I drilled out one of the gearbox bolts that snapped off in the TDI gearbox (what a horrible job!)

And began making the gearbox mount:

That's all for now
More to come
Considering the significance of getting the engine mounts done, this is pretty lame update as I forgot to photograph the engine finally sitting in the car with no crane assistance.
Anyway, the engine mounts are now all finished and painted and while I have the stone-chip gun going, i took the opportunity to spray a few little places low down in the engine bay that looked as though they would appreciate some rust prevention.
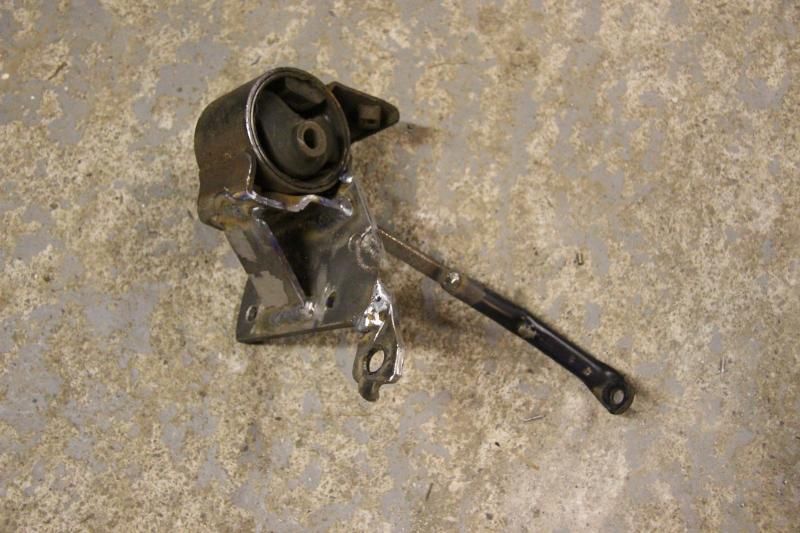
Still need to drop the tank one more time and remove the gauze, sort the clutch hose while access is easy then pop it in for the last time
More to come.
Anyway, the engine mounts are now all finished and painted and while I have the stone-chip gun going, i took the opportunity to spray a few little places low down in the engine bay that looked as though they would appreciate some rust prevention.


Still need to drop the tank one more time and remove the gauze, sort the clutch hose while access is easy then pop it in for the last time
More to come.
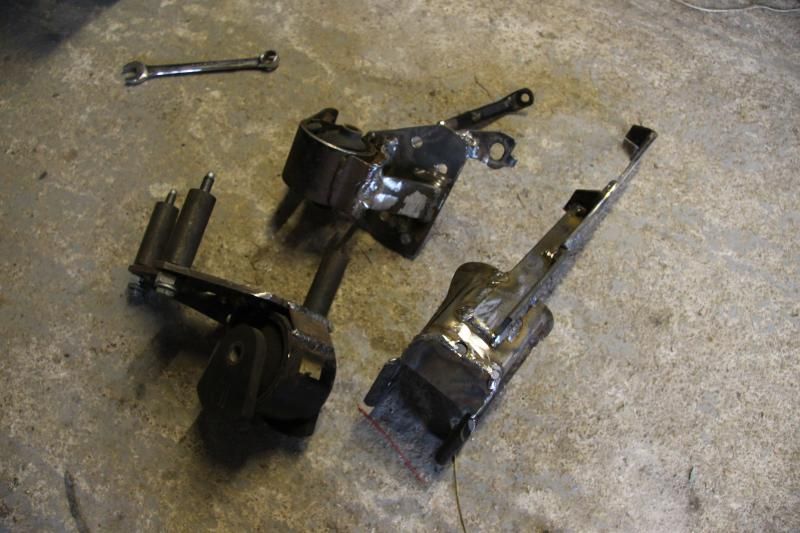
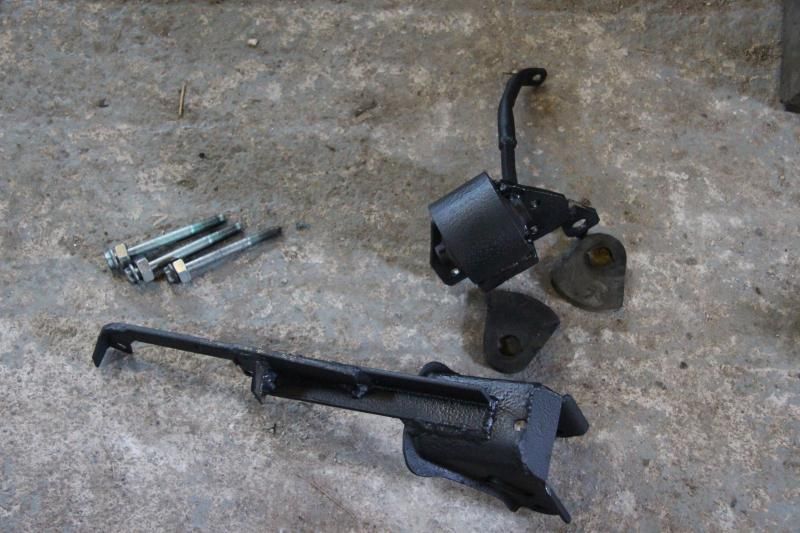
The engine is in, hopefully for the last time. All the mounts are firmly fitted.
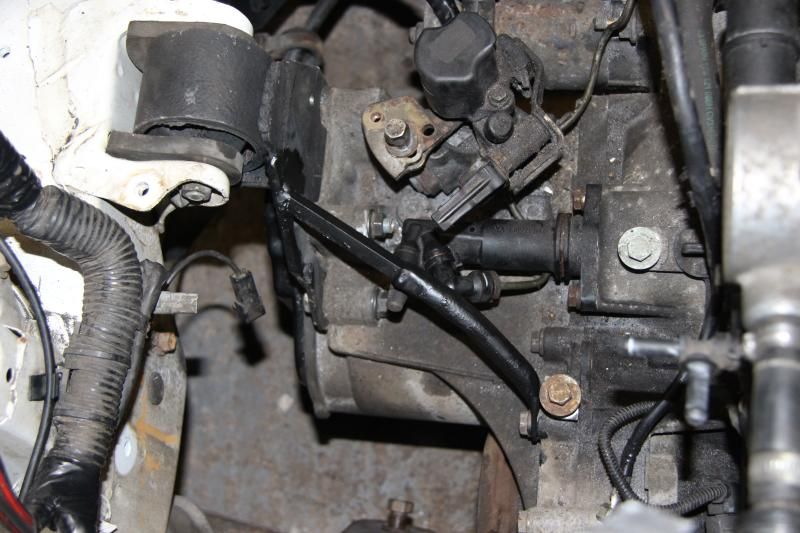
I did find a problem though. I had made the gearbox mount with the clutch slave not attached and guess what, it didn't fit. But after some adjustment all is well.
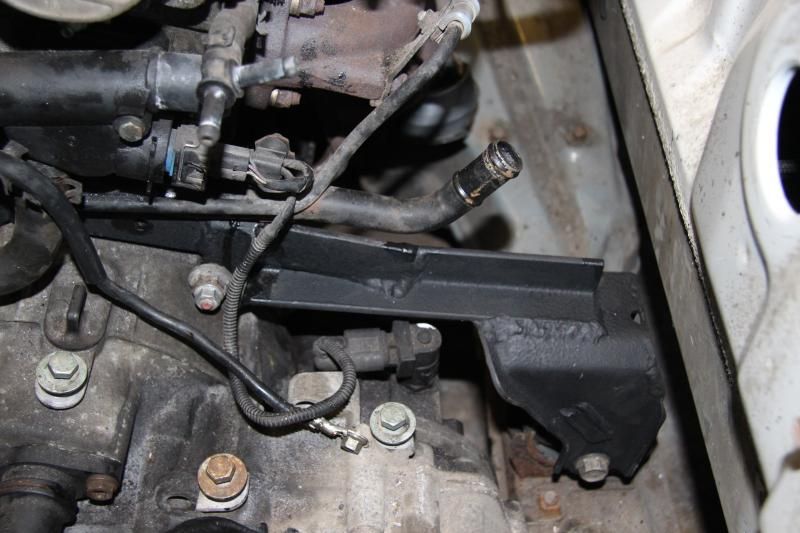
This is the third mount that stops the engine rotation, I'm a little concerned that the rubber bush is a bit rigid and might transmit a too much diesel vibration into the car, time will tell!
The clutch hose is all plumbed in, I'm really please with how easy this was (perhaps that temping fate as I've not bled it yet )
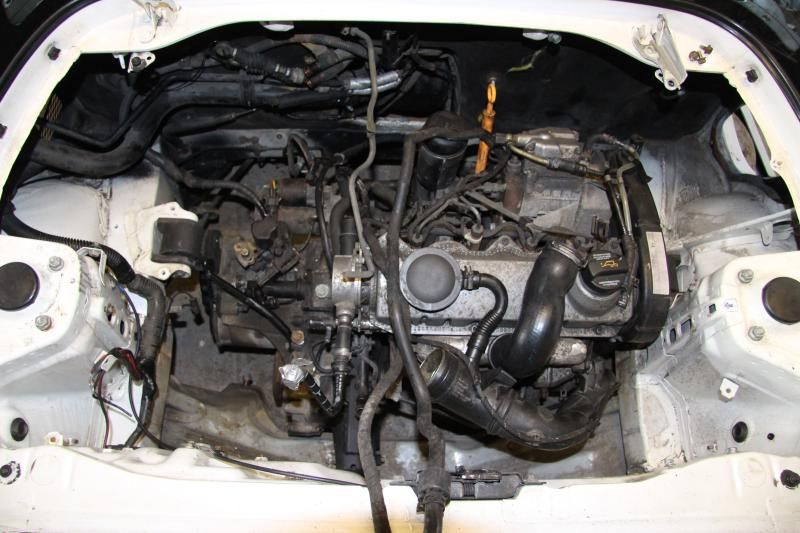
And a couple of shots of the engine in its new home:
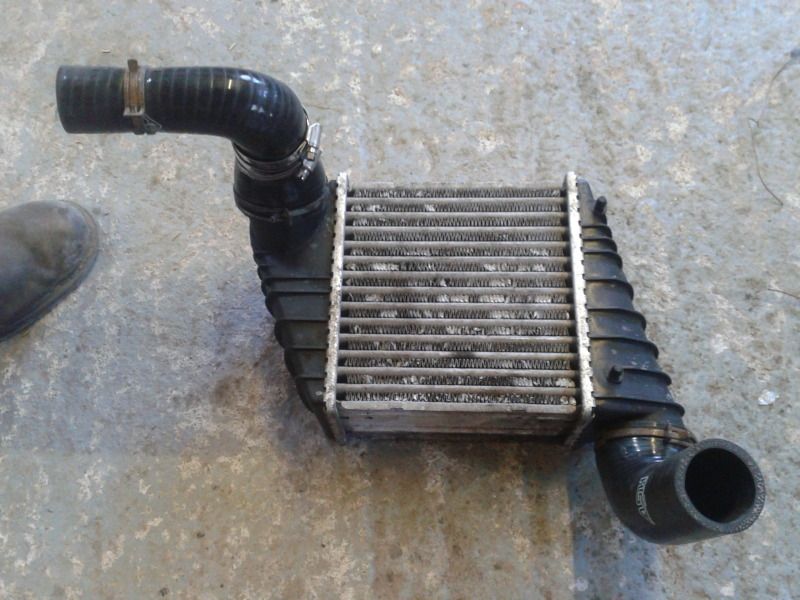
One of the things that was bugging me was how to mount the intercooler. Well that's sorted now
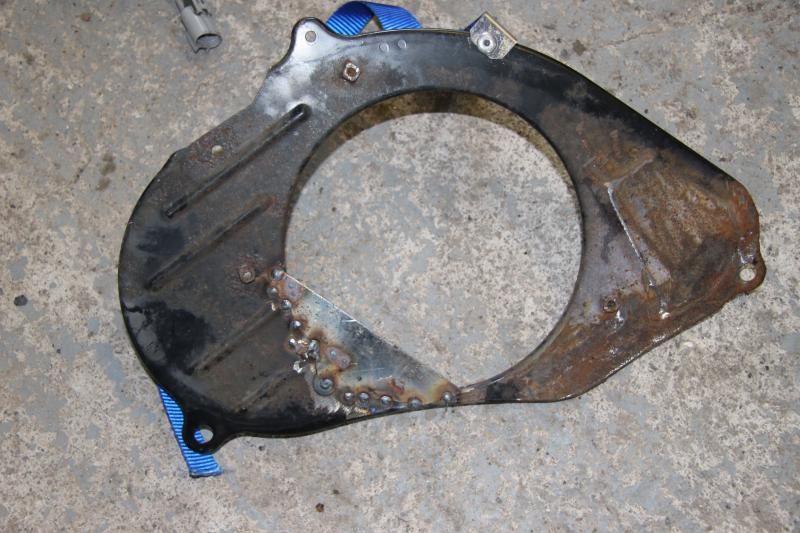
These are the bits that need holding together (the black plate with the big hole mounts to the car body).
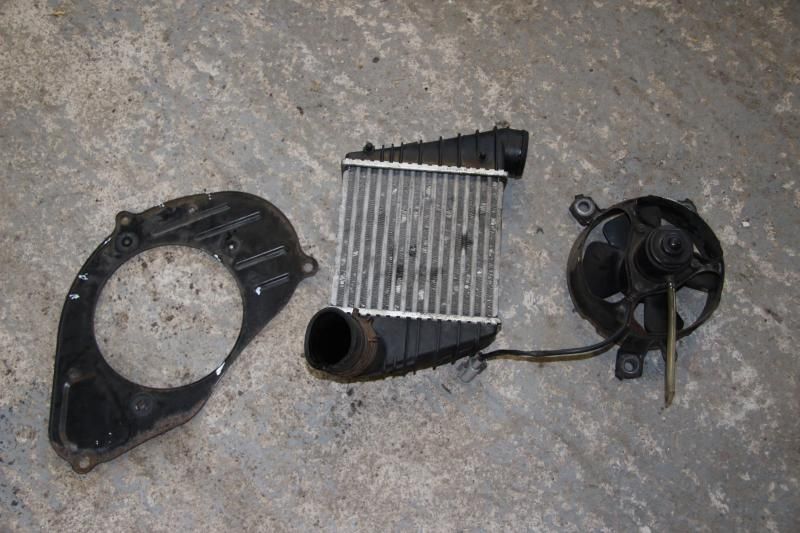
It turns out they fit together quite nicely. Two of the fan mounts line up perfectly with two notches on the intercooler, holding it in place, its like it was meant to happen
So I've attached a strap and a bolt to tighten it against.
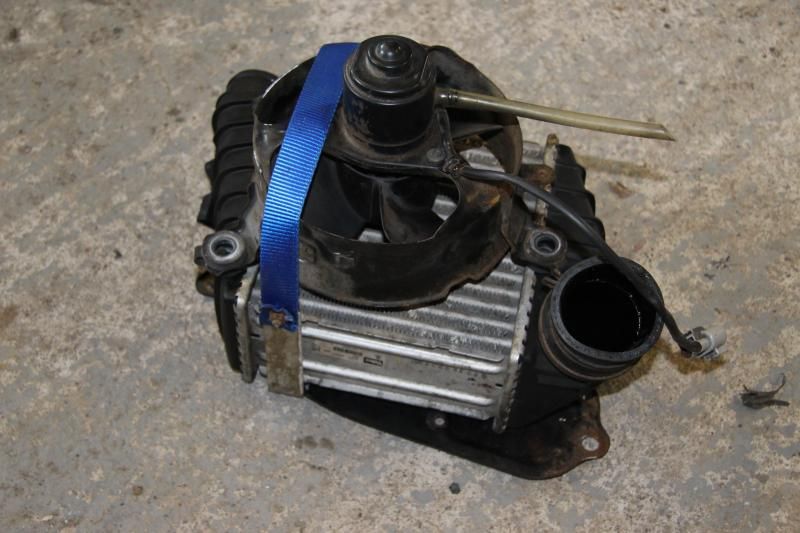

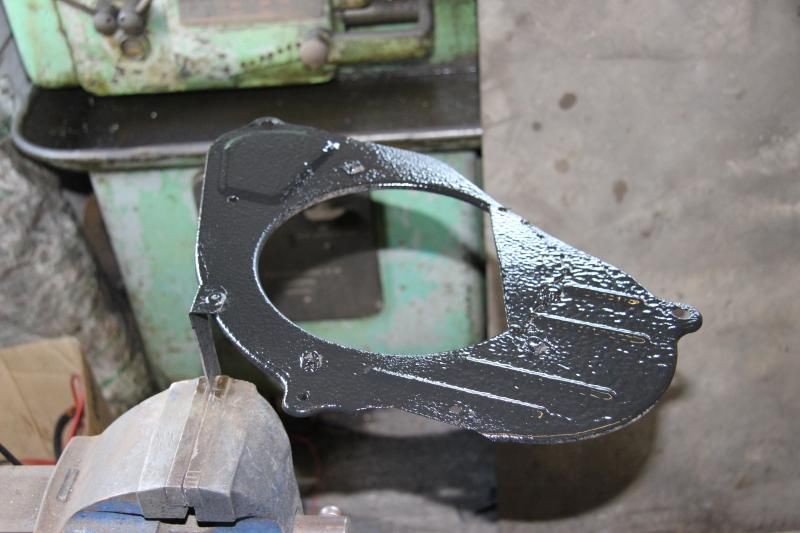
And painted it.
That's all for now. There are some reducers on the way so I can connect up the boost piping, then I'll put it in place and start the more plumbing or wiring.
Was a good weekend, I felt like I've made some good progress
More to come
I did find a problem though. I had made the gearbox mount with the clutch slave not attached and guess what, it didn't fit. But after some adjustment all is well.

This is the third mount that stops the engine rotation, I'm a little concerned that the rubber bush is a bit rigid and might transmit a too much diesel vibration into the car, time will tell!

The clutch hose is all plumbed in, I'm really please with how easy this was (perhaps that temping fate as I've not bled it yet
)
And a couple of shots of the engine in its new home:


One of the things that was bugging me was how to mount the intercooler. Well that's sorted now
These are the bits that need holding together (the black plate with the big hole mounts to the car body).

It turns out they fit together quite nicely. Two of the fan mounts line up perfectly with two notches on the intercooler, holding it in place, its like it was meant to happen
So I've attached a strap and a bolt to tighten it against.


And painted it.


That's all for now. There are some reducers on the way so I can connect up the boost piping, then I'll put it in place and start the more plumbing or wiring.
Was a good weekend, I felt like I've made some good progress
More to come
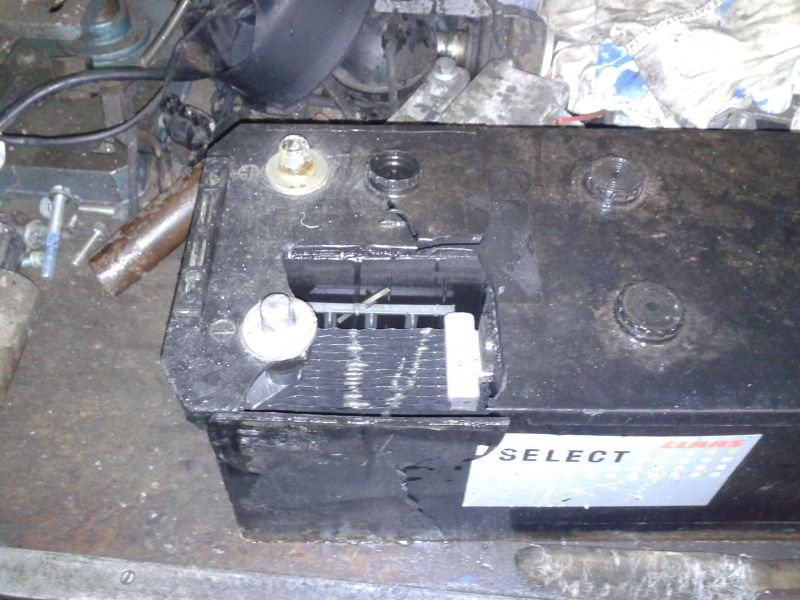
This weekend I exploded a tractor battery in my face and spent hours in A&E having bits of plastic pulled out out my eye and checking for acid damage! Now I have 11 drops a day  and I owe the parents £130 for a new tractor battery!!!
Brilliant!!!!
Luckily my vision is clearing up, a lucky escape!!
More to come
and I owe the parents £130 for a new tractor battery!!! 
Brilliant!!!!
Luckily my vision is clearing up, a lucky escape!!
More to come
Thanks Dave,
I'm not sure if it will tolerate the fuel as its more modern. If you can run it on bio, it would have to be 100% bio (no veg oil left at all.
The engine I've gone with can run on anything down to 70% bio and still not have any problems.
B70 takes me 3 hours to make, but B100 takes at least 7 hours to make.
Thanks folks. And thanks for the kind comments about the threads.
The battery didn't seem to turn the tractor engine over so I charged it. But it went to fully charged after just an hour so I dropped a spanner over the terminals to see if still packed a punch, next thing I know, my ears are ringing, my face is stinging, and I'm running out of the garage with my hands over my eyes tripping over things!!!
Turns out the terminals were a bit dirty, the battery WAS otherwise ok!!
Glad you enjoyed the Scimitar Thread, get that Scim of yours back on the road!!!
Had a good solid day on it yesterday. I was really picking the pace up towards the end of the day as I seem to be approaching the next milestone.... Starting the engine in the car. (not quite there yet mind)
I've got the wires from the engine bay through the bulkhead.
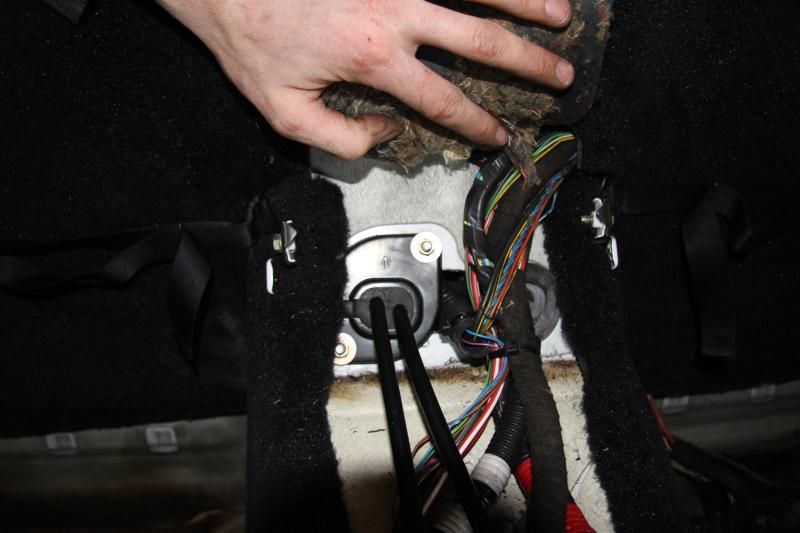
And all of the carpet and trim back in, just the box lids left to attach (well in the back anyway).
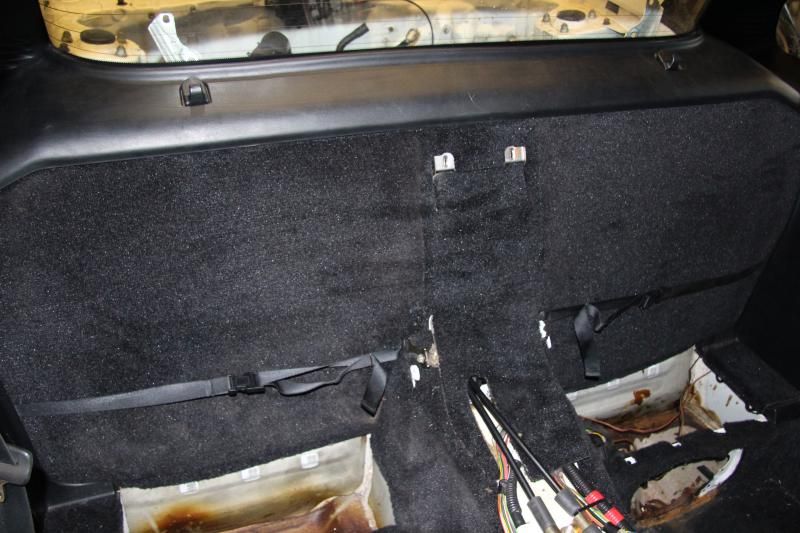
The ECU now sits in the cubby hole behind the passenger.

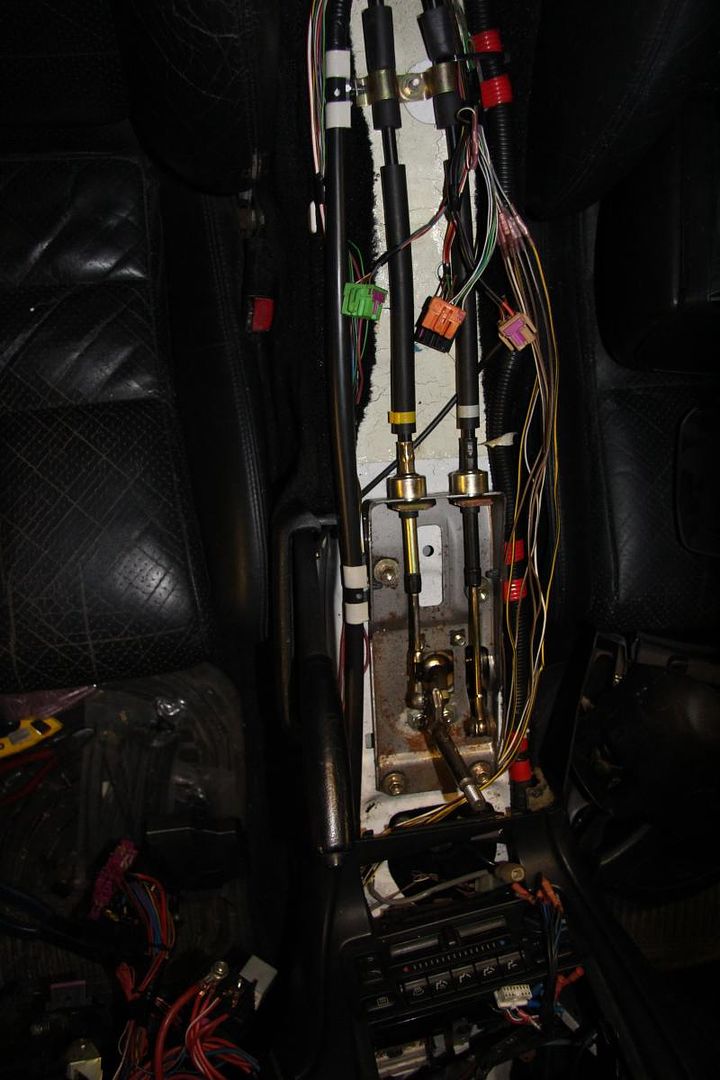
And I've started extending the remaining wires to meet up with the dials in the front.
Jobs left to do before I can start it in the car, are:
Finish extending those wires
Mount the fuel filter and connect up the lines
Put some Bio in the tank
It might go then But could still do with:
Air filter, MAF sensor, and boost plumbing finishing
Exhaust connecting up
Coolant hoses connecting up and bleeding.
Exciting!!!!
More to come
I've got the wires from the engine bay through the bulkhead.

And all of the carpet and trim back in, just the box lids left to attach (well in the back anyway).

The ECU now sits in the cubby hole behind the passenger.

And I've started extending the remaining wires to meet up with the dials in the front.

Jobs left to do before I can start it in the car, are:
Finish extending those wires
Mount the fuel filter and connect up the lines
Put some Bio in the tank
It might go then
But could still do with:Air filter, MAF sensor, and boost plumbing finishing
Exhaust connecting up
Coolant hoses connecting up and bleeding.
Exciting!!!!
More to come
Thanks BGarside. I'm worried about vibration and noise, but that'll be a case of developing it as it progresses. I'm not sure about the weight, but I'd be willing to bet its no heavier, there were a lot of cast iron brackets on the old Toyota motor, and a huge heavy manifold and long exhaust system that started at the front of the engine. The TDI has minimal aluminium brackets and the exhaust comes straight out the back.
Now that the engine is in, the suspension doesn't seem to be sitting any lower. Anyway, I'll get it weighted and we'll see (I wish I'd weighed it before hand).
I got the last of the wires connected up and just had to give it a go
There are a number of sensors missing, no exhaust, lots of air in the fuel lines and a flat battery, but it soon came to life
Two milestones left, Moving under its own power and the MOT
https://www.youtube.com/watch?v=tq8LjXg2SEs
More to come
I've been so busy, I've pretty much had two weeks with no garage time
But yesterday I got a little done.
I finally made up the drive shafts, that should hold
Only kidding, I've sent those off to be made properly, and I'm hoping I should get them back in 3 weeks.
Then I faffed on for quite a while with the Boost plumbing, there are quite a few things that the pipe work has to go around, so its taking a while to get it right. Its go to weave its way between the engine mount, inner wing and the crank and alternator pulley, ensuring that it doesn't touch the drive shaft and suspension bits and has a little room to expand when the pressure increases inside.
Still a work in progress, but getting there.
More to come
But yesterday I got a little done.
I finally made up the drive shafts, that should hold

Only kidding, I've sent those off to be made properly, and I'm hoping I should get them back in 3 weeks.
Then I faffed on for quite a while with the Boost plumbing, there are quite a few things that the pipe work has to go around, so its taking a while to get it right. Its go to weave its way between the engine mount, inner wing and the crank and alternator pulley, ensuring that it doesn't touch the drive shaft and suspension bits and has a little room to expand when the pressure increases inside.

Still a work in progress, but getting there.
More to come
I've made some more progress although this post is a little modest in the number of photographs. Sorry about that. I'll try and get back to old habits next time I'm in the garage.
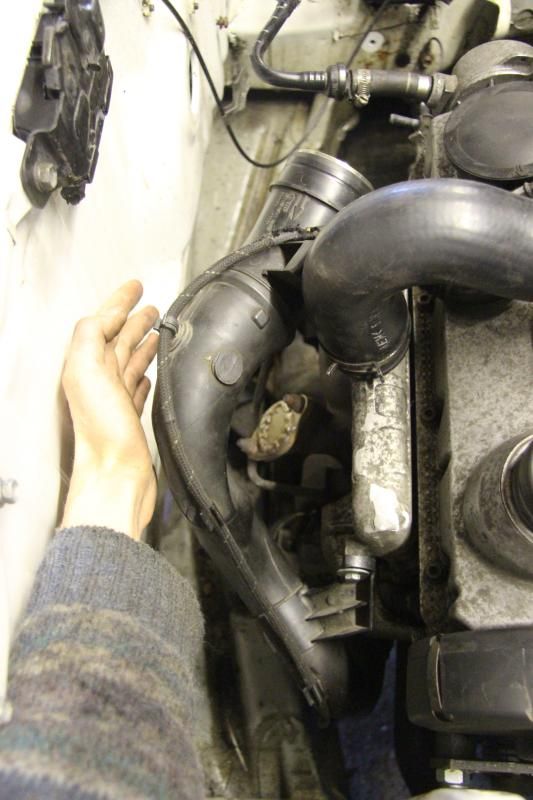
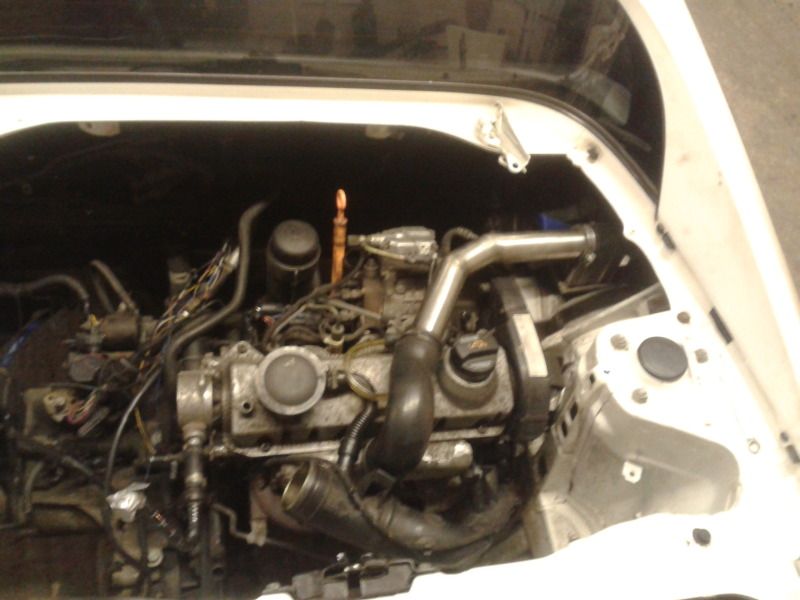
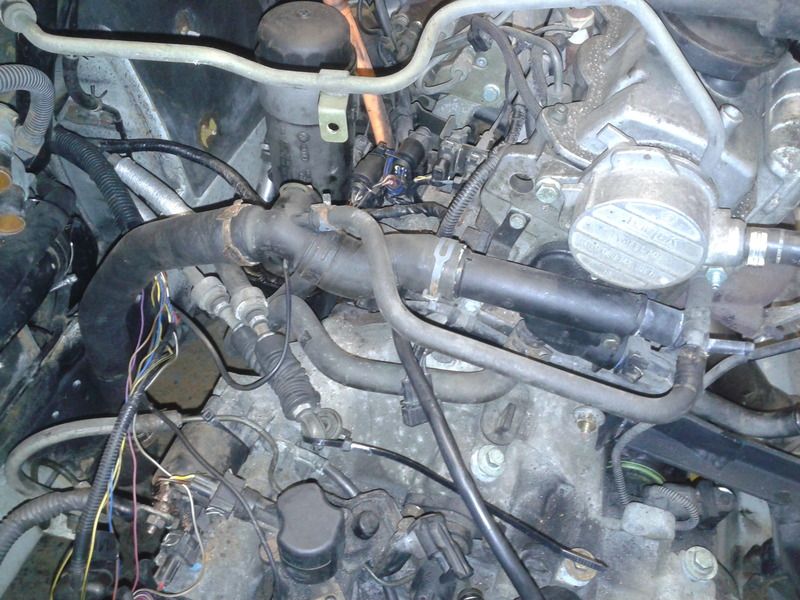
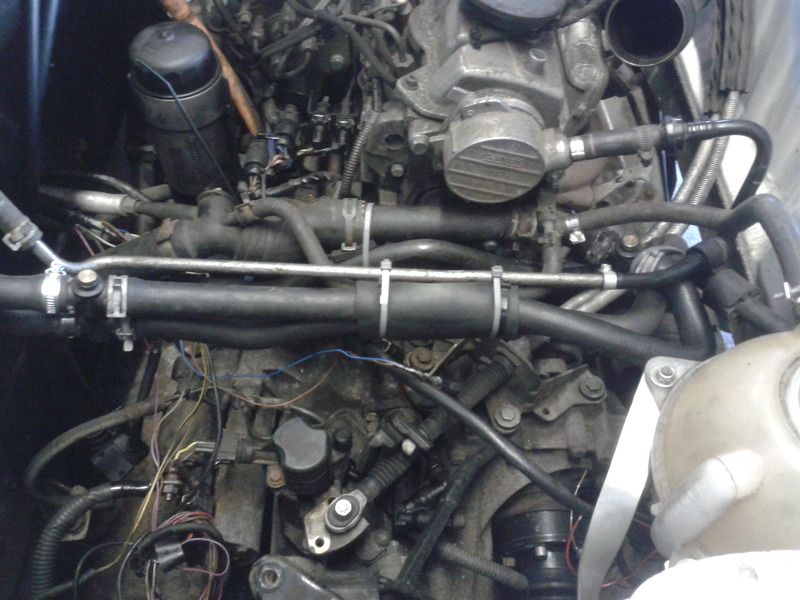
Anyway, I've finally tackled the boost hoses, the outlet from the turbo, makes its way over the drive shaft, past the crank pulley between the alternator pulley and the inner wing and gets to the bottom of the intercooler, then the top hose is much simpler as can be seen here:
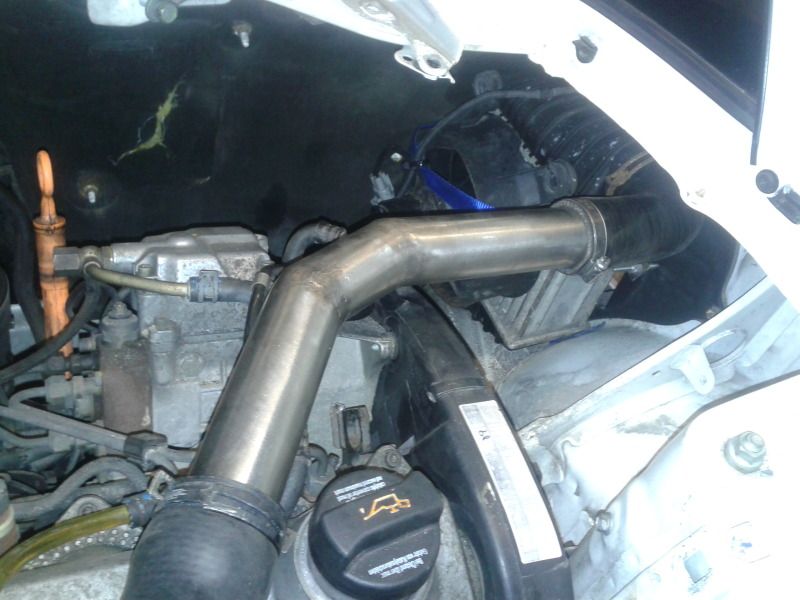
I've more or less got the main radiator hoses sorted (in my head anyway) so I should be able to get those fitted soon, and I've made a good start at altering the MR2 turbo exhaust silencer to meet the turbo outlet pipe. I'm hoping to get those two things finished over the next week.
More to come.
Anyway, I've finally tackled the boost hoses, the outlet from the turbo, makes its way over the drive shaft, past the crank pulley between the alternator pulley and the inner wing and gets to the bottom of the intercooler, then the top hose is much simpler as can be seen here:


I've more or less got the main radiator hoses sorted (in my head anyway) so I should be able to get those fitted soon, and I've made a good start at altering the MR2 turbo exhaust silencer to meet the turbo outlet pipe. I'm hoping to get those two things finished over the next week.
More to come.
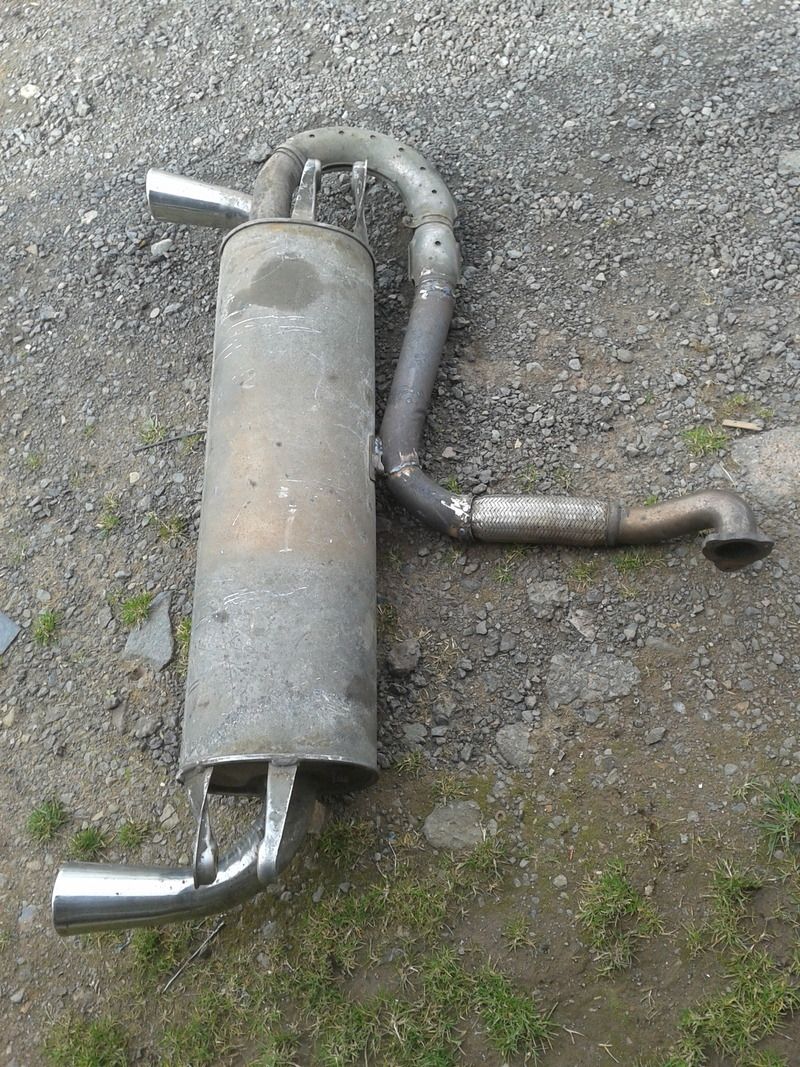
A little update. The exhaust is finished, i'm quite chuffed with how light it is now that its based on the turbo system.
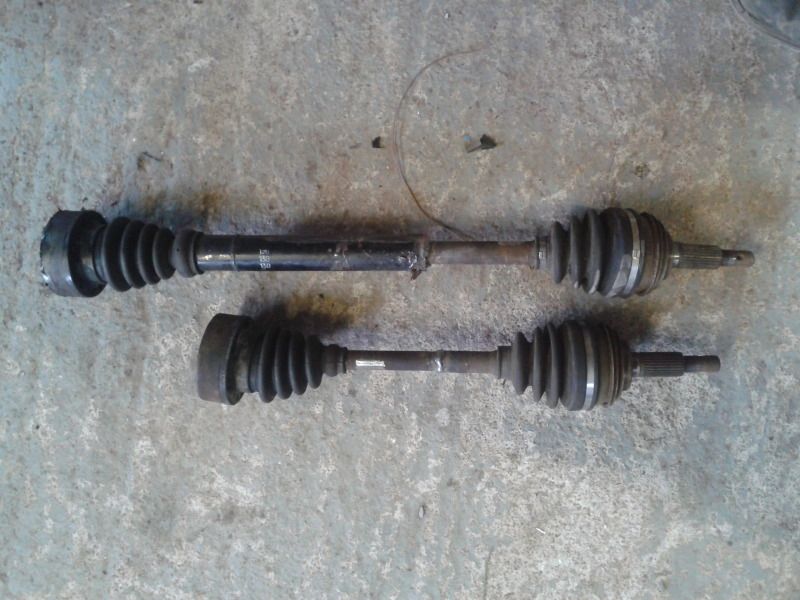
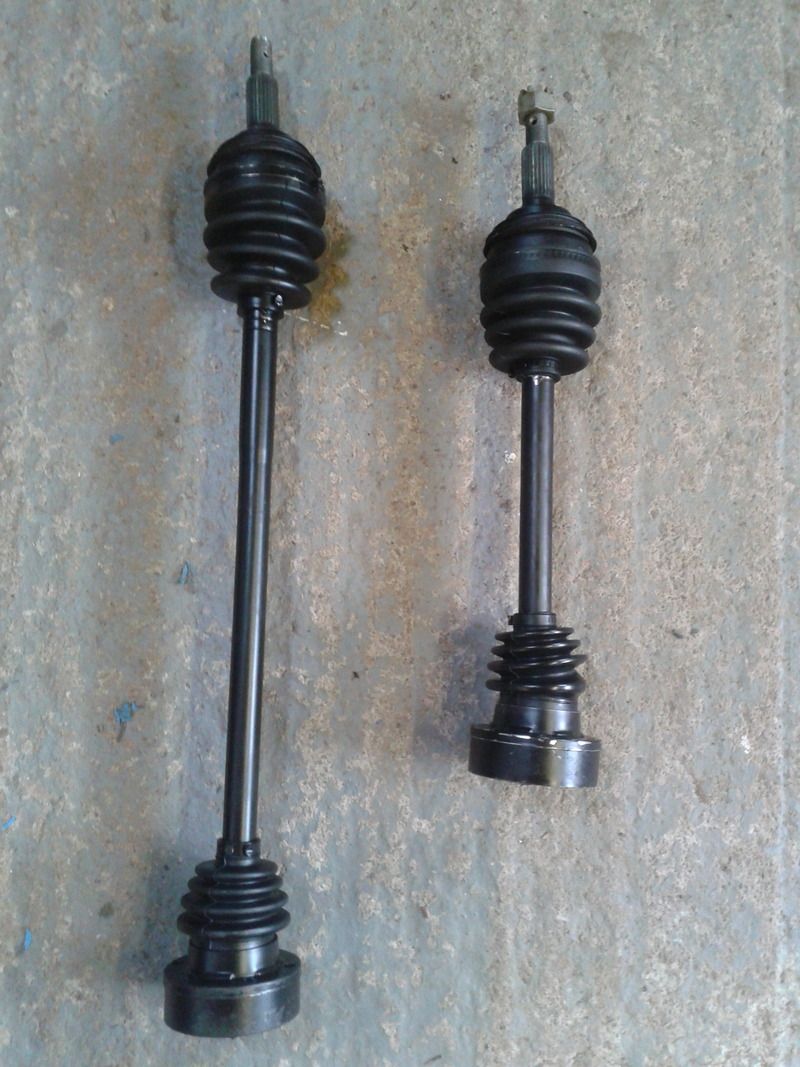
The new drive shafts have arrived and are now fitted:
I had a very frustrating day on the car though, lots of time wasted trying to sort proof of the emgine change, and one of the CV joints arrived in bits!!! very frustrating.
More to come
The new drive shafts have arrived and are now fitted:
I had a very frustrating day on the car though, lots of time wasted trying to sort proof of the emgine change, and one of the CV joints arrived in bits!!! very frustrating.
More to come
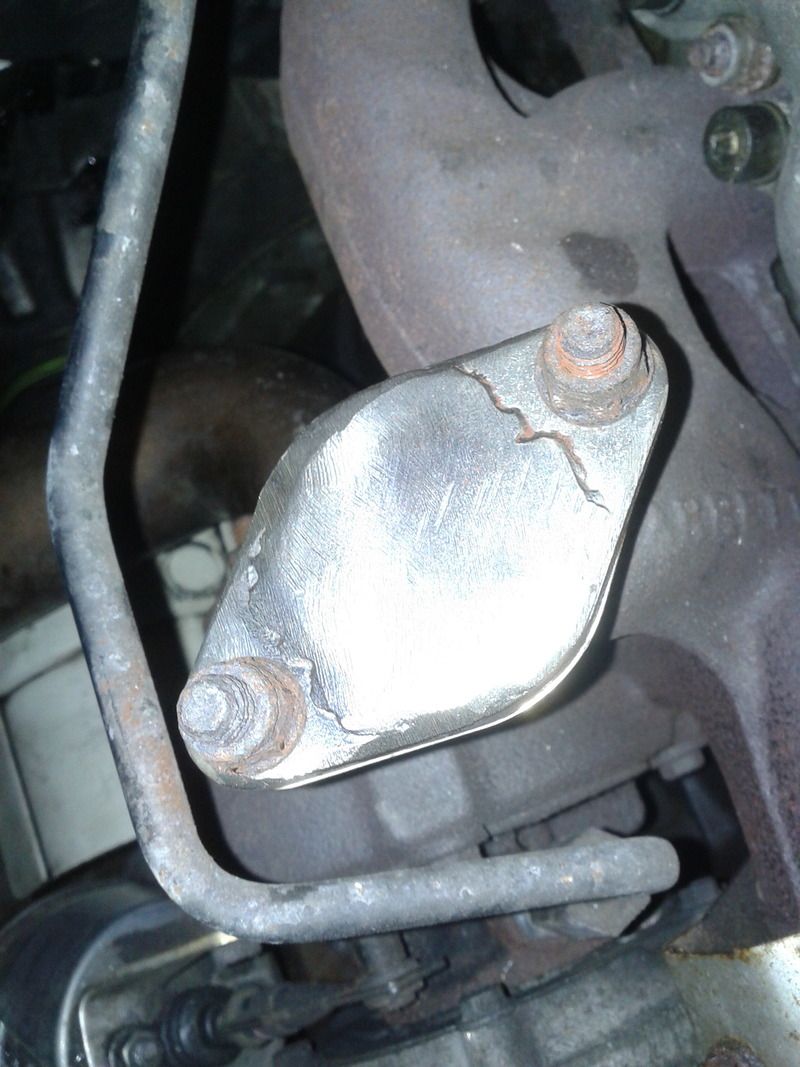
Had a whole day on it today. I managed to get all the drive shaft and suspension bolts torqued up, although the bl***y TCA bolt took an hour to locate in the hole
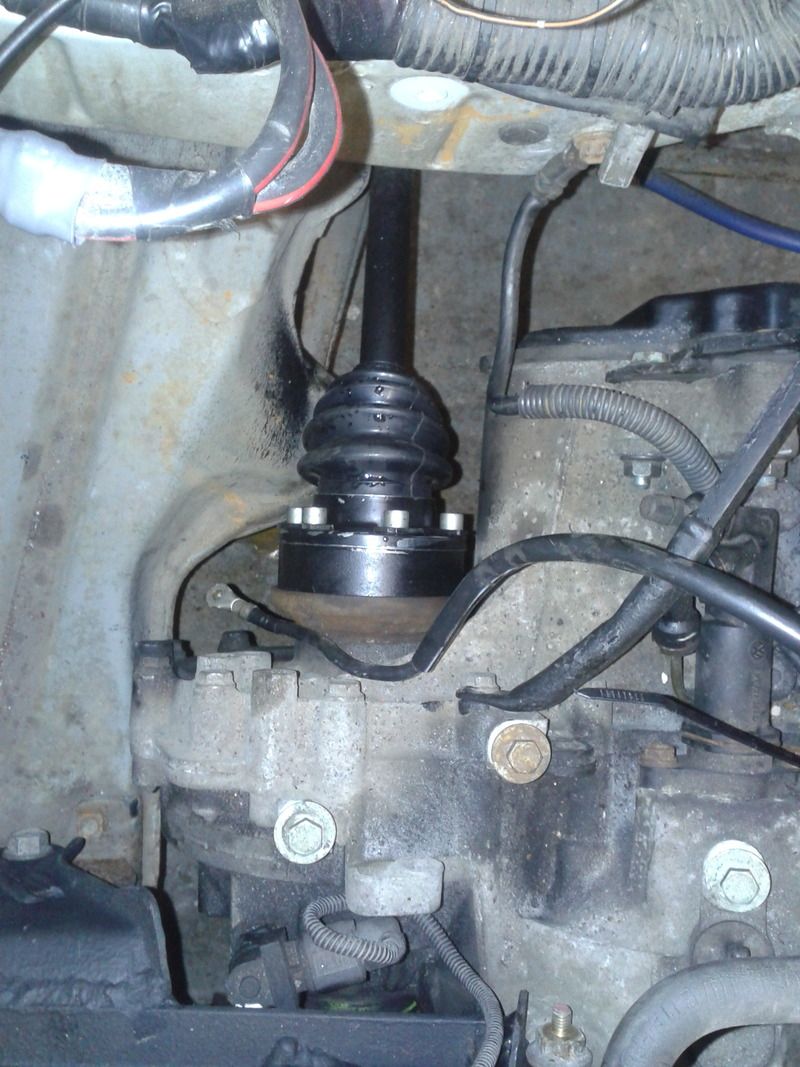
I took the EGR blank off and cleaned it up. It is much more visible than I thought it was going to be, so I've ground it back a tad.

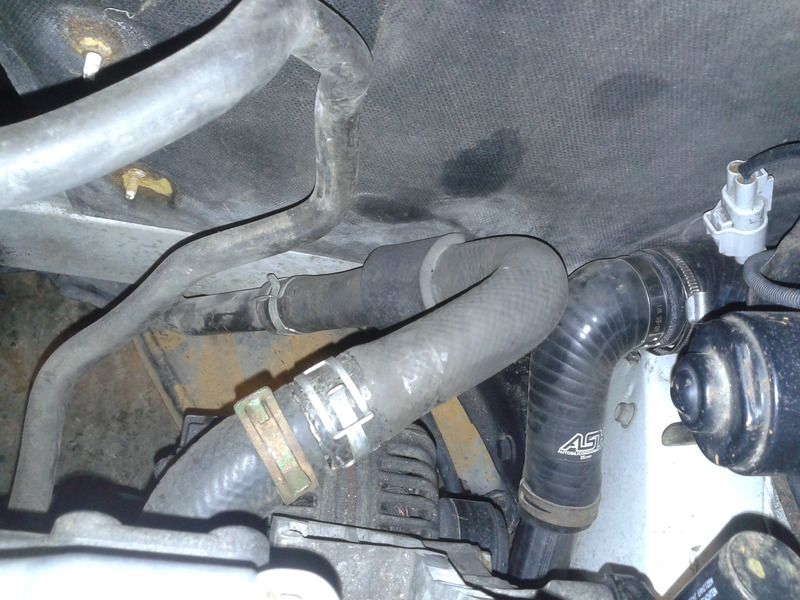
Got all the bits of pipe and joiner sections together and connected up the main coolant hoses to the radiator (still got to connect up the heater hoses and mount the tank).
Got the last under-tray mounted (although mainly with cable ties).
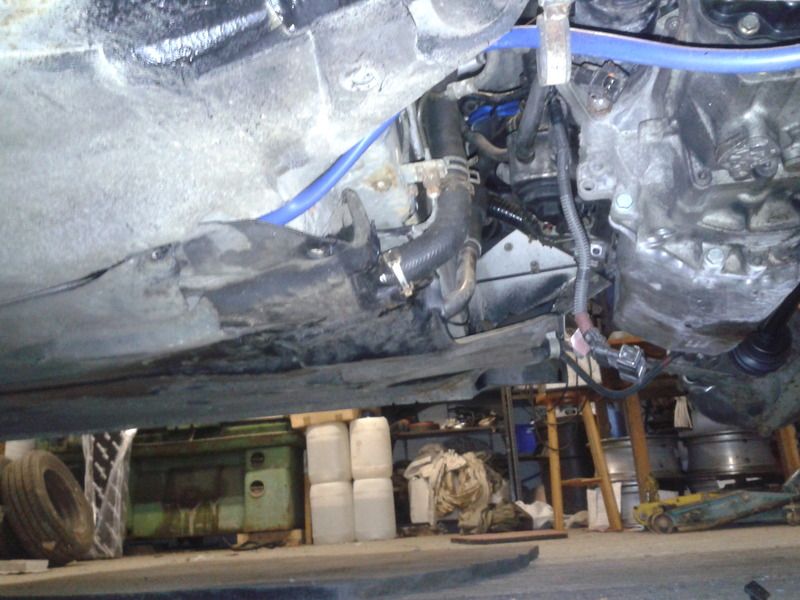
And finally had a scratch around with the wire brush and applied a good coating of stone chip under the arches.
Just the brakes and clutch to bleed and it can go back on its wheels with all the remaining jobs to be done from above
More to come

I took the EGR blank off and cleaned it up. It is much more visible than I thought it was going to be, so I've ground it back a tad.


Got all the bits of pipe and joiner sections together and connected up the main coolant hoses to the radiator (still got to connect up the heater hoses and mount the tank).


Got the last under-tray mounted (although mainly with cable ties).

And finally had a scratch around with the wire brush and applied a good coating of stone chip under the arches.
Just the brakes and clutch to bleed and it can go back on its wheels with all the remaining jobs to be done from above
More to come
Thanks Shnev
I've been busy with lots of other car related stuff, so haven't had any time on the MR2 for a while. But this weekend I did get some done, and with some help too (cheers Matt)
The exhaust is fitted, I've bled the brakes and clutch, starred for hours at the gear linkage, finished the coolant hoses (just the expansion tank to go now), trimmed the subframe where the driveshaft was looking a little close and even found a way to connect the Toyota air box to the TDI MAF sensor (not yet fitted but I know how )
I've done away with all the resonance chambers (turbo means far less pulsing in the inlet pipe). No need for all these:
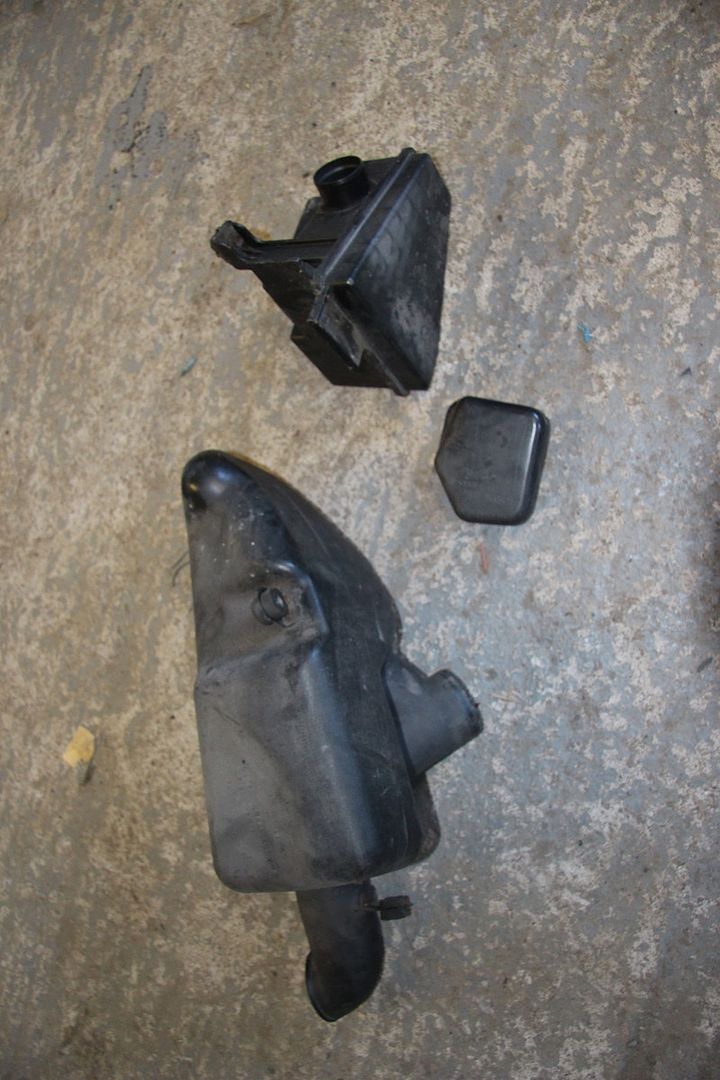
Found a new cold air feed for the filter housing (without the massive resonance chamber):
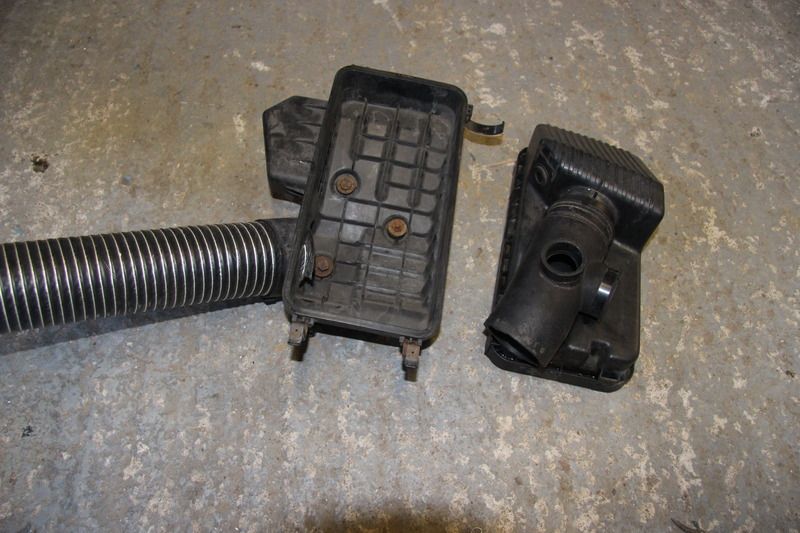
And I even managed to find the air box mount that I had previously thrown away
Then to top it all off, I got the diesel filter mounted and managed to start it for the first time with the exhaust on The video isn't very informative but the cut down long story is that the exhaust is very quiet but the engine is very loud!!! (I think I'm going to need to sound deadening under the engine cover)
https://www.youtube.com/watch?v=0Ke2LAJtPCc&fe...
The first start is with an empty filter so it runs out of diesel pretty quick, second is after we'd primed the filter.
More to come
I've been busy with lots of other car related stuff, so haven't had any time on the MR2 for a while. But this weekend I did get some done, and with some help too
(cheers Matt)The exhaust is fitted, I've bled the brakes and clutch, starred for hours at the gear linkage, finished the coolant hoses (just the expansion tank to go now), trimmed the subframe where the driveshaft was looking a little close and even found a way to connect the Toyota air box to the TDI MAF sensor (not yet fitted but I know how
)I've done away with all the resonance chambers (turbo means far less pulsing in the inlet pipe). No need for all these:

Found a new cold air feed for the filter housing
(without the massive resonance chamber):
And I even managed to find the air box mount that I had previously thrown away

Then to top it all off, I got the diesel filter mounted and managed to start it for the first time with the exhaust on
The video isn't very informative but the cut down long story is that the exhaust is very quiet but the engine is very loud!!! (I think I'm going to need to sound deadening under the engine cover)https://www.youtube.com/watch?v=0Ke2LAJtPCc&fe...
The first start is with an empty filter so it runs out of diesel pretty quick, second is after we'd primed the filter.
More to come
Thanks bearman68
I've had a very productive morning on the MR2 although my success has been accompanied by some new problems to solve. The fuel lines are all in now and the engine runs with the simple connecting of the battery and turning of the key
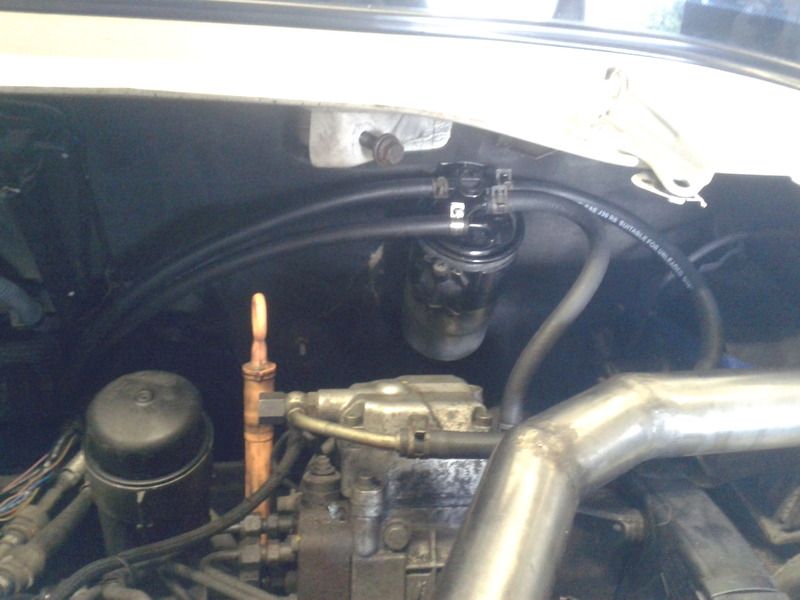
The vacuum feed to the brake servo is now connected up.
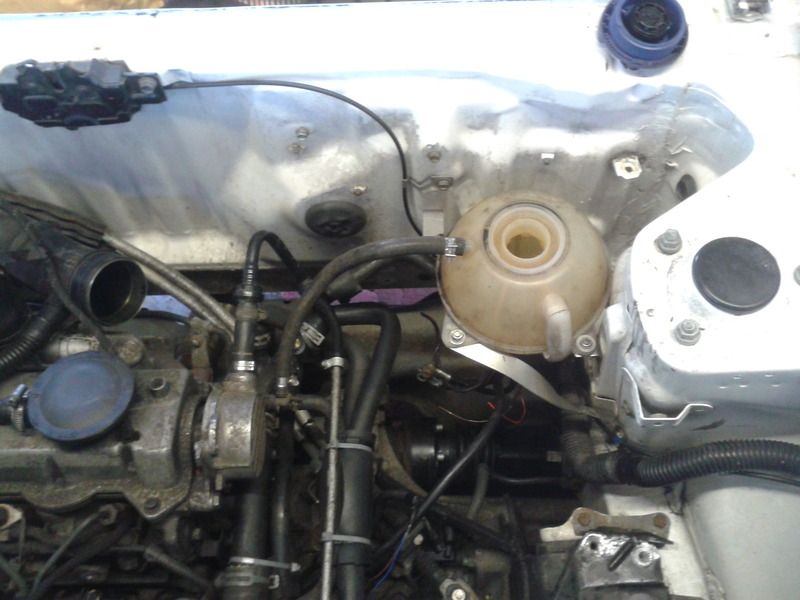
And the expansion tank is finally mounted and I've filled the system with coolant and bled it, although its not got fully hot yet, so there might be more bubbles to remove.
There are however a couple of issues. The coil light flashes after a minute or so of running, I'm not sure really what that means. And more concerning, it smokes! a lot! blue smoke, I think its unburnt fuel.
I messed around a little with the timing before the engine went in, I advanced it knowing that this can be a god idea with Bio, This morning I retarded it again to see if it cured the smoke. It made lots less combustion noise, but still smoked plenty. I thought this might just be down to it being on bio, but that can't be right, my 106 doesn't smoke at all. It could be that an injector or two is contaminated? I did run it a couple of times without a filter1
Any ideas welcome? I've love to hear what you think about the smoke or the flashing coil light?
More to come
I've had a very productive morning on the MR2 although my success has been accompanied by some new problems to solve. The fuel lines are all in now and the engine runs with the simple connecting of the battery and turning of the key

The vacuum feed to the brake servo is now connected up.

And the expansion tank is finally mounted and I've filled the system with coolant and bled it, although its not got fully hot yet, so there might be more bubbles to remove.


There are however a couple of issues. The coil light flashes after a minute or so of running, I'm not sure really what that means. And more concerning, it smokes! a lot! blue smoke, I think its unburnt fuel.
I messed around a little with the timing before the engine went in, I advanced it knowing that this can be a god idea with Bio, This morning I retarded it again to see if it cured the smoke. It made lots less combustion noise, but still smoked plenty. I thought this might just be down to it being on bio, but that can't be right, my 106 doesn't smoke at all. It could be that an injector or two is contaminated? I did run it a couple of times without a filter1
Any ideas welcome? I've love to hear what you think about the smoke or the flashing coil light?
More to come
Gassing Station | Japanese Chat | Top of Page | What's New | My Stuff