Moto Guzzi Cali Cafe Racer Build thread
Discussion


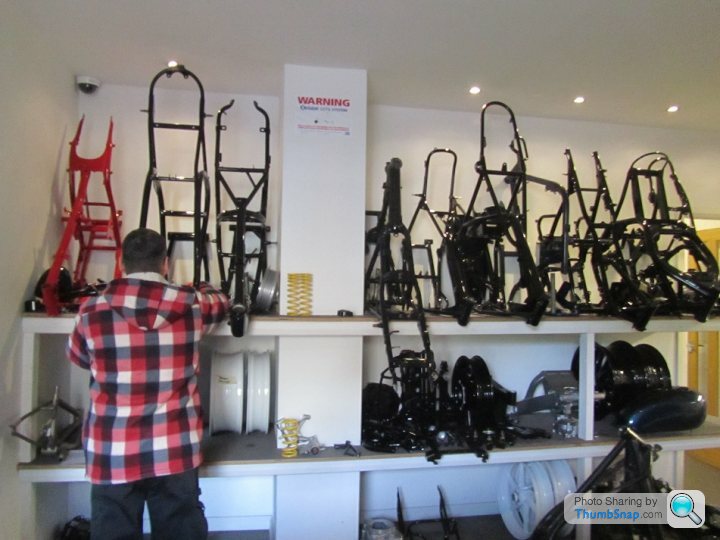
Geoff the welder was working last weekend, so I popped over where he welded the last piece on the RHS pipe. I've learnt my lesson in not trying to do both sides at the same time. I've wasted hours trying to get both megas at the same angle and height, and changing both sides at the same time. With one side done, I finally managed to match the LHS, which then got welded. The hooks to hold the exhaust springs have also been welded onto the exhaust.
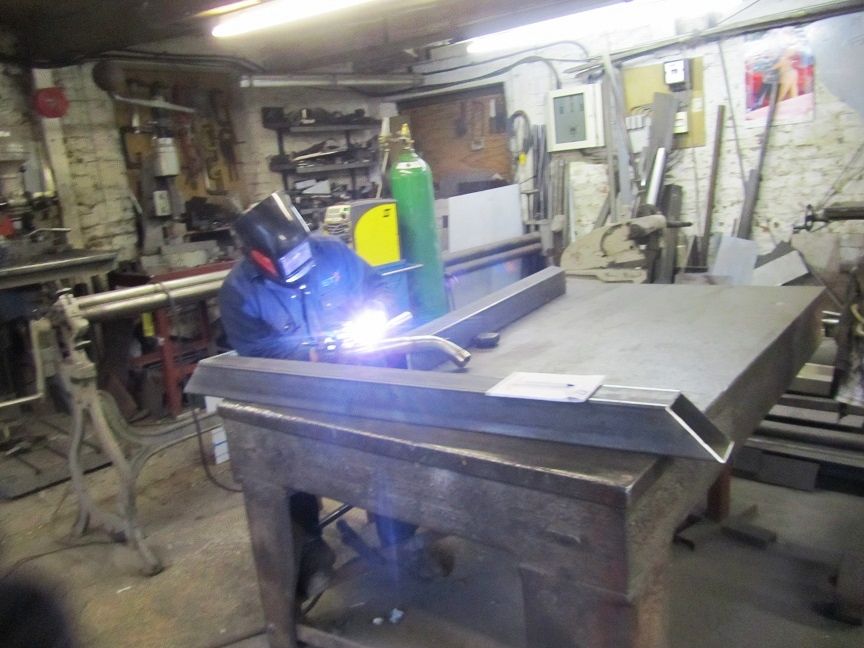
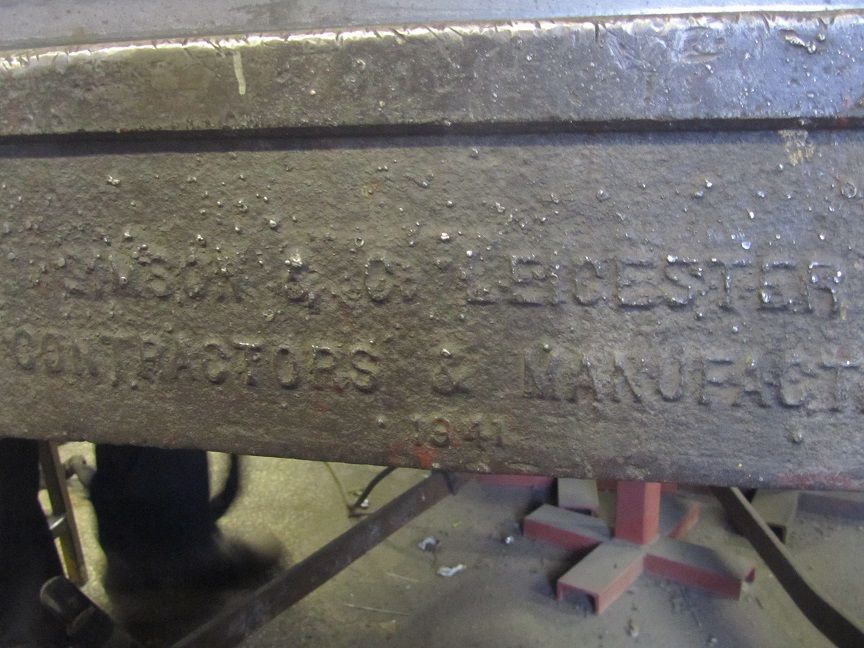
Here's an action pic of Geoff welding my exhaust (surprised the camera could handle the intense light, I certainly didn't risk it). I asked about his old work bench, he did his apprenticeship on it, in a local brewery. When it closed, it came with him. BTW that old brewery had been there since the 1740s.
Been playing with the edit function in Photobucket..the new downpipes may not look much different, but every joint has been changed and rewelded..
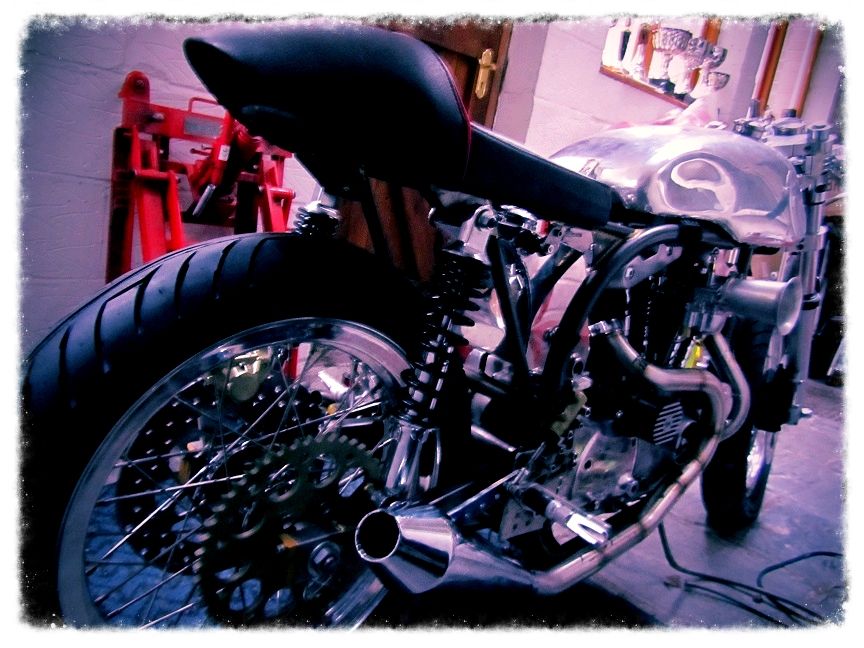
With the exhaust is finally done (still need to decide whether to polish the downpipes) the next job will be to make the real rear set mounts and exhaust hangers, in place of the temporary ones I've used so far. Also been thinking about where the battery is going to live. Ideally it should go under the seat hump, but there isn't a lot of room under there, so the back up plan was to mount it under the swing arm, behind the gearbox, as I'd seen a few Sportsters with the battery in that location, so should be enough room. My drop seat Harley has its battery under the swing arm (actually it sits in the swing arm), which has been a PITA, as to access it, I need to remove the rear wheel, not ideal
I'd always intended to use a Lithium Iron battery, and for the Ironhead, I'd need the equivalent of a 20AH Yuasa lead acid battery. I could get a Shorai at a good price, but looking at it specs, it didn't look that much smaller than the Yuasa, though it is much lighter. With one of my exhaust downpipes running under the engine, I wasn't sure if there was enough room behind the gearbox to fit the Shorai, let alone a Yuasa.
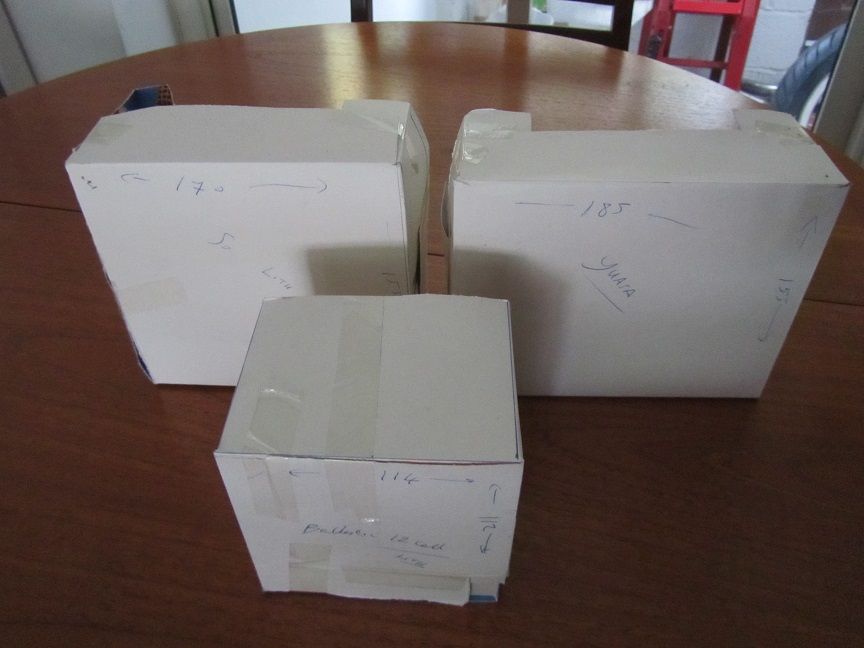
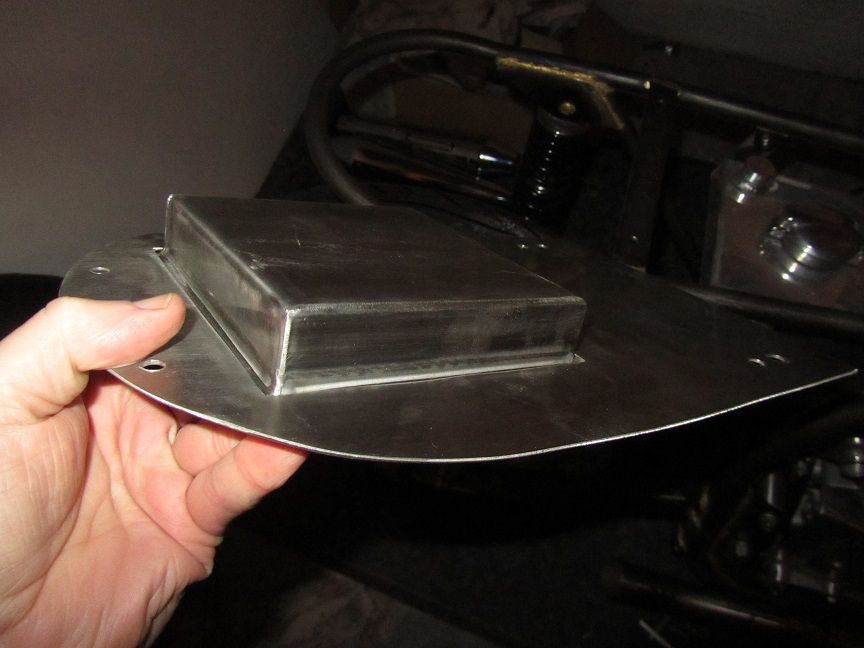
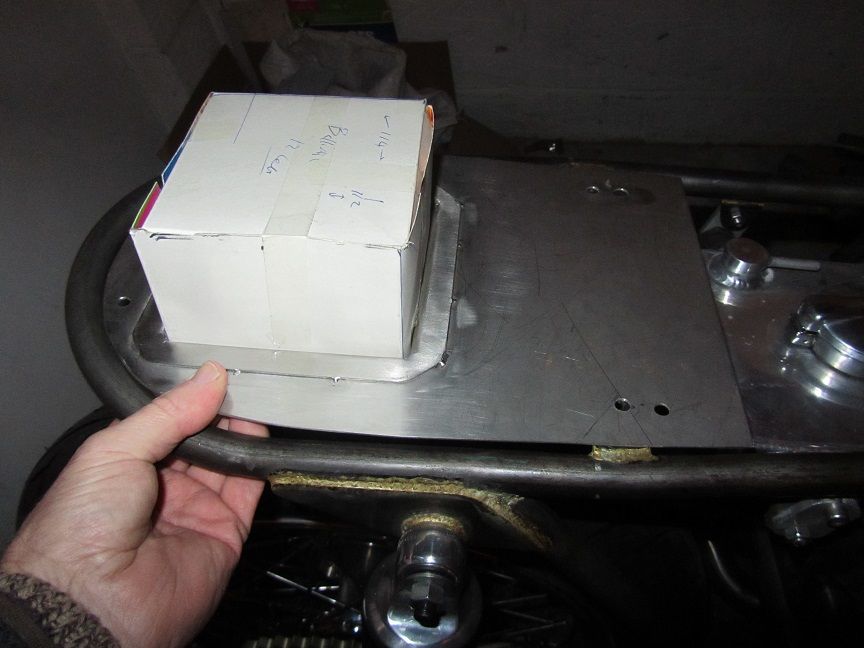
I made cardboard copies of the three options, Yuasa, Shorai and Ballistic. Sure enough the Yuasa wouldn't fit, while the Shorai only just squeezed under the swing arm, a bit too close to the exhaust and rear tyre for comfort. The Ballistic was so much smaller it would even fit under the seat, if it was recessed a little into the tray I'd made earlier. So that's what I did. The Ballistic isn't cheap, twice the price of a Yuasa, and I've read mixed reviews of Lithium batteries on bikes, but going to give it a try..
I got the seat under tray modified to hold the battery, need a real battery now..
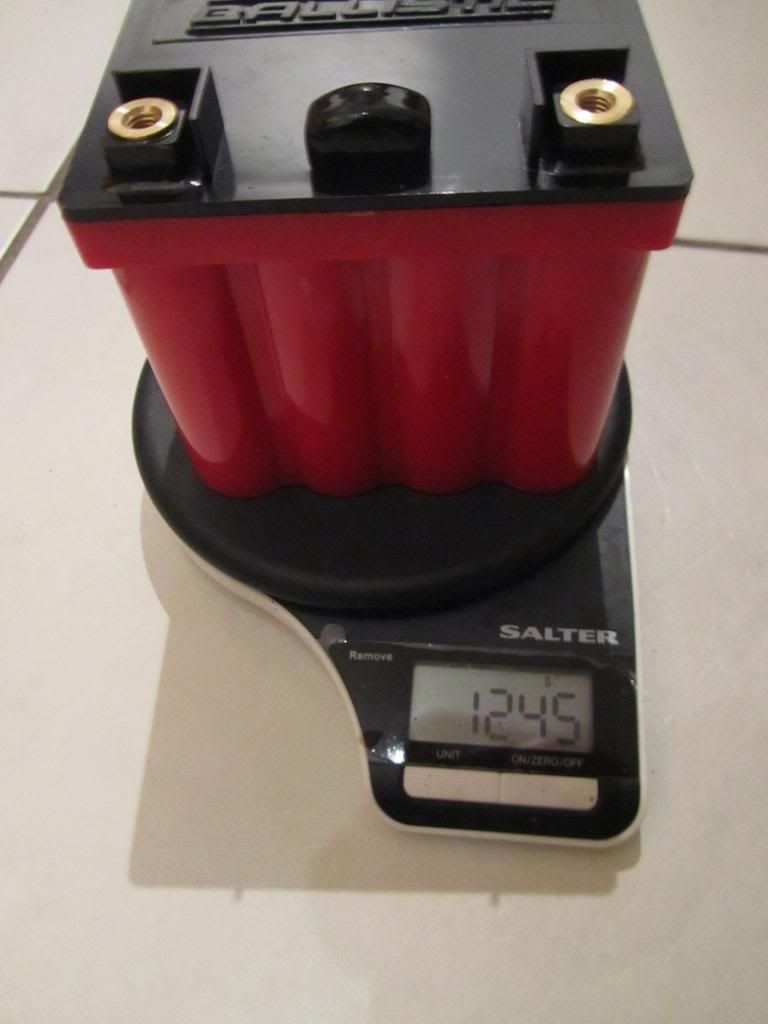
With the arrival of my new Ballistic battery, my bike has lost another 11lbs, compared to the equivalent Yuasa YTX20BS (13.9lbs Vs 2.7lbs) or 1.2kg. I'm edging closer to the target of losing 100lbs compared to a standard XL1000. The new battery fits easily in the recess made for it, with spare room enough for some foam to cushion the vibes..
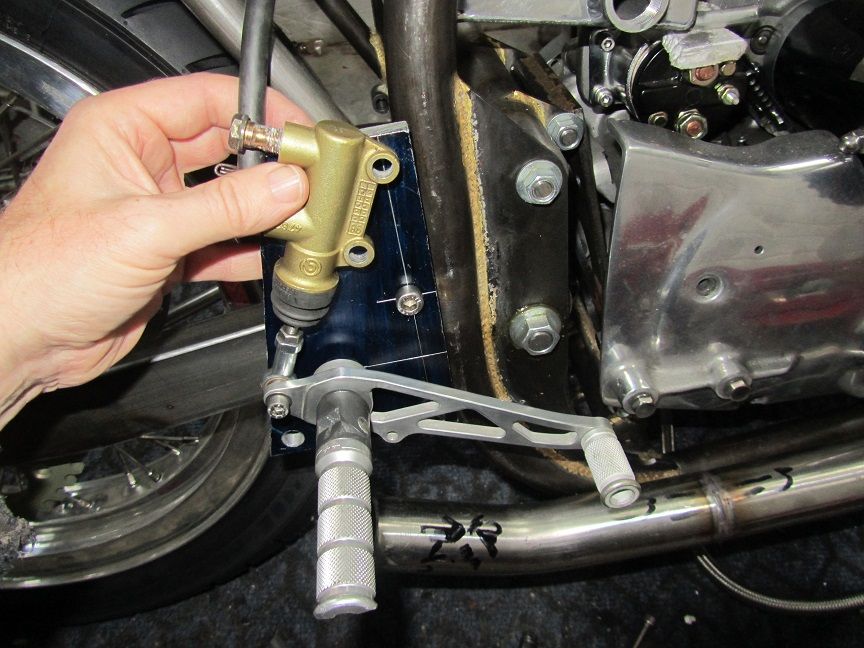
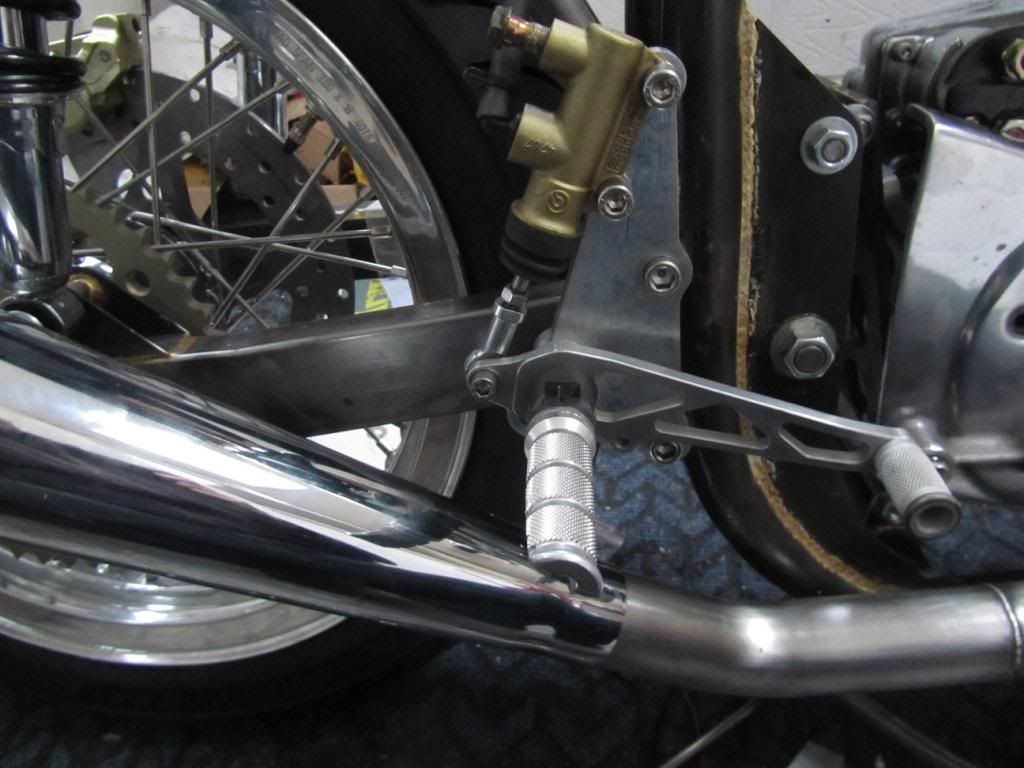
Also made a start on the new rear set brackets, made from some scrap 10mm alloy plate. Had to bring them home to check the mounting holes were ok, before drilling the holes for the master cylinder and shaping the plates..
Here's an action pic of Geoff welding my exhaust (surprised the camera could handle the intense light, I certainly didn't risk it). I asked about his old work bench, he did his apprenticeship on it, in a local brewery. When it closed, it came with him. BTW that old brewery had been there since the 1740s.


Been playing with the edit function in Photobucket..the new downpipes may not look much different, but every joint has been changed and rewelded..

With the exhaust is finally done (still need to decide whether to polish the downpipes) the next job will be to make the real rear set mounts and exhaust hangers, in place of the temporary ones I've used so far. Also been thinking about where the battery is going to live. Ideally it should go under the seat hump, but there isn't a lot of room under there, so the back up plan was to mount it under the swing arm, behind the gearbox, as I'd seen a few Sportsters with the battery in that location, so should be enough room. My drop seat Harley has its battery under the swing arm (actually it sits in the swing arm), which has been a PITA, as to access it, I need to remove the rear wheel, not ideal
I'd always intended to use a Lithium Iron battery, and for the Ironhead, I'd need the equivalent of a 20AH Yuasa lead acid battery. I could get a Shorai at a good price, but looking at it specs, it didn't look that much smaller than the Yuasa, though it is much lighter. With one of my exhaust downpipes running under the engine, I wasn't sure if there was enough room behind the gearbox to fit the Shorai, let alone a Yuasa.
I made cardboard copies of the three options, Yuasa, Shorai and Ballistic. Sure enough the Yuasa wouldn't fit, while the Shorai only just squeezed under the swing arm, a bit too close to the exhaust and rear tyre for comfort. The Ballistic was so much smaller it would even fit under the seat, if it was recessed a little into the tray I'd made earlier. So that's what I did. The Ballistic isn't cheap, twice the price of a Yuasa, and I've read mixed reviews of Lithium batteries on bikes, but going to give it a try..

I got the seat under tray modified to hold the battery, need a real battery now..


With the arrival of my new Ballistic battery, my bike has lost another 11lbs, compared to the equivalent Yuasa YTX20BS (13.9lbs Vs 2.7lbs) or 1.2kg. I'm edging closer to the target of losing 100lbs compared to a standard XL1000. The new battery fits easily in the recess made for it, with spare room enough for some foam to cushion the vibes..

Also made a start on the new rear set brackets, made from some scrap 10mm alloy plate. Had to bring them home to check the mounting holes were ok, before drilling the holes for the master cylinder and shaping the plates..

The key with lithium based batteries is to not them fully discharged, so there are two things worth considering.
The charging system on the bike, which should be fine with the Harley engine which has more than enough output from the stator. And then an off bike lithium specific trickle charger which will keep it fit and healthy.
Do not use a 'normal' lead acid trickle charger. It will cycle it incorrectly and ruin the battery. LiOn chargers are an extra expense, about £50, but totally worth it in my experience especially on infrequently ridden bikes.
Great project by the way, beautiful fabrication and the proportions of the bike look great
Almost time to dismantle the bike to get the frame powder coated, then the final assembly can be done. Been busy with lots of small jobs, never seems to end..
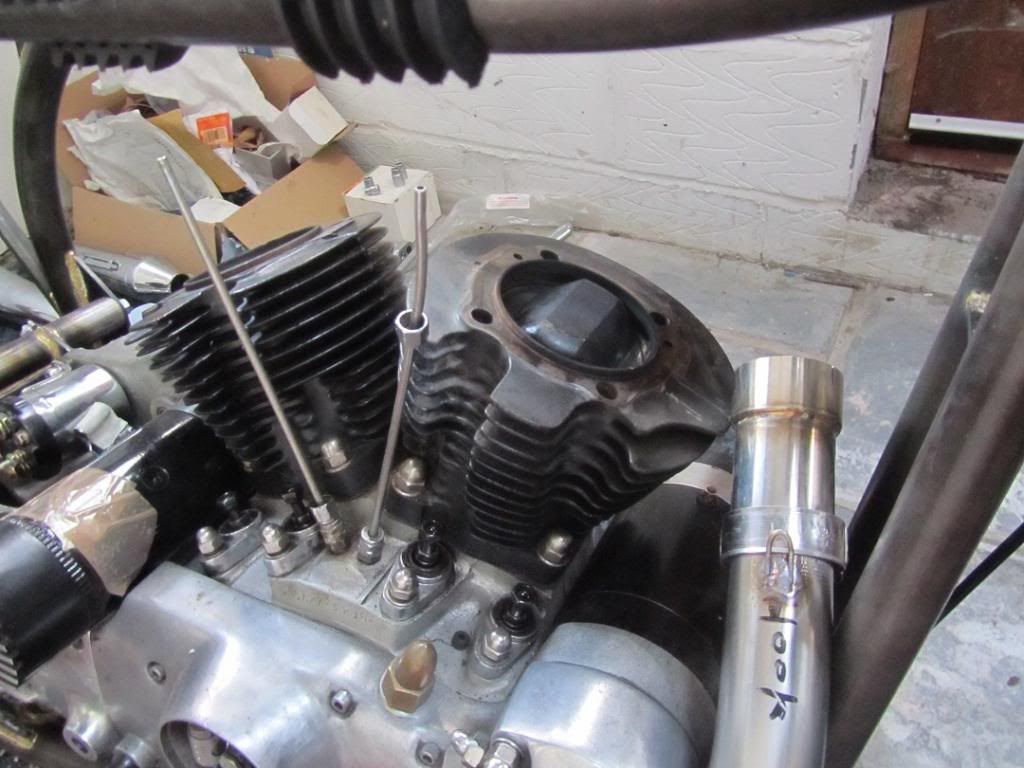
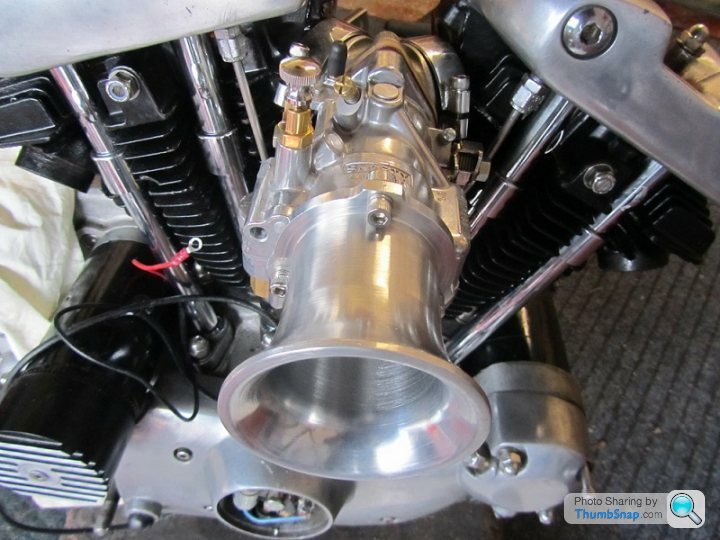
Made the new foot peg brackets, fitted a stainless starter button into the top motor mount, took the cylinder heads off for paint and to fit new pushrod tubes. Also fitted hand controls from a Honda VTR, I wanted to use Brembos, but they were silly money on Ebay. Still need to fit a smaller brake reservoir. Still got to finish the hydraulic clutch conversion and the new shorter velocity stack..
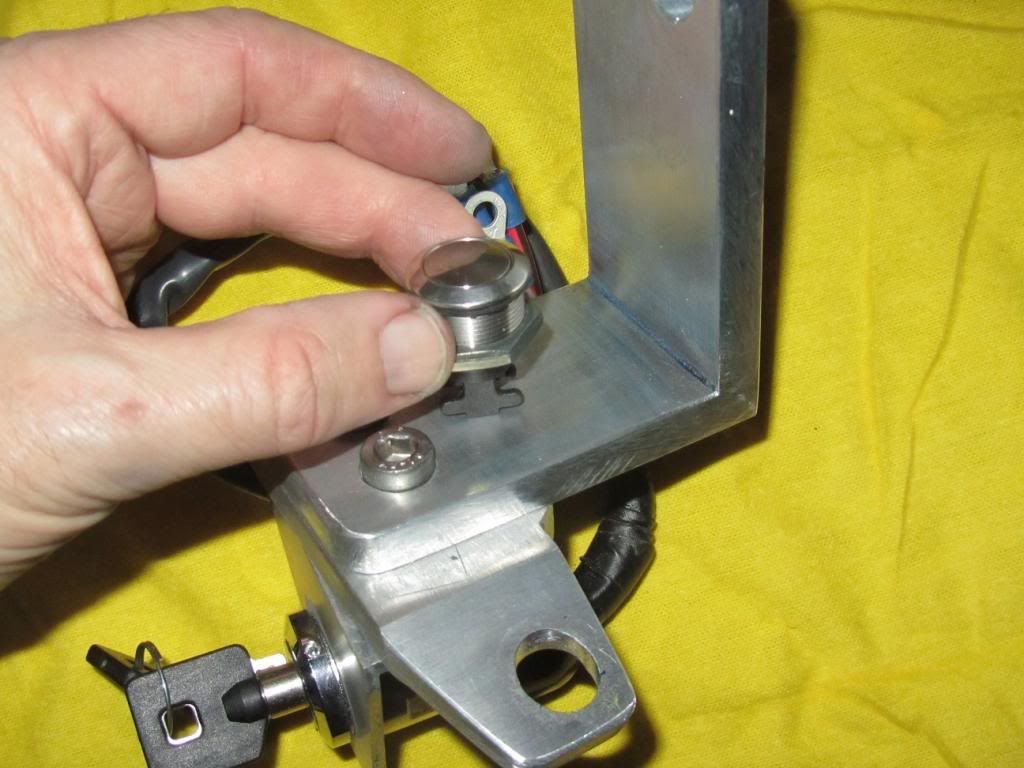
Starter Button can go here..
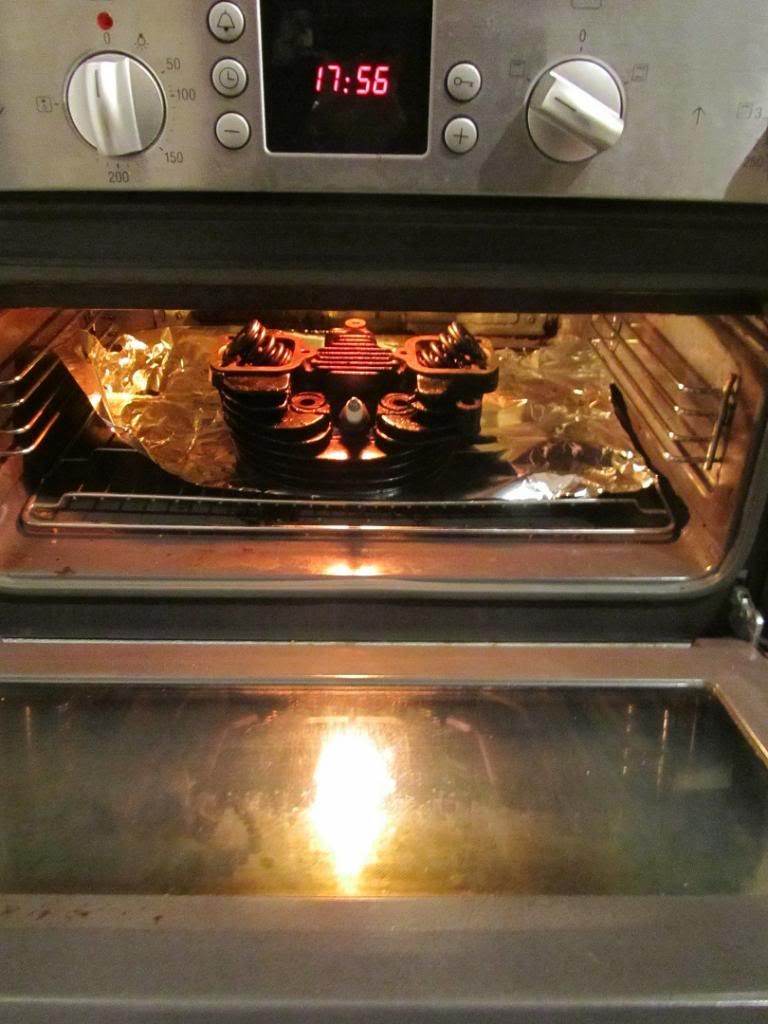
Curing the newly painted cylinder heads.. 80c for 30 mins..
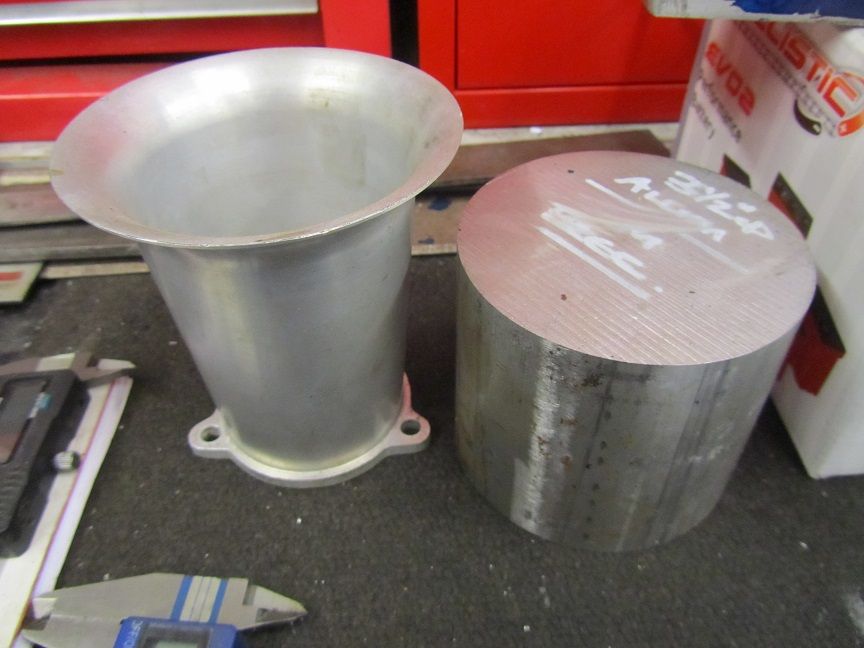
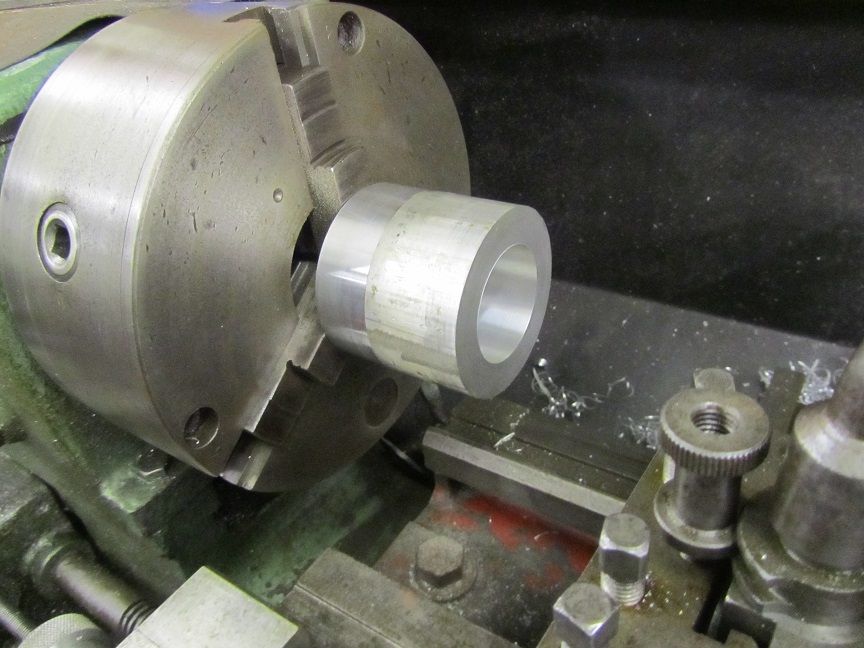
Making a new Velocity stack..
Almost ready do be dismantled for paint
Made the new foot peg brackets, fitted a stainless starter button into the top motor mount, took the cylinder heads off for paint and to fit new pushrod tubes. Also fitted hand controls from a Honda VTR, I wanted to use Brembos, but they were silly money on Ebay. Still need to fit a smaller brake reservoir. Still got to finish the hydraulic clutch conversion and the new shorter velocity stack..

Starter Button can go here..


Curing the newly painted cylinder heads.. 80c for 30 mins..

Making a new Velocity stack..


Almost ready do be dismantled for paint

Finally got the frame welded this week (to add mounts for the rear light/plate and oil tank), then took it to be powder coated at Triple S in Bingley today. Before I took the bike apart I weighed it, including the battery and chain, but with no oil or fuel, it weighed Front wheel = 185lbs, rear = 202lbs, total 387lbs
4 litres of oil weighs 8lbs (I checked), while half a tank of fuel will be around 20lbs... gives 415lbs ready to ride. I was aiming for 420lbs, so happy with that. That's approx. 130 lbs lighter than a standard old Harley XL1000.
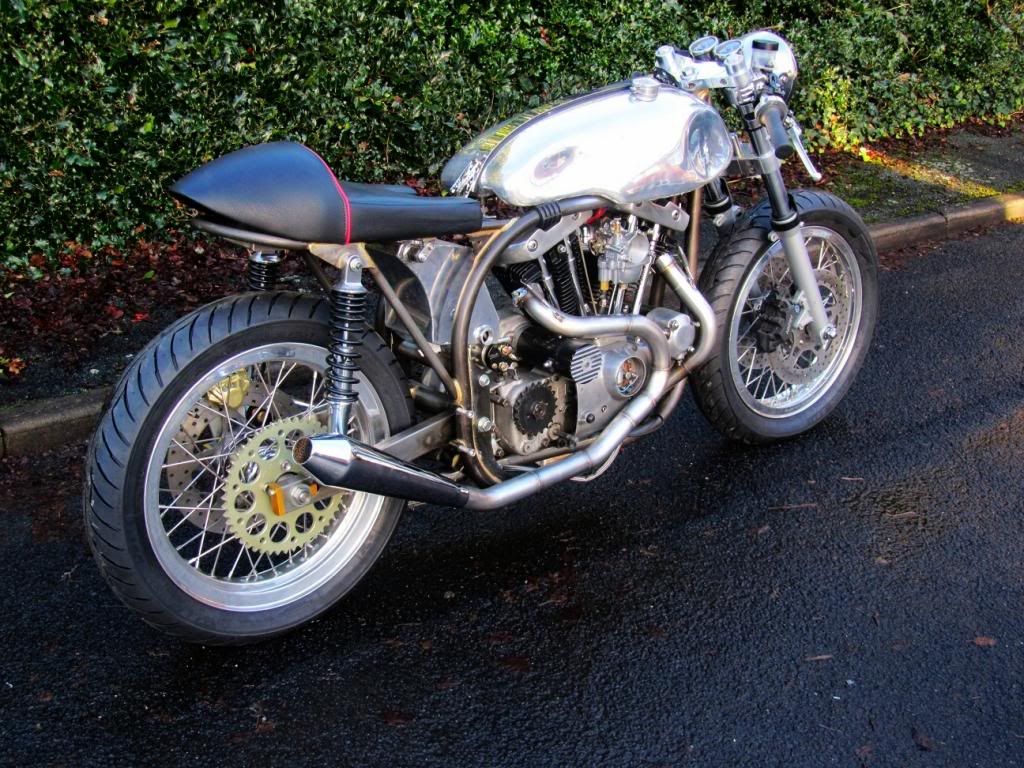
Here's a photo before it came apart, still a few parts to make, but they can be done during the final build..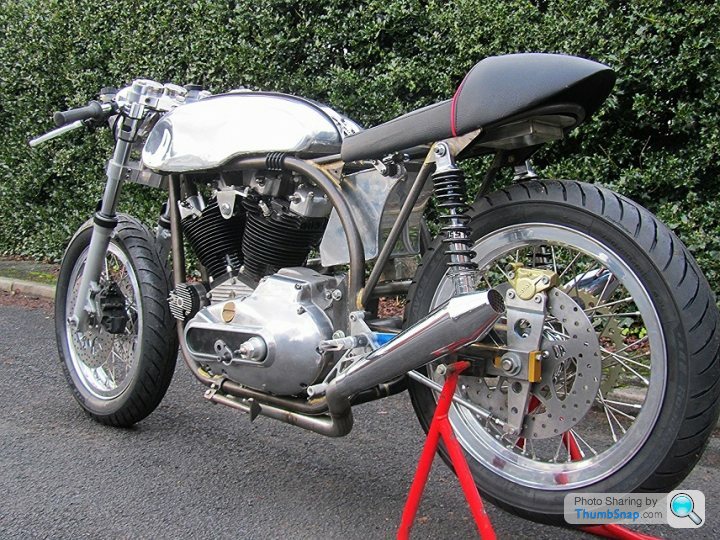
4 litres of oil weighs 8lbs (I checked), while half a tank of fuel will be around 20lbs... gives 415lbs ready to ride. I was aiming for 420lbs, so happy with that. That's approx. 130 lbs lighter than a standard old Harley XL1000.
Here's a photo before it came apart, still a few parts to make, but they can be done during the final build..
Collected my frame from Triple S, the powder coaters in Bingley, as always they did a great job, they specialise in motorbike frames and wheels etc. For me its a half day return trip (traffic is always awful), but its worth the effort. I ended up with my little car full of other peoples parts on each trip, as when they knew I was going I was asked to take their stuff too.
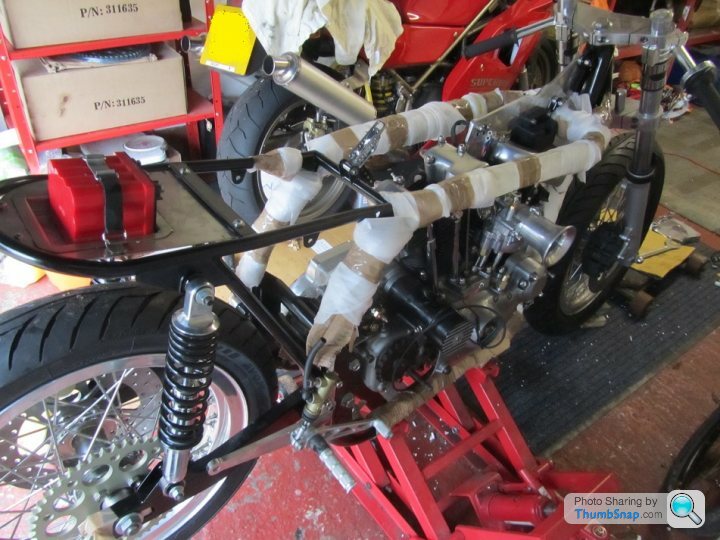
The engine is ridiculously heavy, but I decided not to wait for help to fit it into the frame, instead I wrapped the frame in card and foam, then placed the engine on its side on wooden blocks before dropping the frame carefully over it. Worked out ok, though took ages to fit all the mounting brackets and swing arm due to the thickness of the powder coat. Had to turn down the swing arm spacers a little in the end.
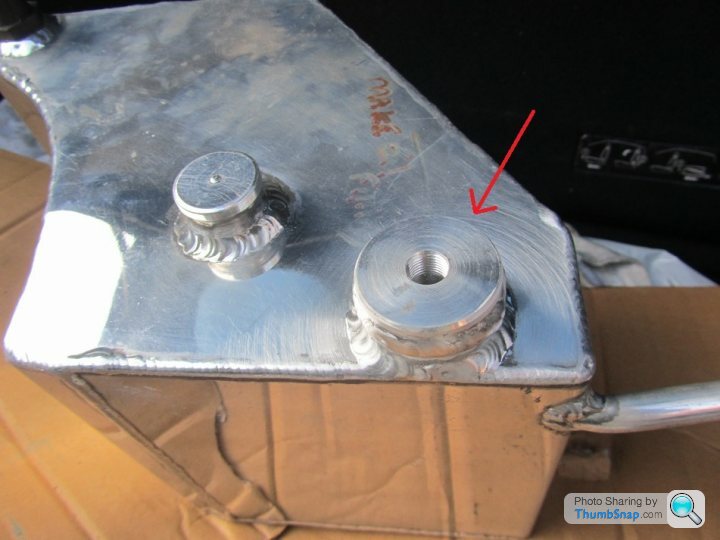
Also had a threaded 'bung' welded into the oil tank for the outlet fitting, saved having to cut a British Cycle thread to match the oil tank and since the bikes got a modern oil filter, there was no need to use the authentic Norton oil filter (just a crude wire mesh) that would normally sit inside the oil tank. We didn't finish tapping the inner thread in the bung for the oil fitting, as there was a small chance it would distort a bit when the bung was welded into the oil tank. Now that's done we can finish cutting the thread.
The engine is ridiculously heavy, but I decided not to wait for help to fit it into the frame, instead I wrapped the frame in card and foam, then placed the engine on its side on wooden blocks before dropping the frame carefully over it. Worked out ok, though took ages to fit all the mounting brackets and swing arm due to the thickness of the powder coat. Had to turn down the swing arm spacers a little in the end.
Also had a threaded 'bung' welded into the oil tank for the outlet fitting, saved having to cut a British Cycle thread to match the oil tank and since the bikes got a modern oil filter, there was no need to use the authentic Norton oil filter (just a crude wire mesh) that would normally sit inside the oil tank. We didn't finish tapping the inner thread in the bung for the oil fitting, as there was a small chance it would distort a bit when the bung was welded into the oil tank. Now that's done we can finish cutting the thread.
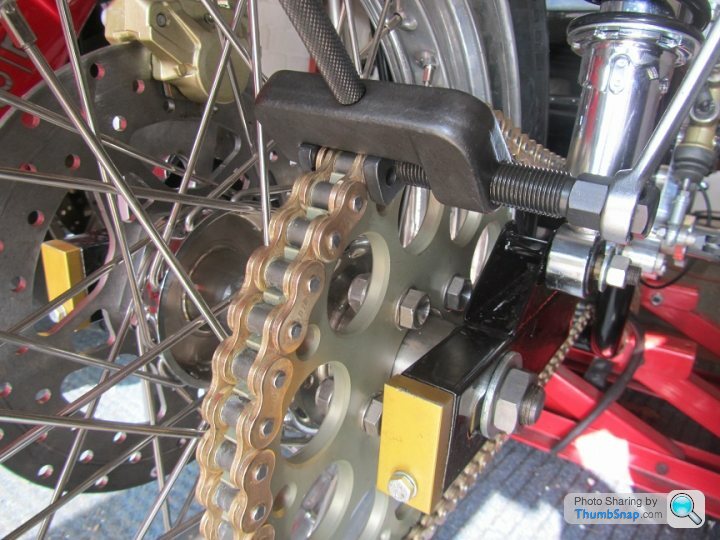
I struggled to fit the chain, until I realised I'd been given a 520 split link for the 530 chain. Having collected the correct sized split link and with my shiny new rivet tool the chain went on ok. Though I did have to pause half way through and go off to check on youtube the correct way of using the riveter, it wasn't obvious and it came without instructions.
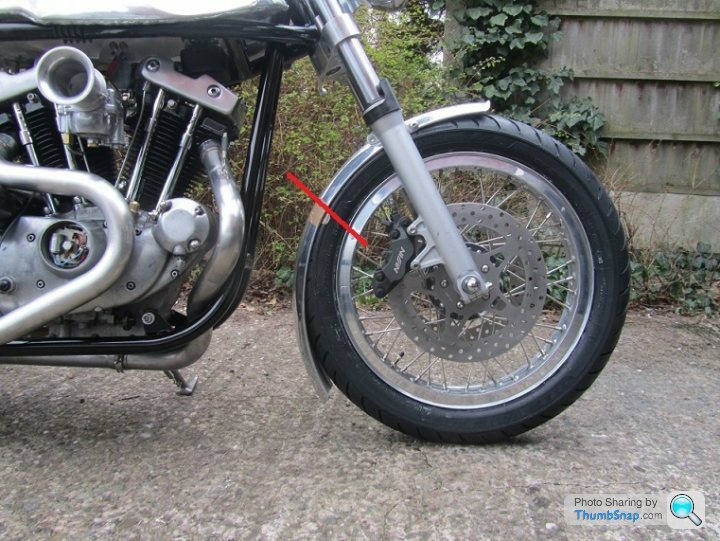
Also changed the front Avon to a narrower 100 width tyre, the 110 looked good but the general consensus was that it will handle better with the 100. Luckily the 110 tyre fits my Guzzi so its not going to wasted. With the new tyre on, my next job is to work out how long I want the alloy front mudguard to be and how to mount it
I spent an afternoon at Geoff the welders place, where he let me use his pipe belt sander, it saved me a huge amount of time linishing the welds of the stainless downpipes. They aren't perfect (I was afraid of sanding right through the pipe walls), and still need to be polished but overall I'm happy with the result.
I did hit one problem today, the oil filter mount (which I had been pleased with), just happens to place the oil pipes directly in line with the lower chain run.. should have thought of that beforehand it'll have to be changed.
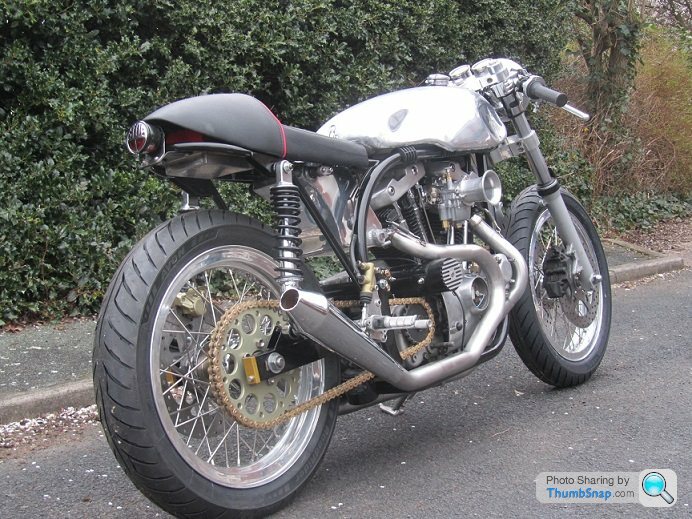
I did hit one problem today, the oil filter mount (which I had been pleased with), just happens to place the oil pipes directly in line with the lower chain run.. should have thought of that beforehand
it'll have to be changed.
Waiting on having the brake and clutch lines made up, should be ready end of the week, so until then just been playing around with a couple of ideas. I wasn't happy with one area of the bike, so I took my trusty hacksaw and file and made this simple bracket, from a scrap piece of angled alloy plate. Spent an afternoon cutting, filing and measuring till it fit ok. But it didn't really look right, even if it was polished or painted or whatever, so I went off to drink tea and work on a MK2 version... 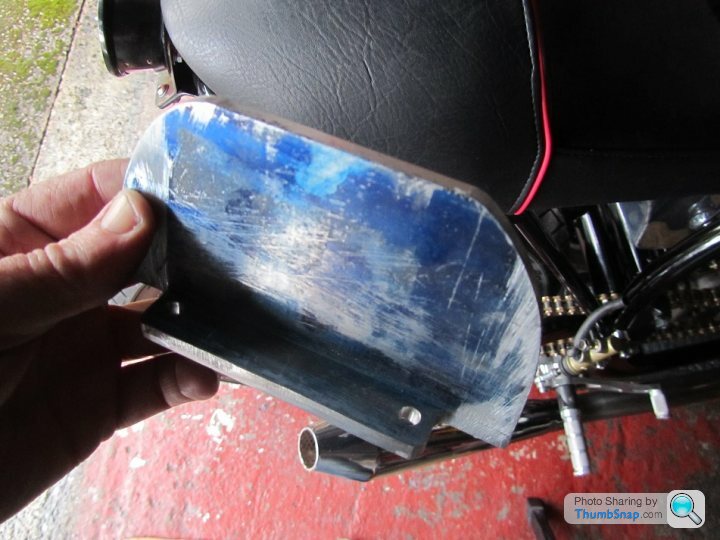
I made a few templates from cardboard until I came up with something that looked right, and with the brackets welded on this morning, it just needs a little finishing and its done.. a 'Tiara' for the bike, to make the bright orange battery a little less obvious, and finish off the under seat area.. 
Gassing Station | Biker Banter | Top of Page | What's New | My Stuff