Moto Guzzi Cali Cafe Racer Build thread
Discussion


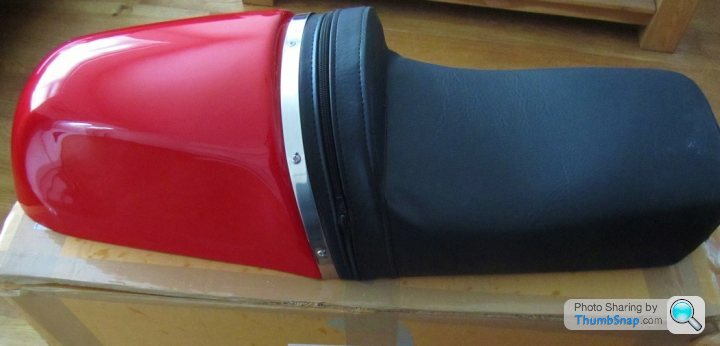
After much indecision, finally ordered a new seat from Mead Speed, which arrived today. I knew it would be 20mm or so too narrow to fit over the seat rails of the Guzzi, but I think it will look ok if I mount it to sit on top of the frame. I did make a simple copy in cardboard from the dimensions found on the internet, which I find helpful. It will be an expensive mistake if it doesn't look right, at least its the right colour..
Been thinking about various options on how to mount the new seat. The mounts need to be adjustable (up and down and backwards and forwards) so I can get the height just right. The seat needs to sit above the frame rails, not touching, but as close as possible to look ok. The problem is that I cant drill the seat base and use nuts and bolts where I want as the seat cover sits above it, so what to do? I did consider using Eboxy resin to glue some kind of mount to the underside of the seat base, but in the end I decided to forego the eboxy option, and stick with old fashioned nuts and bolts.
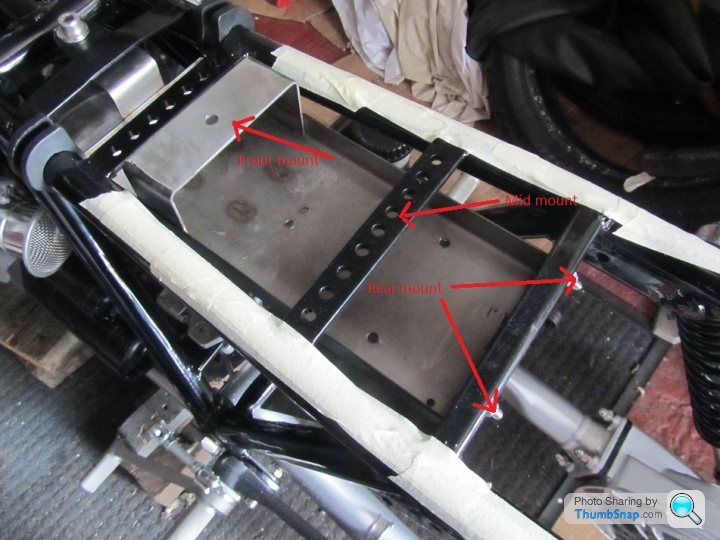
First I had to sort out the front mount (of three.. front, middle and back), these needed to consist of two rods which would slot into the two tubes already fixed to the base of the seat. Its made from two stainless rods and a thick stainless base plate, so no need to worry about paint or corrosion...

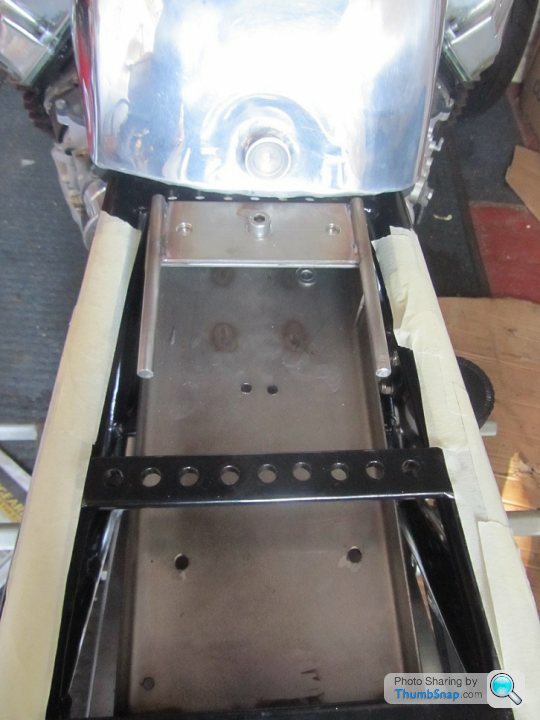
While the middle mount, is just a support, it doesn't need to be fixed to the seat, which makes life much easier. I haven't finished it yet, it consists of two simple alloy spacers and an alloy plate on top which will be bolted down to the middle frame bracket with a couple of countersunk bolts. I just need to add a washer or two to raise the support plate as needed.. well that's the plan, oh and I'll stick some neoprene to the alloy plate to cushion the fibreglass base too.
First I had to sort out the front mount (of three.. front, middle and back), these needed to consist of two rods which would slot into the two tubes already fixed to the base of the seat. Its made from two stainless rods and a thick stainless base plate, so no need to worry about paint or corrosion...
While the middle mount, is just a support, it doesn't need to be fixed to the seat, which makes life much easier. I haven't finished it yet, it consists of two simple alloy spacers and an alloy plate on top which will be bolted down to the middle frame bracket with a couple of countersunk bolts. I just need to add a washer or two to raise the support plate as needed.. well that's the plan, oh and I'll stick some neoprene to the alloy plate to cushion the fibreglass base too.
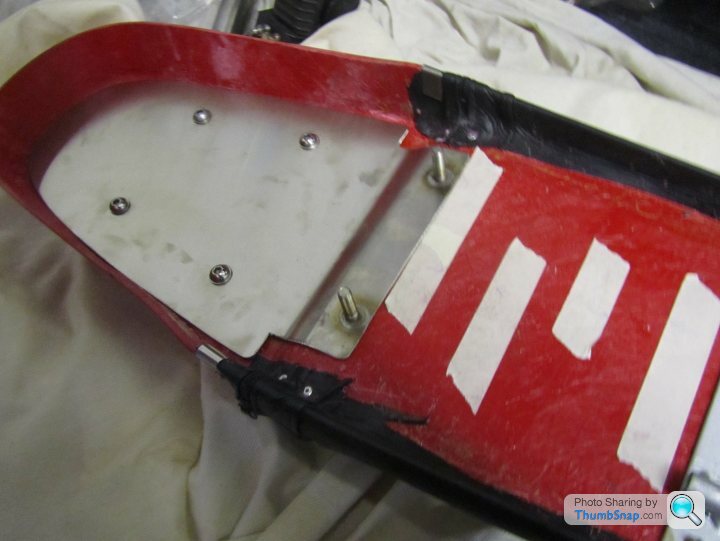
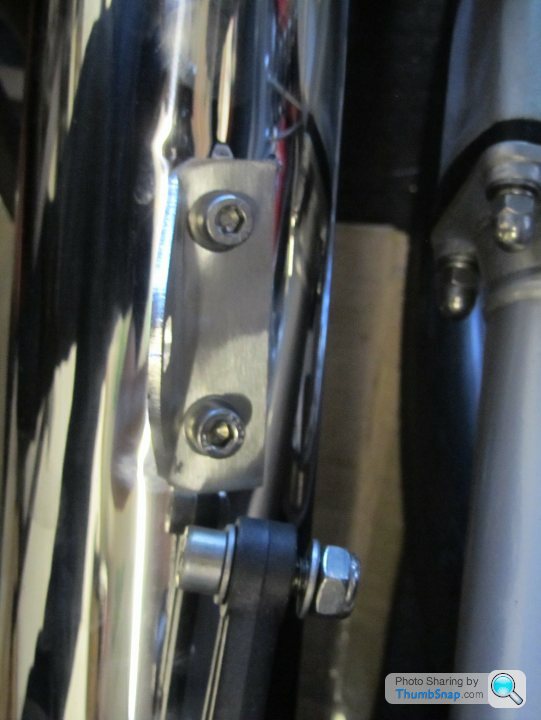
Finally to the rear mount, which is the main support for the seat, the only mounting point for which is two bolts which are just off vertical and currently hold the top of the splash guard to the frame, while I need to make sure I don't put too much stress in one point of the seat, don't want it cracking or failing...
This is the solution I came up with, along with help from Geoff The Welder... who did all the hard work..
Cut and shape a piece of stainless plate...
Then bend it to follow the contours of the seat base, before welding in two M8 threaded bars.
Then drilled four holes through both the plate and the seat base, below the seat hump, which I can access via the zipped seat back, and so get a spanner in there to bolt everything up nicely.
This leaves me to make one more piece, which will connect the two threaded bars to the frame mount. That had to wait until everything else is made and I can measure what's needed accurately.
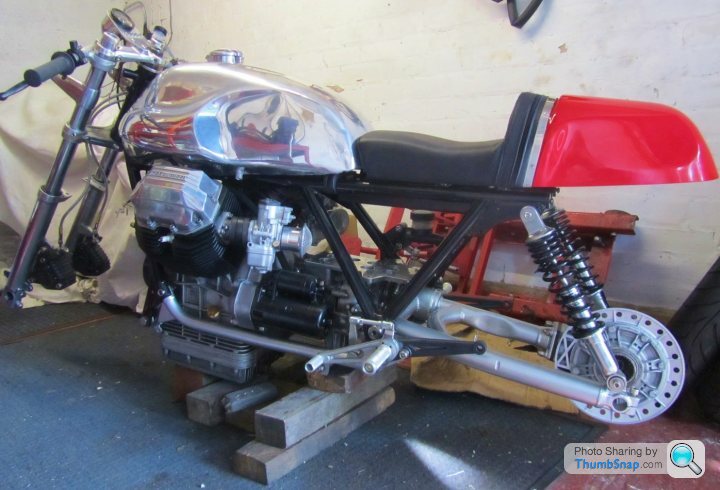
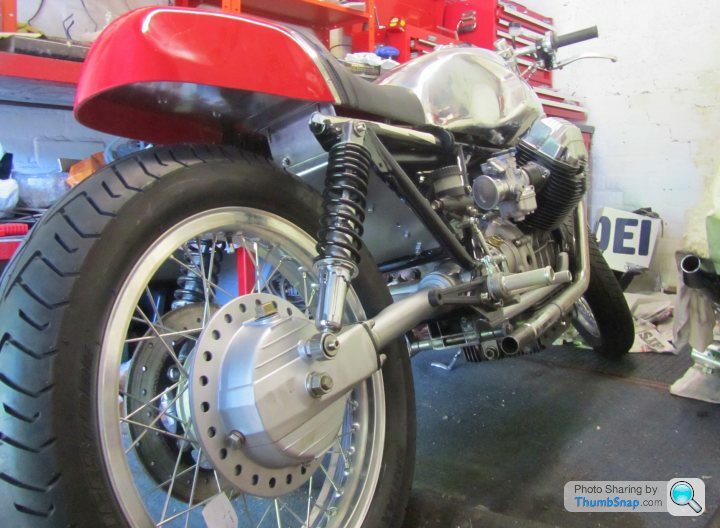
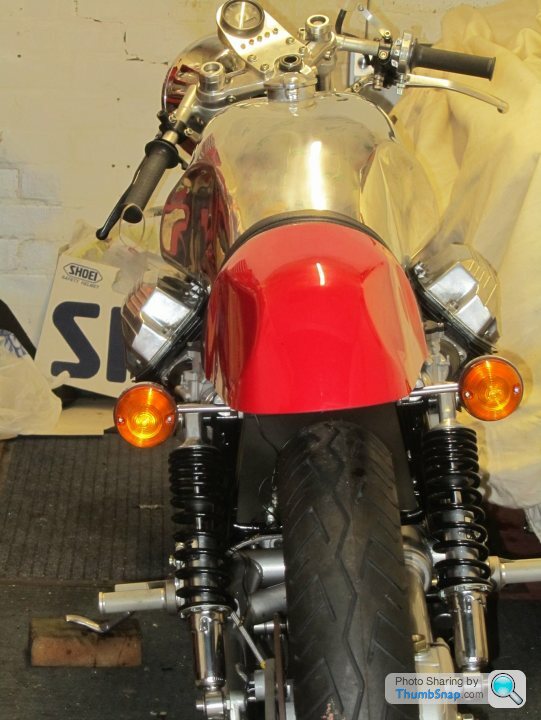
The seat is finally fitted, it could've been a mm or two lower to the frame rails, but its already too low for comfort with the rearsets, so for now its as low as I dare make it. It'll be easy enough to raise it if needed when I finally get to test ride it.
The parts I took for chroming should be ready next week, if the 4 week lead time they gave me is accurate, while there are a couple of parts I designed that are waiting to be machined, they probably wont be done for another few weeks. I was promised my stainless spindles would be finished next week too, (I laced up a Harley wheel in exchange), for now just got to wait.
The next big expenses will be the new alloy rims and spokes, along with Lemans replica silencers, and finally the paintwork, which will also have to wait, at least it gives me plenty of time to decide on the design of the paintwork.
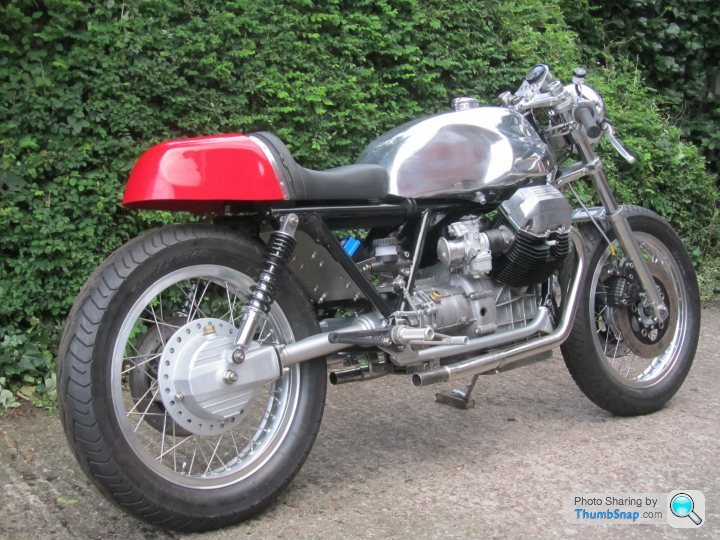
Filmed a walk around the Guzzi the other week, probably missed a few details, but here it is anyway...
https://youtu.be/AaYPYpQhGE4
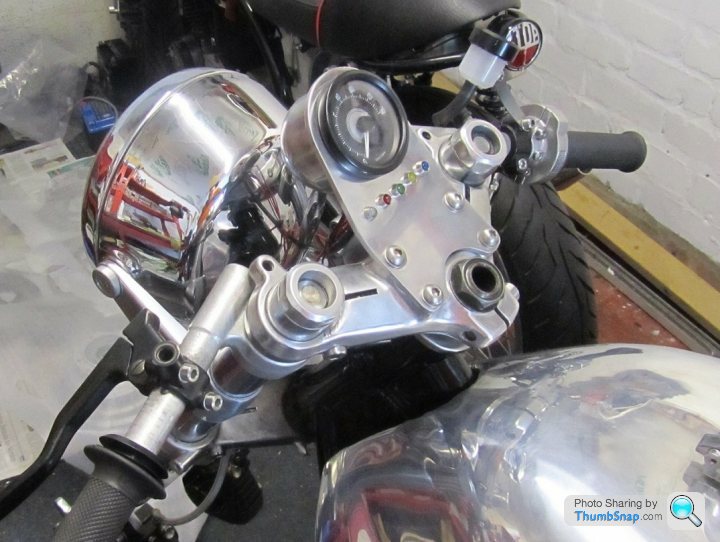
Coming up to date, I collected my chrome parts from Niphos in Crewe yesterday, which finally allowed me to fit the downpipes and headlight. I wasn't 100% sure about having the black headlight shell chromed, but now its done and on the bike, I think it was the right decision. In the meantime work started on a couple of billet parts for the Guzzi. There's a couple of short videos of progress on youtube too.
https://youtu.be/AaYPYpQhGE4
Coming up to date, I collected my chrome parts from Niphos in Crewe yesterday, which finally allowed me to fit the downpipes and headlight. I wasn't 100% sure about having the black headlight shell chromed, but now its done and on the bike, I think it was the right decision. In the meantime work started on a couple of billet parts for the Guzzi. There's a couple of short videos of progress on youtube too.
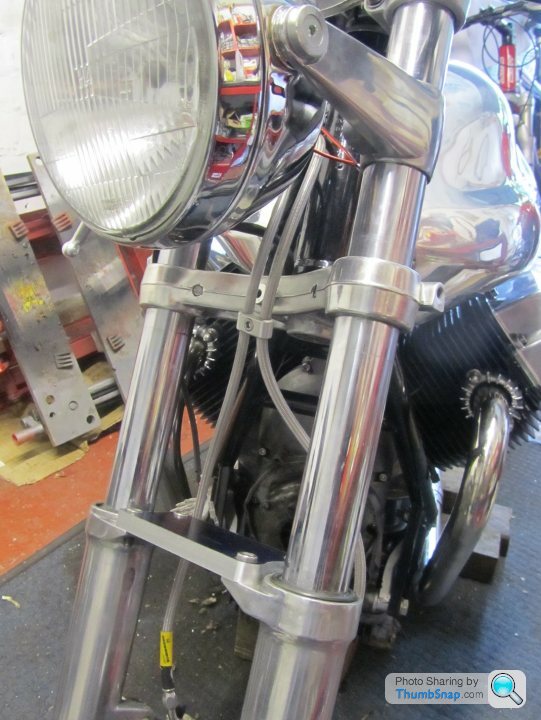
This week has been a good one for the Guzzi, its new billet fork brace has been machined and fits fine, though it still needs more work to make it look better. That all happened yesterday, and I filmed the steps of the fork brace being made, which is now on youtube. Meanwhile my new billet alternator cover has been started too.
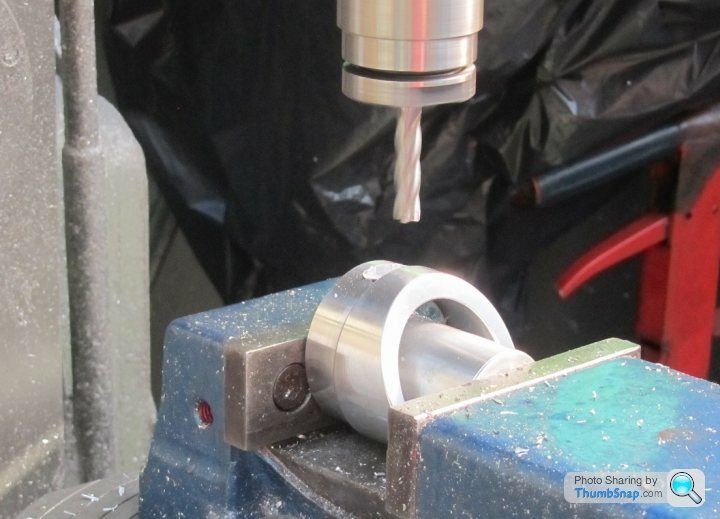
The new stainless spindles (for which I've been waiting months) have been machined on a CNC lathe, and now the machine shop have written the program, they could churn out hundreds a week... pity mine are not standard, I designed in a couple of extra features. By chance I happen to be passing by on the afternoon they were being made, so I got to see the first one being made, though I wont be able to collect them until next week.
Our other projects are making good progress too... may as well make the most of it while it lasts lol.
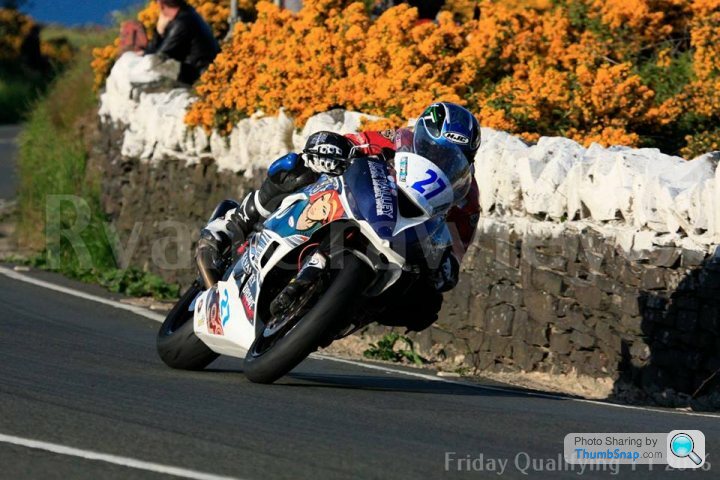
Its been a busy week for me, as yesterday I spent the morning in my local dyno. Sam, the operator is a racer, just back from the TT, he crashed during practice, fractured his pelvis but still raced the following week, they're all mental!
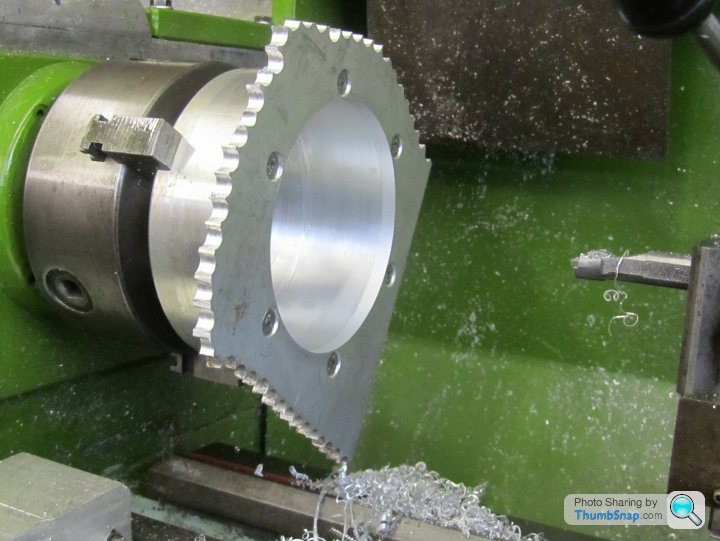
The new stainless spindles (for which I've been waiting months) have been machined on a CNC lathe, and now the machine shop have written the program, they could churn out hundreds a week... pity mine are not standard, I designed in a couple of extra features. By chance I happen to be passing by on the afternoon they were being made, so I got to see the first one being made, though I wont be able to collect them until next week.
Our other projects are making good progress too... may as well make the most of it while it lasts lol.
Its been a busy week for me, as yesterday I spent the morning in my local dyno. Sam, the operator is a racer, just back from the TT, he crashed during practice, fractured his pelvis but still raced the following week, they're all mental!
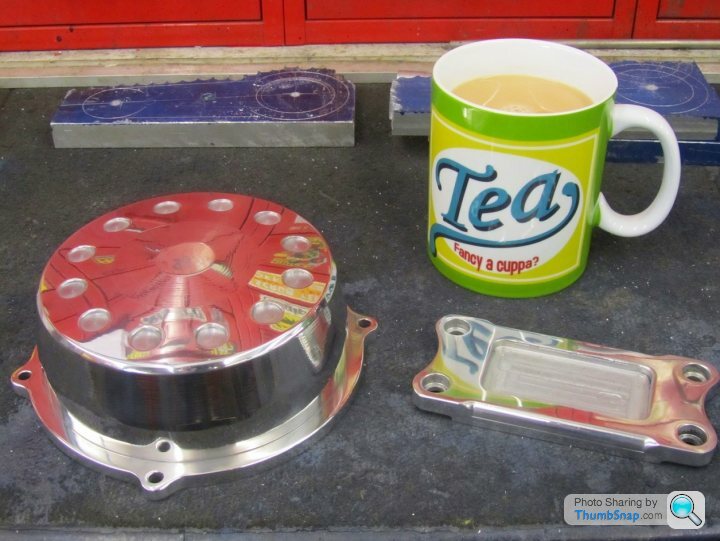
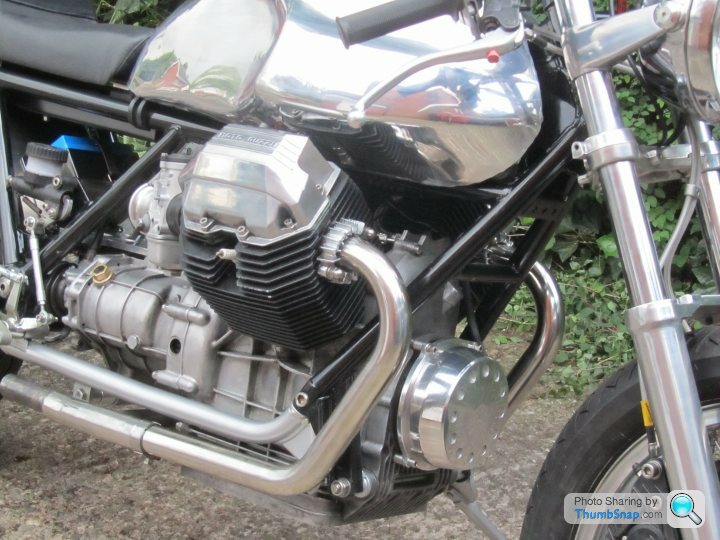
Finally, finally the one off fork brace and alternator cover are done and fitted to the bike. Spent this afternoon polishing these two pieces on the polishing mop, at the end of which they looked ok, not exactly show quality, but good enough for me on a road bike..
While that was happening, we made a short video again, this time showing how we use the polishing mop..
https://youtu.be/RrAEDVnvSdM
While that was happening, we made a short video again, this time showing how we use the polishing mop..
https://youtu.be/RrAEDVnvSdM
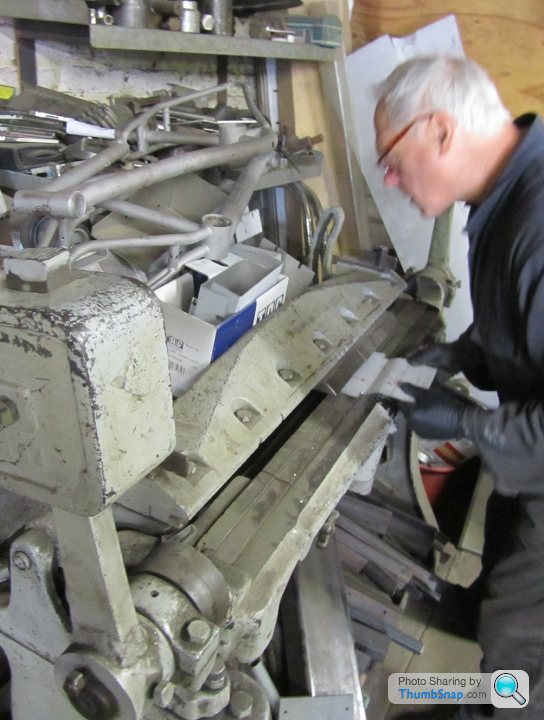
This week I finally decided where the new lithium battery was going to live on the bike. I made a tray in cardboard, then took it to Geoff the welders workshop, where he made it in stainless for me. I made video of the process, and had a look around his workshop... converted from a 18th century farm building, most of his equipment is pre war too...
https://youtu.be/JfUj5Zn41iA

https://youtu.be/JfUj5Zn41iA
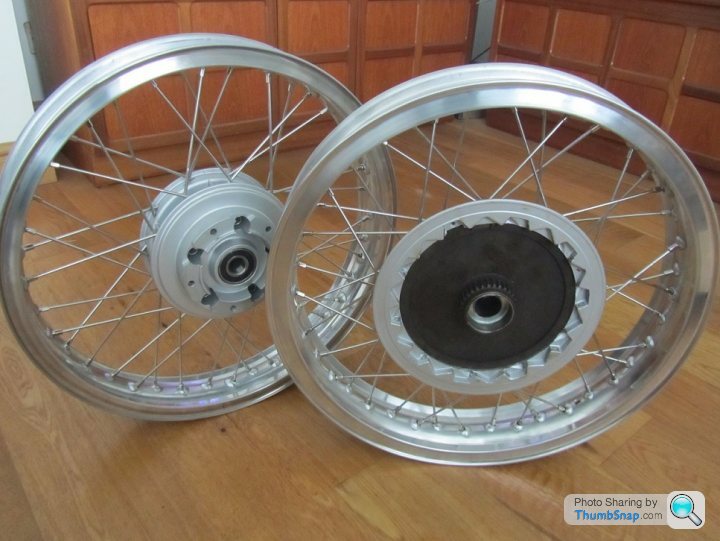
The new spokes and Borrani rims arrived this week, it didn't take long to get them laced up and trued. Though I did hit a problem with the rear wheel, as the drive side of the hub didn't have a bearing (its part of the bevel box on the bike), which meant it wouldn't fit on my trusty wheel stand. Had to make an adaptor bush which worked surprisingly well. I ordered Morad alloy flanged rims, but they were out of stock, and would be for a long time, so got the equivalent Borranis instead. They are ok, but not quite as nice as the Morads.
Next week I'll get the tyres fitted and balanced, then fingers crossed the bike will be on its wheels at last.
I took a couple of vids of the process, which took longer to make than building the wheels.. think I need a faster laptop... anyway here they are..
https://youtu.be/4KXXeWj8p2Q
https://youtu.be/rVhruA1_Rdk
Got the tyres fitted to the wheels, had a small problem as the bike shop couldn't balance the wheels, because the flanged Borrani rims left too little room to fit the standard stick on wheel weights. Something to sort out another day. Back home, the wheels went on ok, using my new stainless spindles and stainless wheel spacers, calipers back on, seat and tank back on, not so easy in a confined space on the hottest day of the year. I was keen to get the wheels back on the bike so I could roll it out majestically into the summer sunshine.
But it wasn't to be, the old Guzzi didn't want to budge... maybe the new pads are sticking, maybe its still in gear or maybe the clutch plates are sticking after so long being unused?? Well, the front wheel wasn't the culprit, and with no clutch cable fitted it wasn't possible to get much further. Better fit that cable then, I would've done if it was where I thought it was. Looked everywhere for the damn thing with no joy. I'm sure its with some other Guzzi spares that I put somewhere for 'safe keeping', a couple of years ago, and now I have no idea where that may be. I need to order a few more parts, so I'll order a new cable too. Its not a problem ,as the old cable is more than 25 years old, so replacing it is a good idea in any case. Though it is frustrating, as I'd hoped to have a look at the bike from more than a few feet away at last.
But it wasn't to be, the old Guzzi didn't want to budge... maybe the new pads are sticking, maybe its still in gear or maybe the clutch plates are sticking after so long being unused?? Well, the front wheel wasn't the culprit, and with no clutch cable fitted it wasn't possible to get much further. Better fit that cable then, I would've done if it was where I thought it was. Looked everywhere for the damn thing with no joy. I'm sure its with some other Guzzi spares that I put somewhere for 'safe keeping', a couple of years ago, and now I have no idea where that may be. I need to order a few more parts, so I'll order a new cable too. Its not a problem ,as the old cable is more than 25 years old, so replacing it is a good idea in any case. Though it is frustrating, as I'd hoped to have a look at the bike from more than a few feet away at last.
Managed to get it rolled out the garage today, the problem was that the new brake pads and rebuilt discs were a bit 'sticky', should be ok with some miles under its wheels. Also spaced out the billet alt cover as it seems the alternator on mine isn't that reliable and doesn't like to get too hot, hence the spacers to let the cooling air in.
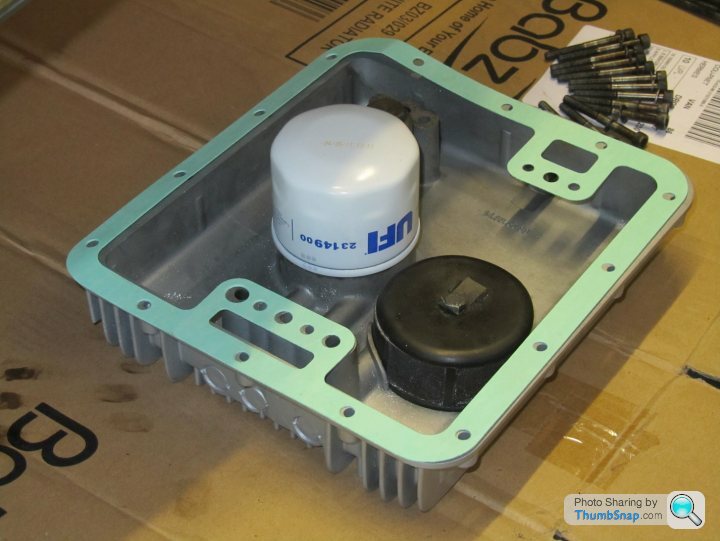
Removed the sump, cleaned it up, bead blasted it and now got I'll probably paint it, same colour as the bevel box.
Removed the sump, cleaned it up, bead blasted it and now got I'll probably paint it, same colour as the bevel box.
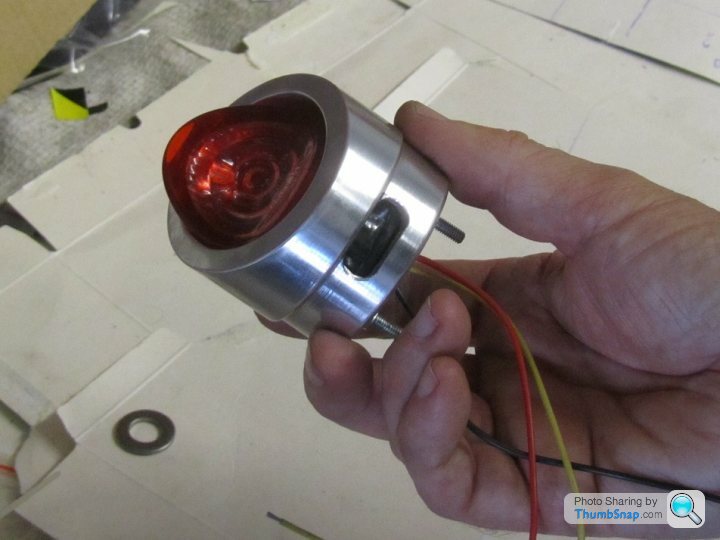
A few more parts arrived in the post this week... indicators, cables and a small LED rear light.. maybe a bit too small? It'll be getting a billet cover to bulk it up a bit and to match the rest of the bike. Also fitted the freshly painted sump and filled it with fluids, though had a brain fade and overfilled the transmission with the engine oil... duh! Oh well, helped flush it out I guess.
Here's the latest two vids showing some of the progress this week..
https://youtu.be/O3vWBnLQk6I
https://youtu.be/axQEhhSVVWU
Here's the latest two vids showing some of the progress this week..
https://youtu.be/O3vWBnLQk6I
https://youtu.be/axQEhhSVVWU
Cheers, its been one of those weeks when nothing seems to work out... first the new throttle cable I just bought doesn't fit the Tommaselli throttle, so had to order a kit to make my own from Venhill. Next the stainless LM1 silencers from Keihan arrived today, and very nice they are too, but of course their mounting brackets don't line up with the Tarozzi rear set mounts. Cant say I'm surprised, but the brackets in stainless wont be so easy to replace, as they are curved to match the curve of the silencer. Got to be done though, don't want another link bracket to connect the two together, it wouldn't look right.. etc etc..
Edit to add a pic of the pipes on the bike
Edit to add a pic of the pipes on the bike
Edited by Merch131 on Friday 5th August 14:53
Having wasted hours trying to make a bracket to mount the silencers to the Tarozzi rearsets look anything but crap, I gave up and ordered a LeMans 1 H pipe to replace the battered original on the bike. Cost me £110 from Keihan, but it allows the silencers to move forward just enough to line up the silencer mount with the rearset mount. Looks much better too.
Cant make a start on the wiring yet, as I'm still waiting for the single fire coil I ordered last week to arrive. Though I am finally happy with the rear light mount/cover, having machined it down for the third time this week.
The next big expense will be the paintwork, still haven't decided what colour / graphics its getting, I'll probably keep flip flopping between red or black/gold until the last moment. There's no rush now, given it wont be finished until the good weather has long gone this year.. Be good to get the Guzzi all done and dusted, as I have a new mini project I'd like to make a start on soon..
Having problems with the carbs, the new throttle cable I bought doesn't fit the Tomaselli throttle.. the adjuster thread is different, and there isn't enough meat on the throttle housing to tap it out... sigh... Will have to make up a new one using a Venhill kit, which I've got. Making it the right length looks tricky given the 1 into 2 splitter the Guzzi uses.
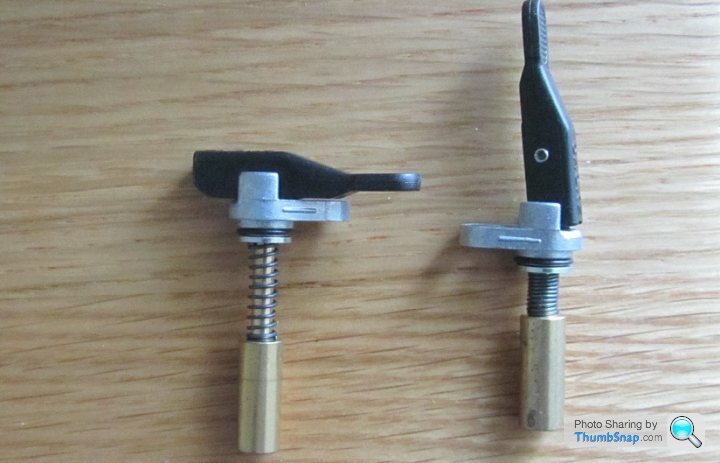
Have a similar issue with the Choke cables, but in this case the handlebar casing which houses the choke lever is damaged and cant be used. So I spent £30 and bought a pair of replacement choke plungers which have the lever on the carb tops. Gets rid of three cables, the splitter and the handlebar lever too.
Finally finished the rear light and its mount, here's how it was made, along with getting the exhaust fitted correctly.
https://youtu.be/ZRnRCXc7K-8
And this is how it looks now. Still waiting on a couple of electrical parts, so cant make a start on the wiring loom yet. There's no rush now, as it needs to be finished by next spring. I'm still pondering what colour to paint it, red or black??? Cant decide. I may have a go at painting it, though my past efforts while being ok, I've never managed to get that glass like finish I want.
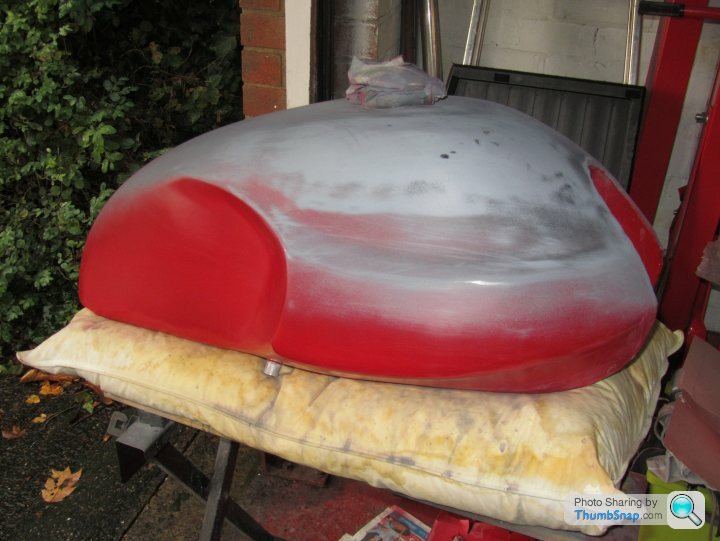
Finally made a start on the paintwork, the seat unit was pretty easy (so far anyway), while I'm still working on the prep of the tank, really want to get the colour on and get it lacquered, but telling myself to do it right and not rush anything...
Here's progress so far today..
https://youtu.be/5Yl3r9g70a8
Here's progress so far today..
https://youtu.be/5Yl3r9g70a8
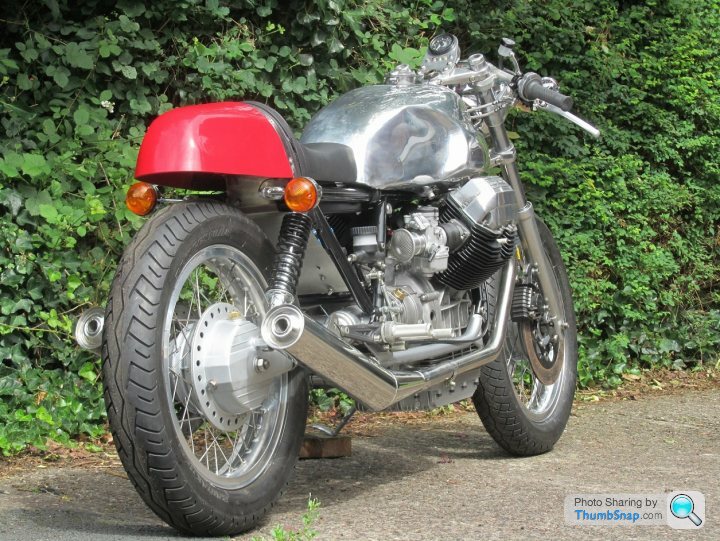
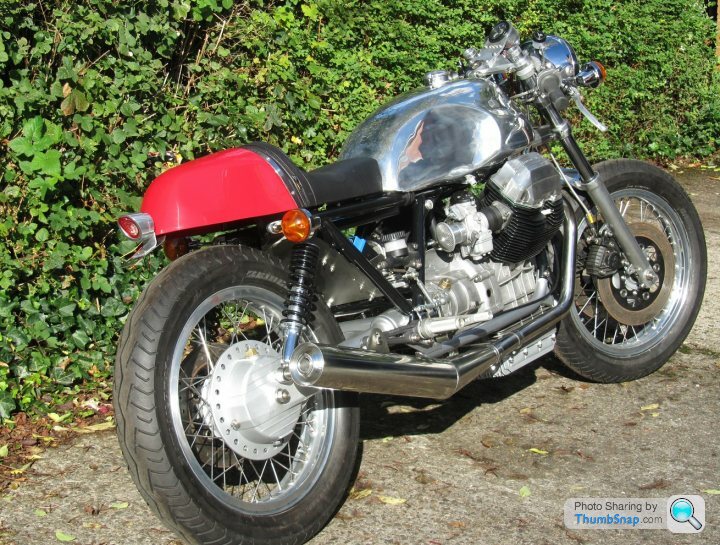
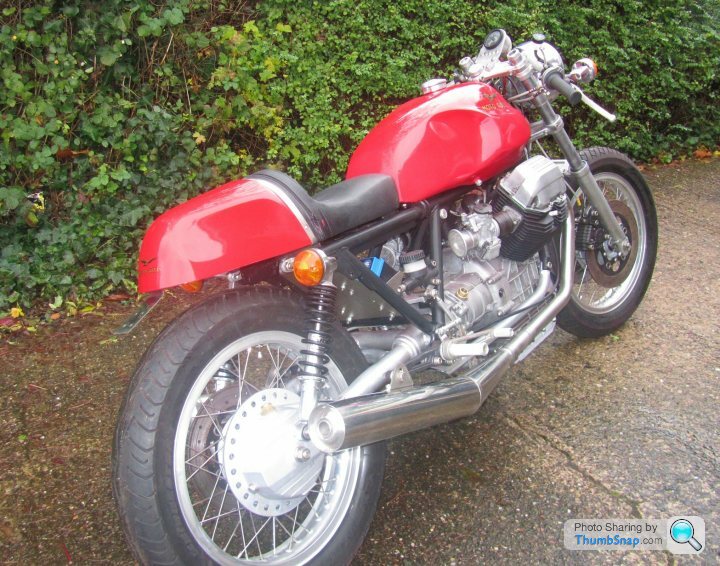
Although the paint still needs to be cut back and polished, I couldn't resist fitting the tank and seat to the bike. Later there was a brief break in the rain clouds, so I quickly pushed the Guzzi outside so I could stand back and see if I like it or not, and if it might need a speed stripe or two (to add 10mph to the top speed of course..).. Think I'll leave it as is for now, the shade of red I chose looks about right, though I do wonder how it'd look in black with gold decals? Perhaps I'll paint my Norley that way someday. Have to tackle the wiring now, which will be next weeks task.
Here's the second part of the DIY paint video..
https://youtu.be/BAn2pw7jFEU
And here's the Guzzi in its new cloths about to get very wet..
Here's the second part of the DIY paint video..
https://youtu.be/BAn2pw7jFEU
And here's the Guzzi in its new cloths about to get very wet..
Gassing Station | Biker Banter | Top of Page | What's New | My Stuff