Moto Guzzi Cali Cafe Racer Build thread
Discussion


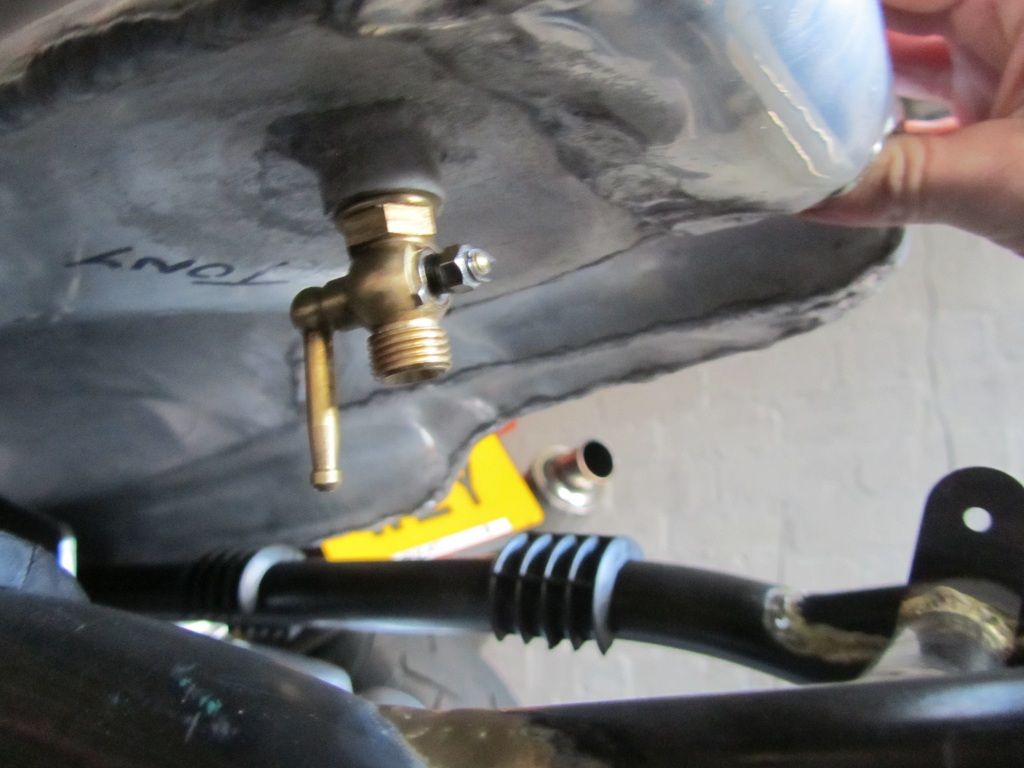
I was lucky today to be able to borrow a few bits and bobs that will the help the Ironhead project along.. First the alloy petrol tank has some weird old british thread for the fuel tap, which I eventually found out was 1/4 inch BSPT (British standard pipe thread). I was given an old style fuel tap to try out and surprisingly it fit. Though, I'm not sure if its meant to be used on a bike, still at least i know for sure the thread now. I'll be going to the Stafford Classic show in a couple of weeks, and will try to find a better tap there..
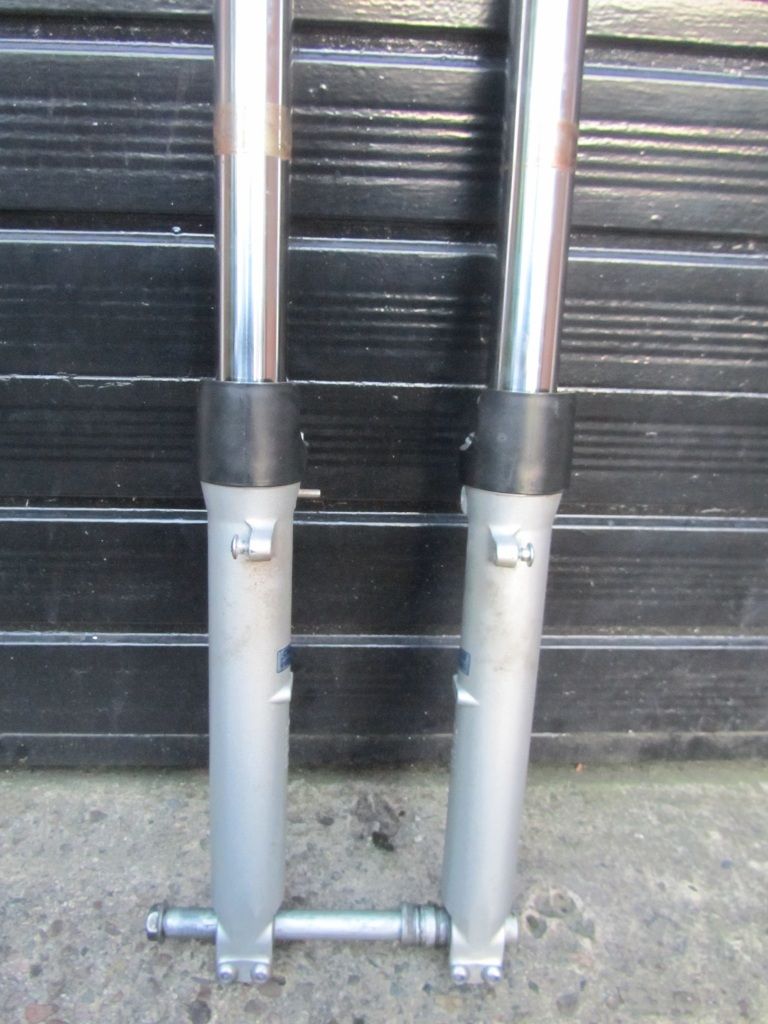
Next I 'borrowed' a mint pair of forks from a 900 Hornet, which I can have if I want them..which I do, as they're the right length, and at 43mm not too big or small for what I'm looking for. They're not adjustable, but thats ok, they'll be far better than those fitted to std Sportster, and they can always be tweaked a bit if they prove to be too soft. The forks came without yokes, which I didnt want to use and of course the stem wouldnt fit in anycase..
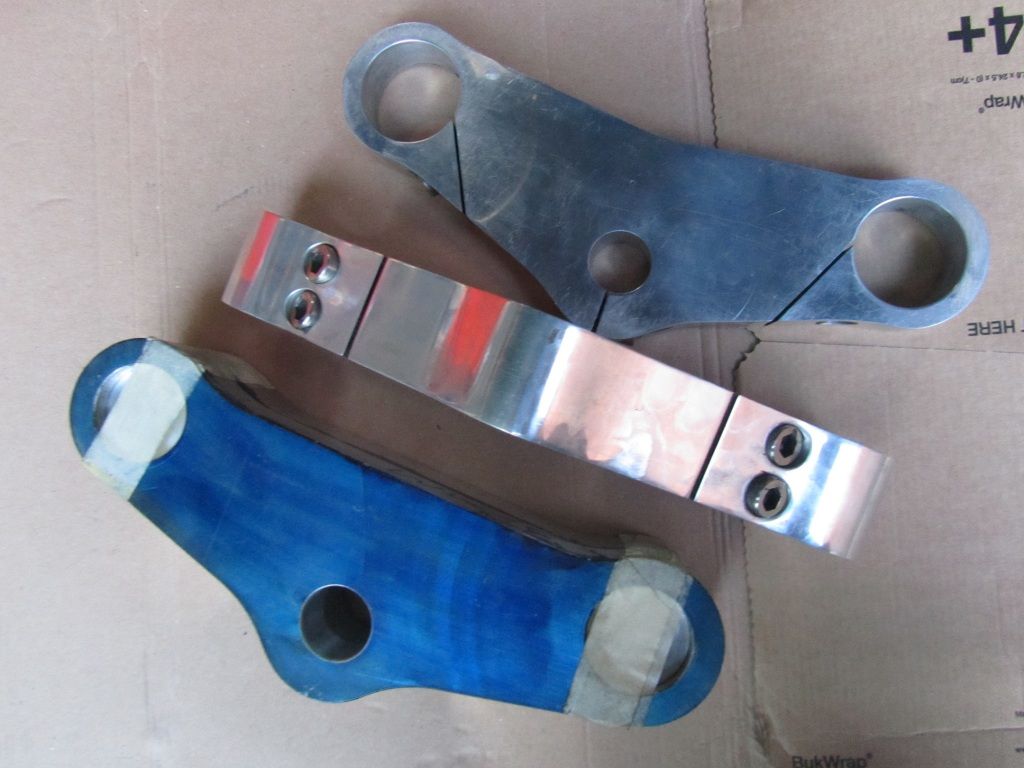
So I raided my mate Jeffs shed and found a couple of unfinished alloy yokes that looked promising. I wanted something a bit retro looking, nothing too thick or angular. A bonus was that both sets of yokes handnt been drilled for risers yet, as I would be fitting clip ons. The top pair in the photo seemed to work best, so I'll have them, and maybe do a bit more machining to make them more interesting and 'cafe racer-ish'..
I'll need to find/make a suitable stem next and then try to find a suitable pair of spoked wheels.. probably 18 inch front and back.
Next I 'borrowed' a mint pair of forks from a 900 Hornet, which I can have if I want them..which I do, as they're the right length, and at 43mm not too big or small for what I'm looking for. They're not adjustable, but thats ok, they'll be far better than those fitted to std Sportster, and they can always be tweaked a bit if they prove to be too soft. The forks came without yokes, which I didnt want to use and of course the stem wouldnt fit in anycase..
So I raided my mate Jeffs shed and found a couple of unfinished alloy yokes that looked promising. I wanted something a bit retro looking, nothing too thick or angular. A bonus was that both sets of yokes handnt been drilled for risers yet, as I would be fitting clip ons. The top pair in the photo seemed to work best, so I'll have them, and maybe do a bit more machining to make them more interesting and 'cafe racer-ish'..
I'll need to find/make a suitable stem next and then try to find a suitable pair of spoked wheels.. probably 18 inch front and back.
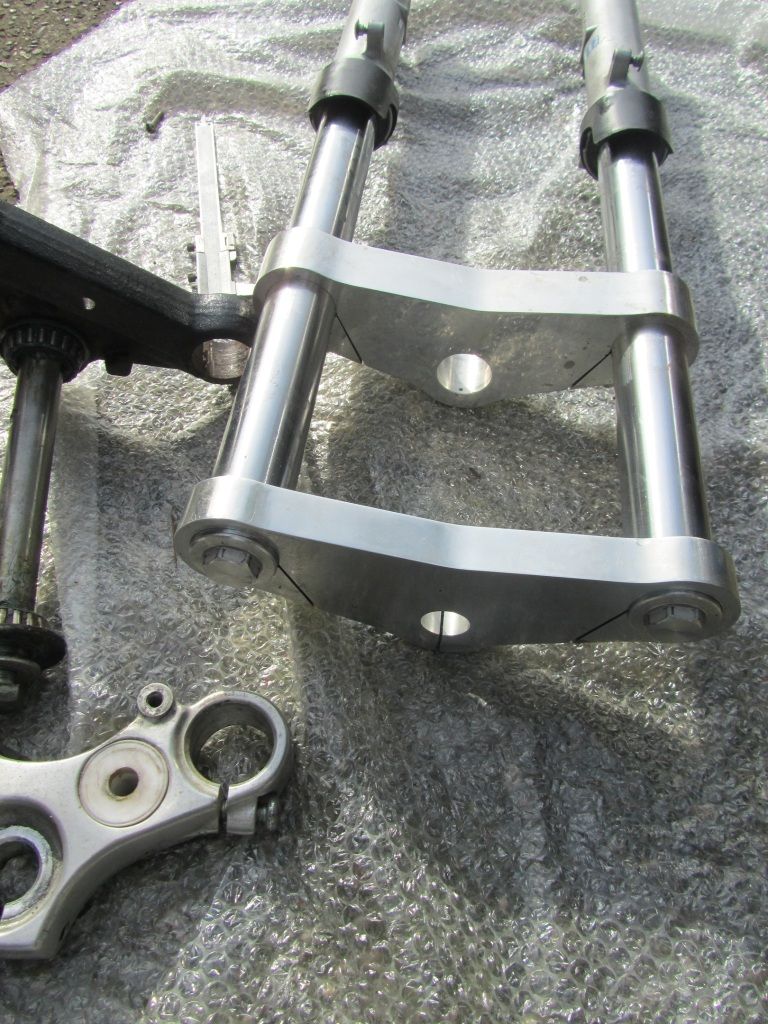
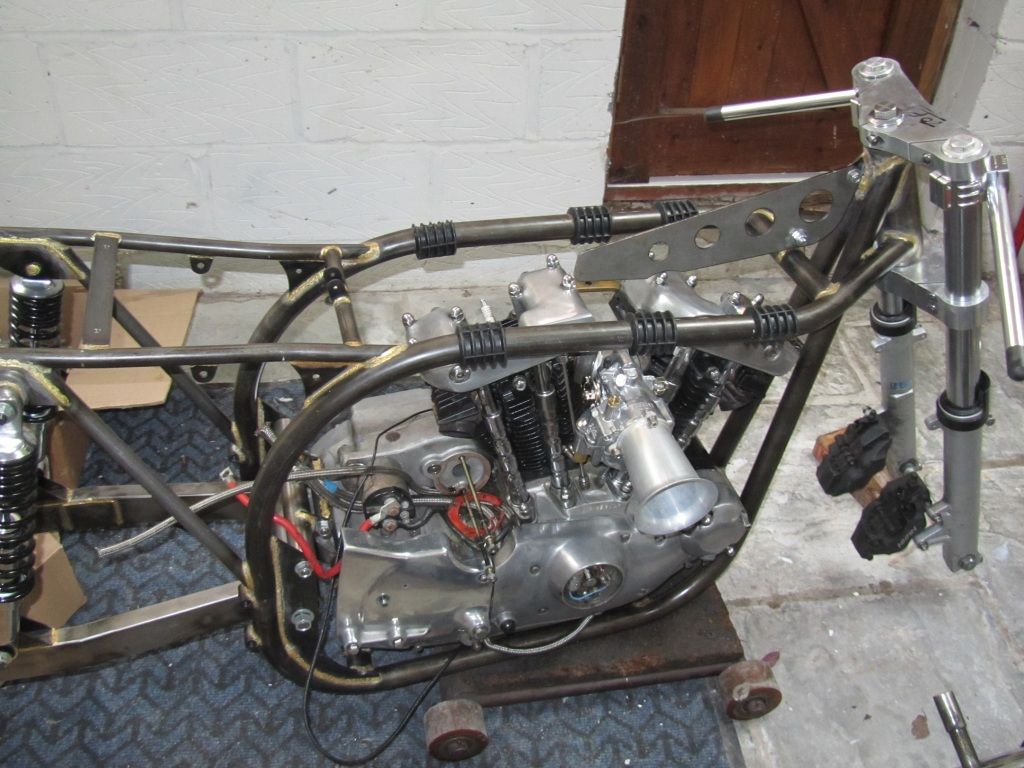
Made a bit more progress yesterday, the forks fit the yokes ok, and I salvaged a steering stem from an old set of Harley evo XL yokes. When I pressed the stem out it was quite badly scored, looks like someone had removed it once before. So far this front end hasnt cost a penny, just swapped a few parts I didnt need for them. Next step is to machine the billet yokes to fit the old stem, then continue the hunt for a good pair of spoked wheels..
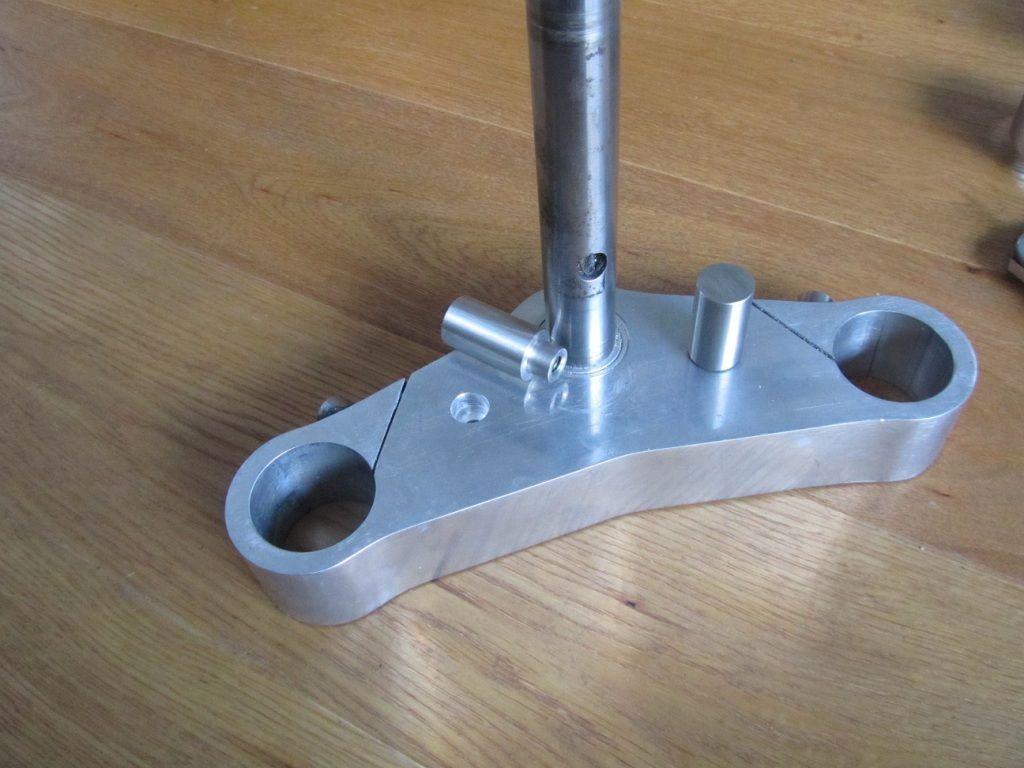
The old stem has now been fitted to the billet yokes, along with a cheap pair of clip ons from the far east, it doesnt look too bad. I havent fitted the lower bearing race yet, as once its on, they tend to want to stay on the stem. The lower yoke will need a bit more work yet, to make steering stops, and a final polish. While the top yoke will need drilling to fit the instruments, when I decide what they will be.
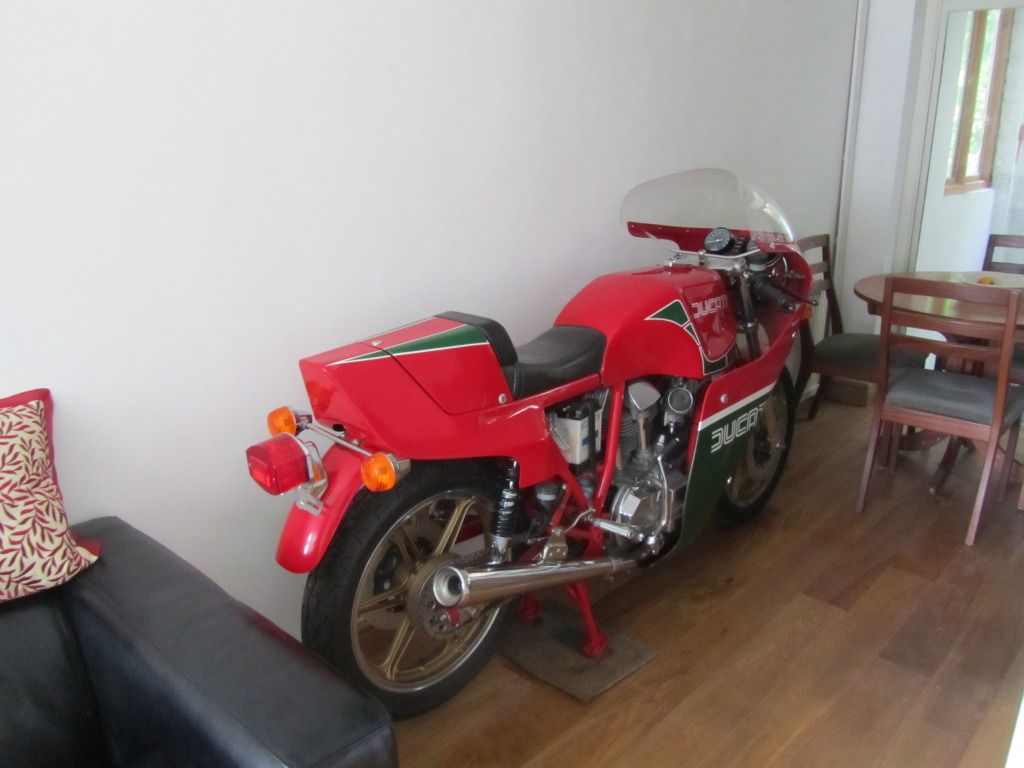
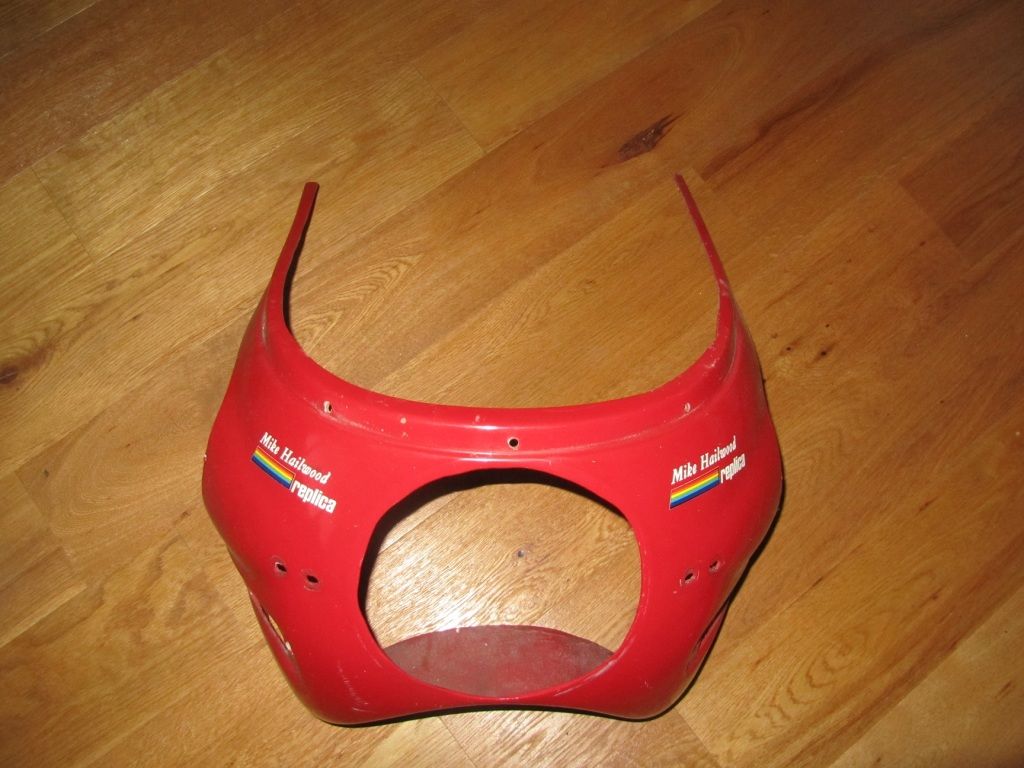
Been busy working on the house recently, so not made much progress with the bikes. One job has been to empty all the junk from my loft, surprised the ceilings didnt give with all the stuff up there. I did find a couple of interesting things though.. first the original fairing from my MHR, been gathering dust up there for about twenty years.. wonder if its worth anything these days..
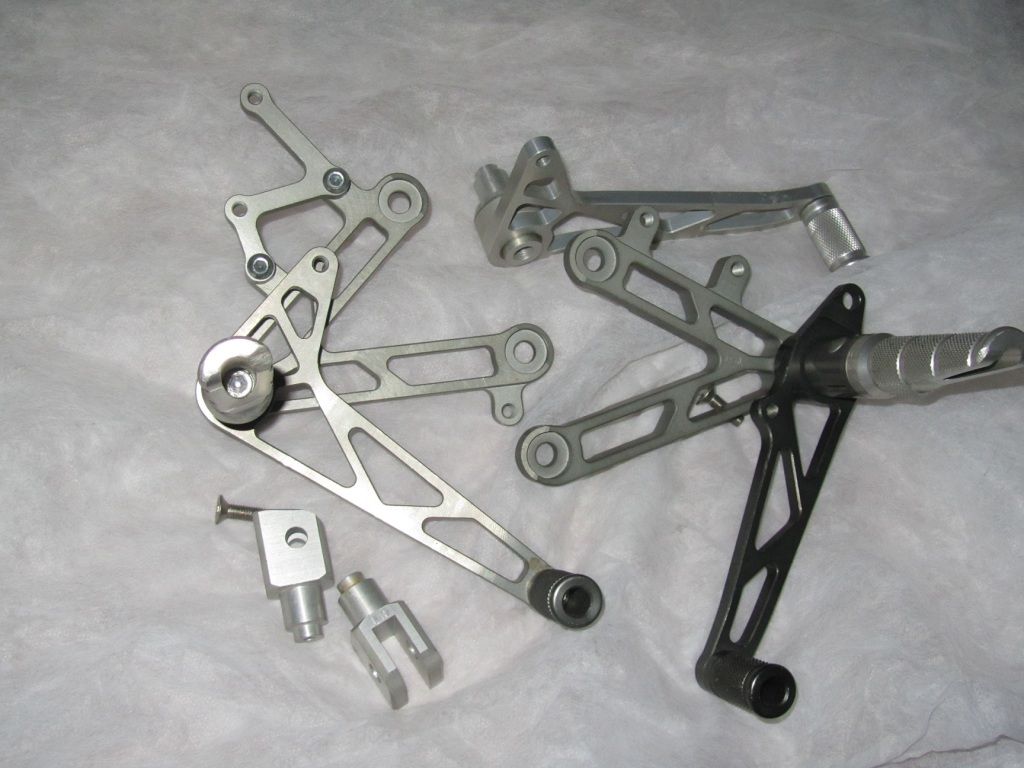
And a small box of spare parts that I was given about ten years ago, they came off a turbo XJR I think. I never really looked at the stuff, just thought, may come in handy one day, and put them away in the loft, then forgot all at about it..
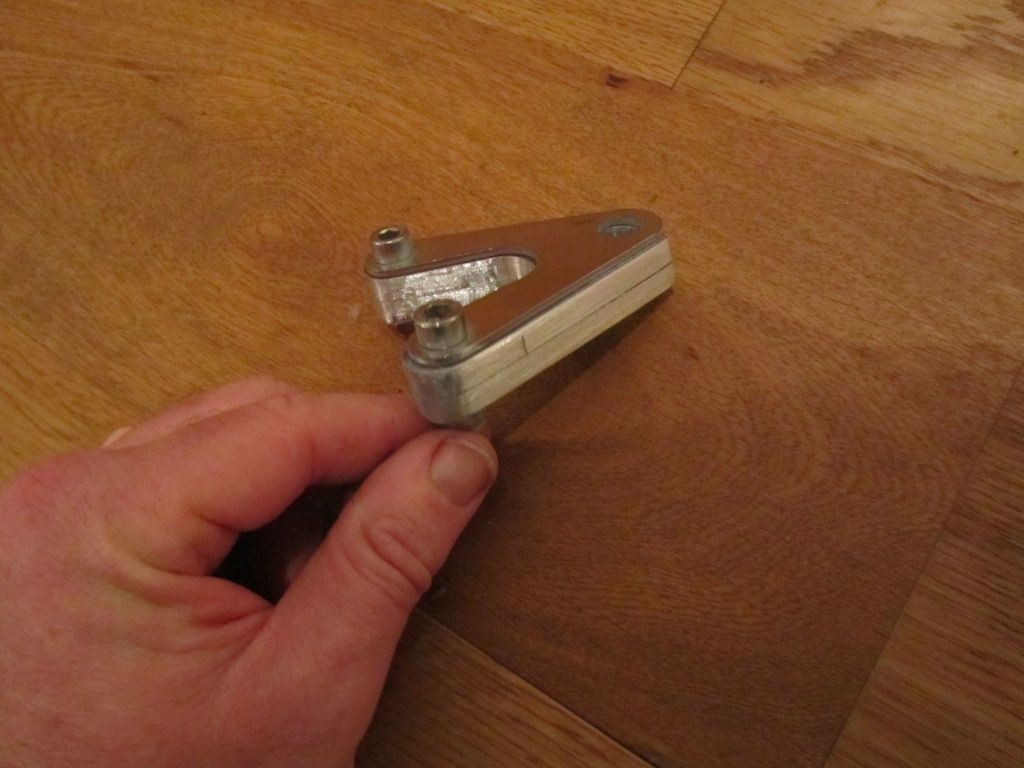
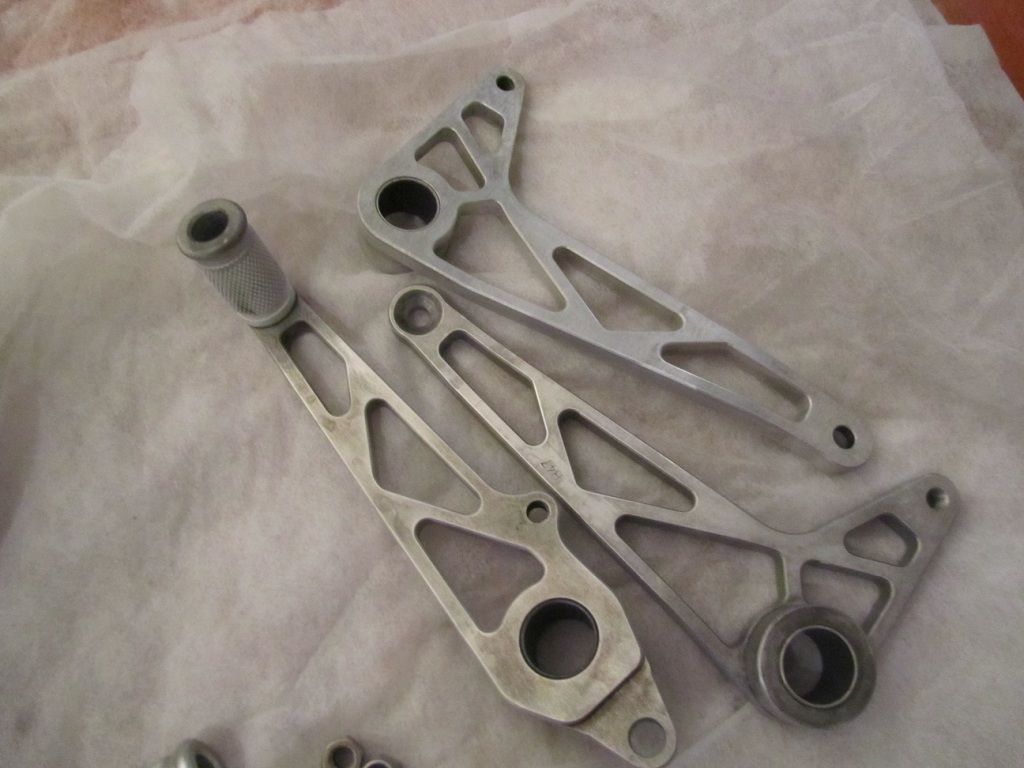
Amongst a few useless bits and bobs, there was a mismatched set of unused LSL rearsets.. turns out there was enough to make up almost a full set, though anodised in different colours. They are nicely made, so I tried the mounting plates on the Norley frame, they dont quite fit, but only by a couple of mm, so with a bit of work I think I can use them. I'll see if the anodising will polish off ok, and if it does, I'll polish the levers and leave the mounting brackets as they are.
And a small box of spare parts that I was given about ten years ago, they came off a turbo XJR I think. I never really looked at the stuff, just thought, may come in handy one day, and put them away in the loft, then forgot all at about it..
Amongst a few useless bits and bobs, there was a mismatched set of unused LSL rearsets.. turns out there was enough to make up almost a full set, though anodised in different colours. They are nicely made, so I tried the mounting plates on the Norley frame, they dont quite fit, but only by a couple of mm, so with a bit of work I think I can use them. I'll see if the anodising will polish off ok, and if it does, I'll polish the levers and leave the mounting brackets as they are.
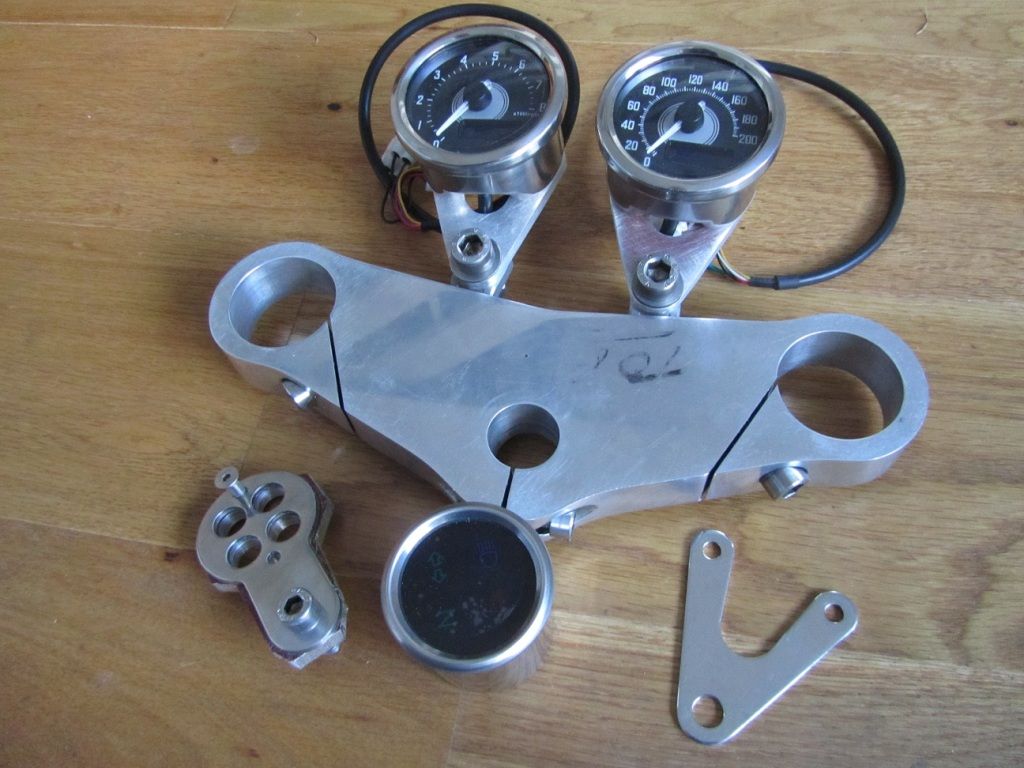
Been busy making mounts for the clocks, as the stainless brackets that came with the clocks didnt look right. I made a cock up when drilling the mounting holes in the underside of the top yoke, I was so intent on making sure I didnt drill all the way through the yoke, that I mistakenly used an 8mm drill bit for the M8 sized holes.. thats too big to allow a thread to be ct using a M8 tap. So as usual when I mess up I went over to see my mate Jeff with my sorry tale and while I drank tea he kindly drilled the holes out a bit more and used helicoil thread inserts to get back to an M8. Well, since I was there, we made a couple of stainless pieces for the steering lock and drilled the lower yoke where I guessed they should go. Cant say for sure, as the frame doesnt have a tab on the headstock, its one of those things I'll have to sort out later. We made them a bit longer than they probably will need to be, that way they can be machined down a bit if needed, once everything is together on the bike.
I made the new brackets from an offcut of alloy plate, using the original to trace out the shape and drill the three holes in each. Then it was a case of hacksawing out the shape and spending a long time with a file and wet and dry to get a reasonable finish.Still need to pretty it up, but its doesnt look too bad so far. I've still to make the idiot light bracket, which is a bit more complex, so far I've drilled all the holes and cut out the shape I need roughly with the hacksaw. Wish I had use of Jeffs miller, it would be much quicker and neater, but its in use all week, making a blower manifold for the drag bike..
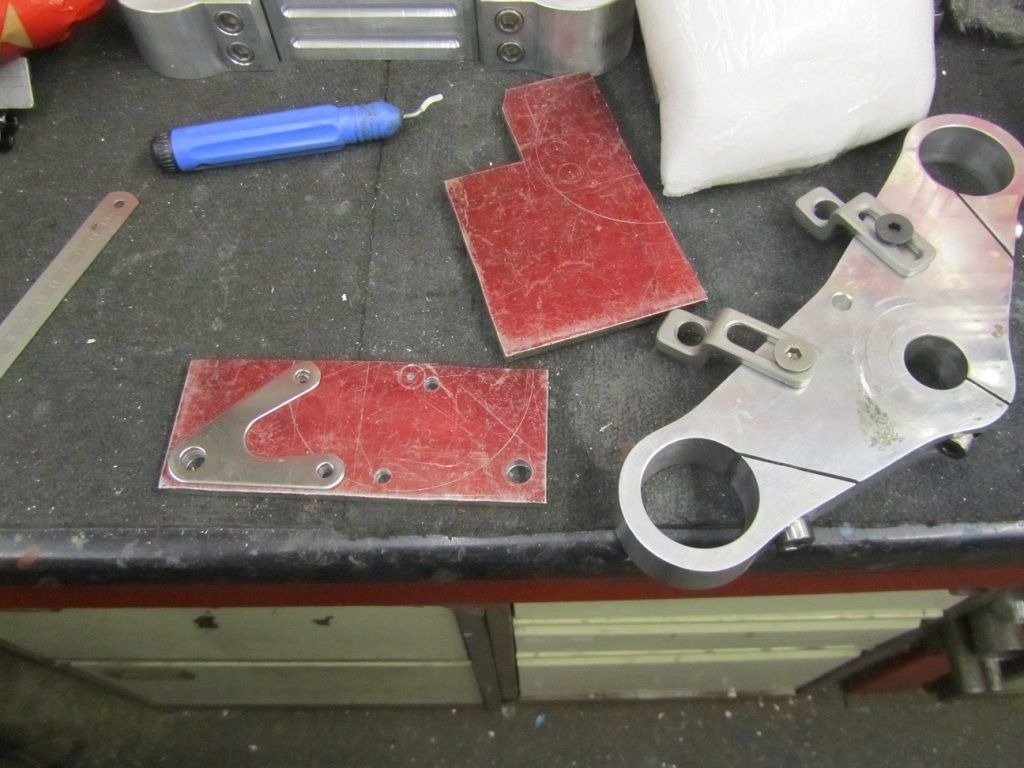
I made the new brackets from an offcut of alloy plate, using the original to trace out the shape and drill the three holes in each. Then it was a case of hacksawing out the shape and spending a long time with a file and wet and dry to get a reasonable finish.Still need to pretty it up, but its doesnt look too bad so far. I've still to make the idiot light bracket, which is a bit more complex, so far I've drilled all the holes and cut out the shape I need roughly with the hacksaw. Wish I had use of Jeffs miller, it would be much quicker and neater, but its in use all week, making a blower manifold for the drag bike..
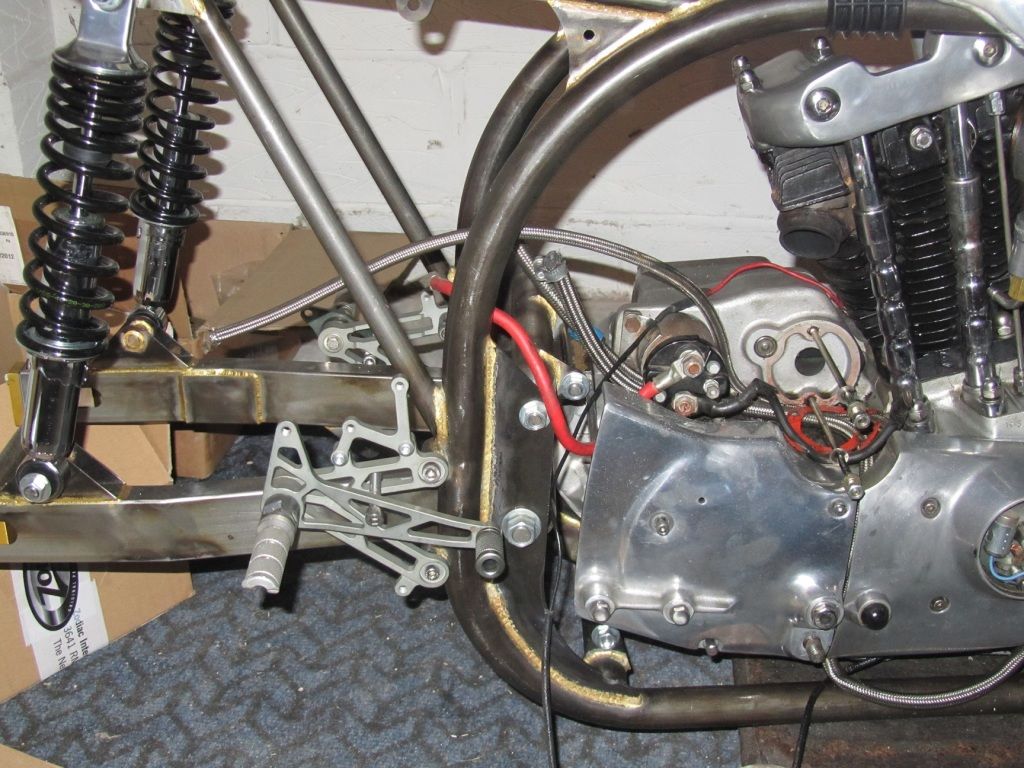
I've modded the rearset mounts slightly, so they fit ok now, they are quite away back, but think they'll be ok in use. I've tried an old Nissin and a Brembo master cylinder but neither fit the mount on the brake mount. May have to make a new bracket, but would be better if I could keep the original.
The gearchange linkage will be interesting to do, as I dont want to use the same style as on Buells and XR1200s, I want something neater with the linkage rod below the pegs and not above.
But first, time for chemistry experiment, a solution of Caustic soda, vinegar as a neutraliser, and a few mismatched alloy parts that I want to remove the anodising from...
what could go wrong?
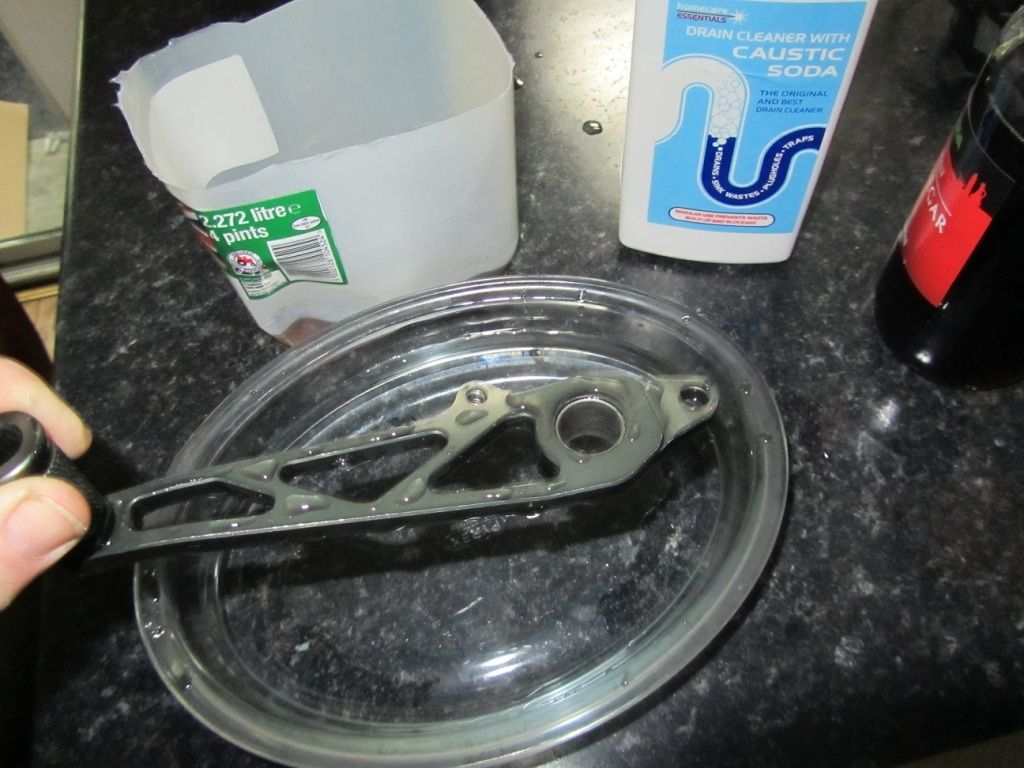
Lots of fizzing and bubbles..erm, somat is happening..
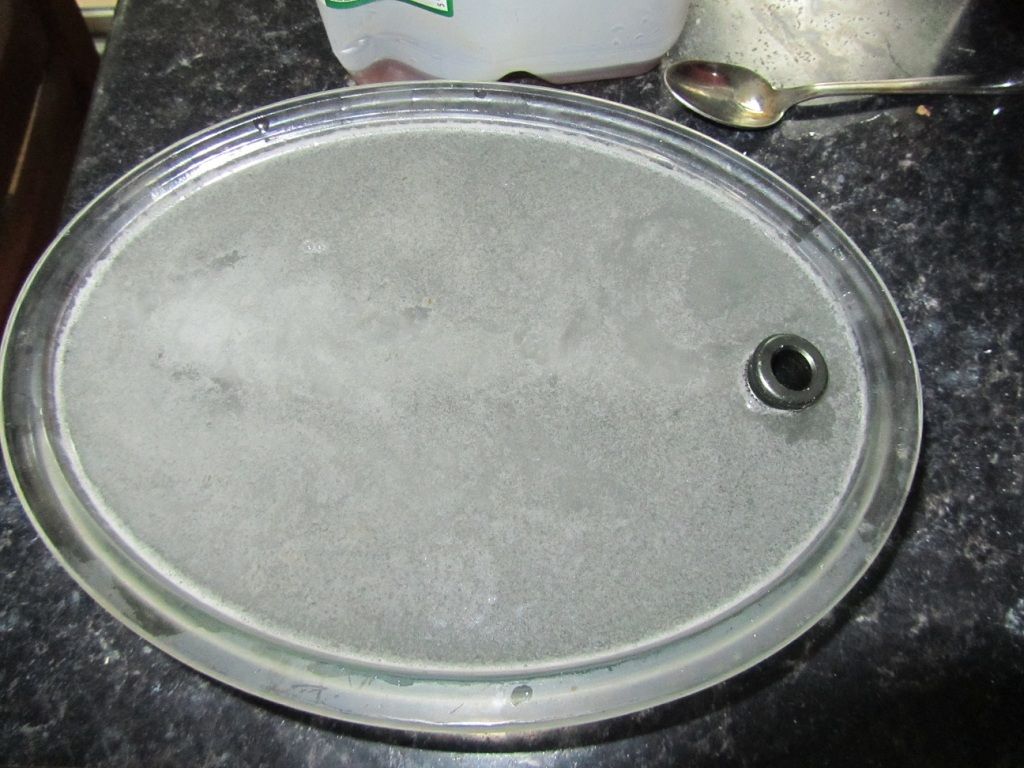
Half an hour later and a wash down... not too bad..
I'll polish them now.. oh, and todays lesson, next time I use caustic soda, I'll follow the instructions and wear gloves
The gearchange linkage will be interesting to do, as I dont want to use the same style as on Buells and XR1200s, I want something neater with the linkage rod below the pegs and not above.
But first, time for chemistry experiment, a solution of Caustic soda, vinegar as a neutraliser, and a few mismatched alloy parts that I want to remove the anodising from...
what could go wrong?
Lots of fizzing and bubbles..erm, somat is happening..
Half an hour later and a wash down... not too bad..
I'll polish them now.. oh, and todays lesson, next time I use caustic soda, I'll follow the instructions and wear gloves
 :
:Oh,I'm no engineer, but I like to try to make stuff, and when I get stuck, I've got a couple of mates who usually get my out of the hole I've dug for myself.
This is a project one of them has been working on for about ten years.. started life as a 78 Z1000.. its all made in a shed for not a lot of money.. the styling is dated now, but the engineering is impressive.. one off injection system, superchsarged, 8 plug heads, mono shocked and a lot more...
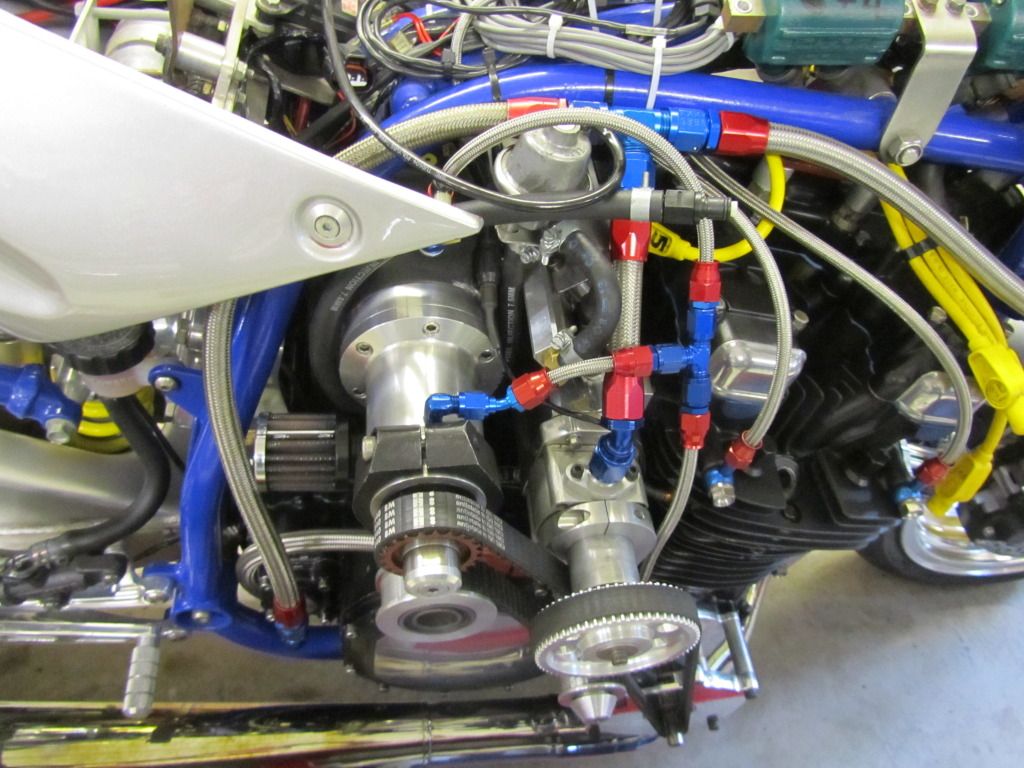
http://youtu.be/ZUSoGDy4x3s
This is a project one of them has been working on for about ten years.. started life as a 78 Z1000.. its all made in a shed for not a lot of money.. the styling is dated now, but the engineering is impressive.. one off injection system, superchsarged, 8 plug heads, mono shocked and a lot more...
http://youtu.be/ZUSoGDy4x3s
I thought I'd tell you about a couple of the kind of problems you have when building a special on a budget, a Heinz 57, trying to make parts fit together which werent made to.
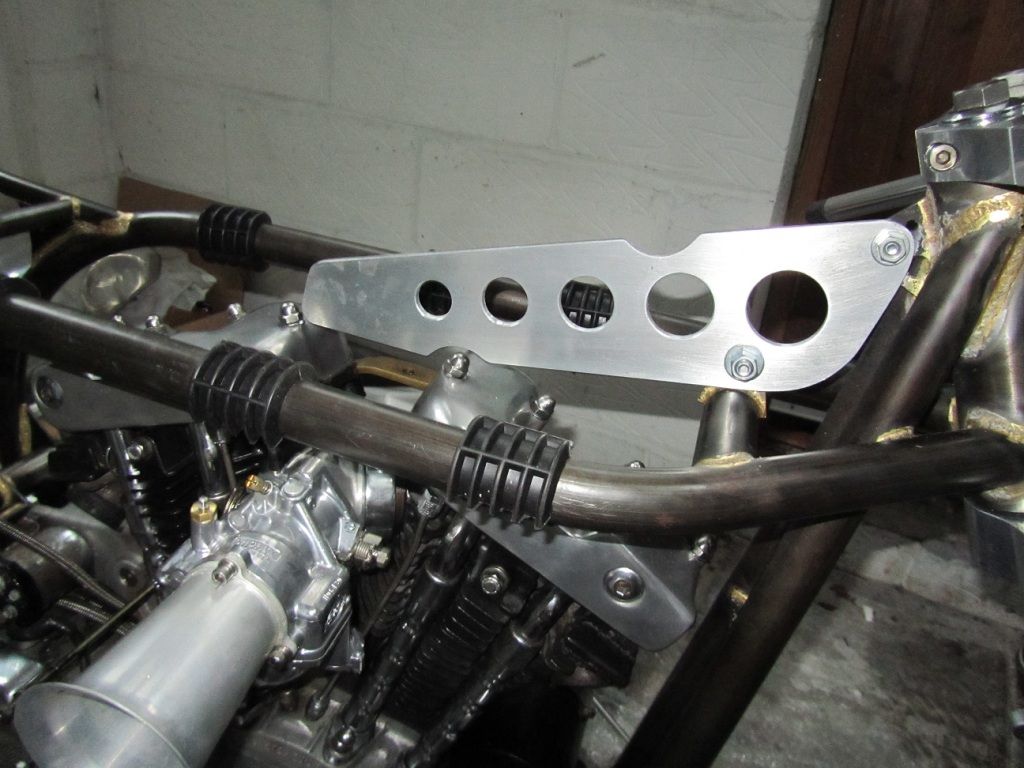
The first job this week was to do something about the head steady which lives beneath the tank and is used to hold the top motor mount. On a std Harley this is a hefty bracket hanging down from the frame top tube. With the Norton frame, it has to take the form of a long bracket bolted on the back of the headstock. I had cut a chunk out of this long bracket, to clear the underside of the tank. I made a bit of mistake as I ended up moving the tank forward slightly, which meant the cut out ended up being a lot bigger and uglier than I had intended. The bracket would no doubt to its job fine, but it looked a bit flimsy to me, so I decided to make a replacement in ally, which would be lighter and stronger, and look better one I'd polished it.
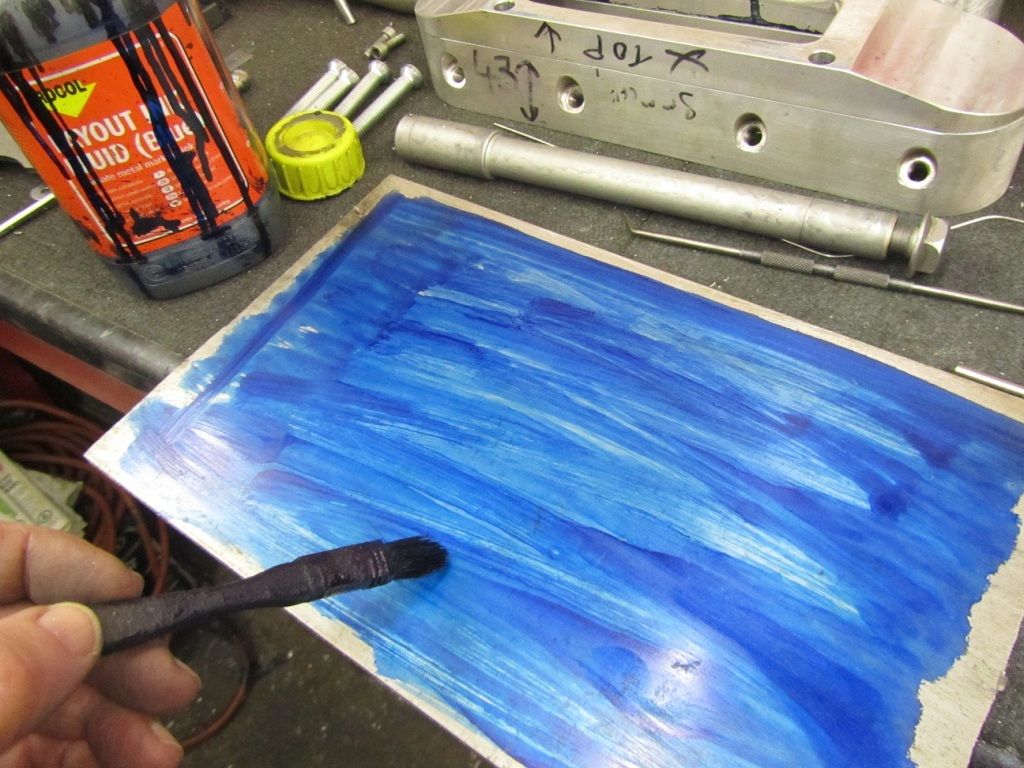
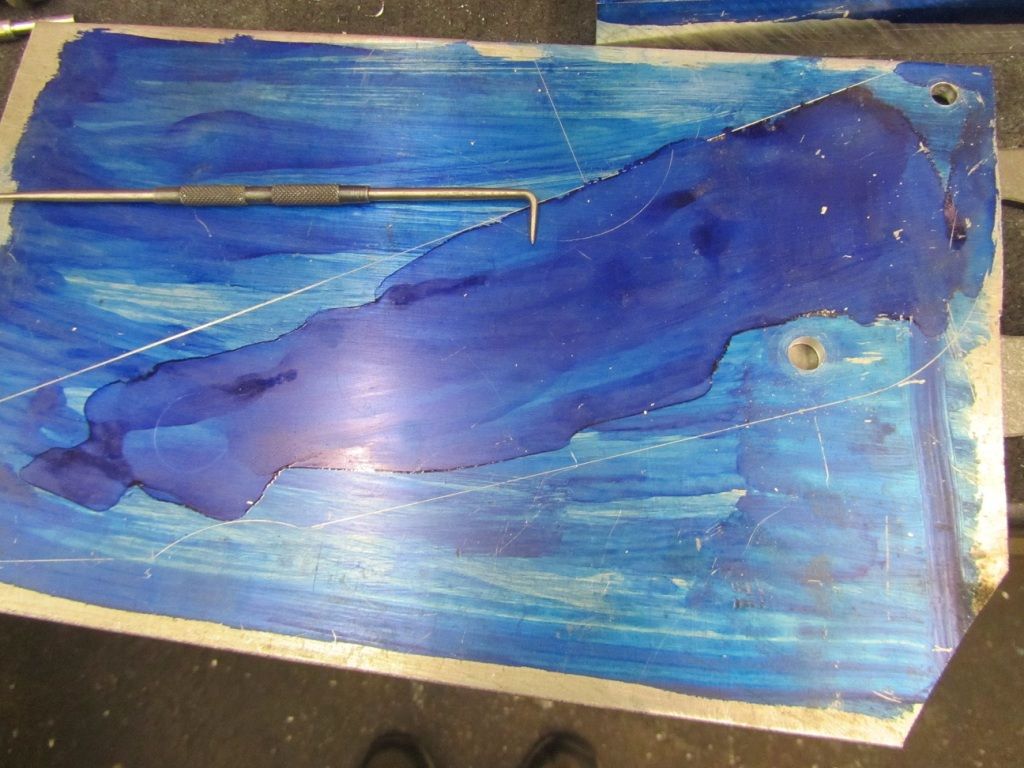
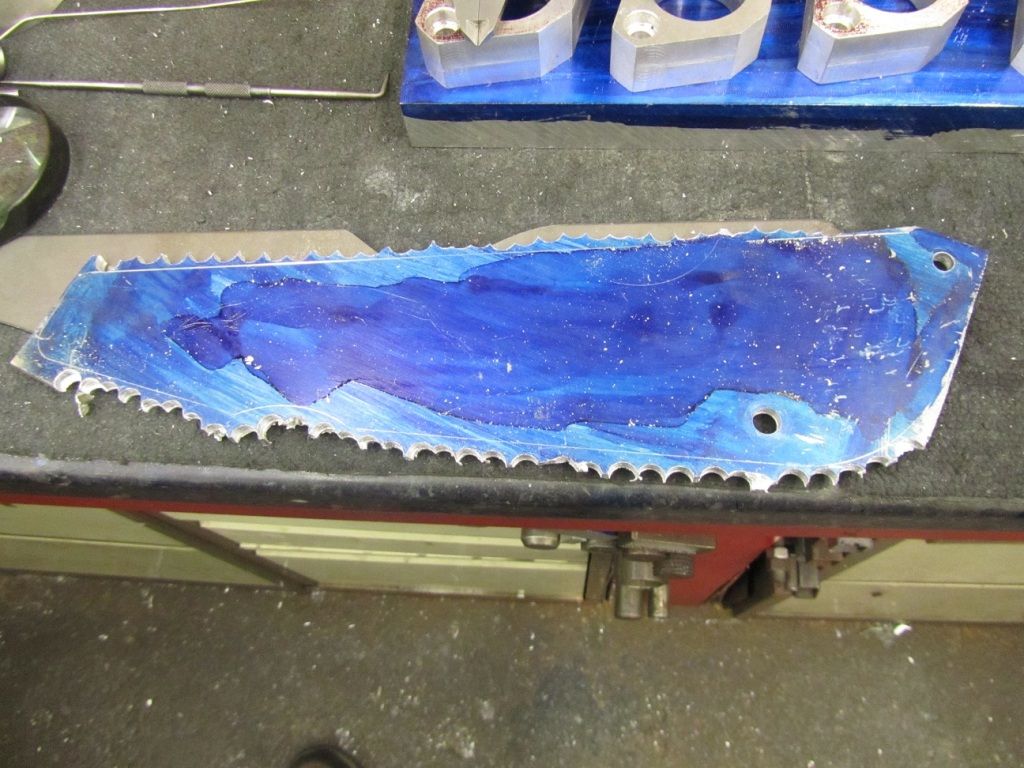
To begin, I went over to my mates workshop and liberated a suitable piece of scrap 6mm aircraft spec alloy. Between cups of tea, I painted the alloy with 'Engineers blue', which is a quick drying dye, then marked out the shape of the old bracket with a scribe. Next I drilled the two mounting holes, as these would give me a datum point to work from. Basically its a lot easier to drill all the key holes before you begin to cut and shape the alloy.
Cutting out the shape in the plate with a hacksaw is far too much like hardwork, so I chain drilled it instead, its a lot easier to do if you have access to a piller drill, though you can use a hand drill..
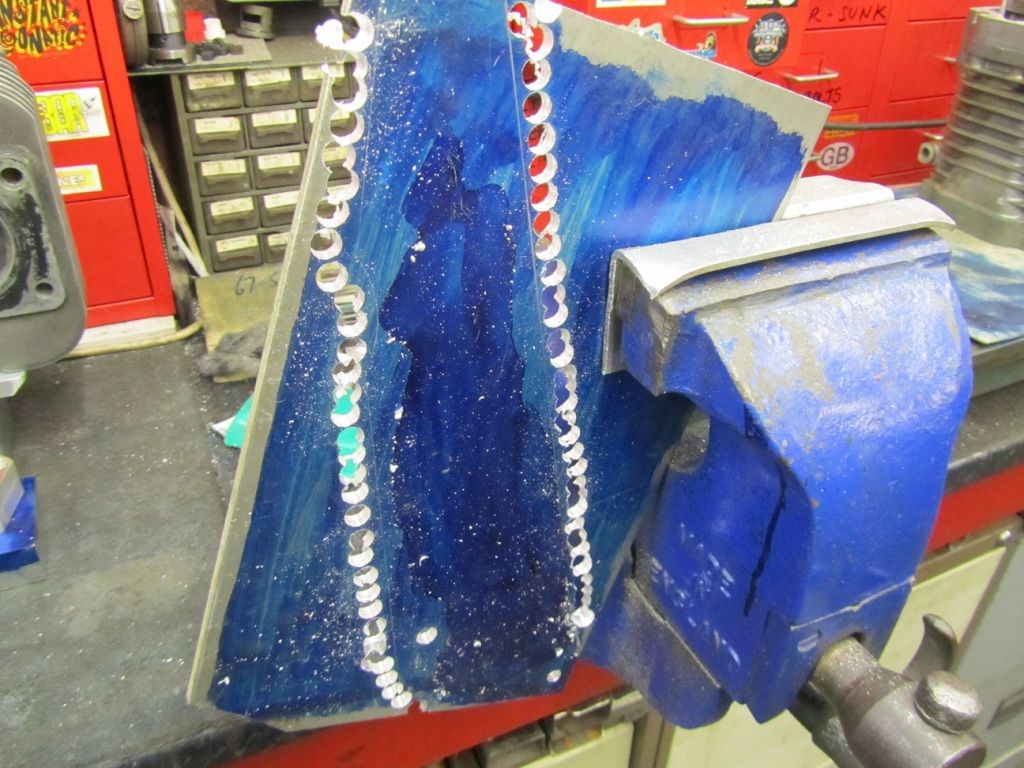
That done it didnt take long to 'join the dots' and cut out the bracket..
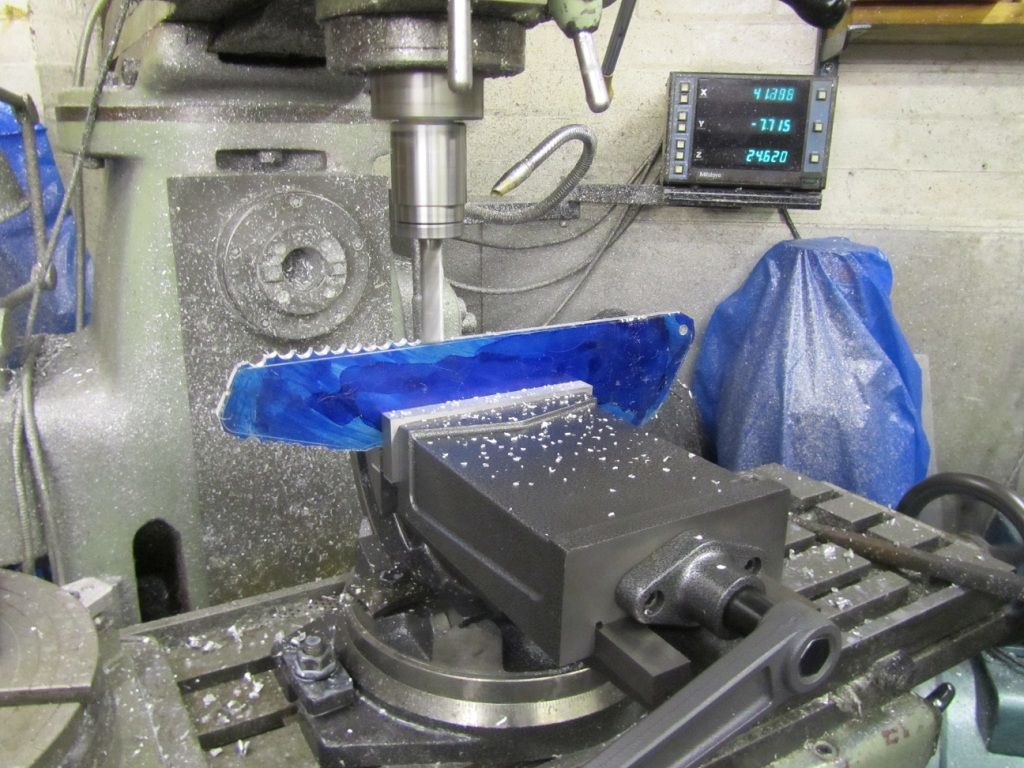
If I was in my garage, I'd be faced with hours of filing to slowly clean up the edges and make it look respectable. But my mate Jeff has a milling machine in the corner of his workshop, so we used it to cut a neat straight line in a couple of minutes. We could have used the miller to cut the corners too, but it would take too long to set the miller up to do that, so I rounded the corners with a file.
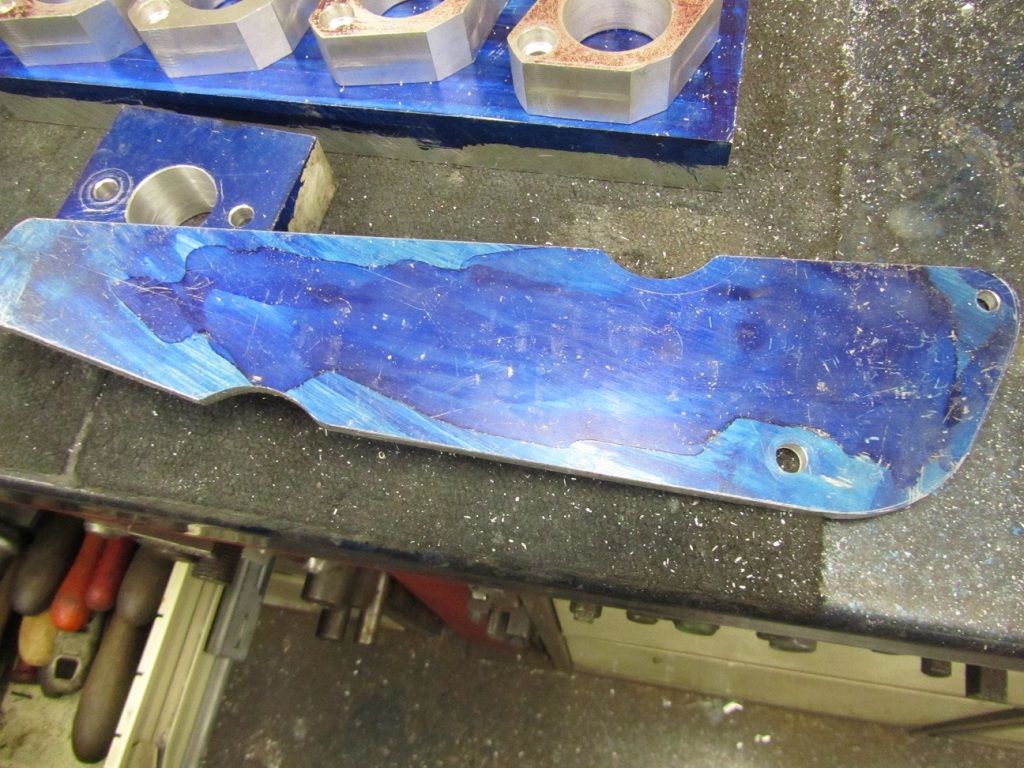
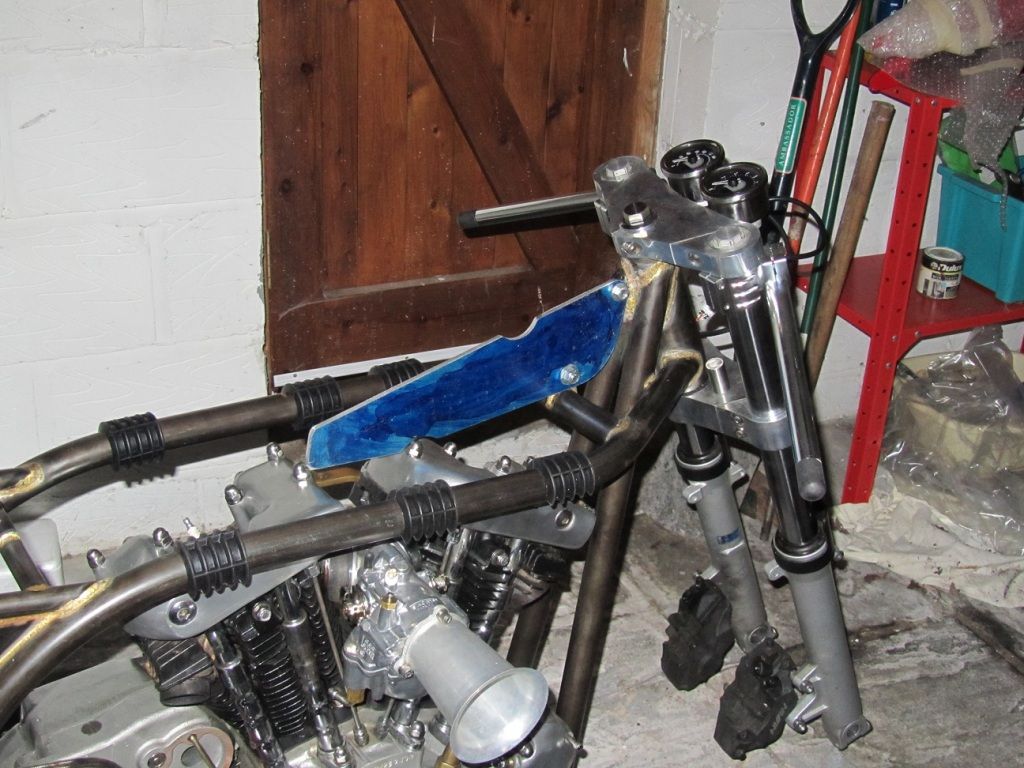
At this point, I stopped as I wanted to go home and check it fit ok, before doing anymore work. Luckily it did, so the next job is to drill some 'cafe racerish' holes to lighten it. The original had four holes, which was a faux pas, as it'll always look better with an odd number of holes, is the case for any repeated pattern. I've marked out a new pattern of five holes, and I'll go over to Jeff's place soon to drill them, then it'll just need an hour or two with wet and dry and a final polish and it'll be done.
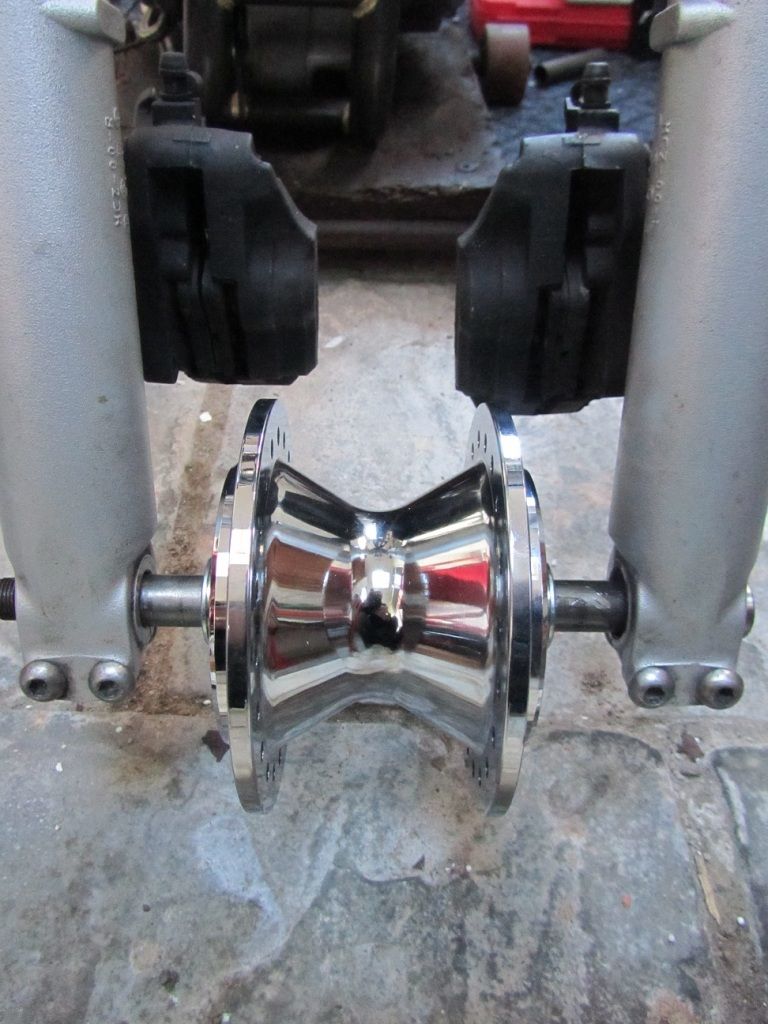
My next task is to sort out the front spindle and spacers. The Honda front end uses a 20mm spindle, while the new Harley twin disc hub I just bought uses a 3/4 inch spindle, which is about 19 mm. Now I could try to find new bearings, but that'll cost money, so instead I'm going to machine an old Harley 3/4 inch spindle to fit the Honda forks, I couldnt use the Honda spindle as its hollow and reducing its diameter isnt a good idea. Jap bike parts are made as light as practical, without much extra meat, whereas Harley stuff is made out of pig iron lol.
When I was playing around with my new shiny hubs (I'm going to have a go at lacing them myself, using stainless spokes and alloy Morad 18 inch rims.. when I can afford them), I noticed a future problem, the Nissin calipers will hit the spokes. So I'll have to move them out a bit or maybe try a different set of calipers, which in turn means having to make spacers to move the discs out.. Oh well, keeps me busy..
The first job this week was to do something about the head steady which lives beneath the tank and is used to hold the top motor mount. On a std Harley this is a hefty bracket hanging down from the frame top tube. With the Norton frame, it has to take the form of a long bracket bolted on the back of the headstock. I had cut a chunk out of this long bracket, to clear the underside of the tank. I made a bit of mistake as I ended up moving the tank forward slightly, which meant the cut out ended up being a lot bigger and uglier than I had intended. The bracket would no doubt to its job fine, but it looked a bit flimsy to me, so I decided to make a replacement in ally, which would be lighter and stronger, and look better one I'd polished it.
To begin, I went over to my mates workshop and liberated a suitable piece of scrap 6mm aircraft spec alloy. Between cups of tea, I painted the alloy with 'Engineers blue', which is a quick drying dye, then marked out the shape of the old bracket with a scribe. Next I drilled the two mounting holes, as these would give me a datum point to work from. Basically its a lot easier to drill all the key holes before you begin to cut and shape the alloy.
Cutting out the shape in the plate with a hacksaw is far too much like hardwork, so I chain drilled it instead, its a lot easier to do if you have access to a piller drill, though you can use a hand drill..
That done it didnt take long to 'join the dots' and cut out the bracket..
If I was in my garage, I'd be faced with hours of filing to slowly clean up the edges and make it look respectable. But my mate Jeff has a milling machine in the corner of his workshop, so we used it to cut a neat straight line in a couple of minutes. We could have used the miller to cut the corners too, but it would take too long to set the miller up to do that, so I rounded the corners with a file.
At this point, I stopped as I wanted to go home and check it fit ok, before doing anymore work. Luckily it did, so the next job is to drill some 'cafe racerish' holes to lighten it. The original had four holes, which was a faux pas, as it'll always look better with an odd number of holes, is the case for any repeated pattern. I've marked out a new pattern of five holes, and I'll go over to Jeff's place soon to drill them, then it'll just need an hour or two with wet and dry and a final polish and it'll be done.
My next task is to sort out the front spindle and spacers. The Honda front end uses a 20mm spindle, while the new Harley twin disc hub I just bought uses a 3/4 inch spindle, which is about 19 mm. Now I could try to find new bearings, but that'll cost money, so instead I'm going to machine an old Harley 3/4 inch spindle to fit the Honda forks, I couldnt use the Honda spindle as its hollow and reducing its diameter isnt a good idea. Jap bike parts are made as light as practical, without much extra meat, whereas Harley stuff is made out of pig iron lol.
When I was playing around with my new shiny hubs (I'm going to have a go at lacing them myself, using stainless spokes and alloy Morad 18 inch rims.. when I can afford them), I noticed a future problem, the Nissin calipers will hit the spokes. So I'll have to move them out a bit or maybe try a different set of calipers, which in turn means having to make spacers to move the discs out.. Oh well, keeps me busy..

This is the first time I've seen this thread and hats off to you and to your mate Jeff who keeps helping you out.
I keep thinking about all the engineering facilities I have access to and how to start building a bespoke bike.... this thread hasn't helped

I look forward to more updates
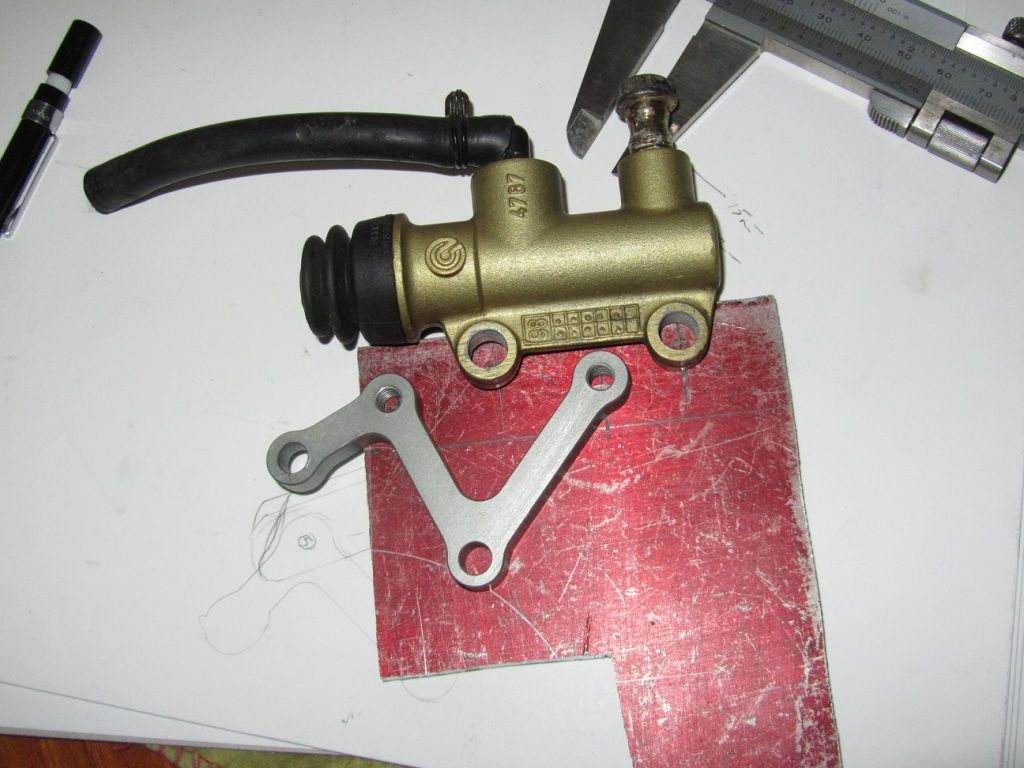
The Ironhead now has a genuine Ducati part  .. a Brembo rear master cylinder from a Monster. It was free and cleaned up ok, so I made a simple bracket to fit it to the LSL rearsets. I marked out where the holes should go, drilled them with my trusty hand drill, then hacksawed out the basic shape before cleaning it up with a file. Still want to do a bit more work on it, but itw as minus 2 in the garage with no heating, so that can wait for a warmer day..
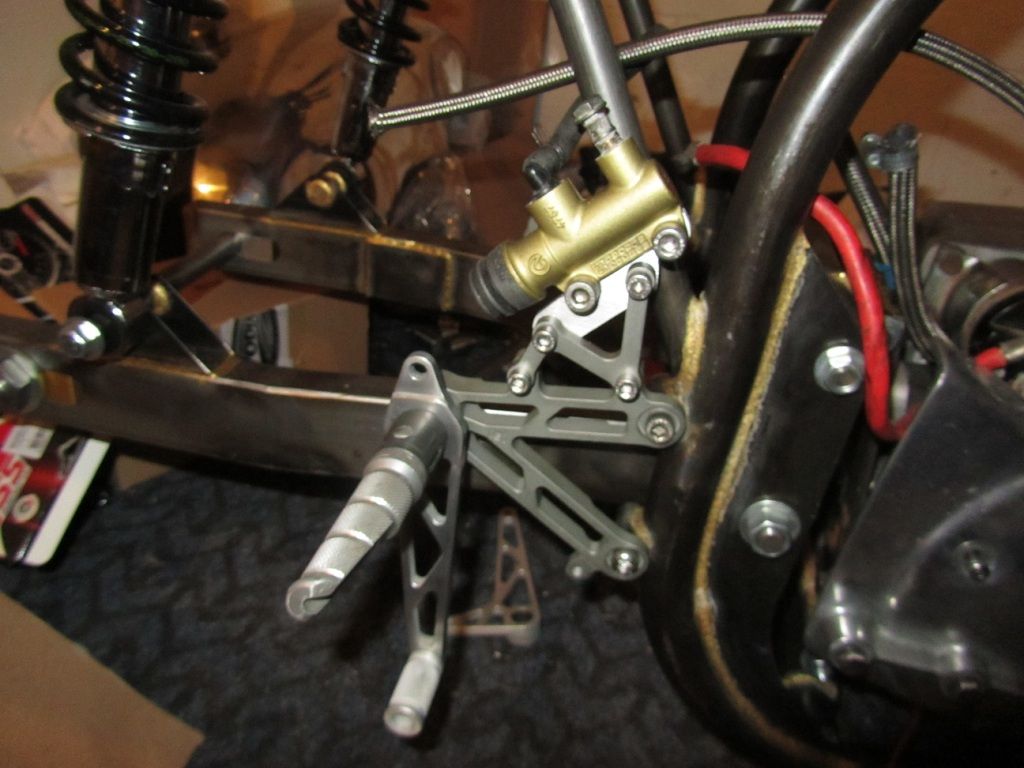
I've also made a stainless link rod for the gearchange, I think it'll work ok, but with the pegs being so far back the link rod has to be long too, dont really like it, but not sure what else to do. It may not be so noticable when the bike is on its wheels..
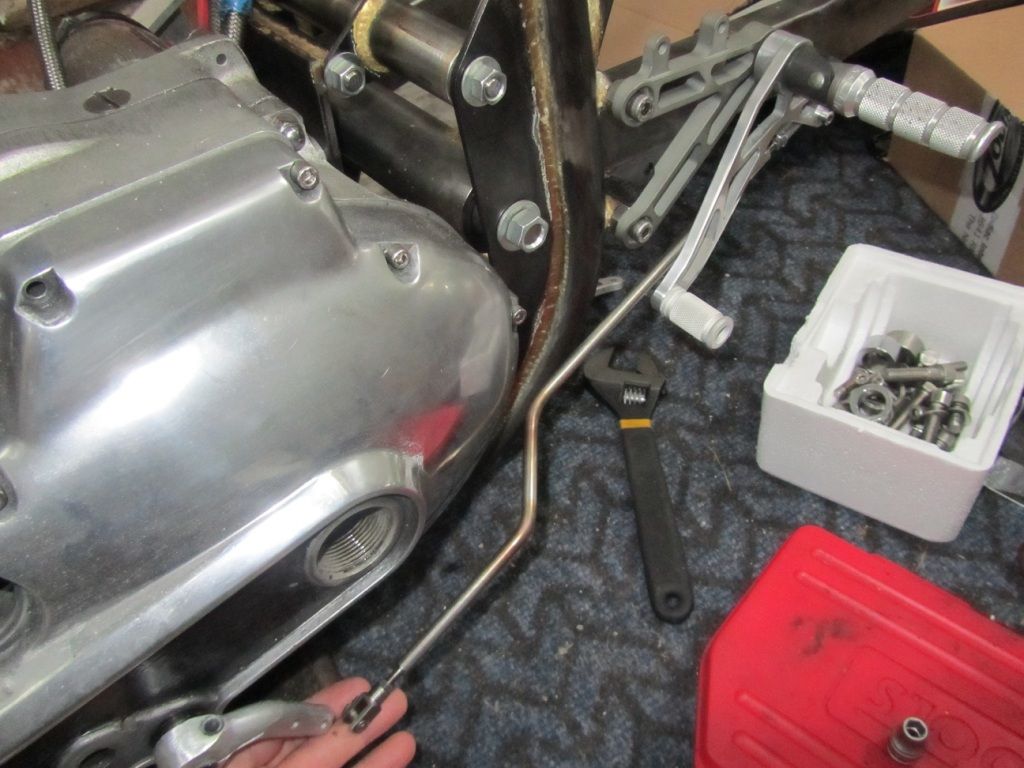
.. a Brembo rear master cylinder from a Monster. It was free and cleaned up ok, so I made a simple bracket to fit it to the LSL rearsets. I marked out where the holes should go, drilled them with my trusty hand drill, then hacksawed out the basic shape before cleaning it up with a file. Still want to do a bit more work on it, but itw as minus 2 in the garage with no heating, so that can wait for a warmer day..I've also made a stainless link rod for the gearchange, I think it'll work ok, but with the pegs being so far back the link rod has to be long too, dont really like it, but not sure what else to do. It may not be so noticable when the bike is on its wheels..
Gassing Station | Biker Banter | Top of Page | What's New | My Stuff