Kawasaki GT550 rebuild
Discussion


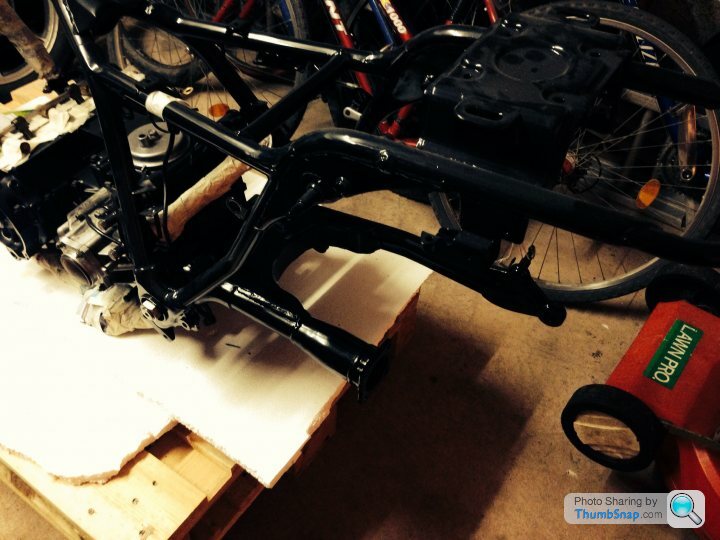
A major step forward: the engine sitting in the frame. The frame tubes are wrapped in several layers of masking tape and newspaper to ensure the paint woulld not be damaged when I lifted the engine in. The engine is not fixed but is sitting on the tubes with a polystyrene block underneath.
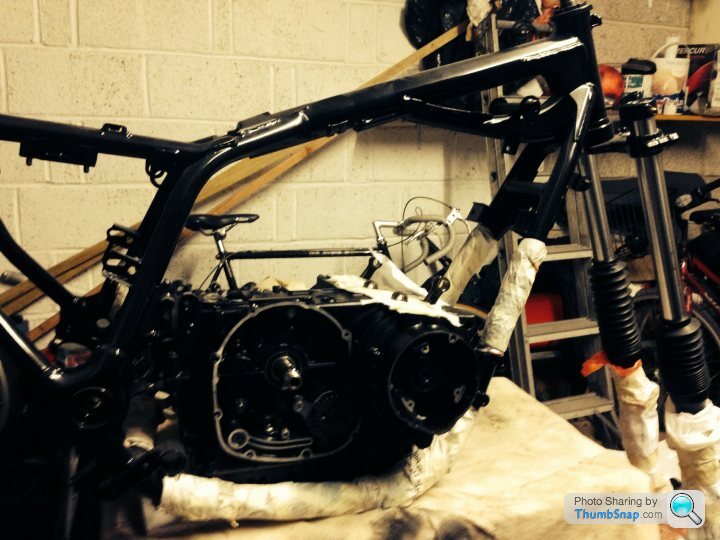
The masking tape around the con rods is there to prevent anything falling into the crankcases. It might be some time before the barrels are fitted.

The masking tape around the con rods is there to prevent anything falling into the crankcases. It might be some time before the barrels are fitted.
Edited by Gareth9702 on Monday 30th June 09:22

Gareth9702 said:
Thanks for the kind comments. I have been adding to the thread without knowing if anyone else was interested. The GT550 is not the world's most exciting motorcycle! I have not seen the GT550 feature but will make sure I find it.
A GT550 took a friend and me on my first South if France trip, so I do have a soft spot for them...If you cant find the mag, drop me a PM, ill post you mine.
Thanks for the very kind offer, but I now have the June 2014 Classic Motorcycle Mechanics. My bike has been well used and has been roughly painted and repainted several times. The pictures will be a useful guide to what it should look like.
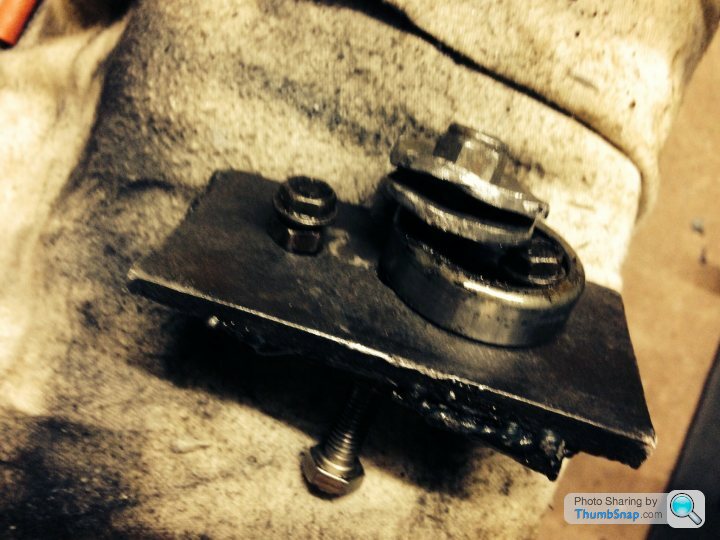
The GT550 is quite a simple bike compared to more modern machines. Even so, there are times when I am surprised by the number of components. These are the engine mounting brackets, rubber bushes, washers, bolts, and nuts. The rear lower bushes and bolt are already fitted.
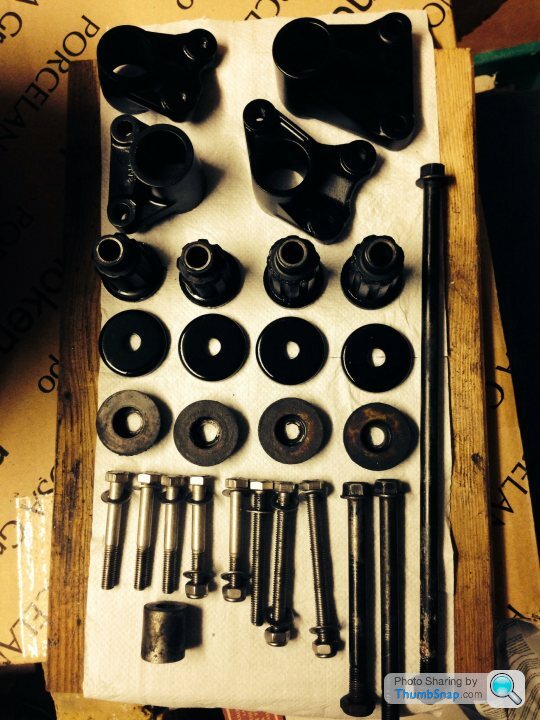
The GT550 is quite a simple bike compared to more modern machines. Even so, there are times when I am surprised by the number of components. These are the engine mounting brackets, rubber bushes, washers, bolts, and nuts. The rear lower bushes and bolt are already fitted.
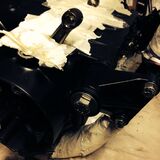
The front engine mountings in place. With the engine sat on the polystyrene block these only needed the frame to be lifted slightly to meet the engine. All the bolts have been replaced with stainless. I am fortunate to have a very good local supplier. For the very first time since pulling the bike apart I now believe that it will eventually become a functioning motorcycle again.

And the rear mountings in place. The next task is to lift the frame and engine off the bench before it gets too heavy.


And the rear mountings in place. The next task is to lift the frame and engine off the bench before it gets too heavy.
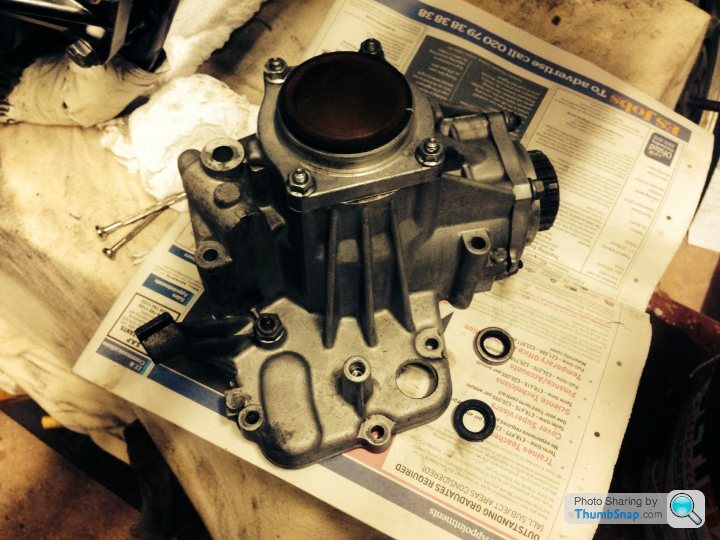
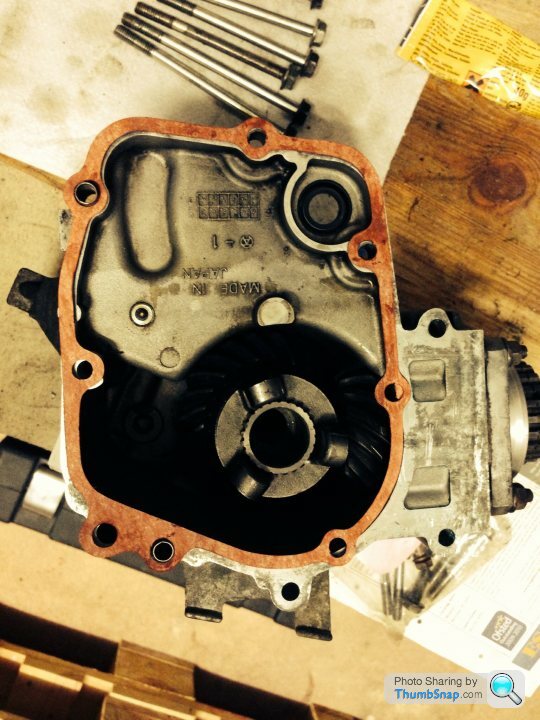
I want to get the bike onto its wheels before finishing the build of the engine. This means that the drive shaft has to be fitted then the swing arm. The first step is the bevel drive gear. This is basically two gears at right-angles. I intended to dismantle this but the workshop manual advised against doing so. It seemed to be in good order so I did no more than give it a good clean and change the gear change oil seal.
A long time with no updates due to work commitments and a hold-up in the rebuild. The gasket for the bevel drive arrived so this was fitted along with the drive shaft.

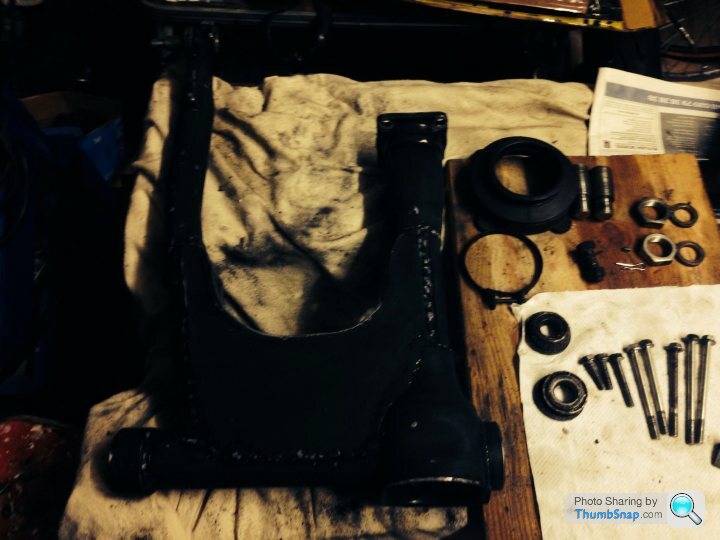
The next part should have been easy: repaint swing arm, add new bearings, and fit to frame. The old bearings were the worst I have seen with rusty cages and roller- shaped grooves in the outer rings. New bearings were obtained from my local bearing supplier.
The hold-up came when I tried to remove the old bearing rings.
One side was easy with room to put a suitable socket behind the outer ring and then use a simple flat plate and bolt to draw the ring out.

The other side had no access with a blanking plate inside the swing arm. This made it necessary to fabricate a puller. This had to push through the outer ring, and then turn through ninety degrees to grip on the millimetre of overlap of the outer ring. After several attempts this was the one that finally worked in action.

And success as the outer ring is free.
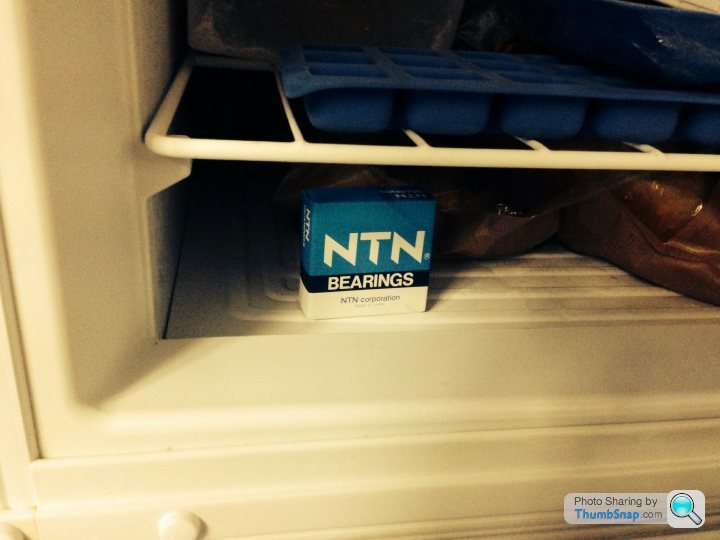
The next step is to freeze the new bearings and drive them into place.
The other side had no access with a blanking plate inside the swing arm. This made it necessary to fabricate a puller. This had to push through the outer ring, and then turn through ninety degrees to grip on the millimetre of overlap of the outer ring. After several attempts this was the one that finally worked in action.
And success as the outer ring is free.
The next step is to freeze the new bearings and drive them into place.
This bike has been rebuilt at least once before, and some bits have the appearance of having been restored many times. But underneath the many rough layers of paint the bike is completely sound and worth the effort.
Progress is now being made again. The swing arm bearings were frozen and easily driven into place.
With the outer rings in place painting has begun.
Progress is now being made again. The swing arm bearings were frozen and easily driven into place.
With the outer rings in place painting has begun.
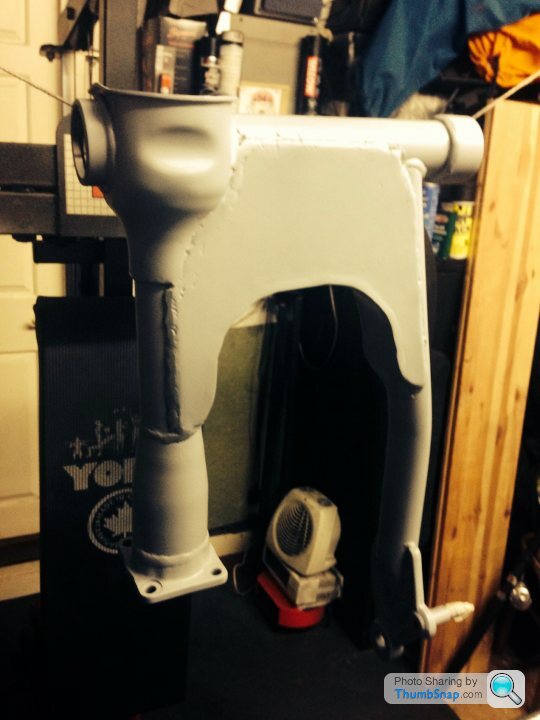
I am very pleased to see the swing arm in place after the difficulties with the bearings. New paint, new bearings, and plenty of grease.
I decided the bike was worth rebuilding because it is the perfect commuter. After all this work I agree that it will be too good to use for commuting. A paradox that will not need resolving for a long time given my rate of progress.
I decided the bike was worth rebuilding because it is the perfect commuter. After all this work I agree that it will be too good to use for commuting. A paradox that will not need resolving for a long time given my rate of progress.


When I inspected the differential I could see that it had started to leak oil through the main seal. I separated the main components, and then found the bearing on the output shaft was in need of replacement. The case of the input shaft also had a fracture. At this stage it seemed easiest to buy a replacement. For £25 one was delivered by eBay. On inspection this had a chip out of the case and a cross-threaded stud. The solution was to combine the old case (on the left) with the new internals (on the right). Add new seals and o-rings and everything will be perfect.


There is a GT 550 on eBay at the moment for £2495. Perhaps there is some point to this rebuild! Seriously, it is hard to imagine anyone would pay that price.
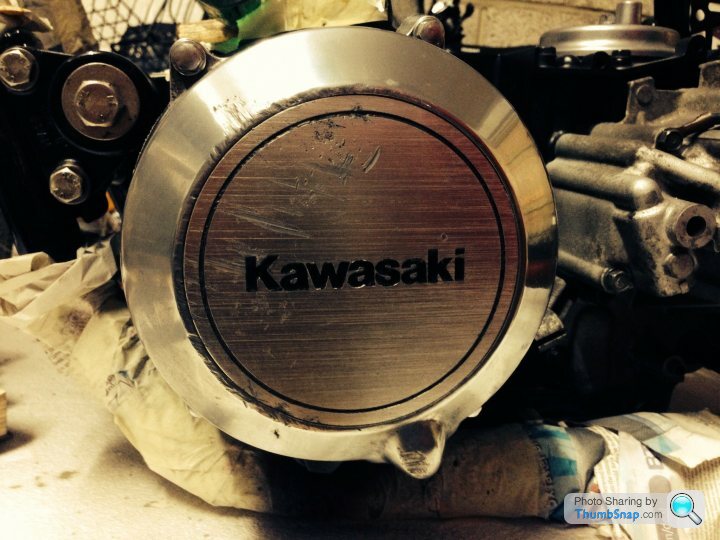
I am quite pleased with the result of painting the lettering on the alternator cover. I can do nothing about the scratches from previous owners throwing it down the road, but at least it now has Kawasaki in clear black lettering and a nice black circle around the edge.
I collect some o-rings tomorrow and can then rebuild the differential.
Gassing Station | Biker Banter | Top of Page | What's New | My Stuff