Kawasaki GT550 rebuild
Discussion


One side was easy with room to put a suitable socket behind the outer ring and then use a simple flat plate and bolt to draw the ring out.

The other side had no access with a blanking plate inside the swing arm. This made it necessary to fabricate a puller. This had to push through the outer ring, and then turn through ninety degrees to grip on the millimetre of overlap of the outer ring. After several attempts this was the one that finally worked in action.

And success as the outer ring is free.
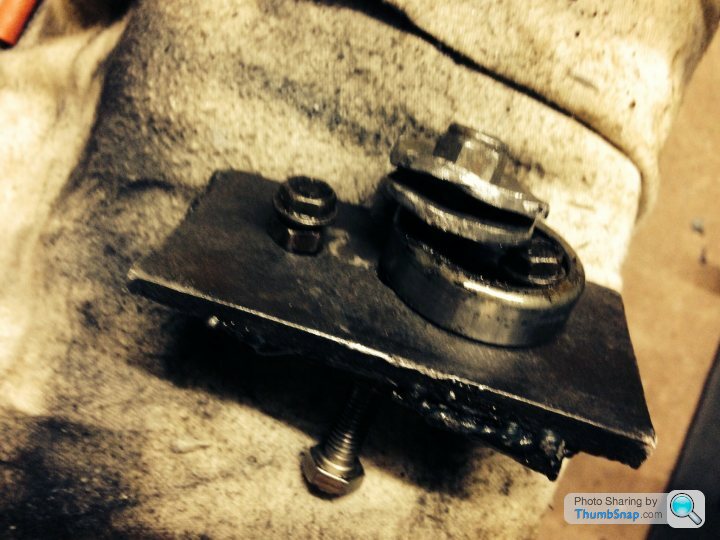
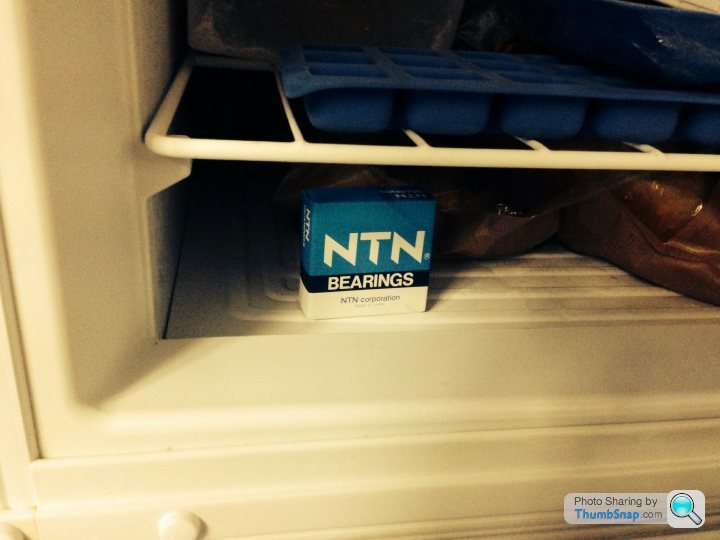
The next step is to freeze the new bearings and drive them into place.
The other side had no access with a blanking plate inside the swing arm. This made it necessary to fabricate a puller. This had to push through the outer ring, and then turn through ninety degrees to grip on the millimetre of overlap of the outer ring. After several attempts this was the one that finally worked in action.
And success as the outer ring is free.
The next step is to freeze the new bearings and drive them into place.
This bike has been rebuilt at least once before, and some bits have the appearance of having been restored many times. But underneath the many rough layers of paint the bike is completely sound and worth the effort.
Progress is now being made again. The swing arm bearings were frozen and easily driven into place.
With the outer rings in place painting has begun.
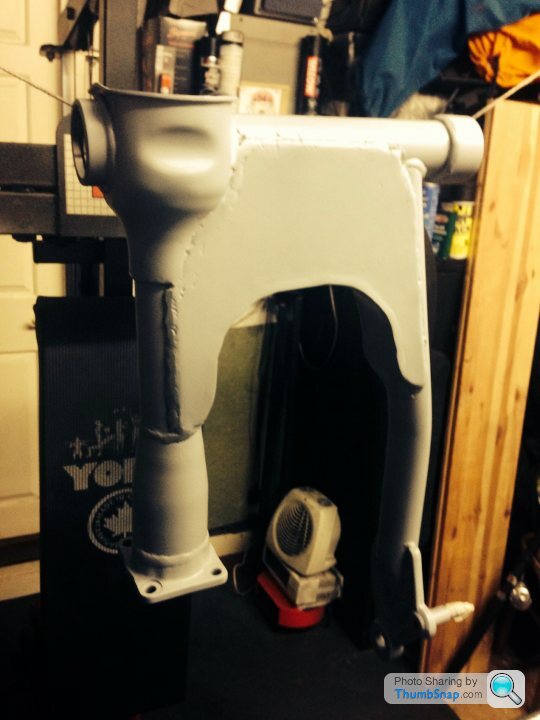
Progress is now being made again. The swing arm bearings were frozen and easily driven into place.
With the outer rings in place painting has begun.
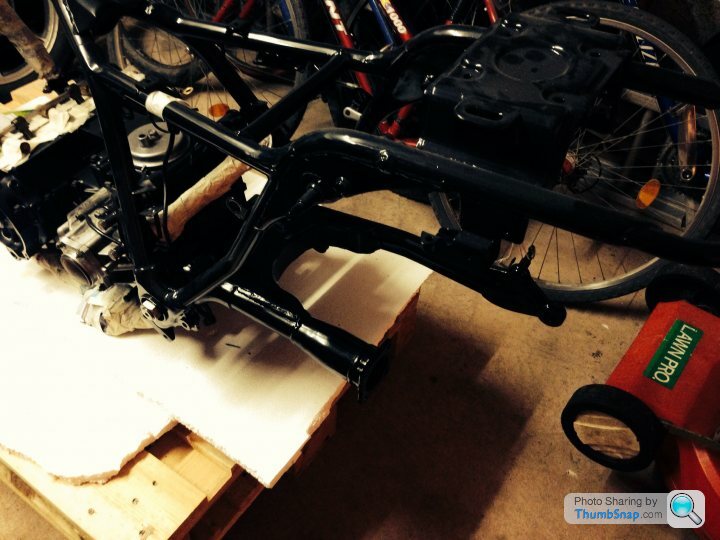
I am very pleased to see the swing arm in place after the difficulties with the bearings. New paint, new bearings, and plenty of grease.
I decided the bike was worth rebuilding because it is the perfect commuter. After all this work I agree that it will be too good to use for commuting. A paradox that will not need resolving for a long time given my rate of progress.
I decided the bike was worth rebuilding because it is the perfect commuter. After all this work I agree that it will be too good to use for commuting. A paradox that will not need resolving for a long time given my rate of progress.


When I inspected the differential I could see that it had started to leak oil through the main seal. I separated the main components, and then found the bearing on the output shaft was in need of replacement. The case of the input shaft also had a fracture. At this stage it seemed easiest to buy a replacement. For £25 one was delivered by eBay. On inspection this had a chip out of the case and a cross-threaded stud. The solution was to combine the old case (on the left) with the new internals (on the right). Add new seals and o-rings and everything will be perfect.

There is a GT 550 on eBay at the moment for £2495. Perhaps there is some point to this rebuild! Seriously, it is hard to imagine anyone would pay that price.
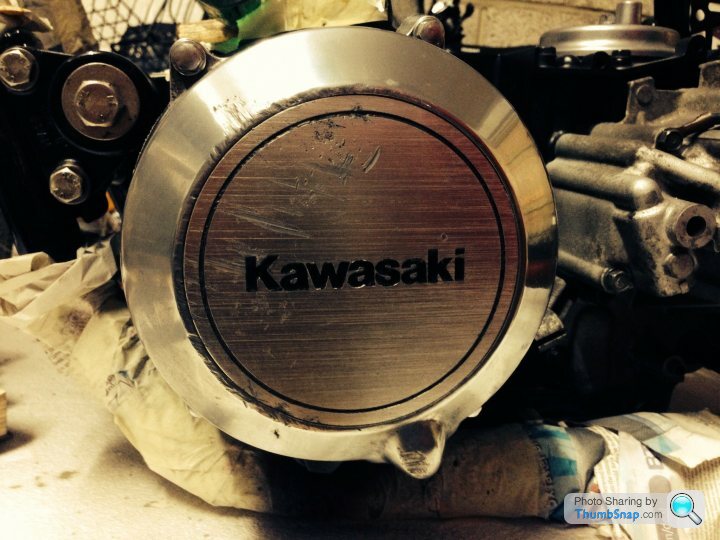
I am quite pleased with the result of painting the lettering on the alternator cover. I can do nothing about the scratches from previous owners throwing it down the road, but at least it now has Kawasaki in clear black lettering and a nice black circle around the edge.
I collect some o-rings tomorrow and can then rebuild the differential.
New o-rings and oil seals were sourced by the ever-helpful Jenna at Premier Power Products, including this 100+mm diameter oddity. The differential housing was painted and then rebuilt. It would have been good to use new bearings but it did not look possible to gain access to the bearings without the services of a transmission specialist to separate the components. The parts I used seemed perfect and it is not too difficult to change the differential if anything should go wrong. In fact, referring to the "chain versus shaft" debate on Biker Banter, it is easier to change this differential than to change a chain.

Time to restart the thread after a break for summer. In response to the previous post, I took the head off with the engine in the frame so it must be possible to reverse the process.
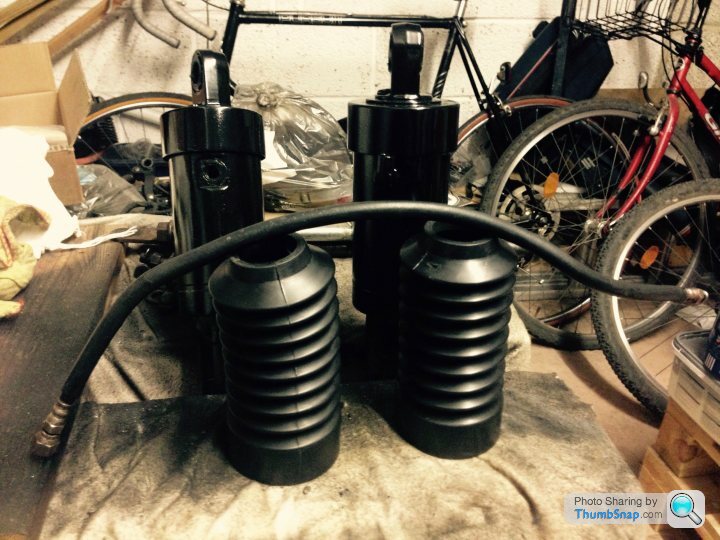
The rear shocks followed the fitment of the differential. It would be easy to buy new but the air shocks are an important part of the GT 550 look. So, the rubber gaiters were removed and the body of the shocks prepared and painted. The bushes were new about 3000 miles ago so these were not changed. The balance pipe was cleaned as well as possible.
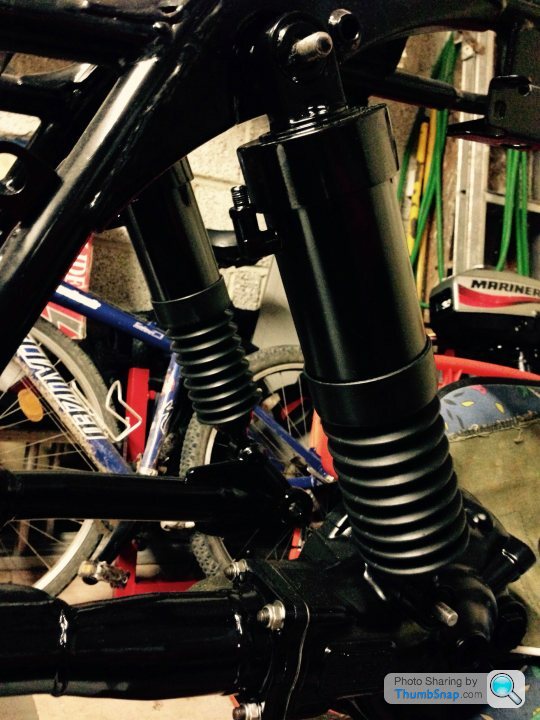
The gaiters were slid back on and the shocks refitted. The bike is almost ready to go back on its wheels.
The rear shocks followed the fitment of the differential. It would be easy to buy new but the air shocks are an important part of the GT 550 look. So, the rubber gaiters were removed and the body of the shocks prepared and painted. The bushes were new about 3000 miles ago so these were not changed. The balance pipe was cleaned as well as possible.
The gaiters were slid back on and the shocks refitted. The bike is almost ready to go back on its wheels.
It should be up and running by the summer. The only major jobs left are the head and the carburettors. I will be removing all the valves and doing some work on the ports. This will take time.
After the shocks I fitted the starter motor. A number of loose cables are starting to appear because I do not want to fit the main wiring harness until more components are in place. Until it is I cannot be quite sure where cables such as the feed to the starter motor should run.
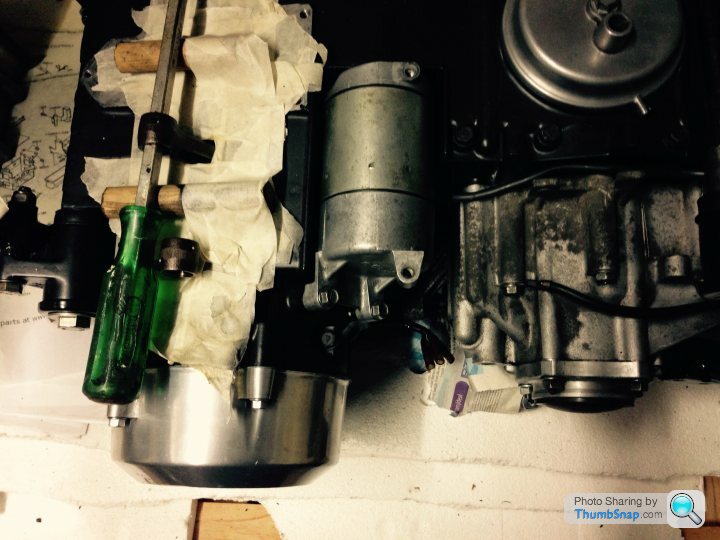
After the shocks I fitted the starter motor. A number of loose cables are starting to appear because I do not want to fit the main wiring harness until more components are in place. Until it is I cannot be quite sure where cables such as the feed to the starter motor should run.
This looks like a bargain for anyone who wants a challenge:
http://pages.ebay.com/link/?nav=item.view&alt=...
A complete bike for the cost of a couple of bearings!
http://pages.ebay.com/link/?nav=item.view&alt=...
A complete bike for the cost of a couple of bearings!
Edited by Gareth9702 on Sunday 30th November 15:25
This looks like a bargain for anyone who wants a challenge:
http://pages.ebay.com/link/?nav=item.view&alt=...
A complete bike for the cost of a couple of bearings!
http://pages.ebay.com/link/?nav=item.view&alt=...
A complete bike for the cost of a couple of bearings!
Edited by Gareth9702 on Sunday 30th November 15:26
Next on the list was the clutch. The plates were less than 5000 miles old so did not need renewing. The clutch bearing and the clutch centre nut were both replaced with Kawasaki stock components. These were sourced by Andy Taylor at Bridge Motorcycles in Exeter. Andy has happily made a large number of very small orders as this rebuild has progressed.
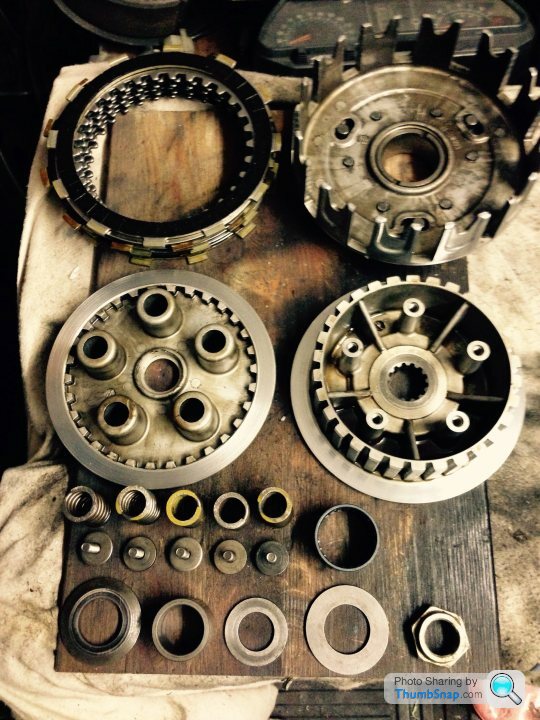
It has been a long time since I posted. Work has been continuing but very slowly at times. The clutch is in place but the central locking nut is not yet tight. This requires a clutch jamming tool (which I do not possess) or the bike to be put in gear and the back brake applied. I have to use the brake, so the clutch centre nut will wait until the wheel is refitted.
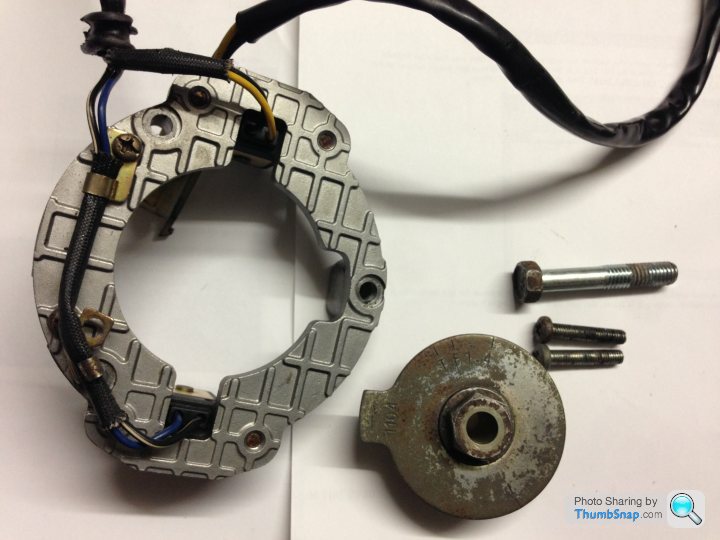
The fitting of the clutch was then followed by the ignition components.
This finishes the bottom half of the engine until the wiring and wheels go on.
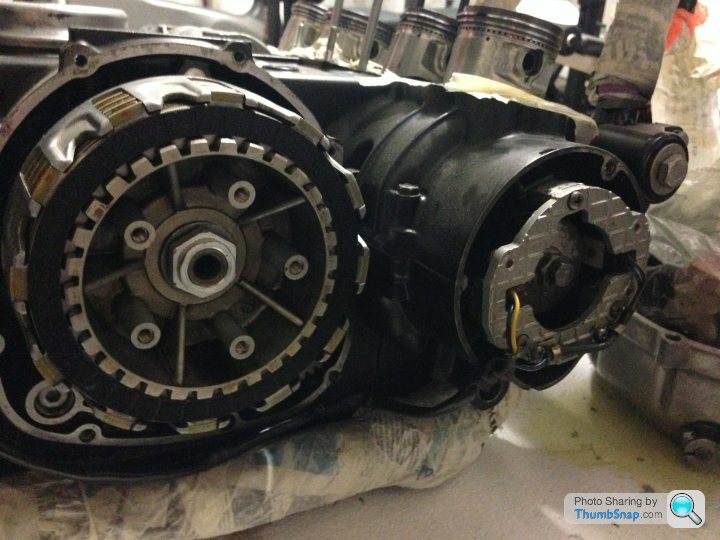
The fitting of the clutch was then followed by the ignition components.
This finishes the bottom half of the engine until the wiring and wheels go on.
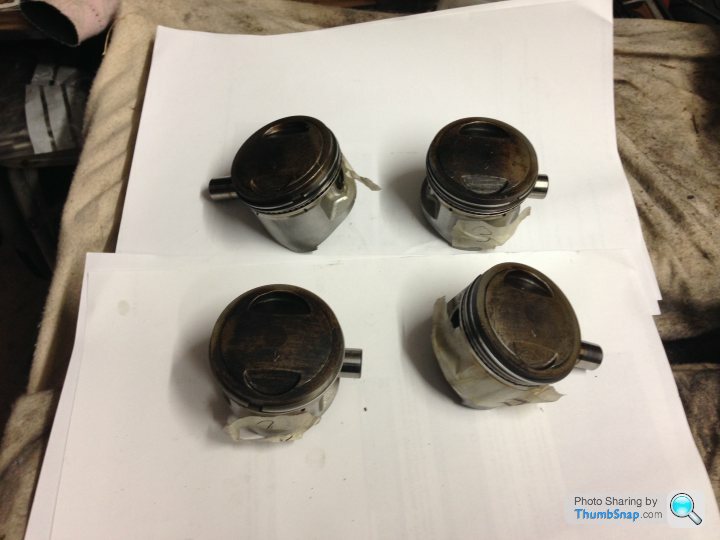
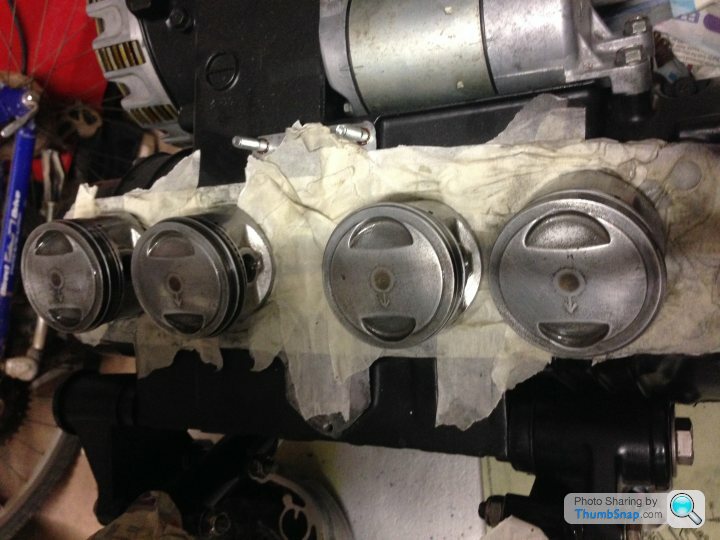
The next step is to clean and polish four dirty pistons. Polishing piston crowns is probably not worth the effort on a GT550 but at least they look good while waiting for the cylinder head to be finished.
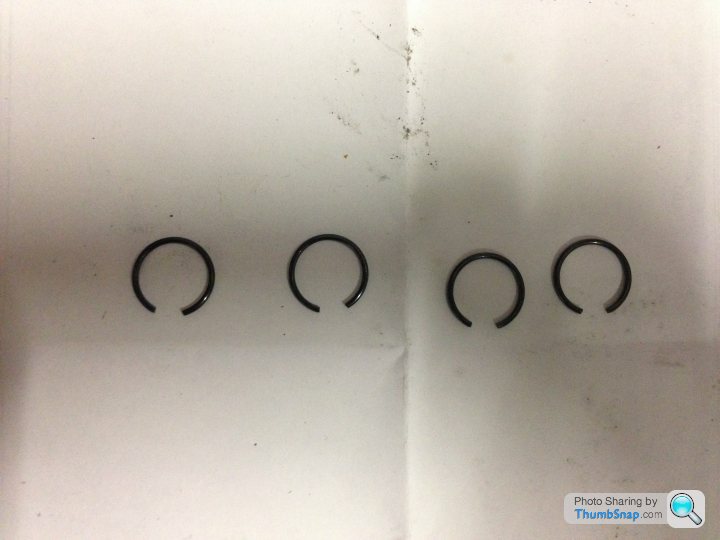
New oem Kawasaki circlips were purchased. I once re-used a piston circlip in an AP50 and suffered the inevitable failure while crossing the Pennines. Two-up. At night. In winter. We hid the bike in a field behind a wall and went back the next day with a van. Fortunately, it was still there. Never again.
The end result looks like progress.
It would be mistake to assume I am experienced - in this format of engine. I have no idea how many miles my bike has done because the clocks have been changed at some point. The workshop manual should give information on the maximum permissible stretch in the chains. I simply changed mine because the cost seemed reasonable relative to the work.
If you want informed advice you should join the GT 550/750 forum on Facebook. It is very active with many knowledgeable contributors.
Good luck with your rebuild. I plan to post more soon.
If you want informed advice you should join the GT 550/750 forum on Facebook. It is very active with many knowledgeable contributors.
Good luck with your rebuild. I plan to post more soon.
Time to update. The pistons were followed be the studs for the head and barrels. The threads were cleaned and they were locked into place using two spammers and two nuts.

Following the studs is the cam chain guide. This one fits behind the pistons and applies pressure from the tensioner. Care has to be taken at this point to avoid dropping the bolts into the crankcases.
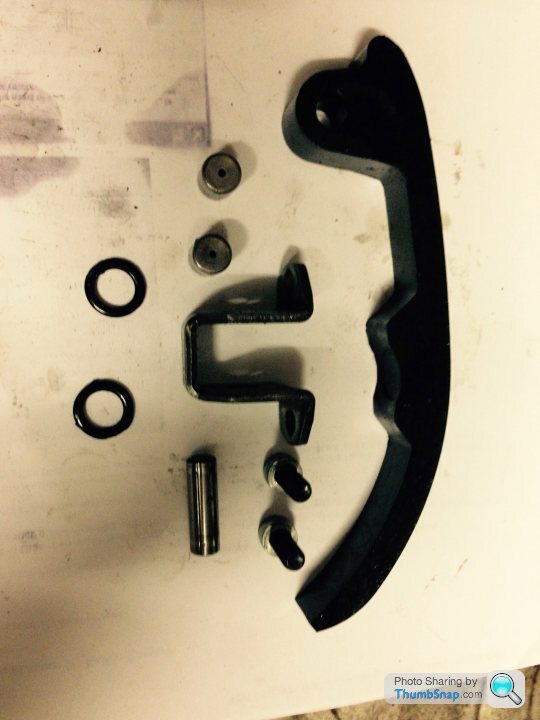
Following the studs is the cam chain guide. This one fits behind the pistons and applies pressure from the tensioner. Care has to be taken at this point to avoid dropping the bolts into the crankcases.
Edited by Gareth9702 on Sunday 15th February 18:15
There seems to be no end to the awkward components that have to be cleaned. The next part for treatment are the barrels. These have a combination of oil, paint, and corrosion for removal. Many hours of scraping, sanding, and degreasing were needed before the barrels could be painted.
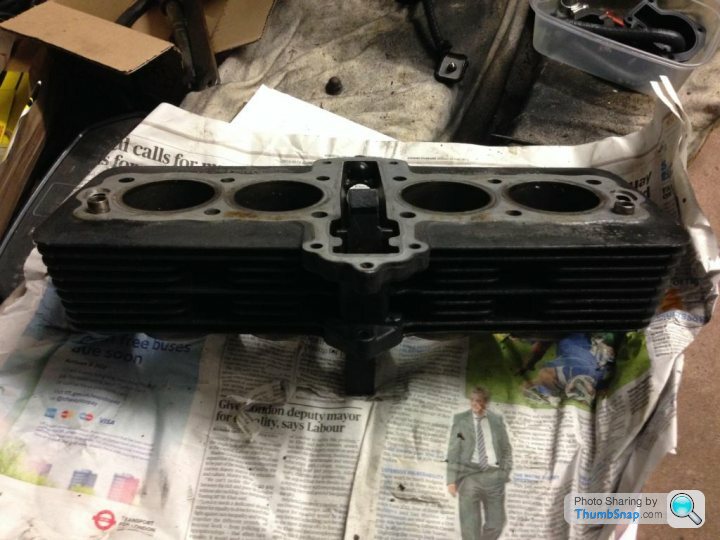
The next picture is part-way through the process with some of the alloy beginning to emerge from beneath the grime.
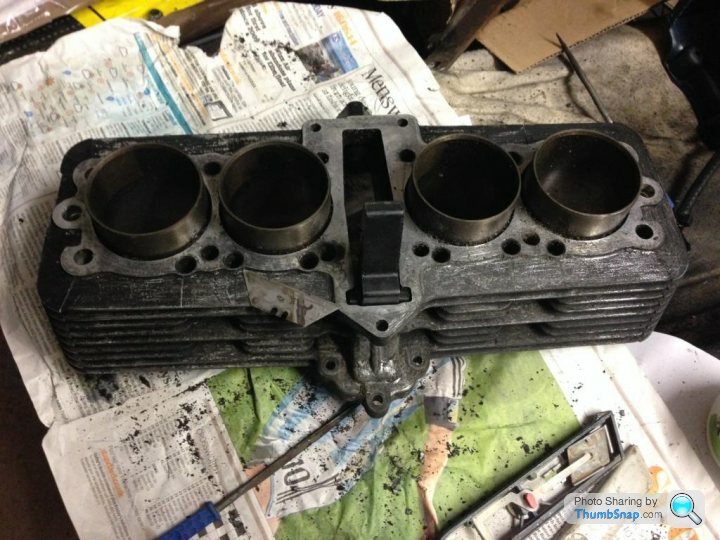
The next picture is part-way through the process with some of the alloy beginning to emerge from beneath the grime.
Gassing Station | Biker Banter | Top of Page | What's New | My Stuff