Honda VRX400 1995 "barn find" restoration
Discussion


Aye, I was talking to a company at the Motorcycle Show in November who are based not far from here in Coleshill who rebuild wheels for the National Motorcycle Museum, they can rebuild the wheels from the hubs up. Not going to be cheap though ! Leaving that for a bit ...
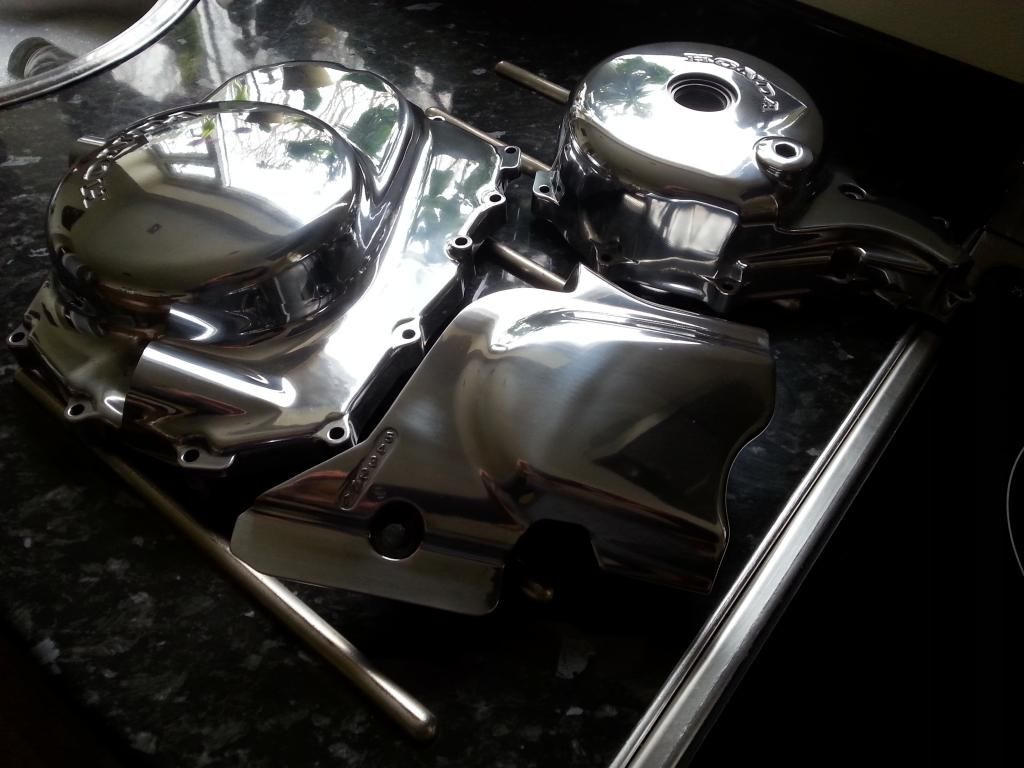
Alternator, clutch and sprocket covers suitably polished up, sat on the kitchen side.
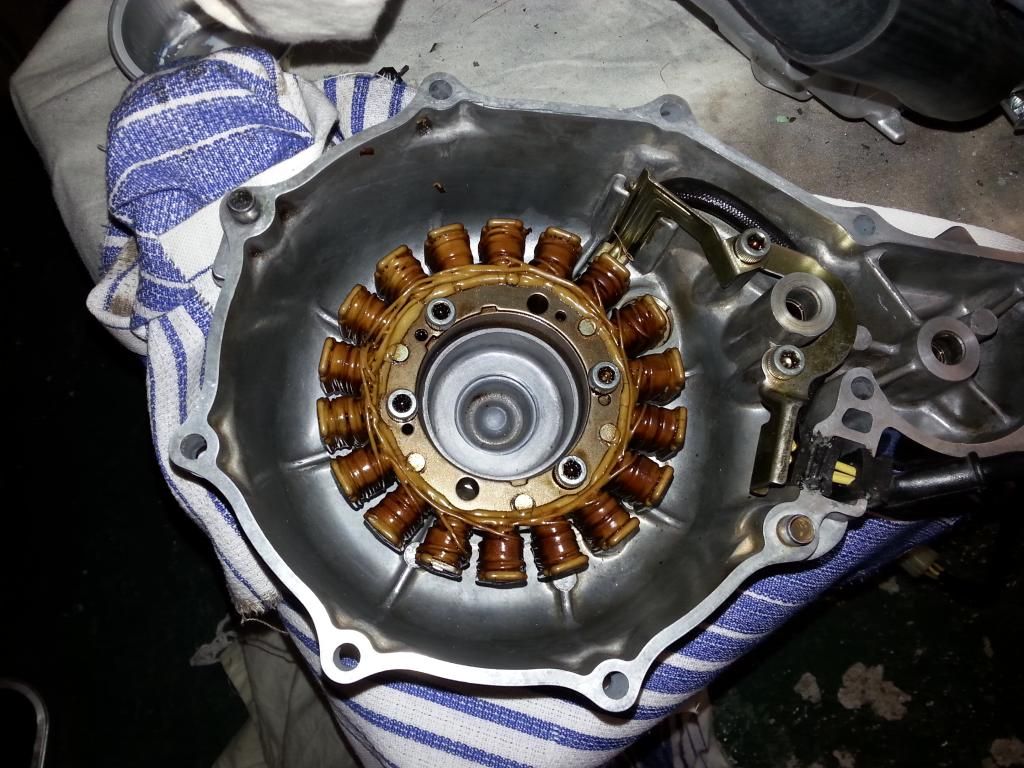
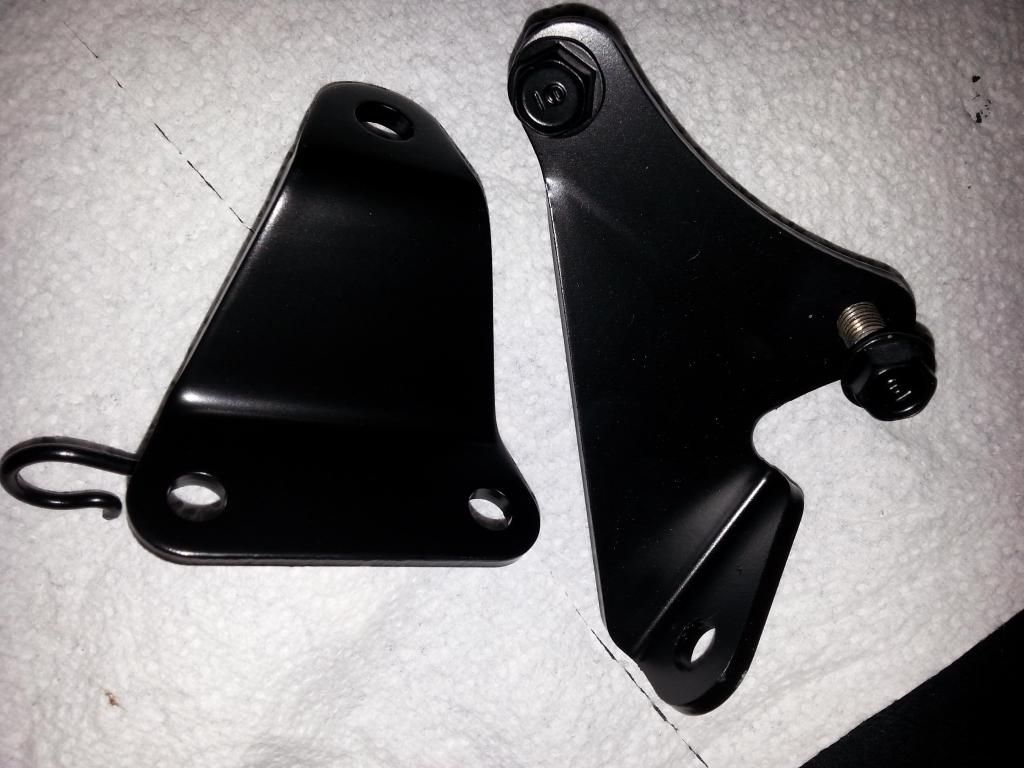
Alternator reinstalled back into the cover. Having to start digging out all the photos I took on disassembly now, and this was one of them ... forgot how the cable brackets went ! Take photos kids. I took hundreds. I wish now I'd taken thousands.
And popped loosely in position. Had to go out, so didn't get chance to bolt it in.

Postscript : Okay so this is where I own up to cheating a bit ... after spending 3 hours doing one small bracket, I thought f k this, and the three covers were polished by a local company for £25 each ! I'll still be doing the remaining odds and sods though. Apart from the complicated rocker covers ... sod that.
Alternator, clutch and sprocket covers suitably polished up, sat on the kitchen side.

Alternator reinstalled back into the cover. Having to start digging out all the photos I took on disassembly now, and this was one of them ... forgot how the cable brackets went ! Take photos kids. I took hundreds. I wish now I'd taken thousands.

And popped loosely in position. Had to go out, so didn't get chance to bolt it in.


Postscript : Okay so this is where I own up to cheating a bit ... after spending 3 hours doing one small bracket, I thought f
k this, and the three covers were polished by a local company for £25 each ! I'll still be doing the remaining odds and sods though. Apart from the complicated rocker covers ... sod that.Cracking work so far, really good read as well.
I have had success using wheel sealant to protect polished parts, i generally use poor boys wheel sealant it is cheap enough and really good stuff.
Its obviously designed to keep wheels easy to clean and it really is effective i put 3 or four coats on the winter wheels of my car and they never get more than a pressure wash to clean them throughout the 5 months or so they are on (granted every two weeks or so).
On a light usage bike i would imagine it will keep the parts looking good no bother.
Thanks ross-co, will try some of that.
VinceFox, yes they are the original wheels (sorry for the delay in replying)
Visible progress has really slowed as I'm fettling all the little bits and bobs, brackets etc ... rerusting, priming and painting takes a long time on small pieces, so you don't feel like you've done much. I really wanted to get the engine in the frame this weekend, but completely failed on that front.
For example, here's the front and rear engine mounts after several days in the rust dissolving tub ...
... and after.
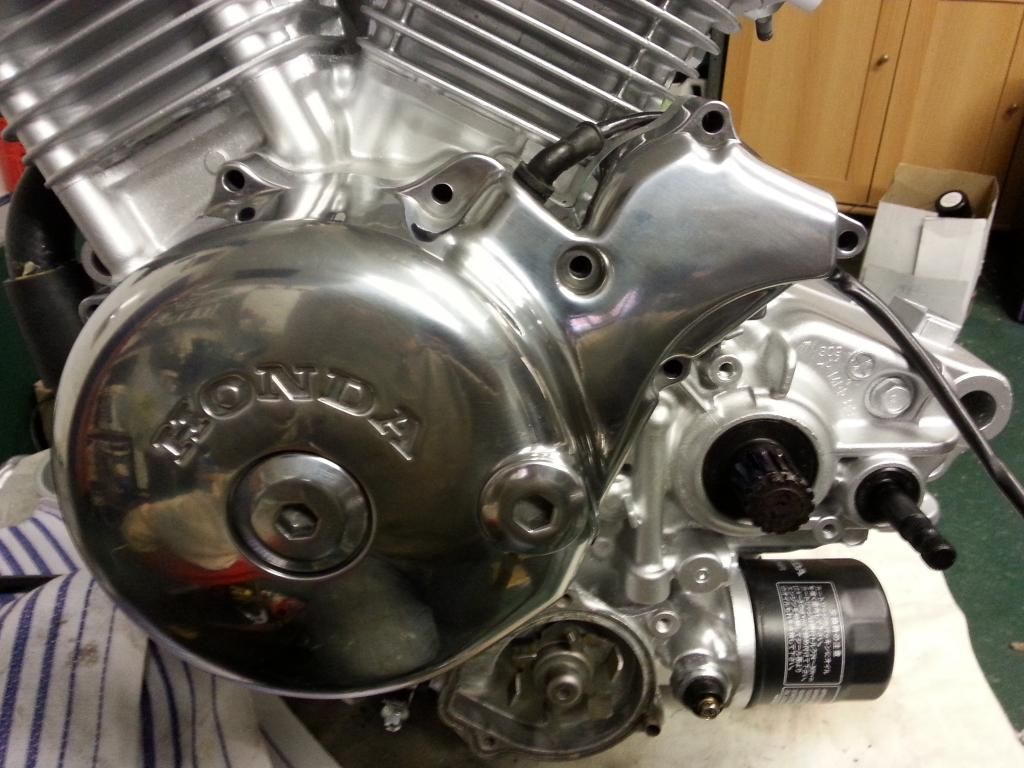
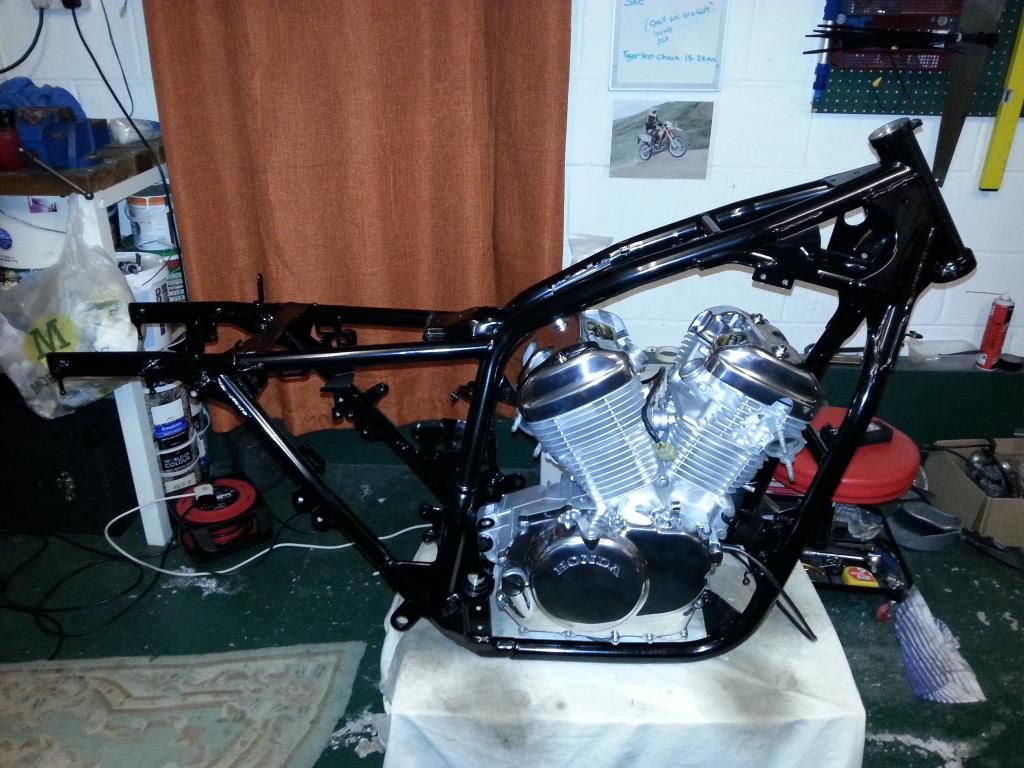
Set the tappets. They were very close to being right. I'm still amazed at how good internally (so far !! have I just jinxed myself ?) this engine is. Clutch cover in the background.
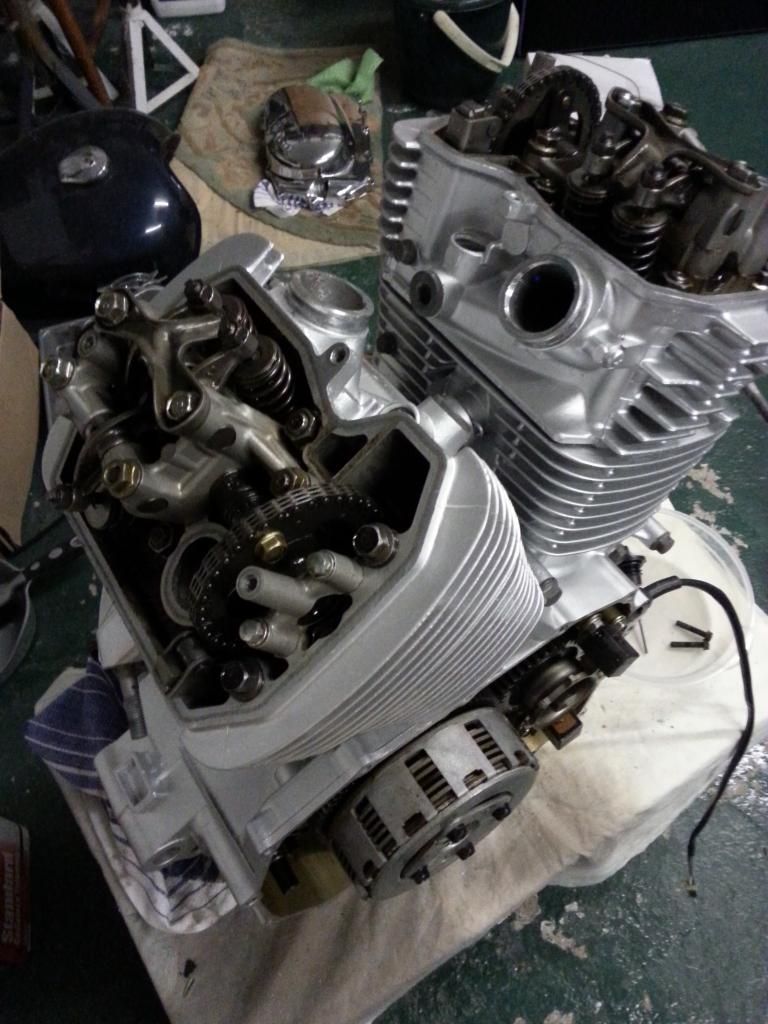
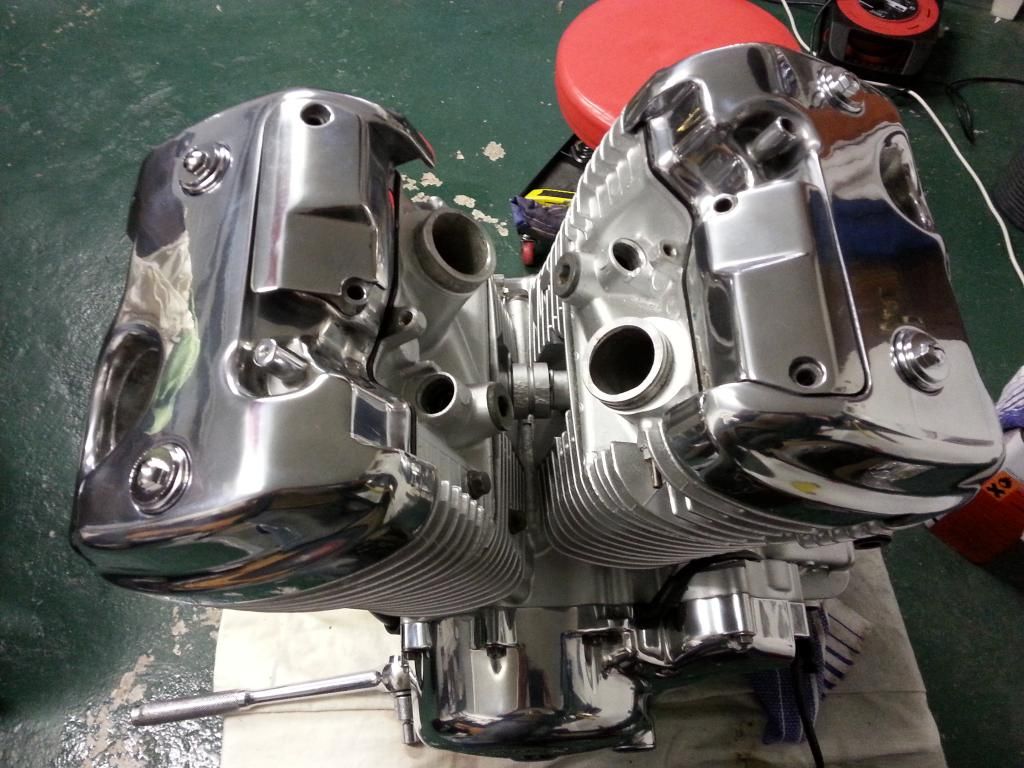
Further progress on the swingarm; spacer tubes refurbished and fitted, rubber chain guide put back on (though I want to replace the two funny oval washers next order). Polished cylinder heads awaiting final titivation.

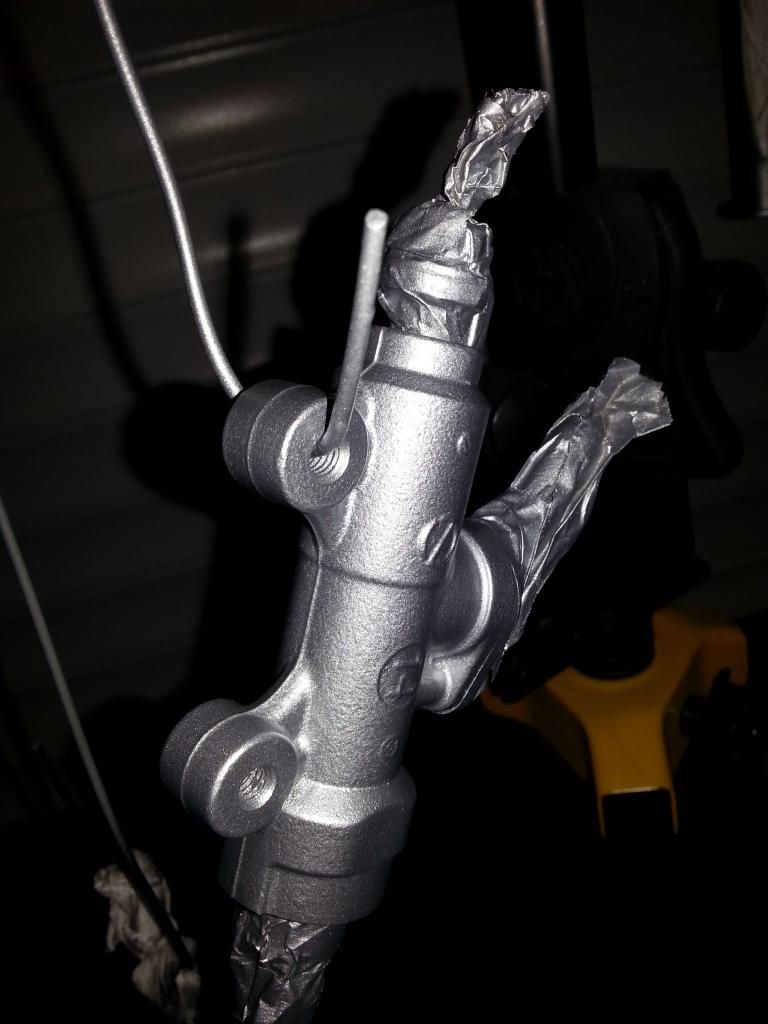
Started working on the rear brake master cylinder, which needs to go back into the frame before I put the swing arm back on (so there IS some logic there). Grubby and rusty, this is after the initial session in the parts washer.

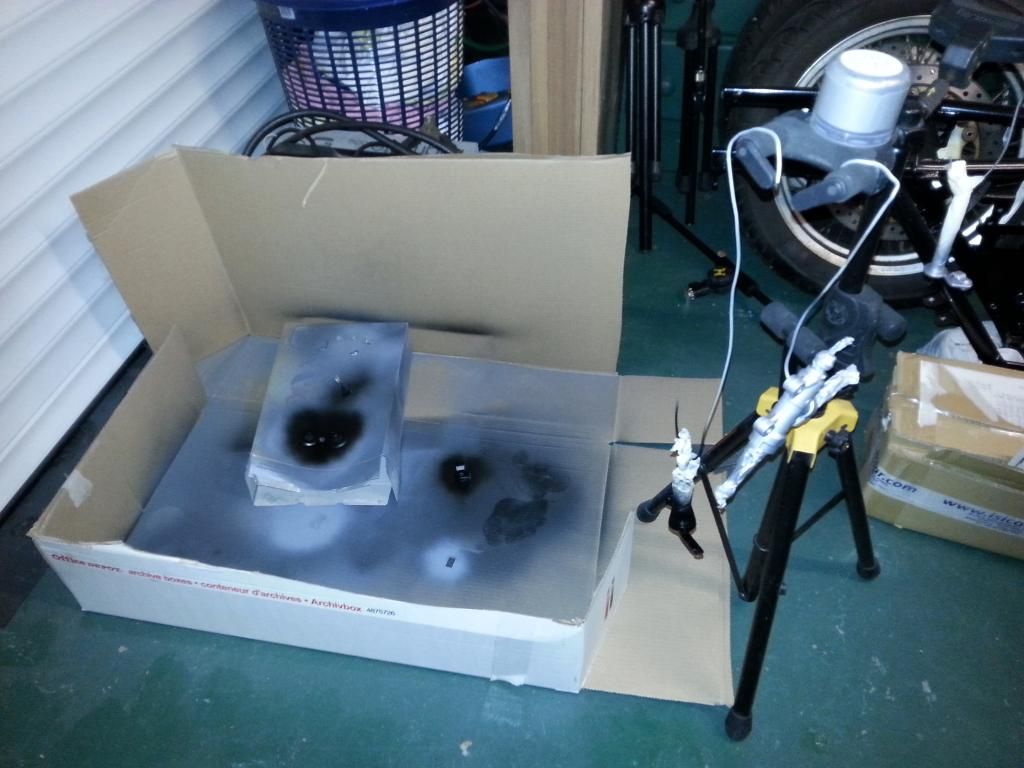
This is my improvised paint booth, lol
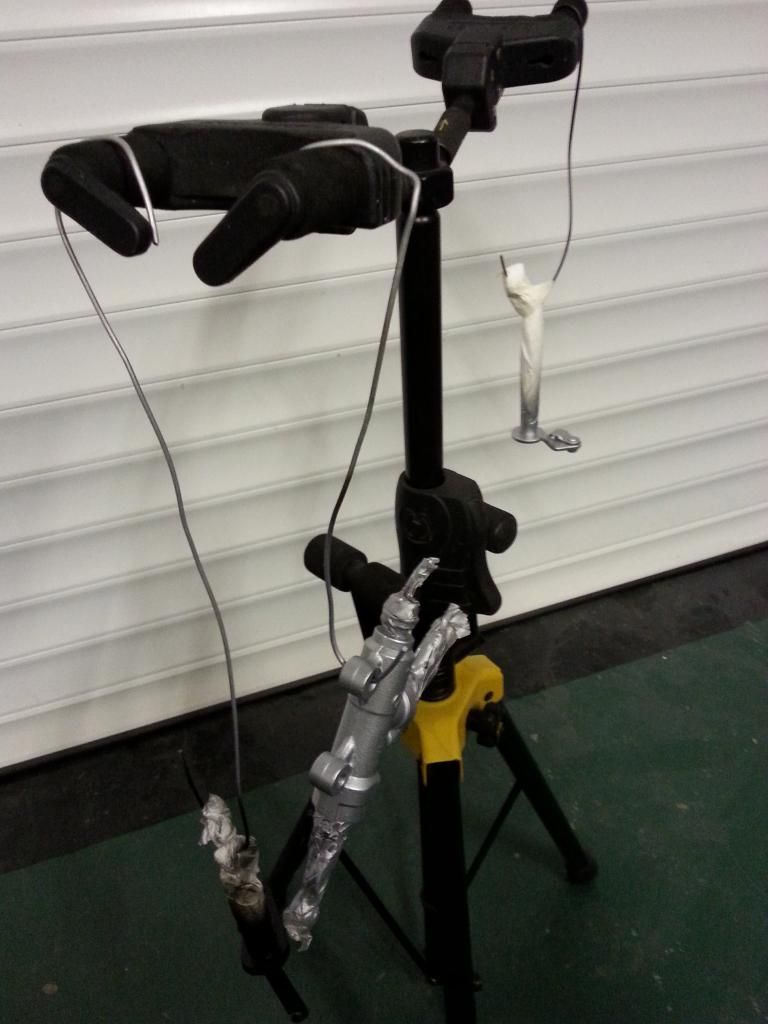
A guitar stand makes a good drying stand ... at the rear you can see the clutch actuator arm, which is the last thing that I need to refurb before I can put the clutch cover back on.
Brake master came up nice.
And that's about it for this week. Two final observations :
1. Customs and Excise are gits. On a 16,050 yen order of parts, they misread (I think) the handwriting and charged me VAT and duty on 76,050 ... which came to (much) more than the value of the whole order ! I've had to fill a laborious form in, and send off umpteen items of proof, to try and get a refund (you have to pay, then claim back later). Bet I don't see my (approx. £100) any time soon ...
2. You can never have enough bench space. I don't have enough bench space.
VinceFox, yes they are the original wheels (sorry for the delay in replying)
Visible progress has really slowed as I'm fettling all the little bits and bobs, brackets etc ... rerusting, priming and painting takes a long time on small pieces, so you don't feel like you've done much. I really wanted to get the engine in the frame this weekend, but completely failed on that front.
For example, here's the front and rear engine mounts after several days in the rust dissolving tub ...

... and after.

Set the tappets. They were very close to being right. I'm still amazed at how good internally (so far !! have I just jinxed myself ?) this engine is. Clutch cover in the background.

Further progress on the swingarm; spacer tubes refurbished and fitted, rubber chain guide put back on (though I want to replace the two funny oval washers next order). Polished cylinder heads awaiting final titivation.

Started working on the rear brake master cylinder, which needs to go back into the frame before I put the swing arm back on (so there IS some logic there). Grubby and rusty, this is after the initial session in the parts washer.

This is my improvised paint booth, lol

A guitar stand makes a good drying stand
... at the rear you can see the clutch actuator arm, which is the last thing that I need to refurb before I can put the clutch cover back on.
Brake master came up nice.

And that's about it for this week. Two final observations :
1. Customs and Excise are gits. On a 16,050 yen order of parts, they misread (I think) the handwriting and charged me VAT and duty on 76,050 ... which came to (much) more than the value of the whole order ! I've had to fill a laborious form in, and send off umpteen items of proof, to try and get a refund (you have to pay, then claim back later). Bet I don't see my (approx. £100) any time soon ...
2. You can never have enough bench space. I don't have enough bench space.
Video of above progress : https://www.youtube.com/watch?v=kFw1MuAwB24
"And in this weeks episode of Project Binky ... fitting the wheels"
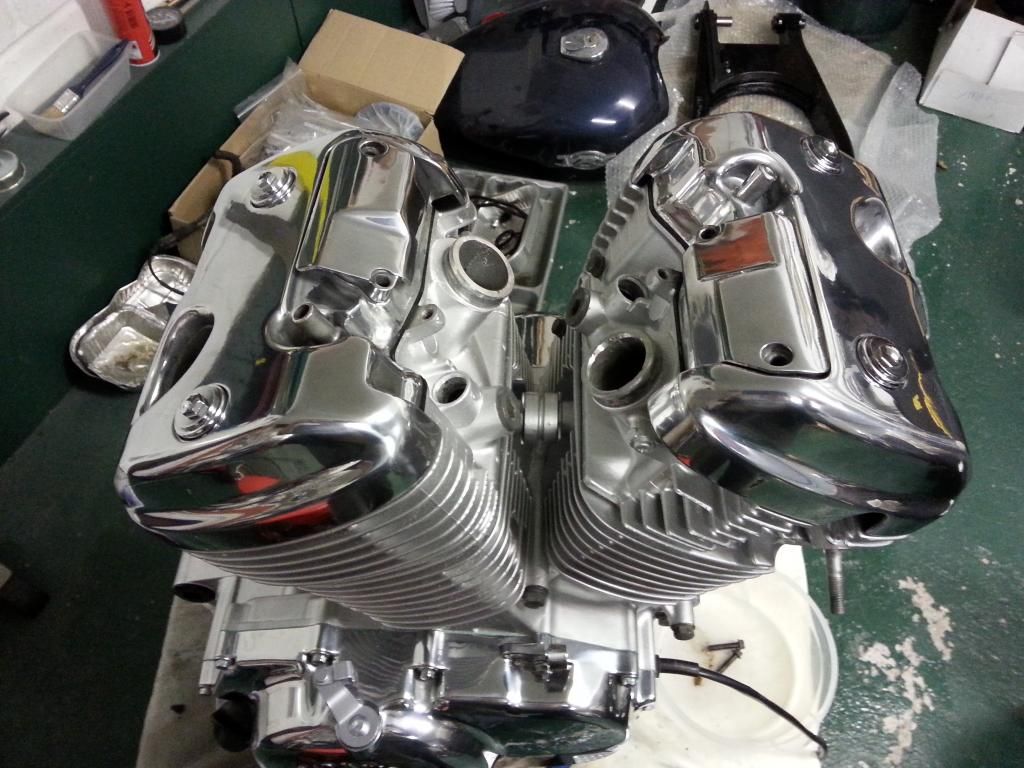
Finished off the polishing of the rocker covers. Not totally 100%, probably more like 90%, but they will do ... was starting to lose the will to live working on these, and they look good in all the places that will actually visible once the bike is back together (a lot of the covers are hidden by things like the carbs)
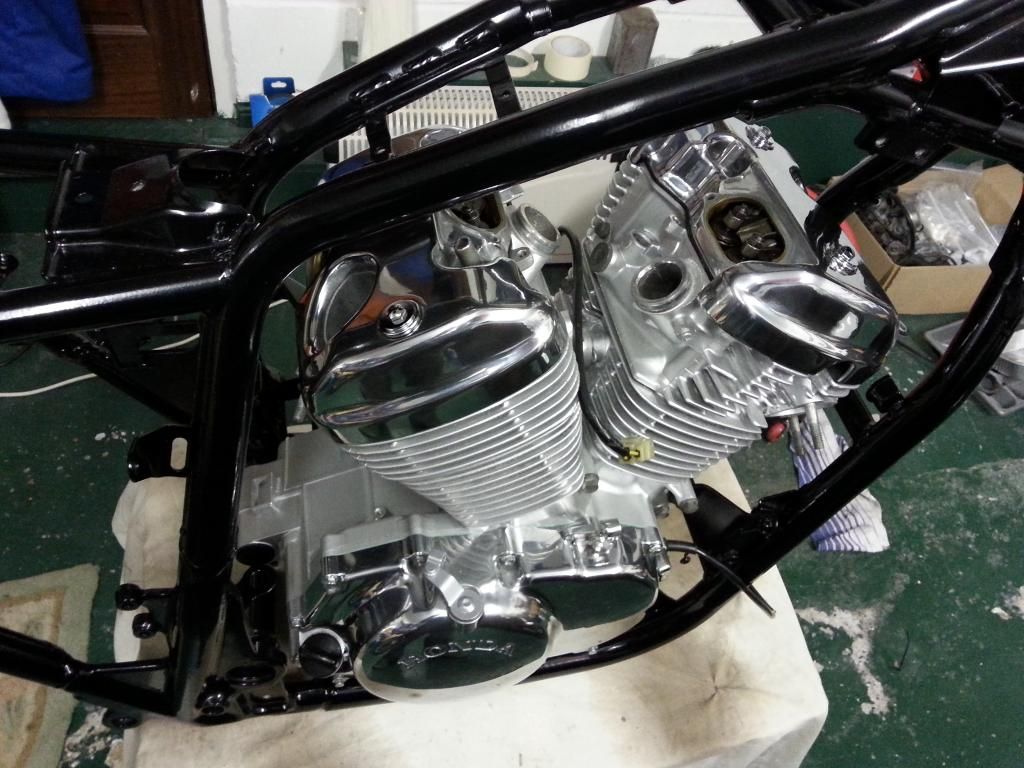
I could carry on working on the engine in isolation, there's loads still to do (e.g. starter motor, carbs) but I need a bit of a morale boost, so it's time to fit the engine into the frame !
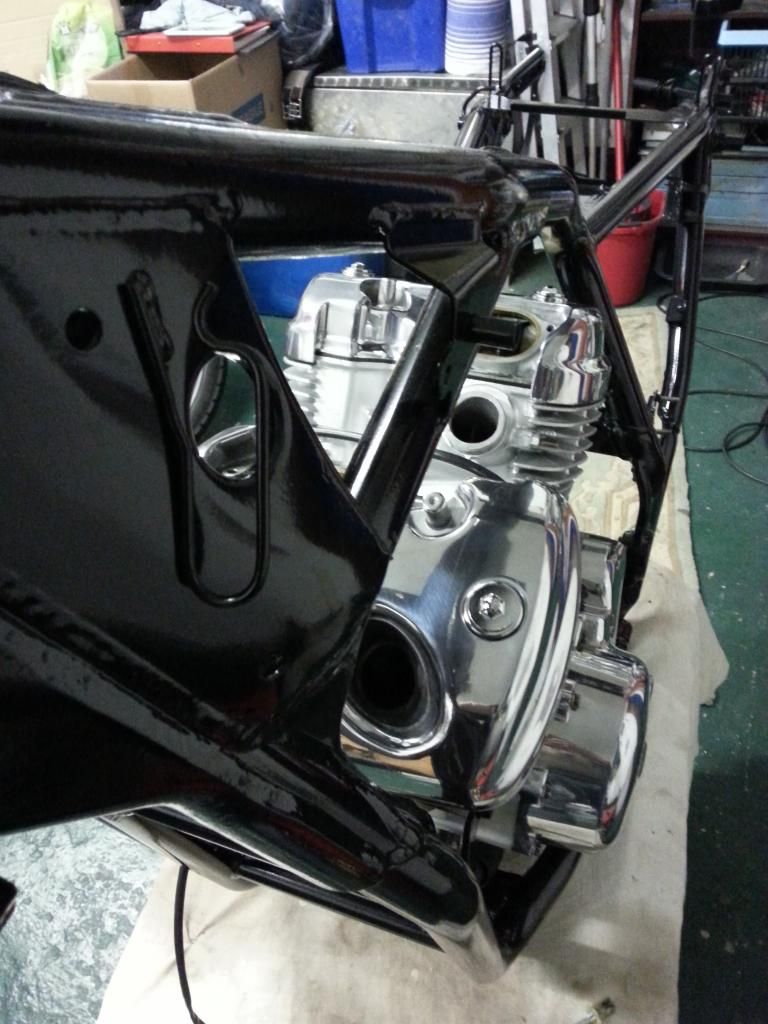
First of all, lets protect that lovely frame with lots of cardboard. This engine was a pig to get out of the frame, so the last thing I want to do is chip something trying to waggle it back in.
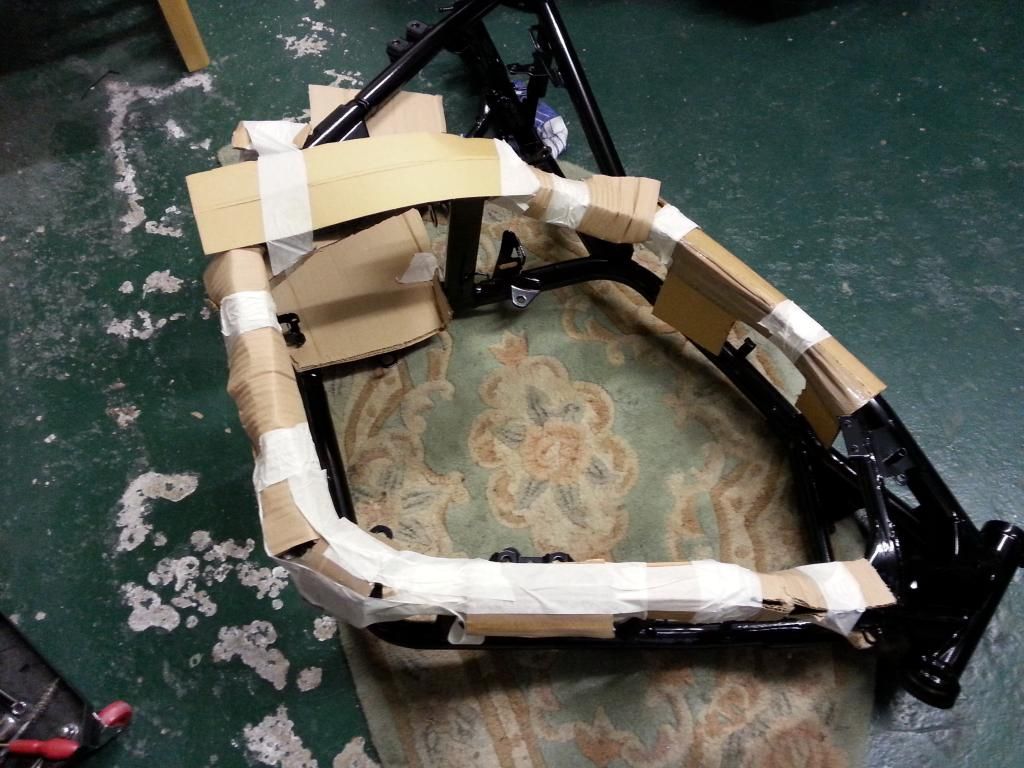
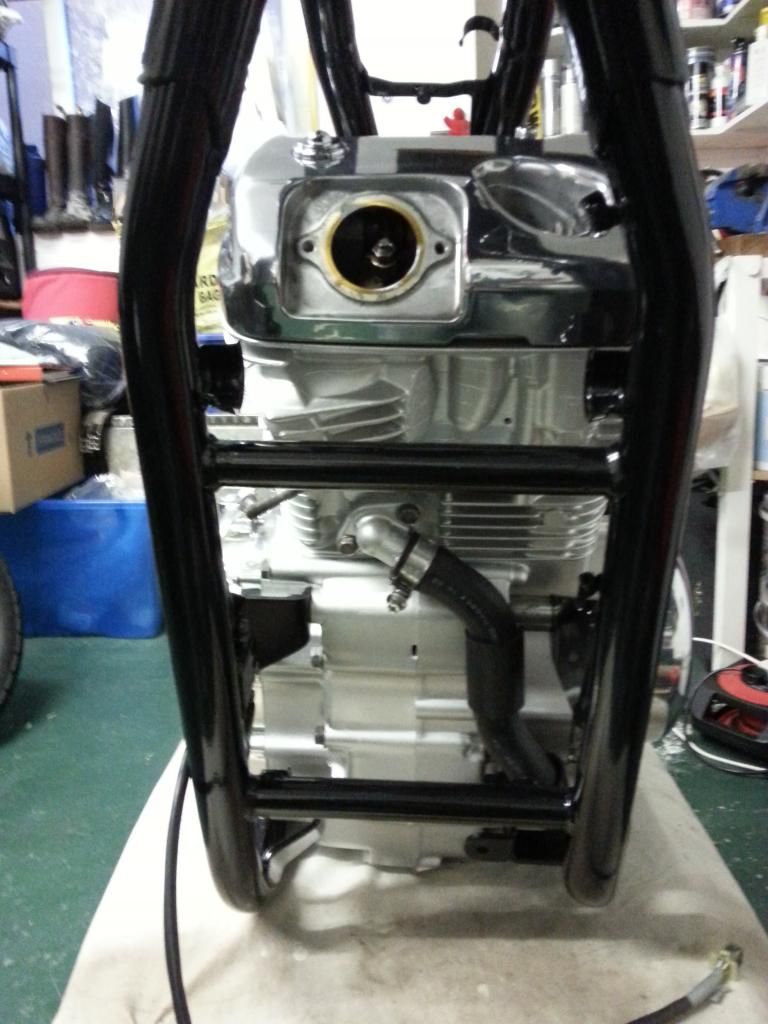
Following the "assembly is reverse of removal" Haynes principle (i.e. this is how I got the engine out) I laid the engine down on lots of padding (rug, cloths etc) on its clutch side. Covered it with a cloth, then gently laid the frame loosely over the top of it.
Then it was just a case of wiggling it about till it lined up with the brackets (two front, one rear) ... this took a while, nearly an hour maybe. Had to check a couple of times on previously taken photos ("does the bracket go in front of or behind the frame" etc) and hand tightened the bolts. Then lifted her right way up.

Removed all the cardboard protection, tightened all the bolts up and ... voilà !
I appreciate that working on the engine within the frame might be slightly more difficult now, but I don't care ... I feel like a milestone's been passed.
Arse shot. The last mounting point is the bolt that goes through the rear of the engine, which also goes through the swingarm.
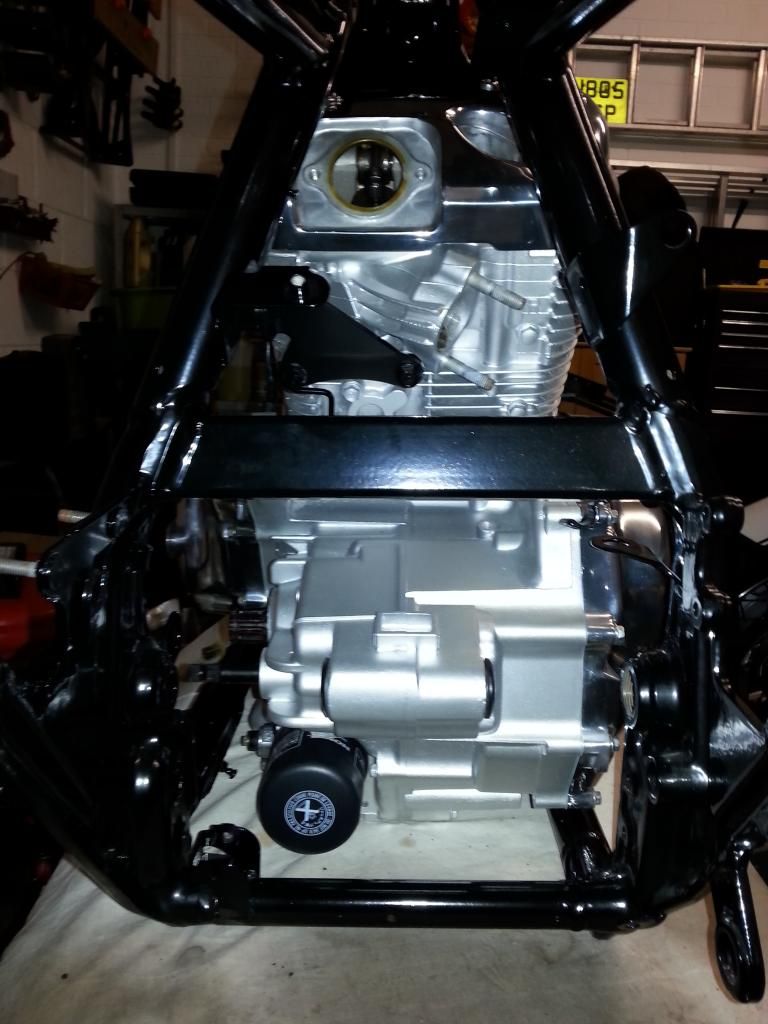
Kinda looks like a motorbike again ! ... kinda.
Had enough now, time for a bath ...
(*) If you've never seen Project Binky, you NEED to watch this ... https://www.youtube.com/user/badobsessionmsport/vi...
Finished off the polishing of the rocker covers. Not totally 100%, probably more like 90%, but they will do ... was starting to lose the will to live working on these, and they look good in all the places that will actually visible once the bike is back together (a lot of the covers are hidden by things like the carbs)


I could carry on working on the engine in isolation, there's loads still to do (e.g. starter motor, carbs) but I need a bit of a morale boost, so it's time to fit the engine into the frame !
First of all, lets protect that lovely frame with lots of cardboard. This engine was a pig to get out of the frame, so the last thing I want to do is chip something trying to waggle it back in.

Following the "assembly is reverse of removal" Haynes principle (i.e. this is how I got the engine out) I laid the engine down on lots of padding (rug, cloths etc) on its clutch side. Covered it with a cloth, then gently laid the frame loosely over the top of it.

Then it was just a case of wiggling it about till it lined up with the brackets (two front, one rear) ... this took a while, nearly an hour maybe. Had to check a couple of times on previously taken photos ("does the bracket go in front of or behind the frame" etc) and hand tightened the bolts. Then lifted her right way up.

Removed all the cardboard protection, tightened all the bolts up and ... voilà !

I appreciate that working on the engine within the frame might be slightly more difficult now, but I don't care ... I feel like a milestone's been passed.


Arse shot. The last mounting point is the bolt that goes through the rear of the engine, which also goes through the swingarm.

Kinda looks like a motorbike again ! ... kinda.

Had enough now, time for a bath ...
(*) If you've never seen Project Binky, you NEED to watch this ... https://www.youtube.com/user/badobsessionmsport/vi...

I wanted to clean up and paint the starter motor properly, so took it all apart.
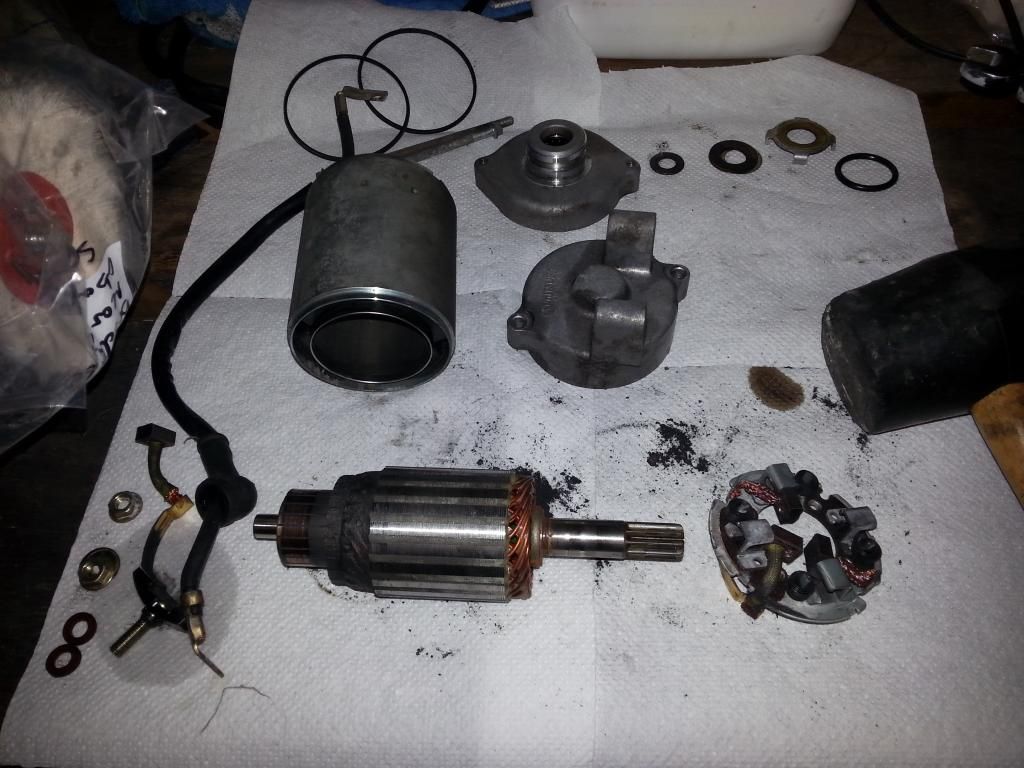
Um. Lots of bits.
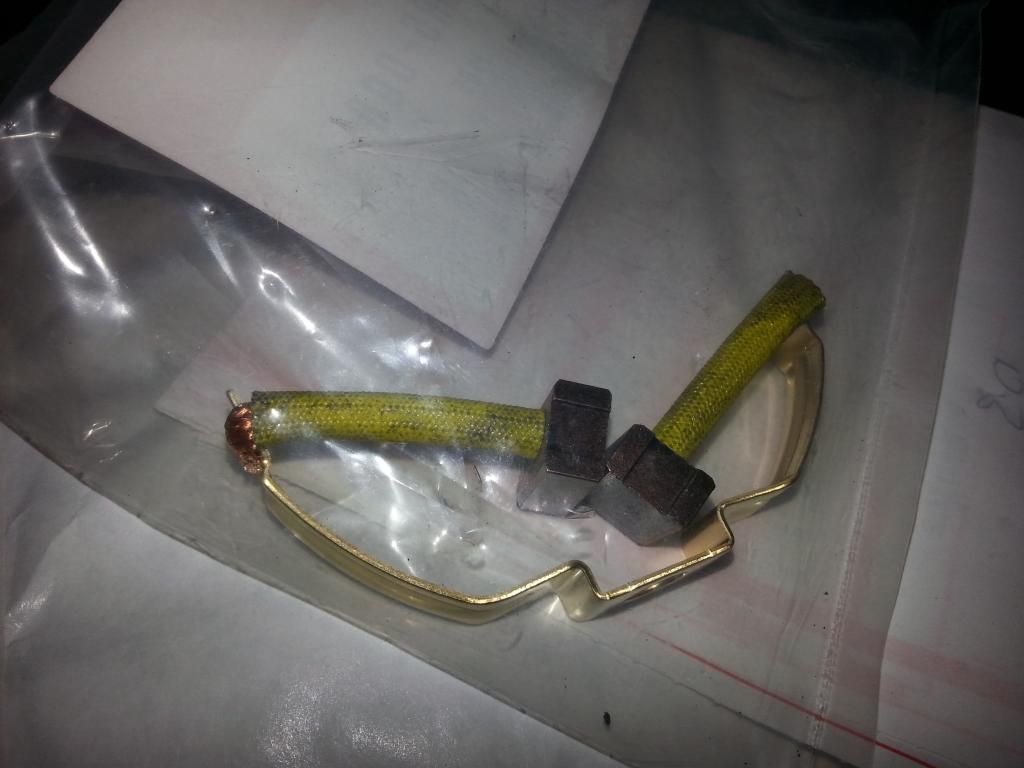
It's in pretty good condition inside, apart from this little piece which is the +ve power input ... as I took the motor apart, first one side of the copper strip then the other side just fell apart.
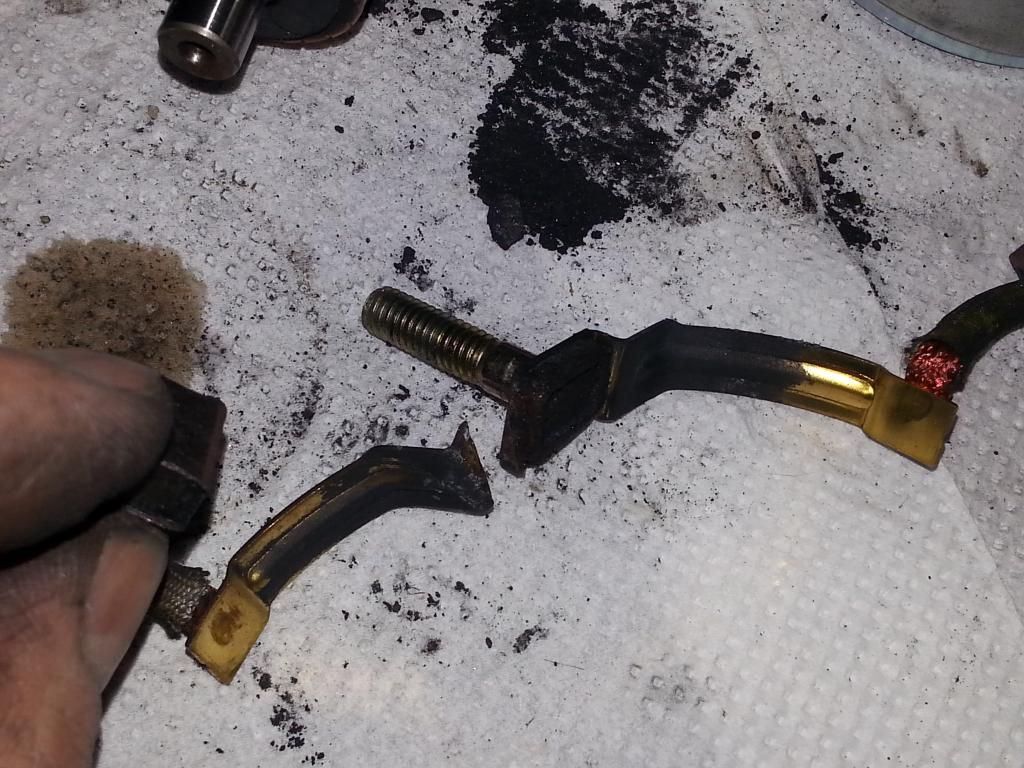
Ordered a new one. £23. TWENTY THREE POUNDS ?!? For this ...
Gave it all a good clean to remove all the black dust inside from the bushes, cleaned up the contacts, gave everything a paint on the exterior.
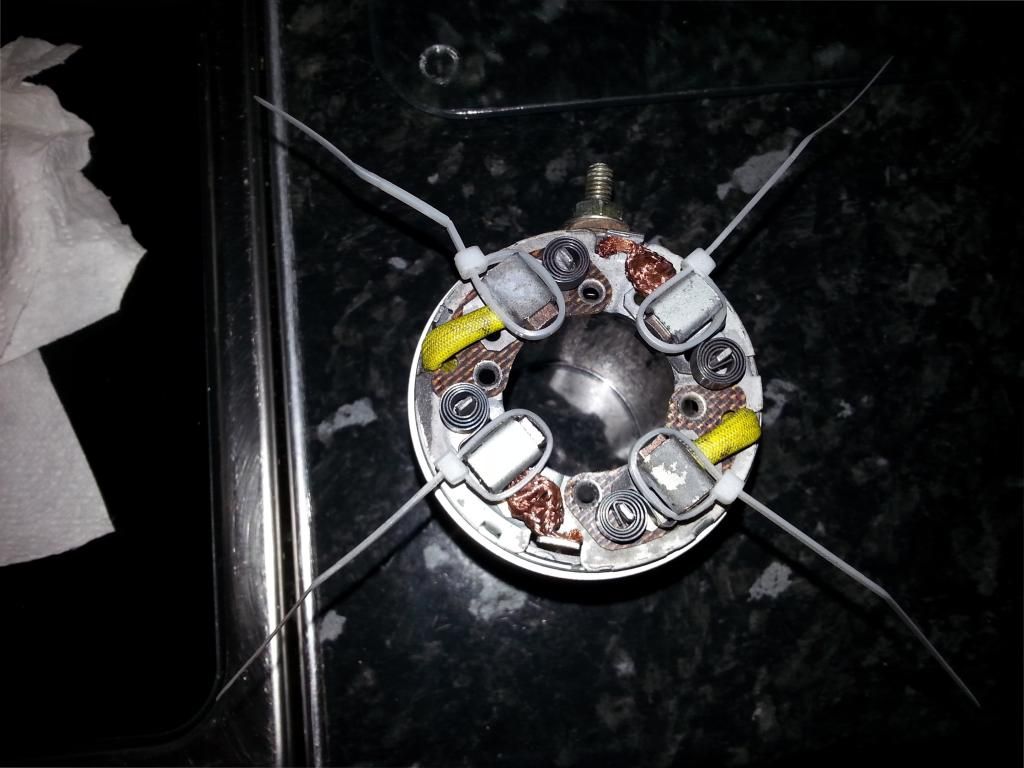
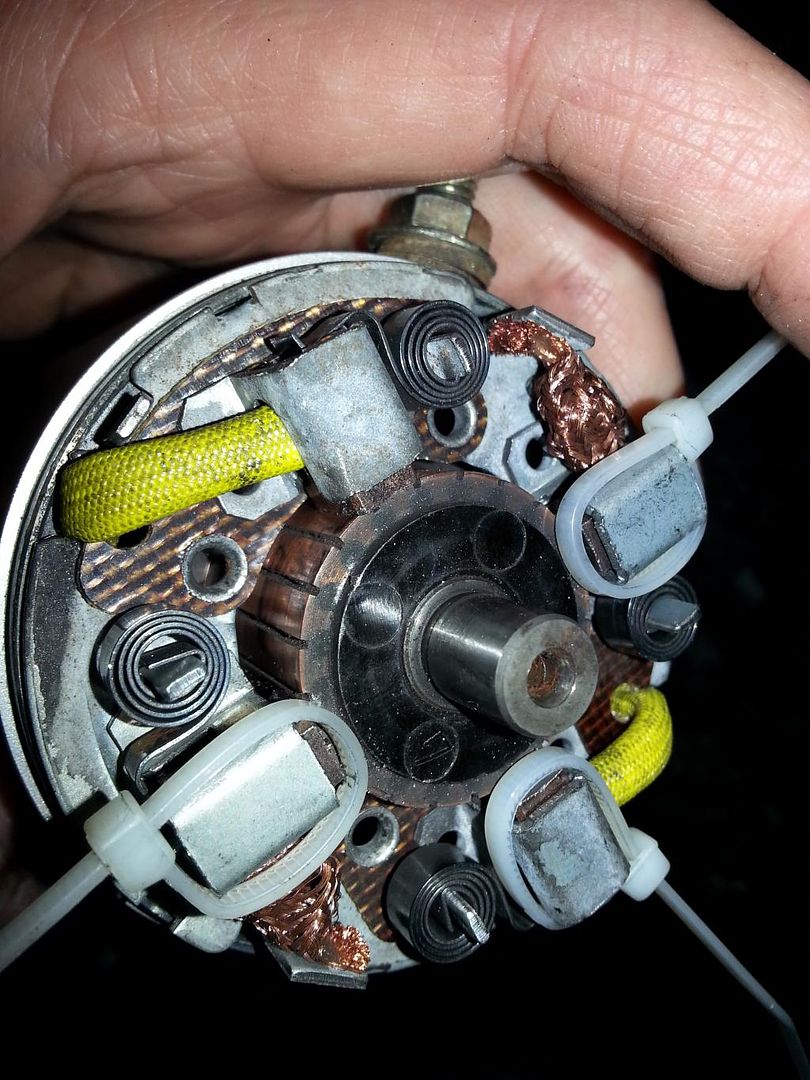
Putting it back together was a bit of an arse. The bushes are held in with springs, and just want to ping everywhere ... you need minimum 5 hands. In the end I zip tied the bushes in place ...
... so I was able to push the shaft back through.
And reassembled. Sorry for the dark picture.
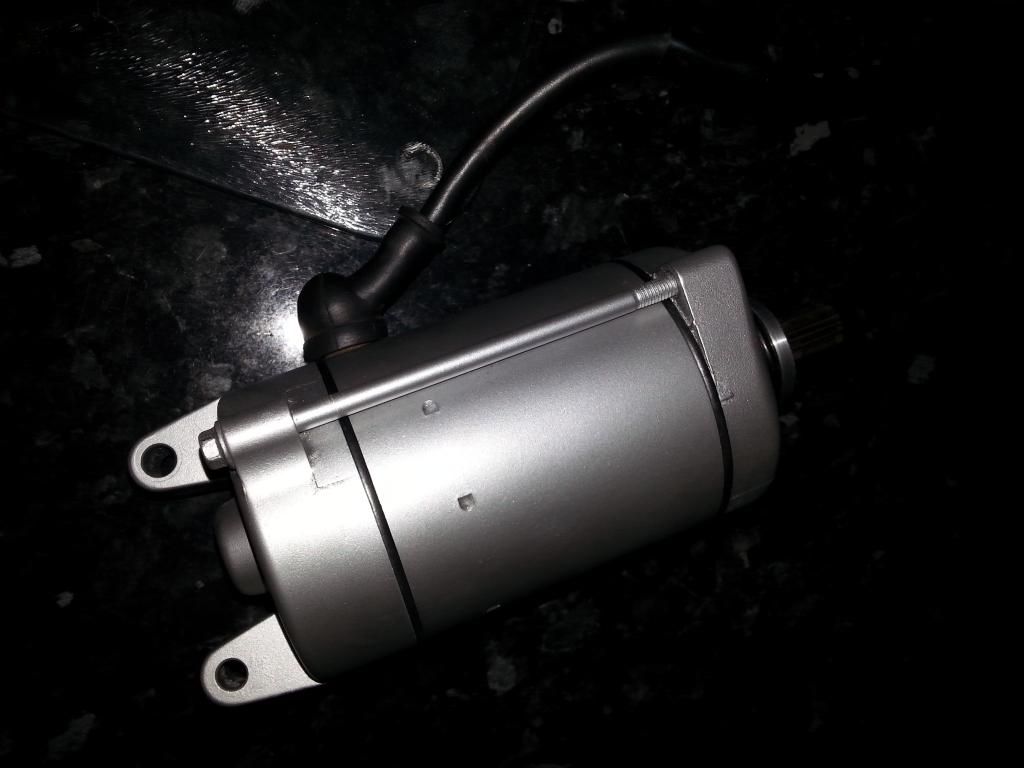
Best of all, it still works ! Spins like a frantic thing.
TIP OF THE DAY : when painting the body of a starter motor, don't paint the mounting points ... it's through these that the -ve power runs. Almost fell into that trap.

Um. Lots of bits.
It's in pretty good condition inside, apart from this little piece which is the +ve power input ... as I took the motor apart, first one side of the copper strip then the other side just fell apart.

Ordered a new one. £23. TWENTY THREE POUNDS ?!? For this ...

Gave it all a good clean to remove all the black dust inside from the bushes, cleaned up the contacts, gave everything a paint on the exterior.
Putting it back together was a bit of an arse. The bushes are held in with springs, and just want to ping everywhere ... you need minimum 5 hands. In the end I zip tied the bushes in place ...

... so I was able to push the shaft back through.

And reassembled. Sorry for the dark picture.

Best of all, it still works ! Spins like a frantic thing.
TIP OF THE DAY : when painting the body of a starter motor, don't paint the mounting points ... it's through these that the -ve power runs. Almost fell into that trap.
Gassing Station | Biker Banter | Top of Page | What's New | My Stuff