Honda VRX400 1995 "barn find" restoration
Discussion


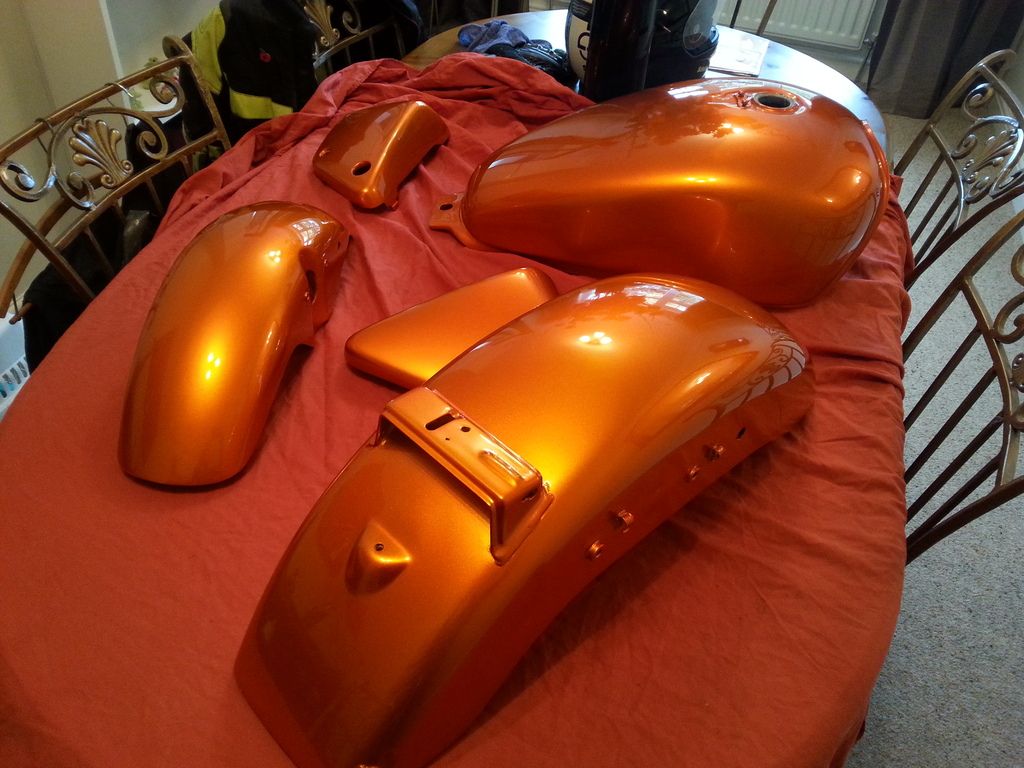
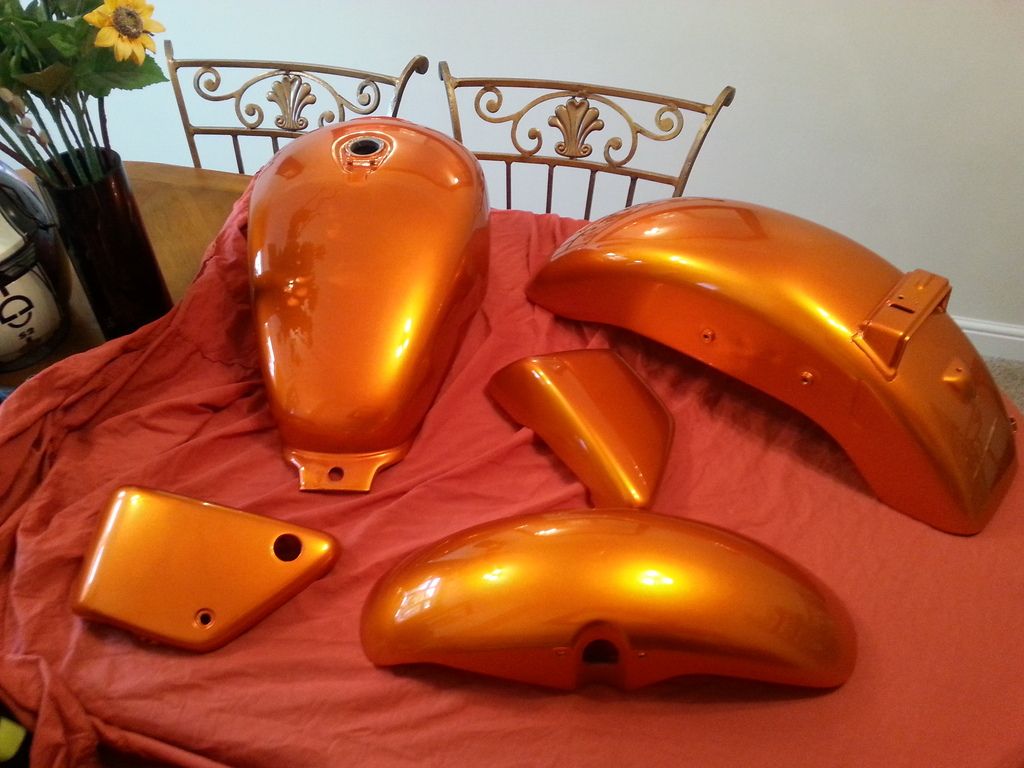
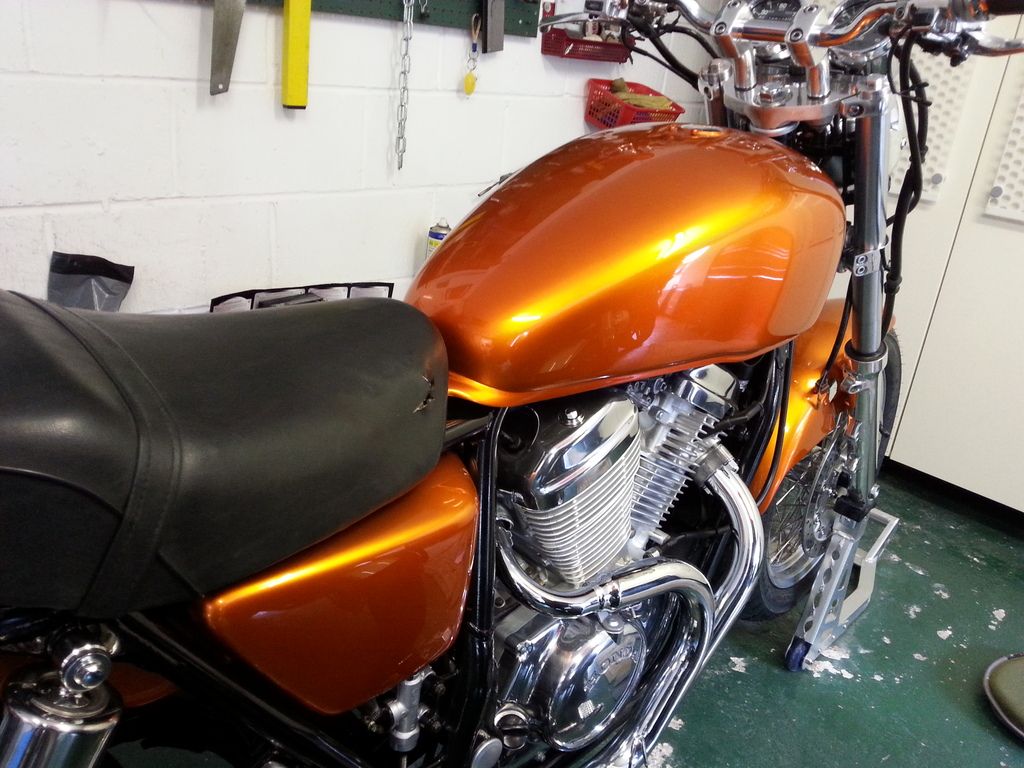
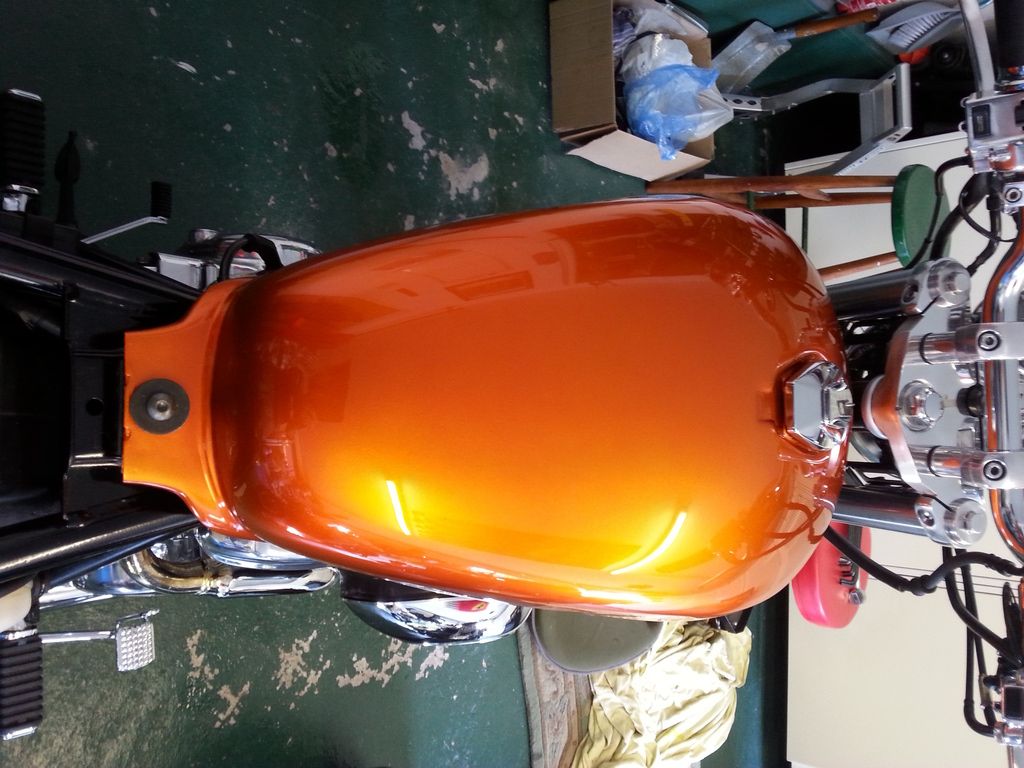
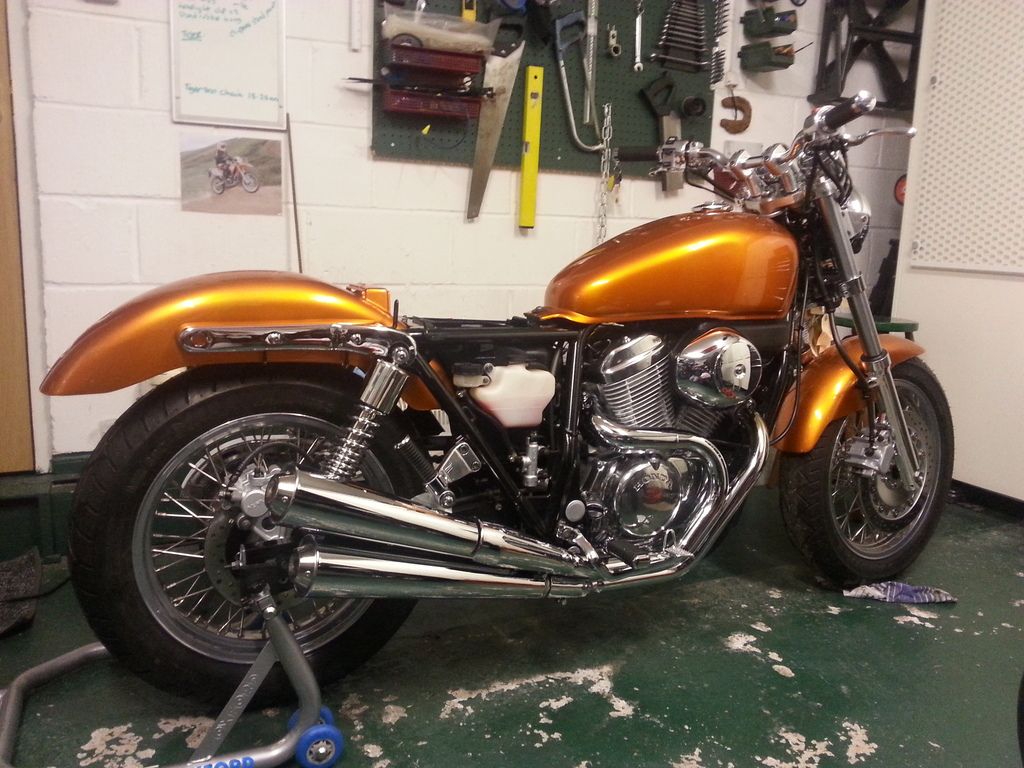
It's candy-apple orange, but toxic earwax did make me laugh !
No fear guys, in the flesh it's a bit more toned down than the photos make it out ... ignore the "flares" in the photo (the really bright bits), that's just the silver coat showing through the orange over-coat, which you don't see with the human eye.
No fear guys, in the flesh it's a bit more toned down than the photos make it out ... ignore the "flares" in the photo (the really bright bits), that's just the silver coat showing through the orange over-coat, which you don't see with the human eye.


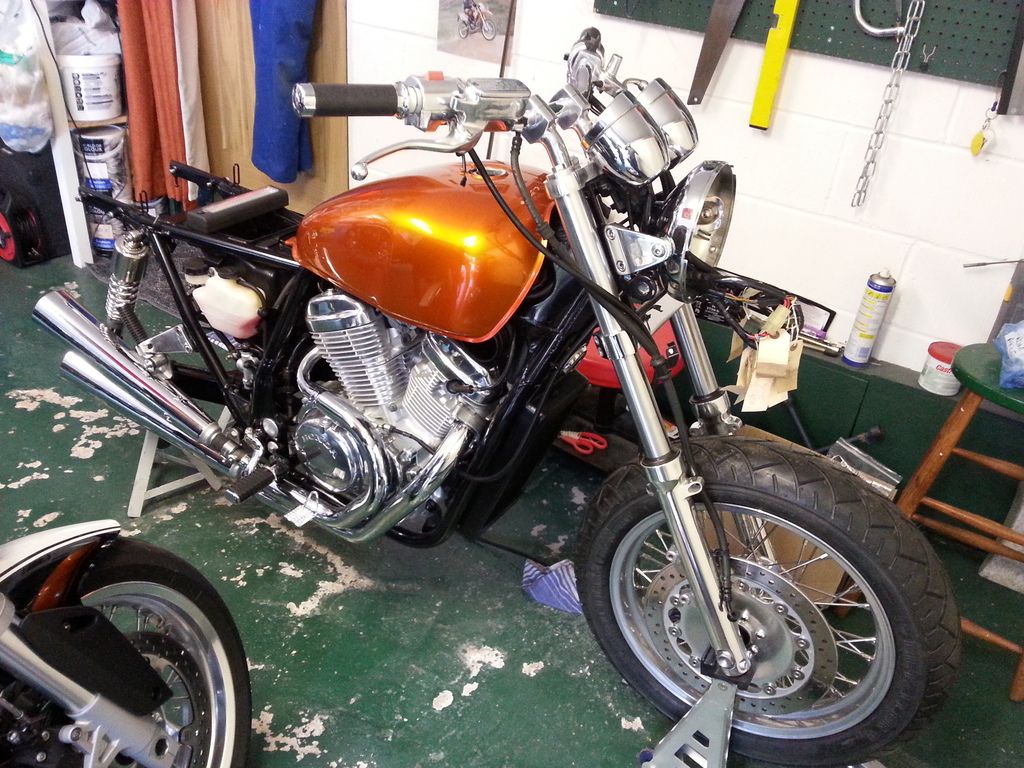
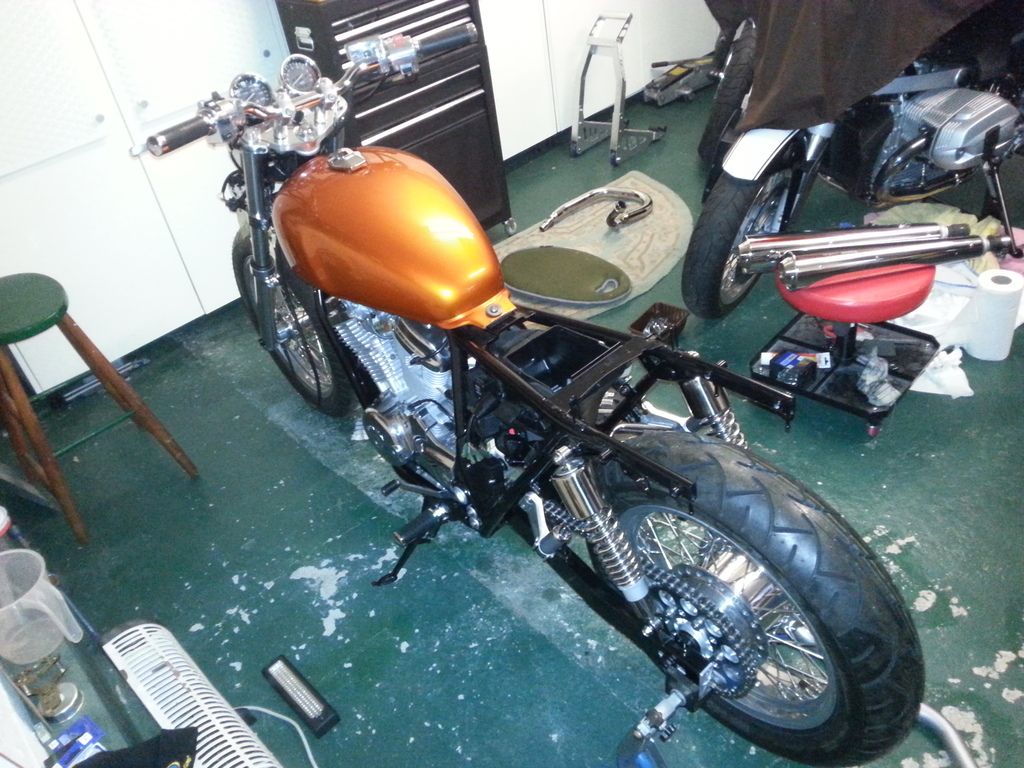
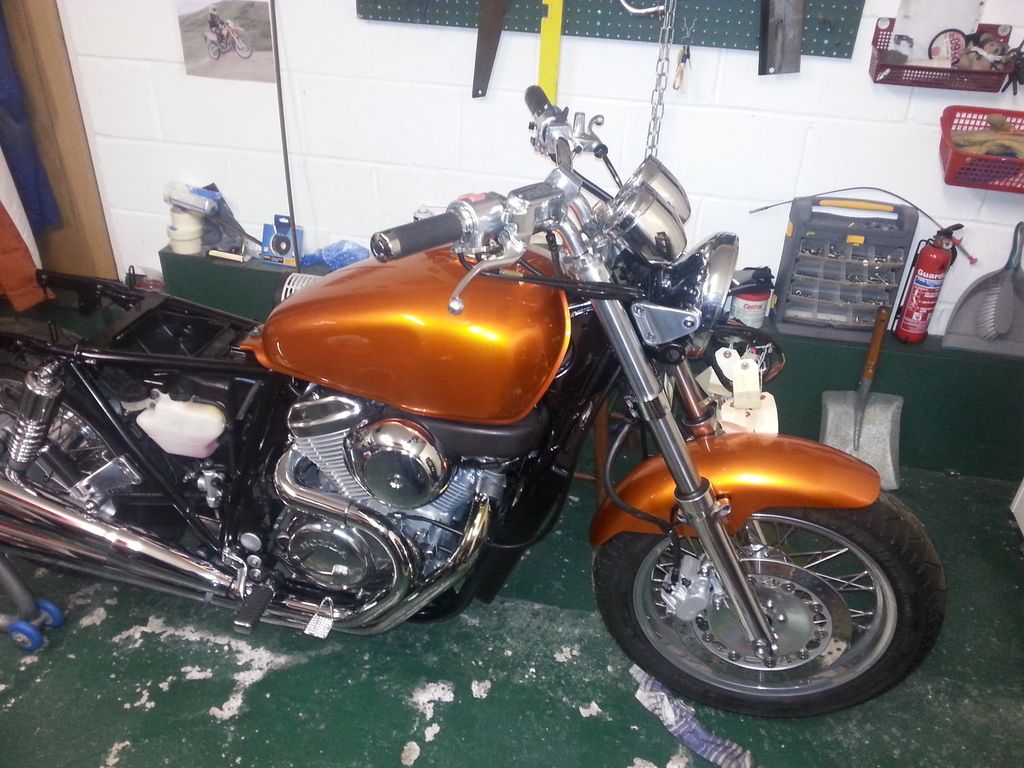
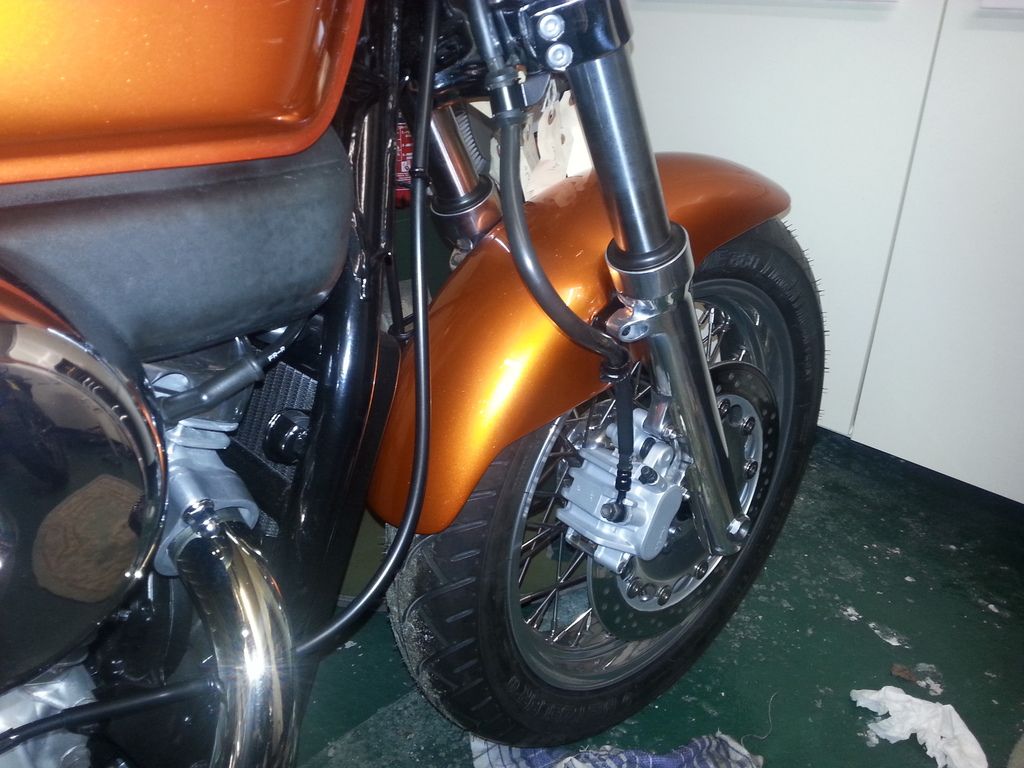
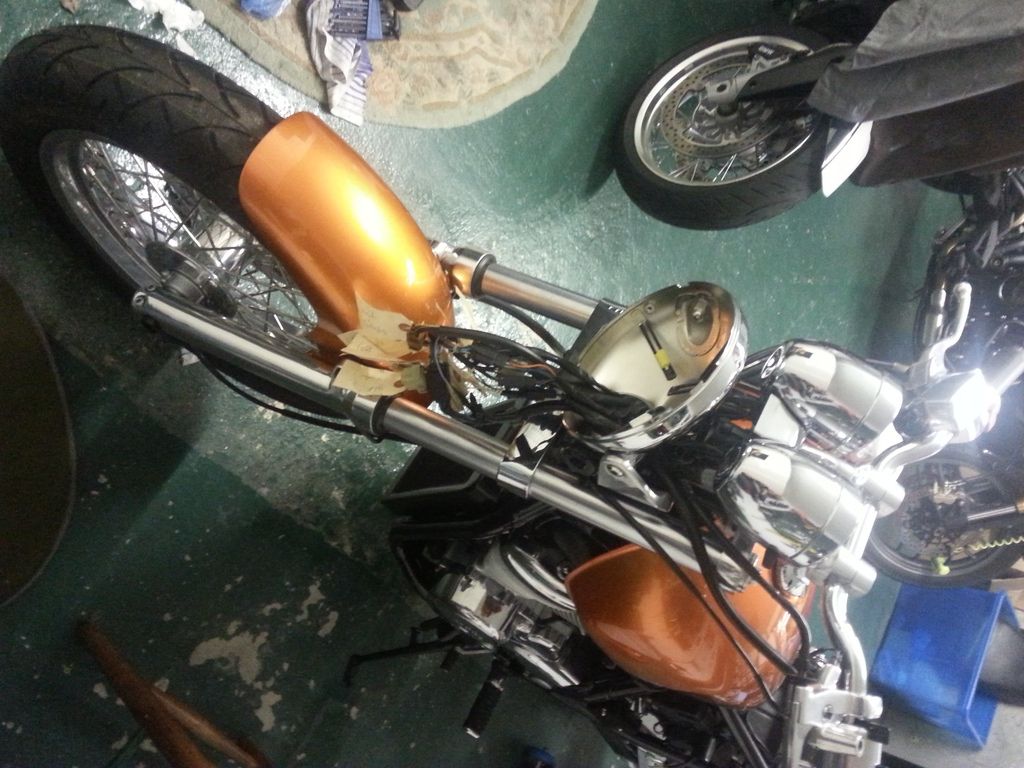
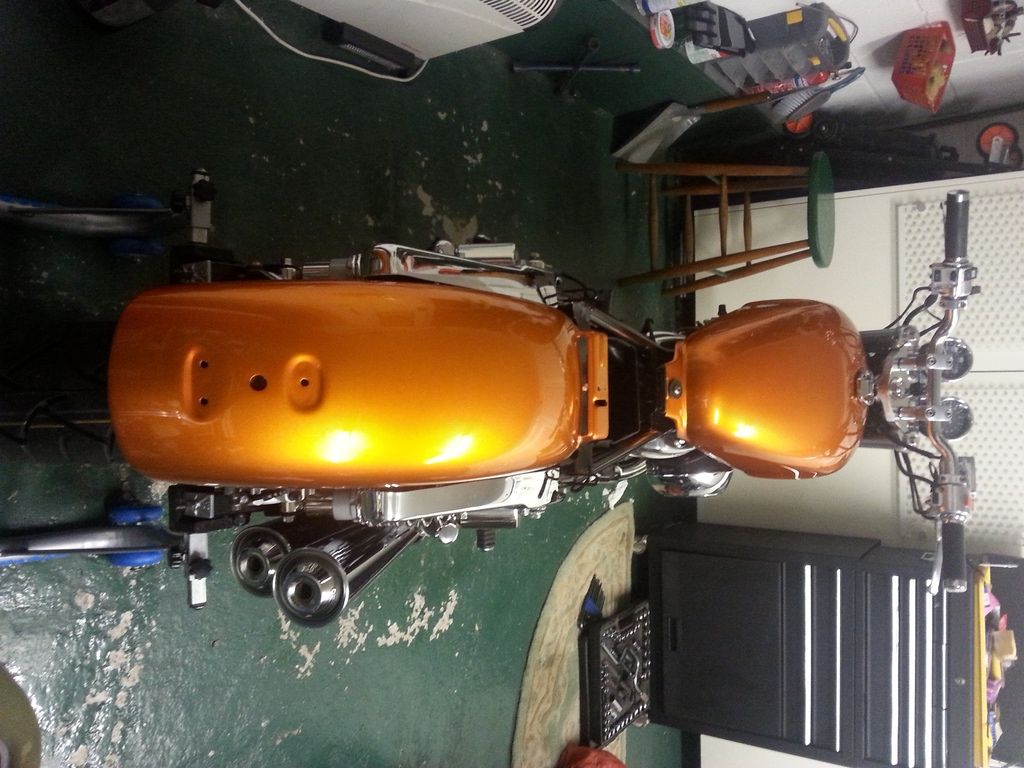
Very pleased with the job that Faircharm, Leicester have done. Quick, loose "plonk everything in place" to get an idea of the finished bike ... everything's off the bike again now and on the dining room table to harden off for 2-3 weeks.
I haven't decided what I'm doing with the seat yet ... I've a few ideas though.

And a reminder / flashback ...
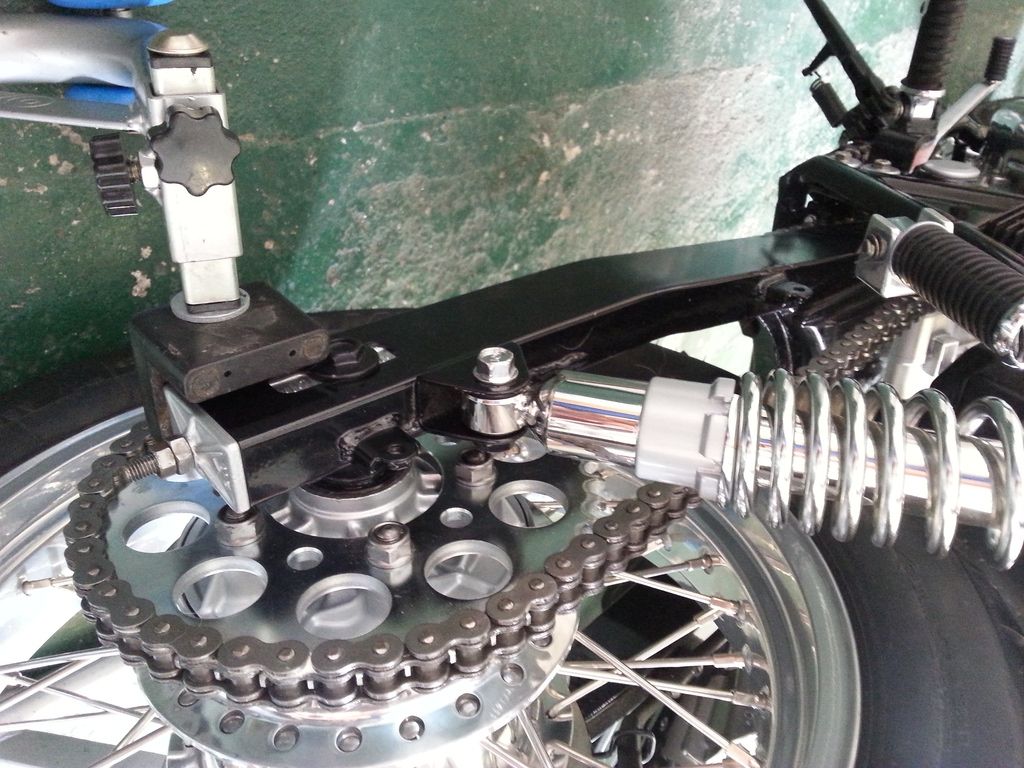
STILL ... A LONG WAY TO GO YET !! Right, enough stargazing, let's crack on with that rear wheel ...
I haven't decided what I'm doing with the seat yet ... I've a few ideas though.


And a reminder / flashback ...

STILL ... A LONG WAY TO GO YET !! Right, enough stargazing, let's crack on with that rear wheel ...
Hadn't thought about that ref the badges, will have a think. I know you can't get the chrome badges new any more, not sure about the black versions ...
Come on FDVictor ... photos of yours please !
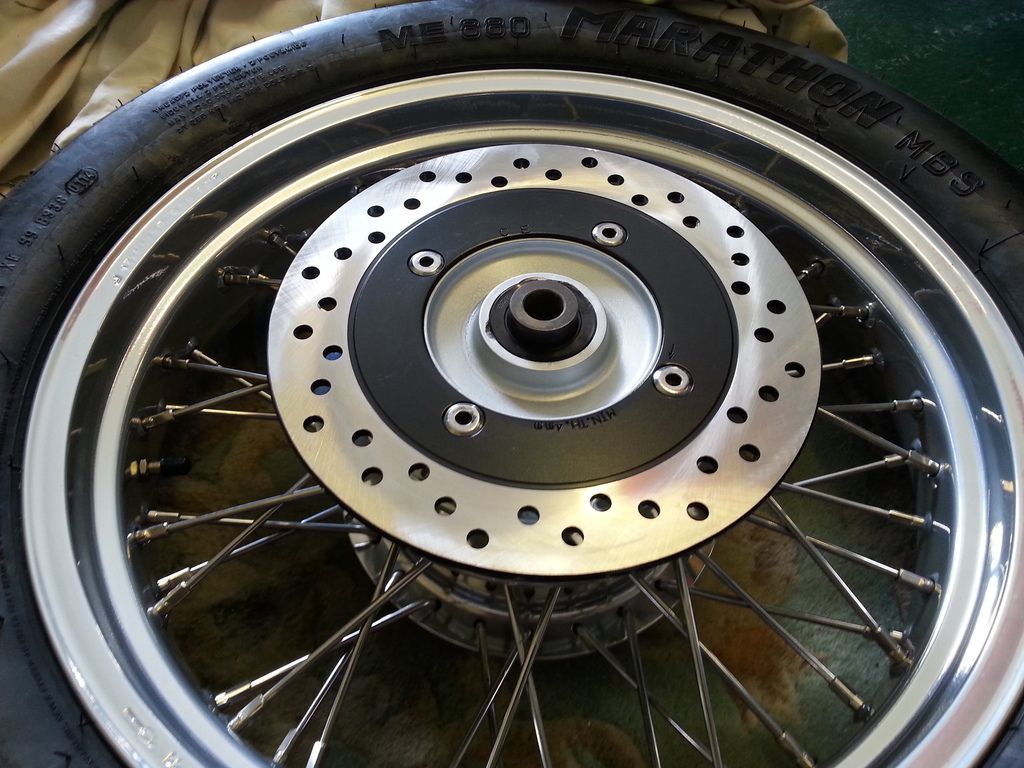
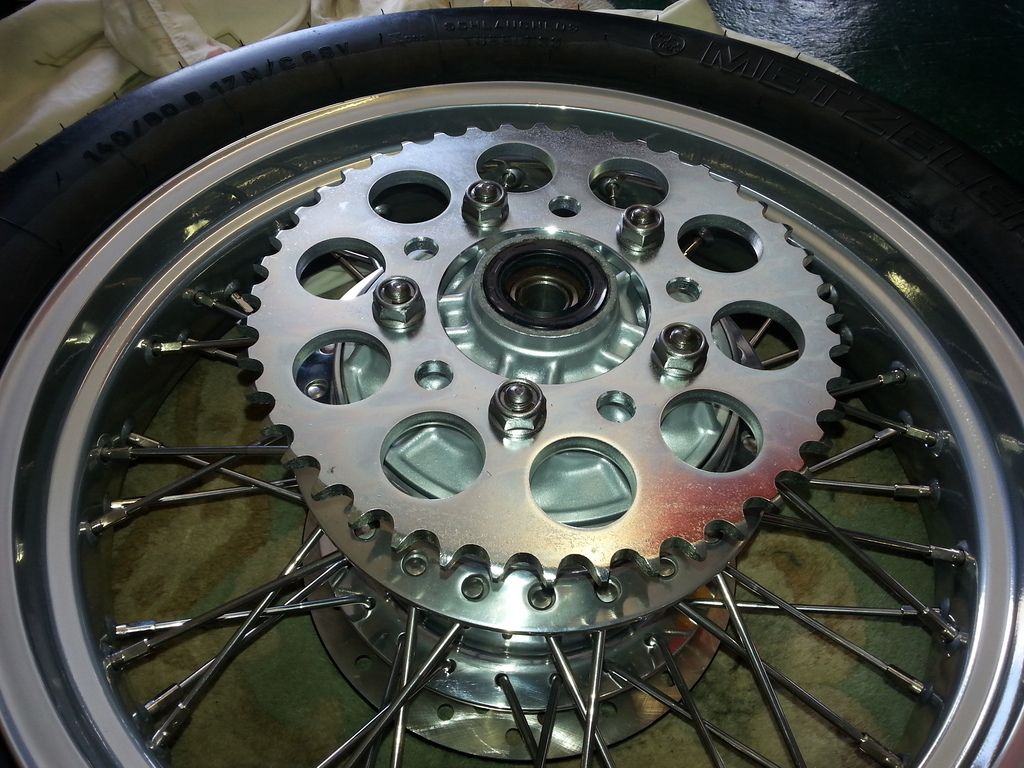
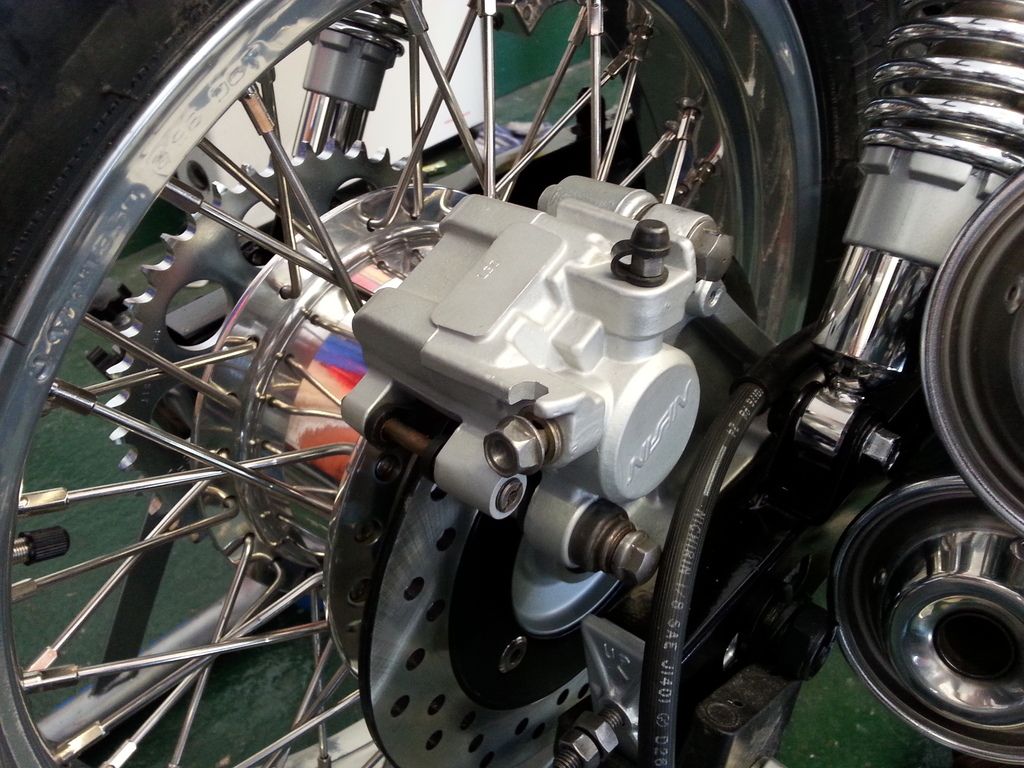
Added the new brake disk to the rear wheel
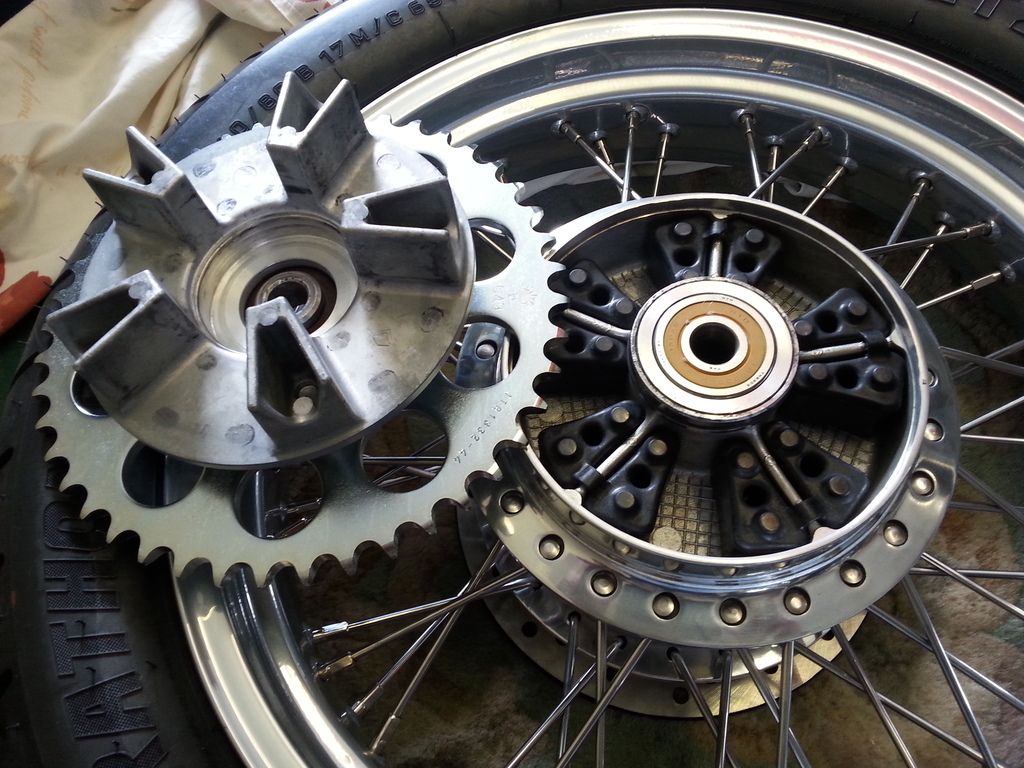
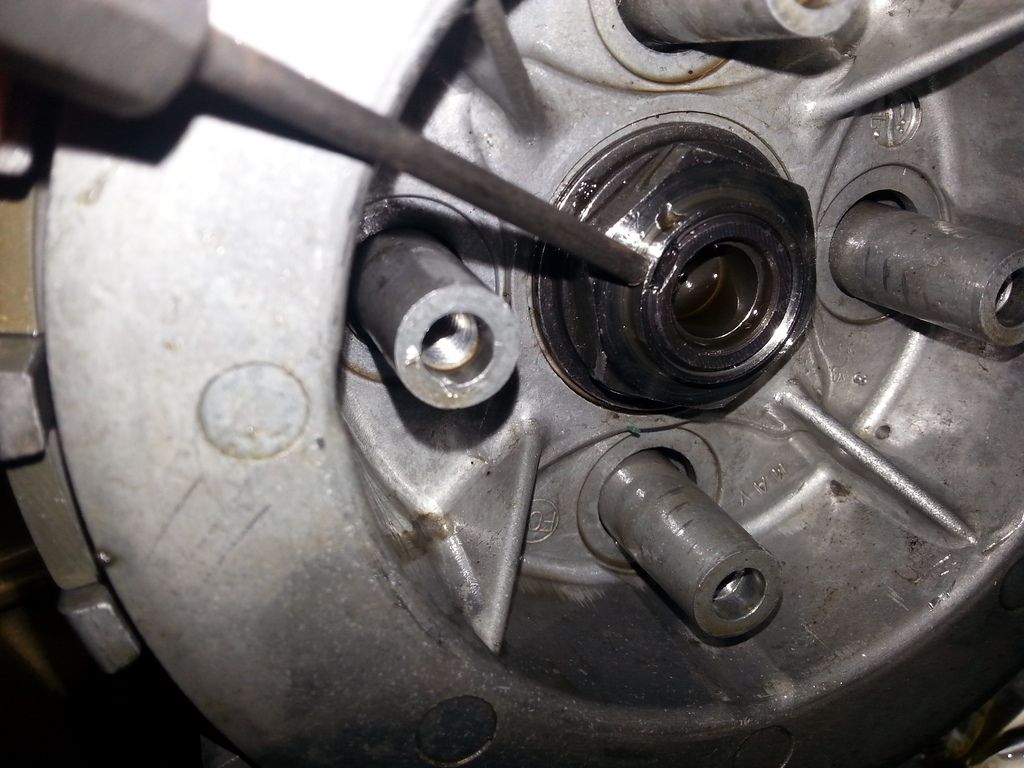
If you ever wondered what a cush drive looks like, then here you go. Basically the rear sprocket isn't actually fixed to the rest of the rear wheel ... it's 'buffered' with rubber, just to soften the drive a little.
And in position. It just plonks in place. Guess how many times this fell out again whilst trying to fit the rear wheel.
Rear wheel fitted, along with spacers and carrier for the rear brake. Rear spindle was greased gently. The wheel was a proper pig to fit ... probably took about 4 attempts to get right.
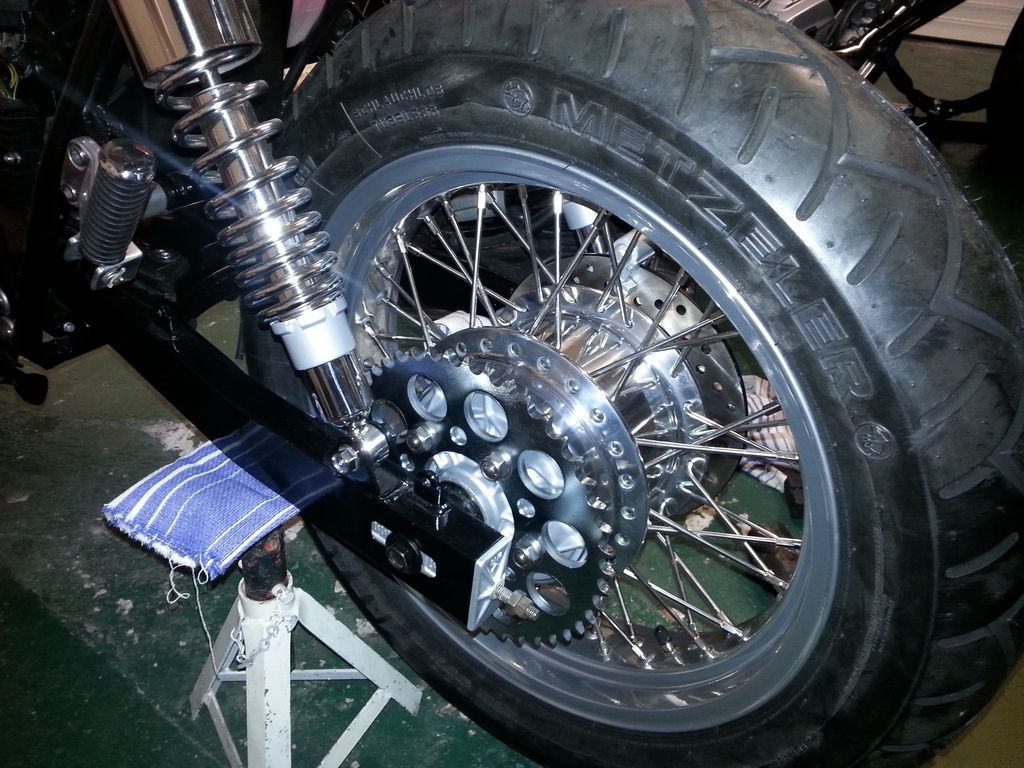
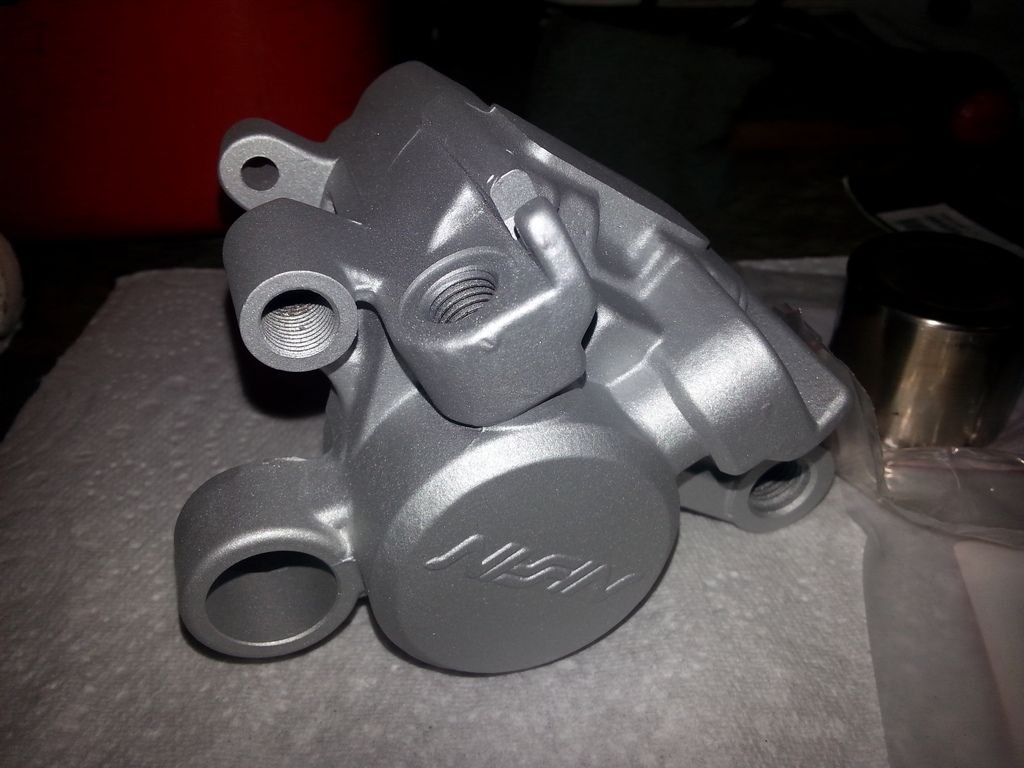
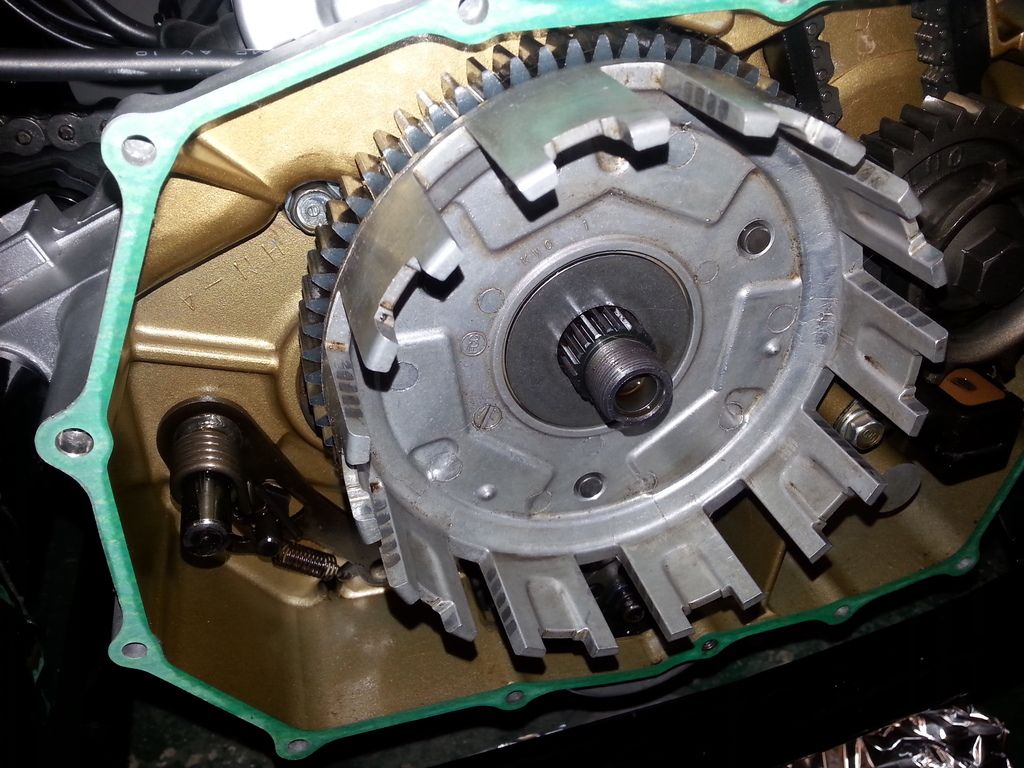
Started working on the rear brake caliper, which looks like this.

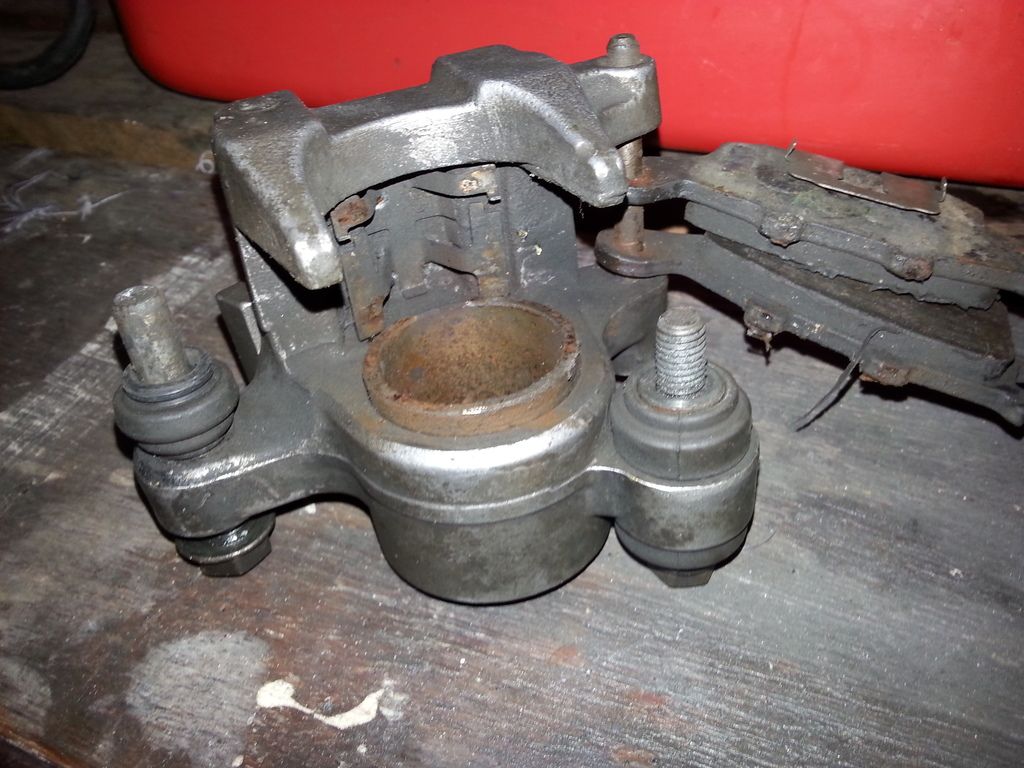
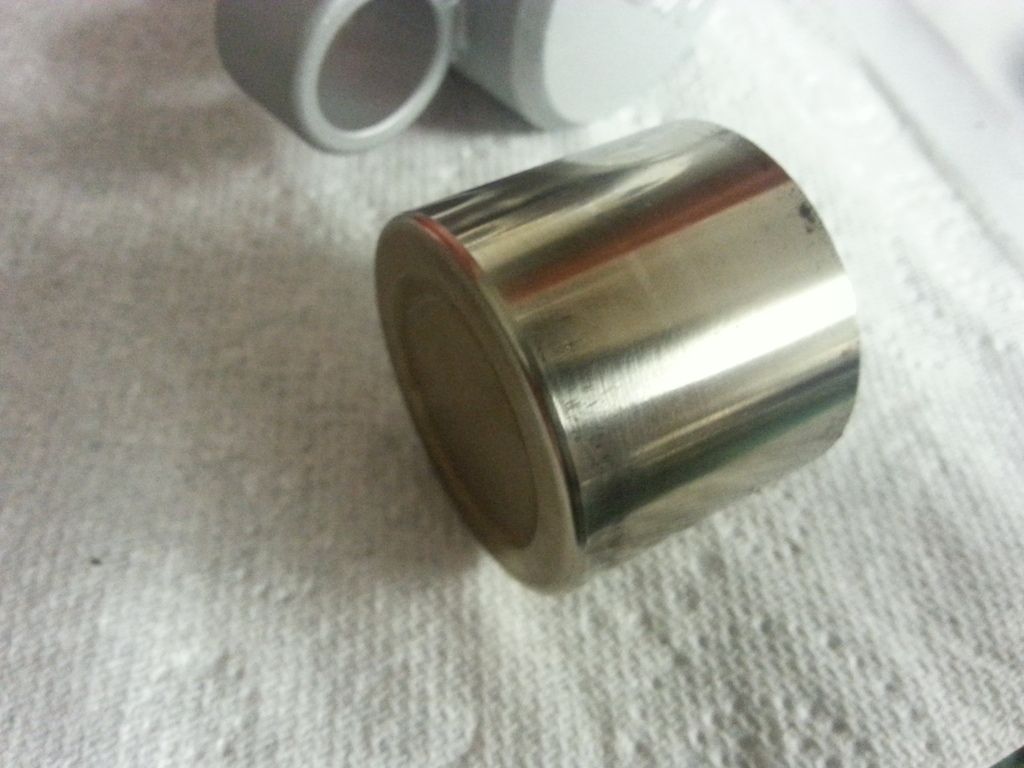
Ideally you use the hydraulics of the brake system in place to pump out the piston, with the pads removed. Of course I forgot to do this, so had to resort to clamping on mole grips then using screw drivers each side to lever out the piston slowly (it's a tight fit) (that's what she said).
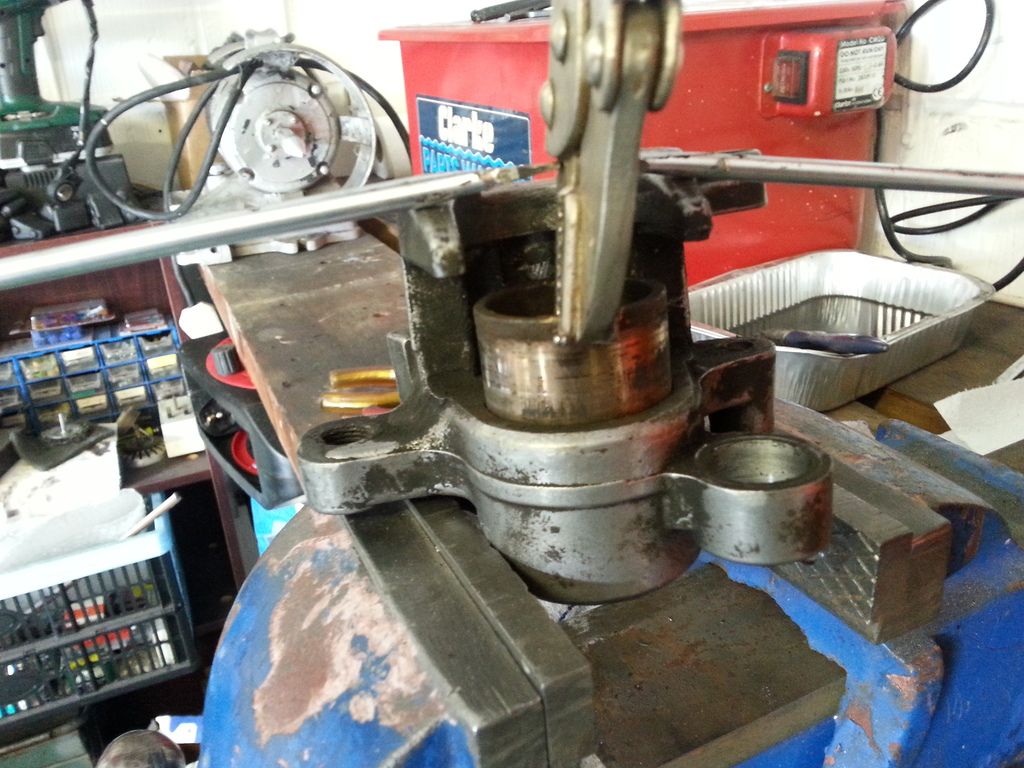
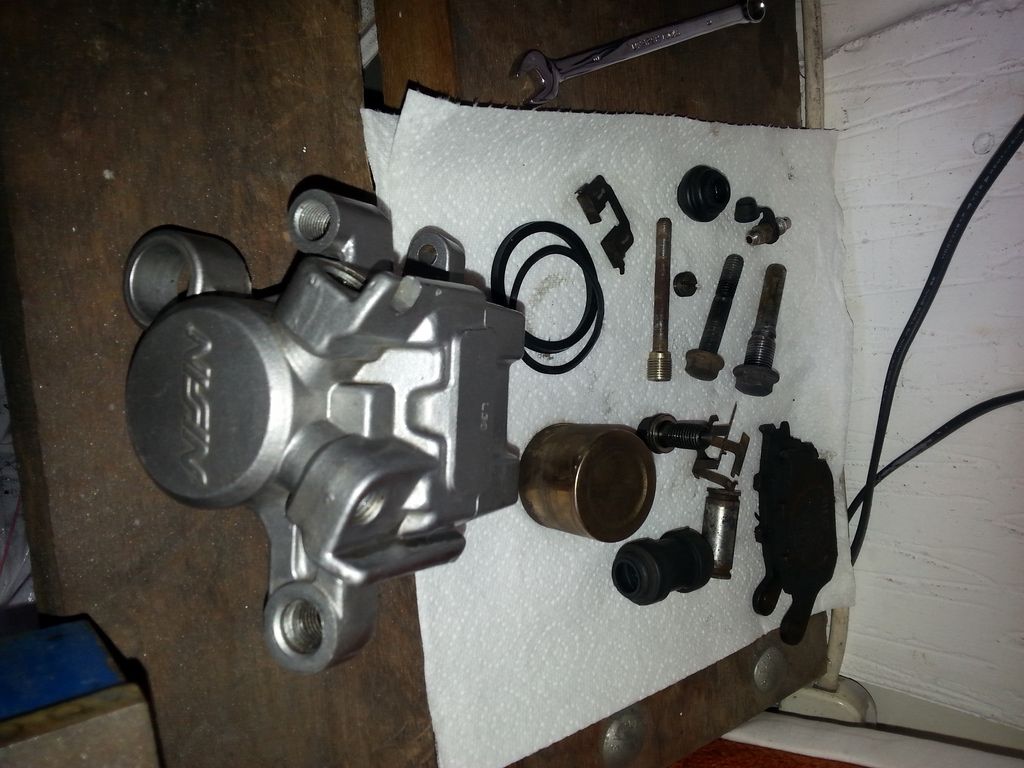
And totally disassembled.
Come on FDVictor ... photos of yours please !
Added the new brake disk to the rear wheel

If you ever wondered what a cush drive looks like, then here you go. Basically the rear sprocket isn't actually fixed to the rest of the rear wheel ... it's 'buffered' with rubber, just to soften the drive a little.

And in position. It just plonks in place. Guess how many times this fell out again whilst trying to fit the rear wheel.

Rear wheel fitted, along with spacers and carrier for the rear brake. Rear spindle was greased gently. The wheel was a proper pig to fit ... probably took about 4 attempts to get right.


Started working on the rear brake caliper, which looks like this.


Ideally you use the hydraulics of the brake system in place to pump out the piston, with the pads removed. Of course I forgot to do this, so had to resort to clamping on mole grips then using screw drivers each side to lever out the piston slowly (it's a tight fit) (that's what she said).

And totally disassembled.

SHE RUNS !
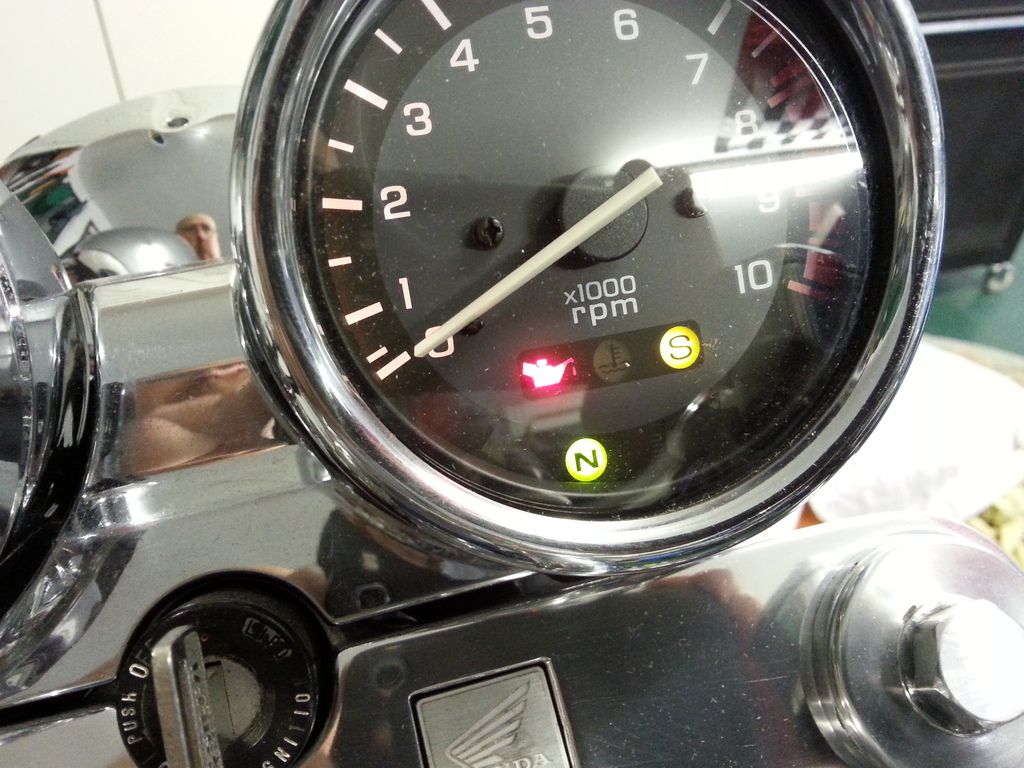
With the wheels on and the side stand on (I connected the side stand switch yesterday, which was fiddly) I thought I'd see if she would fire up. Refitted the battery, along with the last few electrical connectors (apart from the indicators and headlight). Turn the ignition key, and all the tell tail lights on the clocks work excluding ignition. Taking a spark plug out and turning the engine over and there's a nice healthy spark, so I suspect the bulb. I turned the engine over a few times till the oil pressure light went out, to get the oil moving round the engine.
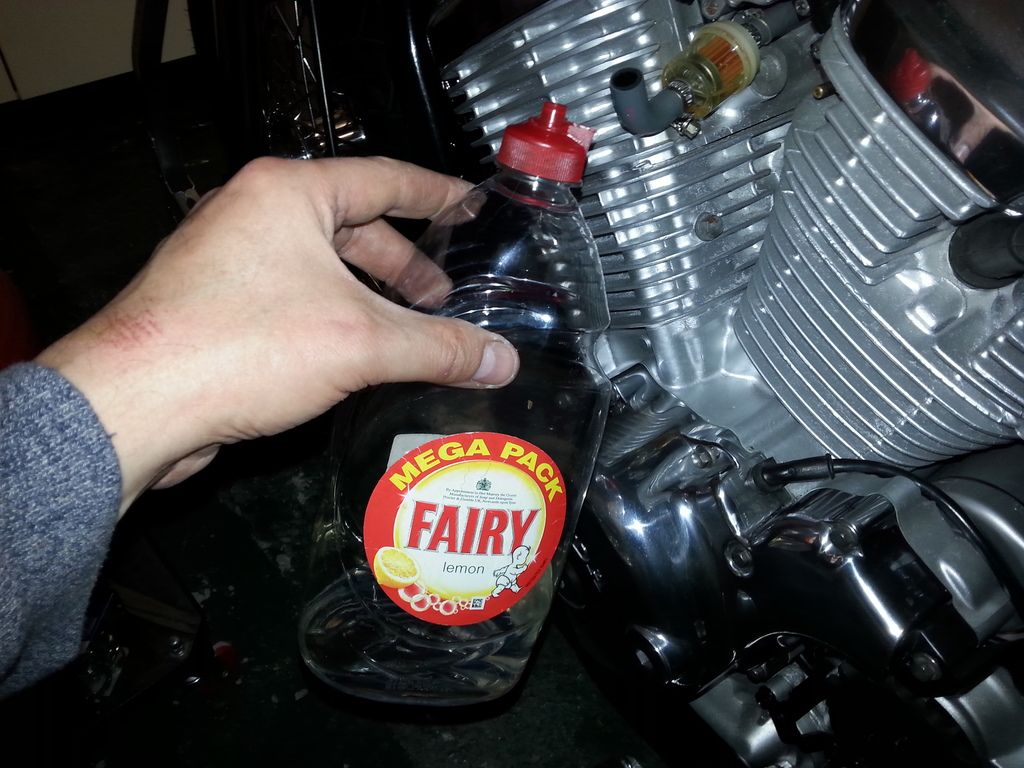
Now, how to get fuel into her ? I don't really want to fit the tank yet ... I haven't cleaned it out etc, plus I want to be able to get to the carbs in case I need to play. After a couple of abortive efforts I came up with the idea of using a washing up liquid bottle ... inserted into the fuel inlet pipe, I could squeeze/inject enough fuel into the carbs to fill the float chambers ... enough to run for a couple of minutes anyway.
Oh, I also fitted a fuel filter (which the bike doesn't have as standard) though I think I'm going to have to move it a bit as it's a bit too close to the carbs currently for comfort.
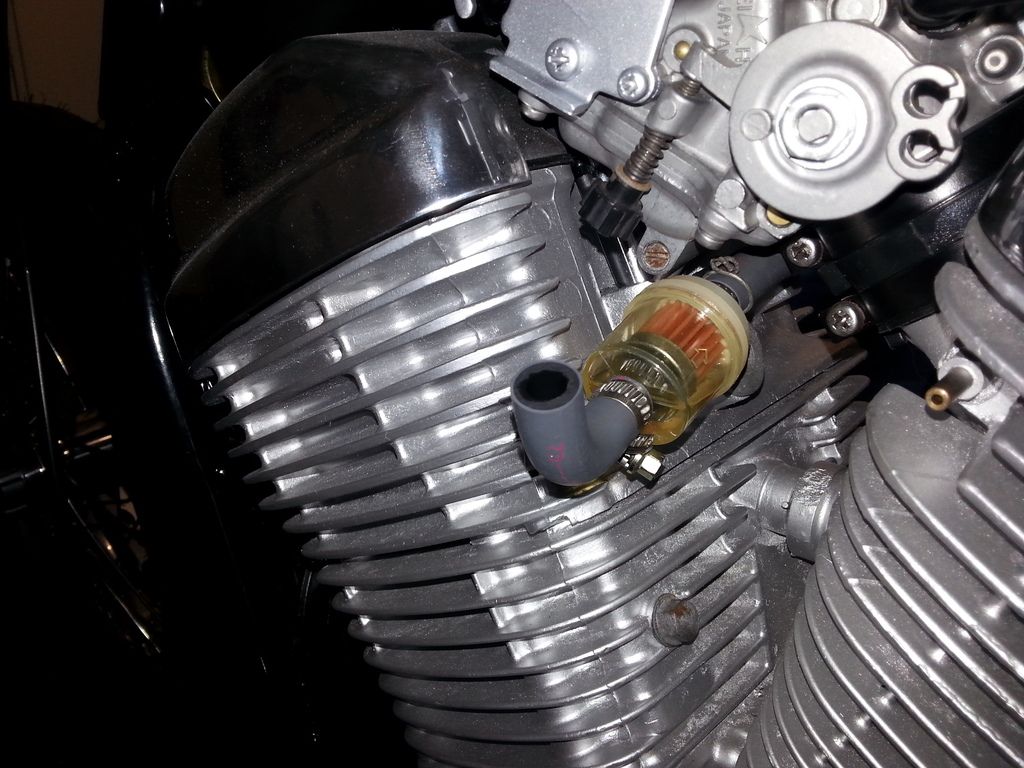
So ... fuel, check. Battery, check. Spark, check. Lets give this a go. As I haven't fitted the throttle cables yet, I've got to open the throttle mech on the carbs by hand.
She's turning over with vigour, but not starting ... she wants to start, with a light chuff, but doesn't catch. After a few minutes of head scratching I realised I'd missed one vital thing ... CHOKE ! Dur. I'm that used these days to not having to use a choke, I'd forgotten. Engage the choke and she fires up instantly.
She sounds pretty good actually ! Chuggy/chuffy in an agricultural way, "rorty". First couple of times I ran her, she was grumpy and misfiring a bit, but settled down as she got warmer. Better than I'd expect from a semi rebuilt engine. But improved by the third, longer run.
However the biggest problem was that she would rev sweetly to 6k, then just hit a brick wall (redline is 8k). After some playing and messing, sealing the vacuum take off for the fuel tap (which isn't on yet) and semi-covering the air intake means she'd rev happily to 8k. So, I think I just need to finish off all the air intake and pipe work (put the air filter on etc). I think someone did mention on this thread last year about the lack of revs (which she also did before I stripped her down) being down to running too lean due to air filter not being on.
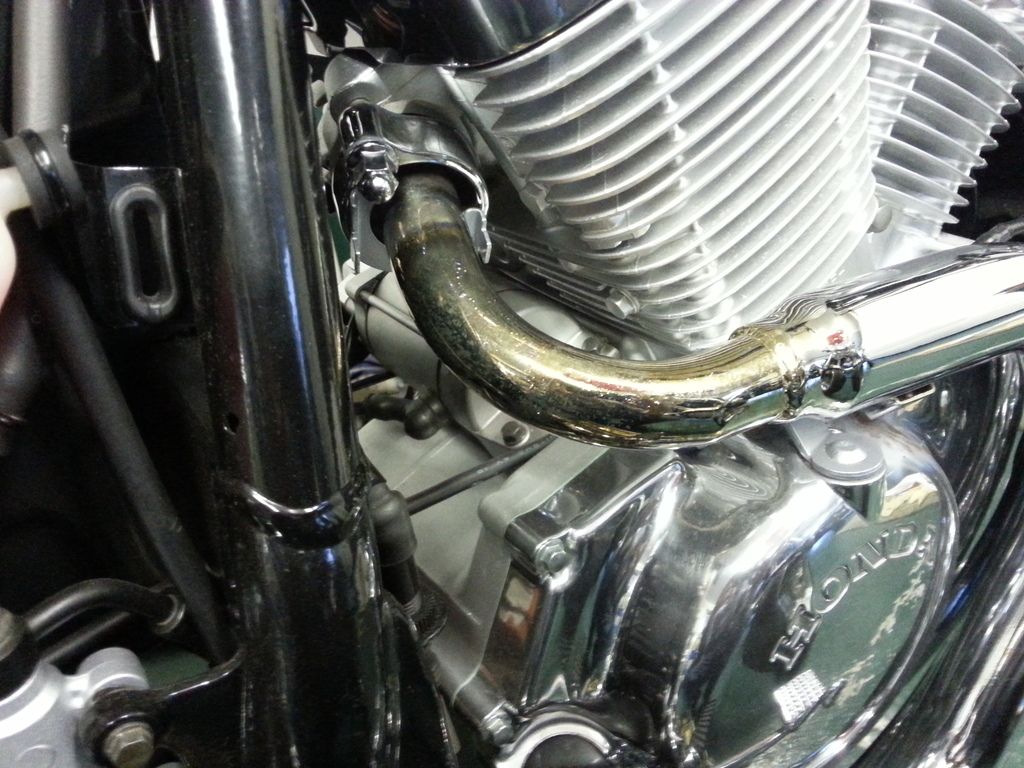
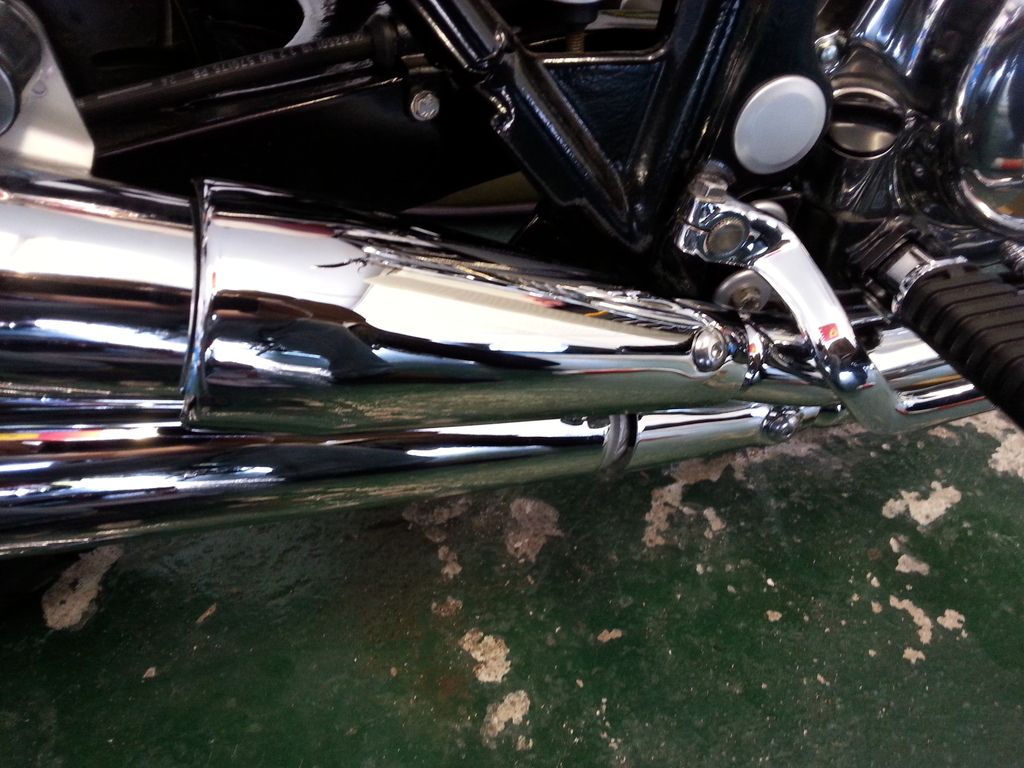
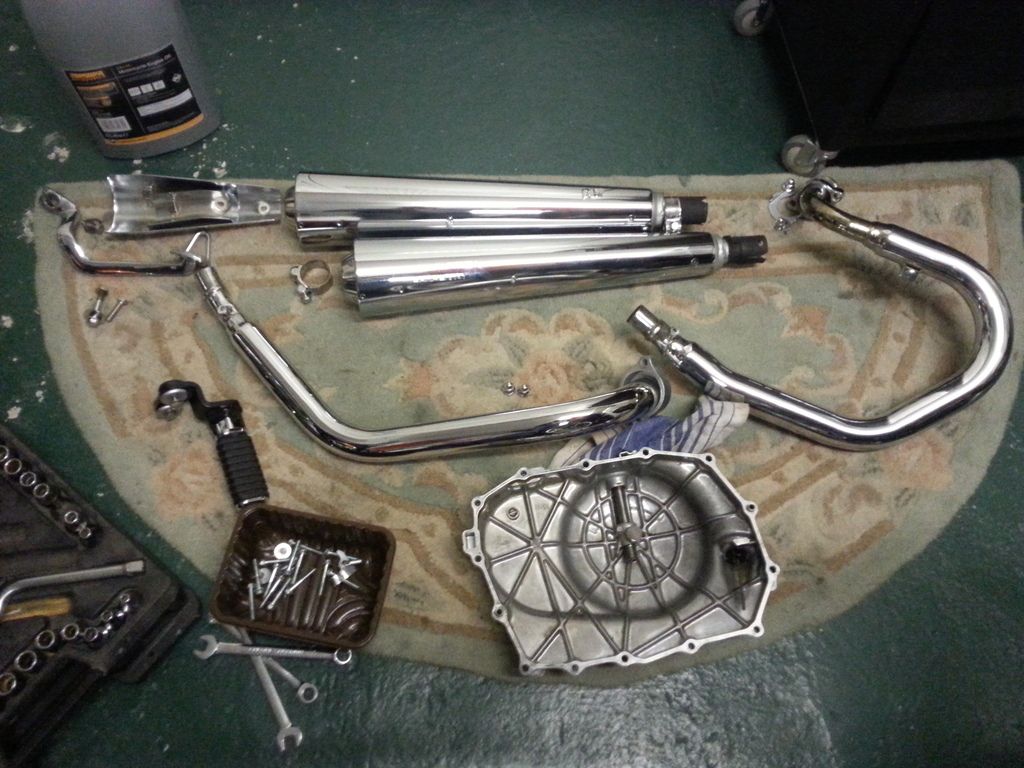
No water or oil leaks that I can see (though I will inspect closely another day when she's cooled down, also check the fluid levels). She runs up and down the gears just fine. Exhaust seems gas tight, though one pipe which was reconditioned by "Maple Vauxhall" is yellowing badly (expected I guess) but also seems to be bubbling slightly. Will have to keep an eye on that ... I'm not surprised frankly, the s t job they did in every other respect. Luckily this is covered by a large chrome cover which I hadn't put on till I was sure the exhaust was gas tight ... I can do that now, and hide it away.
I'll do you a video when I don't need both hands to keep her running well.
Niggles :
- The ignition tell tail light doesn't work. Presume a blown bulb or bad connector. If the former that'll be annoying as I'll have to take it all apart again.
- The (rebuilt) starter motor sometimes just spins without engaging ... or rather that's what it sounds like, bearing in mind it's a direct drive. Will have to take off and apart again.
- There's a light rattle from somewhere towards the front of the engine at idle.
- Light bubbling of chrome on one exhaust pipe where it attaches to the engine
In other news ...
Rear brake calliper cleaned up and painted with heat proof paint, then cured in the oven (Wife : "Darling, what are you cooking ? Me : "Er ... nothing")
The brake piston may be saveable (below after cleaning up) but I think I'll see if I can get a new one as it's borderline.
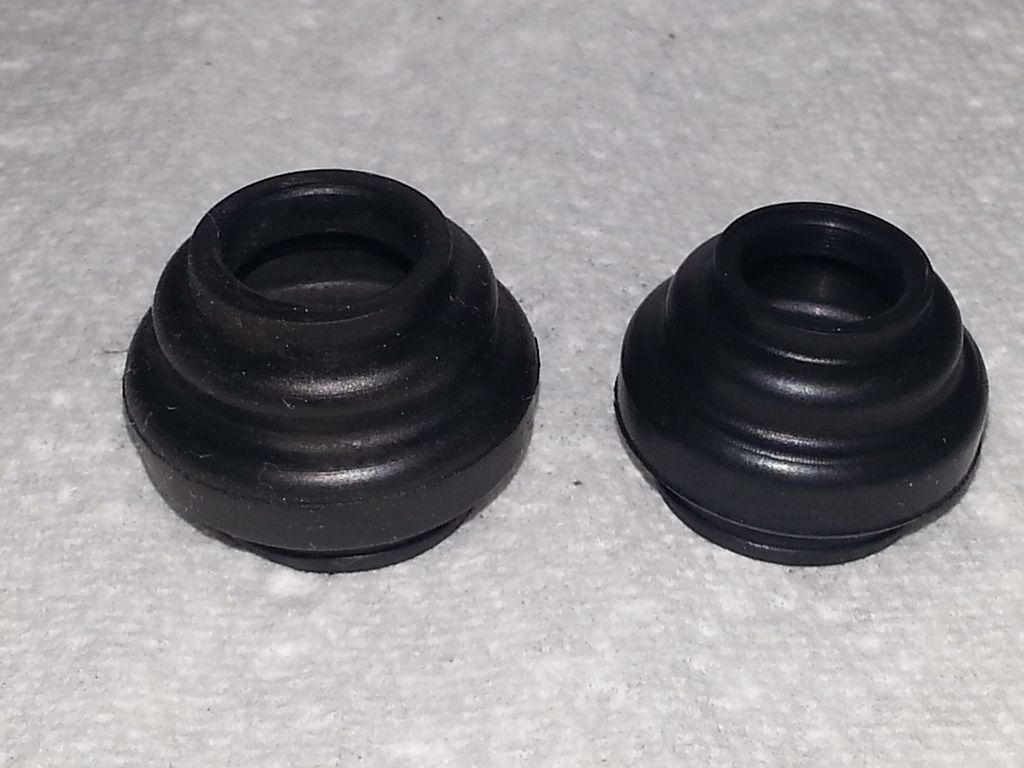
New rubbers
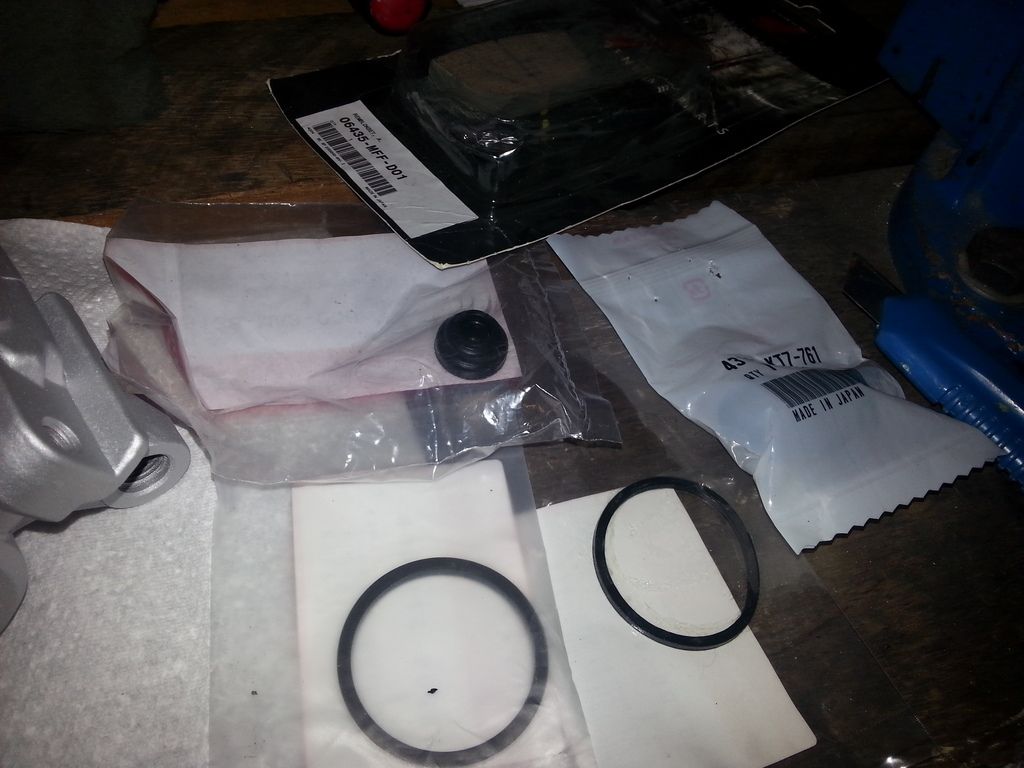
Just shows how brake fluid expands rubber ... old on left, new on right
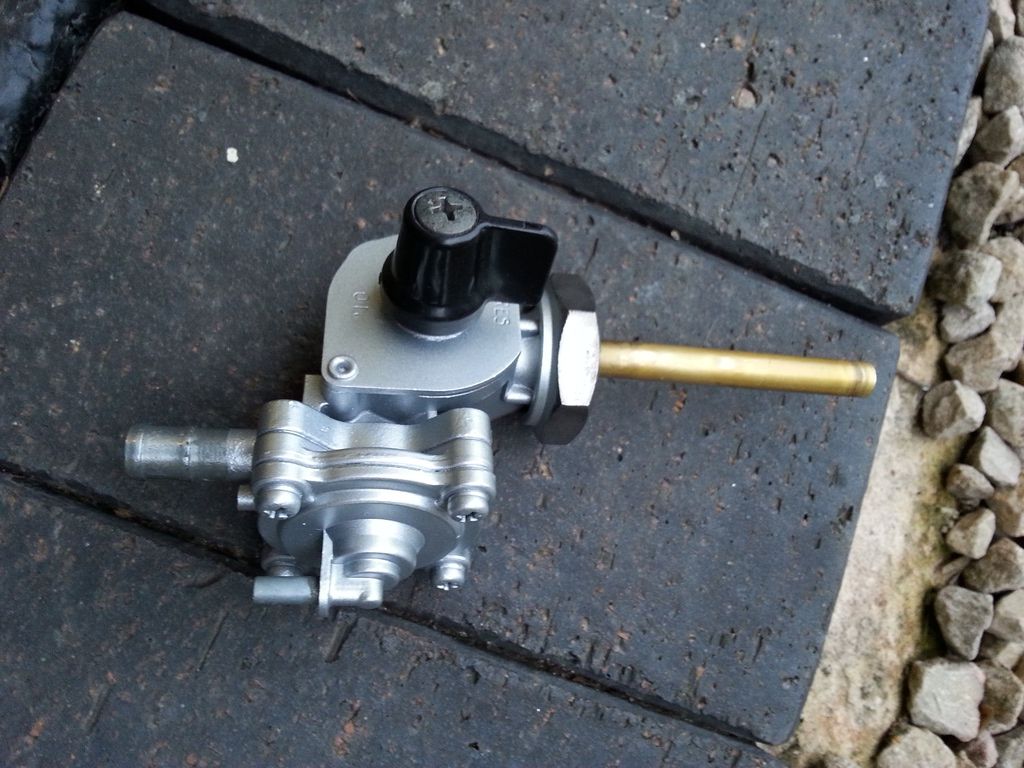
Cleaned, derusted, primed and painted fuel tap.
With the wheels on and the side stand on (I connected the side stand switch yesterday, which was fiddly) I thought I'd see if she would fire up. Refitted the battery, along with the last few electrical connectors (apart from the indicators and headlight). Turn the ignition key, and all the tell tail lights on the clocks work excluding ignition. Taking a spark plug out and turning the engine over and there's a nice healthy spark, so I suspect the bulb. I turned the engine over a few times till the oil pressure light went out, to get the oil moving round the engine.

Now, how to get fuel into her ? I don't really want to fit the tank yet ... I haven't cleaned it out etc, plus I want to be able to get to the carbs in case I need to play. After a couple of abortive efforts I came up with the idea of using a washing up liquid bottle ... inserted into the fuel inlet pipe, I could squeeze/inject enough fuel into the carbs to fill the float chambers ... enough to run for a couple of minutes anyway.

Oh, I also fitted a fuel filter (which the bike doesn't have as standard) though I think I'm going to have to move it a bit as it's a bit too close to the carbs currently for comfort.

So ... fuel, check. Battery, check. Spark, check. Lets give this a go. As I haven't fitted the throttle cables yet, I've got to open the throttle mech on the carbs by hand.
She's turning over with vigour, but not starting ... she wants to start, with a light chuff, but doesn't catch. After a few minutes of head scratching I realised I'd missed one vital thing ... CHOKE ! Dur. I'm that used these days to not having to use a choke, I'd forgotten. Engage the choke and she fires up instantly.
She sounds pretty good actually ! Chuggy/chuffy in an agricultural way, "rorty". First couple of times I ran her, she was grumpy and misfiring a bit, but settled down as she got warmer. Better than I'd expect from a semi rebuilt engine. But improved by the third, longer run.
However the biggest problem was that she would rev sweetly to 6k, then just hit a brick wall (redline is 8k). After some playing and messing, sealing the vacuum take off for the fuel tap (which isn't on yet) and semi-covering the air intake means she'd rev happily to 8k. So, I think I just need to finish off all the air intake and pipe work (put the air filter on etc). I think someone did mention on this thread last year about the lack of revs (which she also did before I stripped her down) being down to running too lean due to air filter not being on.
No water or oil leaks that I can see (though I will inspect closely another day when she's cooled down, also check the fluid levels). She runs up and down the gears just fine. Exhaust seems gas tight, though one pipe which was reconditioned by "Maple Vauxhall" is yellowing badly (expected I guess) but also seems to be bubbling slightly. Will have to keep an eye on that ... I'm not surprised frankly, the s
t job they did in every other respect. Luckily this is covered by a large chrome cover which I hadn't put on till I was sure the exhaust was gas tight ... I can do that now, and hide it away.
I'll do you a video when I don't need both hands to keep her running well.
Niggles :
- The ignition tell tail light doesn't work. Presume a blown bulb or bad connector. If the former that'll be annoying as I'll have to take it all apart again.
- The (rebuilt) starter motor sometimes just spins without engaging ... or rather that's what it sounds like, bearing in mind it's a direct drive. Will have to take off and apart again.
- There's a light rattle from somewhere towards the front of the engine at idle.
- Light bubbling of chrome on one exhaust pipe where it attaches to the engine
In other news ...
Rear brake calliper cleaned up and painted with heat proof paint, then cured in the oven
(Wife : "Darling, what are you cooking ? Me : "Er ... nothing")
The brake piston may be saveable (below after cleaning up) but I think I'll see if I can get a new one as it's borderline.

New rubbers

Just shows how brake fluid expands rubber ... old on left, new on right

Cleaned, derusted, primed and painted fuel tap.

Thanks for posting FDVictor ... I like the bobbed tail !
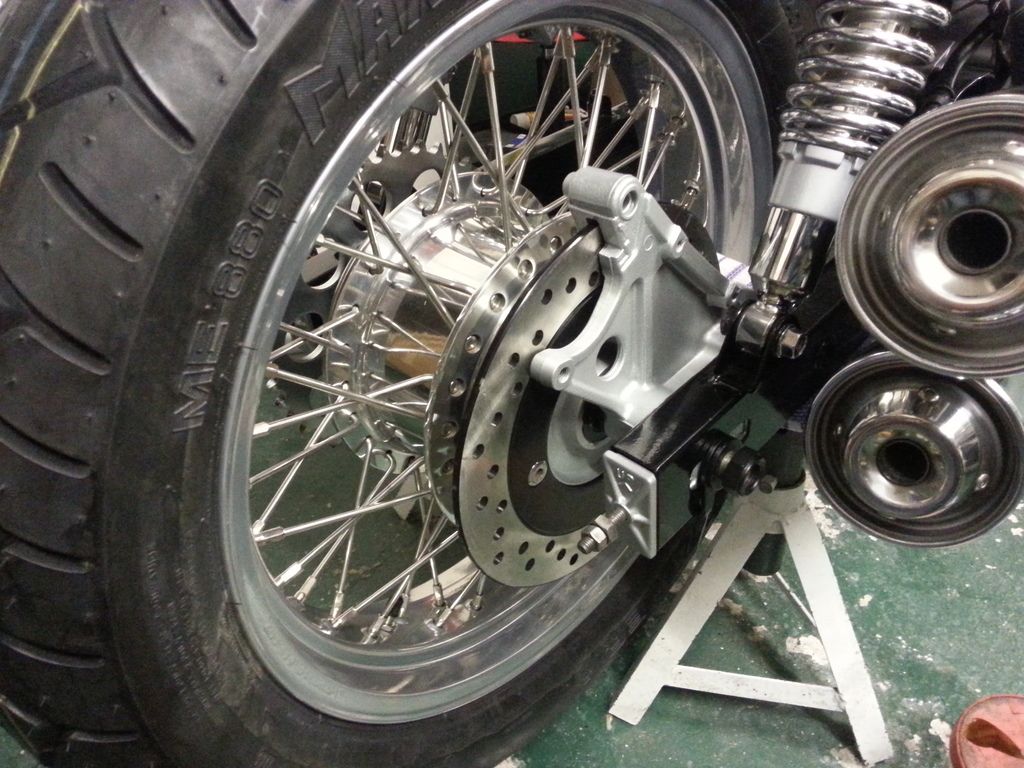
Rear calliper overhauled and back together.
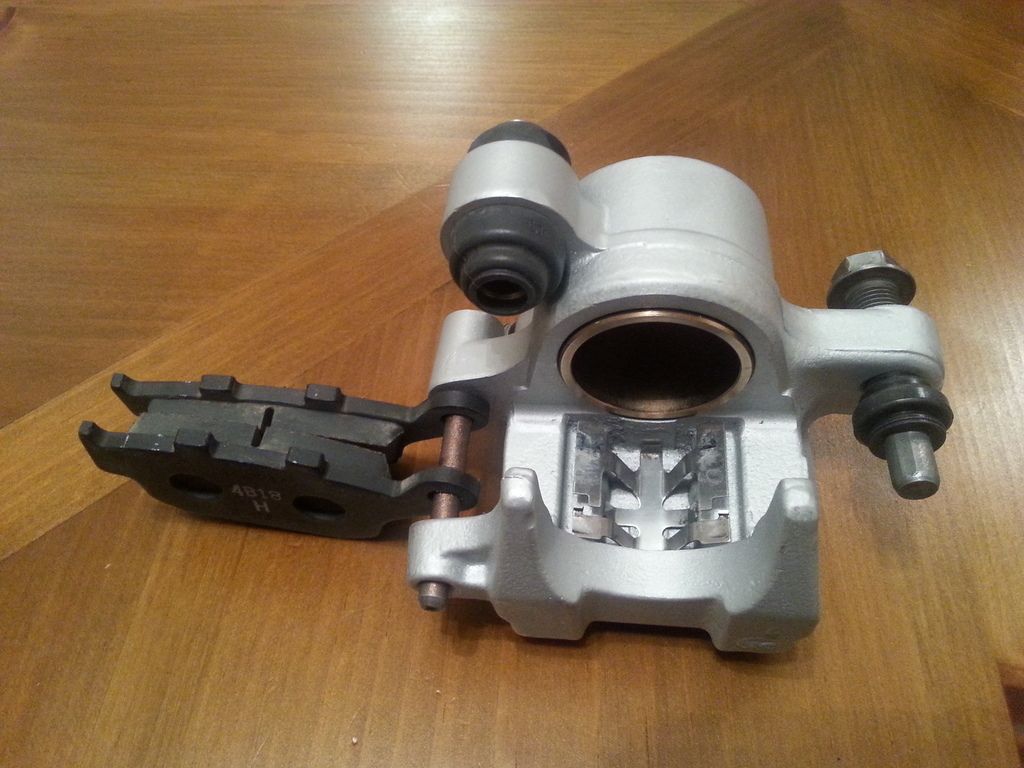
Mounted on the carrier.
Now I know the exhaust doesn't leak, fitted the two chrome covers over the joints between back box and downpipes. The two bolts holding them on are Triumph Tiger 800 'beak' mounting bolts, would you believe.
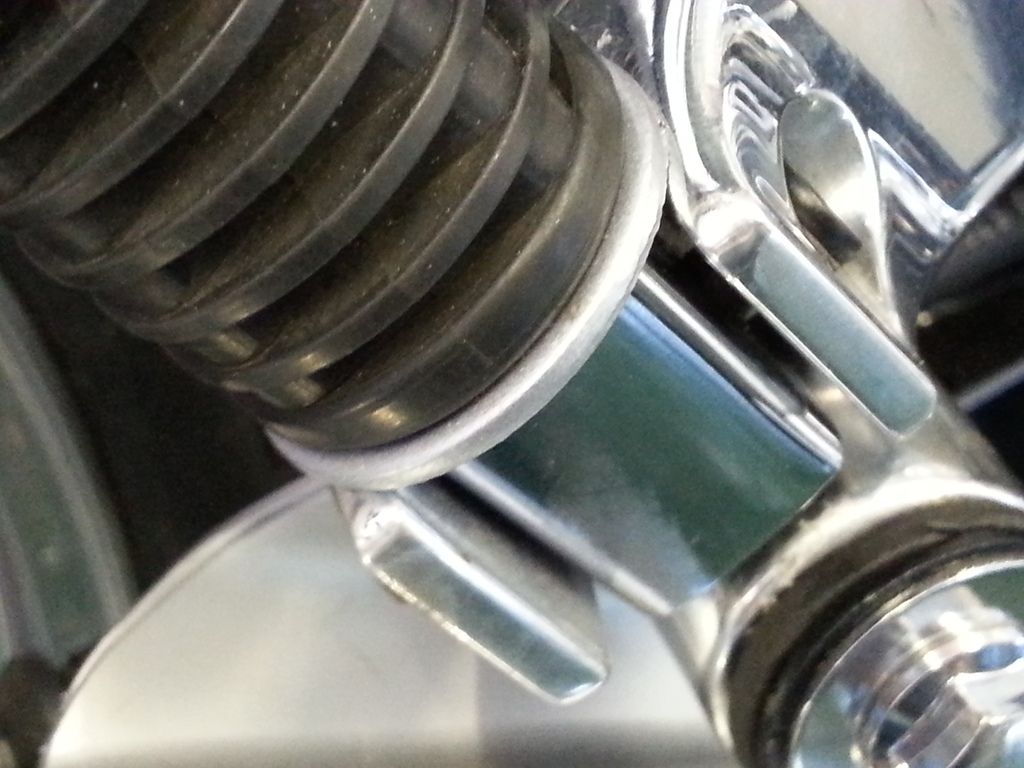
I forgot to fit two metal disks on the pillion footrests, which meant they flapped around a bit ... so I took them apart and fitted them.
bd bd bd bd !
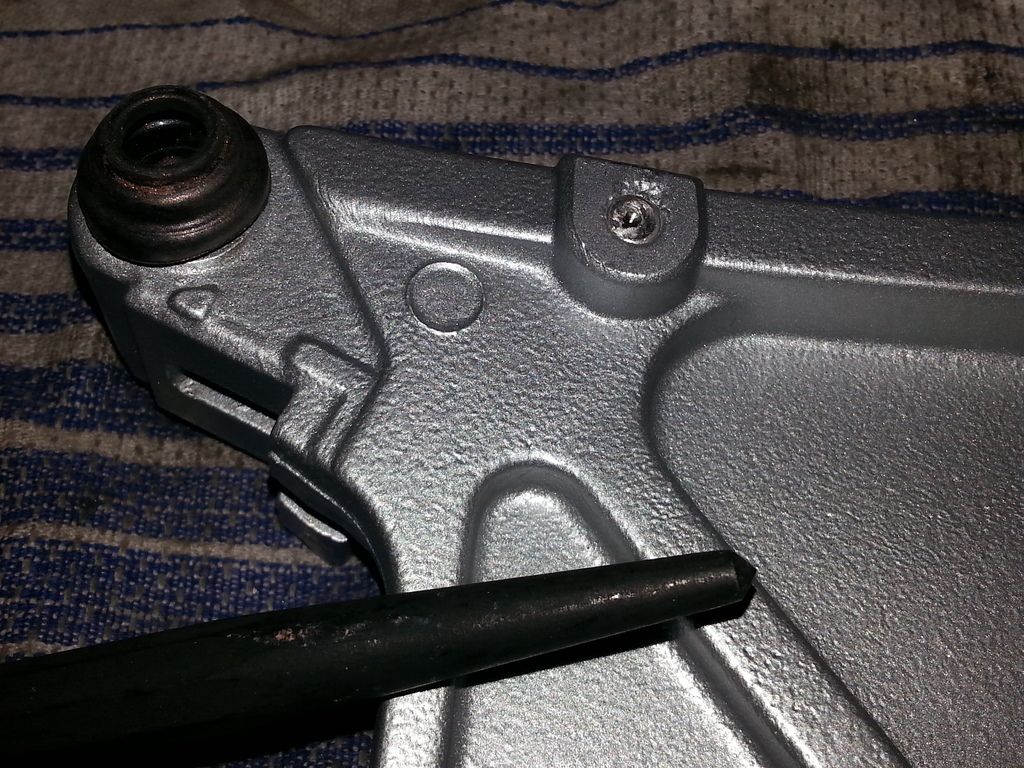
Fitting the wire hanger for the rear brake hose, one bolt suddenly unexplicably went tight ... then wouldn't tighten ... then wouldn't undo ... and then snapped !
I've got to take the whole bd rear end apart and wheel off again, so I can drill and tap the hole. COCK !
Rear calliper overhauled and back together.

Mounted on the carrier.

Now I know the exhaust doesn't leak, fitted the two chrome covers over the joints between back box and downpipes. The two bolts holding them on are Triumph Tiger 800 'beak' mounting bolts, would you believe.

I forgot to fit two metal disks on the pillion footrests, which meant they flapped around a bit ... so I took them apart and fitted them.

b
d bd bd bd !Fitting the wire hanger for the rear brake hose, one bolt suddenly unexplicably went tight ... then wouldn't tighten ... then wouldn't undo ... and then snapped !
I've got to take the whole b
d rear end apart and wheel off again, so I can drill and tap the hole. COCK !
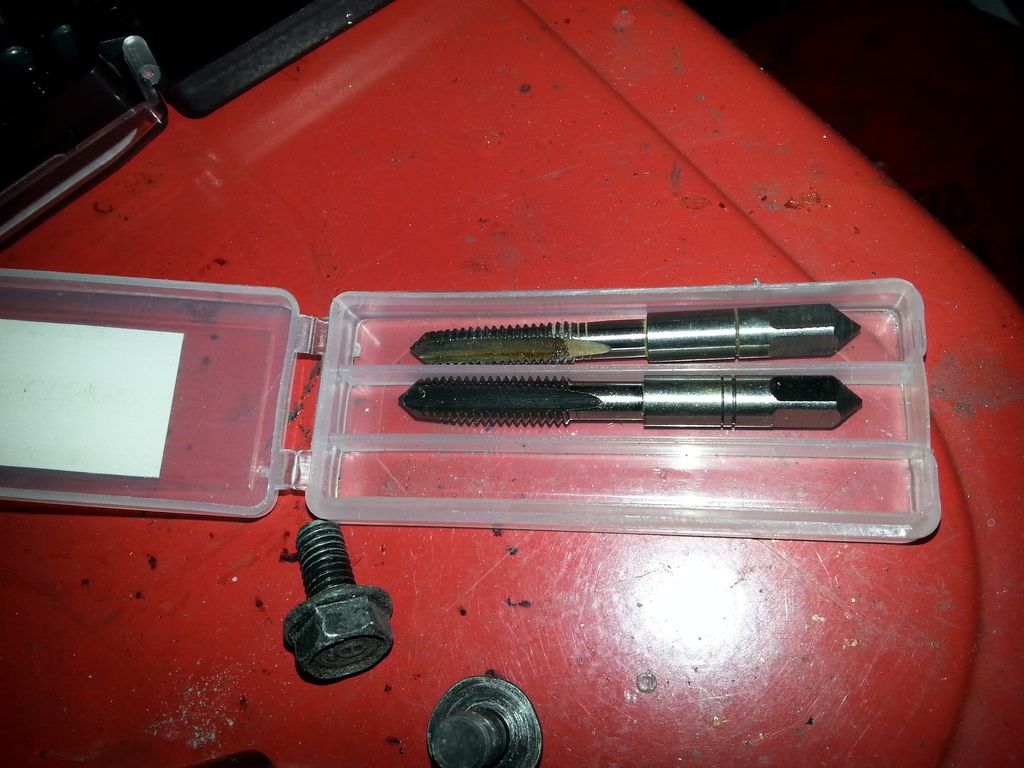
Dry your tear little cirian75 ... this gives me the opportunity to show you how to save a broken bolt.
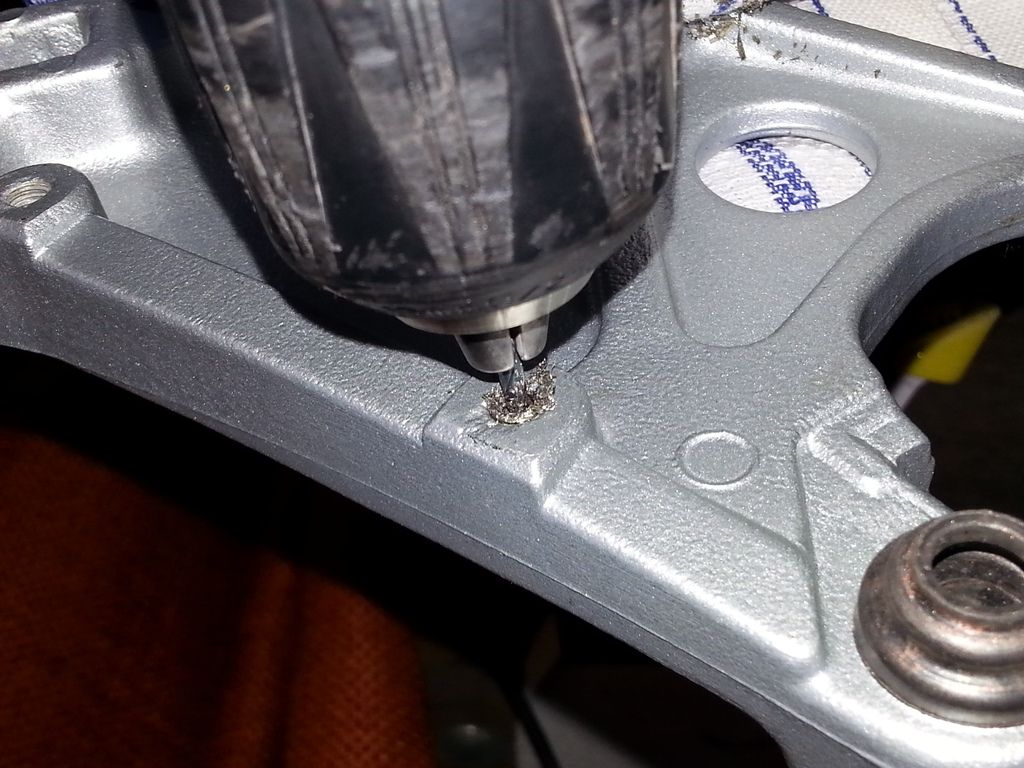
First, centre pop the broken bolt. It's very important to get it right in the middle of the bolt, or as near as you can. Take your time with this bit.
Start by drilling a small pilot hole all the way through the bolt. Again, it pays you to take your time on this early stage, and ensure the hole is straight and in the middle of the bolt. Don't over heat your drill bit, and allow it to cool occasionally (bolts are normally made of quite hard steel). Use oil to lubricate and cool the drill bit. (Sorry for photobucket being an arse and rotating images again)
Once the pilot hole is all the way through, use increasing sized drills to drill continue to expand the hole. It's easier, and more controllable, to do it this way. I used 4 different sized drills in the end. Remember to keep using small amounts of oil.
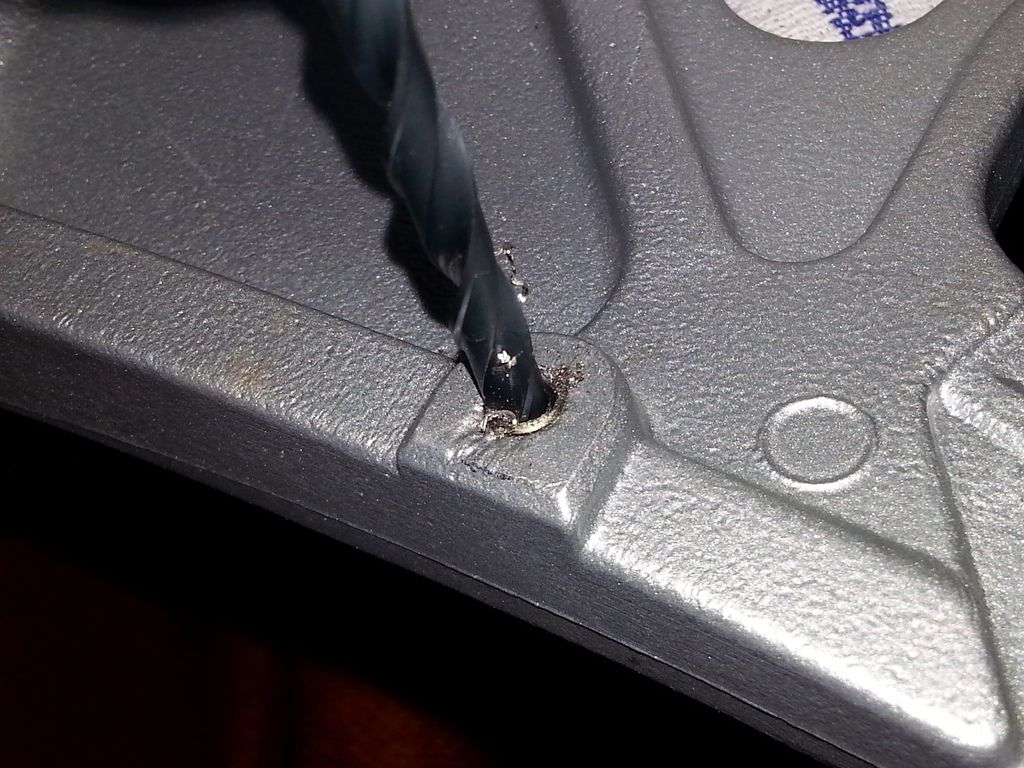
Hey, would you look at that ... I must have been pretty close to the centre. Some of the thread of the broken bolt comes out as a coil ! This is a 6mm thread, so I'm drilling to 5mm. Use a chart like this to know what size hole you need to drill for the tap. http://www.shender4.com/metric_thread_chart.htm
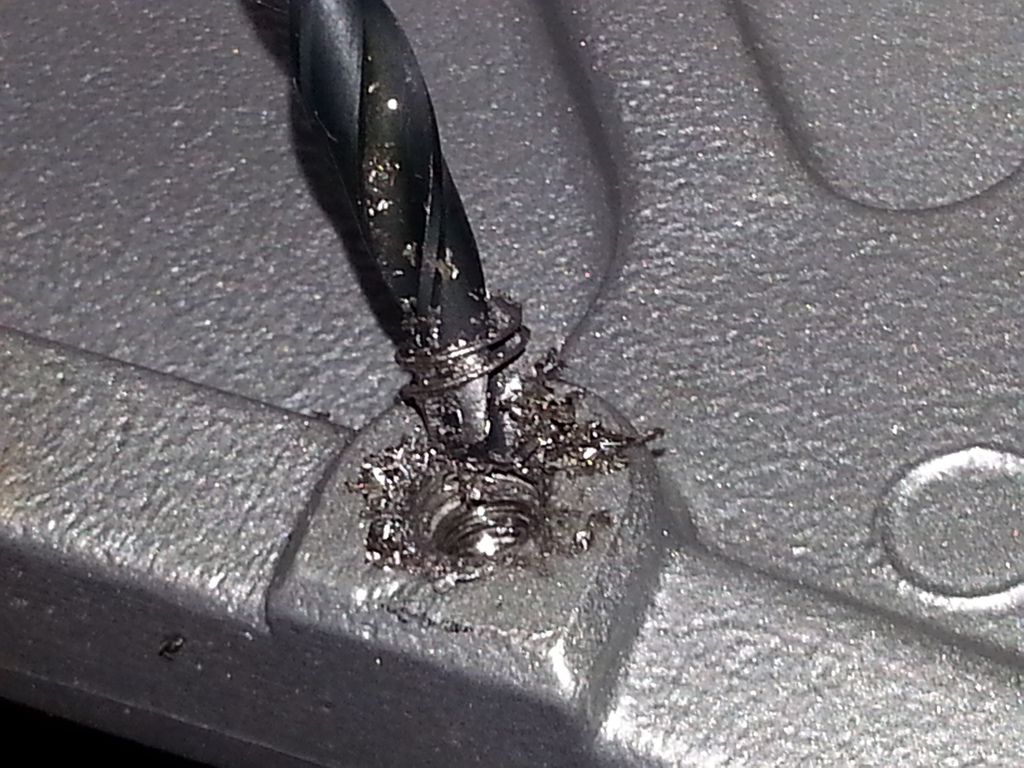
This leaves you with a hole like this ... clean all the swarf up as much as you can.

Taps come in threes (two shown) per size, with increasing tapers. I'm going to start with the biggest taper. If I was tapping a blind hole I'd work my way up to the 'fattest' tap (to ensure the thread goes all the way to the bottom) but this hole goes all the way through the casting, so I don't need to worry about that.
I decided to tap from the OTHER side ... the side with the good, original thread still there. This ensured that I didn't cross threads when I went from the 'bad' area to the good thread. I had to stop several times, back up, and clean out the tap as it started to jam. I also ran paper towel through the hole, trying to get the swarf out. Remember, it's 1/2 a turn forward, then back off 1/4 a turn.
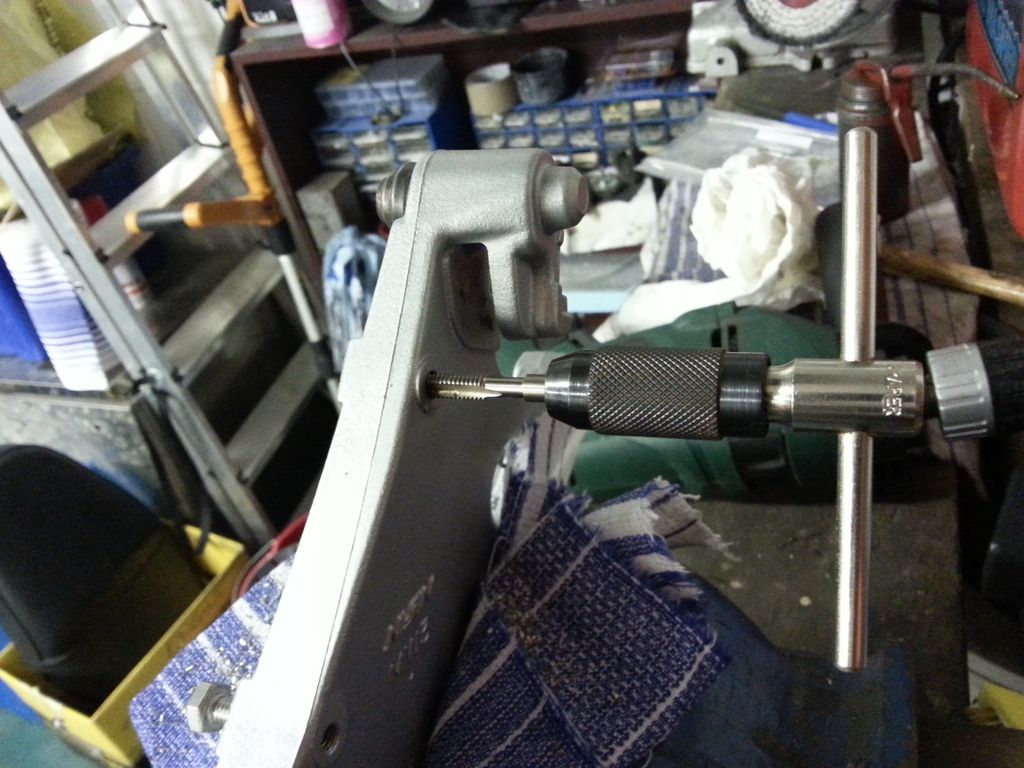
And would you look at that ! The tap ended up working as a stud remover, and wound out a lot of the old bolt's thread ! I guess I got that hole pretty central.
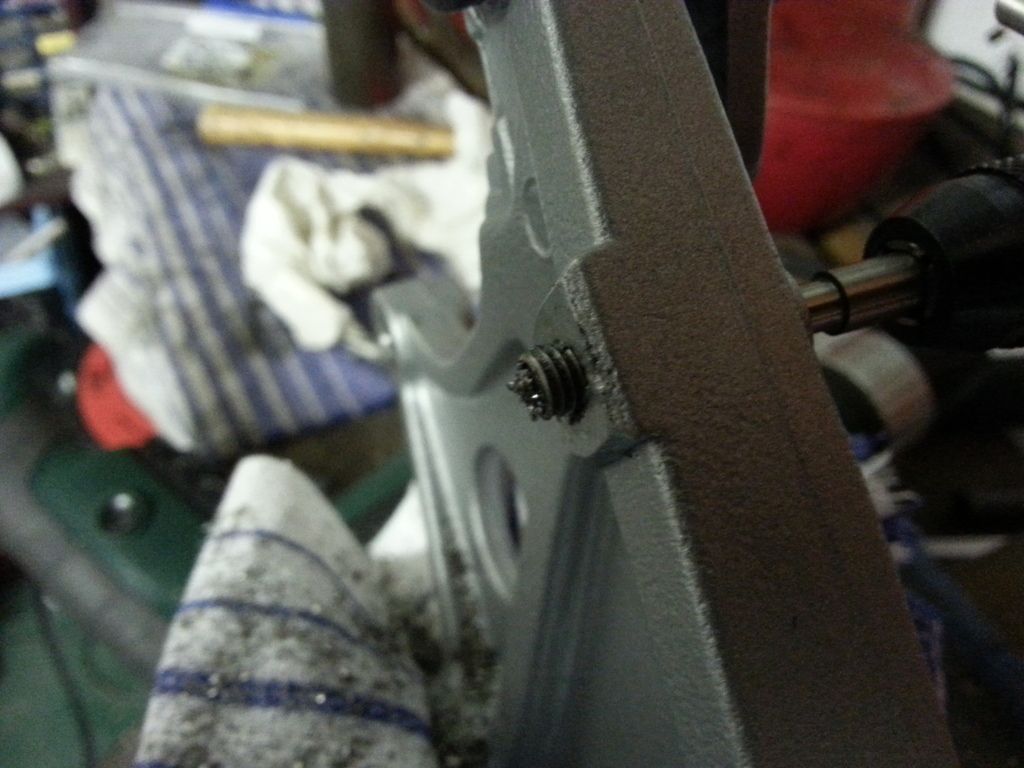
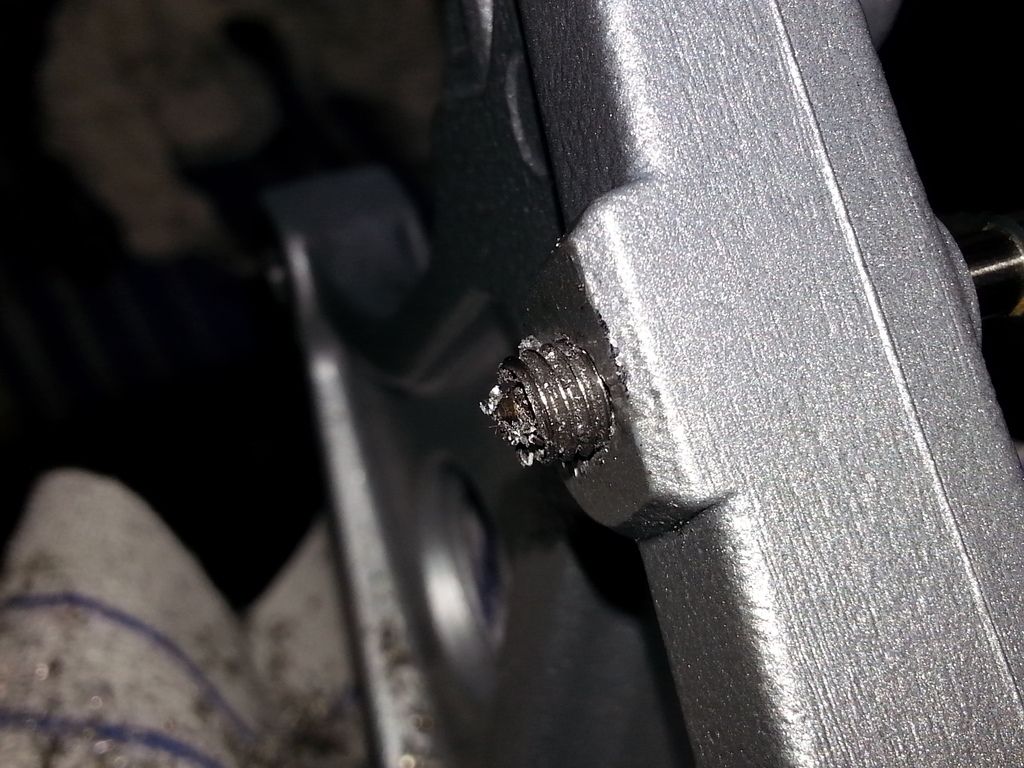
This left me with a tapped hole like this. It's slightly rougher and slightly looser than original (as you'd expect) but perfectly serviceable.
I ran the tap down the other hole to clean it out, just in case. Problem sorted.
Time to refit all the rear end again. Sigh ...
First, centre pop the broken bolt. It's very important to get it right in the middle of the bolt, or as near as you can. Take your time with this bit.

Start by drilling a small pilot hole all the way through the bolt. Again, it pays you to take your time on this early stage, and ensure the hole is straight and in the middle of the bolt. Don't over heat your drill bit, and allow it to cool occasionally (bolts are normally made of quite hard steel). Use oil to lubricate and cool the drill bit. (Sorry for photobucket being an arse and rotating images again)

Once the pilot hole is all the way through, use increasing sized drills to drill continue to expand the hole. It's easier, and more controllable, to do it this way. I used 4 different sized drills in the end. Remember to keep using small amounts of oil.

Hey, would you look at that ... I must have been pretty close to the centre. Some of the thread of the broken bolt comes out as a coil ! This is a 6mm thread, so I'm drilling to 5mm. Use a chart like this to know what size hole you need to drill for the tap. http://www.shender4.com/metric_thread_chart.htm

This leaves you with a hole like this ... clean all the swarf up as much as you can.

Taps come in threes (two shown) per size, with increasing tapers. I'm going to start with the biggest taper. If I was tapping a blind hole I'd work my way up to the 'fattest' tap (to ensure the thread goes all the way to the bottom) but this hole goes all the way through the casting, so I don't need to worry about that.

I decided to tap from the OTHER side ... the side with the good, original thread still there. This ensured that I didn't cross threads when I went from the 'bad' area to the good thread. I had to stop several times, back up, and clean out the tap as it started to jam. I also ran paper towel through the hole, trying to get the swarf out. Remember, it's 1/2 a turn forward, then back off 1/4 a turn.

And would you look at that ! The tap ended up working as a stud remover, and wound out a lot of the old bolt's thread ! I guess I got that hole pretty central.


This left me with a tapped hole like this. It's slightly rougher and slightly looser than original (as you'd expect) but perfectly serviceable.

I ran the tap down the other hole to clean it out, just in case. Problem sorted.

Time to refit all the rear end again. Sigh ...
Forgot to mention, remember to oil your tap too.
Fitted the air filter housing complete with new filter. Luckily a lot of that plastic is behind the tank.
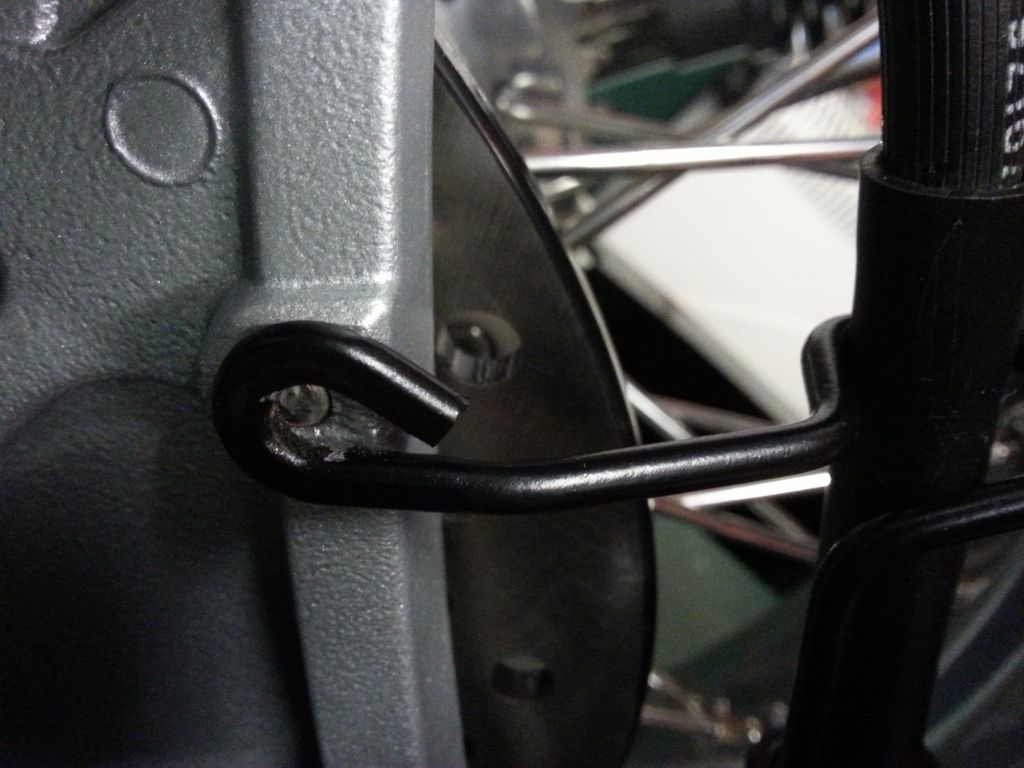
Of course I had to give the rear brake hanger and calliper a light dust over with spray, to cover small marks caused by the on-off-on-off-on-off-on-off ...
Fitted the air filter housing complete with new filter. Luckily a lot of that plastic is behind the tank.

Of course I had to give the rear brake hanger and calliper a light dust over with spray, to cover small marks caused by the on-off-on-off-on-off-on-off ...

Seem to have spent all day today on "Jane", for not a lot of visible progress.
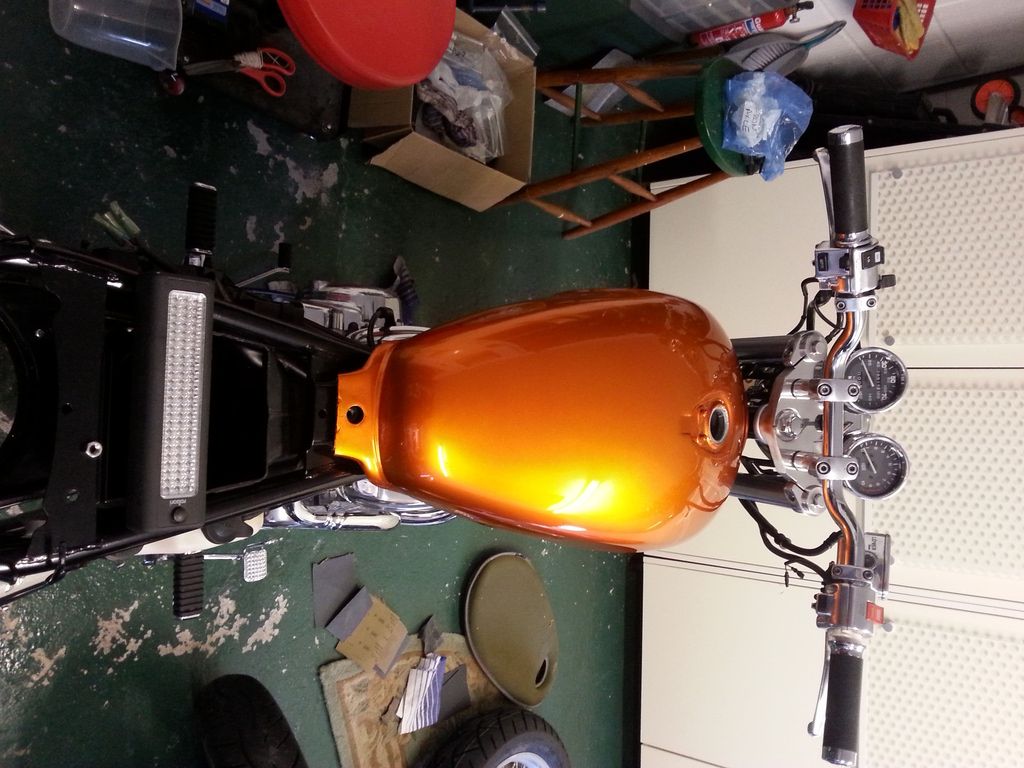
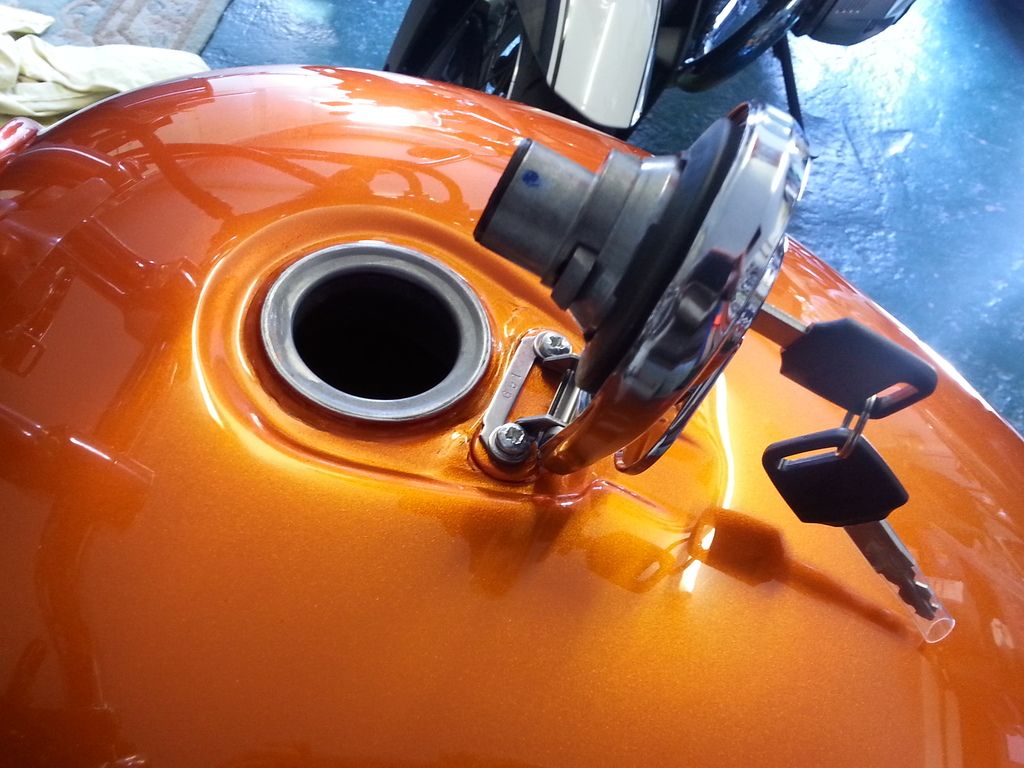
Fitted the fuel tank.
Along with the new fuel cap. Quite satisfying.

The mating surface for the cap had to be cleaned of a bit of paint which would have stopped a good seal.
Trying to decide whether to put this original sticker back on ... current thinking is 'no'.
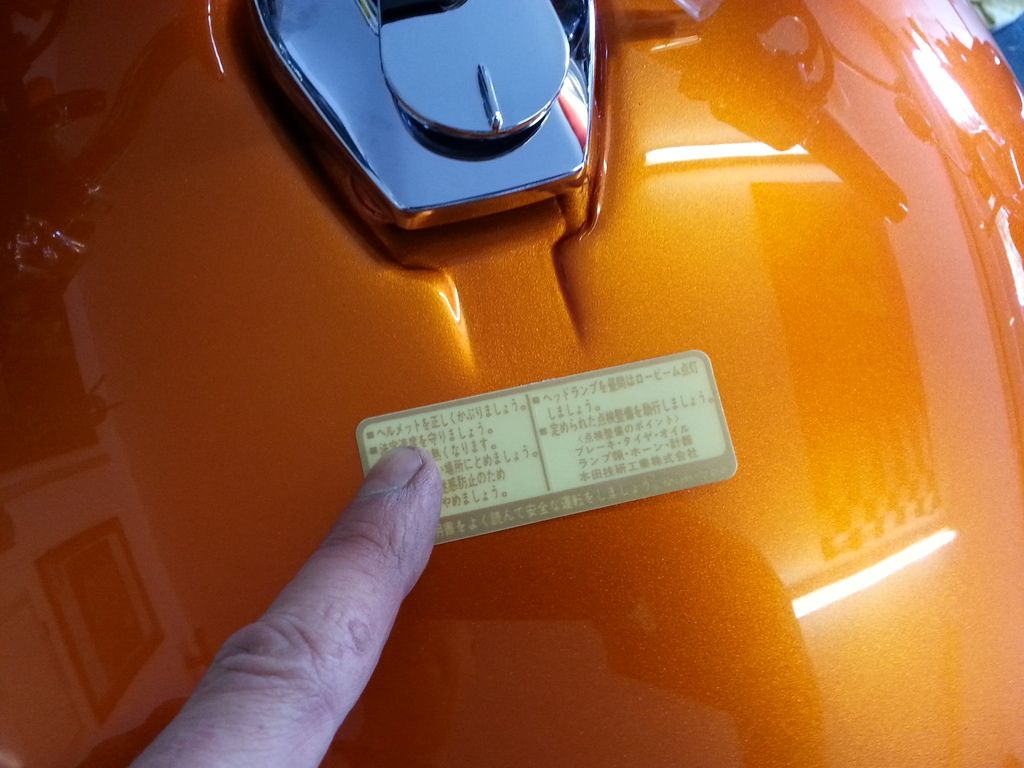
Reminder of the sticker on the original paint.
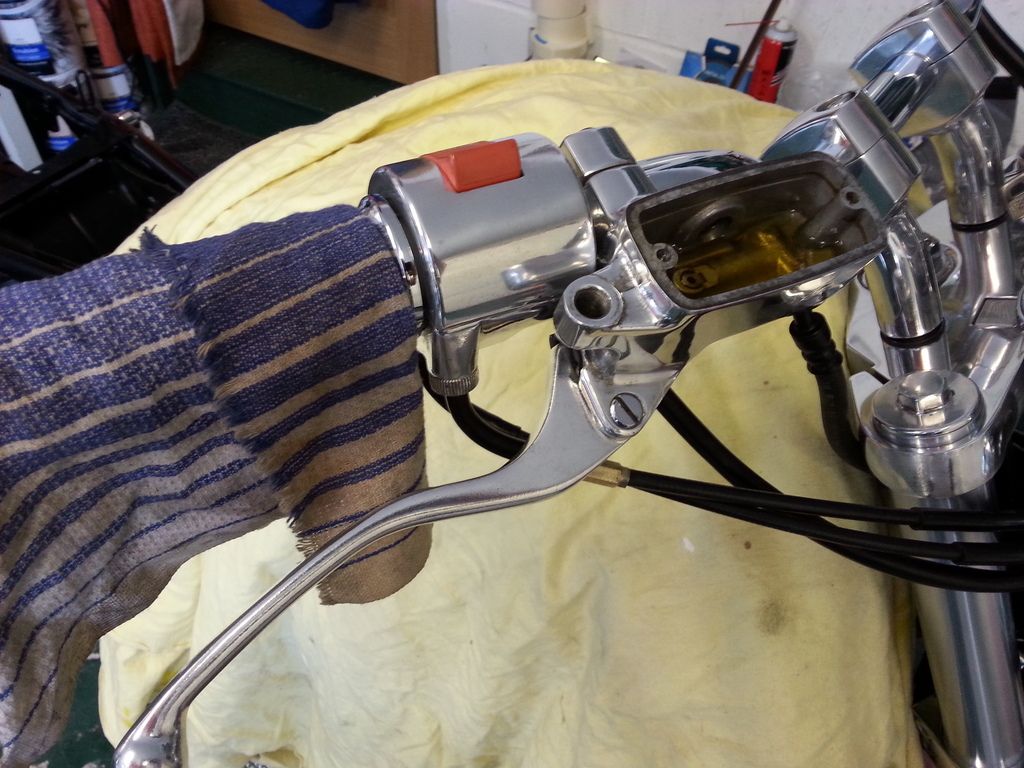
Fitted the two cables for the throttle. This took a lot of buggeration factor, to get it so both cables ran smoothly and the throttle returned to its stop, whilst not having any slack, and working at both extremes of the turned handlebars. This probably consumed a good couple of hours. But the throttle is now working.

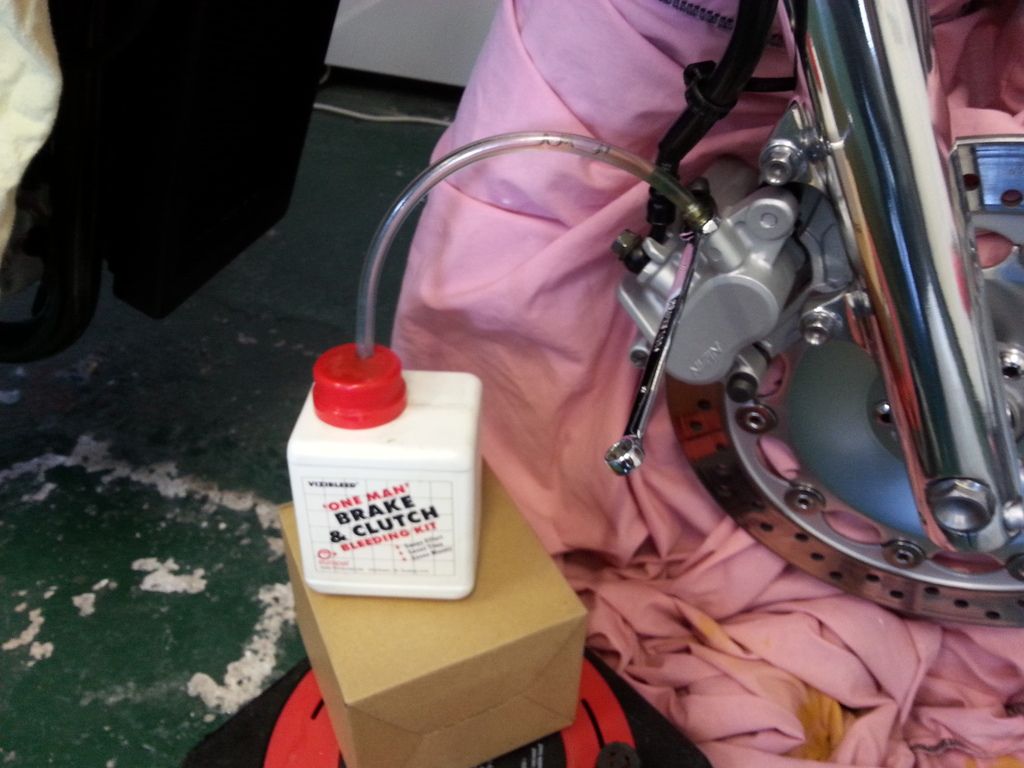
And, successfully bled the front brake. Again though, working from a dry system this took foreeeeever ...
Think I was paranoid about getting brake fluid on anything ?
Bleeding was done in the traditional manner ... brake off / undo nipple / brake on / do nipple. Rinse and repeat a million times. Of all the songs I listened to on Radio 2 for the duration of bleeding this brake, Rivers of Babylon by Boney M had the best beat/tempo to bleed along with.
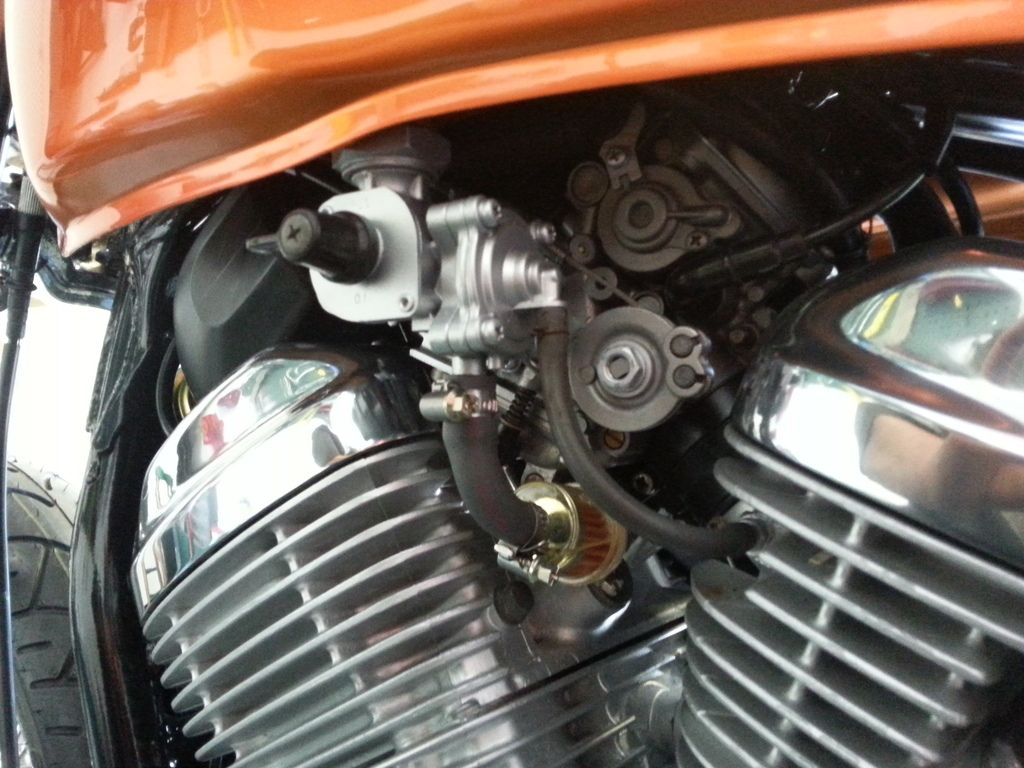
And hooked up the fuel line, vacuum line, fuel tap and here you can also see the other end of the two throttle cables. Originally she didnt have a fuel filter, but I thought it wise to fit one, especially as the fuel tank's been blasted and painted (grit and dust).
Fitted the fuel tank.

Along with the new fuel cap. Quite satisfying.

The mating surface for the cap had to be cleaned of a bit of paint which would have stopped a good seal.

Trying to decide whether to put this original sticker back on ... current thinking is 'no'.

Reminder of the sticker on the original paint.

Fitted the two cables for the throttle. This took a lot of buggeration factor, to get it so both cables ran smoothly and the throttle returned to its stop, whilst not having any slack, and working at both extremes of the turned handlebars. This probably consumed a good couple of hours. But the throttle is now working.

And, successfully bled the front brake. Again though, working from a dry system this took foreeeeever ...

Think I was paranoid about getting brake fluid on anything ?
Bleeding was done in the traditional manner ... brake off / undo nipple / brake on / do nipple. Rinse and repeat a million times. Of all the songs I listened to on Radio 2 for the duration of bleeding this brake, Rivers of Babylon by Boney M had the best beat/tempo to bleed along with.

And hooked up the fuel line, vacuum line, fuel tap and here you can also see the other end of the two throttle cables. Originally she didnt have a fuel filter, but I thought it wise to fit one, especially as the fuel tank's been blasted and painted (grit and dust).

Okay then so it's a no to the stickers
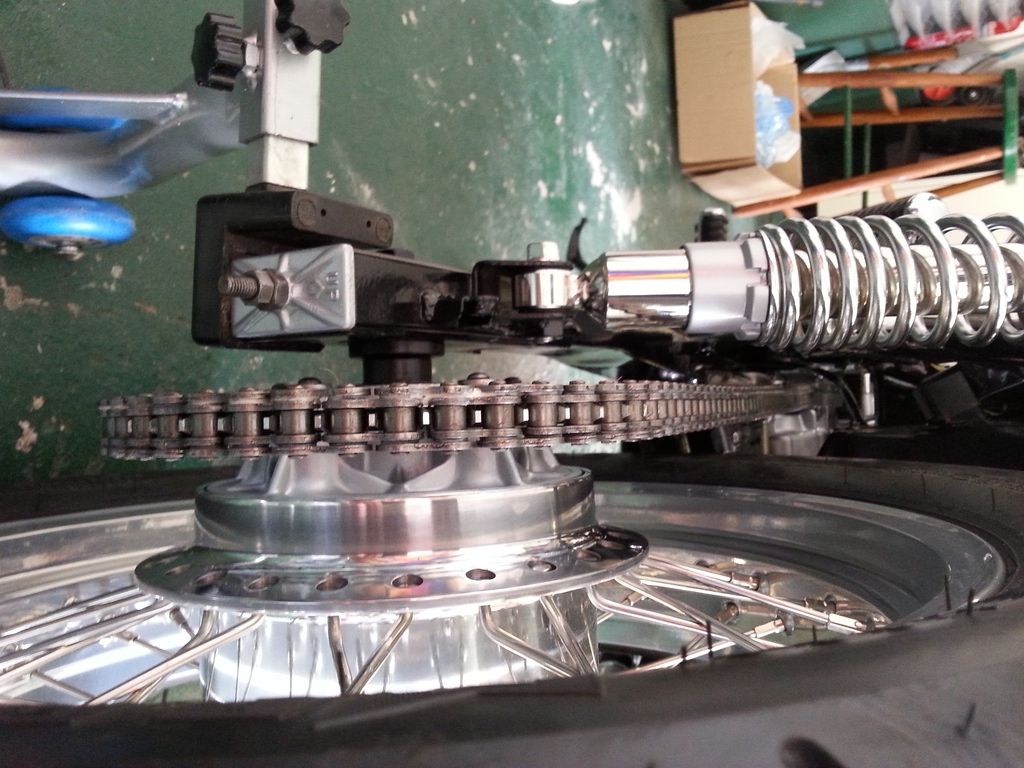
Chain fitted, adjusted, and the rear wheel bolt tightened up.
Spend some time playing with the engine, she's running quite sweetly now. Also the starter appears (?) to have 'fixed' itself (for now anyway)
However ... with the chain now on, I drove her forward a few feet (pedal backwards, repeat) within the garage. Huston, we have a problem. Clutch works okay, but squeals like a bh. If it were a car clutch I'd say the release bearing had gone. Cock. Cock cockity cock. So ... that's all going to have to come apart again then. That's ... annoying.
To be honest the exhaust has got to come off again anyway as the lower silencer is touching the rear wheel bolt. I guess I've got to expect snags which have to be sorted, after taking a bike completely apart ... there's going to be things that don't quite work first time.
Latest video :
https://www.youtube.com/watch?v=Zh_kCEUM4cM
Chain fitted, adjusted, and the rear wheel bolt tightened up.


Spend some time playing with the engine, she's running quite sweetly now. Also the starter appears (?) to have 'fixed' itself (for now anyway)
However ... with the chain now on, I drove her forward a few feet (pedal backwards, repeat) within the garage. Huston, we have a problem. Clutch works okay, but squeals like a b
h. If it were a car clutch I'd say the release bearing had gone. Cock. Cock cockity cock. So ... that's all going to have to come apart again then. That's ... annoying. To be honest the exhaust has got to come off again anyway as the lower silencer is touching the rear wheel bolt. I guess I've got to expect snags which have to be sorted, after taking a bike completely apart ... there's going to be things that don't quite work first time.
Latest video :
https://www.youtube.com/watch?v=Zh_kCEUM4cM
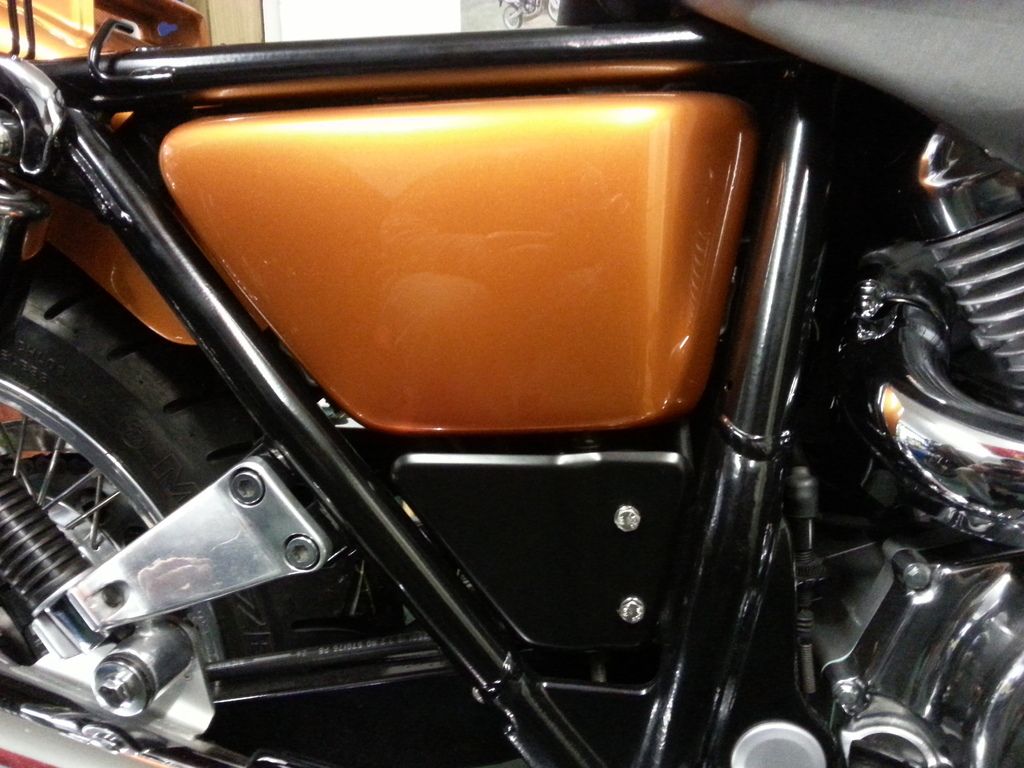
All the polished areas are left bare.
Well, progress has slowed due to being in hospital most of last week with kidney stones, so not done much. I've got another operation coming up in 2 weeks too
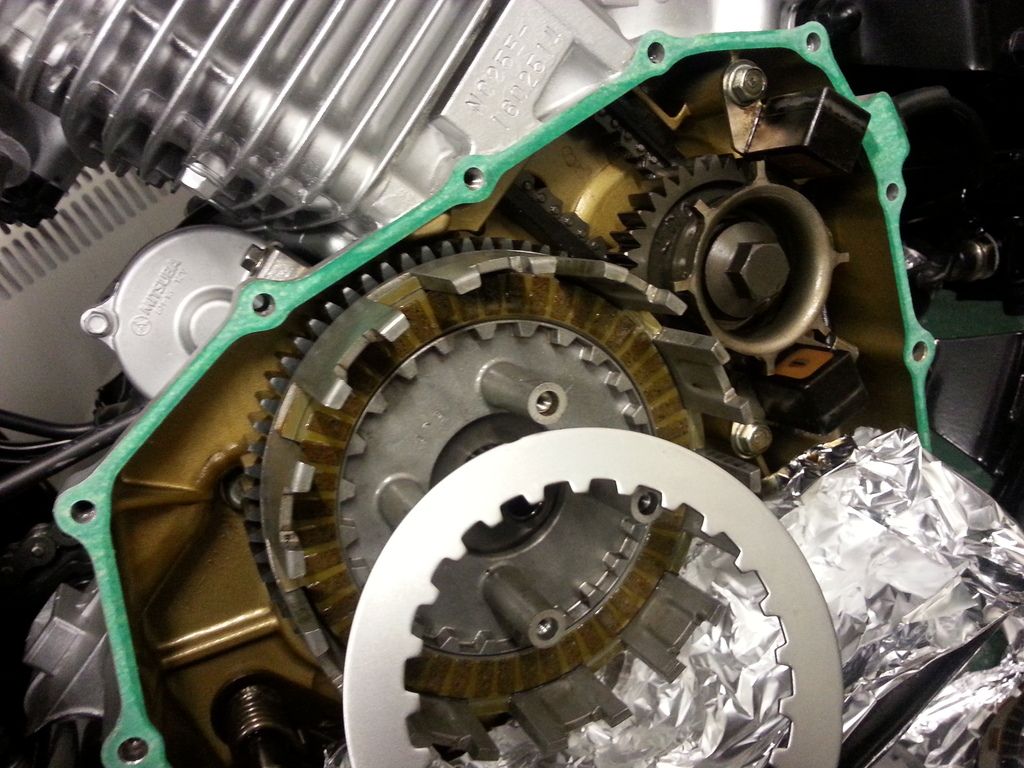
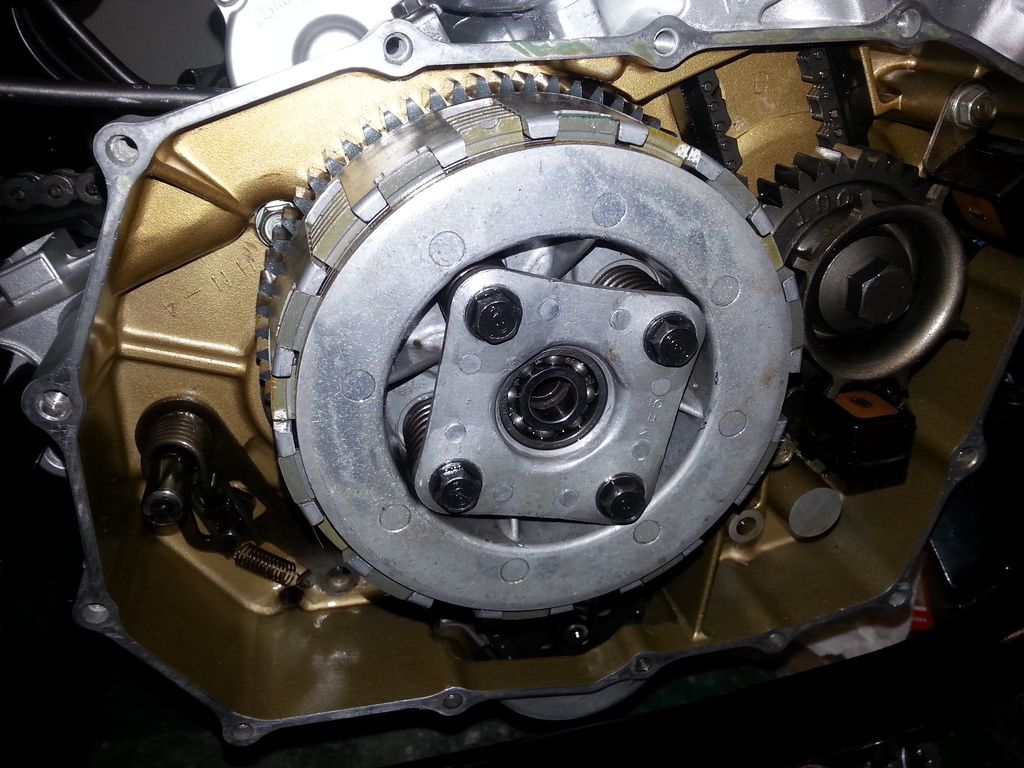
Decided to look at the squealing clutch.
I had to take all this off to get to it.
The springs and outer plate came off easy enough.
Leaving me looking at this ... and a very strong nut holding it all on in the middle !
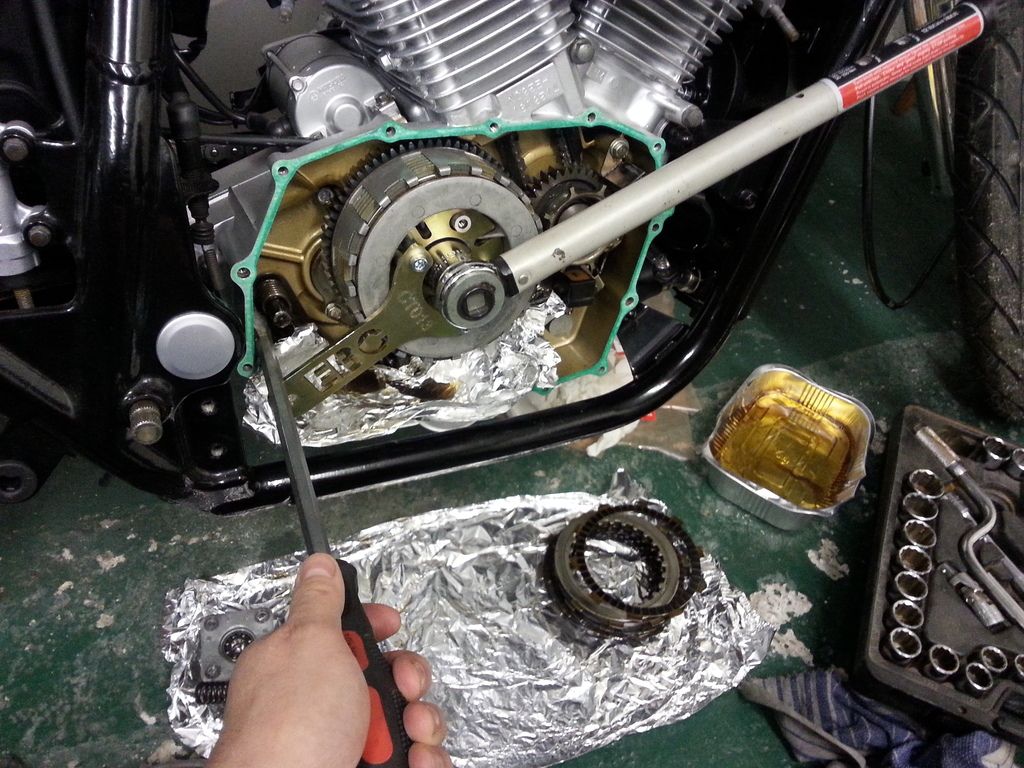
So I had to buy a clutch cage tool from fleabay for £35, which arrived today.
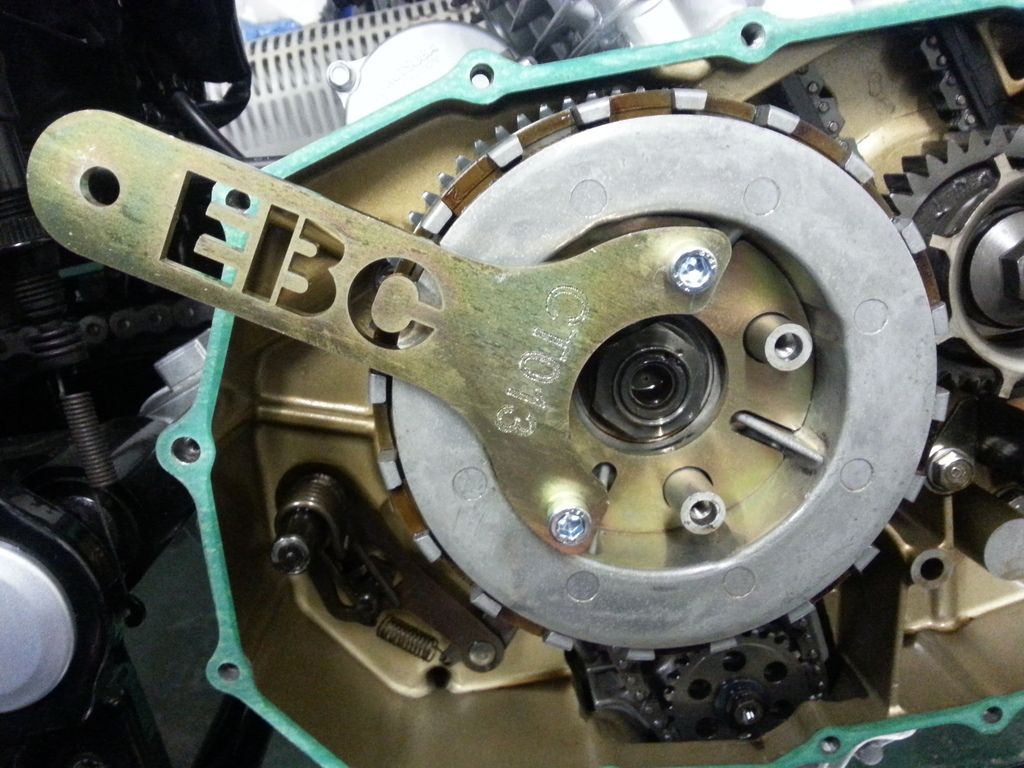
The centre nut came off ... but not without a major league fight involving a crowbar and my longest breaker bar ! It was so tough to crack, it bent the tool ! Cheap st ebay rubbish (but hey, it'll never get used again, and a tool from Honda is £200)

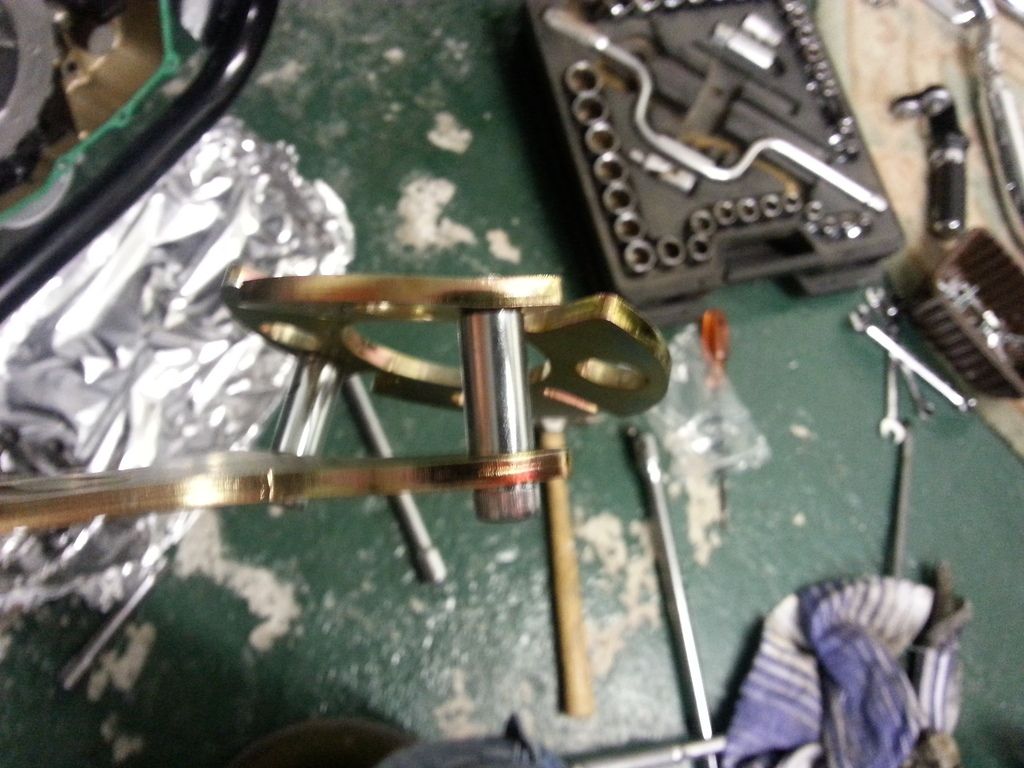
I'll straighten that in the vice later.
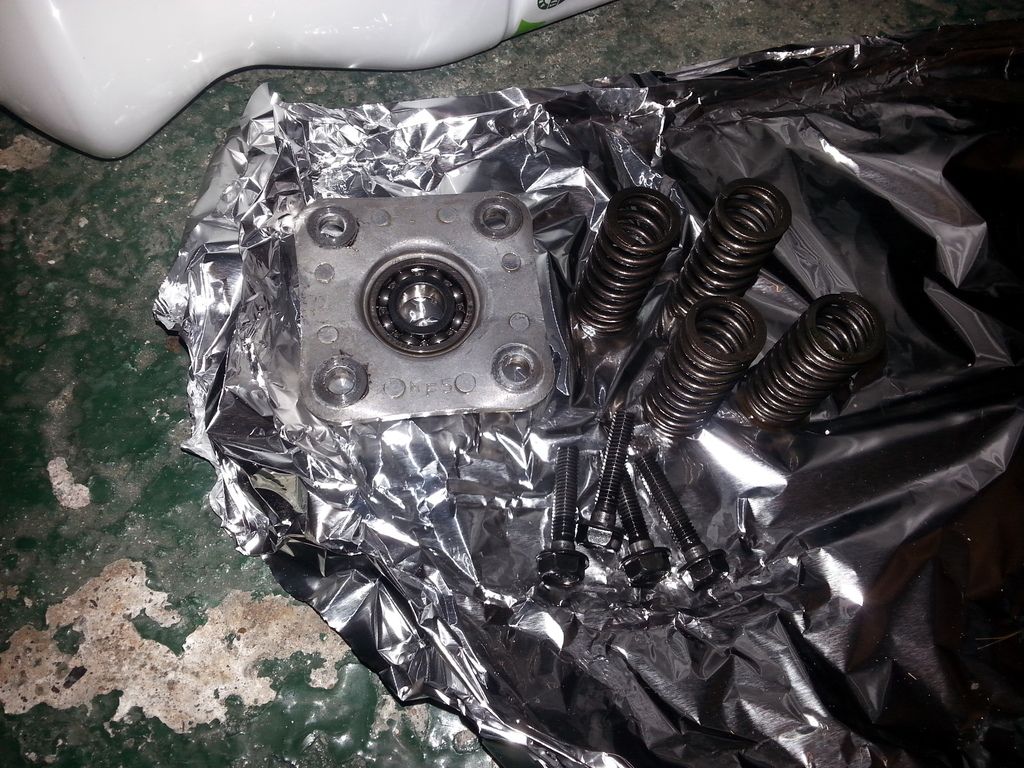
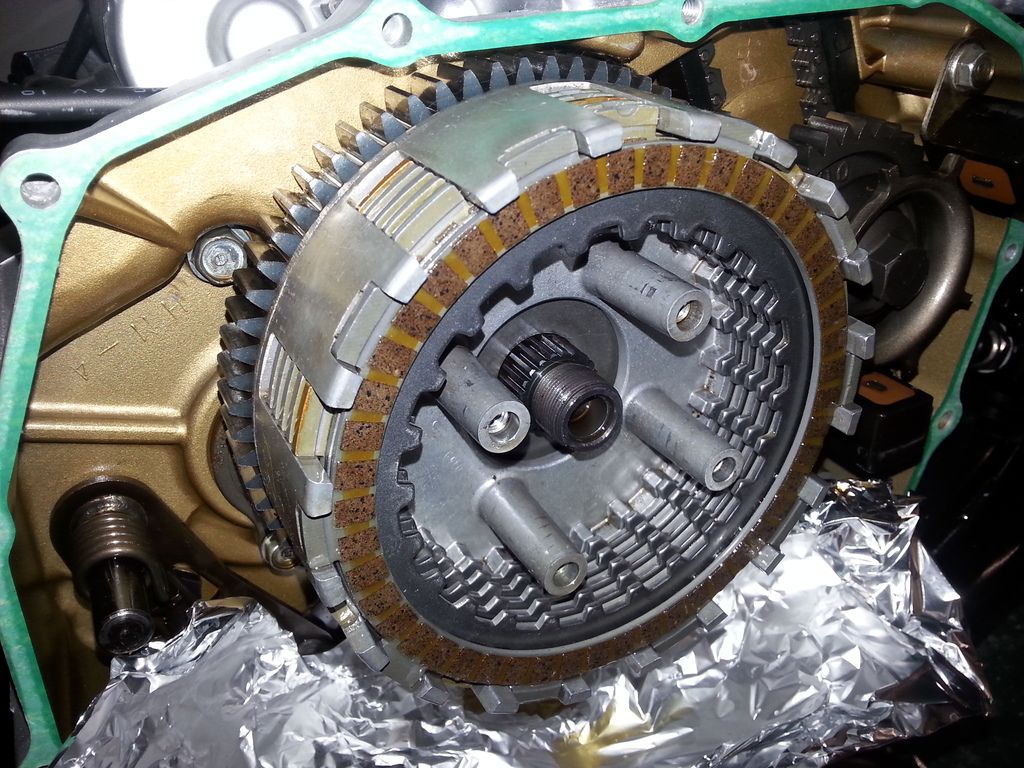
After pulling the cage and all the plates, I'm left with this. This is that "loose" chain I mentioned months ago. Doesn't appear to be any way of tensioning it.
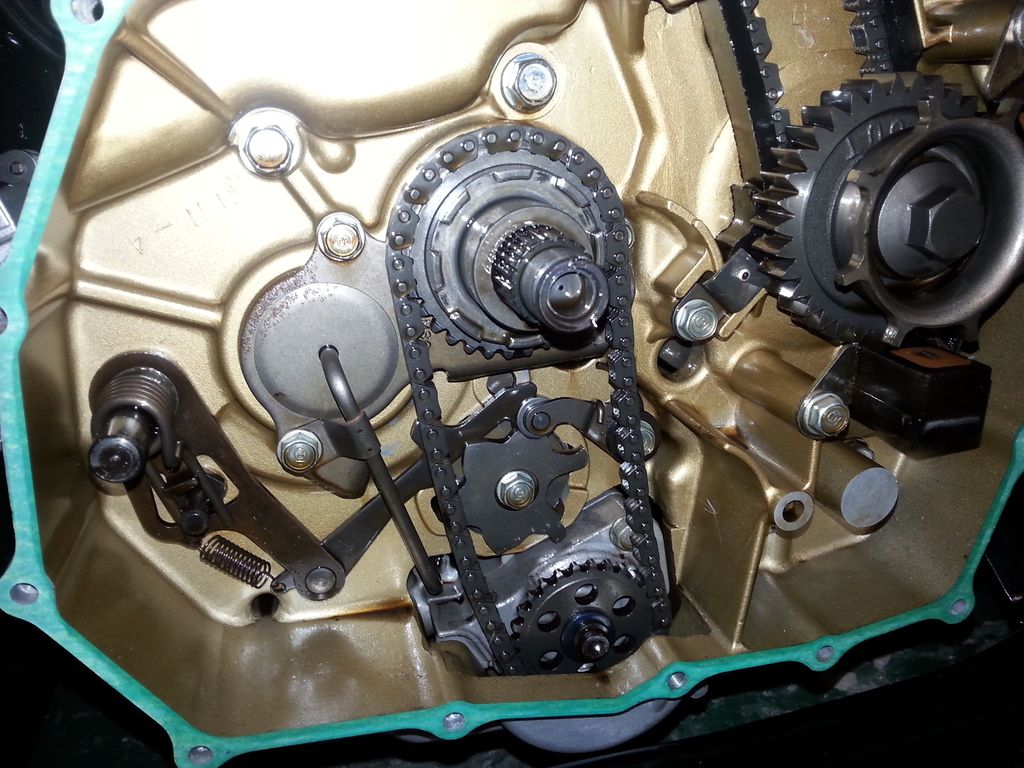
And here's the cage and plates on the floor.
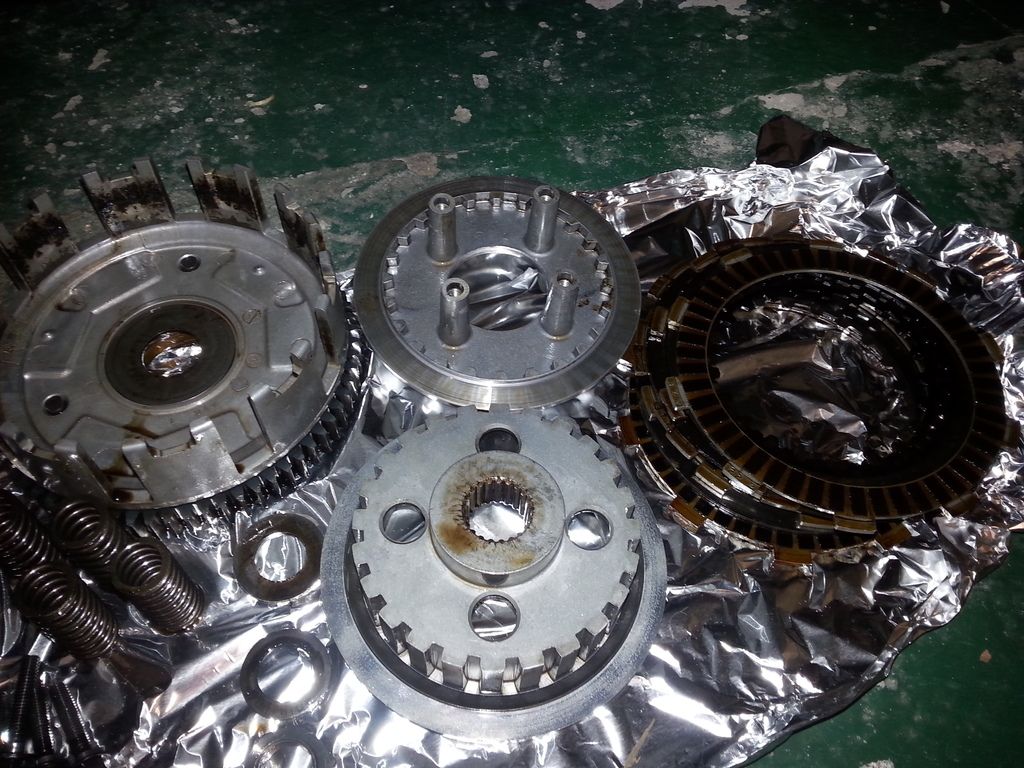
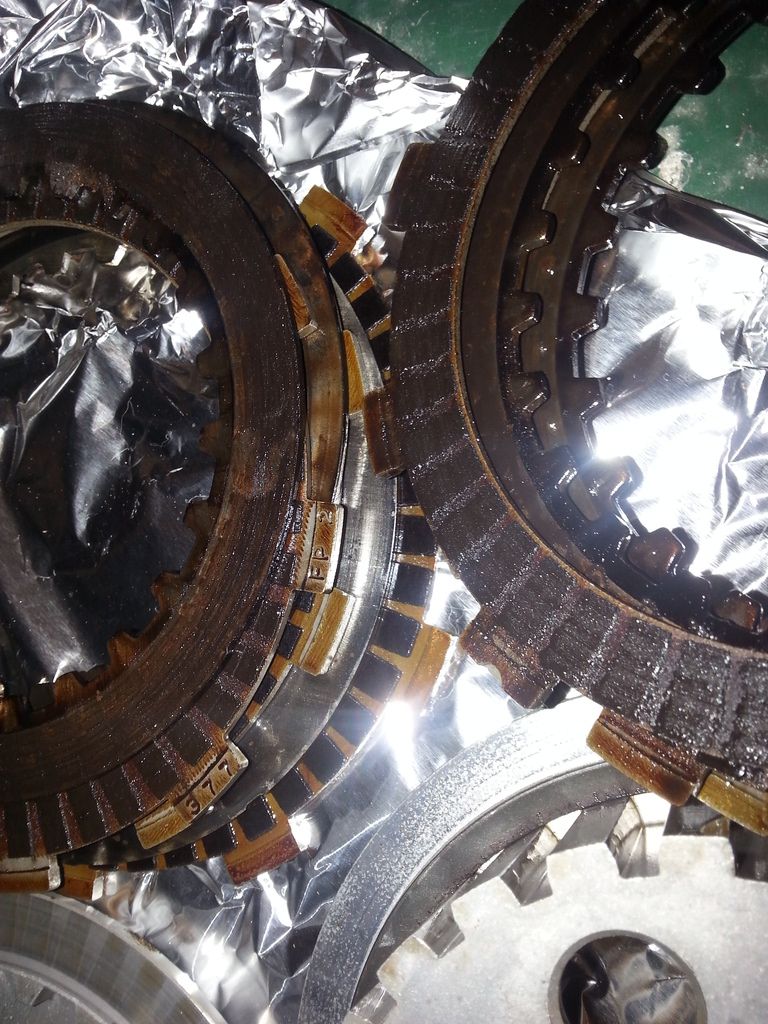
I think the reason for the squeal was all this gunk between some (not all) of the plates. I guess this is a result of her sitting around for 5 years ... I do remember now that the clutch was frozen on when I first got the bike, and I had to 'bump start' the bike to get the clutch to release. I should have thought and replaced it when the engine was on the bench, but you live and learn.
Time to order some new clutch plates and put it back together again.

Well, progress has slowed due to being in hospital most of last week with kidney stones, so not done much. I've got another operation coming up in 2 weeks too
Decided to look at the squealing clutch.
I had to take all this off to get to it.

The springs and outer plate came off easy enough.

Leaving me looking at this ... and a very strong nut holding it all on in the middle !

So I had to buy a clutch cage tool from fleabay for £35, which arrived today.

The centre nut came off ... but not without a major league fight involving a crowbar and my longest breaker bar ! It was so tough to crack, it bent the tool ! Cheap s
t ebay rubbish (but hey, it'll never get used again, and a tool from Honda is £200)

I'll straighten that in the vice later.
After pulling the cage and all the plates, I'm left with this. This is that "loose" chain I mentioned months ago. Doesn't appear to be any way of tensioning it.

And here's the cage and plates on the floor.

I think the reason for the squeal was all this gunk between some (not all) of the plates. I guess this is a result of her sitting around for 5 years ... I do remember now that the clutch was frozen on when I first got the bike, and I had to 'bump start' the bike to get the clutch to release. I should have thought and replaced it when the engine was on the bench, but you live and learn.

Time to order some new clutch plates and put it back together again.

mister_ee said:
Bikes looking sweet, last time I did the clutch on my 400 Bros (similar engine)all I did was wad up a piece of rag and jam it in the gears between the clutch basket and primary gear, locks it up good and tight and does no damage to anything
Yeah, it's not quite like that on this bike. There's in an inner and outer cage. The outer cage is attached to the gears you see visible above. The inner cage (which needs to come off to get to the plates) is what the nut was attached to. Turning the nut just spins the inner cage and plates ... it's not moving any visible gears to jam (you'd have to take the other side off to get to the gearbox innards).Senor_Duende said:
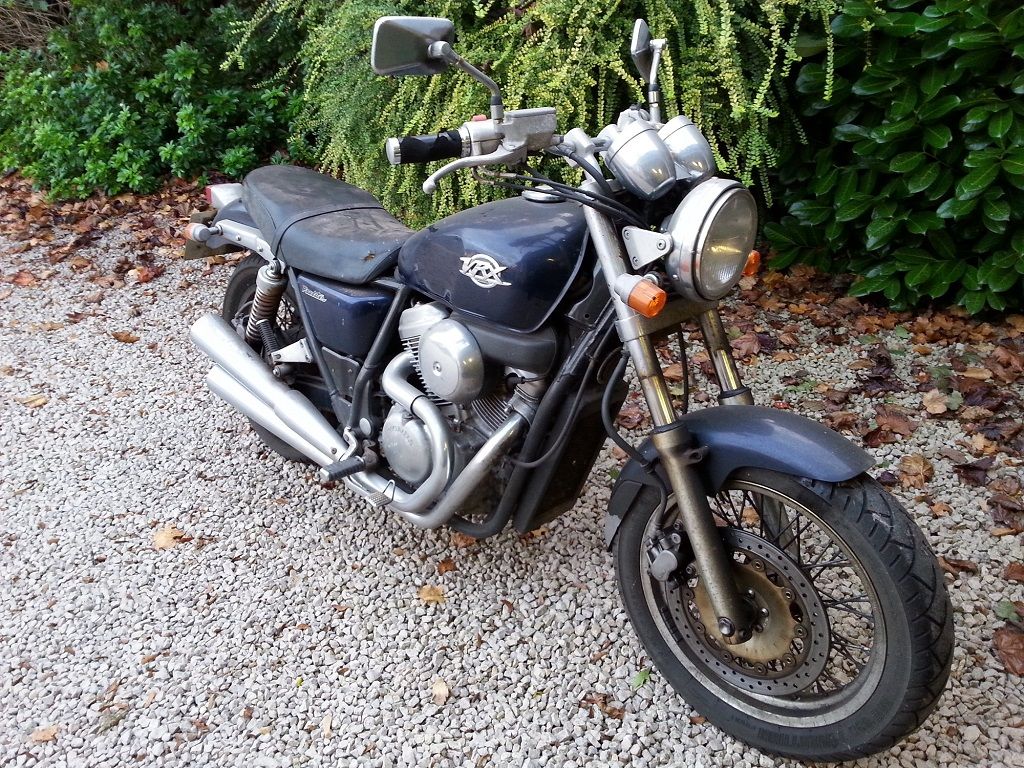
Hi there, I have been following your thread with great interest as a UK based VRX owner (not many of us about). You have done an amazing job, concours springs to mind.
In the spirit of "show us yours", here is mine - a very different take built by the talented Jez at La Busca Autos.
Good luck with the tail end of your restoration - may you enjoy many happy and hopefully dry miles!
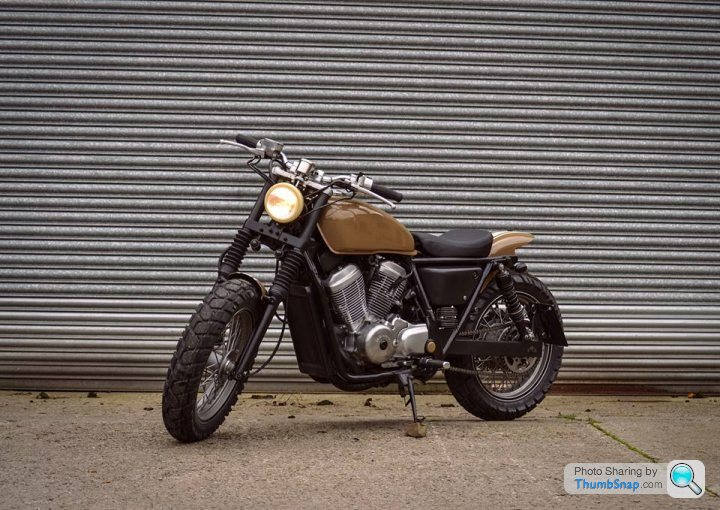
I forgot to comment on this bike. LOVE IT ! Looks great, some styling ideas I'd like to steal there for the future (*) especially the front mudguard.In the spirit of "show us yours", here is mine - a very different take built by the talented Jez at La Busca Autos.
Good luck with the tail end of your restoration - may you enjoy many happy and hopefully dry miles!
(*) once completed I think I'll be forever tinkering and fiddling with this bike, changing it.
Slow progress due to ill health ... kidney stone operation next Wednesday. That's going to be fun. They are going to laser it, going in with an endoscope with a light, 'grabber' and laser on it via, er ... lets say "an existing orifice". Luckily I'll be unconscious whilst a bloke rams something the thickness of your little finger up my junk ...
Bled the rear brake whilst waiting for the clutch bits to arrive. Was REALLY easy. Rock hard now ... might have another go at the front brake.
Clutch arrived ...
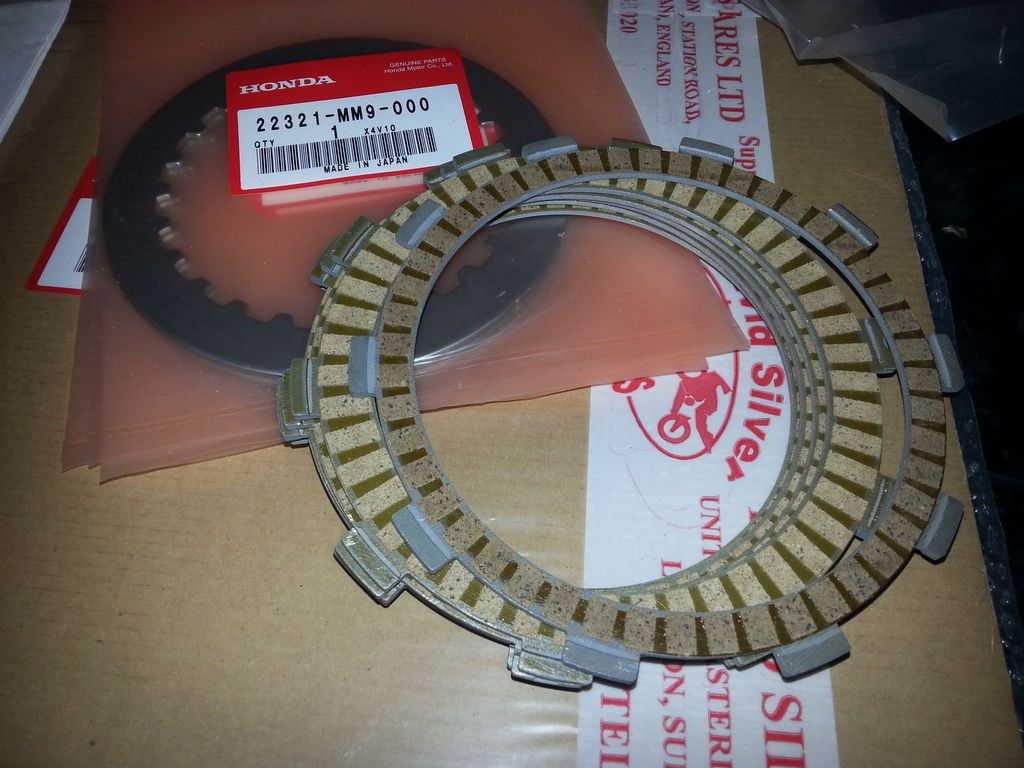
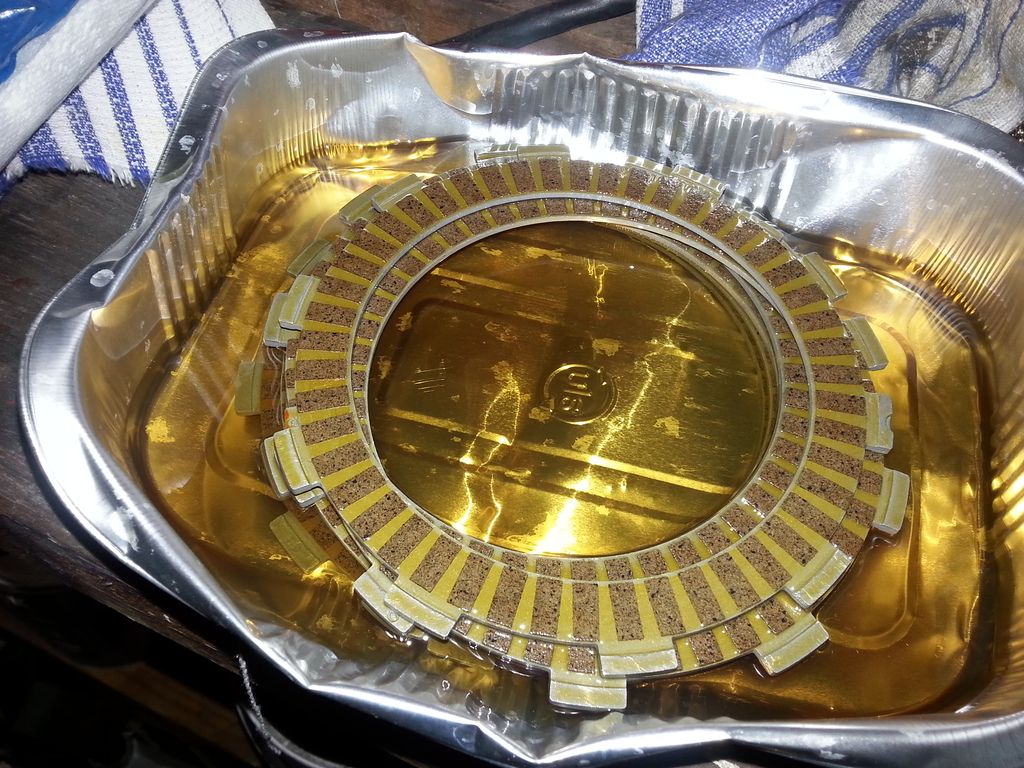
Soak for a while in engine oil before fitting. There seems to be some disagreement about how long you should soak them for, between 15 minutes and 24 hours. I settled for about 4 hours.
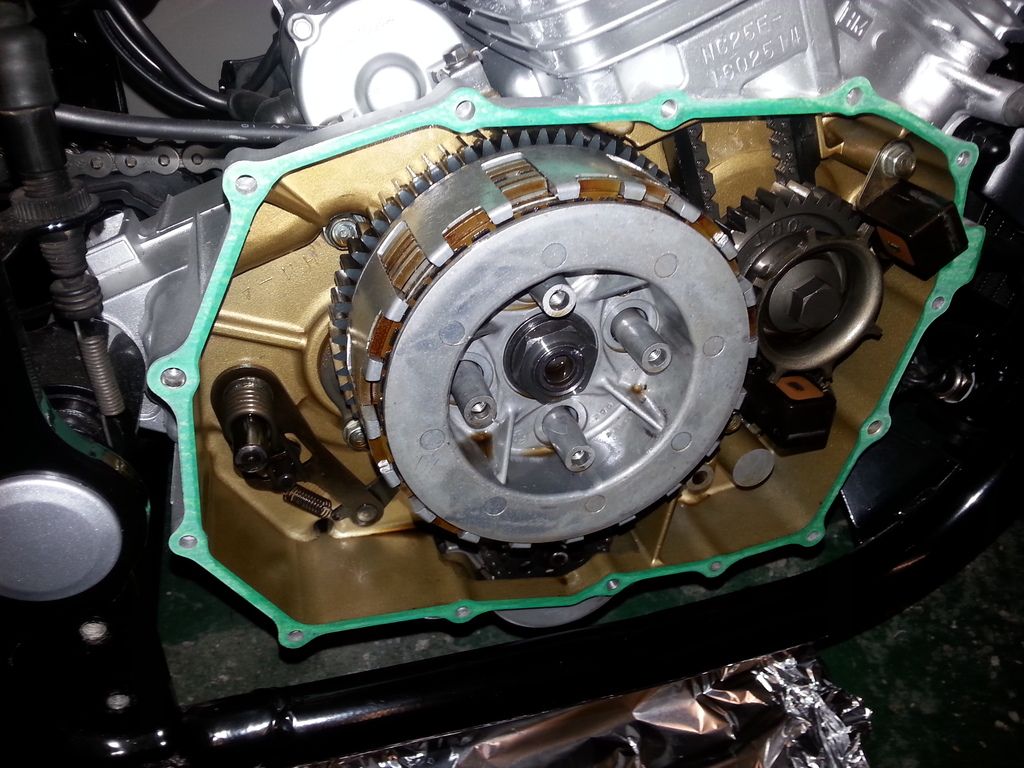
Refitted the outer basket after giving it a bit of a clean.
And then you start to replace the friction plates and steels, alternating. This is a kinda messy process, remembering that these are all gunked in oil.
All plates on, ready for the inner basket. This ... took ... forever ! Getting the inner cage, outer cage, steels, friction plates, springs etc all lined up so they would slot together probably took about an hour, and many times on/off/on/off till I got it right, with everything seated correctly. A very frustrating hour, not helped by getting personally oilier and oilier as time progressed.
Time to do up the centre nut to 128nm, which is bd tight (especially when the whole thing just wants to spin inside the outer cage). Had to use much leverage to get to the right torque ... the little clutch tool just isn't long enough for the job (hence the big screwdriver wedged in to provide "back pressure")
There's a slot, hammer in the outer part of the nut to lock into place.
Release plate and bearing back in along with springs. Another frustrating job. Put it in first, and the thing just locked solid against the centre nut (above). Took it off, spent many hours staring at the workshop manual, parts manual and old photos ... couldn't find WHAT I'd done wrong. Put it back on again, and it went on sweet as you'd like. Obstreperous git of a thing ...
Note I've taken the (not so) old gasket off, to fit a new one (that's a tenner down the drain)
Outer cover cleaned and polished up again (grubby finger marks from removal) and replaced. Clutch cable fitted to ensure the clutch (appears) to work. Just have to fit everything back on (which as I've just finished a 12 hour day at work, I CBA to do today ...)
Bled the rear brake whilst waiting for the clutch bits to arrive. Was REALLY easy. Rock hard now ... might have another go at the front brake.
Clutch arrived ...

Soak for a while in engine oil before fitting. There seems to be some disagreement about how long you should soak them for, between 15 minutes and 24 hours. I settled for about 4 hours.

Refitted the outer basket after giving it a bit of a clean.

And then you start to replace the friction plates and steels, alternating. This is a kinda messy process, remembering that these are all gunked in oil.

All plates on, ready for the inner basket. This ... took ... forever ! Getting the inner cage, outer cage, steels, friction plates, springs etc all lined up so they would slot together probably took about an hour, and many times on/off/on/off till I got it right, with everything seated correctly. A very frustrating hour, not helped by getting personally oilier and oilier as time progressed.

Time to do up the centre nut to 128nm, which is b
d tight (especially when the whole thing just wants to spin inside the outer cage). Had to use much leverage to get to the right torque ... the little clutch tool just isn't long enough for the job (hence the big screwdriver wedged in to provide "back pressure")
There's a slot, hammer in the outer part of the nut to lock into place.

Release plate and bearing back in along with springs. Another frustrating job. Put it in first, and the thing just locked solid against the centre nut (above). Took it off, spent many hours staring at the workshop manual, parts manual and old photos ... couldn't find WHAT I'd done wrong. Put it back on again, and it went on sweet as you'd like. Obstreperous git of a thing ...
Note I've taken the (not so) old gasket off, to fit a new one (that's a tenner down the drain)

Outer cover cleaned and polished up again (grubby finger marks from removal) and replaced. Clutch cable fitted to ensure the clutch (appears) to work. Just have to fit everything back on (which as I've just finished a 12 hour day at work, I CBA to do today ...)

Mr2Mike I did try that too, but then the assembly wouldn't slot into the outer basket. Tried various variants. Oh well, it's done now !
Slow/no progress due to operation last week to remove the kidney stones ... all very successful, but currently sore and battered and just feel a bit poo, so not in the mind to venture out into the garage much. Have a stent in currently (which is not the most pain free of items), that comes out in two weeks, so hope to improve after that. But at least the stones are GONE !
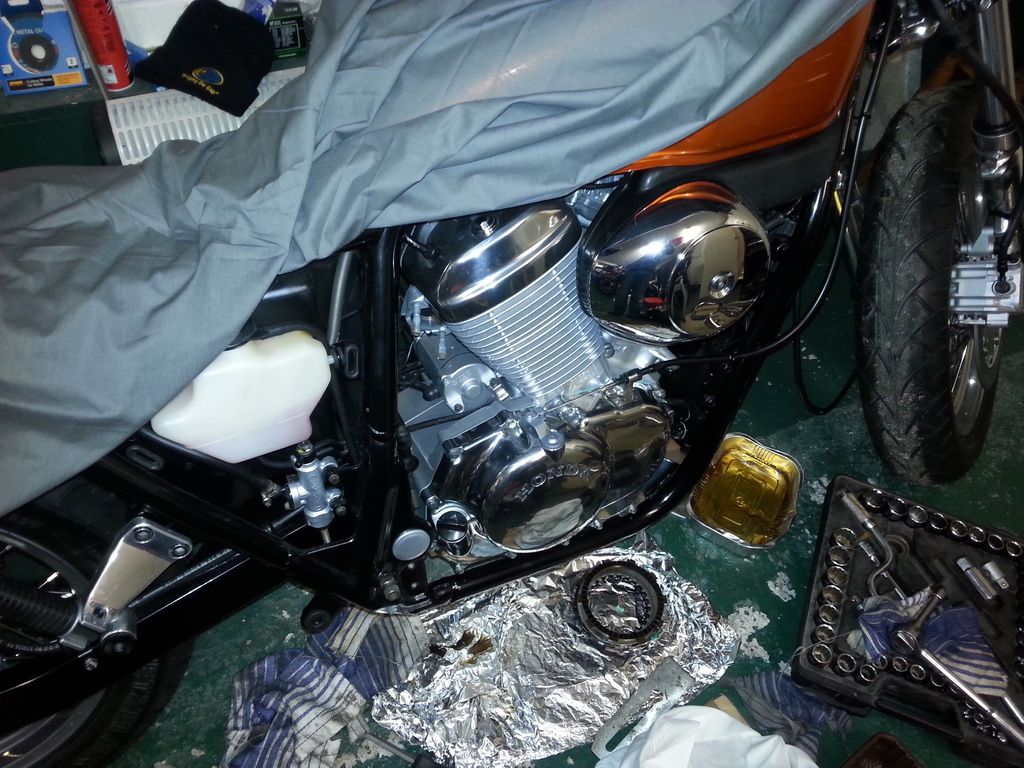
Put all the bits and bobs back on the bike after doing the clutch, then found a small leak in one pipe, so have taken the exhaust back off again to seal that.
She wouldn't start, then I found when trying to get the clutch undone I'd knocked a block connector apart. Reconnected and she fires straight up. And the clutch works sweet as a sweet thing now, with no squeeeeeeel-piggie noise.
Derusted and painted a few small connectors and bits and bobs.
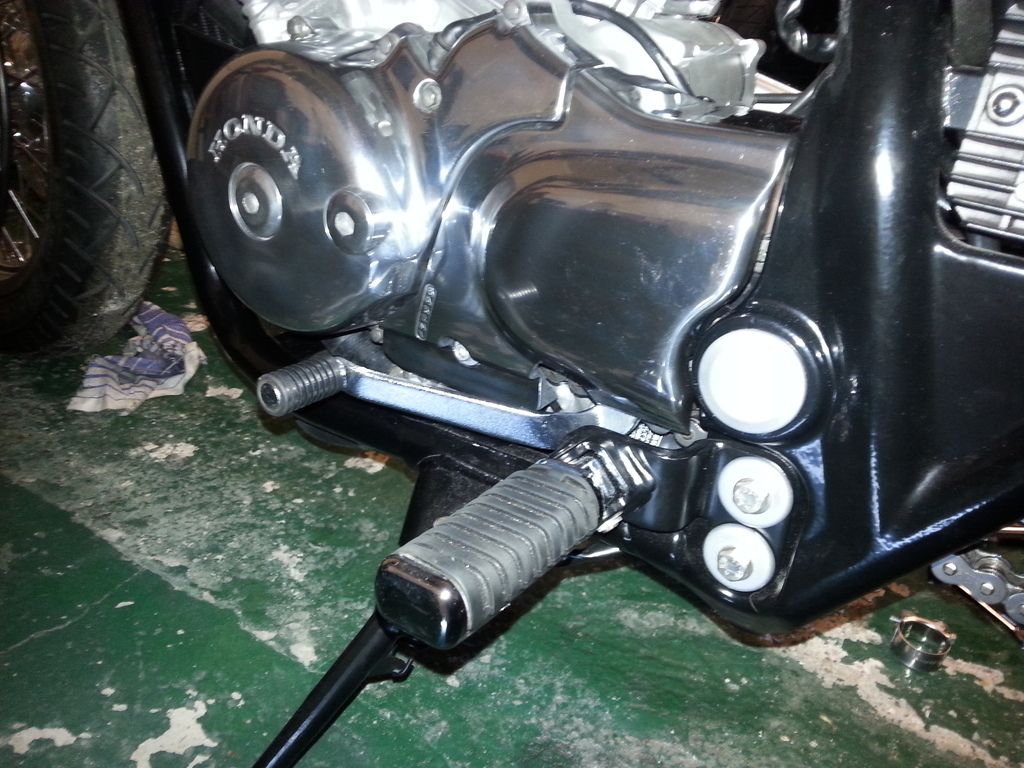
Fitted the front sprocket cover. And I'm afraid that's all folks. Normal service will return soon.
Slow/no progress due to operation last week to remove the kidney stones ... all very successful, but currently sore and battered and just feel a bit poo, so not in the mind to venture out into the garage much. Have a stent in currently (which is not the most pain free of items), that comes out in two weeks, so hope to improve after that. But at least the stones are GONE !
Put all the bits and bobs back on the bike after doing the clutch, then found a small leak in one pipe, so have taken the exhaust back off again to seal that.
She wouldn't start, then I found when trying to get the clutch undone I'd knocked a block connector apart. Reconnected and she fires straight up. And the clutch works sweet as a sweet thing now, with no squeeeeeeel-piggie noise.
Derusted and painted a few small connectors and bits and bobs.
Fitted the front sprocket cover. And I'm afraid that's all folks. Normal service will return soon.


Thanks both
Need some help please from anyone with bright ideas ...
Never quite got the front brake lever as firm as I'd like, so thought I'd have another go at bleeding. Went to try and remove the top of the master cylinder, and the screws just won't budge ! I don't know why, I can't imagine I over tightened both of them, but I've tried all sorts and they just wont come out, and they are to the point now where I'm destroying the heads.
So how do I get these off ... my two thoughts are 1) form a 'shield' from a sheet of metal with a hole in it to protect the rest of the cylinder, and try and weld a big enough blob onto the screws so I can unscrew with mole grips (but I'm worried about melting the plastic cover underneath) or 2) drill out, and hope that there's enough stub left once the cover is off to get mole grips round (if not, I'm into trying to drill and tap a very small hole) .... or 3) ???

Some small progress ... still have a stent inside me, so bending and movement is quite painful, so doing work of any kind is limited to small batches. Stent comes out next Thursday ... can't say I'm looking forward to that ... I'll spare you the details, but lets just say that I'm going to be awake, it involves an endoscope/grabber about the diameter of my little finger, and "an existing orifice" ... 
Front brake re-bled and new stainless screws put in
After thinking about this a while, I'm going to keep the original indicators ... they're quite retro and I like that.
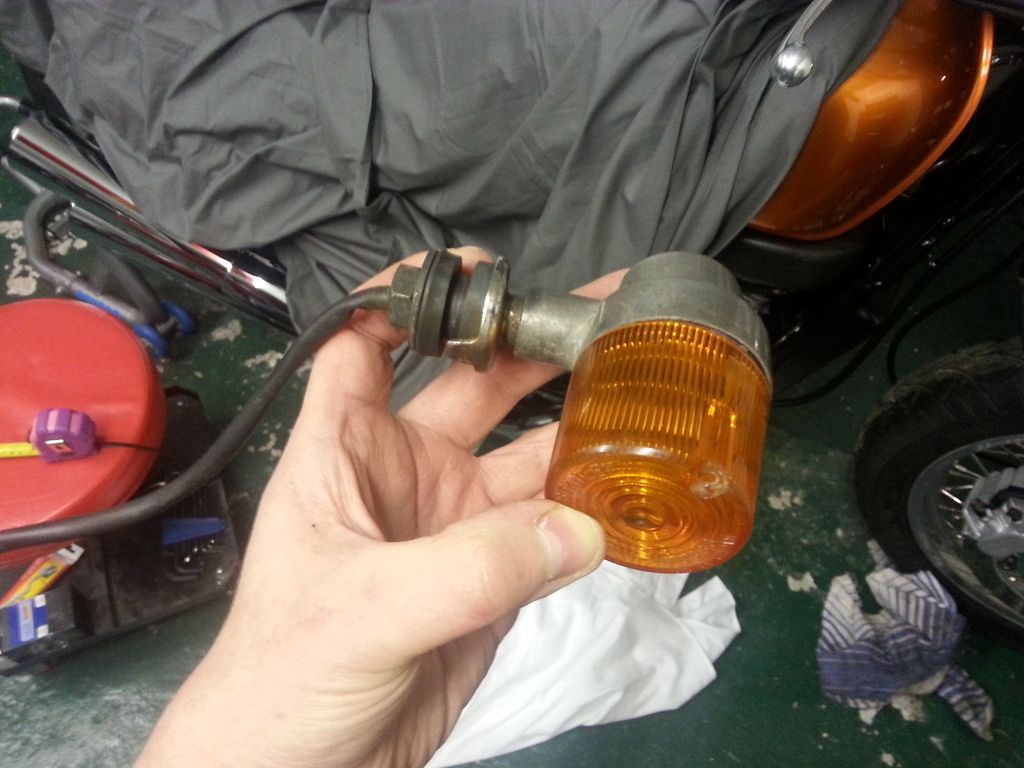
However the chrome mounts are rusty ... so I'm going to have to send these (and a couple of bolts I missed) off to Derby Plating to get rechromed.

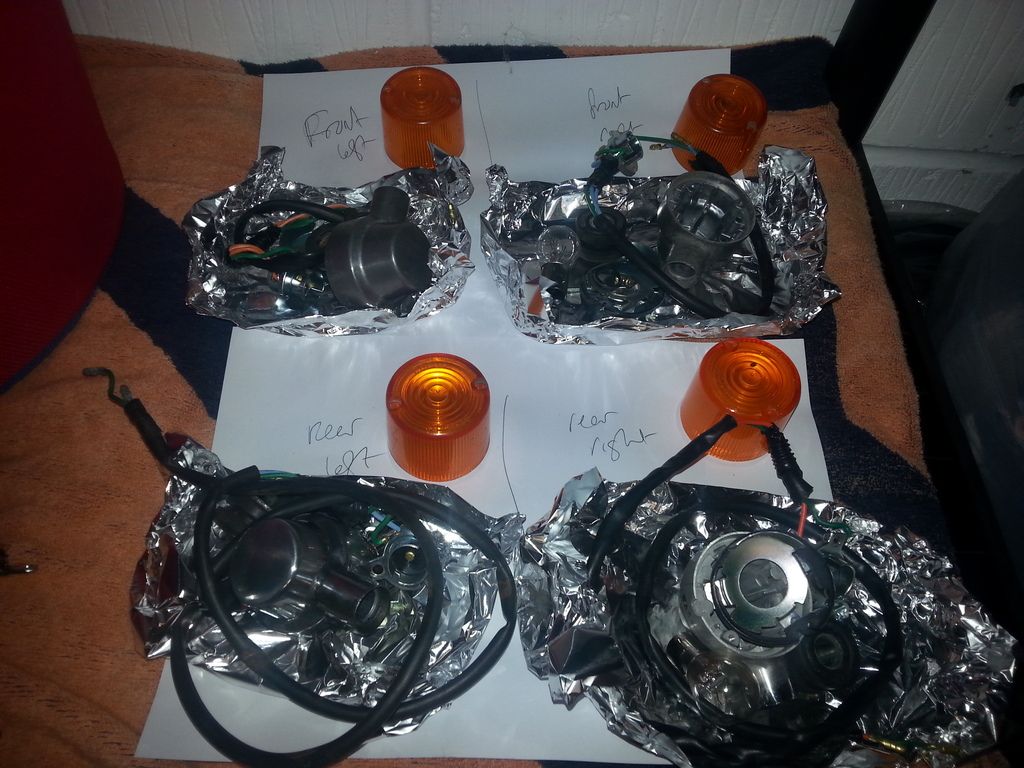
Rest of indicators all disassembled and put on one side safely. These are discontinued now.
Front mudguard fitted, and speedo cable attached.
As a future project I may replace this either with a smaller black mudguard or chrome (and store the originals) ... that's something I can play with in the future. I have a feeling this will be an ongoing project / play bike.
And the rear fitted too (mainly to get it off the living room table !).
Sitting a bit high on the new rear shocks. I need to look at that.

The chrome covers are only on temporarily, they'll need to come off again to put the indicators on.

Coming together ...
Polishing up the alloy indicator housings. One down, three to go.

And this is the next job, currently sat in paint stripper ... a small side panel that goes over the rear brake.

Front brake re-bled and new stainless screws put in
After thinking about this a while, I'm going to keep the original indicators ... they're quite retro and I like that.

However the chrome mounts are rusty ... so I'm going to have to send these (and a couple of bolts I missed) off to Derby Plating to get rechromed.

Rest of indicators all disassembled and put on one side safely. These are discontinued now.

Front mudguard fitted, and speedo cable attached.

As a future project I may replace this either with a smaller black mudguard or chrome (and store the originals) ... that's something I can play with in the future. I have a feeling this will be an ongoing project / play bike.


And the rear fitted too (mainly to get it off the living room table !).

Sitting a bit high on the new rear shocks. I need to look at that.

The chrome covers are only on temporarily, they'll need to come off again to put the indicators on.

Coming together ...

Polishing up the alloy indicator housings. One down, three to go.

And this is the next job, currently sat in paint stripper ... a small side panel that goes over the rear brake.

Edited by evil len on Monday 23 November 22:36
Seat's gone off to the upholsterers, ETA 6 weeks.
Still working on that little metal panel above, lots of primer/filler and rubbing down (rinse, repeat)
An evening sat in front of the telly with a scratch and swirl remover and car polish brought both badges up pretty well.

Shhhhhh ! Had a quick sneaky pre-MOT test run to the end of the road and back ! Ran like a DREAM (after I managed to get her started ... remembering to turn the fuel tap from "off" to "on" does wonders for starting the engine, wouldn't you know). VERY pleased with how she rode, felt immediately "right" and rode really nicely, pulled very well for a 400 (not that I think I even got into 3rd gear). Only one snag to sort out, by time got back (50 yards there and 50 back) the front hub was squeaking like a sod, so I need to take that apart again and see what's wrong.
https://www.youtube.com/watch?v=wkHIBUPsxKE
By the way, I'm dressed like Bibendum as we were just about to go out on the other bikes for a longish ride and it was 0.5 deg C !
Sushifiend ... the helmet cam is even quieter, deliberately as it's set up to record my voice inside the helmet (and cut down on exterior noise) ... I'll do a special recording of the exhaust for you some time.
ash73 ... don't worry, the road was very dry !! Remember this bike's been stripped and put back together by an amateur, so I think teething problems (not that I think there's been many really) have been down to my experience ... I would expect it to be as reliable as any other 1990's Honda.
familyguy1 ... thank you kindly
Battery cover given a bit of a clean
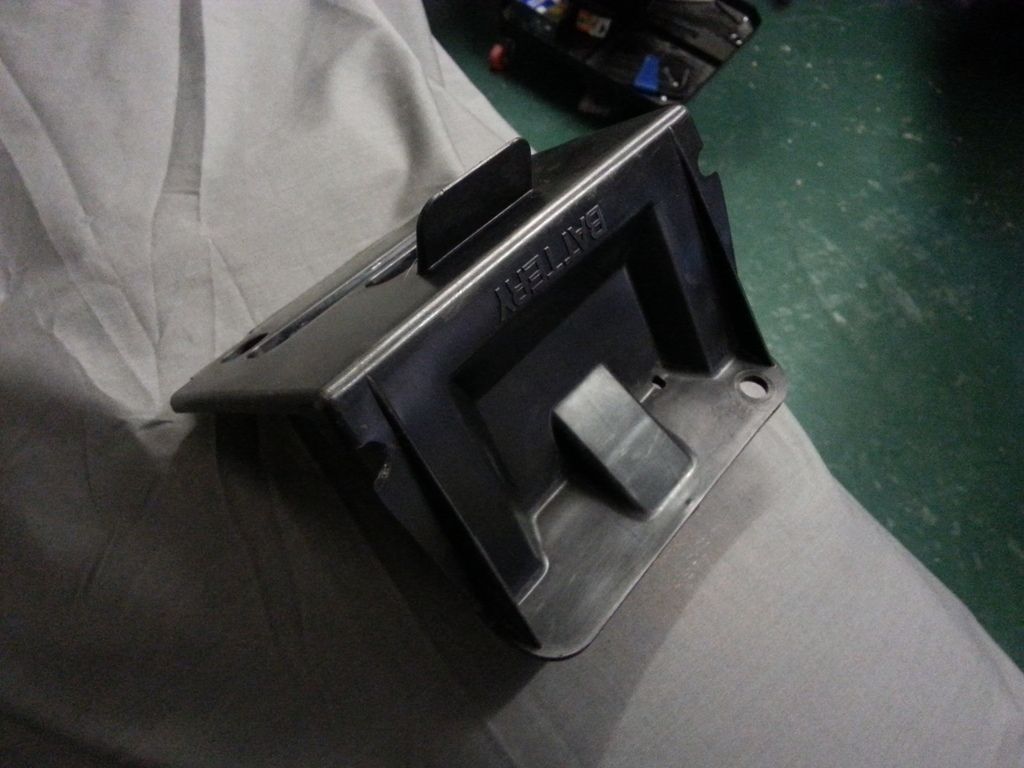
And located in place.

VRX badges applied both sides, they cleaned up nicely with T Cut and polish.


Black cover plate (see above) for the rear brake master finished being painted (sooo many coats) and attached to bike.
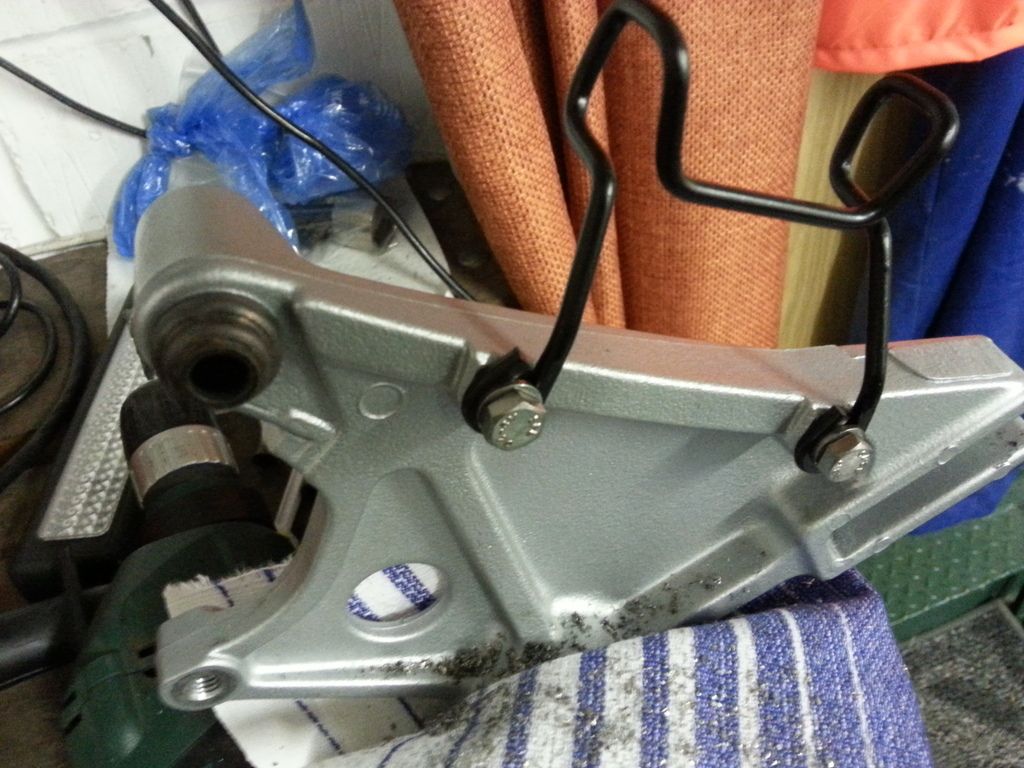
So time to start on the rear number plate bracket. Someone has cut off the bit of the bracket which holds the rear reflector on (presumably to fit a larger-than-Japanese UK number plate on) but I'm not going to replace that, apart from just tidying it up.
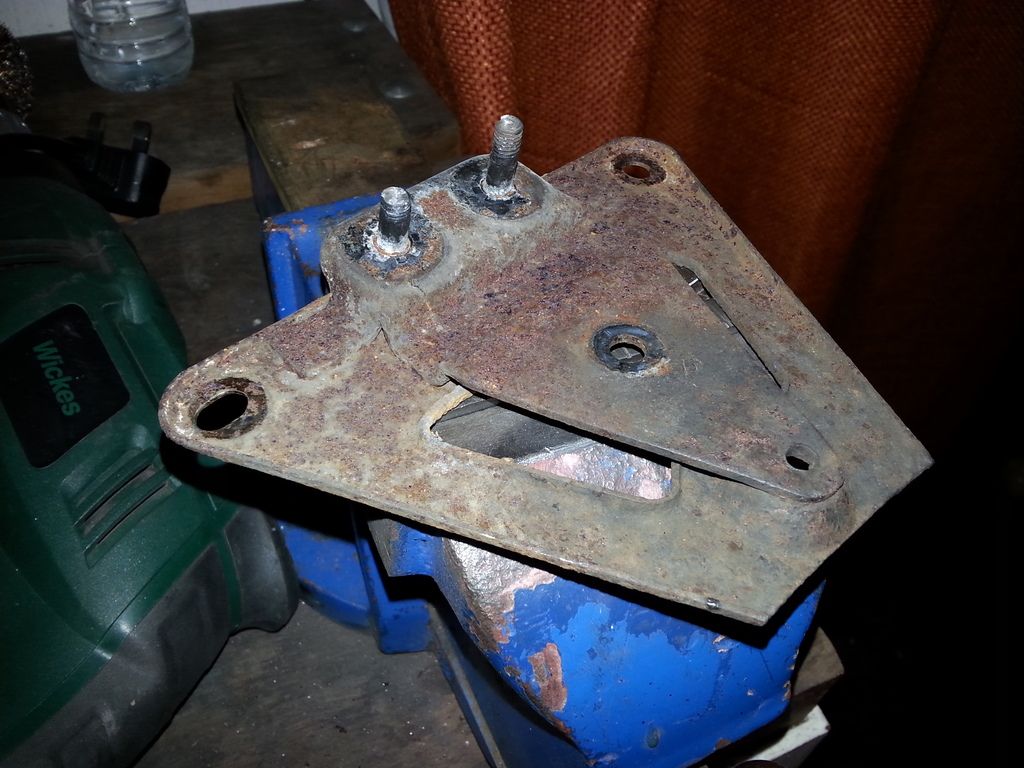
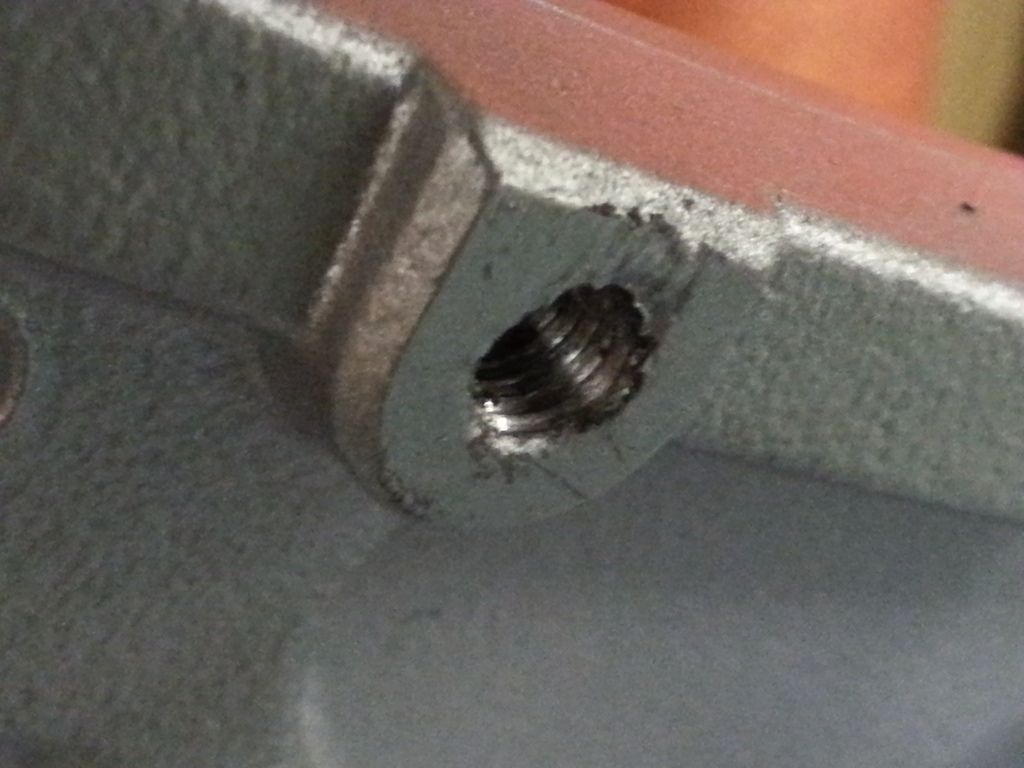
The nuts had rusted solid, so when I went to remove the hanger (when stripping the bike) the captive studs just sheared. You can't get this part new.
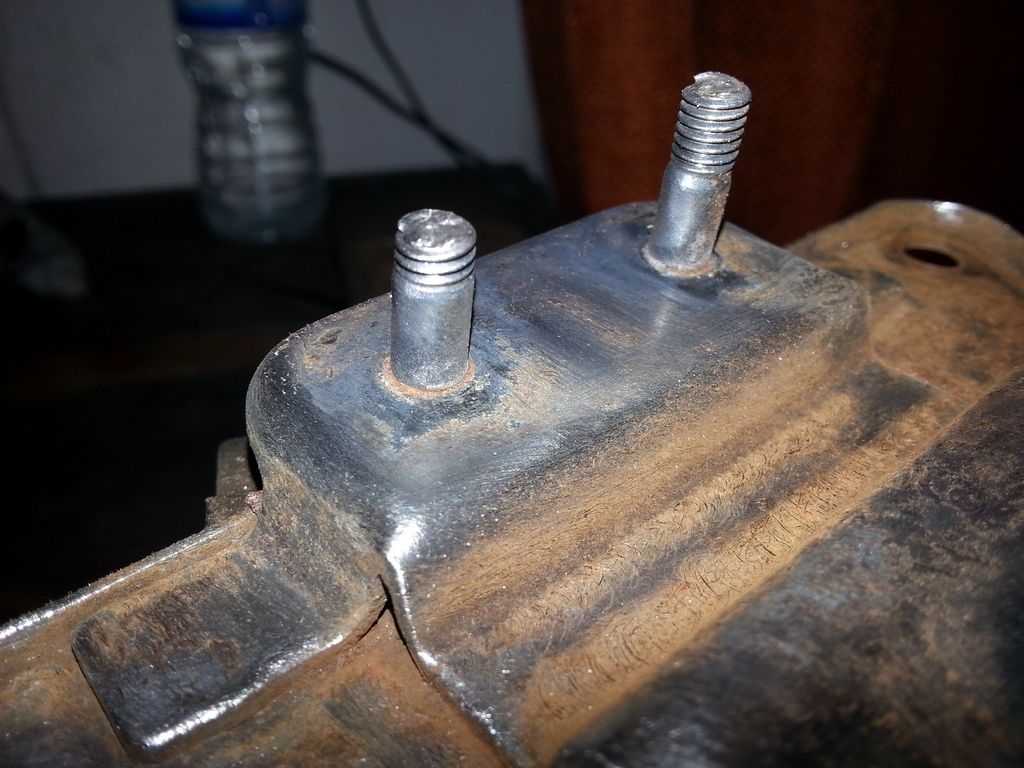
So I ground off the old studs and prepared to weld on two new studs found in my "random parts" bins.
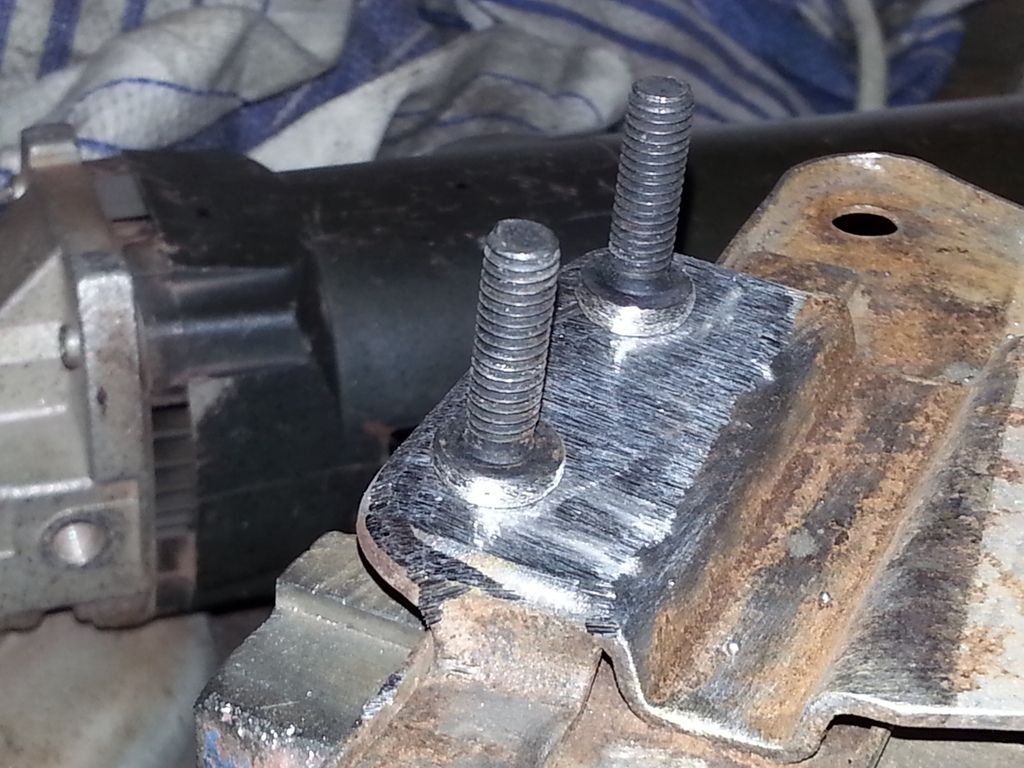
Well that was a fking balls up then. Pissing awful job, this is what you get when you are trying to finish it before going out for a Christmas meal. Had the welder turned up way too high, meaning spatter everywhere, including all over the threads, ruining them.
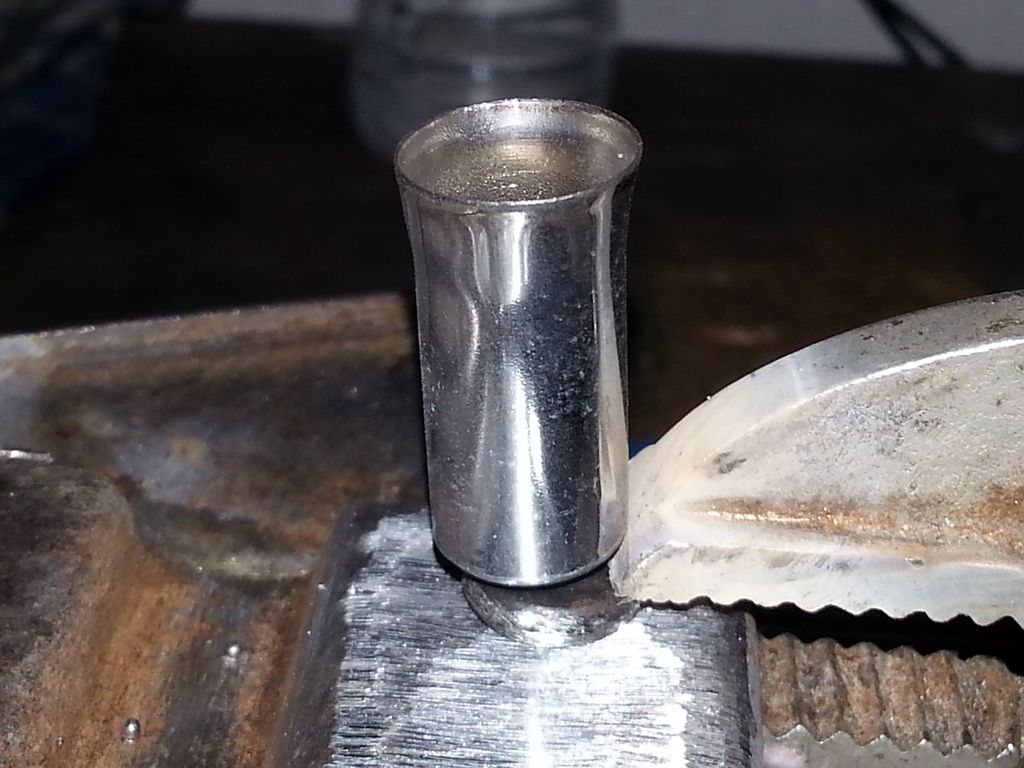
Ground everything back off again, got two more bolts. This time I'm going to cover the threads with an old chrome car tyre valve cover ! Oh, and turn down the welder. And don't rush.
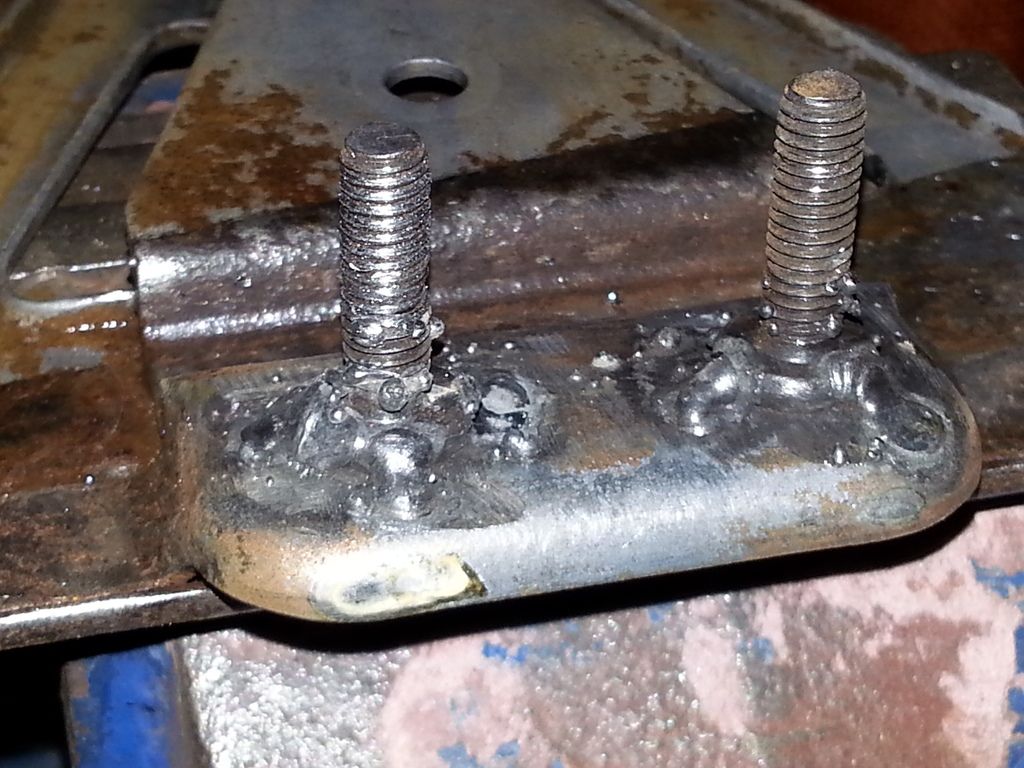
Second attempt, that's better.
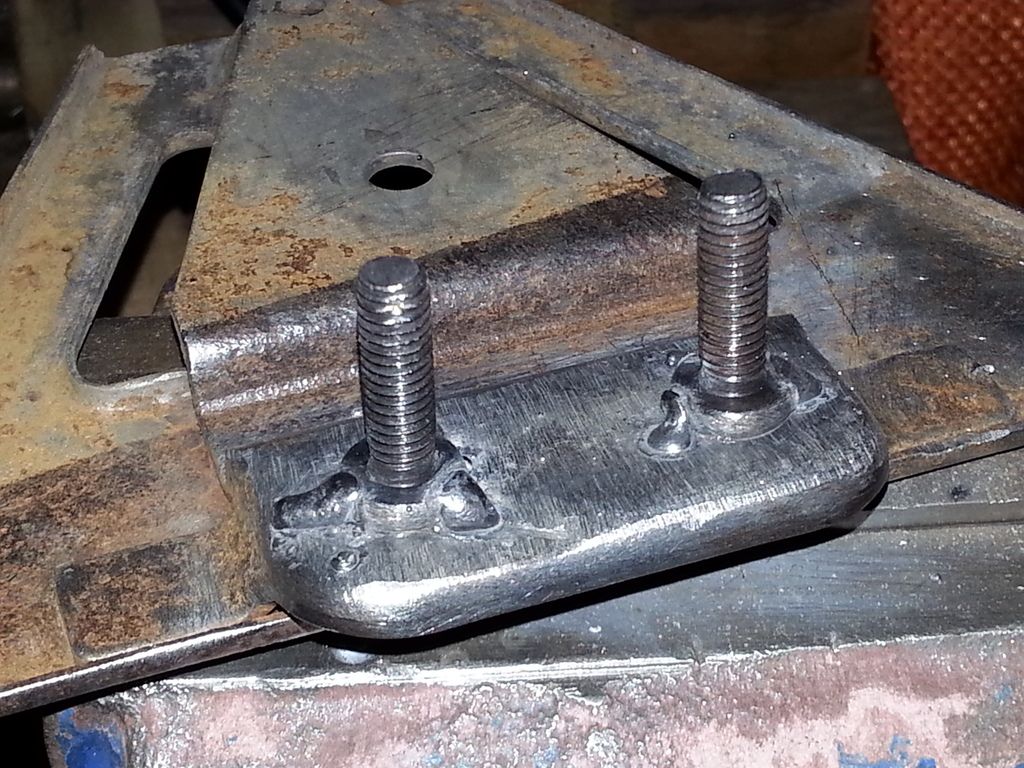
And it fits perfectly.

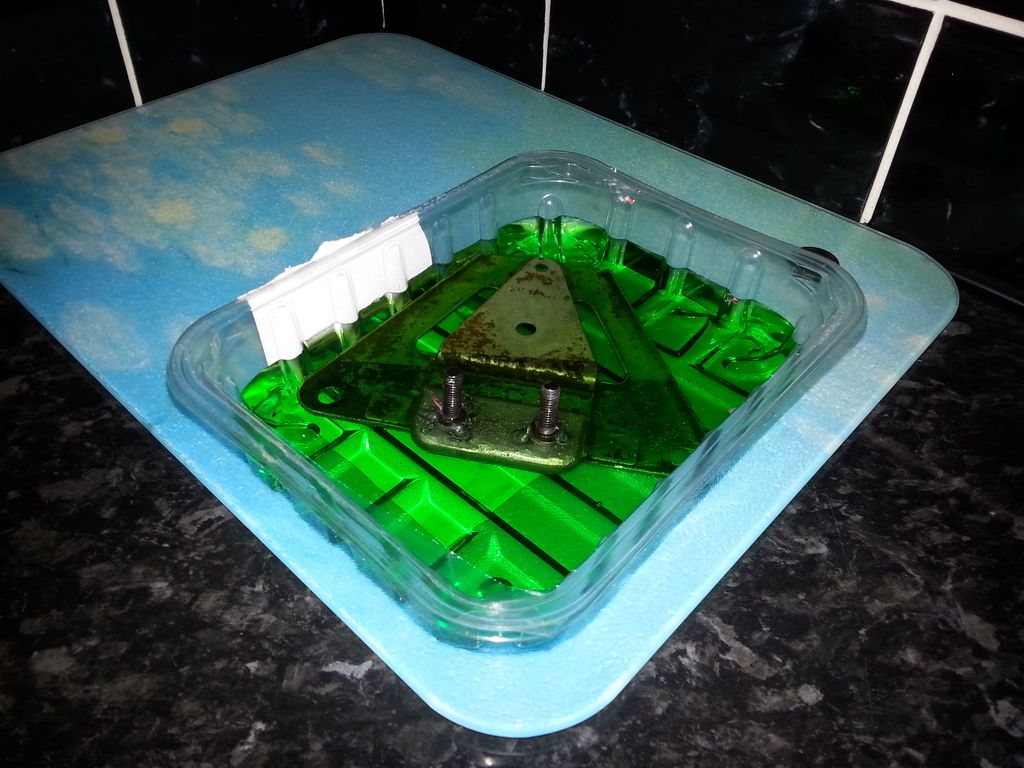
And I'll just leave it in rust remover for a day or two, before spraying.

And located in place.

VRX badges applied both sides, they cleaned up nicely with T Cut and polish.


Black cover plate (see above) for the rear brake master finished being painted (sooo many coats) and attached to bike.

So time to start on the rear number plate bracket. Someone has cut off the bit of the bracket which holds the rear reflector on (presumably to fit a larger-than-Japanese UK number plate on) but I'm not going to replace that, apart from just tidying it up.

The nuts had rusted solid, so when I went to remove the hanger (when stripping the bike) the captive studs just sheared. You can't get this part new.

So I ground off the old studs and prepared to weld on two new studs found in my "random parts" bins.

Well that was a f
king balls up then. Pissing awful job, this is what you get when you are trying to finish it before going out for a Christmas meal. Had the welder turned up way too high, meaning spatter everywhere, including all over the threads, ruining them.
Ground everything back off again, got two more bolts. This time I'm going to cover the threads with an old chrome car tyre valve cover ! Oh, and turn down the welder. And don't rush.

Second attempt, that's better.

And it fits perfectly.

And I'll just leave it in rust remover for a day or two, before spraying.

Gassing Station | Biker Banter | Top of Page | What's New | My Stuff