Honda VRX400 1995 "barn find" restoration
Discussion


Right, that's the seasonal nonsense over and done with, lets get back to something proper. Who'd work in retail at this time of year, eh ?
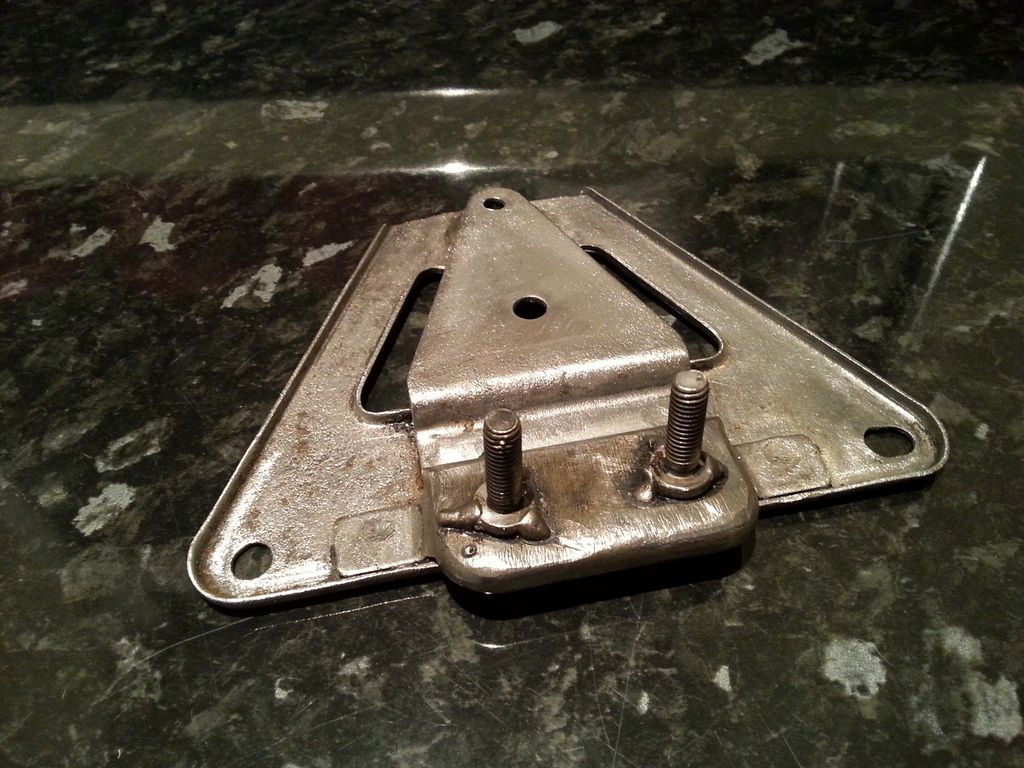
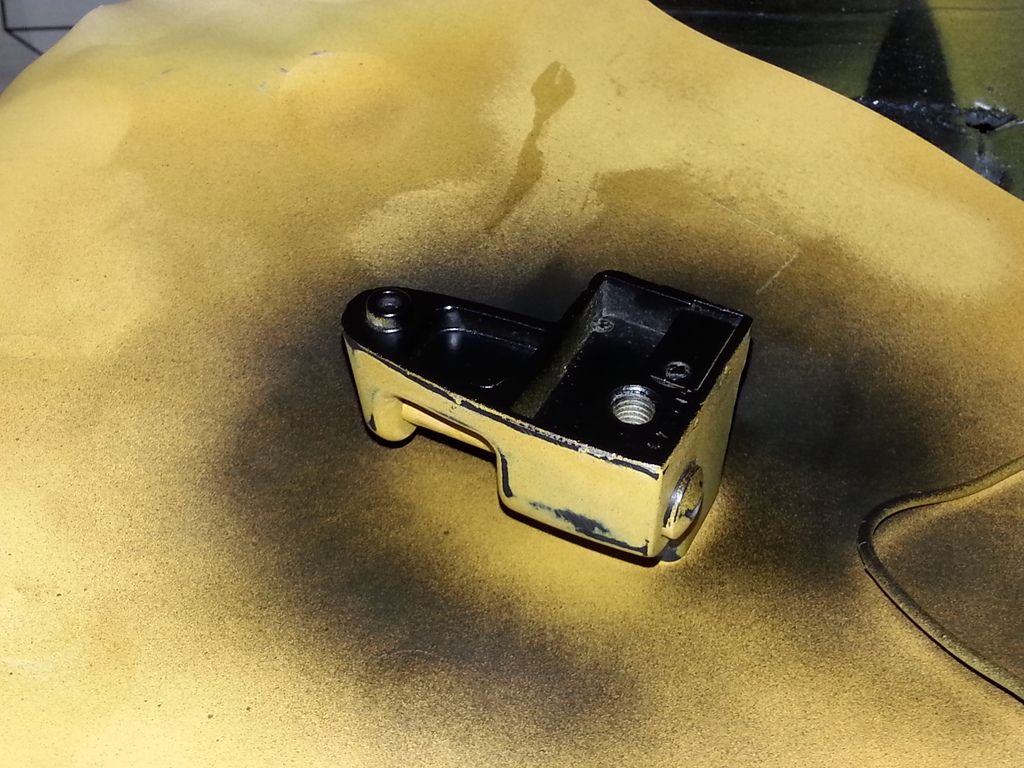
Number plate bracket de-rusted and before various and numerous coats of primer, primer/filler and black satin paint.

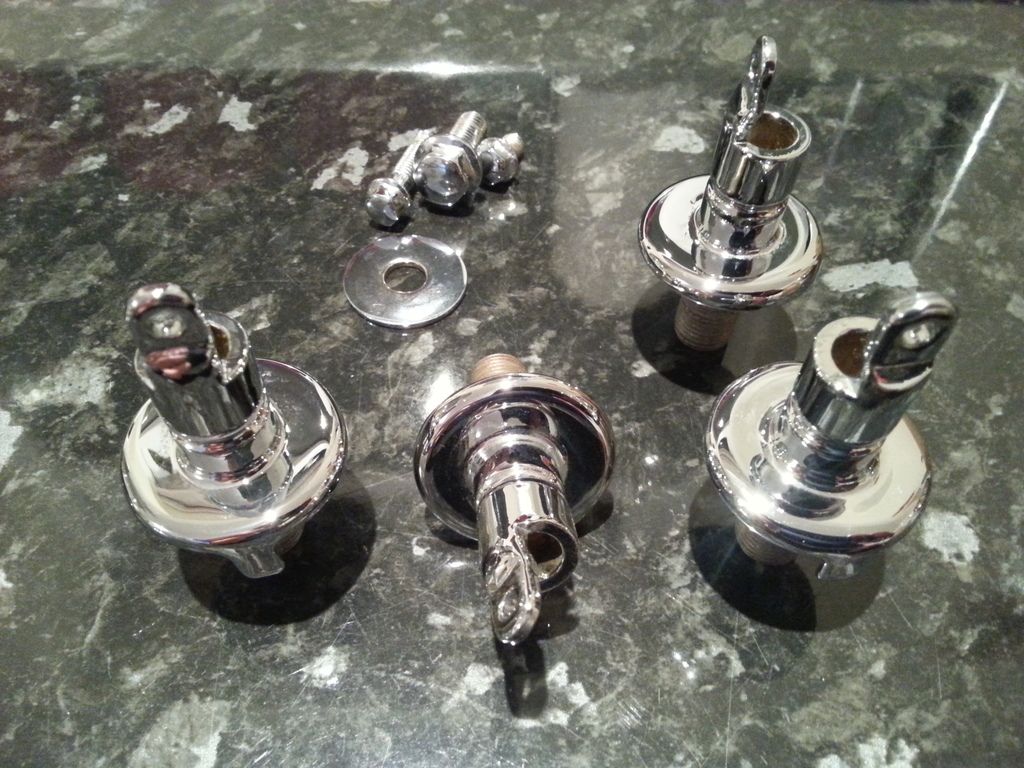
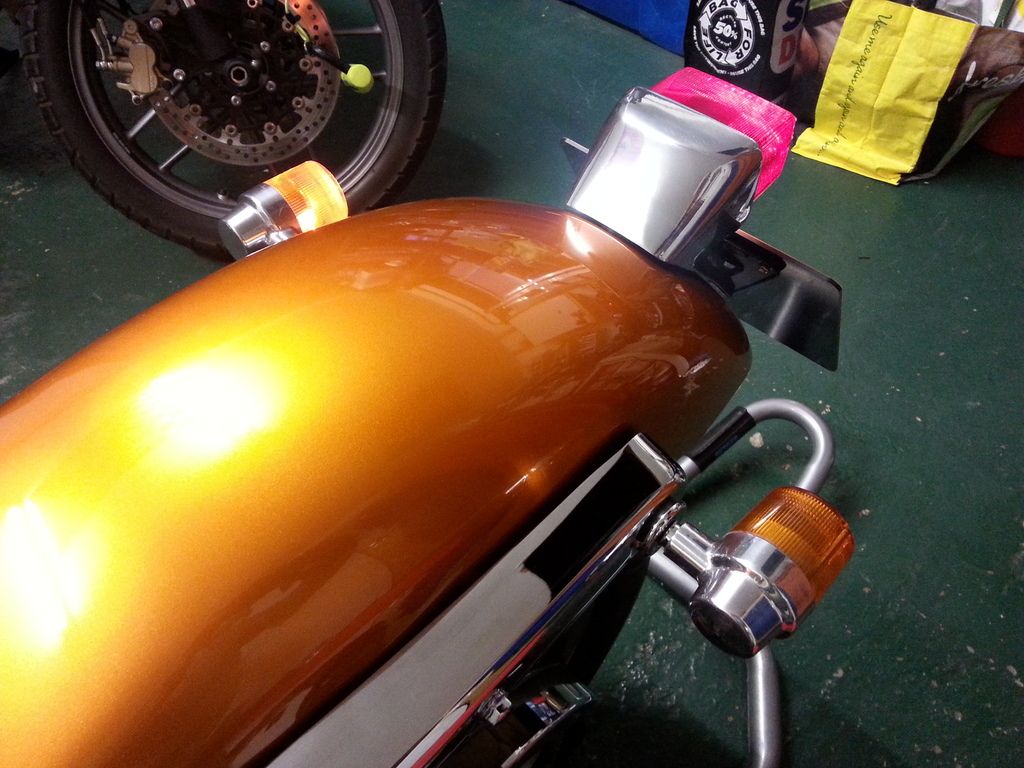
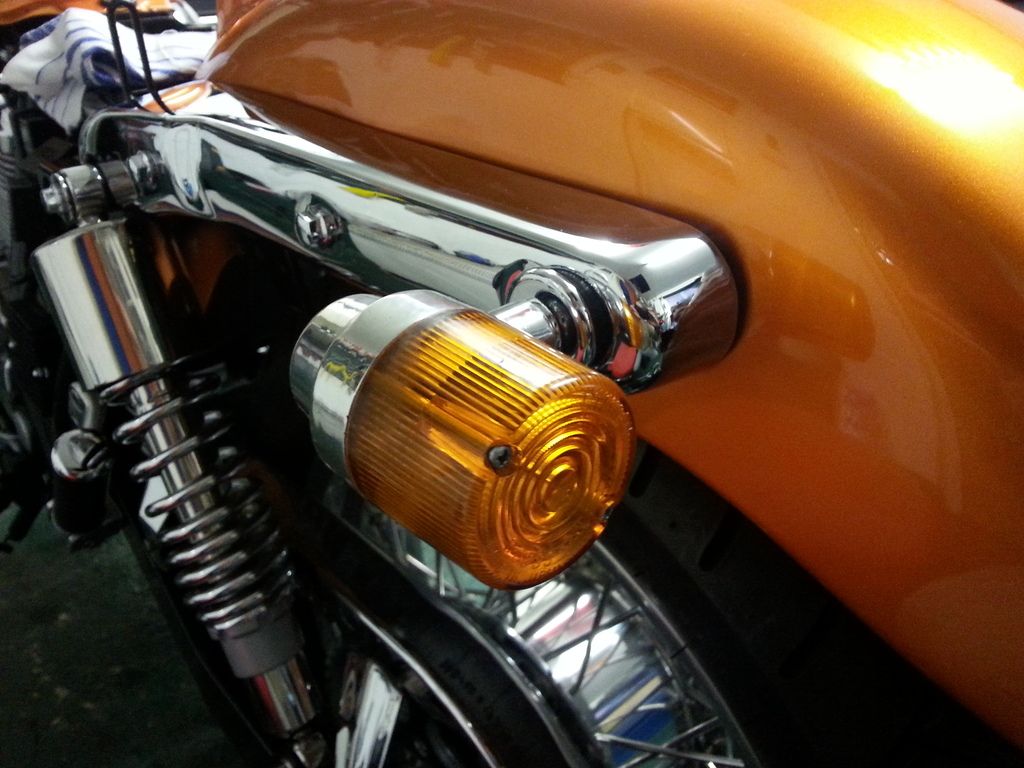
Derby Plating have done their usual superb job on the indicator mounting brackets.
Right, now, reassembling the indicators. What a b d job. This took SOOO long, with SOOO many mistakes, problems and issues.
Issue #1 : unlike all the other aluminium parts, the indicator housings wouldn't retain their polish ... after buffing, within a few days of sitting in a dry garage they'd be tarnishing and going dull again. After polishing a few times, in the end I gave up, cleaned them all up again, and gave them a couple of coats of lacquer. This gives them a slightly duller finish than pure polishing, but at least they shouldn't tarnish. I put this down to the indicators being made out of cheap st alloy.
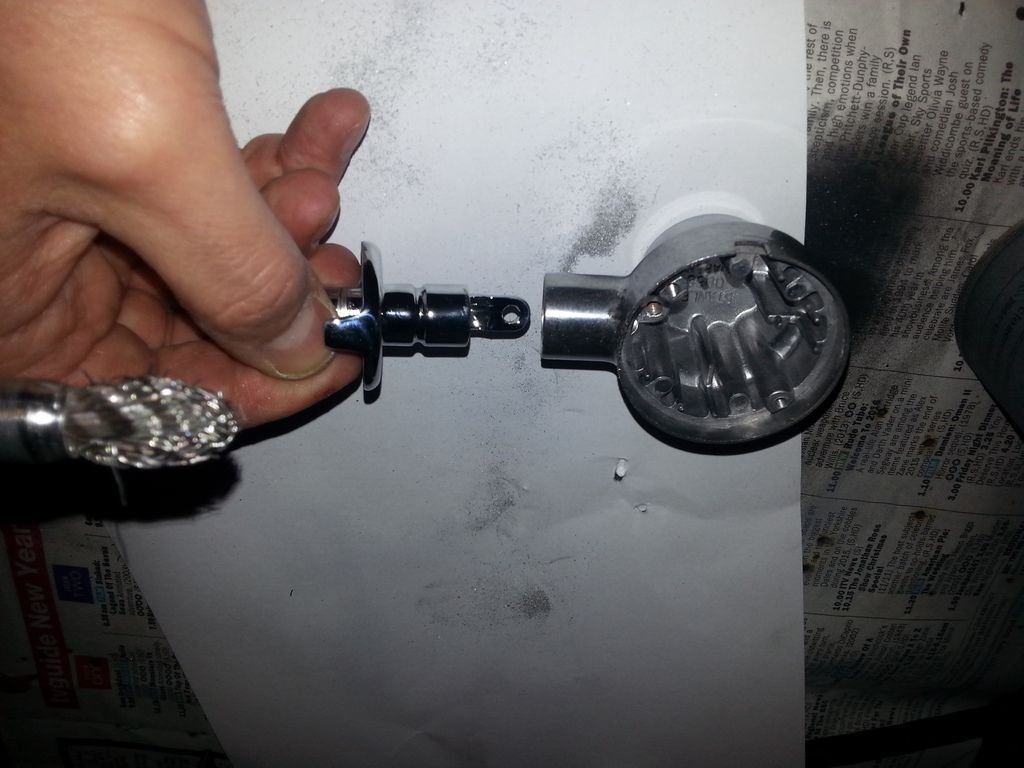
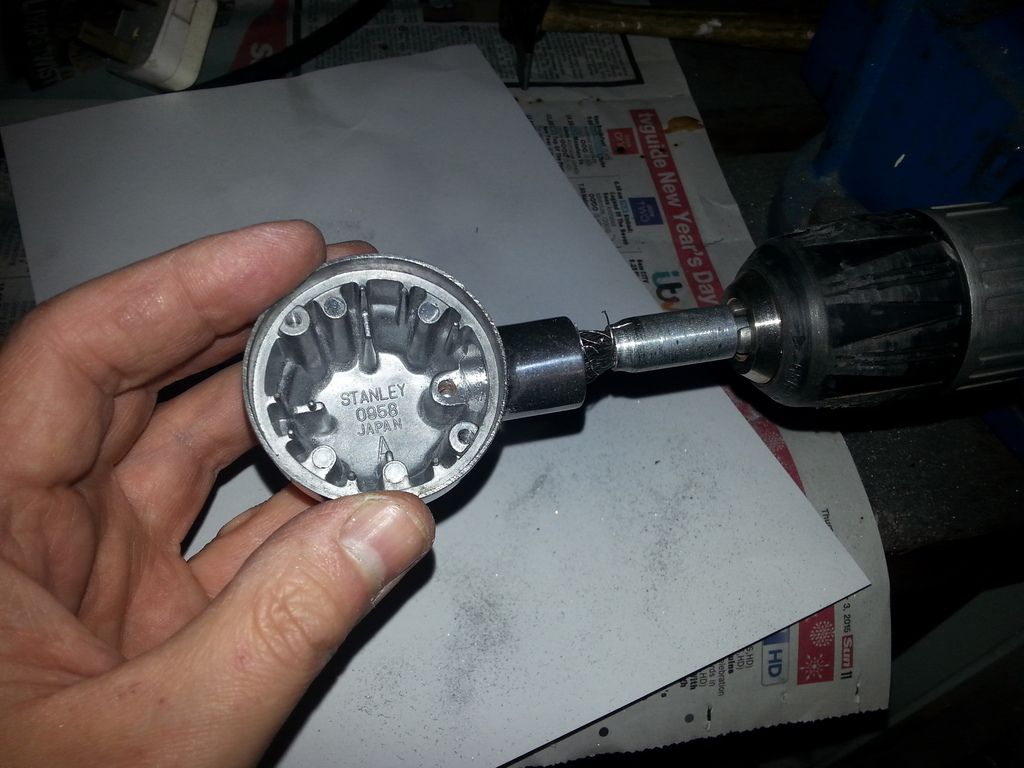
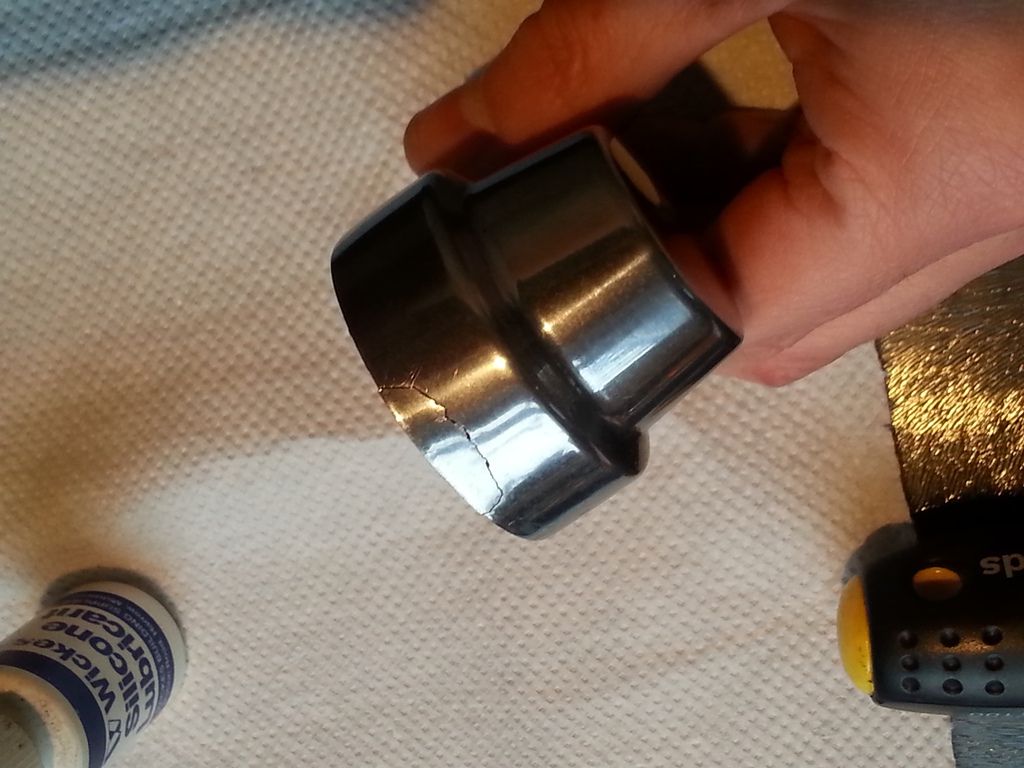
Issue #2 : Derby Plating have done a bit TOO good a job on the chrome ... it's nice and thick. Too thick to reassemble back in the housing ! I got round this by laboriously opening up the inside of the alloy housing with a wire bit in the drill and a round file, till eventually they fit.
Issue #3 : whilst reassembling one of the indicators and trying to get the chrome mount in (see Issue #2) I ended up bending the lip of one. And, being cheap st alloy (see Issue #1) when I tried to gently bend it back, it broke. For now I've araldited it, and with a fresh coat of lacquer it's not too noticeable. This will have to do until I can source a second hand one (rare as rocking horse doo-dah). It looks better in real life.
Issue #4 : they are right fiddly sods to assemble ! The number of times I had to do this, take it apart, try again, rinse and repeat until I eventually got them together. Tiny, fiddly components which just wouldn't want to go back together, but eventually success was achieved. However it did get to the point where my wife was avoiding me, and staying out of the kitchen (well, she said that was her excuse anyway ...)
All four done. I tell you, it's enough to drive a man to drink.
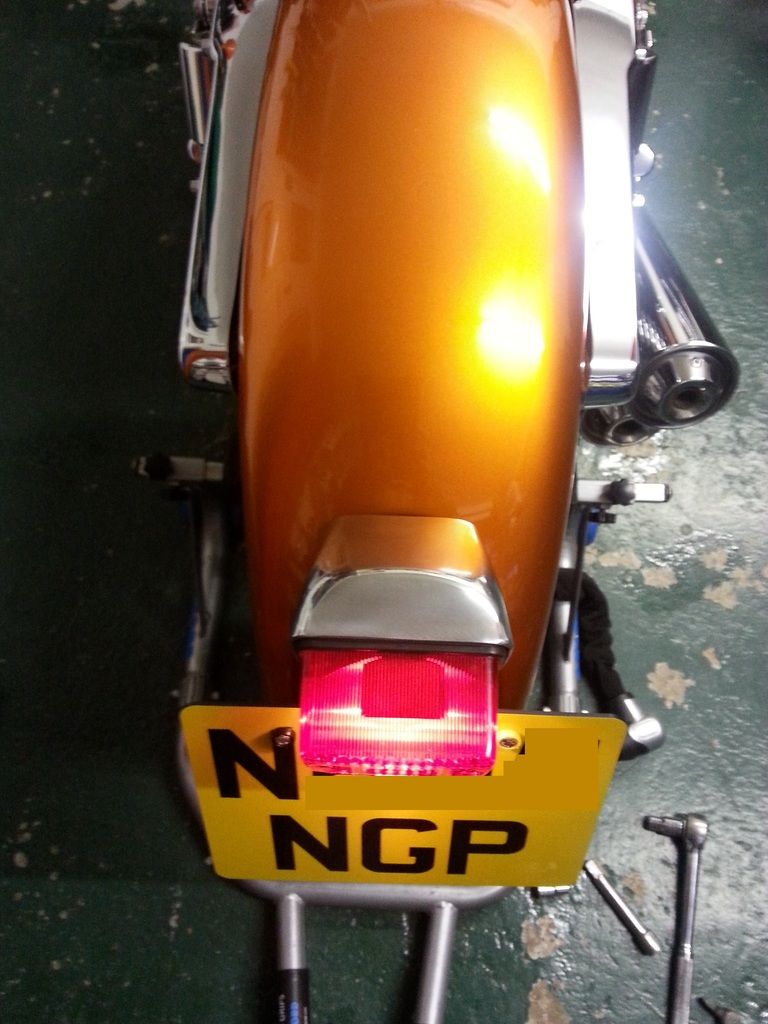
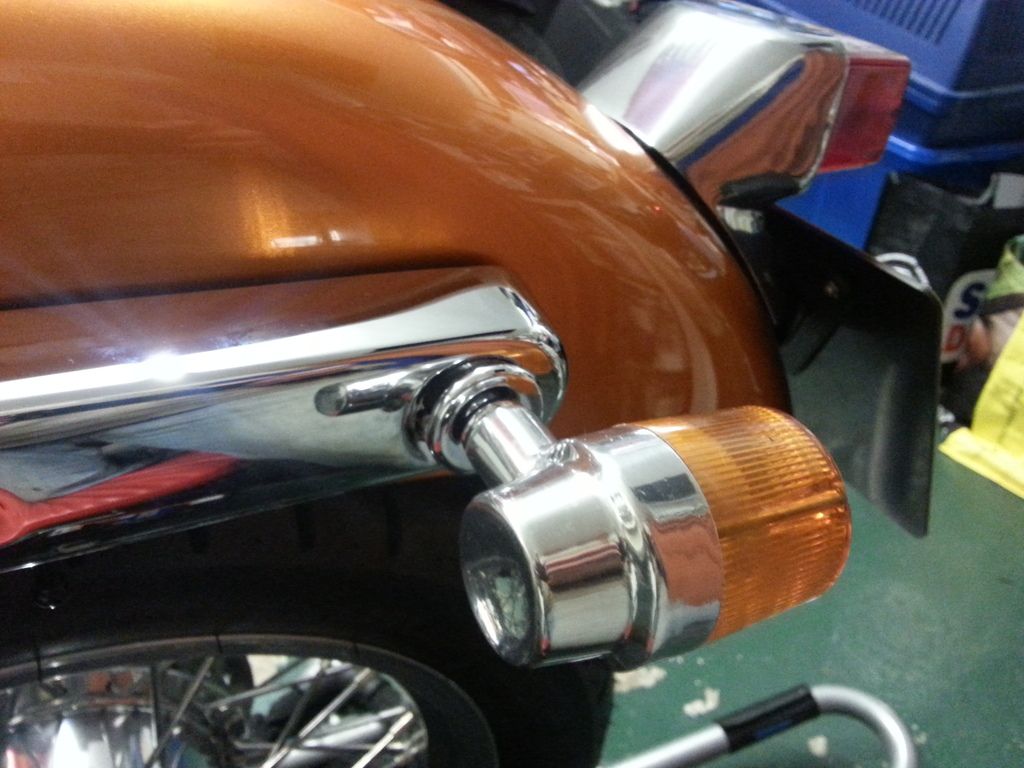
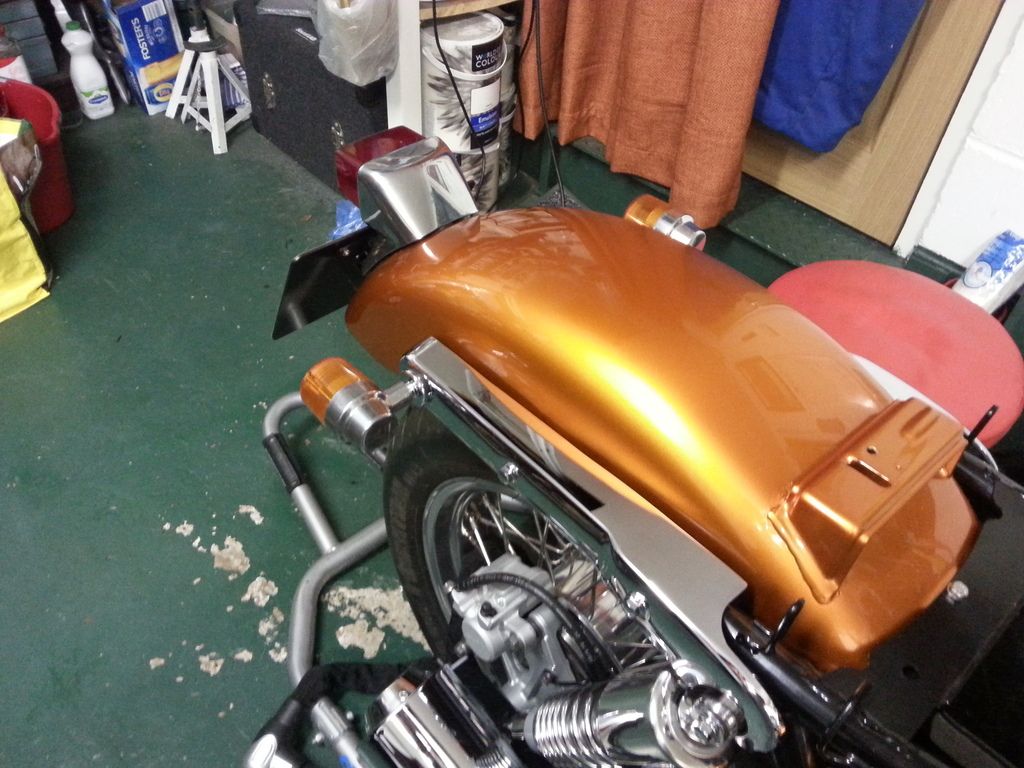
Moving back to the rear light, the number plate bracket was finished off ... but only on third time lucky !! The second sets of studs I welded on above ? Well, had to cut them off. And weld on a third, longer set ... I'd forgotten / didn't realise that the number plate bracket mounts over the top of the rear light housing, and as such has to travel through it. The new studs were too short. So, out with the angle grinder, on with the welder, and repaint it ALL OVER AGAIN !
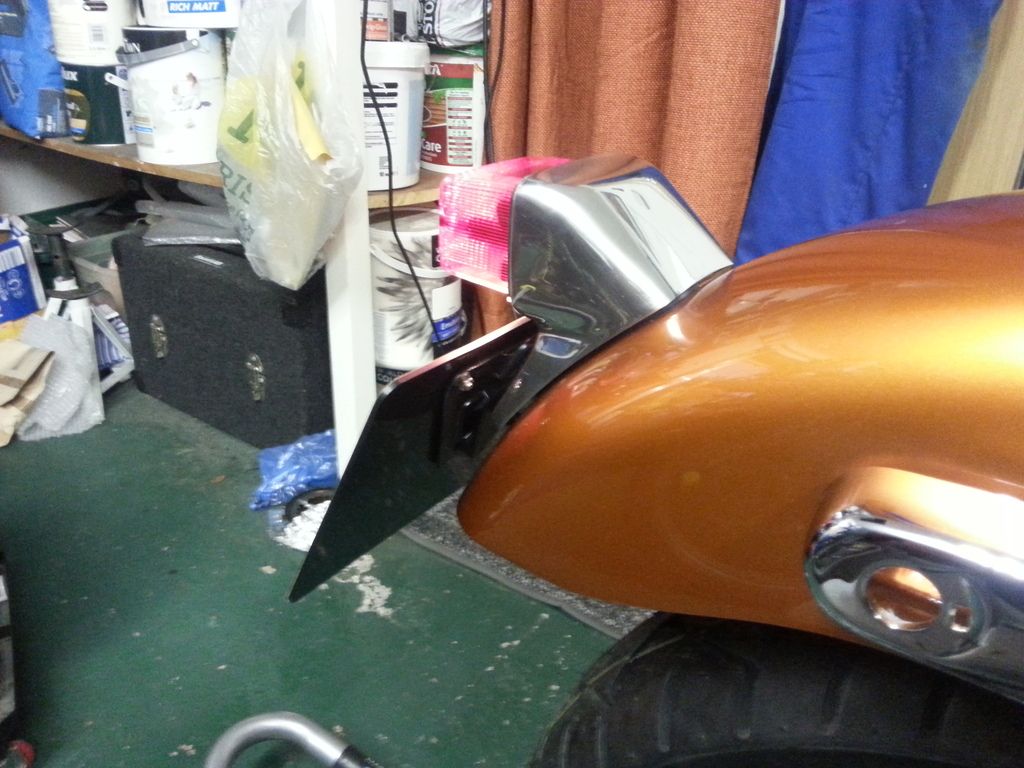
Looks good though, reassembled. The rear light was easy to reassemble (a couple of parts I had to look up on the parts diagrams as I forget where they went).
The horrible legal number plate is purely temporary to get her through the MOT ... I'll be putting a black/silver pressed ally plate on.

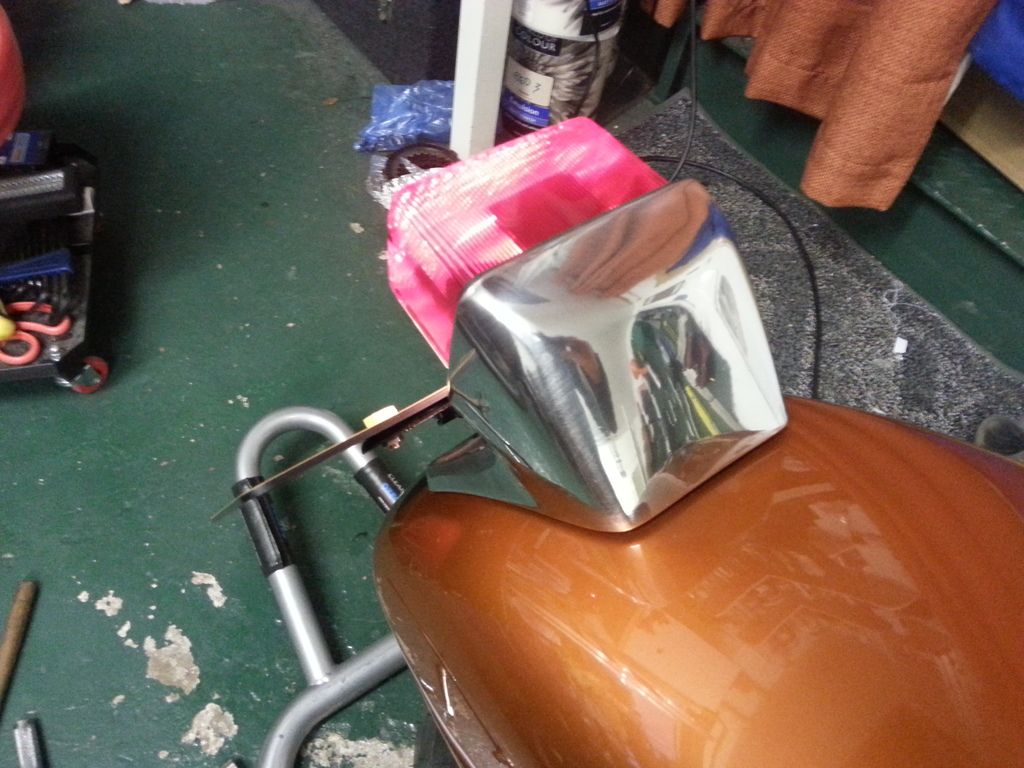
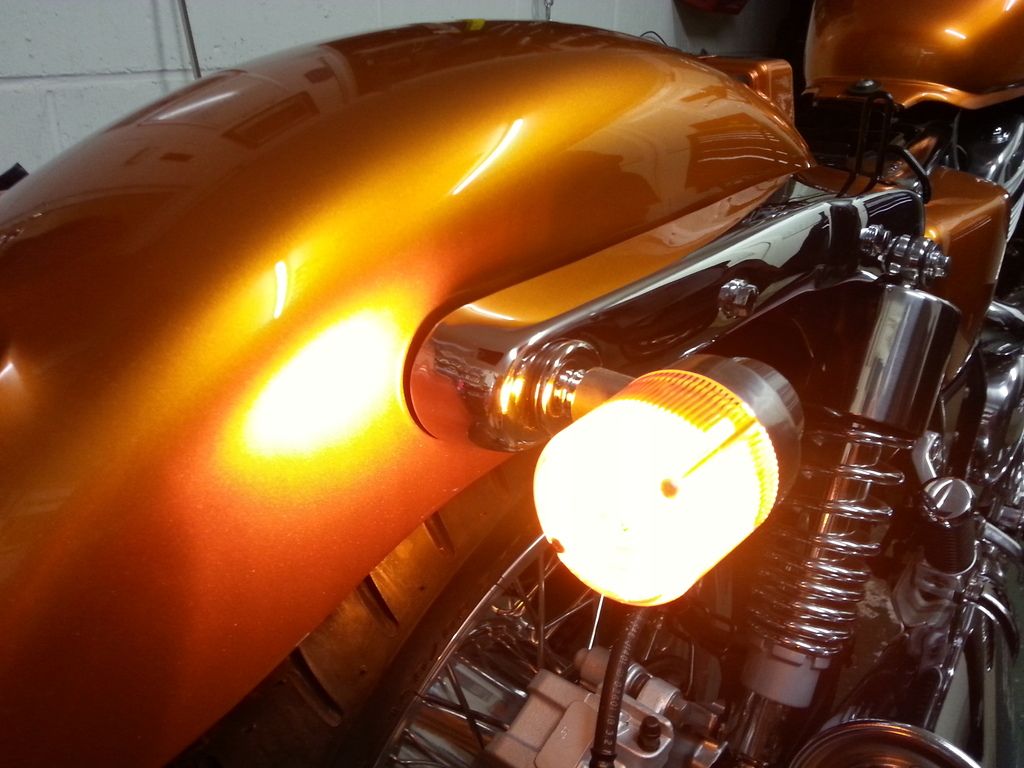
The rear light and brake light both worked first time ! (both front and rear brake levers). The lens isn't actually pink in real life, blame the phone.
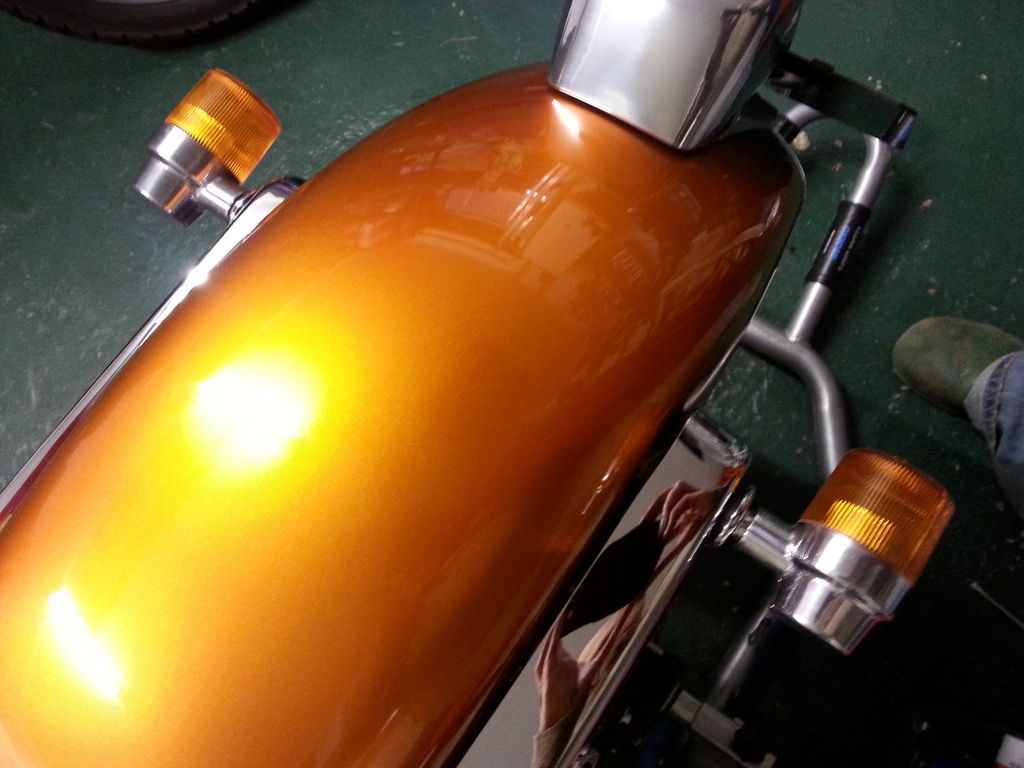
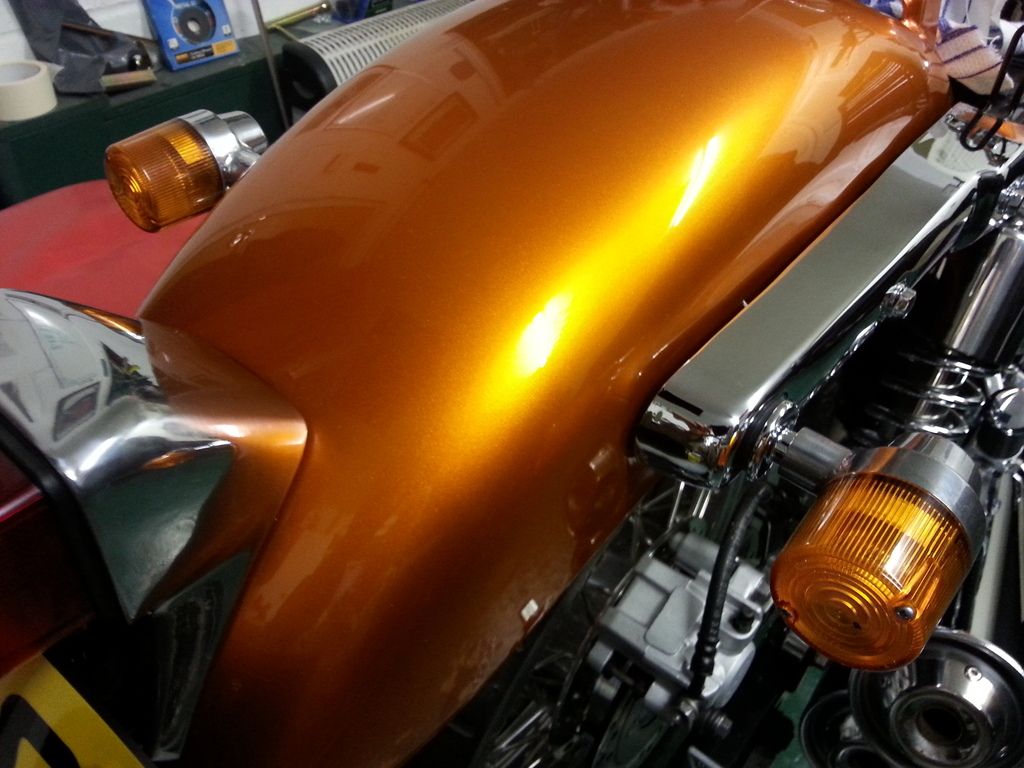
Indicator mounting thingies ... cleaned, derusted, primed, painted, well you know the drill by now (Binky : "Make the noise !")

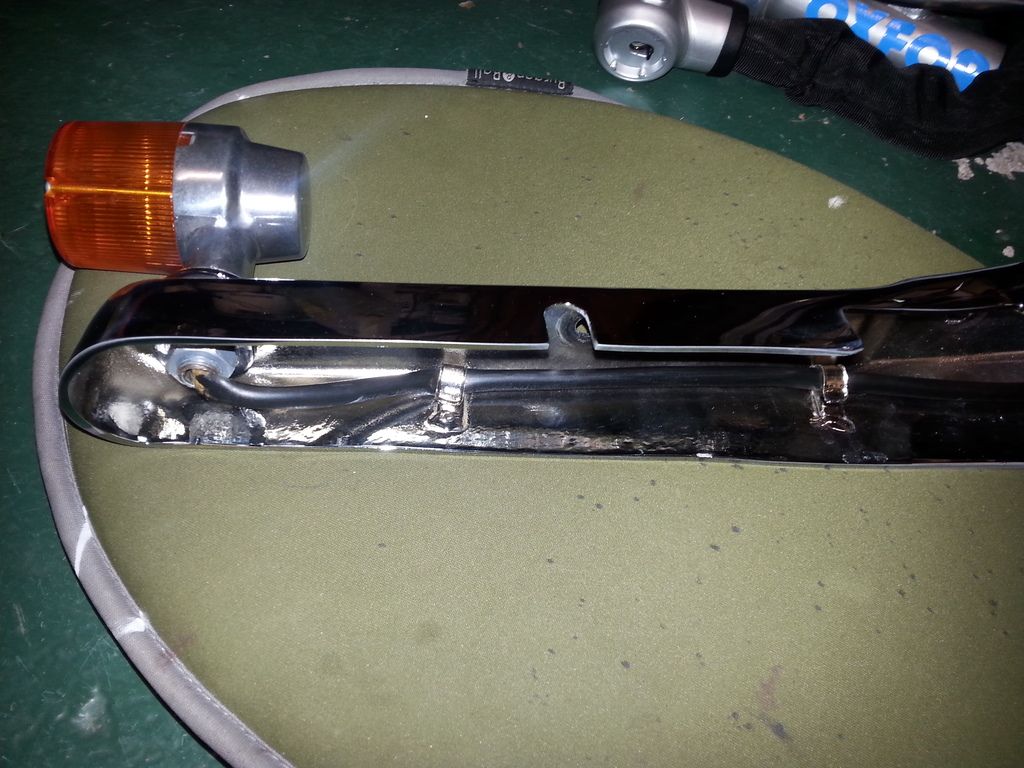
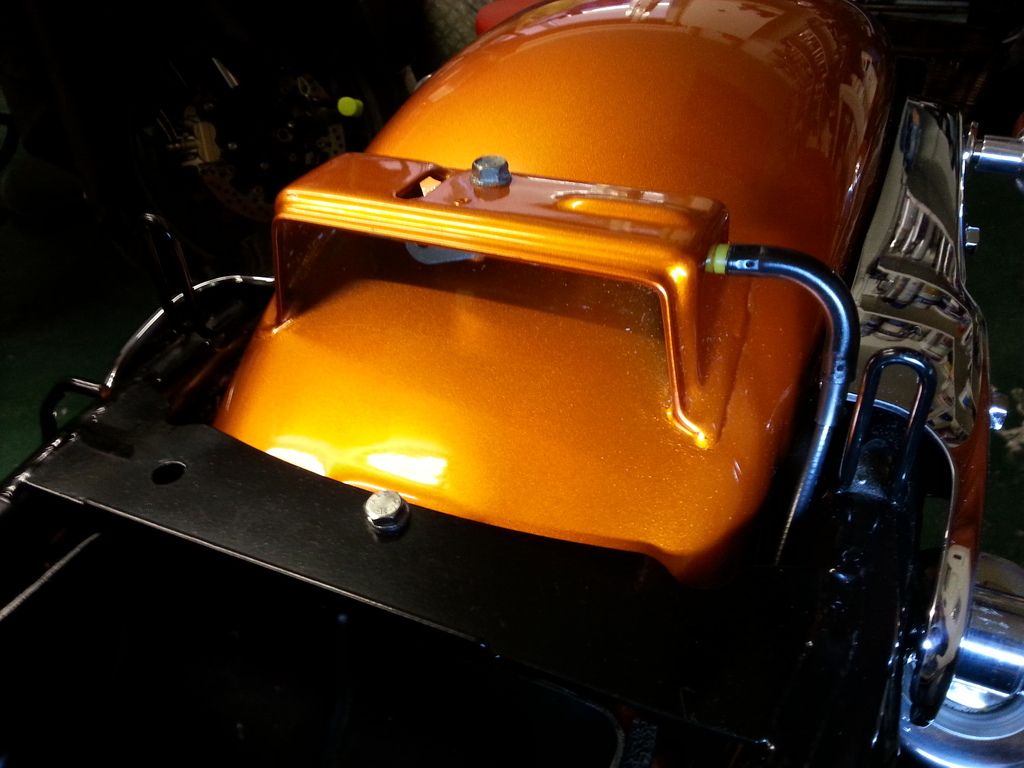
Mounting on the rear chrome bracket. Note the cable run. By the way I use back to black on all the electrical cables.
This is the cable run for the rear brake light.

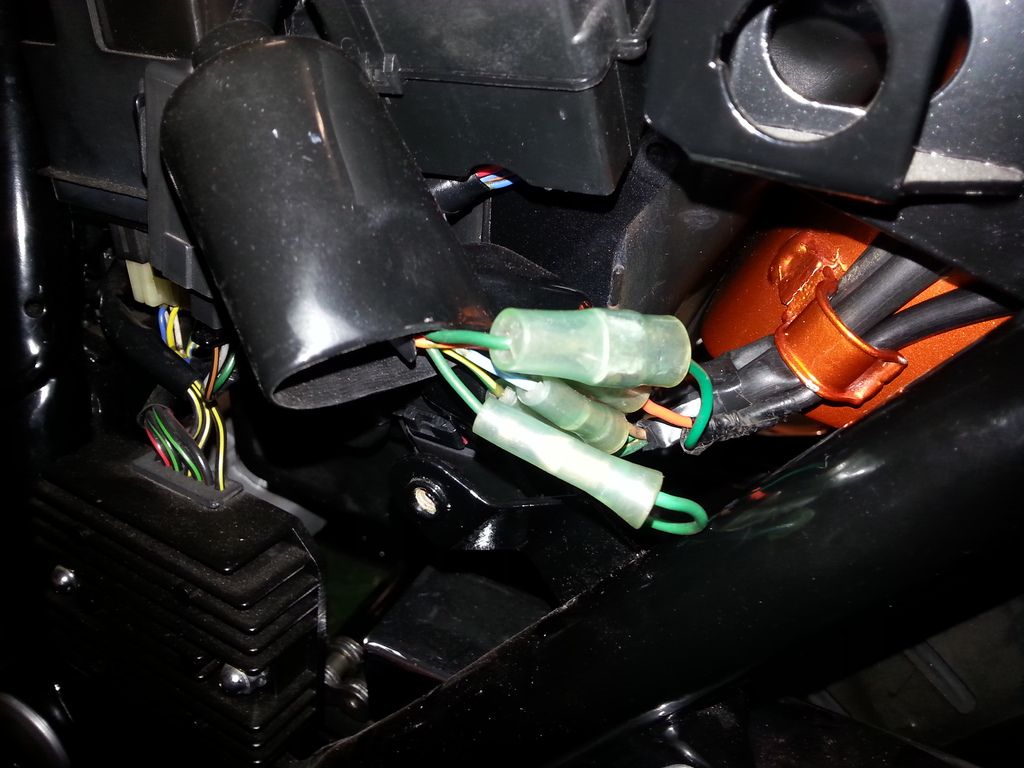
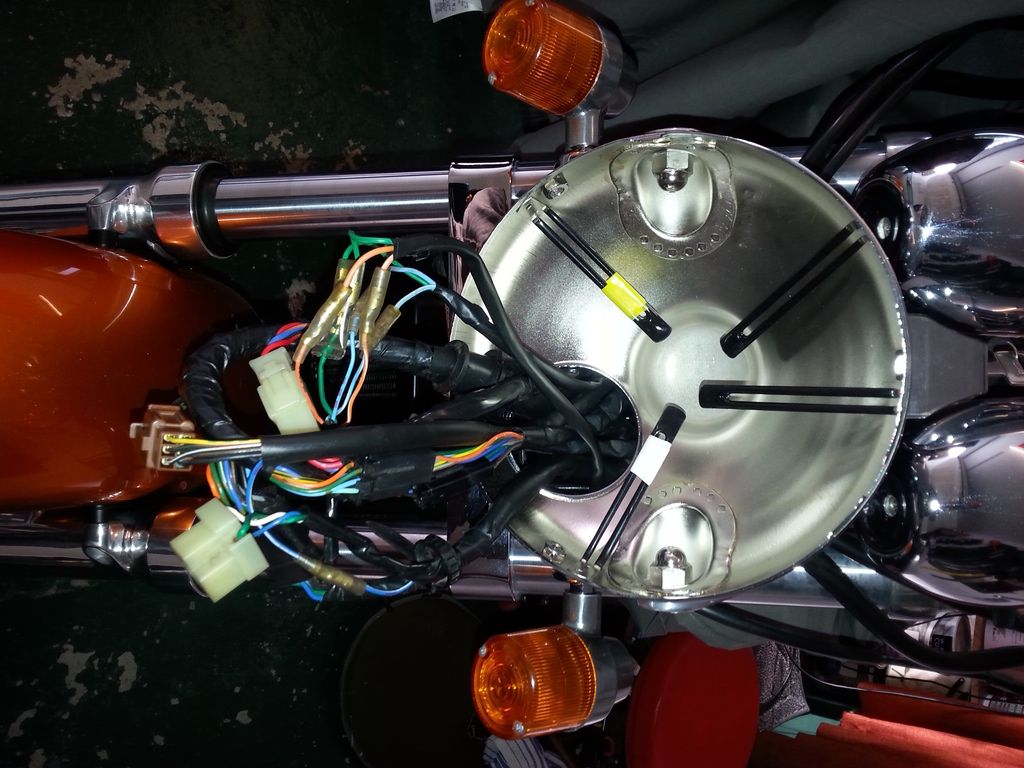
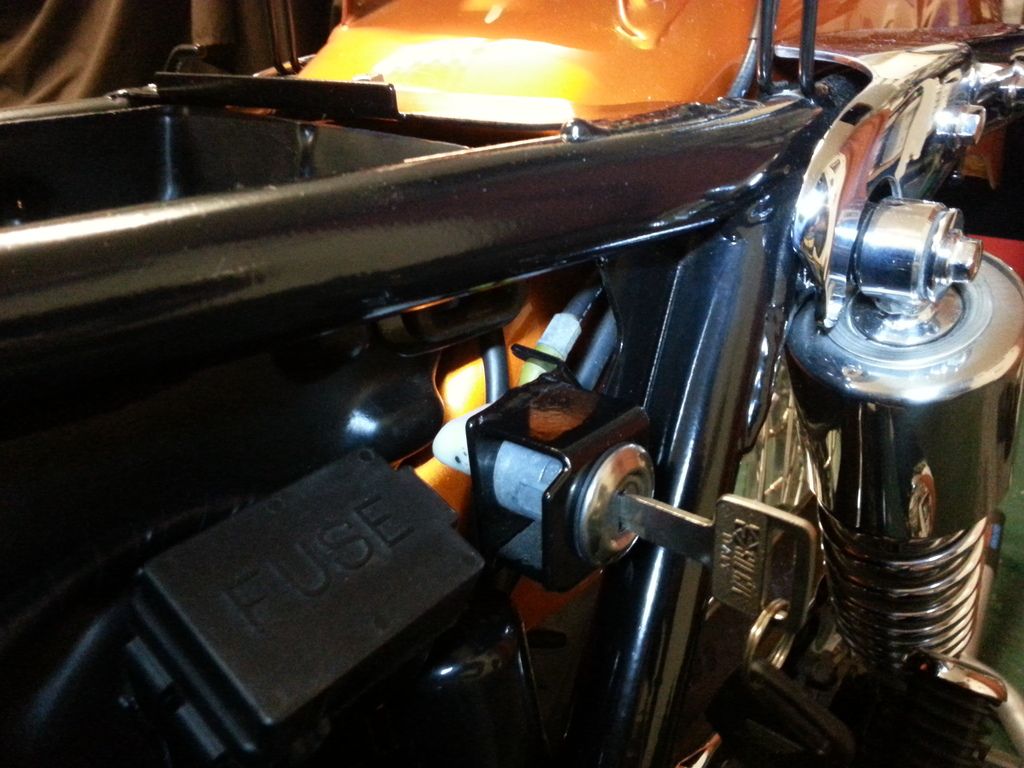
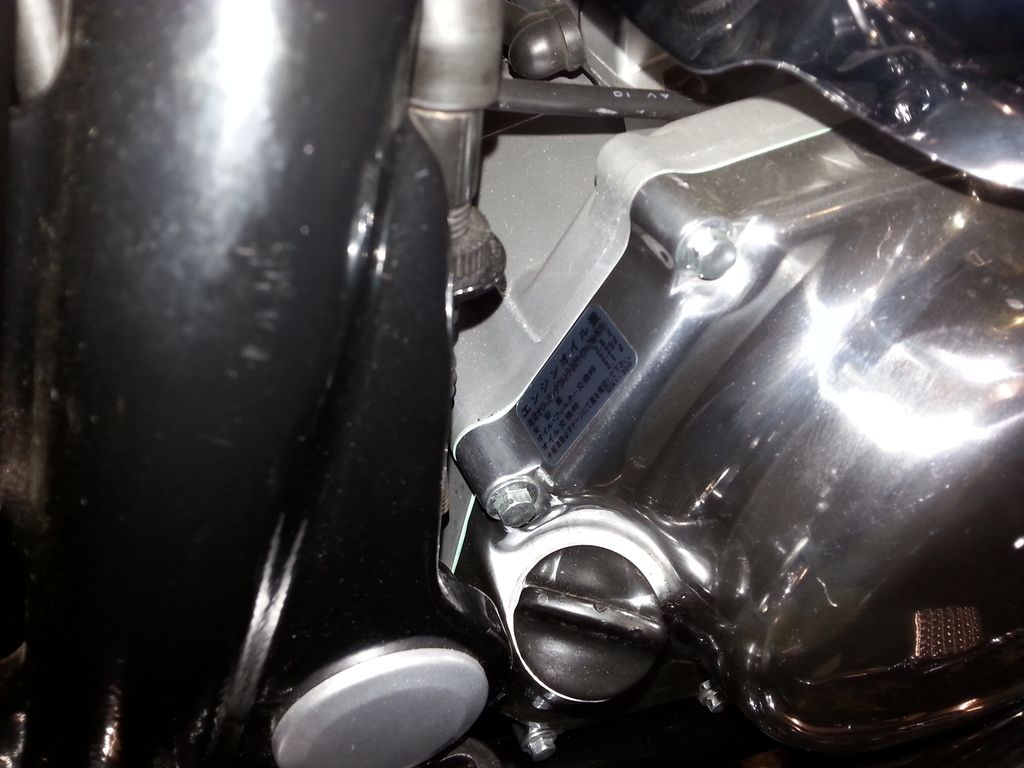
And this is where all the indicators and rear light join up. These connectors were all fuzzed up, so needed cleaning up. I've also used a bit of vaseline when reassembling. Top right you can see the hole for the seat lock, which is another job to do.
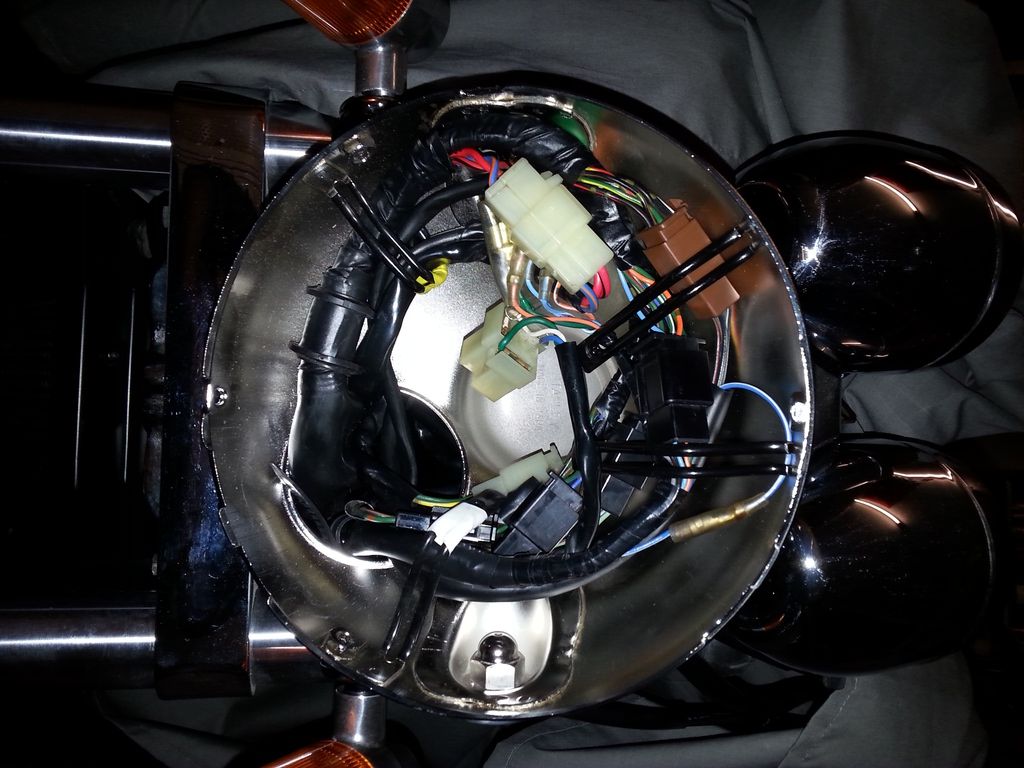
And this is the electronics area all complete.

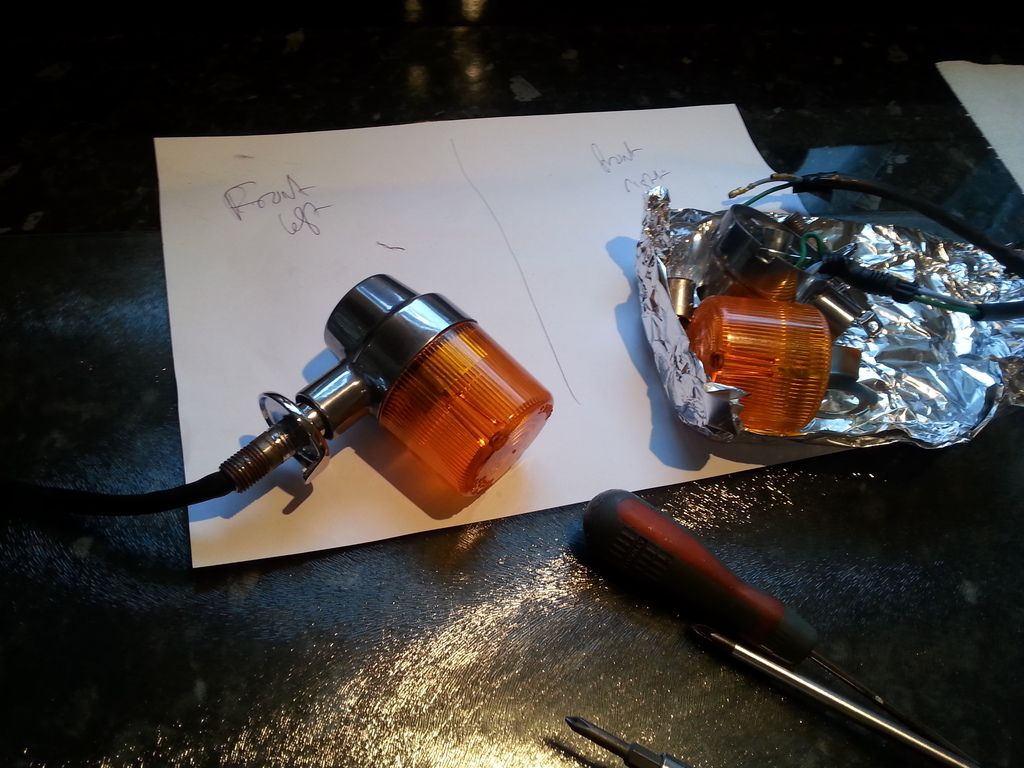
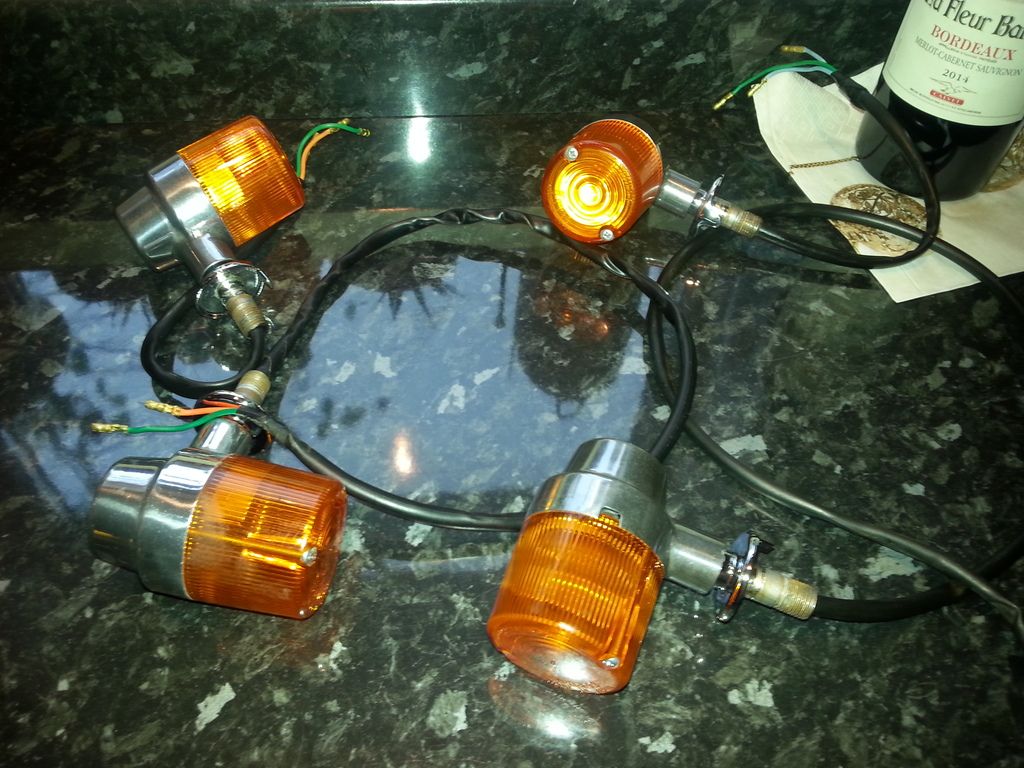
Cue lots of gratuitous shots of the indicators ... there's lots of shots because, well, frankly I've spent way too long on these, so you're going to suffer marvelling at them for a few seconds, okay ?? Humour me.

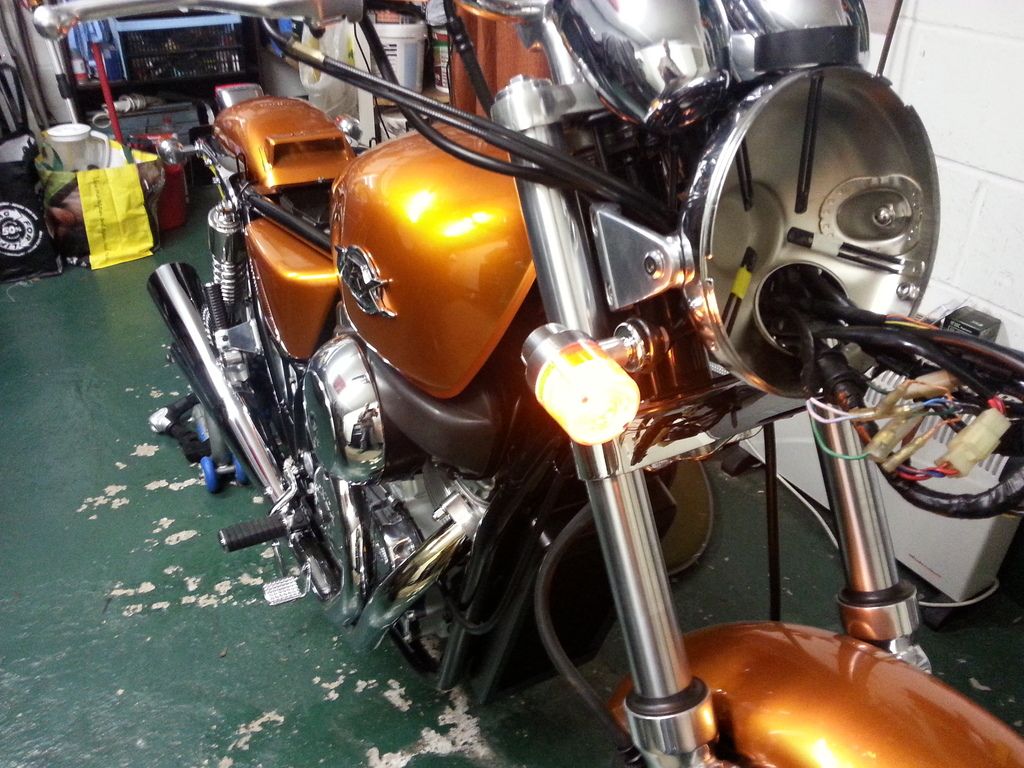
And starting to assemble the front ones too ...

Curiously the front indicators are twin filament bulbs, with both front (only) indicators showing lit at all times. I guess this is the equivalent of running lights, but I'm not sure what the MOT man is going to make about two permanently on amber lights at the front (anyone) ?
Number plate bracket de-rusted and before various and numerous coats of primer, primer/filler and black satin paint.


Derby Plating have done their usual superb job on the indicator mounting brackets.

Right, now, reassembling the indicators. What a b
d job. This took SOOO long, with SOOO many mistakes, problems and issues.Issue #1 : unlike all the other aluminium parts, the indicator housings wouldn't retain their polish ... after buffing, within a few days of sitting in a dry garage they'd be tarnishing and going dull again. After polishing a few times, in the end I gave up, cleaned them all up again, and gave them a couple of coats of lacquer. This gives them a slightly duller finish than pure polishing, but at least they shouldn't tarnish. I put this down to the indicators being made out of cheap s
t alloy.Issue #2 : Derby Plating have done a bit TOO good a job on the chrome ... it's nice and thick. Too thick to reassemble back in the housing ! I got round this by laboriously opening up the inside of the alloy housing with a wire bit in the drill and a round file, till eventually they fit.


Issue #3 : whilst reassembling one of the indicators and trying to get the chrome mount in (see Issue #2) I ended up bending the lip of one. And, being cheap s
t alloy (see Issue #1) when I tried to gently bend it back, it broke. For now I've araldited it, and with a fresh coat of lacquer it's not too noticeable. This will have to do until I can source a second hand one (rare as rocking horse doo-dah). It looks better in real life.
Issue #4 : they are right fiddly sods to assemble ! The number of times I had to do this, take it apart, try again, rinse and repeat until I eventually got them together. Tiny, fiddly components which just wouldn't want to go back together, but eventually success was achieved. However it did get to the point where my wife was avoiding me, and staying out of the kitchen (well, she said that was her excuse anyway ...)

All four done. I tell you, it's enough to drive a man to drink.

Moving back to the rear light, the number plate bracket was finished off ... but only on third time lucky !! The second sets of studs I welded on above ? Well, had to cut them off. And weld on a third, longer set ... I'd forgotten / didn't realise that the number plate bracket mounts over the top of the rear light housing, and as such has to travel through it. The new studs were too short. So, out with the angle grinder, on with the welder, and repaint it ALL OVER AGAIN !
Looks good though, reassembled. The rear light was easy to reassemble (a couple of parts I had to look up on the parts diagrams as I forget where they went).
The horrible legal number plate is purely temporary to get her through the MOT ... I'll be putting a black/silver pressed ally plate on.
The rear light and brake light both worked first time ! (both front and rear brake levers). The lens isn't actually pink in real life, blame the phone.


Indicator mounting thingies ... cleaned, derusted, primed, painted, well you know the drill by now (Binky : "Make the noise !")

Mounting on the rear chrome bracket. Note the cable run. By the way I use back to black on all the electrical cables.

This is the cable run for the rear brake light.

And this is where all the indicators and rear light join up. These connectors were all fuzzed up, so needed cleaning up. I've also used a bit of vaseline when reassembling. Top right you can see the hole for the seat lock, which is another job to do.

And this is the electronics area all complete.

Cue lots of gratuitous shots of the indicators ... there's lots of shots because, well, frankly I've spent way too long on these, so you're going to suffer marvelling at them for a few seconds, okay ?? Humour me.


And starting to assemble the front ones too ...

Curiously the front indicators are twin filament bulbs, with both front (only) indicators showing lit at all times. I guess this is the equivalent of running lights, but I'm not sure what the MOT man is going to make about two permanently on amber lights at the front (anyone) ?

Well THATS a st start to 2016.
Was buffing the tax disk holder ring when it caught on the buffer, jagged, flew up and hit me in the face.
Not bothered about the cut lip and tongue, but I've knocked a HONKING great chunk of my front tooth off. Any dentists in the house ... will they be able to repair this ???
Warning, bit of blood hence spoilered for any squeamish.


At least no-one can say I've not put blood, sweat and, er, teeth into this project ...
Happy new year.
t start to 2016.Was buffing the tax disk holder ring when it caught on the buffer, jagged, flew up and hit me in the face.
Not bothered about the cut lip and tongue, but I've knocked a HONKING great chunk of my front tooth off. Any dentists in the house ... will they be able to repair this ???
Warning, bit of blood hence spoilered for any squeamish.


At least no-one can say I've not put blood, sweat and, er, teeth into this project ...
Happy new year.
Anyway, what (little, foreshortened) did I get up to today ?
Tidied up the wiring in the headlight bowl, ready for the headlight to go on.
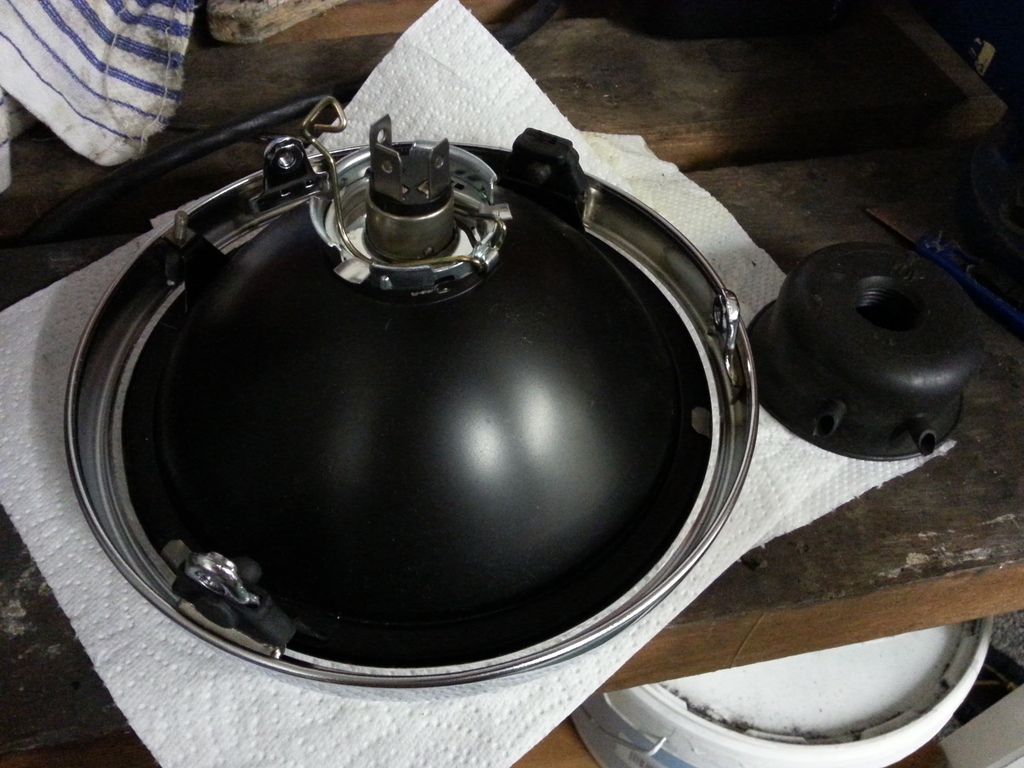
Repainted, cleaned, refurbed the headlight and refitted the adjustment mechanisms and the new chrome outer ring. Just waiting for a new bulb from Wemoto ... one filament is gone, though that wasn't obvious till you plugged it in. I accidentally deleted the "before" shots of the back of the headlight showing the rust around the mounting brackets - I'm not having a good day.
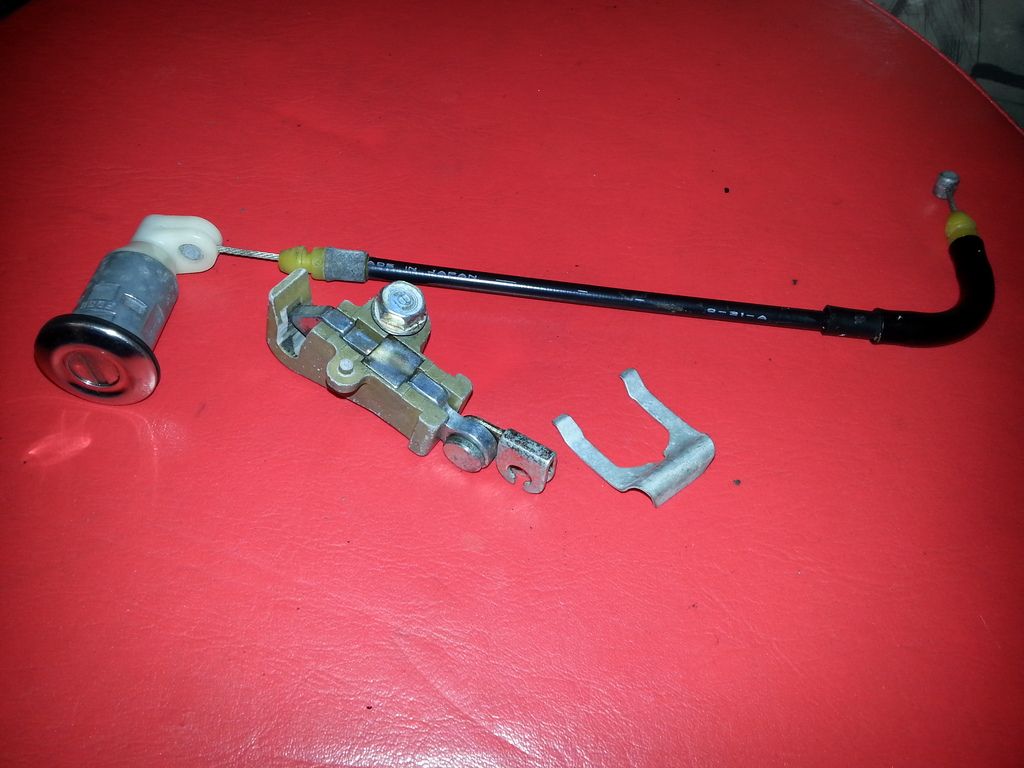
Cleaned up and derusted the seat lock and mechanism.
Tidied up the wiring in the headlight bowl, ready for the headlight to go on.


Repainted, cleaned, refurbed the headlight and refitted the adjustment mechanisms and the new chrome outer ring. Just waiting for a new bulb from Wemoto ... one filament is gone, though that wasn't obvious till you plugged it in. I accidentally deleted the "before" shots of the back of the headlight showing the rust around the mounting brackets - I'm not having a good day.

Cleaned up and derusted the seat lock and mechanism.

Fitted the seat lock at this end ...
... and this end.
Meaning I can now fit the other side panel. This one has a small screw on it ... presumably to stop people fiddling with the electrics.
Painting the helmet lock.
Applied an engine sticker.
And swing arm stickers.

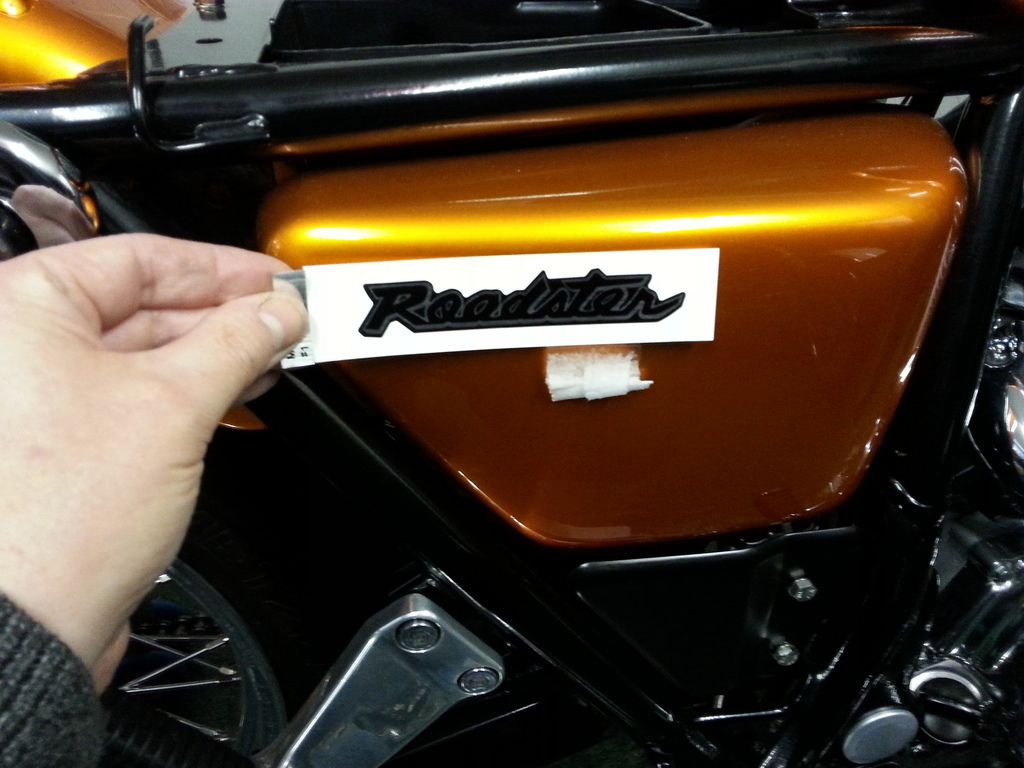
In two minds whether to apply the side panel "Roadster" stickers. So for now I won't apply them.
And ... that's it, I'm officially stuck for something to do on the bike for the first time ! Just waiting on the headlight bulb, mirrors and the seat to come back from the re-upholsterer.
Still to come :
- first (official !) run and post rebuild de-snagging
- MOT
- a summary of the costs incurred on the project
- a picture of all the parts I didn't use / replaced

... and this end.

Meaning I can now fit the other side panel. This one has a small screw on it ... presumably to stop people fiddling with the electrics.

Painting the helmet lock.

Applied an engine sticker.

And swing arm stickers.

In two minds whether to apply the side panel "Roadster" stickers. So for now I won't apply them.

And ... that's it, I'm officially stuck for something to do on the bike for the first time ! Just waiting on the headlight bulb, mirrors and the seat to come back from the re-upholsterer.
Still to come :
- first (official !) run and post rebuild de-snagging
- MOT
- a summary of the costs incurred on the project
- a picture of all the parts I didn't use / replaced
Rollin said:
Get to a dentist for an xray to check no root fracture has occurred.
Trauma to a tooth can cause death of the pulp. Watch for colour changes and swelling in the gum. May need root canal therapy at some point.
That's worst case though. Just a white filling is all that's usually required....about £50 at an NHS dentist.
Thanks for the tips Rollin. Plan on ringing the dentist first thing Monday to get it. Not been in a while though, so hope I'm still on their books ! This is the annoying thing ... 47 years old and only one tiny filling, now this !Trauma to a tooth can cause death of the pulp. Watch for colour changes and swelling in the gum. May need root canal therapy at some point.
That's worst case though. Just a white filling is all that's usually required....about £50 at an NHS dentist.
I have a very fat, blood laden lip.
crofty1984 said:
Are you insane? Why would you do that to yourself?
Because I'm weird like that. It's the geek in me.So, anyway, here goes ... brace yourself ...
Bike (*1) - - - - - £220.00
Parts - - - - - - £1,462.69
Chrome - - - - - - £867.00
Tools (*2) - - - - £245.35
Paint - - - - - - - £600.00
Wheels - - - - - - £825.10
Services (*3) - - £560.00
(*1) incl delivery charge
(*2) either specific to the job, or ones I didn't have, includes workshop manual
(*3) incl blasting and powder coating, fork reconditioning, card ultrasound etc
- - - - - - - - - - - - - - - - - -
GRAND TOTAL £4,789.14
(excluding dental work next Thursday, *cough*)
Think I'm going to go and have a quiet lie down now

On the bright side, got an insurance quote and it's only going to be about £80 !
Still waiting for the seat to come back (included in the costs above), plus the mirrors. The aftermarket "copy" mirrors arrived and they were poor quality and not actually a copy (!) so they went back, I'll have to bite the bullet and buy new ones for £126 (included in the costs above)
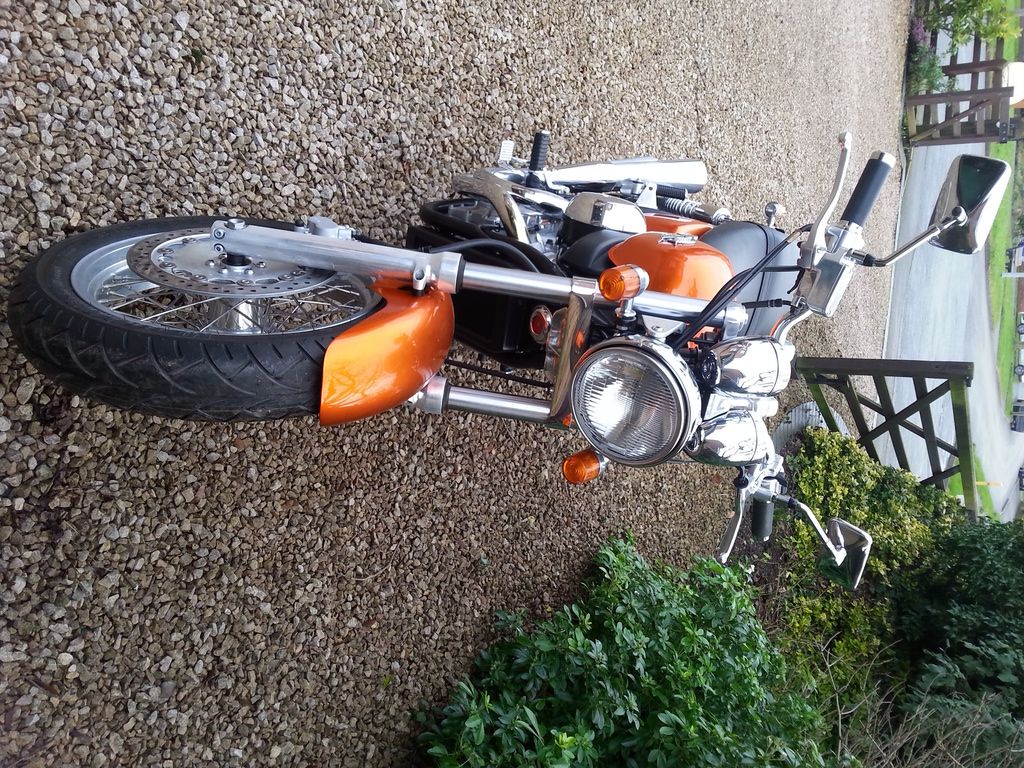
Head light bulb did arrive though, so fitted the headlight. I'll align it properly at the MOT station.

(I see photobucket is being an arse again and rotating photos ...)


Working on the principle of throw NOTHING away till the restoration is complete, here's all the bits not used / replaced by new. Only things missing from this shot are a) the original knackered rear rim and b) the orignal seat cover. Recognise any of these bits from the last 15 months ?

Cheers for the kind words folks
Here's a video to bring youtube up to the same point as this thread (i.e. waiting for seat and mirrors)
https://youtu.be/4j44HtR6o8M
Here's a video to bring youtube up to the same point as this thread (i.e. waiting for seat and mirrors)
https://youtu.be/4j44HtR6o8M
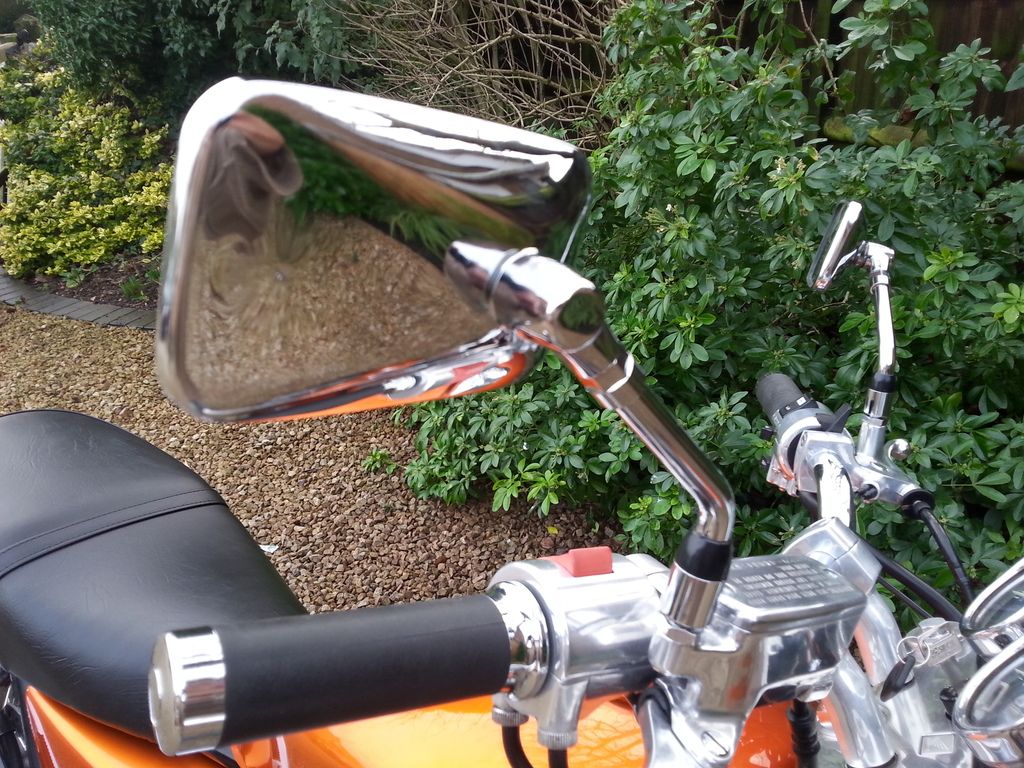
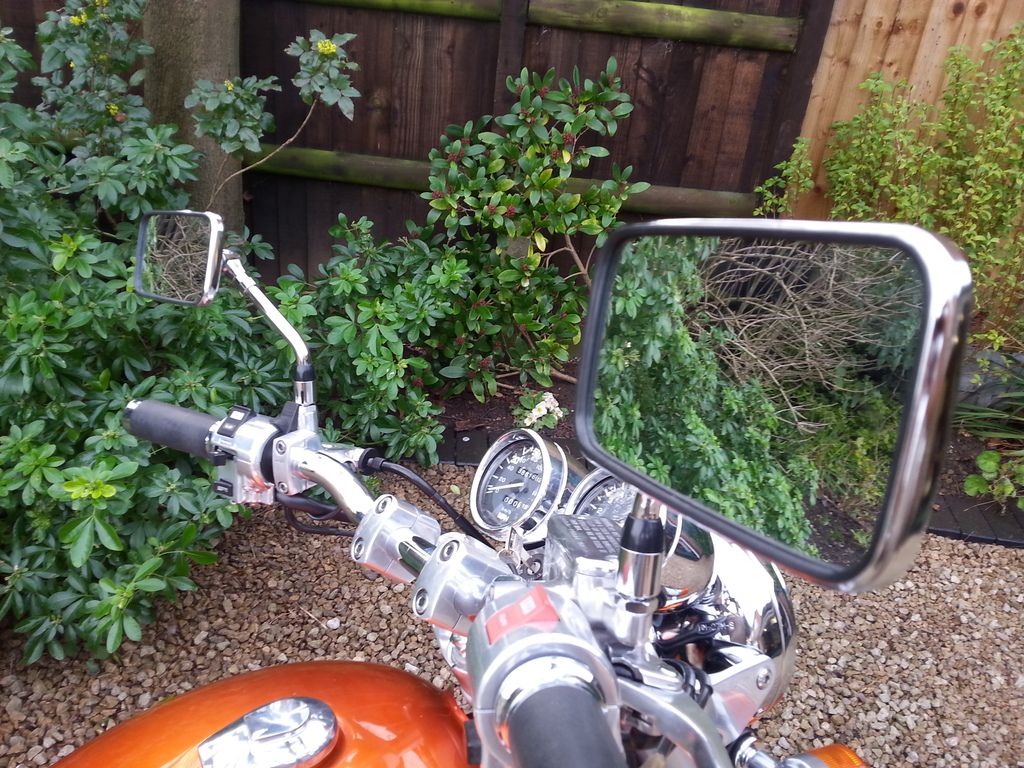
Genuine Honda wing mirrors have arrived from Japan ... less than 2 weeks (UK parts dealers were quoting 'March') and for the same price as aftermarket ones (UK parts dealers were quoting double what I paid).

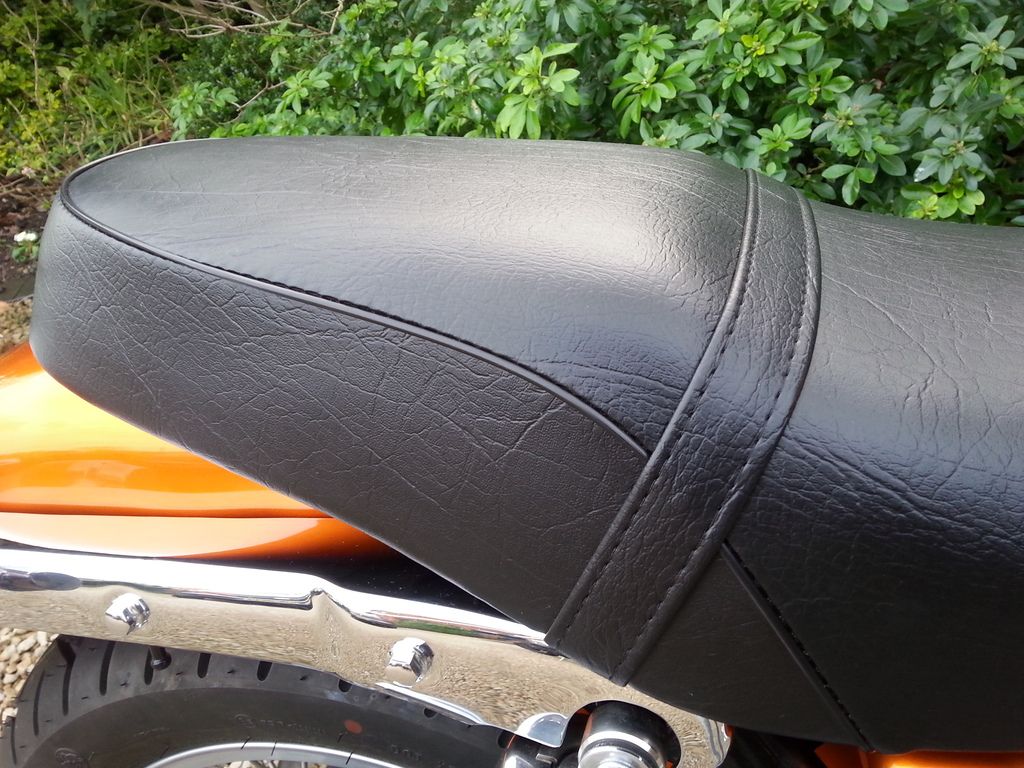
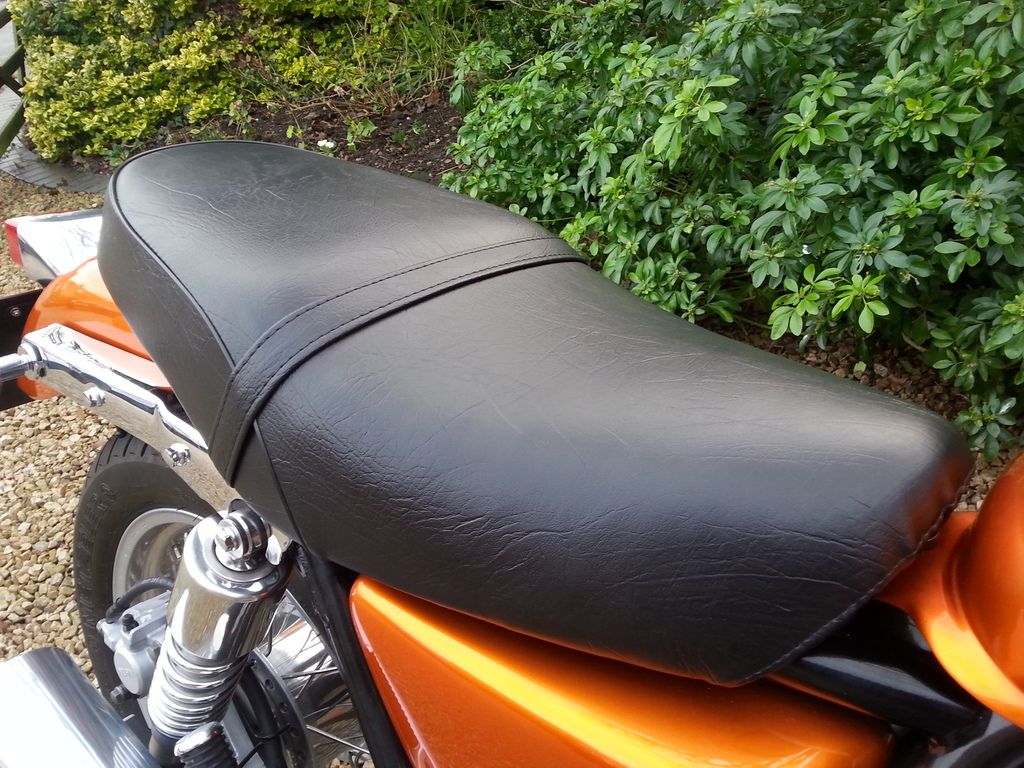
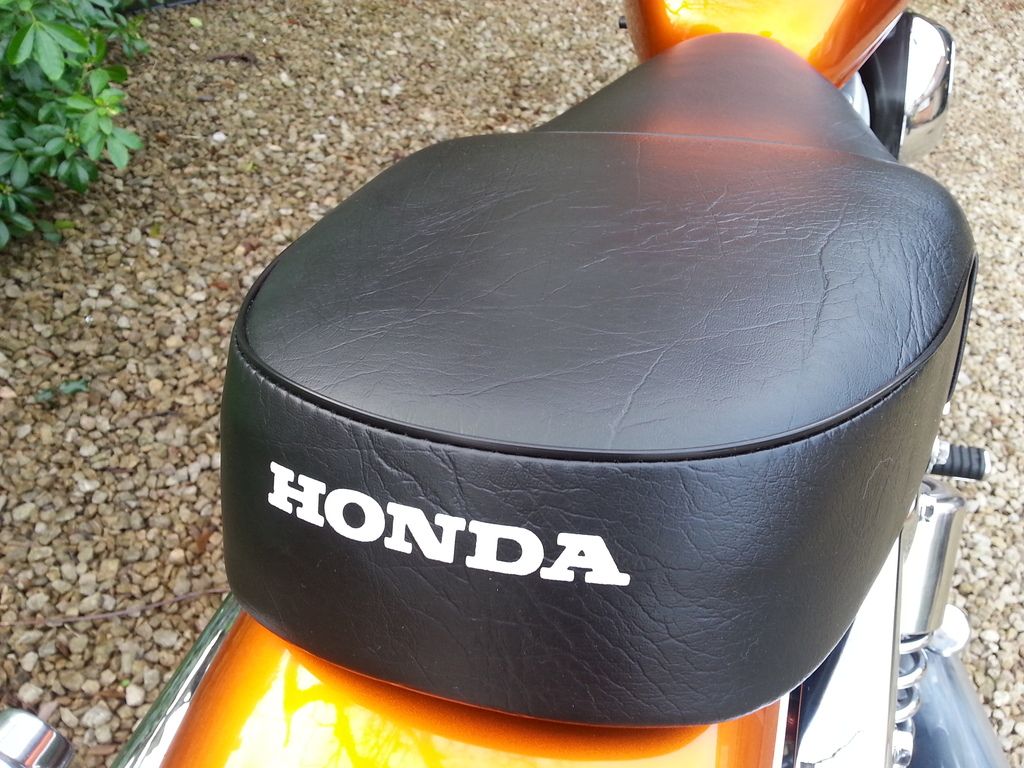
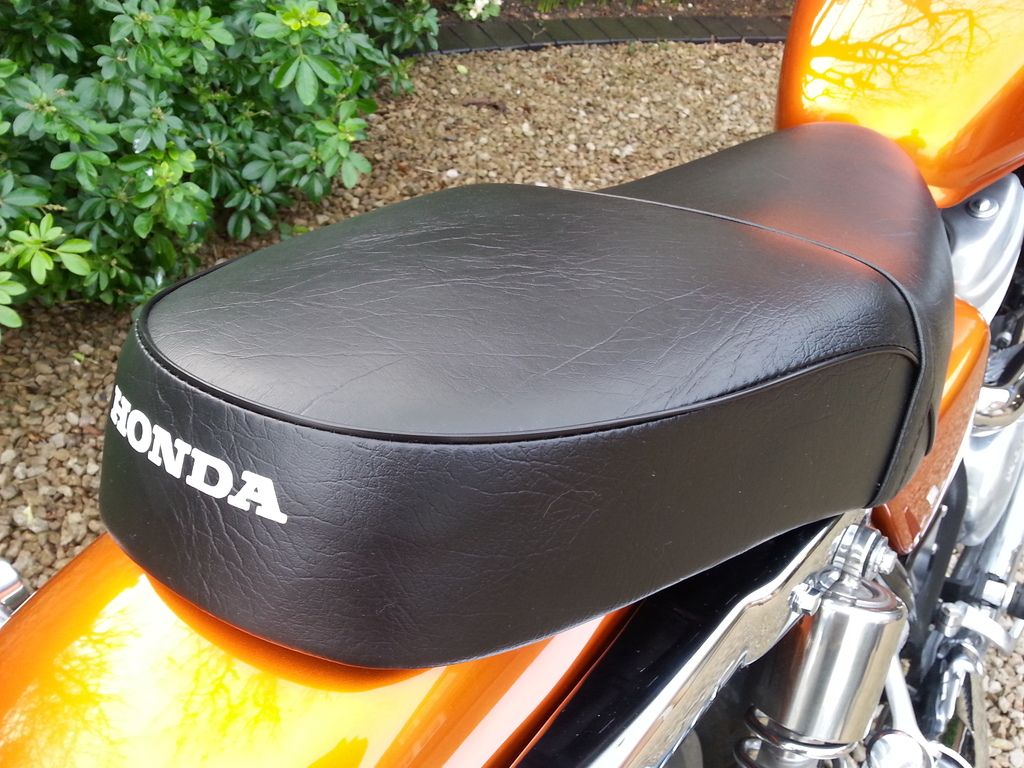
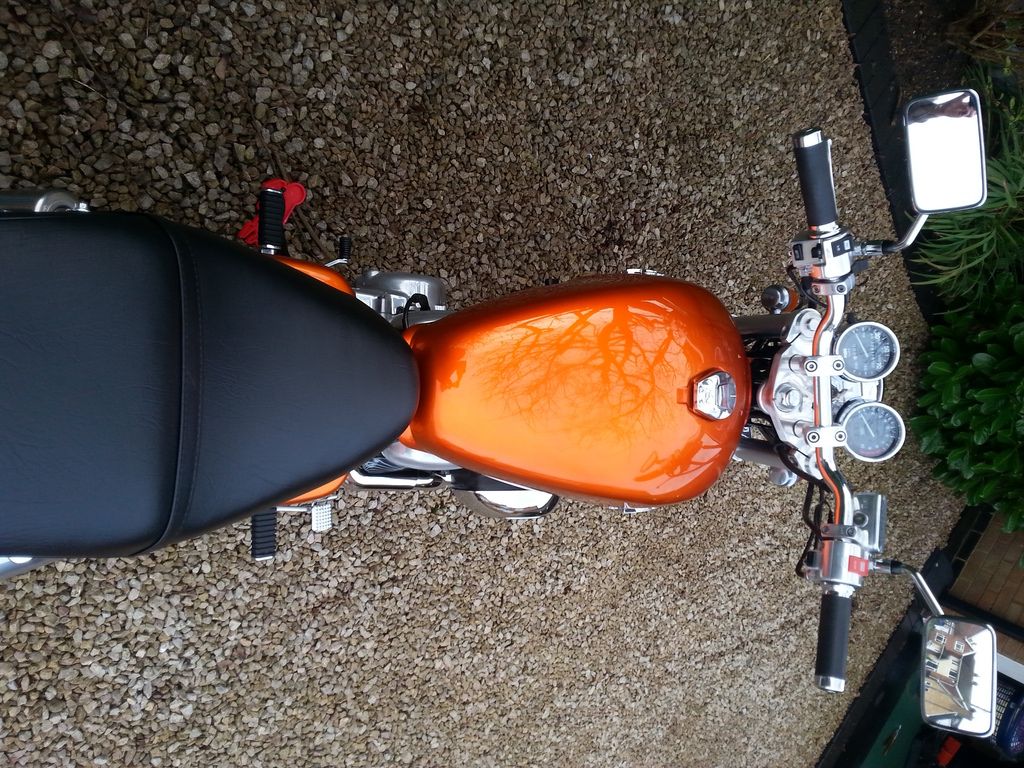
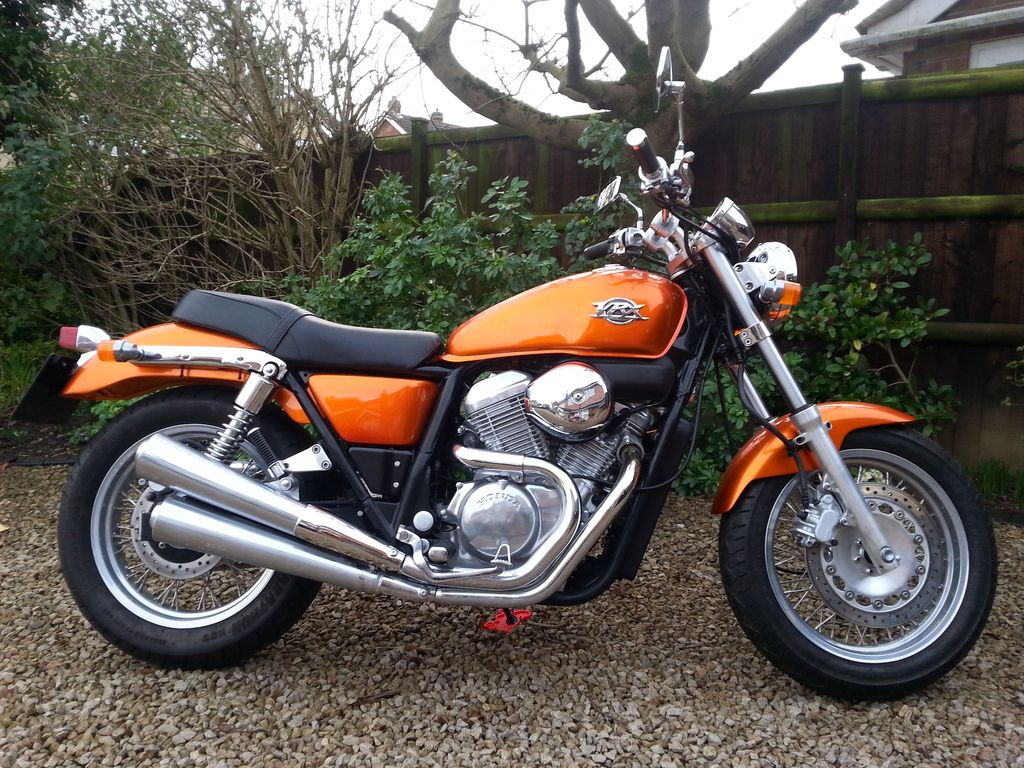
Picked up the seat yesterday from P&K Classic Bikes, went for a slightly 'grainer' vinyl. They also repaired the big chunk of missing foam. Very nice job.
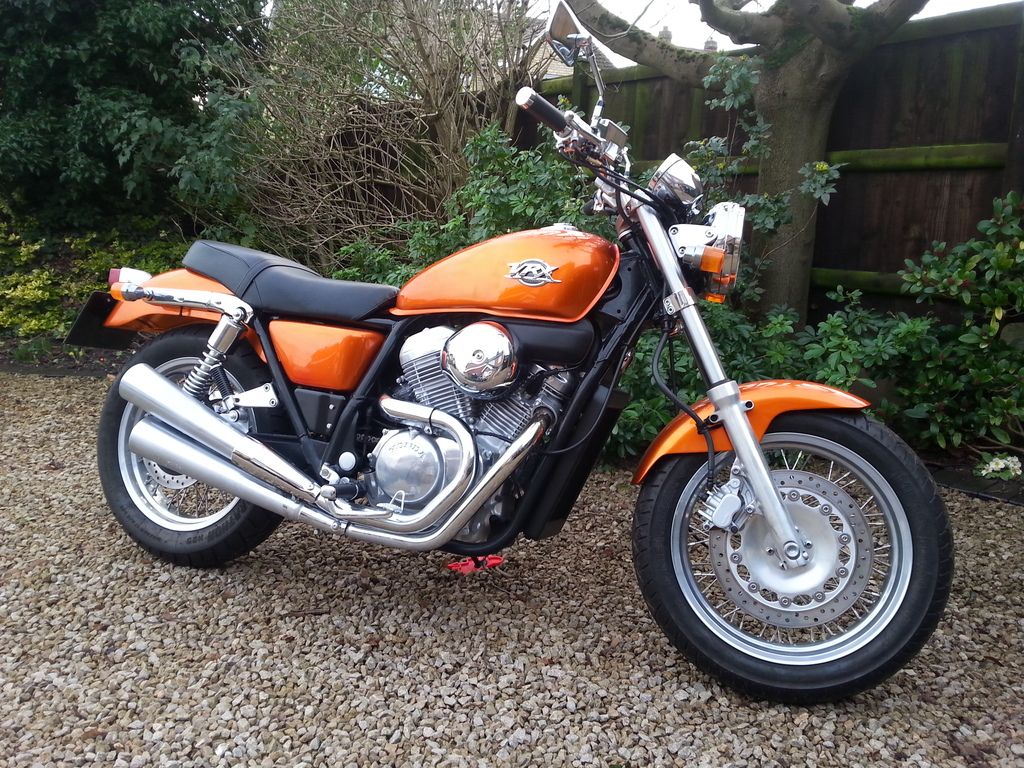
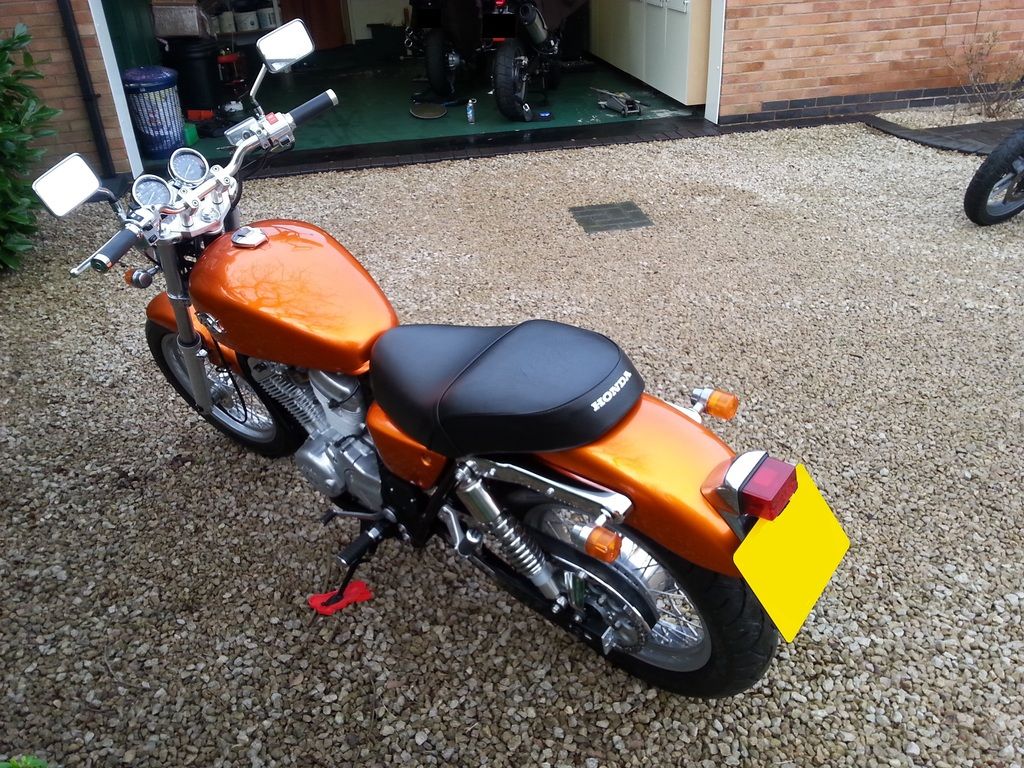
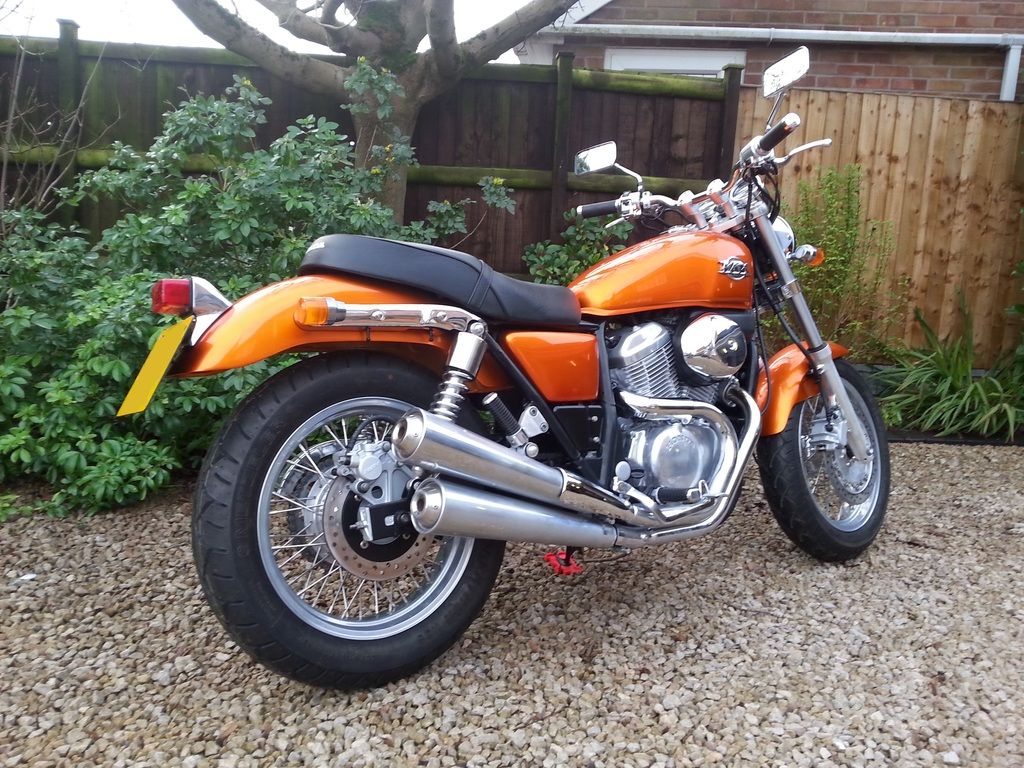
And that's it ... she's finished ! Just got to wait for a dry, clean day to go and get her MOT'd ...

(stupid photobucket)
(if anyone knows of a 1970's Japanese bike for restoration in the Midlands area, PM me )
)


Picked up the seat yesterday from P&K Classic Bikes, went for a slightly 'grainer' vinyl. They also repaired the big chunk of missing foam. Very nice job.


And that's it ... she's finished ! Just got to wait for a dry, clean day to go and get her MOT'd ...


(stupid photobucket)


(if anyone knows of a 1970's Japanese bike for restoration in the Midlands area, PM me
)Thank you everyone !
Thank you everyone for the very kind words. Maybe I might see some of you at some event or show or other over summer (I'm sure you'll spot the bike !) in which case come over and say hello ...
podman said:
Smashing stuff mate, whats your future plans for it?
Ride it ! moto_traxport said:
Absolutely wonderful, it sorta doesn't deserve the level of attention you've lavished on it
True I guess ... but if everyone restored the same thing, the land would be full of 60's Bonnies and 70's Z1's and nothing else ... you gotta have oddballs ! Dog Star said:
the feed to the 5W filament (the DRL) snipped.
Yeah, thinking about it I'll disconnect them before the MOT. It's dead easy, a couple of connectors in the headlight.Thank you everyone for the very kind words. Maybe I might see some of you at some event or show or other over summer (I'm sure you'll spot the bike !) in which case come over and say hello ...
Paikia44 said:
I'm so impressed with your work. And I'm happy to say I found a VRX400 myself.... In Singapore!! Although this bike is running, it is very tired and in desperate need for some TLC.
But like you, I can't find much info on the bike let alone where to purchase the parts. I definitely need a set of exhaust system for a start for sure. Will be awesome if you can point me to the right direction where I'll be able to lay my hands on some of the parts. Many thanks!
Good luck and have fun ... you can always start a restoration thread on Pistonheads ! But like you, I can't find much info on the bike let alone where to purchase the parts. I definitely need a set of exhaust system for a start for sure. Will be awesome if you can point me to the right direction where I'll be able to lay my hands on some of the parts. Many thanks!
You can get exhaust back boxes, but downpipes are getting rare now.
For parts, start with :
David Silver (UK)
http://www.davidsilverspares.co.uk/
Isicar (Japan)
http://auctions.isibike.com/?catId=0&freeWord=...
Email them at isi@isicar.jp with a list of part numbers.
Wemoto (Europe)
http://www.wemoto.com/bikes/honda/vrx_400_roadster...
Also John Oldfield (UK) though I didn't use them in the end :
http://www.johnoldfield.co.uk/
Specifications and information :
http://www.motorbikespecs.net/index.dyn?flag=2&...
Parts diagrams ... invaluable :
https://docs.google.com/file/d/0ByBVL6jbFW1_ZjM2MT...
https://docs.google.com/file/d/0ByBVL6jbFW1_ZTAzMj...
Lots of useful info here, including original sales brochures, servicing details spreadsheet, wiring diagram.
https://drive.google.com/folderview?id=0ByBVL6jbFW...
Buy yourself an original (Japanese) workshop manual from ebay or isicar.
autoalias said:
Can you tell me, did your swingarm come out easily?
I have the "Kev" tool, the castle nut is out and I've managed to get the long bolt turning (along with the threaded sleeve it locates into..) most of the way out.
However it doesn't seem to want to come out all the way, which I'm guessing may be just a corrosion issue?
Normally, I would "persuade" (heat n hammer) the bolt out, but don't want to if there's something else mechanical holding things in there.
Should the bolt just come out fairly easily (i.e. passing through that outermost threaded spacer)?
Kind regards,
Marc.
PS: Do you still have that fender extender?
Now you're testing my memory !! I'm pretty sure there's nothing else holding it in, not when you've got it most of the way out anyway. Suggestion ... long bar down the other side and try hammering it out ? I'll check the workshop manual / parts manual tonight just to be sure. Remember once the bolt is out of one side of the swing arm/frame the weight of the wheel may be dragging it down (if you've not supported it) which might be twisting the bolt in the frame on the other side (does that make sense ?)I have the "Kev" tool, the castle nut is out and I've managed to get the long bolt turning (along with the threaded sleeve it locates into..) most of the way out.
However it doesn't seem to want to come out all the way, which I'm guessing may be just a corrosion issue?
Normally, I would "persuade" (heat n hammer) the bolt out, but don't want to if there's something else mechanical holding things in there.
Should the bolt just come out fairly easily (i.e. passing through that outermost threaded spacer)?
Kind regards,
Marc.
PS: Do you still have that fender extender?
Yes I've still got the fender extender. Doubt I'll put it back on, but I want to see how much crud is thrown up at the radiator first.
RVVUNM said:
I have really enjoyed this thread, well done. Do you have any plans for another restoration?
Yes, definitely .... a) when I've finished ripping out and refitting the main bathroom, my current project (maybe I should have done a thread about that !) ... and b) when I find the right bike. I'm fancying something 60s or 70s ... so if anyone is selling, preferably in the Midlands area ... ? SteelerSE said:
How about this one Len?
http://www.ebay.co.uk/itm/1968-HONDA-CD-175-RED-MO...
Looks mostly complete but desperately in need of some tlc.
You evil temptress you ! And it's the same age as me and Mrs EL ...http://www.ebay.co.uk/itm/1968-HONDA-CD-175-RED-MO...
Looks mostly complete but desperately in need of some tlc.
However ... it's already up to £345 with 5 days to go, and you can pick nice runners of these up for a grand and a half, so it depends what it ends up at. Also I was hoping for something a bit bigger, cc wise.
(adds to watch list)
Hey all
After some umming and ahhhing I've decided to sell the VRX400 to fund the next restoration project (whatever that might be, still looking !) and to also free up garage space.
All details can be found here.
http://www.pistonheads.com/classifieds/motorbikes/...
After some umming and ahhhing I've decided to sell the VRX400 to fund the next restoration project (whatever that might be, still looking !) and to also free up garage space.
All details can be found here.
http://www.pistonheads.com/classifieds/motorbikes/...
Gassing Station | Biker Banter | Top of Page | What's New | My Stuff