Honda VRX400 1995 "barn find" restoration
Discussion


Ooooh I just love it when you're all manly and demanding !
Yes, we're back from Dorset, which I never realised until recently had a monsoon season ...
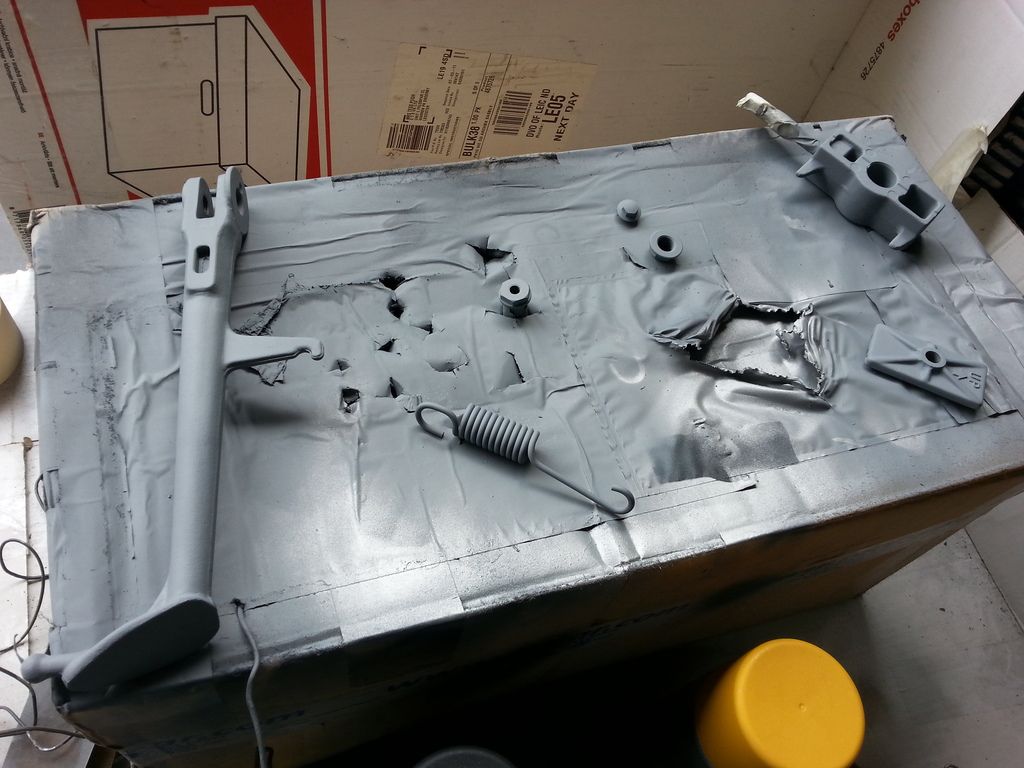
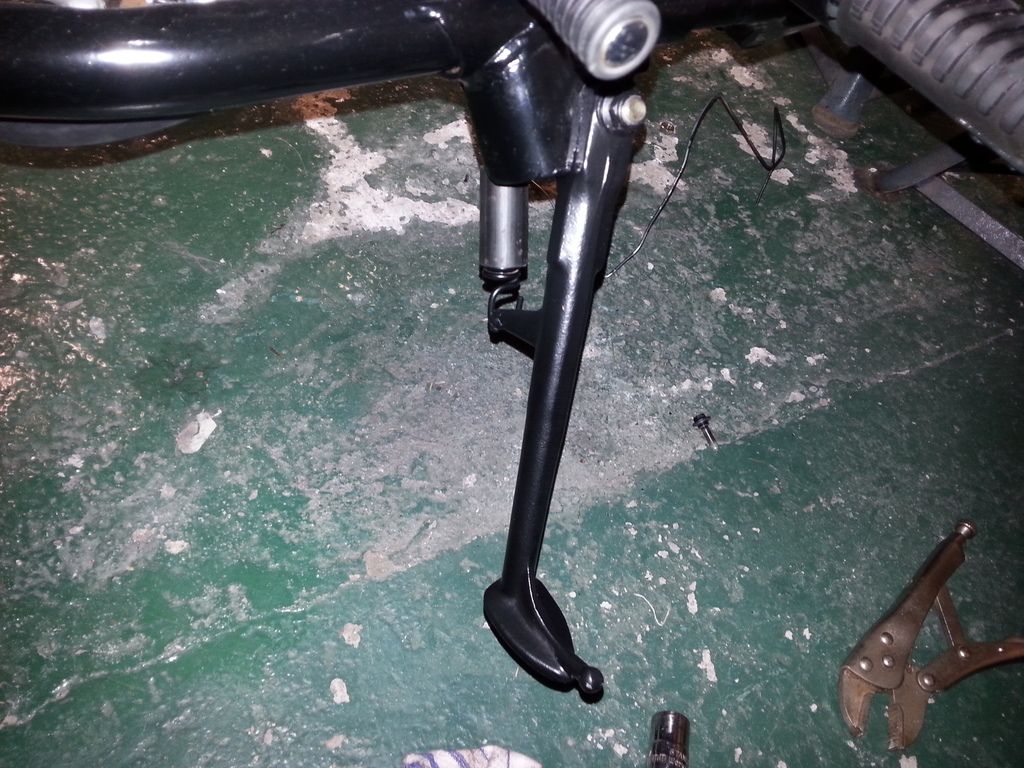
Side stand and other rear wheel adjuster gently drying after de-gunking, de-rusting/de-oxidised and rubbing back. The side stand was, as you'd expect being in the firing line, quite on the rusty side.
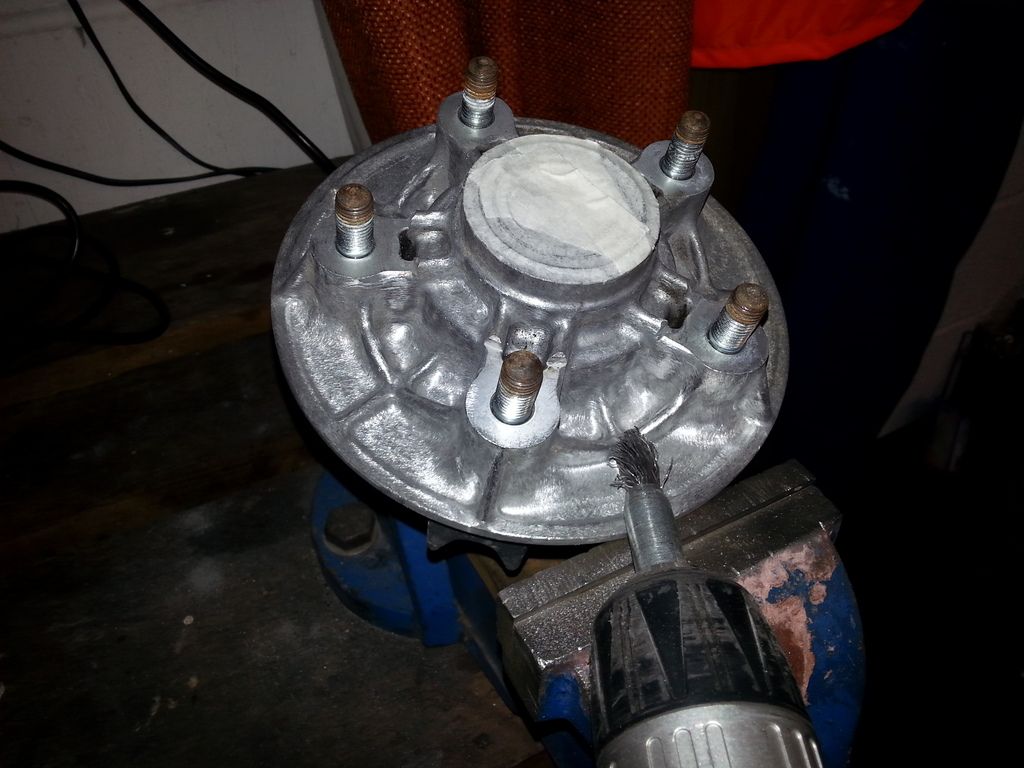
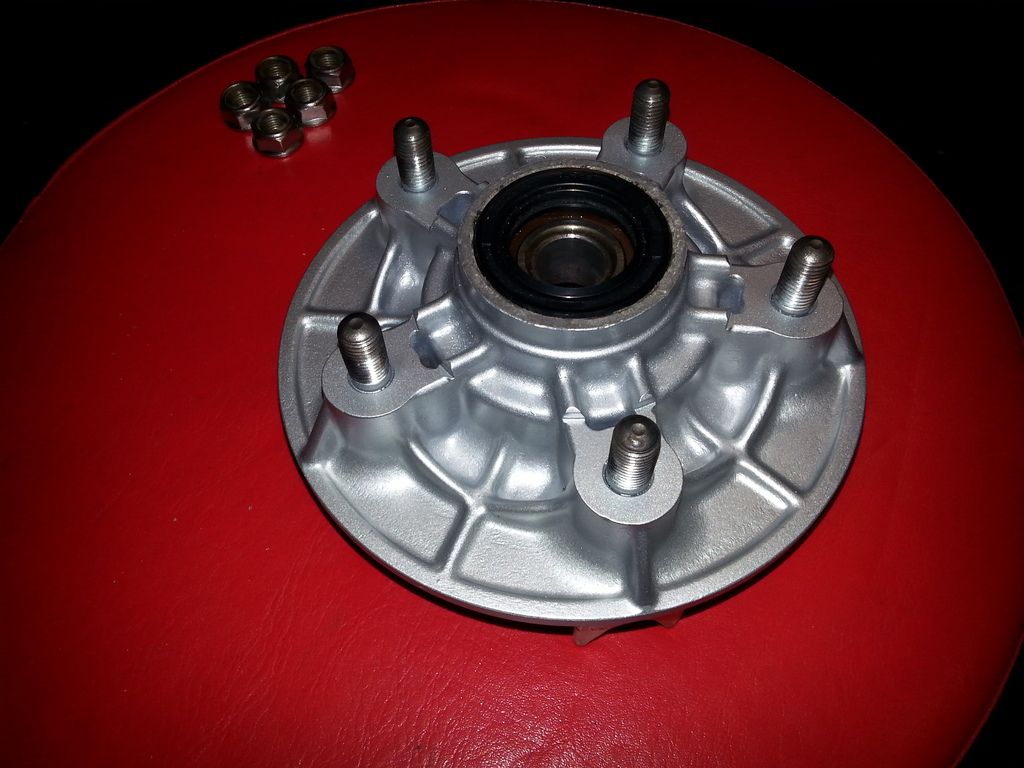
Ah, lets tackle this blob of black grease then ... the rear sprocket and cush drive.
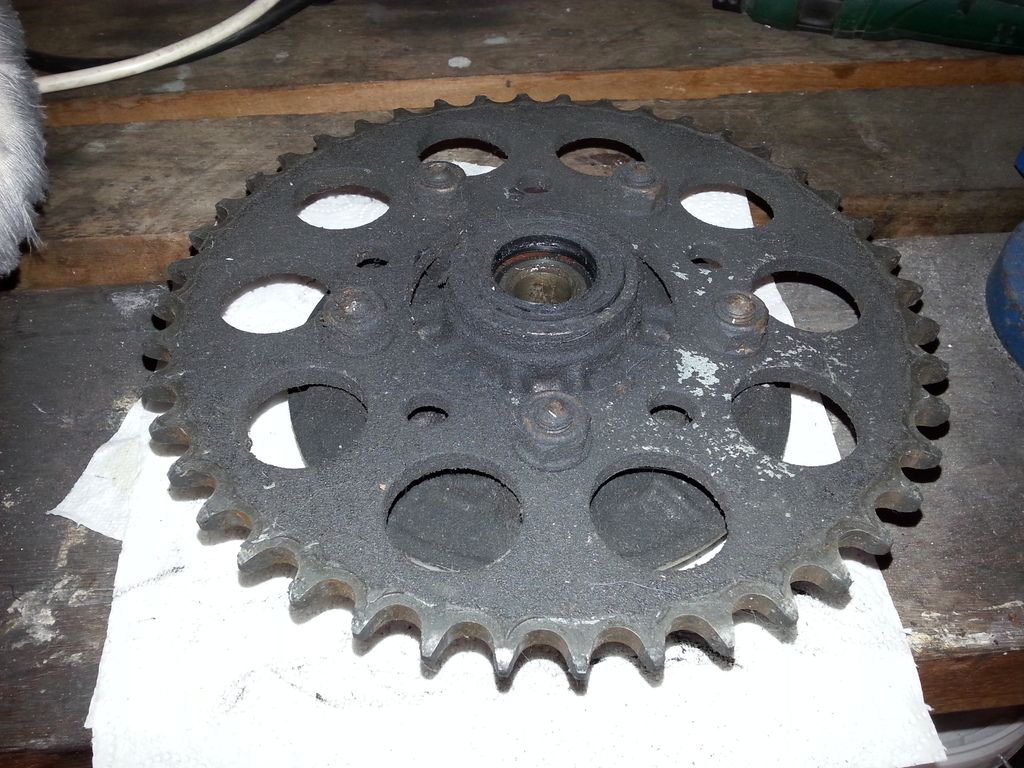
Old sprocket removed and put in the "bin" box (never throw anything away till the end of the restoration) the bolts holding this on were incredibly 'breaker-bar' tight. Then a happy hour spent with a big bowl of white spirit, paint brushes and tooth brushes (I'll put the wife's back in a bit, she'll never notice) and then a dip in the parts washer resulted in a cush drive looking like this.
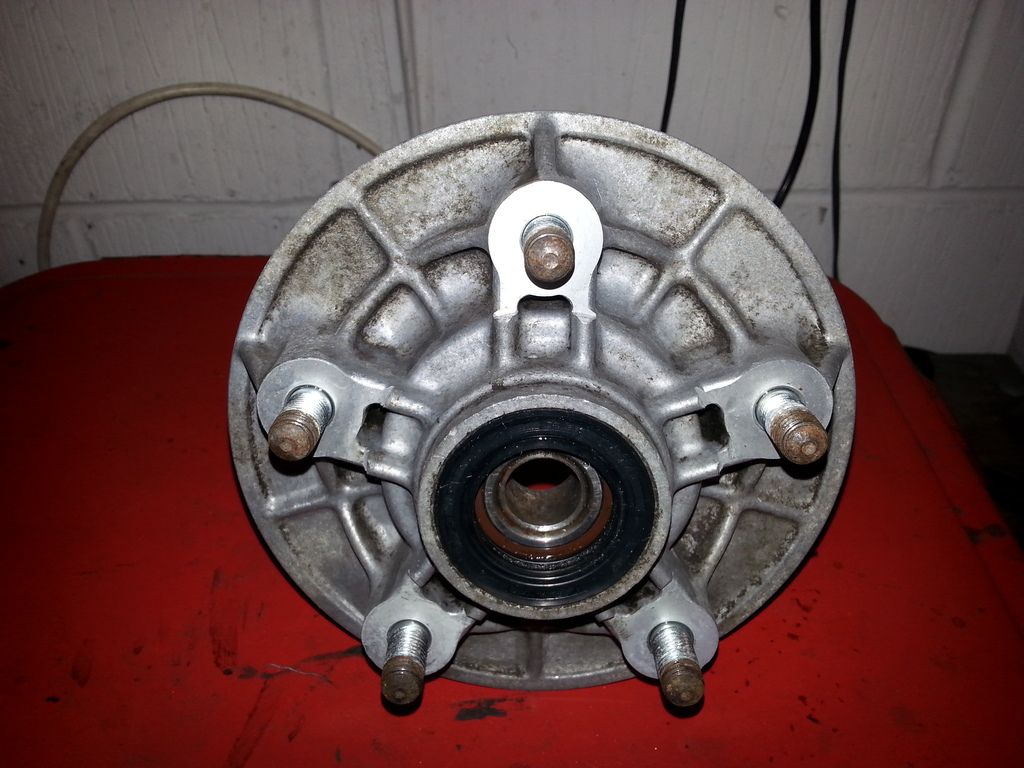
Removing all the alloy oxidisation. The bearing seems fine, so I'll be keeping that.
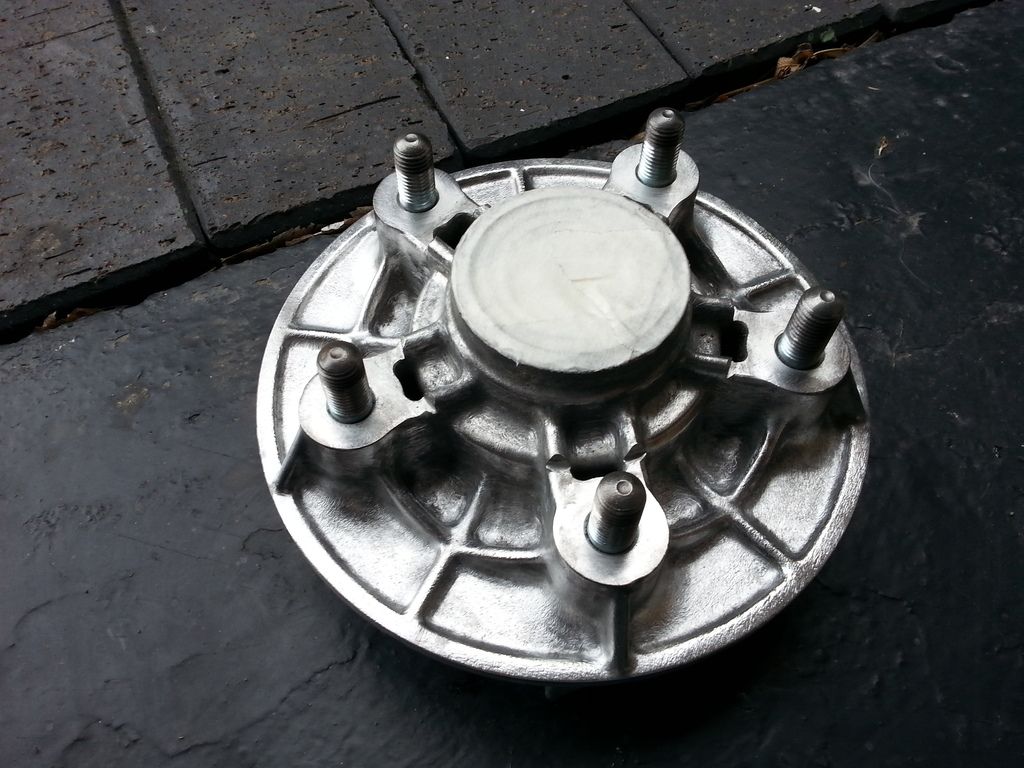
And this is what it looked like after cleaning it all up. The "inside" of the cush drive is in good condition paint wise, so I'm not going to paint that.
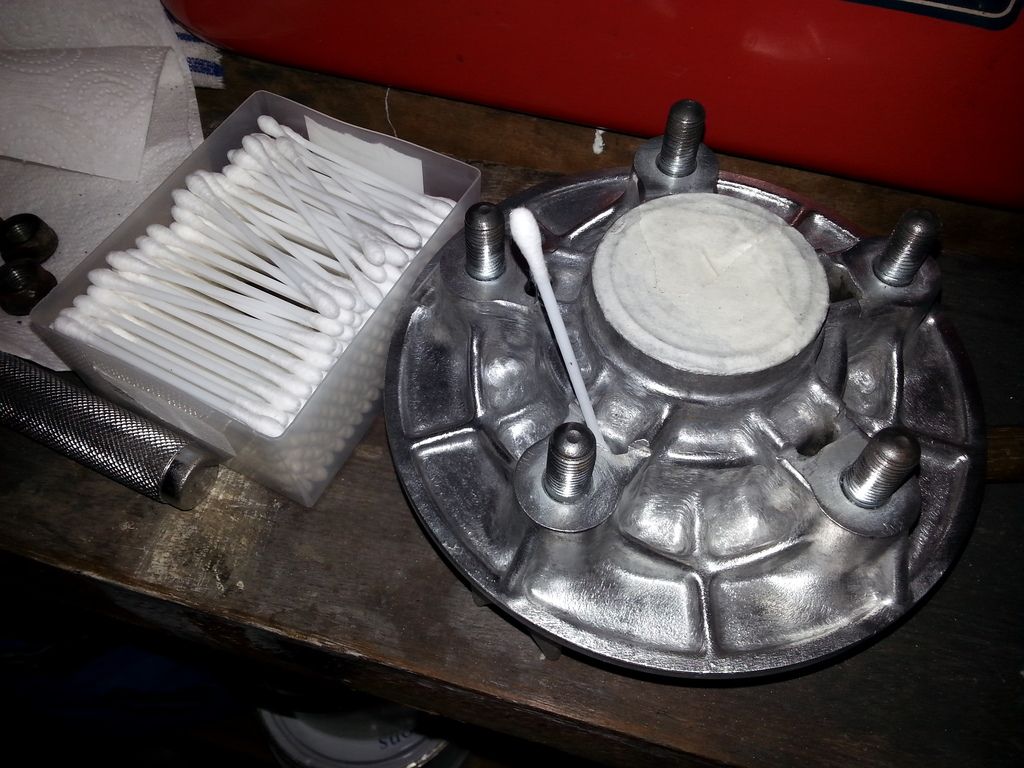
Yes, I am cleaning its sensitive, delicate little areas with a cotton bud ...
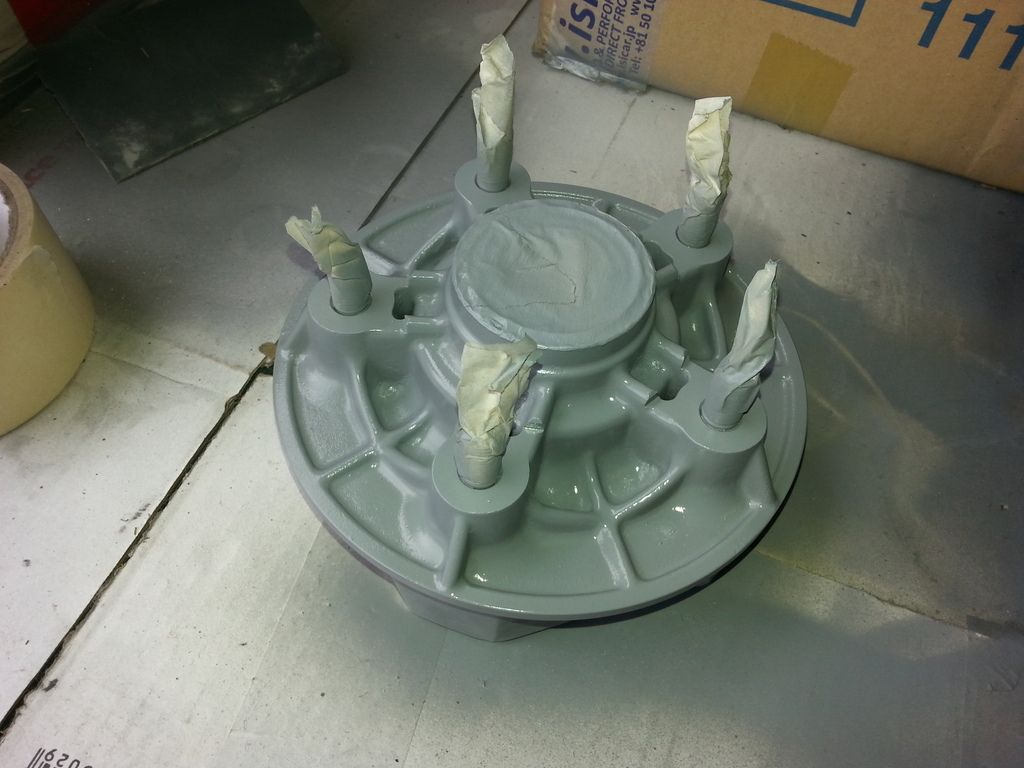
And time for a spot of primer. I'll leave this (plus the above items) to dry overnight now ... never worth rushing paint work, I normally do it over a number of days for each coat to dry. Going too fast can result in a thick, amateurish looking finish or runs. Lots of thin coats = better than one or two thick coats.
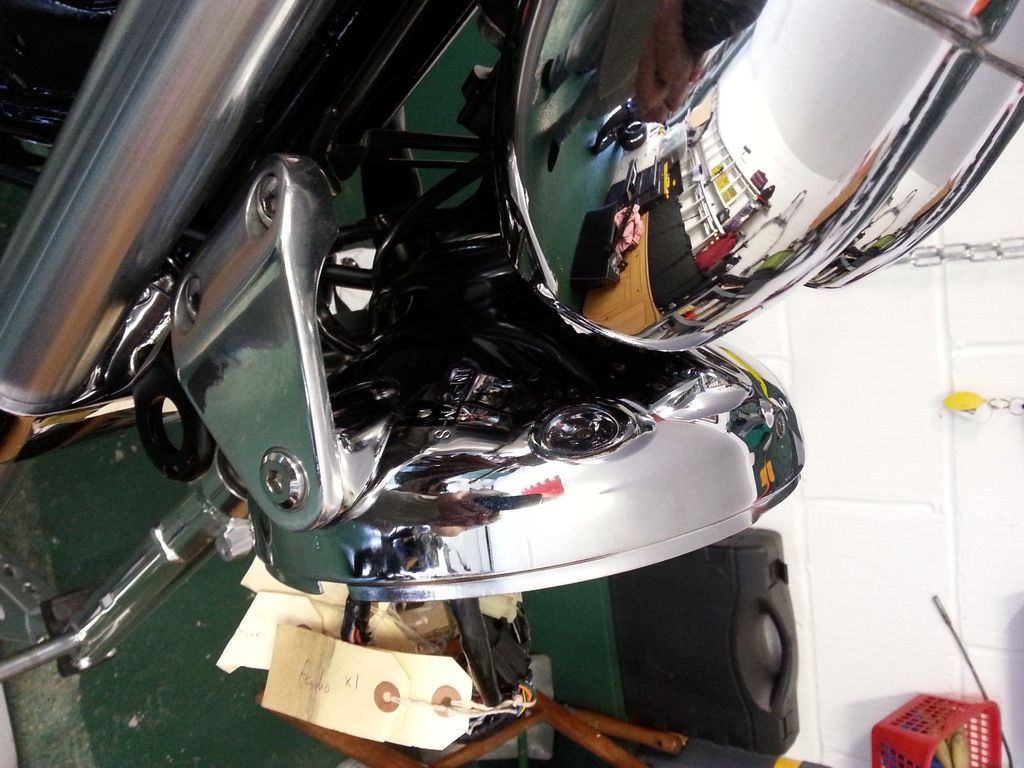
Whenever I've been doing a dirty or repetitive job, I like to reward myself with a little, easy but pretty job. After cleaning up the mounting bolts on the buffer (which came up like new) I attached the new headlight bowl coz, well, you know, why not ... bit more chrome never hurt anyone. I've given up trying to not get myself in a reflection, with this bike it's impossible now. I might even turn it into a game of how many times I can get a reflection of myself in the same shot ...
Yes, we're back from Dorset, which I never realised until recently had a monsoon season ...
Side stand and other rear wheel adjuster gently drying after de-gunking, de-rusting/de-oxidised and rubbing back. The side stand was, as you'd expect being in the firing line, quite on the rusty side.

Ah, lets tackle this blob of black grease then ... the rear sprocket and cush drive.

Old sprocket removed and put in the "bin" box (never throw anything away till the end of the restoration) the bolts holding this on were incredibly 'breaker-bar' tight. Then a happy hour spent with a big bowl of white spirit, paint brushes and tooth brushes (I'll put the wife's back in a bit, she'll never notice) and then a dip in the parts washer resulted in a cush drive looking like this.


Removing all the alloy oxidisation. The bearing seems fine, so I'll be keeping that.

And this is what it looked like after cleaning it all up. The "inside" of the cush drive is in good condition paint wise, so I'm not going to paint that.

Yes, I am cleaning its sensitive, delicate little areas with a cotton bud ...

And time for a spot of primer. I'll leave this (plus the above items) to dry overnight now ... never worth rushing paint work, I normally do it over a number of days for each coat to dry. Going too fast can result in a thick, amateurish looking finish or runs. Lots of thin coats = better than one or two thick coats.

Whenever I've been doing a dirty or repetitive job, I like to reward myself with a little, easy but pretty job. After cleaning up the mounting bolts on the buffer (which came up like new) I attached the new headlight bowl coz, well, you know, why not ... bit more chrome never hurt anyone. I've given up trying to not get myself in a reflection, with this bike it's impossible now. I might even turn it into a game of how many times I can get a reflection of myself in the same shot ...


What do you mean ?!? That's REALLY the colour I'm painting it ! 
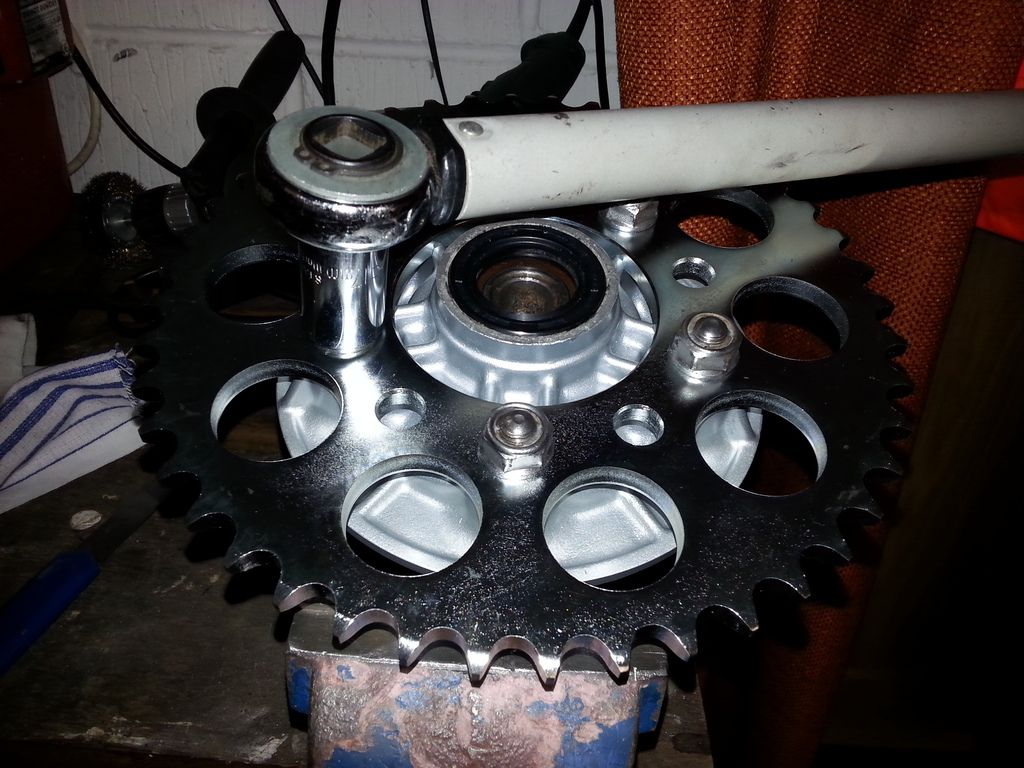
Always best to check that new parts are the same as the old parts before assembly ... rear sprocket is same size and number of teeth.
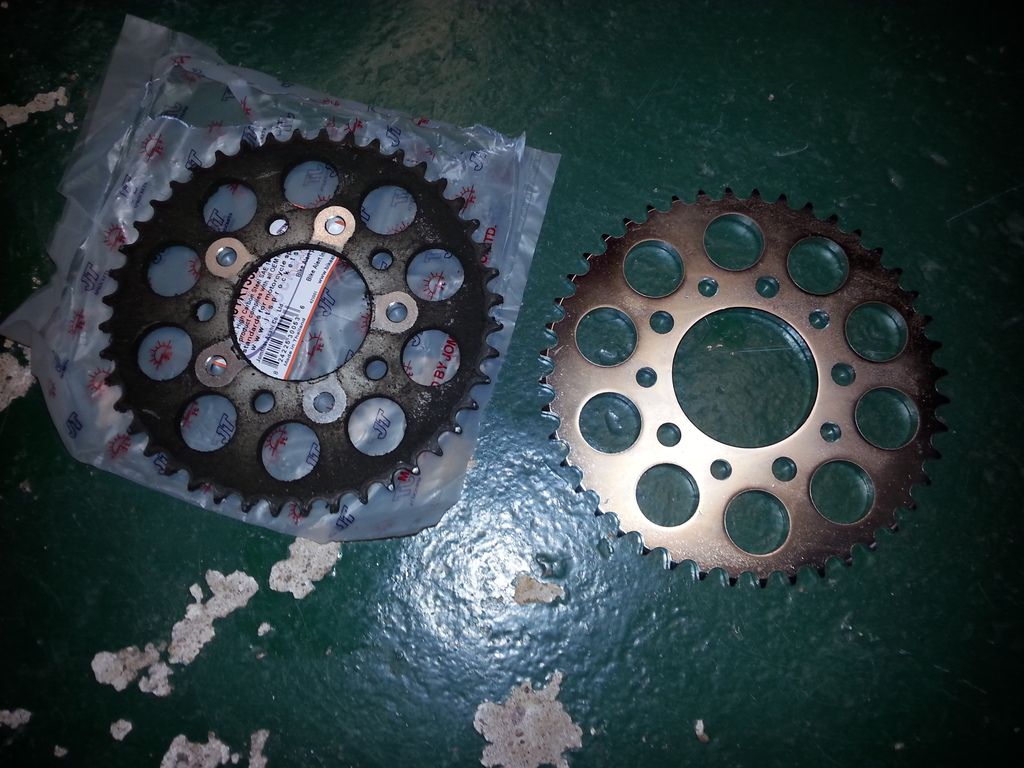
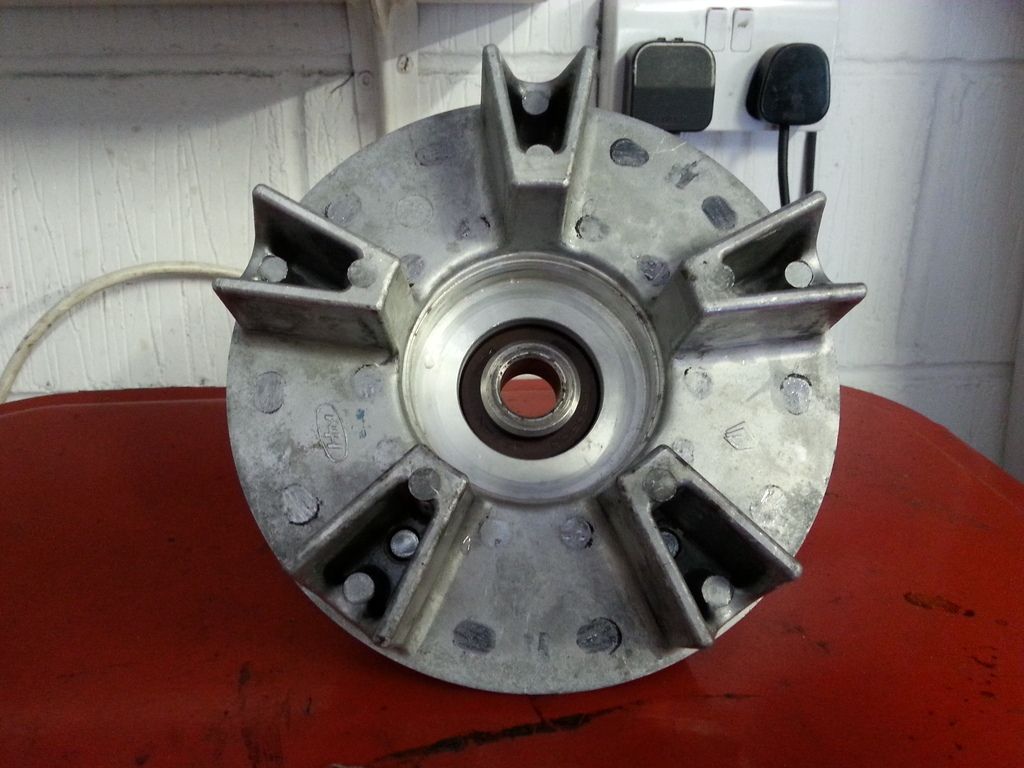
The cush drive carrier finished ...
... and the sprocket attached and torqued up to 64 nm. Painted the top of the studs with clear lacquer to stop them rusting.
Always best to check that new parts are the same as the old parts before assembly ... rear sprocket is same size and number of teeth.

The cush drive carrier finished ...

... and the sprocket attached and torqued up to 64 nm. Painted the top of the studs with clear lacquer to stop them rusting.

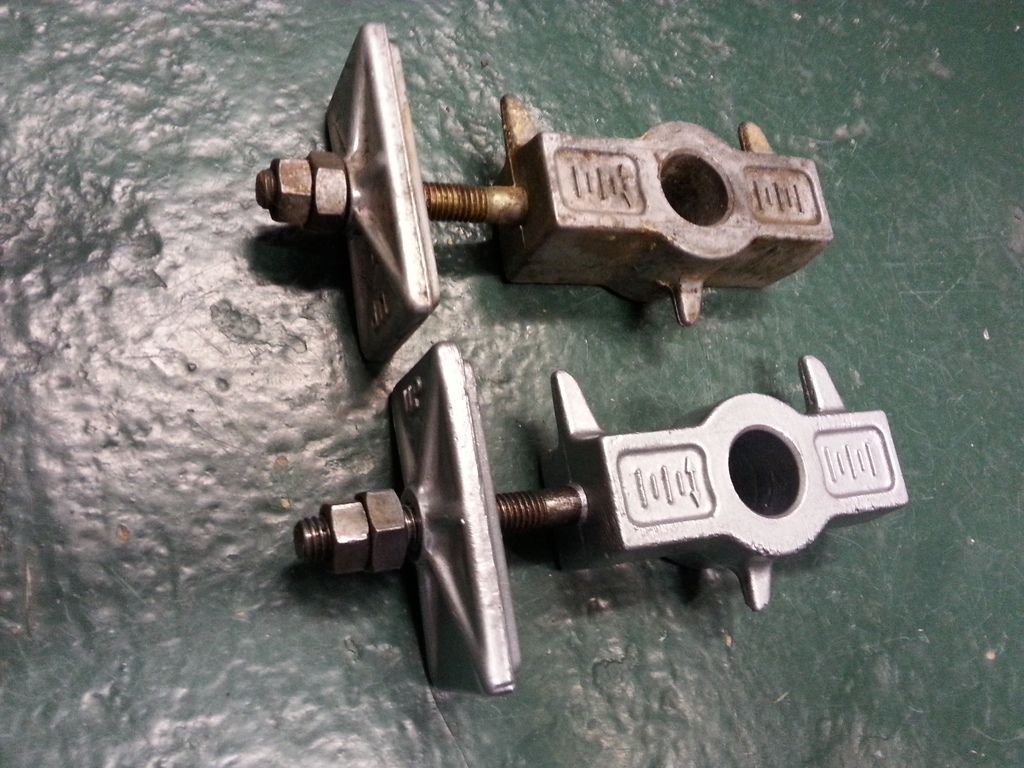
Here's an oddity that maybe someone can help me with. Remember these ? They are the rear axle carriers, including the adjusters to set the chain tension.
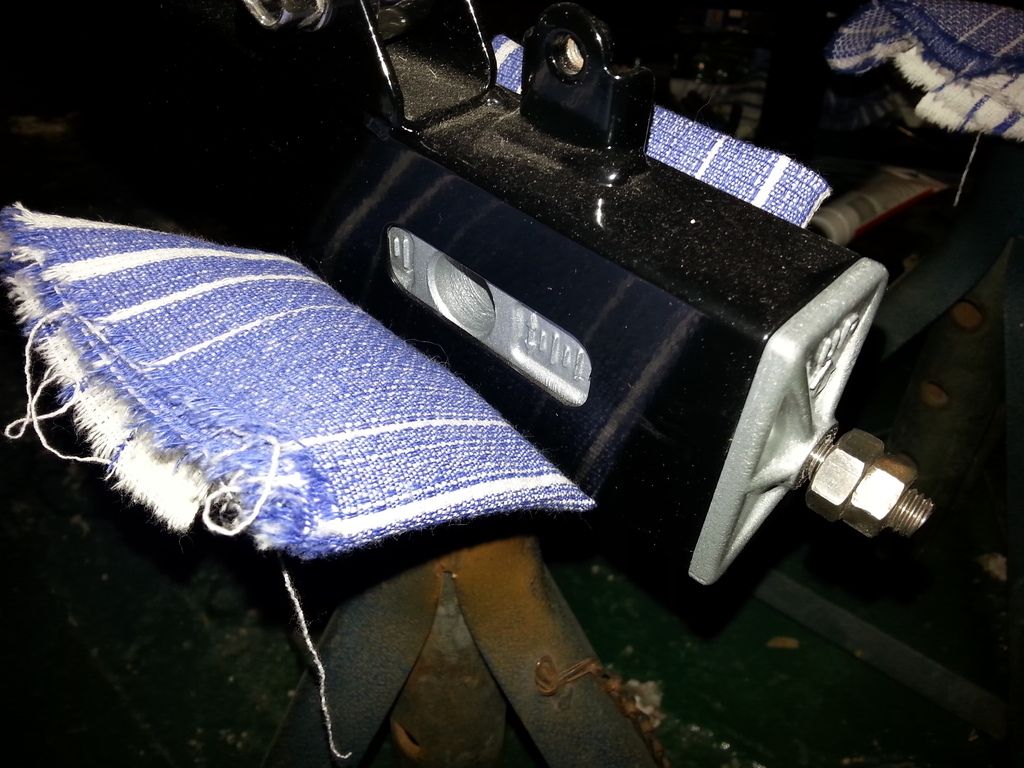
The plate with "up" on it sits at the rear of the swing arm, slightly recessed, as you can see on the photos below. Well, one plate is threaded inside so it screws on, but the other (otherwise identical) plate has no thread, so it slides up and down on the threaded bar.
Now the latter, no thread, seems the most logical to me ... as you tighten the nut on the outside, the threaded bar gets drawn through the outer plate, pulling the axle further away from the engine (and vice versa) hence there's your adjustment of the chain. But I don't get why one outer plate has a thread inside it ... to be able to adjust where the axle sits, you'd have to pull the plate (and thus the rest of the adjustment mech, incl the rear wheel) out of the end of the swing arm slightly to clear the recess, rotate it, and push it back in again ... probably quite hard once the chain is on.
So I'm thinking that ...
a) NEITHER should have a thread, and for some odd reason I've got an odd job of parts at the factory.
b) both should HAVE a thread, and for some odd reason I've got an odd job of parts at the factory or someone's stripped the thread off one side ... though that doesn't look to be the case, it's a smooth 'bore' and normally you'd see the remains of the stripped thread.
c) they SHOULD be odd like this, for some reason that escapes me ... maybe "no thread" on the chain side and "thread" on the off site ??? And why complicate adjusting the chain like that ?
I am tempted just to drill out the one with the thread so it slides up and down easily like its sister ... any thoughts oh Pistonheads Massive ?


Looking good, you can do my old R1 when your finished if you're at loose end.
Some chain adjusters have the stud bar flattened on both sides at the end and you turn the stud to adjust the chain tension. This type have a threaded plate and a single lock nut. Your threaded plate might be a rogue / second hand item as they do fall off if you haven't noticed the nuts loosening off. In short - drill it out.
Some chain adjusters have the stud bar flattened on both sides at the end and you turn the stud to adjust the chain tension. This type have a threaded plate and a single lock nut. Your threaded plate might be a rogue / second hand item as they do fall off if you haven't noticed the nuts loosening off. In short - drill it out.
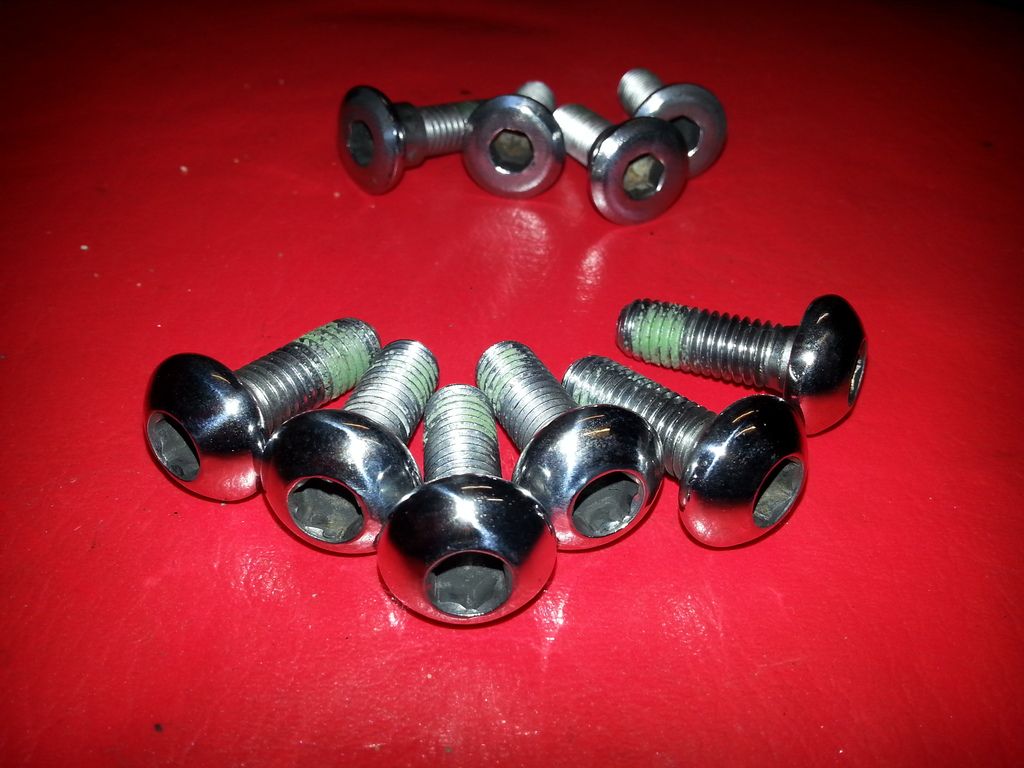
Bolts for the front brake disk (6) and rear brake disk (4) polished up. I need to clean a bit more of the old locktite off the threads.
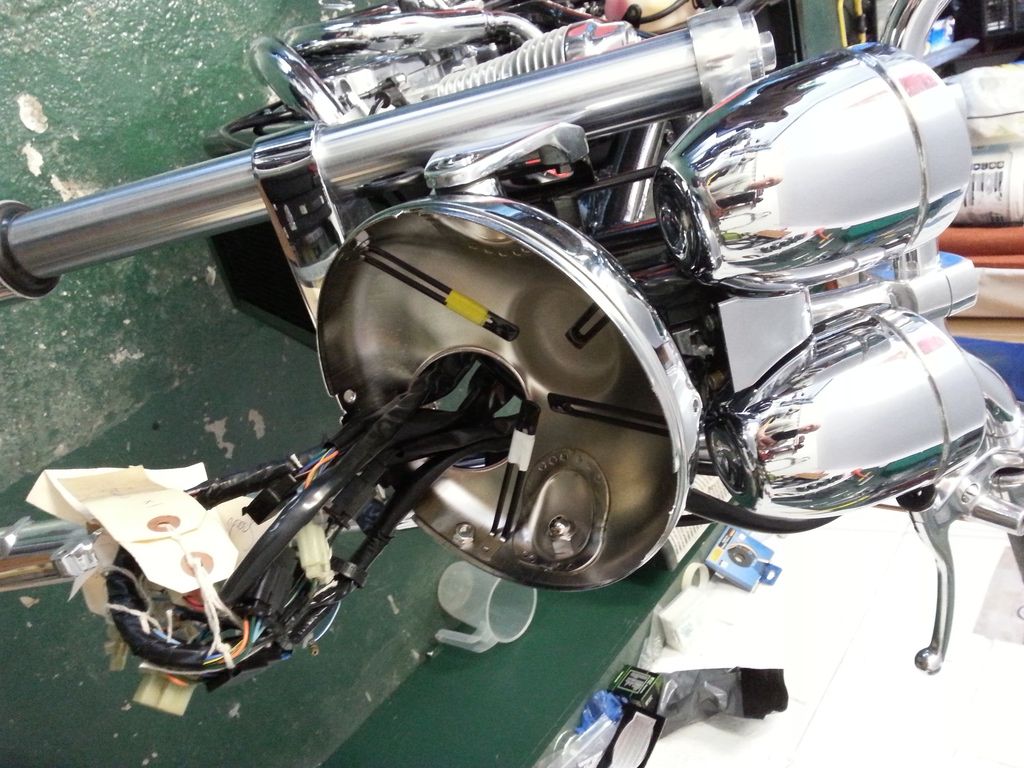
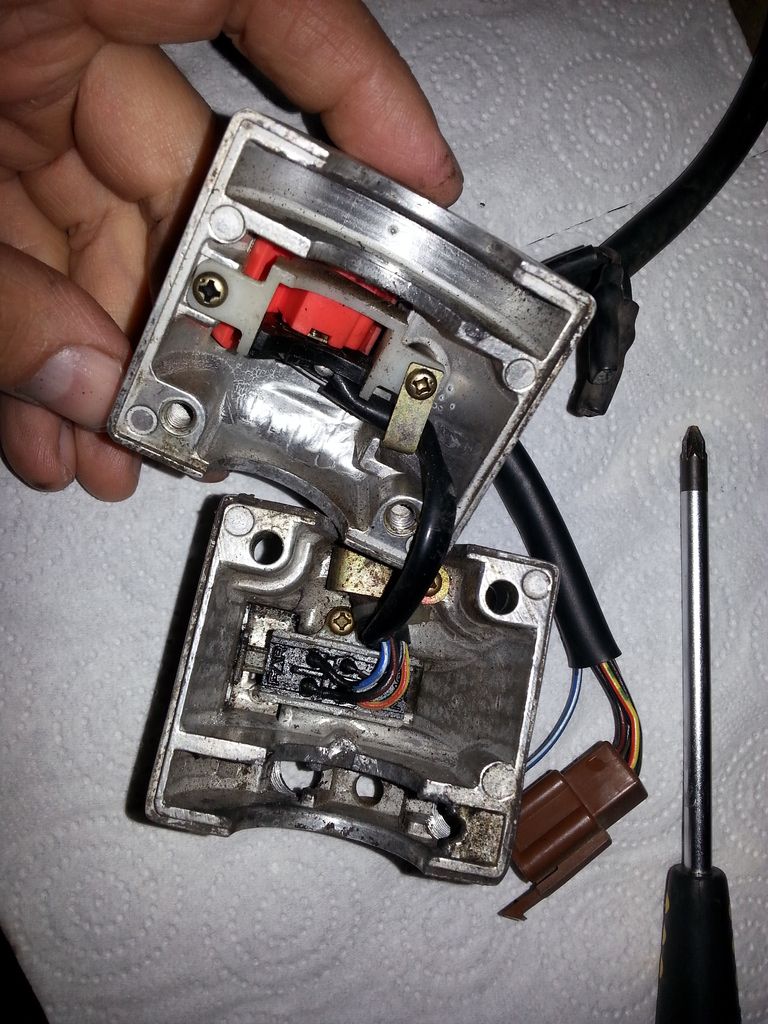
Time to clean up the housing for the starter and cutout switches. A quick reference photo to remember what goes where, then a good session with the white spirit and brushes followed by contact cleaner in the switches. The aluminium trays that food comes in are great for this kind of thing, just fill the bottom with white spirit.
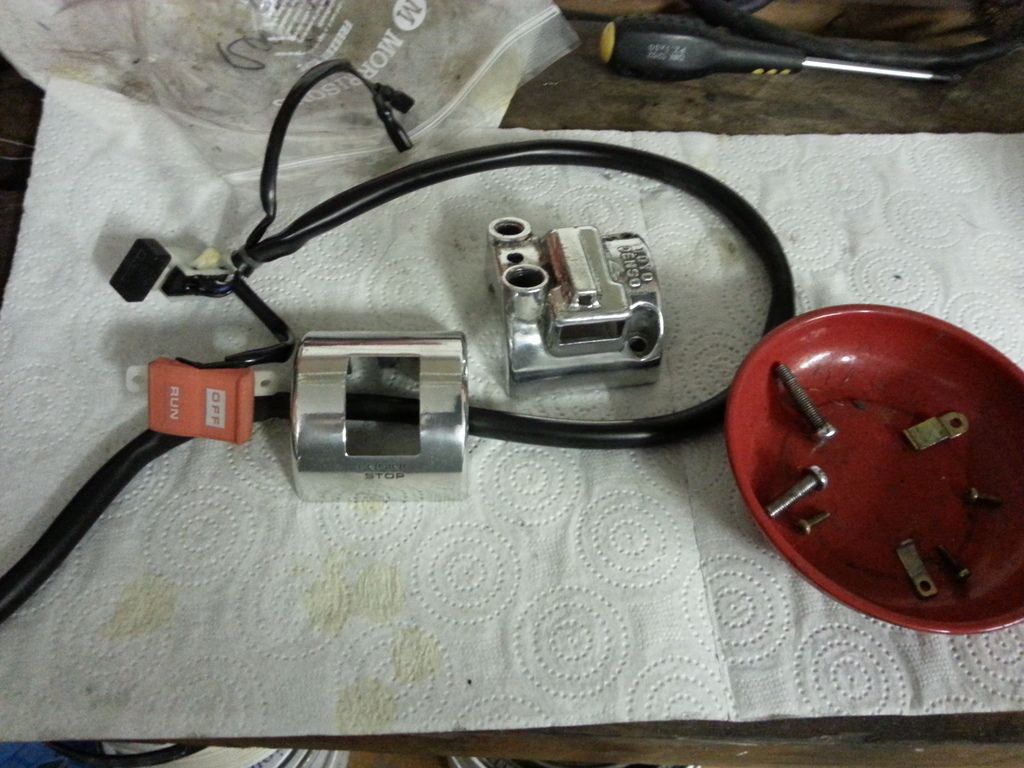
Both half of the housings buffed up on the wheel, ready to go back together.
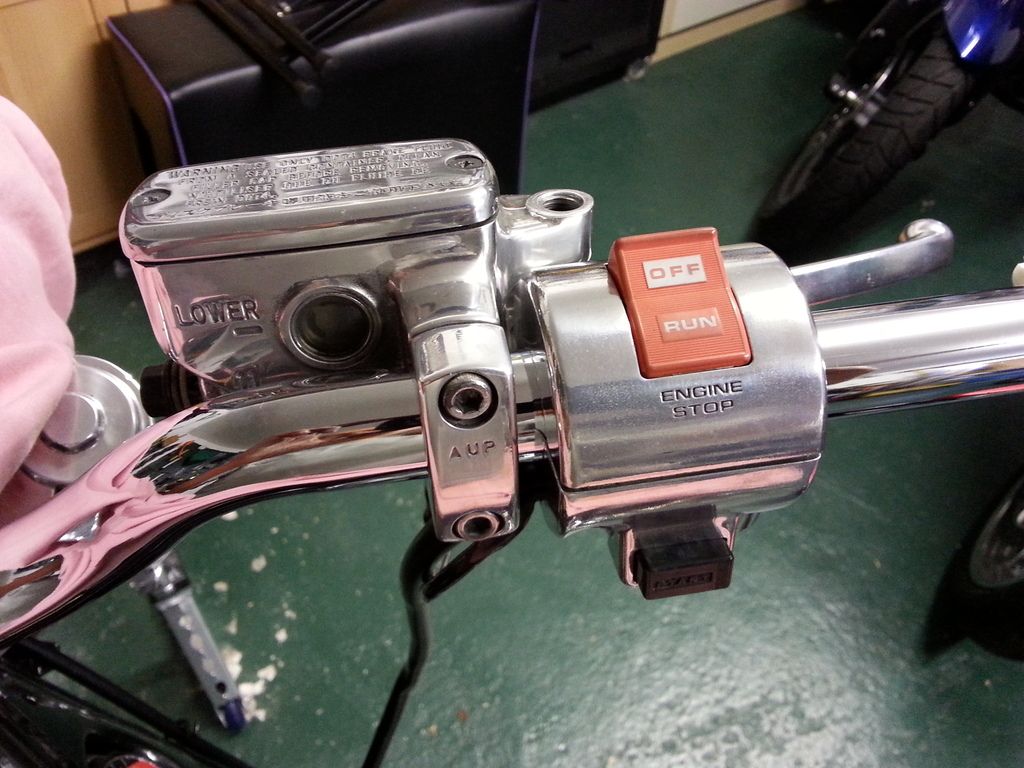
Just plonked in place for now ... the throttle goes into the end of this housing, and I need to refinish and clean the two throttle cables first.

evil len said:
So I'm thinking that ...
a) NEITHER should have a thread, and for some odd reason I've got an odd job of parts at the factory.
The only reason I can think of why one plate would have a thread is so that you can adjust the tension in the other direction - i.e. to hold the axle closer to the engine. That might be necessary for alignment purposes (to make sure the rear wheel is in line with the steering head) but that would only work if the end plate was firmly attached to the swinging arm and not free to drop out of the end. I can't see any way of fixing the end plate to the swinging arm from the pictures you've posted, so I'd be inclined to go with you on choice A.a) NEITHER should have a thread, and for some odd reason I've got an odd job of parts at the factory.
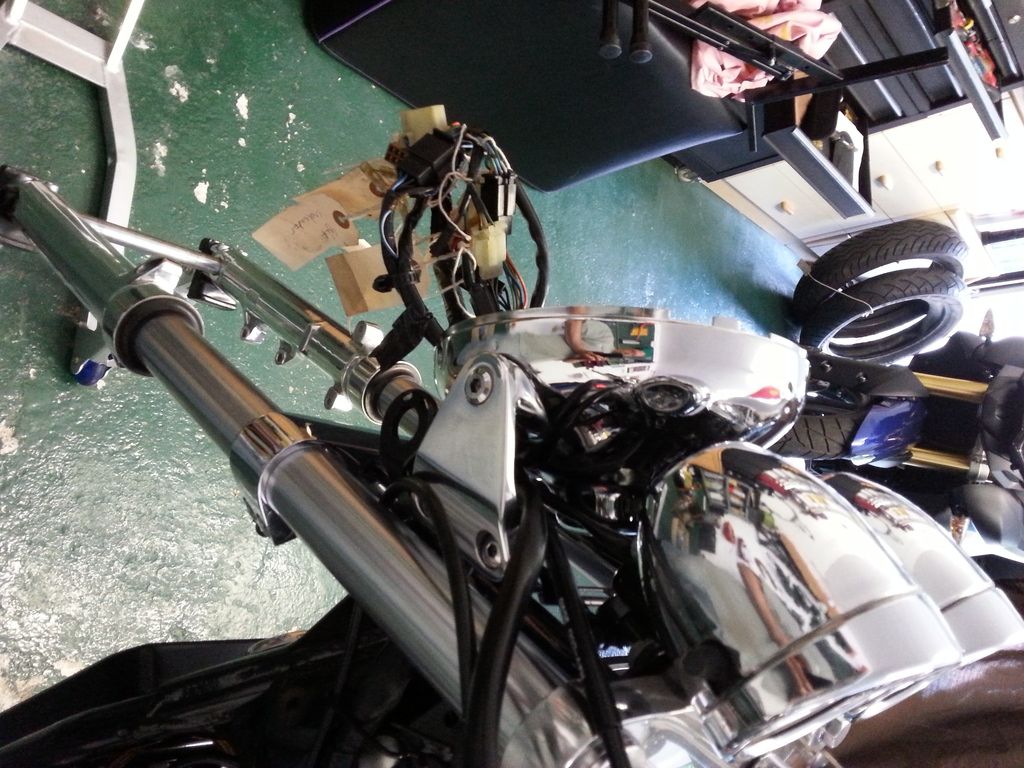
Improvised tool time ... when you have to pull on a strong-ish spring like the one for the side stand, it's a heck of a lot easier to get some thick gauge wire, bend it in two to form a loop, and then clamp with mole grips. This makes pulling on / stretching the spring a doddle, to get it mounted into its groove (sorry for slightly fuzzy photo)
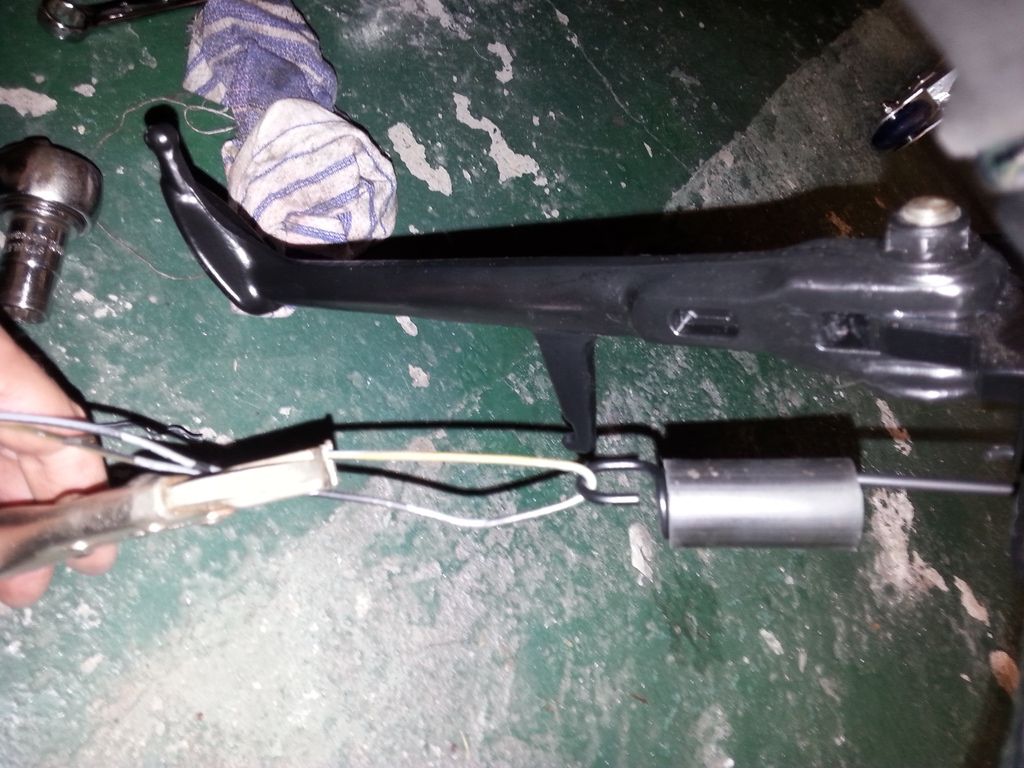
Now, where did I put the small loom and microswitch for the side stand ...

Now, where did I put the small loom and microswitch for the side stand ...

Another 45 mins of lost time to an employer Evil Len....
Read the whole shooting mate, was getting excited about the prospect of seeing her finished.
I'm now disappointing but slightly in love with you and this fine piece of machinery.
Another PH anxiously awaiting the next updates.
Great job so far
Read the whole shooting mate, was getting excited about the prospect of seeing her finished.
I'm now disappointing but slightly in love with you and this fine piece of machinery.
Another PH anxiously awaiting the next updates.
Great job so far
TackleburyUk said:
Another 45 mins of lost time to an employer Evil Len....
Read the whole shooting mate, was getting excited about the prospect of seeing her finished.
I'm now disappointing but slightly in love with you and this fine piece of machinery.
Another PH anxiously awaiting the next updates.
Great job so far
Er ... not entirely sure how to take some of that, but thanks ... I think Read the whole shooting mate, was getting excited about the prospect of seeing her finished.
I'm now disappointing but slightly in love with you and this fine piece of machinery.
Another PH anxiously awaiting the next updates.
Great job so far

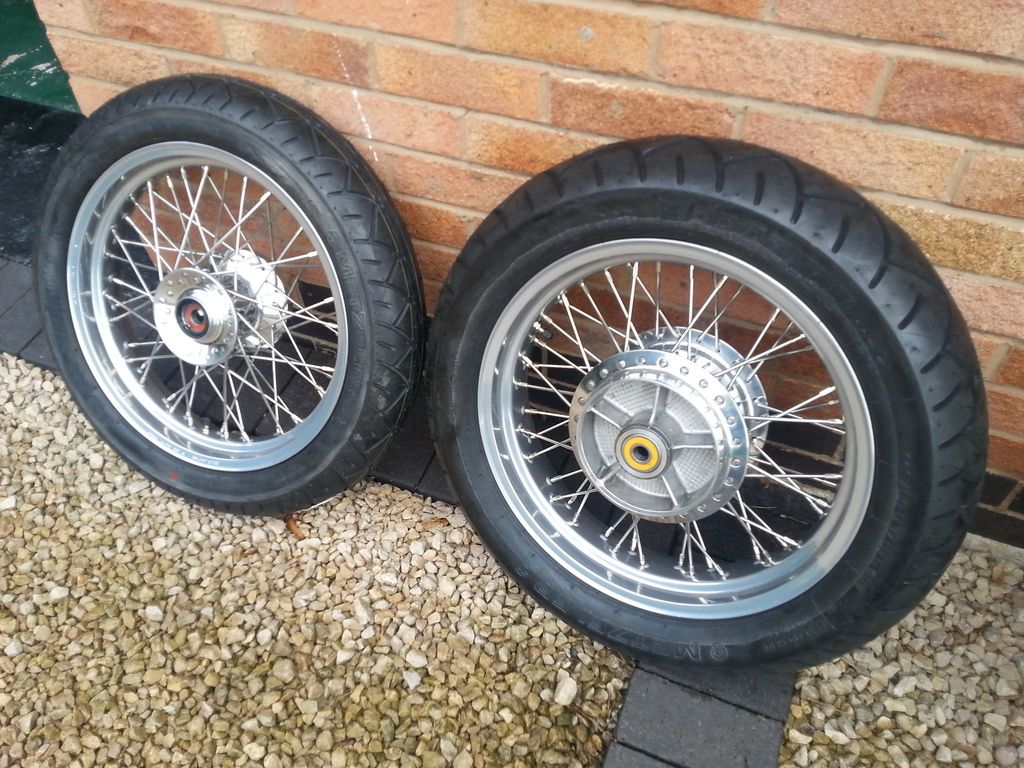
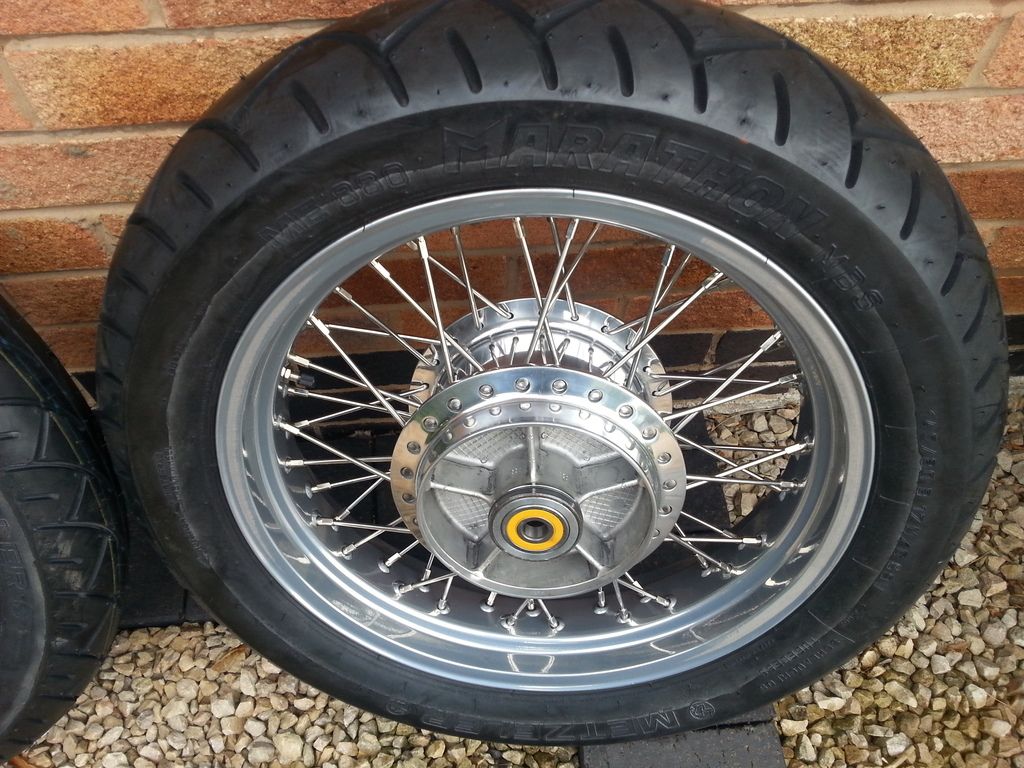
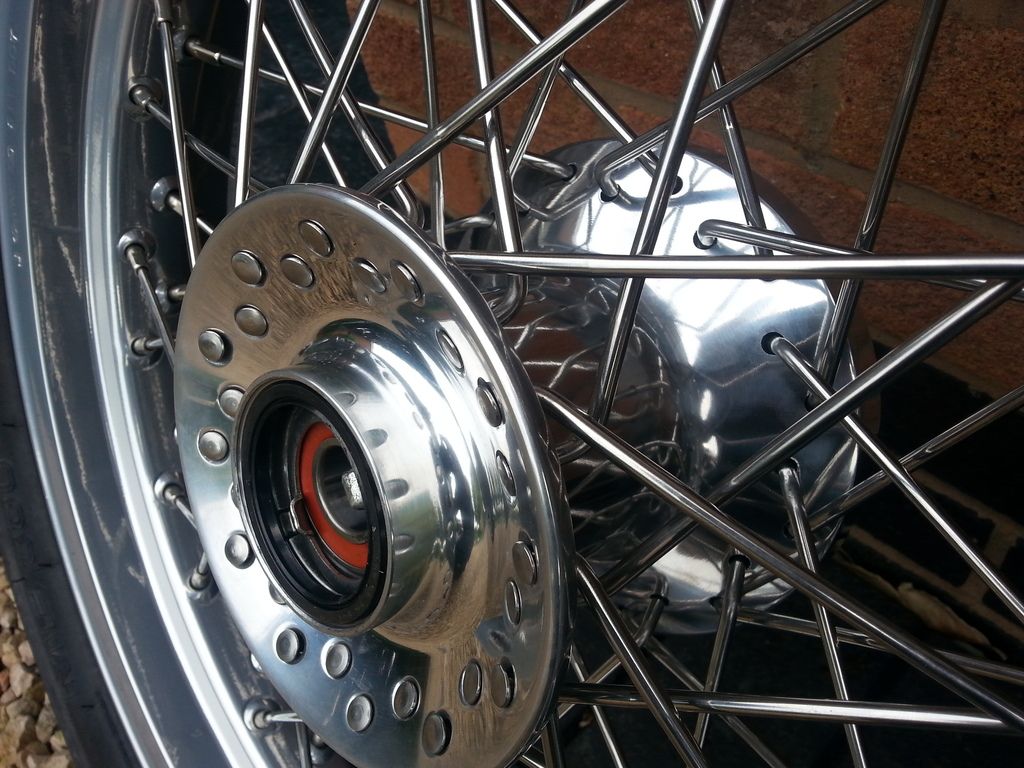
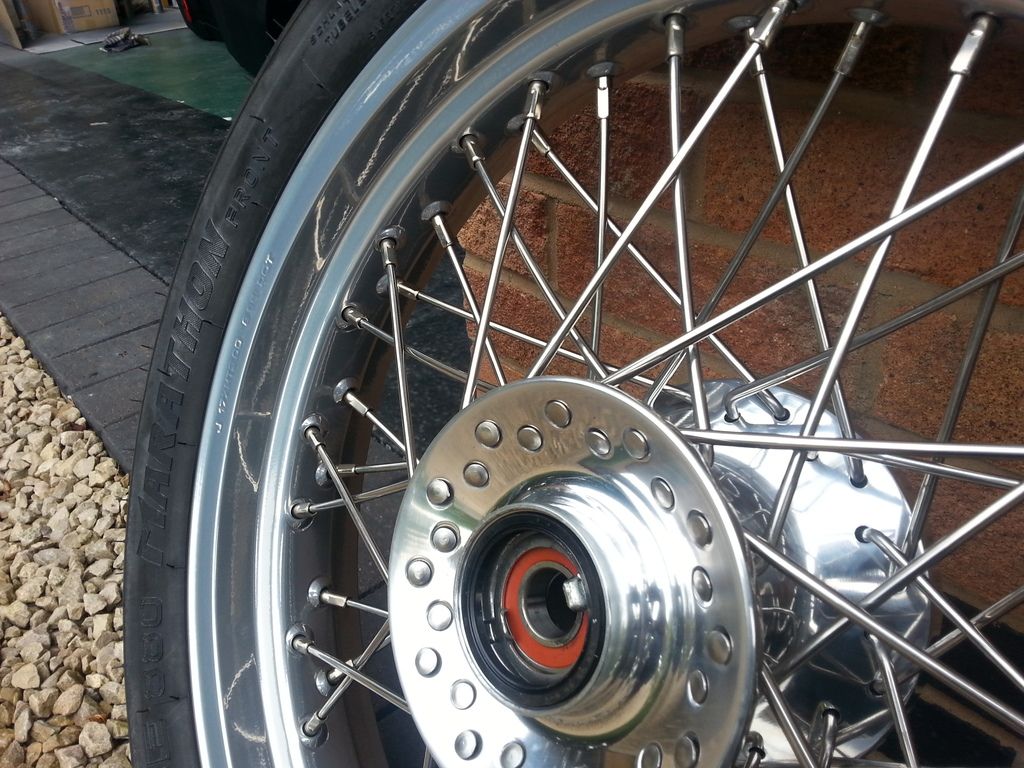
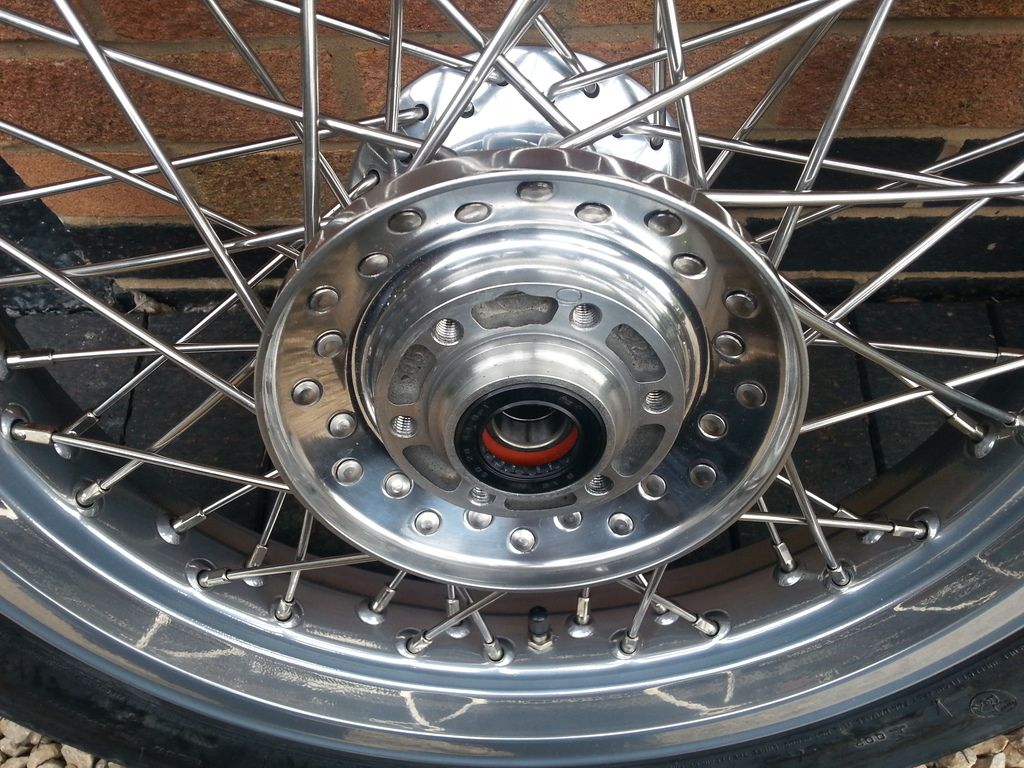
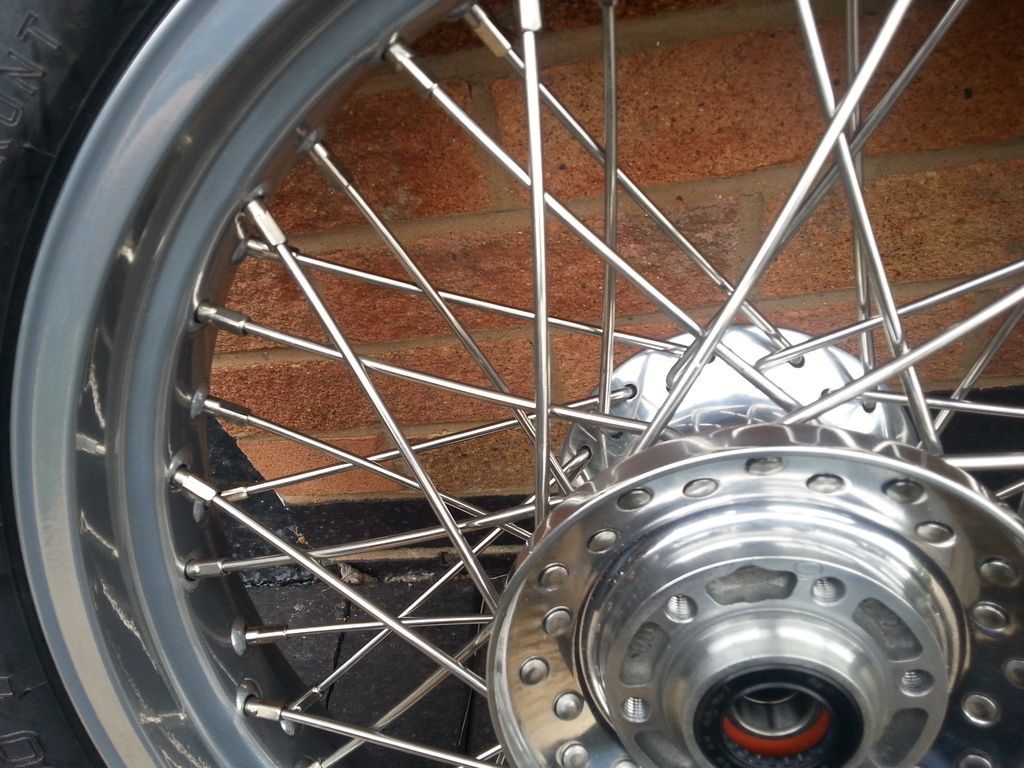
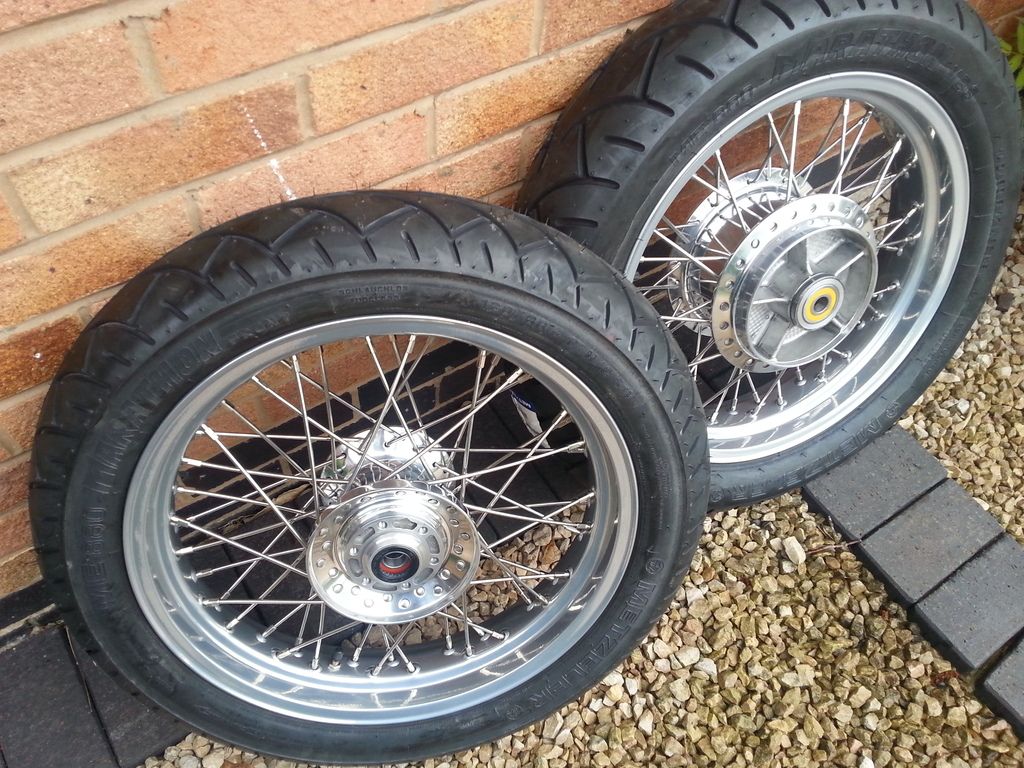
Wheels are back from Central Wheels, Coleshill and superb they are !
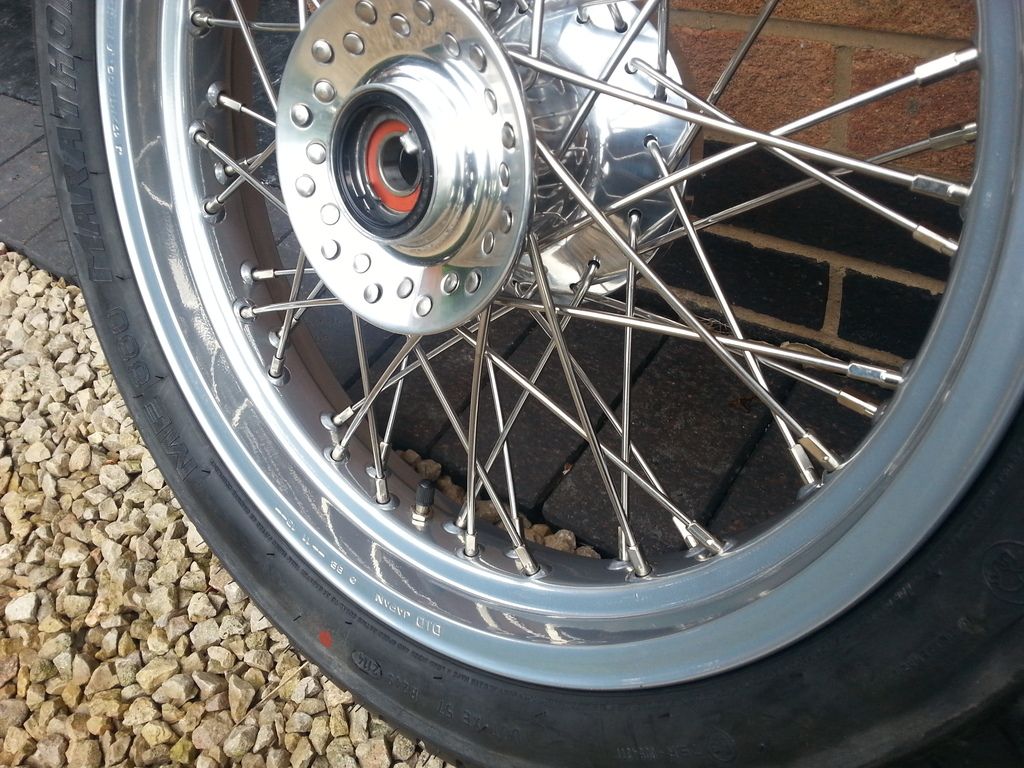
If you recall I had to get a new rear wheel from Japan for the rim, and both anodised rims where pockmarked and chipped so needed refinishing. Re-anodising doesn't tend to work very well apparently, so my options (as you can't get new rims in this configuration, even custom made) were limited to powder coating. I toyed with the idea of a light grey colour powder coat to try and match the original anodisation, but decided to go with a chrome effect with a slight amount of dubiousness ... but I'm glad I did, turned out better than I was hoping for.
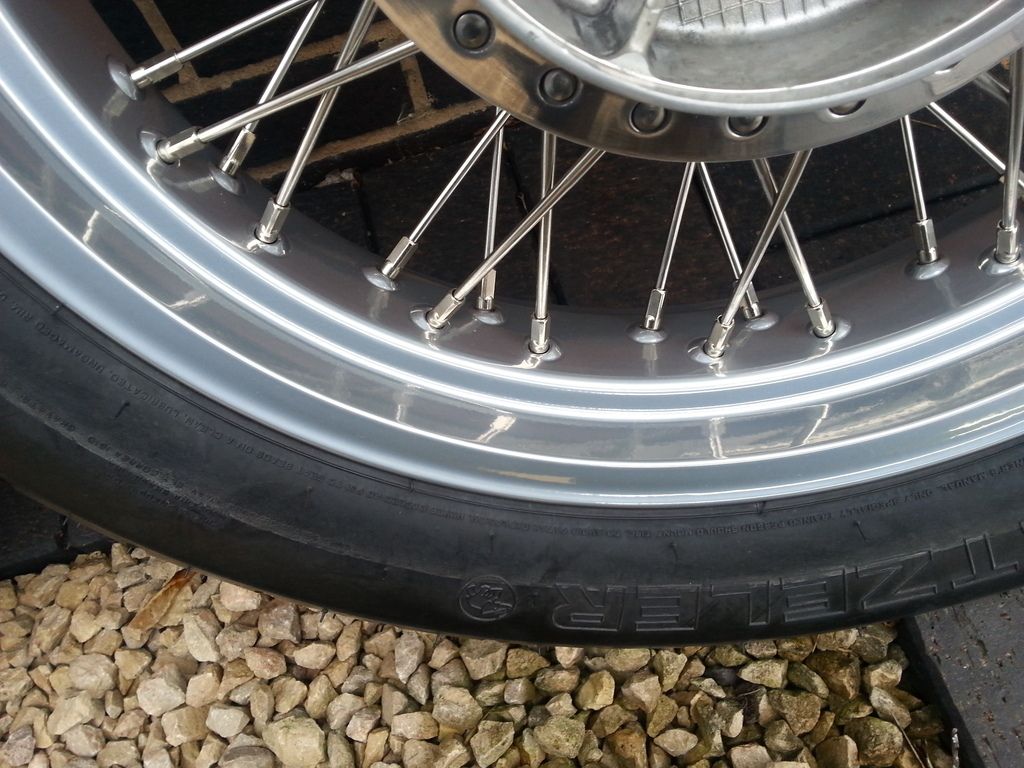
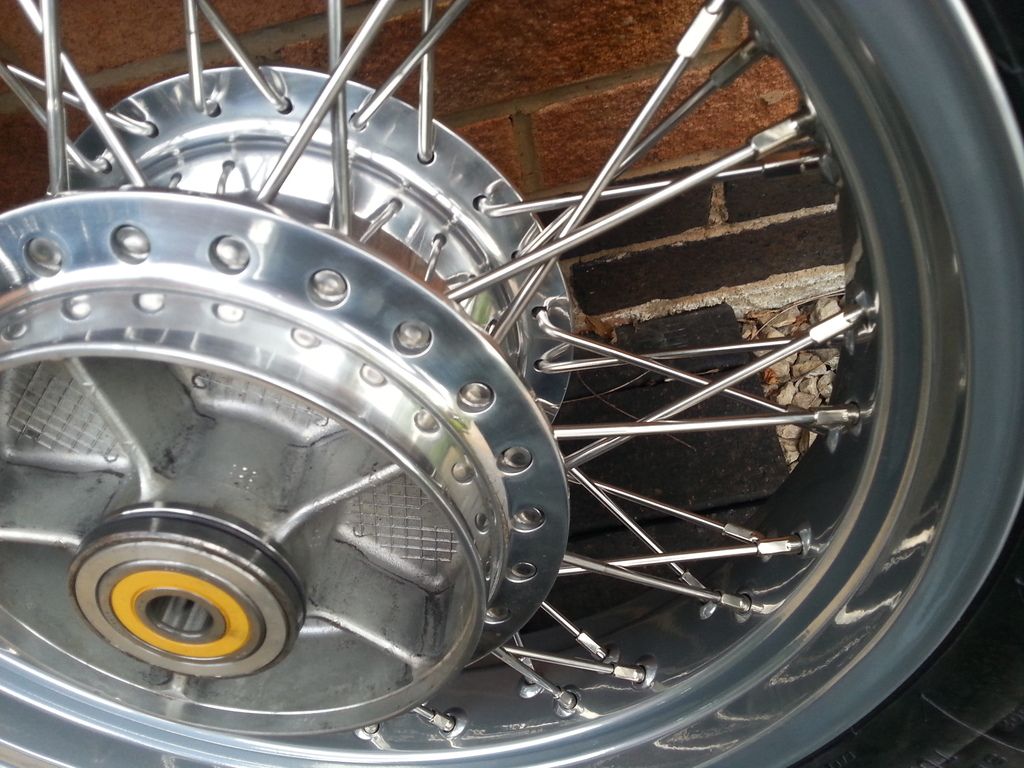
Old wheels disassembled, hubs polished, rims powder coated, built back up again with butted stainless spokes, balanced and trued, new tubes and rim tape fitted with (supplied) Metzeler ME880 tyres, and (supplied) new bearings and seals pressed in for me, all for £456. Bargain.
Superb job, happy bunny.
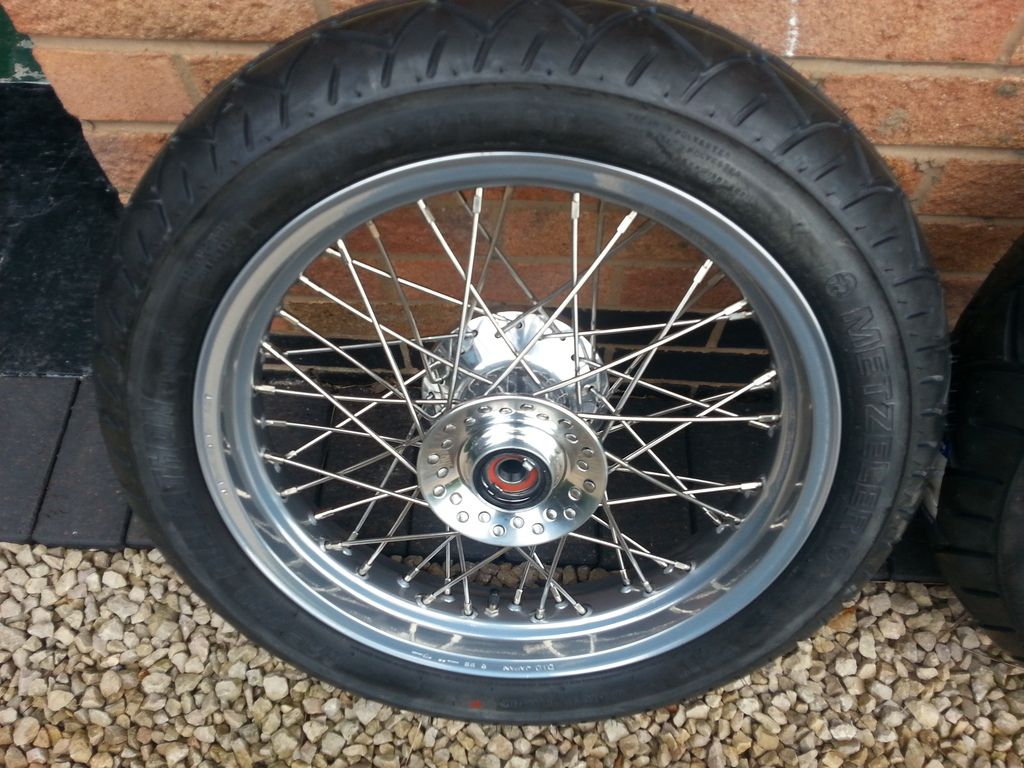

If you recall I had to get a new rear wheel from Japan for the rim, and both anodised rims where pockmarked and chipped so needed refinishing. Re-anodising doesn't tend to work very well apparently, so my options (as you can't get new rims in this configuration, even custom made) were limited to powder coating. I toyed with the idea of a light grey colour powder coat to try and match the original anodisation, but decided to go with a chrome effect with a slight amount of dubiousness ... but I'm glad I did, turned out better than I was hoping for.
Old wheels disassembled, hubs polished, rims powder coated, built back up again with butted stainless spokes, balanced and trued, new tubes and rim tape fitted with (supplied) Metzeler ME880 tyres, and (supplied) new bearings and seals pressed in for me, all for £456. Bargain.
Superb job, happy bunny.


Gassing Station | Biker Banter | Top of Page | What's New | My Stuff