Honda VRX400 1995 "barn find" restoration
Discussion


Some small progress ... still have a stent inside me, so bending and movement is quite painful, so doing work of any kind is limited to small batches. Stent comes out next Thursday ... can't say I'm looking forward to that ... I'll spare you the details, but lets just say that I'm going to be awake, it involves an endoscope/grabber about the diameter of my little finger, and "an existing orifice" ... 
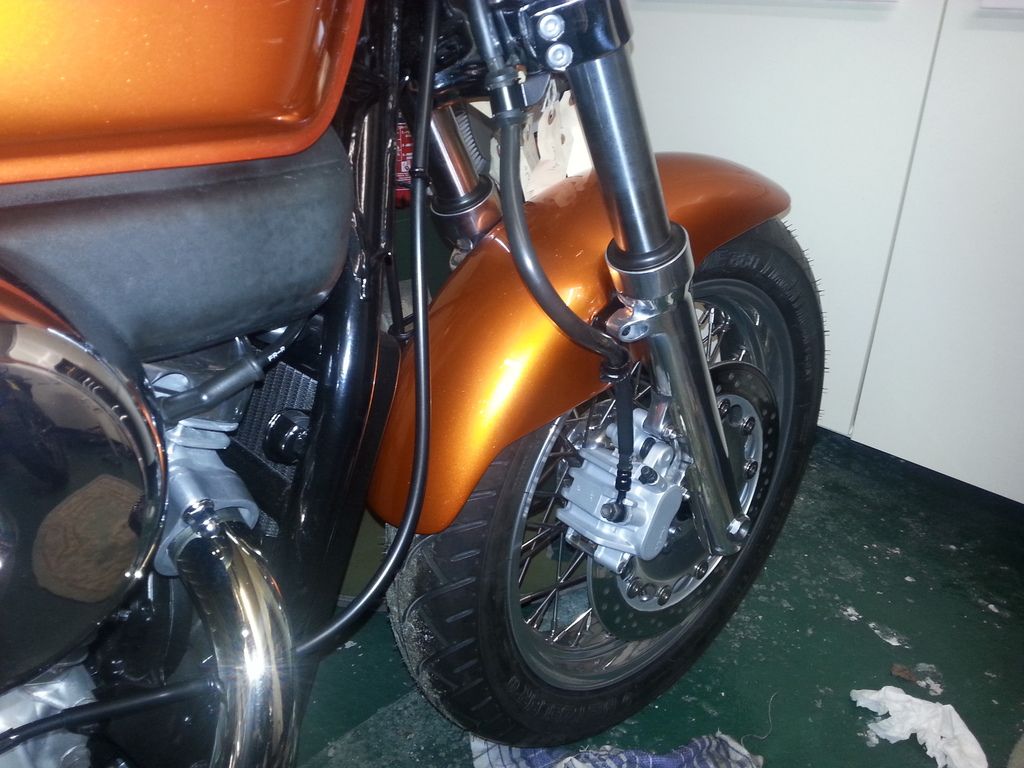
Front brake re-bled and new stainless screws put in
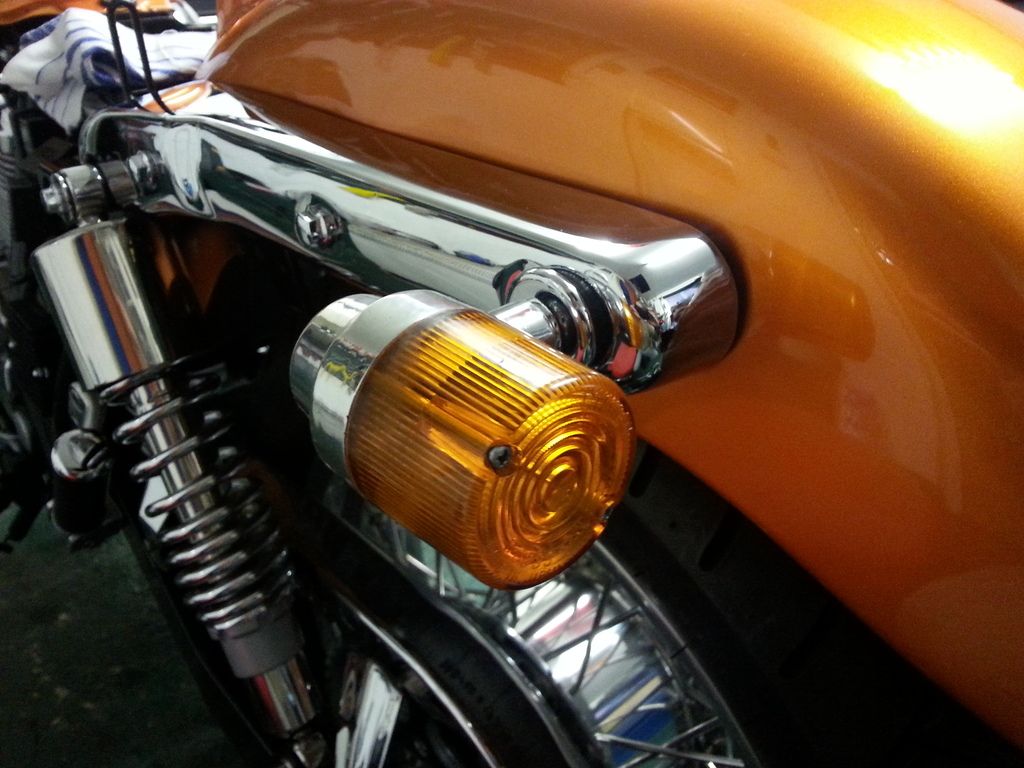
After thinking about this a while, I'm going to keep the original indicators ... they're quite retro and I like that.
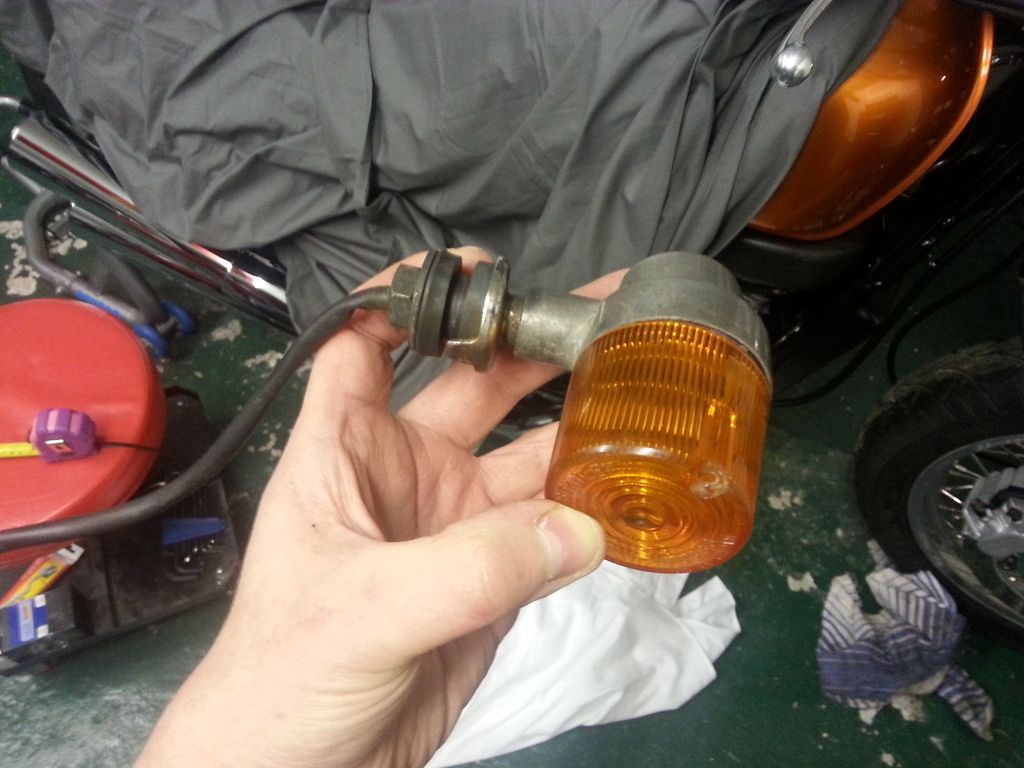
However the chrome mounts are rusty ... so I'm going to have to send these (and a couple of bolts I missed) off to Derby Plating to get rechromed.

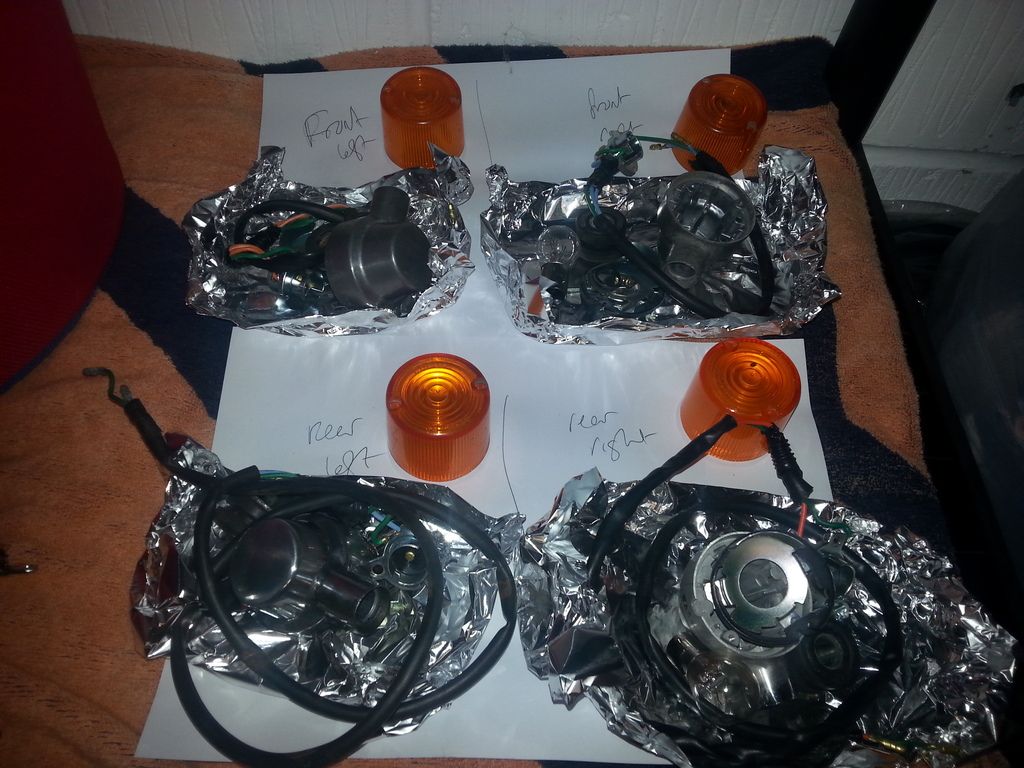
Rest of indicators all disassembled and put on one side safely. These are discontinued now.
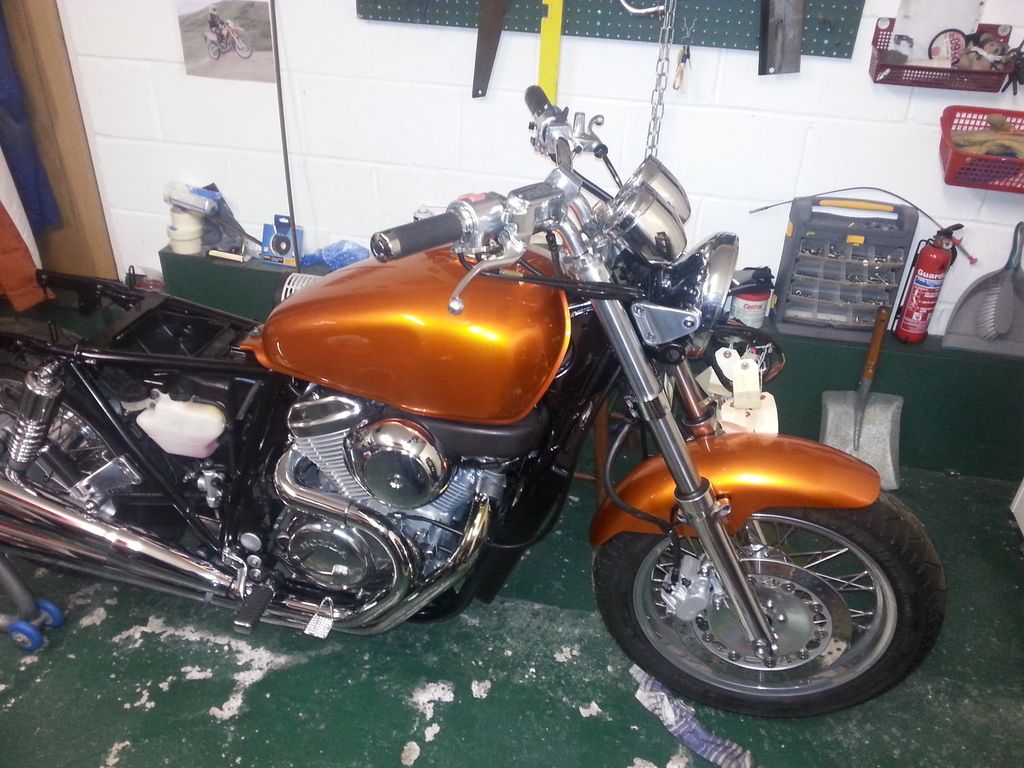
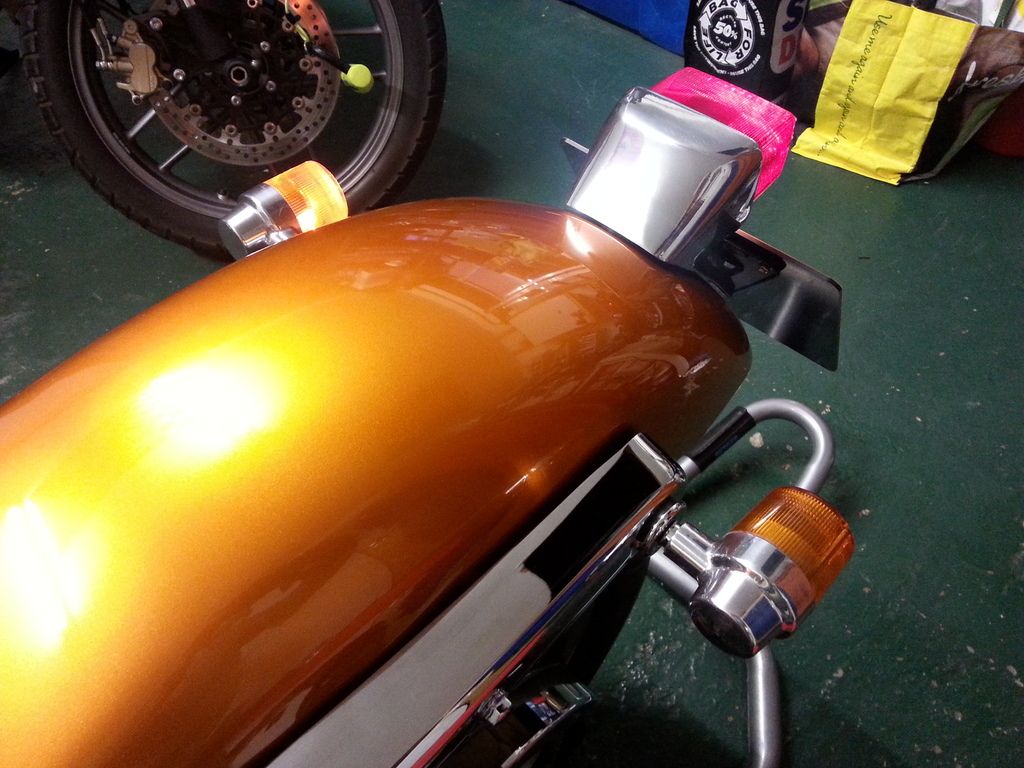
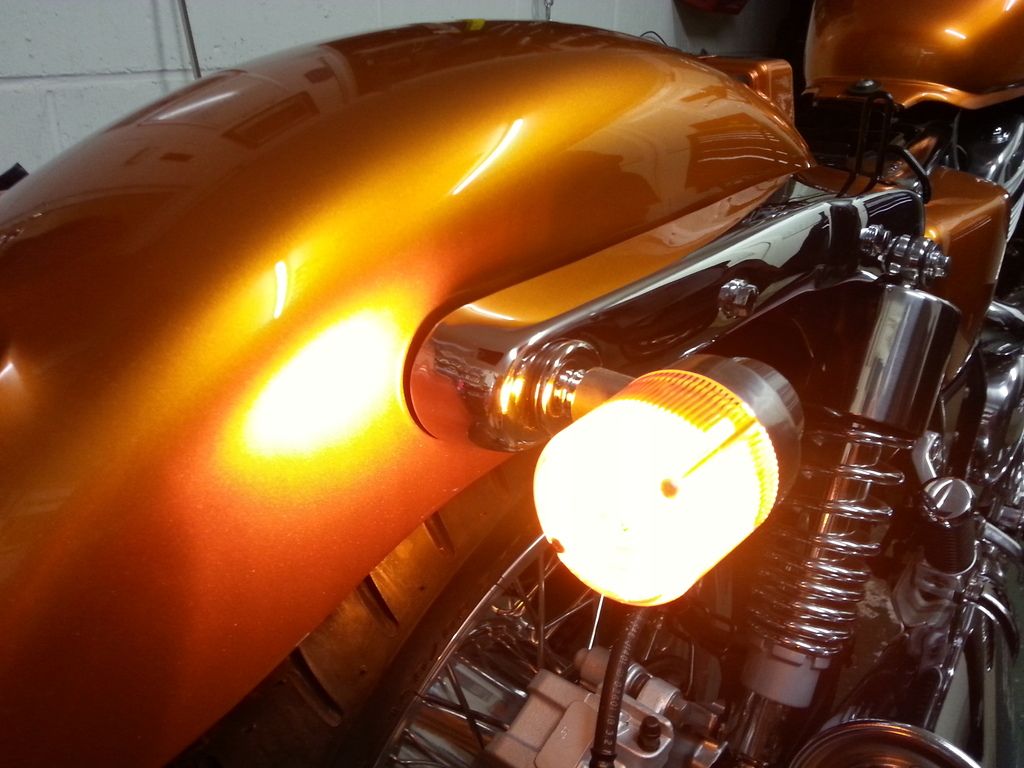
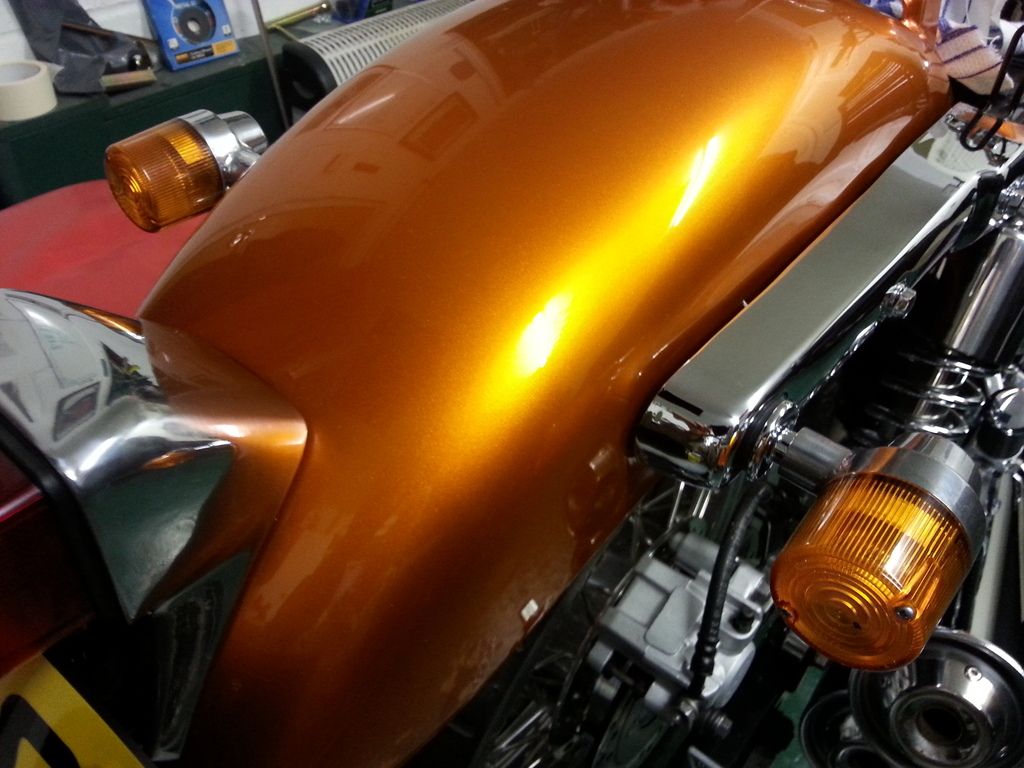
Front mudguard fitted, and speedo cable attached.
As a future project I may replace this either with a smaller black mudguard or chrome (and store the originals) ... that's something I can play with in the future. I have a feeling this will be an ongoing project / play bike.
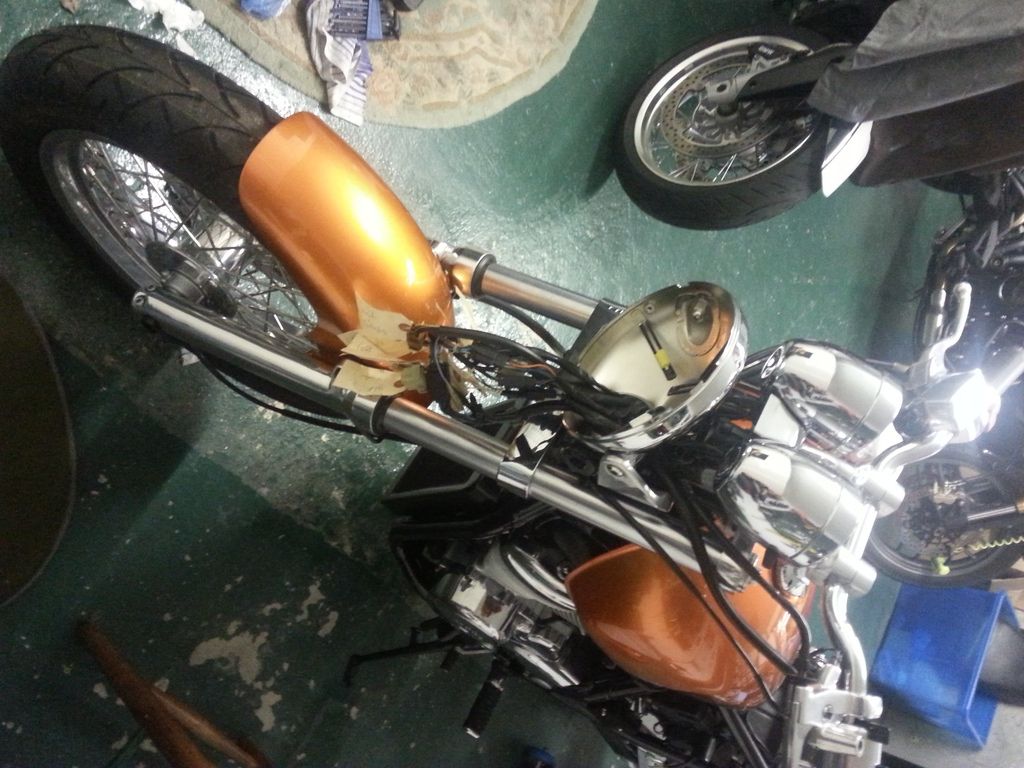
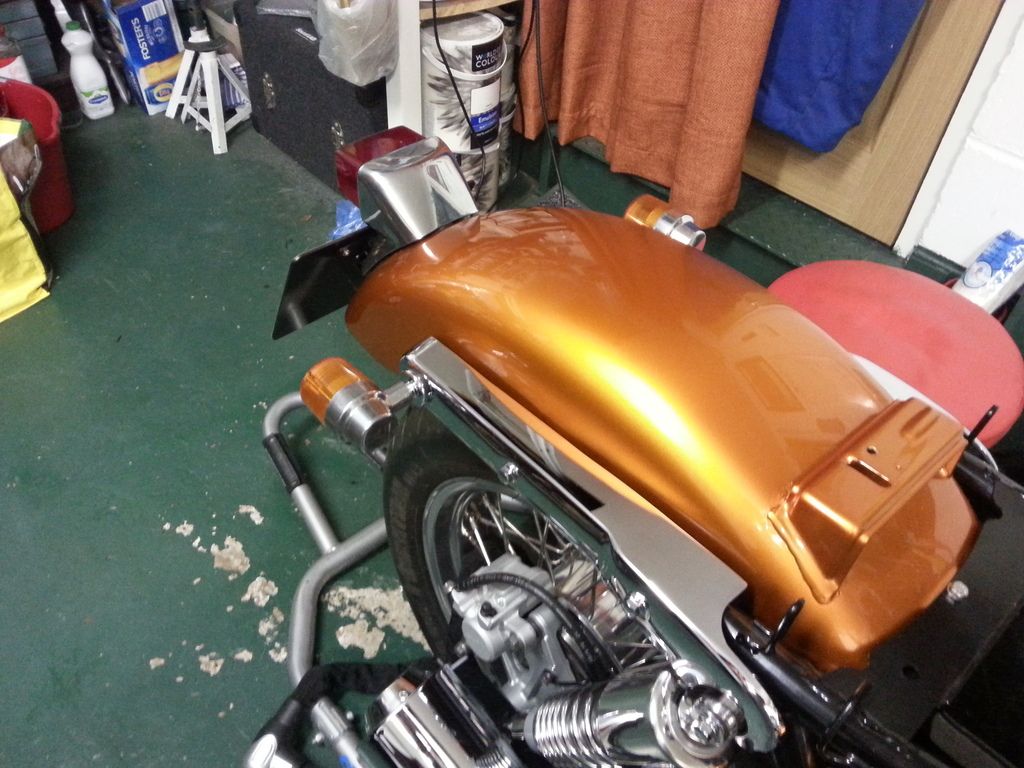
And the rear fitted too (mainly to get it off the living room table !).
Sitting a bit high on the new rear shocks. I need to look at that.

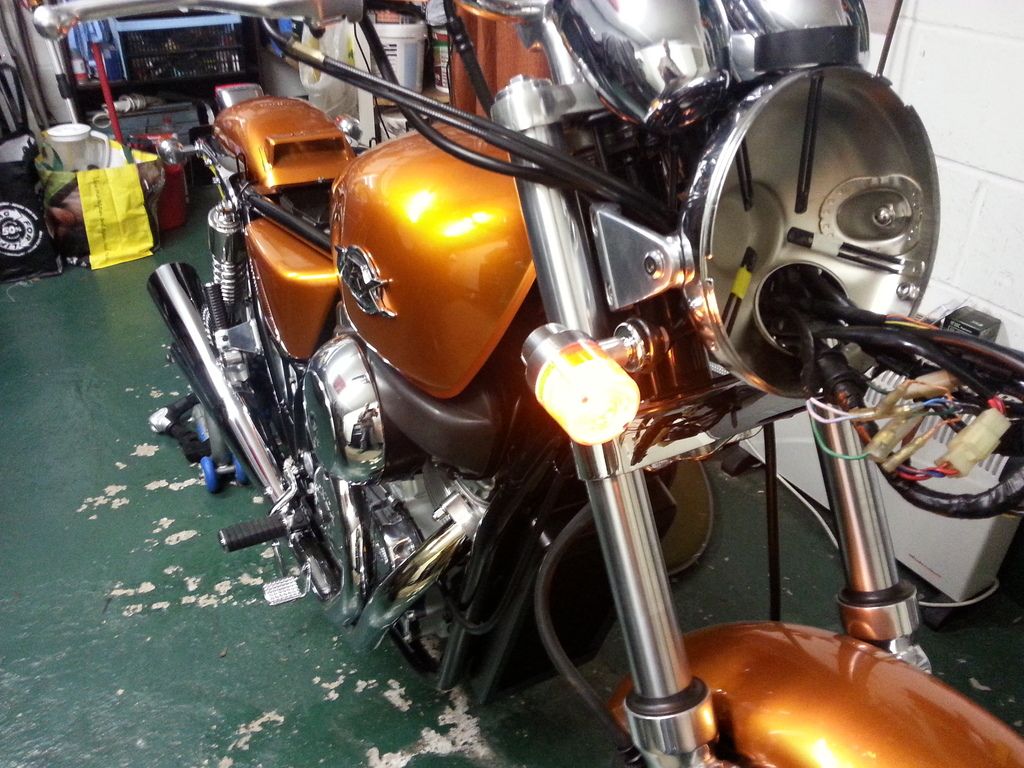
The chrome covers are only on temporarily, they'll need to come off again to put the indicators on.

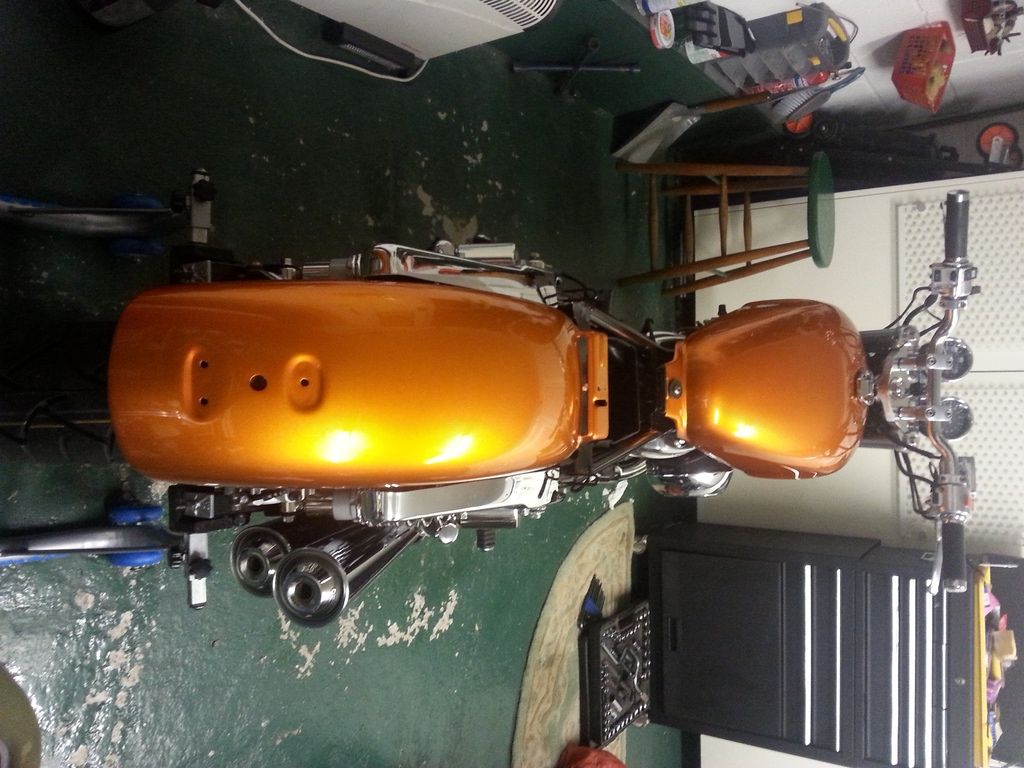
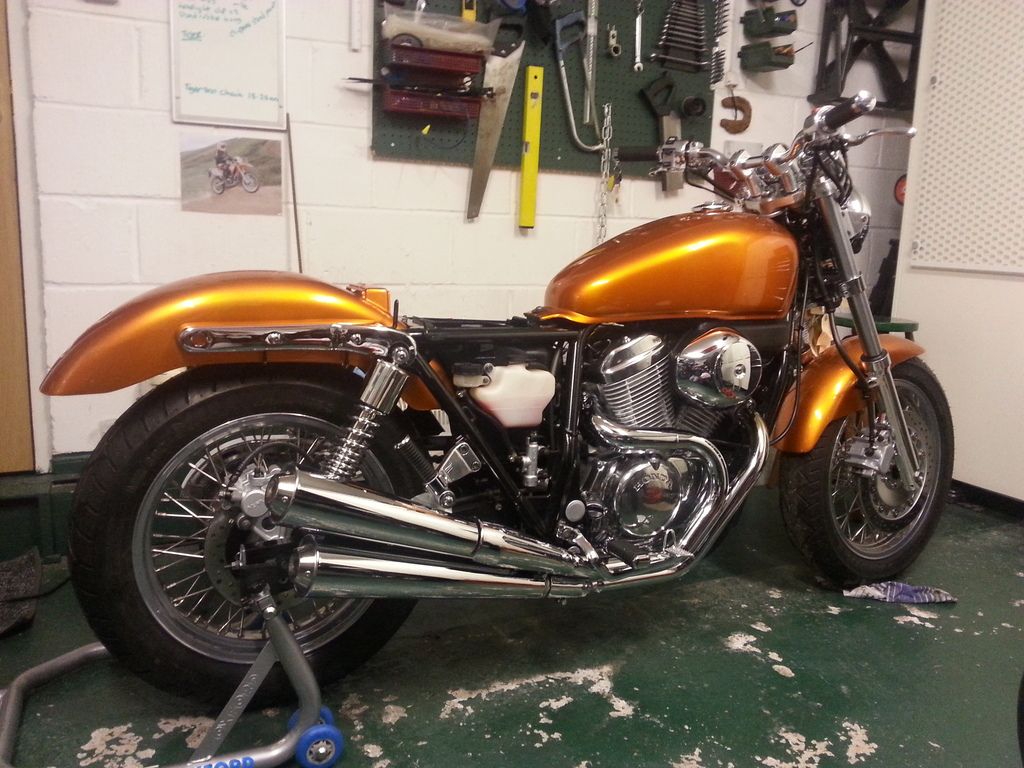
Coming together ...
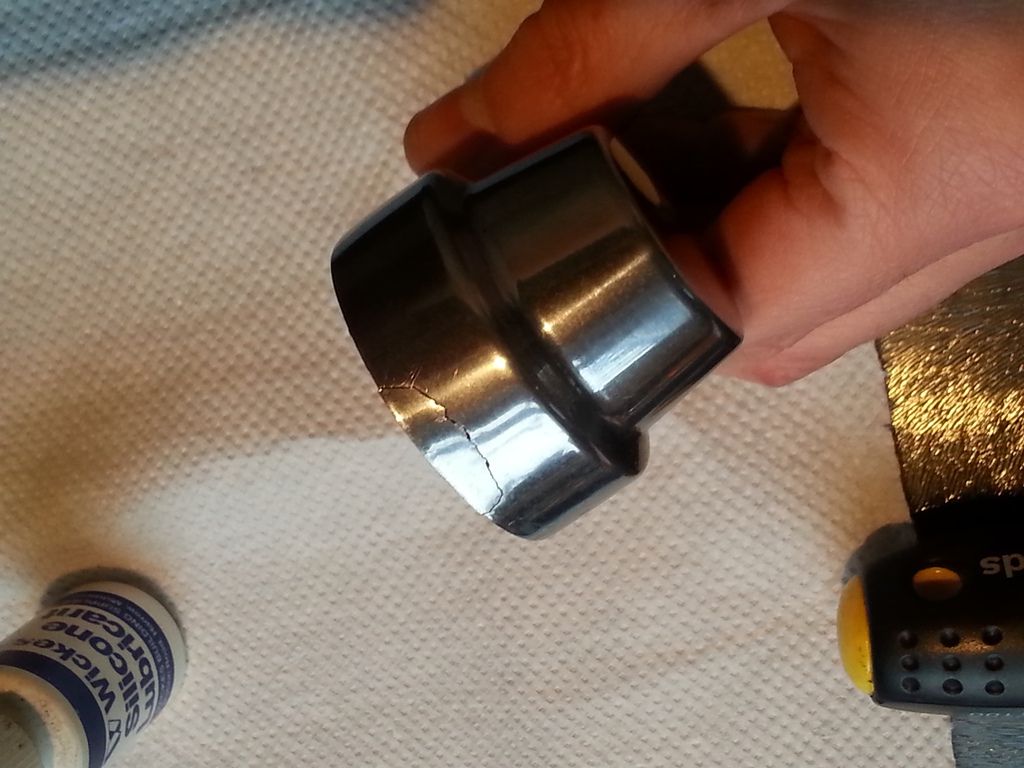
Polishing up the alloy indicator housings. One down, three to go.

And this is the next job, currently sat in paint stripper ... a small side panel that goes over the rear brake.

Front brake re-bled and new stainless screws put in
After thinking about this a while, I'm going to keep the original indicators ... they're quite retro and I like that.

However the chrome mounts are rusty ... so I'm going to have to send these (and a couple of bolts I missed) off to Derby Plating to get rechromed.

Rest of indicators all disassembled and put on one side safely. These are discontinued now.

Front mudguard fitted, and speedo cable attached.

As a future project I may replace this either with a smaller black mudguard or chrome (and store the originals) ... that's something I can play with in the future. I have a feeling this will be an ongoing project / play bike.


And the rear fitted too (mainly to get it off the living room table !).

Sitting a bit high on the new rear shocks. I need to look at that.

The chrome covers are only on temporarily, they'll need to come off again to put the indicators on.

Coming together ...

Polishing up the alloy indicator housings. One down, three to go.

And this is the next job, currently sat in paint stripper ... a small side panel that goes over the rear brake.

Edited by evil len on Monday 23 November 22:36
Seat's gone off to the upholsterers, ETA 6 weeks.
Still working on that little metal panel above, lots of primer/filler and rubbing down (rinse, repeat)
An evening sat in front of the telly with a scratch and swirl remover and car polish brought both badges up pretty well.

Shhhhhh ! Had a quick sneaky pre-MOT test run to the end of the road and back ! Ran like a DREAM (after I managed to get her started ... remembering to turn the fuel tap from "off" to "on" does wonders for starting the engine, wouldn't you know). VERY pleased with how she rode, felt immediately "right" and rode really nicely, pulled very well for a 400 (not that I think I even got into 3rd gear). Only one snag to sort out, by time got back (50 yards there and 50 back) the front hub was squeaking like a sod, so I need to take that apart again and see what's wrong.
https://www.youtube.com/watch?v=wkHIBUPsxKE
By the way, I'm dressed like Bibendum as we were just about to go out on the other bikes for a longish ride and it was 0.5 deg C !
Sushifiend ... the helmet cam is even quieter, deliberately as it's set up to record my voice inside the helmet (and cut down on exterior noise) ... I'll do a special recording of the exhaust for you some time.
ash73 ... don't worry, the road was very dry !! Remember this bike's been stripped and put back together by an amateur, so I think teething problems (not that I think there's been many really) have been down to my experience ... I would expect it to be as reliable as any other 1990's Honda.
familyguy1 ... thank you kindly
Battery cover given a bit of a clean
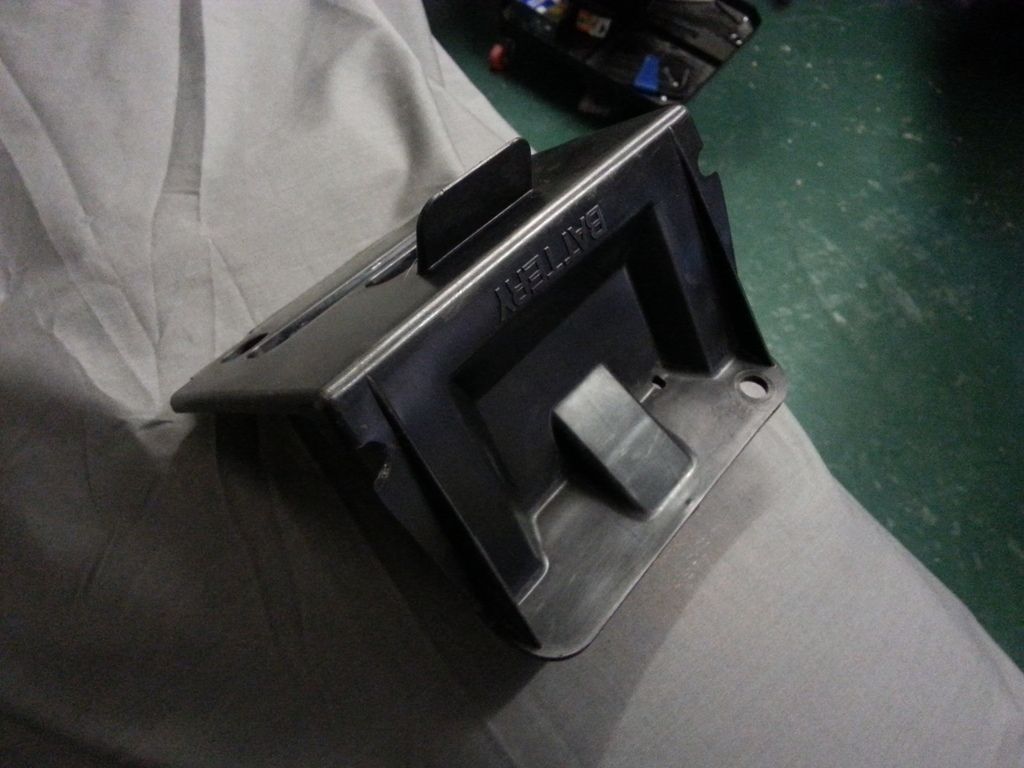
And located in place.

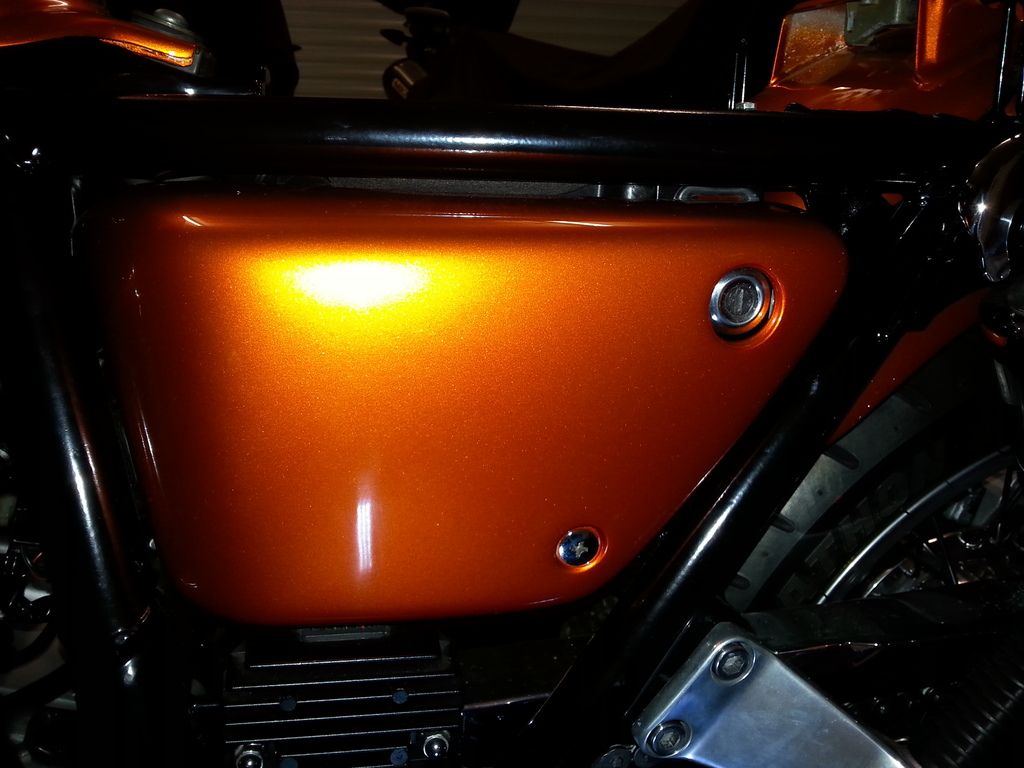
VRX badges applied both sides, they cleaned up nicely with T Cut and polish.


Black cover plate (see above) for the rear brake master finished being painted (sooo many coats) and attached to bike.
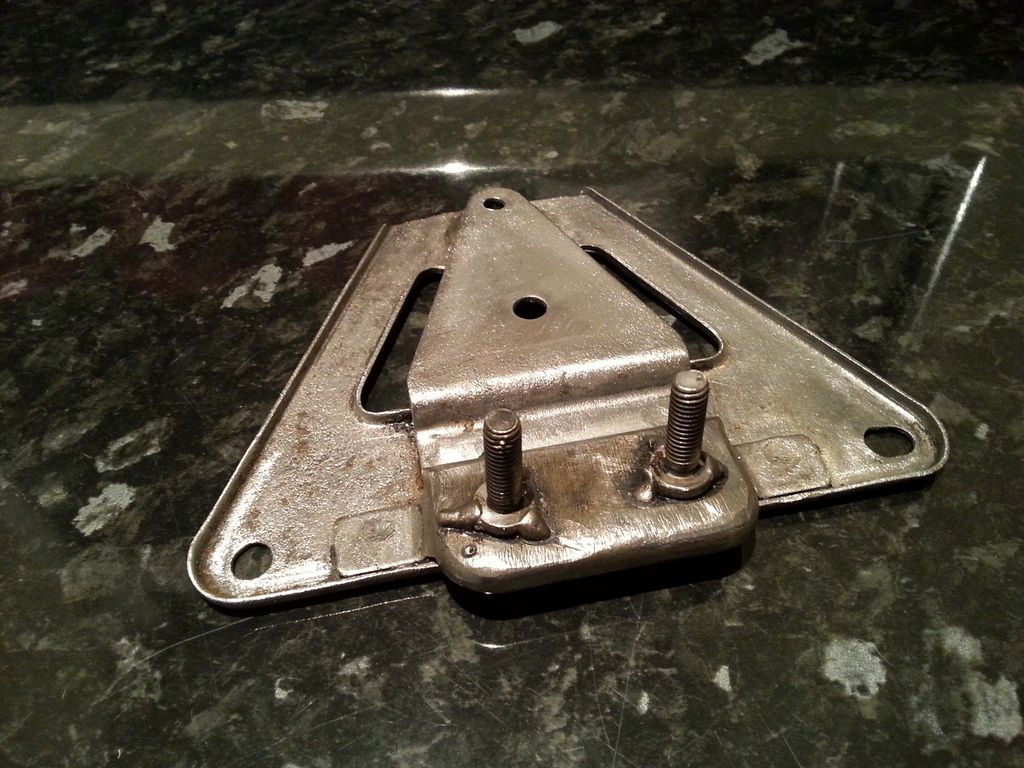
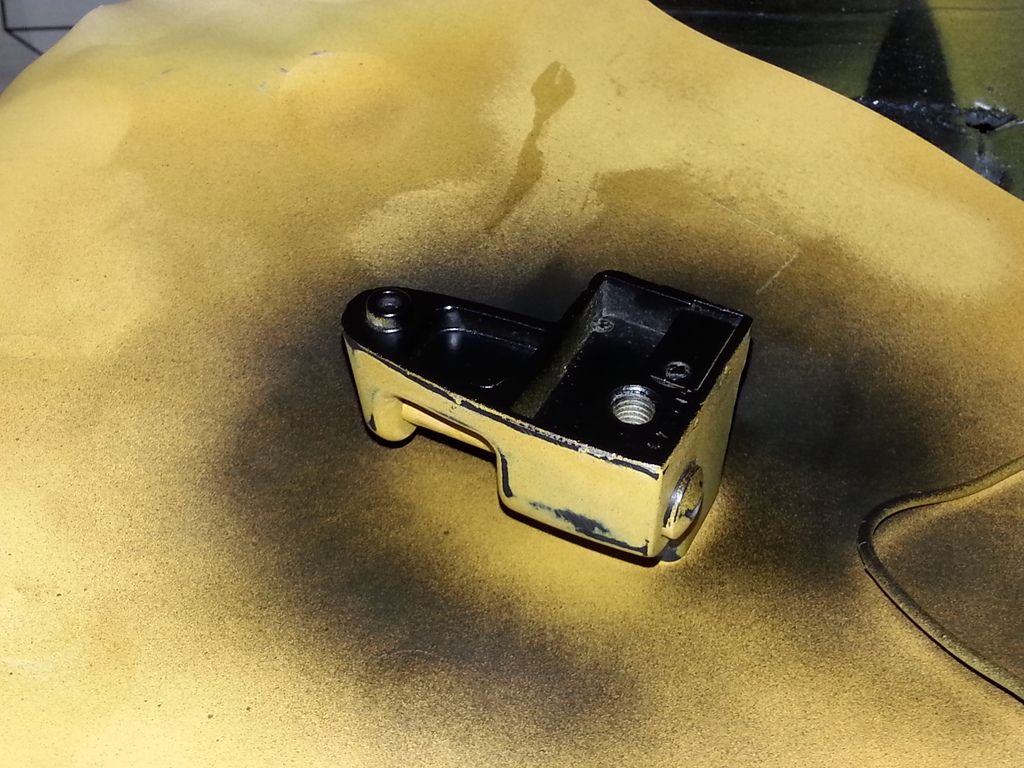
So time to start on the rear number plate bracket. Someone has cut off the bit of the bracket which holds the rear reflector on (presumably to fit a larger-than-Japanese UK number plate on) but I'm not going to replace that, apart from just tidying it up.
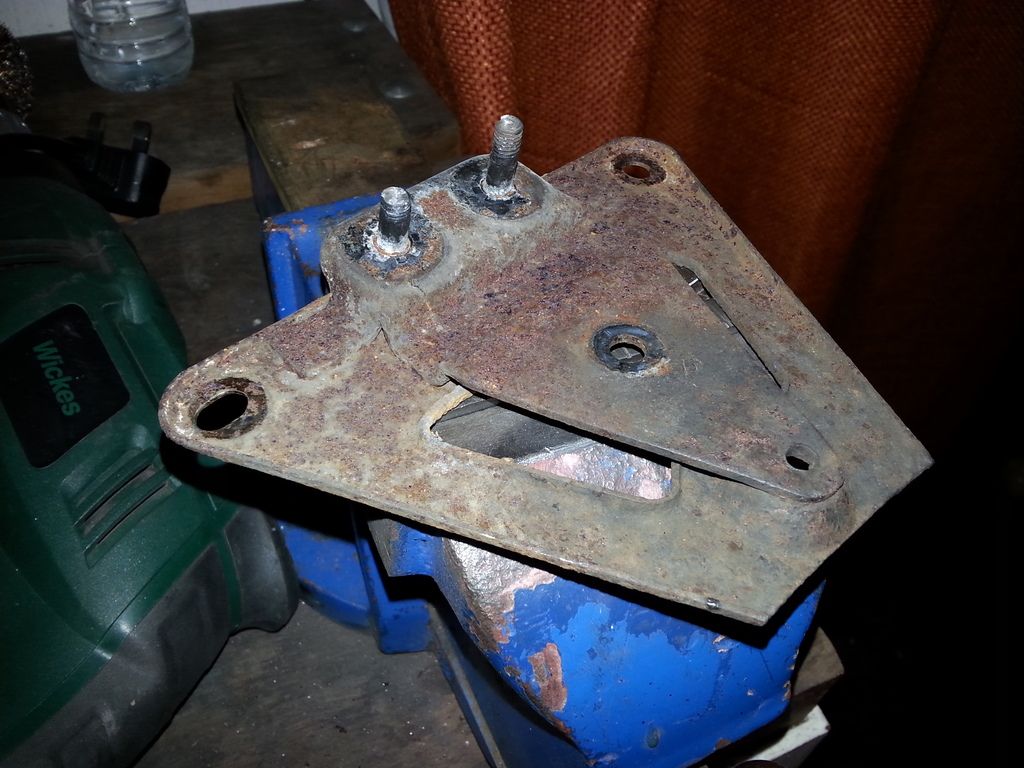
The nuts had rusted solid, so when I went to remove the hanger (when stripping the bike) the captive studs just sheared. You can't get this part new.
So I ground off the old studs and prepared to weld on two new studs found in my "random parts" bins.
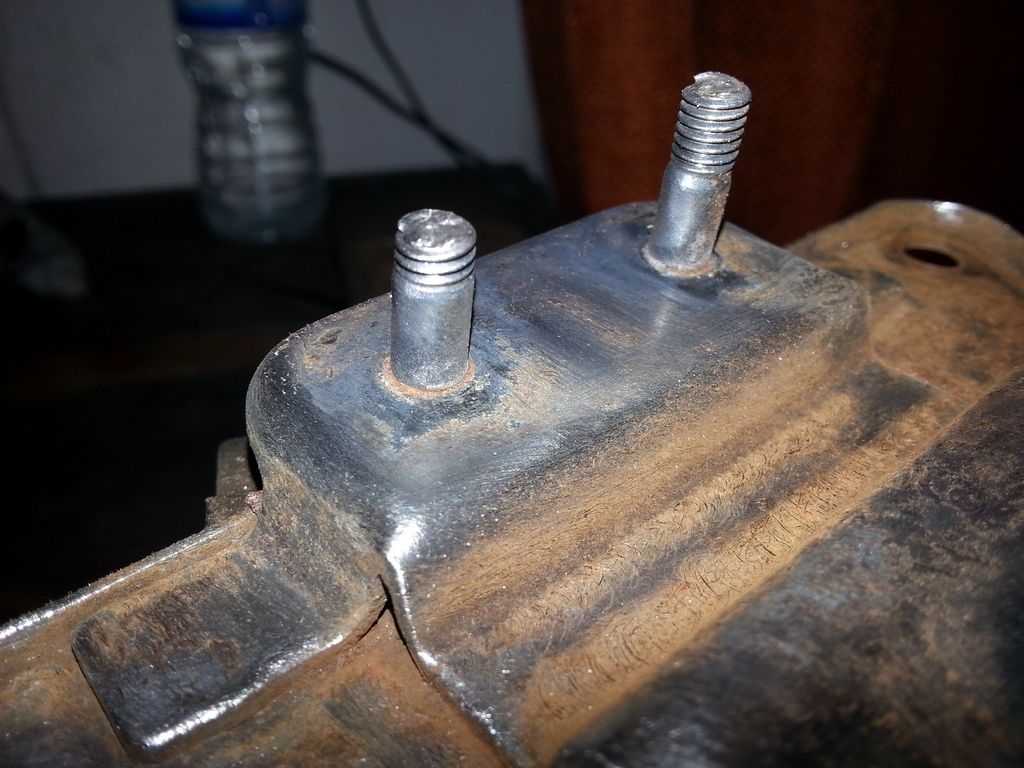
Well that was a f king balls up then. Pissing awful job, this is what you get when you are trying to finish it before going out for a Christmas meal. Had the welder turned up way too high, meaning spatter everywhere, including all over the threads, ruining them.
Ground everything back off again, got two more bolts. This time I'm going to cover the threads with an old chrome car tyre valve cover ! Oh, and turn down the welder. And don't rush.
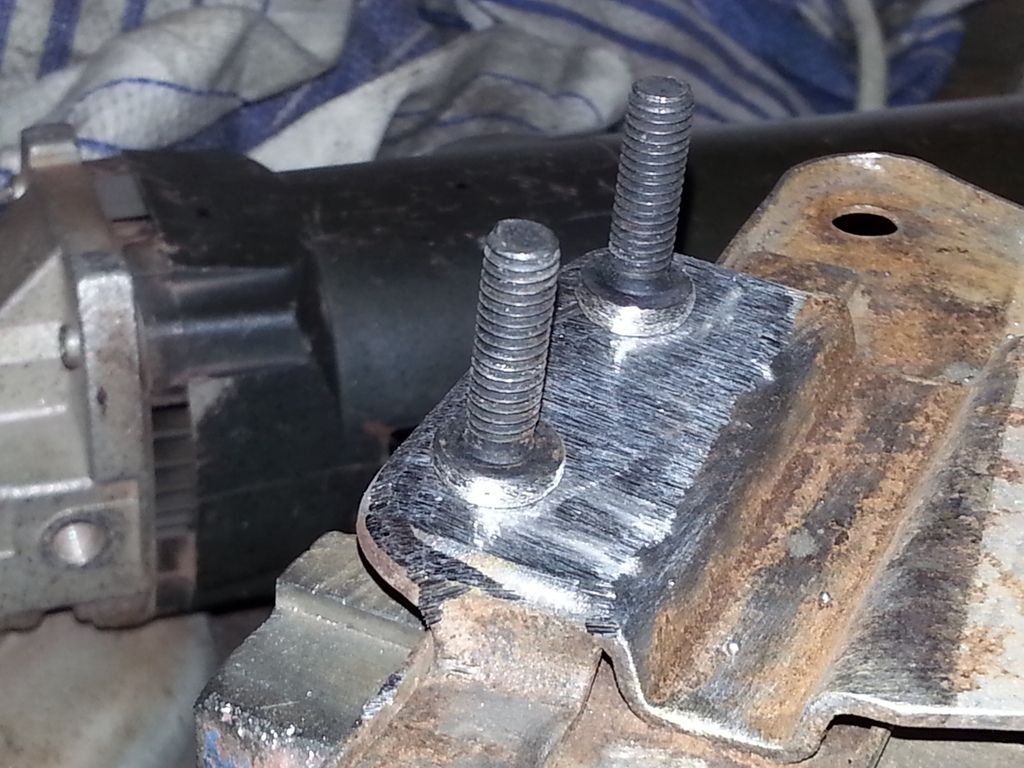
Second attempt, that's better.
And it fits perfectly.

And I'll just leave it in rust remover for a day or two, before spraying.

And located in place.

VRX badges applied both sides, they cleaned up nicely with T Cut and polish.


Black cover plate (see above) for the rear brake master finished being painted (sooo many coats) and attached to bike.

So time to start on the rear number plate bracket. Someone has cut off the bit of the bracket which holds the rear reflector on (presumably to fit a larger-than-Japanese UK number plate on) but I'm not going to replace that, apart from just tidying it up.

The nuts had rusted solid, so when I went to remove the hanger (when stripping the bike) the captive studs just sheared. You can't get this part new.

So I ground off the old studs and prepared to weld on two new studs found in my "random parts" bins.

Well that was a f
king balls up then. Pissing awful job, this is what you get when you are trying to finish it before going out for a Christmas meal. Had the welder turned up way too high, meaning spatter everywhere, including all over the threads, ruining them.
Ground everything back off again, got two more bolts. This time I'm going to cover the threads with an old chrome car tyre valve cover ! Oh, and turn down the welder. And don't rush.

Second attempt, that's better.

And it fits perfectly.

And I'll just leave it in rust remover for a day or two, before spraying.

Right, that's the seasonal nonsense over and done with, lets get back to something proper. Who'd work in retail at this time of year, eh ?
Number plate bracket de-rusted and before various and numerous coats of primer, primer/filler and black satin paint.

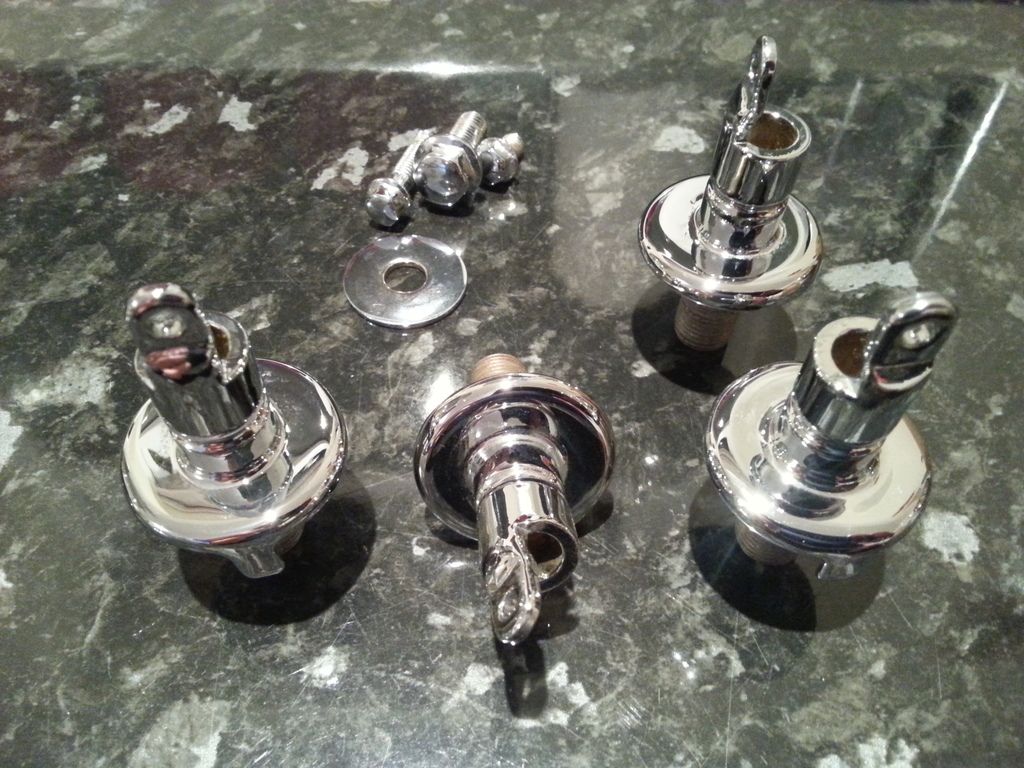
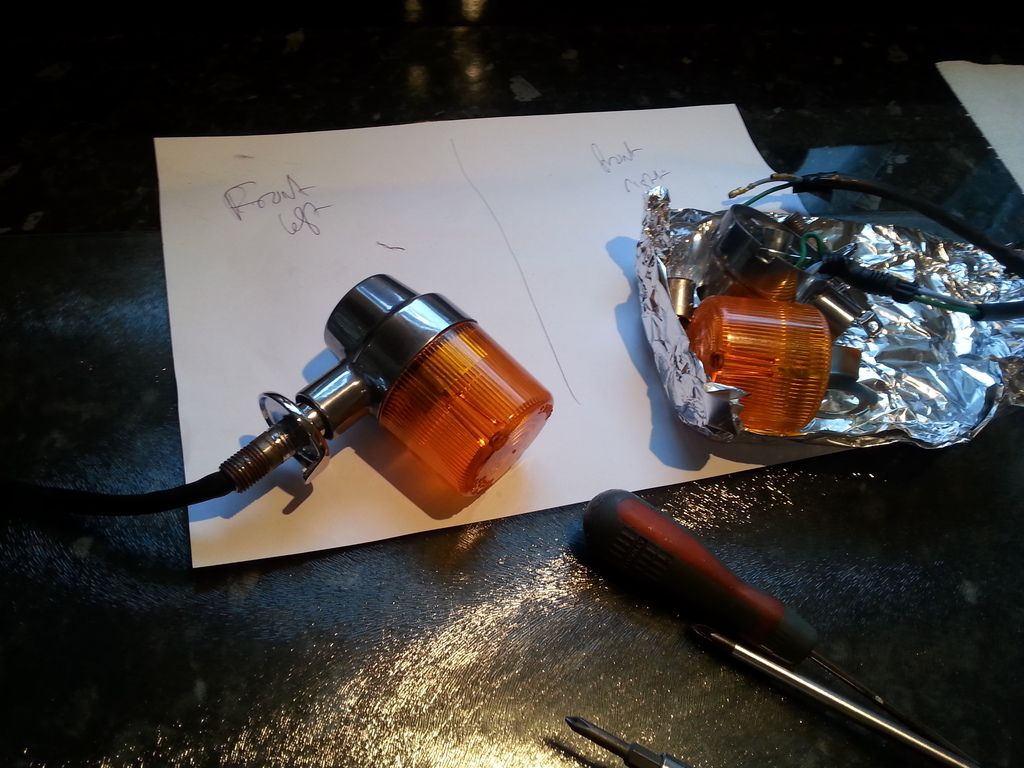
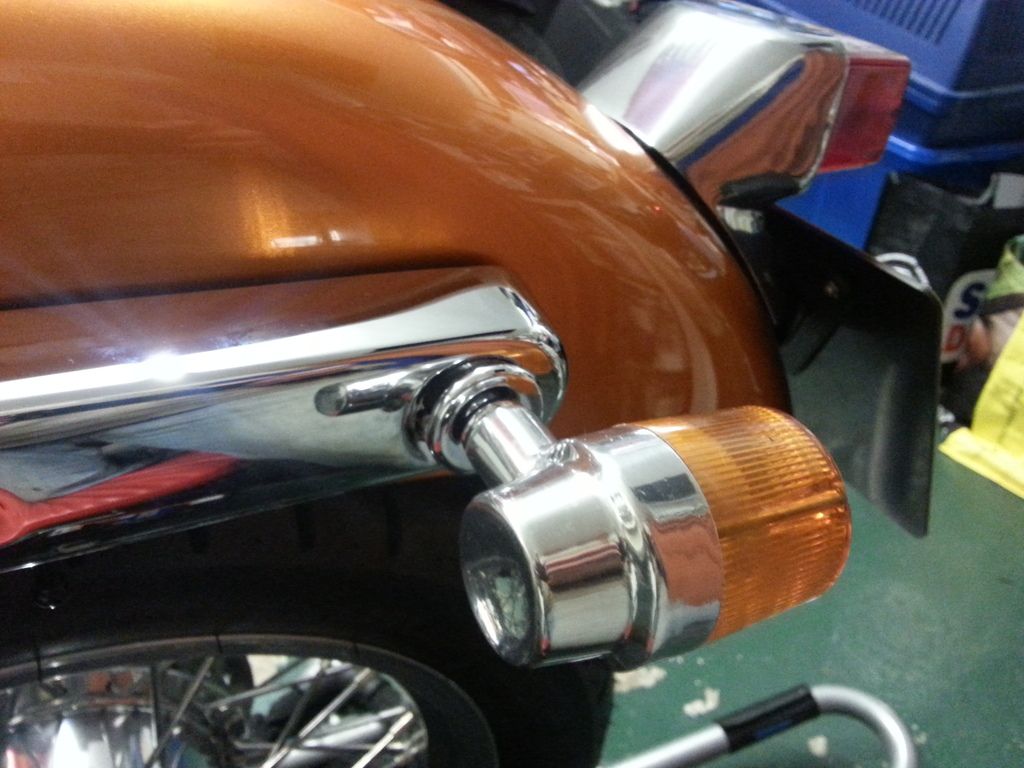
Derby Plating have done their usual superb job on the indicator mounting brackets.
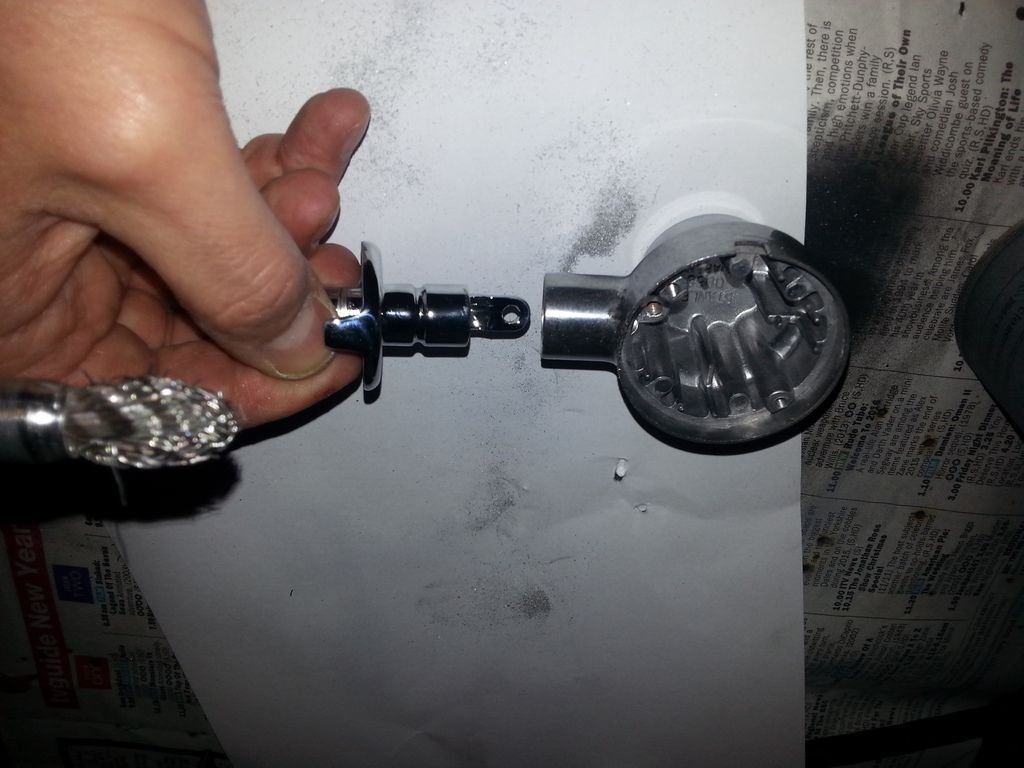
Right, now, reassembling the indicators. What a bd job. This took SOOO long, with SOOO many mistakes, problems and issues.
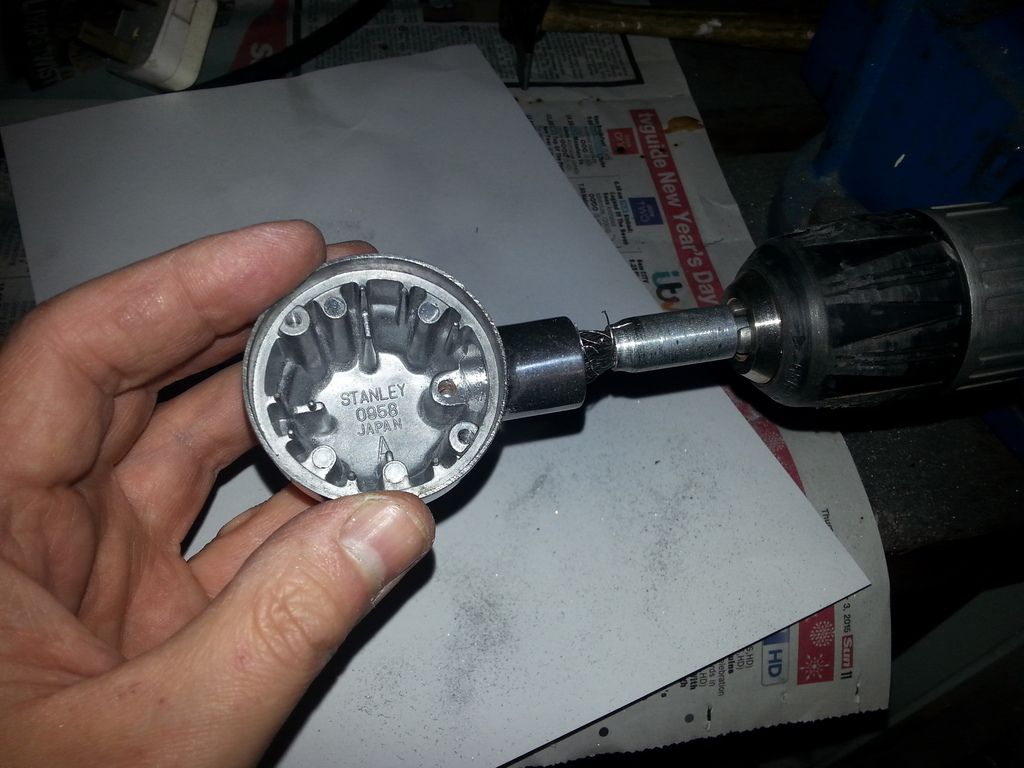
Issue #1 : unlike all the other aluminium parts, the indicator housings wouldn't retain their polish ... after buffing, within a few days of sitting in a dry garage they'd be tarnishing and going dull again. After polishing a few times, in the end I gave up, cleaned them all up again, and gave them a couple of coats of lacquer. This gives them a slightly duller finish than pure polishing, but at least they shouldn't tarnish. I put this down to the indicators being made out of cheap st alloy.
Issue #2 : Derby Plating have done a bit TOO good a job on the chrome ... it's nice and thick. Too thick to reassemble back in the housing ! I got round this by laboriously opening up the inside of the alloy housing with a wire bit in the drill and a round file, till eventually they fit.
Issue #3 : whilst reassembling one of the indicators and trying to get the chrome mount in (see Issue #2) I ended up bending the lip of one. And, being cheap st alloy (see Issue #1) when I tried to gently bend it back, it broke. For now I've araldited it, and with a fresh coat of lacquer it's not too noticeable. This will have to do until I can source a second hand one (rare as rocking horse doo-dah). It looks better in real life.
Issue #4 : they are right fiddly sods to assemble ! The number of times I had to do this, take it apart, try again, rinse and repeat until I eventually got them together. Tiny, fiddly components which just wouldn't want to go back together, but eventually success was achieved. However it did get to the point where my wife was avoiding me, and staying out of the kitchen (well, she said that was her excuse anyway ...)
All four done. I tell you, it's enough to drive a man to drink.
Moving back to the rear light, the number plate bracket was finished off ... but only on third time lucky !! The second sets of studs I welded on above ? Well, had to cut them off. And weld on a third, longer set ... I'd forgotten / didn't realise that the number plate bracket mounts over the top of the rear light housing, and as such has to travel through it. The new studs were too short. So, out with the angle grinder, on with the welder, and repaint it ALL OVER AGAIN !
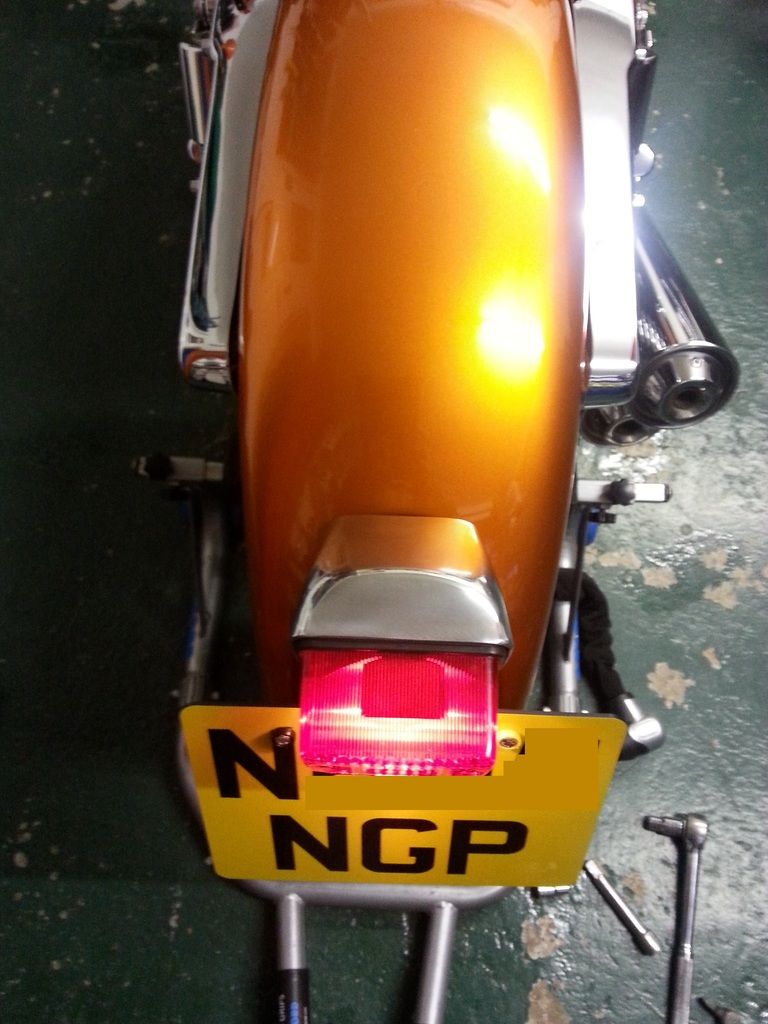
Looks good though, reassembled. The rear light was easy to reassemble (a couple of parts I had to look up on the parts diagrams as I forget where they went).
The horrible legal number plate is purely temporary to get her through the MOT ... I'll be putting a black/silver pressed ally plate on.

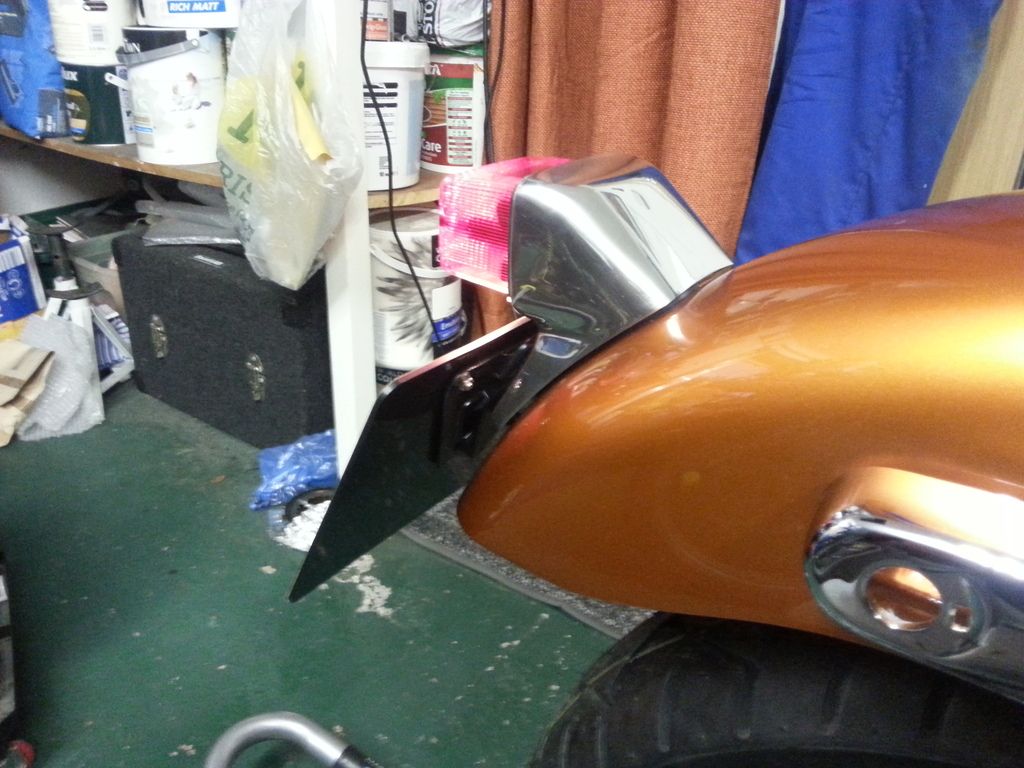
The rear light and brake light both worked first time ! (both front and rear brake levers). The lens isn't actually pink in real life, blame the phone.
Indicator mounting thingies ... cleaned, derusted, primed, painted, well you know the drill by now (Binky : "Make the noise !")

Mounting on the rear chrome bracket. Note the cable run. By the way I use back to black on all the electrical cables.
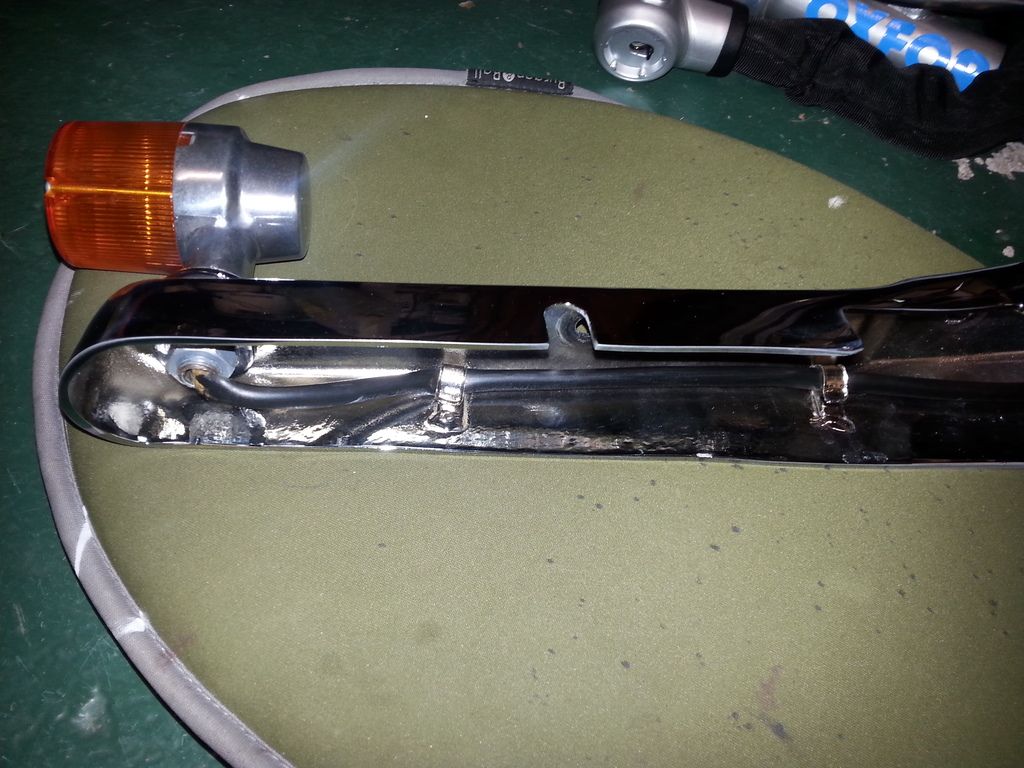
This is the cable run for the rear brake light.

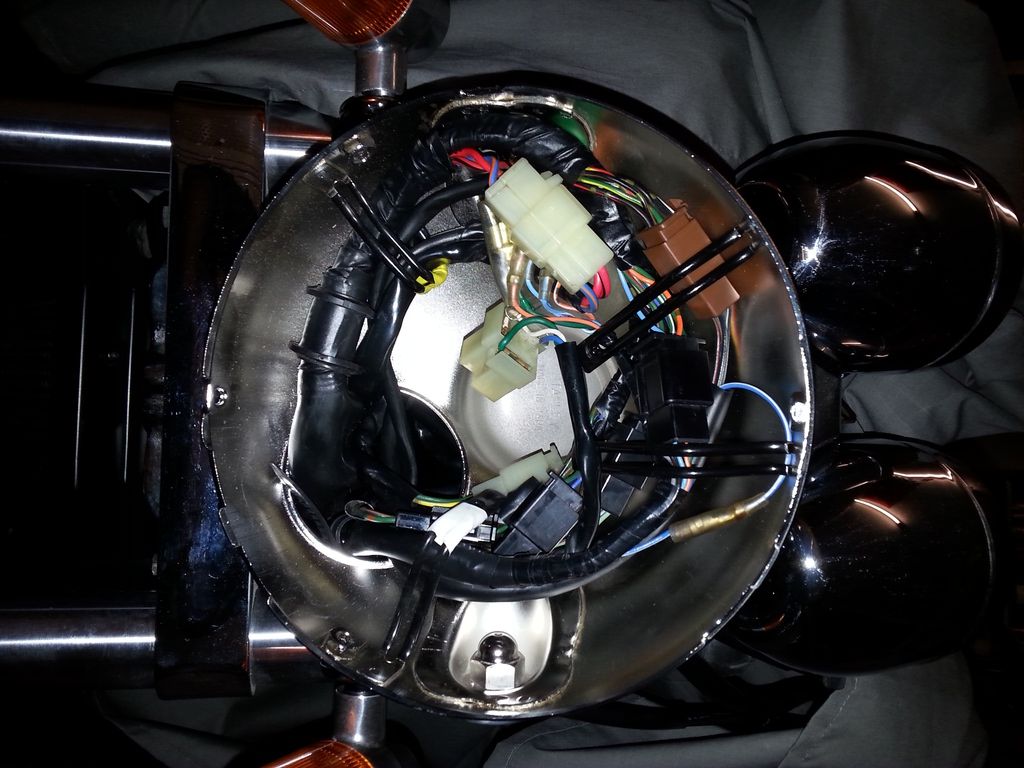
And this is where all the indicators and rear light join up. These connectors were all fuzzed up, so needed cleaning up. I've also used a bit of vaseline when reassembling. Top right you can see the hole for the seat lock, which is another job to do.
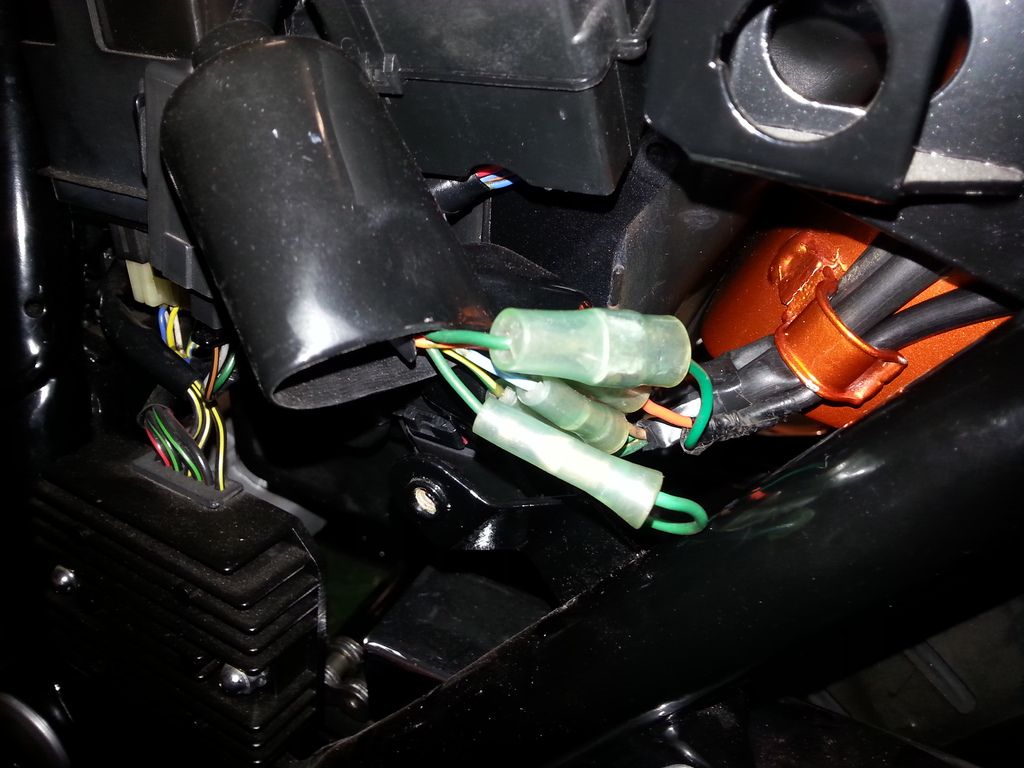
And this is the electronics area all complete.

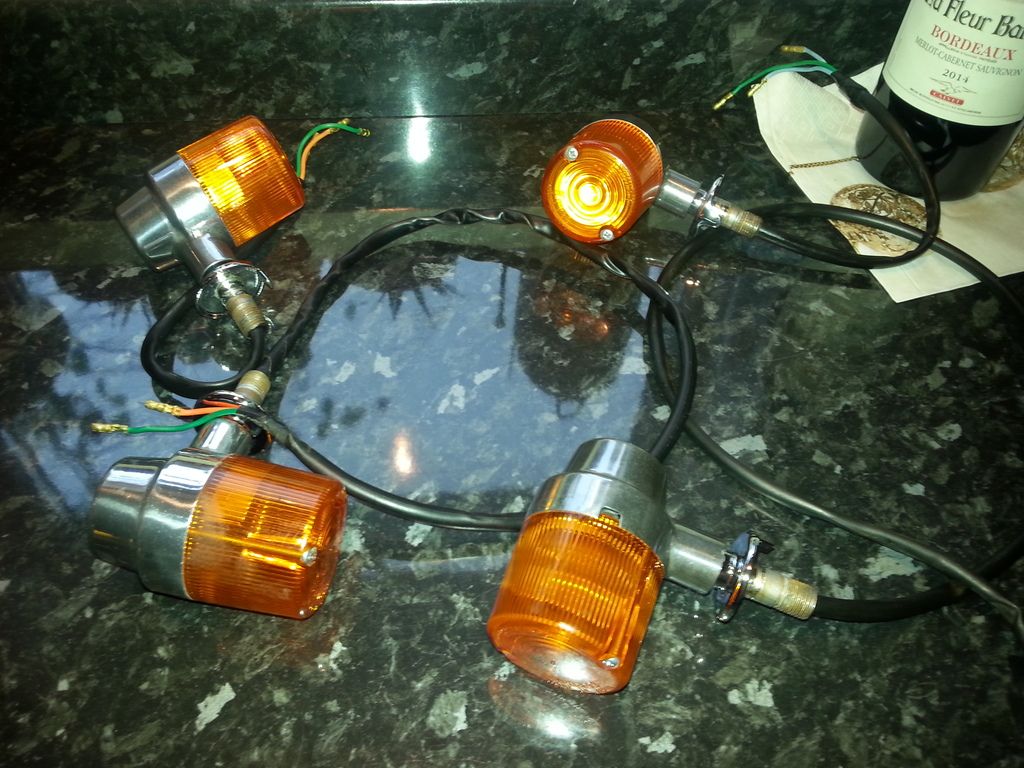
Cue lots of gratuitous shots of the indicators ... there's lots of shots because, well, frankly I've spent way too long on these, so you're going to suffer marvelling at them for a few seconds, okay ?? Humour me.

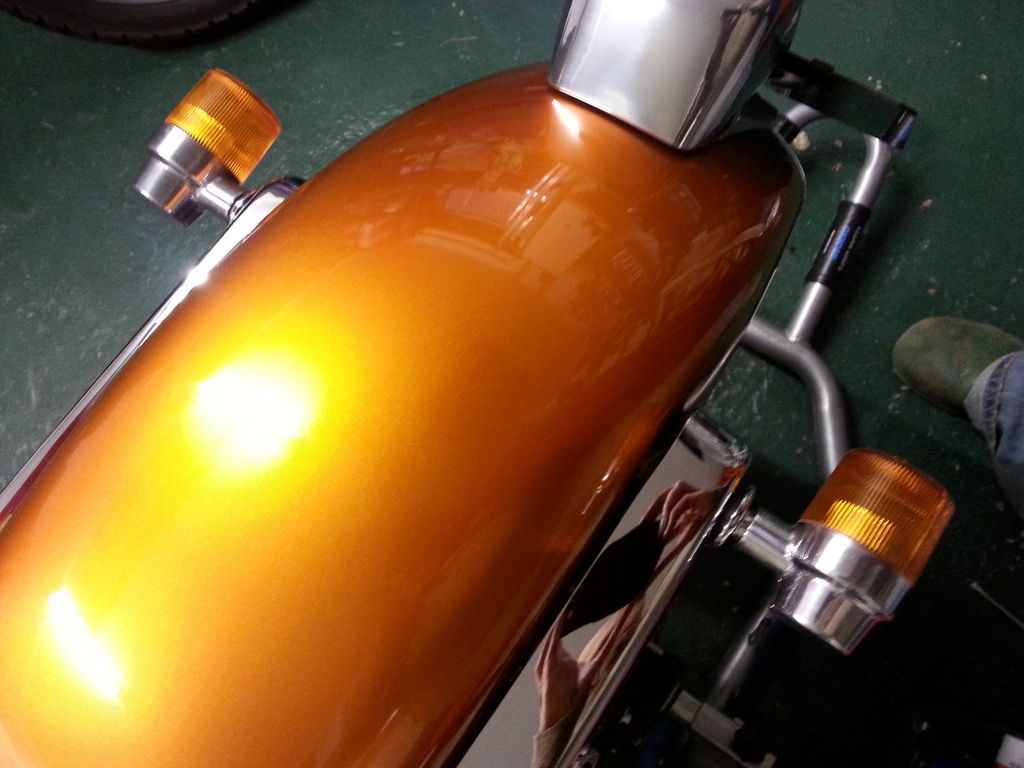
And starting to assemble the front ones too ...

Curiously the front indicators are twin filament bulbs, with both front (only) indicators showing lit at all times. I guess this is the equivalent of running lights, but I'm not sure what the MOT man is going to make about two permanently on amber lights at the front (anyone) ?
Number plate bracket de-rusted and before various and numerous coats of primer, primer/filler and black satin paint.


Derby Plating have done their usual superb job on the indicator mounting brackets.

Right, now, reassembling the indicators. What a b
d job. This took SOOO long, with SOOO many mistakes, problems and issues.Issue #1 : unlike all the other aluminium parts, the indicator housings wouldn't retain their polish ... after buffing, within a few days of sitting in a dry garage they'd be tarnishing and going dull again. After polishing a few times, in the end I gave up, cleaned them all up again, and gave them a couple of coats of lacquer. This gives them a slightly duller finish than pure polishing, but at least they shouldn't tarnish. I put this down to the indicators being made out of cheap s
t alloy.Issue #2 : Derby Plating have done a bit TOO good a job on the chrome ... it's nice and thick. Too thick to reassemble back in the housing ! I got round this by laboriously opening up the inside of the alloy housing with a wire bit in the drill and a round file, till eventually they fit.


Issue #3 : whilst reassembling one of the indicators and trying to get the chrome mount in (see Issue #2) I ended up bending the lip of one. And, being cheap s
t alloy (see Issue #1) when I tried to gently bend it back, it broke. For now I've araldited it, and with a fresh coat of lacquer it's not too noticeable. This will have to do until I can source a second hand one (rare as rocking horse doo-dah). It looks better in real life.
Issue #4 : they are right fiddly sods to assemble ! The number of times I had to do this, take it apart, try again, rinse and repeat until I eventually got them together. Tiny, fiddly components which just wouldn't want to go back together, but eventually success was achieved. However it did get to the point where my wife was avoiding me, and staying out of the kitchen (well, she said that was her excuse anyway ...)

All four done. I tell you, it's enough to drive a man to drink.

Moving back to the rear light, the number plate bracket was finished off ... but only on third time lucky !! The second sets of studs I welded on above ? Well, had to cut them off. And weld on a third, longer set ... I'd forgotten / didn't realise that the number plate bracket mounts over the top of the rear light housing, and as such has to travel through it. The new studs were too short. So, out with the angle grinder, on with the welder, and repaint it ALL OVER AGAIN !
Looks good though, reassembled. The rear light was easy to reassemble (a couple of parts I had to look up on the parts diagrams as I forget where they went).
The horrible legal number plate is purely temporary to get her through the MOT ... I'll be putting a black/silver pressed ally plate on.
The rear light and brake light both worked first time ! (both front and rear brake levers). The lens isn't actually pink in real life, blame the phone.


Indicator mounting thingies ... cleaned, derusted, primed, painted, well you know the drill by now (Binky : "Make the noise !")

Mounting on the rear chrome bracket. Note the cable run. By the way I use back to black on all the electrical cables.

This is the cable run for the rear brake light.

And this is where all the indicators and rear light join up. These connectors were all fuzzed up, so needed cleaning up. I've also used a bit of vaseline when reassembling. Top right you can see the hole for the seat lock, which is another job to do.

And this is the electronics area all complete.

Cue lots of gratuitous shots of the indicators ... there's lots of shots because, well, frankly I've spent way too long on these, so you're going to suffer marvelling at them for a few seconds, okay ?? Humour me.


And starting to assemble the front ones too ...

Curiously the front indicators are twin filament bulbs, with both front (only) indicators showing lit at all times. I guess this is the equivalent of running lights, but I'm not sure what the MOT man is going to make about two permanently on amber lights at the front (anyone) ?

Well THATS a st start to 2016.
Was buffing the tax disk holder ring when it caught on the buffer, jagged, flew up and hit me in the face.
Not bothered about the cut lip and tongue, but I've knocked a HONKING great chunk of my front tooth off. Any dentists in the house ... will they be able to repair this ???
Warning, bit of blood hence spoilered for any squeamish.


At least no-one can say I've not put blood, sweat and, er, teeth into this project ...
Happy new year.
t start to 2016.Was buffing the tax disk holder ring when it caught on the buffer, jagged, flew up and hit me in the face.
Not bothered about the cut lip and tongue, but I've knocked a HONKING great chunk of my front tooth off. Any dentists in the house ... will they be able to repair this ???
Warning, bit of blood hence spoilered for any squeamish.


At least no-one can say I've not put blood, sweat and, er, teeth into this project ...
Happy new year.
A
evil len said:
Well THATS a st start to 2016.
Was buffing the tax disk holder ring when it caught on the buffer, jagged, flew up and hit me in the face.
Not bothered about the cut lip and tongue, but I've knocked a HONKING great chunk of my front tooth off. Any dentists in the house ... will they be able to repair this ???
Warning, bit of blood hence spoilered for any squeamish.
At least no-one can say I've not put blood, sweat and, er, teeth into this project ...
Happy new year.
Wow, sorry to hear about this, of course the irony is that you don't need to display a tax disc any more!t start to 2016.Was buffing the tax disk holder ring when it caught on the buffer, jagged, flew up and hit me in the face.
Not bothered about the cut lip and tongue, but I've knocked a HONKING great chunk of my front tooth off. Any dentists in the house ... will they be able to repair this ???
Warning, bit of blood hence spoilered for any squeamish.
At least no-one can say I've not put blood, sweat and, er, teeth into this project ...
Happy new year.
Anyway, what (little, foreshortened) did I get up to today ?
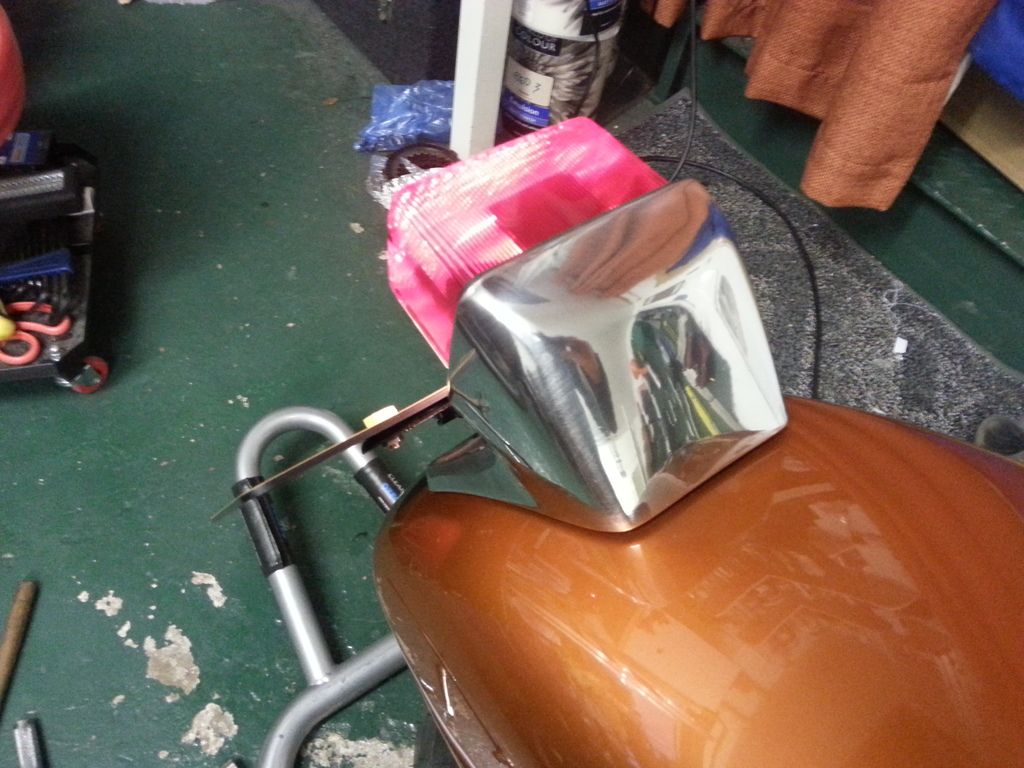
Tidied up the wiring in the headlight bowl, ready for the headlight to go on.
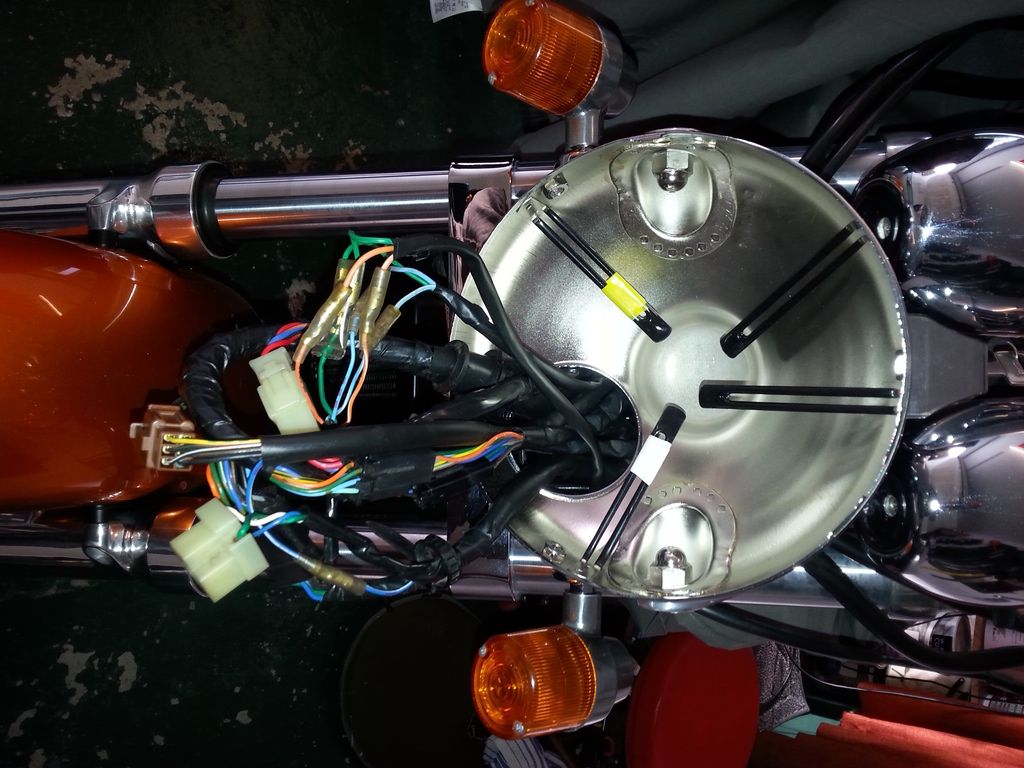
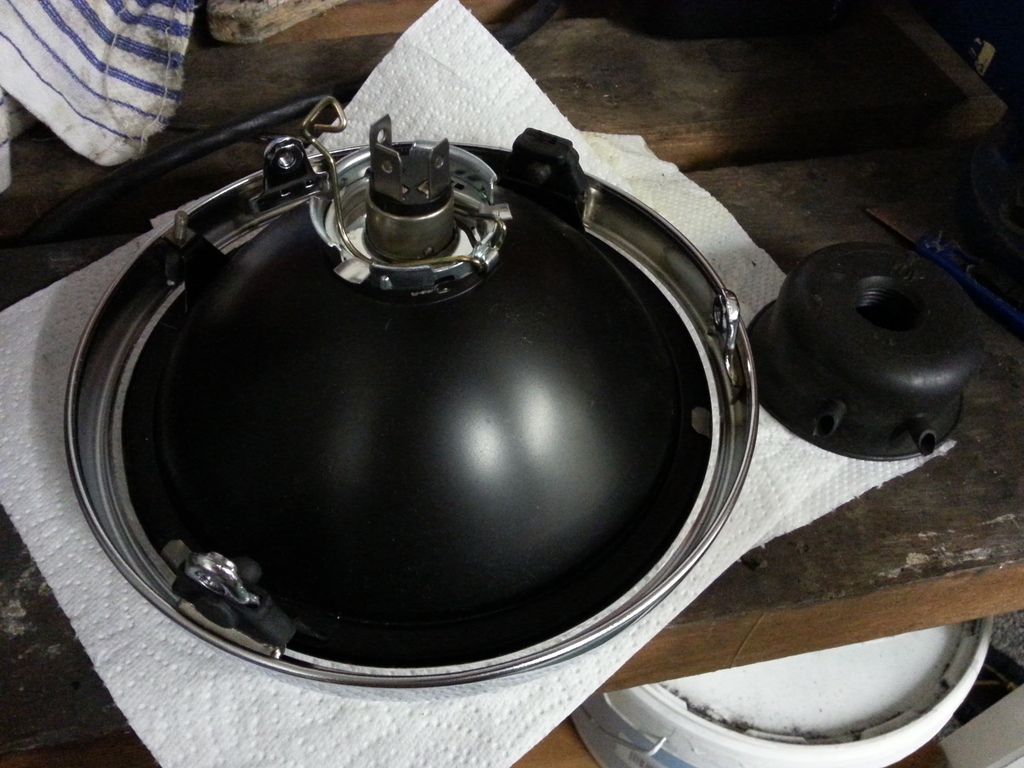
Repainted, cleaned, refurbed the headlight and refitted the adjustment mechanisms and the new chrome outer ring. Just waiting for a new bulb from Wemoto ... one filament is gone, though that wasn't obvious till you plugged it in. I accidentally deleted the "before" shots of the back of the headlight showing the rust around the mounting brackets - I'm not having a good day.
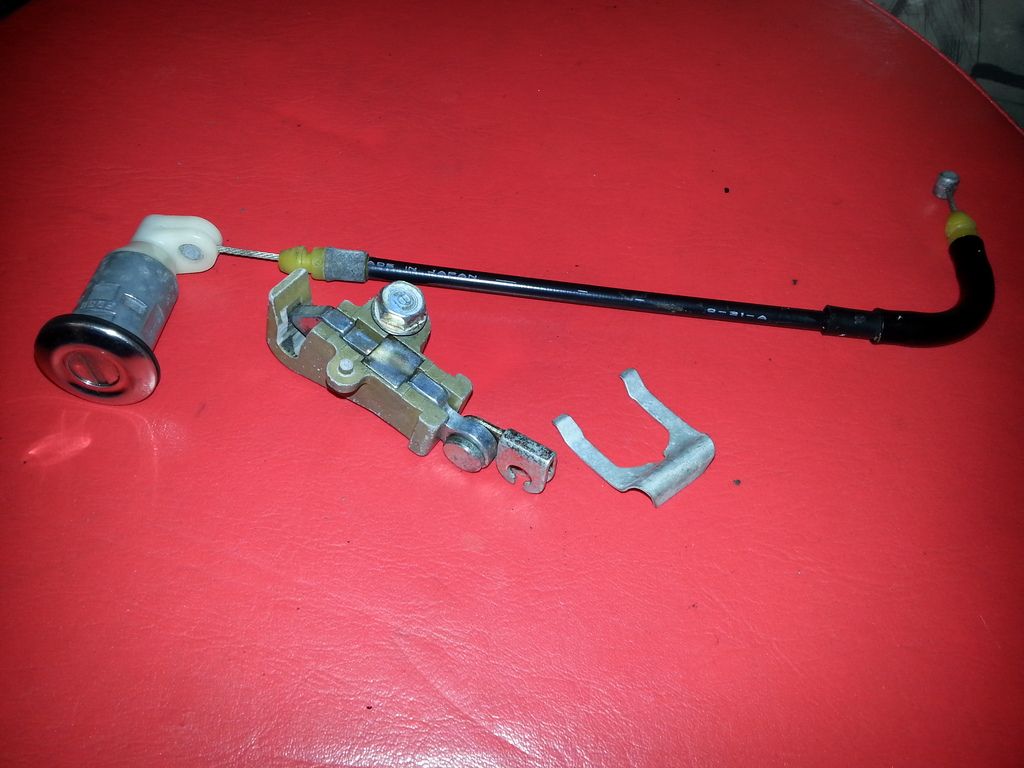
Cleaned up and derusted the seat lock and mechanism.

Fitted the seat lock at this end ...
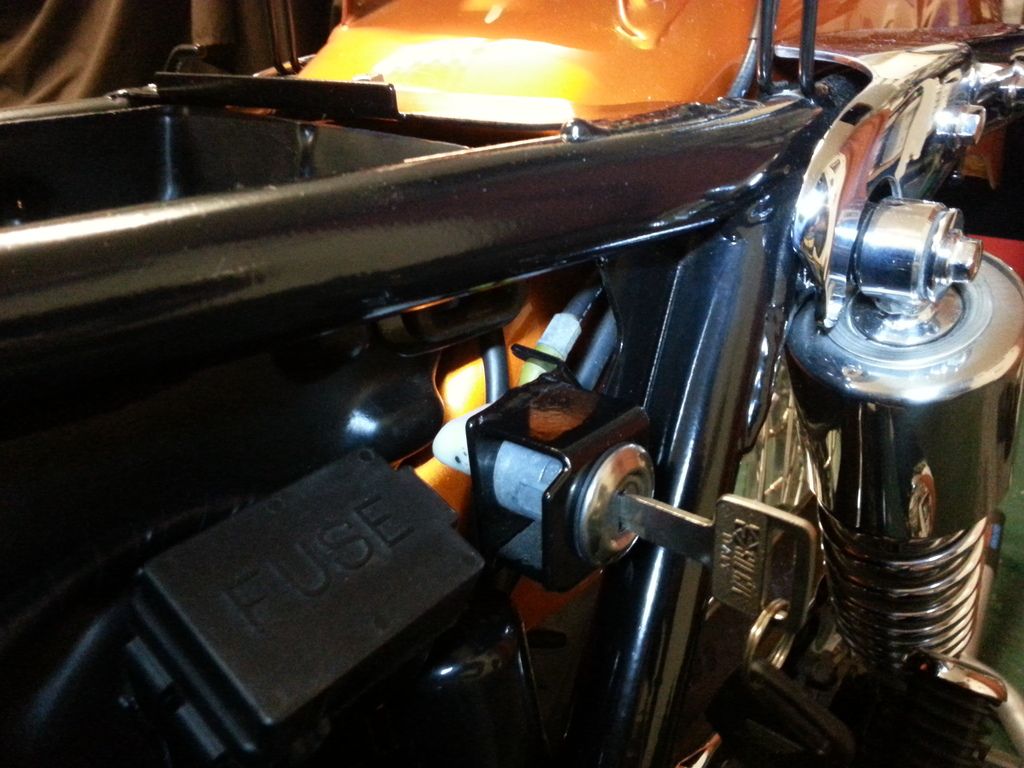
... and this end.
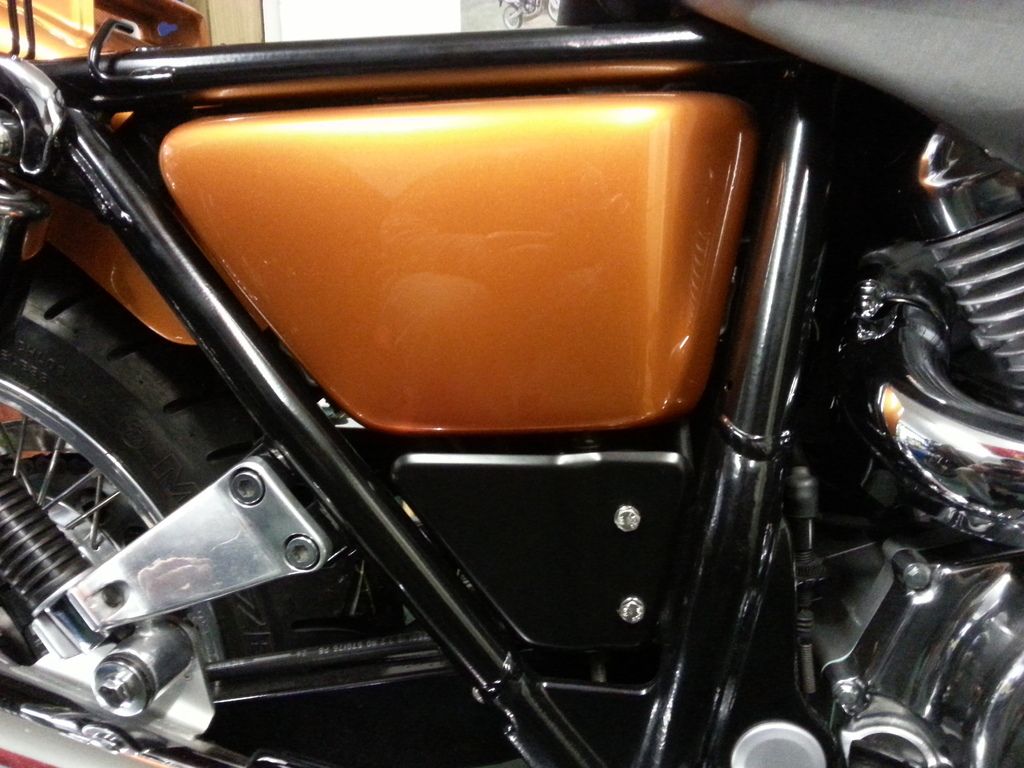
Meaning I can now fit the other side panel. This one has a small screw on it ... presumably to stop people fiddling with the electrics.
Painting the helmet lock.
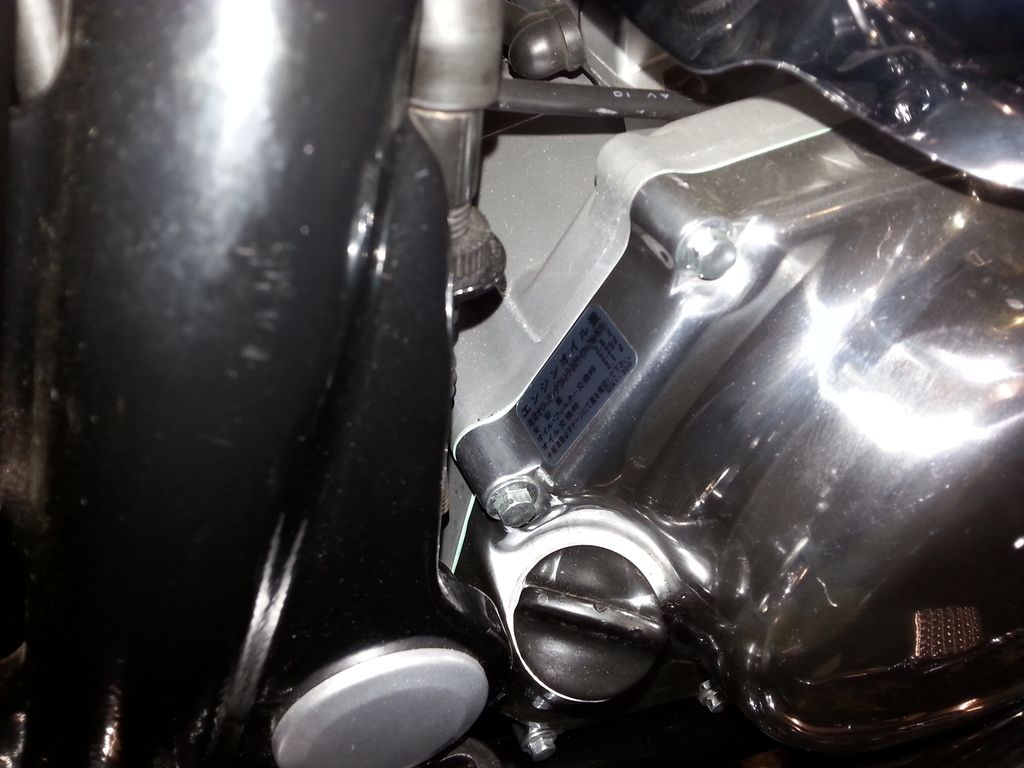
Applied an engine sticker.
And swing arm stickers.

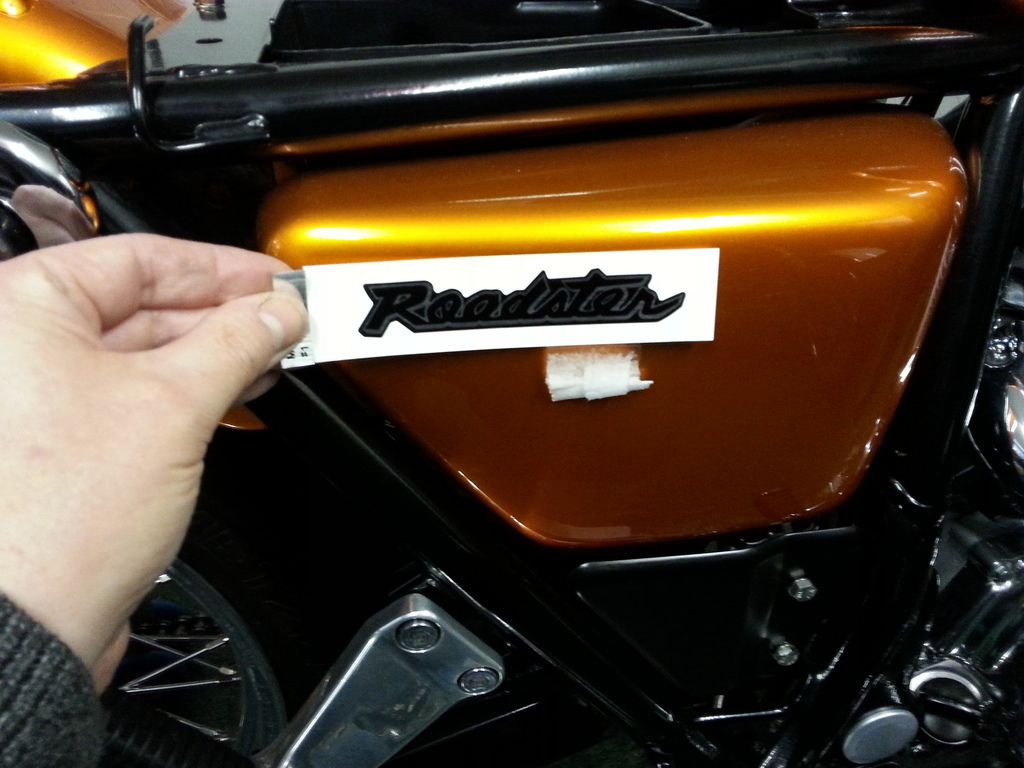
In two minds whether to apply the side panel "Roadster" stickers. So for now I won't apply them.
And ... that's it, I'm officially stuck for something to do on the bike for the first time ! Just waiting on the headlight bulb, mirrors and the seat to come back from the re-upholsterer.
Still to come :
- first (official !) run and post rebuild de-snagging
- MOT
- a summary of the costs incurred on the project
- a picture of all the parts I didn't use / replaced

... and this end.

Meaning I can now fit the other side panel. This one has a small screw on it ... presumably to stop people fiddling with the electrics.

Painting the helmet lock.

Applied an engine sticker.

And swing arm stickers.

In two minds whether to apply the side panel "Roadster" stickers. So for now I won't apply them.

And ... that's it, I'm officially stuck for something to do on the bike for the first time ! Just waiting on the headlight bulb, mirrors and the seat to come back from the re-upholsterer.
Still to come :
- first (official !) run and post rebuild de-snagging
- MOT
- a summary of the costs incurred on the project
- a picture of all the parts I didn't use / replaced
Gassing Station | Biker Banter | Top of Page | What's New | My Stuff