More chassis refurbishment porn at Willow sports cars
Discussion


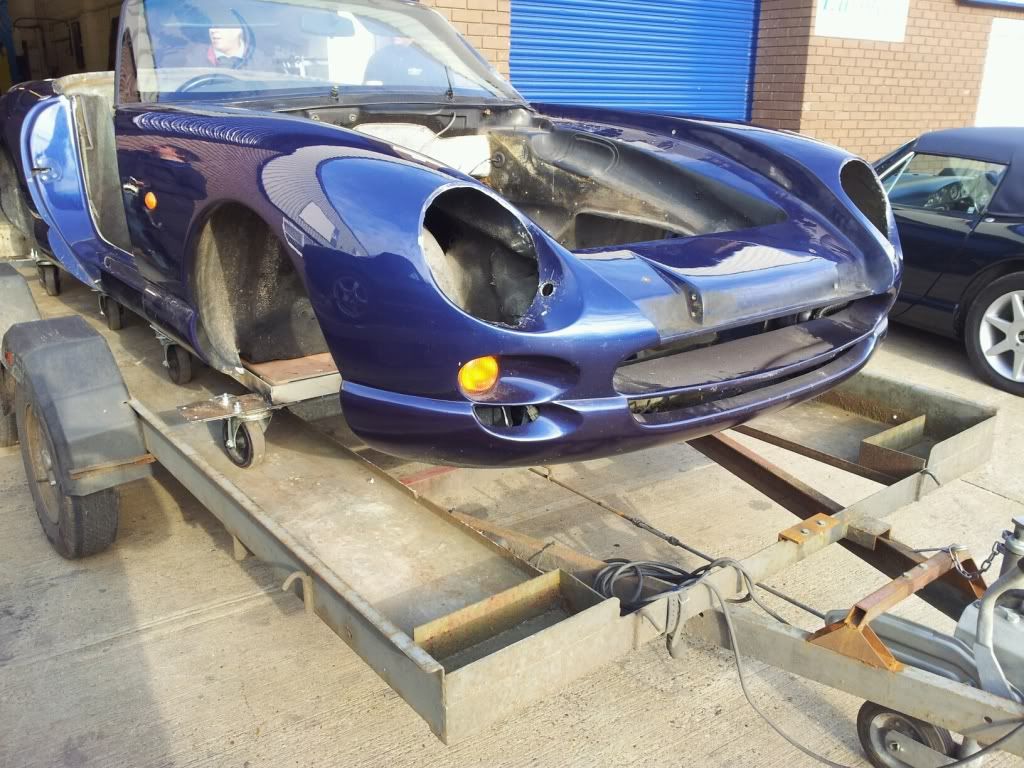
Well its been afew weeks since I have managed to update the post. getting the car to the sprayers in one piece was a success. I am using a local firm who specialise in aircraft spraying, so standards have to be of a good quality, and I know the guys so that helps too.
the body is off to the painters 15 miles down the A46
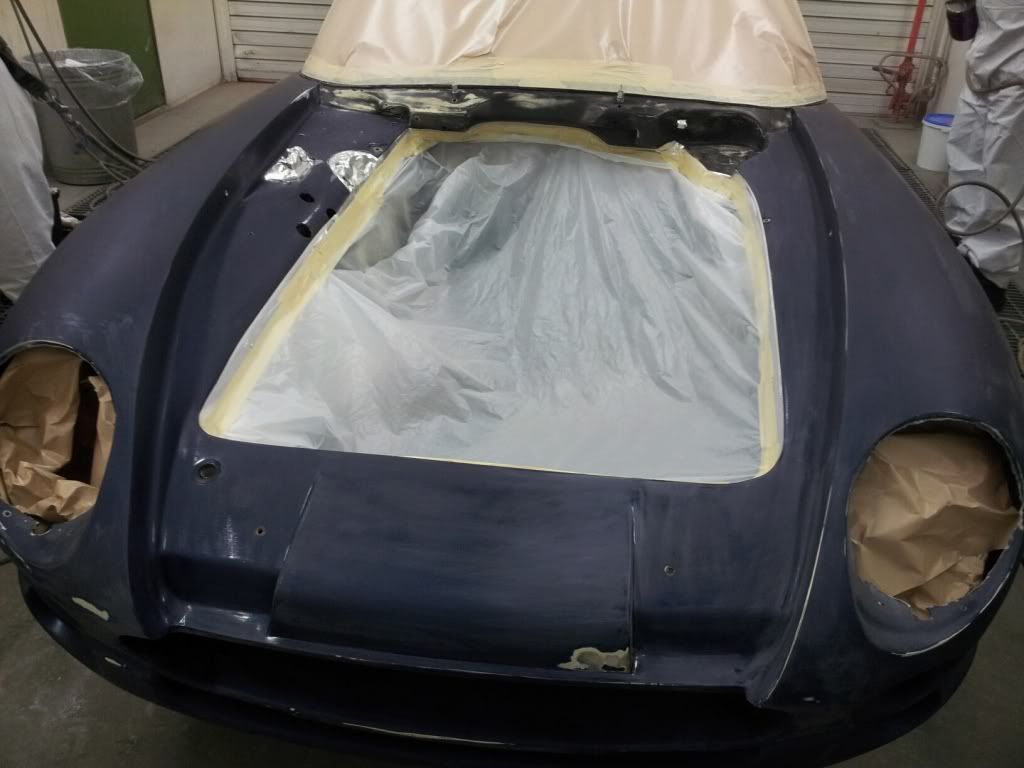
The car was initially masked off.
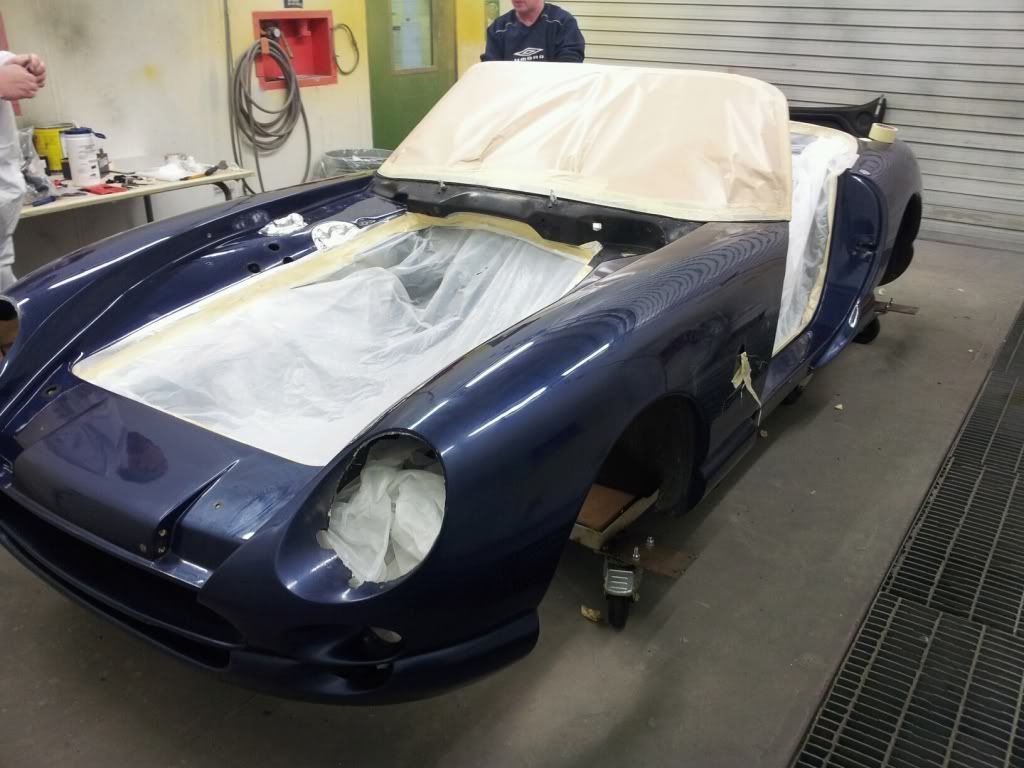
The car was prepared with lots of elbow grease and a light touch along the lovely curves of the car. because of the curves our hands to grip the emery pads was decided as the tradition blocks would impart flats on the car. We were surprised on how good the body was for its age which made to prep work alot easier. Many hours later and cups of tea's
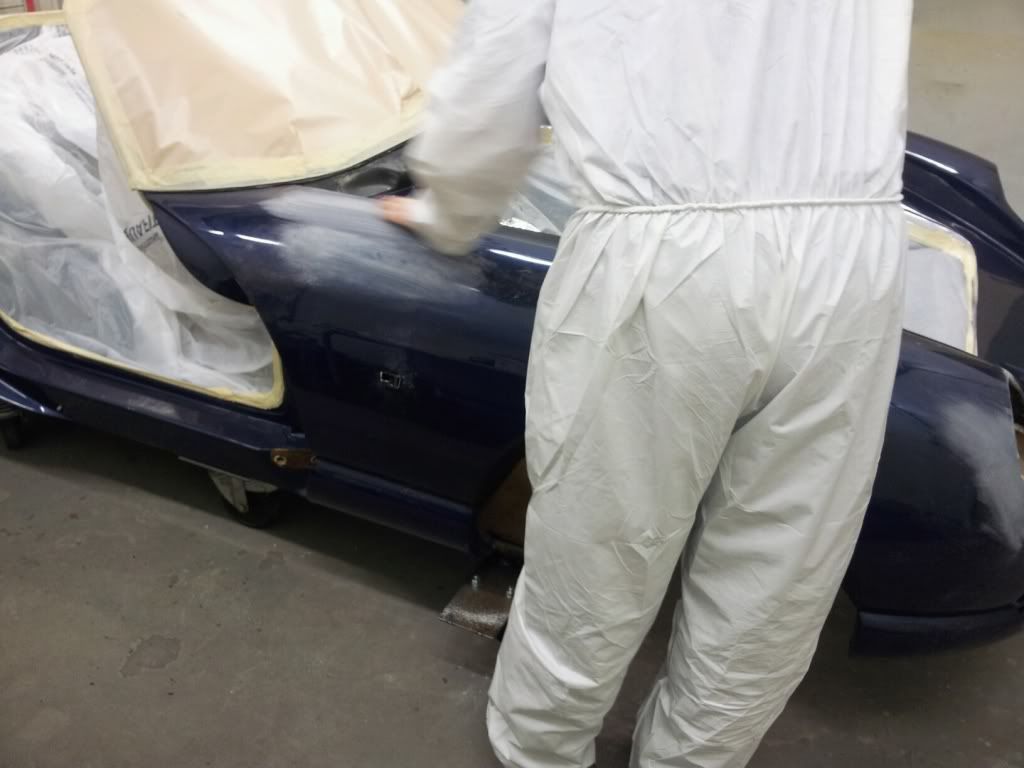
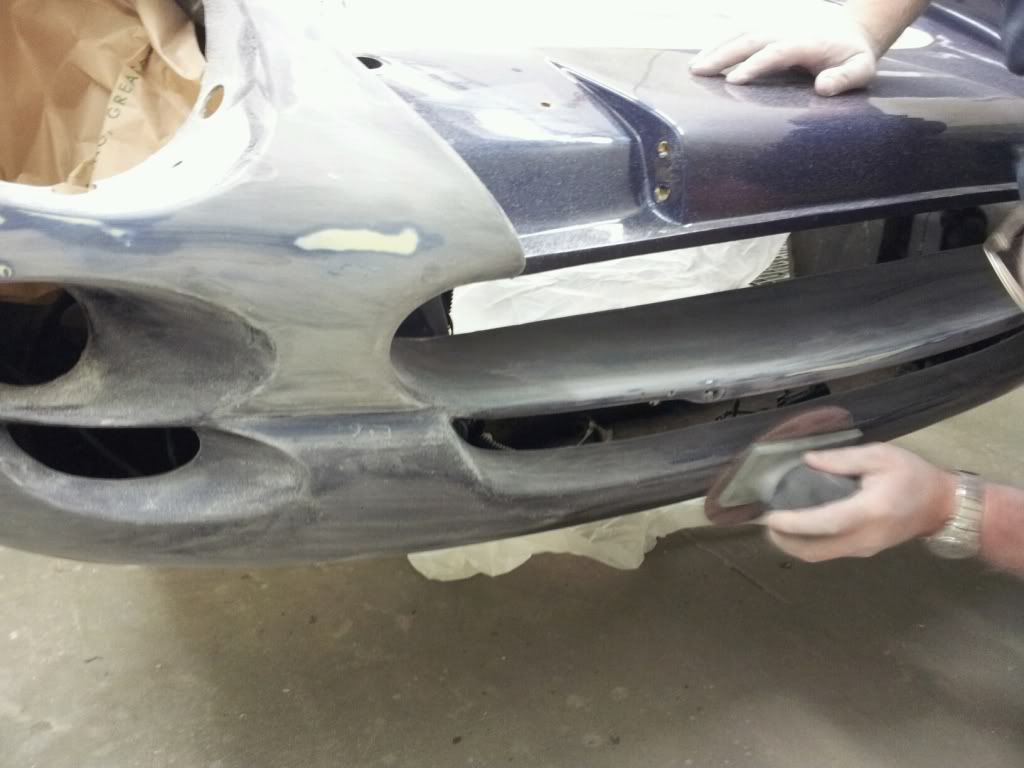
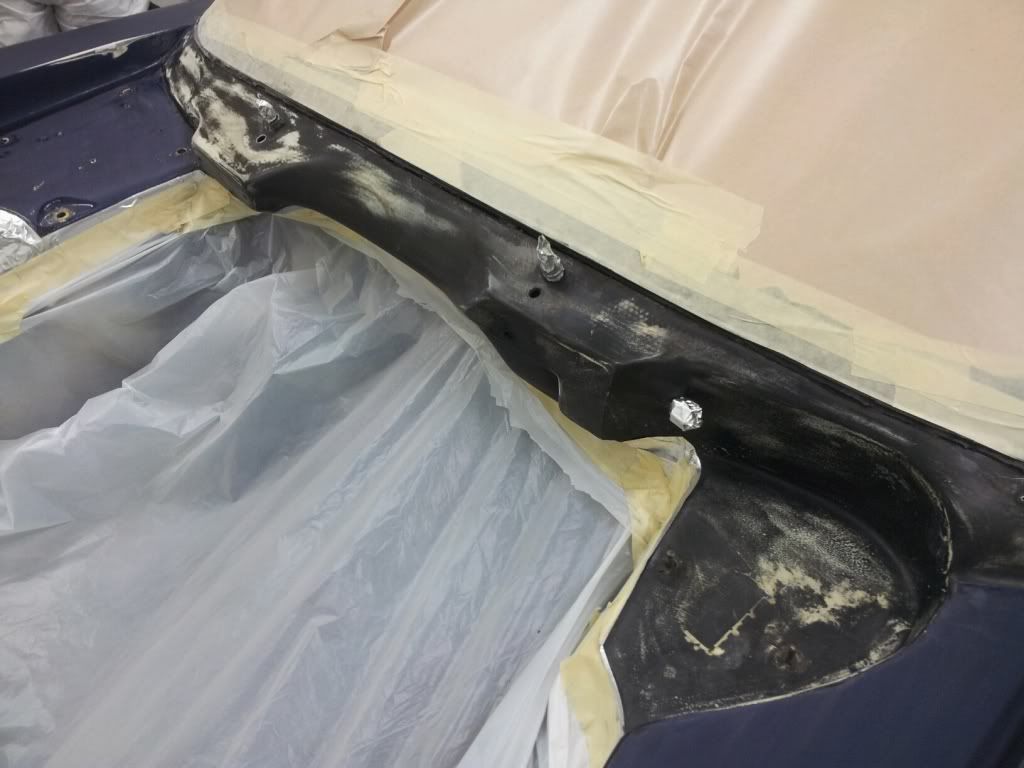
The front end of the car and the along the front sill, were full of stone chips and cracks so these were filled in and rubbed down. sorry no piccs of this too busy rubbing the car that is.
A block pad had to be used on the front as the chips were pretty bad in this area

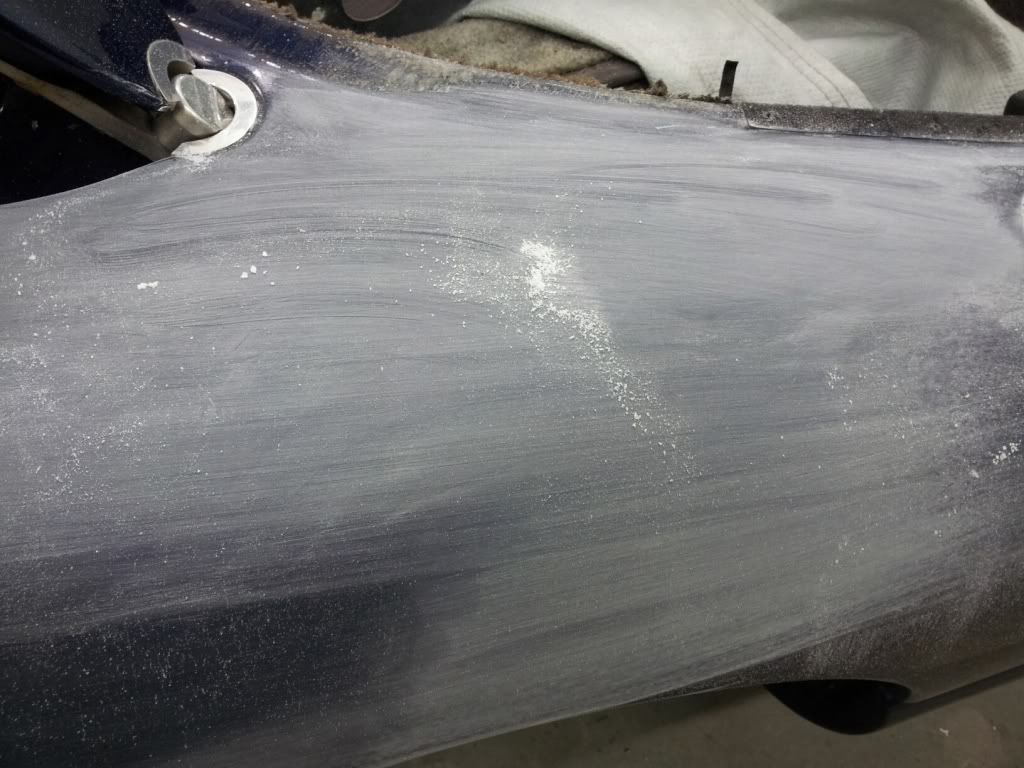
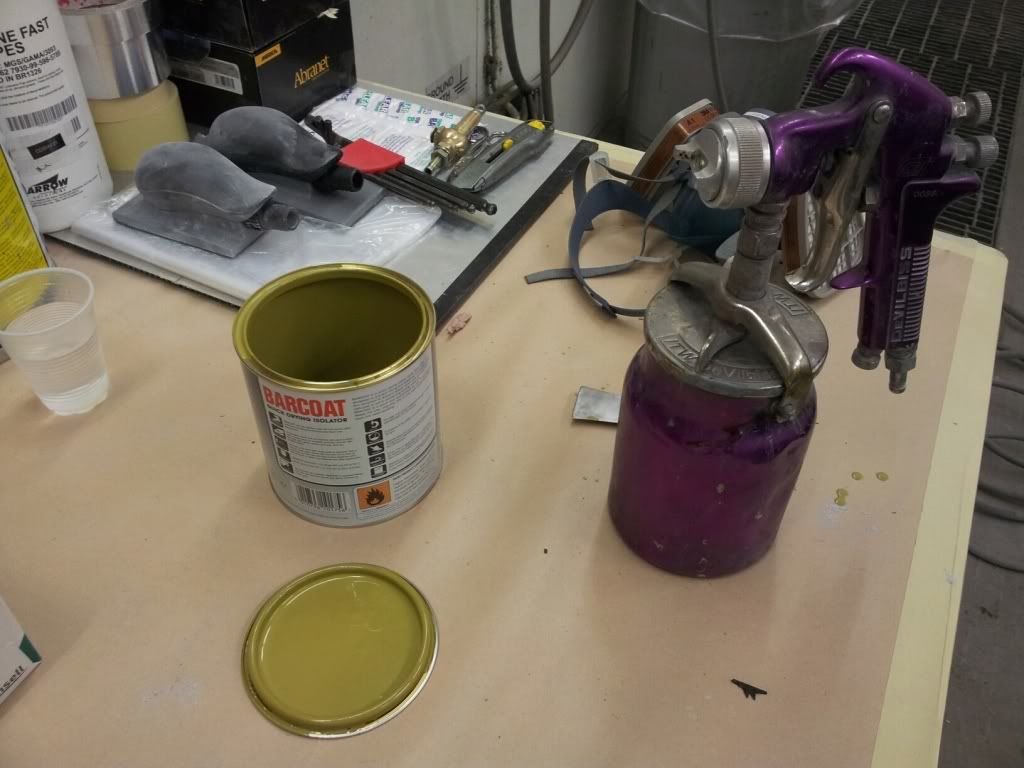
The body was then air hosed down and the vacuum switched on to remove dust, we left and had a brew and a biscuit or two.
One our return we we set to work wiping the car down with lotoxane wipes and some lint free cloths with a chemical on, that removes dust and fibres
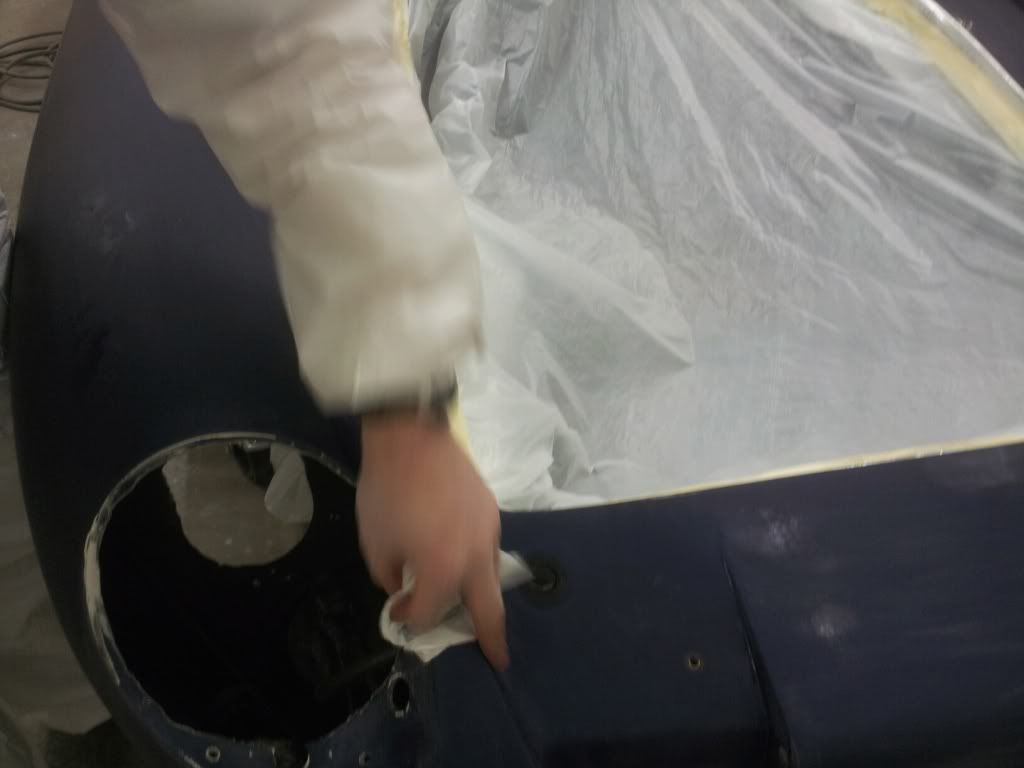
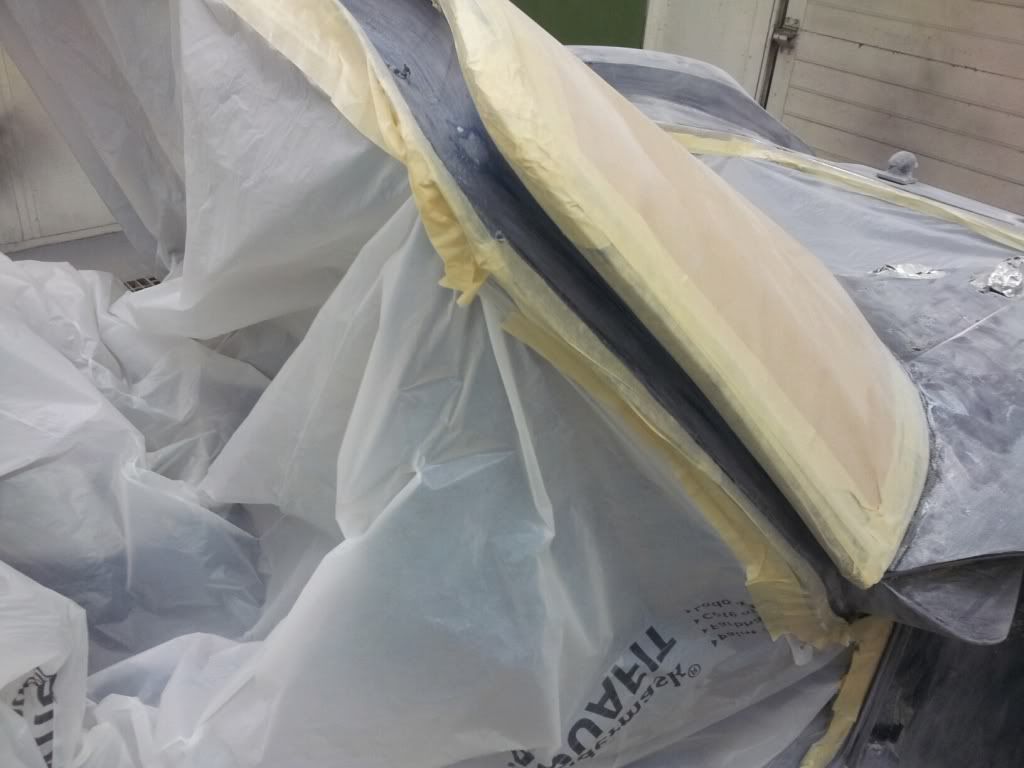
The lotoxane evaporated within afew minutes of application. The spray bay was brought up to temperature for the spraying.The car was now ready for the bar coat which provides a barrier between the old paint and the new paint, and prevents crazing forming.
Steve and mike worked along the car going at the same pace so they applied the coats at the same time around the car ensuring even coverage & drying time.
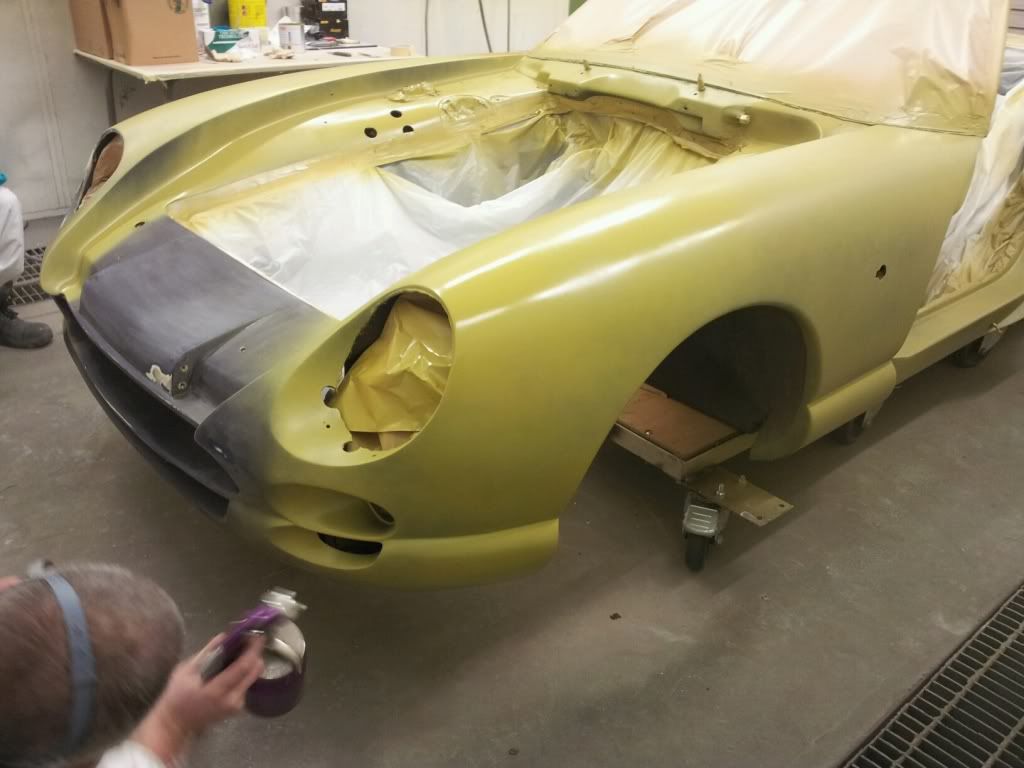
They even let me have a go. Bad move.
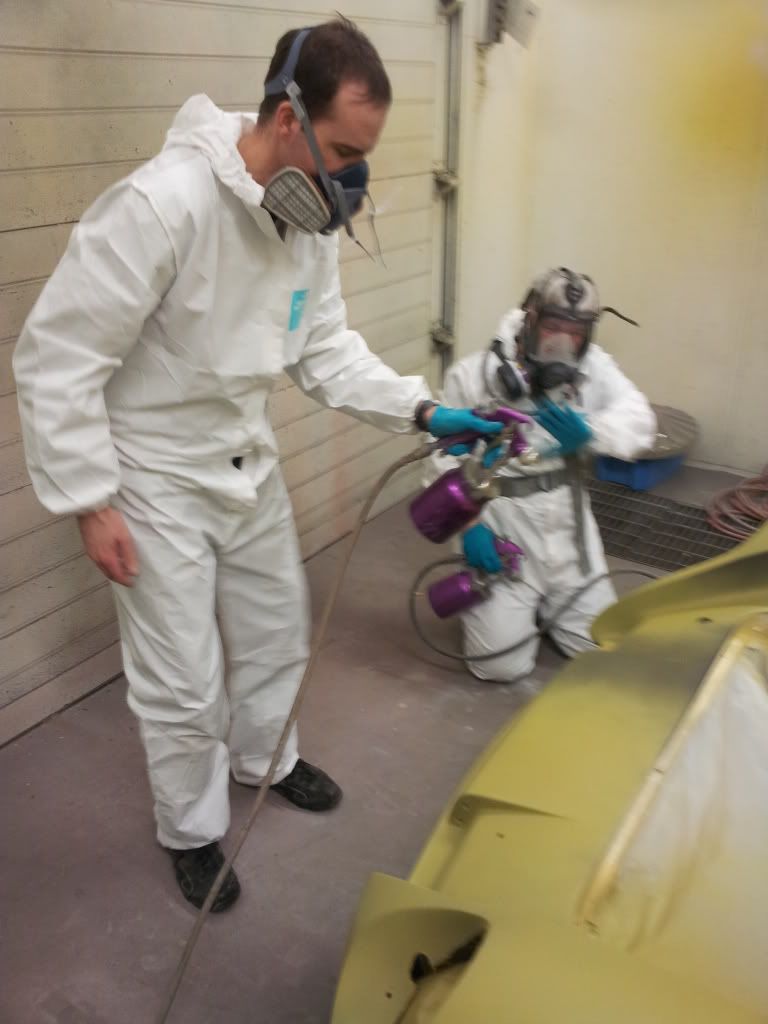
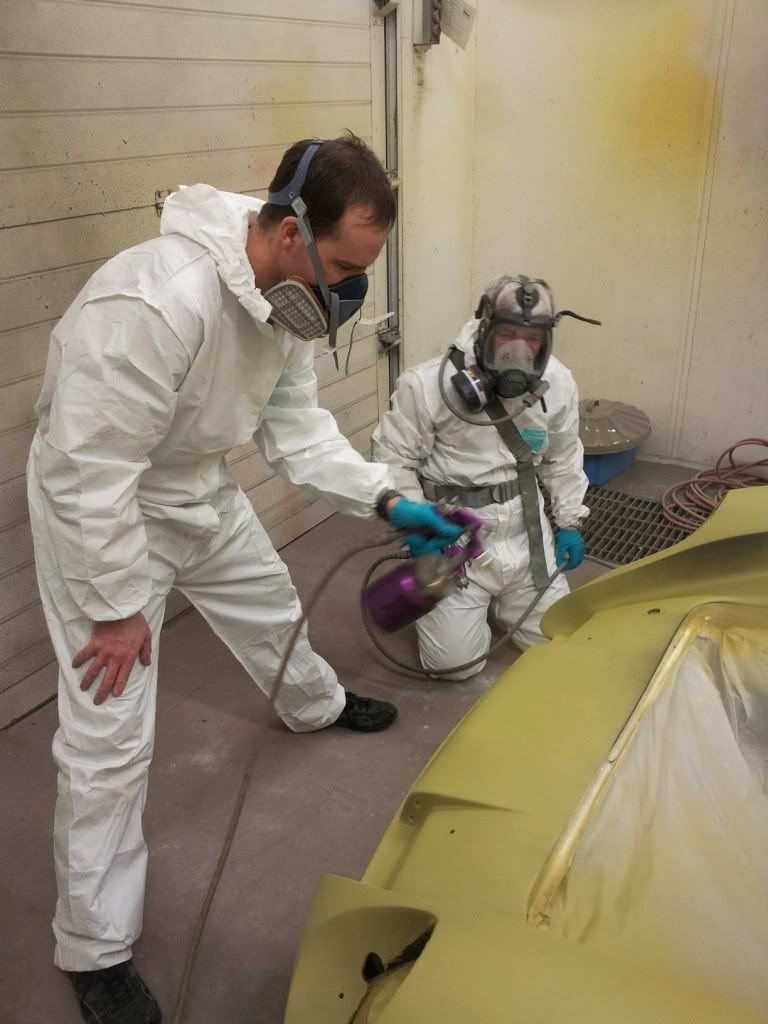
I am doing the splits
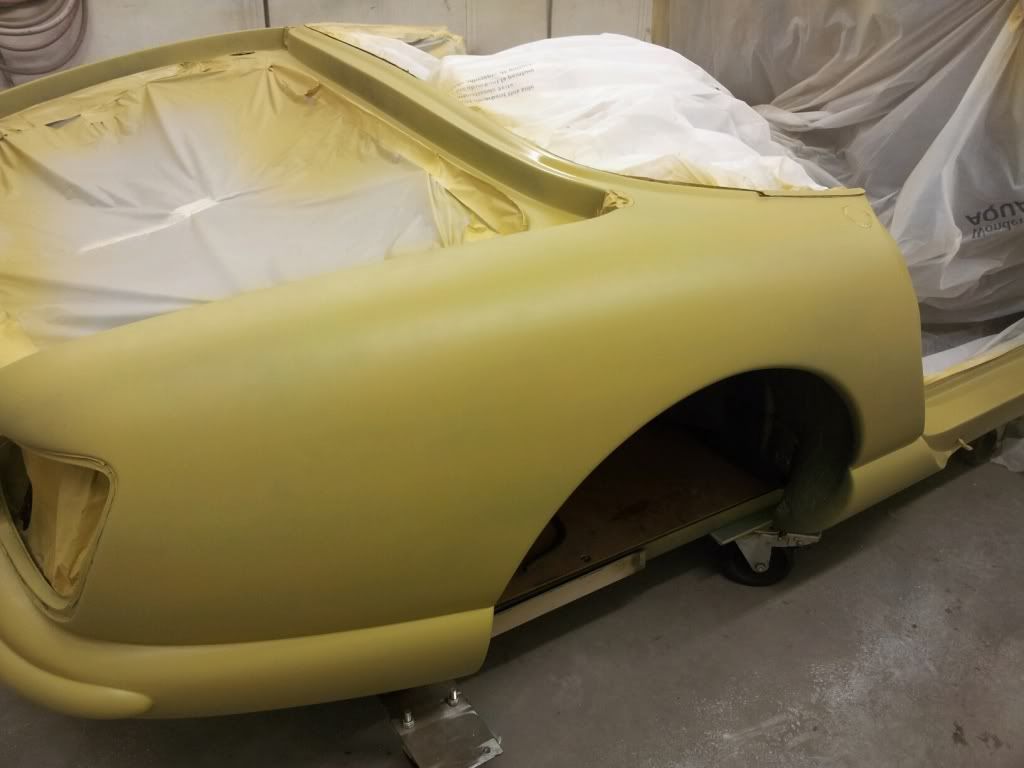
At this we left for another brew and biscuit. We had a final inspection of the car and left for the fotty. Half 7 start in the morning so an early nite for me.
On the way home I popped into willow sports cars and found this, seeing its a chassis refurb post thought I would put this up, well chuffed is an understatment.
the body is off to the painters 15 miles down the A46
The car was initially masked off.
The car was prepared with lots of elbow grease and a light touch along the lovely curves of the car. because of the curves our hands to grip the emery pads was decided as the tradition blocks would impart flats on the car. We were surprised on how good the body was for its age which made to prep work alot easier. Many hours later and cups of tea's
The front end of the car and the along the front sill, were full of stone chips and cracks so these were filled in and rubbed down. sorry no piccs of this too busy rubbing
the car that is.A block pad had to be used on the front as the chips were pretty bad in this area
The body was then air hosed down and the vacuum switched on to remove dust, we left and had a brew and a biscuit or two.
One our return we we set to work wiping the car down with lotoxane wipes and some lint free cloths with a chemical on, that removes dust and fibres
The lotoxane evaporated within afew minutes of application. The spray bay was brought up to temperature for the spraying.The car was now ready for the bar coat which provides a barrier between the old paint and the new paint, and prevents crazing forming.
Steve and mike worked along the car going at the same pace so they applied the coats at the same time around the car ensuring even coverage & drying time.
They even let me have a go. Bad move.
I am doing the splits
At this we left for another brew and biscuit. We had a final inspection of the car and left for the fotty. Half 7 start in the morning so an early nite for me.
On the way home I popped into willow sports cars and found this, seeing its a chassis refurb post thought I would put this up, well chuffed is an understatment.
Edited by portzi on Saturday 11th February 21:07
Edited by portzi on Saturday 11th February 21:21
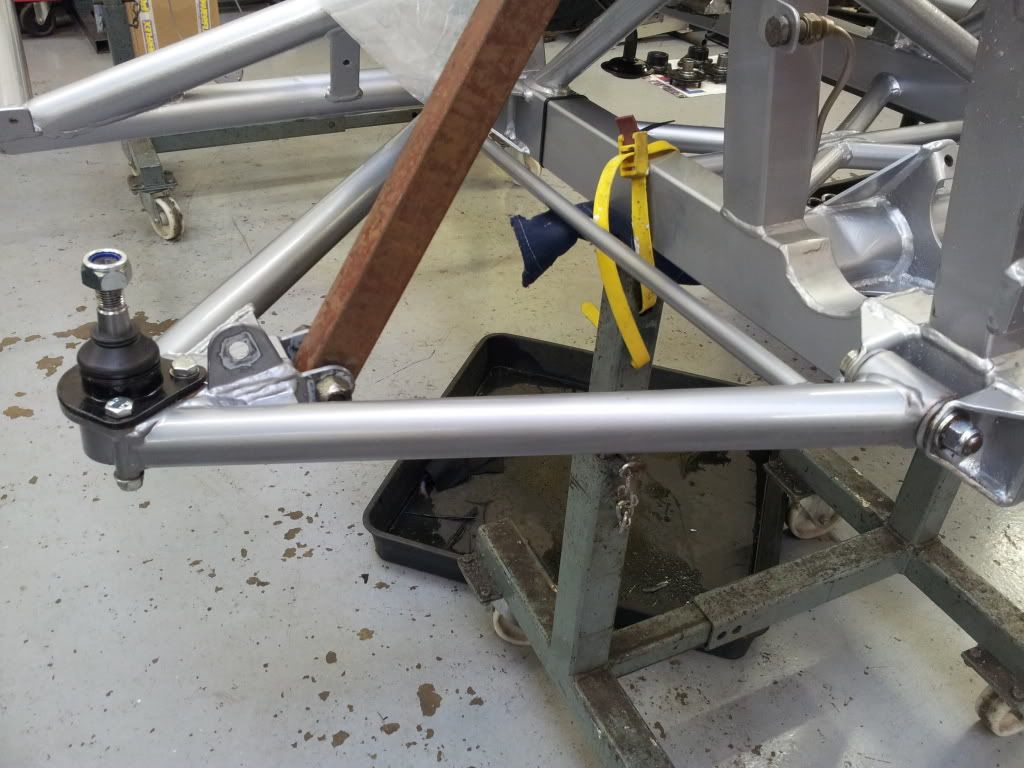
Well an update. I have been waiting for the paint to cure as it were, the car is in my garage at work. I have just machined up some new ball joint mounts and did nt take any pics yet but will. I am in the process of turning new hubs as my old ones were abit dodgy. the stub holes in the hubs were so close to the edge of the metal over time they could crack I will post some pics of one of the new hubs tomorrow. Replacing the current wishbones with tubular ones.
Obvious avantages are no nooks and crannies to gather dirt and alot strong, which could be a bad thing if the unthinkable happens as there will be no give in the wishbone ?
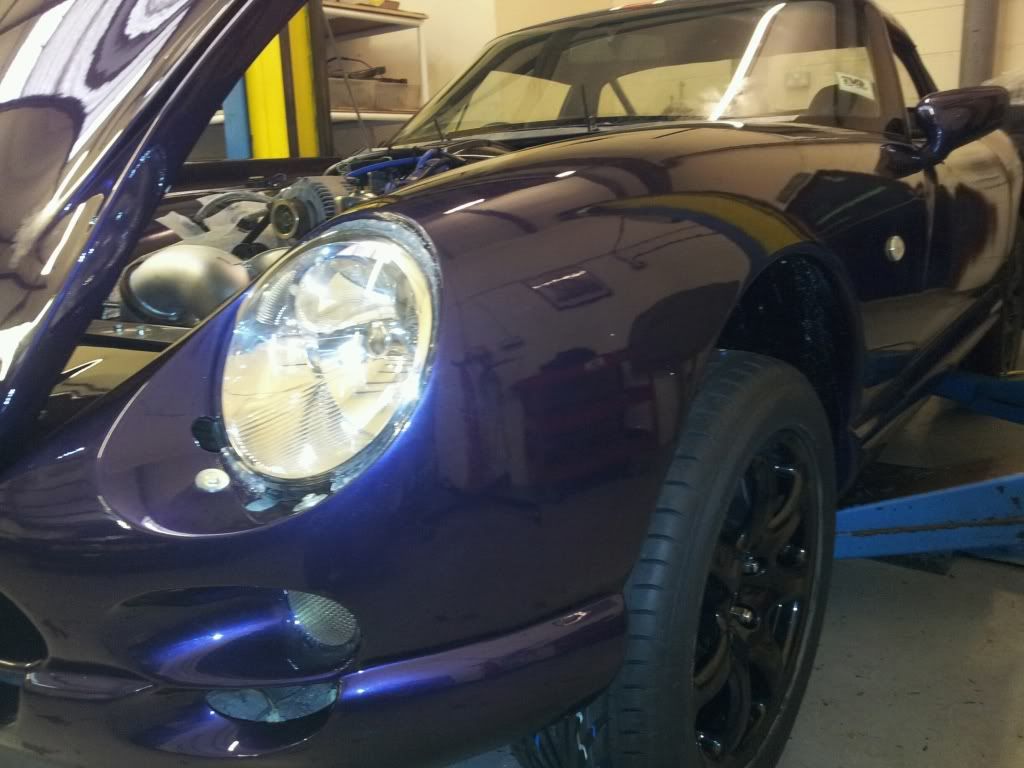
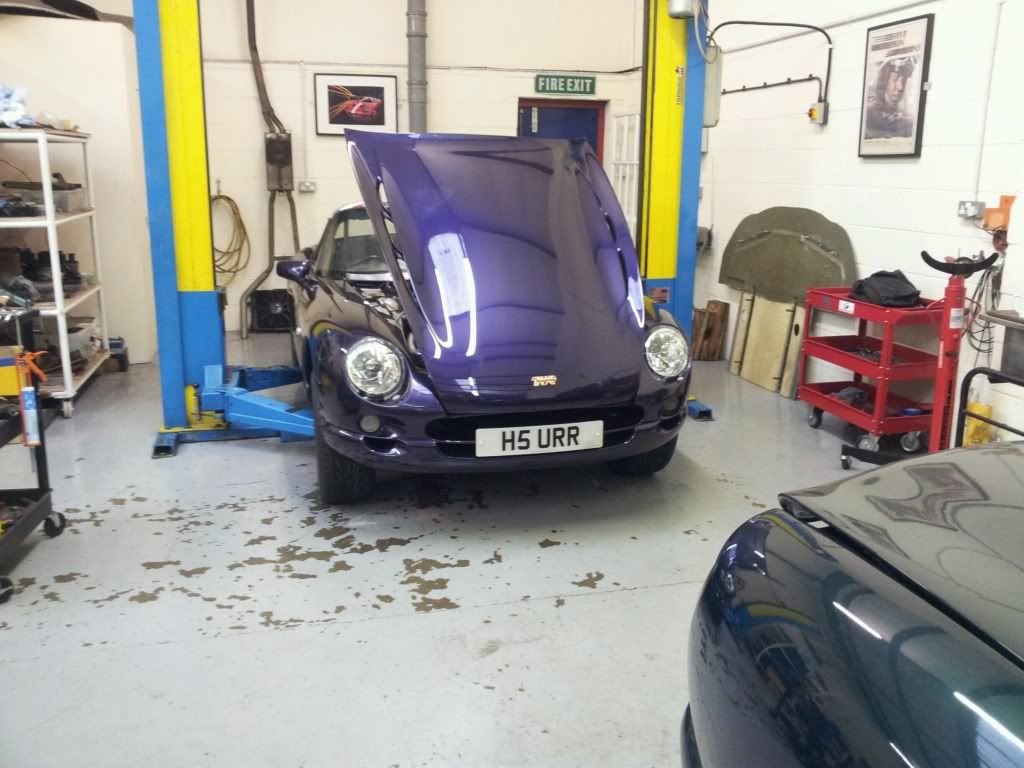
I would love to post the finished spray job but it would not do it justice. Like many cars on here who are having full refurbs I want it to be finished for chatsworth, but I may fall short of that date. I am having the front brakes upgraded and looking at Tuscan AP setup and again a caliper mount will have to be machined up , so the jobs are pilling up so one step at a time, and I will take some piccys as they are the best bits
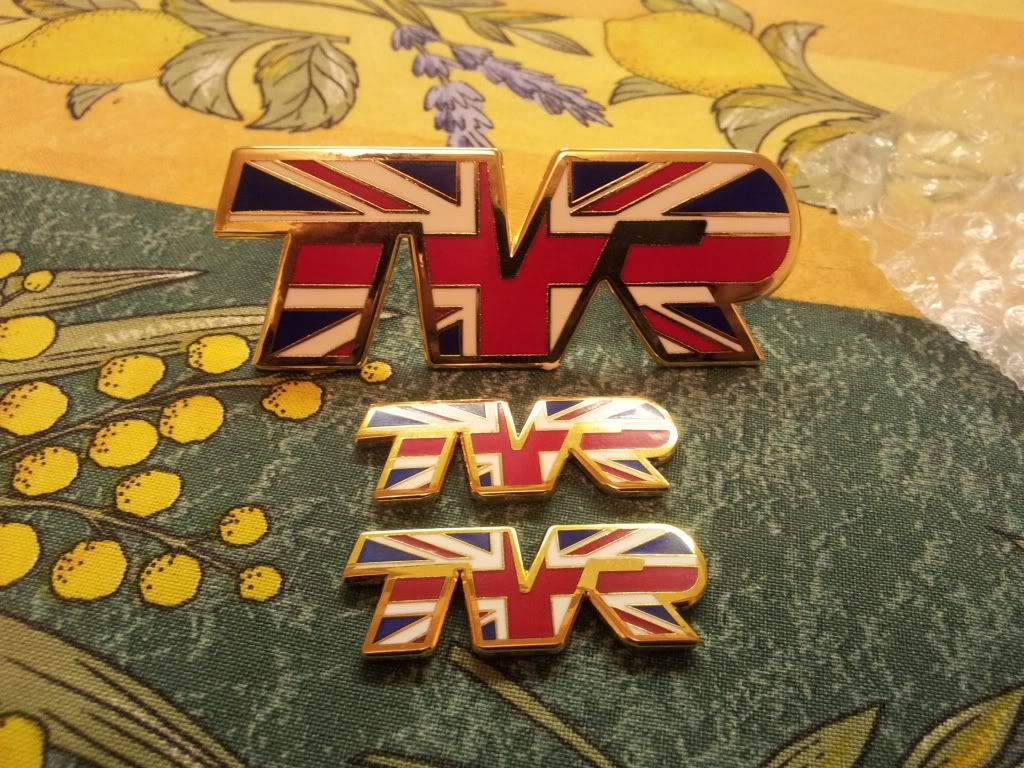
Lastly a thank you to Tim AKA Timja for suppling the badges
Obvious avantages are no nooks and crannies to gather dirt and alot strong, which could be a bad thing if the unthinkable happens as there will be no give in the wishbone ?
I would love to post the finished spray job but it would not do it justice. Like many cars on here who are having full refurbs I want it to be finished for chatsworth, but I may fall short of that date. I am having the front brakes upgraded and looking at Tuscan AP setup and again a caliper mount will have to be machined up , so the jobs are pilling up so one step at a time, and I will take some piccys as they are the best bits
Lastly a thank you to Tim AKA Timja for suppling the badges
Edited by portzi on Sunday 11th March 22:25
Edited by portzi on Sunday 11th March 22:35

Hi Daz,
I am replacing my original 5 stud, as the stud holes were too close to the outside diameter of the hub and had small hair line cracks in some of them. A potential accident waiting to happen, I think if anyone else has had the conversion they should check theirs. I will get some piccys up of my old ones when back at Willow.
Mark
slideways said:
Where did the old hubs come from? I have a set waiting to go on i will check mine when i get home.
they were on when I bought the car, and unless you completely remove the hub from the housing its hard to spot in those dark wheel arches. If I wasnt getting my bearings done I would have not seen either. The outside diameter of my new hubs will be 150mm 10 mm bigger than my old ones. They also had abloody great chamfer on the outside which takes alot of the strength away.SILICONEKID340HP said:
Will it be a show car or are you going to drive it ..i would love to have all this done to mine but i would not feel so relaxed ..thinking a stone might damage the car etc..
I see alot of classic cars go this way and all they do is sit prity in a field ..
Im not Jealous honest
Its gettin driven Daz. I have a budget and at the mo I am sticking to it. Its all about who you know and helping people out and they do the same for you. Thats why I love the TVR forums, people are so friendly and helpful.I see alot of classic cars go this way and all they do is sit prity in a field ..
Im not Jealous honest
Mark
"I went through the same dilemma,but decided that with the state of the roads the tubular ones were more suited to the roads today, the first time I dropped a wheel into a pot hole I was glad I fitted them,
I had to fit stops on the steering rack.
(a few plastic washers on each side of the rack ) due to the slight difference in design, the inner side of the wheel catches on full lock".
thats very intersting to find out about the wheel catching on full lock, and the need for washers, where did you purchase you new wishbones from?
Mark
PRTVR said:
Got them from Readman Racing in Blackpool,also the bottom ball joint has a slightly different fit, not much, but you just need a longer bolt and nut for one of the points.
http://www.readmanracing.co.uk/parts4sale.php
Thanks for the info, something to watch when assembling. did you fit the wishbones, or did Readmans do the job.http://www.readmanracing.co.uk/parts4sale.php
PRTVR said:
Did it myself,another small problem I had was the top ball joint was a tight fit in the wishbone due to the coating,
setting up the camber was a problem due to the fit, ended up taking some off the spacer, didn't want to cut into the coating, I used an pod touch level app to set it up, prior to taking it for a full alignment check.
Tvr's you got to love them, nothing is ever straight forward, I will up bdate as it gets assembled thanks for the tips.setting up the camber was a problem due to the fit, ended up taking some off the spacer, didn't want to cut into the coating, I used an pod touch level app to set it up, prior to taking it for a full alignment check.
Mark
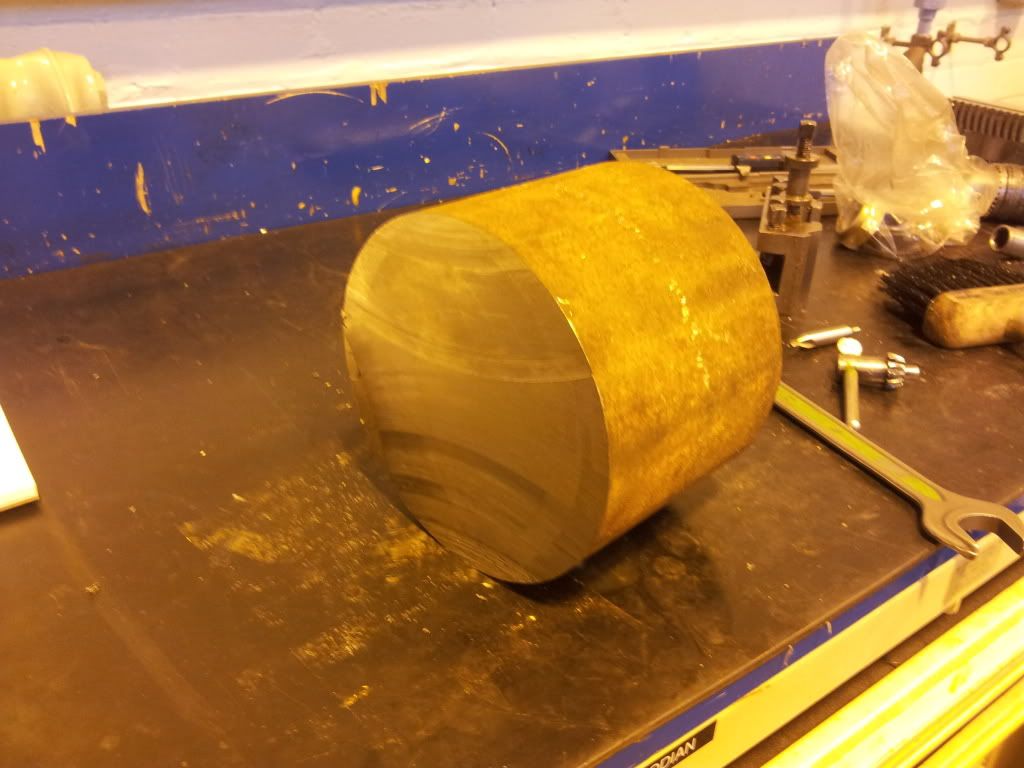
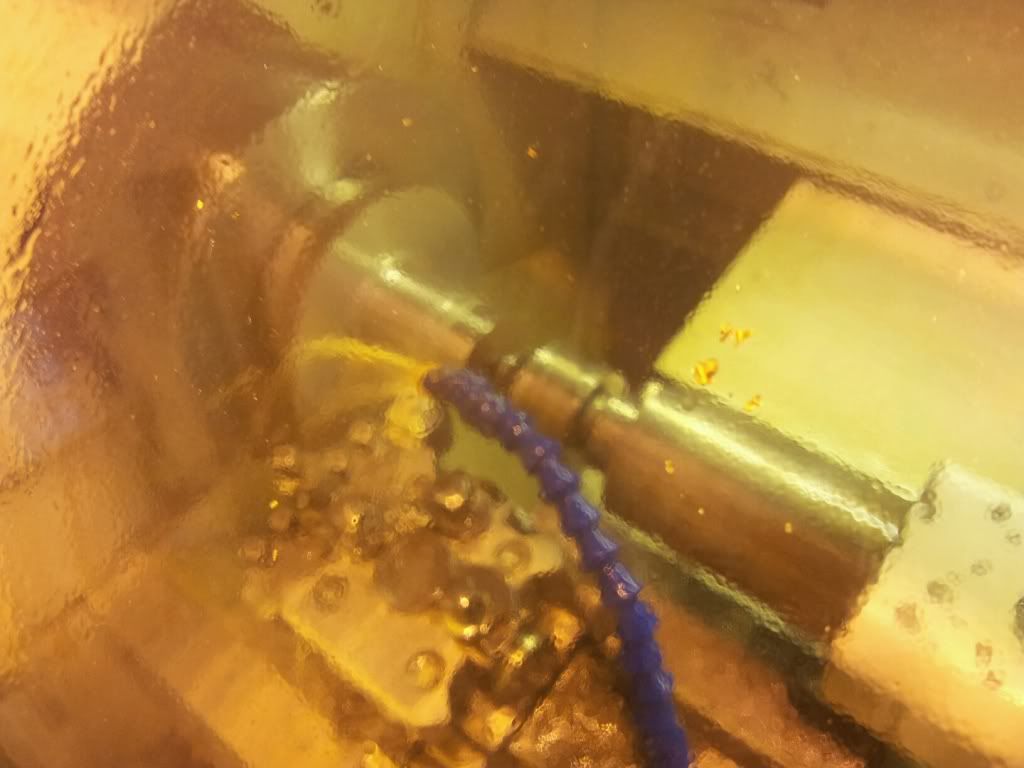
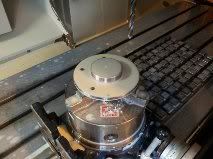
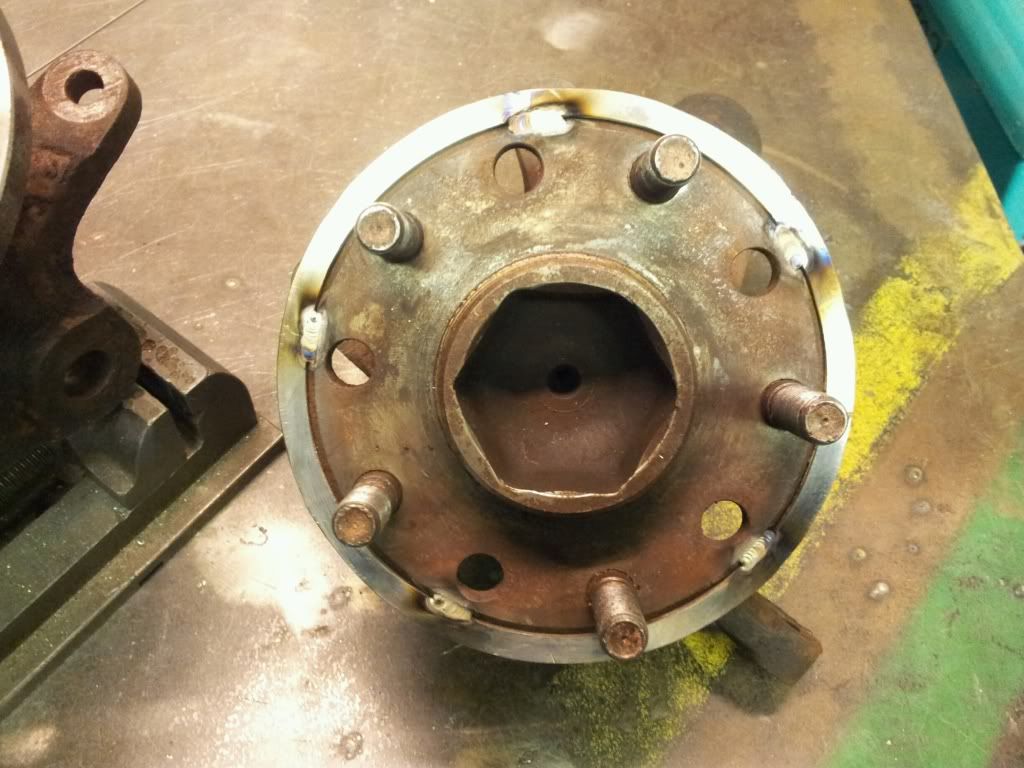
Well its been slow going this last 6 weeks since the car had been sprayed, no progress on the car still be working on the new hubs amoungst other things. Well almost there all the threads have been cut and bearing diameter been ground. Just been drilling the holes for the studs. Still not taken any pics of the old front hubs must do this to show you how bad they were. 
The studs were drilled on a milling machine for accuracy. For anyone who is interested the PCD for spider studs is 114mm which was checked using the hub on the bottom picture.
Its taken some time to manufacture these hubs 4 have been made in total 2 for me and the other 2 will be fitted to an TVR S.

The centre of the hub will be machined away to remove some weight.
The studs were drilled on a milling machine for accuracy. For anyone who is interested the PCD for spider studs is 114mm which was checked using the hub on the bottom picture.
Its taken some time to manufacture these hubs 4 have been made in total 2 for me and the other 2 will be fitted to an TVR S.
The centre of the hub will be machined away to remove some weight.
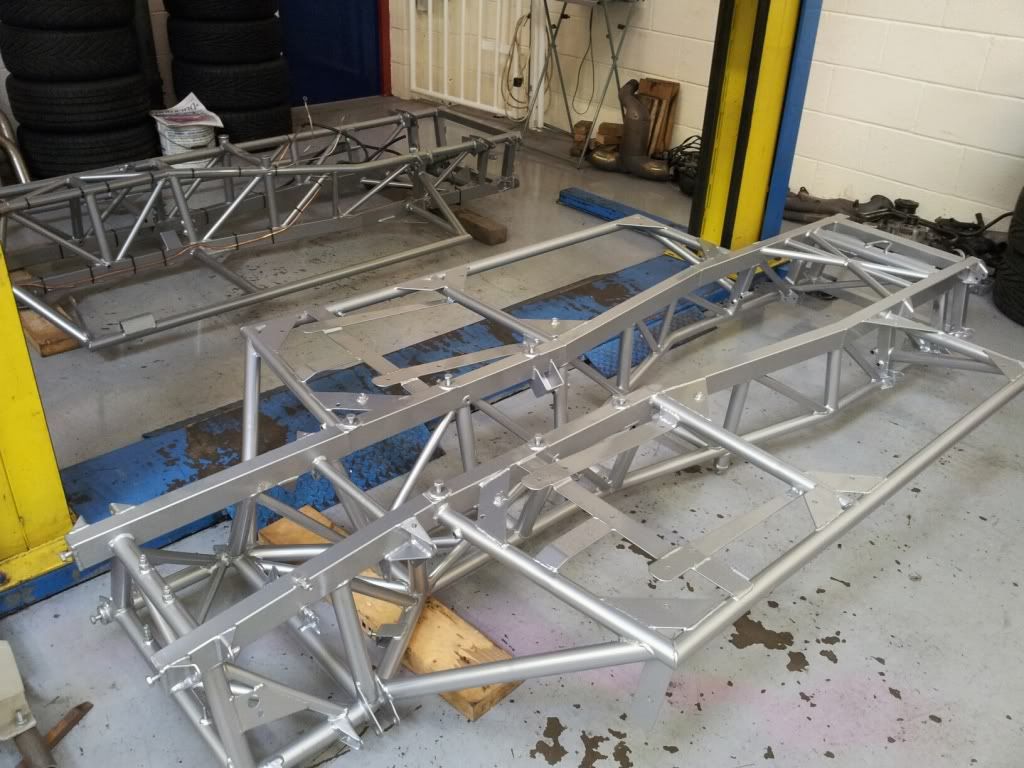
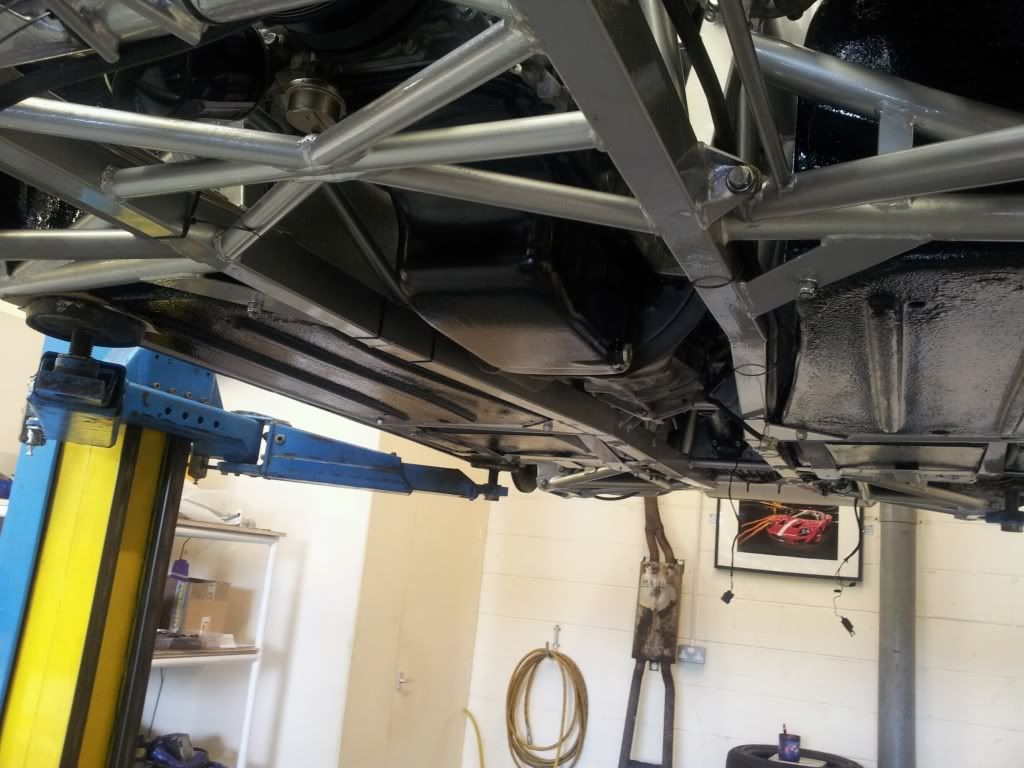
well the chassis and all the other bits and bobs are starting to be assembled, its startin to look like something now
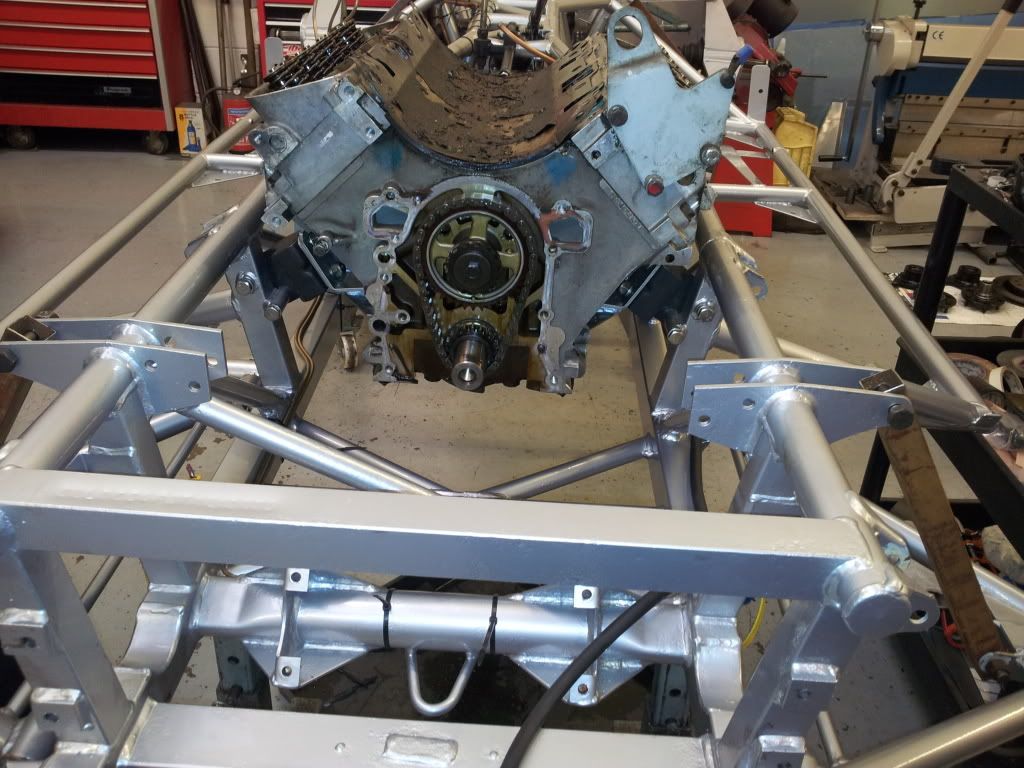
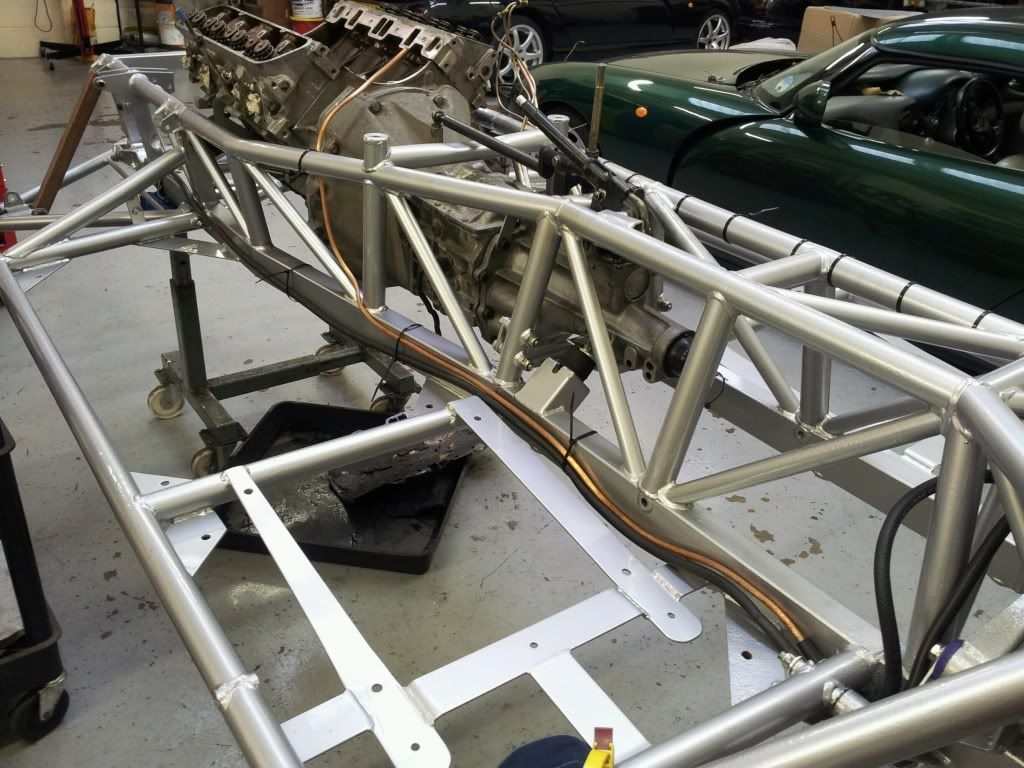
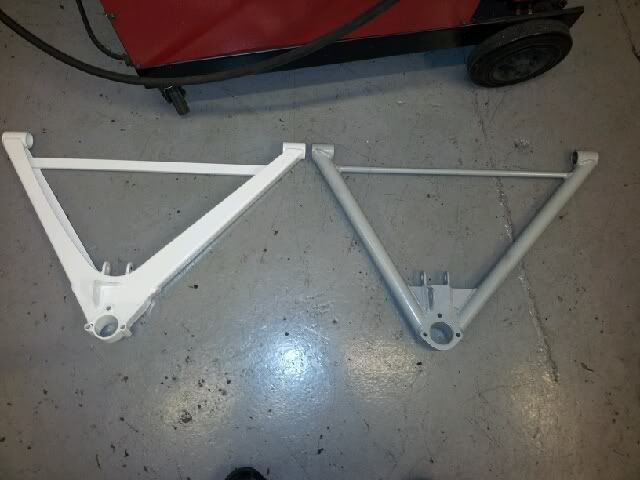
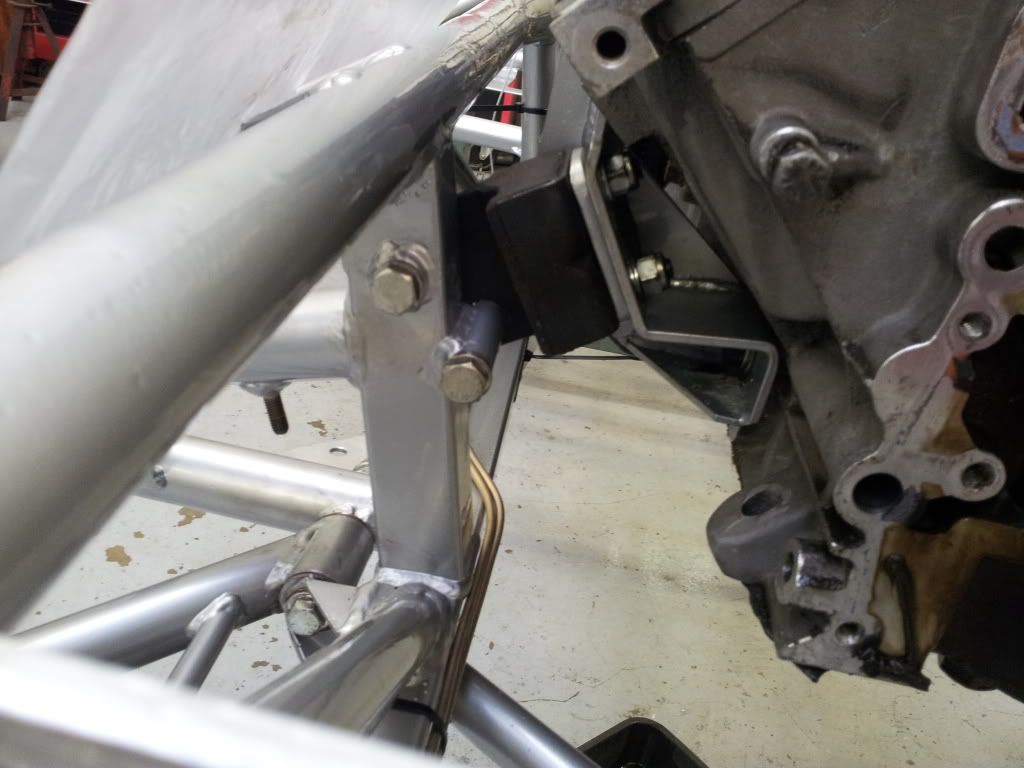
Nick has fitted all new high tensile bolts and new bushes, just waiting for the front uprights to return from blasting then, going for zinc plating.
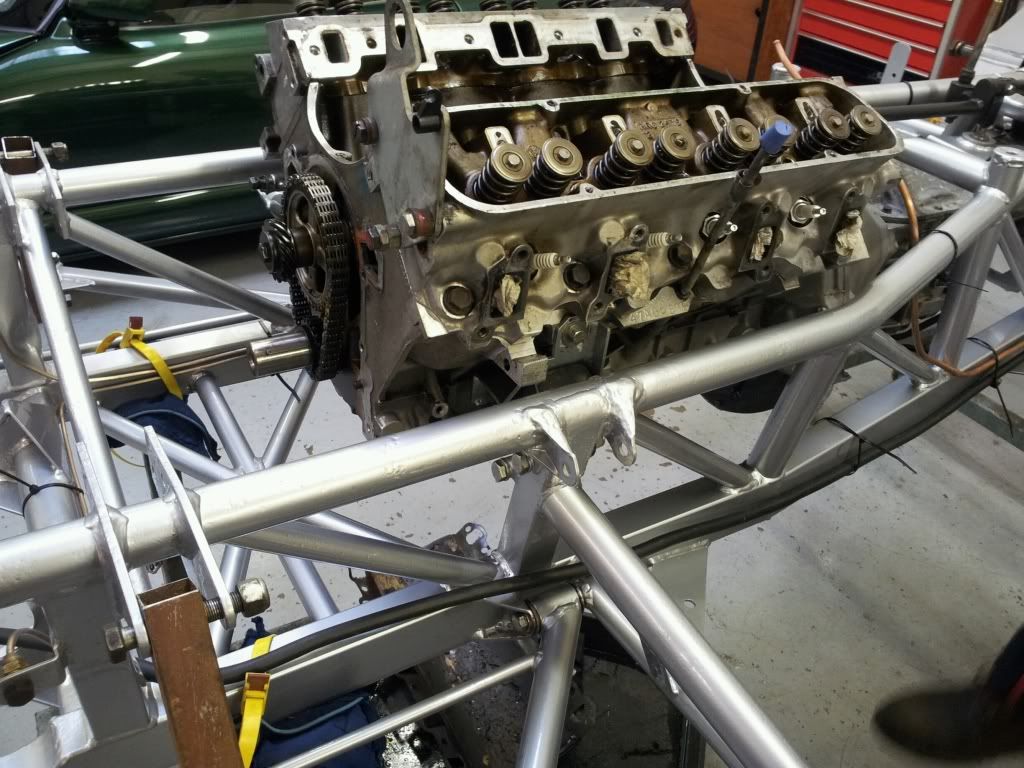
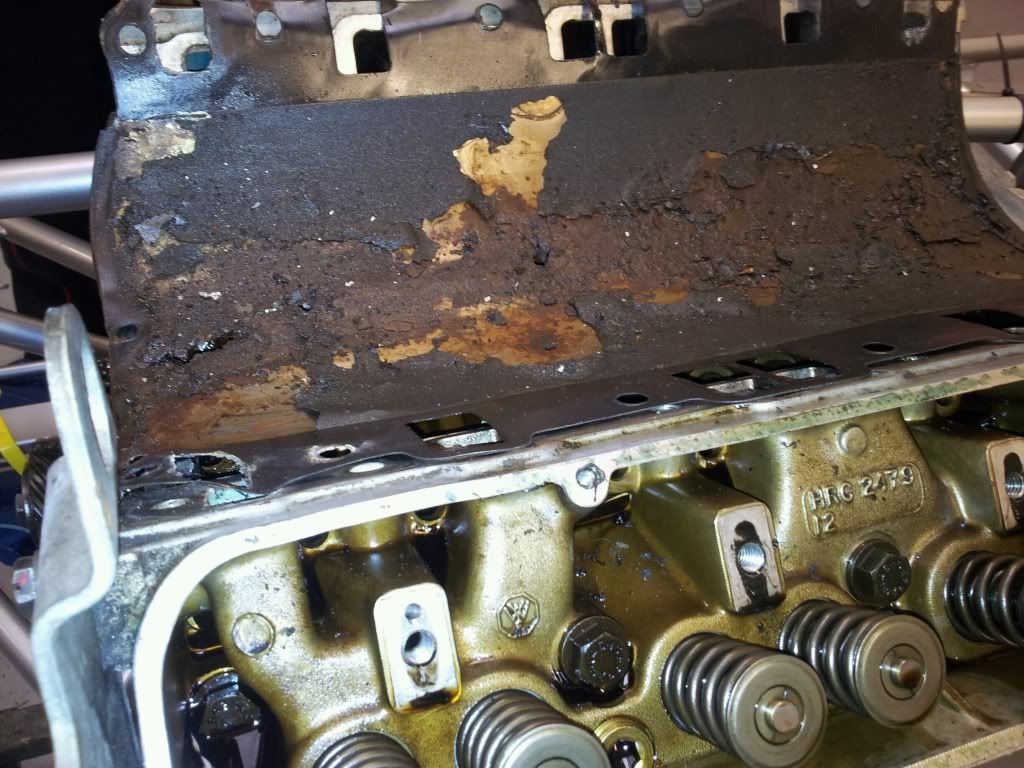
The valley gasket has holes in it, so need to be done. I have a poorly cam too, well its done 70,000 so was getting old.
Done a repair job on my hubs as the holes were very close to my outer diameter, ohh. I made some new hubs but I was happy with the quality of the finish so I have repaired the old ones.

Nick has fitted all new high tensile bolts and new bushes, just waiting for the front uprights to return from blasting then, going for zinc plating.
The valley gasket has holes in it, so need to be done. I have a poorly cam too, well its done 70,000 so was getting old.
Done a repair job on my hubs as the holes were very close to my outer diameter, ohh. I made some new hubs but I was happy with the quality of the finish so I have repaired the old ones.
Well its been a hetic few weeks getting the car back together. Nick & Mike at Willow have worked extremely hard to get the car through its MOT today. This time last week I had no front brakes and no front lights, no top wishbones amoungst other things.
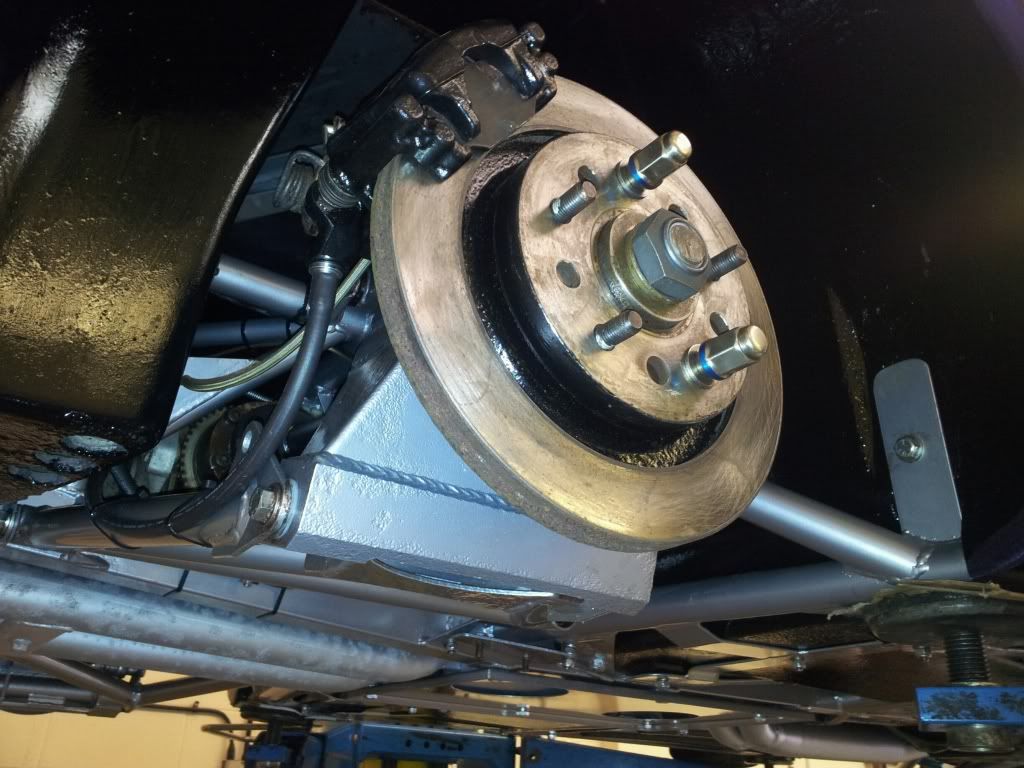

the caliper mounts and spacers brackets were manufactured locally and nick did all the measurements for the brackets and spacer for the disk inhouse, and was fantastic.


the caliper mounts and spacers brackets were manufactured locally and nick did all the measurements for the brackets and spacer for the disk inhouse, and was fantastic.
Edited by portzi on Tuesday 3rd July 21:20
Nick at Willow did the conversion, but it will be his last one he's doing, after doing Dave trolley's first. They are a pig to do without using lots of filler. He manufactured a bracket which bolts to the bodywork, then fastens to the light pod, the silicon around the light is purely to stop water ingress and vibration.
dhf said:
A few questions,
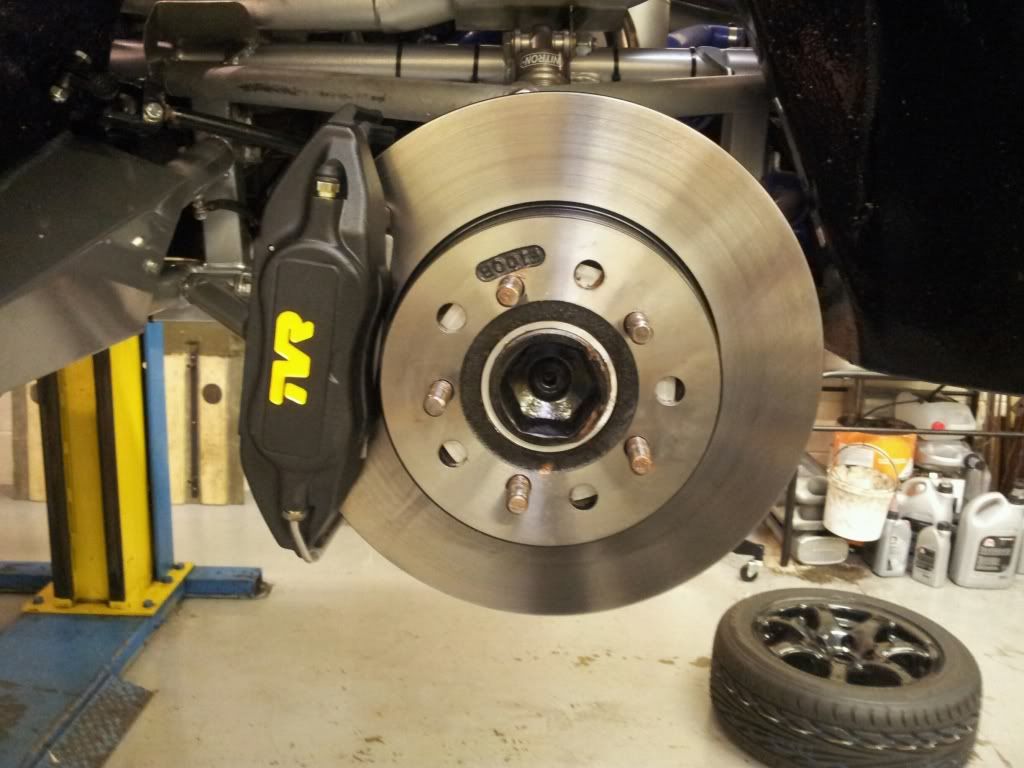
Is that a 5200 AP caliper ?
What size disc are you using ?
Can you get a disc drilled for 4 stud as well as 5 stud ?
What are all the bits and pieces needed/costs/where did they come from for this conversion ?
Thanks
Dermot
The part numbers for the AP calipers are J0462/463. they just about squeeze onto the 16" spiders 5 stud, with mm's to spare. The PCD for the 5 stud is 114mm as per tuscan PCD, I think the Chimaera PCD is 10 mm's less so yes, its just finding the correct disk. I am not sure off what car my discs were off, as the cerbera discs I think are about £200 apiece. Nick at Willow sourced them after much searching through catologues. But still the pades had to be shimmed with stainless plates to centralise them on the disk. I also had longer hub studs fitted, an extra 5mm to give the wheel nuts the correct amount of thread turns before tight. Last but not least I made a spacer to fit behind the disk as it was too close to the lower ball joint gaitor. So all in all quite abit of work but well worth it as these brakes are awsome. Is that a 5200 AP caliper ?
What size disc are you using ?
Can you get a disc drilled for 4 stud as well as 5 stud ?
What are all the bits and pieces needed/costs/where did they come from for this conversion ?
Thanks
Dermot
Twistygit said:
Just wondering how your car is going ? last posts were to say it had been MOT'ed
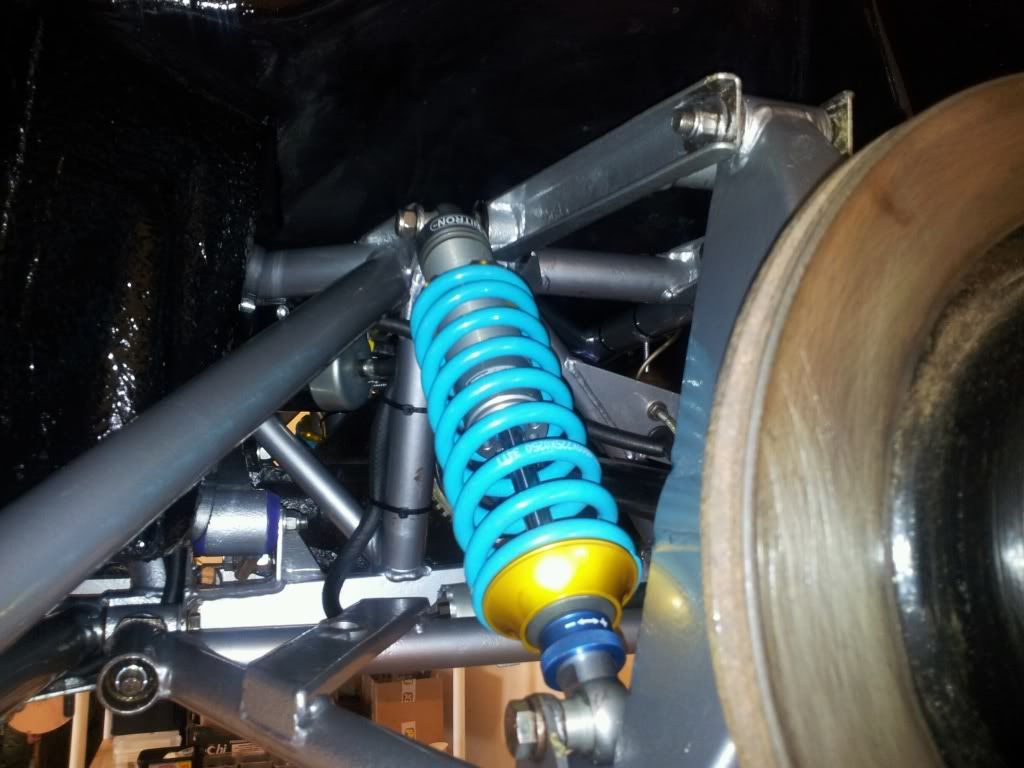
Well since then l have safety made it to le man classic and silverstone . One cam follower broke down after some spirited driving from me, poor skills really but all fixed now. new hood& carpets finished but needs to go back for finishing touches. The best upgrade were the lupos and nitrons. l can see in the dark and the ride quality is superb Mark
Gassing Station | Chimaera | Top of Page | What's New | My Stuff