johns tvr rebuild
Discussion


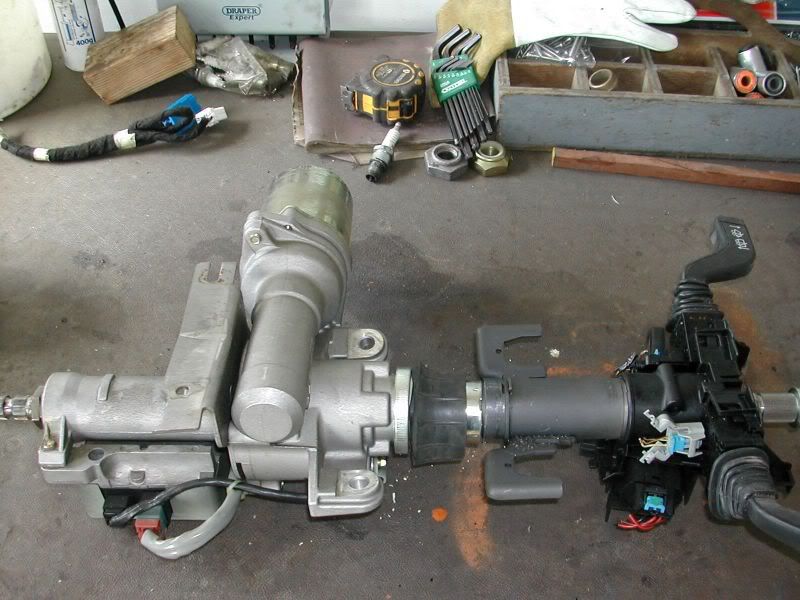
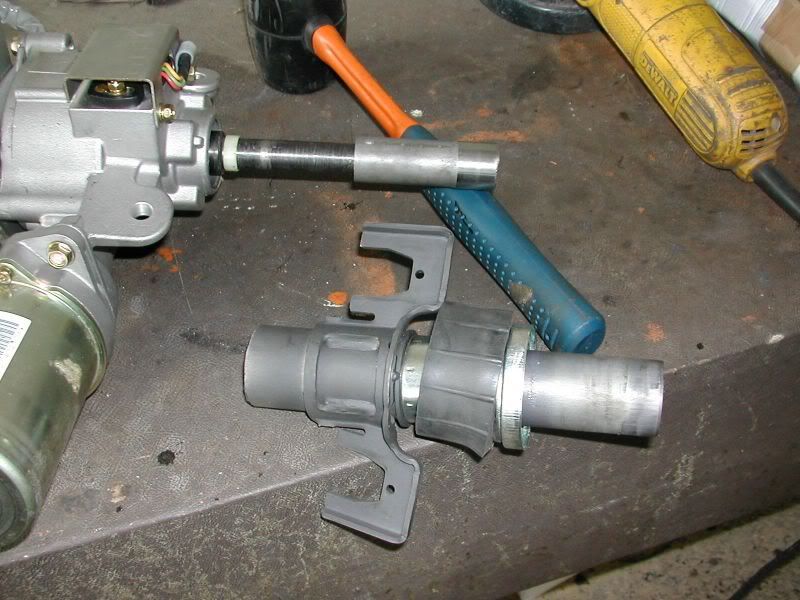
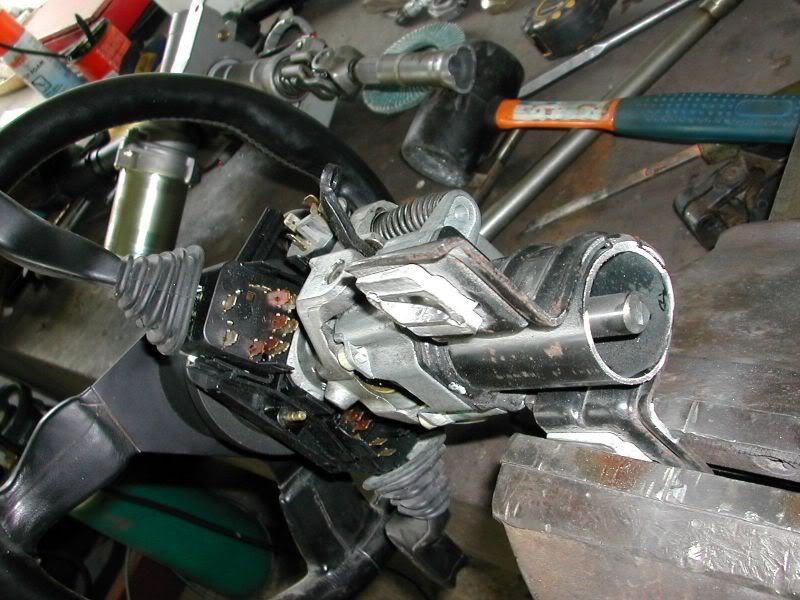
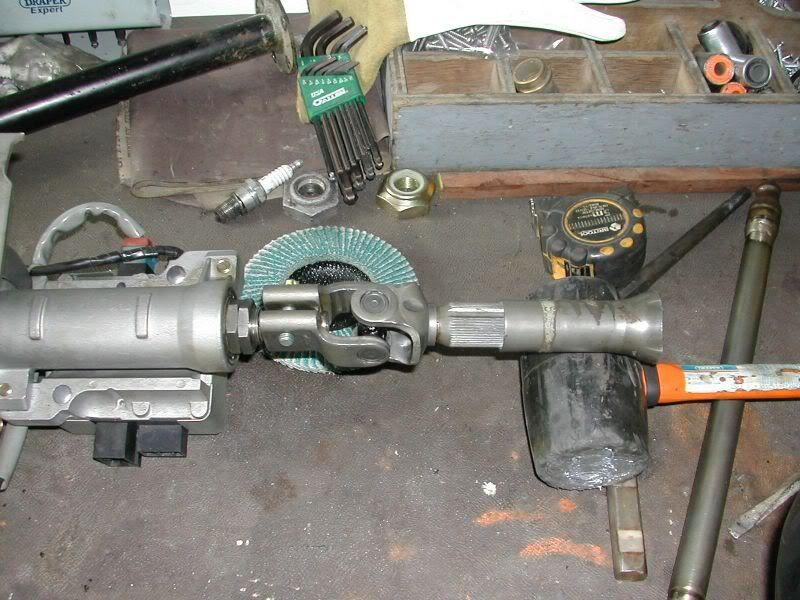
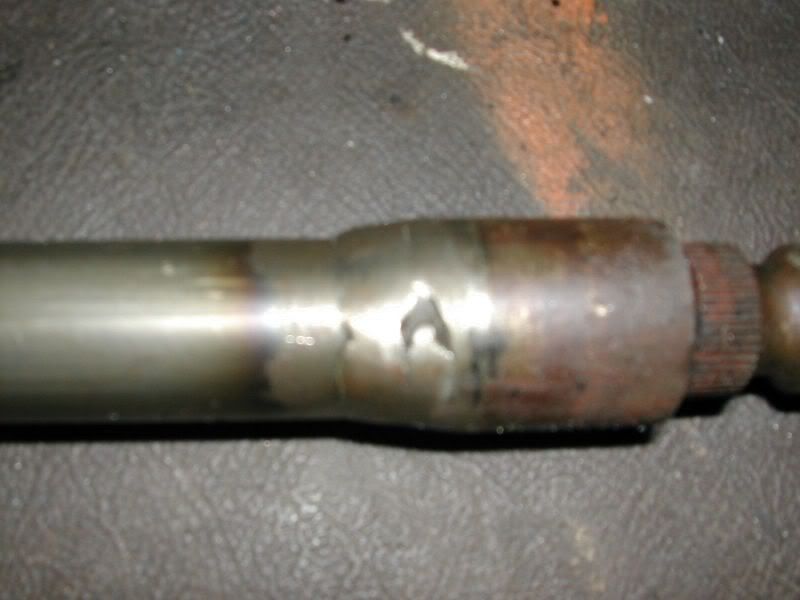
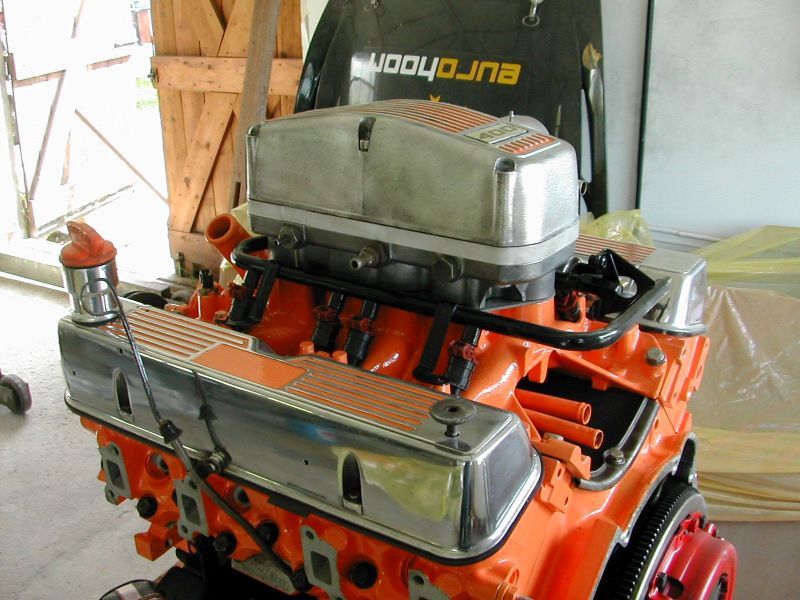
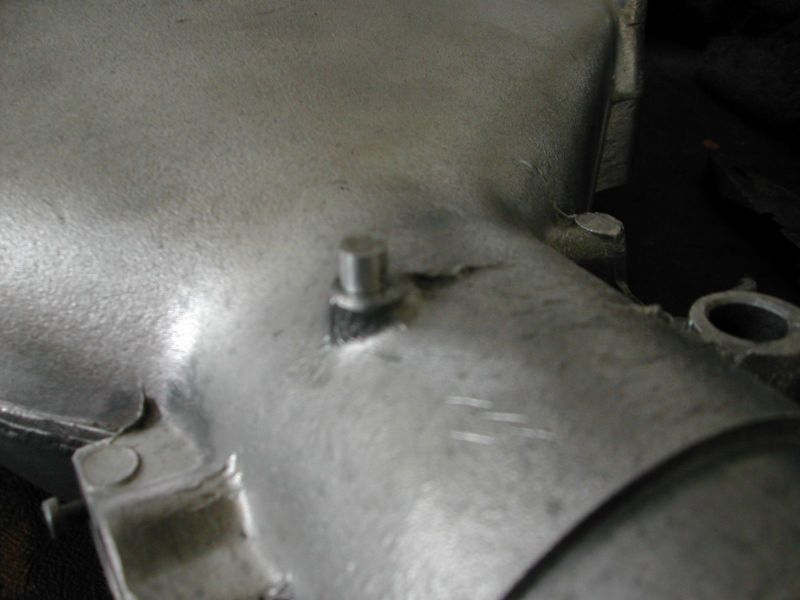
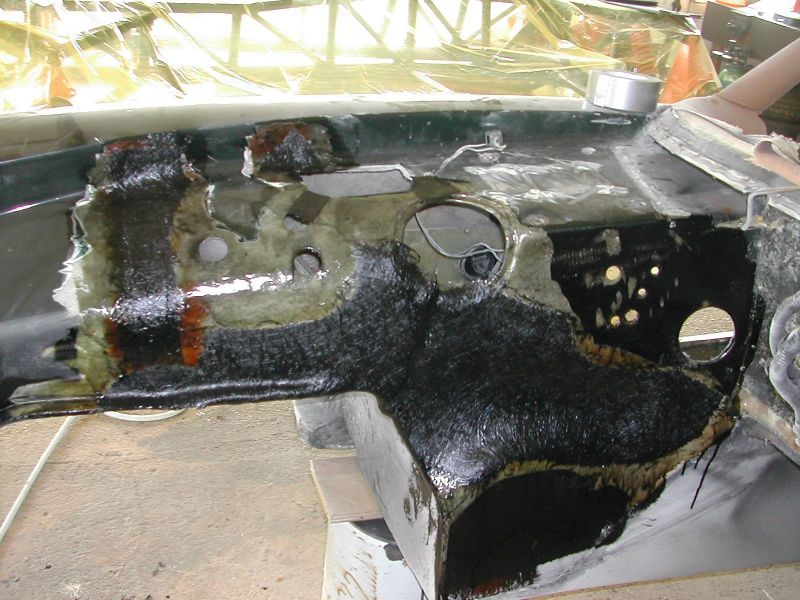
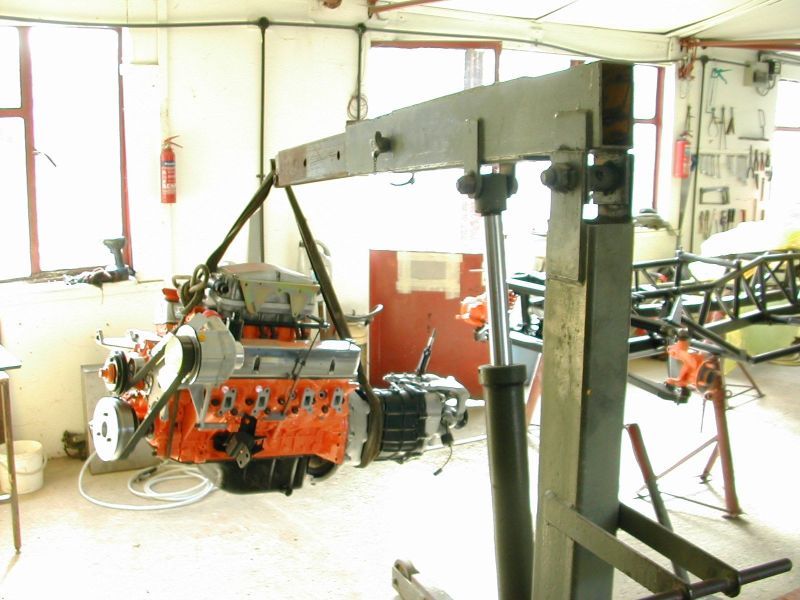
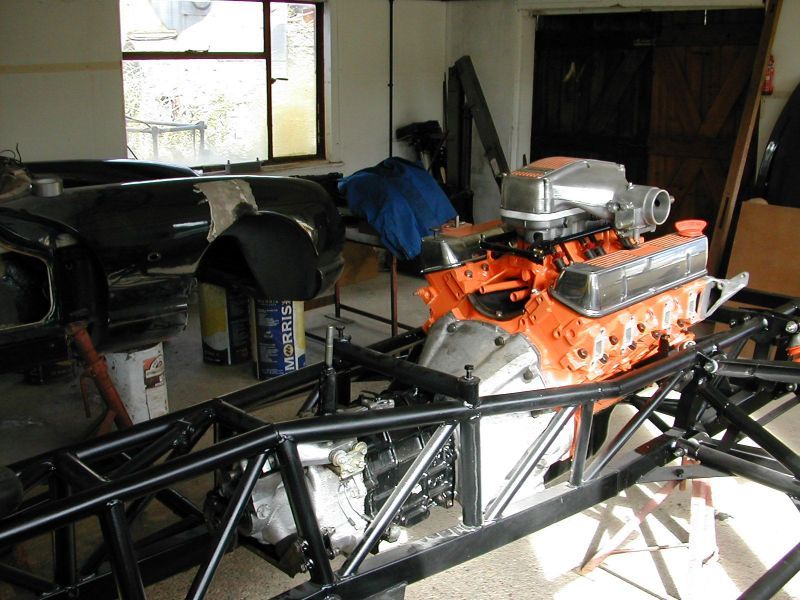
another day at the tvr mill, got the pulleys fitted plus got the fuel rail on and bolted down, finished detailing on the plenum chamber stripped cleaned and polished the alternator and its bracket, plus have made a start on the power steering, got the components sorted to how they are going to fit together the box is going to have a shrunk fit bush to connect to the original column, the shroud will have to have a spacer bush to make up the different diameters so relatively easy, the motor will be bracketed (a) to the back of the dash which is being strengthened with carbon fibre mat and epoxy resin plus( b) a bracket to the strengthened pedal box which is being lengthened to include the mounting for the end of the column (c) the fiberglass bulkhead behind the road wheel is to be beefed up to insure no flexing, the bottom half of the column is the original corsa sliding joint fitted to the motor and grafted via welding to the original very cutdown column this system has the advantage of an extra uj after the motor so should the alligment not be perfect this will insure smooth steering plus in the event of a shunt the column not only can slide but fold as the car crumples as per the original corsa fitment pics follow of progress so far,plus a pic of the crap original column to spline weld scary.
john
john
Well at last the house boat is back on its mooring so can cocentrate on the chim,been to emerald and collected the ecu,coils and all the bits very helpfull folk and luckily just down the road,blower is arriving wednesday so can really crack on,trimmers have made a start i have given them the centre with gear stick in as a test piece if i am happy with the work they can have the door cards seats etc plus make up the carpets so exiting times ahead plus a few headaches , all part of the fun,p.s steering is all sorted just got to machine the relevant pieces on thursday and that can be tested then prefitted to finally sort the bracketery.
John
John
Edited by Engineer1949 on Saturday 11th August 09:56
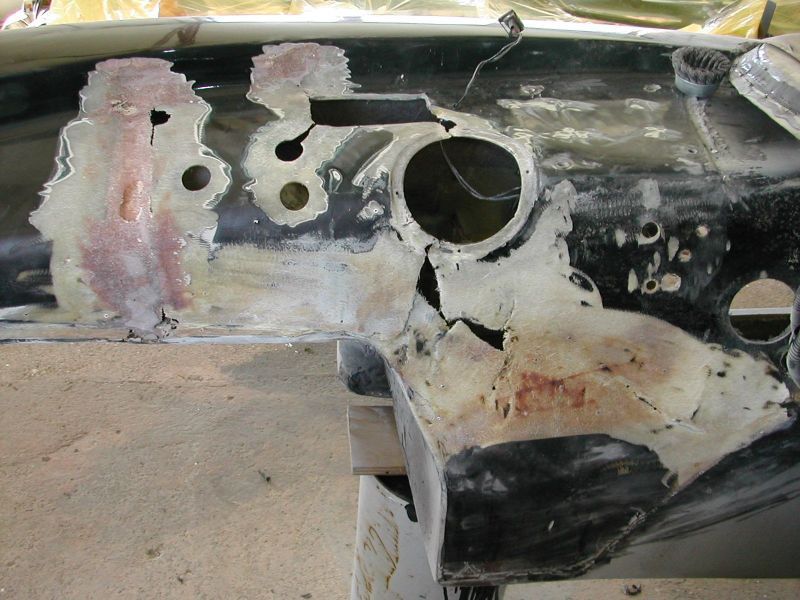
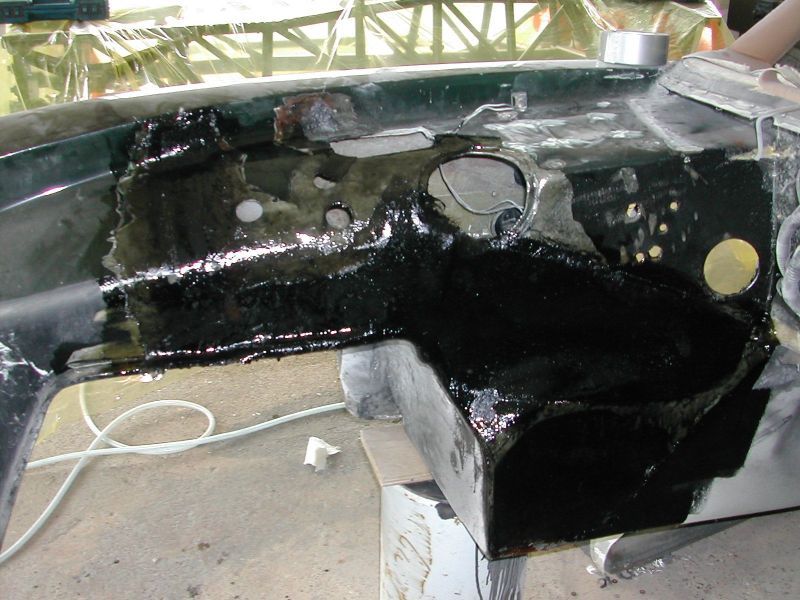
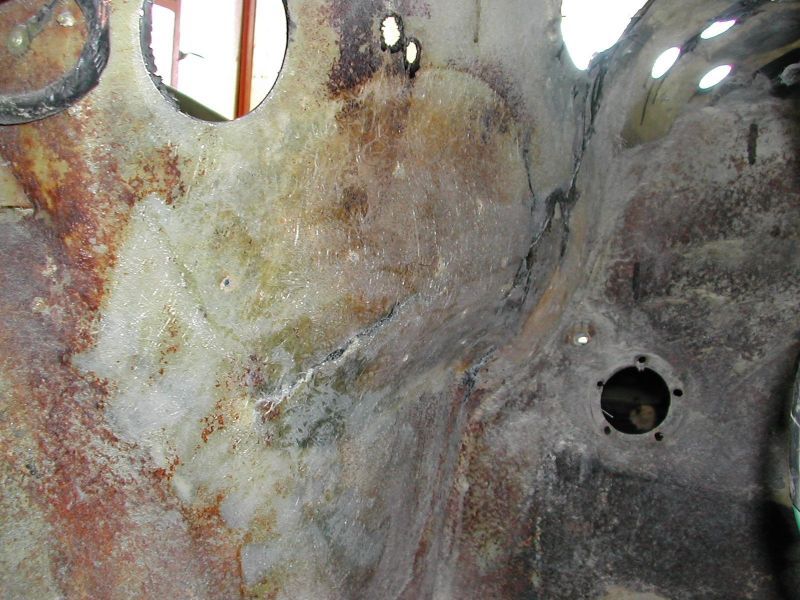
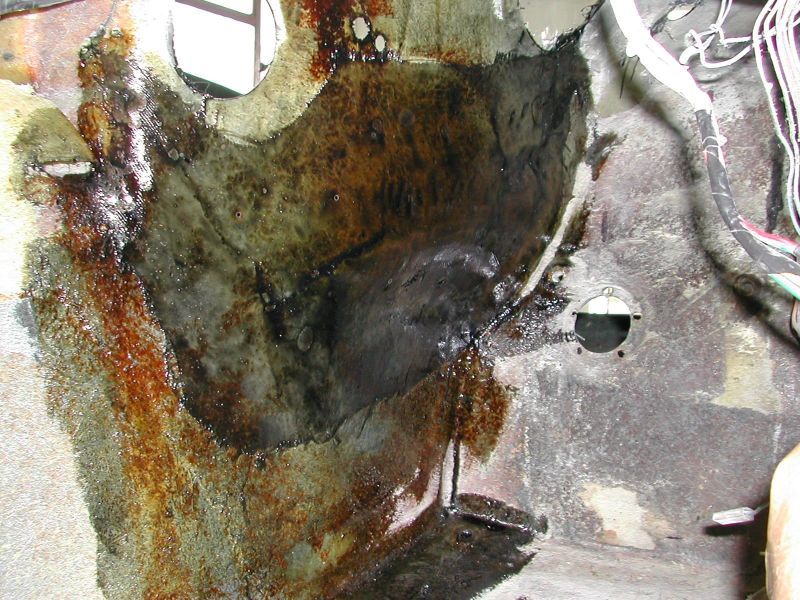
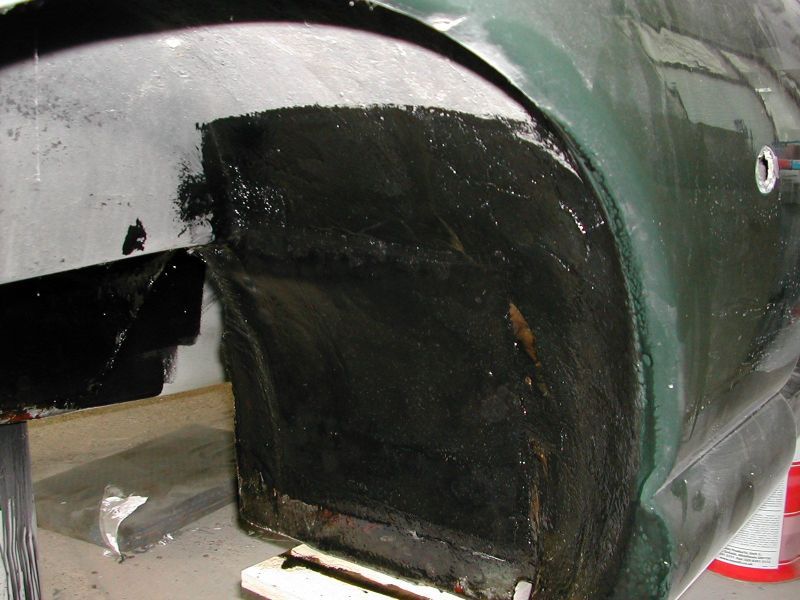
well been at it again started on the body some stress cracks where the front is laminated to the tub which i have ground out ready to relaminate, also the area behind the manifold on the offside where the heat shield is supposed to be (most had gone)has been badly affected so i have cut it out will use it as a mould for a new one and laminate in place. the prefit on the steering is great brackets sorted but not fabricated as yet, i was going to extend the steel on the pedal box to accommodate the bottom bearing but i have decided to leave it so as it can break out in the event of a shunt and double up so to speak on the double knuckle setup and sliding joint of the autograss power unit, blower fitting wednesday will take pics as i work got to sort the drive alignment and belt adjuster position and fixing i promise pics will follow just been full on lately.
john
john
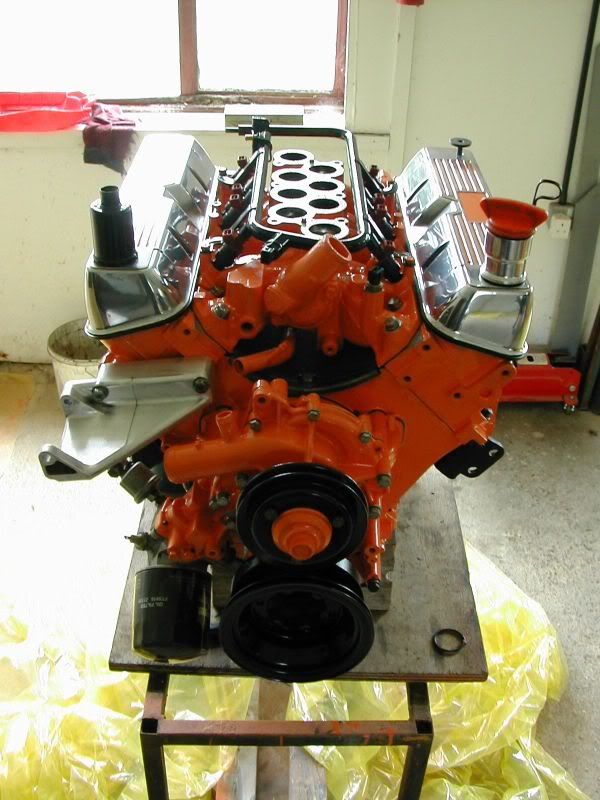
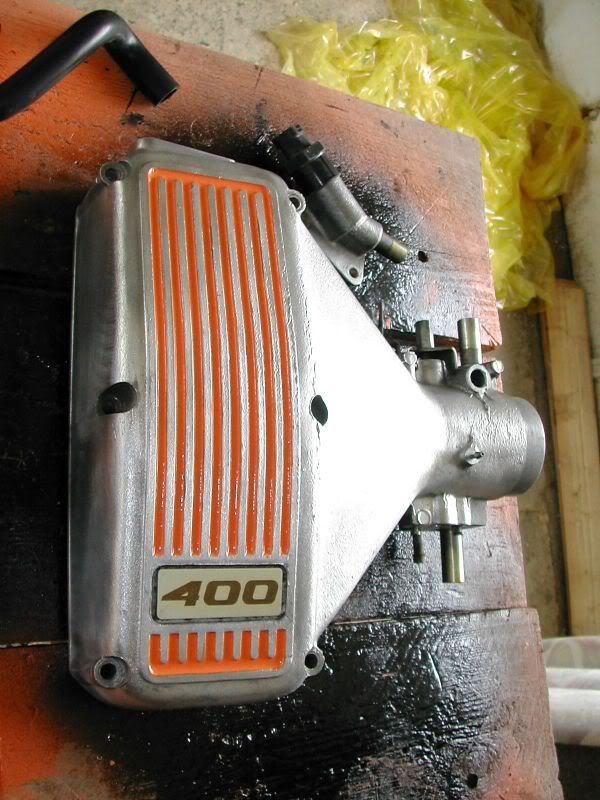
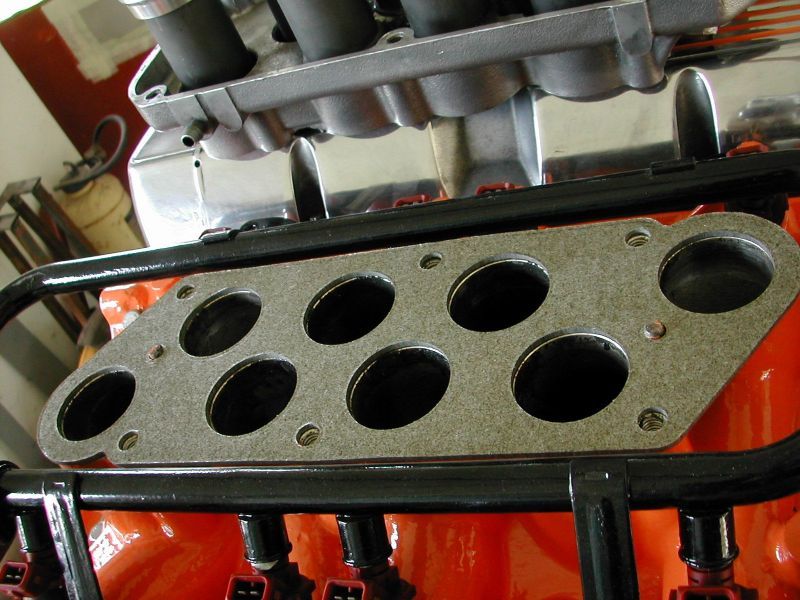
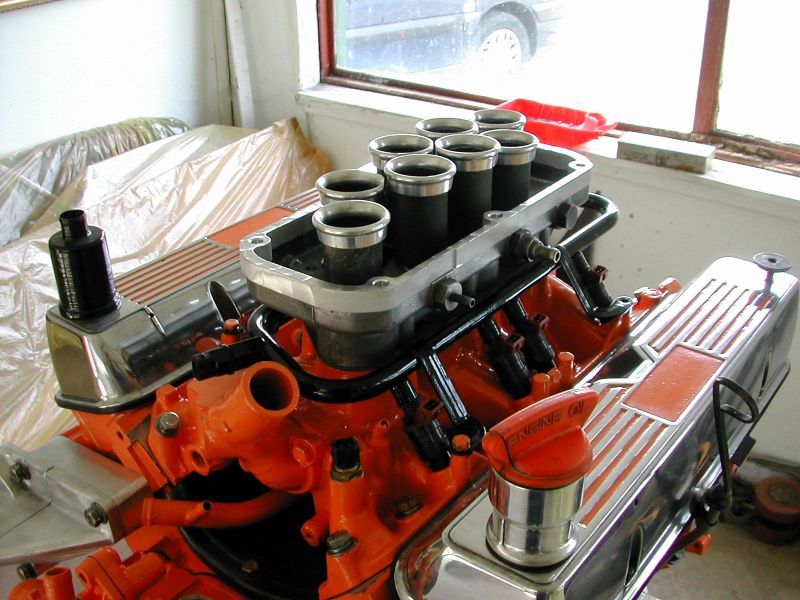
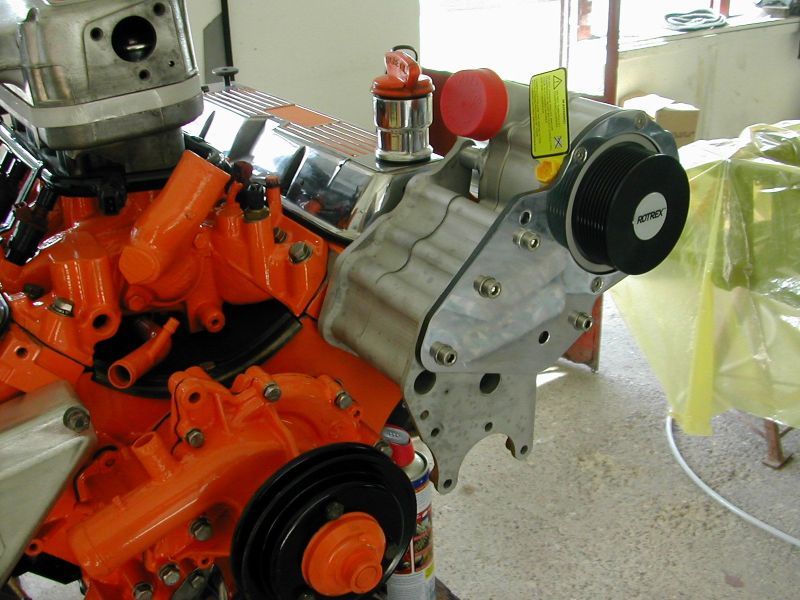
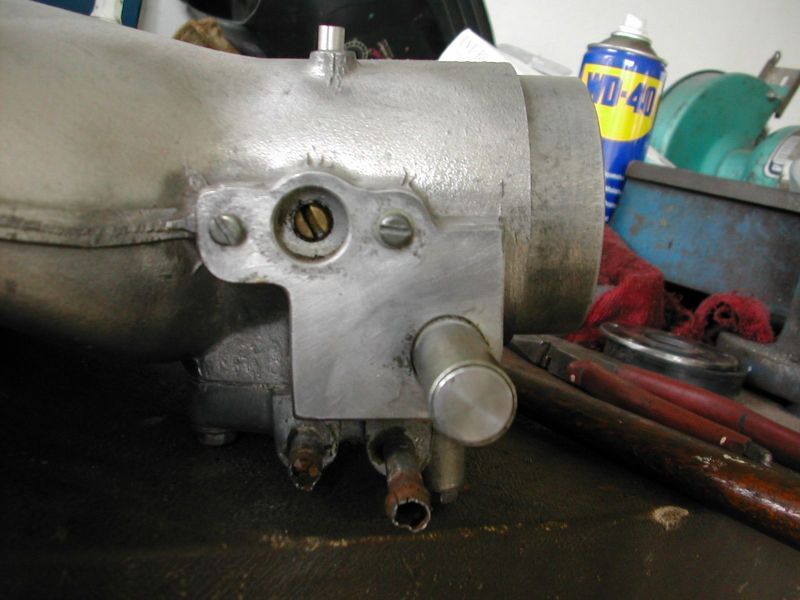
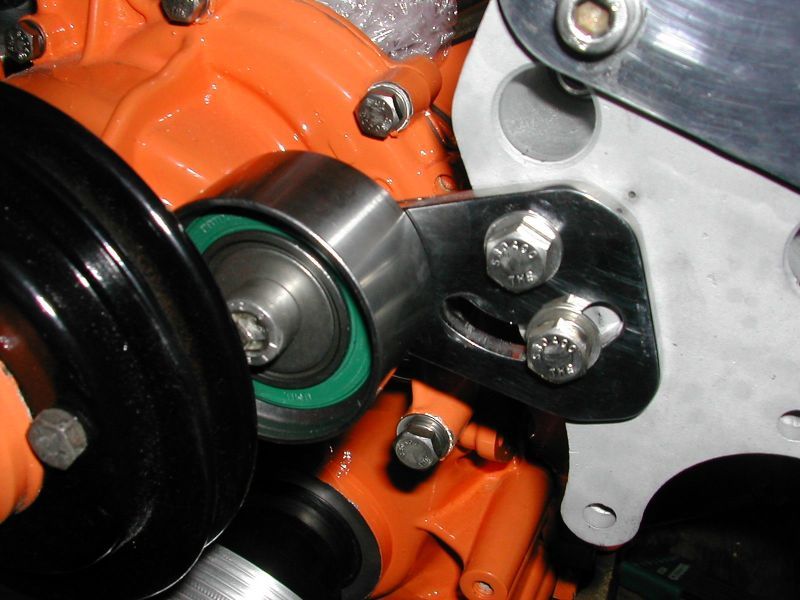
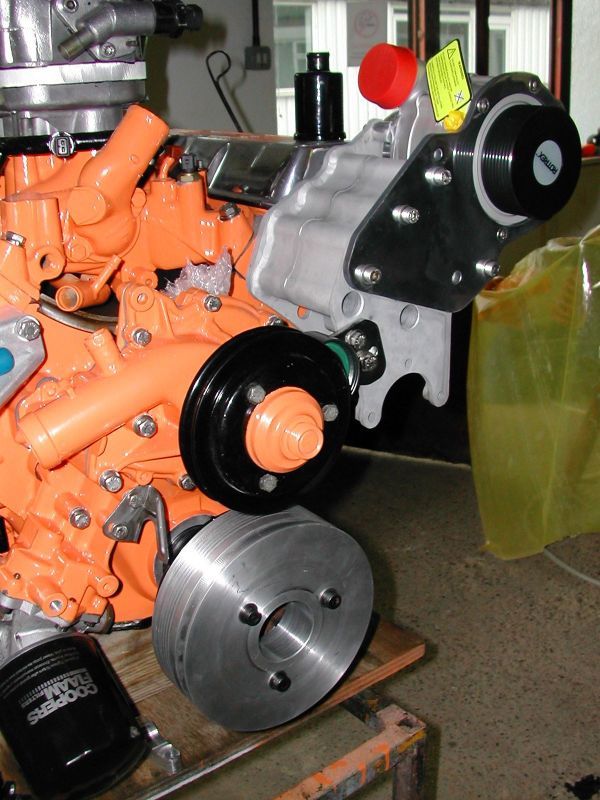
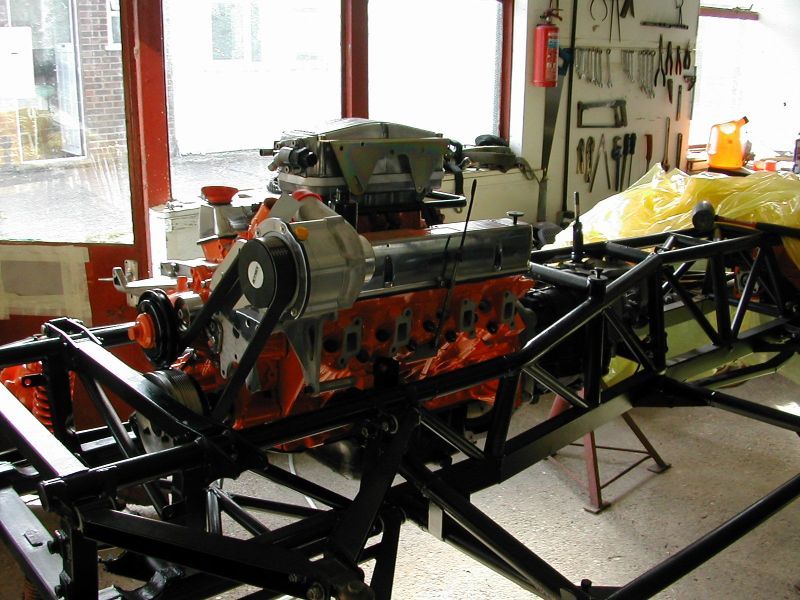
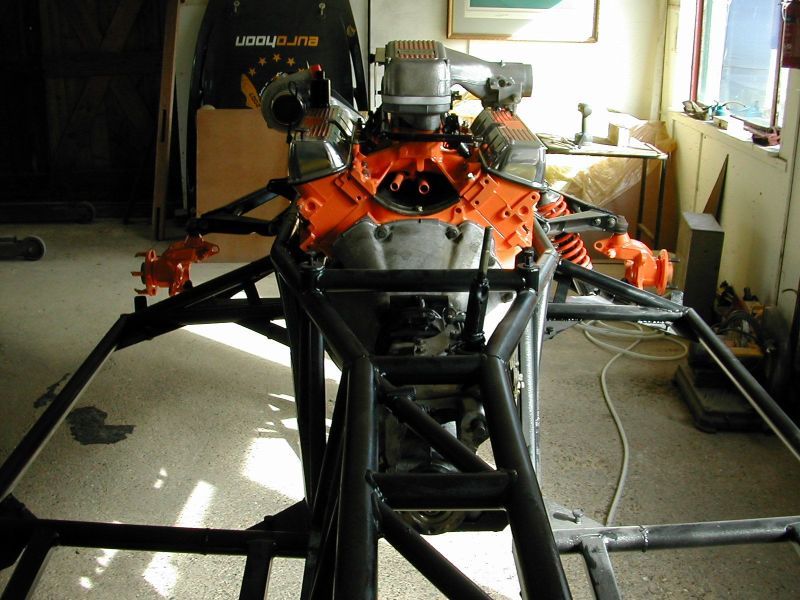
had a good day yesterday started fitting the blower got the fixing bracket on plus the blower attached to it,i have done the measurements for the new driver pulley for the crank and ordered the billet of ally to machine it from which should be with me tuesday,also worked out the tensioner arrangement got to machine the bracket for that it will use the idler supplied from sc power,but as this is a preserp engine there is a fair amount of fettling to do but seems all sorted in theory,fitted the trumpet base with its modded trumpets from sc power with the gasket supplied by them to help keep the plenum chamber cool,also got the plenum chamber riser fitted to increase the plenum capacity,all the mods are done to the connections to the plenum plus cleaned out the waterway which was very blocked,fitted the bracket i am going to use for the coil packs supplied by emerald,i took out the original fuel rail fixings and fitted nice stainless capheads to finish that side of things off,so looking good so far working with the gear supplied is a real pleasure beautifully made and well engineered.
john


john
Edited by Engineer1949 on Thursday 23 August 08:07
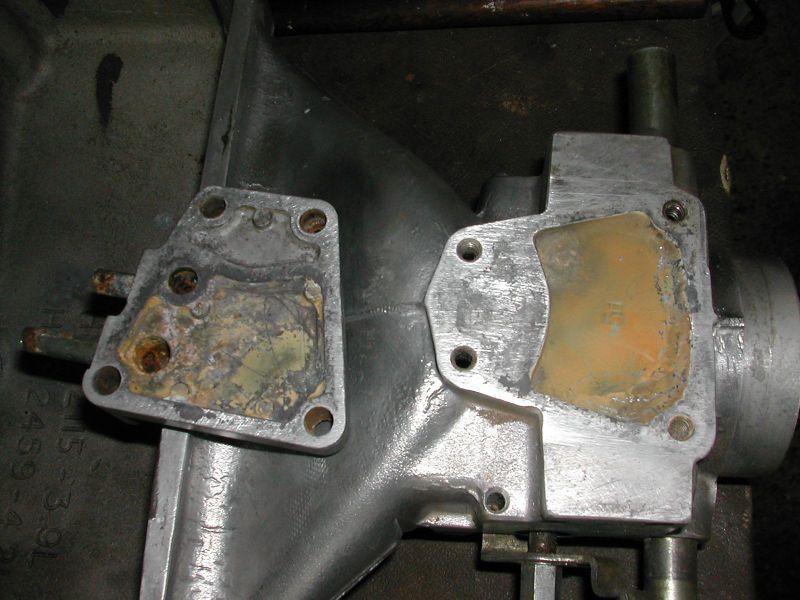
the kit is an sc power kit, basically they produce it for the serpentine engine so i am using what i can i.e. mounting bracket plenum mods and intercooler but i have got to sort a driver pulley for the crank an adjuster for the blower drive belt plus the belt itself as unlike the serpentine engine it will only drive the blower and a power steering pump if one was fitted .
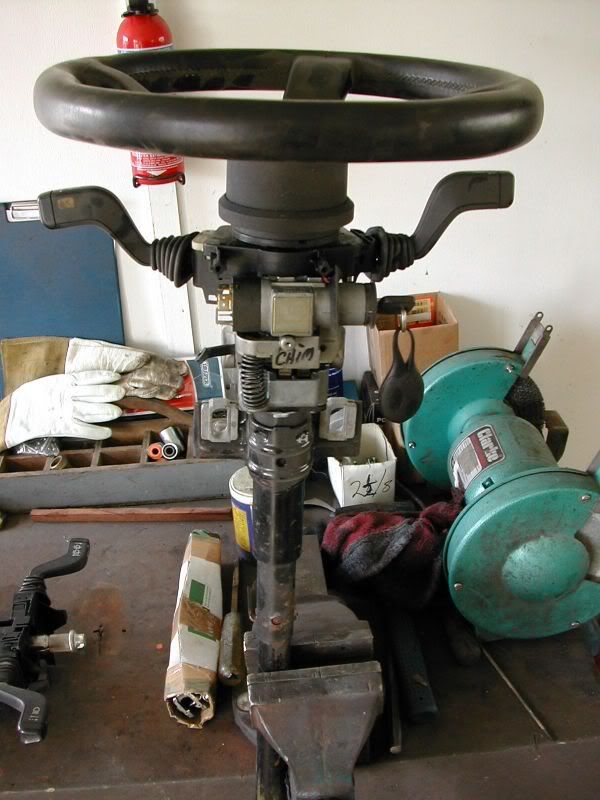
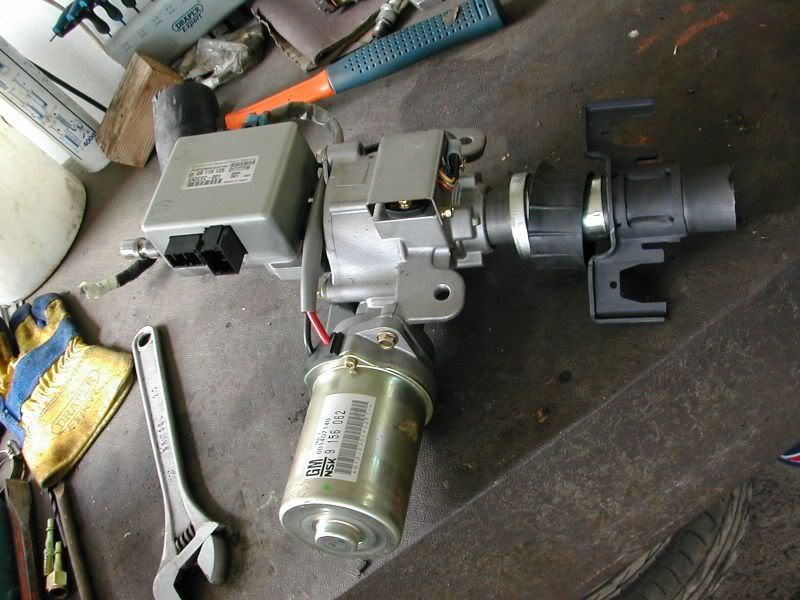
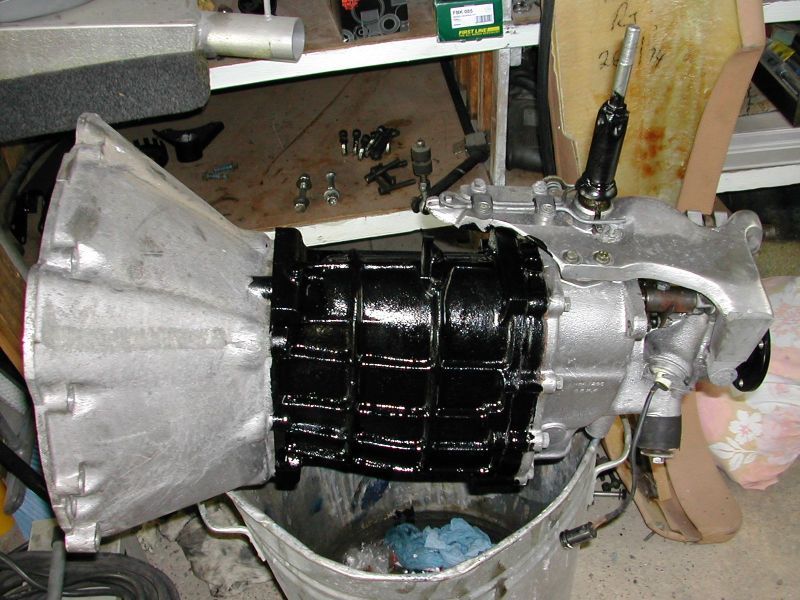
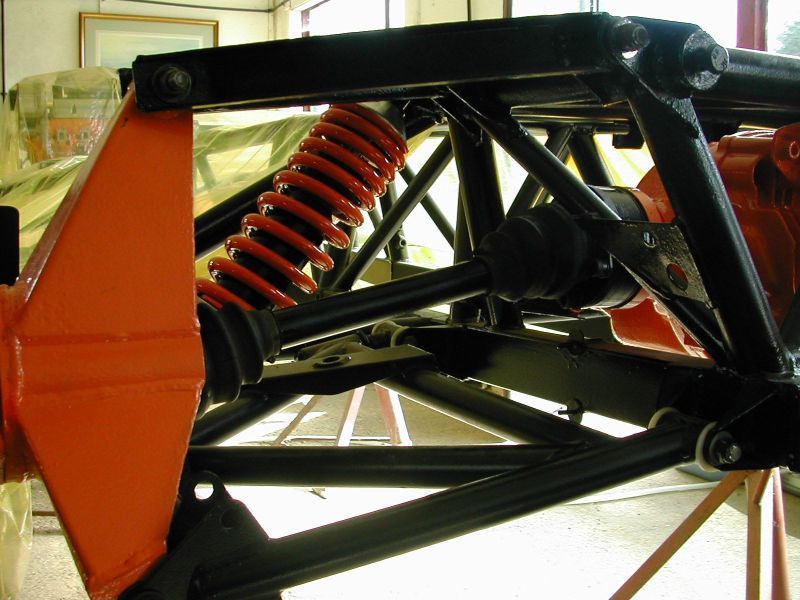
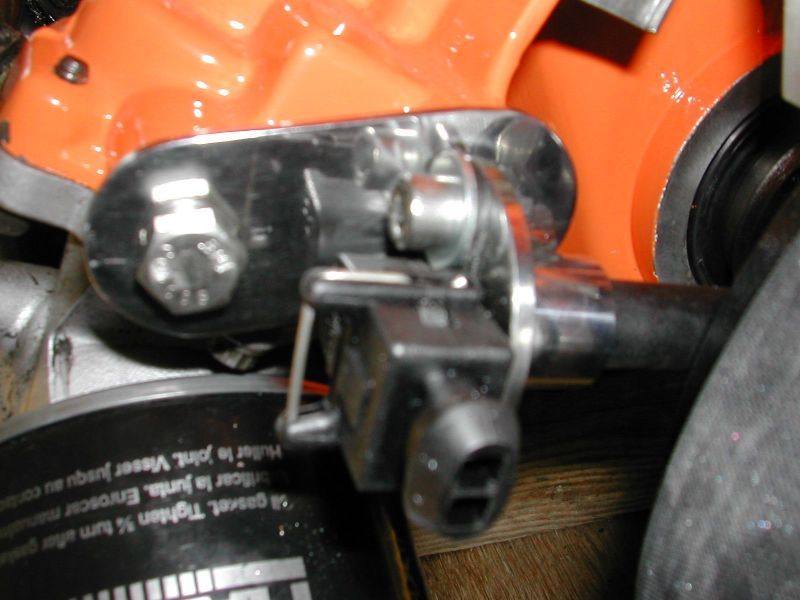
but i have been at it again today not on the engine as am awaiting supplies for the billet to turn up the crank pulley and some laser cutting for the bracket for the tensioner i have designed, but i have rebuilt the remaining rear hub now the seals have arrived,cleaned up the drive shafts and the cvj units, just need to paint those then they can go on,also made a start to the bad area of glassfibre around the offside manifold ,also got a pic of the finnished steering column with its power unit and sliding joint all connected, and i gunked and pressure washed the gearbox ready to paint the box itself.
john
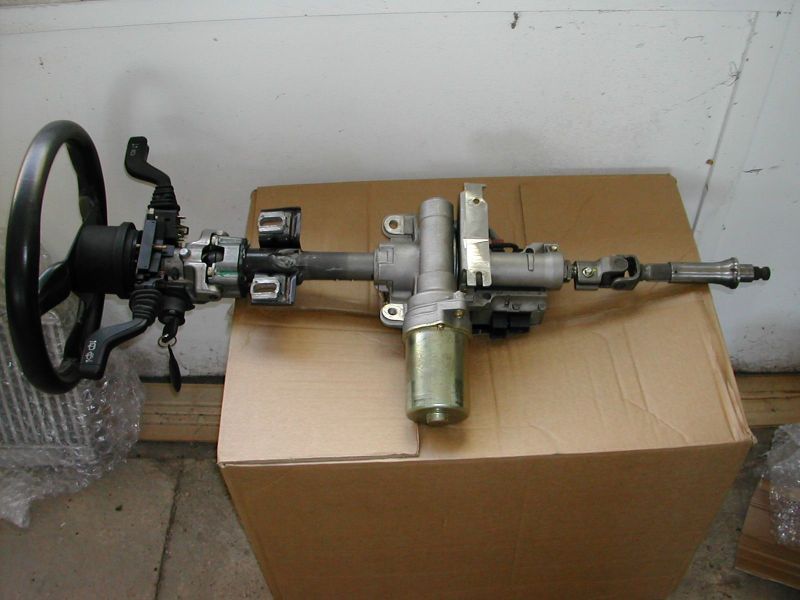
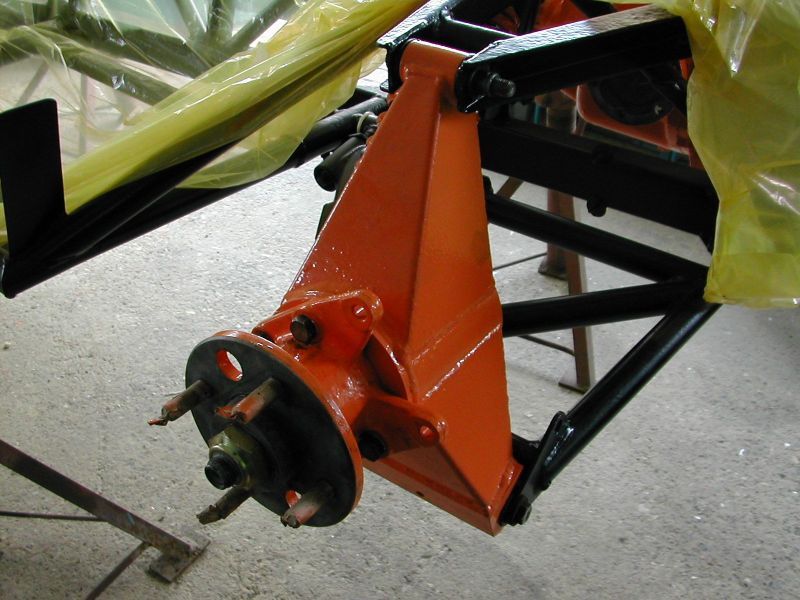
Edited by Engineer1949 on Thursday 23 August 19:43
Edited by Engineer1949 on Thursday 23 August 19:44
Edited by Engineer1949 on Thursday 23 August 19:51
Edited by Engineer1949 on Thursday 23 August 19:54
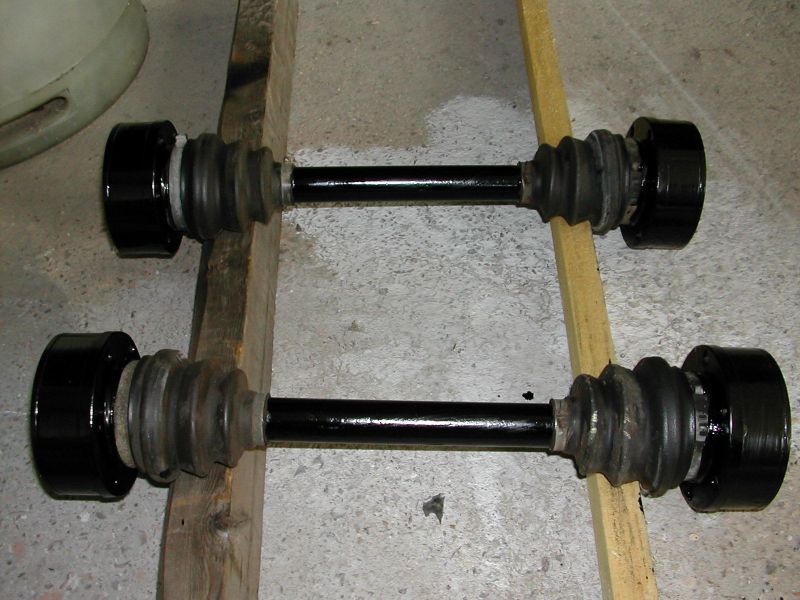
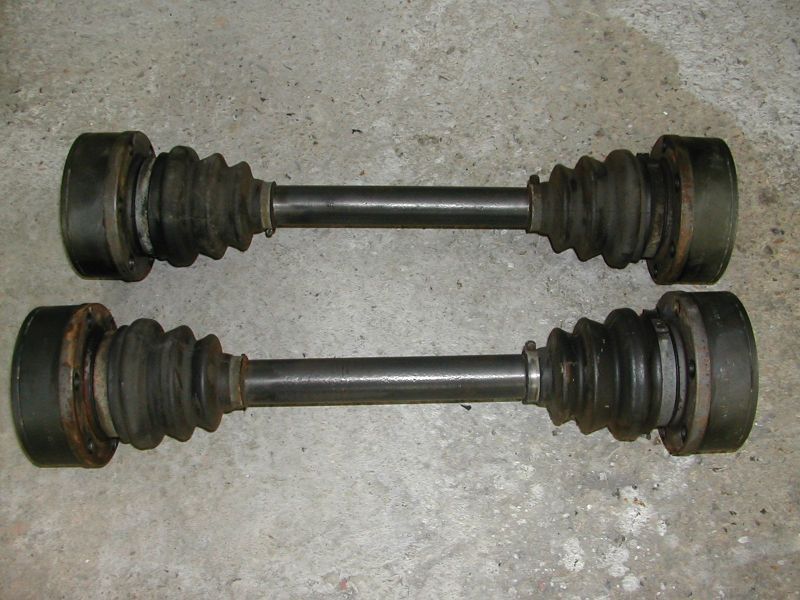
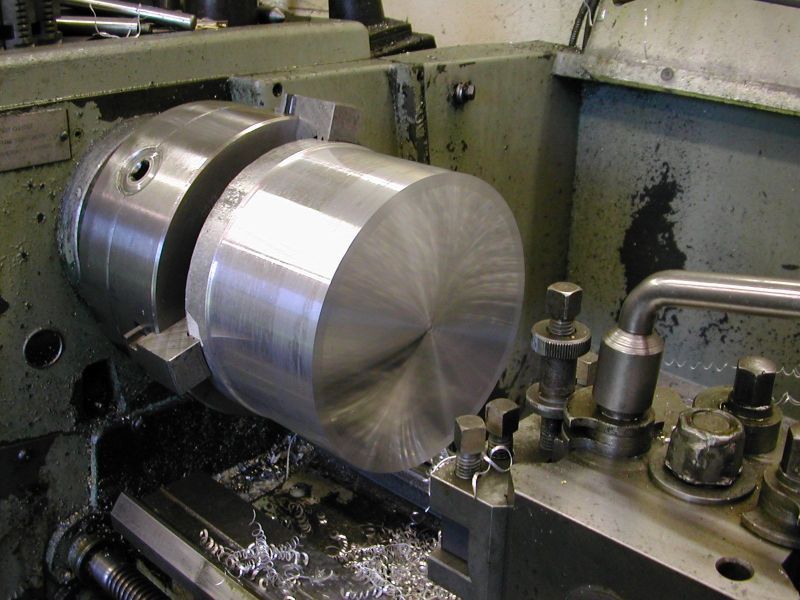
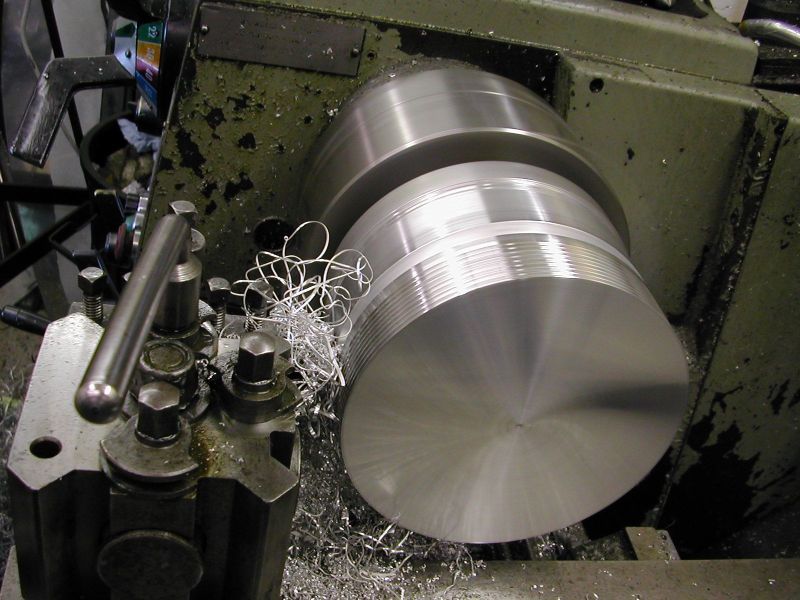
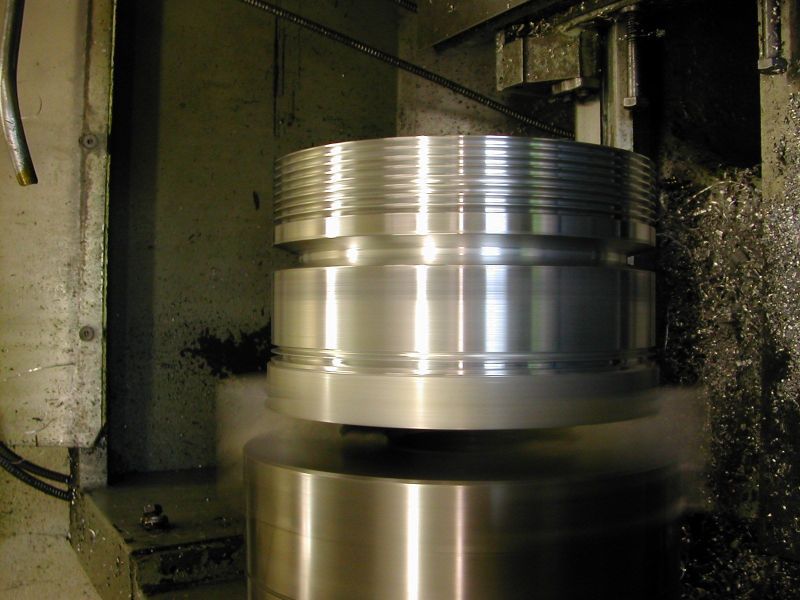
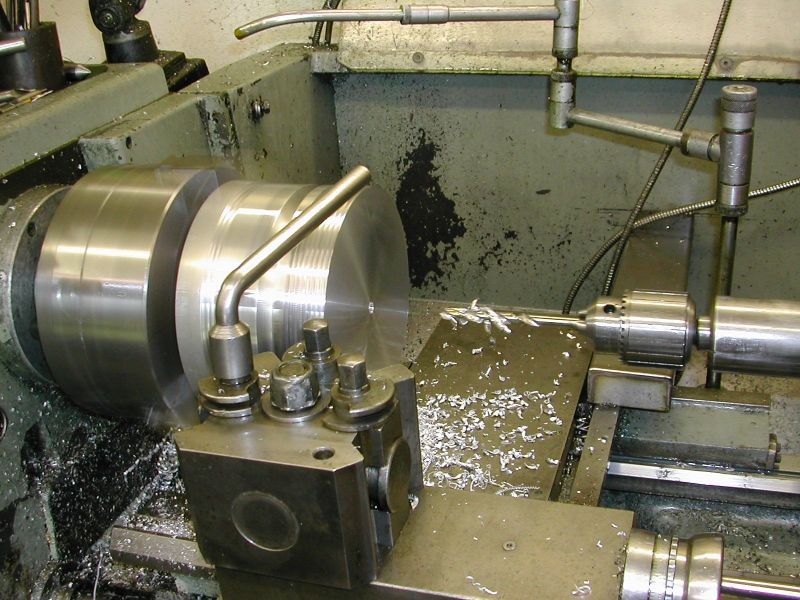
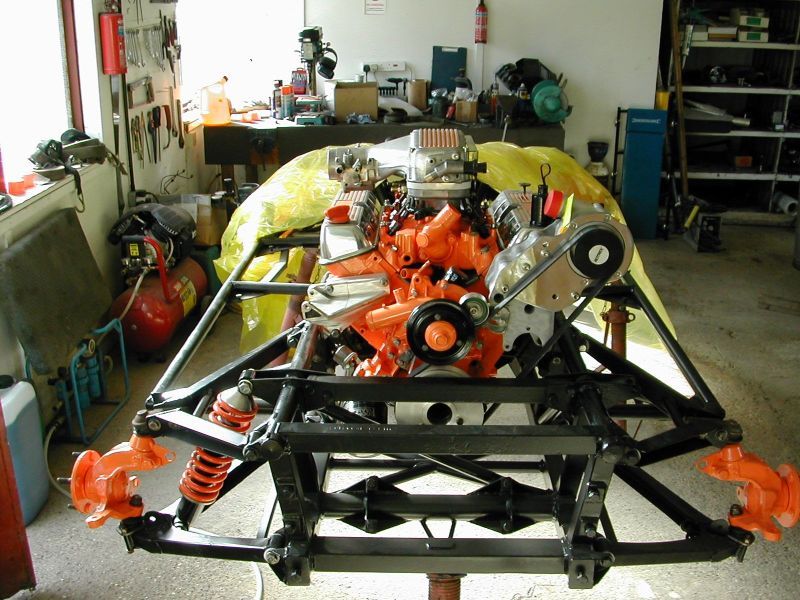
been at it today got the nearside inner wing repair finished as far as the new glassfibre goes finished it with a cloth for strength and smoothness,also made a sandwich piece for the making good where i cut the old battery box out in the nearside wheel arch,got that jammed in place with some bits of timber then 8oz outside plus a cloth finish,glass the inside on thursday,fitted the refurbed driveshafts with new bolts and washers and got all the bits together for a machining day tomorrow,i have cut down the distributer to just a shaft to drive the oil pump and will make a stainless hat for it while on the lathe,so tomorrow big day turn up the crank pulley for the blower,billet of ally arrived today got the laser work back for d.c. development for the adjuster bracket for the blower belt,once these are done can marry up the engine and box and get it in the chassis.
john
john
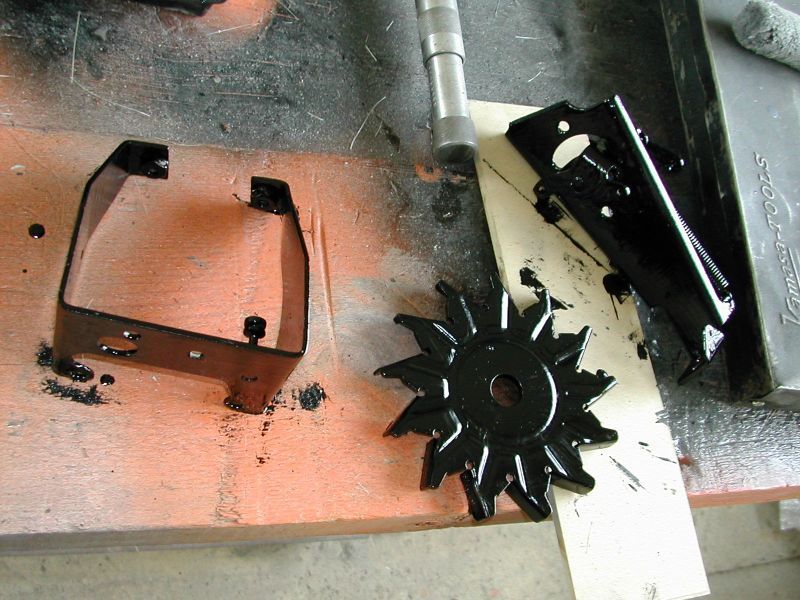
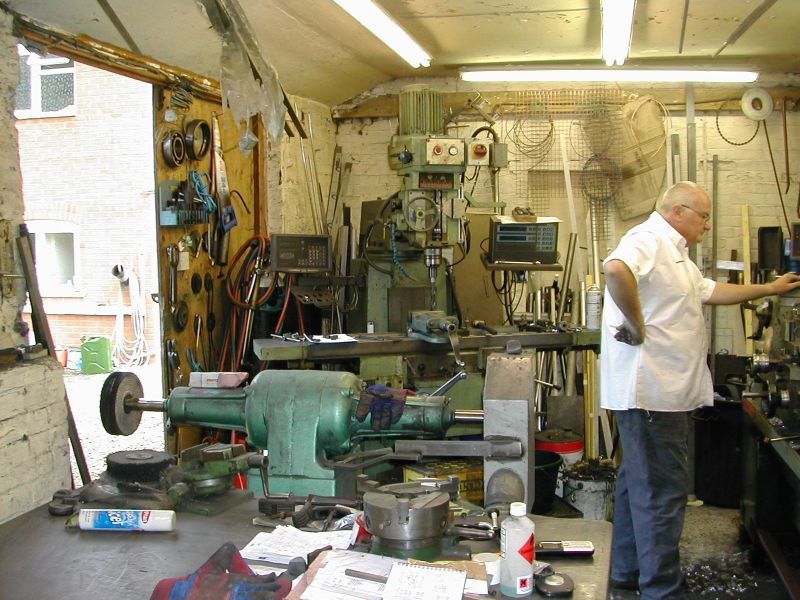
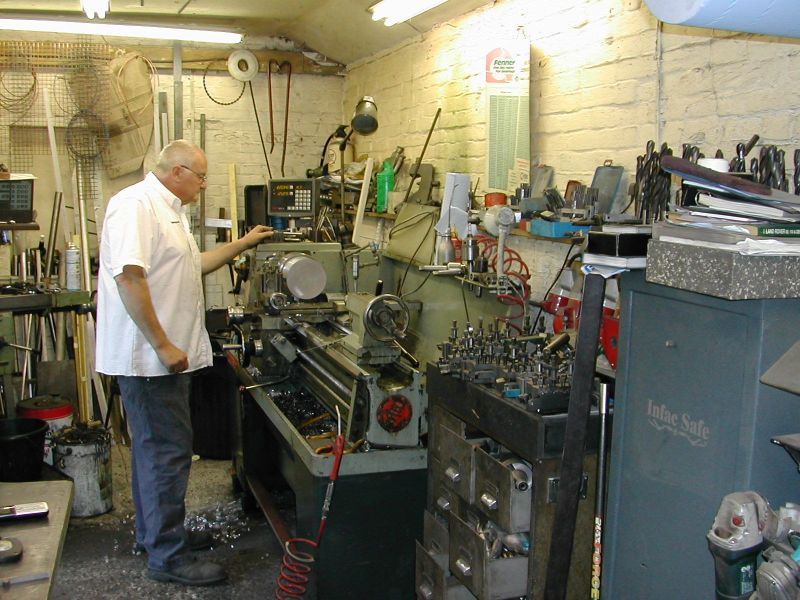
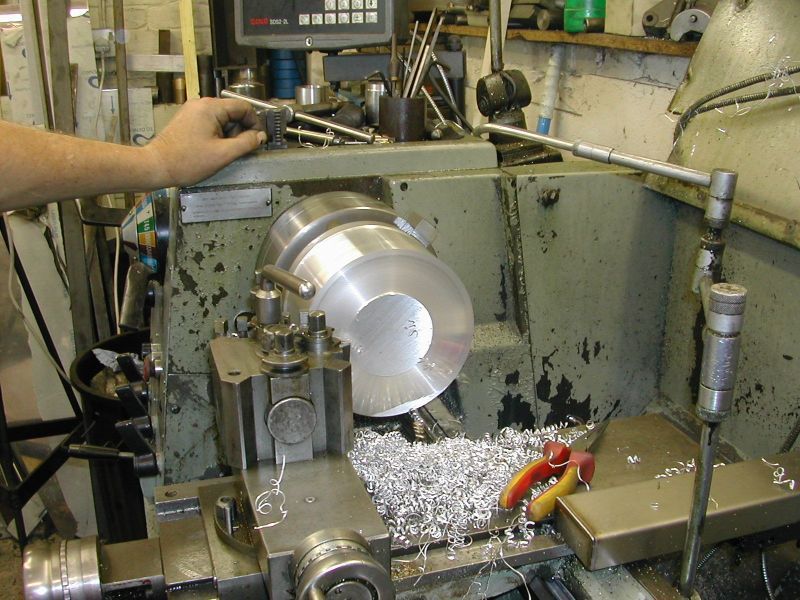
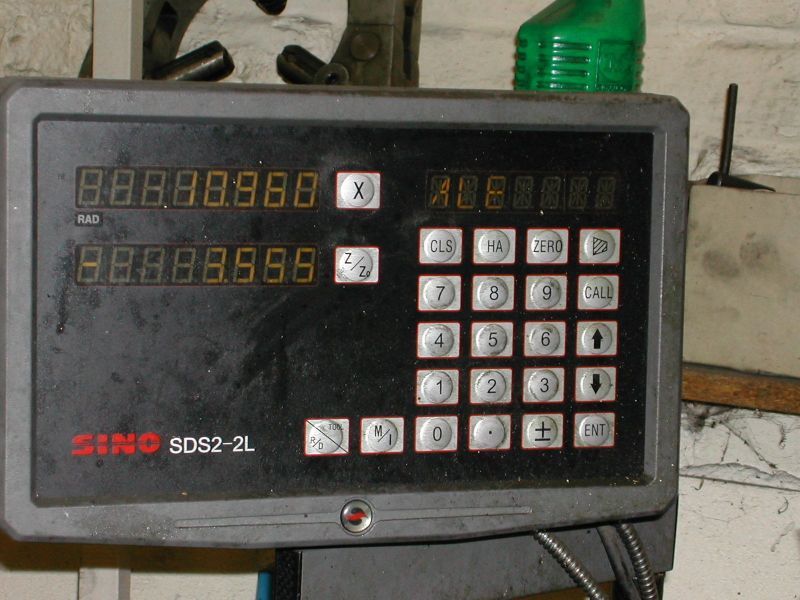
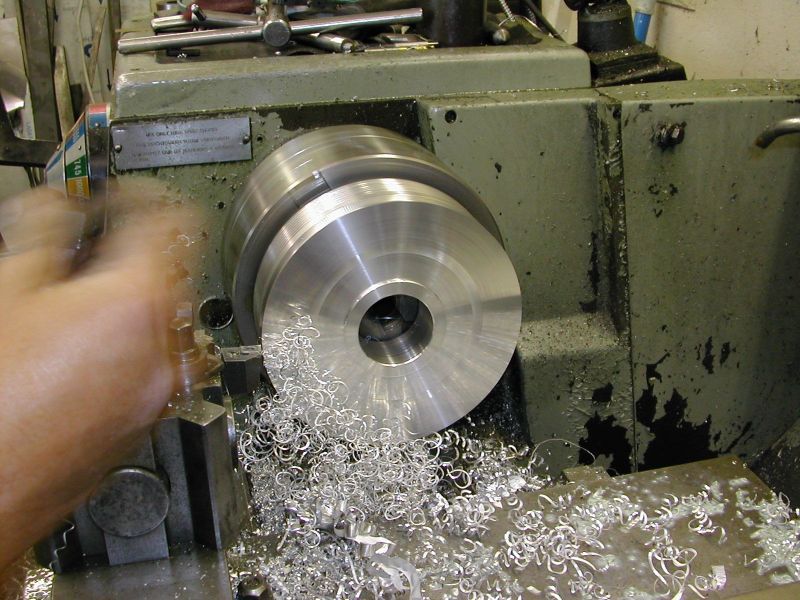
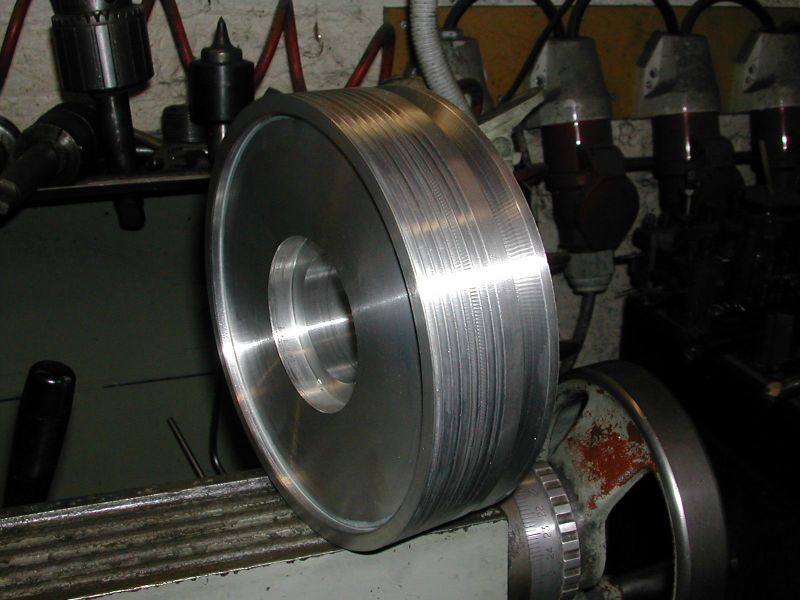
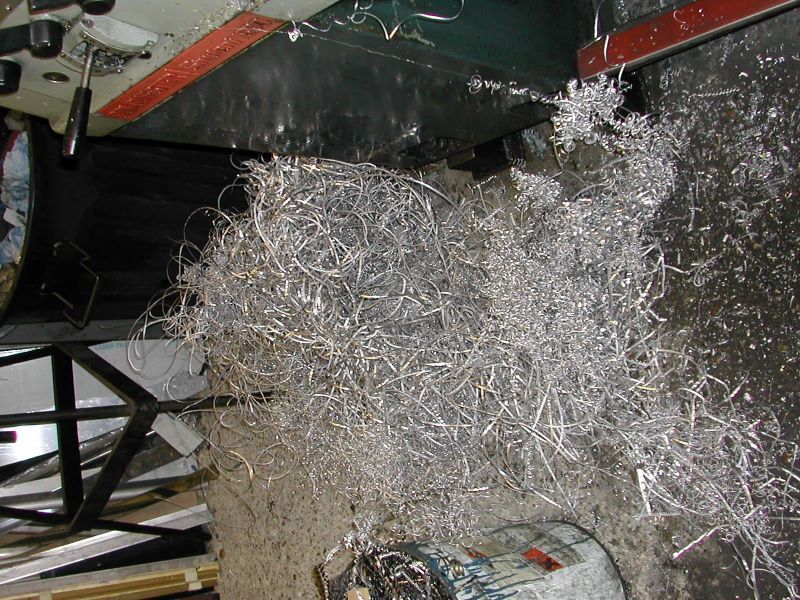
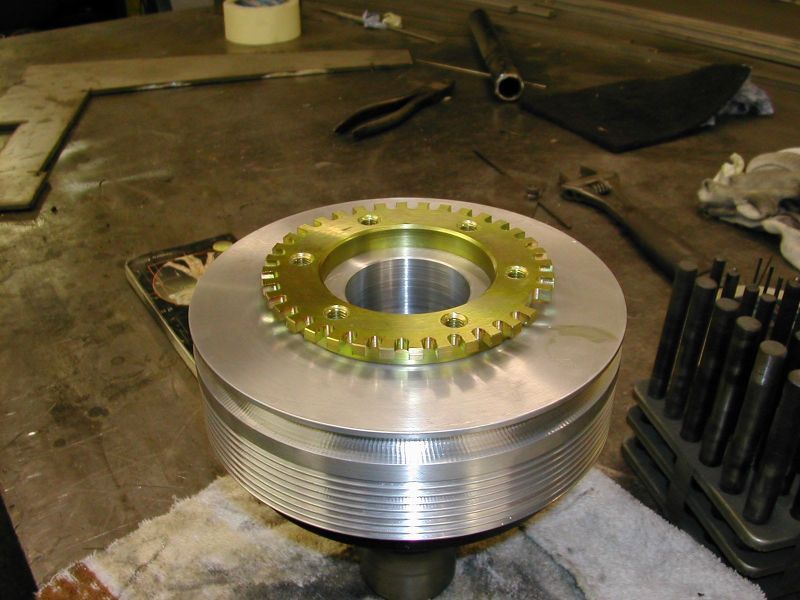
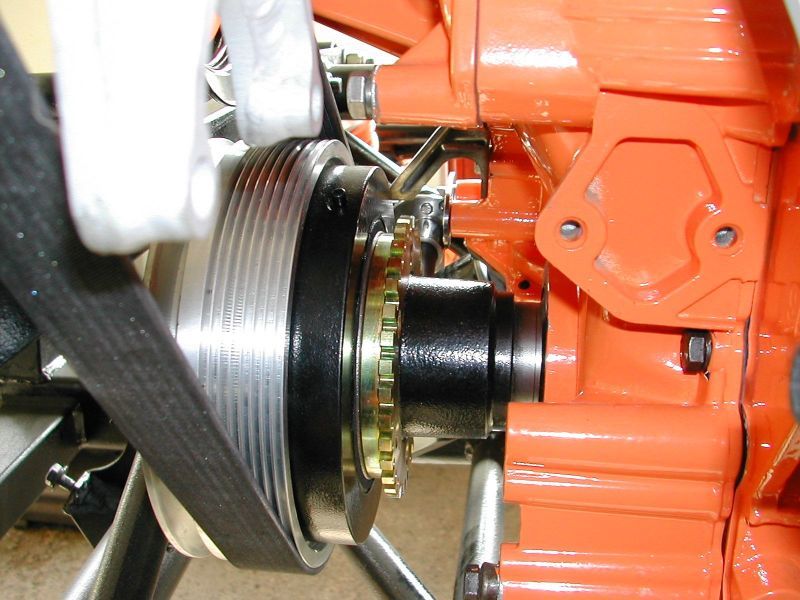
very full on day in the machine shop yesterday,got the crank pulley turned up,fabricated the adjuster bracket,got them all drilled and fixed plus made and fitted the top hat to the now converted dizzy for the oil pump drive,i have included a few pictures of our machine / fabrication shop nothing grand but fairly well tooled,i wont bore you with the details but the pictures give a flavour of whats involved plus the finished items.
john
john
Edited by Engineer1949 on Thursday 30th August 17:20
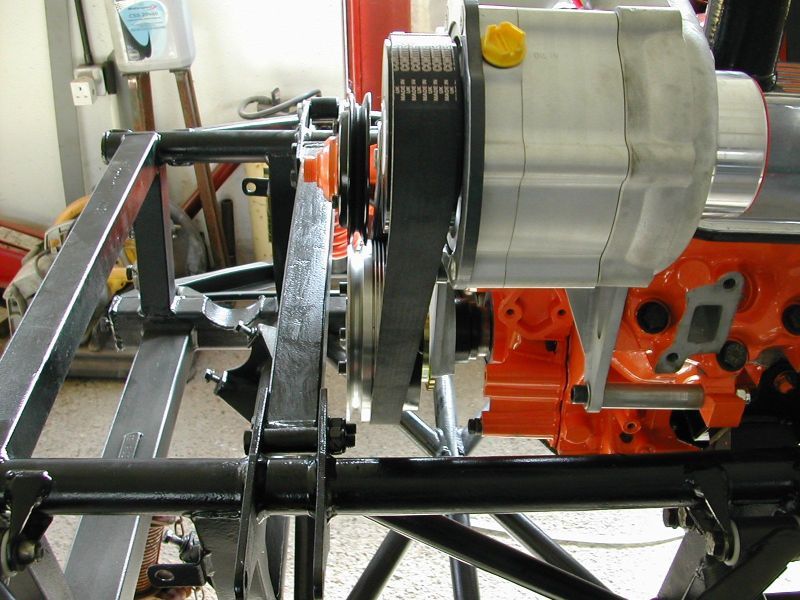
The trigger wheel is going at the back of the main pulley inbetween the timing case and the pulley the power steering pulley is there if one is fitted but with this set up should a pump be required you can use a serpentine pump mounted on the scpower bracket and a slightly longer belt. I am making the bracket for the trigger sensor tomorrow so will post pics etc. then
John
John
No the tensioner is fixed and manually adjusted it dosent need to be shock absorbing as it only drives the blower which is a constant load with virtually no overrun as the components of the blower are very light unlike the serpentine arrangement or bmw stile setup where the alternator and other ancilliaries are being driven which have a considerable konetic energy stored when in overrun.
John
John
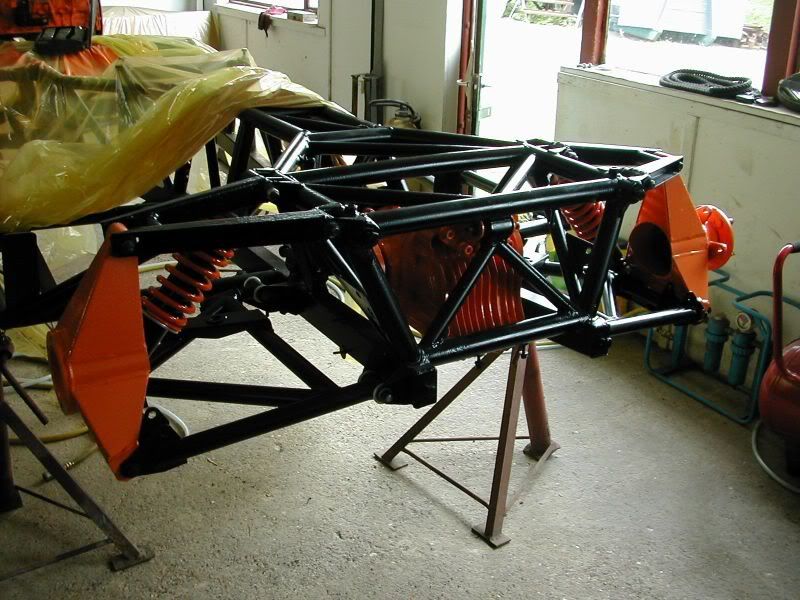
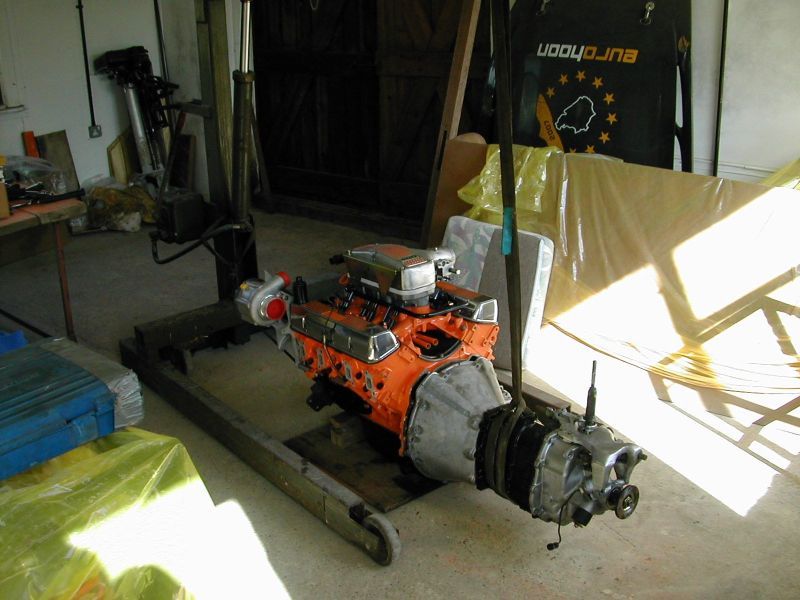
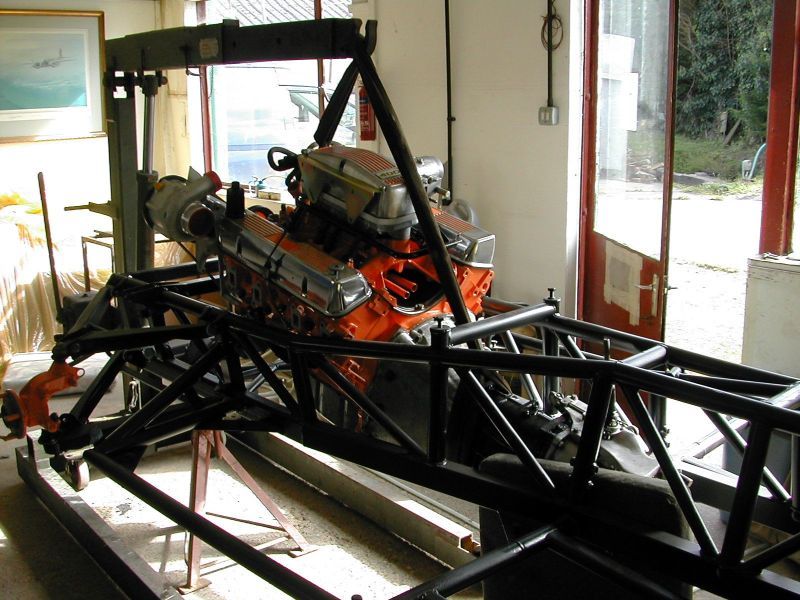
another day at the mill finished the front of the engine off belt on and tensioned bracket made for the timing sensor gearbox mounted to engine and engine now all bolted up and in the chassis seems to have been a long haul looking back hopefully the body will come together as well
john

john
Edited by Engineer1949 on Friday 31st August 19:18
Gassing Station | Chimaera | Top of Page | What's New | My Stuff