JFReturns' TVR Chimaera 4.0
Discussion


I've been reading with interest as I got my Chim at around the same time as you did.
I use an acumate trickle charger and just keep it plugged in if I'm not going to use the car for more than a few days at a time - it just keeps the battery at it's best, rather than it running and down and degrading. Although I haven't left it plugged in for weeks on end if I go on holiday. I worry the garage would set on fire or something hideous like that!
Like the above post says, that button locks the car from the inside so people can't try to get into your car at traffic lights etc. Be careful though. I had my car at the garage this week and they had pressed the button for some reason. As they pilulled my car out when I was collecting it, they got out and then closed the door. Engine still running, but the door wouldn't open. Fortunately the window was down, otherwise there would have been swearing...
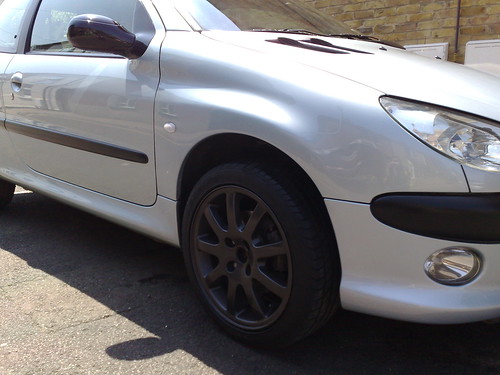
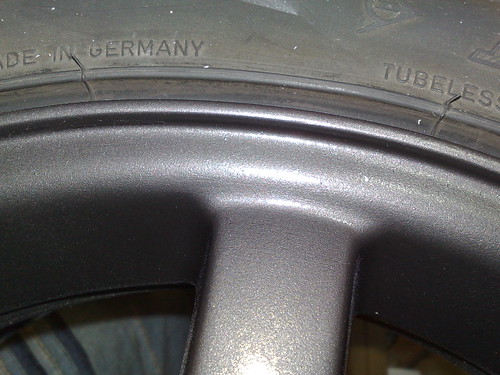
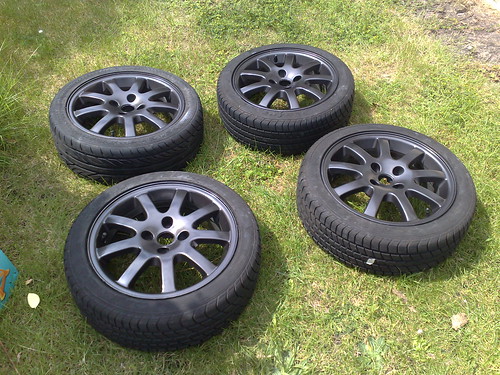
I really like the wheels by the way. What type of paint did you use? Just plain matt black spray paint?
I use an acumate trickle charger and just keep it plugged in if I'm not going to use the car for more than a few days at a time - it just keeps the battery at it's best, rather than it running and down and degrading. Although I haven't left it plugged in for weeks on end if I go on holiday. I worry the garage would set on fire or something hideous like that!
Like the above post says, that button locks the car from the inside so people can't try to get into your car at traffic lights etc. Be careful though. I had my car at the garage this week and they had pressed the button for some reason. As they pilulled my car out when I was collecting it, they got out and then closed the door. Engine still running, but the door wouldn't open. Fortunately the window was down, otherwise there would have been swearing...
I really like the wheels by the way. What type of paint did you use? Just plain matt black spray paint?
so the system must be altered or so...
when you push the button the doors locked from the inside, but you can open the door (from the inside) without pushing the same button again? so after that when the door closes its locked?
that's dangerous and not a correct way...
normally (in ' normal cars' ) you lock from inside but when you pull the door lever, the system overrides the inside lock system and its safe to close the door afterwards.
can't that Chimaera? system be altered to make it function the same way?
and ow, I use the cetec mxs 5.0 which I think is very good, I use it only once a month (I don't use the car much) to be sure and when its ' full' I disconnect it,
The car is in a closed garage so its easy, you can forget it but I set a alarm on my mobile when I think now it must be full and then disconnect it (but you can ofcorse leave it on)
I also have a monthly reminder in my mobile (getting old) to click it on again for a few hours just in case.
when you push the button the doors locked from the inside, but you can open the door (from the inside) without pushing the same button again? so after that when the door closes its locked?
that's dangerous and not a correct way...
normally (in ' normal cars'
) you lock from inside but when you pull the door lever, the system overrides the inside lock system and its safe to close the door afterwards.can't that Chimaera? system be altered to make it function the same way?
and ow, I use the cetec mxs 5.0 which I think is very good, I use it only once a month (I don't use the car much) to be sure and when its ' full' I disconnect it,
The car is in a closed garage so its easy, you can forget it but I set a alarm on my mobile when I think now it must be full and then disconnect it (but you can ofcorse leave it on)
I also have a monthly reminder in my mobile (getting old
) to click it on again for a few hours just in case.I assume that button/function should be over ridden when the doors are opened from the inside - so you can't be locked out. However mine doesn't seem to do that. I don't use that button ever anyway though, so shou cause any issues really for me. Unless there's a quick easy fix, I'll leave it be.
J4CKS said:
I assume that button/function should be over ridden when the doors are opened from the inside - so you can't be locked out. However mine doesn't seem to do that. I don't use that button ever anyway though, so shou cause any issues really for me. Unless there's a quick easy fix, I'll leave it be.
The interior light switches in the sills are also connected to the locking module so when you open the door with the knob they reset the module and re-enable the buttons under the mirrors. If you press one with the door open you should hear a click from under the dash. Yours may need cleaning. Does the interior light work?
s p a c e m a n said:
Do you leave it unlocked in your garage? I got me one of these: battery isolator
I don't, no. When I get the wheels refurbed it will be a little more difficult to wheel away so the isolator might be an idea.J4CKS said:
I've been reading with interest as I got my Chim at around the same time as you did.
I use an acumate trickle charger and just keep it plugged in if I'm not going to use the car for more than a few days at a time - it just keeps the battery at it's best, rather than it running and down and degrading.
I really like the wheels by the way. What type of paint did you use? Just plain matt black spray paint?
Thanks for that, I'll order one now.I use an acumate trickle charger and just keep it plugged in if I'm not going to use the car for more than a few days at a time - it just keeps the battery at it's best, rather than it running and down and degrading.
I really like the wheels by the way. What type of paint did you use? Just plain matt black spray paint?
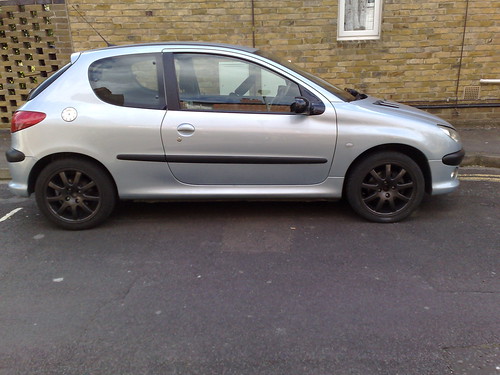
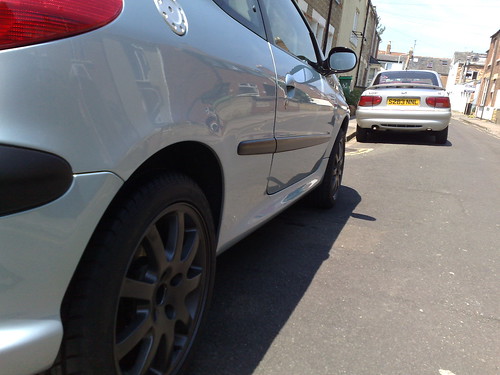
The paint was all Halfords stuff, which is fine for a quick refurb. I've done a guide back when I did my 206 GTi wheels, might be useful (ignore the lacquer bits if you are going matt black):
DIY refurb guide (pasted from my post in another forum, so ignore bits that don't make sense!)
Heres a list of what you need:
- Three large cans of primer
- Three large cans of colour
- Three large cans of lacquer
- Wet and dry sandpaper, range of low to high grits
- Filler e.g. Davids Isopon P38
- Lots of masking tape
- Newspaper
- White spirit
Heres what you do:
1. Clean wheels
- Use your wheel cleaner, then maybe some fairy liquid and warm water
- Wash with plenty of water then dry
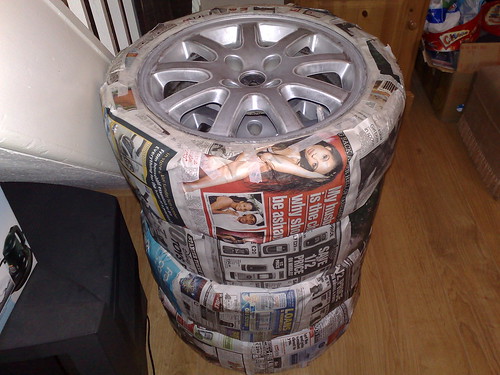
2. Mask up tyres
- Obviously this only applies if you are leaving tyres on
- Let some air out
- Apply plenty of masking tape behind the wheel lip
- Mask the rest of the tyre with newspaper
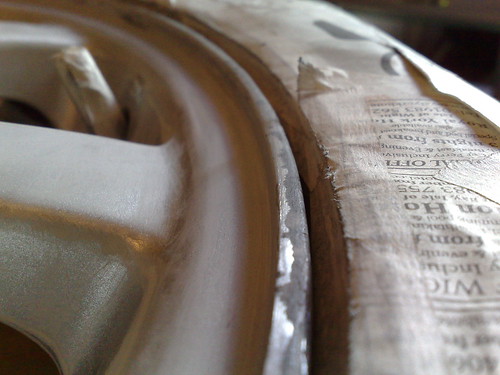
3. Sand down wheels
- Start with a course grit, and sand down the entire wheel
- If the wheel paint is flaking or really corroded, you will need to go down to the metal
- Use less course grit sandpaper until the finish is smooth
4. Fill imperfections, dry and then resand
- Follow filler instructions to get the right consistency - you don't want the filler to set too soon!
- Leave to dry for A LONG time - 48 hours is best
- Sand down using progressively lower course grit, until S-M-O-O-T-H
TIP! This is the most important stage - the more time you spend here, the better the finish. Paint WILL NOT cover up any imperfections!
TIP! Sanding in between coats helps prevent the orange peel effect!
5. Prime wheels
- Clean wheel using white spirit, rinse with water and dry thoroughly
- Leave primer in warm water for half an hour before using, to loosen
- Shake VERY can very well - Apply several thin coats (at least three)
- Do not spray too close
- Leave to dry, and sand in between each coat using a very fine grit

5. Paint wheels
- Leave primer to dry for 48 hours
- Sand lightly, then rinse with water and dry thoroughly
- Again, leave cans in warm water for a while and shake thoroughly
- Aim for lots of very light coats, allow each layer to dry and sand down using a very light grit sandpaper
TIP! When spraying, aim away from the wheel then sweep across. This clears any drips and gives a more misty, fine spray with fewer blobs.
6. Lacquer wheels
- Leave paint to dry for 48 hours
- Same as the other cans, leave in warm water, aim for several thin coats
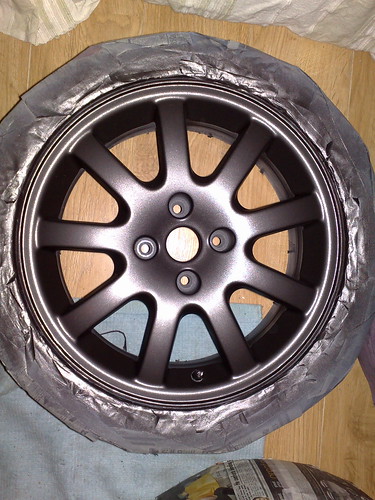
7. Clean and admire
- Apply some sealant, get the wheels rebalanced and enjoy your hard work

Any questions / corrections let me know!
J
EDIT: I only did the front of the alloys, as I don't think the back of the spokes etc. are painted. However, there is nothing stopping you from doing this, and will probably make the refurb last longer. I think Brian did the whole wheel and it looked ace.
EDIT: By sealant I mean wheel sealant - Poorboys do a good one. However, I used my Nattys paste wax and it did a good job!
EDIT: I put my GTi on steelies whilst working on the refurb, but didn't really drive it!
Edited by JFReturns on Tuesday 11th February 18:38
Thanks. That's ideal!
With regard to the dor locking mechanism. I'm on the old model with the button on the body work, and the interior light doesn't work - been meaning to sort it but haven't got round to it. The locking mechanism looks pretty clean from what I can see of it. Maybe some wd40 will help free up anything that is out of sight.
With regard to the dor locking mechanism. I'm on the old model with the button on the body work, and the interior light doesn't work - been meaning to sort it but haven't got round to it. The locking mechanism looks pretty clean from what I can see of it. Maybe some wd40 will help free up anything that is out of sight.
Righto chaps, as expected, the Chim wouldn't start today as the battery was dead as a dodo. I've bought an Accumate, but the problem is access to the battery is restricted as I like to park nice and close to the wall.
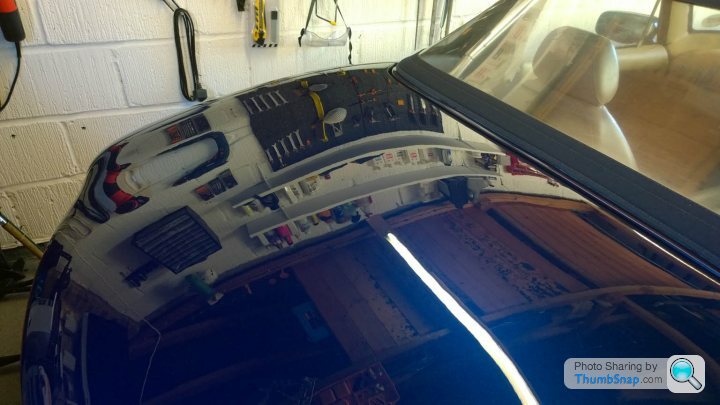
So I managed to dive head first into the footwell (got stuck too) and gained access to the battery. WHAT A MESS! Bloomin' heck there are wires and goodness knows what surrounding it. I've managed to locate what I think are the battery point thingys (positive red on left, negative black on right). No idea where the screws are to remove the fibreglass case.
So my question is, do I just attach the crocodile clips as near as I can to the point thingys, or do I have to remove the metal connecters first?? Ideally I want to remove the battery completely but the car needs to move first!
Heres what I mean:

If you haven't guessed already, I'm a mechanical n00b. I know it already so no laughing at the back!
So I managed to dive head first into the footwell (got stuck too) and gained access to the battery. WHAT A MESS! Bloomin' heck there are wires and goodness knows what surrounding it. I've managed to locate what I think are the battery point thingys (positive red on left, negative black on right). No idea where the screws are to remove the fibreglass case.
So my question is, do I just attach the crocodile clips as near as I can to the point thingys, or do I have to remove the metal connecters first?? Ideally I want to remove the battery completely but the car needs to move first!
Heres what I mean:
If you haven't guessed already, I'm a mechanical n00b. I know it already so no laughing at the back!
Edited by JFReturns on Tuesday 11th February 18:41
The battery case unbolts underneath the car.
Get the car out of the garage first, jack up that side to give you working room, undo the two nuts under the car, underneath where the battery is located, undo the two terminals you have highlighted, get all the rest of the crap out of the way, then lift the battery and box, drag it backwards, and remove battery from box.
Alternatively, if you can get enough charge into the battery to start the car, stick £90 in your pocket and drive to your nearest tyre and battery independent. Then they can test it properly, and if the battery is basically fooked they can do all of the above, sell you a new one, and (at least in my case) charge £7 more than you would have paid for a top quality battery delivered off the net to your door. Then they will have done proper tests and had all that hassle. I got an Exide Excel (watch out that it is the correct orientation - the Exide chart lists the one with the positive on the right) fitted for £83, and no loss of knuckle skin.
Thanks for the help QBee, and everyone else  I managed to get the bolts undone and battery fully removed. The battery was dead as a dodo, but after seven hours the ACCUMATE brought it back to life (think its a nifty ACCUMATE that can deal with dead batteries). Whoop, I fixed something!
So now my question is, how do I get the bolts lined up with the case and back??
I managed to get the bolts undone and battery fully removed. The battery was dead as a dodo, but after seven hours the ACCUMATE brought it back to life (think its a nifty ACCUMATE that can deal with dead batteries). Whoop, I fixed something!So now my question is, how do I get the bolts lined up with the case and back??
Yeah I'll get my ever suffering SWMBO to lend a hand Thanks QBee.
Just flicking through some paperwork, so far I've done the following:
- Kumho tyres all round, balancing, alignment: £365
- Full service, Walldonway TVR: £472.70
- ACT induction kit, magnecor leads, spark plug extensions: £384.60
- Inspection, Taylor TVR: £39
- New engine bay fuel pipes, supply and fit Gaz Gold Pros: £1025.46
- MOT: £25
So about half way through a 'to do' list that all us TVR owners have Thing is, my situation is changing.... marriage and children are just round the corner (hopefully) and if I change jobs I'll need a car to commute more than 24 miles a day. So I don't know what to do with the Chim.... try and sell now relatively cheaply bearing in mind the work that needs doing, or get the work done and sell for more in Spring time. What do you all think?
Either way, it looks like my time with the Chim may well be coming to an end
Saying that, every time I go into the garage I'm once again seduced by the looks and hatch a plan to keep her!
Thanks QBee.Just flicking through some paperwork, so far I've done the following:
- Kumho tyres all round, balancing, alignment: £365
- Full service, Walldonway TVR: £472.70
- ACT induction kit, magnecor leads, spark plug extensions: £384.60
- Inspection, Taylor TVR: £39
- New engine bay fuel pipes, supply and fit Gaz Gold Pros: £1025.46
- MOT: £25
So about half way through a 'to do' list that all us TVR owners have
Thing is, my situation is changing.... marriage and children are just round the corner (hopefully) and if I change jobs I'll need a car to commute more than 24 miles a day. So I don't know what to do with the Chim.... try and sell now relatively cheaply bearing in mind the work that needs doing, or get the work done and sell for more in Spring time. What do you all think?Either way, it looks like my time with the Chim may well be coming to an end
Saying that, every time I go into the garage I'm once again seduced by the looks and hatch a plan to keep her!
Edited by JFReturns on Wednesday 12th February 19:07
These cars are best driven regularly. They don't bite if driven sensibly and according to the conditions. I do 12,000 miles a year in mine without using it for work, and it always starts first time. If you need a family car, buy a cheap person carrier - you can get a decent Megane Scenic for under a grand. At least if you are in the garage or out in the car the boss knows you are being a .good boy and are happy.
Hah, very good point Qbee. I got some good advice yesterday regarding values, and have decided to keep her 
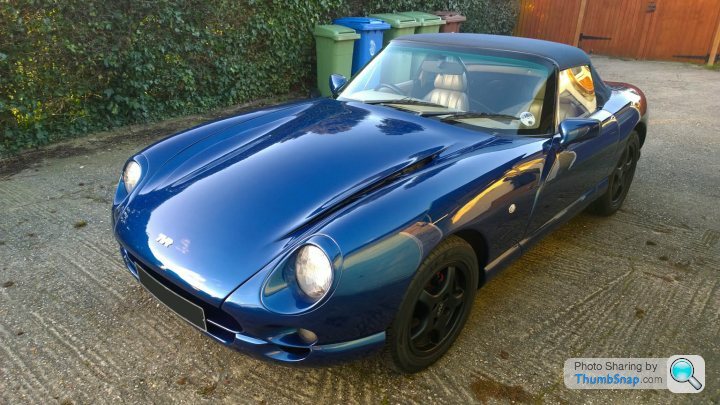
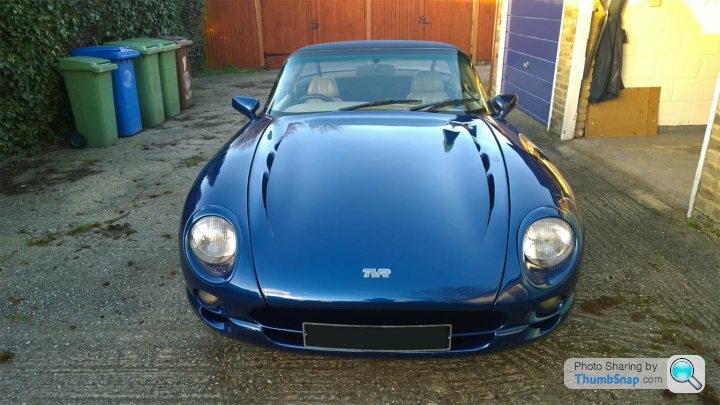
Spent the whole day on her half yearly polish / wax and I'm still pretty amazed at how good the paint work is. Absolutely stunning and has to be the best colour for a Chim
I don't mean to come over all Detailing World, but check out these reflections!
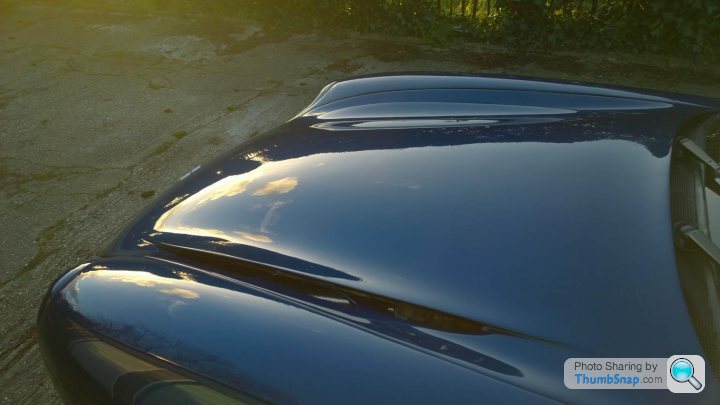
And a couple more:
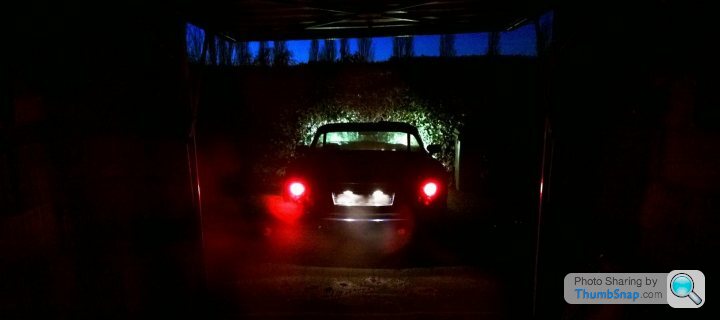
Finally, I made a cheeky video - sounds pretty good I think
.... Click for awesome sounding Chim ....
Spent the whole day on her half yearly polish / wax and I'm still pretty amazed at how good the paint work is. Absolutely stunning and has to be the best colour for a Chim
I don't mean to come over all Detailing World, but check out these reflections!
And a couple more:
Finally, I made a cheeky video - sounds pretty good I think
.... Click for awesome sounding Chim ....
QBee said:
These cars are best driven regularly. They don't bite if driven sensibly and according to the conditions. I do 12,000 miles a year in mine without using it for work, and it always starts first time. If you need a family car, buy a cheap person carrier - you can get a decent Megane Scenic for under a grand. At least if you are in the garage or out in the car the boss knows you are being a .good boy and are happy.
How do you manage 12,000 miles a year without using it for work? Well.....
About ten track days a year. 150 miles on track, average 150 miles return trip to the track = 3000 miles
Thundering the tunnels twice a year - I live 125 miles from London, plus say 50 miles on the route = 600 miles
Two or three car shows (Burghley, Chimfest, etc) say 300 miles
A Sunday Service or two, say 400 miles
Three or four run PH organized runouts, including getting there and back, say 800 miles
Trips to friends, TVR guy etc, say 1000 miles.
Just going for a hoon.......another 2000 miles
Going shopping the long way round, another 2000 miles
Going to buy bits or get things fixed (last year went to Sheffield for wheels 90 miles, Carl Baker re alarm change 350 miles, Mark Adams for re-tune 300 miles, Surrey Rolling Road and Phazed for a brake change 300 miles) = 1040 miles
Need I continue? Never does a week go by without me driving somewhere.

Gassing Station | Chimaera | Top of Page | What's New | My Stuff