What did you do in the garage yesterday?
Discussion


s p a c e m a n said:
Taking a breather from the fumes at the mo.. How the f k do people remove the bracket with the filter still in there? There's barely room for a finger, no chance of wiggling a tool about in there (ooh er missus)
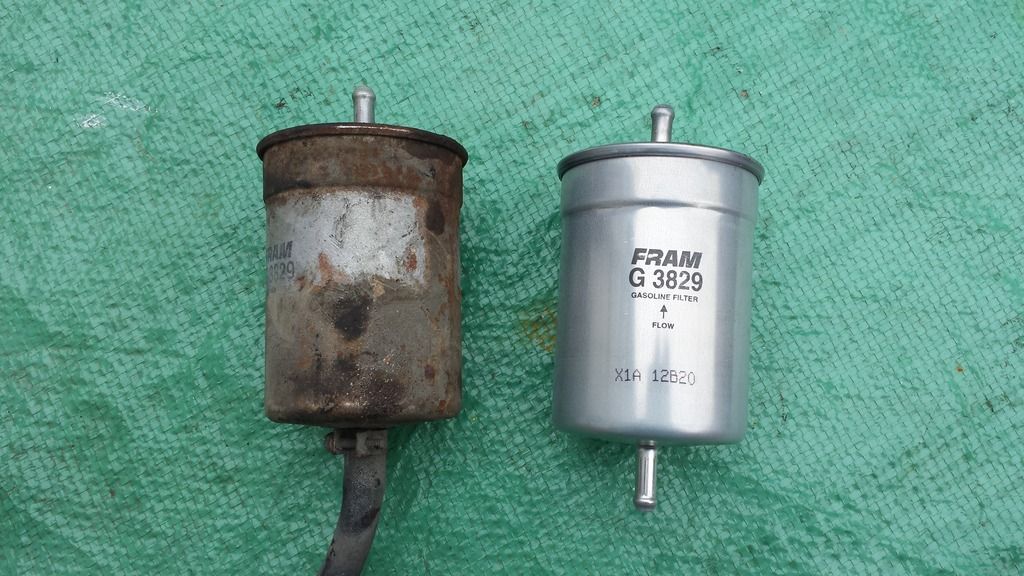
With difficulty !! mine done too but it had to be done on a two poster, everything was seized. k do people remove the bracket with the filter still in there? There's barely room for a finger, no chance of wiggling a tool about in there (ooh er missus)

Ptr400J said:
Reinstalled recored radiator, silicon hoses, etc only to find the I had not got enough antifreeze and the swirl pot bung is fubar. 
The6 P's Planning
Preparation
Prevents
Piss
Poor
Performance

When I had a tidy up of my front end it took weeks, mainly because I'd start something then realise I'd forget to buy this or that, stuff like locktite, simple stuff, does your nut in doesn't it.
What's wrong with the bung?
ClassiChimi said:
The6 P's
Planning
Preparation
Prevents
Piss
Poor
Performance
When I had a tidy up of my front end it took weeks, mainly because I'd start something then realise I'd forget to buy this or that, stuff like locktite, simple stuff, does your nut in doesn't it.
What's wrong with the bung?
Planning
Preparation
Prevents
Piss
Poor
Performance
When I had a tidy up of my front end it took weeks, mainly because I'd start something then realise I'd forget to buy this or that, stuff like locktite, simple stuff, does your nut in doesn't it.
What's wrong with the bung?

Yeah, looked on the shelf in the w/shop and saw three containers with antifreeze, two blue and one red. Thought , yeah no probs, only to discover that one of the blue was a mixed one already
The original brass bung has SPLIT along the side flange compromising the seal... didn't notice it before I took it off and it wasn't leaking from there so I guess it must have split when I took it out.. wasn't particularly difficult to remove once I had the scaffold bar on it...
 ok maybe not ! It only took a screwdriver, flat down to remove it so it wasn't V F tight or even F tight.
TR4man said:
Funnily enough, I have been using their blue Colour Reviver on my Chimaera's roof.
After a good cleaning on Sunday, then with three days to completely dry out followed by coat of it yesterday and another today. Can't believe the difference it has made. I was concerned that the Reviver might darken the blue hood but it hasn't at all - justmade it look like brand new! A great product.
After a good cleaning on Sunday, then with three days to completely dry out followed by coat of it yesterday and another today. Can't believe the difference it has made. I was concerned that the Reviver might darken the blue hood but it hasn't at all - justmade it look like brand new! A great product.

Did mine a few weeks ago with the reviver, followed by the sealant, turned from very faded hood to something that's actually nice to look at !
Ptr400J said:
Yeah, looked on the shelf in the w/shop and saw three containers with antifreeze, two blue and one red. Thought , yeah no probs, only to discover that one of the blue was a mixed one already
The original brass bung has SPLIT along the side flange compromising the seal... didn't notice it before I took it off and it wasn't leaking from there so I guess it must have split when I took it out.. wasn't particularly difficult to remove once I had the scaffold bar on it...
ok maybe not ! It only took a screwdriver, flat down to remove it so it wasn't V F tight or even F tight. Mine has a small section missing, the oil seal swells out the side of it, I used a bit of Ptfe tape in conjunction with the seal ages ago and it's been fine since, I do have a new bung but I like the brass one better

I'll change it soon enough

I use a 50/50 mix too.
You'll get there in the end and all will be forgotten.
The 6 P's
My brother taught it me when I was a lad, he got it from the army
s p a c e m a n said:
Ptr400J said:
With difficulty !! mine done too but it had to be done on a two poster, everything was seized.
Mines up on axle stands with no exhaust on and it still gave me the hump Part 2: Front brake lines looked fine, rears not so much...

Discopotatoes said:
s p a c e m a n said:
Ptr400J said:
With difficulty !! mine done too but it had to be done on a two poster, everything was seized.
Mines up on axle stands with no exhaust on and it still gave me the hump Part 2: Front brake lines looked fine, rears not so much...
http://tvr-parts.com/tvr-parts/part-details/tvr-bh...


That rustbuster epoxy mastic stuff : http://www.rust.co.uk/epoxy-mastic-rust-proofing-p...
The product and finish is amazing, the problem is that you have to be fully committed to use it. I'm used to doing engine bays in normal paint where you can pour it back in the tin and clean the brushes so you can just do an hour here and there when you've got a bit of spare time. Can't do that with 2 pack paint, you have to plan a few hours to paint so you end up not doing it as often. That would've taken me a week with hammerite, took me a month doing 3 coats in between the other bits I've done
The product and finish is amazing, the problem is that you have to be fully committed to use it. I'm used to doing engine bays in normal paint where you can pour it back in the tin and clean the brushes so you can just do an hour here and there when you've got a bit of spare time. Can't do that with 2 pack paint, you have to plan a few hours to paint so you end up not doing it as often. That would've taken me a week with hammerite, took me a month doing 3 coats in between the other bits I've done
s p a c e m a n said:
That rustbuster epoxy mastic stuff : http://www.rust.co.uk/epoxy-mastic-rust-proofing-p...
The product and finish is amazing, the problem is that you have to be fully committed to use it. I'm used to doing engine bays in normal paint where you can pour it back in the tin and clean the brushes so you can just do an hour here and there when you've got a bit of spare time. Can't do that with 2 pack paint, you have to plan a few hours to paint so you end up not doing it as often. That would've taken me a week with hammerite, took me a month doing 3 coats in between the other bits I've done
You forgot to mention it also stinks.The product and finish is amazing, the problem is that you have to be fully committed to use it. I'm used to doing engine bays in normal paint where you can pour it back in the tin and clean the brushes so you can just do an hour here and there when you've got a bit of spare time. Can't do that with 2 pack paint, you have to plan a few hours to paint so you end up not doing it as often. That would've taken me a week with hammerite, took me a month doing 3 coats in between the other bits I've done
Steve
s p a c e m a n said:
That rustbuster epoxy mastic stuff : http://www.rust.co.uk/epoxy-mastic-rust-proofing-p...
The product and finish is amazing, the problem is that you have to be fully committed to use it. I'm used to doing engine bays in normal paint where you can pour it back in the tin and clean the brushes so you can just do an hour here and there when you've got a bit of spare time. Can't do that with 2 pack paint, you have to plan a few hours to paint so you end up not doing it as often. That would've taken me a week with hammerite, took me a month doing 3 coats in between the other bits I've done
Did you go back to metal or does some of this over-paint the powder coat??The product and finish is amazing, the problem is that you have to be fully committed to use it. I'm used to doing engine bays in normal paint where you can pour it back in the tin and clean the brushes so you can just do an hour here and there when you've got a bit of spare time. Can't do that with 2 pack paint, you have to plan a few hours to paint so you end up not doing it as often. That would've taken me a week with hammerite, took me a month doing 3 coats in between the other bits I've done
It's fine using it over the powder coat, I used it on a couple of wishbone years ago and it was stil as good as the day I put it on. I just wire brushed the rusty bits back and then used that hammerite kurust stuff on it, degreased the rest of the powdercoat and painted straight on it. I think the main reason that it took me so long really is that I went from the grey powdercoat to white, it took 3 coats to cover it satisfactorily. Did the engine bay and front wishbones with the small starter pack that they sell
Steve_D said:
You forgot to mention it also stinks.
Steve
The fumes help the time move faster Steve
Edited by s p a c e m a n on Monday 31st October 04:13
Gassing Station | Chimaera | Top of Page | What's New | My Stuff